

Page 1
Instruction Manual
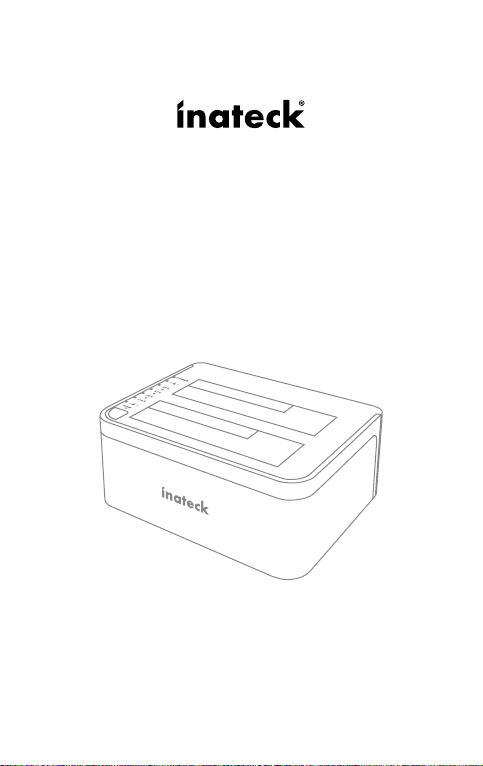
FD2002 USB3.0 Dual SATA HDD Docking Station
With Oine Clone Function
English · Deutsch · 日本語
Page 2
English
Introduction
This product support data copy and clone between dual HDDs.
Meanwhile, it adopts USB3.0 (Super Speed) with date transfer rate up to
Meanwhile, it adopts USB3.0 (Super Speed) with data transfer rate up to
5Gbps and SATA3 (6Gbps) and backward compatible with earlier versions
as well. This excellent transmission performance and good compatibility
is convenient for data exchange and perfectly suitable for the men who
need to batch processing and clone data at some certain places, such
as lm and television production, Backup & processing IT data, Schools
batch processing data etc.
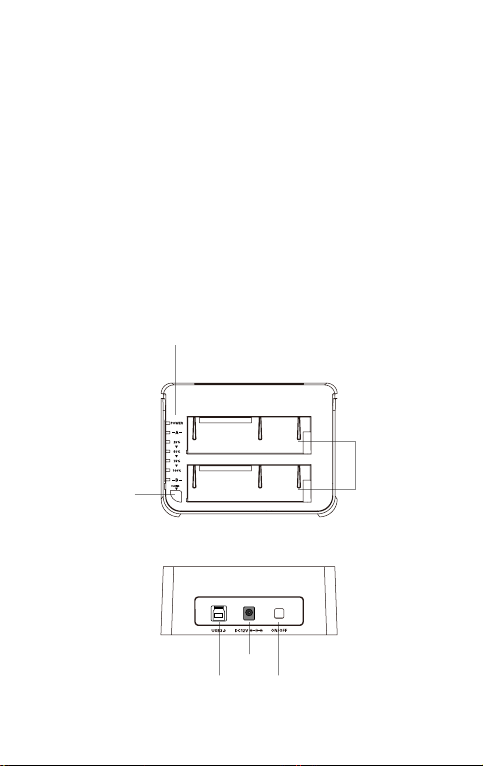
Overview
LED Indicator
SATA HDD Slot
Clone Button
DC-IN Jack
USB 3.0
Power Switch
1
Page 3

How to Use
1. Connect the external power adapter from the hard drive dock to an
electrical outlet.
2. Connect the included USB 3.0 cable from the hard drive dock to an
available USB port on the computer system.
3. Insert a 2.5” or 3.5” hard drive into the top loading slot.
4. Press the power button. A pop-up bubble in the task bar at the bottomright of your screen notifying you once your hard drive has been
recognized. You may also nd the hard drive in Disk Management.
Note:
a. To remove the hard drive, make sure it is currently not being accessed
by the computer then unmount or uninstall the disk drive from the
operating system. Never remove the docking station while the hard
drive is in use. Doing so may corrupt the data on the hard drive or
damage the hard drive, docking station, or computer.
b. When connected via USB, the dock will automatically go into sleep
mode if the connection is left idle for more than 30 minutes. The
power LED indicator will flash every 3 seconds. Accessing the hard
drive will automatically cancel sleep mode and power the drive back
up. The hard drive LED indicator will ash and the power LED indicator
will be constantly on.
c. Please do not remove your hard drive or insert a new one while
the other hard drive is being accessed, as doing so the other drive
temporarily disconnects and this could damage your hard drive and
result in data loss.
Hard Drive Oine Clone
1. Make sure there are no connection on the USB.
2. Insert the drives straight down until the connection is secured. Oine
clone is from HDD A to HDD B. Make sure your Main Drive is in HDD
A and slave in HDD B. The capacity of HDD B must be equal or bigger
than HDD A.
3. Press and hold the oine clone button for 3 seconds, the LED indicator
will light up. Then quickly press the oine clone button and the oine
clone operation will start. Each LED represents 25% completion. It is
only when every 25% of HDD A is offline clone to HDD B that such
LED will remain constantly on. When offline clone operation is fully
completed, all LEDs will constant on until the device is power o.
2
Page 4

Technical Specications
Product Name USB3.0 Dual SATA HDD Docking Station with Oine Clone Function
Model Number Inateck FD2002
Weight 410g
Color Black
Drive Size 2.5”/3.5” SATA I/II/III HDD/SSD
Interface USB3.0 up to 5Gbps
Material ABS plastic
Hot Plug, Plug & Play Supported
Licenses CE, FCC
Dimensions 450mm length × 109mm width × 60mm height
Environmental Storage: -20 to 70 ° C; Operating: 5 to 40 ° C
Operating Systems Windows XP/7/8/8.1/10, Mac OS 9.0 and higher
Tool free Yes
Driver No software or drivers required
Package Contents
FD2002 Docking Station × 1
USB 3.0 Data Cable × 1
DC Power Adapter × 1
Instruction Manual × 1
Troubleshooting/FAQ
a. Unable to clone: Please check if the capacity of Disk B is larger or
equivalent to that of Disk A. Here the capacity means the actual
capacity that can be used, instead of the one marked on the product.
For example, the actual capacity of a disk marked 500GB might be
480GB only. The actual capacity of disks with the same marked capacity
differs if they are produced by different producers. To ensure two
disks of the same marked capacity have the same actual capacity, they
should be produced by the same producer in the same batch with the
same model number.
3
Page 5

b. Indicator light stops ashing up during oine duplicating: it might
because of disk bad sectors so that data couldn’t be cloned as usual.
It’s better to change a good disk.
c. After cloning, the rest capacity of B disk is showed and operated via
“Computer management - Storage - Disk management”.
d. Why over 2TB hard disk couldn’t be identied by USB? Because the
maximum capacity of hard disk which Windows XP can supports is 2TB
and couldn’t be identied by system if over 2TB. It only supports after
upgrading the operating system above Vista (64 bit) version and we
suggest changing hard disk into a GPT disk partition, or the operating
system will not support over 2 TB disk partitions.
e. Please make sure that B hard disk data can be covered before cloning
data. Because once you start cloning, B hard disk partition methods
and data are completely cloned as A hard disk. Our company does NOT
undertake any responsibility for data or economy loss which could
bring by damaged data.
f. Please do not remove your hard drive or insert a new one while
the other hard drive is being accessed, as doing so the other drive
temporarily disconnects and this could damage your hard drive and
result in data loss.
Support
For any inquiries or comments concerning our products, please send an
email to support@inateck.com, and we will respond to you as soon as
possible.
4
Page 6

Deutsch
Einführung
Dieses Produkt ermöglicht simultanen Zugriff, Kopiervorgänge und
Duplikation auf und
zwischen zwei HDDs. Außerdem entspricht die Station den USB 3.0(theoretischer Maximal-transfer von 5 Gb/s) und SATA-III-Standards
(theoretisch 6 Gb/s), welche natürlich auch abwärtskompatibel sind. Das
hohe Maß an Übertragungsleistung und Kompatibilität gewährleistet,
dass diese Station für Nutzer geeignet ist, die große Mengen an Daten
verarbeiten und duplizieren müssen, zum Beispiel im Rahmen von
Video- und Audiobearbeitung, IT-Datensicherung und-verarbeitung,
Massendatenverarbeitung in Büro und Bildungseinrichtungen etc.
Produktübersicht
LED-Anzeige
SATA HDD-Einschübe
Klon-Bedienknopf
DC-Netzeingang
USB-3.0-Anschluss
Netzschalter
5
Page 7

Betrieb und Verwendung
1. Verbinden Sie das Netzteil mit der Steckdose und den
Gleichstromstecker mit der Netzbuchse an der Station.
2. Verbinden Sie das USB 3.0 Kabel mit den entsprechenden Anschlüssen
an Station und Rechner.
3. Setzen Sie ein Laufwerk in einen der Einschübe an dere Oberseite ein.
4. Betätigen Sie den Netzschaltewr. Eine Systemmitteilung in der
Statusleiste des Systems teilt Ihnen zeitnah mit, wenn der Treiber
installiert wurde und der Datenträger zwecks Zugriff verfügbar ist.
Außerdem kann der Datenträger in der Datenträgerverwaltung
aufgefunden und eventuell noch einmal initialisiert werden.
Bitte beachten:
a. Um Laufwerke sicher zu entfernen, achten Sie bitte darauf, das skein
Zugri auf den Datenträger erfolgt. Werfen Sie den Datenträger nun
über das System aus. Bitte das Laufwerk nicht entfernen, während es in
Betrieb ist, um Datenverlust und Beschädigungen zu vermeiden.
b. Im USB-Modus geht die Dockingstation automatisch nach 30 Minuten
in den Ruhezustand über, wenn kein Zugri erfolgt. In diesem Zustand
blinkt die Netz-LED alle drei Sekunden. Bei erneutem systemseitigen
Zugri fährt das Laufwerk automatisch hoch. Die Betriebs-LED blinkt
dann, während die Netz-LED permanent leuchtet.
c. Laufwerke sollten niemals während des laufenden Betriebs gewechselt
oder entnommen werden, da sonst schwere Beschädigungen und
Datenverlust auftreten können.
Duplikation von Datenträgern
1. Stellen Sie sicher, dass die USB-Verbindung zum Rechner getrennt ist.
2. Setzen Sie die Laufwerke in die Schächte, bis diese fest in den SATASchnittstellen sitzen. Die Duplikation geschieht von Schacht A auf
Schacht B. Das Quelllaufwerk muss daher in Schacht A und das
Ziellaufwerk in Schacht B stecken. Die Kapazität des Ziellaufwerks muss
gleich groß oder größer als die des Quelllaufwerks sein.
3. Schalten Sie die Station ein und halten den Duplikationsknopf für ca.
drei Sekunden gedrückt. Die allgemeine Status-LED sollte anfangen
zu leuchten. Drücken Sie nun schnell den Duplikationsknopf für noch
einmal drei Sekunden, um die Duplikation zu starten. Jede blinkende
Status-LED repräsentiert einen Duplikationsfortschritt von jeweils 25%.
Sind je 25% Duplikation abgeschlossen, leuchtet die entsprechende
Status-LED permanent. Nach erfolgter Duplikation blinken alle LED
regelmäßig, bis die Station ausgeschaltet wird.
6
Page 8

Technische Daten
Produktname USB3.0 Dual SATA HDD Docking Station mit Oine Klonfunktion
Typenbezeichnung Inateck FD2002
Gewicht 410g
Farbe Schwarz
Unterstützte Laufwerke 2.5”/3.5” SATA I/II/III HDD/SSD
Schnittstelle USB 3.0 mit theoretisch bis zu 5 Gb/s
Material ABS-Kunststo
Hot Plug, Plug & Play Unterstützt
Zertikanzen CE, FCC
Maße 450mm Länge × 109mm Tiefe × 60mm Höhe
Umgebungsbedingungen Lagerung: -20 bis 70 ° C; Betrieb: 5 bis 40 ° C
Kompatible Betriebssysteme Windows XP/7/8/8.1/10, Mac OS 9.0 und höher
Werkzeuglos Ja
Treiber Keine gesonderten Treiber oder Programme nötig
Lieferumfang
FD2002 Dockingstation × 1
USB 3.0 Datenkabel × 1
Netzteil AC/DC × 1
Bedienungsanleitung × 1
Lösungsansätze und Antworten
a. Kann nicht geklont werden: Bitte überprüfen Sie, ob die reale
physikalische Kapazität von Laufwerk B größer oder gleich groß der von
Laufwerk A ist. Die reale Kapazität ist die, die auf dem Laufwerk wirklich
genutzt werden kann, erkennbar an der Sektorenanzahl, anstatt der auf
dem Etikett angegebenen theoretischen Kapazität. Zum Beispiel kann
ein Datenträger mit 500GB Kapazität ausgewiesen sein, verfügt jedoch
real nur über eine reale Kapazität von 48 0GB. In der Regel verfügen
Laufwerke von verschiedenen Herstellern über unterschiedliche
Kapazitäten, auch wenn auf dem Etikett die gleiche Kapazität
7
Page 9

angegeben ist. Um wirklich sicher zu gehen, daß deklarierte und reale
Kapazität zumindest gleich groß sind, empehlt sich ein Rückgri auf
Laufwerke mit der gleichen Typen- und Chargenbezeichnung des
gleichen Herstellers.
b. Wieso hören die Fortschritts-LED während der Duplikation auf
zu blinken? Dies könnte daran liegen, dass auf einem Laufwerk
beschädigte Sektoren vorhanden sind, die zu einem Abbruch der
Duplikation führen. Es sollten unbeschädigte Laufwerke verwendet
werden.
c. Wenn nach der Duplikation auf dem Ziellaufwerk noch Restkapazität
vorhanden sein sollte, so kann diese über die Datenträgerverwaltung
(siehe Punkt VII.) einem neuen Laufwerk zugeordnet werden.
d. Weshalb wird mein Laufwerk mit über 2 TB Kapazität nicht erkannt? Hier
liegt die Ursache in der Tatsache, dass bei MBR-Partitionszuweisungen
unter XP Kapazitäten über 2 TB nicht unterstützt werden. Es
wird daher empfohlen, bei Systemen ab Vista 64bit auf die GPTPartitionszuweisung zurückzugreifen, um die Windows-XPBeschränkung zu umgehen. Danach sollte eine Initialisierung und
Formatierung von Laufwerken von gar 6 TB oder 8 TB Größe kein
Problem darstellen.
e. Bitte überprüfen Sie zuvor den Inhalt der Festplatten, die Sie
überschreiben, Inateck übernimmt KEINE Garantie für verlorene Daten
und anderweitige Verluste.
f. Bitte entfernen Sie die Festplatte nicht während diese in Benutzung ist
oder wechseln Sie diese während der Nutzung aus. Unsachgemäßes
entfernen der Festplatte während der Nutzung kann Ihre Festplatte
beschädigen und zu Datenverlust verführen.
Kundenservice
Bei Fragen und Problemen besuchen Sie bitte unsere Webseite www.
inateck.com/de oder schreiben Sie un san: support@inateck.com
8
Page 10

日本語
主な機能
本製品は2台 HDD の間にデータのコピーやクローンをサポートしてい
ます。そして、USB3.0(超高速の 5Gbps に達する)や SATA3(超高速の
6Gbps に達する)にサポートしながら、下位互換性があります。優れた
転送性能や良好の互換性によって、データの転送がより便利になります。
ご利用シーン例:学校や企業のデータバッチ処理、データのクローン、
データのバックアップなどを簡単に実現できます。
製品概要
LED インジケーター
SATA HDD スロット
クローンボタン
DC - IN ジャック
USB 3.0
電源スイッチ
9
Page 11

ハードドライバ インストールステップ
1. DC パワーアダプタをドッキングステーションに接続してください。
2. USB ケーブルを通して、このドッキングステーションをパソコンに接
続してください。
3. ご使用の HDD をドッキングステーションのスロットに正確に挿入して
ください。
4. パワーボタンを押せるとスクリーンの右下には「モバイルハードウェ
ア」という表示が出ます。識別されたデバイスはディスクマネージャ
にも表示されます。
ご注意 :
a. ストレージがを正常に取り出せるために、データ記憶装置を取り外す
前に、すべてのデータアクセスを停止してください。強制的に取り出
すと、デバイスの損壊またはお大切なデータの損失につながる可能性
があります。
b.USB3.0 ポートを通して本製品をコンピュータに接続するとき、30 分
の間にハードディスクに読み込みまたは書き込みの動作がなかった場
合は、スリープモードに移行され、HDD の動作は停止します。電源イ
ンジケータが 3 秒ごとに点滅して、ハードディスクインジケータが点
灯しています。
c. 一つのハードディスクがアクセスする時に、他のハードディスクを取
り外したり、新しいハードディスクを挿入したりしないでください。
アクセスしているハードディスクが一時的に切断され、ハードドライ
ブが損傷し、データが失われる可能性があります。
オフラインコピー機能
この製品は、オフラインのコピー機能をサポートしています。コンピュ
ータに接続せずに、本製品を利用して直接に HDD のクローンを作成する
ことができます。
1. ご使用の HDD を「A」と「B」ポートに挿入してください。A にはク
ローンされる HDD で、B にはクローニングターゲット HDD を挿入し
ます。HDD の容量:B≥A が必要です。
2. クローン作成の方法:本製品の上部にある「クローン」ボタンを約 3
秒押してください。手を放すと「100%」の LED インジケータが点灯
します。もう一回「クローン」ボタンを快速に押せばクローン作成
が開始します。クローニング中、表示ランプ(25%、50%、75%、
100%)が順番に点滅します。クローンが完了されると全ての LED 表
示灯が点灯します。
10
Page 12

テクニカルデータ
商品名称 USB3.0 デュアル SATA HDDドッキングステーションオフライン
商品型番 Inateck FD2002
重量 410g
カラー ブラック
対応ドライブ 2.5”/3.5” SATA I/II/III HDD/SSD
インターフェイス USB3.0 (最大 5Gbps)
主な材料 ABS プラスチック
ホットプラグ、プラグ&プレイ サポート
ライセンス CE, FCC
商品寸法 450mm× 109mm × 60mm
動作環境 保存温度: -20 ~ 70 ° C; 動作温度 : 5 ~ 40 ° C
対応 OS Windows XP/7/8/8.1/10, Mac OS 9.0 及び以降
取り付けに工具不要 はい
驅動ドライバ 不要
クローン機能付き
パッキングリスト
FD2002 ドッキングステーション × 1
USB3.0 データケーブル × 1
取扱説明書 × 1
DC パワーアダプター × 1
F&Q
a. クローンできない場合:ディスク B の実容量がディスク A の実容量よ
り大きいか同等であるかどうかを確認してください。実容量とは、製
品に記載されている表示容量ではなく、実際に使用できる容量という
ことです。 たとえば、表示容量 500GB のディスクは実際使用できる
容量が 480GB である可能性があります。 通常、表示容量が同じでも、
メーカー、ロットやモデル番号により、2 台のディスクの実容量が異
なります。そのため、同じ表示容量の 2 台のディスクを利用してクロ
ーンする場合は、2 台のメーカー、ロットとモデル番号が同じである
必要があります。
11
Page 13

b. オフラインデュプリケーター途中にインジケーター LED が点滅停止し
ます。 HDD が不良セクタがありますので、データが順調に HDD に書
き込みすることができません。本製品は HDD復旧ツールではありま
せんので、異常のある HDD を交換
c. クローンが完了あと空き容量を調べる方法。 「コンピュータの管理」
ウインドウを開きます。【記憶域】⇒【ディスクの管理】してください。
d. 2TB の HDD を 接続 したが識別され ませ んで した。 Window XP に
2TB 超の HDD を接続した場合、OS 側の仕様では認識されません。
Windows Vista(64 Bit) 以降のバ ージョンは 2TB 超 の HDD が認識さ れ
ます が、HDD をGPT ディスクパーティションにする必要があります。
e. クローンする前にコピー先の HDD/SSD 中に消したくないデータの有
無をご確認く ださい。一旦クローンを実行したらコピー先 HDD/SSD
のパーティションとデータが完 全にコピー元と同じようにクローンさ
れますので、十分ご注意ください。本製品を使 用することによって生
じた、直接・間接の損害、データ消失等については、弊社では一 切そ
の責を負いません。
f. 本製品の保護規制により、B ハードディスクが動作中の場合、A ハー
ドディスクを外すと、B ハードディスクの接続は中止されてしまいま
すので、ご使用のハードディスクのデータまたは安全性を確保するた
めに、B ハードディスクが動作している間に、A ハードディスクを外
すことをご遠慮ください。
サポート
当社の製品に関するお問い合わせやコメントがございましたら、
support@inateck.com までご連絡ください。御連絡を承り次第ご対応い
たします。
12
Page 14

Contact Information
USA
Tel.: +1 702-445-7528
Phone hours: Weekdays 9 AM to 5 PM (EST)
Email: support@inateck.com
Web: www.inateck.com
Addr.: Inateck Technology Inc, 6045 Harrison Drive Suite 6,
Las Vegas, Nevada 89120
Germany
Tel.: +49 342-07673081 Fax.: +49 342-07673082
Phone hours: Weekdays 9 AM-5 PM (CET)
Email: support@inateck.com
Web: http://www.inateck.com/de/
Addr.: F&M Technology GmbH, Montgolerstraße 6,
04509 Wiedemar
Japan
Email: support@inateck.com
Web: www.inateck.com/jp/
Addr.: F & M 株式会社 東京都昭島市拝島町三丁目 10 番 3 号
Made in China
 Loading...