

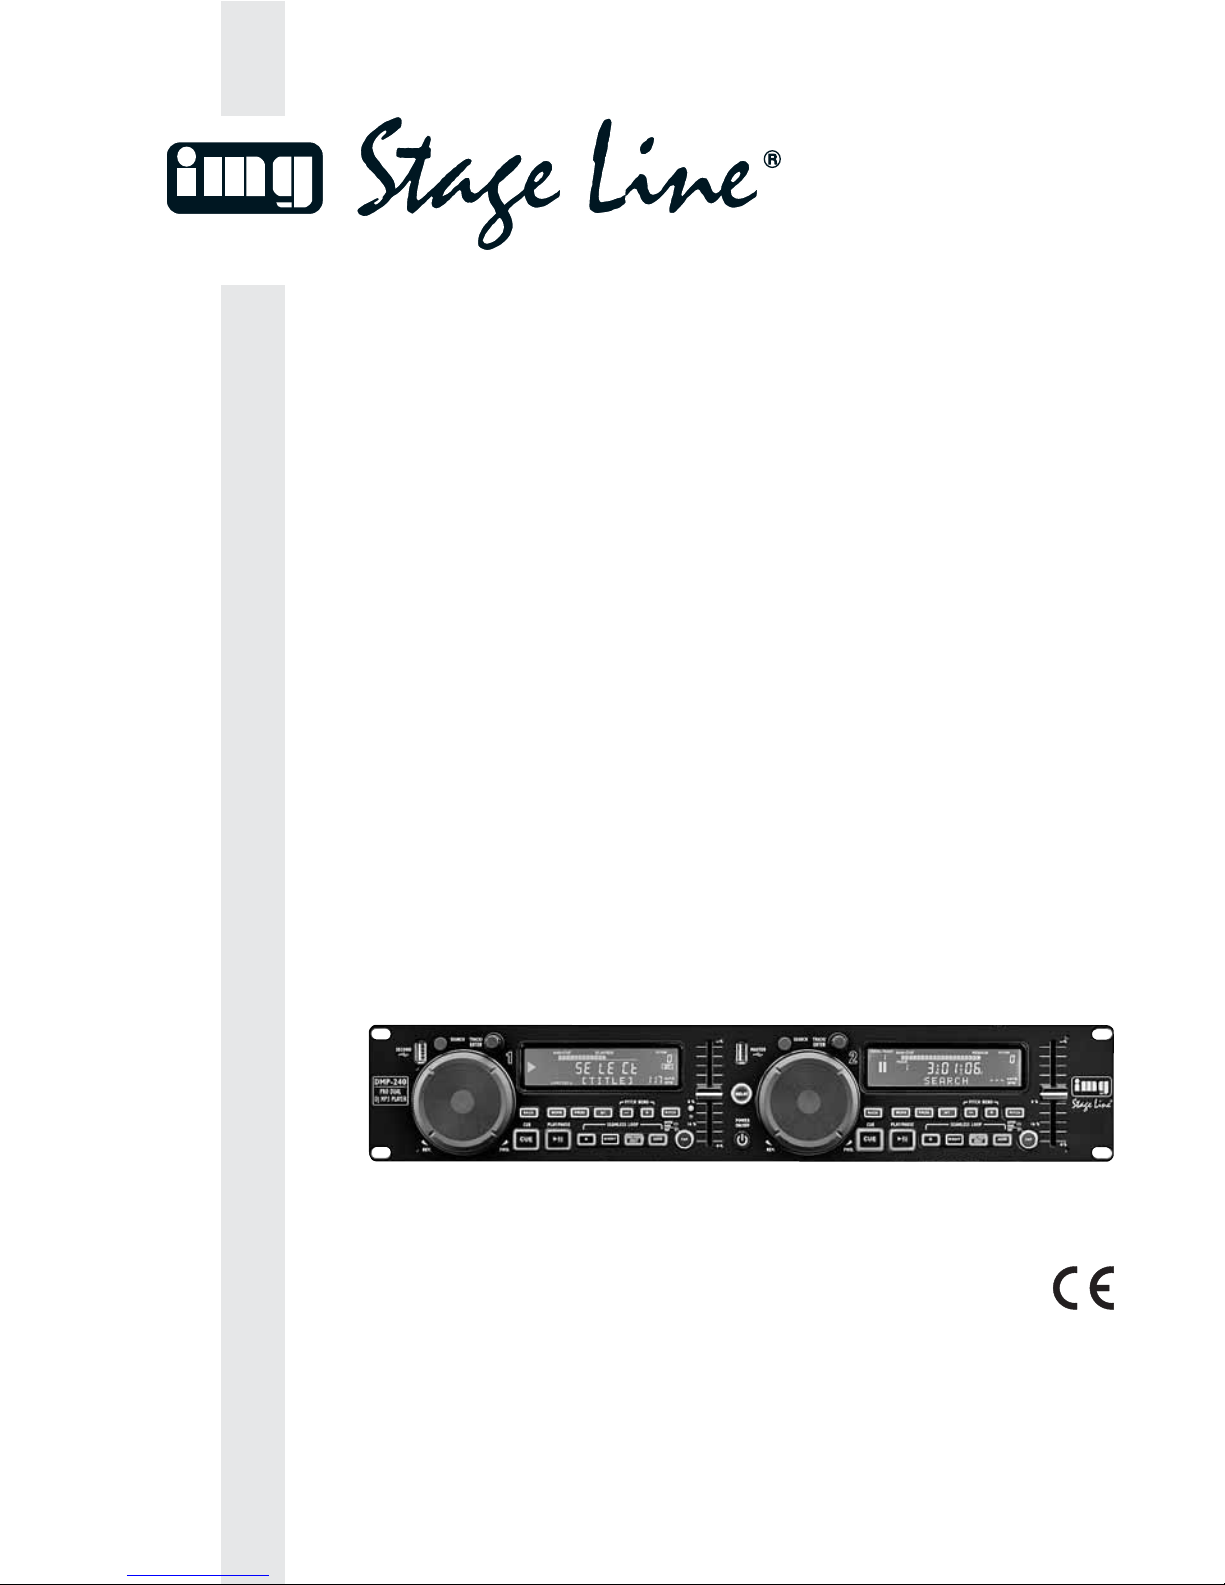
IMG STAGE LINE DMP-240 Instruction Manual
PROFESSIONELLER
DUAL-DJ-MP3-PLAYER
PROFESSIONAL DUAL DJ MP3 PLAYER
LECTEUR DJ MP3 DOUBLE PROFESSIONNEL
LETTORE DOPPIO MP3 PROFESSIONALE PER DJ
DMP-240 Best.-Nr. 21.2570
BEDIENUNGSANLEITUNG • INSTRUCTION MANUAL • MODE D’EMPLOI
ISTRUZIONI PER L’USO •GEBRUIKSAANWIJZING
MANUAL DE INSTRUCCIONES • INSTRUKCJA OBSŁUGI
SIKKERHEDSOPLYSNINGER • SÄKERHETSFÖRESKRIFTER • TURVALLISUUDESTA
2
wwwwww..iimmggssttaaggeelliinnee..ccoomm
®
Bevor Sie einschalten …
Wir wünschen Ihnen viel Spaß mit Ihrem neuen
Gerät von „img Stage Line“. Bitte lesen Sie diese
Bedienungsanleitung vor dem Betrieb gründlich
durch. Nur so lernen Sie alle Funktionsmöglichkeiten kennen, vermeiden Fehlbedienungen und
schützen sich und Ihr Gerät vor eventuellen Schäden durch unsachgemäßen Gebrauch. Heben
Sie die Anleitung für ein späteres Nachlesen auf.
Der deutsche Text beginnt auf der Seite 4.
Before switching on …
We wish you much pleasure with your new “img
Stage Line” unit. Please read these operating
instructions carefully prior to operating the unit.
Thus, you will get to know all functions of the unit,
operating errors will be prevented, and yourself
and the unit will be protected against any damage
caused by improper use. Please keep the oper ating instructions for later use.
The English text starts on page 14.
Avant toute installation …
Nous vous souhaitons beaucoup de plaisir à utiliser cet appareil “img Stage Line”. Lisez ce mode
dʼemploi entièrement avant toute utilisation. Uniquement ainsi, vous pourrez apprendre lʼensemble des possibilités de fonctionnement de lʼappareil, éviter toute manipulation erronée et vous
protéger, ainsi que lʼappareil, de dommages
éventuels engendrés par une utilisation inadaptée. Conservez la notice pour pouvoir vous y
reporter ultérieurement.
La version française se trouve page 24.
Prima di accendere …
Vi auguriamo buon divertimento con il vostro
nuovo apparecchio di “img Stage Line”. Leggete
attentamente le istruzioni prima di mettere in funzione lʼapparecchio. Solo così potete conoscere
tutte le funzionalità, evitare comandi sbagliati e
proteggere voi stessi e lʼapparecchio da eventuali danni in seguito ad un uso improprio. Conservate le istruzioni per poterle consultare anche
in futuro.
Il testo italiano inizia a pagina 34.
D
A
CH
GB
Innan du slår på enheten …
Vi önskar dig mycket glädje med din nya “img
Stage Line” produkt. Läs igenom säkerhetsföre skrifterna innan en heten tas i bruk för att undvika
skador till följd av felaktig hantering. Behåll
instruktionerna för framtida bruk.
Säkerhetsföreskrifterna återfinns på sidan 74.
Ennen kytkemistä …
Toivomme Sinulle paljon miellyttäviä hetkiä uuden
“img Stage Line” laitteen kanssa. Ennen laitteen
käyttöä Sinua huolellisesti tutustumaan turvallisuusohjeisiin. Näin vältyt vahingoilta, joita virheellinen laitteen käyttö saattaa aiheuttaa. Ole hyvä ja
säilytä käyttöohjeet myöhempää tarvetta varten.
Turvallisuusohjeet löytyvät sivulta 75.
F
B
CH
I
S FIN
Antes de la utilización …
Le deseamos una buena utilización para su nue vo aparato “img Stage Line”. Por favor, lea estas
in s trucciones de uso atentamente antes de ha cer
funcionar el aparato. De esta manera conocerá
todas las funciones de la unidad, se pre vendrán
errores de operación, usted y el apa rato estarán
protegidos en contra de todo daño cau sado por
un uso inadecuado. Por favor, guarde las instrucciones para una futura utilización.
La versión española comienza en la página 54.
Voor u inschakelt …
Wij wensen u veel plezier met uw nieuwe apparaat van “img Stage Line”. Lees deze gebruikershandleiding grondig door, alvorens het apparaat
in gebruik te nemen. Alleen zo leert u alle functies
kennen, vermijdt u foutieve bediening en behoedt
u zichzelf en het apparaat voor eventuele schade
door ondeskundig gebruik. Bewaar de handleiding voor latere raadpleging.
De veiligheidsvoorschriften vindt u op pagina 44.
Przed uruchomieniem …
Życzymy zadowolenia z nowego produktu “img
Stage Line”. Dzięki tej instrukcji obsługi będą
państwo w stanie poznać wszystkie funkcje tego
urządzenia. Stosując się do instrukcji unikną
państwo błędów i ewentualnego uszkodzenia
urządzenia na skutek nieprawidłowego użytkowania. Prosimy zachować instrukcję.
Tekst polski zaczyna się na stronie 64.
Før du tænder …
Tillykke med dit nye “img Stage Line” produkt.
Læs sikkerhedsanvisningerne nøje før ibrugtagning, for at beskytte Dem og enheden mod skader, der skyldes forkert brug. Gem manualen til
senere brug.
Sikkerhedsanvisningerne findes på side 74.
E
PL DK
B
NL
3
MODE
PROG.
MT.
PITCH
BACK
A
RELOOP
/EXIT
AUTO
B/EDIT
SEARCH
REV. FWD.
CUE
PLAY/PAUSE
SEAMLESS LOOP
PITCH BEND
8 %
16 %
REV. FWD.
%
%
%
%
SEARCH
2
1
TRACK/
ENTER
TRACK/
ENTER
SECOND
MASTER
TAP
DMP-240
PRO DUAL
DJ
MP3 PLAYER
POWER
RELAY
CUE
TOTAL TRACK
CUE
MSF
RELOOP
BPM
<
ALBUM
>
MT
TRACK
PITCH
REMAINAuto-CUE
AUTO
TOTAL TRACK
CUE
MSF
BPM
<
TITLE
>
TRACK
PITCH
REMAINAuto-CUE
AUTO
MODE
PROG.
MT.
PITCH
BACK
A
RELOOP
/EXIT
AUTO
B/EDIT
CUE
PLAY/PAUSE
SEAMLESS LOOP
PITCH BEND
8 %
16 %
TAP
CUE
12
34
25 26 27 28 29
LINE OUT
L
R
FADER
START
LINE OUT
FADER
START
L
R
1
2
9V~/1.5 A
16 17 18 19 20 21 22 23 24
SEARCH
REV. FWD.
CUE
PLAY/PAUSE
SEAMLESS LOOP
PITCH BEND
8 %
16 %
%
%
TRACK/
ENTER
SECOND
TOTAL TRACK
CUE
MSF
<
TITLE
>
TRACK
PITCH
REMAINAuto-CUE
5 6 7 8 9 10 11 12 131415
TOTAL TRACK
CUE
MSF
RELOOP
BPM
<
TITLE
>
<
ALBUM
>
<
ARTIST
>
FOLDER
MTPROG
TRACK
PITCH
CONTINUE REMAINELAPSEDAuto-CUE
AUTO
ABCDE FG
KLMN OPQR
H
I
J

Auf der ausklappbaren Seite 3 finden Sie
alle beschriebenen Bedienelemente und An schlüsse.
Inhalt
1 Übersicht der Bedienelemente
und Anschlüsse . . . . . . . . . . . . . . . . . . . . 5
2 Hinweise für den sicheren Gebrauch . . . 6
3 Einsatzmöglichkeiten . . . . . . . . . . . . . . . 6
4 Gerät aufstellen und anschließen . . . . . . . 7
5 Bedienung . . . . . . . . . . . . . . . . . . . . . . . . . 7
5.1 Musikstücke abspielen . . . . . . . . . . . . . . . . 7
5.2 Play-Liste laden . . . . . . . . . . . . . . . . . . . . . 8
5.3 Anzeige von Titelinformationen
und des Ruhemodus . . . . . . . . . . . . . . . . . 8
5.3.1 Grafische Laufzeitanzeige . . . . . . . . . . . 8
5.3.2 Beatcounter . . . . . . . . . . . . . . . . . . . . . . . 9
5.3.3 Ruhemodus . . . . . . . . . . . . . . . . . . . . . . . 9
5.4 Betriebsart wählen . . . . . . . . . . . . . . . . . . . 9
5.4.1 Fortlaufende Wiedergabe aller Titel
und Einzeltitelwiedergabe . . . . . . . . . . . . 9
5.4.2 Relay-Betrieb – automatischer Start
der anderen Abspieleinheit
am Ende eines Titels . . . . . . . . . . . . . . . . 9
5.5 Anspielen eines Titels . . . . . . . . . . . . . . . . 9
5.6 Schneller Vor- und Rücklauf . . . . . . . . . . . 10
5.7 Genaues Anfahren
einer bestimmten Stelle . . . . . . . . . . . . . . 10
5.8 Rücksprung zu einer bestimmten Stelle . . 10
5.9 Geschwindigkeit mit oder ohne
Tonhöhenverschiebung verändern . . . . . . 10
5.10 Pitch Bend – Takt zwischen
zwei Musikstücken angleichen . . . . . . . . . 11
5.11 Effekte . . . . . . . . . . . . . . . . . . . . . . . . . . . 11
5.11.1 Leiereffekte . . . . . . . . . . . . . . . . . . . . . . 11
5.11.2 Stottereffekte . . . . . . . . . . . . . . . . . . . . . 11
5.11.3 Endlosschleife abspielen . . . . . . . . . . . . 11
5.12 Eigene Titelfolge zusammenstellen . . . . . 12
5.12.1 Titelfolge speichern . . . . . . . . . . . . . . . . 12
5.12.2 Titelfolge abspielen und beenden . . . . . 12
5.12.3 Titelfolge löschen . . . . . . . . . . . . . . . . . 12
6 Faderstart . . . . . . . . . . . . . . . . . . . . . . . . 12
7 Firmware aktualisieren . . . . . . . . . . . . . 13
8 Technische Daten . . . . . . . . . . . . . . . . . . 13
4
D
A
CH

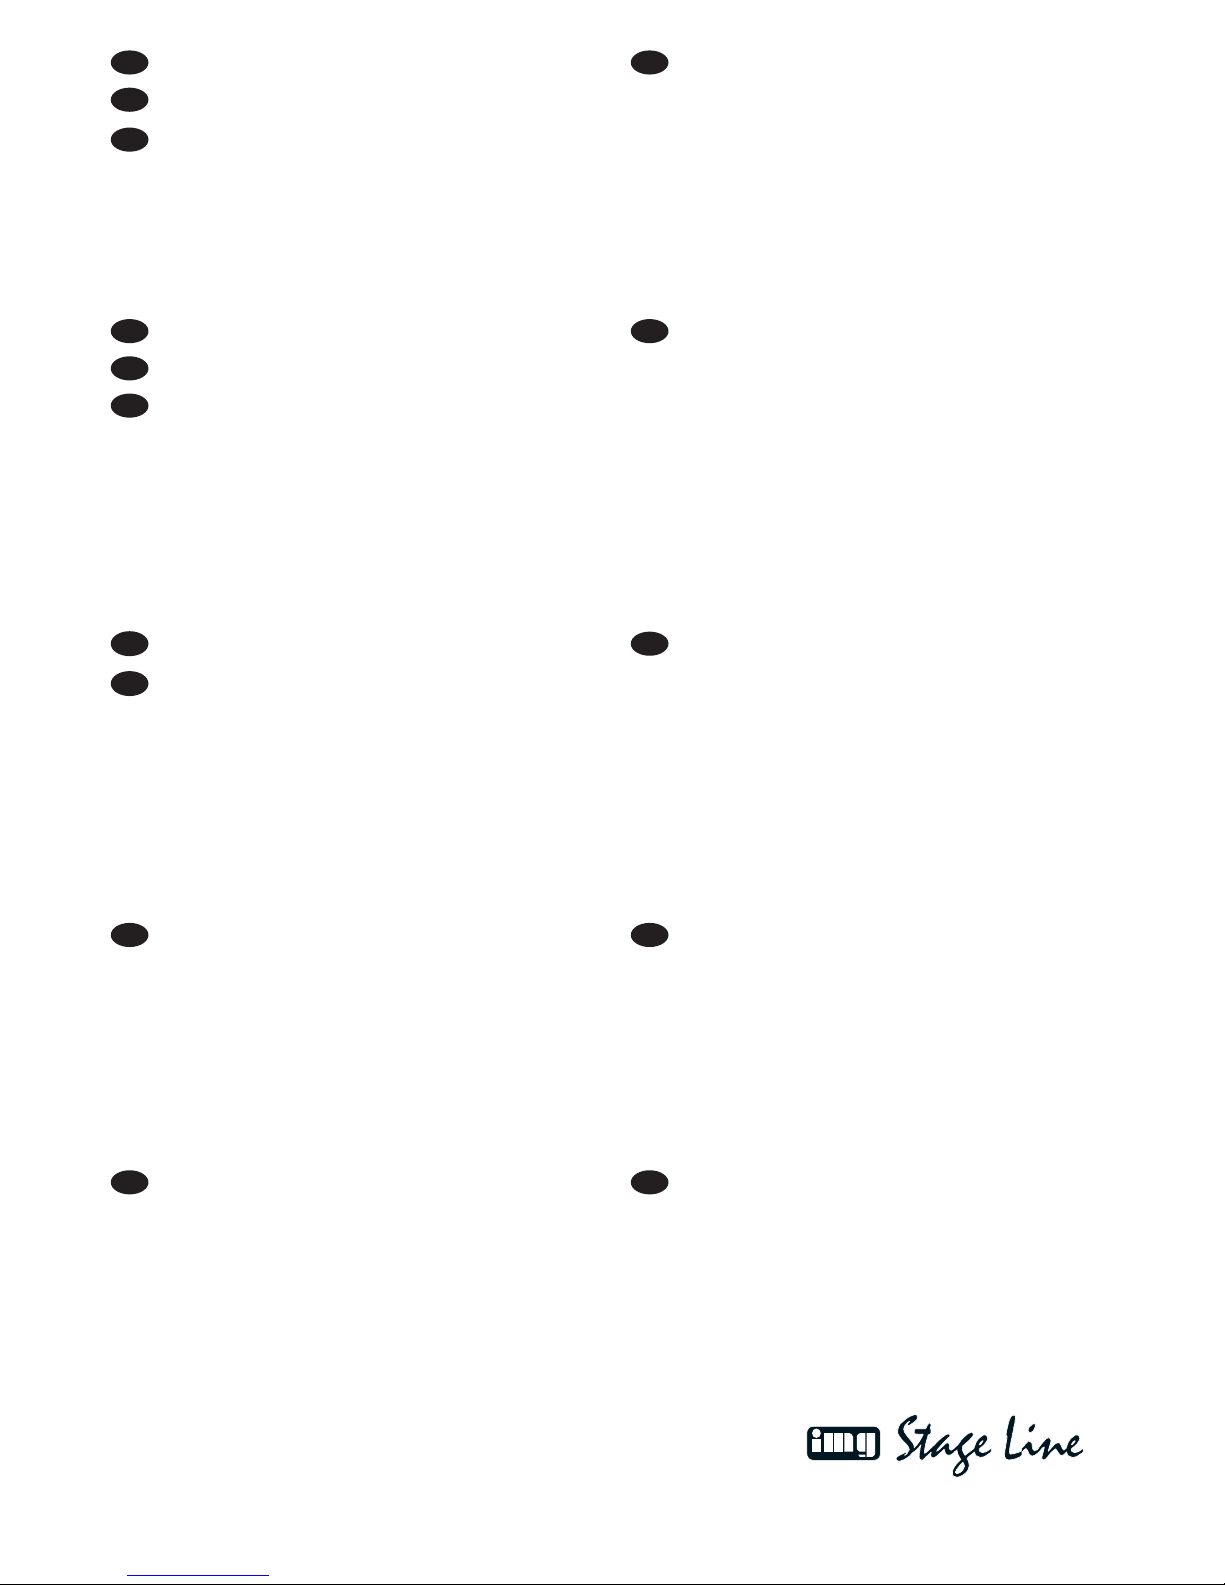
1 Übersicht der Bedienelemente
und Anschlüsse
1 Bedienfeld der Abspieleinheit 1
Details siehe Abb. 2
2 Bedienfeld der Abspieleinheit 2
Details siehe Abb. 2
3 Taste RELAY zum automatischen Starten der
anderen Abspieleinheit am Ende eines Titels
(
Kap. 5.4.2)
4 Ein- und Ausschalter POWER
5 USB-Buchse (Typ A) zum Anschluss eines USB-
Speichermediums
6 Taste SEARCH
–
zum Ein- und Ausschalten des schnellen Vor- /
Rücklaufs mit dem Drehrad (16)
– Wird „TRACK“ über den Ziffern (B) angezeigt
und die Taste gedrückt gehalten, lassen sich
die Titel mit dem Drehrad schnell anwählen
– Wird „FOLDER“ unter den Ziffern (B) ange-
zeigt und die Taste gedrückt gehalten, lassen
sich die Ordner mit dem Drehrad schnell
anwählen
7 Knopf TRACK/ENTER
– Wenn kein Auswahlmodus aktiviert ist, kön-
nen durch Drehen Titel ausgewählt werden
– Wenn einer der Auswahlmodi aktiviert ist,
lässt sich durch Drehen eine Einstellung auswählen
– Durch Drücken wird eine gewählte Einstel-
lung aktiviert
8 Taste BACK, um bei einem aktivierten Auswahl-
modus in die nächsthöhere Auswahlebene
zurückzuschalten
9 Taste MODE, um den Auswahlmodus für die
Betriebsart (
Kap. 5.4.1), für die Zeitanzeige
(
Kap. 5.3) oder für die MP3-Textanzeige
(ID3-Tag, Kap. 5.3) zu aktivieren
10 Taste PROG, um eine programmierte Titelfolge
aufzurufen (
Kap. 5.12.2) oder zu löschen
(Kap. 5.12.3)
11 Taste MT (Master-Tempo) zum Ein- und Aus-
schalten der Funktion für konstante Tonhöhe
(
Kap. 5.9)
12 Tasten PITCH BEND zur Anpassung des Taktes
des gerade laufenden Titels an den Takt eines
auf der anderen Abspieleinheit laufenden
Musikstückes (
Kap. 5.10)
13 Taste PITCH zum Aktivieren / Deaktivieren des
Geschwindigkeitsreglers (24) und zur Auswahl
des Ge schwindigkeitseinstellbereiches (8 %
oder 16 %); die Auswahl wird durch die LEDs
(15) angezeigt
14 Display, Details siehe Abb. 3
A Anzahl der Titel im angewählten Ordner
B wenn über der Ziffer „TRACK“ angezeigt
wird: Nummer des Musiktitels im angewählten Ordner;
wenn unter der Ziffer „FOLDER“ angezeigt
wird: Nummer des angewählten Ordners
C Anzeige „Auto-CUE“: signalisiert die Be -
triebs art Einzeltitelwiedergabe
D
Anzeige „CONTINUE“: signalisiert die Be triebsart für fortlaufende Wiedergabe aller Titel
E Anzeige „ELAPSED“: signalisiert, dass die
bereits gespielte Zeit eines Titels angezeigt
wird
F Anzeige „REMAIN“: signalisiert, dass die
Restlaufzeit eines Titel angezeigt wird
G Anzeige der Abweichung von der Normalge-
schwindigkeit
H Pausensymbol
I Wiedergabesymbol
J Anzeige “CUE”: erscheint, wenn ein Start-
punkt automatisch (
Kap. 5.4.1) oder mit
der Taste CUE (17) gespeichert wurde
K In diesem Feld ist angegeben, ob in der Text-
zeile (N) der Titel-, Album- oder Künstlername des Musiktitels angezeigt wird. Ist
keine dieser Anzeigen eingeblendet, wird der
Dateiname angezeigt (
Kap. 5.3).
L Bargraf zur Darstellung der relativen Titelzeit
M Titelzeitanzeige, siehe auch Pos. E und F
N Textzeile für Klartextanzeigen
O Anzeige „PROG“: signalisiert, dass eine pro-
grammierte Titelfolge aufgerufen ist
P Anzeige „RELOOP“: signalisiert das Ab spie-
len einer Endlosschleife
Q Anzeige der Taktschläge pro Minute für den
laufenden Titel
R Anzeige „MT“ (Master-Tempo): signalisiert
die Funktion für konstante Tonhöhe
(
Kapitel 5.9)
15 LEDs „8%“ und „16%“ zur Anzeige des ge wähl-
ten Geschwindigkeitseinstellbereiches; leuchtet
eine der LEDs, ist der Geschwindigkeitsregler
(24) aktiviert
16 Drehrad REV/ FWD
– für den schnellen Vor- und Rücklauf, wenn
die Taste SEARCH (6) gedrückt wurde
– für die Funktion „Pitch Bend“
während der Wiedergabe eines Titels
– zum exakten Anfahren einer Stelle
im Pausenmodus
– zum Verschieben des Abschnittsendes, wenn
während des Abspielens einer Endlosschleife
die Taste B / EDIT (20) gedrückt wurde
5
D
A
CH
17 Taste CUE zum Anspielen eines Titels (Kap.
5.5) und für den Rücksprung zu einer zuvor
bestimmten Stelle (
Kap. 5.8)
18 Taste zum Starten eines Titels und zum Um -
schalten zwischen Wiedergabe und Pause
19 Taste A zum Bestimmen des Startpunktes einer
Endlosschleife
20 Taste B/EDIT zum Bestimmen des Endpunktes
eines Abschnittes zur Endlosschleifenwiedergabe und gleichzeitigem Starten der Schleife;
zum Verschieben des Endpunktes die Taste
erneut drücken und den Endpunkt mit dem
Drehrad (16) einstellen
21 Taste RELOOP/ EXIT zum Verlassen der Endlos-
schleife oder zum erneuten Abspielen der
Schleife
22 Taste AUTO für eine Endlosschleife mit der
Länge des Vielfachen einer Taktschlaglänge
23 Taste TAP für den manuellen Zählmodus des
Beatcounters und zum Zurückschalten auf den
Automatikmodus (
Kapitel 5.3.2)
24 Schieberegler zum Ändern der Geschwindigkeit
[bei gedrückter Taste MT (11) ohne Änderung
der Tonhöhe]; die Einstellung des Reglers ist
nur bei gedrückter Taste PITCH (13) wirksam
25 Buchse 9 V~ zur Stromversorgung über das
beiliegende Netzgerät
26
Audio-Ausgang LINE OUT der Abspieleinheit 2
zum An schluss an den Line-Eingang z. B. eines
Verstärkers oder Mischpults
27 3,5-mm-Klinkenbuchse FADER START der
Abspieleinheit 2 für die Fernsteuerung der
Funktion Start/Pause von einem Mischpult aus
(
Kapitel 6)
28
Audio-Ausgang LINE OUT der Abspieleinheit 1
29 3,5-mm-Klinkenbuchse FADER START der
Abspieleinheit 1
2 Hinweise für den
sicheren Gebrauch
Die Geräte (MP3-Player und Netzgerät) entsprechen allen erforderlichen Richtlinien der EU und
sind deshalb mit gekennzeichnet.
Beachten Sie auch unbedingt die folgenden
Punkte:
Die Geräte sind nur zur Verwendung im Innenbe reich geeignet. Schützen Sie sie vor Tropf- und
Spritzwasser, hoher Luftfeuchtigkeit und Hitze
(zulässiger Einsatztemperaturbereich 0 – 40°C).
Stellen Sie keine mit Flüssigkeit gefüllten Ge fäße
z. B. Trinkgläser, auf die Geräte.
Nehmen Sie den MP3-Player nicht in Betrieb
bzw. ziehen Sie sofort das Netzgerät aus der
Steckdose,
1. wenn sichtbare Schäden am MP3-Player oder
am Netzgerät vorhanden sind,
2. wenn nach einem Sturz oder Ähnlichem der
Verdacht auf einen Defekt besteht,
3. wenn Funktionsstörungen auftreten.
Geben Sie die Geräte in jedem Fall zur Reparatur in eine Fachwerkstatt.
Verwenden Sie für die Reinigung nur ein trockenes, weiches Tuch, niemals Wasser oder Chemikalien.
Werden die Geräte zweckentfremdet, nicht richtig an geschlossen, falsch be dient oder nicht
fach gerecht repariert, kann keine Haftung für
daraus resultierende Sach- oder Personenschäden und keine Garantie für die Geräte übernommen werden. Ebenso kann keine Haftung für
durch Fehlbedienung oder durch einen Defekt
entstandene Datenverluste und deren Folgeschäden übernommen werden.
3 Einsatzmöglichkeiten
Der MP3-Player DMP-240 mit zwei Abspieleinheiten ist speziell für den professionellen DJ-Bereich
konzipiert. Viele Funktionsmöglichkeiten sind ge nau auf diesen Einsatzbereich abgestimmt, z. B.
Einzeltitelwiedergabe, automatischer Beatcounter,
nahtlose Wiedergabe einer Endlosschleife, Ge schwindigkeitsänderung ohne Tonhöhenänderung.
Zum Abspielen von Musiktiteln im MP3-Format
sind zwei An schlüsse für USB-Speichermedien
(USB-Stick, Festplatte etc.) vorhanden. Die Ab spieleinheiten können unabhängig voneinander
auf die An schlüsse zugreifen, sodass auch der
Betrieb mit nur einem USB-Speicher möglich ist.
Sollen die Geräte endgültig aus dem
Betrieb genommen werden, übergeben
Sie sie zur umweltgerechten Entsorgung
einem örtlichen Recyclingbetrieb.
WARNUNG Das Netzgerät wird mit lebensge-
fährlicher Netzspannung versorgt.
Nehmen Sie deshalb niemals selbst
Eingriffe am Gerät vor. Es besteht
die Gefahr eines elektrischen Schlages.
6
D
A
CH
7
D
A
CH
4 Gerät aufstellen
und anschließen
Vor dem Anschließen von Geräten oder dem
Ändern bestehender Anschlüsse den MP3-Player
und die anzuschließenden Geräte ausschalten.
Der MP3-Player ist für die Montage in ein Rack
(482 mm /19″) vorgesehen, kann aber auch als frei
stehendes Tischgerät verwendet werden. Für den
Einbau in ein Rack werden 2 HE benötigt (HE =
Höheneinheit = 44,45 mm).
1) Die beiden Signalausgänge LINE OUT (26 und
28) an je einen Eingang mit Line-Pegel z. B.
eines Mischpultes oder Verstärkers an schließen
(mögliche Beschriftung: Line, CD, Aux).
2) Die USB-Anschlüsse (5) mit jeweils einem
USB-Speichermedium verbinden, z. B. USBStick oder Festplatte (ggf. mit eigener Stromversorgung). Wird nur ein USB-Speicher zum
Abspielen verwendet, sollte vorzugsweise der
rechte Anschluss MASTER verwendet werden,
weil dieser immer automatisch angewählt wird.
3) Die beiden Abspieleinheiten können über ein
Mischpult mit Faderstart-Funktion gestartet und
auf Pause geschaltet werden. Dazu die Buchsen FADER START (27, 29) über zwei Kabel mit
3,5-mm-Klinkensteckern (2- oder 3-polig) an die
entsprechenden Buchsen des Mischpultes an schließen. Der DMP-240 muss auf die Faderstartart des Mischpultes eingestellt werden;
siehe dazu Kapitel 6.
4) Das beiliegende Netzgerät an die Buchse 9 V~
(25) anschließen und den Netzstecker in eine
Steckdose (100 – 240 V~ / 50 – 60 Hz) stecken.
5 Bedienung
Das Gerät mit dem Netzschalter POWER (4) einschalten. Die Bedienung der beiden Abspieleinheiten ist vollkommen identisch.
Nach dem Betrieb das Gerät ausschalten. Die
folgenden Einstellungen sind stets gespeichert und
beim nächsten Einschalten wieder aktiviert:
1. der gewählte Betriebsmodus (Einzeltitelwieder-
gabe / fortlaufende Wiedergabe,
Kap. 5.4.1
)
2. die gewählte Zeitanzeige (Titelrestlaufzeit/ be -
reits gespielte Zeit,
Kapitel 5.3)
3. der gewählte Geschwindigkeitseinstellbereich
(
Kapitel 5.9)
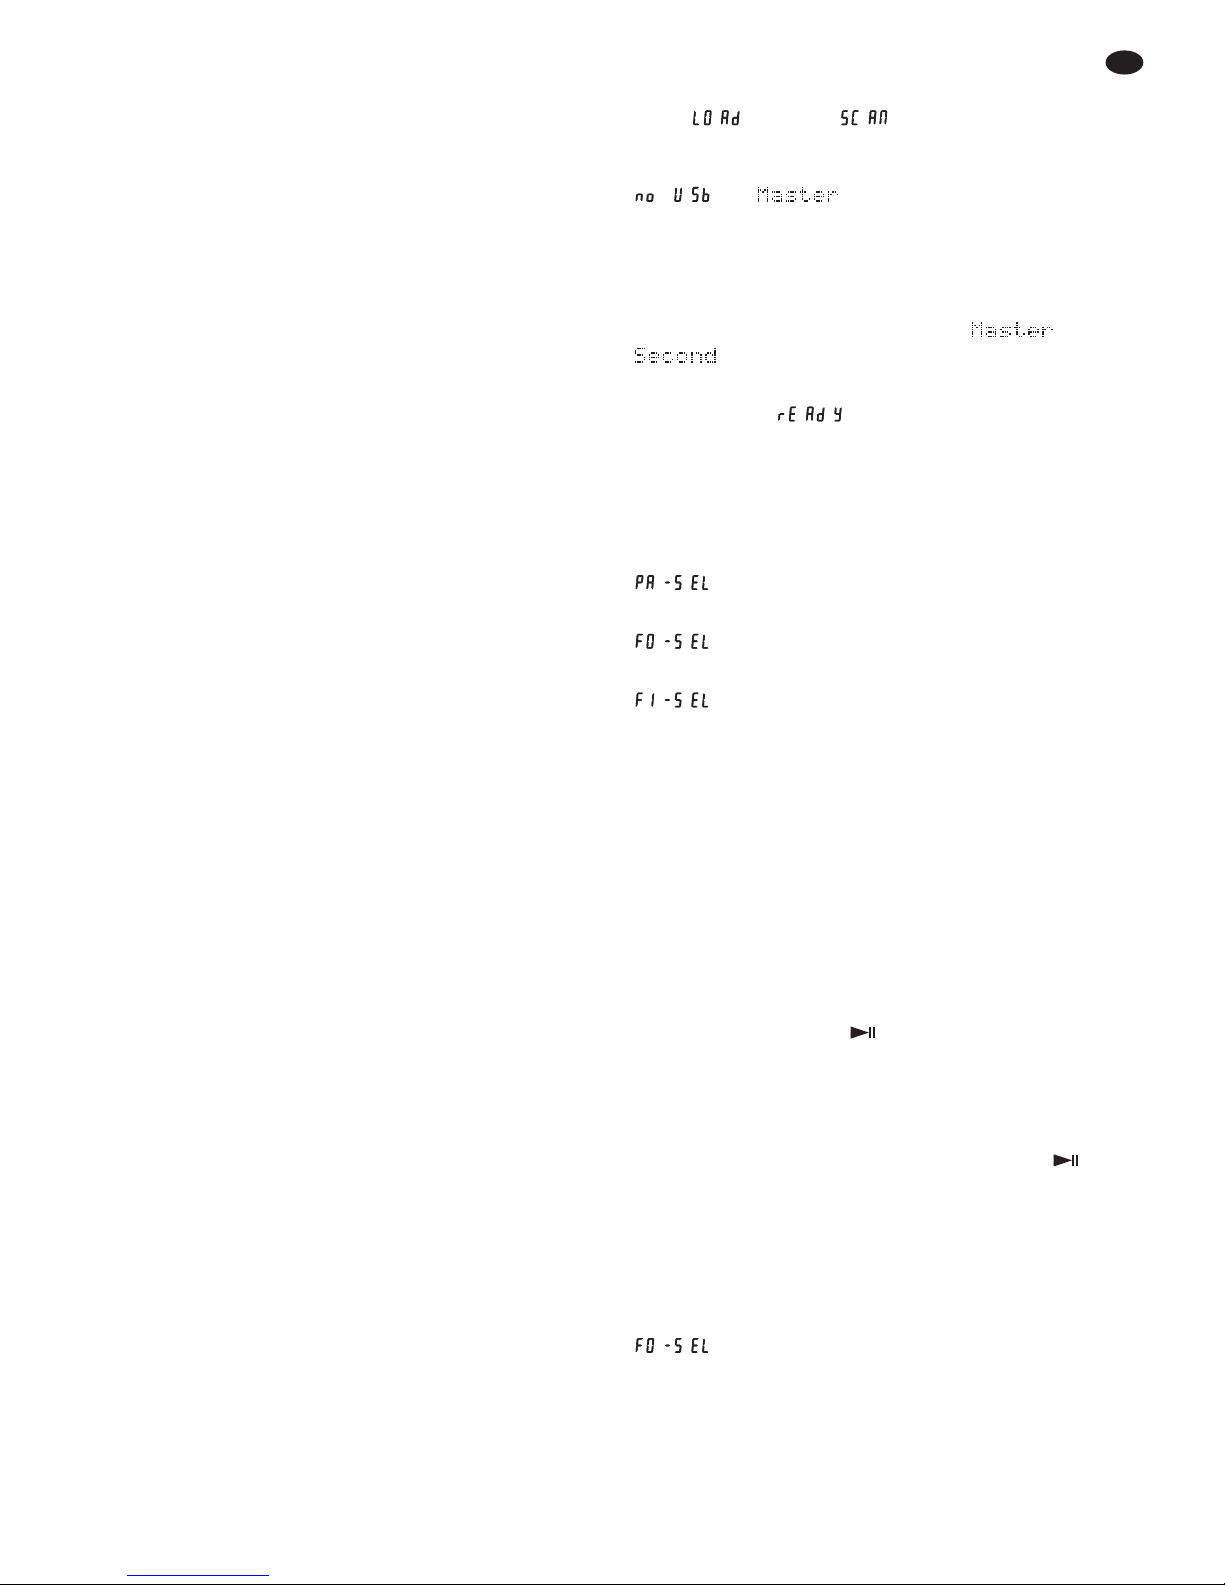
5.1 Musikstücke abspielen
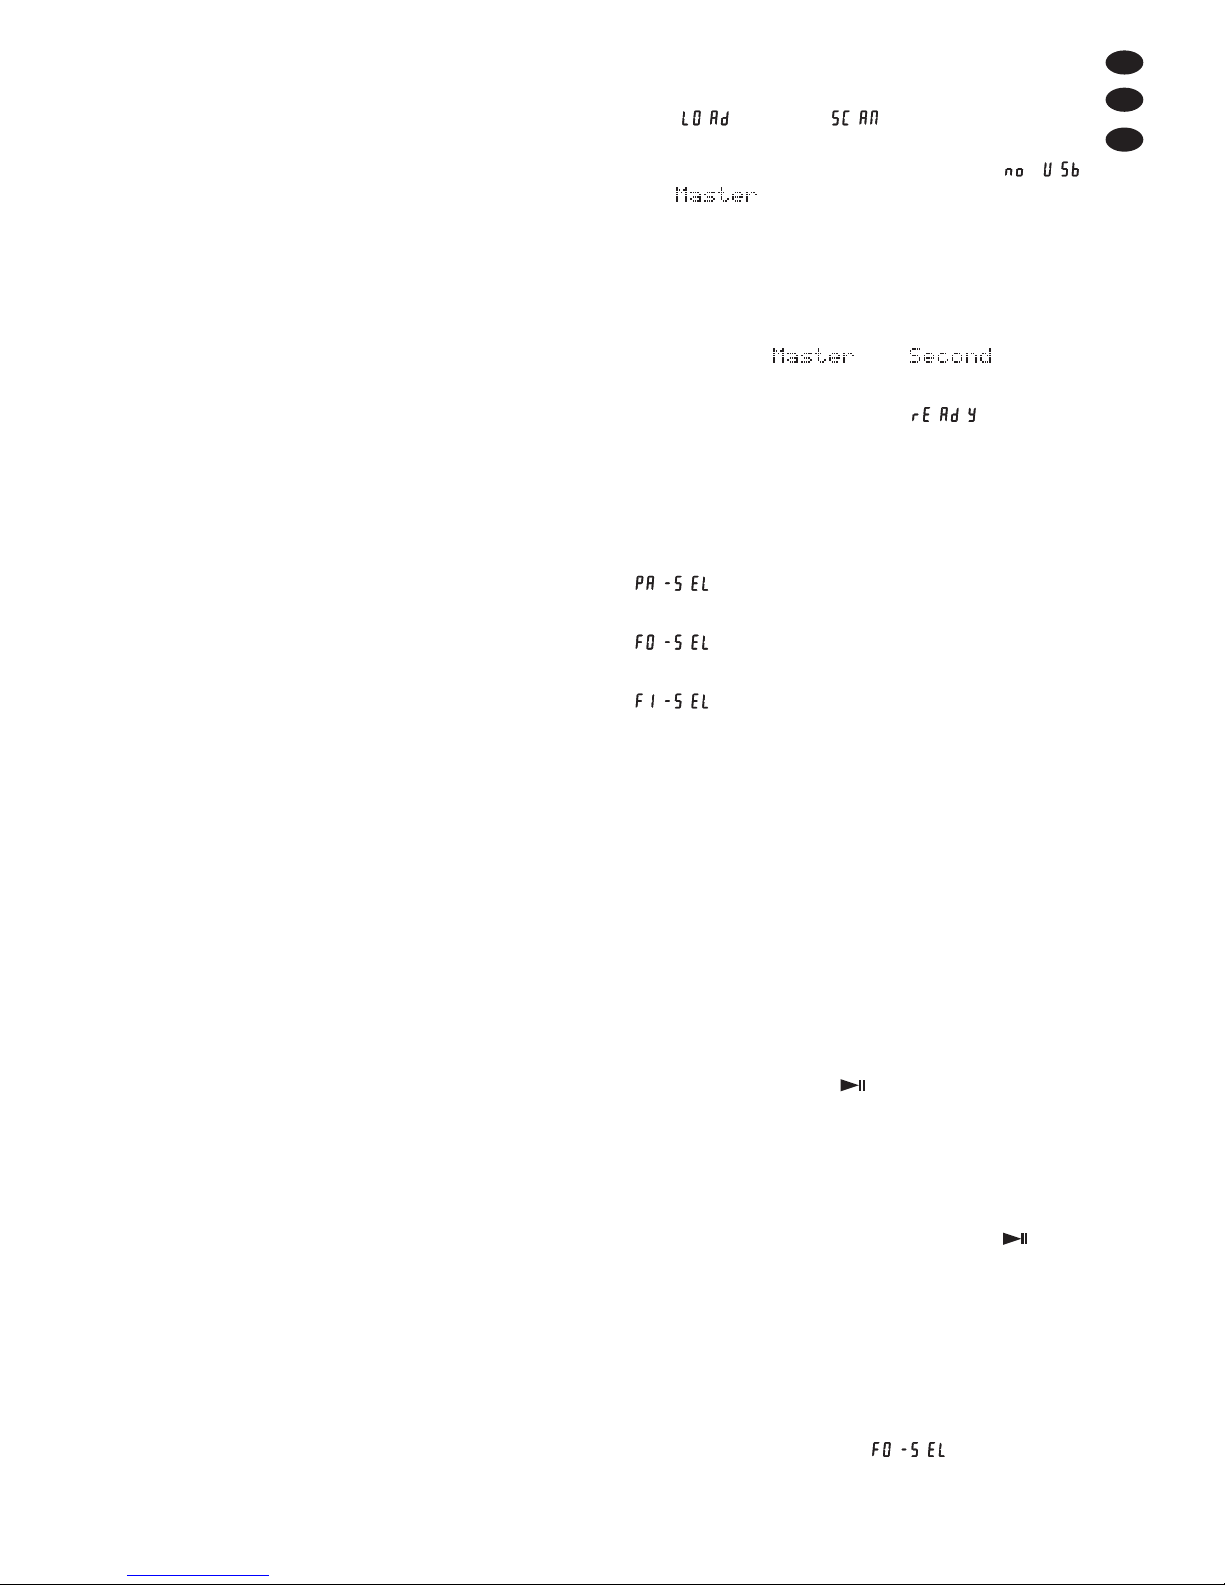
1) Nach dem Einschalten zeigt das Display (14)
kurz und dann an. Wenn kein USBSpeicher am rechten USB-Anschluss MASTER
(5) angeschlossen ist, zeigt es da nach
und an.
2) Für beide Abspieleinheiten ist der rechte USBAnschluss MASTER angewählt. Zum Anwählen
des linken USB-Anschlusses SECOND den
Knopf TRACK / ENTER (7) drehen. Die Textzeile
(N) unten im Display zeigt den angewählten
Anschluss an: oder .
3) Ist der USB-Speicher nach dem Anwählen eingelesen, signalisiert das Display . Zur weiteren Auswahl von Partitionen, Ordnern und Titeln
den Knopf TRACK / ENTER drücken.
4) Je nach Datenstruktur auf dem USB-Speicher
zeigt das Display die nächste Auswahlmöglichkeit an:
= Auswahl einer Partition
1
(Partition Selection)
= Auswahl eines Ordners
2
(Folder Selection)
= Auswahl einer MP3-Datei
(File Selection)
1
nur wenn mehrere Partitionen vorhanden sind
2
nur wenn Ordner vorhanden sind
Durch Drehen des Knopfes TRACK / ENTER die
Auswahl durchführen und durch Drücken des
Knopfes TRACK / ENTER bestätigen. Das Display zeigt die nächste Auswahlmöglichkeit an.
Den Vorgang so oft wiederholen, bis nach der
Auswahl der MP3-Datei das Display die Titelaufzeit (M) anzeigt.
5) Um zurück in die nächsthöhere Ebene zu ge langen, die Taste BACK (8) drücken.
6) Nach dem Bestätigen der Titelauswahl die Wiedergabe mit der Taste (18) starten. Mit dieser
Taste kann die Wiedergabe auch jederzeit
unterbrochen und fortgesetzt werden. Ist die Be
triebsart Einzeltitelwiedergabe gewählt, schaltet
das Gerät am Anfang des nächsten Titels auf
Pause (Kap. 5.4.1).
Sollte die Wiedergabe mit der Taste nicht
starten, überprüfen, ob das Display die Titellaufzeit (M) anzeigt. Wenn nicht, den Knopf
TRACK/ ENTER entsprechend oft drücken.
7) Zum Umschalten auf einen anderen Titel den
Knopf TRACK/ ENTER drehen. Das Gerät
springt sofort auf diesen Titel. Zum Anwählen
eines anderen Ordners die Taste BACK so oft
drücken, bis das Display zeigt.
5.2 Play-Liste laden
Zum Abspielen einer bestimmten Titelauswahl lassen sich auf einem Computer erstellte Play-Listen
mit der Dateiendung „.wpl“, „.xml“ oder „.m3u“ in
den DMP-240 laden.
Wichtig: Eine Play-Liste und die dazugehörigen
MP3-Dateien müssen sich auf demselben Speichermedium befinden. Die Play-Listen müssen immer im
Hauptverzeichnis (root directory) ge speichert sein.
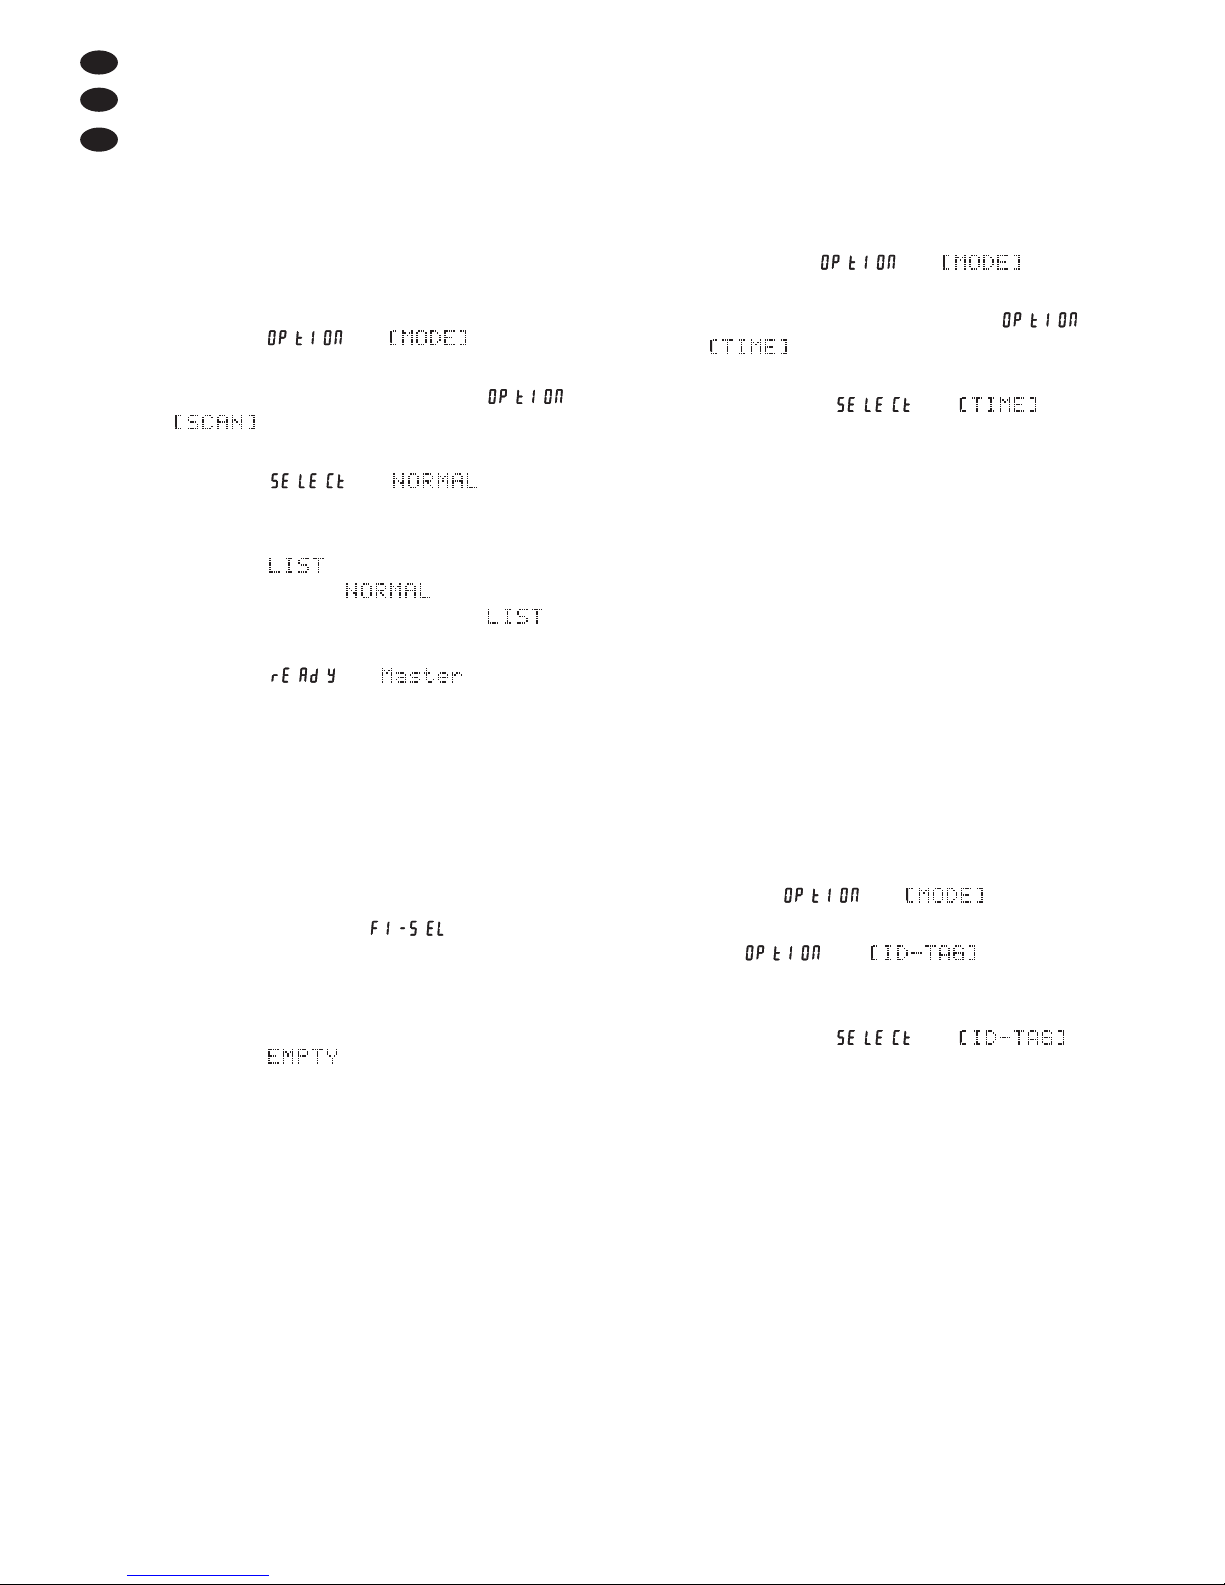
1) Die Taste MODE (9) drücken. Im Display
erscheint und .
2) Den Knopf TRACK / ENTER (7) eine Rastung
nach links drehen, sodass und
angezeigt werden.
3) Den Knopf TRACK / ENTER drücken. Das Display zeigt und an.
4)
Durch Drehen des Knopfes TRACK / ENTER
kann nun zwischen der Auswahl von Play-Listen
(Anzeige ) und der Auswahl von MP3Dateien (Anzeige ) umgeschaltet werden. Zur Auswahl von Play-Listen wählen.
5) Die Taste BACK (8) einmal drücken. Das Display zeigt und an.
6) Den gewünschten USB-Anschluss (5) durch Drehen des Knopfes TRACK / ENTER wählen und
durch Drücken des Knopfes bestätigen.
7) Sind auf dem angewählten USB-Speicher mehrere Partitionen vorhanden, die ge wünschte
Partition mit dem Knopf TRACK / ENTER auswählen. Anderenfalls mit dem nächsten Bedienschritt fortfahren.
8) Wenn das Display anzeigt und das
Feld „TOTAL TRACK“ (A) die Anzahl der vorhandenen Play-Listen, durch Drehen des Knopfes TRACK / ENTER eine Play-Liste auswählen.
Die Textzeile (N) zeigt den Namen der Play-Liste
an. Wird (= leer) angezeigt, ist keine
Play-Liste auf dem angewählten USB-Speicher
vorhanden.
9) Durch Drücken des Knopfes TRACK / ENTER
die Play-Liste laden und aus der Liste den zu
spielenden Titel mit dem Knopf TRACK / ENTER
auswählen.
5.3 Anzeige von Titelinformationen
und des Ruhemodus
Das Display (14) gibt eine Vielzahl von Informationen an:
1. Anzahl der Titel (A) im angewählten Ordner
2. Nummer des gewählten Titels (B), wenn über
der Ziffer „TRACK“ angezeigt wird
3. Laufzeit des gewählten Titels relativ (L) und
absolut (M); die Sekunden sind in 75 so genannte Frames unterteilt
Die Laufzeitanzeige lässt sich zwischen Restlaufzeit „REMAIN“ (F) und bereits gespielter
Zeit „ELAPSED“ (E) umschalten:
a) Die Taste MODE (9) drücken. Im Display
erscheinen und .
b) Den Knopf TRACK / ENTER (7) eine Rastung
nach rechts drehen, sodass und
angezeigt werden.
c) Den Knopf TRACK / ENTER drücken. Das
Display zeigt und an.
d) Durch Drehen des Knopfes TRACK / ENTER
kann nun zwischen Restlaufzeit „REMAIN“
(F) und bereits gespielter Zeit „ELAPSED“
(E) umgeschaltet werden.
e) Zum Zurückschalten auf die Zeitanzeige die
Taste BACK (8) zweimal drücken.
4. Die Textzeile (N) lässt sich auf eine der folgenden Informationen (ID3-Tag) umschalten:
Titelname*, Anzeige < TITLE > (K)
Albumname*, Anzeige < ALBUM >
Künstlername*, Anzeige < ARTIST >
Dateiname, keine Anzeige im Feld (K)
* Wenn eine der Informationen nicht in der MP3-Datei
gespeichert ist, wird ein Fragezeichen in der Textzeile
angezeigt.
a) Die Taste MODE drücken. Im Display er -
scheint und .
b) Den Knopf TRACK / ENTER so weit drehen,
bis und angezeigt werden.
c) Den Knopf TRACK / ENTER drücken. Das
Display zeigt und an.
d) Durch Drehen des Knopfes TRACK / ENTER
kann nun zwischen den angegebenen
Anzeigemöglichkeiten um geschaltet werden.
e) Zum Zurückschalten auf die Zeitanzeige die
Taste BACK zweimal drücken.
5.3.1 Grafische Laufzeitanzeige
Zusätzlich zur numerischen Laufzeitanzeige (M)
stellt der Bargraf (L) die Laufzeit, bezogen auf die
Titeldauer, durch seine Länge grafisch dar (relative
Zeitdarstellung). Die l8etzten 30 Sekunden eines
Titels signalisiert der Bargraf durch Blinken in voller
Länge, wobei die letzten 15 Se kunden durch
schnelleres Blinken angezeigt werden.
8
D
A
CH
5.3.2 Beatcounter
Nach dem Starten eines Titels ermittelt der Beatcounter automatisch die Anzahl der Taktschläge pro Minute.
Nach kurzer Zeit erscheint die Anzahl unten rechts im
Display (Q). Kann der Beatcounter keinen richtigen
Wert ermitteln (z. B. bei ruhigen Musiktiteln), in den
manuellen Modus schalten:
1) Die Taste TAP (23) so lange gedrückt halten, bis die
Anzeige „AUTO“ unten rechts im Display er lischt.
2) Die Taste TAP im Takt der Musik einige Male an tippen, sodass die Anzahl der Taktschläge angezeigt
wird.
3) Zum Zurückschalten auf den automatischen Zählmodus, die Taste TAP gedrückt halten, bis wieder
die Anzeige „AUTO“ erscheint.
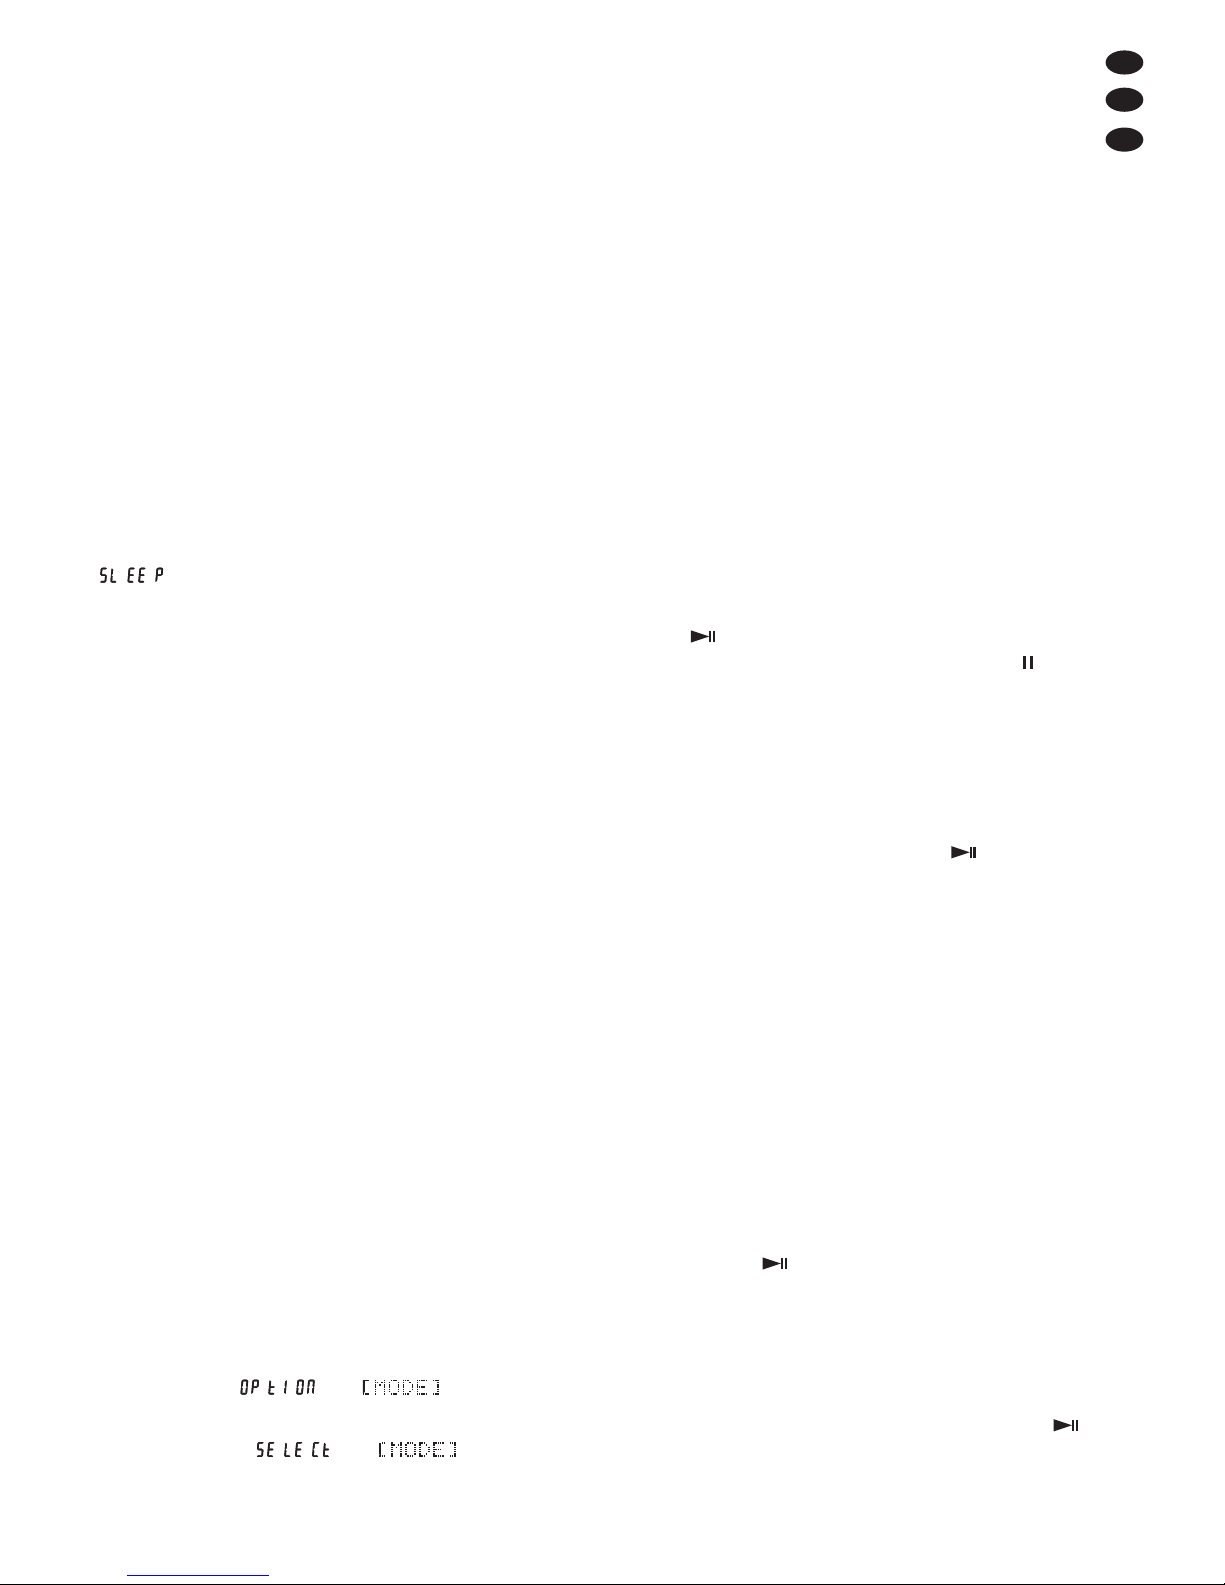
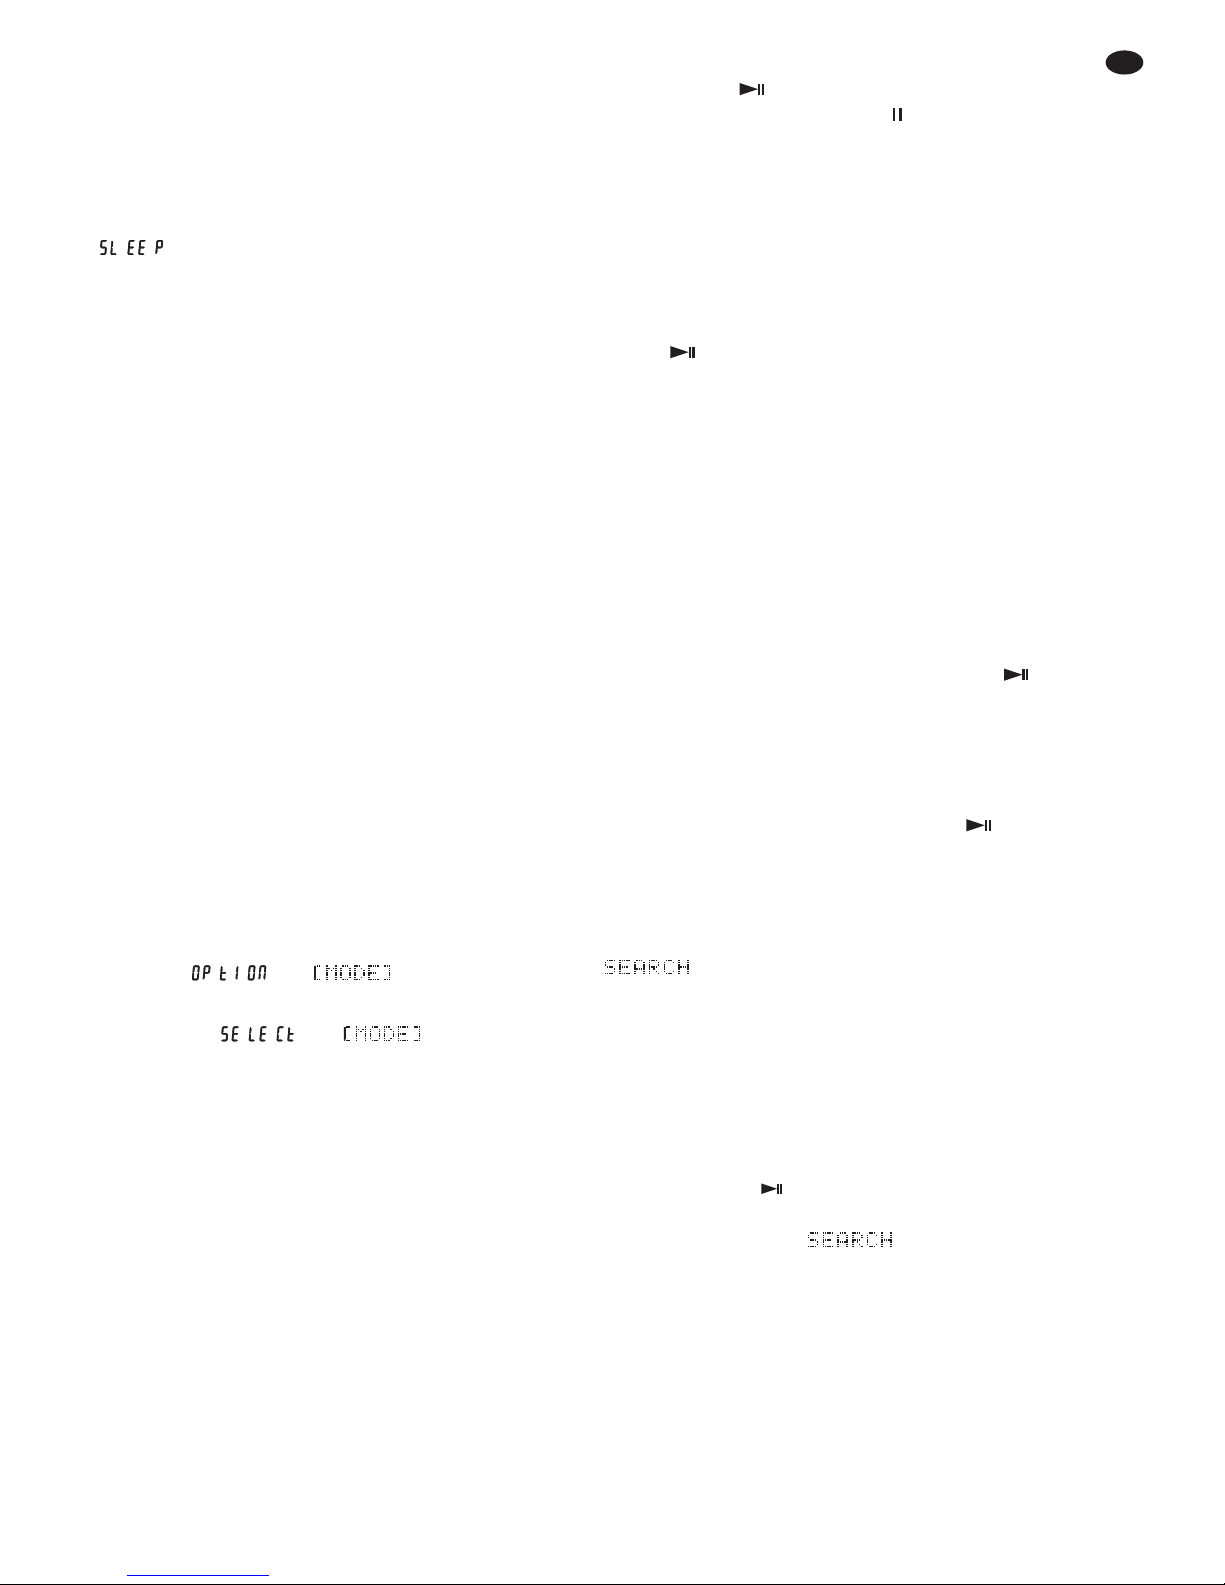
5.3.3 Ruhemodus
Steht das Gerät länger als 20 Minuten auf Pause,
schaltet es in den Ruhemodus. Das Display zeigt
(Schlaf) an und alle beleuchteten Tasten
erlöschen. Durch Betätigen einer beliebigen Taste
wird in den vorherigen Be triebsmodus zurückgeschaltet.
5.4 Betriebsart wählen
5.4.1 Fortlaufende Wiedergabe aller Titel und
Einzeltitelwiedergabe
Bei der Betriebsart für fortlaufende Wiedergabe
wird im Display „CONTINUE“ (D) angezeigt, bei der
Einzeltitelwiedergabe „Auto-CUE“ (C). Die Einzeltitelwiedergabe ist speziell für DJ-Anwendungen
vorgesehen:
1. Nach dem Anwählen eines Titels steht das
Gerät exakt an der Stelle, an der die Musik
beginnt (und nicht bei Zeitindex 0:00:00). Diese
Stelle wird automatisch als Startpunkt gespeichert. Das Display zeigt „CUE“ (J). Nach dem
Starten des Titels kann mit der Taste CUE (17)
auf diesen Startpunkt zurückgesprungen werden.
2. Nach dem Spielen eines Titels schaltet das
Gerät exakt an der Stelle auf Pause, an der die
Musik des nächsten Titels beginnt. Diese Stelle
ist dann als neuer Startpunkt gespeichert.
Zum Umschalten zwischen fortlaufender Wiedergabe und Einzeltitelwiedergabe:
1) Die Taste MODE (9) drücken. Im Display
erscheinen und .
2) Den Knopf TRACK / ENTER (7) drücken. Das
Display zeigt und an.
3) Durch Drehen des Knopfes TRACK / ENTER
kann nun zwischen fortlaufender Wiedergabe
„CONTINUE“ (D) und Einzeltitelwiedergabe
„Auto-CUE“ (C) umgeschaltet werden.
4) Zum Zurückschalten auf die Zeitanzeige die
Taste BACK (8) drücken.
5.4.2 Relay-Betrieb – automatischer Start der
anderen Abspieleinheit
am Ende eines Titels
Am Ende eines Titels kann automatisch die andere
Abspieleinheit gestartet werden.
1) Beide Abspieleinheiten auf Einzeltitelwiedergabe schalten (
Kap. 5.4.1); in beiden Displays (14) muss „Auto-CUE“ (C) angezeigt werden.
2) Auf jeder Abspieleinheit einen Titel anwählen.
3) Die Taste RELAY (3) betätigen. Die Taste leuchtet.
4) Die Wiedergabe auf einer Abspieleinheit mit der
Taste (18) starten. Die andere Ab spieleinheit
muss auf Pause geschaltet sein [Anzeige (H)].
Sobald ein Titel zu Ende gespielt ist, schaltet die
Abspieleinheit auf Pause und die andere startet.
Der Vorgang wird bis zum Ausschalten des
Relay-Betriebs endlos wiederholt. (Zum Ausschalten die Taste RELAY erneut drücken.)
5) Während des Relay-Betriebs kann an jeder
Stelle eines Titels mit der Taste zusätzlich
die Wiedergabe von einer zur anderen Ab spieleinheit umgeschaltet werden.
Hinweis: Wird in dieser Betriebsart die Taste CUE (17) an
der wiedergebenden Abspieleinheit betätigt, wechselt die
Wiedergabe zur anderen Abspieleinheit. Wird an der auf
Pause stehenden Abspieleinheit die Taste CUE ge drückt
gehalten, erfolgt die Wiedergabe von dieser Ab spieleinheit
so lange, bis die Taste gelöst wird.
5.5 Anspielen eines Titels
Mit der Taste CUE (17) lässt sich ein Titel an spielen, solange diese Taste gedrückt gehalten wird.
Nach dem Lösen der Taste springt das Gerät auf
den Titelanfang zurück und schaltet auf Pause.
1) Mit der Taste (18) auf Pause schalten.
2)
Den gewünschten Titel mit dem Knopf TRACK/
ENTER (7) wählen.
3) Durch Gedrückthalten der Taste CUE den Titel
anspielen.
4) Soll der Titel abgespielt werden, die Taste
betätigen.
9
D
A
CH
5.6 Schneller Vor- und Rücklauf
Soll ein Titel schnell vor- oder zurücklaufen, zuerst
die Taste SEARCH (6) drücken. In der Textzeile (N)
wird angezeigt. Das Drehrad REV/ FWD
(16) in die entsprechende Richtung drehen. Die
Vor- bzw. Rücklaufgeschwindigkeit hängt von der
Drehgeschwindigkeit des Rads ab.
Hinweise
1. Im Pausenmodus wird nach einem Vor- oder Rücklauf
die momentane Stelle ständig wiederholt. Um das Wiederholen zu beenden, entweder die Taste CUE (17)
zweimal kurz drücken (neuer Cue-Punkt wird gesetzt,
Kap. 5.8) oder die Wiedergabe mit der Taste
(18) starten.
2. Wird das Drehrad im Wiedergabemodus 8 Sek. nicht
betätigt, erlischt die Anzeige und das Rad
dient wieder für die Funktion „Pitch Bend“ (Kap. 5.10).
5.7 Genaues Anfahren
einer bestimmten Stelle
Eine Stelle im Titel lässt sich auf 1Frame (1⁄75 Sek.)
genau anfahren, wenn z. B. die Wiedergabe nicht
am Titelanfang, sondern ab einer bestimmten
Stelle starten soll.
1) Ist die gewünschte Stelle durch Abspielen des
Titels oder mit dem schnellen Vor-/Rücklauf
(
Kap. 5.6) ungefähr erreicht, mit der Taste
(18) auf Pause schalten.
2) Durch Links- und Rechtsdrehen des Dreh rades
(16) die Stelle genau anfahren. Dabei wird die
momentane Stelle ständig wiederholt.
3) Ist die gewünschte Stelle eingestellt, die Taste
CUE (17) zweimal kurz drücken. Damit ist die
Stelle gespeichert und das wiederholte Ab spielen beendet. Mit der Taste kann nun die Wiedergabe ab diesem Punkt gestartet werden.
5.8 Rücksprung
zu einer bestimmten Stelle
Um schnell zu einer bestimmten Stelle springen zu
können, lässt sich mit der Taste CUE (17) ein Startpunkt (Cue-Punkt) speichern.
Hinweis: Im Modus Einzeltitelwiedergabe kann der Rücksprung mit der Taste CUE nur innerhalb eines Titels erfolgen. Beim Erreichen des nächsten Titels wird der CuePunkt durch den Startpunkt des nächsten Titels ersetzt
(
Kapitel 5.4.1).
1) Während des Abspielens eines Titels mit der
Taste (18) auf Pause schalten, wenn die
Stelle erreicht ist, zu der später zurückgesprungen werden soll. Die Tasten und CUE (17)
blinken.
2) Bei Bedarf kann mit dem Drehrad (16) die Stelle
exakter angefahren werden (
Kapitel 5.7).
Die angefahrene Stelle ist danach fortlaufend
zu hören.
3) Die Taste CUE antippen. Dadurch wird die
Stelle als Cue-Punkt gespeichert und im Display erscheint die Anzeige „CUE“ (J). Falls die
momentane Stelle zu hören ist, die Taste CUE
erneut kurz zum Stummschalten drücken. Die
Taste CUE leuchtet jetzt kontinuierlich. Die
Taste blinkt weiter als Aufforderung, die Wiedergabe zu starten.
4) Das Abspielen mit der Taste wieder starten.
Vorsicht: Jetzt nicht mit dem Knopf TRACK /
ENTER einen anderen Titel anwählen. Andernfalls wird der Cue-Punkt durch den Anfangspunkt des gewählten Titels er setzt.
5) Mit der Taste CUE kann nun auf den Cue-Punkt
zurückgesprungen werden. Die Abspieleinheit
steht dann auf Pause.
6) Mit der Taste die Wiedergabe starten oder
die Taste CUE erneut drücken und gedrückt halten. Nach dem Lösen der Taste CUE steht die
Abspieleinheit wieder am Cue-Punkt auf Pause.
Durch erneutes Gedrückthalten der Taste CUE
kann so ab dem Cue-Punkt be liebig oft eine
Wiederholung erfolgen.
5.9 Geschwindigkeit mit oder ohne
Tonhöhenverschiebung verändern
Die Geschwindigkeit lässt sich mit dem Schieberegler (24) bis zu ±16 % ändern:
1) Den Einstellbereich mit der Taste PITCH (13)
wählen: ±8 % oder ±16%. Die LEDs (15) zeigen
den gewählten Bereich an. Leuchtet die LED
„16 %“, wird durch erneutes Betätigen der Taste
PITCH der Geschwindigkeitsregler wieder de aktiviert und der Titel mit der Normalgeschwindigkeit abgespielt. In der Textzeile (N) wird kurz
die gewählte Einstellung angezeigt.
2) Die Geschwindigkeit mit dem Schieberegler
einstellen. Das Display zeigt die prozentuale
Abweichung von der Normalgeschwindigkeit
oben rechts (G) an. Die An zahl der Taktschläge
(Q) ändert sich entsprechend.
3) Mit dem Verändern der Geschwindigkeit ändert
sich auch proportional die Tonhöhe. Soll jedoch
die Tonhöhe konstant bleiben, die Taste MT (11)
drücken. Im Display erscheint die Anzeige „MT“
(R). Zum Ausschalten der Funktion die Taste
MT erneut drücken.
10
D
A
CH
5.10 Pitch Bend – Takt zwischen
zwei Musikstücken angleichen
Die Taktschläge von zwei Musikstücken mit demselben Tempo lassen sich zeitlich genau über einander legen. Dadurch wird beim Überblenden
von einer zur anderen Abspieleinheit der Rhythmus
beim Tanzen nicht unterbrochen.
1) Zuerst das Tempo des Musikstückes, auf das
übergeblendet werden soll, mit dem Ge schwindigkeitsregler (24) an das Tempo des laufenden
Musikstückes angleichen. Dazu mit dem Schieberegler die gleiche Anzahl von Taktschlägen
pro Minute einstellen, siehe An zeige (Q) unten
rechts im Display.
2) Die Taktschläge des Musikstückes, auf das
übergeblendet werden soll, mit den Tasten
PITCH BEND (12) genau über die des laufenden Musikstückes legen: Solange die Taste +
oder
-
gedrückt gehalten wird, läuft der Titel
schneller bzw. langsamer und die LED „16%“
(15) blinkt. Dadurch verschieben sich die Taktschläge im Bezug zu den Taktschlägen des laufenden Musikstückes.
3) Die Taktschläge können auch durch Drehen des
Drehrads (16) verschoben werden.
5.11 Effekte
5.11.1 Leiereffekte
Falls die Funktion Master-Tempo (konstante Tonhöhe) aktiviert ist [Anzeige „MT“ (R) im Display],
diese mit der Taste MT (11) ausschalten. Durch
Hin- und Herdrehen des Drehrades (16) wird die
Abspielgeschwindigkeit abwechselnd erhöht und
verringert. Dadurch entsteht ein Leiereffekt.
5.11.2 Stottereffekte
Ein mit den Taste CUE (17) gespeicherten CuePunkt (
Kap. 5.8) kann auch zum Erzeugen von
interessanten Stottereffekten genutzt werden:
Durch mehrfaches kurzes Drücken der Taste CUE
entsteht ein Stottereffekt. Dieser ist dabei umso
eindrucksvoller, je geeigneter der Cue-Punkt ist
(z. B. Instrumenteneinsatz oder Anfang eines
Wortes).
5.11.3 Endlosschleife abspielen
Ein bestimmter Abschnitt kann als nahtlose
Schleife beliebig oft wiederholt werden.
1) Mit der Taste (18) auf Wiedergabe schalten.
Ist der gewünschte Startpunkt der Schleife
erreicht (Punkt a in Abb. 5), die Taste A (19)
antippen.
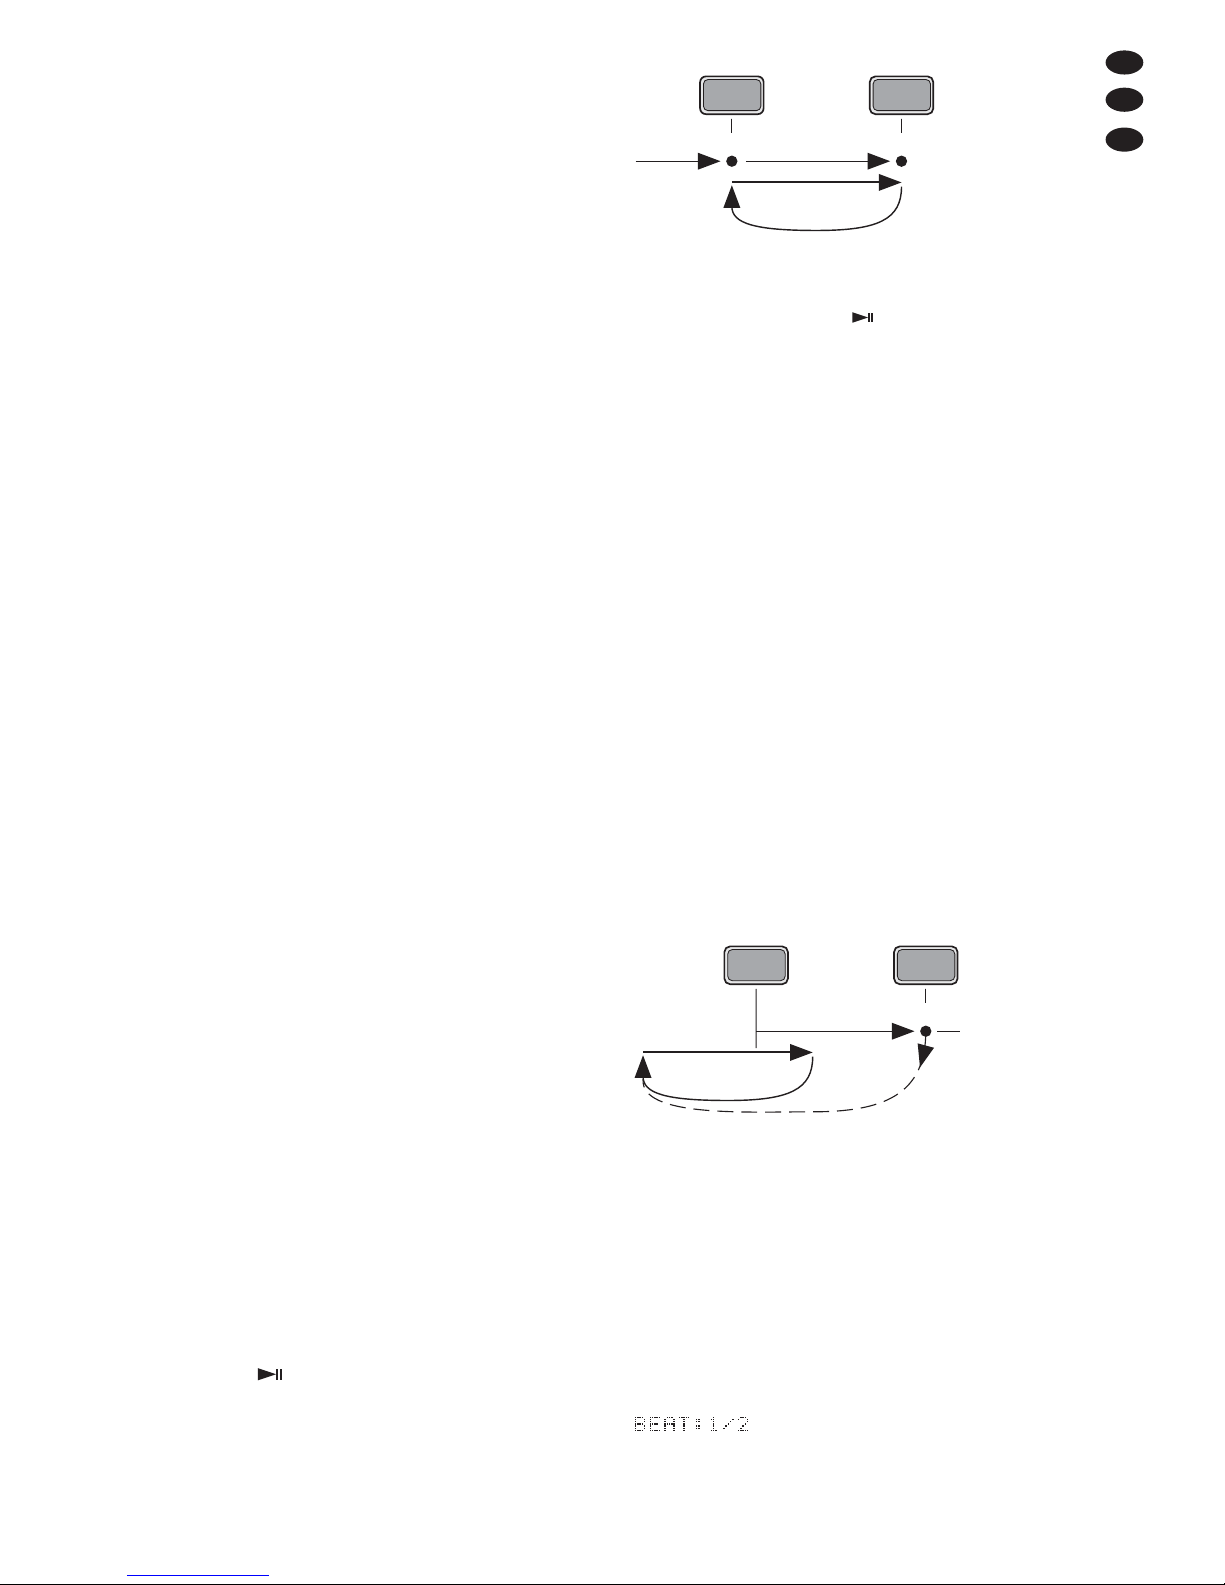
Abb. 5 Endlosschleife abspielen
Tipp: Um den Startpunkt auf 1 Frame genau festzule-
gen, zuerst mit der Taste auf Pause schalten, mit
dem Drehrad (16) den Punkt exakt einstellen und dann
die Taste A drücken.
2) Ist beim Weiterspielen das gewünschte Ende
des Abschnitts erreicht (Punkt b in Abb. 5), die
Taste B/EDIT (20) drücken. Der Abschnitt zwischen den Punkten wird fortlaufend wiederholt.
Solange eine Endlosschleife abgespielt wird,
signalisert das Display „RELOOP“ (P).
3) Um den Endpunkt zu verschieben oder um ihn
auf 1 Frame genau einzustellen, während des
Abspielens der Schleife die Taste B/EDIT drücken. Die Zeitanzeige (M) zeigt jetzt den Zeitindex des Endpunktes an. Mit dem Drehrad (16)
den Endpunkt verschieben und mit der Taste
B/EDIT den Endpunkt speichern.
4) Um die Schleife zu verlassen und den Titel weiterzuspielen, die Taste RELOOP/ EXIT (21) drücken. Durch Anwählen eines anderen Titels mit
dem Knopf TRACK / ENTER (7) wird die Schleife
ebenfalls verlassen. Zum erneuten Starten der
Schleife die Taste RELOOP/ EXIT wieder drücken.
Abb. 6 Endlosschleife beenden und erneut starten
Abschnitt mit dem Vielfachen einer Taktschlaglänge
Die Länge eines Abschnitts für Schleifenwiedergabe kann auch auf das Vielfache oder auf einen
Bruchteil einer Taktschlaglänge eingestellt werden:
×
1
⁄16, ×1⁄8, ×1⁄4, ×1⁄2, × 1, × 2, × 4, × 8, × 16
1) Die Taste AUTO (22) gedrückt halten und durch
Drehen des Knopfes TRACK / ENTER (7) die
Schleifenlänge einstellen. In der Textzeile (N)
wird die Länge angezeigt, zum Beispiel:
= Die Schleifenlänge be trägt eine
halbe Taktschlaglänge.
c
1.
PLAY
LOOP
2.
RELOOP
/EXIT
RELOOP
/EXIT
ab
1.
PLAY PLAY
LOOP
2.
A
B/EDIT
11
D
A
CH
2) Die Taste AUTO antippen, sodass sie leuchtet.
3) Den Startpunkt mit der Taste A (19) bestimmen.
Damit wird gleichzeitig die Endlosschleife ge startet.
5.12 Eigene Titelfolge zusammenstellen
Sollen von einem USB-Speicher nur ausgewählte
Titel in einer bestimmten Reihenfolge abgespielt
werden, kann eine Folge mit max. 99 Titeln programmiert werden.
5.12.1 Titelfolge speichern
1) Den ersten Titel, der gespeichert werden soll,
anwählen oder abspielen.
2) Den Knopf TRACK/ENTER (7) gedrückt halten,
bis in der Titelzeitanzeige (M) er scheint.
Der Titel ist damit als erster für die Titelfolge
gespeichert.
3) Alle weiteren Titel genauso speichern. Sind 99
Titel gespeichert und wird versucht, einen weiteren Titel zu speichern, erscheint die Meldung
.
Hinweis: Eine gespeicherte Titelfolge wird beim Ausschalten des Gerätes gelöscht.
5.12.2 Titelfolge abspielen und beenden
1) Die Taste PROG (10) drücken. Das Display
zeigt an.
Wird (= leer) angezeigt, ist noch kein
Titel gespeichert worden. Mit der Taste BACK
(8) auf die Zeitanzeige zurückschalten und eine
Titelfolge speichern.
2) Den Knopf TRACK/ENTER (7) drücken. Im Display erscheint die Anzeige „PROG“ (O).
3) Wenn die Abspieleinheit auf Pause steht, die
Wiedergabe mit der Taste (18) starten.
4) Zum Vor- oder Zurückspringen auf andere Titel
der Titelfolge den Knopf TRACK/ENTER entsprechend drehen.
5) Um das Abspielen der Titelfolge zu beenden,
die Taste BACK entsprechend lange drücken.
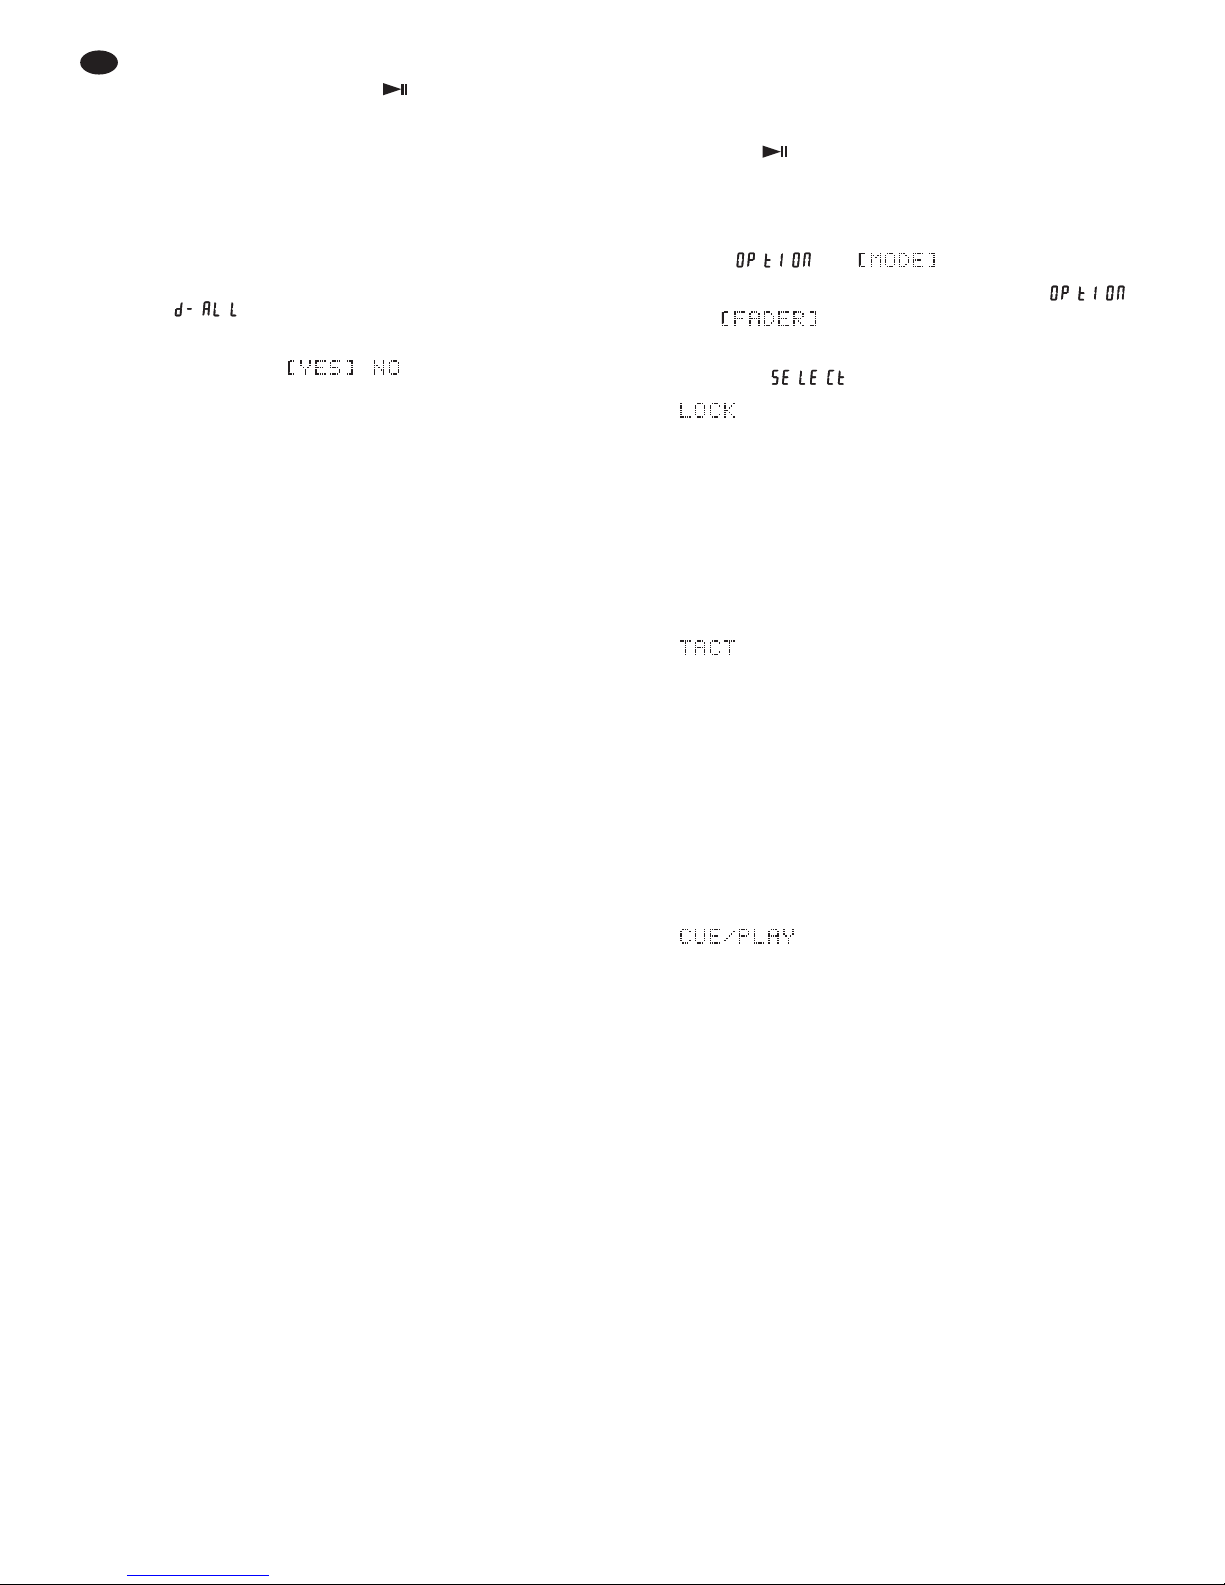
5.12.3 Titelfolge löschen
1) Die Taste PROG so lange drücken, bis das Display (delete all = alles löschen) anzeigt.
2) Den Knopf TRACK/ENTER (7) eine Raststufe
drehen, sodass in der Textzeile (N) „YES“ angewählt ist ( ).
3) Zum Löschen den Knopf TRACK/ENTER drücken oder zum Abbrechen des Löschens die
Taste BACK (8). Durch das Ausschalten des
DMP-240 wird die Titelfolge ebenso ge löscht.
6 Faderstart
Die Funktion Start/Pause der Taste (18) lässt
sich von einem Mischpult mit Faderstart-Funktion
aus fernbedienen. Der Anschluss an das Mischpult
ist im Kapitel 4, Bedienschritt 3 be schrieben. Der
DPM-240 muss auf die Faderstartart des Mischpultes eingestellt werden:
1) Die Taste MODE (9) drücken. Im Display
erscheinen und .
2) Den Knopf TRACK / ENTER (7) so weit drehen,
bis und angezeigt werden.
3) Den Knopf TRACK / ENTER drücken. Das Display zeigt an und die aktuelle Einstellung:
- - - - - Steuerung mit einem Ein-/ Ausschalter
Für die meisten Mischpulte von
„img Stage Line“ muss diese
Einstellung gewählt werden. Mit
dem Aufziehen des Faders wird
ein Schalter im Mischpult ge schlossen, der das Ab spielen
startet. Beim Zuziehen des
Faders öffnet der Schalter und
schaltet den DMP-240 auf
Pause.
- - - - - - Steuerung mit einem Taster
Wird der Taster das erste Mal
durch das Aufziehen des Faders
betätigt, startet das Ab spielen.
Wird der Taster zum zweiten Mal
durch das Zuziehen des Faders
betätigt, schaltet der
DMP-240
auf Pause.
Rücksprung auf einen Cue-
Punkt durch eine elektronische
Impulssteuerung
Das Gerät springt beim Zuziehen des Faders auf den Titelanfang oder auf einen mit der Taste
CUE (17) gesetzten Cue-Punkt
und schaltet dann auf Pause.
4) Durch Drehen des Knopfes TRACK / ENTER die
erforderliche Einstellung auswählen.
5) Zum Zurückschalten auf die Zeitanzeige, die
Taste BACK (8) zweimal drücken.
12
D
A
CH
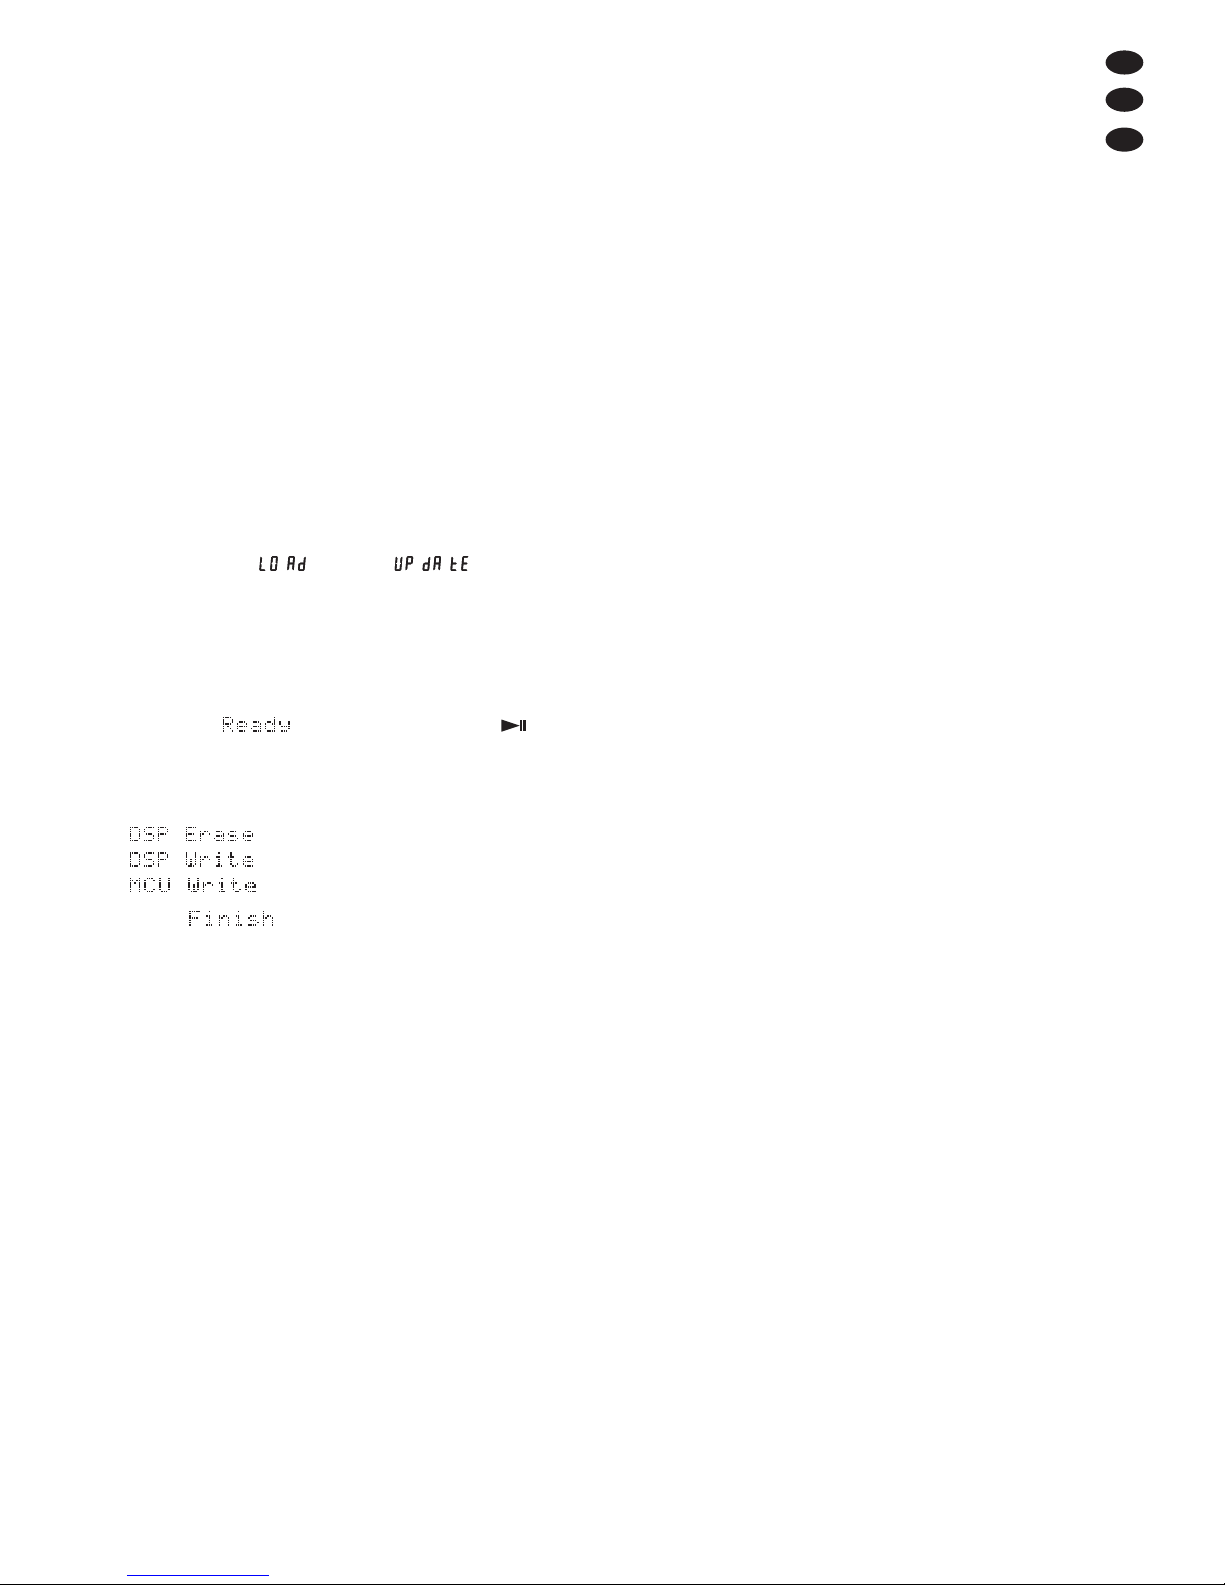
7 Firmware aktualisieren
Ist im Internet eine neue Firmware verfügbar, kann
die Ihres Gerätes aktualisiert werden:
1) Auf der Homepage von „img Stage Line“
(www.imgstageline.com) unter der Rubrik
„SUPPORT“ auf „Software-Updates“ klicken.
Dann nach unten bis zur Rubrik „FIRMWAREDOWNLOADS“ scrollen.
Dort zum Herunterladen auf das Symbol vor
„DMP-240“ klicken.
Die heruntergeladene Software auf einen USBMemory-Stick kopieren.
2) Den DMP-240 mit dem Netzschalter (4) ausschalten.
3) Den Memory-Stick mit der neuen Firmware in
die rechte USB-Buchse MASTER (5) stecken.
4) Bei gedrückt gehaltener Taste PROG (10) das
Gerät wieder einschalten. Das linke Display
zeigt zuerst . Wenn angezeigt
wird, die Taste PROG wieder lösen. Im Feld
PITCH (G) erscheint zuerst die Versionsnummer der Firmware des Gerätes, dann die Versionsnummer der Firmware auf dem USB-Stick.
5) Wenn nach dem Einlesevorgang in der Textzeile (N) erscheint, die Taste (18)
drücken, um die Firmware-Aktualisierung zu
starten. Das Display zeigt nacheinander folgende Meldungen:
Wird angezeigt, ist die Firmware
aktualisiert.
6) Das Gerät aus- und wieder einschalten.
8 Technische Daten
Frequenzbereich: . . . . . . 20 – 20 000Hz
Klirrfaktor: . . . . . . . . . . . . < 0,03 %
Kanaltrennung: . . . . . . . . > 80 dB
Dynamikumfang: . . . . . . > 80 dB
Störabstand: . . . . . . . . . . > 80 dB
Ausgang: . . . . . . . . . . . . . . 1,8 V (Line-Pegel),
Cinch-Buchsen
Stromversorgung: . . . . . . 9 V~ über beiliegendes
Netzgerät
Einsatztemperatur: . . . . . . 0 – 40°C
Abmessungen: . . . . . . . . . 482 × 88 × 85 mm,
2 HE (Höheneinheiten)
Gewicht: . . . . . . . . . . . . . . 2 kg
Änderungen vorbehalten.
13
D
A
CH
Diese Bedienungsanleitung ist urheberrechtlich für MONACOR®INTERNATIONAL GmbH & Co. KG ge schützt.
Eine Reproduktion für eigene kommerzielle Zwecke – auch auszugsweise – ist untersagt.

All operating elements and connections described can be found on the fold-out page 3.
Contents
1 Operating Elements and Connections .15
2 Safety Notes . . . . . . . . . . . . . . . . . . . . . . 16
3 Applications . . . . . . . . . . . . . . . . . . . . . . 16
4
Setting Up and Connecting the Player
. . 17
5 Operation . . . . . . . . . . . . . . . . . . . . . . . . 17
5.1 Replaying music pieces . . . . . . . . . . . . . . 17
5.2 Loading a play list . . . . . . . . . . . . . . . . . . 18
5.3 Indicating title information
and sleep mode . . . . . . . . . . . . . . . . . . . . 18
5.3.1 Bar graph . . . . . . . . . . . . . . . . . . . . . . . 18
5.3.2 Beat counter . . . . . . . . . . . . . . . . . . . . . 18
5.3.3 Sleep mode . . . . . . . . . . . . . . . . . . . . . . 19
5.4 Selecting the operating mode . . . . . . . . . 19
5.4.1 Continuous replay of all titles
and single title replay . . . . . . . . . . . . . . 19
5.4.2 Relay mode – Automatic start of the
other player unit at the end of a title . . . 19
5.5 Short replay of a title beginning . . . . . . . . 19
5.6 Fast forward / reverse . . . . . . . . . . . . . . . . 19
5.7 Precise selection of a certain spot . . . . . . 20
5.8 Return to a certain spot . . . . . . . . . . . . . . 20
5.9 Changing the speed with or
without displacing the pitch . . . . . . . . . . . 20
8.10 Pitch bend – Matching the beat
between two music pieces . . . . . . . . . . . . 20
5.11 Effects . . . . . . . . . . . . . . . . . . . . . . . . . . . 21
5.11.1 Droning effects . . . . . . . . . . . . . . . . . . . 21
5.11.2 Stutter effects . . . . . . . . . . . . . . . . . . . . 21
5.11.3 Replaying a continuous loop . . . . . . . . . 21
5.12 Creating your personal title sequence . . . 21
5.12.1 Storing a title sequence . . . . . . . . . . . . 21
5.12.2 Replaying and
ending a title sequence . . . . . . . . . . . . . 21
5.12.3 Deleting a title sequence . . . . . . . . . . . . 22
6 Fader Start . . . . . . . . . . . . . . . . . . . . . . . 22
7 Updating the Firmware . . . . . . . . . . . . . 23
8 Specifications . . . . . . . . . . . . . . . . . . . . . 23
14
GB

1 Operating Elements
and Connections
1 Control panel of player unit 1
For details see fig. 2
2 Control panel of player unit 2
For details see fig. 2
3 Button RELAY for automatic start of the other
player unit at the end of a title (
chapter 5.4.2)
4 POWER switch
5 USB port (type A) to connect a USB storage
medium
6 Button SEARCH
– to activate / deactivate the fast forward /
reverse feature with the jog wheel (16)
– to quickly select the titles with the jog wheel
when “TRACK” is indicated above the numbers (B) and the button is kept pressed
– to quickly select the folders with the jog wheel
when “FOLDER” is indicated below the numbers (B) and the button is kept pressed
7 Knob TRACK / ENTER
– if no selection mode has been activated, turn
the knob to select titles
– if one of the selection modes has been acti-
vated, turn the knob to select a setting
–
press the knob to activate a setting selected
8 Button BACK to switch back to the next higher
selection level when the selection mode has
been activated
9 Button MODE to activate the selection mode for
the operating mode (
chapter 5.4.1), for the
time indication (
chapter 5.3) or for the MP3
text indication (ID3 tag, chapter 5.3)
10 Button PROG to activate (
chapter 5.12.2)
or delete (chapter 5.12.3) a programmed title
sequence
11 Button MT (Master Tempo) to activate / deacti-
vate the function for constant pitch
(
chapter 5.9)
12 Buttons PITCH BEND to match the beat of the
title currently playing to the beat of a music
piece playing on the other player unit (
chap-
ter 5.10)
13 Button PITCH to activate / deactivate the speed
control (24) and to select the speed adjusting
range (8 % or 16 %): the LEDs (15) will indicate
the selection
14 Display, for details see fig. 3
A number of titles in the folder selected
B
if “TRACK” is indicated above the number:
number of the music title in the folder selected;
if “FOLDER” is indicated below the number:
number of the folder selected
C indication “Auto-CUE”: to indicate the single
title replay mode
D indication “CONTINUE”: to indicate the oper-
ating mode for continuous replay of all titles
E indication “ELAPSED”: to indicate that the
time already played of a title is shown
F indication “REMAIN”: to indicate that the
remaining time of a title is shown
G indication of the deviation from the standard
speed
H pause symbol
I replay symbol
J indication “CUE”: will appear when a start-
ing point has been stored automatically
(
chap. 5.4.1) or with the button CUE (17)
K This field will indicate if the name of the title,
the album or the artist of the music title is
shown in the text line (N). If none of these
indications appears, the file name will be
shown (
chapter 5.3).
L bar graph to indicate the relative title time
M title time indication, also see items E and F
N text line for clear text indications
O indication “PROG”: to indicate that a pro-
grammed title sequence has been activated
P indication “RELOOP”: to indicate replay of a
continuous loop
Q indication of beats per minute (BPM) for the
current title
R
indication “MT” (Master Tempo): to indicate the
function for constant pitch (chapter 5.9)
15 LEDs “8%” and “16%” to indicate the speed
adjusting range selected; if one of the LEDs
lights up, the speed control (24) has been activated
16 Jog wheel REV /FWD
– for fast forward/reverse if the button SEARCH
(6) has been pressed
– for the function “Pitch Bend” during replay of
a title
– for precise selection of a spot in the pause
mode
– to displace the end of a section if the button
B/ EDIT (20) was pressed during replay of a
continuous loop
15
GB
17 Button CUE for short replay of a title beginning
(chapter 5.5) and for return to a certain spot
(chapter 5.8)
18 Button to start a title and to switch over
between replay and pause
19 Button A to define the starting point of a contin-
uous loop
20 Button B / EDIT to define the end point of a sec-
tion for replay of a continuous loop and simultaneous start of the loop;
to displace the end point, press the button once
again and set the end point with the jog wheel
(16)
21 Button RELOOP/ EXIT to exit the continuous
loop or to replay the loop once again
22 Button AUTO for a continuous loop of the length
of a multiple of a beat length
23 Button TAP for the manual counting mode of the
beat counter and for returning to the automatic
mode (
chapter 5.3.2)
24 Sliding control to change the speed [without
changing the pitch when the button MT (11) is
pressed]; the adjustment of the control will only
be effective when the button PITCH (13) is
pressed
25 Jack 9 V~ for power supply via the power supply
unit provided
26 Audio output LINE OUT of the player unit 2 for
connection to the line input e. g. of an amplifier
or a mixer
27 3.5 mm jack FADER START of the player unit 2
for remote control of the function Start / Pause
from a mixer (
chapter 6)
28 Audio output LINE OUT of the player unit 1
29 3.5 mm jack FADER START of the player unit 1
2 Safety Notes
The units (MP3 player and power supply unit) correspond to all required directives of the EU and are
therefore marked with .
Please observe the following items in any case:
The units are suitable for indoor use only. Protect
them against dripping water and splash water,
high air humidity, and heat (admissible ambient
temperature range 0 – 40°C).
Do not place any vessel filled with liquid on the
units, e. g. a drinking glass.
Do not operate the MP3 player or immediately
disconnect the power supply unit from the mains
socket
1. if the MP3 player or the power supply unit is
visibly damaged,
2. if a defect might have occurred after a unit was
dropped or suffered a similar accident,
3. if malfunctions occur.
In any case the units must be repaired by skilled
personnel.
For cleaning only use a dry, soft cloth; never use
water or chemicals.
No guarantee claims for the units and no liability
for any resulting personal damage or material
damage will be accepted if the units are used for
other purposes than originally intended, if they
are not correctly connected or operated, or if they
are not repaired in an expert way. Likewise, no
liability will be accepted for operating errors or for
data loss caused by a defect and for any consequential damage of this data loss.
3 Applications
The MP3 player DMP-240 with two player units is
specially designed for professional DJ applications.
Many functional features have precisely been
matched to this range of application, e. g. single title
replay, automatic beat counter, seamless replay of a
continuous loop, change of speed without displacing
the pitch. Two ports for USB storage media (USB
flash drive, hard disk, etc.) are provided for replaying music titles in MP3 format. The player units will
be able to access the ports independently so that
operation with a single USB storage medium will
also be possible.
If the units are to be put out of operation
definitively, take them to a local recycling
plant for a disposal which is not harmful to
the environment.
WARNING
The power supply unit uses dangerous mains voltage. Leave ser
vicing
to skilled personnel; inexpert
han-
dling may result in electric shock.
16
GB
4 Setting Up and
Connecting the Player
Prior to connecting any units or to changing any
existing connections, switch off the MP3 player and
the units to be connected.
The MP3 player is designed for installation into
a rack (482 mm / 19″); however, it can also be used
as a free-standing desktop unit. For rack installation, 2 rack spaces (rack space = 44.45 mm) will be
required.
1) Connect each of the two signal outputs LINE
OUT (26 and 28) to an input with line level, e. g.
of a mixer or amplifier (possible marking: Line,
CD, Aux).
2) Connect the USB ports (5) to a USB storage
medium each, e. g. USB flash drive or hard disk
(with a separate power supply, if necessary). If
only one USB storage medium is used for
replay, the port MASTER on the right should be
preferred as this port will always be selected
automatically.
3) Via a mixer with fader start feature, it will be pos-
sible to start the two player units and to set them
to pause. For this purpose, connect the jacks
FADER START (27, 29) via two cables with
3.5 mm plugs (2-pole or 3-pole) to the corresponding jacks of the mixer. Set the DMP-240 to
the type of fader start of the mixer, see chapter 6.
4) Connect the power supply unit provided to the
jack 9 V~ (25); then connect the mains plug to a
socket (100 – 240 V~ / 50 – 60 Hz).
5 Operation
Switch on the player with the POWER switch (4).
The operation of the two player units is identical.
Switch off the player after operation. The following settings will always be stored and will be
activated when the player is switched on:
1. the operating mode selected (single title replay /
continuous replay,
chapter 5.4.1)
2.
the time indication selected (remaining time of
the title / time already played,
chapter 5.3)
3.
the speed adjusting range selected (chapter
5.9)
5.1 Replaying music pieces
1) After switching on, the display (14) will shortly
show and then . If no USB storage
medium has been connected to the USB port
MASTER (5) on the right, it will then show
and .
2) For both player units the USB port MASTER on
the right will be selected. To select the USB port
SECOND on the left, turn the knob TRACK /
ENTER (7). The text line (N) at the bottom of the
display will show the port selected: or
.
3) If the USB storage medium has been read in
after selection, will be displayed. For further selection of partitions, folders and titles,
press the knob TRACK / ENTER.
4) According to the data structure on the USB storage medium, the display will show the next
option:
= selection of a partition
1
(Partition Selection)
= selection of a folder
2
(Folder Selection)
= selection of an MP3 file
(File Selection)
1
only if several partitions are available
2
only if folders are available
Turn the knob TRACK / ENTER to make the
selection and press the knob TRACK/ENTER to
confirm. The display will show the next option.
Repeat the process until the display shows the
title time (M) after selecting the MP3 file.
5) To return to the next higher level, press the button BACK (8)
6) After confirming the title selection, start the
replay with the button (18). This button will
interrupt and continue the replay at any time. If
the single title replay mode has been selected,
the player will be set to pause at the beginning
of the next title (
chapter 5.4.1).
If the replay does not start with the button
, check if the display shows the title time (M). If
not, press the knob TRACK/ENTER repeatedly.
7) To switch over to another title, turn the knob
TRACK / ENTER. The player will immediately go
to this title. To select another folder, press the
button BACK repeatedly until the display shows
.
17
GB

5.2 Loading a play list
To replay a certain selection of titles, create play
lists with the file extension “.wpl”, “.xml” or “.m3u”
on a computer and load them onto the DMP-240.
Important: The play list and the corresponding
MP3 files must be on the same storage medium.
The play lists must always be stored in the root
directory.
1) Press the button MODE (9). The display will
show and .
2) Turn the knob TRACK / ENTER (7) one step
counter-clockwise so that und
will be displayed.
3) Press the knob TRACK / ENTER. The display
will show and .
4) Turn the knob TRACK / ENTER to switch over
between the selection of play lists (indication
) and the selection of MP3 files (indication
). For play lists, select .
5) Press the button BACK (8) once. The display
will show and .
6) Turn the knob TRACK / ENTER to select the
desired USB port (5) and press the knob to confirm.
7) If there are several partitions on the USB storage medium selected, select the desired partition with the knob TRACK / ENTER. If not, continue with the next operating step.
8) If the display shows and the field
“TOTAL TRACK” (A) shows the number of available play lists, turn the knob TRACK / ENTER to
select a play list. The text line (N) will show the
name of the play list. If is shown, there
is no play list on the USB storage medium
selected.
9) Turn the knob TRACK/ENTER to load the play
list and use the knob TRACK / ENTER to select
the title to be replayed from the list.
5.3 Indicating title information
and sleep mode
The display (14) offers a variety of information:
1. number of titles (A) in the folder selected
2. number of the title selected (B) if “TRACK” is
shown above the number
3. relative (L) and absolute (M) playing time of the
title selected; the seconds are divided into 75
frames
To switch over the playing time indication
between remaining time “REMAIN” (F) and time
already played “ELAPSED” (E):
a) Press the button MODE (9). The display will
show and .
b) Turn the knob TRACK/ENTER (7) clockwise
one step so that and will be
displayed.
c) Press the knob TRACK / ENTER. The display
will show and .
d)
Turn the knob TRACK / ENTER to switch over
between “REMAIN” (F) and “ELAPSED”
(E).
e) To return to the time indication, press the
button BACK (8) twice.
4. text line (N) for providing the following information (ID3 tag):
< TITLE >* (K)
< ALBUM >*
< ARTIST >*
file name, no indication in the field (K)
* If a certain information has not been stored in the
MP3 file, there will be a question mark in the text line.
a) Press the button MODE. The display will
show and .
b) Turn the knob TRACK / ENTER until
and are displayed.
c) Press the knob TRACK/ENTER. The display
will show and .
d) Turn the knob TRACK/ENTER to switch over
between the indicating possibilities mentioned above.
e) To return to the time indication, press the
button BACK twice.
5.3.1 Bar graph
In addition to the numerical time indication (M), the
bar graph (L) will show the playing time of the title
graphically by its length (relative time indication).
For the last 30 seconds of a title, the bar graph will
flash in its full length; for the last 15 seconds, it will
flash even faster.
5.3.2 Beat counter
After selecting a title, the beat counter will automatically determine the number of beats per
minute. After a short time, the number will appear at
the bottom on the right of the display (Q). If the beat
counter is not able to determine a useful value (e. g.
in case of calm music titles), switch to the manual
mode:
1) Keep the button TAP (23) pressed until the indication “AUTO” at the bottom on the right of the
display disappears.
2) Shortly press TAP repeatedly to the beat of the
music so that the number of beats will be indicated.
18
GB
3) To return to the automatic counting mode, keep
the button TAP pressed until the indication
“AUTO” reappears.
5.3.3 Sleep mode
If the player is set to pause for more than 20 minutes, it will go to sleep mode. The display will show
and all illuminated buttons will be extinguished. Press any button to return to the previous
operating mode.
5.4 Selecting the operating mode
5.4.1 Continuous replay of all titles and
single title replay
In the continuous replay mode, the display will
show “CONTINUE” (D); in the single title replay
mode “Auto-CUE” (C). The single title replay is specially provided for DJ applications:
1. After selecting a title, the player will be set to
pause precisely on the spot where the music
starts (not at the time index 0:00:00). This spot
will be automatically stored as a starting point.
The display will show “CUE” (J). To return to this
starting point, press the button CUE (17) after
starting the title.
2. After replaying a title, the player will be set to
pause precisely on the spot where the music of
the next title starts. This spot will then be stored
as a new starting point.
To switch over between continuous replay and single title replay:
1) Press the button MODE (9). The display will
show and .
2) Press the knob TRACK / ENTER (7). The display
will show and .
3) Turn the knob TRACK / ENTER to switch over
between continuous replay “CONTINUE” (D)
and single title replay “Auto-CUE” (C).
4) To return to the time indication, press the button
BACK (8).
5.4.2 Relay mode – Automatic start of the
other player unit at the end of a title
To start the other player unit automatically at the
end of a title:
1) Set both player units to single title replay
(
chapter 5.4.1): Both displays (14) must
show “Auto-CUE” (C).
2) Select a title on each player unit.
3) Press the button RELAY (3). The button will light
up.
4) Start the replay on one of the player units with
the button (18). The other player unit must
be set to pause [indication (H)]. At the end of
a title, the player unit will be set to pause and the
other player unit will start. This procedure will be
continuously repeated until the relay mode is
deactivated. (To deactivate the relay mode,
press the button RELAY once again.)
5) During the relay mode, it will also be possible at
any spot of the title to switch over the replay
from one player unit to the other with the but ton .
Note: If you press the button CUE (17) in this mode on the
player unit currently replaying, the replay will change to the
other player unit. If the button CUE is kept pressed on the
player unit set to pause, the replay from this player unit will
be continued until the button is released.
5.5 Short replay of a title beginning
For short replay of a title beginning, keep the button
CUE (17) pressed. After releasing the button, the
player will return to the title beginning and will be
set to pause.
1) Set the player to pause with the button (18).
2)
Select the desired title with the knob TRACK /
ENTER (7).
3) For short replay of a title beginning, keep the
button CUE pressed.
4) To replay the title, press the button .
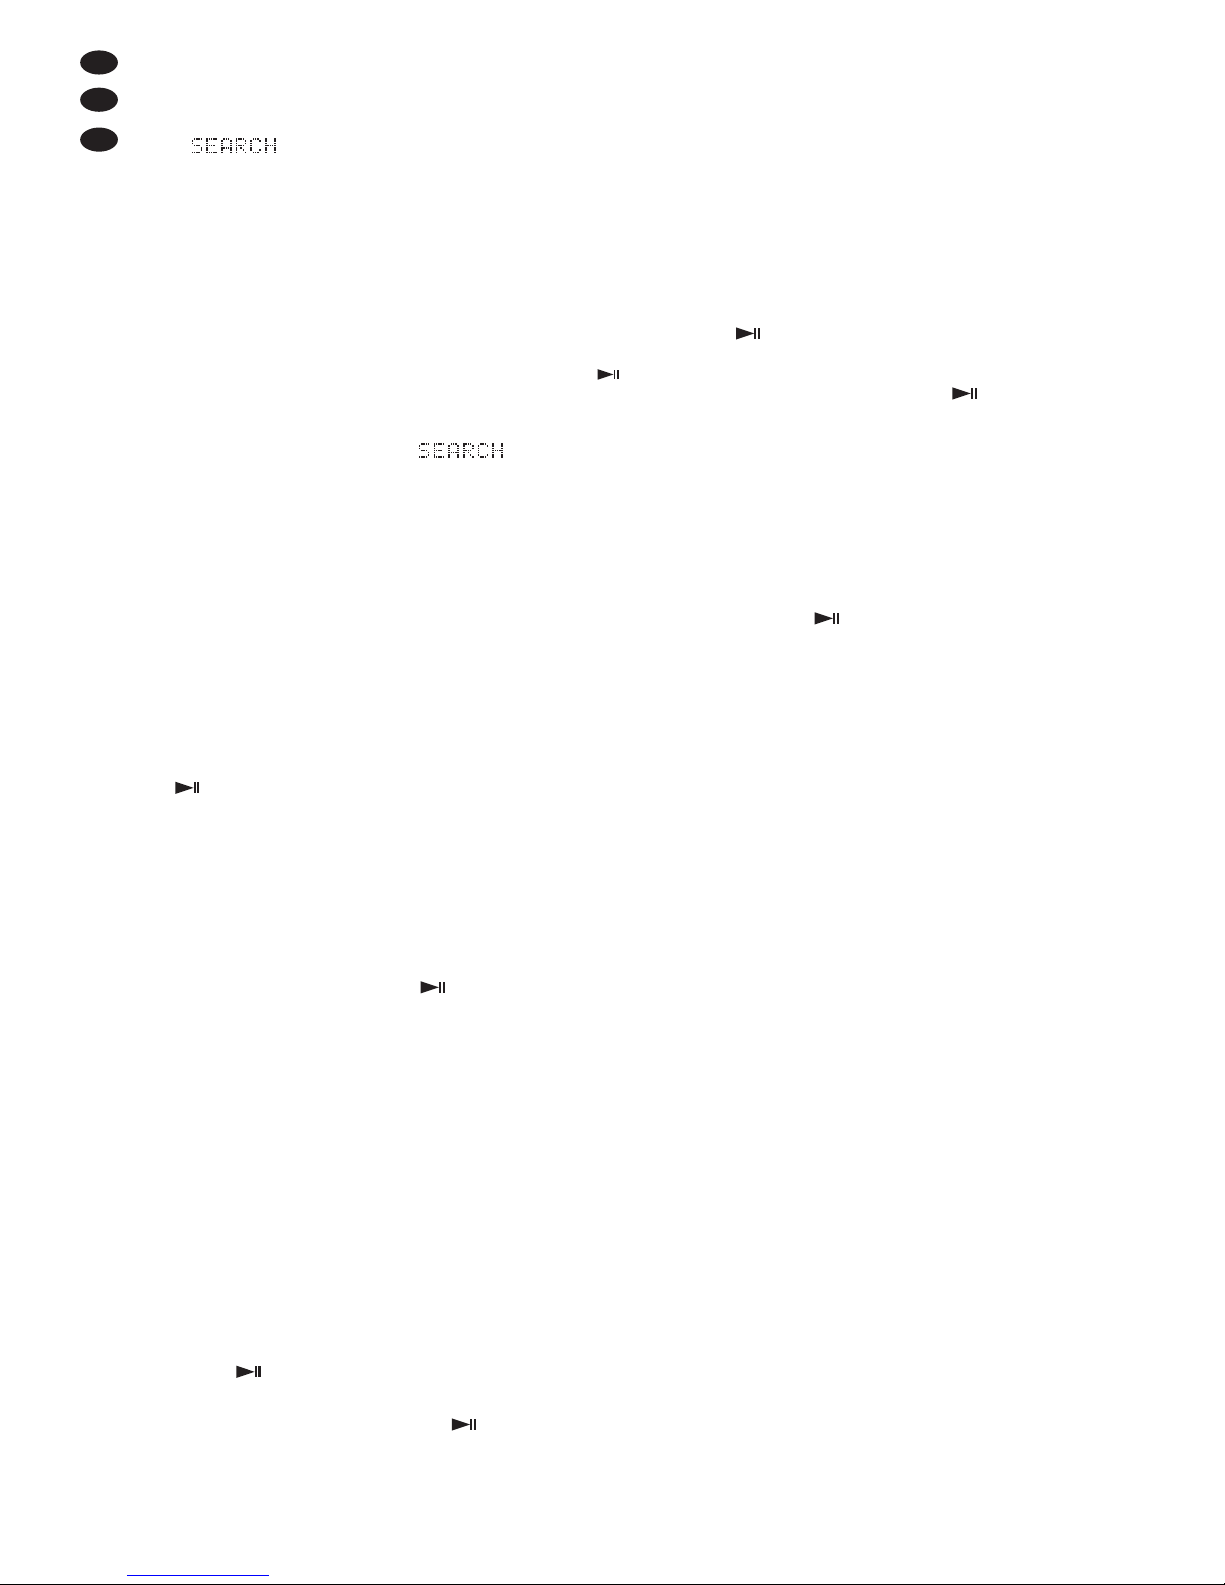
5.6 Fast forward/reverse
For fast forward / reverse of a title, press the button
SEARCH (6) first. The text line (N) will show
. Turn the jog wheel REV/ FWD (16) in
the corresponding direction. The forward / reverse
speed will depend on the turning speed of the jog
wheel.
Notes
1. In the pause mode, after fast forward/reverse, the cur-
rent spot will be constantly repeated. To stop repeating,
either shortly press the button CUE (17) twice (new
Cue point will be set, chapter 5.8) or start the replay
with the button (18).
2. If the jog wheel is not turned for 8 seconds in the replay
mode, the indication will disappear and the
jog wheel will be used again for the function “Pitch
Bend” (chapter 5.10).
19
GB

5.7 Precise selection of a certain spot
It will be possible to select a spot in a title with the
precision of one frame (
1
⁄75 second), e. g. for starting the replay from a certain spot instead of starting
it from the beginning of a title.
1) When the desired spot is roughly reached by
replaying the title or by using fast forward /
reverse (
chapter 5.6), set the player to
pause with the button (18).
2) Precisely select the spot by turning the jog
wheel (16) clockwise and counter-clockwise.
The current spot will be constantly repeated.
3) When the desired spot has been set, shortly
press the button CUE (17) twice. Thus, the spot
will be stored and repeating will end. The replay
will then be started from this point with the button .
5.8
Return to a spot certain spot
To quickly find a certain spot, store a starting point
(Cue point) with the button CUE (17):
Notes: In the single title replay mode, return with the button CUE will be possible within a title only. When the next
title is reached, the Cue point will be replaced by the starting point of the next title (
chapter 5.4.1).
1) While replaying a title, set the player to pause
with the button (18) when the spot is reached
where the player is to return to later. The buttons
and CUE (17) will flash.
2) If required, select the spot more precisely with
the jog wheel (16) [
chapter 5.7]. This spot
will then be continuously repeated.
3) Shortly press the button CUE. Thus, the spot
will be stored as a Cue point. The display will
show “CUE”. (J). If the current spot is replayed,
shortly press the button CUE again to mute the
sound. The button CUE will light continuously.
The button will keep flashing as a prompt to
start the replay.
4)
Restart the replay with the button . Caution:
Do not select another title with the knob TRACK /
ENTER now; otherwise the Cue point will be
replaced by the starting point of the title selected.
5) It will now be possible to return to the Cue point
with the button CUE: The player unit will then be
set to pause.
6) Start the replay with the button or press the
button CUE once again and keep it pressed.
After releasing the button CUE, the player unit
will be set to pause again at the Cue point.
When the button CUE is kept pressed again,
repeating from the Cue point will be possible as
many times as desired.
5.9 Changing the speed with or without
displacing the pitch
To change the speed with the sliding control (24) by
±16 % max.:
1) Select the adjusting range with the button
PITCH (13): ±8 % or ±16 %. The LEDs (15) will
indicate the range selected. If the LED “16%”
lights up and the button PITCH is pressed
again, the speed control will be deactivated and
the title will be replayed at normal speed. The
text line (N) will shortly show the setting se lected.
2)
Adjust the speed with the sliding control. The
display will show the percentage deviation from
the standard speed at the top on the right (G).
The number of beats (Q) will change accordingly.
3) If you change the speed, the pitch will also
change proportionally. To keep a constant pitch,
press the button MT (11). The display will show
“MT” (R). To deactivate the function, press the
button MT once again.
5.10 Pitch Bend – Matching the beat
between two music pieces
It will be possible to precisely synchronize the
beats of two music pieces with the same speed.
Thus, the dancing rhythm will not be interrupted
when crossfading from one player unit to the other.
1) First use the speed control (24) to match the
speed of the music piece to which crossfading is
desired to the speed of the current music piece.
For this purpose, set the same number of beats
per minute (BPM) with the sliding control, see
indication (Q) at the bottom on the right of the
display.
2) Synchronize the beats of the music piece to
which crossfading is desired to those of the current music piece with the buttons PITCH BEND
(12): As long as the button + or
-
is kept
pressed, the replay of the title will be faster or
slower and the LED “16 %” (15) will flash. Thus,
the beats will be displaced with respect to the
beats of the current music piece.
3) The beats will also be displaced when the jog
wheel (16) is turned.
20
GB

5.11 Effects
5.11.1 Droning effects
If the function Master Tempo (constant pitch) has
been activated [indication “MT” (R) on the display],
deactivate it with the button MT (11). Turn the jog
wheel (16) back and forth to increase or decrease
the replay speed alternately. This will create a droning effect.
5.11.2 Stutter effects
To create interesting stutter effects, use a Cue point
(
chapter 5.8) stored with the button CUE (17):
When the button CUE is shortly pressed repeatedly, a stutter effect will be created. The more suitable the Cue point (e. g. start of an instrument or
beginning of a word), the more impressive the
effect.
5.11.3 Replaying a continuous loop
To repeat a certain section as a seamless loop as
many times as desired:
1) Switch to replay with the button (18). When
the desired starting point of the loop is reached
(point a in fig. 5), shortly press the button A (19).
Fig. 5 Replaying a continuous loop
Hint: To define the starting point with the precision of
one frame, first set the player to pause with the button
, precisely select the spot with the jog wheel (16),
then press the button A.
2) When the desired end of the section (point b in
fig. 5) is reached while the replay is continued,
press the button B / EXIT (20). The section
between the two points will be repeated continuously. While a continuous loop is replayed, the
display will show “RELOOP” (P).
3) To displace the end point or to define it with
the precision of one frame, press the button
B / EDIT during replay of the loop. The time indication (M) will show the time index of the end
point. Displace the end point with the jog wheel
(16) and store the end point with the button B /
EDIT.
4) To exit the loop and to continue the replay of the
title, press the button RELOOP/ EXIT (21). The
loop will also be exited when
another title is
selected with the knob TRACK /
ENTER (7).
To restart the loop, press the button RELOOP/
EXIT once again.
Fig. 6 Exit and restart of a continuous loop
Section with the multiple of a beat length
To set the length of a section for loop replay to a
multiple or a fraction of a beat length (
×
1
⁄16, ×1⁄8,
×
1
⁄4, ×1⁄2, × 1, × 2, × 4, × 8, × 16):
1) Keep the button AUTO (22) pressed and turn
the knob TRACK / ENTER (7) to set the length of
the loop. The text line (N) will show its length,
e. g. = the length of the loop is half
a beat length.
2) Shortly press the button AUTO so that it will light
up.
3) Define the starting point with the button A (19).
This will start the continuous loop at the same
time.
5.12
Creating your personal title sequence
To replay particular titles only in a defined order
from a USB storage medium, it will be possible
to programme a sequence with a maximum of
99 titles.
5.12.1 Storing a title sequence
1) Select or replay the first title to be stored.
2) Keep the knob TRACK/ENTER (7) pressed until
appears in the title time indication (M).
Thus, the title will be stored as the first title of the
title sequence.
3) Store all further titles in the same way. If you try
to store another title after 99 titles have been
stored, the message will appear.
Note: A stored title sequence will be deleted when the
player is switched off.
5.12.2
Replaying and ending a title sequence
1) Press the button PROG (10). The display will
show .
If is shown, no title has been stored.
Switch back to the time indication with the button BACK (8) and store a title sequence.
2) Press the knob TRACK / ENTER (7). The display
will show “PROG” (O).
ab
1.
PLAY PLAY
LOOP
2.
A
B/EDIT
c
1.
PLAY
LOOP
2.
RELOOP
/EXIT
RELOOP
/EXIT
21
GB
3) If the player unit has been set to pause, start the
replay with the button (18).
4) To go to other titles, turn the knob TRACK /
ENTER back and forth accordingly.
5) To end the replay of the title sequence, press
the button BACK for the required time.
5.12.3 Deleting a title sequence
1) Press the button PROG until the display shows
(delete all).
2) Turn the knob TRACK / ENTER (7) one step so
that “YES” ( ) will be selected in the
text line (N).
3) To delete, press the knob TRACK / ENTER or to
abort the deleting process, press the button
BACK (8). The title sequence will also be
deleted when the DMP-240 is switched off.
6 Fader Start
From a mixer with fader start function, it will be possible to remote-control the function Start / Pause of
the button (18). Connection to the mixer is
described in chapter 4, step 3. Set the DMP-240 to
the type of fader start of the mixer:
1) Press the button MODE (9). The display will
show and .
2) Turn the knob TRACK / ENTER (7) until
and are displayed.
3) Press the knob TRACK / ENTER. The display
will show and the current setting:
- - - - - control with an on / off switch
This setting must be selected for
most mixers of the “img Stage
Line” range. When the fader is
advanced, a switch starting the
replay will be closed in the mixer.
When the fader is closed, the
switch will open and set the
DMP-240 to pause.
- - - - - - control with a momentary push-
button switch
When the momentary pushbutton switch is actuated for the first
time by advancing the corresponding fader, the replay will
start. When the momentary
pushbutton switch is actuated for
the second time by closing the
fader, the DMP-240 will be set to
pause.
return to a Cue point by electronic pulse control
When the fader is closed, the
player will return to the beginning
of the title or to a Cue point set
with the button CUE (17) and will
then be set to pause.
4) Turn the knob TRACK / ENTER to select the
required setting.
5) To return to the time indication, press the button
BACK (8) twice.
22
GB
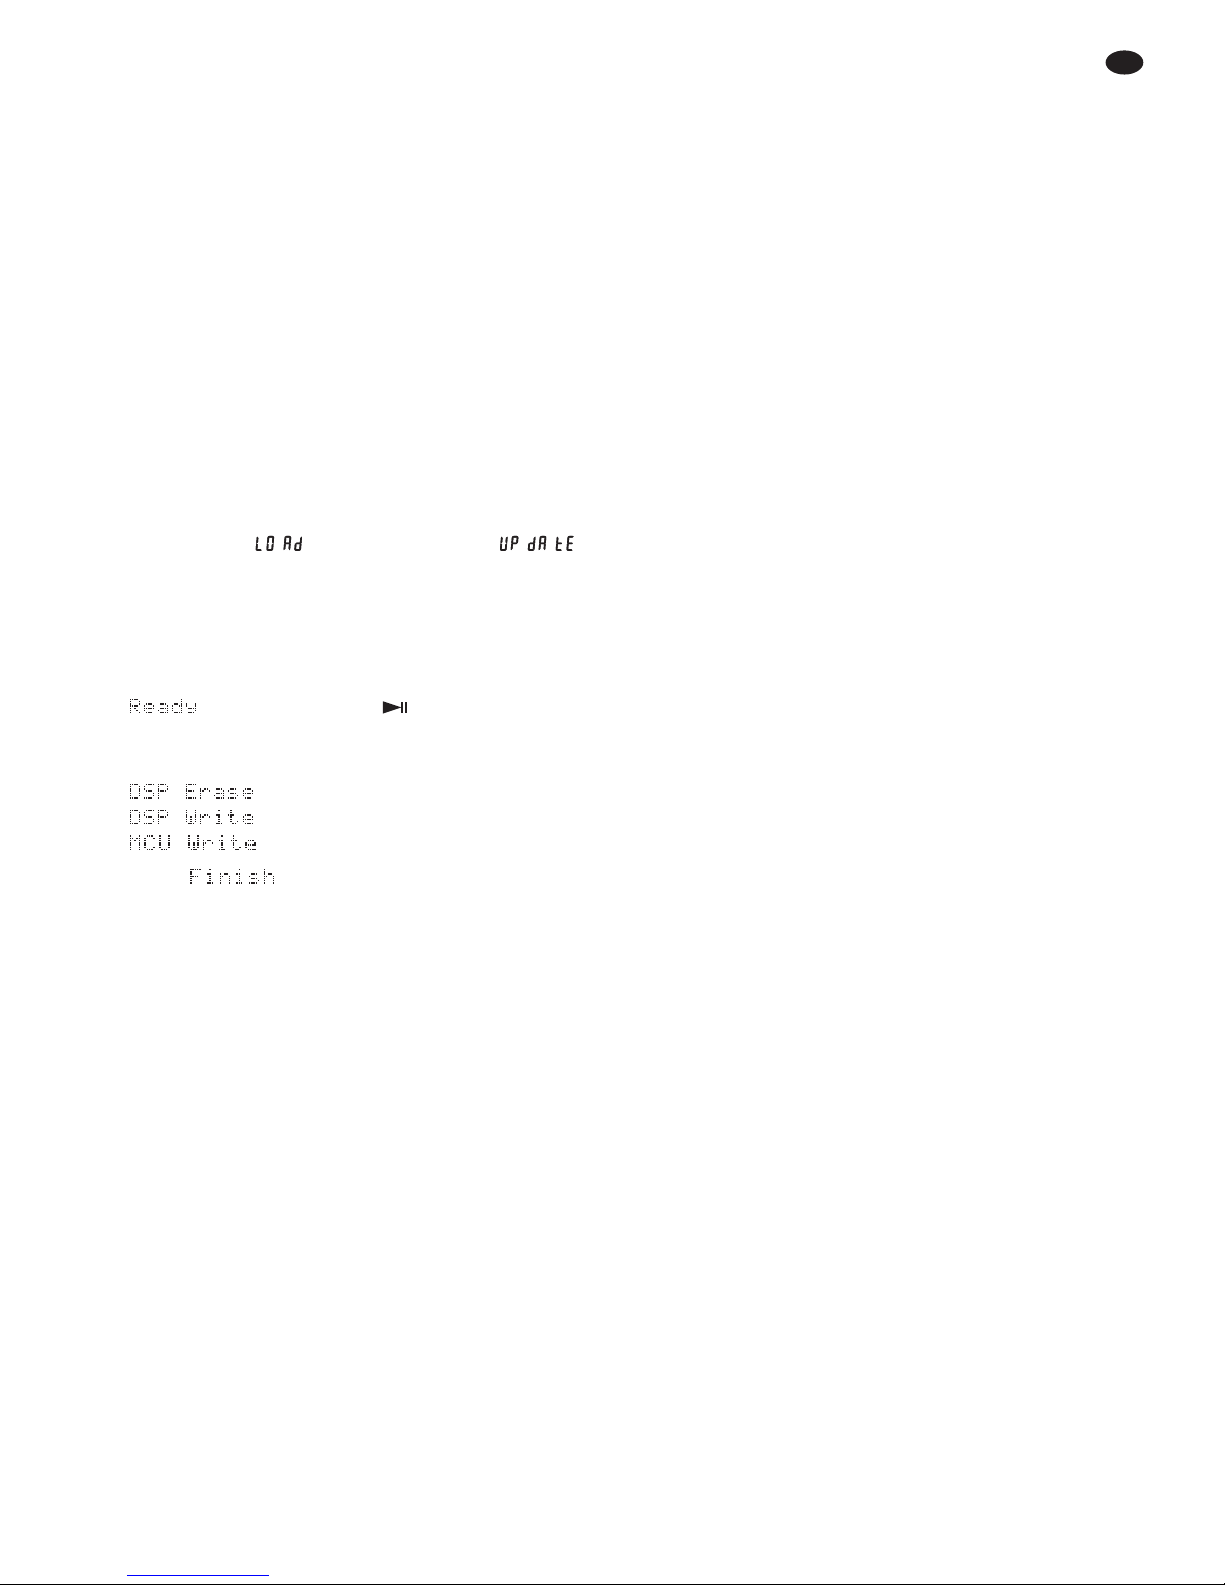
7 Updating the Firmware
To update the firmware of your player if a new
firmware is available on the Internet:
1) On the home page of “img Stage Line”
(www.imgstageline.com), click “Software
Updates” under “SUPPORT”. Then scroll down
to “FIRMWARE-DOWNLOADS”.
For downloading, click the icon in front of
“DMP-240”.
Copy the software download onto a USB flash
drive.
2) Switch off the DMP-240 with the POWER switch
(4).
3) Insert the USB flash drive with the new firmware
into the USB port MASTER (5) on the right.
4) Switch on the player again while keeping the
button PROG (10) pressed. The display on the
left will show first. When it shows
, release the button PROG. In the field PITCH
(G), the version number of the firmware of the
player will appear, then the version number of
the firmware on the USB flash drive.
5) After reading in, when the text line (N) shows
, press the button (18) to start the
firmware update. The following messages will
appear on the display one after the other:
When appears, the firmware has been
updated.
6) Switch off the player and switch it on again.
8 Specifications
Frequency range: . . . . . . 20 – 20 000Hz
THD: . . . . . . . . . . . . . . . . < 0.03 %
Channel separation: . . . . > 80 dB
Dynamic range: . . . . . . . > 80 dB
S/N ratio: . . . . . . . . . . . . > 80 dB
Output: . . . . . . . . . . . . . . 1.8 V (line level), RCA
jacks
Power supply: . . . . . . . . . 9 V~ via power supply
unit provided
Ambient temperature: . . . 0 – 40 °C
Dimensions: . . . . . . . . . . 482
× 88 × 85 mm,
2 rack spaces
Weight: . . . . . . . . . . . . . . 2 kg
Subject to technical modification.
23
GB
All rights reserved by
MONACOR®INTERNATIONAL
GmbH & Co. KG. No part of this instruction manual
may be reproduced in any form or by any means for any commercial use.
 Loading...