

Page 1
ix2700
User’s Guide
Version A
Page 2

Thank you for selecting an Imagistics solution for
your document production and management needs.
The following information will help you get the most
productive and reliable use out of your system.
Imagistics brand supplies are designed for Imagistics
copiers, printers and fax machines to ensure
maximum product performance and quality.
Substituting other supplies may result in inferior
image quality and machine malfunction. To order
supplies call the Imagistics Supply Line at
1-800-462-6797. For faster service, please have your
machine model and serial number available before
calling.
Should your ix2700 develop a problem that cannot be
remedied by using the maintenance or
troubleshooting procedures outlined in this manual,
please contact the Imagistics National Diagnostic
Center at 1-800-243-5556.
Model Number: ix2700
Serial Number:*
* The serial number is on the back of the unit.
Page 3
Safety precautions
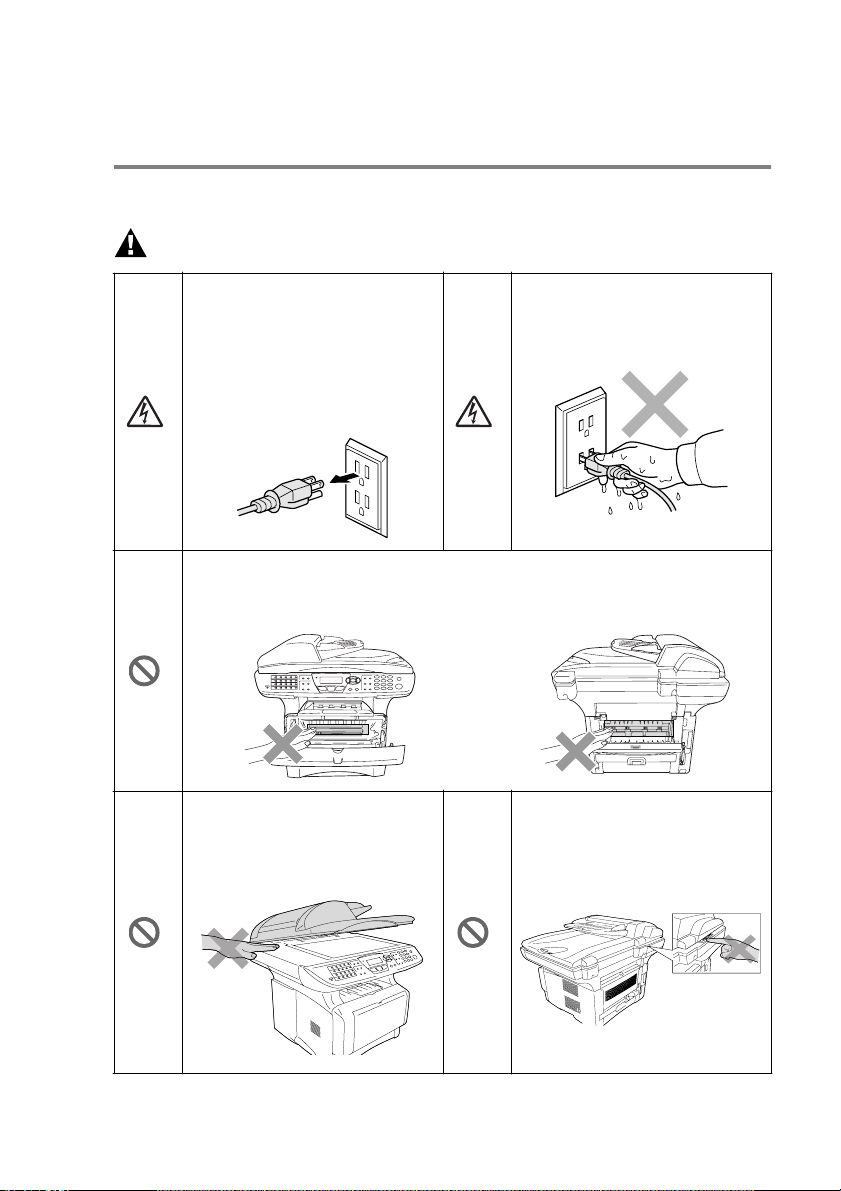
To use the machine safely
Save these instructions for later reference.
WARNING
There are high voltage
electrodes inside the machine.
Before you clean the machine
or clear a paper jam, make
sure you have unplugged the
power cord from the power
outlet.
After you use the machine, some internal parts are extremely HOT!
To prevent injuries, be careful not to put your fingers in the area shown in
the illustration.
To prevent injuries, be careful
not to put your hands on the
edge of the machine under the
document cover.
Do not handle the plug with wet
hands. Doing this might cause
an electrical shock.
To prevent injuries, be careful
not to put your fingers in the
area shown in the illustration.
i
Page 4
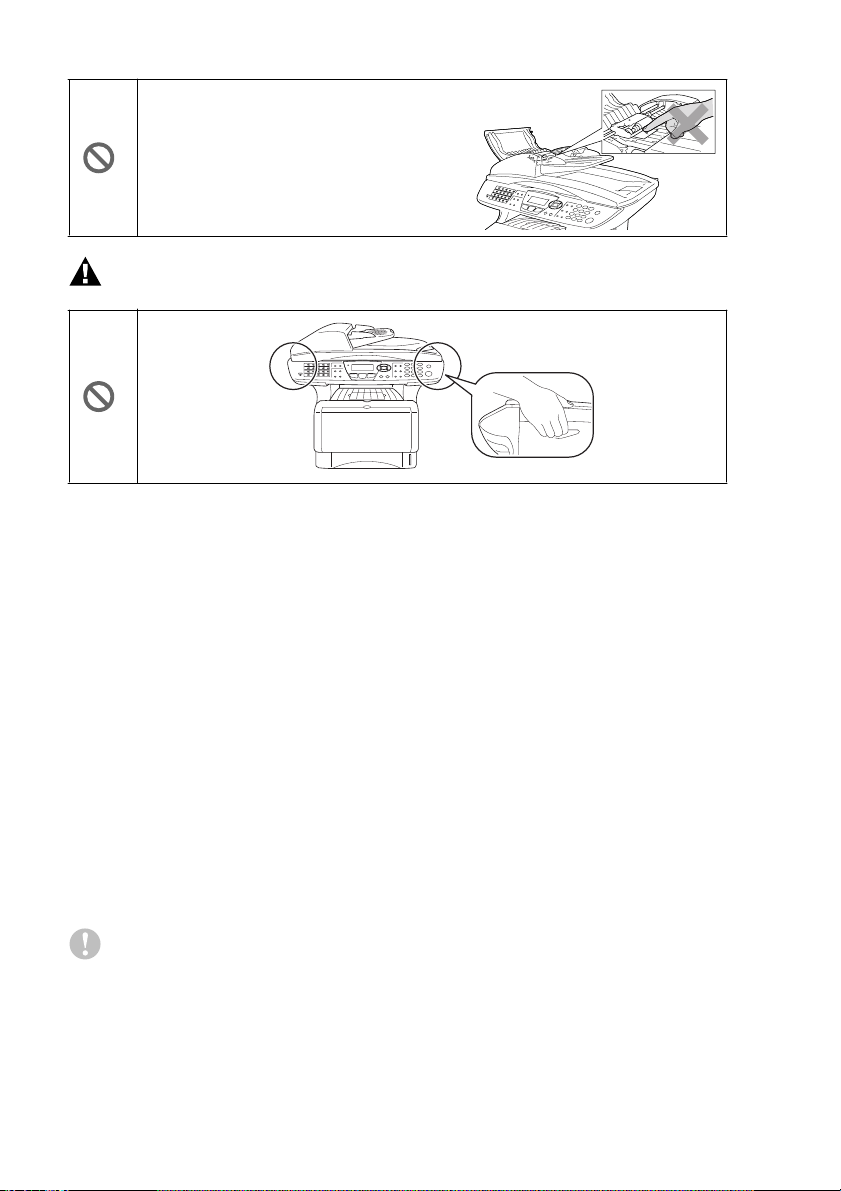
To prevent injuries, be careful not to put
your fingers in the area shown in the
illustration.
WARNING
■ When you move the machine, grasp the side handholds that are under
the scanner. Do NOT carry the machine by holding it at the bottom.
■ Use caution when installing or modifying telephone lines. Never touch
telephone wires or terminals that are not insulated unless the telephone
line has been disconnected at the wall jack. Never install telephone
wiring during a lightning storm. Never install a telephone jack in a wet
location unless the jack is specifically designed for a wet location.
■ Install equipment with a power cord near a socket/outlet that is easily
accessible.
■ To reduce the risk of shock or fire, use only a No. 26 AWG or larger
telecommunication line cord.
■ Do not use a telephone in the vicinity of gas leak to report leak.
■ Do not use this product near appliances that use water, in a wet
basement or near a swimming pool.
■ Avoid using a telephone other than a cordless type during an electrical
storm. There may be a remote risk of electric shock from lightning.
Caution
■ Lightning and power surges can damage this product! We recommend
that you use a quality surge protection device on the AC power line and
on the telephone line, or unplug the lines during a lightning storm.
ii
Page 5
Choosing a location
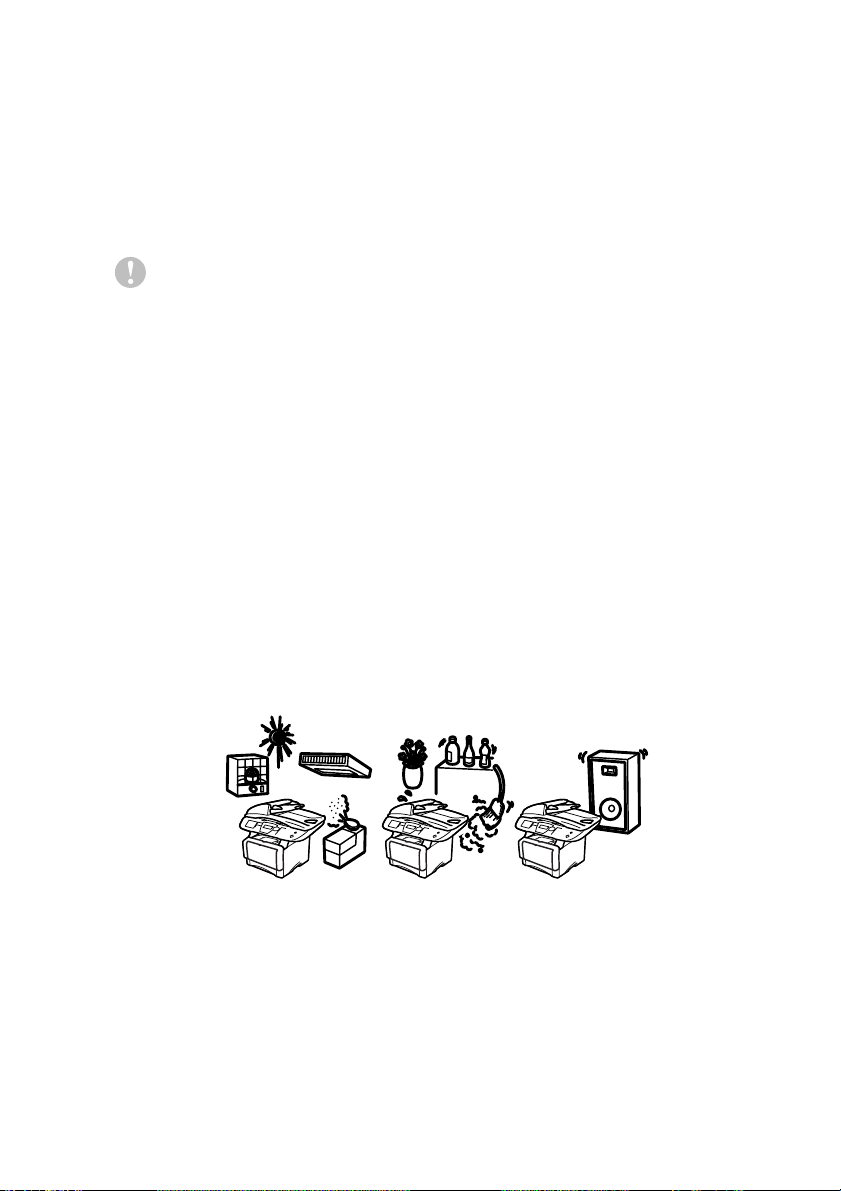
Place your machine on a flat, stable surface that is free of vibration
and shocks, such as a desk. Put the machine near a telephone jack
and a standard, grounded power outlet. Choose a location where the
temperature remains between 50°F and 95.5°F (10°-32.5°C).
Caution
■ Avoid placing your machine in a high-traffic area.
■ Do not place near heaters, air conditioners, water, chemicals, or
refrigerators.
■ Do not expose the machine to direct sunlight, excessive heat,
moisture, or dust.
■ Do not connect your machine to electrical outlets controlled by
wall switches or automatic timers.
■ Disruption of power can wipe out information in the machine’s
memory.
■ Do not connect your machine to electrical outlets on the same
circuit as large appliances or other Equipment that might disrupt
the power supply.
■ Avoid interference sources, such as speakers or the base units
of cordless phones.
NO !
NO ! NO !
iii
Page 6
Quick Reference Guide
Sending faxes
Automatic Transmission
If it is not illuminated in
1
green, press (
Place the original face up in
2
the ADF, or face down on
the scanner glass.
Enter the fax number using
3
One-Touch, Speed Dial,
Search or the dial pad.
Press
4
If you are using the scanner
5
glass, press
Transmission from ADF
You can send faxes in real time.
If it is not illuminated in
1
green, press (
Place the original face up in
2
the ADF, or face down on
the scanner glass.
Press
3
Press or to select
4
, and then press
On
—OR—
For the next transmission
only, press or to
select
and then press
For the next fax only, press
5
or to select
Fax:On
Enter
.
Start
or
2
Menu, 2, 2, 5
Next Fax Only
Enter
, and then press
.
Start
.
Enter
Fax
.
Fax
,
.
Next
Press 1 if you want to
6
choose more Entertings and
the LCD will return to the
Enterup send menu.
).
).
.
—OR—
Press
Enter the fax number.
7
Press
8
Receiving faxes
Select Answer Mode
Press
1
Press or to select
2
Fax Only, Manual
Fax/Tel
TAM
Storing numbers
Storing One-Touch Dial
numbers
Press
1
Press the One-Touch key
2
where you want to store the
number.
Enter a number (up to 20
3
digits), and then press
Enter
Enter a name (or leave it
4
blank), and then press
Enter
Press
5
to fax.
2
Start
Menu, 0,1
and
and then press
Menu, 2, 3, 1
.
.
Stop
.
.
External
.
,
Enter
.
.
v
Page 7

Storing Speed Dial numbers
Press
1
Enter a three-digit Speed
2
Dial number, and then press
Enter
Enter a number (up to 20
3
digits), and then press
Enter
Enter a name (or leave it
4
blank), and then press
Enter
Press
5
Dialing operations
One-Touch Dialing / Speed
Dialing
If it is not illuminated in
1
green, press (
Place the original face up in
2
the ADF, or face down on
the scanner glass.
Press the One-Touch key of
3
the number you want to call
—OR—
Press
press
three-digit Speed Dial number.
Press
4
Menu, 2, 3, 2
.
.
.
.
Stop
Search/Speed Dial
, and then press the
#
.
Start
.
Fax
Using Search
If it is not illuminated in
1
green, press (
Press
2
3
4
Making copies
Single copy
1
2
).
3
Sorting multiple copies
(Using the ADF)
1
,
2
3
4
5
Search/Speed Dial
and then enter the first letter
of the name you’re looking for.
Press or to
search the memory.
Press
Press
illuminate it in green.
Place the original face up in
the ADF, or face down on
the scanner glass.
Press
Press
illuminate it in green.
Place the original face up in
the ADF.
Use the dial pad to enter the
number of copies you want
(up to 99).
Press
Sort icon appears on the
LCD.
Press
Start
Start
Sort
Start
.
(Copy)
.
(Copy)
.
.
Fax
to
to
).
,
vi
Page 8

Table of contens
1
Introduction .......................................................................... 1-1
Using this Guide............................................................... 1-1
Finding information................................................. 1-1
Symbols used in this Guide.................................... 1-1
Machine part names and operations .......................... 1-2
Control panel overview..................................................... 1-5
Status LED indications.............................................1-10
About fax machines........................................................ 1-12
Custom features.......................................................1-12
Do you have Voice Mail on the phone line? ......... 1-12
Why should there be problems?........................... 1-12
How can you avoid possible problems? ............... 1-12
Fax tones and handshake ........................................1-13
ECM (Error Correction Mode)...................................1-14
Connecting the machine.................................................1-14
Connecting an external telephone............................ 1-14
Connecting an external telephone answering machine
(TAM) ................................................................... 1-15
Sequence ............................................................. 1-15
Connections ......................................................... 1-17
Recording outgoing message (OGM) on an external
TAM..................................................................1-17
Special line considerations.......................................1-18
Two-line phone system ........................................1-18
Converting telephone wall outlets ........................1-18
Installing machine, external two-line TAM and two-line
telephone..........................................................1-19
Multi-line connections (PBX) ....................................1-20
If you are installing the machine to work with a
PBX..................................................................1-20
Custom features on your phone line......................... 1-20
2
Paper .....................................................................................2-1
About paper ...................................................................... 2-1
Type and size of paper............................................... 2-1
Recommended paper ................................................. 2-1
Choosing acceptable paper.............................................. 2-2
Paper capacity of the paper trays........................... 2-3
Paper specifications for each paper tray ................ 2-4
How to load paper ...................................................... 2-5
To load paper or other media in the paper tray ...... 2-5
vii
Page 9

To load paper or other media in the multi-purpose tray
(MP tray).............................................................2-7
To use Automatic Duplexing for fax, copy and print
operations...............................................................2-9
3
4
On-screen programming .....................................................3-1
User-friendly programming ...............................................3-1
Menu table..................................................................3-1
Memory Storage.........................................................3-1
Navigation keys ................................................................3-2
Getting started .....................................................................4-1
Initial Setup .......................................................................4-1
Setting the Date and Time..........................................4-1
Setting the Machine ID ...............................................4-2
Entering text ...........................................................4-3
Inserting spaces .....................................................4-3
Making corrections .................................................4-3
Repeating letters ....................................................4-3
Special characters and symbols ............................4-4
Setting Tone and Pulse dialing mode .........................4-4
System Setup ...................................................................4-5
Setting the Mode Timer ..............................................4-5
Setting the Paper Type ...............................................4-5
Setting the Paper Size ................................................4-6
Setting the Ring Volume.............................................4-7
Setting the Beeper Volume......................................... 4-7
Setting the Speaker Volume ....................................... 4-8
Save Toner .................................................................4-8
Sleep Timer ................................................................4-9
Turning off the Scanner Lamp ....................................4-9
Setting the Tray Use for Copy mode ........................4-10
Setting the Tray Use for Fax mode...........................4-11
Setting the Tray Use for Printing Reports .................4-11
Setting the LCD Contrast..........................................4-12
viii
5
RX Settings ...........................................................................5-1
Basic receiving operations................................................5-1
Choosing the Answer Mode........................................5-1
To select or change your Answer Mode.................5-2
Setting the Ring Count ...............................................5-2
Setting the F/T Ring Time (Fax/Tel mode only)..........5-3
EXT. TEL. RX.............................................................5-4
Page 10

Printing a reduced incoming fax
(Auto Reduction) ....................................................5-5
Printing a fax from the memory .................................. 5-5
Setting the Print Density............................................. 5-6
Advanced receiving operations ........................................ 5-7
Operation from extension telephones......................... 5-7
For FAX/TEL mode only ............................................. 5-7
Using a cordless external handset ............................. 5-8
Changing the remote codes ....................................... 5-8
Polling.........................................................................5-9
Setting up Polling Receive ..................................... 5-9
Setting up Sequential Polling Receive ................. 5-10
Setting Duplex printing for Fax mode .......................5-10
Telephone services ........................................................ 5-11
Unique Ring.............................................................. 5-11
What does your telephone company’s
‘Unique Ring’ do?............................................. 5-11
What does ix2700’s ‘Unique Ring’ do?................. 5-11
Do you have Voice Mail?......................................5-12
Before you choose the ring pattern to register ..... 5-12
Registering the Unique Ring pattern ........................ 5-13
Turning off the Unique Ring ................................. 5-13
Caller ID..........................................................................5-14
Viewing Caller ID List ...............................................5-15
Clearing a Caller ID stored in the memory...............5-15
Printing Caller ID List................................................ 5-15
6
TX Settings ...........................................................................6-1
How to Fax .......................................................................6-1
Enter Fax mode.......................................................... 6-1
Faxing from the automatic document feeder (ADF) ... 6-1
Faxing from the ADF ..............................................6-2
Faxing from the scanner glass...................................6-3
Faxing legal size originals from the scanner glass ..... 6-4
Out of Memory message ........................................ 6-4
Manual transmission................................................... 6-4
Automatic transmission ..............................................6-5
This is the easiest way to send a fax...................... 6-5
Sending a fax at the end of a conversation ................ 6-5
Basic sending operations ................................................. 6-6
Sending faxes using multiple settings........................6-6
Contrast......................................................................6-6
Fax Resolution............................................................ 6-7
Manual and automatic fax Redial............................... 6-8
ix
Page 11

Dual Access ...............................................................6-9
Real Time Transmission...........................................6-10
Checking job status ..................................................6-11
Canceling a job while scanning the original..............6-11
Canceling a scheduled job........................................6-11
Advanced sending operations ........................................6-12
Composing the electronic Cover Sheet ....................6-12
Composing your own comments..........................6-13
Cover sheet for the next fax only.......................... 6-14
Send a cover sheet for all faxes ...........................6-15
Using a printed cover sheet ......................................6-15
Broadcasting.............................................................6-16
Overseas Mode ........................................................6-18
Delayed Send ...........................................................6-19
Delayed Batch Transmission....................................6-20
Setting up Polled Transmission ................................6-21
Memory Security....................................................... 6-22
Setting up the password.......................................6-22
Turning Memory Security on ................................6-23
Turning Memory Security off.....................................6-23
7
8
x
Auto Dial numbers and dialing options .............................7-1
Storing numbers for easy dialing ......................................7-1
Storing One-Touch Dial numbers...............................7-1
Storing Speed Dial numbers....................................... 7-2
Changing One-Touch and Speed Dial numbers.........7-3
Setting up Groups for Broadcasting............................7-4
Dialing options ..................................................................7-5
Search ........................................................................7-5
One-Touch Dialing......................................................7-5
Speed Dialing .............................................................7-6
Manual dialing.............................................................7-6
Using an external telephone ....................................... 7-6
Access codes and credit card numbers......................7-7
Pause .........................................................................7-8
Tone or Pulse .............................................................7-8
Remote Fax Options ............................................................8-1
Fax Forwarding .................................................................8-1
Programming a Fax Forwarding number ....................8-1
Setting Remote Retrieval..................................................8-2
Local Print...............................................................8-2
Using R R Passcode...................................................8-3
Remote commands.....................................................8-4
Page 12

Retrieving fax messages............................................8-5
Changing your Fax Forwarding number..................... 8-5
9
10
Printing reports .................................................................... 9-1
Machine settings and journal............................................9-1
Customizing the Job Status Report............................9-1
Setting the Journal Interval......................................... 9-2
Printing reports ........................................................... 9-3
To print a report...................................................... 9-3
Making copies ....................................................................10-1
Using the machine as a copier .......................................10-1
Enter Copy mode...................................................... 10-1
Temporary copy settings ......................................10-2
Making a single copy from the ADF..........................10-3
Making multiple copies from the ADF.......................10-3
Single or multiple copies using the scanner glass.... 10-4
Out of Memory message..........................................10-5
Using the copy keys
(Temporary settings) ................................................... 10-6
Enlarge/Reduce........................................................ 10-7
Copy Mode (type of original) .................................... 10-8
Sorting copies using the ADF...................................10-9
Contrast....................................................................10-9
Tray Select ............................................................. 10-10
Duplex/N in 1..........................................................10-11
Duplex/N in 1 copy .................................................10-12
N in 1 copy .........................................................10-12
Poster.................................................................10-13
Duplex (1 in 1).................................................... 10-13
Duplex (2 in 1) and Duplex (4 in 1)..................... 10-15
Changing the default copy settings ..............................10-16
Copy Mode.............................................................10-16
Contrast..................................................................10-16
11
Using the Machine as a printer ......................................... 11-1
Using the ix2700 printer driver........................................11-1
How to print your document............................................11-2
Simultaneous printing and faxing ...................................11-3
Two-sided printing (Duplex Printing) ........................11-3
Automatic Duplex Printing .................................... 11-3
Manual Duplex Printing ........................................11-4
Face-down output tray..............................................11-4
Printing on plain paper.............................................. 11-5
xi
Page 13

The MP tray..........................................................11-5
Printing on thicker paper and card stock ..................11-6
The multi-purpose tray (MP tray)..........................11-6
Printing on envelopes ...............................................11-8
Printer operation keys ................................................... 11-11
Job Cancel..............................................................11-11
Secure key..............................................................11-11
Setting the Emulation Selection..............................11-12
Printing the Internal Font List..................................11-13
Printing the Print Configuration List........................11-13
Restoring factory default settings ...........................11-13
12
Printer driver settings ........................................................12-1
Printer driver settings......................................................12-1
How to access the printer driver settings........................12-1
Features in the Native Driver ..........................................12-2
Basic tab...................................................................12-2
Paper Size ............................................................12-3
Multiple Page........................................................12-3
Orientation ............................................................12-3
Copies ..................................................................12-4
Media Type...........................................................12-4
Advanced tab............................................................12-5
Print Quality..........................................................12-5
Duplex Printing..................................................... 12-7
Watermark............................................................12-8
Page Setting ....................................................... 12-10
Device Options...................................................12-11
Secure Print............................................................ 12-11
Accessories tab ..................................................12-15
Features in the PS printer driver
(For Windows®)..........................................................12-16
Ports tab .................................................................12-16
Device Settings tab.................................................12-17
Layout tab...............................................................12-18
Booklet (For Windows® 2000/XP).......................12-18
Paper / Quality tab ..................................................12-19
Advanced Options ..................................................12-20
xii
13
How to scan using Windows® ...........................................13-1
Scanning a document ....................................................13-1
TWAIN compliant......................................................13-1
How to access the Scanner ......................................13-2
Scanning a document into the PC ............................ 13-3
Page 14

Scanning a whole page ........................................13-3
PreScanning to crop a portion you want to scan.. 13-4
Settings in the Scanner window ............................... 13-6
Image Type ..........................................................13-6
Resolution ............................................................13-6
Scan Type ............................................................ 13-7
Brightness ............................................................13-7
Contrast................................................................13-7
Document Size .....................................................13-8
Scanning a document
(For Windows® XP only)............................................13-10
WIA compliant ........................................................13-10
How to access the scanner .................................... 13-10
Scanning a document into the PC..........................13-11
Scanning a document using the ADF ................. 13-11
PreScanning to crop a portion you want to scan using
the scanner glass ........................................... 13-13
Scanner Utility .................................................... 13-15
Using the scan key (For USB or Parallel interface cable
users).........................................................................13-16
Scan to E-mail........................................................13-17
Scan to Image ........................................................13-17
Scan to OCR ..........................................................13-18
Scan to File.............................................................13-18
Using ScanSoft® PaperPort® and TextBridge® OCR....13-19
Viewing items .........................................................13-20
Organizing your items in folders.............................13-21
Quick links to other applications.............................13-21
ScanSoft® TextBridge® OCR lets you convert image text
into text you can edit ..........................................13-22
You can Import items from other applications ........13-22
You can Export items in other formats ................... 13-23
Exporting an image file.......................................13-23
How to Uninstall PaperPort® and ScanSoft®
TextBridge®........................................................13-24
14
Using the SmartUI for Windows® 95/98/98SE/Me/2000
Professional and Windows NT® WS 4.0 ...........................14-1
SmartUI ....................................................................14-1
AutoLoad the SmartUI .............................................. 14-2
How to turn off AutoLoad.......................................... 14-2
SmartUI features ............................................................14-3
Auto Configuration....................................................14-3
Scan key operations ................................................. 14-4
xiii
Page 15

Copy operations........................................................14-4
PC-Fax operation......................................................14-4
Scanner settings for Scan, Copy and
PC-Fax buttons.....................................................14-5
Global settings ..........................................................14-5
Setting up the scanner configurations ......................14-6
Perform an operation from the SmartUI screen ........14-7
Scan to File.....................................................................14-8
To access Scan to File Configurations screen .........14-8
Scanner settings .......................................................14-8
Destination folder......................................................14-9
Scan to E-mail .............................................................. 14-10
To access Scan to E-mail Configurations screen ...14-10
Scanner settings ..................................................... 14-10
E-mail application ...................................................14-11
Send to Options ......................................................14-11
Scan to OCR (Word Processor) ................................... 14-12
To access Scan to OCR Configurations screen .....14-12
Scanner settings ..................................................... 14-12
Word Processor......................................................14-13
Scan to Image...............................................................14-14
To access Scan to Image Configurations screen ...14-14
Scanner Settings ....................................................14-14
Target Application...................................................14-14
Copy .............................................................................14-15
To access the Copy Configurations screen ............14-15
Scanner settings ..................................................... 14-15
Number of copies....................................................14-15
Send a fax.....................................................................14-16
To access the Send a fax Configurations screen ...14-16
Scanner settings ..................................................... 14-16
PC-FAX Settings.....................................................14-17
xiv
15
Using the Windows®-Based SmartUI ...............................15-1
SmartUI...........................................................................15-1
AutoLoad the SmartUI .............................................. 15-2
How to turn off Auto Load .........................................15-2
SmartUI features.............................................................15-3
Auto Configuration ....................................................15-4
Hardware Section: Changing the Scan to button
configuration ................................................................15-5
Scan to E-mail ..........................................................15-6
Scan to File...............................................................15-7
Scan to Image ..........................................................15-8
Page 16

Scan to OCR ..........................................................15-10
Software Section ..........................................................15-12
Scan .......................................................................15-13
Copy .......................................................................15-13
Fax..........................................................................15-14
Custom...................................................................15-14
Scan to File................................................................... 15-15
Scan to E-mail ..............................................................15-17
File attachments.....................................................15-19
Scanner settings.....................................................15-20
Scan to OCR (Word Processing program) ...................15-21
Scan to Graphics application
(example: Microsoft Paint)......................................... 15-23
Copy .......................................................................15-25
Fax setting (PC-Fax using the ix2700 Fax Driver)........15-27
FAX settings........................................................... 15-28
Custom: User-defined buttons......................................15-30
Customizing a user-defined button......................... 15-30
1. Select the Scan Action ...................................15-30
2. Select Configuration for the Scan Type.......... 15-31
3. Select Scan Settings. .....................................15-35
16
17
Using Remote Setup ..........................................................16-1
Remote Setup................................................................. 16-1
Using PC-FAX software .....................................................17-1
PC-FAX sending............................................................. 17-1
Setting up user information.......................................17-2
Sending setup...........................................................17-3
Outside line access ..................................................17-4
Include header.......................................................... 17-4
Addressbook file.......................................................17-4
User interface ...........................................................17-5
Simple style ..........................................................17-5
Facsimile style...................................................... 17-5
Speed Dial setup ............................................................17-6
The Address Book....................................................17-7
Setting up a Member in the Address Book............... 17-8
Setting up a Group for Broadcasting ........................ 17-9
Editing Member information.................................... 17-10
Deleting a Member or Group..................................17-10
Exporting the Address Book...................................17-10
Importing to the Address Book...............................17-12
Setting up a Cover Page ........................................17-13
xv
Page 17

You can enter information in each field ..................17-14
Sending a file as a PC-FAX using the
Facsimile style ....................................................17-15
Redial .................................................................17-16
Sending a file as a PC-FAX using the Simple style 17-16
Setting up PC-FAX receiving
(Windows® 95/98/98SE/Me/2000 Professional and
Windows NT® WS 4.0 only).......................................17-18
Running PC-FAX Receiving ................................... 17-18
Setting up your PC..................................................17-18
Viewing new PC-FAX messages ............................ 17-19
Receiving a fax into the PC
(Windows® XP only)................................................... 17-20
How to receive a fax automatically.........................17-20
How to view the received faxes ..............................17-25
18
Using your Machine with a Macintosh® ...........................18-1
Setting up your USB-equipped Apple® Macintosh® .......18-1
Using the printer driver with your Apple® Macintosh®
(Mac OS 8.6-9.2) .........................................................18-2
Using the Printer Driver with Your Apple® Macintosh®
(Mac OS X) ..................................................................18-5
Choosing page setup options ...................................18-5
Specific settings........................................................18-6
Using the PS driver with your Apple® Macintosh®.......... 18-8
For Mac OS 8.6 to 9.2 users.....................................18-8
For Mac OS X users ...............................................18-12
Sending a fax from your Macintosh® application..........18-15
For Mac OS 8.6-9.2 users ......................................18-15
For Mac OS X users ...............................................18-17
Drag a vCard from the Mac® OS X Address Book
application ......................................................18-19
Using the TWAIN scanner driver with your Macintosh®18-21
Accessing the scanner............................................18-21
Scanning an image into your Macintosh®...............18-22
Scanning a whole page ......................................18-22
PreScanning an image ...........................................18-23
Settings in the Scanner window..............................18-24
Image..................................................................18-24
Scanning Area ....................................................18-26
Business Card Size ............................................18-26
Adjusting the Image............................................18-27
Remote Setup (Mac OS® X).........................................18-28
xvi
Page 18

19
Network Scanning
(Windows® 98/98SE/Me/2000 Professional
and XP only) .......................................................................19-1
Registering your PC with the machine .....................19-1
Using the Scan key.........................................................19-4
Scan to E-mail (PC)..................................................19-4
Scan to E-mail (E-mail server).................................. 19-5
Scan to Image ..........................................................19-6
Scan to OCR ............................................................19-7
Scan to File............................................................... 19-8
20
21
Network PC-FAX software ................................................20-1
Enable Network PC-FAX..........................................20-1
Sending setup ...................................................... 20-1
Extra options in Address Book ............................. 20-3
Installing Network PC-FAX....................................... 20-4
Windows® 95/98/98SE and Me users .................. 20-4
Using the Network PC-FAX software ....................... 20-5
Quick Tips: ...........................................................20-5
Sending a Network PC-FAX from your Macintosh®
application ............................................................ 20-6
For Mac OS 8.6-9.2 users....................................20-6
For Mac OS X users.............................................20-6
Important information .......................................................21-1
Standard telephone and FCC Notices
These notices are in effect on models sold and used
only in the United States. ..................................... 21-1
Federal Co mmunications Commission (FCC) D eclaration
of Conformity (USA only)......................................21-3
Important .............................................................. 21-4
Important – about the interface cable ...................21-4
Industry Canada Compliance Statement
(Canada only) .......................................................21-4
International ENERGY STAR®
Compliance Statement .........................................21-4
Laser safety..............................................................21-4
FDA regulations........................................................ 21-5
Important safety instructions........................................... 21-6
Trademarks .................................................................... 21-8
xvii
Page 19

22
Troubleshooting and routine maintenance ..................... 22-1
Troubleshooting .............................................................22-1
Error messages ........................................................22-1
Original jams.............................................................22-4
Original is jammed in the top of the ADF unit. ......22-4
Original is jammed inside the ADF unit. ...............22-5
Paper jams................................................................ 22-6
Paper is jammed in the duplex tray ....................22-11
If you are having difficulty with your machine .........22-13
Improving the print quality.......................................22-17
Packing and shipping the machine...............................22-21
Routine maintenance ....................................................22-24
Cleaning the scanner..............................................22-24
Cleaning the printer ................................................22-25
Cleaning the drum unit............................................22-26
Replacing the toner cartridge..................................22-27
How to replace the toner cartridge..........................22-28
Replacing the drum unit..........................................22-33
Page Counter .........................................................22-36
23
G
Optional accessories ......................................................... 23-1
Memory board.................................................................23-1
Installing the optional memory board........................23-2
Network (LAN) board ......................................................23-4
Before starting installation ........................................23-5
Step 1: Hardware installation....................................23-5
Step 2: Connecting the Network board to an Unshielded
Twisted Pair 10BASE-T or 100BASE-TX Ethernet
Network ................................................................23-8
LED.......................................................................23-8
TEST SWITCH .....................................................23-9
Lower Tray................................................................ 23-9
Glossary ............................................................................... G-1
xviii
Page 20

S
Specifications ......................................................................S-1
Product description ...........................................................S-1
General.............................................................................S-1
Print media .......................................................................S-2
Copy .................................................................................S-2
Fax....................................................................................S-3
Scanner............................................................................S-4
Printer ...............................................................................S-5
Interfaces..........................................................................S-5
Computer requirements....................................................S-6
24
25
Index ...................................................................................... I-1
Remote Retrieval Access card .......................................... R-1
xix
Page 21

1
Introduction
Using this Guide
Thank you for buying an Imagistics ix2700. Your ix2700 is simple to
use, with LCD screen instructions to guide you through programming
it. You can make the most of your machine by taking a few minutes to
read this Guide.
Finding information
All the chapter headings and subheadings are listed in the Table of
Contents. You will be able to find information about a specific feature
or operation by checking the Index at the back of this Guide.
Symbols used in this Guide
Throughout this Guide you’ll see special symbols alerting you to
important warnings, notes and actions. To make things clearer and
to help you press the correct keys, we used special fonts and added
some of the messages that will appear in the LCD.
Bold
Italics Italicized typeface emphasizes an important point
Courier
New
Warnings inform you what to do to avoid possible personal
injury.
Cautions specify procedures you must follow or avoid to
prevent possible damage to the machine.
Notes tell you how you should respond to a situation that may arise or
give tips about how the current operation works with other features.
Improper Setup alerts you to devices and operations that are not
compatible with the machine.
Bold typeface identifies specific keys on the
machine control panel.
or refers you to a related topic.
Courier New typeface identifies the messages on
the LCD of the machine.
INTRODUCTION 1 - 1
Page 22
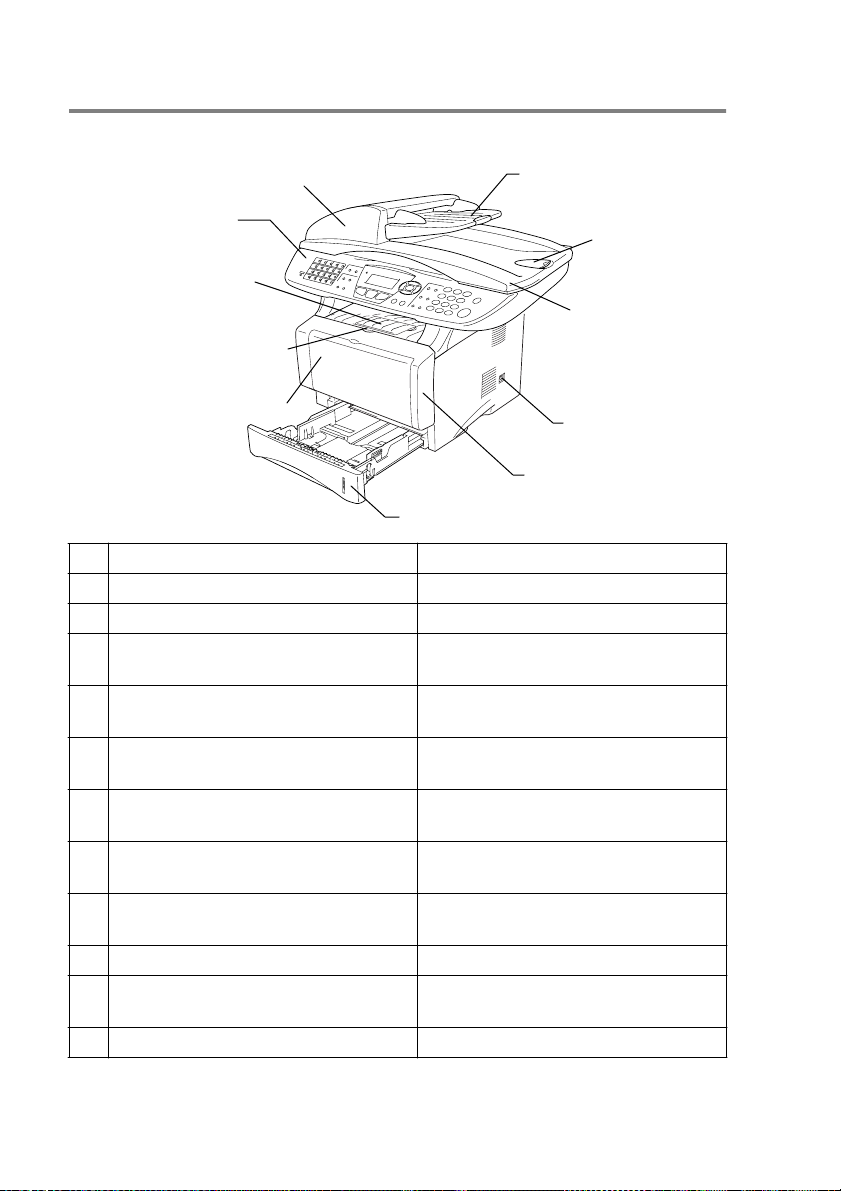
Machine part names and operations
■ Front view
5 Automatic Document Feeder (ADF)
4 Control Panel
3
Face-down Output Tray
Support Flap with Extensi on
2 Front Cover Release Button
1
Multi-purpose Tray (MP Tray)
11 Paper Tray (Upper Tray)
No.
Name Description
6 ADF Document Support
Extension
7 ADF Document
Output Support
Flap
8 Document Cover
9 Power Switch
10 Front Cover
1 Multi-purpose Tray (MP Tray) Load paper here.
2 Front Cover Release Button Press it to open the front cover.
3 Face-down Output Tray Support Flap
with Extension (Support Flap)
Unfold it to prevent the printed paper
from sliding off the machine.
4 Control Panel Use the keys and display to control
the machine.
5 Automatic Document Feeder (ADF) Use the ADF unit for multiple page
originals.
6 ADF Document Support Extension Place the original here to use the
ADF unit.
7 ADF Document Output Support Flap Unfold to prevent the scanned pages
from sliding off the machine.
8 Document Cover Open to place the original on the
scanner glass.
9 Power Switch Switch it on or off.
10 Front Cover Open to install a toner cartridge or
drum unit.
11 Paper Tray (Upper Tray) Load paper here.
1 - 2 INTRODUCTION
Page 23
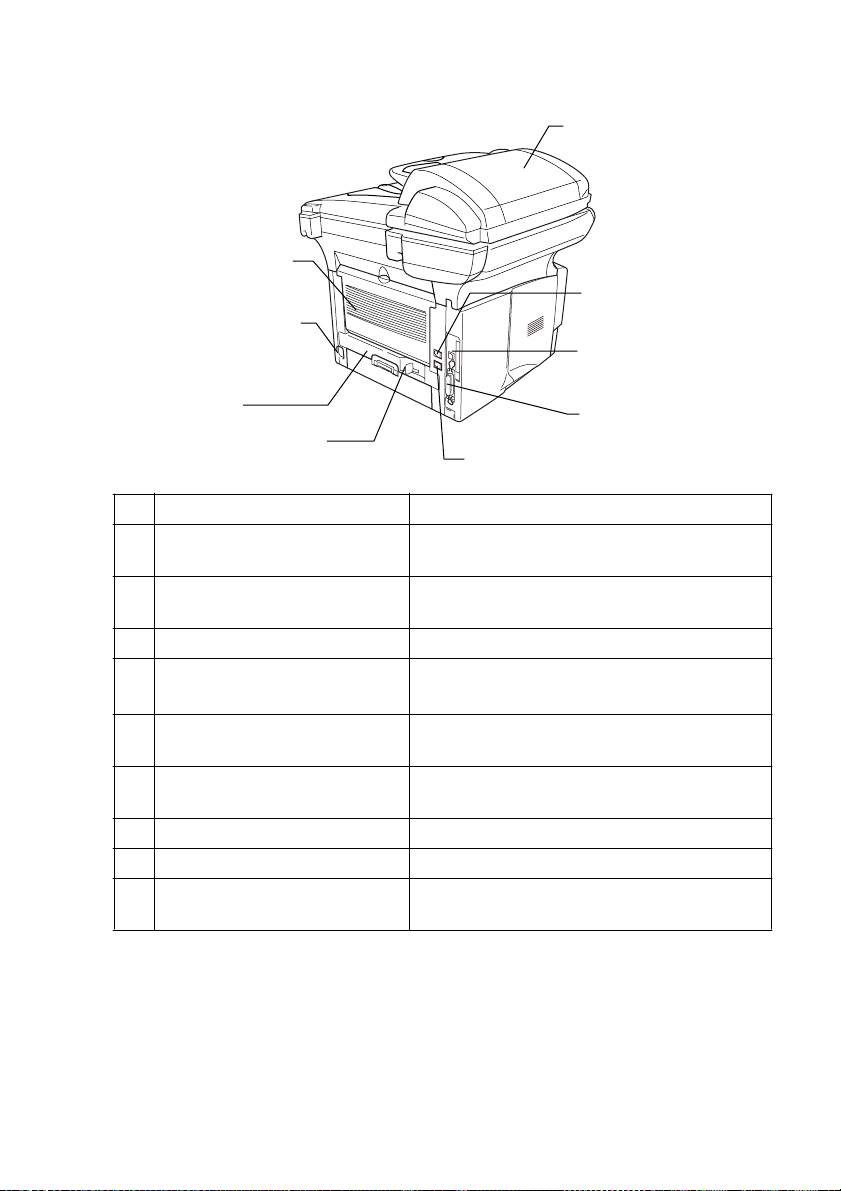
■ Back view
16 ADF Cover
15 Face-up Output Tray
(Back Output Tray)
14 AC Power Connector
13 Duplex Tray
12 Paper Adjustment Lever
for Duplex Printing
No.
Name Description
12 Paper Adjustment Lever for
Duplex Printing
20 External Telephone
Line Jack
Use to match your paper size for duplex
printing.
13 Duplex Tray Slide out to remove paper jammed inside
the machine.
14 AC Power Connector Connect the AC Power Connector here.
15 Face-up Output Tray
(Back Output Tray)
Open it when thicker paper is placed in the
MP tray.
16 ADF Cover Open to remove paper jammed inside the
ADF unit.
17 Telephone Line Jack Plug the line cord supplied with the
into here.
18 USB Interface Connector Connect the USB Cable here.
19 Parallel Interface Connector Connect the Parallel Cable here.
20 External Telephone Line Jack Plug in the modular plug on the external
telephone line here.
17 Telephone Line Jack
18 USB Interface
Connector
19 Parallel Interface
Connector
machine
INTRODUCTION 1 - 3
Page 24
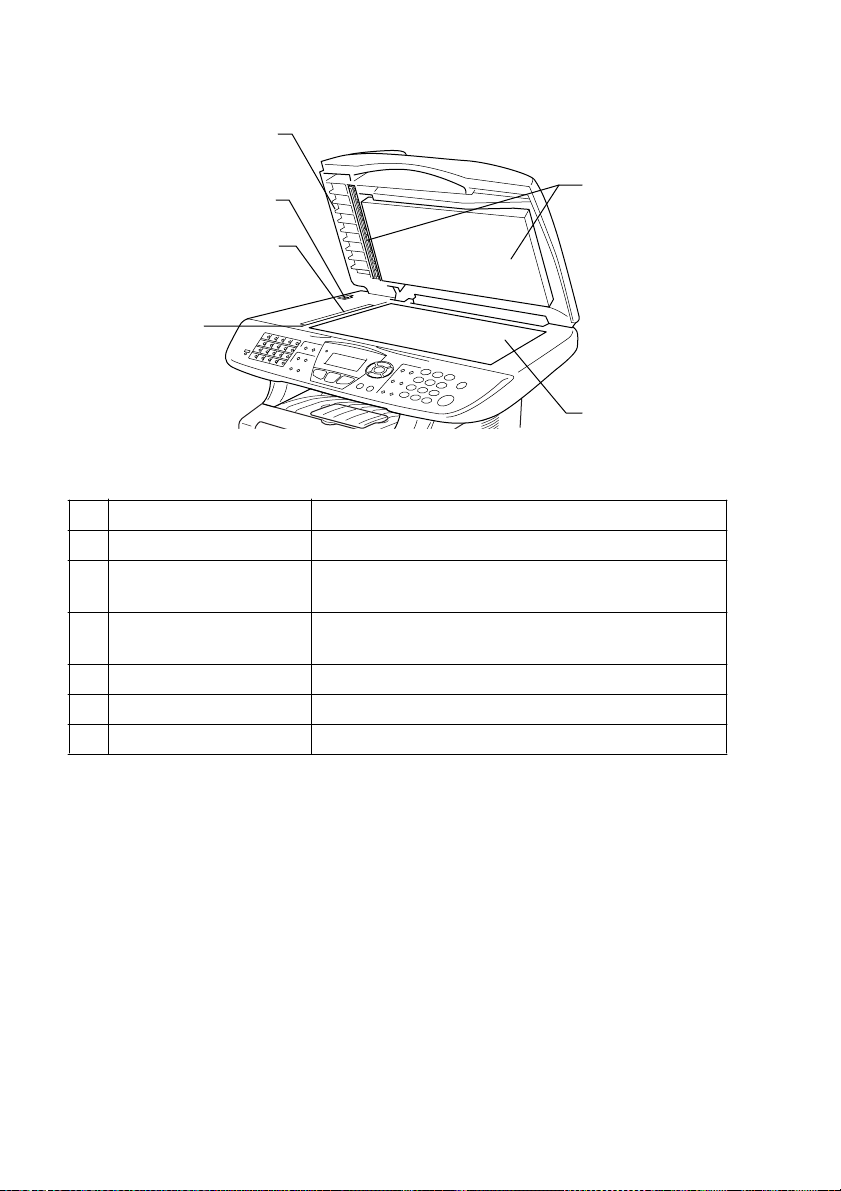
■ Inside view (Document cover open)
24 Document Cover
23 Scanner Lock Lever
22 Glass Strip
21 Document
Guidelines
No.
Name Description
25 White Film
26 Scanner Glass
21 Document Guidelines Use to center the original on the scanner glass.
22 Glass Strip This is used to scan the original when using the
ADF.
23 Scanner Lock Lever Use to lock/unlock the scanner when relocating the
machine.
24 Document Cover Open to place the original on the scanner glass.
25 White Film Clean it for good quality copying and scanning.
26 Scanner Glass Place the original to be scanned here.
1 - 4 INTRODUCTION
Page 25
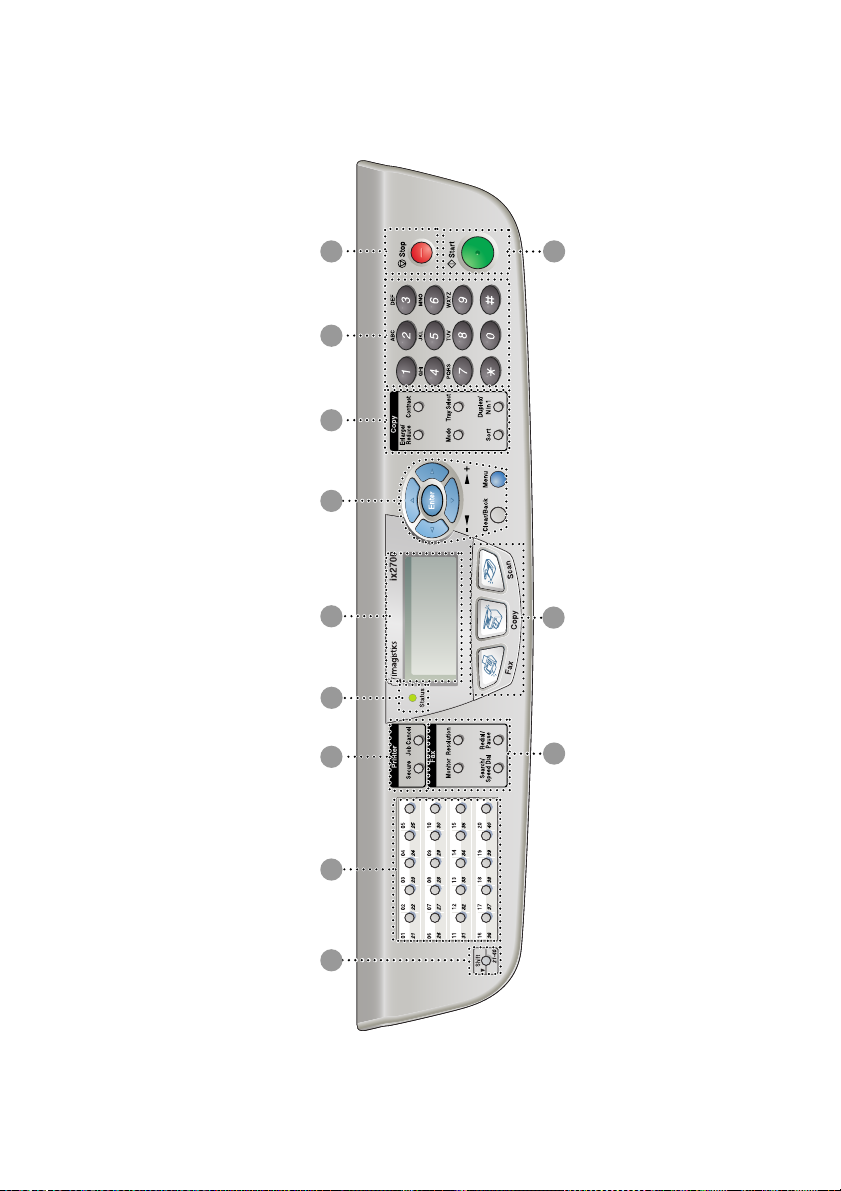
Control panel overview
10 11
9
12
5 8
4
2
1 3
6
7
INTRODUCTION 1 - 5
Page 26

1 3
2
4
5
Shift
1
To access memory locations 21
through 40 in the One-Touch keys
hold down the Shift key.
One-Touch keys
2
These 20 keys give you instant
access to 40 previously stored dial
numbers.
Print keys:
3
Secure
Lets you print out data saved in
memory by entering your four-digit
password.
Job cancel
Clears data from the printer
memory.
7
4
5
Status LED
(Light-Emitting Diode)
The LED will flash and change color
depending on the machine status.
5-Line Liquid Crystal Display
(LCD)
Displays messages on the screen to
help you to set up and use your
machine.
6
1 - 6 INTRODUCTION
Page 27

Mode keys:
6
Fax
Lets you access Fax mode.
Copy
Lets you access Copy mode.
Scan
Lets you access Scan mode.
Fax and telephone keys:
7
Monitor
Press before dialing if you want to
make sure a fax machine will
answer, and then press Start.
Resolution
Sets the resolution when you send a
fax.
Search/Speed Dial
Lets you look up numbers that are
stored in the dialing memory. It also
lets you dial stored numbers by
pressing
Redial/Pause
Redials the last number you called.
It also inserts a pause in auto dial
numbers.
and a three-digit number.
#
INTRODUCTION 1 - 7
Page 28
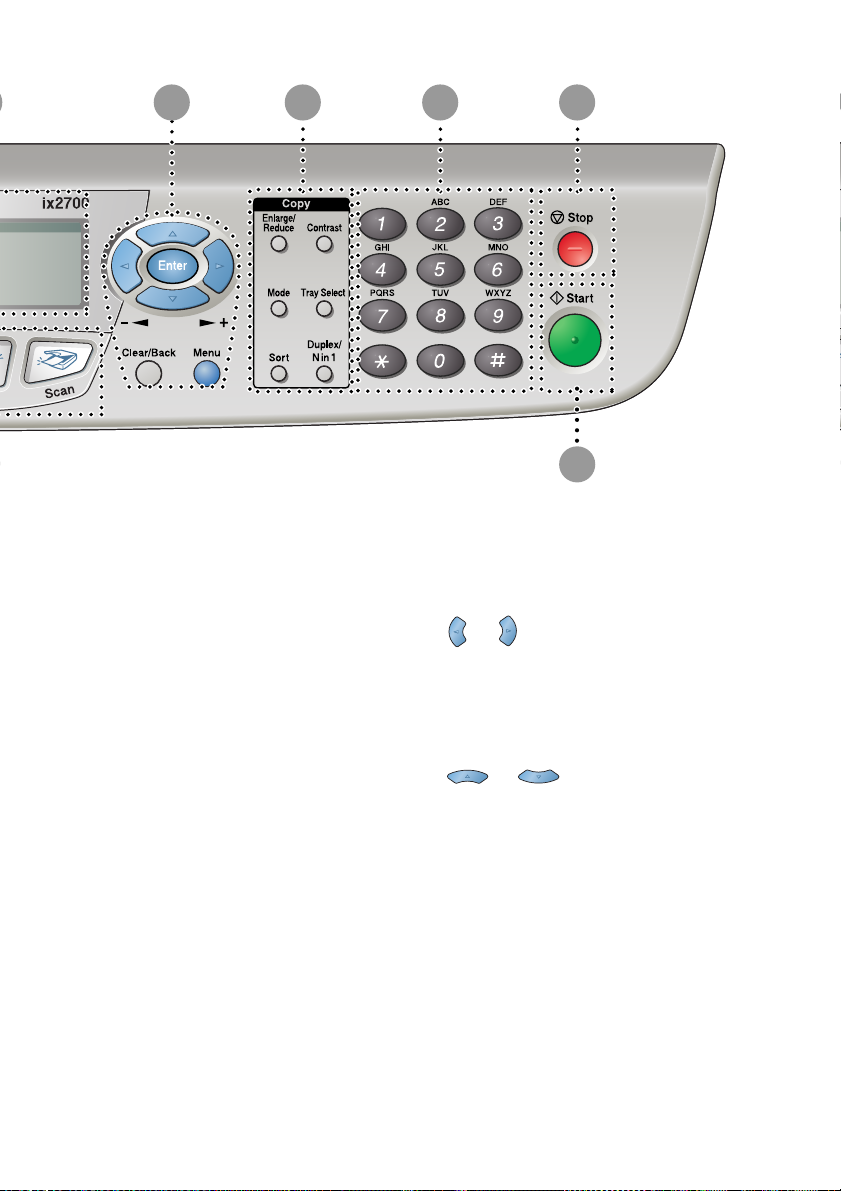
8
9
10 11
12
Navigation keys:
8
Menu
Lets you access the Menu to
program.
Enter
Lets you store your settings in the
machine.
Clear/Back
Deletes entered data or lets you exit
the menu by pressing repeatedly.
1 - 8 INTRODUCTION
or
Press to scroll forward or backward
to a menu selection.
When using the speaker or ring, you
can press these keys to adjust the
volume in fax mode.
or
Press to scroll through the menus
and options.
Also, you can use these keys to do
a numerial search for the names of
stored numbers in fax mode.
Page 29

Copy keys
9
(Temporary settings):
Enlarge/Reduce
Lets you reduce or enlarge copies
depending upon the ratio you
select.
Contrast
Lets you make a copy that is lighter
or darker than the original.
Mode
Lets you select the copy mode for
your type of original.
Tray Select
You can select which tray you would
like to use for the next copy.
Sort
Lets you sort multiple copies using
the ADF.
Duplex/N in 1
You can choose Duplex to copy on
both sides of the paper or N in 1 to
copy 2 or 4 pages onto one page.
Dial Pad
0
Use these keys to dial telephone
and fax numbers and as a keyboard
for entering information into the
machine.
The # key lets you temporarily
switch the dialing mode during a
telephone call from Pulse to Tone.
A
Stop
Stops a fax, copy and scan
operation or exits from the menu.
B
Start
Lets you start sending faxes,
making copies or scanning.
INTRODUCTION 1 - 9
Page 30
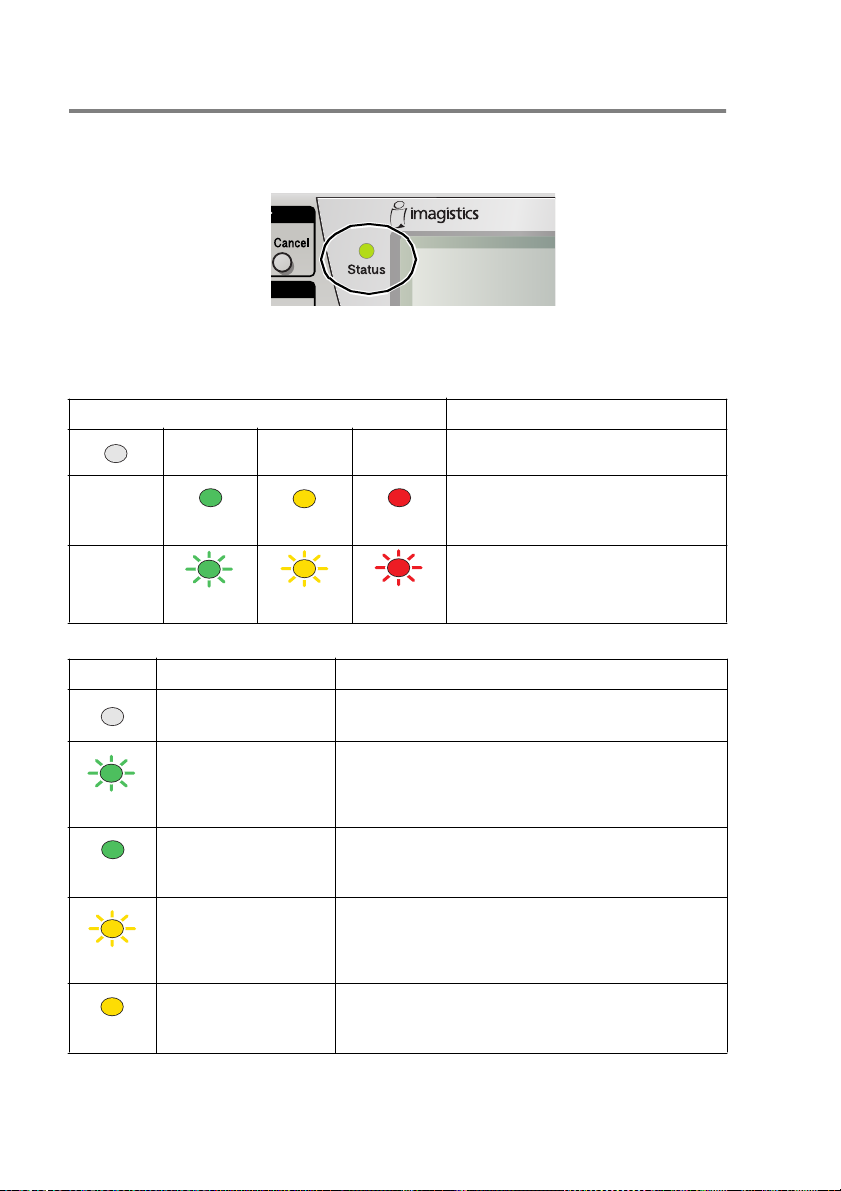
Status LED indications
The Status LED (Light Emitting Diode) will flash and change color
depending on the machine status.
The LED indications shown in the table below are used in the
illustrations in this chapter.
LED LED status
LED is off.
LED is on.
Green Yellow Red
LED is blinking.
Green Yellow Red
LED machine status Description
Sleep Mode The power switch is off or the machine is in
Sleep mode.
Warming Up The machine is warming up for printing.
Green
Ready The machine is ready to print.
Green
Receiving Data The machine is either receiving data from the
computer, processing data in memory or
Yellow
Data Remaining in
Memory
Yellow
1 - 10 INTRODUCTION
printing data.
Print data remains in the machine memory.
Page 31
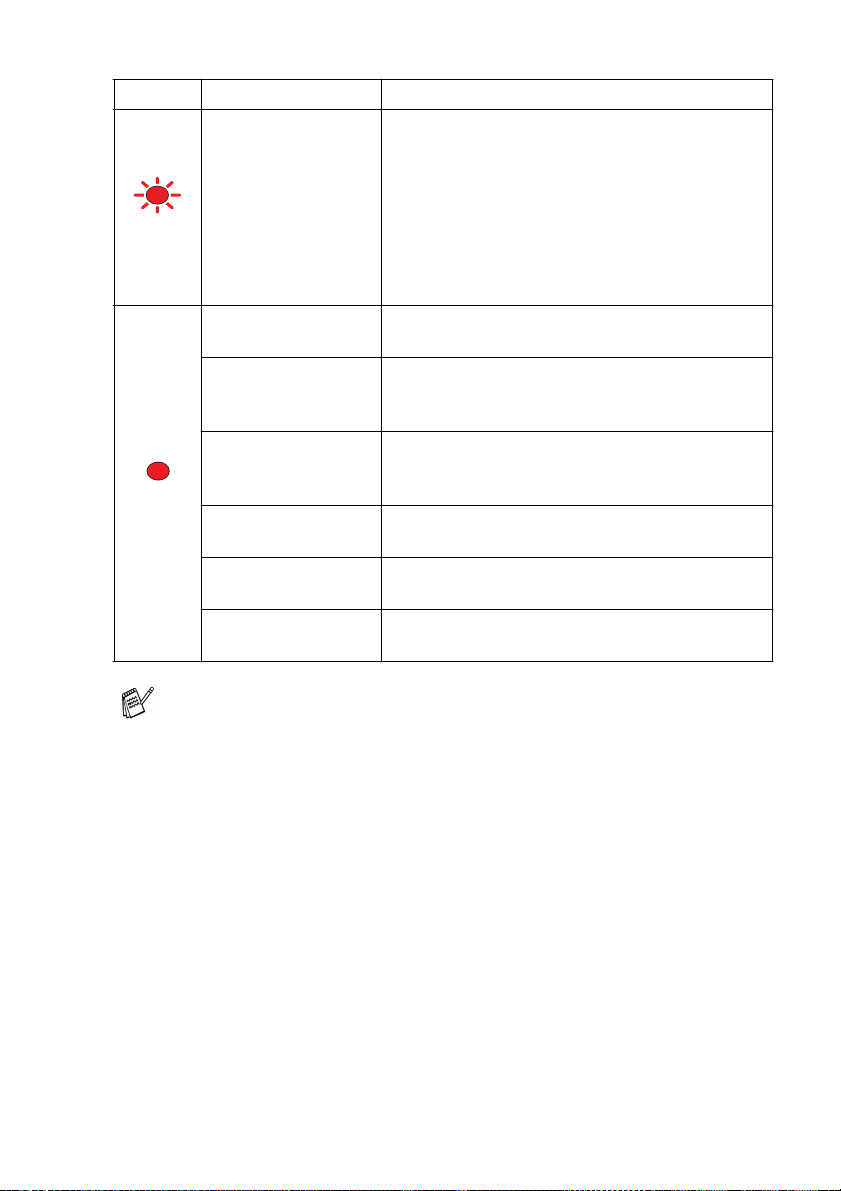
LED machine status Description
Service error Follow the steps below.
1. Turn off the power switch.
2. Wait a few seconds, and then turn it back on
and try to print again.
Red
Cover open The cover is open. Close the cover. (See Error
Toner empty Replace the toner cartridge with a new one.
Paper error Put paper in the tray or clear the paper jam.
Red
Scan lock Check that the scanner lock lever is released.
Others Check the LCD message. (See Troubleshooting
Out of memory Memory is full. (See Error messages on page
If you cannot clear the error and see the same
service call indication after turning the machine
back on, please call the Imagistics National
Diagnostic Center at 1-800-243-5556 (In USA).
messages on page 22-1.)
(See Replacing the toner cartridge on page
22-27.)
Check the LCD message. (See Troubleshooting
on page 22-1.)
(See Scanner Lock Lever on page 1-4.)
on page 22-1.)
22-1.)
When the power switch is off or the machine is in Sleep mode,
the LED is off.
INTRODUCTION 1 - 11
Page 32

About fax machines
Custom features
Do you have Voice Mail on the phone line?
If you have Voice Mail on the phone line where you will install your
new machine,
machine may conflict with each other while receiving incoming calls.
Why should there be problems?
Since both the machine and Voice Mail will pick up the call, after the
number of rings you have set, each of them has the ability to keep
the other from receiving calls.
For example, if your Voice Mail is set to answer after two rings and
your machine is set to answer after four, your Voice Mail will stop
your machine from receiving faxes.
If you set Voice Mail and the machine to answer after the same
number of rings, there is no way of knowing which one will answer
first. It is important to remember that neither Voice Mail nor the
machine can pass the call back to the other after the call has been
answered.
How can you avoid possible problems?
there is a strong possibility that Voice Mail and the
A very good way to avoid problems like the one mentioned, is to get
a second phone number on your present phone line.
Many people with Voice Mail choose an alternative service, which is
called “Unique Ring”, and they are very satisfied with it. (See Unique
Ring on page 5-11.)
Another way to avoid possible problems is to replace your Voice Mail
with an answering machine. Your machine is designed to work with
an answering machine or TAM (telephone answering machine).
(See
Connecting an external telephone answering machine (TAM)
on page 1-15.)
1 - 12 INTRODUCTION
Page 33

Fax tones and handshake
When someone is sending a fax, the machine sends fax calling tones
(CNG tones). These are quiet, intermittent beeps every 4-seconds.
You’ll hear them after you dial and press
for about 60 seconds after dialing. During that time, the sending
machine must begin the “handshake”, or connection, with the
receiving machine.
Each time you use automatic procedures to send a fax, you are
sending CNG tones over the phone line. You’ll soon learn to listen for
these quiet beeps each time you answer a phone on your fax line, so
you will know if you are receiving a fax message.
The receiving fax responds with fax receiving tones, which are loud,
chirping sounds. A receiving fax chirps for about 40 seconds over the
phone line, and the LCD shows
If your machine is set to the
automatically with fax receiving tones. If the other person hangs up,
your machine will continue to send the “chirps” for about 40 seconds,
and the LCD continues to show
press
The fax ‘handshake’ is the time in which the sending machine’s CNG
tones and the receiving machines “chirps” overlap. This must be for
at least 2 to 4 seconds, so both machines can understand how each
is sending and receiving the fax. The handshake cannot begin until
the call is answered, and the CNG tones only last for about 60
seconds after the number is dialed. So it is important for the receiving
machine to answer the call in as few rings as possible.
Stop
.
Receiving
Fax Only
Receiving
mode, it will answer every call
and they will continue
Start
.
. To cancel receiving,
When you have an external Telephone Answering machine
(TAM) on your fax line, your TAM will decide the number of rings
before the call is answered.
Pay special attention to the directions for connecting a TAM in
this chapter. (See
machine (TAM)
Connecting an external telephone answering
on page 1-15.)
INTRODUCTION 1 - 13
Page 34
ECM (Error Correction Mode)
The Error Correction Mode (ECM) is a way for the machine to check
a fax transmission while it is in progress. If the machine detects
errors during fax transmission, if resends the pages of the fax that
had an error. ECM transmissions are only possible between fax
machines that both have this feature. If they do, you may send and
receive fax messages that are continuously being checked by the
machine.
Your machine must have enough memory for this feature to work.
Connecting the machine
Connecting an external telephone
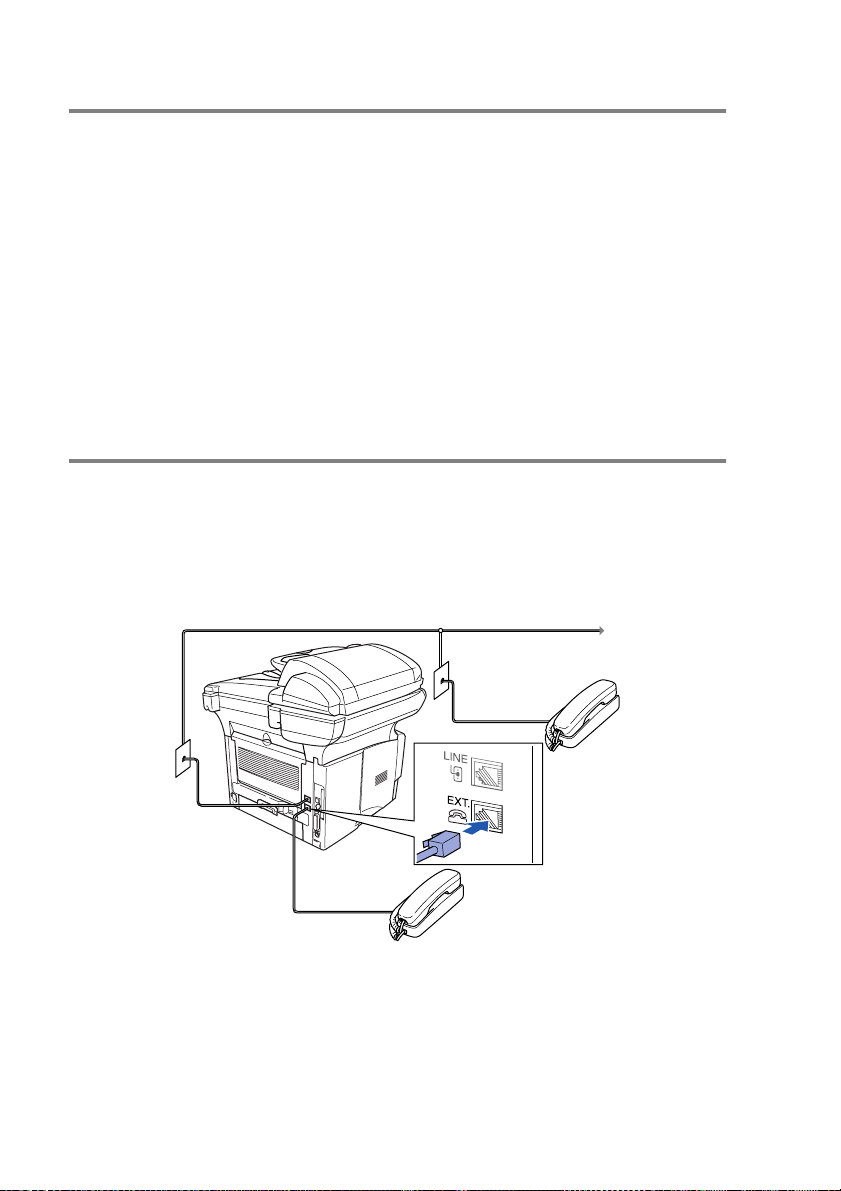
Although your machine does not have a handset, you can connect a
separate telephone (or telephone answering device) directly to your
machine as shown in the diagram below.
Connect the modular plug on the telephone’s line cord to the jack
labeled EXT. in the back of the machine.
Whenever this phone (or TAM) is in use, the LCD shows
Telephone
1 - 14 INTRODUCTION
.
Page 35

Connecting an external telephone answering machine (TAM)
Sequence
You may choose to connect an answering device. However, when
you have an external TAM on the same telephone line as the
machine, the TAM answers all calls and the machine “listens” for fax
calling (CNG) tones. If it hears them, the machine takes over the call
and receives the fax. If it doesn’t hear CNG tones, the machine lets
the TAM continue playing your outgoing message so your caller can
leave you a voice message.
The TAM must answer within four rings (the recommended setting is
two rings). The machine cannot hear CNG tones until the TAM has
answered the call, and with four rings there are only 8 to 10 seconds
of CNG tones left for the fax “handshake”. Make sure you carefully
follow the instructions in this guide for recording your outgoing
message. We do not recommend using the toll saver feature on your
external answering machine if it exceeds five rings.
If you do not receive all your faxes, reduce the Ring Delay
setting on your external TAM.
If You Subscribe to your Telephone Company’s Unique Ring
Service:
You may connect an external TAM to a separate wall jack only
if you subscribe to your telephone company’s Unique Ring
service, have registered the unique ring pattern on your
machine, and use that number as a fax number. The
recommended setting is four rings on the external TAM when
you have the telephone company’s Unique Ring Service.
If You Do Not Subscribe to Unique Ring Service:
You must plug your TAM into the EXT. jack of your machine. If
your TAM is plugged into a wall jack, both your machine and the
TAM will try to control the phone line. (See illustration on the
next page.)
INTRODUCTION 1 - 15
Page 36
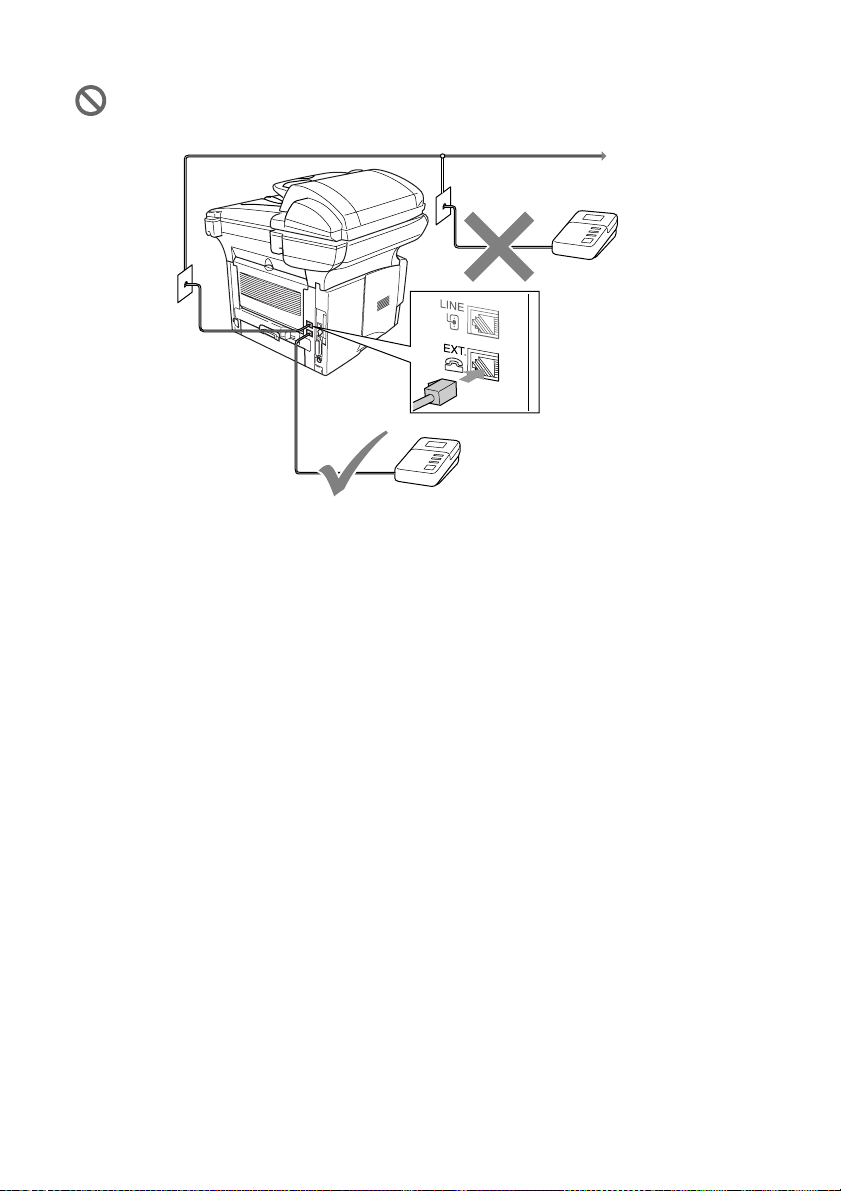
Do not connect a TAM elsewhere on the same phone line
(unless you have the Unique Ring service).
TAM
TAM
1 - 16 INTRODUCTION
Page 37

Connections
The external TAM must be plugged into the back of the machine, into
the jack labeled EXT. Your machine cannot work properly if you plug
the TAM into a wall jack (unless you are using Unique Ring).
Plug the telephone line cord from the wall jack into the back of
1
the machine, in the jack labeled LINE.
Plug the telephone line cord from your external TAM into the
2
back of the machine, in the jack labeled EXT. (Make sure this
cord is connected to the TAM at the TAM’s telephone
and not its telephone jack.)
Set your external TAM to four rings or less. (The machine’s Ring
3
Count setting does not apply.)
Record the outgoing message on your external TAM.
4
Set the TAM to answer calls.
5
Set the Answer Mode to
6
(See Choosing the Answer Mode on page 5-1.)
External TAM
.
line
jack,
Recording outgoing message (OGM) on an external TAM
Timing is important in recording this message. The message sets up
the ways to handle both manual and automatic fax reception.
Record 5 seconds of silence at the beginning of your message.
1
(This allows your machine time to listen for the fax CNG tones
of automatic transmissions before they stop.)
Limit your speaking to 20 seconds.
2
End your 20-second message by giving your Fax Receive Code
3
for people sending manual faxes. For example:
“After the beep, leave a message or send a fax by pressing
51 and Start.”
We recommend beginning your OGM with an initial 5-second
silence because the machine cannot hear fax tones over a
resonant or loud voice. You may try omitting this pause, but if your
machine has trouble receiving, then you must rerecord the OGM
to include it.
INTRODUCTION 1 - 17
Page 38

Special line considerations
Two-line phone system
A two-line phone system is nothing more than two separate phone
numbers on the same wall outlet. The two phone numbers can be on
separate jacks (RJ11) or combined into one jack (RJ14). Your
machine must be plugged into an RJ11 jack. RJ11 and RJ14 jacks
may be equal in size and appearance and both may contain four
wires (black, red, green, yellow). To test the type of jack, plug in a
two-line phone and see if it can access both lines. If it can, you must
separate the line for your machine. (See EXT. TEL. RX on page 5-4.)
Converting telephone wall outlets
There are three ways to convert to an RJ11 jack. The first two ways
may require assistance from the telephone company. You can
change the wall outlets from one RJ14 jack to two RJ11 jacks. Or,
you can have an RJ11 wall outlet installed and slave or jump one of
the phone numbers to it.
The third way is the easiest: Buy a triplex adapter. You can plug a
triplex adapter into an RJ14 outlet. It separates the wires into two
separate RJ11 jacks (Line 1, Line 2) and a third RJ14 jack (Lines 1
and 2). If your machine is on Line 1, plug the machine into L1 of the
triplex adapter. If your machine is on Line 2, plug it into L2 of the triple
adapter.
1 - 18 INTRODUCTION
Triplex Adapter
RJ14
RJ11
RJ14
Page 39

Installing machine, external two-line TAM and two-line telephone
When you are installing an external two-line telephone answering
machine (TAM) and a two-line telephone, your machine must be
isolated on one line at both the wall jack and at the TAM. The most
common connection is to put the machine on Line 2, which is
explained in the following steps. The back of the two-line TAM must
have two telephone jacks: one labeled L1 or L1/L2, and the other
labeled L2. You will need at least three telephone line cords, the one
that came with your machine and two for your external two-line TAM.
You will need a fourth line cord if you add a two-line telephone.
Place the two-line TAM and the two-line telephone next to your
1
machine.
Plug one end of the telephone line cord for your machine into the
2
L2 jack of the triplex adapter. Plug the other end into the LINE
jack on the back of the machine.
Plug one end of the first telephone line cord for your TAM into
3
the L1 jack of the triplex adapter. Plug the other end into the L1
or L1/L2 jack of the two-line TAM.
Plug one end of the second telephone line cord for your TAM
4
into the L2 jack of the two-line TAM. Plug the other end into the
EXT. jack on the left side of the machine.
Triplex Adapter
External Two Line TAM FAX
You can keep two-line telephones on other wall outlets as always.
There are two ways to add a two-line telephone to the machine’s wall
outlet. You can plug the telephone line cord from the two-line
telephone into the L1+L2 jack of the triplex adapter. Or, you can plug
the two-line telephone into the TEL jack of the two-line TAM.
Two Line Phone
INTRODUCTION 1 - 19
Page 40

Multi-line connections (PBX)
Most offices use a central telephone system. While it is often
relatively simple to connect the machine to a key system or a PBX
(Private Branch Exchange), we suggest that you contact the
company that installed your telephone system and ask them to
connect the machine for you. It is advisable to have a separate line
for the machine. You can then leave the Receive Mode set to FAX
Only to receive faxes any time of the day or night.
If the machine is to be connected to a multi-line system, ask your
installer to connect the unit to the last line on the system. This
prevents the unit from being activated each time a telephone call is
received.
As with all fax units, this machine must be connected to a two
wire system. If your line has more than two wires, proper
connection of the machine cannot be made.
If you are installing the machine to work with a PBX
It is not guaranteed that the unit will operate correctly under all
1
circumstances with a PBX. Any cases of difficulty should be
reported first to the company that handles your PBX.
If all incoming calls will be answered by a switchboard operator,
2
it is recommended that the Receive Mode be set to
incoming calls should initially be regarded as telephone calls.
Manual
. All
Custom features on your phone line
If you have Voice Mail, Call Waiting, Caller ID, RingMaster, an
answering service, an alarm system or other custom feature on one
phone line it may create a problem with the operation of your
machine. (See
1 - 20 INTRODUCTION
Custom features
on page 1-12.)
Page 41

2
Paper
About paper
Type and size of paper
The machine loads paper from the installed paper tray,
multi-purpose tray or optional lower tray.
Recommended paper
Plain Paper: Imagistics 471-1 Letter
Imagistics 472-2 Legal
Transparency: 3M CG 3300
Labels: Avery laser label #
■ Before you buy a large amount of paper, please test some to
make sure that the paper is suitable.
■ Use paper that is made for plain-paper copying.
■ Use paper that is 75 to 90 g/m
■ Use neutral paper. Do not use acidic or alkaline paper.
■ Use long-grain paper.
■ Use paper with a moisture content of approximately 5%.
5160
2
(20 to 24 lb).
Caution
Do not use ink jet paper. It may cause a paper jam and damage your
machine.
PAPER 2 - 1
Page 42

Choosing acceptable paper
We recommend that you test paper (especially special sizes and
types of paper) on the machine before purchasing large quantities.
■ Avoid feeding label sheets that are partly used or your machine
will be damaged.
■ Avoid using coated paper, such as vinyl coated paper.
■ Avoid using preprinted or highly textured paper, or paper with an
embossed letterhead.
For optimum printing, use a recommended type of paper, especially
for plain paper and transparencies. For more information on paper
specifications, call your nearest authorized sales representative or
the place where you purchased your machine.
■ Use label or transparencies that are designed for use in laser
printers.
■ For the best print quality, we recommend using long-grained
paper.
■ If you are using special paper and the paper has problems
feeding from the paper tray, try again using the multi-purpose
tray.
■ You can use recycled paper in this machine.
2 - 2 PAPER
Page 43

Paper capacity of the paper trays
Paper size Number of sheets
Multi-purpose tray
(MP tray)
Width: 69.8 to 220 mm
(2.75 to 8.66 in.)
Height: 116 to 406.4 mm
(4.57 to 16.0 in.)
Paper tray
(Upper Tray)
A4, Letter, Legal, B5 (ISO), B5
(JIS), Executive, A5, A6, B6
(ISO)
Optional lower tray A4, Letter, Legal, B5 (ISO), B5
(JIS), Executive, A5, B6 (ISO)
Duplex printing A4, Letter, Legal —
50 sheets
(80 g/m
2
250 sheets
(80 g/m
2
250 sheets
(80 g/m
2
or 20 lb)
or 20 lb)
or 20 lb)
PAPER 2 - 3
Page 44

Paper specifications for each paper tray
Paper
types
Multipurpose
Plain paper, Bond paper, Recycled paper, Envelope
Labels
*2
, and Transparency
*2
tray
Paper tray Plain paper, Recycled paper, and Transparency
Optional
Plain paper, Recycled paper, and Transparency
Lower tray
Paper
weights
Multipurpose
60 to 161 g/m2 (16 to 43 lb)
tray
Paper tray 60 to 105 g/m
Optional
60 to 105 g/m
2
(16 to 28 lb)
2
(16 to 28 lb)
Lower tray
Paper
sizes
Multipurpose
tray
Width: 69.8 to 220 mm
(2.75 to 8.66 in.)
Height: 116 to 406.4 mm
(4.57 to 16.0 in.)
Paper tray A4, Letter, Legal, B5 (ISO), B5 (JIS), Executive, A5, A6,
B6 (ISO)
Optional
Lower Tray
A4, Letter, Legal, B5 (ISO), B5 (JIS), Executive, A5, B6
(ISO)
*1 Up to 3 envelopes
*2 Up to 10 sheets
When printing transparencies, remove each one from the
face-down output tray after it exits the machine.
*1
,
*2
*2
2 - 4 PAPER
Page 45
How to load paper
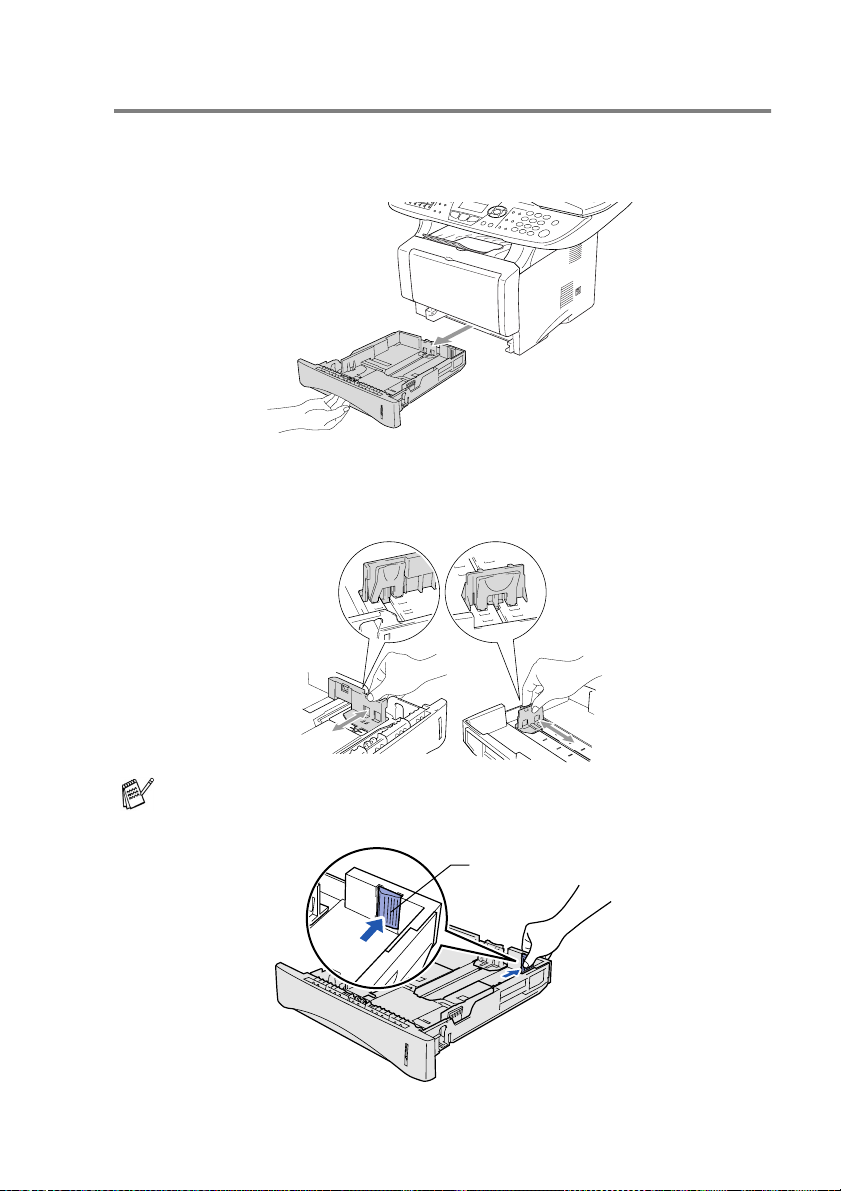
To load paper or other media in the paper tray
Pull the paper tray completely out of the machine.
1
While pressing the paper guide release lever, slide the adjusters
2
to fit the paper size.
Check that the guides are firmly in the slots.
For Legal size paper, press the universal guide release button
and pull out the back of the paper tray.
Universal Guide Release
Button
PAPER 2 - 5
Page 46
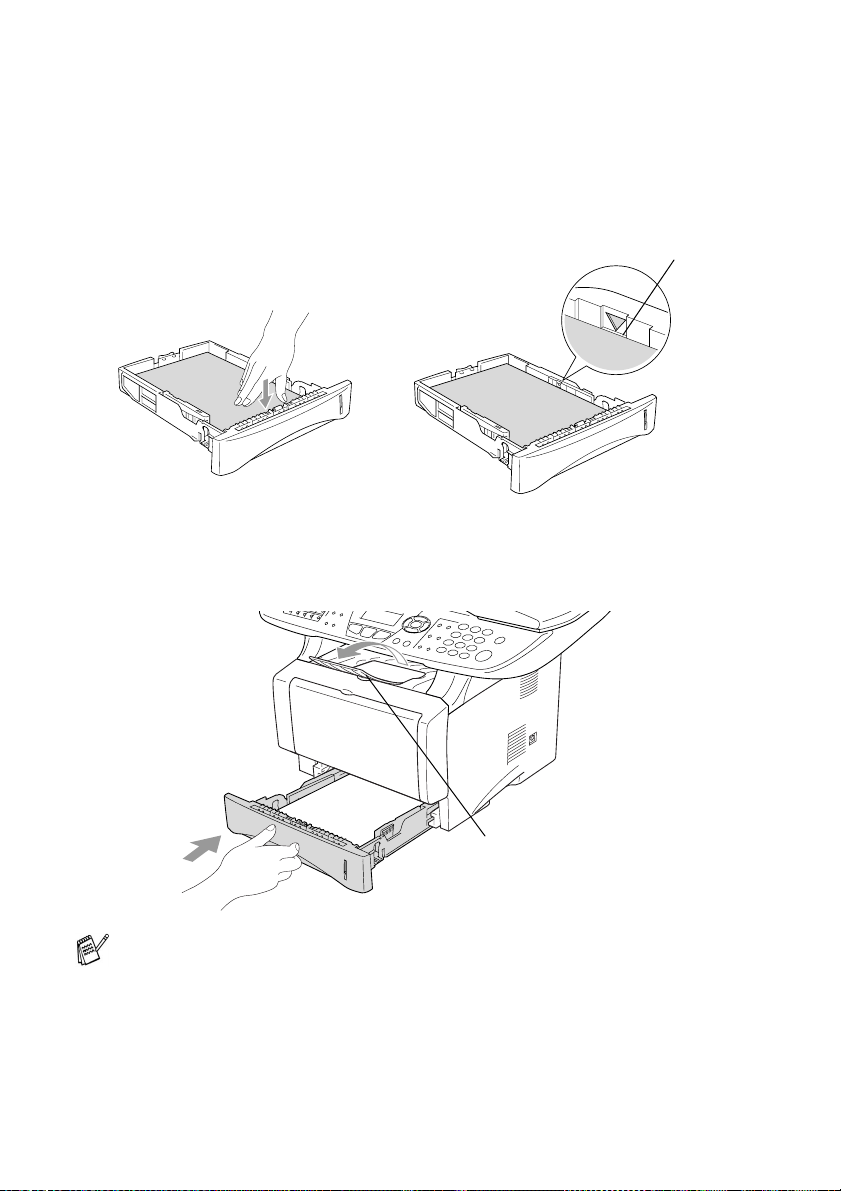
Fan the stack of paper well to avoid paper jams and misfeeds.
3
Put paper in the paper tray.
4
Check that the paper is flat in the tray, below the maximum
paper mark, and that the paper guide is flush against the paper
stack.
Up to here.
Put the paper tray firmly back in the machine and unfold the
5
support flap before you use the machine.
Support Flap with
Extension
When you put paper in the paper tray, please remember the
following:
■ The side to be printed on must be face down.
■ Put the leading edge (top of the paper) in first and push it
gently into the tray.
■ To copy or receive faxes on Legal size paper, unfold the
support flap extension, too.
2 - 6 PAPER
Page 47

To load paper or other media in the multi-purpose tray (MP tray)
When printing envelopes and labels you should only use the
multi-purpose tray.
Open the MP tray and lower it gently.
1
Pull out and unfold the MP tray support flap.
2
MP tray support flap
When loading paper in the MP tray, make sure it touches the
3
back of the tray.
Make sure that the paper is straight and in the proper position
on the MP tray. If it is not, the paper may not be fed properly,
resulting in a skewed printout or a paper jam.
PAPER 2 - 7
Page 48
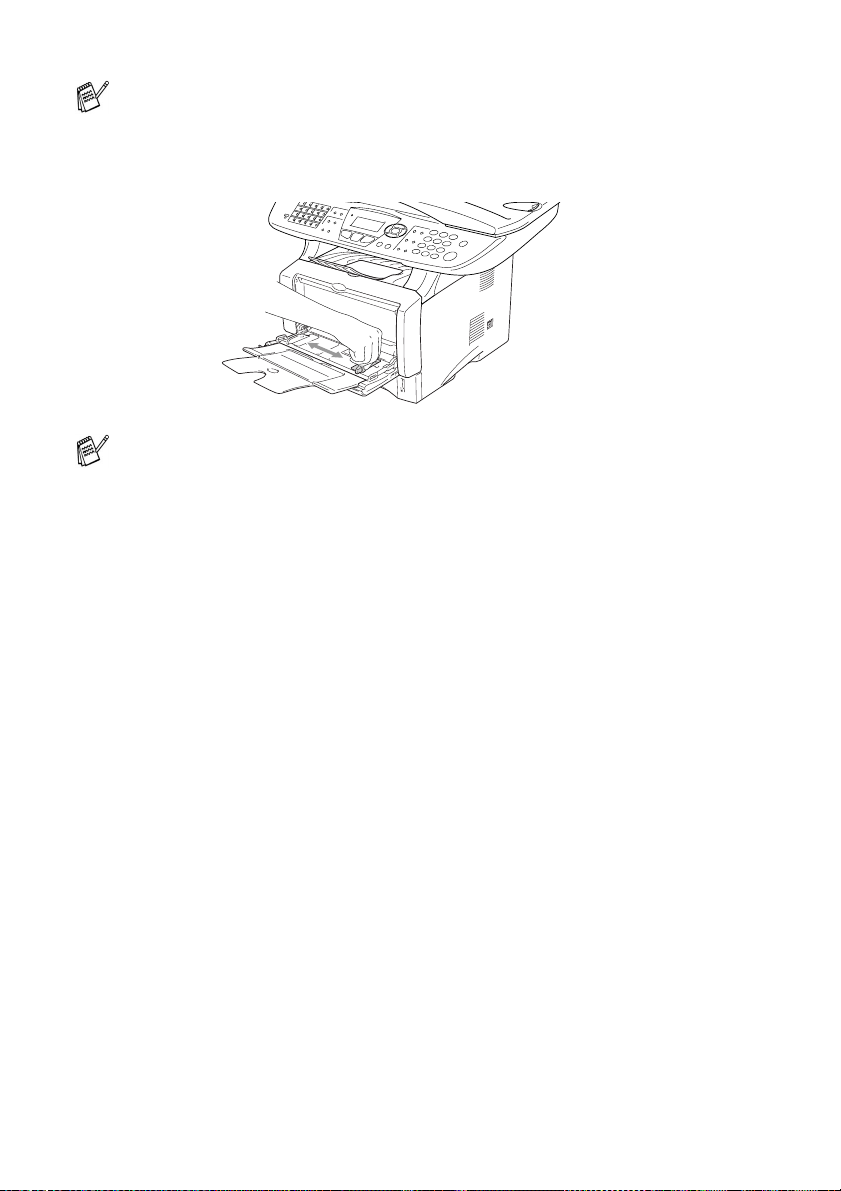
You can place up to 3 envelopes or up to 50 sheets of 80 g/m2
or 20 lb paper in the MP tray.
While pressing the paper-guide release lever, slide the paper
4
guide to fit the paper size.
When you put paper in the MP tray, please remember the
following:
■ The side to be printed on must be face up.
■ During printing, the inside tray rises to feed paper into the
machine.
■ Put the leading edge (top of the paper) in first and push it
gently into the tray.
2 - 8 PAPER
Page 49

To use Automatic Duplexing for fax, copy and print operations
If you want to print on both sides of the paper using the Duplex
feature for fax, copy or print, you will need to set the Paper
Adjustment Lever to the size of paper you are using.
This feature is available for A4, Letter or Legal size paper. (See
Setting Duplex printing for Fax mode
page 10-11 and
Load paper in the Paper Tray or Multi-purpose Tray.
1
Set the Paper Adjustment Lever for Duplex Printing, in the back
2
of the machine, to match your paper size.
Two-sided printing (Duplex Printing)
on page 5-10,
Duplex/N in 1
on page 11-3.)
Letter/Legal
A4
on
Your machine is now ready to print two-sided pages.
3
PAPER 2 - 9
Page 50

3
On-screen programming
User-friendly programming
Your machine is designed to be easy to use with LCD on-screen
programming using the navigation keys. User-friendly programming
helps you take full advantage of all the menu selections your
machine has to offer.
Since your programming is done on the LCD, we have created
step-by-step on-screen instructions to help you program your
machine. All you need to do is follow the instructions as they guide
you through the menu selections and programming options.
Menu table
You can probably program your machine without the User’s Guide.
But to help you understand the menu selections and options that are
found in the machine programs, use the Menu table on page 3-4.
You can program your machine by pressing
the menu numbers.
For example to set
Press
Press
Menu, 2, 2, 2
Enter
.
Resolution
and or to select
to
Fine
:
Menu
followed by
.
Fine
Memory Storage
If there is a power failure, you will not lose your menu settings
because they are stored permanently. Temporary settings (such as
Contrast, Overseas Mode, and so on) will be lost. You may also have
to reset the date and time.
ON-SCREEN PROGRAMMING 3 - 1
Page 51

Navigation keys
* Access the menu
* Go to the next menu level
* Accept an option
* Exit the menu by pressing
repeatedly
* Go back to the previous
menu level
* Scroll through the current
menu level
* Go back to the previous
menu level
* Go forward to the next
menu level
* Exit the menu
You can access the menu mode by pressing
When you enter the menu, the LCD scrolls.
Press
—OR—
Press
—OR—
Press
—OR—
Press
—OR—
Press
—OR—
Press
(If the optional Network board is installed.)
—OR—
Press
—OR—
You can scroll more quickly through each menu level by pressing the
arrow for the direction you want: or .
3 - 2 ON-SCREEN PROGRAMMING
for System Setup menu
1
for Fax menu
2
for Copy menu
3
for Printer menu
4
for Print Reports menu
5
for LAN menu
6
for Initial Setup menu
0
Menu
1.System Setup
2.Fax
3.Copy
4.Printer
Set ▲ ▼ & Enter
4.Printer
5.Print Reports
6.LAN
0.Initial Setup
Set ▲ ▼ & Enter
.
Page 52

Then set an option by pressing
the LCD.
The LCD will then show the next menu level.
Press or to scroll to your next menu selection.
Press
When you finish setting an option, the LCD shows
Enter
Use to scroll backward if you passed your choices or want
to save keystrokes.
The current setting is always the option with “ ”.
.
Enter
when that option appears on
Accepted
.
ON-SCREEN PROGRAMMING 3 - 3
Page 53

Main Menu Submenu Men u
1.
System
Setup
1.Mode Timer — 0 Sec
2.Pap er Type 1 .MP Tray Thin
3.Pap er Size 1 .Up per Tray
Selections
2.Up per T ray Thin
3.Lo wer T ray
(option)
(This menu on ly
appears if you
have the
optional lower
tra y)
2.Lo wer T ray
(option)
Options Descriptions Page
30 Se cs
1 Min
2 Mins
5 Mins
Off
Plain
Thick
Thick er
Transparency
Plain
Thick
Thick er
Transparency
Thin
Plain
Thick
Thick er
Transparency
A4
Lette r
Legal
Execu tive
A5
A6
B5
B6
A4
Lette r
Legal
Execu tive
A5
B5
B6
Sets how long the
machine will stay in
Copy or Scan mode
before returning to
Fax mode.
Sets the type of
paper in the
Multi-purpose tray.
Sets the type of
paper in upper tray.
Sets the type of
paper in lower tray.
Sets the size of paper
in upper tray.
Sets the size of paper
in lower tray.
4-5
4-5
4-5
4-5
4-6
4-6
The factory settings are shown in Bold
with .
3 - 4 ON-SCREEN PROGRAMMING
Page 54
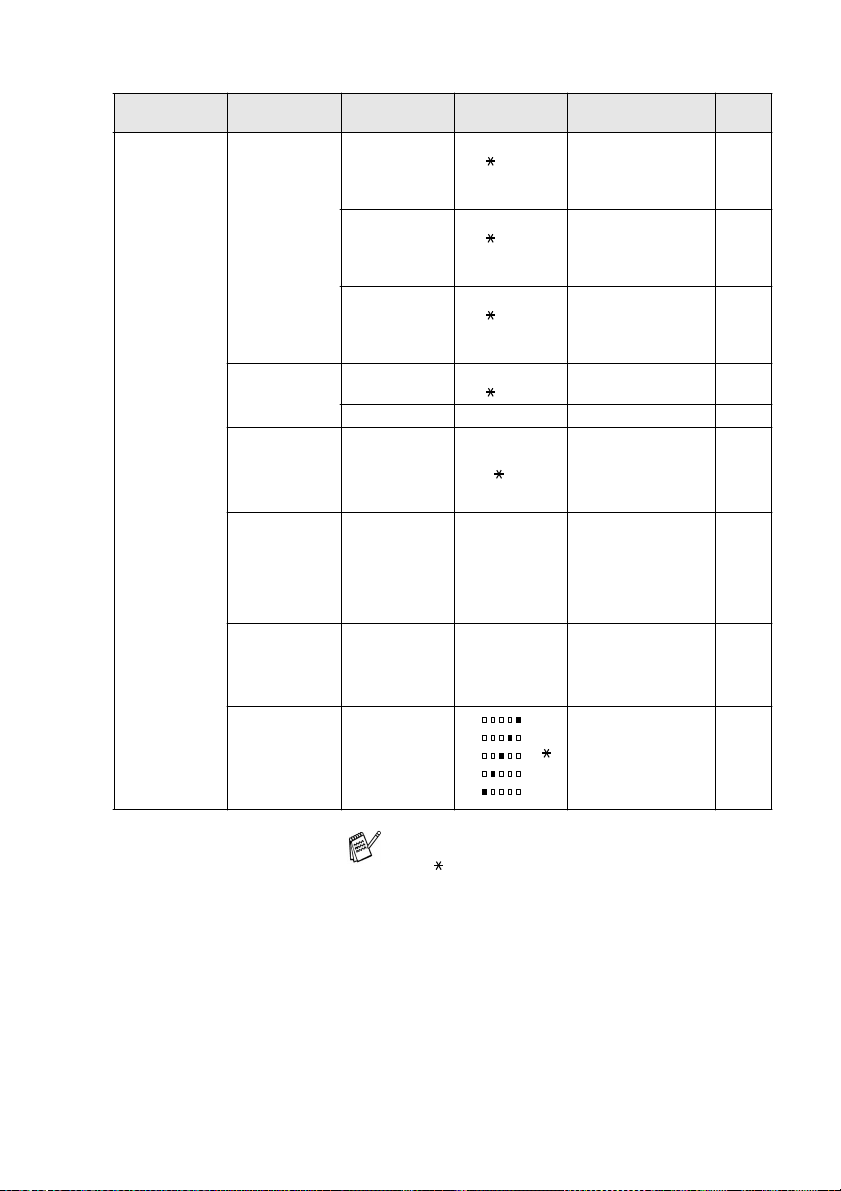
Main Menu Submen u Menu
Selections
System Setup
1.
4.Vo lume 1.Ring Low
(Continued)
2.Beep Vol. Low
3.Spea ker Low
5.Ec ology 1.S ave To ne r On
2.Slee p Tim er Conserves power. 4-9
6. Tray
— Upper Tra y
Use:Co py
(If you have the
optional l ower tray,
see page 3-14.)
7. Tray
— Selects the tray that
Use:Fa x
(This setting only
appears if you have
the optio nal lower
tray, see page
3-14.)
8. Tray
— Selects the tray that
Use:Rp rt
(If you have the
optional l ower tray,
see page 3-14.)
7.LCD
—- +
Contra st
9.LCD
Contra st
(With optional lower
tray.)
Options Descriptions Page
Med
Adjusts the ring
volume.
4-7
High
Off
Med
Adjusts the volume
level of the beeper.
4-7
High
Off
Med
Adjusts the speaker
volume.
4-8
High
Off
Off
MP Only
Auto
Increases the life of
the toner cartridge.
Selects the tray that
will be used for Copy
mode.
will be used for Fax
4-8
4-10
4-11
mode.
will be used for
4-11
Report/List.
- +
Adjusts the contrast of
the LCD.
4-12
- +
- +
- +
The factory settings are shown in Bold
with .
ON-SCREEN PROGRAMMING 3 - 5
Page 55
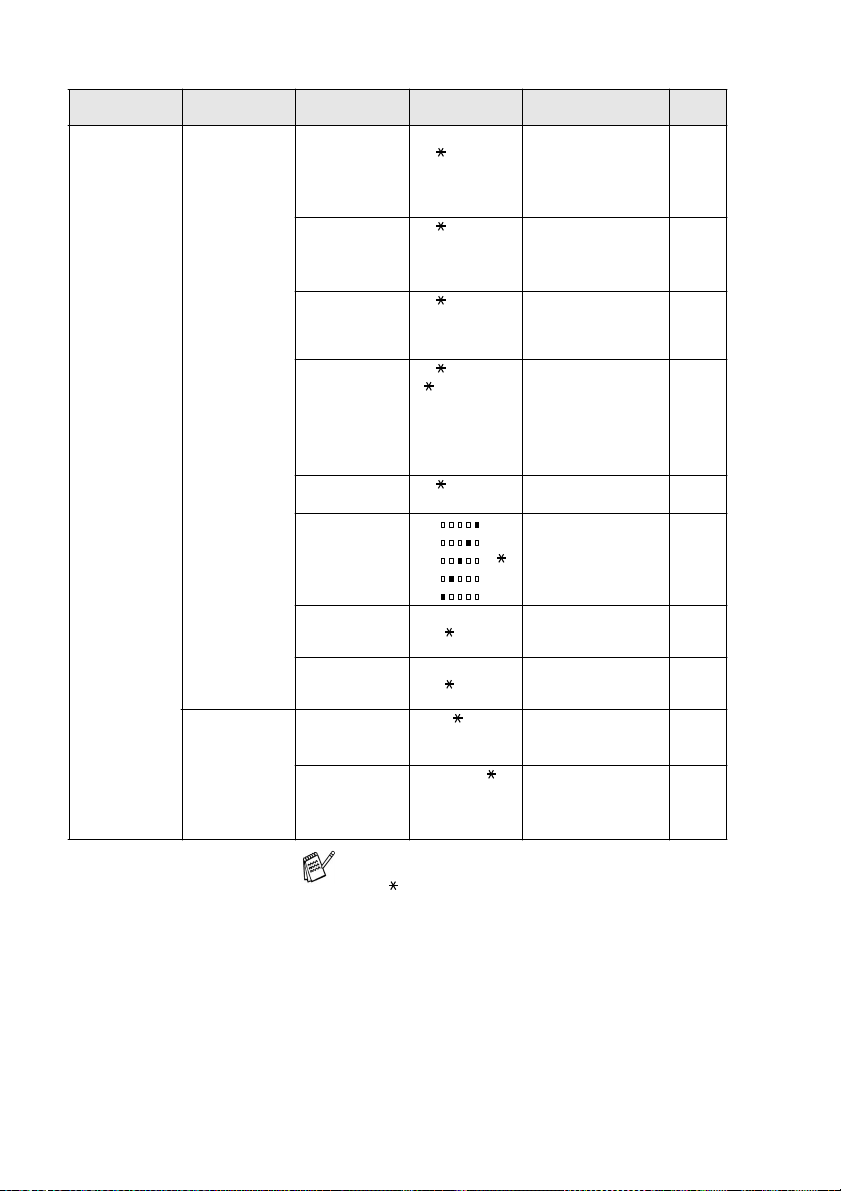
Main Menu Submenu Men u
2.Fax 1.
RX Settings
(In Fax mode
only)
TX Settings
2.
(In Fax mode
only)
Selections
1.Ri ng Count 00
2.F/ T Rin g
Time
3.Ex t.
Tel. R X
4.Re mote
Code
5.Au to
Reduct io n
6.Pr int
Densit y
7.Po ll RX On
8.Du plex On
1.Co ntras t Au to
2.Re solut ion Stand ar d
Options Descriptions Page
01
02
03
04
20
30
40
70
On
Off
On
( 51, #51)
Off
On
Off
- +
- +
- +
- +
- +
Off
Off
Light
Dark
Fine
EX-Fi ne
Photo
Sets the number of
rings before the
machine answers in
FAX or FAX/TE L
mode.
Sets the
pseudo/double-ring
time in FAX/TEL
mode.
Receives fax
messages without
pr essi ng the Star t
key.
You can answer all
calls at an extension
or external phone
and use codes to turn
the machine on or off.
You can personalize
these codes.
Reduces the size of
incoming faxes.
Makes printouts
darker or lighter.
Sets up your
machine to poll
another fax machine.
Prints received faxes
on both sides of the
paper.
Changes the
lightness or darkness
of faxes you send.
Sets the default
resolution for
outgoing faxes.
5-2
5-3
5-4
5-8
5-5
5-6
5-9
5-10
6-6
6-7
The factory settings are shown in Bold
with .
3 - 6 ON-SCREEN PROGRAMMING
Page 56
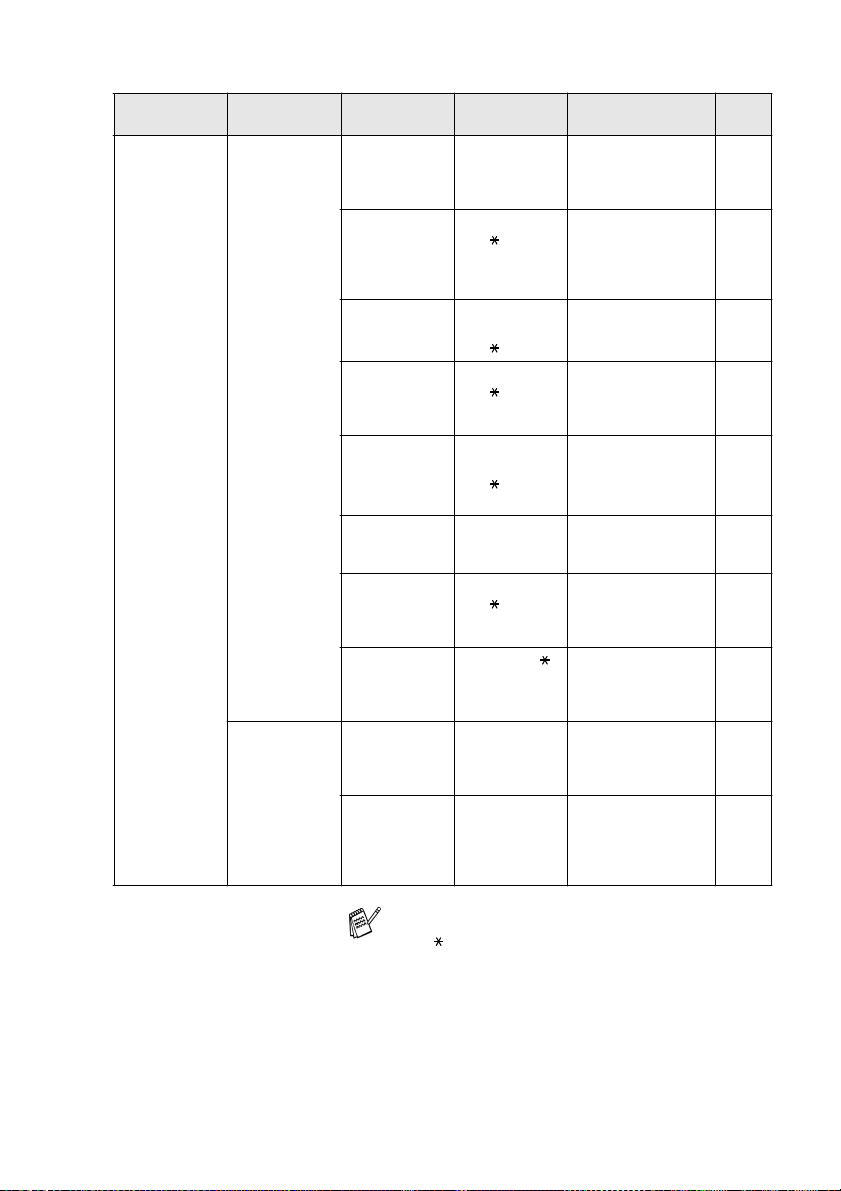
Main Menu Submen u Menu
2.Fax
(Continued)
TX Settings
2.
(Continued)
(In Fax mode
only)
3.Di aler
Settin g
Selections
3.Dela yed
Send
4.Batc h TX On
5.TX f rom
ADF
6.Poll On
7.Cove r
Sheet
8.Cove r
Messa ge
9.Over seas
Mode
0.Glas s Fax
Size
1.One- Touch Stores One-Touch
2.Spee d Dia l — Stores Speed Dial
Options Descriptions Page
— Set the time of day in
Off
Next Fax Only
On
Off
Off
Nex t Fa x Only
On
Off
Print Sample
— You can set up your
On
Off
A4/L et ter
Lega l
24 hour format that
the delayed faxes will
be sent.
Combines delayed
faxes to the same fax
number at the same
time of day into one
transmission.
You can send a fax
without using the
memory.
Sets up the original
on your machine to
be r etrieve d by
another fax machine.
Automatically sends
a Cove r Sheet you
have programmed.
own co mment s for
fax Cover Sheet.
Adjusts for overseas
transmissions, which
can sometimes
cause problems.
Adjusts the scan
area of the scanner
glass to the size of
the original.
Dial numbers, so you
can dial by pressing
one key (and Start).
numbers, so you can
dial by pressing only
a few keys (and
Start).
6-19
6-20
6-10
6-21
6-12
6-13
6-18
6-4
7-1
7-2
The factory settings are shown in Bold
with .
ON-SCREEN PROGRAMMING 3 - 7
Page 57

Main Menu Submenu Men u
2.Fax
(Continued)
3.Di ale r
Sett ing
(continued)
4.Setup
Repo rts
5.Rem ote Fax
Opt
6.Vie w/Del .
Jobs
Selections
3.Se tup
Groups
1.Job Status
Rpt
2.Jo urnal
1.RM T RTV/F X
FWD
2.Pr int F ax — Prints incoming faxes
— — Checks which jobs
Options Descriptions Page
— Sets up a Group
Incomplete
Inc+I mage
All
All+I mage
Every 50 Faxes
Eve ry 6 Hour s
Every 12 Hours
Every 24 Hours
Every 2 Days
Every 7 Days
Off
Off
Remote Retrieve
Fax F orward
number for
Broadcasting.
Initial setup for Job
Status Repo rt and
Journal.
Storing incoming
faxes in memory for
remote retrieval
-ORSets the machine to
forward fax
messages.
stored in the
memory.
are in the memory or
cancels a delayed
fax or polling job.
7-4
9-1
9-2
8-1
5-5
6-11
The factory settings are shown in Bold
with .
3 - 8 ON-SCREEN PROGRAMMING
Page 58
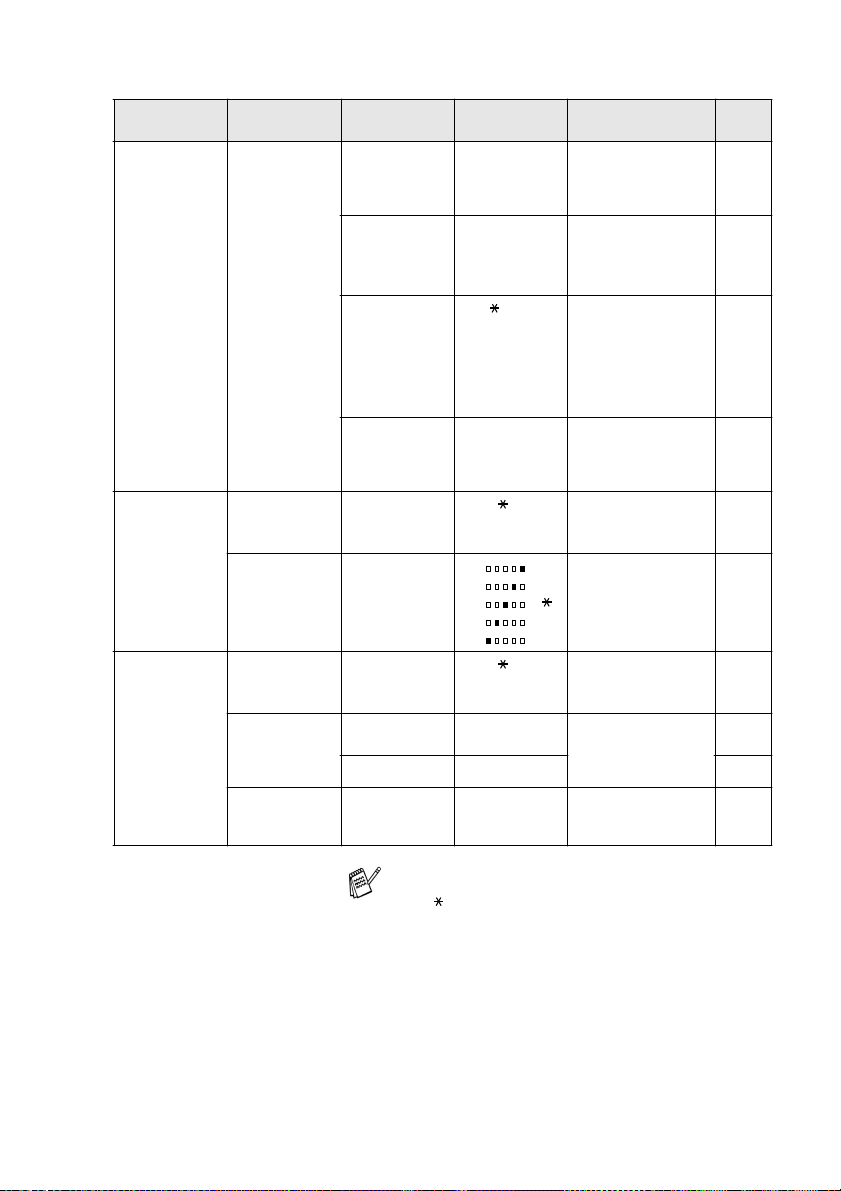
Main Menu Submen u Menu
2.Fax
(Continued)
3.Copy 1.Copy Mod e Auto
4.Printer 1.Emula tio n — Auto
Miscellaneous
0.
2.Co ntrast —- +
2.Pr int
Option s
3.Re set
Printe r
Selections
1.Mem
Security
2.Page
Count er
3.Unique Ring
4.Caller ID
1.Inte rnal
Font
Configuration
2.
— — Returns the machine
Options Descriptions Page
— Prohibits most
Tota l
Copy
Prin t
List /Fax
Off
Set (On)
Disp lay #
Print R eport
Text
Phot o
HP L aserJet
BR-S cript 3
— Prints a list of the
— 11-13
- +
- +
- +
- +
functions except
receiving faxes into
memory.
Let you check
number of total
pages the machine
has printed so far.
Uses the Telephone
Company’s
Distinctive Ring
subscriber service to
register the ring
pattern with the
machine.
View or print a list of
the last 30 Caller IDs
stored in the
memory.
Selects the Copy
resolution for your
type o f origin al .
Adjusts the contrast
for copi es.
Selects the
Emulation mode.
machine’s internal
fonts or current
printer settings.
to the original factory
default settings.
6-23
22- 36
5-13
5-15
10- 16
10- 16
11- 12
11- 13
11- 13
The factory settings are shown in Bold
with .
ON-SCREEN PROGRAMMING 3 - 9
Page 59
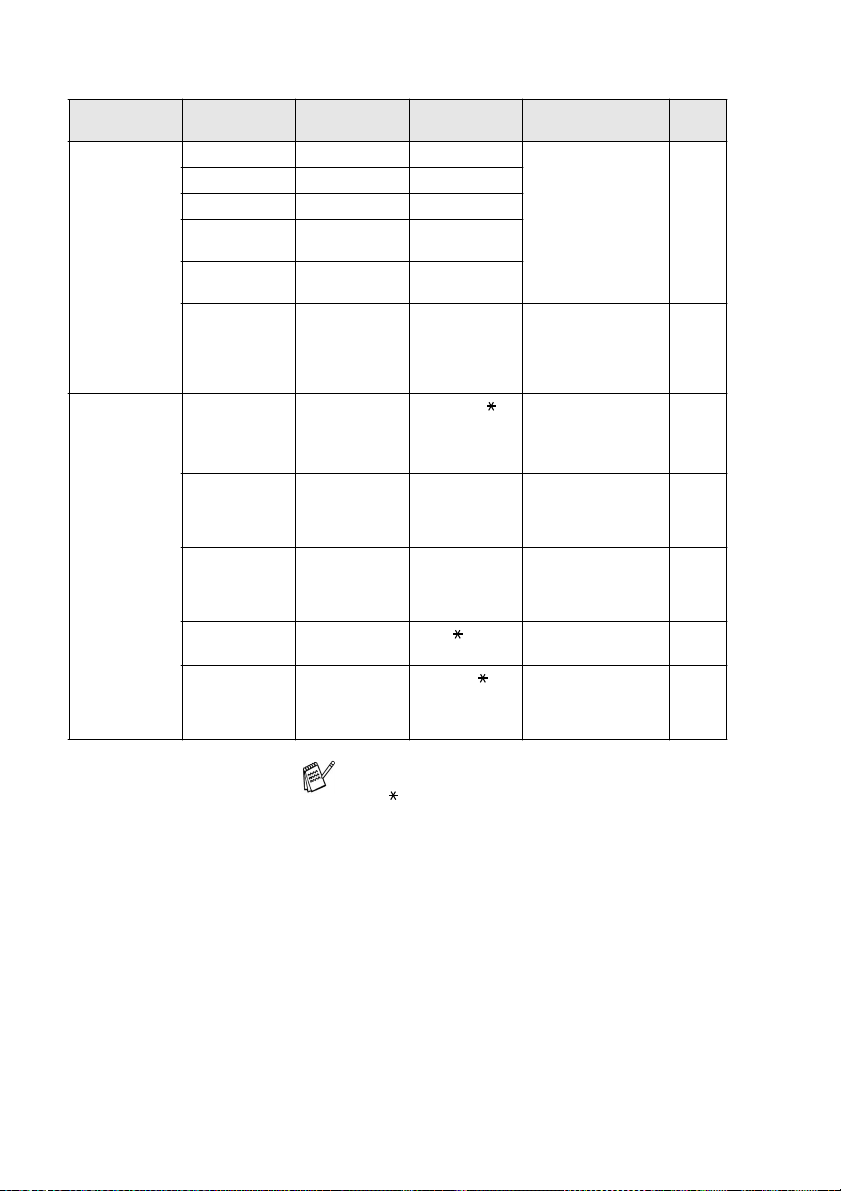
Main Menu Submenu Men u
5.Prin t
Repor ts
0.Init ial
Setup
1.Help List — — You can print these
2.Dialer Dir ——
3.Journal ——
4.Job Status
Rpt
5.
Mach.
Settings
6.Or der
Form
1.Answer
Mode
2.Dat e/Tim e — — Puts the date and
3.Mac hine ID — Fa x
4.Ton e/Pul se — To ne
5.Lan guage — Engli sh
Selections
——
——
— — You can print a
— Fax O nl y
Options Descriptions Page
9-3
5-2
4-1
4-2
4-3
4-4
See
Quic k
Setup
Guide
Fax/T el
External TAM
Manua l
Tel
Name
Pulse
Frenc h
lists and reports.
supplies order form
that you can Fax to
request new
supplies.
You can choose the
receive mode that
best suits your
needs.
time on the LCD and
in headings of faxes
you send.
Program your name,
fax and telephone
number to appear on
each page you fax.
Selects the dialing
mode.
Allows you to change
the LCD Language
for your country.
The factory settings are shown in Bold
with .
3 - 10 ON-SCREEN PROGRAMMING
Page 60
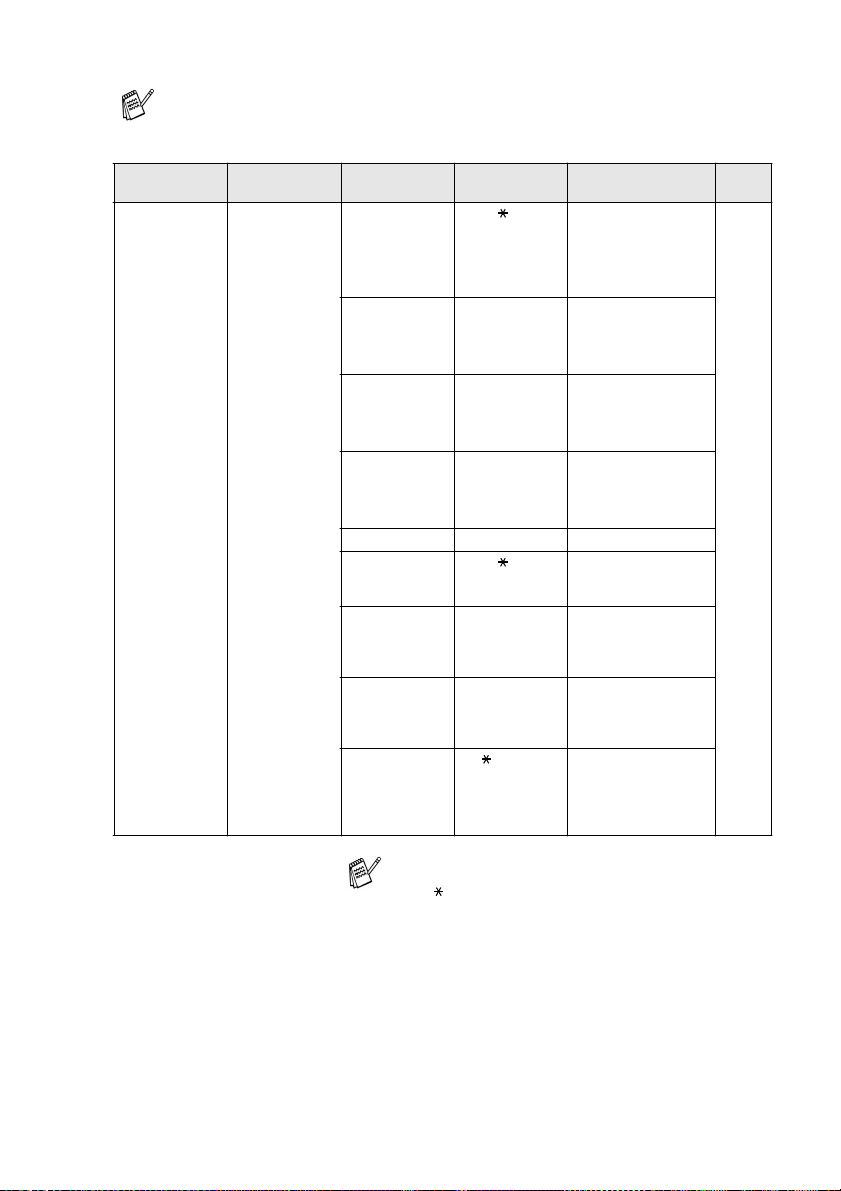
If you installed optional LAN board, the LCD shows the following
LAN menu.
Main Menu Submen u Menu
6.LAN
(option)
1.Se tup
TCP/IP
Selections
1.BOOT Method
2.IP A ddres s [ 000-2 55] .
3.Subnet Mask
4.Gate way [000-255] .
5.Host Name B RN_XXXXX X Enter the Host name.
6.WINS Config
7.WINS
Serve r
8.DNS Ser ver P rim ary
9.APIP A On
Options Descriptions Page
Auto
Stat ic
RARP
BOOT P
DHCP
[000 -255].
[000 -255].
[000 -255]
[000 -255].
[000 -255].
[000 -255].
[000 -255]
[000 -255].
[000 -255].
[000 -255]
Auto
Stat ic
Prim ary
Seco ndary
Seco ndary
Off
You can choose the
BOOT method that
best suits your
needs.
Enter the IP address.
Enter the Subnet
mask.
Enter the Gateway
address.
You can choose the
WINS configuration
mode.
Specifies the IP
address of the
primary or secondary
server.
Specifies the IP
address of the
primary or secondary
server.
Automatically
allocates the IP
address from the
link-local address
range.
See
Networ k
User ’s
Guide
on the
CD-ROM.
The factory settings are shown in Bold
with .
ON-SCREEN PROGRAMMING 3 - 11
Page 61

Main Menu Submenu Men u
6.LAN
(option)
2.Setup
Inte rne t
3.Set up Mail RX1.Au to
4.Set up Mail TX1.Se nder
Selections
1.Ma il
Addres s
2.SMTP Server
3.POP3 Server
4.Ma ilbox
Name
5.Mailbox Pwd
Pollin g
2.Po ll
Freque nc y
3.He ader
4.De l Err or
Mail
5.Notification
Subjec t
2.Si ze Limit On
Notification
3.
Options Descriptions Page
(60
chara cters)
[000- 255].
[000- 255].
[000- 255].
[000- 255]
[000- 255].
[000- 255].
[000- 255].
[000- 255]
(up t o 20
chara cters)
Passw ord:**
****
On
Off
10Min S ets the interval for
Subject+From
+To
None
All
On
Off
MDN
Off
On
— Displays the subject
Off
On
Off
Enter the mail
address.
Enter the SMTP
server address.
Enter the POP3
server address.
Enter the mail box
name.
Enter the password
to login to the POP3
server.
Automatically checks
the POP3 server for
new messages.
checking for new
messages on the
POP3 server.
Selects the contents
of the mail header to
be printed.
Deletes error mails
automatically.
Sends notification
messages.
that is attached to the
Internet Fax data.
Limits the size of
E-mail documents.
Sends notification
messages.
See
Networ k
User ’s
Guide
on the
CD- R OM .
The factory settings are shown in Bold
with .
3 - 12 ON-SCREEN PROGRAMMING
Page 62
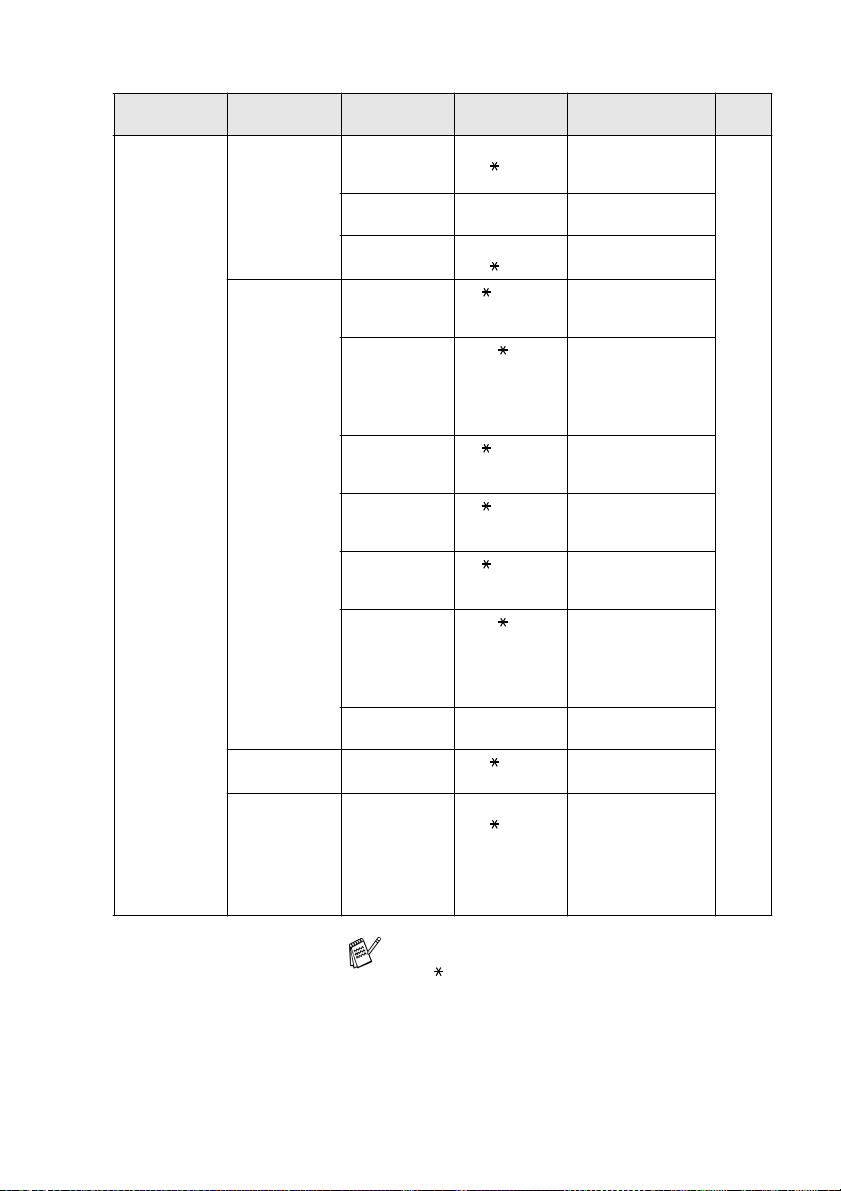
Main Menu Submen u Menu
6.LAN
(option)
(Continued)
5.Setup Relay
6.Setup Misc.
7.Scan to
Email
8.Fax Server
TX
Selections
1.Rly
Broad ca st
2.Rela y
Domai n
3.Rela y
Repor t
1.Netw are On
2.Net Fra me Auto
3.Appl eTalk O n
4.DLC/ LLC On
5.Net BIO S
/IP
6.Ethe rnet Auto
7.Time Zone G MT-XX:XX
— PDF
— On
Options Descriptions Page
On
Off
Rela yXX: Registers the
On
Off
Off
8023
ENET
8022
SNAP
Off
Off
On
Off
100B -FD
100B -HD
10B- FD
10B- HD
JPEG
Off
Relays a document
to another fax
machine.
Domain name.
Prints the Relay
Broadcast Report.
Select On to use the
machine on a
Netware ne two rk.
Lets you specify the
frame type.
Select On to use the
machine on a
Macintosh network.
Select On to use the
machine on a
DLC/LLC network.
Select On to use the
machine on a Net
BIOS/IP network.
Selects Ethernet link
mode.
Sets the time zone
for your country.
Selects the file type.
You can store
prefix/suffix address
in the machine and
can send e-mail for a
faxserver service
system
automatically.
See
Networ k
User ’s
Guide
on the
CD-ROM.
The factory settings are shown in Bold
with .
ON-SCREEN PROGRAMMING 3 - 13
Page 63
If you have the optional paper tray, the LCD displays these
options. (
Menu, 1, 6/Menu, 1, 7/Menu, 1, 8
)
Main Menu Submenu Men u
1.Syst em
Setup
6.Tray
Use: Cop y
7.Tray
Use: Fax
8.Tray
Use: Rpr t
Selections
— Upper Tray
— Upper Tray
— Upper Tray
Options Descriptions Page
Lower Tray
MP On ly
Auto
Lower Tray
Auto
Auto
Separ ation
Lower Tray
Auto
Select the tray that
will be used for
copying.
Select the tray that
will be used for
faxing.
Select the tray that
will be used for
printing reports.
4-10
4-11
4-11
The factory settings are shown in Bold
with .
3 - 14 ON-SCREEN PROGRAMMING
Page 64

4
Getting started
Initial Setup
Setting the Date and Time
Your machine displays the date and time and if you set up the Machine ID
it prints on every fax you send. If there is a power failure, you may have
to reset the date and time. All other settings will not be affected.
Press
1
Enter the last two digits of the year.
2
Press
Enter two digits for the month.
3
Press
(For example, enter 09 for September, or 10 for October.)
Enter two digits for the day.
4
Press
(For example, enter 06 for 6th.)
Enter the time in 24-Hour format.
5
Press
(For example, enter 15:25 for 3:25 P.M.)
Press
6
the machine is in Standby mode.
Menu, 0, 2
Enter
Enter
Enter
Enter
Stop
.
.
.
.
.
. The LCD now shows the date and time whenever
02.Date/Time
Year:20XX
Set & Enter
GETTING STARTED 4 - 1
Page 65

Setting the Machine ID
You should store your name or company name and fax number and
telephone number to be printed on all fax pages that you send.
Press
1
Enter your fax number (up to 20
2
digits).
Press
Enter your telephone number (up
3
to 20 digits).
Press
(If your telephone number and fax number are the same, enter
the same number again).
The telephone number you enter is only used for Cover Sheet
features.(See Composing the electronic Cover Sheet on page
6-12.)
You can not enter a hyphen.
Use the dial pad to enter your name
4
(up to 20 characters).
Press
(See Entering text on page 4-3.)
Press
5
The LCD will show the date and time.
Menu, 0, 3
Enter
Enter
Enter
.
Stop
.
.
.
.
03.Machine ID
Fax:
Set & Enter
If the Machine ID has already been programmed, the LCD will
ask you to press
changing.
4 - 2 GETTING STARTED
to make a change or 2 to exit without
1
Page 66

Entering text
When you are setting certain functions, such as the Machine ID, you
may need to type text into the machine. Most number keys have
three or four letters printed above them. The keys for
and do
0, #
not have printed letters because they are used for special
characters.
By pressing the appropriate number key repeatedly, you can access
the character you want.
Press Key one time two tim es three times four times
2 ABC2
3 DEF 3
4 GH I 4
5 JKL5
6 MNO 6
7 PQRS
8 TUV 8
9 WXY Z
Inserting spaces
To enter a space, press once between numbers and twice
between characters.
Making corrections
If you entered a letter incorrectly and want to change it, press to
move the cursor under the incorrect character. Then press
Clear/Back
. The letter above the cursor will be deleted. Re-enter
the correct character.
Repeating letters
If you need to enter a character that is on the same key as the
previous character, press to move the cursor to the right before
you press the key again.
GETTING STARTED 4 - 3
Page 67
Special characters and symbols
Press , # or 0, and then press or to move the cursor under
the special character or symbol you want. Then press
select it.
Press for (space) ! " # $ % & ’ ( ) + , - . /
Enter
to
Press
#
Press
0
The Telephone Consumer Protection Act of 1991 makes it unlawful
for any person to use a computer or electronic device to send any
message via a telephone fax machine unless such messages
clearly contain, in a margin at the top or bottom of each transmitted
page, or on the first page of the transmission, the date and time it
is sent and an identification of the business or other entity or other
individual sending the message and the telephone number of the
sending machines or such business, other entity or individual.
In order to program this information into your machine, complete
the steps described on page 4-2.
for : ; < = > ? @ [ ] ^ _
for É À È Ê Î Ç Ë Ö 0
NOTICE (For USA)
Setting Tone and Pulse dialing mode
Press
1
Press or to select
2
Pulse
Press
Press
3
Menu, 0, 4
(or
Tone
Enter
.
Stop
.
).
.
04.Tone/Pulse
▲ Tone
▼ Pulse
Set ▲ ▼ & Enter
4 - 4 GETTING STARTED
Page 68

System Setup
Setting the Mode Timer
The machine has three temporary mode keys on the control panel:
Fax, Copy and Scan. You can change the number of seconds or
minutes the machine takes after the last Copy or Scan operation
before it returns to Fax mode. If you select Off, the machine stays in
the mode you used last.
Press
1
Press or to select
2
0 Sec, 30 Secs, 1 Min,
2 Mins, 5 Mins or Off
Press
3
Menu, 1, 1
Enter
.
.
.
11.Mode Timer
▲ 0 Sec
30 Secs
▼ 1 Min
Set ▲ ▼ & Enter
Setting the Paper Type
To get the best print quality, set the machine for the type of paper you
are using.
Press
1
paper type for
—OR—
Press
paper type for
—OR—
If you have the optional paper tray, press
the paper type for
Menu, 1, 2, 1
Menu, 1, 2, 2
to set the
MP Tray
Upper Tray
.
to set the
Lower Tray
12.Paper Type
1.MP Tray
2.Upper Tray
3.Lower Tray
Set ▲ ▼ & Enter
.
Menu, 1, 2, 3
.
to set
GETTING STARTED 4 - 5
Page 69
Press or to select
2
Plain, Thick, Thicker
Transparency
Press
3
Press
4
You can select
only when A4,
Enter
Stop
.
.
.
Transparency
Letter
or
or
Legal
,
Thin
12.Paper Type
1.MP Tray
▲ Plain
▼ Thick
Set ▲ ▼ & Enter
for Upper Tray and Lower Tray
is selected in
Menu, 1, 3
.
Setting the Paper Size
You can use eight sizes of paper for printing copies: A4, letter, legal,
executive, A5, A6, B5 and B6 and three sizes of paper for printing
faxes: A4, letter and legal. When you change the size of paper in the
machine, you will need to change the setting for Paper Size at the
same time so your machine can fit an incoming fax or reduced copy
on the page.
Press
1
Press or to select A4,
2
Letter, Legal, Executive, A5
A6, B5
Press
Press
3
With optional paper tray (LT-5000)
Press
1
paper size for
—OR—
Press
paper size for
Press or to select A4,
2
A5
Press
Press
3
Menu, 1, 3
or B6.
Enter
.
Stop
Menu, 1, 3, 1
Menu, 1, 3, 2
,
, B5 and B6.
A6
Enter
.
Stop
.
.
to set the
Upper Tray
to set the
Lower Tray
.
13.Paper Size
▲ A4
,
.
Letter, Legal, Executive
Letter
▼ Legal
Set ▲ ▼ & Enter
13.Paper Size
1.Upper Tray
2.Lower Tray
Set ▲ ▼ & Enter
,
■ If you are using the optional paper tray, paper size A6 is not
available.
■ If you select
select A4,
4 - 6 GETTING STARTED
Transparency
Letter
or
Legal
in Menu
.
, 1, 2, you can only
Page 70

Setting the Ring Volume
You can adjust the ring volume when your machine is idle (not being
used). You can turn the ring
level.
or you can select the ring volume
Off
Press
1
Press or to select
2
(
Press
Press
3
—OR—
In Fax mode, press or to adjust the volume level. Every time
you press these keys, the machine will ring so you can hear the
active setting as the LCD shows it. The volume changes with each
key press. The new setting will stay until you change it again.
Menu, 1, 4, 1
Low, Med, High
Enter
Stop
.
.
or
.
Off
).
14.Volume
1.Ring
▲ Med
▼ High
Set ▲ ▼ & Enter
Setting the Beeper Volume
You can change the beeper volume. The default (factory) setting is
. When the beeper is on, the machine beeps every time you
Med
press a key or make a mistake and after a fax is sent or received.
Press
1
Press or to select your
2
option.
(
Press
Press
3
Menu, 1, 4, 2
Low, Med, High
Enter
Stop
.
.
or
.
Off
14.Volume
2.Beep Vol.
▲ Med
)
▼ High
Set ▲ ▼ & Enter
GETTING STARTED 4 - 7
Page 71
Setting the Speaker Volume
You can adjust the machine’s one-way speaker volume.
Press
1
Press or to select
2
(
Press
Press
3
—OR—
In Fax mode, you can adjust the speaker volume by pressing
Monitor
Press or to adjust the volume level. The LCD shows the setting
you are choosing. Each key press changes the volume to the next
setting. The new setting will remain until you change it again.
Menu, 1, 4, 3
Low, Med, High
Enter
Stop
, and then selecting a speaker volume level.
.
.
or
.
Off
14.Volume
3.Speaker
).
▲ Med
▼ High
Set ▲ ▼ & Enter
Save Toner
You can conserve toner using this feature. When you set Save Toner
to On, print appears somewhat lighter. The default setting is
Press
1
Press or to select On (or
2
Off
Press
3
Press
4
Menu, 1, 5, 1
).
Enter
Stop
.
.
.
15.Ecology
1.Save Toner
▲ On
▼ Off
Set ▲ ▼ & Enter
Off
.
4 - 8 GETTING STARTED
Page 72

Sleep Timer
Setting the Sleep Time reduces power consumption by turning off
the fuser inside the machine, while it is idle. You can choose how
long the machine is idle (from 00 to 99 minutes) before it goes into
sleep mode. The timer is automatically reset when the machine
receives a Fax or PC data, or makes a copy. The factory setting is 05
minutes. If you try to print or copy in sleep mode, there will be a short
delay while the fuser warms up to working temperature.
Press
1
Use the dial pad to enter the length of time the machine is idle
2
before it goes into sleep mode (00 to 99).
Press
3
Press
4
■ If you want to turn Sleep mode off, press
■ If the machine is in Sleep mode when you change the sleep
Menu, 1, 5, 2
Enter
Stop
Cancel
timer, the new setting will take effect the next time the
machine copies, prints or is restarted.
.
.
simultaneously in Step 2.
.
Secure
and
Job
Turning off the Scanner Lamp
The scanner lamp stays on for 16 hours before automatically
switching off to preserve the life of the lamp. You can turn off the
scanner lamp manually if you wish by pressing the and keys
simultaneously. The scanner lamp will remain turned off until the next
time you use the scanning feature.
Turning off the scanner lamp will also reduce the power
consumption.
Please note that turning the lamp off regularly will reduce the
lamp’s life. Some people prefer to turn the lamp off as they leave
the office, or late at night at home. This is not necessary for
normal day to day use.
GETTING STARTED 4 - 9
Page 73
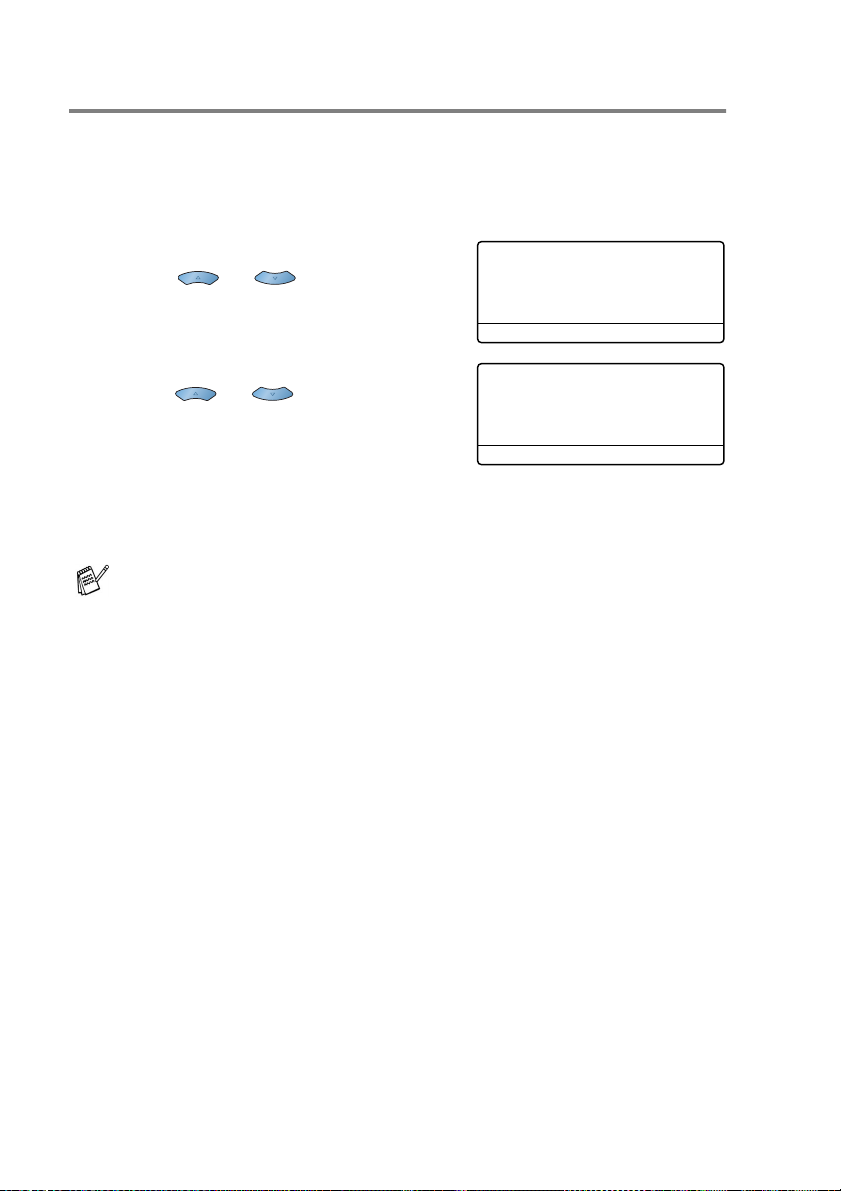
Setting the Tray Use for Copy mode
The default setting of
optional Lower Tray or the MP tray when paper is out in Upper Tray
or *2 when the size of the original will fit best on the paper in Lower
Tray.
Press
1
Press or to select
2
Upper Tray, MP Only
—OR—
If you have the optional paper tray,
press or to select
Upper Tray, Lower Tray, MP
Only
Press
3
Press
4
*1 Copies will automatically be printed from Lower Tray only if
*2 When using the ADF, copies will automatically be printed
Menu, 1, 6
or
Enter
Stop
the Paper Size setting for Lower Tray is the same as Upper
Tray.
from Lower Tray if the Paper Size setting for Lower Tray is
different than Upper Tray and this paper size is more
suitable for the scanned original.
Auto
.
.
.
allows*1 your machine to choose the
Auto
.
, or
Auto
16.Tray Use:Copy
▲ Upper Tray
.
MP Only
▼ Auto
Set ▲ ▼ & Enter
16.Tray Use:Copy
▲ Upper Tray
Lower Tray
▼ MP Only
Set ▲ ▼ & Enter
4 - 10 GETTING STARTED
Page 74
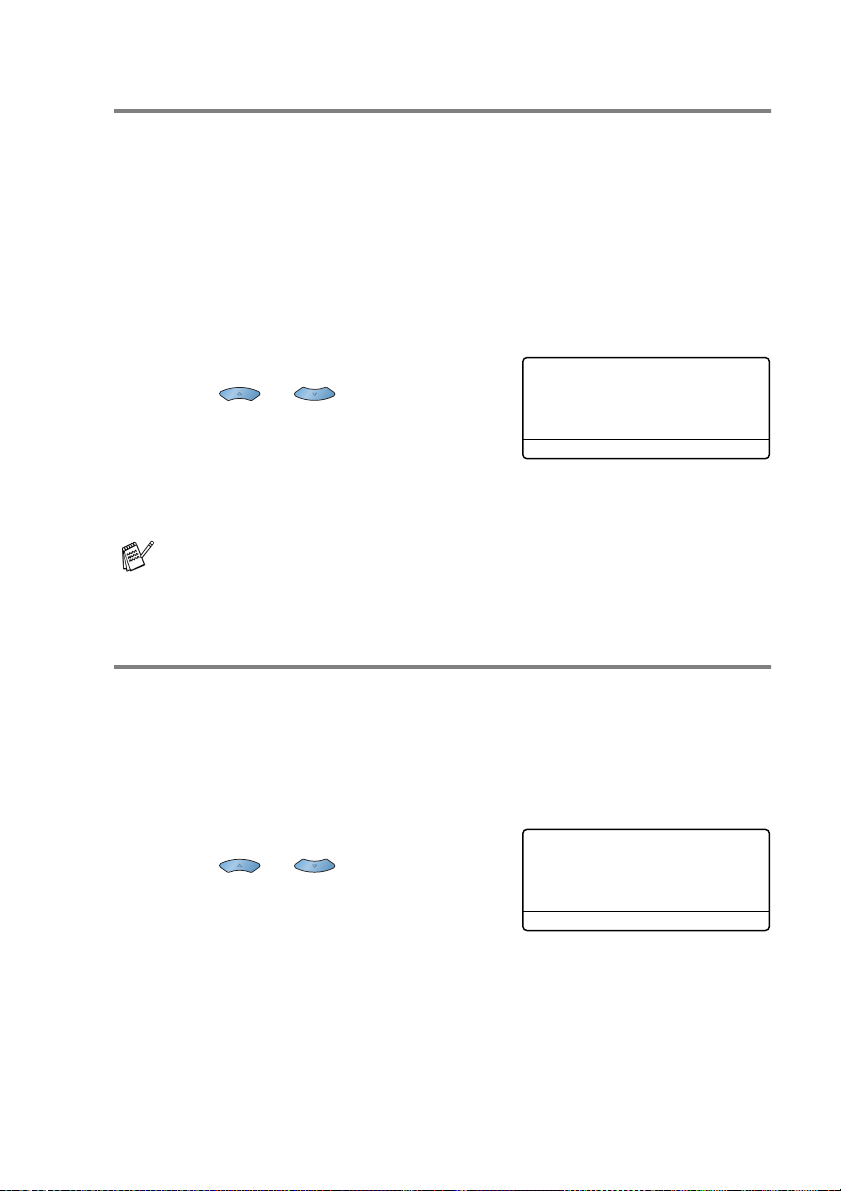
Setting the Tray Use for Fax mode
If your machine doesn’t have the optional Lower Tray, you can skip
this setting.
The default setting of
optional Lower Tray if Upper Tray is out of paper or if incoming faxes
will fit best on the paper in Lower Tray.
Auto Separation
of the fax document from Upper Tray. All the remaining pages are
printed from the Lower Tray.
Press
1
Press or to select
2
Upper Tray, Lower Tray, Auto
or
Press
3
Press
4
If Auto Reduction is turned on, incoming faxes will be printed
from the tray that is set for Auto Reduction. (See
reduced incoming fax (Auto Reduction)
Menu, 1, 7
Auto Separation
Enter
Stop
allows the machine always to print the first page
.
.
allows your machine to choose the
Auto
.
.
17.Tray Use:Fax
▲ Upper Tray
Lower Tray
▼ Auto
Set ▲ ▼ & Enter
on page 5-5.)
Printing a
Setting the Tray Use for Printing Reports
If your machine doesn’t have the optional Lower Tray, you can skip
this setting.
The default setting of
optional Lower Tray if Upper Tray is out of paper or if reports will fit
best on the paper in Lower Tray.
Press
1
Press or to select
2
Upper Tray, Lower Tray
Auto
Press
3
Press
4
Menu, 1, 8
.
Enter
Stop
.
.
allows your machine to choose the
Auto
.
, or
18.Tray Use:Rprt
▲ Upper Tray
Lower Tray
▼ Auto
Set ▲ ▼ & Enter
GETTING STARTED 4 - 11
Page 75

Setting the LCD Contrast
You can change the contrast to help the LCD look lighter or darker.
Press
1
—OR—
If you have the optional Lower
Tray, press
Press to increase the contrast.
2
—OR—
Press to decrease the contrast.
Press
Press
3
Menu, 1, 7
Menu, 1, 9
Enter
.
Stop
.
.
.
17.LCD Contrast
-+
Set & Enter
4 - 12 GETTING STARTED
Page 76
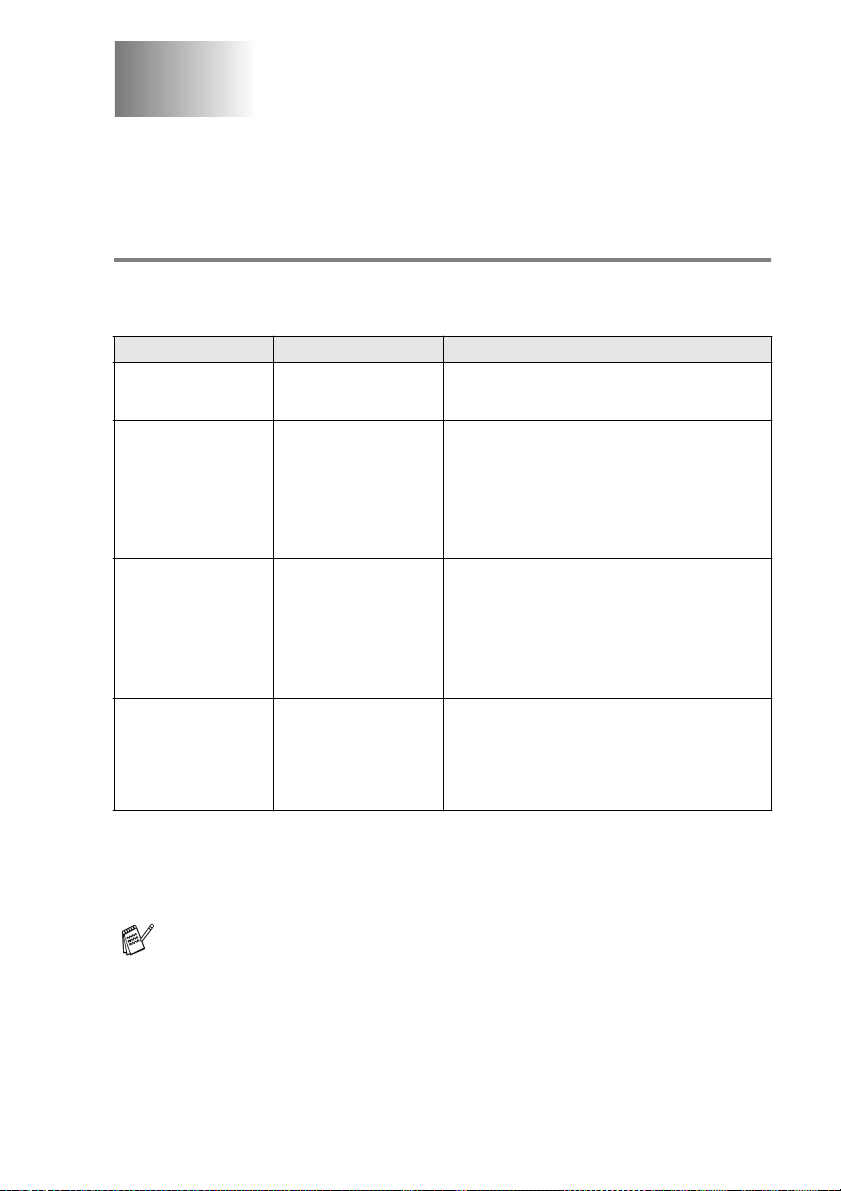
5
RX Settings
Basic receiving operations
Choosing the Answer Mode
There are four different Answer Modes for your machine. You can
choose the mode that best suits your needs.
LCD How it works When to use it
Fax Onl y
(a utom atic recei ve)
Fax/ Tel*
(fax and telephone)
(with an external or
extension telephone)
Exte rnal TAM
(with an external
answering machine)
Manu al
(manual receive)
(with an external or
extension telephone or
with Unique Ring)
The machine
automatically answers
every call as a fax.
The machine controls the
line and automatically
answers every call. If the
call is a fax it will receive
the fax. If the call is not a
fax it will ring
(pseudo/double ring) for
you to pick up the call.
The external answering
machine (TAM)
automatically answers
every call.
Voice messages are
stored on the external
TAM. Fax messages are
printed.
You control the phone
line and must answer
every call yourself.
For dedicated fax lines.
Use this mode if you expect to receive lots of fax
messages and few telephone calls. You cannot
have an answering machine on the same line, even
if it is on a separate wall jack/phone socket on the
same line. You cannot use the telephone
company’s Voice Mail in this mode.
Use this mode if you have an external answering
machine on your phone line.
The TAM setting works only with an external
answering machine. Ring Delay and F/T Ring Time
do not work in this setting.
Use this mode when you are using a computer
modem on the same line or if you don’t receive
many fax messages or with Unique Ring.
If you hear fax tones, wait until the machine takes
over the call, then hang up. (See EXT. TE L. RX on
page 5-4.)
* In
Fax/Tel
mode you must set the Ring Count and F/T Ring Time.
If you have extension phones on the line, keep the Ring Count set to
four rings.
The MP tray is not available with Fax Receive.
RX SETTINGS 5 - 1
Page 77
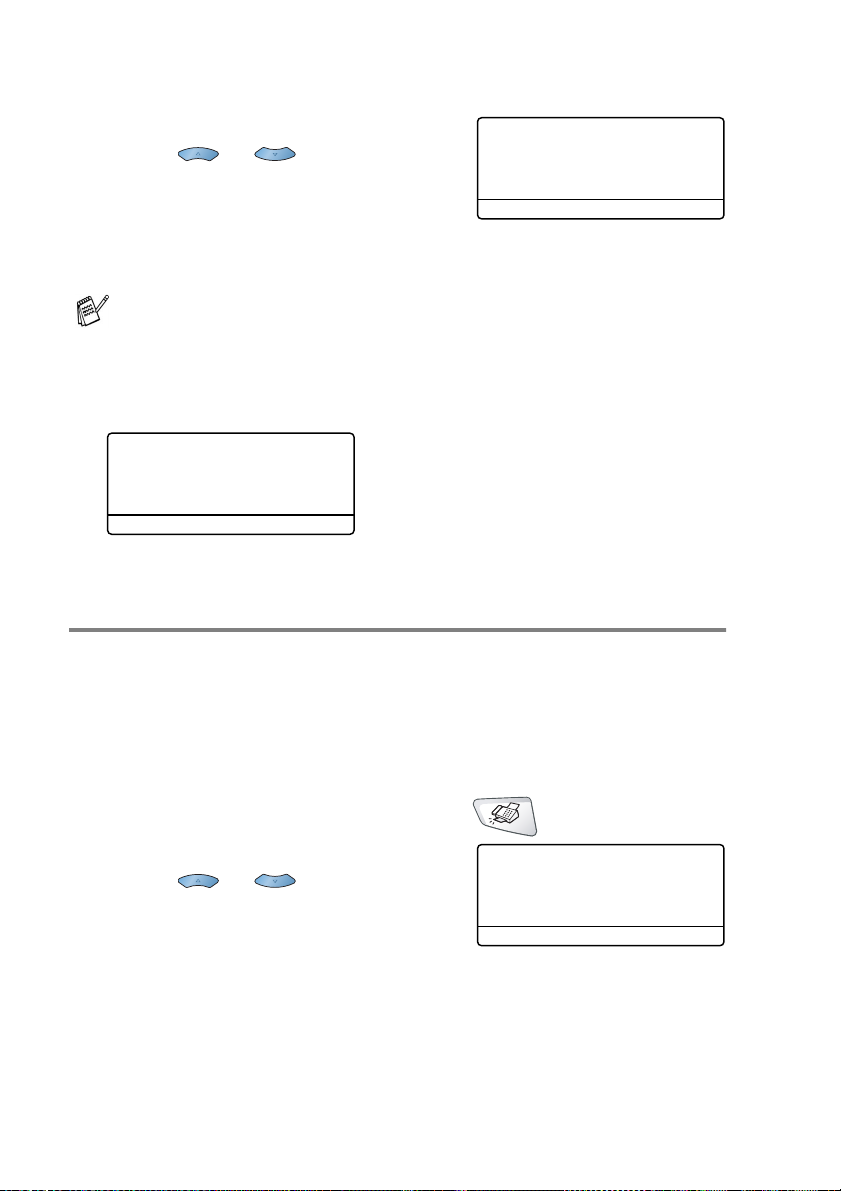
To select or change your Answer Mode
Press
1
Press or to select
2
Only, Fax/Tel, External TAM
or
Press
Press
3
If you are changing the Answer Mode while in another
operation, the LCD will return to that operation.
Menu, 0, 1
Manual
Enter
Stop
.
.
03/01/2003 18:15
External TAM
Dial & Start
.
Fax
.
01.Answer Mode
▲ Fax Only
Fax Only
Fax/Tel
External TAM
Manual
Fax/Tel
▼ External TAM
Set ▲ ▼ & Enter
Setting the Ring Count
The Ring Count sets the number of times the machine rings before it
answers in
phones on the same line as the machine or subscribe to the
telephone company’s Unique Ring service, keep the Ring Count
setting of 4. (See
extension telephones
If it is not illuminated in green, press (
1
Press
2
Press or to select how
3
many times the line rings before
the machine answers (00-04).
Press
(If you select 00, the line won’t ring at all.)
Press
4
Fax Only
Menu, 2, 1, 1
Enter
Stop
or
Fax/Tel
EXT. TEL. RX
on page 5-7.)
.
.
.
mode. If you have extension
on page 5-4 and
21.RX Settings
▲ 03
▼ 04
Set ▲ ▼ & Enter
Operation from
).
Fax
1.Ring Count
5 - 2 RX SETTINGS
Page 78
Setting the F/T Ring Time (Fax/Tel mode only)
If you set the Receive Mode to Fax/Tel, you’ll need to decide how long
the machine will signal you with its special pseudo/double-ring when
you have a
This pseudo/double-ring happens after the initial ringing from the
phone company. Only the machine rings (for 20, 30, 40 or 70 seconds)
and no other phones on the same line will ring with the special
pseudo/double-ring. However, you can still answer the call on any
extension phone (in a separate wall jack/phone socket) on the same
line as the machine. (See Operation from extension telephones on
page 5-7.)
call. (If it’s a fax call, the machine prints the fax.)
voice
If it is not illuminated in green, press (
1
Press
2
Press or to select how
3
long the machine will ring to alert
you that you have a voice call.
Press
Press
4
Even if the caller hangs up during the pseudo/double-ringing,
the machine will continue to ring for the set time.
Menu, 2, 1, 2
Enter
Stop
.
.
.
21.RX Settings
2.F/T Ring Time
▲ 20
▼ 30
Set ▲ ▼ & Enter
Fax
).
RX SETTINGS 5 - 3
Page 79
EXT. TEL. RX
When you use this feature, you don’t have to press
Receive Code
the machine to receive fax calls automatically, even if you lift the
handset of an extension or external phone. When you see
Receiving
handset of an extension phone connected to another wall jack/phone
socket, just replace the handset and your machine will do the rest.
Selecting
lifting the handset of an external or extension phone, and then press
on the machine
Start
—OR—by pressing
Operation from extension telephones on page 5-7.)
If this feature is set to On, but your machine doesn’t connect a
fax call when you lift a extension or external phone handset,
press the Fax Receive Code
If you send faxes from a computer on the same phone line and
the machine intercepts them, set EXT. TEL. RX to
If it is not illuminated in green, press (
1
Press
2
Use or to select On (or
3
Off
Press
Press
4
on the LCD or when you hear ‘chirps’ through the
Off
Menu, 2, 1, 3
).
Enter
Stop
when you answer a fax call. Selecting On allows
51
means you’ll have to activate the machine yourself by
if you are not at your machine. (See
51
.
51
Fax
.
.
.
21.RX Settings
3.Ext. Tel. RX
▲ On
▼ Off
Set ▲ ▼ & Enter
Start
).
or the Fax
.
Off
5 - 4 RX SETTINGS
Page 80
Printing a reduced incoming fax (Auto Reduction)
If you choose On, the machine automatically reduces an incoming
fax to fit on one page of letter, legal or A4 size paper, regardless of
the paper size of the original. The machine calculates the reduction
ratio by using the page size of the original and your Paper Size
setting (
Menu, 1, 3
).
If it is not illuminated in green, press (
1
Press
2
If you have the optional paper
3
lower tray, press or to
select
Tray
Press
Use or to select On (or
4
Press
Press
5
If you receive faxes that are split onto two pages, turn on this
setting.
Menu, 2, 1, 5
Upper Tray
.
Enter
Enter
Stop
.
.
.
.
or
Lower
21.RX Settings
5.Auto Reduction
▲ On
▼ Off
Set ▲ ▼ & Enter
).
Off
Fax
).
Printing a fax from the memory
If you use Remote Rtrv or Fax Forward features, you can still print a
fax from the memory when you are at your machine.
Press
1
Press
2
After printing has finished,
3
press
Menu, 2, 5, 2
.
Start
.
Stop
.
25.Remote Fax Opt
2.Print Fax
Press Start
RX SETTINGS 5 - 5
Page 81

Setting the Print Density
You can adjust print density, making your printed pages darker or
lighter.
If it is not illuminated in green, press (
1
Press
2
Press to make the print darker.
3
—OR—
Press to make the print lighter.
Press
Press
4
Menu, 2, 1, 6
Enter
Stop
.
.
.
21.RX Settings
6.Print Density
Set & Enter
).
Fax
-+
5 - 6 RX SETTINGS
Page 82

Advanced receiving operations
Operation from extension telephones
If you answer a fax call on an extension telephone, or an external
telephone in the EXT. jack, you can make your machine take the call
by using the Fax Receive Code. When you press the Fax Receive
Code
(See
If the machine answers a voice call and pseudo/double-rings for you
to take over, use the Telephone Answer Code
an extension phone. (See
only) on page 5-3.)
If you answer a call and no one is on the line, you should assume that
you’re receiving a manual fax.
■ At an extension phone (on a separate telephone wall jack/phone
socket), press
then hang up.
■ At an external phone (connected to the machine’s EXT jack),
press
hang up (the LCD shows
Your caller will have to press
, the machine starts to receive a fax.
51
EXT. TEL. RX
51
on page 5-4.)
Setting the F/T Ring Time (Fax/Tel mode
, wait for fax-receiving tones (chirps), and
51
and wait for the phone to be disconnected before you
Receiving
Start
#51
).
to send the fax.
to take the call at
For FAX/TEL mode only
When the machine is in FAX/TEL mode, it will use the F/T Ring Time
(pseudo/double-ringing) to alert you to pick up a voice call.
Lift the external telephone's handset, and then press
answer.
If you’re at an extension phone, you’ll need to lift the handset during
the F/T Ring Time and then press
no one is on the line, or if someone wants to send you a fax, send the
call back to the machine by pressing
between the double rings. If
#51
.
51
Monitor
RX SETTINGS 5 - 7
to
Page 83
Using a cordless external handset
If your cordless telephone is connected to the EXT. jack of the
machine and you typically carry the cordless handset elsewhere, it is
easier to answer calls during the Ring Count. If you let the machine
answer first, you will have to go to the machine so you can press
Monitor
to transfer the call to the cordless handset.
Changing the remote codes
Remote Codes might not work with some telephone systems. The
preset Fax Receive Code is
Code is
If you are always disconnected when accessing your external
TAM remotely, try changing the Fax Receive Code and
Telephone Answer Code to another three-digit code (such as
###
# 51
and
.
999
).
. The preset Telephone Answer
51
If it is not illuminated in green, press (
1
Press
2
Press or to select On (or
3
Off
Press
If you want to, enter a new Fax
4
Receive Code.
Press
If you want to, enter a new Telephone Answer Code.
5
Press
Press
6
Menu, 2, 1, 4
).
Enter
Enter
Enter
Stop
.
.
.
.
.
21.RX Settings
4.Remote Code
▲ On
▼ Off
Set ▲ ▼ & Enter
Fax
).
5 - 8 RX SETTINGS
Page 84
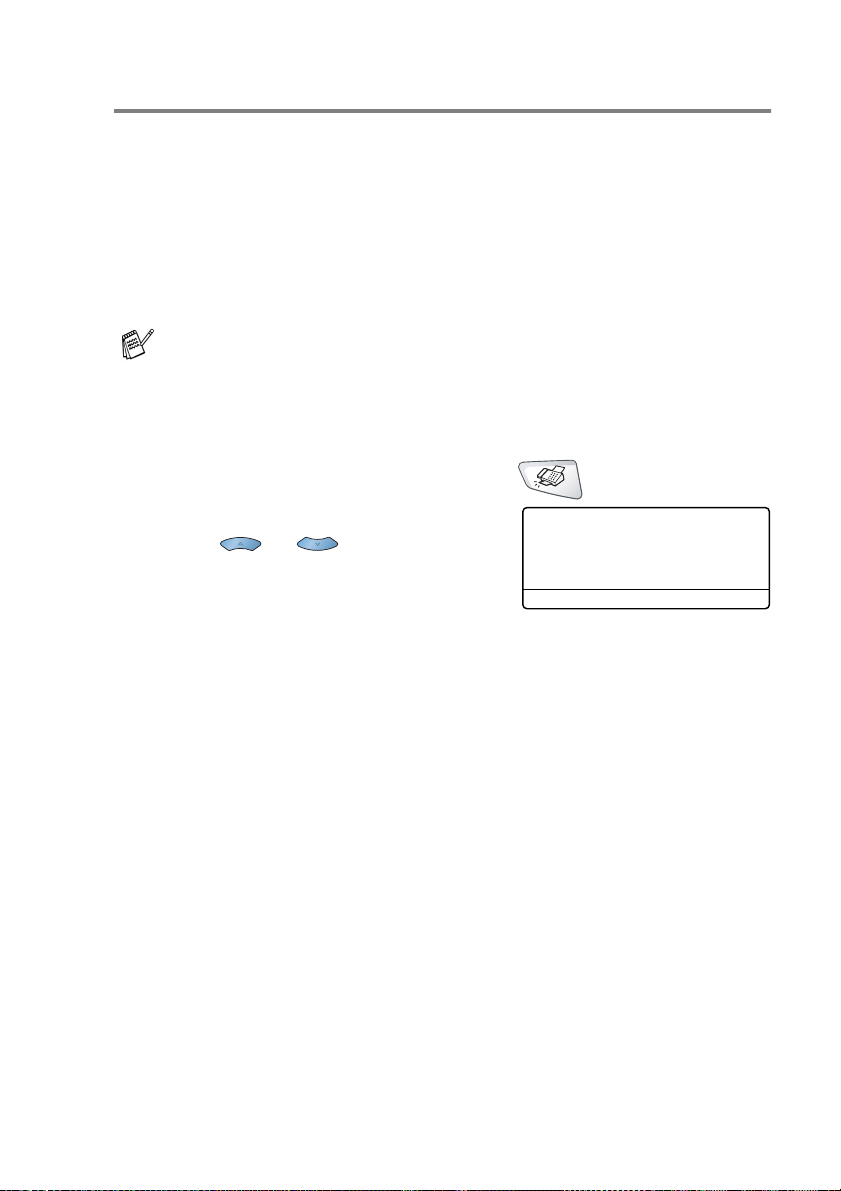
Polling
Polling is the process of retrieving faxes from another fax machine.
You can use your machine to ‘poll’ other machines, or you can have
someone poll your machine.
Everyone who is involved in Polling needs to set up their fax
machines for Polling. When someone polls your machine to receive
a fax, they pay for the call. If you poll someone’s fax machine to
receive a fax, you pay for the call.
Some fax machines do not respond to the Polling feature.
Setting up Polling Receive
Polling Receive is when you call another fax machine to receive a fax
from it.
If it is not illuminated in green, press (
1
Press
2
Press or to select On (or
3
Off
Press
Enter the fax number you are
4
polling.
Press
5
The LCD shows
Menu, 2, 1, 7
).
Enter
Start
.
.
.
Dialing
.
21.RX Settings
7.Poll RX
▲ On
▼ Off
Set ▲ ▼ & Enter
Fax
).
RX SETTINGS 5 - 9
Page 85
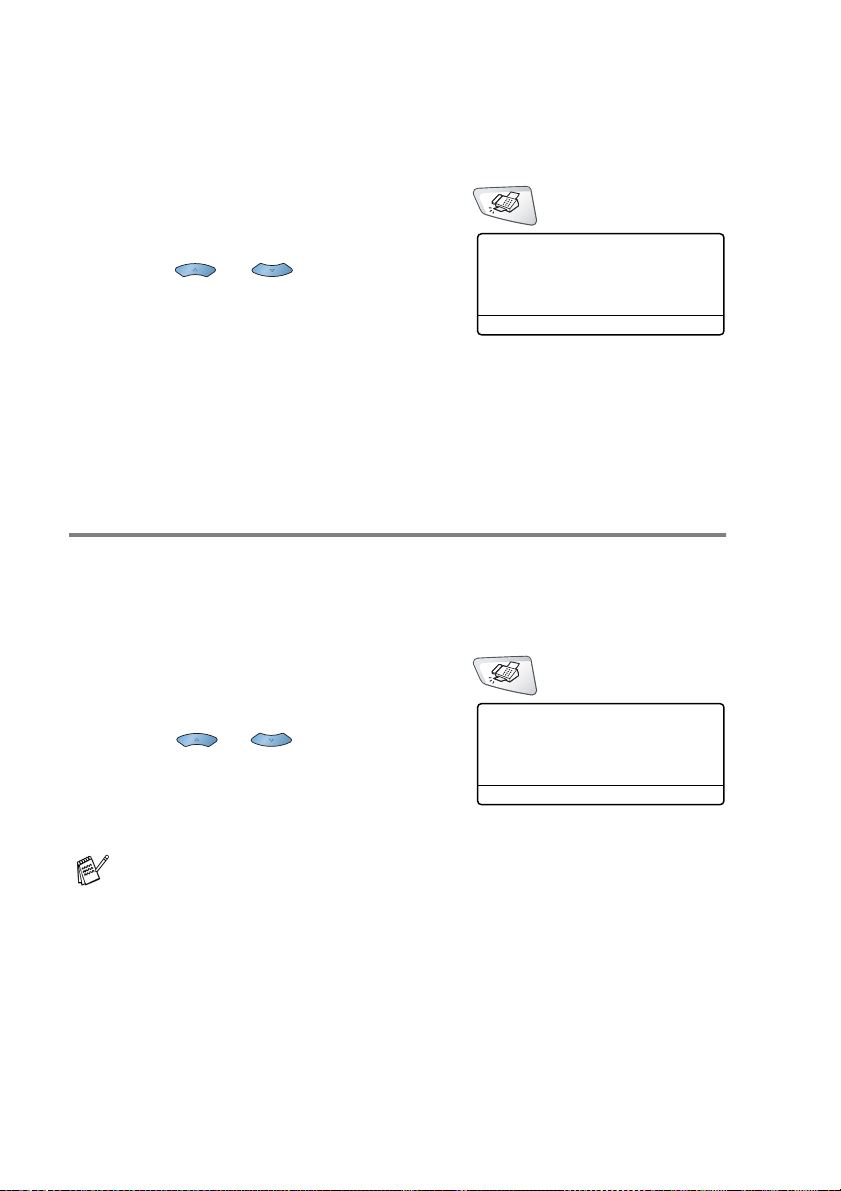
Setting up Sequential Polling Receive
Your machine can ask for faxes from several fax units in a single
operation (Sequential Polling Receive). Afterwards, a Sequential
Polling Report will be printed.
If it is not illuminated in green, press (
1
Press
2
Press or to select On (or
3
Off
Press
Enter the fax machines you want
4
to poll using One-Touch, Speed Dial, a Group or the dial pad.
You must press
Press
5
number in turn to receive a fax.
Menu, 2, 1, 7
).
Enter
Start
.
. Your machine will poll each number or Group
.
Enter
21.RX Settings
7.Poll RX
▲ On
▼ Off
Set ▲ ▼ & Enter
between each fax number.
Fax
).
Setting Duplex printing for Fax mode
If you set Duplex to On for fax receive, the machine prints received
faxes on both sides of the paper.
You can use three sizes of paper for this function - letter, legal and
A4.
If it is not illuminated in green, press (
1
Press
2
Press or to select On (or
3
Off
Press
Press
4
While the Duplex printing for fax is working, auto reduction is
also On temporarily.
Menu, 2, 1, 8
).
Enter
Stop
.
.
.
21.RX Settings
8.Duplex
▲ On
▼ Off
Set ▲ ▼ & Enter
Fax
).
5 - 10 RX SETTINGS
Page 86

Telephone services
Your machine supports the Unique Ring telephone service that some
telephone companies offer.
If you have Voice Mail, RingMaster, an answering service, an
alarm system or other custom features on your telephone line, it
may affect the way your machine works. (See
on page 1-12.)
If you have Voice Mail on your phone line, please read the
following carefully.
Unique Ring
The term “Unique Ring” is used to identify a phone company service
that is given many names, depending on the telephone company you
are using
RingMaster, Teen-Ring, Indent-a-Call or Indent-a-Ring.
What does your telephone company’s ‘Unique Ring’ do?
Your telephone company’s Unique Ring service allows you to have
more than one number on the same phone line. If you need more
than one phone number, it is cheaper than paying for an extra
line. Each phone number has its own unique ring pattern, so you will
know which phone number is ringing. This is one way you can have
a separate phone number for your machine.
. For example, this service may be called SmartRing,
Custom features
Please call your telephone company for availability and rates.
What does ix2700’s ‘Unique Ring’ do?
The ix2700 has a Unique Ring feature that allows you to use your
machine to take full advantage of the telephone company’s Unique
Ring service. The new phone number on your line can just receive
faxes.
You must pay for your telephone company’s Unique Ring
service before you program the machine to work with it.
RX SETTINGS 5 - 11
Page 87

Do you have Voice Mail?
If you have Voice Mail on the phone line that you will install your new
machine on,
machine will conflict with each other while receiving incoming calls
However, the Unique Ring feature allows you to use more than
one number on your line, so both Voice Mail and the machine
can work together without any problems. If each one has a
separate phone number, neither will interfere with the other’s
operations.
If you decide to get the Unique Ring service from the telephone
company, you will need to follow the directions below to ‘register’ the
new Unique Ring pattern they give you. This is so your machine can
recognize its incoming calls.
You can change or cancel the Unique Ring pattern at any time.
You can switch it off temporarily, and turn it back on later. When
you get a new fax number, make sure you reset this feature.
there is a strong possibility that Voice Mail and the
Before you choose the ring pattern to register
You can only register one Unique Ring pattern with the machine.
Some ring patterns cannot be registered. The ring patterns below are
supported by your machine. Register the one your telephone
company gives you.
.
Ring
Pattern
1 long-long
2 short-long-short
3 short-short-long
4 very long (normal pattern)
If the ring pattern you received is not on this chart, please call
your telephone company and ask for one that is shown.
5 - 12 RX SETTINGS
Rings
Page 88
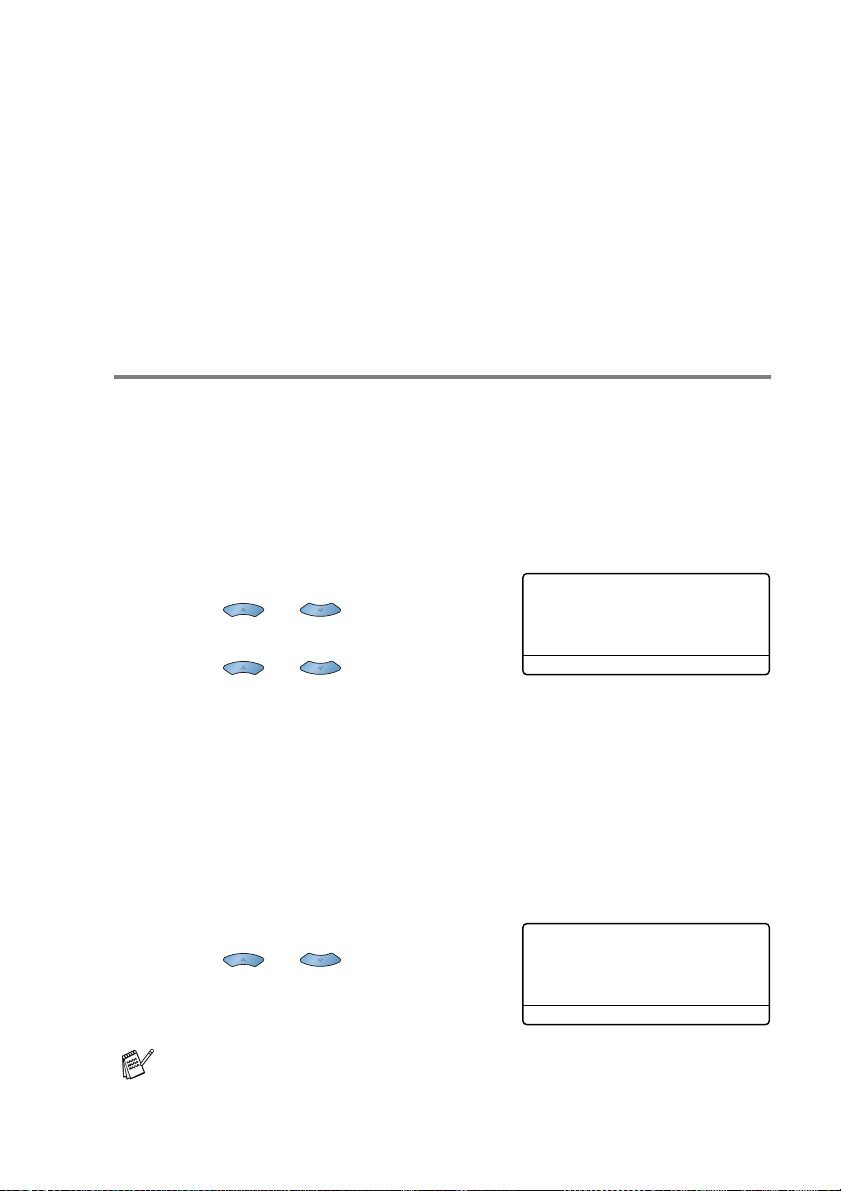
■ The machine will only answer calls to its registered number.
■ The first two rings are silent on the machine. This is because the
fax must «listen» to the ring pattern (to compare it to the pattern
that was ‘registered’). (Other telephones on the same line will
ring.)
■ If you program the machine properly, it will recognize the
registered ring pattern of the ‘fax number’ within 2 ring patterns
and then answer with a fax tone. When the ‘voice number’ is
called, the machine will not answer.
Registering the Unique Ring pattern
Very important!
After you have set the Unique Ring feature to ON, the answer mode
is set to
set up on the Unique Ring number,
answer all the calls yourself. You can not change the answer mode
to the other mode while the Unique Ring is set to on.
1
2
3
4
Manual
Press
Press or to select
Press
Press or to select the
stored ring pattern you want to use.
Press
(You will hear each pattern as you scroll through the four
patterns. Make sure you choose the pattern that the telephone
company gave you.)
Press
Unique Ring is now set to on.
automatically. Unless you have a TAM or Voice Mail
mode means you must
20.Miscellaneous
3.Unique Ring
▲ Off
▼ Set
Set ▲ ▼ & Enter
Menu, 2, 0, 3
Enter
Enter
Stop
.
.
.
Manual
.
.
Set
Turning off the Unique Ring
Press
1
Press or to select
2
Press
Press
3
If you turn off Unique Ring, the machine will stay in
answer mode. You will need to set the Answer Mode again.
(See To select or change your Answer Mode on page 5-2.)
Menu, 2, 0, 3
Enter
Stop
.
.
.
Off
20.Miscellaneous
.
3.Unique Ring
▲ On
▼ Off
Set ▲ ▼ & Enter
RX SETTINGS 5 - 13
Manual
Page 89

Caller ID
The Caller ID feature lets you use the Caller ID subscriber
service offered by many local telephone companies. This
service provides you, by means of the LCD, the name or
telephone number of your caller as the line rings.
After a few rings, the LCD shows the telephone number of your caller
(or name, if available). Once you pick up the handset, the Caller ID
information disappears from the LCD, but the call information
remains stored in the Caller ID memory.
■ You will see the first 16 characters of the number (or name).
■ Out of Area
ID service area.
■ Private Call
blocked transmission of information.
If both the name and number are received, the LCD shows only the
name. You can print a list of Caller ID information received by your
machine. (See Printing Caller ID List on page 5-15.)
Caller ID service varies with different carriers. Call your local
telephone company to determine the kind of service available in your
area.
display means call originated outside your Caller
display means the caller has intentionally
5 - 14 RX SETTINGS
Page 90
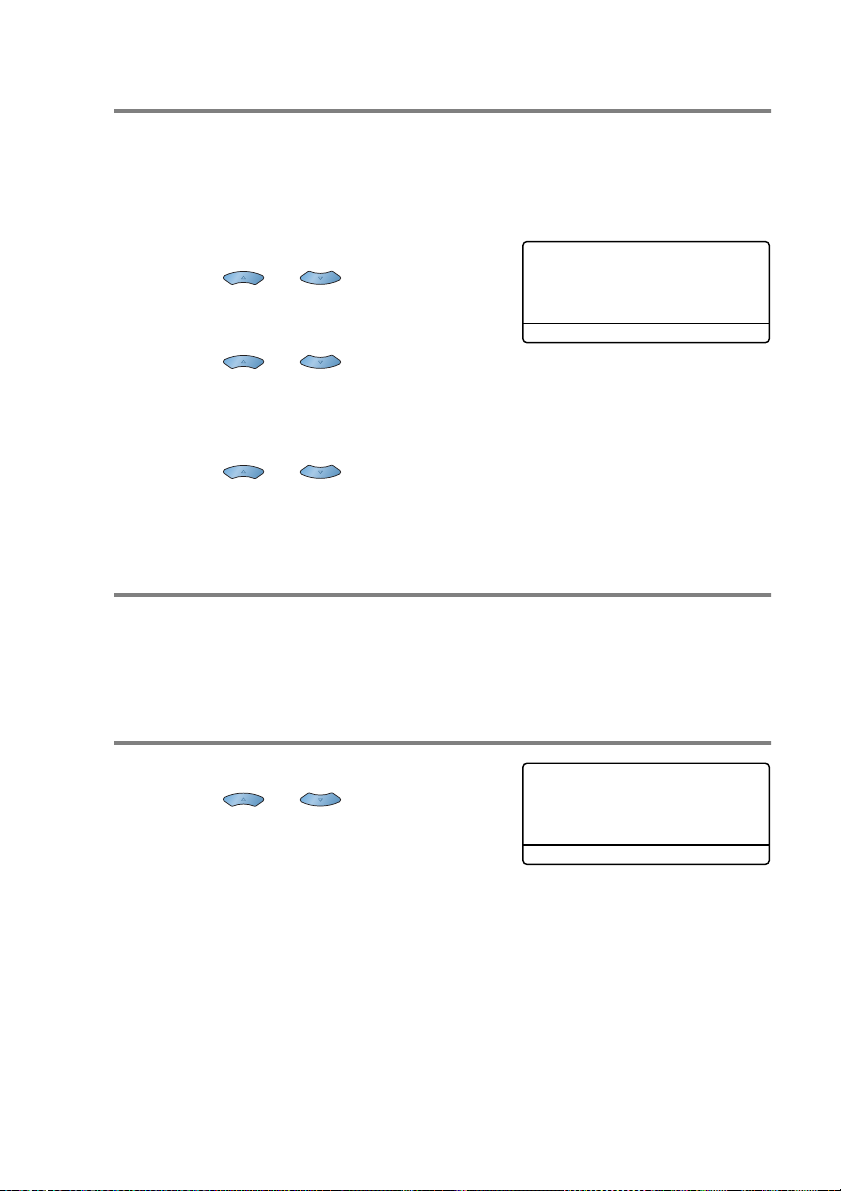
Viewing Caller ID List
Caller ID memory stores information for up to thirty calls. When the
thirty-first call comes in, information about the first call is erased. You
can scroll through Caller ID information to review those calls made to
your machine.
Press
1
Press or to select
2
Display#
Press
Press or to scroll
3
through the Caller ID memory to select the Caller ID you want to
view, and then press
number and the date and time of the call.
Press or to return to the Caller ID listing.
4
—OR—
Press
Menu, 2, 0, 4
.
Enter
Stop
.
.
.
Enter
20.Miscellaneous
4.Caller ID
▲ Display#
▼ Print Report
Set ▲ ▼ & Enter
. The LCD shows the caller’s
Clearing a Caller ID stored in the memory
For effective use of the memory, we recommend that you clear the
Caller IDs stored in memory by pressing
shows each caller ID number or name.
Clear/Back
when the LCD
Printing Caller ID List
Press
1
Press or to select
2
Print Report
Press
Press
3
After printing has finished,
4
press
Menu, 2, 0, 4
Enter
Start
Stop
.
.
.
.
.
20.Miscellaneous
4.Caller ID
▲ Display#
▼ Print Report
Set ▲ ▼ & Enter
RX SETTINGS 5 - 15
Page 91

6
TX Settings
How to Fax
You can send faxes from the ADF (Automatic Document Feeder) or
from the scanner glass.
Enter Fax mode
Before sending faxes, make sure (
green. If not, press (
setting is Fax.
) to enter Fax mode. The default
Fax
) is illuminated in
Fax
Faxing from the automatic document feeder (ADF)
The ADF can hold up to 50 pages and feeds each sheet individually.
Use standard (20 lb or 75 g/m
before putting them in the ADF.
DO NOT use paper that is curled, wrinkled, folded, ripped,
stapled, paper clipped, pasted or taped.
DO NOT use cardboard, newspaper or fabric. (To fax this kind
of original, see
■ Make sure originals written with ink are completely dry.
■ The originals to be faxed must be from 5.8 to 8.5 inches wide and
5.8 to 14 inches long.
Faxing from the scanner glass
2
) paper and always fan the pages
on page 6-3.)
TX SETTINGS 6 - 1
Page 92

Faxing from the ADF
If it is not illuminated in
1
green, press
). Pull out the ADF
(Fax
Document Support
Extension.
Unfold the ADF
2
Document Output
Support Flap.
Fan the pages well and
3
stagger them at an angle. Make sure you put the originals face
up, top edge first in the ADF until you feel them touch the feed
roller.
Adjust the paper guides to fit the width of your originals.
4
The originals are
Face Up
in the ADF
ADF Document
Support Extension
ADF
Document
Output
Support
Flap
Dial the fax number.
5
Press
6 - 2 TX SETTINGS
Start
Document Support
. The machine starts scanning the first page.
Page 93

Faxing from the scanner glass
You can use the scanner glass to fax pages of a book or one page
at a time. The originals can be up to letter, A4 or legal size (8.5 inches
to 14 inches). To cancel, press
Stop
.
If it is not illuminated in green, press (
1
Document
Guidelines
Using the document guidelines on the left, center the original
2
face down on the scanner glass.
Close the document cover.
3
If the original is a book or is thick, do not slam the cover or press
on it.
Dial the fax number.
4
Press
The machine starts scanning the first page.
To send a single page, press 2 (or
5
press
starts sending the original.
—OR—
To send more than one page, press
Place the next page on the
6
scanner glass.
Press
The machine starts scanning.
(Repeat Steps 5 and 6 for each
additional page.)
■ If the memory is full and you are faxing a single page, it will
be sent in real time.
■ If you need to cancel before the fax is sent, press Stop
.
Start
again). The machine
Start
Enter
.
). Lift the document cover.
Fax
The originals are
Face Down on the
Scanner Glass
Flatbed Fax:
Next Page?
▼ 1.Yes
▲ 2.No(Send)
Set ▲ ▼ & Enter
and go to Step 6.
1
Flatbed Fax:
Set Next Page
Then Press Enter
.
TX SETTINGS 6 - 3
Page 94

Faxing legal size originals from the scanner glass
When originals are legal size, you need to set the Glass Fax Size to
Legal
. If you do not, the bottom portion of the faxes will be missing.
If it is not illuminated in green, press (
1
Press
2
Press or to select
3
Press
Press
4
Menu, 2, 2, 0
Enter
Stop
.
.
.
Legal
.
Fax
).
Out of Memory message
If you get an
of a fax, press
Memory
the option to press
press
Stop
Out of Memory
Stop
message while scanning a subsequent page, you will have
to cancel the operation.
to cancel the scan. If you get an
Start
message while scanning the first page
Out of
to send the pages scanned so far, or to
Manual transmission
Manual transmission lets you hear the dialing, ringing and
fax-receiving tones while sending a fax.
If it is not illuminated in green, press (
1
original face up in the ADF, or face down on the scanner glass.
Pick up the handset of the external phone and listen for a dial
2
tone.
—OR—
Press
On the external phone, dial the fax number you want to call. If
3
you pressed
When you hear the fax tone,
4
press
If you are using the ADF, go to Step 6.
If you are using the scanner glass,
go to Step 5.
Press 1 to send a fax.
5
If you picked up the handset of the external phone, replace it.
6
Monitor
Start
and listen for a dial tone.
Monitor
.
, dial using the machine dial pad.
Send or Receive?
▲ 1.Send
▼ 2.Receive
Set ▲ ▼ & Enter
). Place the
Fax
6 - 4 TX SETTINGS
Page 95
Automatic transmission
This is the easiest way to send a fax.
You must not pick up the handset of the external phone or press
Monitor
to listen for a dial tone.
If it is not illuminated in green, press (
1
original face up in the ADF, or face down on the scanner glass.
Enter the fax number using the dial pad, One-Touch, Speed Dial
2
or Search.
(See One-Touch Dialing on page 7-5 and Speed Dialing on
page 7-6.)
Press
3
If you are using the scanner glass, press 2 or
4
Start
.
). Place the
Fax
Start
.
Sending a fax at the end of a conversation
At the end of a conversation you can send a fax to the other party
before you both hang up.
Ask the other party to wait for fax tones (beeps) and then to
1
press
If it is not illuminated in green, press (
2
original face up in the ADF, or face down on the scanner glass.
Press
The LCD shows:
Press 1 to send the fax.
3
Replace the external handset.
4
before hanging up.
Start
.
Start
). Place the
Fax
Send or Receive?
▲ 1.Send
▼ 2.Receive
Set ▲ ▼ & Enter
TX SETTINGS 6 - 5
Page 96

Basic sending operations
Sending faxes using multiple settings
When you send a fax you can choose any combination of these
settings: cover sheet, contrast, resolution, overseas mode, delayed
fax timer, polling transmission or real time transmission. After each
setting is accepted, the LCD will ask if you want to enter more
settings:
Press
LCD will return to the
menu.
—OR—
Press
settings and go to the next step.
Contrast
If your original is very light or very dark, you may want to set the contrast.
Use
Use
to select more settings. The
1
TX Settings
if you have finished choosing
2
Light
Dark
to make the fax darker.
to make the fax lighter.
22.TX Settings
Other Settings?
▲ 1.Yes
▼ 2.No
Set ▲ ▼ & Enter
If it is not illuminated in green, press (
1
original face up in the ADF, or face down on the scanner glass.
Press
2
Press or to select
3
Light
Press
Press 1 if you want to choose more
4
settings and the LCD will return to the
—OR—
Press
then go to Step 5.
Enter a fax number.
5
6 - 6 TX SETTINGS
Menu, 2, 2, 1
or
Dark
Enter
2
.
if you have finished choosing settings for this page, and
.
Auto
.
22.TX Settings
,
1.Contrast
▲ Auto
▼ Light
Set ▲ ▼ & Enter
TX Settings
). Place the
Fax
menu.
Page 97
Press
6
The machine starts scanning the first page.
If you are using the scanner glass, go to Step 7.
To send a single page, press 2 (or press
7
The machine starts sending the original.
—OR—
To send more than one page, press
Place the next page on the scanner glass.
8
Press
The machine starts scanning and returns to Step 7. (Repeat
Step 7 and 8 for each additional page).
to send the fax from the ADF.
Start
Enter
.
again).
Start
and go to Step 8.
1
Fax Resolution
When you have an original in the ADF or on the scanner glass you
can use the
this fax only). If it is not illuminated in green, press (
Press
want.
Resolution
Resolution
key to change the setting temporarily (for
).
Fax
repeatedly until the LCD shows the setting you
—OR—
You can change the default setting.
If it is not illuminated in green, press (
1
Press
2
Press or to select the
3
resolution you want.
Press
Press
4
Standard:
Fine:
EX-Fine:
Photo:
Menu, 2, 2, 2
Enter
Stop
.
.
Suitable for most typed originals.
Good for small print and transmits a little slower than
Standard resolution.
Good for small print or artwork and transmits slower
than Fine resolution.
Use when the original has varying shades of gray.
This has the slowest transmission time.
.
).
Fax
22.TX Settings
2.Resolution
▲ Standard
▼ Fine
Set ▲ ▼ & Enter
TX SETTINGS 6 - 7
Page 98

Manual and automatic fax Redial
If you are sending a fax manually and the line is busy, press
Redial/Pause
make a second call to the last number dialed, you can save time by
pressing
Redial/Pause
If you are sending a fax automatically
machine will automatically redial one time after five minutes.
, and then press
Redial/Pause
only works if you dialed from the control panel.
and
Start
to try again. If you want to
Start
.
and the line is busy, the
6 - 8 TX SETTINGS
Page 99
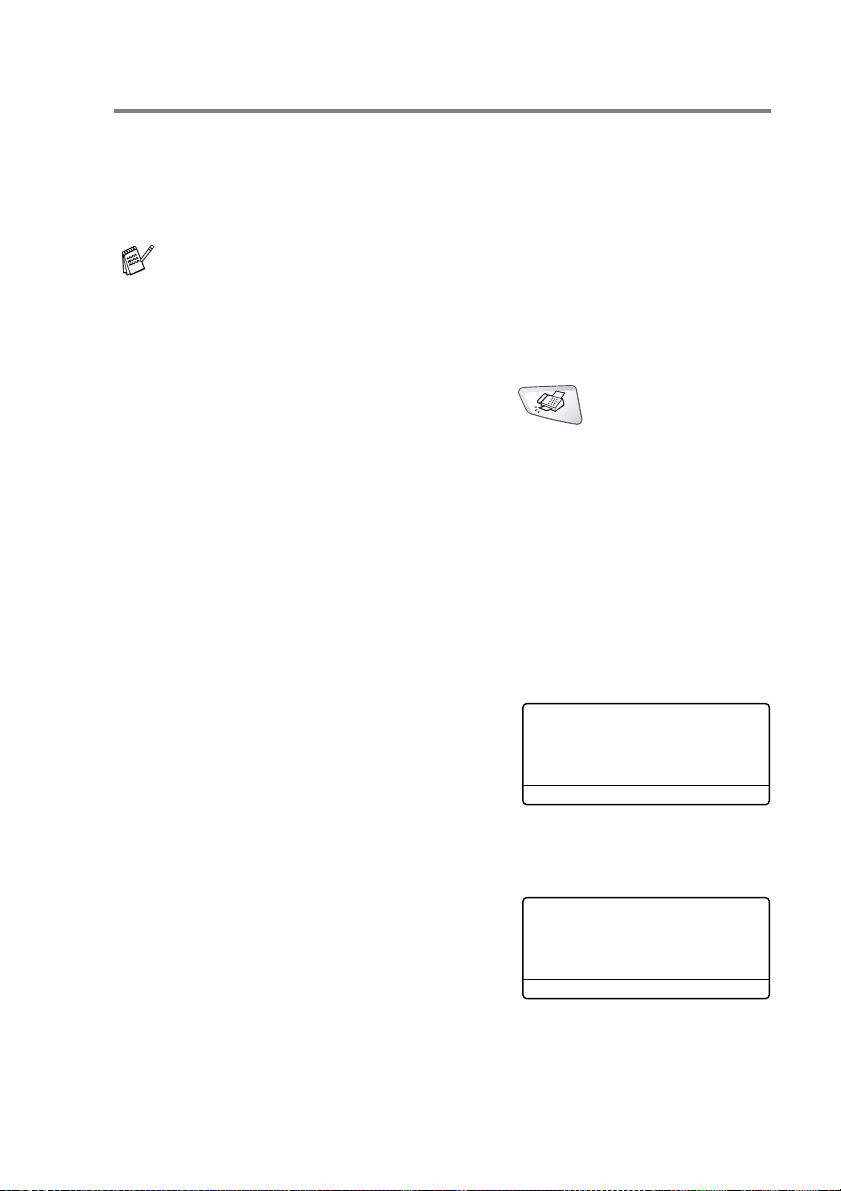
Dual Access
You can dial a number, and begin scanning the fax into memory—
even when the machine is receiving, sending or printing a fax from
memory. The LCD shows the new job number and available
memory.
If you get a
page of a fax, press
Of Memory
can press
to cancel the operation.
Stop
If it is not illuminated in green, press (
1
original face up in the ADF, or face down on the scanner glass.
Enter the fax number.
2
Press
3
The machine starts scanning the first
page and the LCD shows the job number
(#XXX) of the fax and how much memory is available. You can
repeat Steps 1 to 3 for the next fax.
—OR—
If you are using the scanner glass, go to Step 4.
To send a single page,
4
press
The machine starts sending the
original.
—OR—
To send more than one page,
press
Place the next page on the
5
scanner glass. Press
The machine starts scanning, and
then returns to Step 4. (Repeat
Steps 4 and 5 for each additional
page). To send the next fax, go to Step 1.
Out Of Memory
Stop
message while scanning a subsequent page, you
to send the pages scanned so far, or press
Start
to send the fax.
Start
(or press
2
and go to Step 5.
1
Start
Enter
message while scanning the first
to cancel scanning. If you get a
). Place the
Fax
Flatbed Fax:
again).
.
Next Page?
▲ 1.Yes
▼ 2.No(Send)
Set ▲ ▼ & Enter
Flatbed Fax:
Set Next Page
Then Press Enter
Out
TX SETTINGS 6 - 9
Page 100
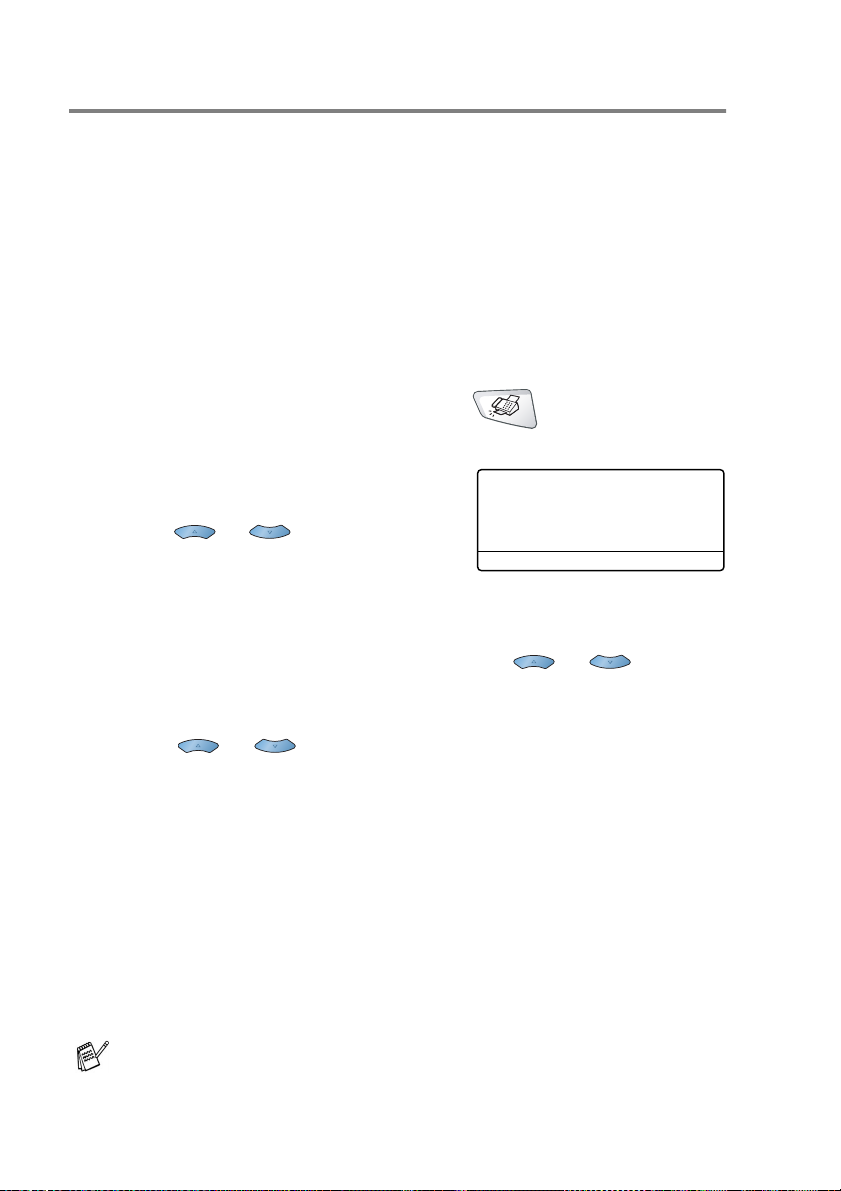
Real Time Transmission
When you are sending a fax, the machine will scan the originals into
the memory before sending. Then, as soon as the phone line is free,
the machine will start dialing and sending.
If the memory becomes full, the machine will send the original in real
time (even if
Sometimes, you may want to send an important original immediately,
without waiting for memory transmission. You can set
to On for all originals or for the next fax only.
If you want to fax multiple pages, use ADF.
TX from ADF
is set to
Off
).
TX From ADF
If it is not illuminated in green, press (
1
original face up in the ADF, or face down on the scanner glass.
Press
2
To change the default setting,
3
press or to select On (or
Off
Press
Go to Step 5.
—OR—
For the next fax transmission only, press or to select
Next Fax Only
Press
Press or to select
4
Fax:Off
Press
Press 1 if you want to choose more settings and the LCD will
5
return to the
—OR—
Press
then go to Step 6.
Enter the fax number.
6
Press
7
Menu, 2, 2, 5
).
Enter
Enter
Enter
2
Start
.
.
).
.
TX Settings
if you have finished choosing settings for this page, and
to send the fax.
.
.
Next Fax:On
menu.
22.TX Settings
5.TX from ADF
▲ Next Fax Only
▼ On
Set ▲ ▼ & Enter
). Place the
Fax
(or
Next
In Real Time Transmission using the scanner glass, the auto
redial function doesn't work.
6 - 10 TX SETTINGS
 Loading...