

Page 1
HD Radio™ receiver with iPod® Dock and Dual Alarm Clock
Instruction Manual
Model: i169
Please read this manual carefully before operating and save it for future reference.
Have a question? Please visit http://www.i-Luv.com
Page 2

HD Radio Receiver with iPod Dock and Dual Alarm Clock V10M10_IM_EN_03032008
www.i-Luv.com - 1 -
USER SAFETY GUIDE
INSTRUCTIONS ON ENVIRONMENT PROTECTION
Do not dispose of this product in the usual household garbage at the end of its life cycle; bring it to a collection point for the recycling of
electrical and electronic appliances. This symbol on the product means the instructions for use or the packing will inform about the methods
for disposal. The materials are recyclable as mentioned in its marking. By recycling, material recycling, or other forms of re-utilization of old
appliances, you make an important contribution to protect the environment. Please inquire at your local community administration for the
authorized disposal location.
IMPORTANT SAFETY WARNINGS
1. FCC regulations state that any change or modification to the equipment, not expressly approved by maker or its authorized parties, could void the
user’s authority to operate this equipment.
2. To prevent fire or electric shock, do not expose the unit to rain or moisture.
3. Never attempt to open the cabinet. Always refer servicing to a qualified technician.
IMPORTANT SAFETY INSTRUCTIONS
1. READ INSTRUCTIONS - All the safety and operating instructions should be read before the appliance is operated.
2. RETAIN INSTRUCTIONS - The safety and operating instructions should be retained in a secure place for future reference.
3. HEED WARNINGS - All warnings on the appliance and in the operating instructions should be observed.
4. FOLLOW INSTRUCTIONS - All operating and use instructions should be followed.
5. WATER AND MOISTURE - The appliance should not be used near water. For example: near a bathtub, kitchen sink, laundry tub, and/or swimming
pool.
6. HEAT - The appliance should be situated away from heat sources such as radiators, heat registers, stoves, or other appliances (including amplifiers)
that produce heat.
Page 3

HD Radio Receiver with iPod Dock and Dual Alarm Clock V10M10_IM_EN_03032008
www.i-Luv.com - 2 -
USER SAFETY GUIDE
IMPORTANT SAFETY INSTRUCTIONS – CONTINUED
7. POWER SOURCES - The appliance should be connected to a power supply only of the type described in the operating instructions or as marked on
the appliance.
8. CLEANING - The appliance should be cleaned with a dry cloth.
9. OBJECT and LIQUID ENTRY - Care should be taken so that objects do not fall and liquids are not spilled into the device’s openings.
10. CARTS AND STANDS - The appliance should be used only with a cart or stand that is recommended by the manufacturer. An
appliance and cart combination should be moved with care. Quick stops, excessive force, and uneven surfaces may cause the
appliance and cart combination to overturn
11. DAMAGE REQUIRING SERVICE - The appliance should be serviced by qualified service professional when:
a. The power-supply cord or plug has been damaged.
b. Objects have fallen into, or liquid has been spilled into the appliance’s apertures.
c. The appliance has been exposed to rain.
d. The appliance has been dropped and suffered damage.
e. The appliance does not appear to operate normally, or exhibits a change in performance.
12. SERVICING - The user should not attempt to service the appliance beyond that described in the user's operating instructions. All other servicing should
be referred to qualified service professional.
13. by your local authorities due to environmental considerations. For more detailed disposal or recycling information, please contact your local authorities
or the EIA (Electronic Industries Alliance).
Page 4

HD Radio Receiver with iPod Dock and Dual Alarm Clock V10M10_IM_EN_03032008
www.i-Luv.com - 3 -
USER SAFETY GUIDE
FOR USERS IN THE USA
As specified in Part 15 of the FCC Rules, this equipment complies within the limits of a Class B digital device. These restrictions provide sufficient protection
against radio and TV interference in residential areas. However, even during normal operation, this device may cause TV or radio interference. In attempting
to eliminate some or all interference, you should try one or more of the following corrective measures:
1. Increase the distance between the device and the radio and/or TV
2. Try a different outlet on various electrical circuits for the device, the radio and/or TV.
3. Reposition the receiving antenna
Do not attempt to fix technical problems yourself if they continue to still exist. Refer servicing only to a qualified technical professional. Interfering or
modifying with your product’s internal components may cause a malfunction and an invalidation of the system’s warranty. This tampering can also void the
FCC authorization to operate it.
This device complies with Part 15 of the FCC Rules. Operation is subject to the condition that this device does not cause harmful interference.
IMPORTANT NOTES
Since digital circuitry may cause interference to other radio or television tuners nearby, switch this unit off when not in use or move it away from the affected
radio/television tuner.
FOR USERS IN CANADA
This digital apparatus does not exceed the Class B limits for radio noise emissions from digital apparatus as set out in the Radio Interference Regulations of
Industry Canada. These limits are designed to provide reasonable protection against harmful interference in a residential installation. This equipment
generates, uses, and can radiate radio frequency energy and, if not installed and used in accordance with the instructions, may cause harmful interference
to radio communications. However, there is no guarantee that interference will not occur in a particular installation. If this equipment does cause harmful
interference to radio or television operation (which can be determined by turning the equipment off), the user is encouraged to try to correct the interference
by one or more of the following measures:
• Reorient or relocate the receiving antenna.
• Increase the separation between the equipment and receiver.
• Connect the equipment into an outlet on a circuit different from that to which the receiver is connected.
• Consult the dealer or an experienced radio / TV technician for help.
Page 5

HD Radio Receiver with iPod Dock and Dual Alarm Clock V10M10_IM_EN_03032008
www.i-Luv.com - 4 -
TABLE OF CONTENTS
Getting Started
General features ……………………………………………………………………………………………………………………………………………...… 6
Power Source…………….……………………………………………………………..………………………………………………………..……………... 7
Protect your Furniture ………………..……………………….……………………………………………………………………………………………….. 7
Installing the remote control battery ….....………………………………………………………………………………………………………….………… 7
Preparing the remote control ………………………………………………………………………………………………………………………………….. 8
Installing the dock adapter …………………………………………………………………………………………………………………………………….. 8
Location of controls on the main unit ……………………………………………………………………………………………………………….…...…… 9
Location of controls on the remote control …………………………………………………………………………………………………………………... 11
Location of indications on the LCD screen …...……………………………………………………………………………………………………………... 12
Connecting the FM antenna wire……………………………………………………………………………………………………………………………… 12
Connecting the AM Loop antenna…………………………………………………………………………………………………………………………….. 12
Operational Instructions
General radio operation………………………………………………………………………………………………..………………………………………. 13
Listening to the radio……………………………………………………………………………………………………………………………………………. 13
Using the preset channels……………………………………………………………………………………………………………………………………… 14
Receiving preset stations………………………………………………………………………………………………………………………………………. 14
HD Radio multicast channels (FM only)…………………………………………………………………………………………………………………….... 14
Delay in the HD Radio system……………………………………………………………………………………………………………………………….. 15
Displaying Text information……………………………………………………………………………………………………………………………………. 15
RBDS ………………………………………………………………………….………………………………………………………………………………… 15
AUX operation…………………………………………………………………………………………………………………………………………………… 15
Setting the clock………………………………………………………...………………………………………………………………………………………. 16
Setting the alarm………………………………………………………………………………………………………………………………………………… 16
Using the snooze function……………………………………...…………………………………………………………………………..………………….. 17
Page 6

HD Radio Receiver with iPod Dock and Dual Alarm Clock V10M10_IM_EN_03032008
www.i-Luv.com - 5 -
TABLE OF CONTENTS
Setting sleep timer………………………………………………………………………………………………………………………………………………. 17
Adjusting the sleep period …………………………………………………………………………………………………………………………………….. 17
Docking your iPod……………………………………………………………………………………………………………………...……………………….. 18
iPod playback control……………………………………………………………………………..…………………………………………………………….. 18
Docking your iPod nano…………………………………………………………………………………………………..……………………………………. 18
Charging your iPod………………………………………………………………………………………………………………………….………………..… 19
AUX in …………………………………………………………………………………………………………………………………………………………… 19
Adjusting the Brightness of the LCD screen…………………………………………………………………………………………………………………. 19
Resetting the unit………………………………………………………………………………………………………………………………………………... 19
Maintenance and Troubleshooting Guide
Maintenance ……………………………………………………………………………………………………………………………………………………... 20
Troubleshooting………………………………………………………………………………………………………………………………………………….. 20
Specifications…………………………………………………………………………………………………………………………………………………….. 22
Page 7
HD Radio Receiver with iPod Dock and Dual Alarm Clock V10M10_IM_EN_03032008
www.i-Luv.com - 6 -
GETTING STARTED
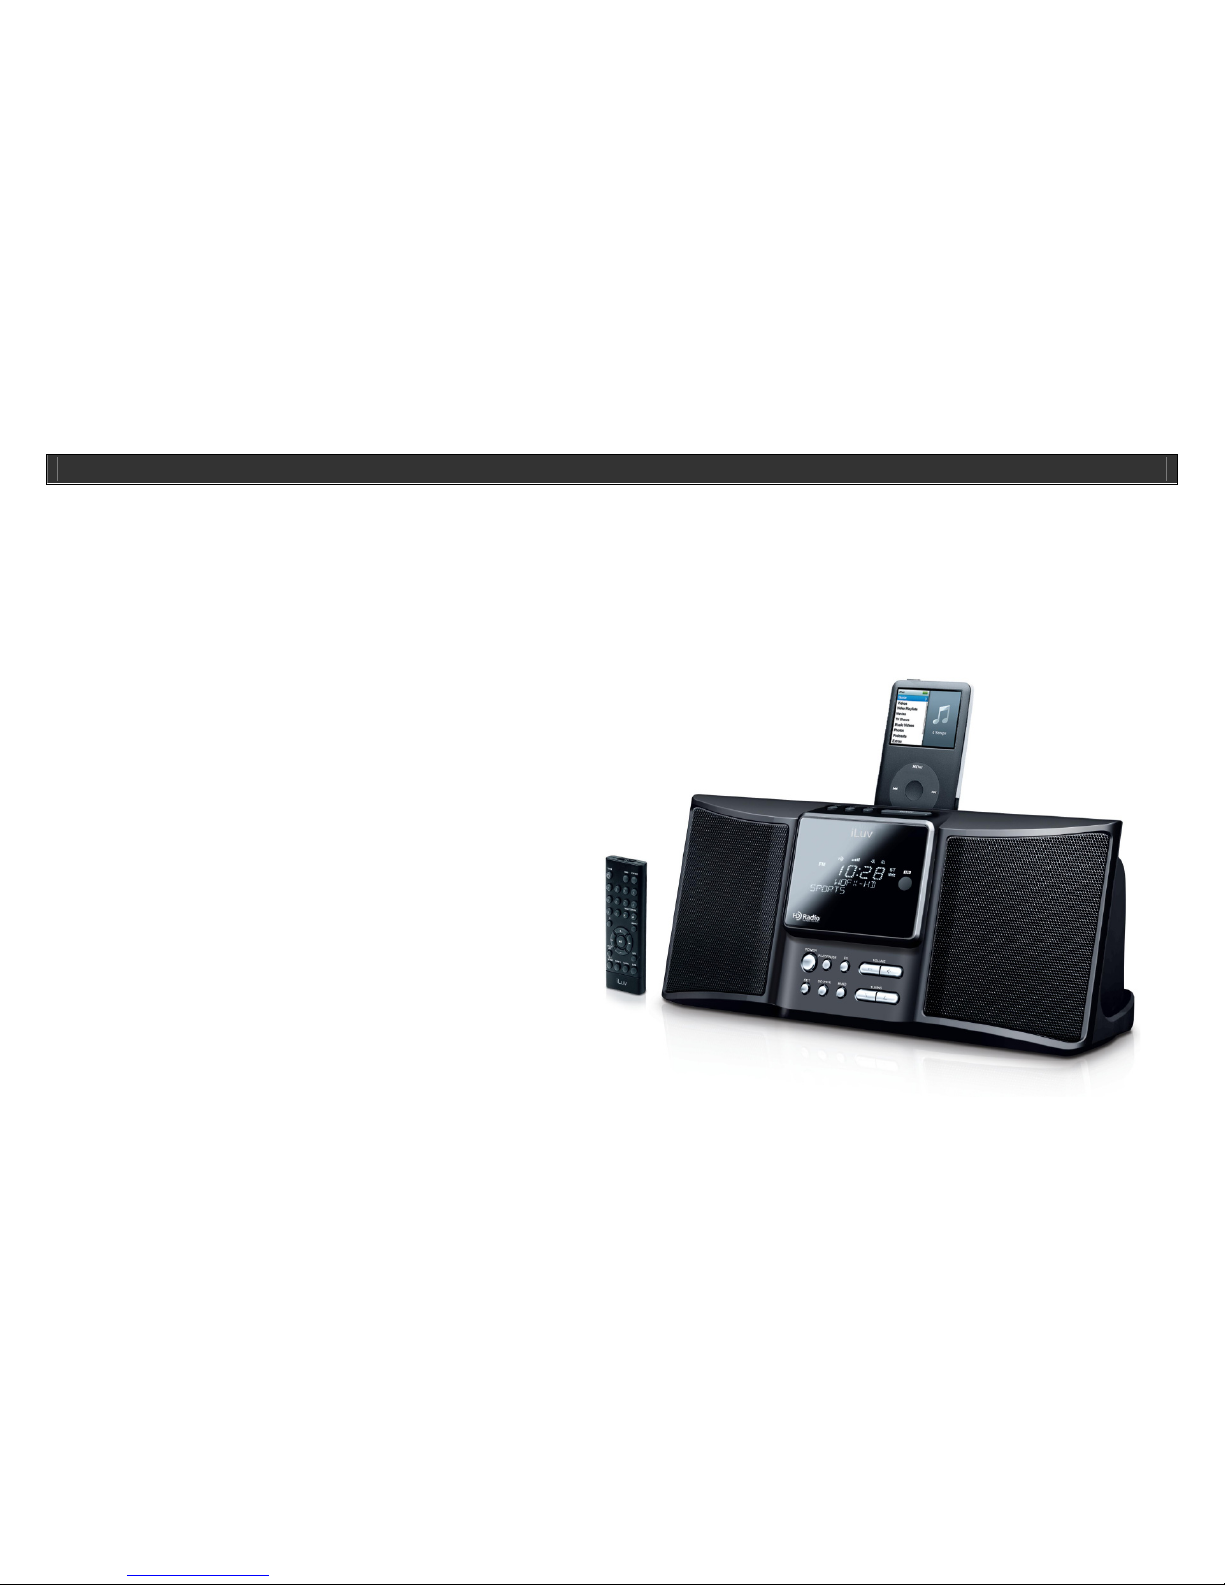
Congratulations on your purchase of the new iLuv i169 HD Radio™ receiver and iPod dock. Targeted specifically to work with your iPod, iLuv stereo audio
system with the built-in universal dock provides advanced audio and radio performance that brings out the best in your music. Do not forget to keep this
manual for future reference.
HD Radio™ receiver with iPod Dock and Dual Alarm
HD Radio
• Provides crystal clear, digital stereo for FM and AM HD Radio and multicast stations*
• Receive HD Radio signals for CD-quality sound*
• Displays information such as station and song name, band, frequency and more if available from the station
• Receives standard analog AM and FM stereo
• PLL tuning digital tuning technology
• Programmable presets for 30 radio stations (10 for AM / 20 for FM)
iPod
• Enjoy rich sound from your iPod
• Plays and charges your iPod
Digital Dual Alarm Clock
• Digital clock display with dual alarm clock
• Wake to iPod, AM/FM radio, or buzzer
• Sleep to iPod, AM/FM radio, or AUX
• Auxiliary line input for any audio devices with 3.5mm jack
• 5 Preset EQ
In the box
• HD Radio receiver with dock for your iPod and dual alarm clock
• Remote control
• Instruction manual
• Warranty card
• AM loop antenna
• FM antenna
*Any Audio Device with 3.5 mm output (iPod Shuffle 1
st
and 2nd Gen., MP3, CD, DVD players, Laptops, PDAs, etc.)
Page 8
HD Radio Receiver with iPod Dock and Dual Alarm Clock V10M10_IM_EN_03032008
www.i-Luv.com - 7 -
GETTING STARTED
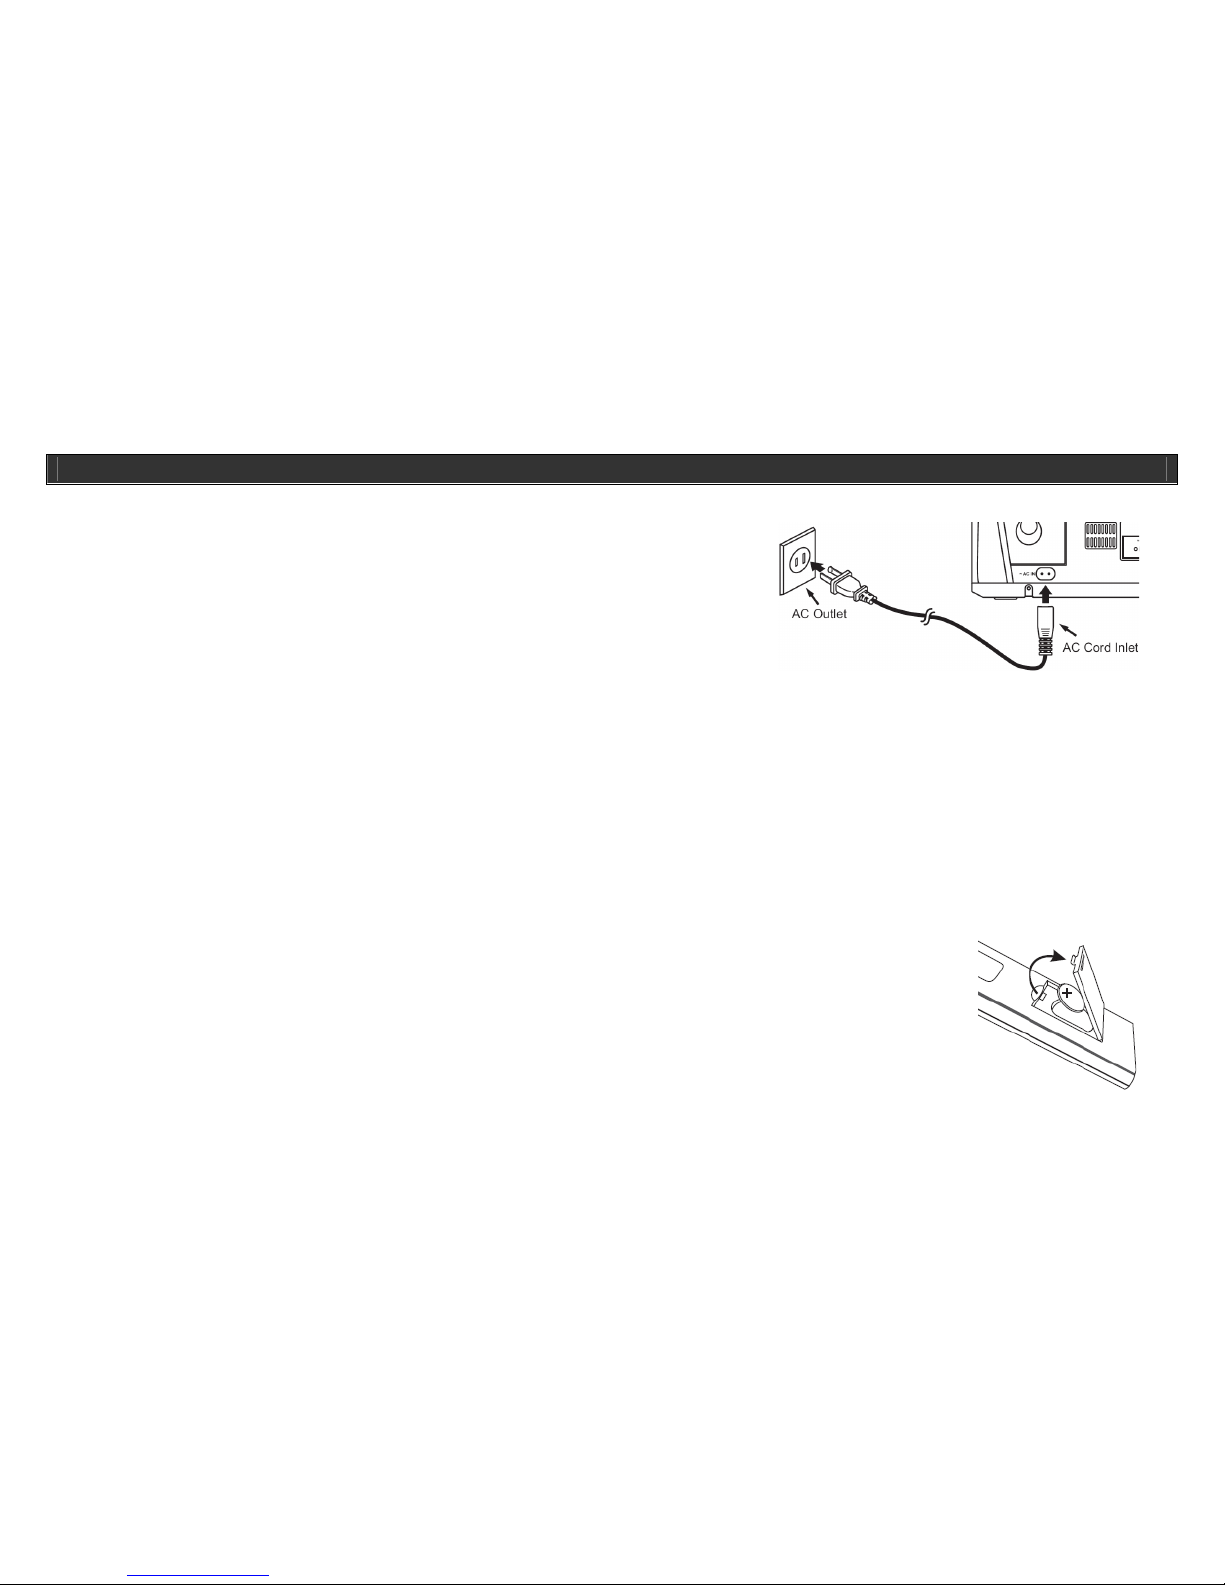
Power Source
• This HD Radio
System operates from AC120V/60Hz line power supply.
• The Remote Control operates on 1 Lithium battery, CR2025 (Included).
Insert the AC Cord Inlet into the AC cord socket on back of the Radio and the other end into a
standard 120V AC outlet as shown in the diagram on this page. The Radio will automatically go
into standby mode.
Note: The system has an AC plug and will only fit into matching AC outlets. This is a safety feature to reduce the possibility of electric shock. If the plug will
not fit in your AC outlets, you should have the outlet changed by a qualified, licensed electrician. Do not use an adapter to make the plug fit into your outlet.
This defeats the safety feature and could expose you to electric shock. In the event of a malfunction due to electrostatic discharge (ESD), reset the unit by
pressing the RESET pinhole located on the back of the main unit with a ballpoint pen or similar object.
Protect your Furniture
This model is equipped with non-skid rubber 'feet' to prevent the product from moving when you operate the controls. These 'feet' are made from non-
migrating rubber material specially formulated to avoid leaving any marks or stains on your furniture. However certain types of oil based furniture polishes,
wood preservatives, or cleaning sprays may cause the rubber 'feet' to soften, and leave marks or a rubber residue on the furniture. To prevent any damage
to your furniture we strongly recommend that you purchase small self-adhesive felt pads, available at hardware stores and home improvement centers
everywhere, and apply these pads to the bottom of the rubber 'feet' before you place the product on fine wooden furniture.
Installing the Remote Control Battery
The remote control battery has been previously installed and ready for operation for the first time use. When the remote control
stops functioning, replace the battery with a new one. To do so, locate the battery compartment and follow the steps below:
1. Remove the battery cover.
2. Insert a “CR2025” 3V lithium battery making certain to follow the correct polarity (+/-).
3. Replace the cover.
Page 9

HD Radio Receiver with iPod Dock and Dual Alarm Clock V10M10_IM_EN_03032008
www.i-Luv.com - 8 -
GETTING STARTED
Preparing the Remote Control
1. Remove the protective film.
2. Point remote control toward the front of the main unit. The effective range of the remote is about 19 ft from the remote sensor and within an angle of
about 45° from the front of the unit.
Installing the Dock Adapter
To ensure that your iPod will fit properly into the built-in universal dock, we have included several detachable dock adapters for old iPod players with this
product. Please check the bottom of dock adapters to see the compatibility with your iPod.
1. How to insert a dock adapter
a. First choose the dock adapter that corresponds with the type of iPod you would like to dock. Using the correct dock adapter ensures the
proper fit for your iPod.
b. Gently push the dock adapter down into the universal dock.
c. Carefully place your iPod into the universal dock. Your iPod must not be in a case or “Skin”.
2. How to remove the dock adapter
• Remove your iPod first, then grasp the dock adapter and lift upwards carefully.
Note: The i169 is not magnetically shielded and may cause color distortion on the screen of some TVs or video monitors. To avoid this, you may need to
move the unit further away from the TV or monitor if unnatural color shifts or image distortion occurs.
Page 10

HD Radio Receiver with iPod Dock and Dual Alarm Clock V10M10_IM_EN_03032008
www.i-Luv.com - 9 -
GETTING STARTED
Location of Controls on the Main Unit
1 2 3 4 5 6 7 8 9 10 11 12 13 14 15 1
1. Stereo Speakers
2. FUNCTION Button
3. SET/FM MODE Button
4. POWER Button
5. PLAY/PAUSE Button
6. Negative LCD Screen
7. SLEEP Button
8. ALARM 1 Button
9. ALARM 2 Button
10. SNOOZE/DIMMER Button
11. Remote Sensor
12. EQ Button
13. VOLUME - / + Buttons
14. BAND Button
15. TUNING T/ SButtons
Page 11

HD Radio Receiver with iPod Dock and Dual Alarm Clock V10M10_IM_EN_03032008
www.i-Luv.com - 10 -
GETTING STARTED
Location of Controls on the Main Unit- continued
1 2 3 4 5 6
1. AC power jack
2. Aux in jack
3. FM antenna jack
4. AM loop antenna jack
5. Headphone jack
6. Reset pinhole
Page 12

HD Radio Receiver with iPod Dock and Dual Alarm Clock V10M10_IM_EN_03032008
www.i-Luv.com - 11 -
1
2
3
4
5
6
7
8
9
10
11
12
13
14
15
16
17
18
GETTING STARTED
Location of Controls on the Remote Control
1. BAND button
2. POWER button
3. NUMERICAL buttons
4. EQ button
5. VOLUME + button
6. I__ button
7. XII button
8. SNOOZE / DIMMER button
9. SET / FM MODE button
10. ALARM 1 button
11. FUNCTION button
12. PRESET TSbuttons
13. MEMORY button
14. `` I button
15. VOLUME - button
16. MUTE button
17. SLEEP button
18. ALARM 2 button
Note: The included remote control commands all of the basic functions on i169. Aim the remote control towards the center of the main unit for the best
results. Please note that the provided remote control cannot control iPod shuffle, first generation iPod, and second generation of iPod.
To install a new battery, please refer to the section “Installing the Remote Control Battery”.
Page 13

HD Radio Receiver with iPod Dock and Dual Alarm Clock V10M10_IM_EN_03032008
www.i-Luv.com - 12 -
GETTING STARTED
Location of Indications on the LCD Screen
1. Band/AM-PM indicator
2. iPod indicator
3. HD Radio indicator
4. Time/Frequency Readout
5. ALARM 1 indicator
6. ALARM 2 indicator
7. SLEEP indicator
8. FM STEREO indicator
9. Frequency unit
10. RBDS Messages/FUNCTION indicator
Connecting the FM Antenna Wire
1. Push the connector plug on the end of the antenna wire onto the FM Antenna Connector at the rear of the radio.
2. Straighten out the Antenna to its full length and orient the wire for the best reception.
Connecting the AM Loop Antenna
If AM reception is weak for improvement connect the provided Loop Antenna as described below:
1. Push to open the 2 receptacles of the AM antenna terminals and insert 2 open-end wires of the AM loop antenna into them.
2. Release the 2 AM antenna terminal handles to hold the AM loop antenna wires in place.
3. Orient the AM loop antenna for the best reception.
Page 14

HD Radio Receiver with iPod Dock and Dual Alarm Clock V10M10_IM_EN_03032008
www.i-Luv.com - 13 -
OPERATIONAL INSTRUCTIONS
General Radio Operation
The following procedures can be accomplished by using the controls of the main unit.
1. Press the POWER button to turn on the unit.
2. Press the FUNCTION button to operate the unit in radio mode.
3. Press the BAND button repeatedly to switch the band (AM / FM).
4. Press and hold the TUNING T/S
button for one (1) second to automatically scan radio stations.
5. Press the TUNING T/S
button again to stop automatic station scanning.
6. Press the TUNING T/S
button repeatedly to manually tune the stations.
7. Press the VOLUME T/S button to control the volume.
Listening to the Radio
1. When listening to an FM station, fully extend the antenna to insure maximum tuner sensitivity.
2. Automatic tuning depends on the signal strength of the broadcasting station, so weak stations are sometimes skipped. Tune manually to find the
weak stations. With stronger stations, the tuner may stop before it reaches optimum setting for that station. Adjust manually for the best reception if
needed.
3. For FM reception, the unit provides FM STEREO/MONO selection. In stereo mode, the unit will automatically switch to stereo when a strong FM
stereo broadcast is received and will indicate “ST” in the LCD.
4. To receive a weaker (noisy) FM station, press the SET / FM MODE button to switch to MONO mode. The reception may improve, but the sound
heard is MONO.
Page 15

HD Radio Receiver with iPod Dock and Dual Alarm Clock V10M10_IM_EN_03032008
www.i-Luv.com - 14 -
OPERATIONAL INSTRUCTIONS
Using the Preset Channels
This radio is equipped with 10 preset memories for AM and 20 preset memories for FM. Once they are preset, they can be instantly accessed by keying in
the preset channel using the PRESET T/S
button.
1. Press the POWER button to turn on the unit.
2. Press the FUNCTION button to switch the unit into radio mode and to select band as desired.
3. Tune to a desired station.
4. Press the MEMORY button. PRESET Indicator appears. Channel Indicator “01” appears and blinks.
5. While the Channel Indicator is blinking, press the PRESET T/S button to select the desired preset channel.
6. Press the MEMORY button again to confirm when the desired preset channel appears in the LCD.
7. Tune to another station and repeat steps 4 to 6 to store a new station in another preset channel.
Receiving Preset Stations
1. Press the POWER button to turn on the unit.
2. Press the FUNCTION button to select RADIO mode.
3. Press the BAND button to select the AM or FM band as desired
4. Press the PRESET T/S button to select the preset channels.
HD Radio™ Multicast Channels (FM Only)
• Together with digital sound quality, HD Radio™ technology gives broadcasters the opportunity to offer more than one programming channel
simultaneously using their existing frequency on the radio tuning buttons.
• If the HD Radio™ Receiver recognizes an HD Radio™ channel, the HD logo appears on the upper left corner of LCD. After the HD Radio™
Receiver is tuned to an HD channel, multicast number, located on the right of the tuned frequency, will indicate the existence of multicast services.
Use the TUNING ▼/▲ button to select another multicast channels.
Page 16

HD Radio Receiver with iPod Dock and Dual Alarm Clock V10M10_IM_EN_03032008
www.i-Luv.com - 15 -
OPERATIONAL INSTRUCTIONS
Delay in the HD Radio™ System
Digital systems inherently produce a delay in audio. To overcome such delay, HD Radio™ broadcasting uses a station’s current analog signal to ensure fast
tuning of an AM or FM station. After an estimated 5 seconds, the audio will change from analog to digital HD Radio™ broadcasting.
If the change is smooth, the radio station will implement the HD Radio™ broadcast correctly. But if the station has no smooth change, you will experience a
jump in content of an estimated 5 seconds. The HD Radio™ Receiver is not a problem. It is an HD Radio™ broadcaster’s implementation problem which
could be corrected by the station through time.
• Today’s analog is only preset on the main channel. If you tune directly to a station’s multicast channel (Not the first multicast), there will have a
delay of about 5 seconds before audio or content is heard. This operation is normal.
Displaying Text Information
If digital HD Radio™ broadcasting or analog broadcasting having RBDS is tuned on, you can change the currently serving text data.
RBDS
This radio supports RBDS, Program Identification, Radio Text, Program Service and Program Type.
AUX Operation
You can play other music sources (MP3, CD or other digital audio player) through the speakers of this unit by connecting the AUX IN Jack to your external
player's audio out jack or headphone jack.
1. Set up the unit and your external player as described in the section AUX IN Connection.
2. Power up the unit and the external player.
3. Press the FUNCTION button to operate the unit in AUX mode.
4. Start playing your MP3, CD or other digital audio player.
5. Press the VOLUME
T/S button to obtain the desired sound level.
Page 17

HD Radio Receiver with iPod Dock and Dual Alarm Clock V10M10_IM_EN_03032008
www.i-Luv.com - 16 -
OPERATIONAL INSTRUCTIONS
Setting the Clock
The Clock can only be set in POWER off mode.
1. Press and hold the SET/FM MODE button for 2 seconds and the Hour digits of the clock will flash.
2. Press the I__ or`` I buttons or TUNING TS buttons until the correct Hour digits appear in the LCD.
Note: Make sure the hour is set so that AM or PM is correctly displayed. It is important that the "AM" or "PM" setting is correct for proper operation of the
Alarm function.
3. Press the SET/FM MODE Button to confirm. Minute digits will appear and flash in the LCD.
4. Press the I__ or `` I buttons on the remote control or TUNING TS buttons on the unit to set the Minute digits.
5. Press the SET/FM MODE button to exit and activate the new clock time to operate.
Setting the Alarm
This Radio allows you to set two different wake-up times which can be used independently or simultaneously AL1 or AL2 or AL1 and AL2.
The procedure for setting the alarm time for ALARM 1 and ALARM 2 is the same.
To set ALARM 1 alarm, follow these instructions:
1. In POWER off mode, press the ALARM 1 Button briefly. The ALARM 1 Alarm Indicator
appears.
2. Press and hold the ALARM 1 Button until the wakeup sound source appears and flashes in the display.
3. Press the`` I /T or I__ /S Buttons repeatedly to select the Alarm1 wakeup mode (Radio, iPod or Buzzer).
4. Press the ALARM1 Button to confirm when the desired wakeup mode appears in the Display.
The Display will then show the flashing Hour digits prompting for input.
5. Press the ``I /T or I__ /S Buttons to select the desired wakeup Hour.
Note: Make sure the hour is set so that AM or PM is correctly displayed. It is important that the "AM" or "PM" setting is correct for proper operation of the
Alarm function.
6. Press the ALARM 1 Button again to confirm the wakeup Hour. Minute digits will appear and flash in the Display.
7. Press the `` I /T or I__ /S Buttons to select the desired Minutes.
8. Press the ALARM 1 Button again to confirm the Minutes. The Alarm sound level will then be displayed and flash to prompt for input.
9. Press the VOLUME + or – Buttons to select the desired wakeup sound level.
10. Press the ALARM 1 Button to confirm and the alarm setting process is then completed.
Page 18

HD Radio Receiver with iPod Dock and Dual Alarm Clock V10M10_IM_EN_03032008
www.i-Luv.com - 17 -
OPERATIONAL INSTRUCTIONS
Using the Snooze Function
1. When the alarm sounds (alarm, radio or iPod), you can press the SNOOZE / DIMMER Button to extend the alarm time by 9 minutes. The alarm,
radio or iPod will then turn on again.
2. The SNOOZE / DIMMER operation can be repeated several times within the 60 minutes alarm duration.
Setting Sleep Timer
Note: The default SLEEP duration is 60 minutes.
1. In POWER On mode, operate the Radio or iPod as usual. Adjust the volume to the desired level.
2. Press the SLEEP Button. The Sleep Indicator
appears in upper right corner of the Display. The display will show 60 minutes of playing time
and then return to show the current time in a few seconds. The Sleep Indicator
flashes in upper right corner of the Display.
The Radio or iPod will automatically turn off after 60 minutes has elapsed. The Sleep Indicator
will disappear in the Display.
Adjusting the Sleep Period
1. With the unit In POWER ON mode, press the SLEEP Button. The display will show 60 minutes of playing time.
2. To adjust the sleep time for more than 60 minutes, press the I`` button or TUNING S button repeatedly. The sleep time will increase in 5 minutes
increment every time the SLEEP Button is pressed. Stop press when your desired sleep time is displayed.
3. To adjust the sleep time for less than 60 minutes, press the I__ Button or TUNING T Button repeatedly. The sleep time will decrease in 5 minutes
decrement every time the SLEEP Button is pressed. Stop press when the desired sleep time is displayed.
4. The unit will automatically turn off after the preset sleep time has elapsed. However, if you want to turn the radio off before the preset sleep time
has elapsed, press the POWER Button once to switch the power off. The LCD Backlight turns off and the Sleep Indicator
disappears from the
Display.
Note: Make sure the FUNCTION is set on your iPod or RADIO or AUX position before you press the SLEEP Button.
Page 19

HD Radio Receiver with iPod Dock and Dual Alarm Clock V10M10_IM_EN_03032008
www.i-Luv.com - 18 -
OPERATIONAL INSTRUCTIONS
Docking your iPod
Select a suitable adaptor for your iPod and insert it into the dock. Your iPod can now be inserted into the dock
by placing the connector on the bottom of the iPod onto the connector in the docking bay.
Note: Be careful when seating the iPod into the docking to avoid damaging the 30-pin connector on the iPod or
in the docking system.
1. Press the POWER Button to turn on the unit.
2. Press the FUNCTION Button to select iPod mode.
3. Your iPod will start playing automatically and start charging immediately.
4. Adjust the sound level by pressing the VOLUME +/– Buttons.
5. To remove the iPod from the unit, press and hold the PLAY/PAUSE Button for three seconds to
switch off the device and then gently remove it from the docking connector.
iPod Playback Control
• Press the PLAY/PAUSE Button to pause or resume the iPod playback;
• Press the iPod Skip/Search Forward or Backward button to skip to the next or previous song;
• Press and hold the HD Radio
TUNING TS buttons or remote control I__ or `` I buttons or iPod Skip/Search Forward or Backward button for fast-
forwarding or fast-rewinding during playback.
Docking your iPod nano
Insert the correct dock adapter for your iPod nano.
1
st
Generation iPod nano:
Make sure the connector on the bottom of your iPod nano is positioned over the connector in the i169 dock prior to seating your iPod nano. Carefully slide
the nano down onto the connector in order to insure a secure connection.
2
nd
Generation iPod nano:
Make sure on the bottom of your iPod nano is positioned over the connector in the i169 dock prior to seating your iPod nano. Carefully slide the nano down
onto the connector in order to insure a secure connection.
Note: Be careful not to damage the connector when docking your iPod nano.
Never use force when docking your iPod nano into the connector.
Page 20

HD Radio Receiver with iPod Dock and Dual Alarm Clock V10M10_IM_EN_03032008
www.i-Luv.com - 19 -
OPERATIONAL INSTRUCTIONS
Charging your iPod
If your iPod is connected to the unit, it will charge automatically at either STANDBY Mode, iPod Mode, FM Mode or AUX Mode.
Note: Your iPod can not charge when the i169 is in AM radio mode.
AUX In
Connect the Audio Output jacks of your auxiliary sound source (TV, VCR, DVD Player, Cassette Deck, Mini Disc player, etc., etc.,) to the AUX IN jack on the
back panel of the unit.
1. Press the FUNCTION button on the top panel or remote control to select AUX function. “AUX” will show on the top of the display
2. Turn your auxiliary source ON and operate it as usual. The sound from the auxiliary source will be heard through the speakers of the i169.
3. Adjust the VOLUME level controls of this unit and the auxiliary sound source as desired.
Note: Connection cables are not included with this unit.
Adjusting the Brightness of the LCD Screen
During STANDBY mode, press the SNOOZE / DIMMER button on top panel or remote control to adjust the brightness of the display. Press the SNOOZE /
DIMEER button to interchange the dimmer and brightness display.
Resetting the Unit
If the system does not respond, there may have been a power surge that triggered the internal computer to shut down automatically. If this occurs,
disconnect the main power and connect it again after approximately one minute.
Note: Although the power disconnection will unlock the internal computer after a power surge, it will also erase all of the settings. After turning the unit ON, it
may be necessary to reset.
Page 21

HD Radio Receiver with iPod Dock and Dual Alarm Clock V10M10_IM_EN_03032008
www.i-Luv.com - 20 -
MAINTENANCE AND TROUBLESHOOTING GUIDE
Maintenance
• Place the unit on a level surface away from sources of direct sunlight or excessive heat.
• Protect your furniture when placing your unit on a natural wood and lacquered finish. A cloth or other protective material should be placed between it
and the furniture.
• Clean your unit with a soft cloth moistened only with mild soap and water. Stronger cleaning agents, such as Benzine, thinner or similar materials can
damage the surface of the unit.
Troubleshooting
• The stereo speaker system (i169) does not turn on.
o The AC plug may not be connected properly. Check the connection.
o The wall outlet may not function. Try another outlet.
• Your iPod does not fit into the built-in universal dock.
o The installed dock adapter is not the correct one. Check whether a correct dock adapter is installed.
o There might be some obstructions on the dock. Check whether there are any obstructions on the connector and on the dock. If everything is
secured, place your iPod back into the dock.
• It does not recognize your iPod when docked.
o Your iPod may not be properly docked. Take your iPod out of the dock, and remove any obstructions on the connector from the dock and on
your iPod. Place your iPod back into the dock.
o Your iPod is frozen or locked up. Check whether your iPod operates correctly before placing it back into the dock. Please refer to the owner’s
instruction manual of your iPod.
o The software of your iPod is outdated. Upgrade the software on your iPod. For the details on how to upgrade the software on your iPod,
please visit Apple’s website: http://www.apple.com.
Page 22

HD Radio Receiver with iPod Dock and Dual Alarm Clock V10M10_IM_EN_03032008
www.i-Luv.com - 21 -
TROUBLESHOOTING GUIDE
• Your iPod is not charged even though it is in the dock.
o Your iPod might not be properly docked. Take your iPod out of the dock, and remove any obstructions on the connector from the dock and on
your iPod. Place your iPod back into the dock.
o Your iPod is frozen or locked up. Check whether your iPod operates correctly before placing it back into the dock. Please refer to the owner’s
instruction manual of your iPod.
• When playing music, the sound gets distorted.
o The volume level on the connected device or the i166 is set too high. Decrease the volume until the distortion has disappeared.
o The source sound is distorted. If the original sound source (MP3) on your iPod is poor quality, the distortion and noises are easily noticed with
high-power speakers. Try a different audio source like a music CD to test.
• The remote control does not operate properly.
o The installed battery is weak. Replace with a new battery.
o It is not aimed to the i169 or too far away from it. Move within 20 feet of the unit and point the remote control toward the i169.
• Remote functions like play/pause skip up, skip down does not work
o Depending on the device these functions might be disabled due to differences in software.
o Please refer to owner’s manual of the device you are using.
• AM band is too noisy.
o The reception at the set location is poor. Rotate the AM loop antenna position for best reception.
o Move the antenna away from the unit to avoid interference.
• FM band is too noisy.
o The reception at the set location is poor. Check that the FM antenna is properly connected to the jack in the rear of the unit.
o Stretch the antenna to a “T” shape and move slightly closer to a window.
Page 23

HD Radio Receiver with iPod Dock and Dual Alarm Clock V10M10_IM_EN_03032008
www.i-Luv.com - 22 -
SPECIFICATIONS
• 30 preset radio station memories (10 AM / 20 FM)
• 90 minutes sleep
• 9 minutes snooze
• Audio Output: 2 x 3W RMS
• 3.5mm Aux-in jack
• 3.5mm headphone jack
• Frequency Range: AM: 520 kHz – 1710kHz FM: 87.5 MHz – 108.1MHz
• Power Supply: AC120V 60Hz
Page 24

iLuv is a trademark of jWIN Electronics Corp. iPod is a trademark of Apple, Inc. All logos and brands are property of their respective owners. iPod is not
included in this package. Features and specifications are subject to change without prior notification.
© 2008 jWIN Electronics Corp. All rights reserved. No portion of this printed material or product enclosed herewith including design, shape or graphics, may
be reproduced or transmitted in any form without the expressed written consent of jWIN Electronics Corp. by any means, electronic or mechanical, including
photocopying, recording or use of an information storage and retrieval system. Any unauthorized distribution or reproduction of this printed material or
product, or any portion thereof, will be prosecuted to the fullest possible extent of the law.
Printed in China
TEL: 516-626-7188
FAX: 516-626-7105
website: www.i-Luv.com
e-mail: info@i-Luv.com
 Loading...