

Page 1
HEALTH
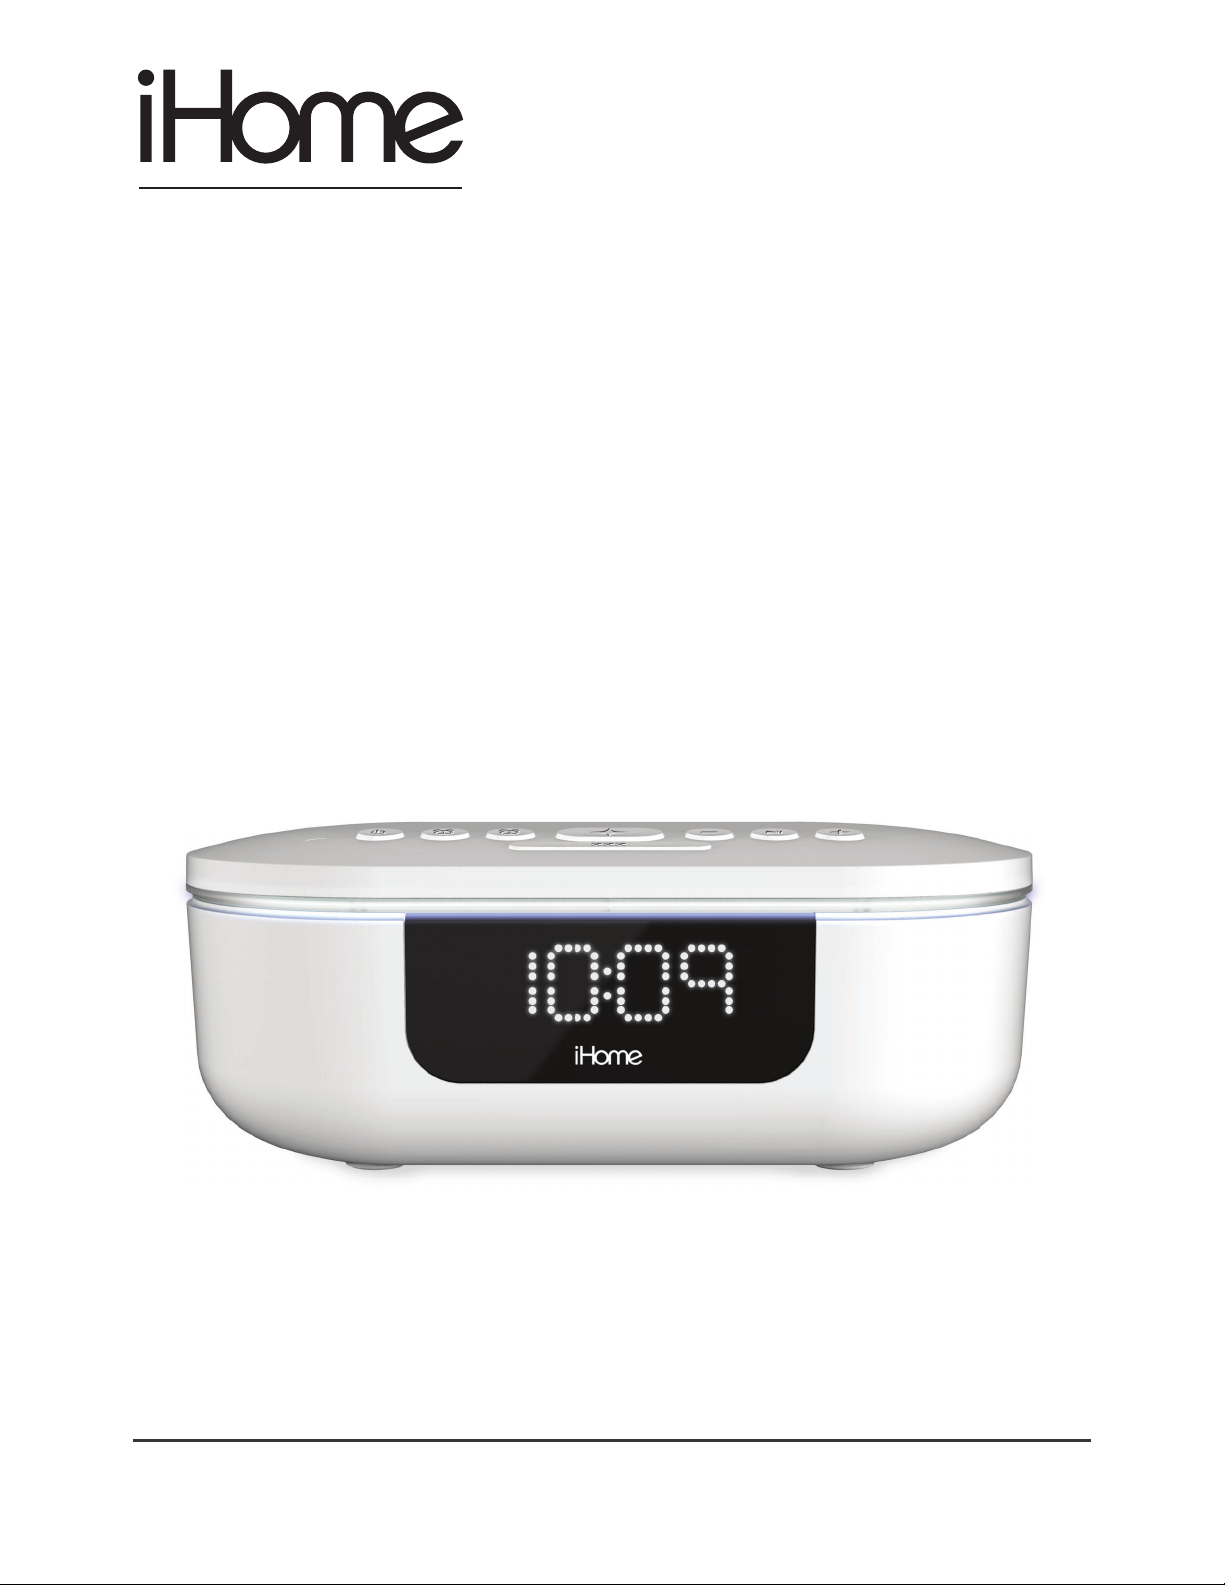
POWERUVC PRO
360° UV-C Sanitizer
with Bluetooth Speaker
Model iUVBT1
QUESTIONS? visit www.ihome.com
Page 2
WELCOME
Thank you for choosing the PowerUVC PRO from iHome. This superior
quality UV-C LED light safely kills up to 99% of surface germs in under 3
minutes, without using harmful chemicals. The iUVBT1 is safe to use on
everyday essentials including eyeglasses, smartphones, cosmetic tools,
toothbrushes, and more. For more information about this and other
iHome products, please visit www.ihome.com
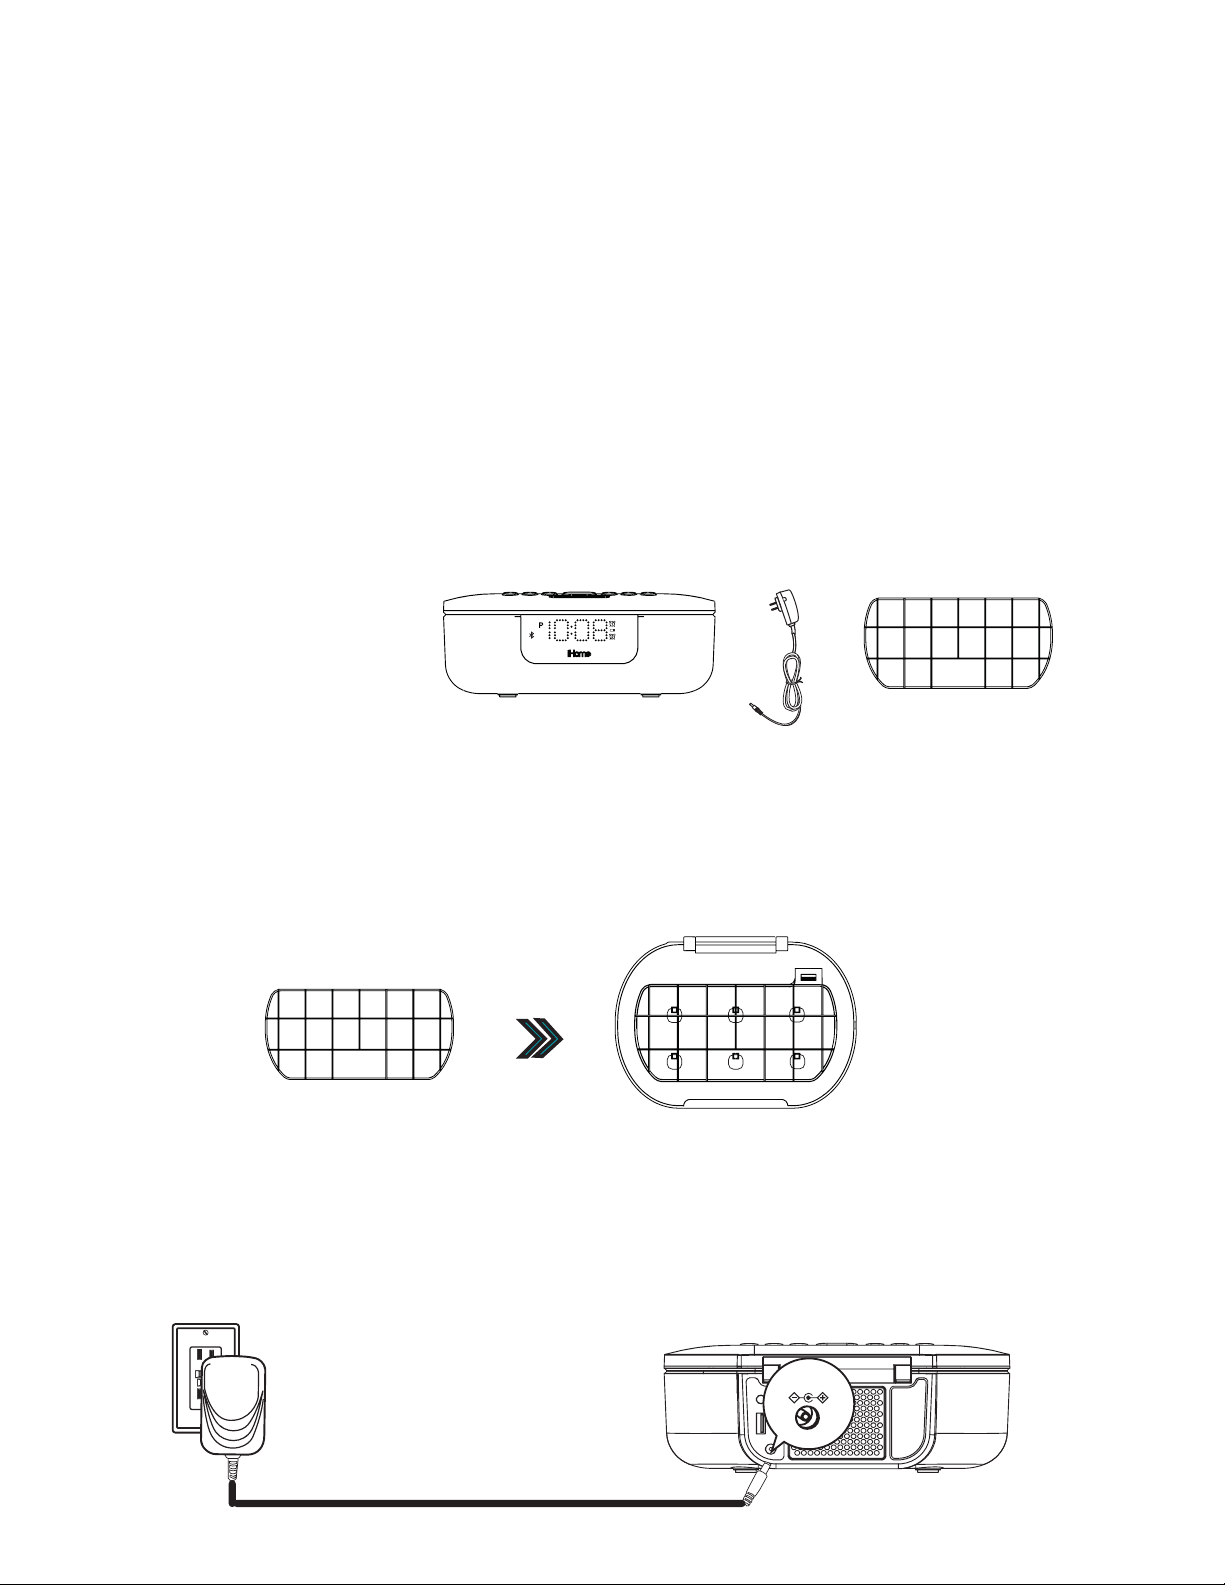
WHAT’S IN THE BOX
1. PowerUVC PRO
2. AC power adapter
2. UV Shelf
INSTALLING THE UV SHELF
A shelf is provided to ensure optimal spacing between your items and the
UV-C LEDs. Place the shelf inside the cabinet and firmly press it into the
locking tabs.
CONNECTING THE POWERUVC PRO
Plug the included AC adapter into the DC jack on the back of the unit and
connect the plug to a working outlet not controlled by a light switch.
Page 3
FEATURES & FUNCTIONS
9V, 3A
Bluetooth
Time
Set
DST
Set
+1
A
-1
DC
input
USB
Port
#1
TOP PANEL
Auto Dimmer
Sensor
Power (Speaker)/
Alarm Reset
FRONT PANEL
LED Status Indicator
UNDER THE LID
Alarm 1
Alarm 2
BACK PANEL
Bluetooth
USB
Port
#1
Sanitize
Snooze/Dimmer
Time
Set
DST
Set
-1
+1
Volume
Controls
Play/Pause
BOTTOM PANEL
Battery Back-up
Compartment*
*Remove batt
ore use
bef
BACKUP
BATTERY
ery pull tab
Sanitizing Chamber
USB Port #2
DISPLAY
PM Indicator
Bluetooth
Status
DC
input
9V, 3A
Alarm 1
Low Backup Battery
Alarm 2
Page 4

SETTING THE TIME
1. Press and hold the Time Set Button located on the back of the unit
for 2 seconds until the clock display flashes and a beep sounds.
2. Pr
3.
4.
5.
6.
ess the – or + Buttons to adjust the clock to the curr
or rapid setting). Make sure you set the correct AM/PM time. T
f
indicat
To toggle the clock display between standard 12 hour time and 24
(“military”) time displa
the display is flashing during time setting.
Press and release the Time Set Button to confirm the current time
setting. The YEAR will flash on the display. Press the – or + Buttons
to set the correct year.
Press and release the Time Set Button to confirm the current year
setting. The Date will flash on the display. Press the – or + Buttons to
set the correct month and day(hold for rapid adjustment).
Press and release the Time Set Button to confirm the current date
setting. 2 beeps will sound to indicate time setting mode is complete.
or appears to the left of the display; there is no AM indicator
y, press the Alarm or Alarm Button while
ent time (hold
he PM
.
hour
DAYLIGHT SAVINGS (DST) SWITCH
This unit has a DST switch on the back of the unit to adjust the time for
daylight saving time and standard time. By default, it is set to Auto and
will automatically adjust the time at the start and end of daylight saving
time.
If you wish to adjust manually, slide the switch to +1 to add one hour
or to –1 to subtract an hour.
SETTING AND USING ALARMS
This unit features dual alarms which can be set to dierent times and alarm
sources. Each is set in the same way. Instructions are given as “Alarm
Button”; use Alarm 1 Button or Alarm 2 Button to set respective alarms.
0QVG: Each step must be completed while displa
time-out with an
y changes saved.
y is flashing or setting will
1. Press and hold the Alarm Button for 2 seconds until the alarm time display
and alarm ic
ess the – or + Buttons to adjust the alarm time to the desir
2. Pr
for rapid setting).
indicat
or appears to the left of the display.
on flash. A beep sounds.
ed time (hold
Make sure you set the correct AM/PM alarm time. The PM
(continued on next page...)
Page 5

SETTING AND USING ALARMS (CONTINUED)
3. Press the Alarm Button to confirm the alarm time setting. The alarm schedule will
flash: 7 (
select the desired alarm schedule.
4. Press the Alarm Button to confirm the alarm schedule. The wake-to source will
flash.
ess the – or + Buttons to select the desired wake-to alarm source: Bluet
5. Pr
To n e.
every day), 5 (weekdays) or 2 (weekend only). Press the – or + Buttons to
ooth or
Wake to Bluetooth: You will wake to the currently linked Bluetooth device
vice is detected, the alarm will default to the last tone selected.
de
Wake to Tone: Press the Alarm Button to confirm. Press the – or + Buttons to
select the desired tone to wake to (Tone 1 -T
ess the Alarm Button to confirm wake-to source. The alarm volume will flash.
6. Pr
7.Press the – or + Buttons to adjust the alarm volume
ess the Alarm Button to confirm the alarm settings and exit alarm setting mode
8. Pr
2 beeps will c
displa
*To preview the current alarm time, press and release the Alarm Button.
y, to show the alarm is armed.
onfirm alarm setting is complete. The alarm icon will re
one 4).
.
main on the
. If no
TURNING THE ALARM ON/OFF
1. Press the Alarm Button to toggle the alarm ON and OFF, indicated by the
.
related white alarm indicator.
hen the alarm sounds, press the Power/Alarm Reset Button
2. W
c
orresponding Alarm Button (1 or 2) to disable the alarm and reset it to c
on at the same time the ne
xt day.
or the
ome
SNOOZE/DIMMER
Snooze: When the alarm is sounding, press the ZZZ/Dimmer Button to
snooze the alarm for 9 minutes.
Dimmer: Press the ZZZ/Dimmer Button (when alarm is NOT sounding) to
adjust the display brightness.
Page 6

PROGRAMMABLE SNOOZE
To adjust the snooze duration:
1. Press and hold the ZZZ/Dimmer Button.
2. Use the + or - Buttons to adjust the snooze duration from 1-29 minut
ess the ZZZ/Dimmer Button again to confirm.
Pr
es.
AUTO DIMMER
This unit is equipped with a sensor that will automatically adjust the
brightness of the clock display based on ambient light in your room. When
the room is well lit, the display will adjust to Hi brightness for better visibility.
In a dark room, it will dim to a lower brightness. You can adjust the “lower
limit” of the Auto-dimmer to fit your personal preference of display
brightness in a dark room.
The 3 options are:
“Auto 2”– minimum brightness setting will be level 2
“Auto 1” - minimum brightness setting will be level LO
“Auto 0” – clock display will turn FULLY OFF in a dark room
To adjust Dimmer settings:
Press the ZZZ/Dimmer Button repeatedly to cycle through brightness
levels: Auto 1, Auto 2, Auto 0, Hi, 3, 2, Lo, or OFF.
(Note: choosing Hi, 3, 2, LO, or OFF are fixed settings and will not
auto-adjust.)
Page 7

USING THE SANITIZER
1. Make sure the unit is plugged into a working wall outlet. Lift the lid of the
unit and place items on the shelf, making sure not to overlap items.
2. Close the lid. Press and release the Sanitize Button to begin a UV
sanitizing cycle. A countdown timer will display the remaining cycle
time, LED status indicator (around the rim of the cabinet) will slowly
blink, and a tone will sound when the cycle is complete.
NOTES:
1. Features a built-in safety switch that will shut o the UV light
whenever the lid is opened. Do not attempt to defeat the safety
function and operate the unit with an open lid.
2. If the lid is opened during the UV sanitizing cycle, the timer will
pause. Closing the lid within 1 minute will resume the cycle.
3. We recommend leaving the shelf in place while sanitizing your
items. If items are too large, the shelf may be removed. In those
cases we recommend flipping the items over and sanitizing a
second time for optimal eect.
4. To cancel a sanitizing cycle, press the Sanitize Button.
Page 8

BLUETOOTH PAIRING
Make sure your device is ‘discoverable’ by turning on Bluetooth mode. The
first time the unit is powered on, it will automatically enter pairing mode. To
manually pair your Bluetooth device:
2s
1. Press and hold the Bluetooth Button on the
back of the unit f
2
. Select ‘iHome iUVBT1’ on your device’s
or 2 seco
Bluetooth menu to co
3. If pairing is successful, the Bluetooth indicator appears solid blue, indicating
the unit is r
eady to pla
nds.
nnect.
y music.
iHome
iUVBT1
o reset Bluetooth settings, press & hold Bluetooth Button for 10 seconds.)
(T
Playing Bluetooth Audio:
1. Pr
ess the Play/Pause Button on the unit to play or pause audio from your
ed Bluetooth device.
link
2. Pr
ess the – or + Buttons to adjust the volume on the unit.
CHARGING DEVICES VIA USB
There are 2 USB Charging ports on this unit each is 1A. To charge a device, connect the
standard size end of a USB cable (not included)
to either USB Port #1 (back of unit) or USB Port
#2 (inside sanitizing cabinet). Connect the other
end to the charging port on your device.
Monitor the charging on your device. Some
devices use a proprietary charging method and
will not charge using the USB port. If this
happens, you must charge your device using
the charger that came with it.
Unit must be plugged into a
working outlet to charge devices.
Page 9

BATTERY BACK-UP
The unit comes with a CR-2450 back-up battery installed to maintain clock
settings in the event of a temporary power failure. Remove the battery pull
tab before use. When the battery icon on the display is flashing, it is time
to replace the back-up battery.
1. Make sure the AC adapter is connected,
or you will lose your time and alarm
settings during battery replacement.
2. Use a Phillips screwdriver to open the
battery compartment door.
3. Remove the exhausted battery from the
compartment and insert 1 CR-2450
battery, checking that the + side is
facing you. Replace the compartment
door. Do not overtighten.
CR-2450 x 1
WARNING: Lithium batteries can explode or cause burns if disassembled, shorted,
recharged, exposed to water, fire, or high temperatures. Do not place loose batteries in a
pocket, purse, or other container containing metal objects, mix with used or other battery
types, or store with hazardous or combustible materials. Store in cool, dry, ventilated area.
Follow applicable laws and regulations for transport and disposal.
• Do not ingest the battery, Chemical Burn Hazard. This product contains a coin/button
cell battery. If the coin/button cell battery is swallowed, it can cause severe internal
burns in just 2 hours and can lead to death.
• Keep new and used batteries away from children. If the battery compartment does not
close securely, stop using the product and keep it away from children. If you think
batteries might have been swallowed or placed inside any part of the body, seek
immediate medical attention.
Maintenance + Caring For Your Device
• Place the unit on a level surface away from sources of direct sunlight or
excessive heat.
•
Remove the plastic protective film from the clock display.
• Protect your furniture when placing your unit on a natural wood and
lacquered finish. A cloth or other protective material should be placed
between it and the furniture.
• Should the casing of your device become soiled, you may wipe down with a
moist cloth.
• Do not immerse the device into water or any cleaning solvents.
• Do NOT use gasoline, benzene, thinner, harsh cleaners, etc on and/or in the
unit while cleaning, as they may damage the product. NEVER use alcohol or
other solvents.
Page 10

IMPORTANT SAFETY INSTRUCTIONS
Please heed all warnings, read and follow all instructions and keep these instructions
handy for future reference.
WARNING - DO NOT ATTEMPT TO OPERATE THIS DEVICE WITH THE LID/TOP
OPEN. The device was designed to shut o automatically when the lid/top is
open. It is important NOT to defeat or tamper with this safety feature as UVC light
can cause damage to eyesight and skin.
All users should be alerted to the potential hazards indicated by the product safety
labeling on the unit and these instructions.
WARNING - Use this device only for its intended use as described in this manual. If the
device is not used in the manner specified, the protection provided by the equipment
may be compromised. Always place device on a flat, smooth surface, in a horizontal
position for operational use.
WARNI NG - KEEP OUT OF REACH OF CHILDREN. This device is not a toy and is not
intended to be used by children.
ATTENTION: Use only the supplied power adapter.
This product must only be supplied at safety extra low voltage corresponding to the
marking on the appliance.
ATTENTION: Prolonged or excessive exposure to UV-C light may degrade and discolor
fabrics, plastics and other non-metallic materials.
Keep operation away from strong magnetic fields.
• Do not look directly at the UV-C source.
Device is intended for indoor use only, do not use outdoors or on wet surfaces.
•
Device should be protected from the elements and from temperatures below freezing.
•
Do not operate/drop near water or while bathing or s
•
de
vice with wet hands.
•
Only use as intended. Use according to this manual’s ins
or modifying the de
•
Do not alter the construction or design. Do not remove safe
de
vices.
Do not use device for other than its intended purpose, as described in the manual.
•
Do not operate if any damage to the unit is visible or suspected, such as afte
•
dr
opped.
•
Do not use if charging cable/cor
•
Keep the cable/cords and device away from heated surfaces.
•
Close supervision is necessary when any appliance device is used by or near childre
and people with special needs.
•
Do not operate in the presence of explosives and/or flammable fumes, smok
liquids.
Disclaimer: T
medical condition. The information provided herein is not to be construed as a medical
diagnosis or medical advice. No medical claims are implied or intended with the sale of
this device. Purchaser accepts responsibility for correct and proper use of device.
his product is not intended to diagnose, treat, cure or prevent any disease or
vice in any way.
d is damaged.
wimming, do not handle the
tructions without tampering
ty labels, markings or
r being
n
e or
Page 11

LIMITED ONE YEAR WARRANTY
iHome Products, a division of SDI Technologies Inc. (hereafter referred to as SDI),
warrants this product to be free from defects in workmanship and materials, under
normal use and conditions, for a period of one (1) year from the date of original
purchase. Should this product fail to function in a satisfactory manner, it is best to first
return it to the store where it was originally purchased. Should this fail to resolve the
matter and service still be required by reason of any defect or malfunction during the
warranty period, SDI will repair or, at its discretion, replace this product without charge.
This decision is subject to verification of the defect or malfunction upon delivery of this
product to the Factory Service Center authorized by Customer Service.
If service is required, please contact Customer Service at ihome.com/support/contact to
obtain a Return Authorization Number and shipping instructions. A copy of the sales
receipt is required to validate in-warranty coverage.
Disclaimer of Warranty
NOTE: This warranty is valid only if the product is used for the purpose for which it was
designed. It does not cover (i) products which have been damaged by negligence or
willful actions, misuse or accident, or which have been modified or repaired by
unauthorized persons; (ii) cracked or broken cabinets, or units damaged by excessive
heat; (iii) damage to digital media players, CD’s or tape cassettes (if applicable); (iv) the
cost of shipping this product to the Factory Service Center and its return to the owner.
This warranty is valid only in the United States of America and does not extend to
owners of the product other than to the original purchaser. In no event will SDI or any of
its aliates, contractors, resellers, their ocers, directors, shareholders, members or
agents be liable to you or any third party for any consequential or incidental damages,
any lost profits, actual, exemplary or punitive damages. (Some states do not allow
limitations on implied warranties or exclusion of consequential damages, so these
restrictions may not apply to you.) This warranty gives you specific legal rights, and you
may also have other rights which vary from state to state. Your acknowledgment and
agreement to fully and completely abide by the above mentioned disclaimer of
warranty is contractually binding to you upon your transfer of currency (money order,
cashier's check, or credit card) for purchase of your SDI product.
© 2020 SDI Technologies, Inc. All rights reserved
Questions? Visit www.ihome.com
 Loading...