

Page 1
Quick Start Guide
iGO GPS navigation software
Page 2
Thank you for choosing iGO as your in-car
navigator. The SD card version of the program is
very easy to use. You only need to plug the card into
your PDA. A simple setup procedure will run
automatically, and later on inserting the card into the
PDA will automatically start iGO and removing it
will exit the program (without losing any data).
2.
Plug & Go – as simple as that
Contents of this manual:
•_What's in the box?
•_What's on the SD card?
•_Automatic setup
•_How to start the setup manually
•_Ready to navigate
•_•_The first steps if you have no GPS
•_•_The first steps if you have a GPS
•_•_•_Automatic GPS detection
•_•_•_Manual GPS configuration
•_Out on the road
Page 3

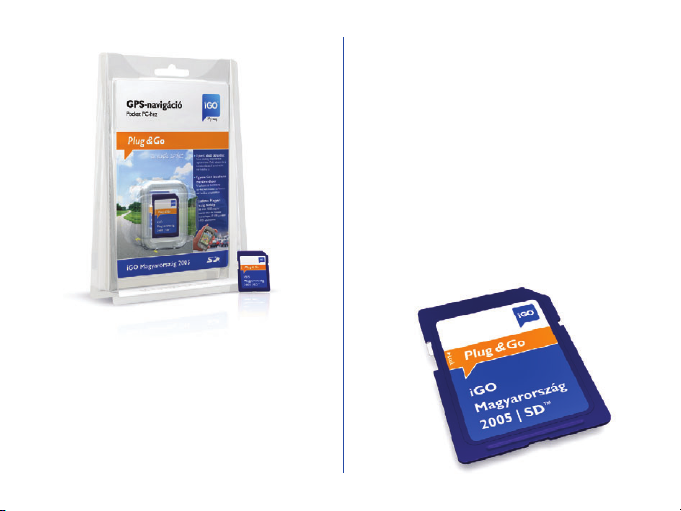
What's in the box?
Unpacking the iGO Hungary 2005 | SD™ you
will find a preprogrammed SD card and this printed
Quick Start Guide. That is all you need to use iGO.
What's on the SD card?
The iGO SD card contains everything you need to
use the system. There is no need for additional
downloads from the Internet, product registration
or other time consuming and/or infrastructure
demanding procedures. You can start using iGO
wherever you are. Right out of the box, in just
seconds.
The contents of the SD card:
•_iGO application (no further registration needed)
•_Autorun facility to let you run iGO by simply
•_inserting the SD card
•_Detailed map of your region with cities, postal
•_codes, streets, house numbers and thousands of
•_POI (Points of Interest)
•_The electronic format of this Quick Start Guide
•_The detailed iGO User Manual
Automatic setup
Installing iGO is really simple. All you need to do is
plug the SD card into your PDA and the setup
procedure will start automatically*. It will perform all
the necessary actions for you. You need only do this
once for each PDA you intend to use iGO with, then
iGO will start and quit automatically as you insert or
remove the SD card.
* Some PDA models prevent the installation from running
automatically. In this case follow the instructions in 'How to start
the setup manually'
3.
Page 4
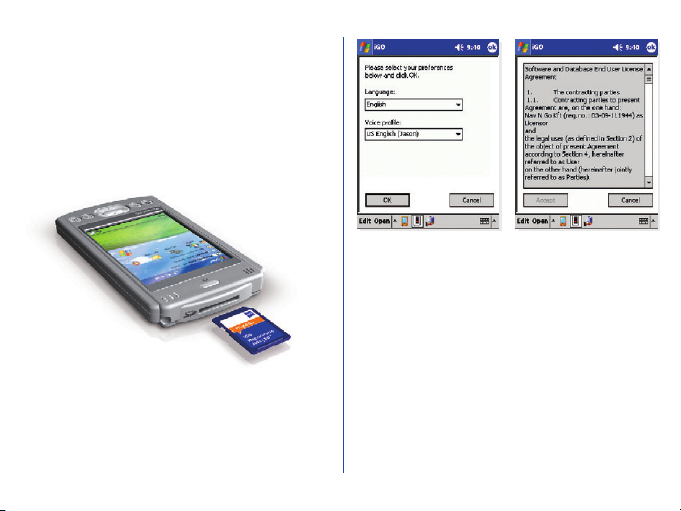
To complete the one time setup you need to do
the following:
•_If you already have a GPS device at hand, connect
it to your PDA before starting the setup.
•_Insert the iGO SD card into your PDA.
•_In the next screen read carefully and Accept the
End User License Agreement or Cancel the
installation if you do not agree with the conditions
and limitations.
Note: the Accept button remains disabled until you reach the last
page of the agreement.
•_After a few seconds the first screen of the setup
program appears. Choose the language of the
program and the voice profile for the guidance, then
tap OK to confirm your selection.
4.
•_Setup will be completed within a few seconds.
•_The iGO main screen will then automatically
appear. You are now ready to use the program
Page 5

How to start the setup manually
Even if your PDA does not support the automatic
setup, it is also easy to start manually. Apply the same
procedure later if you wish to change the language
of the program or the voice profile used.
Note: reinstalling the program will not erase any of your previously
saved data.
To start the setup manually you need to do the
following:
•_Open the Start menu (by tapping the Windows
•_logo in the top left corner)
•_Open Programs
•_Launch File Explorer
•_Open the folder of the SD card (its name
•_depends on your PDA, usual names are 'Storage
•_Card', 'SD Card', etc.)
•_Run SETUP
The details of the setup procedure are described in
'Automatic setup'.
®
5.
Page 6

Ready to navigate
Now that the installation is complete and iGO is
running, you are ready to start using it. Without a
GPS it can be used as a digital map (e.g. to search for
addresses or for POI, to browse the map or use it as
an off-line reference for navigation), but with the
addition of a GPS device (that is able to
communicate with your PDA) it can be turned into
the ultimate navigation system.
The program offers several custom settings for your
comfort described in detail in the User Manual
located in the Manual folder of the SD Card.
However the factory settings let you start using iGO
with its full functionality and comfort.
The first steps if you have no GPS:
Tap the MAP button on the main screen to start
using the program as a map, searching for Points of
Interest, or looking for addresses.
The screen is set to give you the maximum map size
possible. You can move the map in each direction by
simply dragging it. You can also drag and stretch the
scale at the bottom to set the zoom level. Use the
6.
PDA cursor buttons to turn and scale the map. Tap
any map location to have the name of the street
displayed together with the house number and the
list of the nearest POI. You can mark this point with
a pin or save it as POI. In addition various other
options are available in the different menus
accessible from the corners of the screen.
Note: You can find a comprehensive description of the Map screen
and its controls in the iGO User Manual.
Page 7

The first steps if you have a GPS:
Make sure your GPS has already been recognised by
the handheld computer (e.g. a Bluetooth GPS device
needs to be searched for, connected and paired using
the built-in Bluetooth manager application of the
PDA). Now you are ready to set up the connection
to iGO.
_______When iGO is first started, a black satellite
_______dish with a red exclamation mark is
_______displayed at the bottom left corner. This
shows that there is no GPS connection.
Tap this icon to bring up the GPS Data screen where
you have two options:
•_Automatic GPS detection
•_Manual GPS configuration
Automatic GPS detection
The easy way to connect your GPS is launching
Detect in the bottom right corner.
The program will check each available
communication port with all possible port speeds
and communication protocols to automatically
detect your GPS. This may take one or two minutes.
The successful connection is confirmed by iGO, the
communication between your GPS and your PDA is
indicated by a blinking green light on the left.
7.
Page 8

Unless you are inside a building or under heavy
foliage, shortly after that the satellite positions and
reception strength bars should appear in the upper
section of the screen, and when the GPS device finds
its position, the exact location coordinates together
with date, time, accuracy, elevation and speed
information become available in the lower part of
the screen.
Your GPS is now set up and next time you run iGO,
it will automatically connect to it using the same
settings. Now you can return to the main screen by
tapping the arrow in the top left corner. The satellite
8.
dish in the bottom left corner is now white (if you
have a GPS fix) or red (if you are inside a building),
and the exclamation mark has disappeared.
Manual GPS configuration
If you know where and how the GPS is connected,
you may select Config. instead of Detect.
In the next screen you need to set the
communication protocol (NMEA or SIRF), the
communication port (e.g. COM1, COM4) and the
communication speed in Bauds (4800, 9600, 19200,
38400 or 57600).
Page 9

Tap OK to return to the GPS Data screen having
the GPS receiver connected with your settings, or
tap the arrow in the top left corner to cancel the
operation leaving the factory settings untouched.
If you have selected OK and your settings were
correct the result will be the same as with the
Detect function. The green light on the left will start
blinking immediately, and after a short wait satellite
positions, signal strength bars, actual coordinates,
date, time, accuracy, elevation and speed will be
displayed.
Now you can return to
the main screen by
tapping the arrow in the
top left corner. The
satellite dish in the
bottom left corner is
now white (if you have a
GPS fix) or red (if you
are inside a building), and
the exclamation mark
has disappeared.
9.
Page 10

Out on the road
The first steps of the GPS aided navigation are also
very easy.
If you have no exact destination to reach or you just
want to try iGO cruising around for a while, tapping
COCKPIT in the main screen will take you to the
driving screen where the automatically rotated 3D
map will instantly put you on the virtual road.
As you start driving you will see how the blue arrow
(yellow at night) keeps showing your exact location
10.
and heading on the map. At the lower part of the
screen some important travel data is also shown
(e.g. the street you are driving on and your current
speed).
If you already have a destination to reach, choose
FIND & GO instead of COCKPIT and enter the
Find section of iGO.
Here you can choose
your destination from
the built-in data of the
map (city names, exact
addresses, Points of
Interest) so far, but later
also from the previous
search results, your own
POI database, and your
favourite destinations
(originally called Home
and Work).
Page 11

As soon as you pick any location in Find, iGO will
switch to the Cockpit screen and navigation begins.
Just listen to the voice and follow the instructions.
Now you are using iGO for navigation, its main
function. This was the aim of this short manual. To
explore the full functionality and extra features of
iGO we strongly encourage you to read the full iGO
User Manual available in the Manual folder of the
iGO SD card.
Thank you for purchasing our product. We hope that
you will enjoy using it.
Important Note
There is a 10-digit code located on the back of the
plastic box containing the iGO SD card. This is your
personal iGO ID (Identity code). Be sure to keep it
in a safe place or write it down, because You will
need the iGO ID for software updates and for
discount shopping in the future.
Navi-Gate Ltd. warrants the SD card for one year
from the date of purchase. The warranty does not
cover failures due to abuse, misuse, improper
istallation, accident or unauthorized alteration or
repairs.
For more information please contact the official iGO
distributor or your local iGO dealer. For a list of dealers
please visit our website: www.i-go.com
The map of Hungary in iGO brought to you by Top-Map Ltd.
The company's specialised staff continuously maintain and
expand the map database to ensure that iGO users can
always rely on a high-standard map that is as up-to-date and
as reliable as possible.
Navi-Gate Ltd.
H-1133 Budapest, Visegrádi 80/a.
Tel: +36 (1) 801-2830, +36 (1) 801-2831
Fax: +36 (1) 801-2832
11.
Page 12

© Nav N Go Ltd. All rights reserved.
 Loading...