

Page 1
English
WIRELESS HD CCTV Kit
CMS Software
Instruction Manual
KIT MODELS
HGNVK-48302 / 48304 / 88304 / 88308
www.iget.cz
Page 2

Contents
1. Set Up and Login
1.1 Set Up
1.2 Set Up Wizard
1.3 Users Login
2. Real Time Viewing
2.1 Connect / Disconnect
2.2 Recording / Screen Shot
2.3 Panorama Mode
2.4 PTZ Control
2.5 Split Screen Number
2.6 Other Functions
3. Video Playback
3.1 Playback
3.2 Fixed Time Play
3.3 Video SYNC
3.4 Video Download
3.5 Other Functions
4. Device Management
4.1 Add Device
4.2 Modify the Equipment
4.3 Remote Setting
4.4 Device Grouping
3
3
3
4
5
5
6
6
8
9
9
9
9
10
10
10
11
11
11
12
13
13
5. User Specifications
5.1 Basic Setting
5.2 Advanced settings
6. More Functions
6.1 User Management
6.2 Log Query
6.3 Resource Management
6.4 Electronic Map
6.5 System Information
14
14
15
16
16
17
17
18
18
2
Page 3
1. Set Up and Login
1.1 Set up
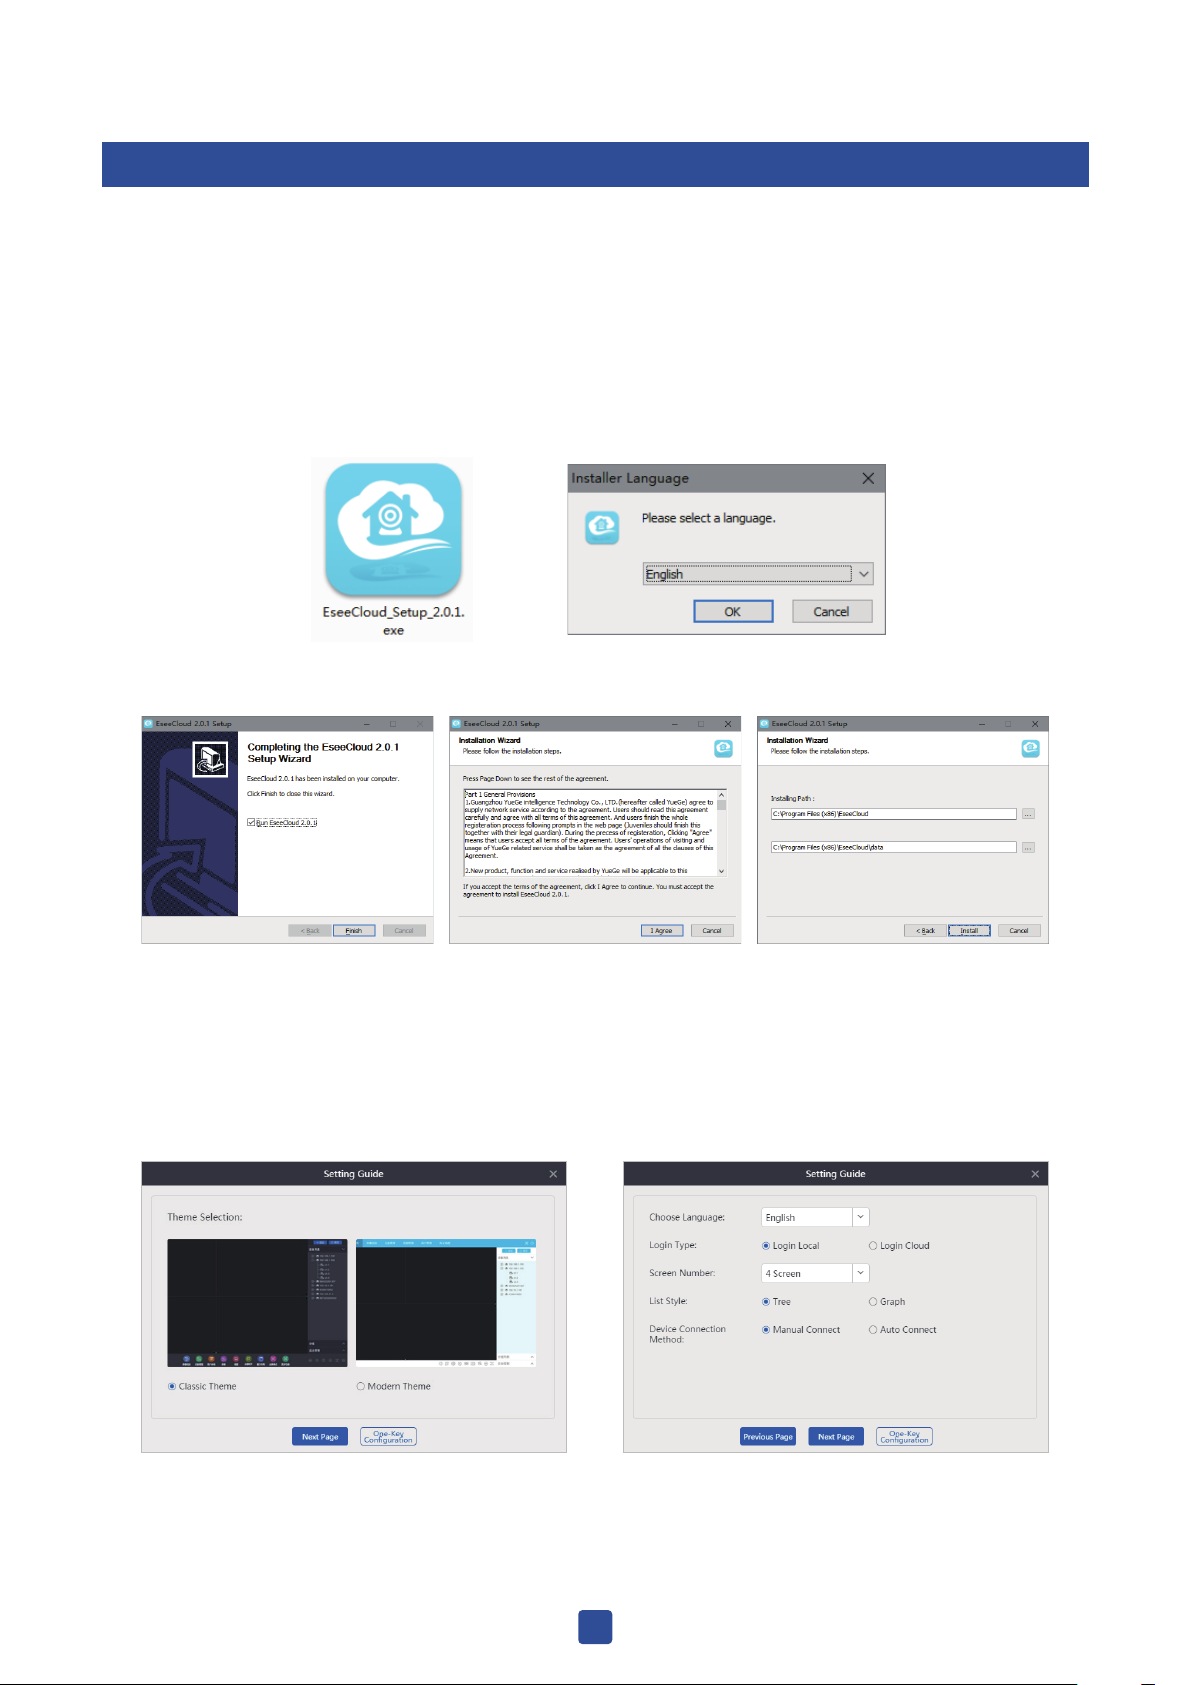
Step1: run EseeCloud CMS setup.exe install pack.
Step2: select a display language.
Step3: read and click accept the protocol or not.
Step4: select a install path and click install.
Step5: click finished and you can run the program.
Run the program Select a language
read the protocol Select a path Set up finished
1.2 Set Up Wizard
First time log in you’ll see a wizard interface, as shows below:
Step 1 Step 2
3
Page 4
Step 3 Step 4
1. Select CMS theme
2. Language / log in options / split screen number / list style / device connection method
• Local login is a normal mode, user name is admin, default password is empty.
• Cloud login can use app user name.
• Play back timer shaft scale / configuration / WiFi fill in / choose a save path.
• WiFi configuration function is Temporarily shielded.
3. Device choose
Note:
1. Modern theme include day mode/night mode.
2. After clicked finished, data information shows in the wizard.
3. You can choose one key set up in set up wizard, default setting will be provided by client side, can be
revised in the user parameters If needed.
4. If many channels selected in set up wizard, will need some time for automatic adding after login, We
suggest you to add channels in the device management after log in.
5. All specifications in set up wizard can be revised at client side, Operators can select depend on current
situation.
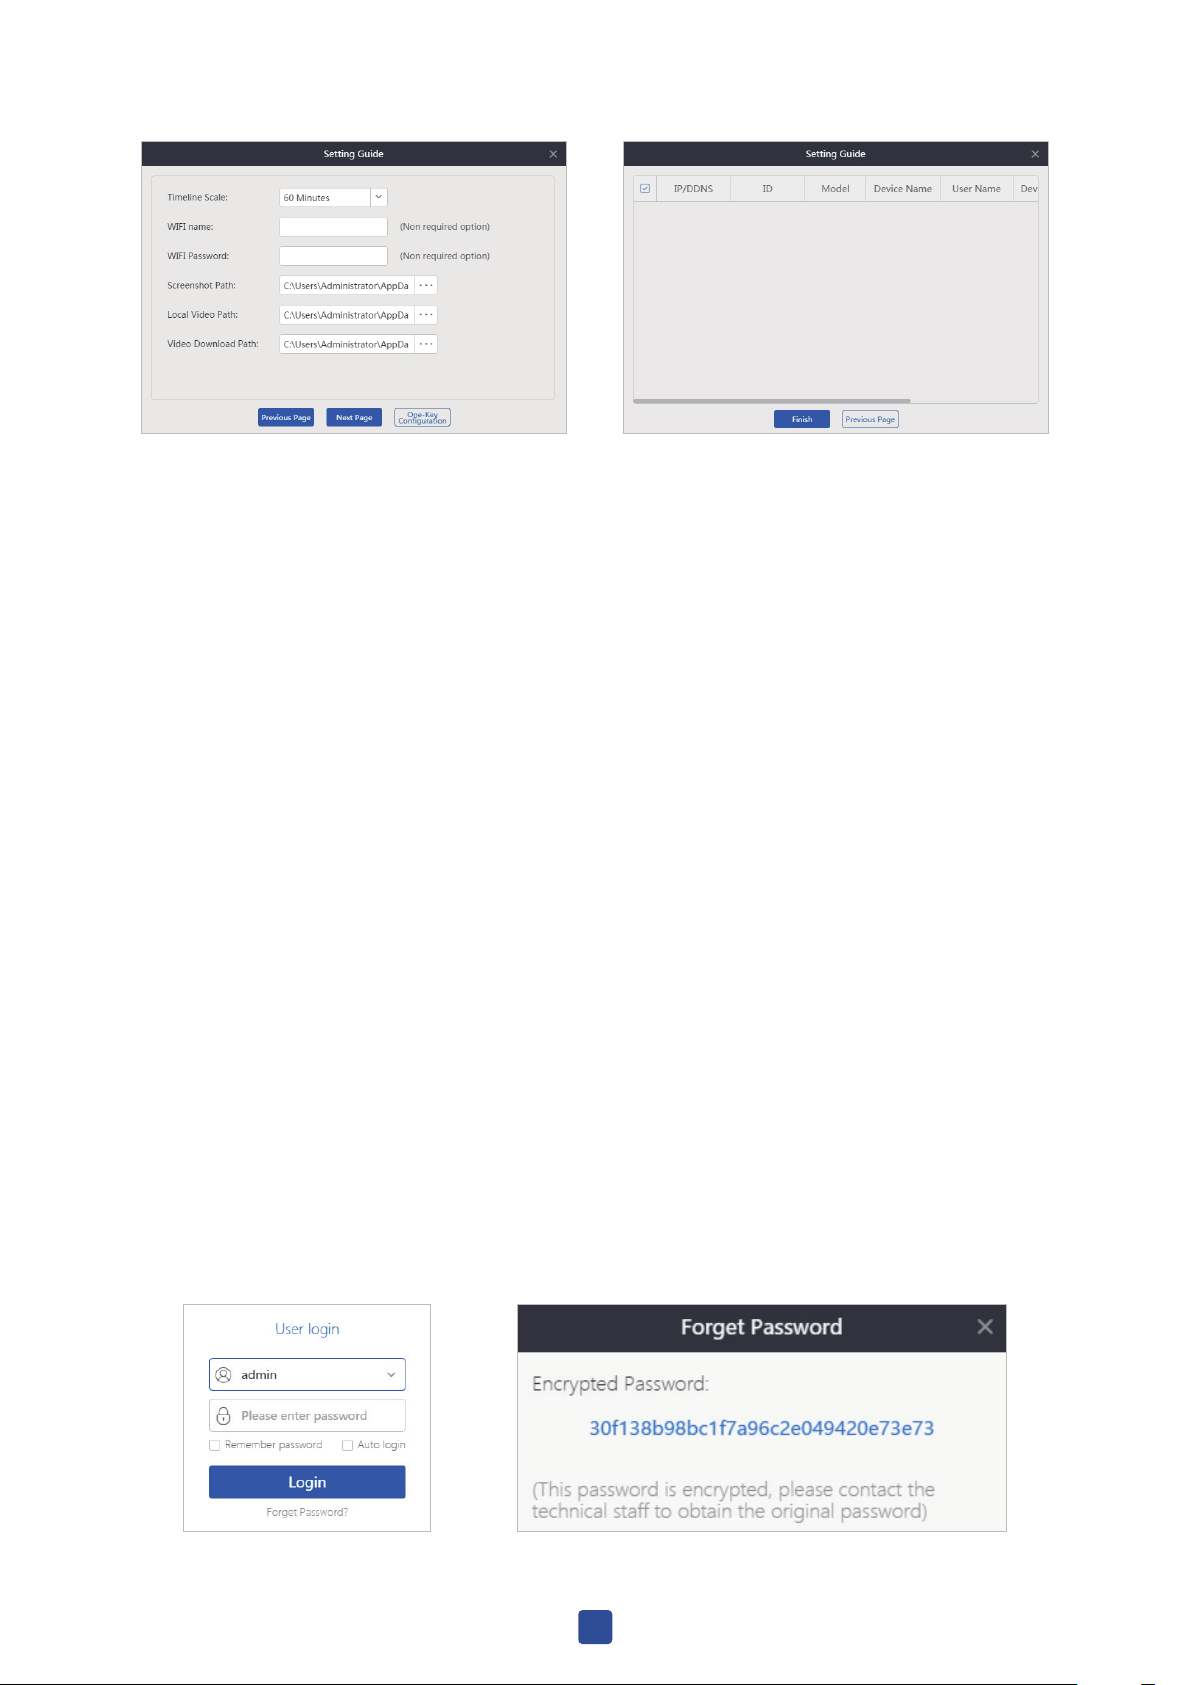
1.3 Users Login
local login
1. Enter user name + password
2. Click log in
• Can use default user name admin and empty password to log in.
• Can remember user name and password (automatic login unavailable when auto-locked status opened).
• Strings were encrypted in forgot password, different user name point to different encrypted password.
• User name drop-down box can show maximum three recently used user name.
4
Page 5
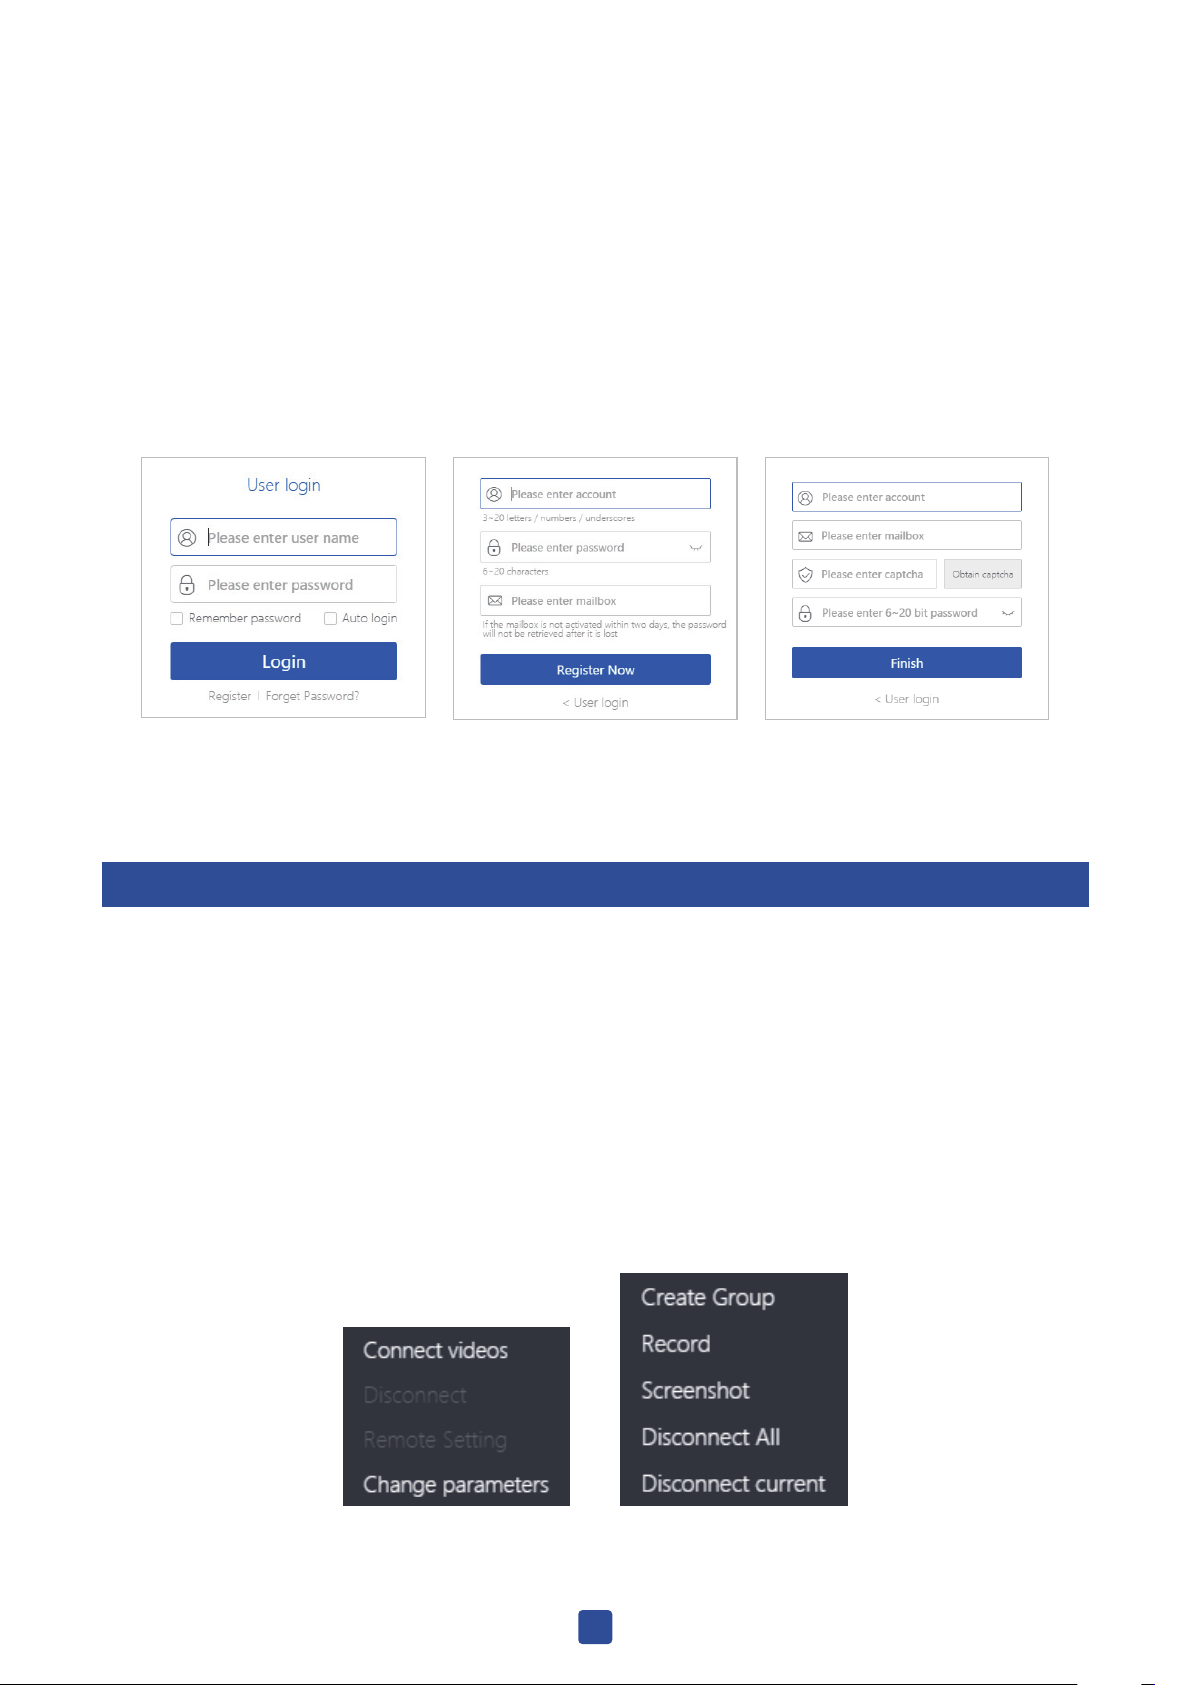
Cloud login
• User login: enter user name + password, remember the password and auto-login (optional), click login.
• Register: 1. Enter a new user name + password + email. 2. Click register.
• Retrieve password: 1. Enter user name + email. 2. Click to get the verification code and enter.
Note:
1. Cloud login must be existed user name ( Eseecloud account can login from app side).
2. Please use valid email, for retrieve the password or some special case.
3. After register, a registration confirmation will be send to your Email box, please click the link to activate.
4. None activated email status, retrieve password will be unavailable (activate within two days after register).
Login Register Retrieve password
2. Real Time Viewing
2.1 Connect / Disconnect
Tree style list
• Connect:
1. Select the device / channel double click to enter video connecting status.
2. Select device / channel right click and choose connect video to enter video connecting status.
• Disconnect:
1. Select device / channel and right click disconnect.
2. Right click and choose disconnect all or disconnect current device (as shows in image 2).
image 1 image 2
5
Page 6
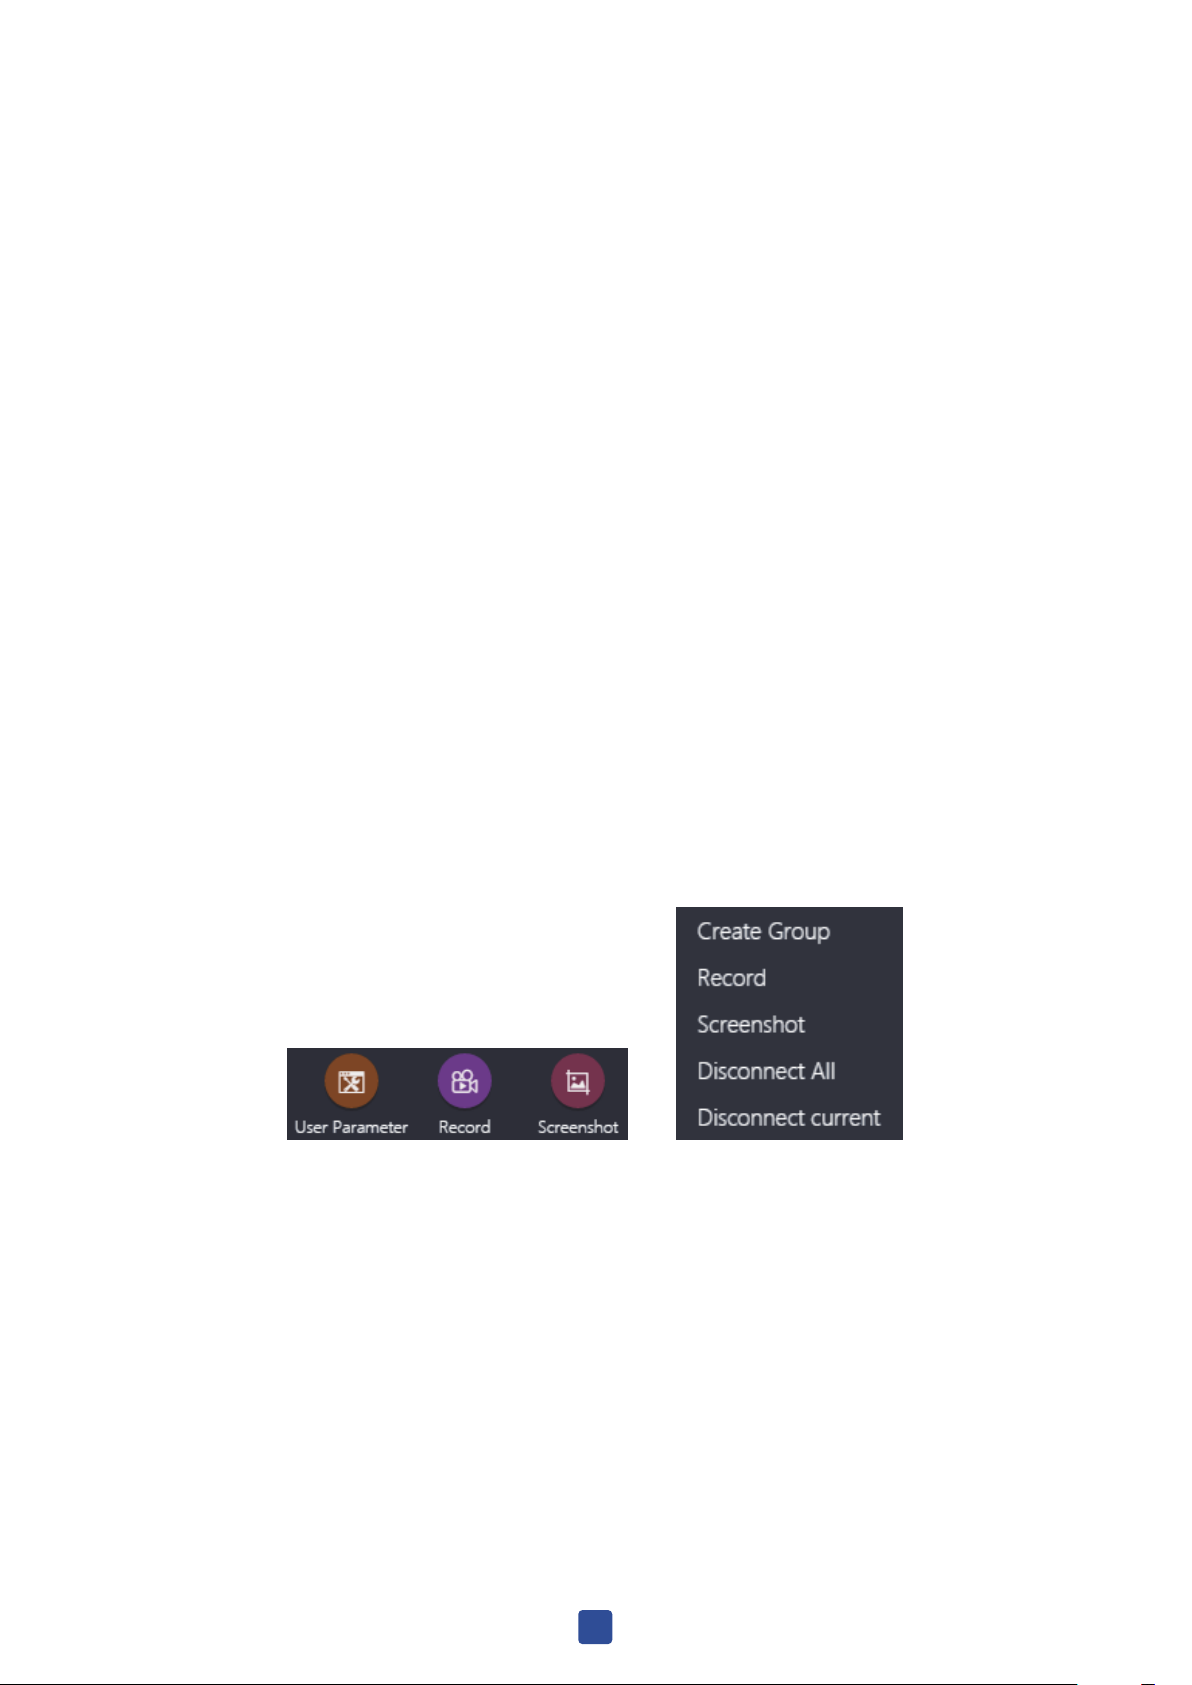
Chart style list
1. After Select device/channel, click play to enter video connecting status.
2. Select device/channel and then click stop to disconnect.
3. Right click connect/disconnect refer to tree style list.
Note: Poor computer performance might effect video fluency, We suggest you add device channel step
by step.
2.2 Recording / Screen Shot
Recording:
1. Click record button in toolbar to enter recording status. (as shows in image 1).
2. Right click and choose record also works (as shows in image too).
3. Click record again will be stop recording.
Note: Real recording time not equal to the time recording start to end.
Screen shot:
1. Click screen shot button.
2. Right click to choose screen shot.
Note:
1. Code stream switching status, screen shot can not download.
2. There is no continuously screen shot function, one picture at once.
image 2image 1
2.3 Panorama Mode
Panorama Mode
• Enter:
1. Double click to enter maximum status, right click to choose panorama mode.
2. Channel mode no split screen status, panorama icon will shows changing status, Click to change to
panorama mode.
• Exit:
1. Right click to choose exit.
2. Click the panorama mode, then choose exit panorama mode.
6
Page 7

Cylindrical ModePanorama Mode
Unfurled Mode Two-split Screen Mode
Four-split Screen Mode
Six-split Screen Mode
Note:
1. In the panorama mode, you can select 6 display forms, including: panorama, cylinder, expansion, 2
split screen, 4 split screen, 6 screen.
2. The Panorama mode 4 split screen and 6 split screen can make the preset point patrol, you can add
the preset position by Operating the left and right click the channel screen.
Installation mode
• Hanging Installation: patrol will be turn circle by clockwise direction.
• Wall-handing: the direction of the patrol is swinging from side to side.
7
Page 8

Cruise Mode
• Speed: the patrol provides 20s, 40s, 60s options, refer to slow / medium / fast speed.
• Stop: pause the current patrol statues, Click on the left patrol channel or select the stop button in
Cruise mode.
Panorama Mode Installation Mode Cruise Mode
2.4 PTZ Control
Patrol / PTZ / Zoom / Focal Length / Aperture:
PTZ control function needs PTZ device (such as analog PTZ camera) connect the main control device.
Patrol is the direct execution of the picture cruise operation, the PTZ is to adjust the camera direction,
and zoom is to replace the mirror multiple.
PTZ Control PTZ
Focal Length Zoom / Aperture
8
Page 9

PTZ direction control button
Focal Length Adjustment button
Aperture Adjustment button
Zoom Adjustment button
Cruise Function button
2.5 Split Screen Number
1. Client-side provide 1 channel, 4 chanel, 6 channel, 8 channel, 9 channel, 16 channel, 25 channel, 36
channel, 49 channel, 64 channel, those modes can be switched as you like.
2. When the number of connected device channels is greater than the current split screen, the display
screen will automatically increase and stop when Reach 64.
2.6 Other Functions
Clarity switch: SD Standard definition and HD high definition switch buttons.
Sound: 1. Select channel. 2. Click close/open sound.
Help: the help button at each interface is the corresponding function operation instructions.
Video: when the real-time preview channel is recording, the icon flashing.
Full screen: 1. Click the full screen button. 2. Click the Esc key to exit the full screen status.
Close: 1. Click the close button. 2. Click ok to close the CMS client.
3. Video Playback
3.1 Playback
Playback four steps:
1. Select the device channel. 2. Select the video type.
3. Select the playback date. 4. Confirm the retrieval video.
• The video retrieval requires three conditions at the same time: “device channel + video type + playback
date”.
• Video types include: motion, timing, alarm, manual. Generally, all types of video can be retrieved by default.
• The selection of the equipment channel can directly affect the retrieval results, and the online status of
the device must be confirmed before the video retrieval.
9
Page 10

Device Channel Video Type Select Date
3.2 Fixed Time Play
Fixed time play playback: Select the fixed time play operation, input the video valid time point in the
time frame, click ok to play immediately.
Time drag playback: Adjust the time scale and drag the cursor on the timeline to the corresponding time
(As shown in the 2 figure below).
1. Fixed time play
2. Time line
3.3 Video SYNC
Operation step: 1. Retrieve the video. 2. Check the SYNC. 3. Switching time point.
Date: check the timing of SYNC, and the different channel synchronization will not take effect.
Time: check synchronization switch time point, the video time of each channel will not take effect during
the same time period.
3.4 Video Download
Batch download: in the range of searching time result, the time period of the download should be
entered according to the time of the start time + end time.
Period download: the download will also show the time period of the video, and click the download
button of any time period according to your own needs.
10
Page 11

Define bulk download
Select the time period to download
3.5 Other Functions
Play control: video playback supports playback / pause / stop control, select the screen form in
playback and click operation.
Hidden timeline: switching to video playback, the timeline displays a “hide” small key that can be used to
hide the timeline when playback.
Time scale adjustment: the setup wizard doesn't set the Settings, the playback time axis will default to 60
minutes, and video playback can also be used to modify the scale by clicking “shrink” or “magnification”.
Play Control Hidden Adjust the scale
4. Device Management
4.1 Add Device
Add device by network:
1. Enter the device management interface.
2. Refresh LAN devices.
3. Check the device to add (The LAN device can be filtered by the input IP/ID in the filter box).
Add Cloud ID: Manual input devices “cloud ID + channel number”, choose “type”, according to the
condition, and the remaining default is to click ok (password can choose according to the actual circumstance of equipment set up input).
Add IP/DDNS: Manual input device “IP/DDNS + port + channel number”, select “type” according to the
actual situation of the device, and the remaining default can be clicked ok.
Add device by network
11
Page 12

Manual input addition
4.2 Modify the Equipment
Modify the equipment: Under the device management or preview interface, click modify after selecting
the device, which will load the modification device interface (As shows in image 1).
Regional modify: After selecting the selected area in the device management, click the modify button to
load the modified area information interface (As shown in image 2).
Grouping modify: When you select groups in the preview screen, click the modify button to load the
modified group information interface (As shows in image 3).
Note: Changes in the equipment channel serial number corresponding to the channel name, panoramic
view, types, each serial number corresponding panoramic or channel types are independent and need
the channel equipment into a panoramic status which can select the corresponding channel number,
modified panoramic and channel type.
1. Device Modification
2. Area modification
3. Grouping modification
12
Page 13

4.3 Remote Setting
Setting step: 1. Select device 2. Click setting / Remote setting button (Refer image 1, 2).
Device Information: Content including device model, device ID, OED serial number, firmware version
(provide check the update).
Function Setting: Function configuration, tips sound, tips language and display mode, resolution can be
set up on here.
Alarm Settings: content including mobile detection, push notification, motion detecting sensitivity and
synchronization time function.
TF card Settings: TF card status, the available/the total capacity, TF card memory format function.
Note:
1. Do not support alarm push notification in local login, and you need to switch to cloud login status.
2. The VR cam device is supported for remote setting at present.
Image 1 Image 2 Image 3
4.4 Device Grouping
Create groups: 1. Click the “create group” button. 2. Input “group name” then click ok.
Add Channel
• Enter: select created group and click add channel button.
• Import: 1. Select the channel. 2. Select group. 3. Click the Import button.
• Import All: 1. Select group. 2. Click Import All button.
Modification / Delete
• Modification: Click modification button to modify after selected grouping.
• Delete: Click Delete button to delete after selected grouping or channel.
13
Page 14

1. Create Group
2. Add Channel
3. Change Group
5. User Specifications
5.1 Basic Setting
Theme: CMS provides classic theme, modern theme, click application or confirm switch to the corre-
sponding theme.
Split screen number: the selected split screen number is displayed after login, the CMS provides the
split screen 1/4/6/8/9/16/25/36/49/64 Total Ten forms of choose.
Display language: CMS has two display language:simplified Chinese and English. After choose and login
again,it will change to the language you want.
Login: online mode which need to connect to network. But local login don't need.
List Styles: the change is the device list show for real time preview and playback interface. The device list
of other interface are all for tree style.
14
Page 15

Path Modification:
1. Screenshot path: Screenshot files save in the snapshot folder by default or can save to other path
according to your needs.
2. Local video path: local video kept in the record folder, can choose to save in other path according to
own needs.
3. Video download path: the download files will save to video_download folder by default
Note: After modify setting, click “apply” then CMS will change accordingly but you need to log in again.
5.2 Advanced settings
Time Zone Setting: you can choose your local time zone.
System Lock: click Enable auto lock, input the time for no operating time.
Auto Start: click Auto Start, CMS will run after power on computer.
Auto Connect Video: click Login auto connect video, Automatically connect to added equipment on list,
connect the channel number based on the number of split screen in a set.
Basic setting
Advanced setting
15
Page 16

6. More Functions
6.1 User Management
Create users:
1. Click the create user.
2. Enter your user name (required) + Remark name (optional).
3. Click confirmation.
Modify permissions:
Default: Permissions include screenshot, Video, cloud setting, video playback, remote download.
Modification:
1. Click modification permission.
2. Check need to give permissions to new user and the device/channel (click the full select if need).
3. Click confirmation.
Other Functions:
• Empty password: when the user forget login password, the password can be empty by direct opera-
tion, so that the new user can be re-login and the internal Settings data can be retained.
• Change Remark: Add remarks , change remarks or delete remarks ,to operate in Modify remarks .
• Delete User: Click delete user if think that the create user is unnecessary .
Create users
Modify permissions
16
Page 17
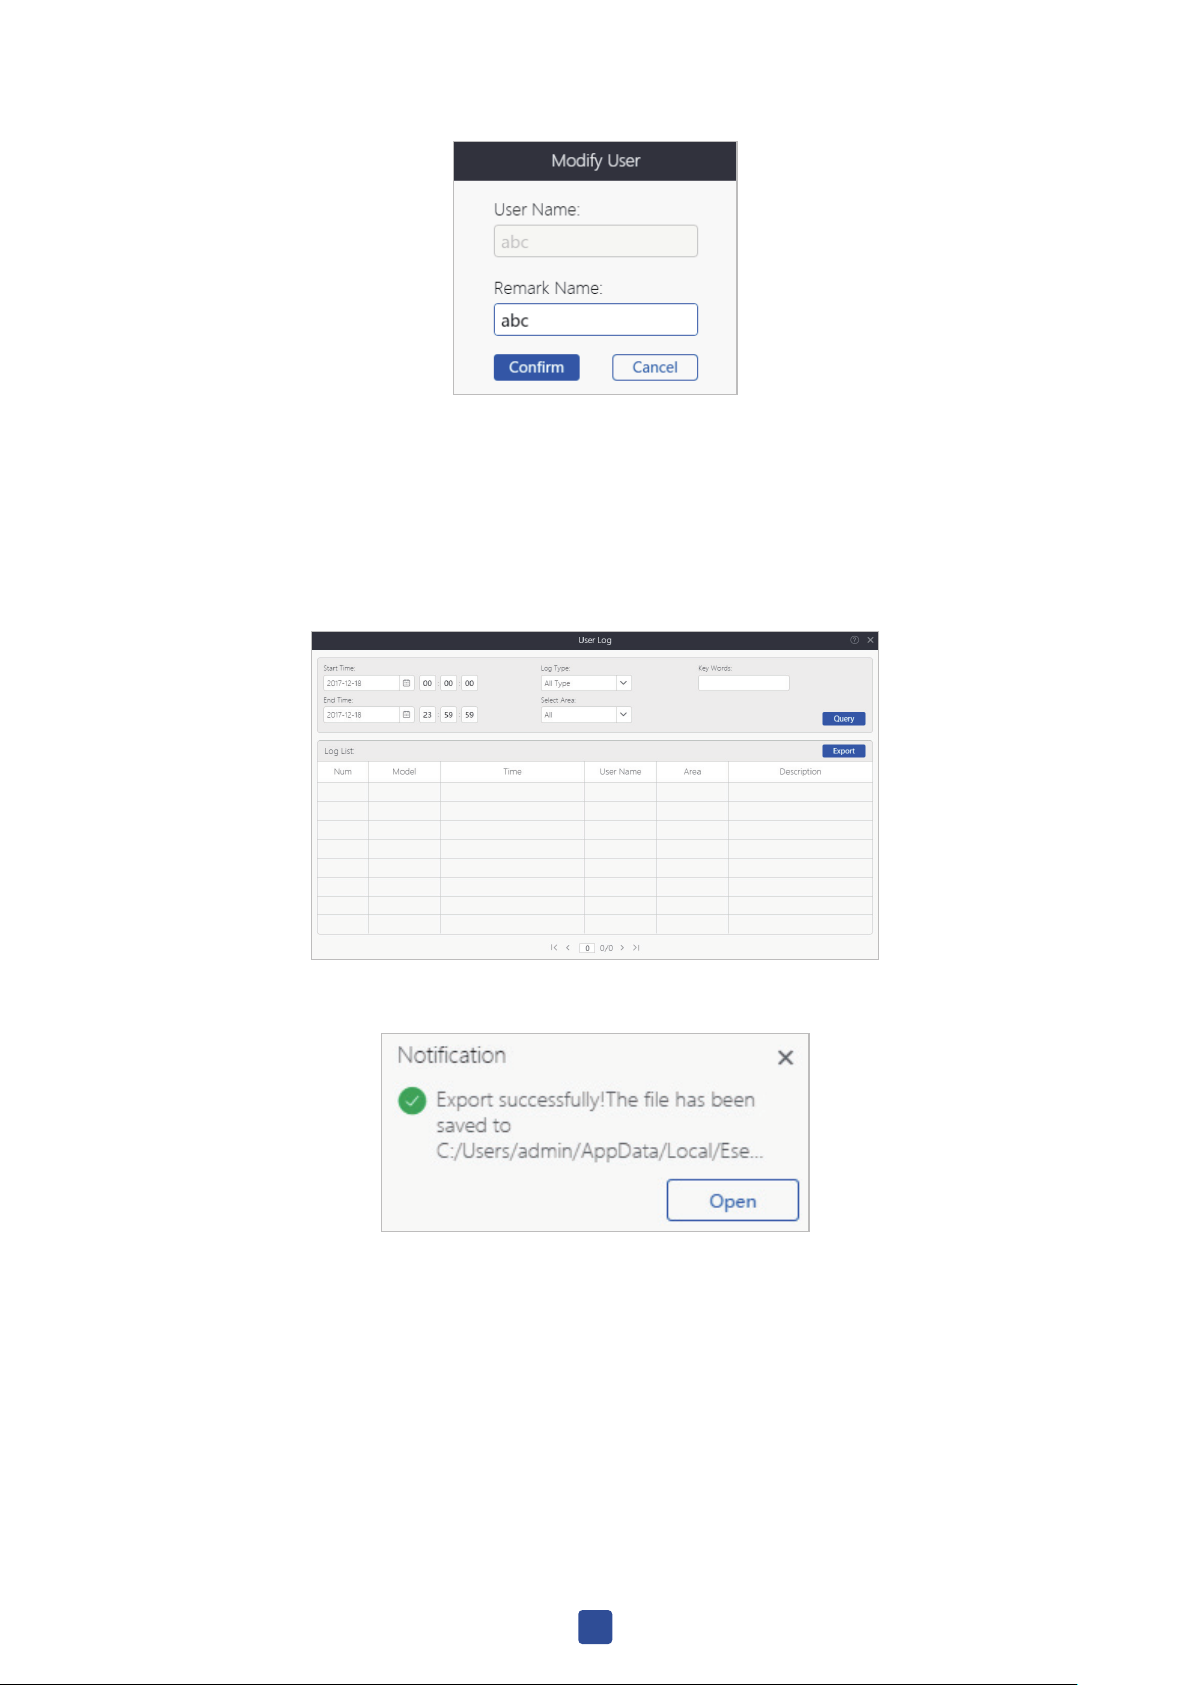
Modify User
6.2 Log Query
Query: 1. Confirm start time + ending time 2. Log type (include: alarm log, login log, operation logs)
3. Selected area 4. click query (shows in image 1)
Export: 1. Query log 2. Click Export 3. Open the file to confirm (shows in image 2)
Image 1
Image 2
6.3 Resource Management
Screenshot:
• Search: 1. Choosed start time + ending time. 2. Start to search.
• Preview: Method 1: Select “preview” in right button. Method 2: Directly click researching screenshot files.
• Delete: Method 1: Select “delete”. Method 2: Come into Screenshot Preview Status, Then click “delete”.
• Location: Method 1: Click on the location in right button. Method 2: Click “save location” in resource
information.
17
Page 18

• Resource information: “user, resource size, resolution, device name, channel, screenshot time, save
location”, including the above contents (as shown in figure 2).
• Change size: “original size, maximize, magnify, shrink, resource information, delete”, and screenshot
preview status includes can be switched to the above status/function.
Video
• Search : 1. Choosed start time + ending time. 2. Select video type (include: preview video, play back
video, default all types). 3. Click on Searching.
• Resource information: “user, resource size, video type, device name, channel, video time, save
location”, including the above contents.
• Other functions: “preview, resource information, location, delete” operation steps same as screenshot,
can refer to the operation in the screenshot.
1. Right click 2. Recource information
6.4 Electronic Map
Upload Map: 1. Click “Upload Map” button to choose the image files. 2. Choose the Intra-area
channel and Drag and load onto the map. 3. Click “Save”.
Delete Channel: 1. Click the channel on the load map. 2. Click Delete button.
6.5 System Information
Version Information: The contents are shown as follows: company name, version number, date.
Modify Password: 1. Input “original password + new password + Confirm new password”. 2. Click on
confirmation. 3. Confirm the new password to login authentication codes.
Log out: Click on the “log out” button to exit the current account login state.
Version Info Change Password
18
Page 19

HGNVK8300-4M-230518 | © 2018 HOMEGUARD
 Loading...