

Icom IC-F5060, IC-F6060, IC-F5061, IC-F5061D, IC-F5062 Operating Manual
...
OPERATING GUIDE
OPERATING GUIDE FOR
IC-F5060/F6060 SERIES
BIIS 1200/MDC 1200 SYSTEM/
LTR®/IDAS™ OPERATION

IMPORTANT
Thank you for purchasing this Icom transceiver.
®
The BIIS 1200/MDC 1200 system/LTR
/IDAS™ (Icom Digital
NOTE: In this operating guide, the LCD illustration is de-
scribed using the 2 line display mode.
Advanced System) functions are built into your IC-F5060/
F6060 series transceiver.
INFORMATION: The 10-key pad of the optional DTMF mi-
crophone (HM-148T) has only the DTMF code transmitting
READ ALL INSTRUCTIONS carefully and completely
before using the transceiver.
capability, so an ID and message cannot be input with this
microphone.
SAVE THIS OPERATING GUIDE — This operating
guide contains important oper ating instructions for:
• IC-F5061/F5061D/F5062/F5063 VHF MOBILE TRANS-
CEIVERS
• IC-F6061/F6061D/F6062/F6063 UHF MOBILE TRANS-
CEIVERS
Icom, Icom Inc. and the Icom logo are registered trademarks of Icom Incorporated (Japan) in Japan, the United States, the United Kingdom, Germany,
France, Spain, Russia and/or other countries.
IDAS and IDAS logo are trademarks of Icom Incorporated (Japan).
LTR is a registered trademark of the E.F.Johnson Technologies, INC. in the
United States.
All other products or brands are registered trademarks or trademarks of their
i
respective holders.

TABLE OF CONTENTS
IMPORTANT .......................................................................... i
TABLE OF CONTENTS ........................................................ ii
1 PREPARATION............................................................1−2
■ Programmable function keys ........................................1
2 BIIS 1200 OPERATION .............................................3−15
■ Setting example ............................................................3
■ Receiving a call ............................................................ 3
■ Transmitting a call ......................................................... 6
■ Receiving a message ...................................................8
■ Transmitting a status...................................................10
■ Transmitting an SDM .................................................. 11
■ Position data transmission..........................................12
■ Printer connection ......................................................13
■ BIIS ANI .....................................................................13
■ Transmitting an Emergency call ..................................13
■ Stun function ..............................................................14
■ BIIS indicators ............................................................ 14
■ Priority A channel selection ........................................14
■ Horn output ................................................................15
3 MDC 1200 SYSTEM OPERATION ..........................16−23
■ MDC 1200 system operation ......................................16
■ Receiving a call .......................................................... 16
■ Transmitting a call ....................................................... 19
■ Status message transmission ....................................23
4 LTR OPERATION ....................................................24−25
■ LTR operation ............................................................. 24
■ Receiving a call .......................................................... 24
■ Transmitting a call ....................................................... 25
5 IDAS OPERATION ..................................................26−46
■ IDAS operation ...........................................................26
■ IDAS-Trunk operation ................................................. 26
■ Receiving a call .......................................................... 26
■ Transmitting a call ....................................................... 32
■ Transmitting Position data...........................................44
■ Sending a Status message ........................................45
■ Sounding a Horn ........................................................45
■ Connecting a printer ...................................................45
■ Encryption function .....................................................45
■ ATB Ring Back function ..............................................46
ii

1
PREPARATION
■ Programmable function keys
The following functions can be assigned to the [UP], [DOWN],
[P0], [P1], [P2], [P3] and [P4] programmable function keys.
Consult your Icom dealer or system operator for details concerning your transceivers programming.
If the programmable function names are bracketed in the following explanations, the specific key is used to activate the
function.
D For BIIS 1200 operation only
BIIS BUTTON KEY
➥ Push to toggle the call ID list, transmit message and stand-
by modes.
➥ Push to toggle between the queue channel and the received
message record display, after the queue channel is selected.
➥ Hold down for 1 second to select the queue channel
mode.
STATUS UP/DOWN KEYS
➥ While in standby, push to display the transmit status screen
and select a status number.
➥ When a received SDM (Short Data Message) is displayed,
push to cancel the automatic scroll and then manually
scroll the message.
➥ When an SDM that contains more than 12 characters is
displayed, push to manually scroll the message.
1
D For MDC 1200 system operation only
MDC CALL KEY
➥ Push to enter the MDC menu selection mode.
➥ Push [CH Up] or [CH Down] to select the desired
“SELCALL,” “CALALERT,” “STUN,” “REVIVE,”
“RADIOCHK,” “ STATUS”, “MSG” and “CALL LOG” MDC
menu.
After selecting, push this key again to enter the transceiver
alias selection mode.
• If no operation is performed for approximately 15 seconds, the
transceiver returns to the normal operating mode.
➥ In the transceiver alias selection mode, push to return to the
MDC menu selection mode.
MDC SELCALL KEY
Push to enter the transceiver alias selection mode for a
SelCall.
• After selecting the desired alias, push [PTT] to transmit a SelCall.
• If no operation is performed for approximately 15 seconds, the trans-
ceiver returns to the normal operating mode.
MDC CALLALERT KEY
Push to enter the transceiver alias selection mode for a
CallAlert.
• After the desired alias selection, push [PTT] to transmit a Call
Alert.
• If no operation is performed for approximately 15 seconds, the trans-
ceiver returns to the normal operating mode.

PREPARATION
1
1
D For LTR operation only
PHONE KEY
Push to connect or disconnect the telephone network.
D For IDAS operation only
DIGITAL BUTTON KEY
➥ Push to enter the application selection mode.
➥ Hold down for 1 second to toggle the call type between
Individual and Talkgroup, and then automatically enter the
application selection mode.
• Push [CH Up] or [CH Down] to select the desired “VOICE,”
“CALALERT,” “STUN,” “ KILL,” “REVIVE,” “ REM MON,”
“RADIOCHK,” “STATUS,” “MSG,” “ STAT POL” and “CALL LOG”
application.
➥ While in the application selection mode, push to enter the
Individual or Talkgroup ID selection mode.
• If “STATUS” or “MSG” is selected as the application, the message
selection mode appears. Push [CH Up] or [CH Down] to select
the desired message, then push the Digital Button key again to
enter the Individual or Talkgroup ID selection mode. (pp. 39, 40)
➥
In the application selection mode, hold down for
to return to the normal operating mode.
1 second
STATUS UP/DOWN KEYS
➥ When a received SDM is displayed, push to cancel the
automatic scroll and manually scroll the message.
➥ When an SDM that contains more than 12 characters is
displayed, push to manually scroll the message.
10-KEY ENTER KEY
Push to enable the microphone’s 10-key pad operation to select the memory channel, status message number, and so on,
depending on the presetting. Ask your dealer for details.
2
3
4
5
6
7
8
9
10
11
12
13
14
15
16
2
2
0001
1234
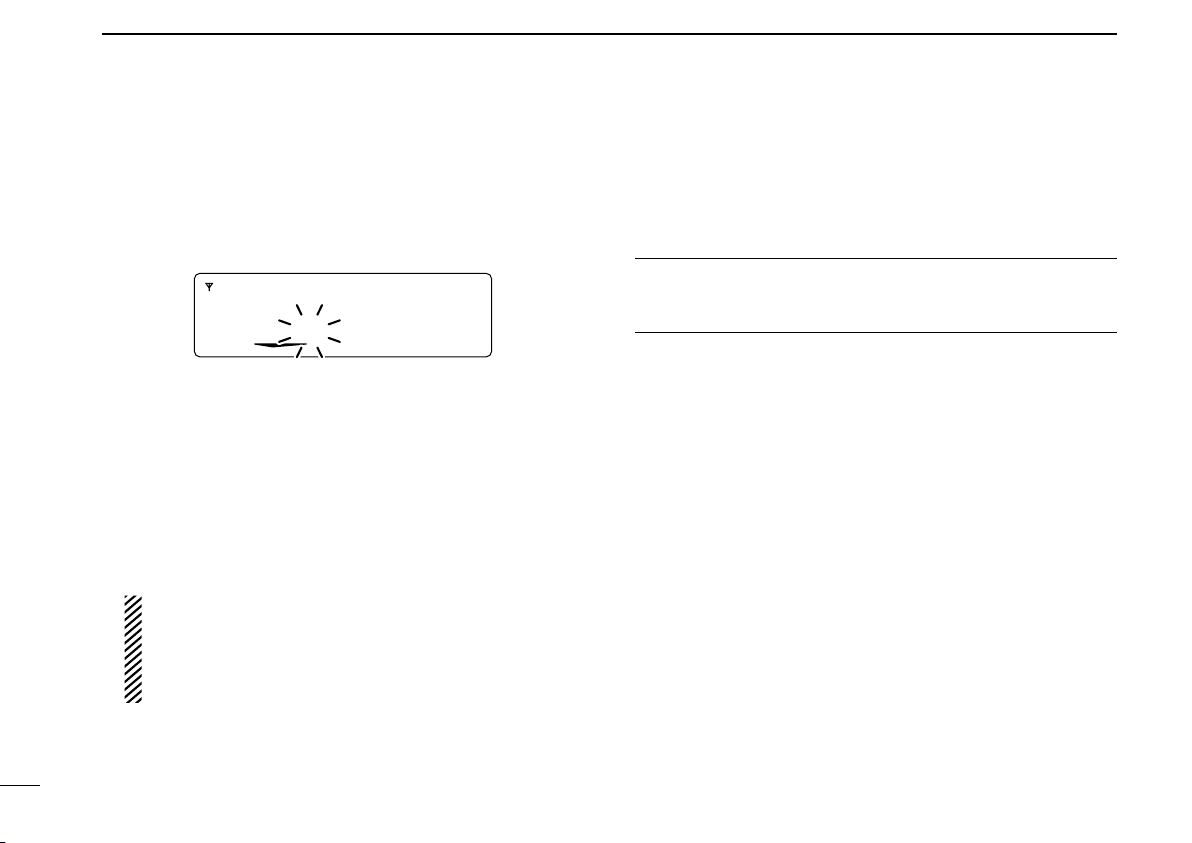
Appears or blinksAppears
Your own ID Calling station ID
BIIS 1200 OPERATION
■ Setting example
The following key functions are recommended to be assigned
to each programmable key for BIIS 1200 operation. The key
functions can be assigned by your dealer. Ask your dealer for
details.
NOTE: During BIIS 1200 operation, the MDC 1200 sys-
tem, LTR
[Call] : Push to transmit a BIIS call when the
[BIIS Button] : Push to select the call list ID/transmit
•
[TX Code Enter] : Push to directly enter the ID code
[Moni (Audi)] : When your communication in the MSK
[CH Up]/[CH Down] : While in the standby mode, push to se-
Aft er pus hing [BIIS Button] or
3
and IDAS operations are disabled.
selected channel is an MSK channel.
message, or a displayed receive message record.
The key indicator appears above the key that
this key function is assigned to, while it is activated. See the instruction manual for details.
edit mode, then push [CH Up] or [CH
Down] to set the desired digit.
channel mode is finished, push this key
to send a ‘Clear down’ signal.
lect an operating channel.
[TX Code CH Enter], push to select a
call list or TX code digit, respectively.
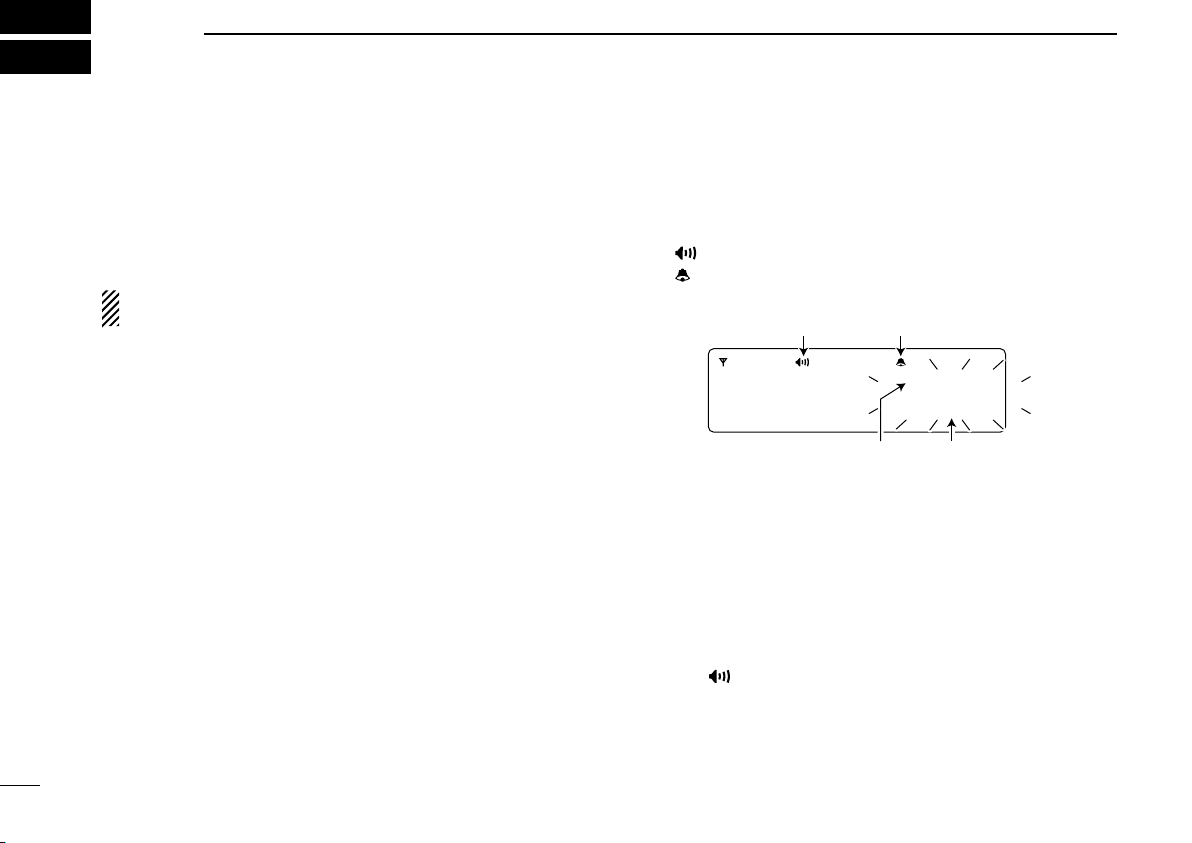
■ Receiving a call
D Individual call
q When an individual call is received:
• Beeps sound.
• “ ” appears and the mute is released.
• “ ” appears or blinks, depending on the presetting.
• Your own ID (or text) and the calling station ID (or text) blink.
w Hold down [PTT], then speak into the microphone at your
normal voice level.
• The LED lights red.
e Release [PTT] to return to receive.
• The LED indicator lights green while receiving a signal.
r To end the call, push [Moni(Audi)] to send the ‘Clear
down’ signal.
• Either station can send a ‘Clear down’ signal.
• “CLR DOWN” is displayed for approximately 2 seconds.
• The “
standby mode.
” icon disappears and the transceiver returns to the
BIIS 1200 OPERATION
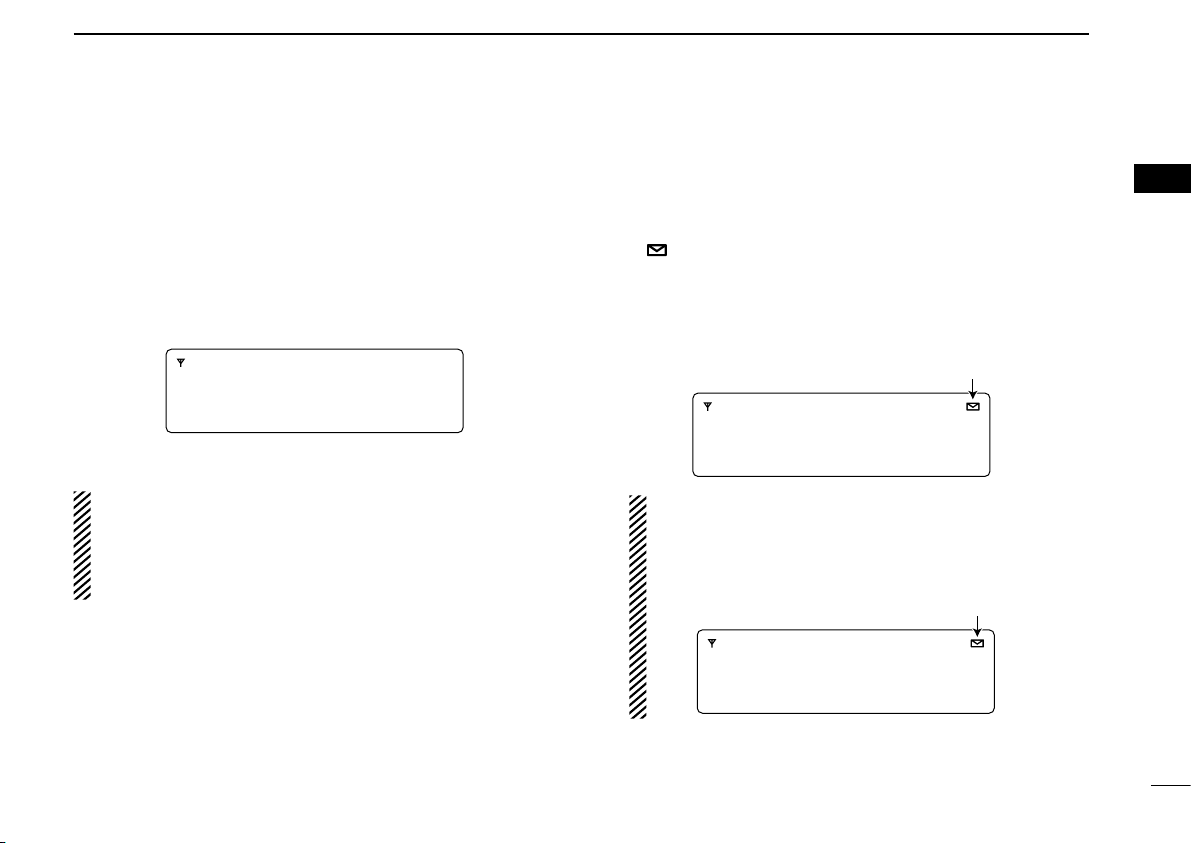
4001
1234
Appears or blinksAppears
Group ID Calling station ID
Emergency
1111
Calling station ID
2
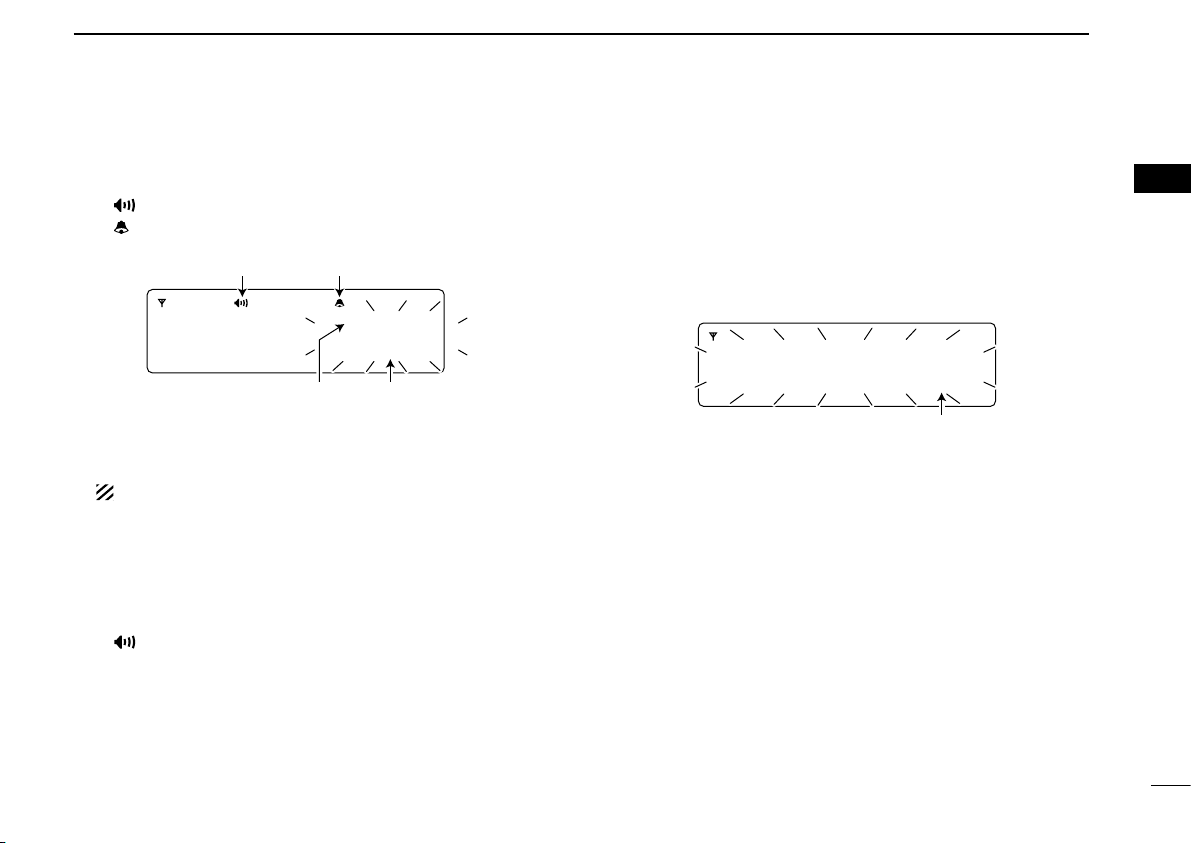
D Group call
q When a group call is received:
• Beeps sound.
• “ ” appears and the mute is released.
• “ ” appears or blinks, depending on the presetting.
• The group ID (or text) and the calling station ID (or text) blink.
w Hold down [PTT], then speak into the microphone at a
normal voice level.
• The LED indicator lights red.
NOTE: Only one station is permitted to speak at a time.
e Release [PTT] to return to receive.
• The LED lights green while receiving a signal.
r To end the call, push [Moni (Audi)] to send a ‘Clear down’
signal.
• Either station can send a ‘Clear down’ signal.
• “CLR DOWN” is displayed for approximately 2 seconds.
• “
” disappears, and the transceiver returns to the standby
mode.
D Emergency call
q When an emergency call is received:
• Beeps sound.
• “Emergency” and the calling station ID (or text) blink.
• The state of the backlight depends on the Backlight setting in the
User set mode. When “OFF Auto” is selected, the backlight turns
ON for the preprogrammed time period. (Auto Backlight Timer)
This function is usable in transceivers whose revision number is
3.0 or later. Ask your dealer for details.
w The transceiver automatically transmits an acknowledge-
ment to the calling station.
e Turn power OFF or change the channel to stop the beep
and display indication.
1
2
3
4
5
6
7
8
9
10
11
12
13
14
15
16
4
BIIS 1200 OPERATION
<QUEUE>
-QUEUE!-
<QUEUE>
NO QUEUE
2
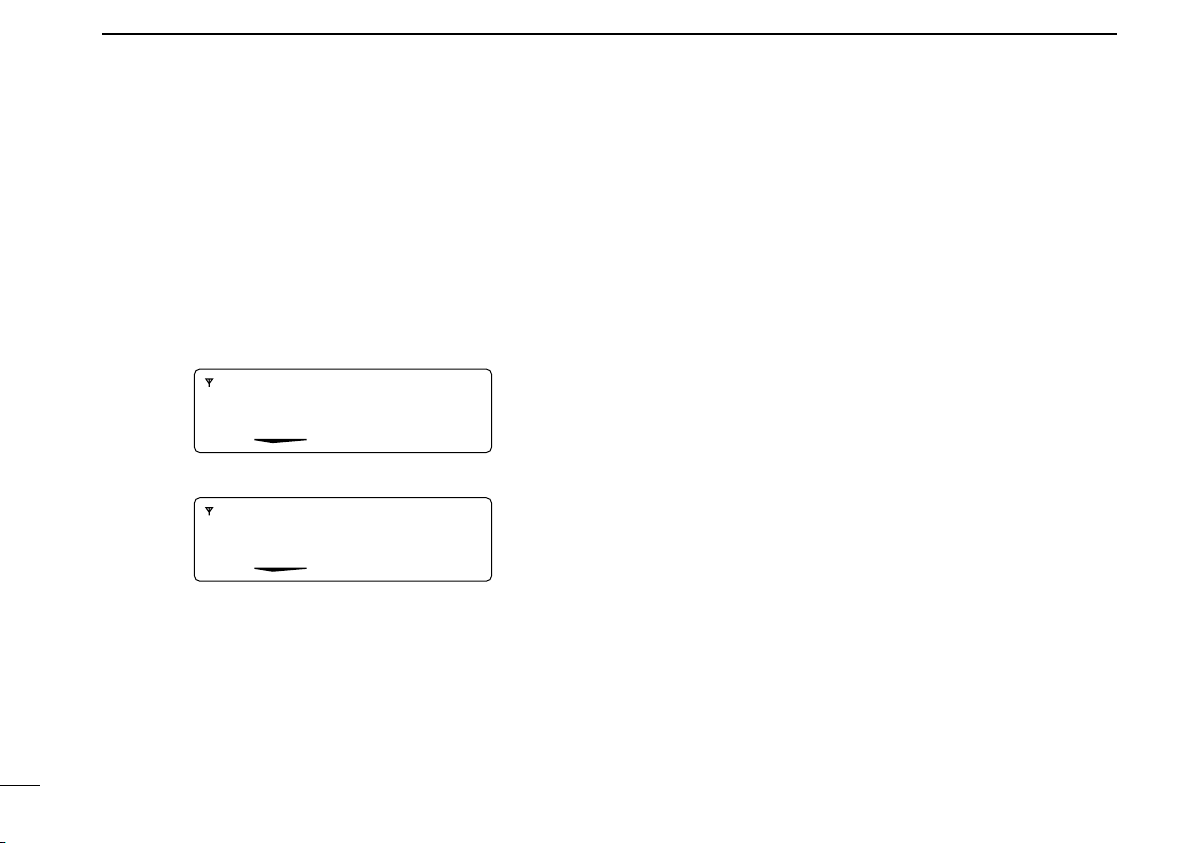
D Displaying the received call record
— Queue display
The transceiver memorizes the calling station ID in the
memory. Up to 3 calls can be memorized, and the oldest call
record is erased when a 4th call is received. However, once
the transceiver is powered OFF, all the records are erased.
q Hold down [BIIS Button] for 1 second.
• The following display appears.
When a record is selectable
When no record is stored
w Push [CH Up] or [CH Down] to select the desired call.
e Push and hold [BIIS Button] for 1 second again to return
to the standby mode.
• If no operation is performed for 30 seconds, the transceiver automatically returns to the standby mode.
5
BIIS 1200 OPERATION
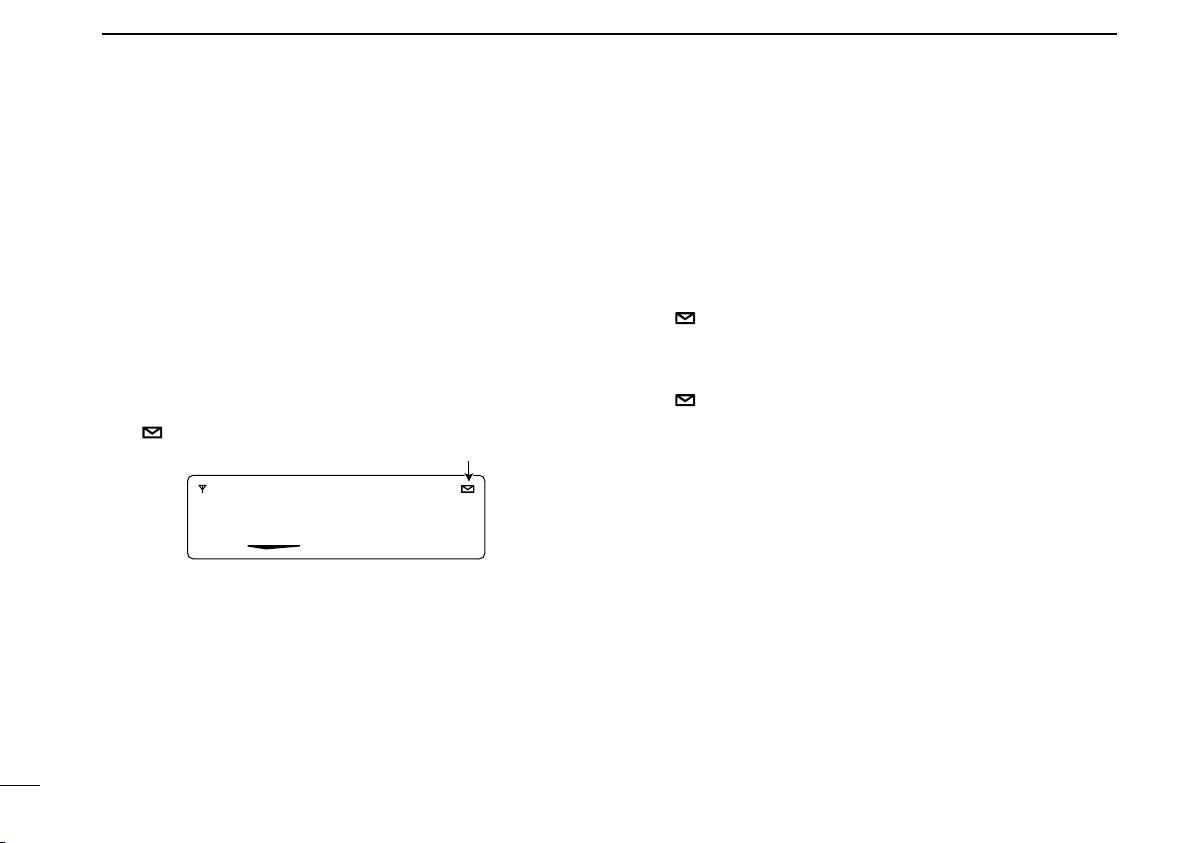
1234
Appears
<QUEUE>
-QUEUE!-
0001
1234
2
■ Transmitting a call
There are 3 ways to select a call code— selecting from memory, calling back from the queue channel record, and entering
from the keypad.
D Using call memory
q While in the standby mode, push [BIIS Button] to enter
the call code memory channel selection mode.
• “ ” appears.
w Push [CH Up] or [CH Down] to select the desired call
code.
e Push [Call] or [PTT]* to call.
* A P
TT call can be made only when PTT call capability is permit-
ted.
NOTE: When no answer back is received, the trans-
ceiver automatically repeats the call 3 times (default),
and “WAIT” is displayed during each call. However, an
error beep sounds and “FAILED” is displayed when
no answer back is received after the repeated calls.
r Push [PTT] to transmit; release to receive.
t Push [Moni (Audi)] to send a ‘Clear down’ signal.
D Calling back from the queue channel
q
While in the standby mode
1 second to enter the queue memory channel selection
mode.
w Push [Up] or [Down] to select the desired record.
e Push [Call] or [PTT]* to call.
* A
PTT call can be made only when PTT call capability is permit-
ted.
NOTE: When no answer back is received, the trans-
ceiver automatically repeats the call 3 times (default),
and “WAIT” is displayed during each call. However, an
error beep sounds and “FAILED” is displayed when
no answer back is received after the repeated calls.
r Push [PTT] to transmit; release to receive.
t Push [Moni (Audi)] to send a ‘Clear down’ signal.
, push and hold [BIIS Button]
for
1
2
3
4
5
6
7
8
9
10
11
12
13
14
15
16
6
BIIS 1200 OPERATION
1234
2
D Direct code entry
q In the standby mode, push [TX Code Enter] to enter the
TX code edit mode.
• A Code digit blinks.
w Push [TX Code Enter] to select the desired digit to be
edited.
• Editable digits differ according to the transceiver setting.
e Push [CH Up] or [CH Down] to select the desired digit.
r Push [TX Code Enter] to set the digit, then the digit to the
right will automatically blink.
t Repeat e and r to edit all allowable digits.
y Push [Call] or [PTT]* to call.
* A PTT call can be made only when PTT call capability is permit-
ted.
NOTE: When no answer back is received, the trans-
ceiver automatically repeats the call 3 times (default),
and “WAIT” is displayed during each call. However, an
error beep sounds and “FAILED” is displayed when
no answer back is received after the repeated calls.
u Push [PTT] to transmit; release to receive.
i Push [Moni (Audi)] to send a ‘Clear down’ signal.
For your information
When the “UpDate” setting for the call code is enabled, the
set code is overwritten into the call code memory.
7
BIIS 1200 OPERATION
RX Status 01
1234
SDM8
1234
Appears
SDM12345678
1234
Appears
2
■ Receiving a message
D Receiving a status message
q When a status message is received:
• Beeps sound.
• The status message and the calling station ID (or text) is dis-
played when the display mode is 2 lines, as shown below.
• When the display mode is 1 line, the status message and the
calling station ID (or text) may be alternately displayed depending on the setting.
w Push [Moni (Audi)] to return to the standby mode.
NOTE: When the display mode is 1 line
Only the calling station ID (or text) is displayed (no message
is alternately displayed) when the scroll timer is set to ‘OFF.’
In this case, push [Status Up]/[Status Down] to manually
display the status message.
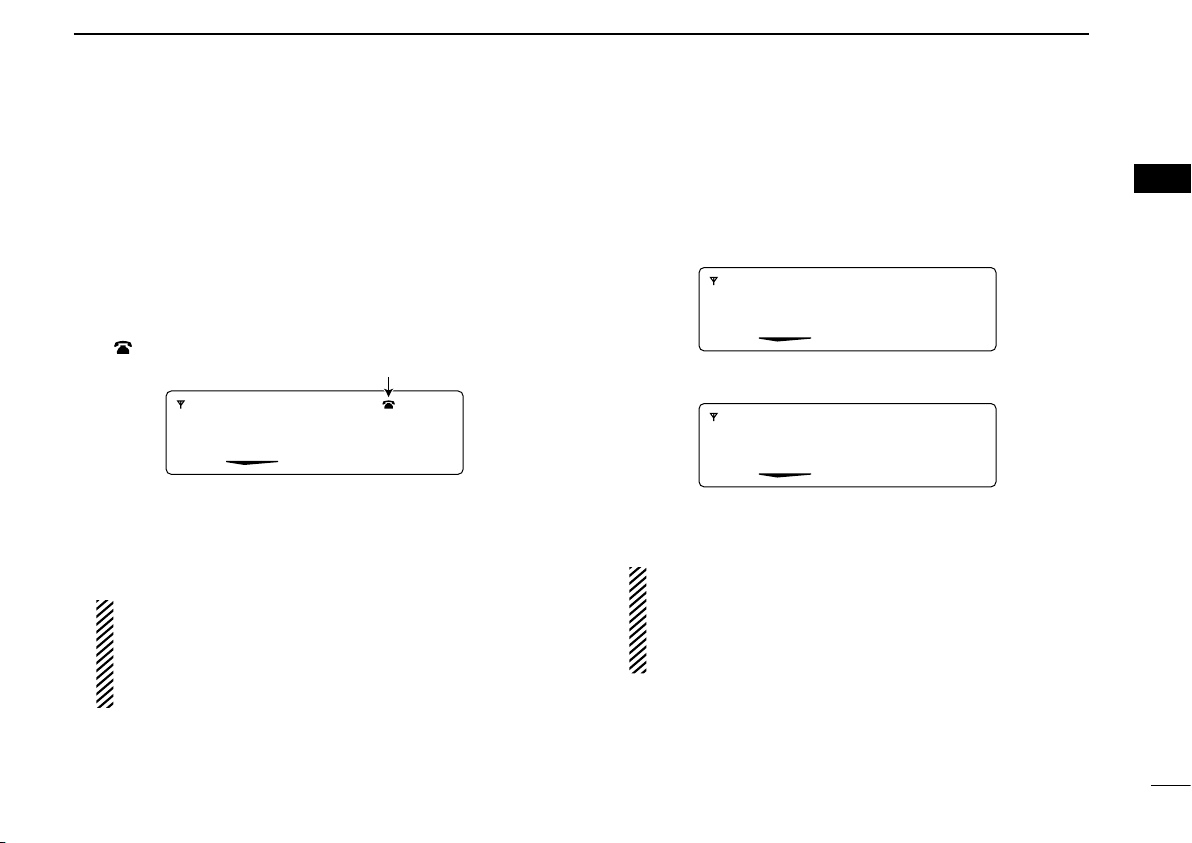
D Receiving an SDM (Short Data Message)
q When an SDM is received:
• Beeps sound.
• “ ” appears.
• The SDM and the calling station ID (or text) may be displayed
when the display mode is 2 lines, as shown below.
• The SDM and the calling station ID (or text) is alternately displayed when the display mode is 1 line, depending on the presetting.
NOTE: When the received SDM includes more than 12
characters, the message automatically scrolls when the
automatic scroll function is activated.
•
Push [Status Up]/[Status Down] to manually scroll the message.
1
2
3
4
5
6
7
8
9
10
11
12
13
14
15
16
w Push [Moni (Audi)] to return to the standby mode.
8

BIIS 1200 OPERATION
MESSAGE
-MSG!-
MESSAGE
-NOMSG-
2
D Selecting a received message
The transceiver memorizes the received message in the
memory. Up to 6 messages for status and SDM, or 95 character SDM’s can be memorized. The oldest message is erased
when the 7th message is received. However, once the transceiver is powered OFF, all messages are cleared.
q Hold down [BIIS Button] for 1 second.
• The queue memory is displayed.
w Push [BIIS Button] again for 1 second.
• The message memory is displayed.
When a message is selectable
When no message is stored
e Push [CH Up] or [CH Down] to select a desired mes-
sage.
• When selecting a SDM that includes more than 12 characters,
the message automatically scrolls when the automatic scroll
function is activated.
• Push [Status Up]/[Status Down] to manually scroll the message.
r Push and hold [BIIS Button] for 1 second again to return
to the standby mode.
• If no operation is performed for 30 seconds, the transceiver automatically returns to the standby mode.
9

BIIS 1200 OPERATION
STATUS 01
TX Status 01
Status message is displayed.
2
■ Transmitting a status
D General
The programmed status message can be selected, and the
message text is also displayed on the function display of the
called station.
Up to 24 status types (1 to 24) are selectable, and status
messages 22 and 24 have designated meanings.
Status 22: Emergency*
Status 24: GPS request
* Status 22 can also be used as a normal status message by disa-
bling the designated meaning. However, the status 24 meaning
is fixed.
A status call can be sent with both individual and group
calls.
D Transmitting a status
q While in the standby mode, push [BIIS Button], then push
[CH Up] or [CH Down] to select the desired station/group
code.
w Push [BIIS Button] again, then push [CH Up] or
[CH Down] to select the desired status message.
e Push [Call] or [PTT]* to transmit the status message to
the selected station or group.
* A PTT call can be made only when PTT call capability is permit-
ted.
• When the transmission is successful, 2 beeps sound and the
transceiver automatically returns to the standby mode.
1
2
3
4
5
6
7
8
9
10
11
12
13
14
15
16
10
BIIS 1200 OPERATION
MESSAGE1
SDM1
SDM is displayed.
Appears
2
■ Transmitting an SDM
D General
The short data message, SDM, can be sent to an individual
station or group stations. Also, 8 SDM memory channels are
selectable and the messages can be edited on your PC.
D Transmitting an SDM
q While in the standby mode, push [BIIS Button], then push
[CH Up] or [CH Down] to select the desired station/group
code.
w Push [BIIS Button] again, then push [CH Up] or
[CH Down] to select the desired SDM.
• “ ” appears.
e Push [Call] or [PTT]* to transmit the SDM to the selected
station/group.
* A
PTT call can be made only when PTT call capability is permit-
ted.
• 2 beeps sound and the transceiver automatically returns to the
standby mode when transmission is successful.
D Direct message input
The optional HM-152T is required for this operation.
q While in the standby mode, push [BIIS Button] twice, then
push [CH Up] or [CH Down] to select the desired SDM to
be edited.
• “ ” appears.
w Push [M] or [#] to enter the message editing mode.
• The first character blinks when [#] is pushed; the last character
blinks when [M] is pushed.
• “ ” blinks.
e Push the appropriate digit key, [0] to [9], to enter the de-
sired character.
• See the table on page 12 for the selectable characters.
• Pushing [CH Up] also enters a space, pushing [CH Down] de-
letes the selected character.
r Push [#] to move the cursor to the right, push [M] to move
the cursor to the left.
t Repeat steps e and r to enter the desired text mes-
sage.
y Push and hold [BIIS Button] for 1 second to write the set
message into the message memory.
• Push [BIIS Button] momentarily to cancel the editing and return
to the original message display.
11

BIIS 1200 OPERATION
Key
[0]
[1]
[2]
[3]
[4]
[5]
[6]
[7]
[8]
[9]
Characters
0 ! ? ' " , ; : _ ( ) < > [ ]
1 (space) # * / + - = & % $ @ ^
2 A B C a b c
3 D E F d e f
4 G H I g h i
5 J K L j k l
6 M N O m n o
7 P Q R S p q r s
8 T U V t u v
9 W X Y Z w x y z
/
!
2
• Selectable characters
■ Position data transmission
When a GPS receiver is connected to the transceiver, the position
(longitude and latitude) data can be automatically transmitted.
Ask your dealer or system operator for connection details.
The position data is transmitted when:
• A status 24 message is received
* When the status 24 message, GPS request, is received.
• Automatic is enabled.
When automatic position transmission is enabled, sends
the position data according to ‘Time Marker’ and ‘Interval
Timer’ settings.
• PTT is released
When ‘Send with Logoff’ is enabled.
- Set the ‘Log-In/Off’ item as ‘L-OFF.’
• Send with Status is enabled
Sent after sending a status message.
• Send with SDM is enabled
Sent after sending an SDM.
• Send with Emergency is enabled
Sent after sending status 22 (Emergency).
1
2
3
4
5
6
7
8
9
10
11
12
13
14
15
16
12
 Loading...