

Page 1
IBM System x
Hints and Tips:
Installing and Cabling a
Multinode System x3950 M2
Use these hits and tips in addition to the Rack Installation Instructions manual and
the Scalability Option Kit manuals to cable and setup an x3950 M2 multinode
complex.
Page 2

IBM System x
Notes on the Scalability Cabling Setup
1.
The deep-plug design of the scalability cables will help to prevent the cables from
becoming disconnected from the port since the connection is actually in the center of
the system, not at the rear of the system like previous System x scalable systems.
2.
Due to the deep-plug nature of the scalability cables, the lengths are actually longer
than previous systems but the actual amount of slack outside the system and the CMA
is slightly less than the slack in the xSeries 460/System x3950 system.
3.
Thinner gauge cable was chosen for this generation of the scalability cables, and a
thinner gauge still will be introduced later in 2008. This reduces the stiffness of the
cables and will help the cables route more easily.
4.
It is recommended to wrap the cable strap around the scalability cables first to secure
them within the brackets, then wrap the strap around the CMA.
2
Page 3

IBM System x
Links to System Manuals
1.
2.
3.
4.
5.
Installation Guide:
● ftp://ftp.software.ibm.com/systems/support/system_x_pdf/jr1bcms2.pdf
Rack Installation Instructions (x3950 M2 starts on page 6):
● ftp://ftp.software.ibm.com/systems/support/system_x_pdf/jr1birii.pdf
The deep-plug design of the scalability cables will help to prevent the cables from
becoming disconnected from the port since the connection is actually in the center of
the system, not at the rear of the system like previous System x scalable systems.
Due to the deep-plug nature of the scalability cables, the lengths are actually longer
than previous systems but the actual amount of slack outside the system and the
CMA is slightly less than the slack in the xSeries 460/System x3950 system.
Thinner gauge cable was chosen for this generation of the scalability cables, and a
thinner gauge still will be introduced later in 2008. This reduces the stiffness of the
cables and will help the cables route more easily.
6.
It is recommended to wrap the cable strap around the scalability cables first to secure
them within the brackets, then wrap the strap around the CMA.
3
Page 4
IBM System x
8u needed for 2-node system
The length of the scalability cables requires that no empty U-spaces exist between the nodes.
4
Page 5
IBM System x
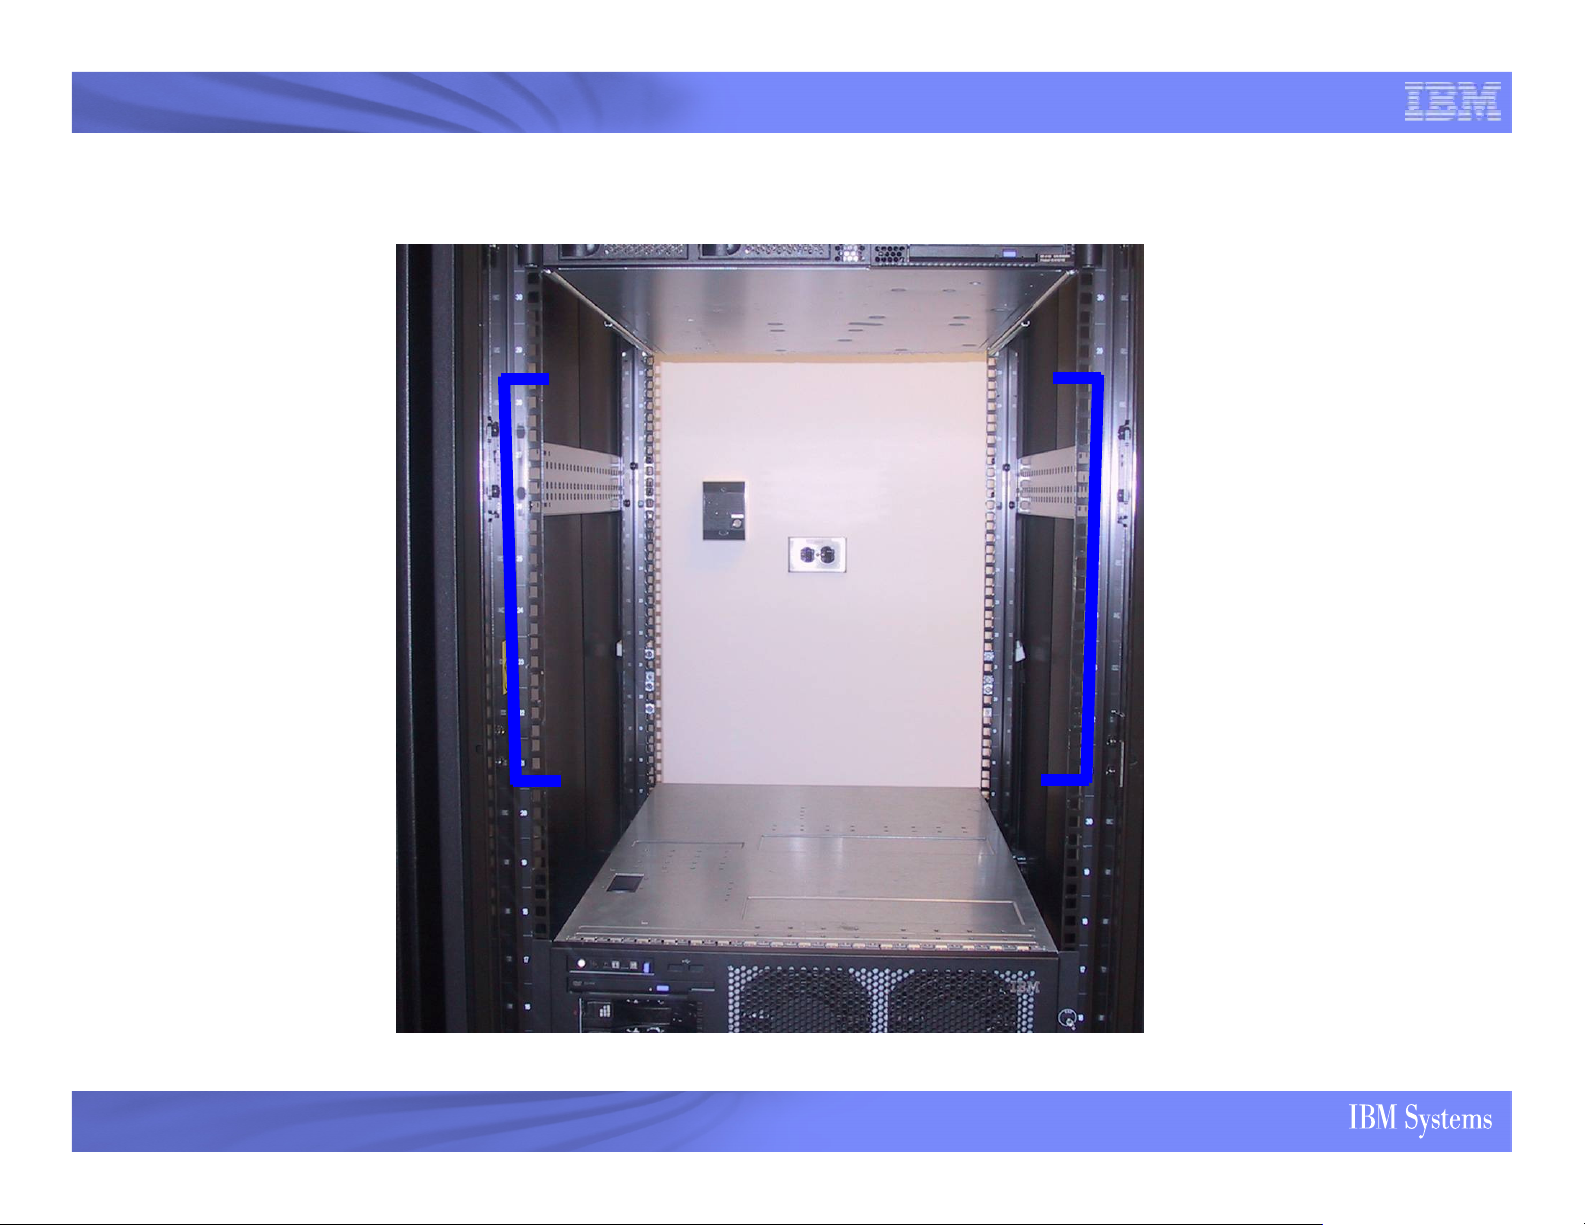
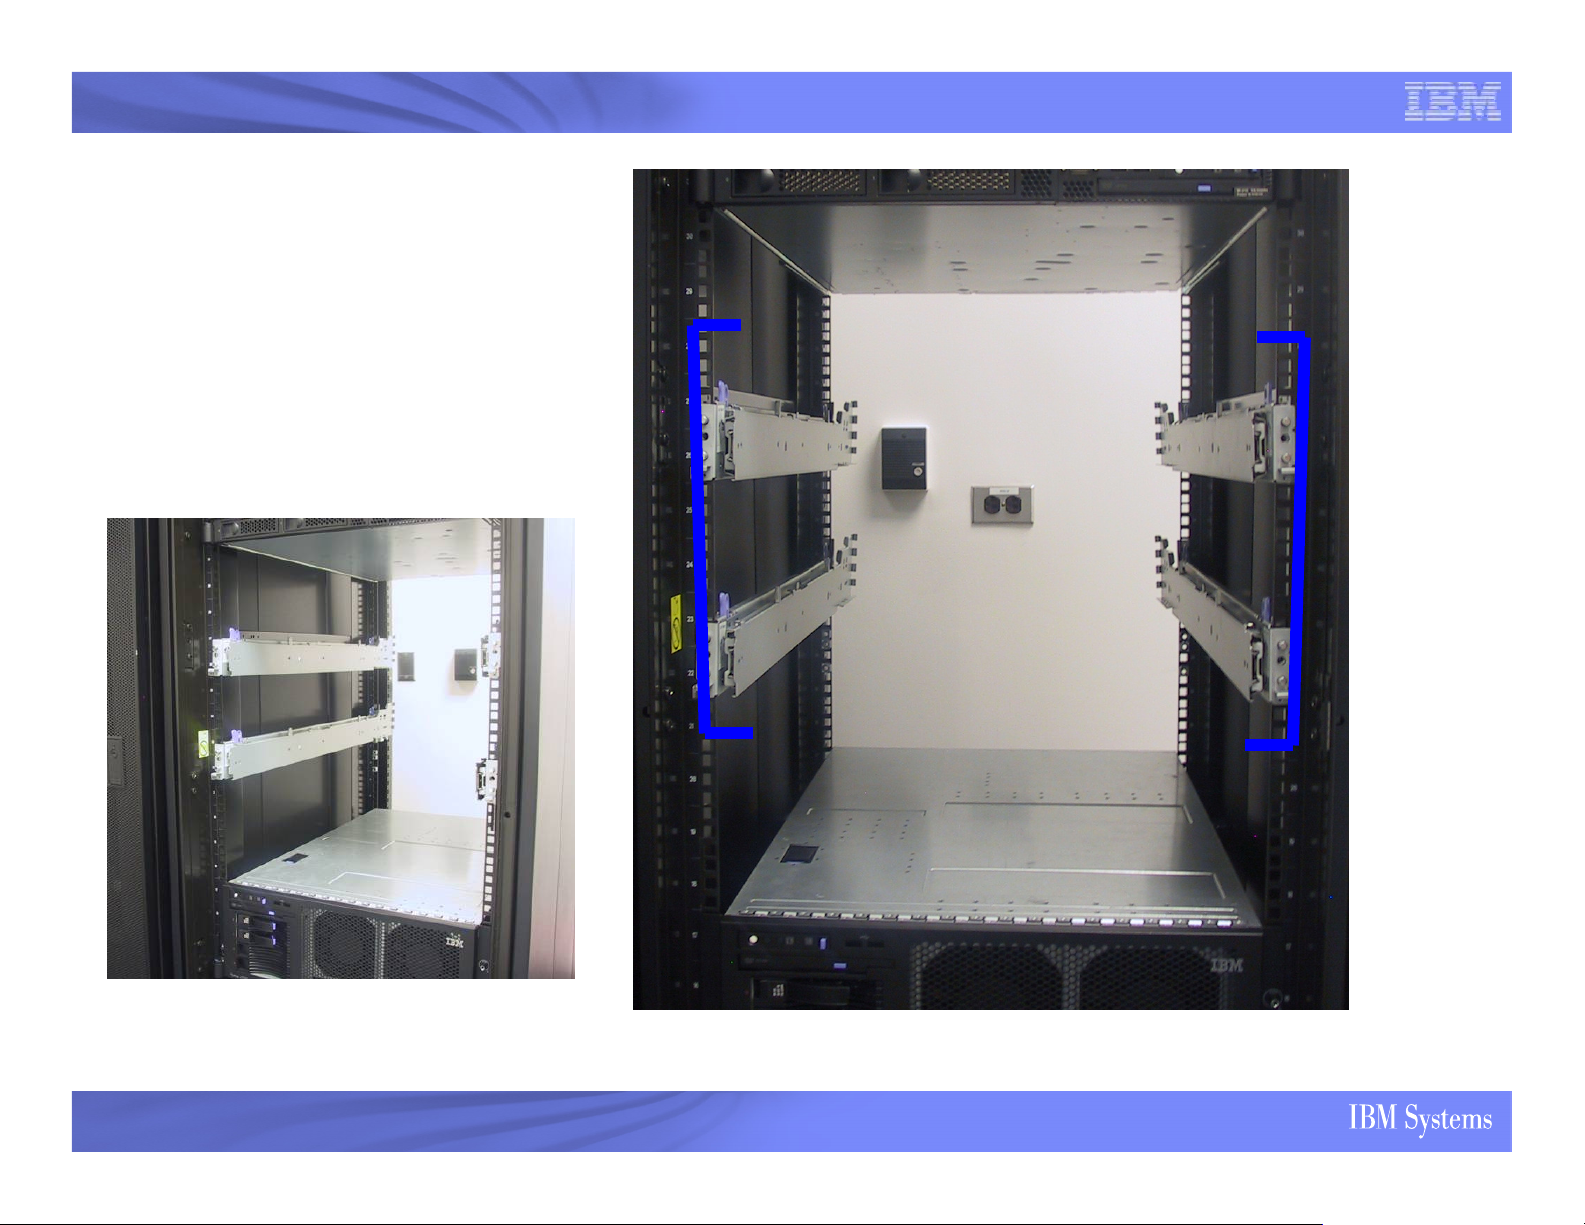
Install slides into rack
Use Rack Installation Instructions manual to space slides appropriately and install the slides into
the rack. Note this system is 4u as opposed to 3u for the original System x3950/xSeries 460.
5
Page 6

IBM System x
Install nodes onto the slides
Use Rack Installation Instructions manual to install systems and cable
management arms onto slides.
6
Page 7

IBM System x
Install Enterprise Cable Management Arms onto nodes.
NOTES:
1. If you purchased an x3950 M2, the Enterprise CMA comes within the system. If you purchased an
x3850 M2 and the ScaleXpander option, the Enterprise CMA comes with the option.
2. The Enterprise CMA from the xSeries 460/x3950 can not be used on the x3850 M2/x3950 M2 due to
slight differences in the dimensions of the CMA components.
7
Page 8

IBM System x
Connect Scalability Cables to Scalability Ports
Notes
1. Route cables through hanger brackets, balancing the slack in the cables
between the CMAs and the nodes and in the side of the rack.
2. Refer to the manuals to determine which ports to connect the cables to.
8
Page 9

IBM System x
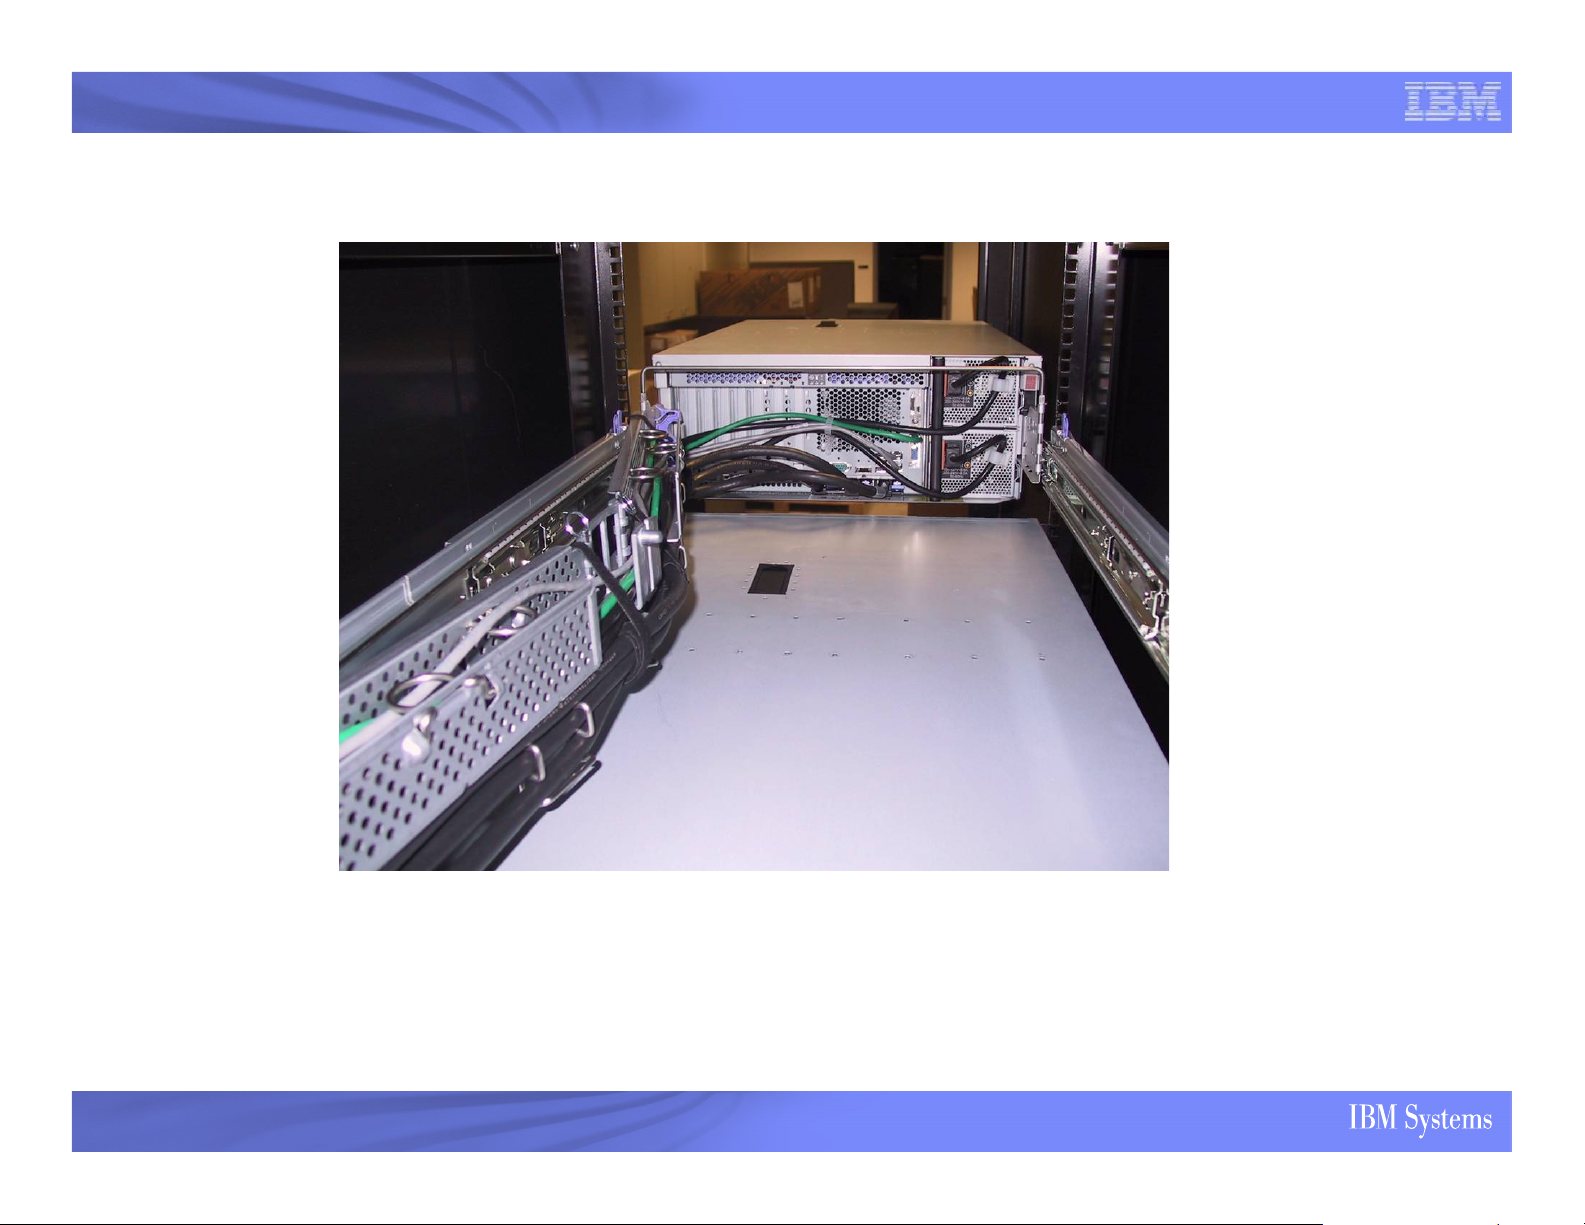
Install and Route Scalability Cables—
Recommended Method
Route cables through hanger brackets,
balancing the slack in the cables
between the CMAs and the nodes and in
the side of the rack.
9
Page 10

IBM System x
Install and Route Scalability Cables—
Recommended Method
Connect cables to scalability ports
according to the system manuals.
10
Route cables through hanger brackets,
balancing the slack in the cables between
the CMAs and the nodes and in the side of
the rack.
Page 11

IBM System x
Connect power and IO cables to system and route through CMA
NOTES:
1. Use the strain relief cable clamps on the rear of the power supplies for the power cables and the IO
cables on the rear of the system. This prevents the cable from sagging and getting caught on the
node below.
2. Route the power cables and other IO cables as needed through the blue plastic cable restraint
brackets attached to the side of the slide rails.
11
Page 12

IBM System x
Secure the cables in the CMA
NOTE:
1. It is recommended to wrap the cable strap around the scalability cables first to secure them within
the brackets, then wrap the strap around the CMA.
12
Page 13
IBM System x
Remove cable slack from CMA hanger brackets.
Once all cables are secured in the CMA, pull the system out all the way and pull the scalability
cables tight within the CMA hanger brackets. Retighten the cable straps if needed. This will
ensure the cables stay in the CMA while sliding the system in and out for hardware maintenance
and upgrade activities. This is especially important because thinner cables are used in this M2
generation of the x3950 system compared to the previous version.
13
Page 14
IBM System x
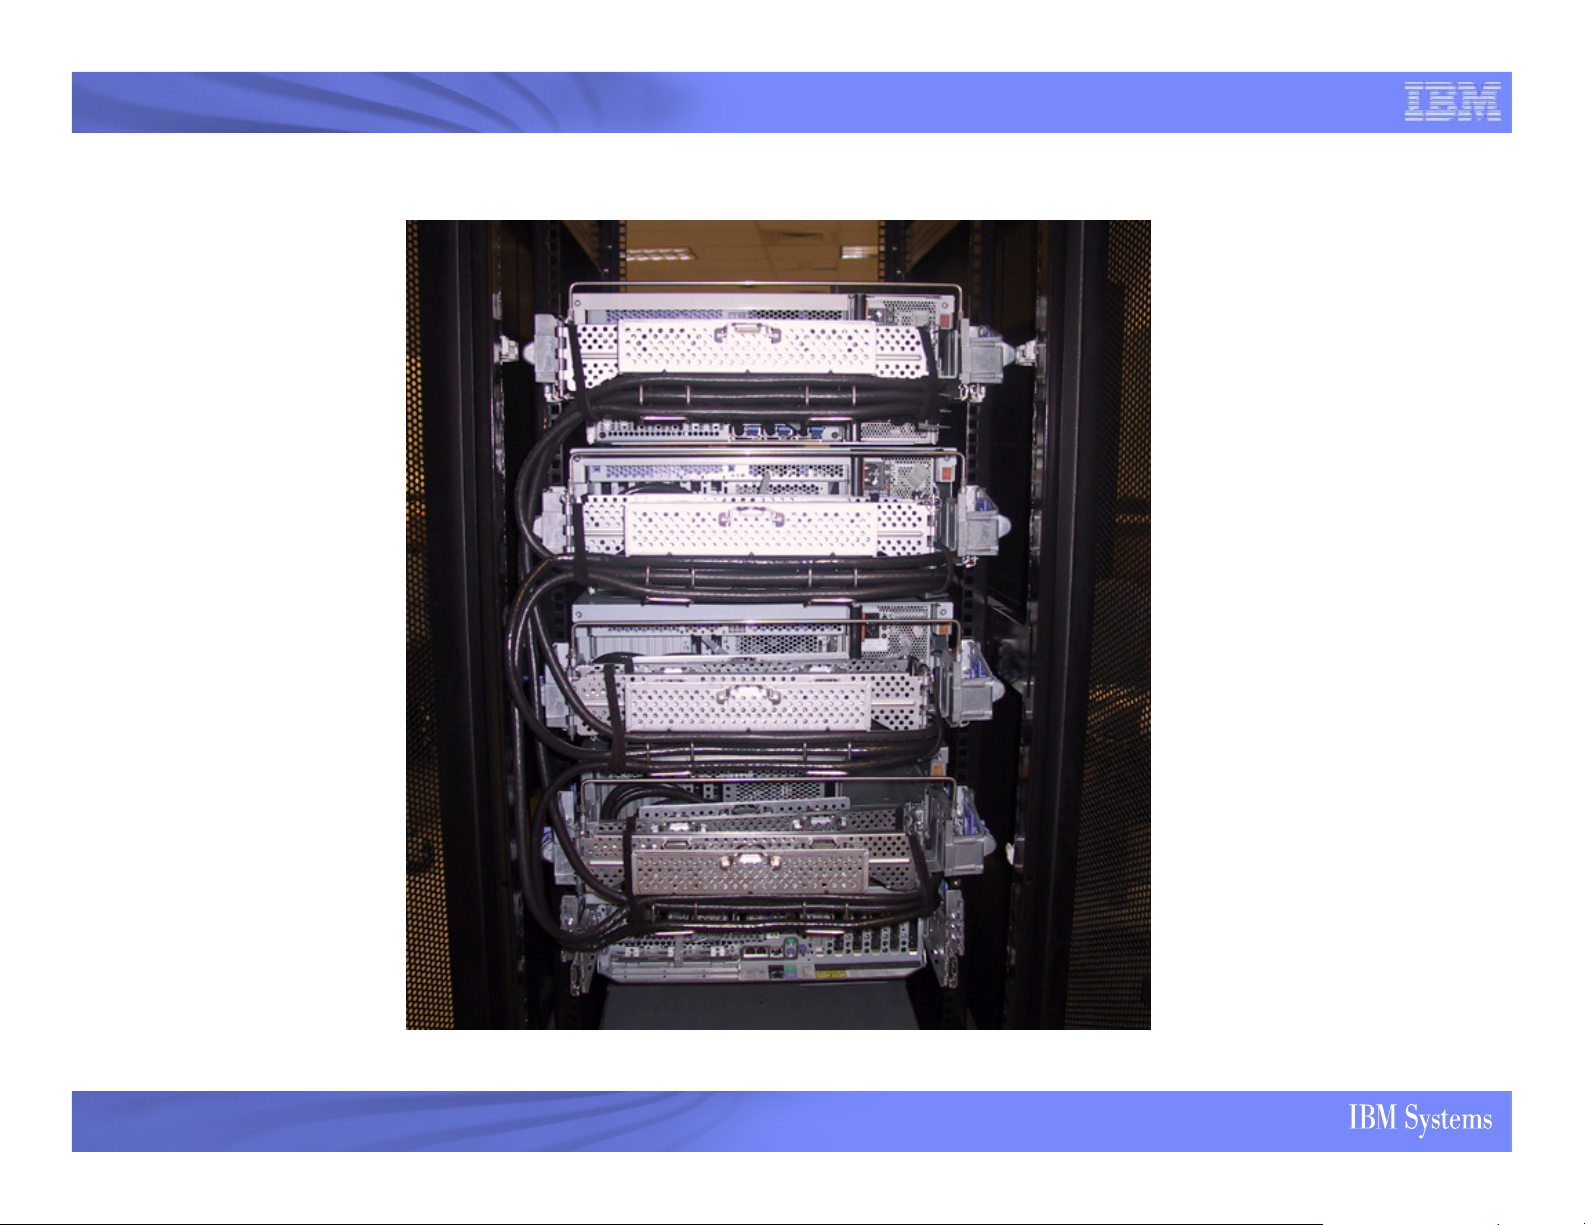
4-node Cable Setup
14
Page 15

IBM System x
Verify Cabling
Once all the cabling is complete, you can
verify the cabling 2 ways:
1. In the RSA2 interface, during setup of
the partitions, will show any
disconnects of the cables within the
scalable complex as shown to the left.
2. Once the system complex is powered
on, look at the back of the system to
ensure all ports with scalability cables
connected have the green LED lit to
indicate a good link. Also, on the light
path panel, the “LINK” LED on the top
surface will be lit if any of the cables
are not connected correctly.
15
► Ports turn red when there is a problem with the port, it is marked offline, or the
cabling is incorrect
► The Port Number becomes a link
► Clicking on the link provides a pop up displaying the correct cable configuration
for that size complex
Page 16

IBM System x
Feedback
•
If you have comments or feedback on this document please contact
the author.
Dan Kelaher
IBM Human Factors
dkelahe@us.ibm.com
16
 Loading...