

Page 1

ViaVoice® Simply Dictation for Mac® OS X
User’s Guide
Page 2

Note:
Before using this information and the product it supports, be sure to read the information in the
“Appendix” on page 83.
First Edition (August 2002)
This edition applies to IBM ViaVoice Simply Dictation for Mac OS X only and to all subsequent releases
and modifications until otherwise indicated in new editions.
This book is written in International English. Readers may send comments on this publication as an e-mail
to the following user ID: vvdev@us.ibm.com
When you send information to IBM, you grant IBM a nonexclusive right to use or distribute the information
in any way it believes appropriate without incurring any obligation to you.
30 Day Money Back Guarantee (US English Product Only)
If you have purchased this product directly from IBM or an IBM Authorized Business Partner and are not
completely satisfied, you may return the entire undamaged product for a refund within 30 days.
In the United States, you can return unopened product to your place of purchase, or opened and
undamaged product directly to us for a refund. Product purchased from IBM Direct 1-800-426-2255 or IBM
PSG Sales 1-800-426-7235 should be returned directly to them.
To receive your refund directly from us, you will need to first obtain a Return Authorization Form. The form
is available by calling: 1-800-825-5263, e-mail: talk2me@us.ibm.com or by writing to us:
IBM Voice Systems Returns - 3rd Floor
8051 Congress Avenue
Boca Raton, Florida 33487
Send the Return Authorization Form, your dated original sales receipt and the ViaVoice product box and its
contents back to us at the above address. We must have the Return Authorization Form in order to process
the refund. The refund includes purchase price and taxes, but not shipping costs. IBM is not responsible for
lost mail.
In Canada, you can return unopened product to your place of purchase, or call 1-800-825-5263 and request
to speak with someone in the Rebates and Returns Department.
© Copyright International Business Machines Corporation 1999-2002. All rights reserved.
US Government Users Restricted Rights - Use, duplication or disclosure restricted by GSA ADP Schedule
Contract with IBM Corp.
Page 3

Contents
Introduction 1
ViaVoice Simply Dictation for Mac OS X............ 1
System Requirements......................................... 1
Experienced Mac Users...................................... 1
New Mac Users .................................................. 1
What’s in This User’s Guide .............................. 2
Conventions Used in This Guide ....................... 3
Quick Setup Guide ............................................ 4
Welcome 5
About ViaVoice ..................................................... 5
Installing ViaVoice ................................................ 6
Registering ViaVoice ........................................ 10
Setting Up ViaVoice ........................................... 11
Starting the ViaVoice SetupAssistant .......... 11
Creating Your First Voice Model ......................11
Entering a User Name ...................................... 12
Audio Setup Assistant ...................................... 12
Analyze My Voice Assistant ............................ 12
Analyze My Documents Assistant................... 13
Congratulations!............................................... 14
Getting Started .................................................... 15
The ViaVoice Folder......................................... 15
The VoiceCenter ........................................... 15
Dictating with SpeakPad .............................. 17
Dictating for the First Time .......................... 18
Quick Tutorial ..................................................... 21
Practicing Dictation.......................................... 21
Pausing Dictation ......................................... 22
Formatting Text ................................................ 22
Correcting Your Dictation ................................ 23
Using the Correction Window ...................... 24
Displaying the Correction Window .............. 24
Playback Dictated Text ................................ 25
Basic Correction Using Commands ............. 25
Reading Text..................................................... 26
Using the What Can I Say Window ................. 26
Closing ViaVoice................................................ 27
Viewing the Help Files........................................ 28
Viewing the PDF Files ..................................... 28
Tips for Using ViaVoice ................................... 29
Using ViaVoice 33
Users and Voice Models...................................... 33
Using the ViaVoice SetupAssistant .................. 33
Audio Setup Assistant ...................................34
Analyze My Voice Assistant ........................ 34
Creating a Voice Model ................................34
Analyze My Documents ............................... 35
Dictating with ViaVoice.......................................37
Dictating Into SpeakPad ...................................37
Correcting Text in SpeakPad ............................38
Delayed Correction .......................................38
Hands-Free Correction ..................................38
Correction Voice Commands .......................39
Transferring Text to Other Applications ...... 40
Using Dictation Stream Redirection................. 40
Text Editing and Formatting.............................41
Dictating Punctuation ....................................... 41
General Dictation Tips......................................42
Spelling Words in Spell Mode ..........................43
Spelling Methods .......................................... 43
Dictating Numbers............................................ 43
Number Formatting ......................................44
Dictating Numbers in Number Mode ........... 44
Navigating With Commands in SpeakPad .......... 45
Activating the Attention Word..........................45
Creating Application-Specific Commands....... 46
Using AppleScript ........................................46
Reading E-mail.................................................47
The What Can I Say Window ..............................47
Playing Back Dictated Text in SpeakPad............48
Reading Your Text ...............................................48
Changing Voices ...............................................49
Using Manage My Vocabulary............................49
Working With Dictation Macros .........................49
Macro Editor Window Components................. 50
Creating a Dictation Macro ..............................50
Sample Dictation Macro ............................... 51
Editing a Dictation Macro ............................51
Managing ViaVoice Users ..................................52
Adding a Voice Model......................................52
Backing Up a User............................................ 52
ViaVoice Components 55
ViaVoice Components Overview.........................55
The VoiceCenter.................................................. 56
VoiceCenter Components .............................56
VoiceCenter Drawer..........................................57
© Copyright IBM Corp. 1999-2002 iii
Page 4

VoiceCenter Views ........................................... 58
Zoomed In View ........................................... 58
Zoomed Out View ........................................ 58
Minimized View ........................................... 59
VoiceCenter Preferences................................... 59
SpeakPad ............................................................. 60
SpeakPad Preferences ...................................... 60
SpeakPad Menu................................................ 61
Dictation Menu ............................................. 61
Opening a File .............................................. 61
Saving a File ................................................. 62
Closing SpeakPad ......................................... 62
ViaVoice Preferences.......................................... 63
Opening ViaVoice Preferences......................... 63
Commands Preferences ................................ 63
Microphone Preferences ............................... 64
Numbers Preferences .................................... 64
Performance Preferences .............................. 64
Voices Preferences ....................................... 65
The CommandCenter .......................................... 65
CommandCenter Preferences........................... 66
The What Can I Say Window........................... 67
What Can I Say Window Components ......... 68
Training a Word or Phrase ........................... 68
Recording a Pronunciation ........................... 69
Training a Command .................................... 69
The Correction Window................................... 70
Correction Window Components ................. 71
The History Window ........................................ 72
ViaVoice SetupAssistant ..................................... 72
Starting the ViaVoice SetupAssistant .......... 73
ViaVoice UserSettings......................................... 74
Topics and Vocabularies................................... 75
Troubleshooting Guide........................................ 77
Getting Help 77
Using the Help Features...................................... 78
Accessing Information Central ..................... 78
Viewing PDFs .............................................. 78
Uninstalling ViaVoice ......................................... 79
Obtaining Technical Support .............................. 80
Information Required Before You Contact
Technical Support............................................. 80
E-mail Support ............................................. 81
Telephone Support ....................................... 81
Microphone Support ..................................... 82
Notices................................................................. 83
Appendix 83
Trademarks ..........................................................85
Notes.................................................................... 86
Index 87
iv Contents
Page 5

Introduction
ViaVoice Simply Dictation for Mac OS X
Thank you for selecting IBM ViaVoice as your program of choice for speechrecognition technology in the home or workplace. ViaVoice combines advanced
capabilities and responsive application controls to deliver a superb speech processing
package.
Yo u t a lk , i Ty p e. It’s that simple. The computer listens to your words and phrases and
then translates them into text or actions that carry out commands. With ViaVoice, you'll
give your keyboard and fingertips a well-deserved rest!
System Requirements
Please ensure that your Apple® computer meets or exceeds ALL of the requirements
listed on the box prior to installation. Consult the ReadMe file for information about
using previous versions of ViaVoice and other information.
Experienced Mac Users
The steps detailed in the “Quick Setup Guide” section may be sufficient to get you well
on your way, especially if you are upgrading from a previous version of ViaVoice. It is
recommended, however, that you follow the lessons in the “Quick Tutorial” on page 21.
These exercises are designed to give you a fast start and they may actually save you time
in getting to know ViaVoice Simply Dictation for Mac OS X in depth.
Consult the online help and User's Guide for information about using ViaVoice.
New Mac Users
Read this “Introduction” section in full. Then, follow the steps in the “Installation”
section for details on how to install the application and use the ViaVoice SetupAssistant.
The ViaVoice SetupAssistant will guide you through the necessary steps to create a User,
set up your microphone, and create a Voice Model.
Follow the lessons in the Quick Tutorial section on page 21 carefully. When you feel
comfortable with the basic commands, we suggest you read the remaining chapters,
which cover all of the powerful tools included with ViaVoice in greater detail.
© Copyright IBM Corp. 1999-2002 1
Page 6

What’s in This User’s Guide
Chapter 1 - Welcome
This chapter contains a general introduction to ViaVoice and installation instructions. We
recommend you complete our “Quick Tutorial” section on page 21. The Getting Started
section is designed to introduce you to the many tools and features that are available for
your use in customizing the application to your personal requirements.
Chapter 2 - Using ViaVoice
Here is where you can find all of the information you need to better understand the
process of dictation and navigation. Learn how to dictate and correct using SpeakPad and
other applications, as well as navigate your computer by voice using the keyboard
shortcuts you create with AppleScript
computer and e-mail by using only voice commands.
Chapter 3 - ViaVoice Components
Using detailed graphics and callouts, this chapter is designed to introduce the main
components of the ViaVoice application: VoiceCenter, SpeakPad, ViaVoice
Preferences, CommandCenter, What Can I Say window, Correction window,
ViaVoice SetupAssistant, and UserSettings. We recommend that you familiarize
yourself with these components as soon as possible, and then search the remaining topics
as needed.
®
. It also explains how to use ViaVoice with your
Chapter 4 - Getting Help
Should you encounter difficulties using any of the ViaVoice functions, behaviors, or
features, please refer to the “Getting Help” chapter on page 77. It contains information on
how to contact Technical Support and links to IBM’s web site. While you work with
ViaVoice, refer to Information Central, the ViaVoice online help, where you can find
additional information as well as quick answers to many frequently asked questions. If
you need to remove ViaVoice from your computer, follow the Uninstall procedures also
found in this section.
Appendix and Index
At the end of this book is the Appendix, which contains Notices and Trademarks, and the
Index.
2 ViaVoice Simply Dictation for Mac OS X
Page 7

Conventions Used in This Guide
WHEN YOU SEE IT MEANS
Bold Blue Text
Bold Black Text
<Angle Brackets>
TIP
TIP
TIPTIP
NOTE
NOTE
NOTENOTE
CAUTION
CAUTION
CAUTIONCAUTION
Voice commands you are prompted to say in examples
found throughout this guide and especially in the Quick
Tutorial. For example, saying the voice command
DELETE THIS removes highlighted text.
The names of buttons, menu items, labels, and list names
in the ViaVoice programs.
A variable in a voice command that is substituted for a
word, phrase, or number when saying a voice command.
For example, for the voice command MOVE UP <1 to
20> LINES, you could say MOVE UP 2 LINES.
Useful information, such as shortcuts and other time-
saving methods. This type of information is “good to
know” but generally not essential to the functionality of
ViaVoice.
Important information, which must be completed
correctly (or in proper sequence) in ViaVoice to obtain
specific or proven results.
Necessary information, essential to the functionality of
ViaVoice.
Exclusive information for ViaVoice and Mac OS X.
Here you will find shortcuts and other useful information
to help you get a jump-start on using ViaVoice.
IBM ViaVoice Simply Dictation for Mac OS X User’s Guide 3
Page 8
Quick Setup Guide
If you are familiar with previous versions of ViaVoice, the
following steps may be sufficient to help you install and
NOTE
1. Insert the ViaVoice CD and double-click the ViaVoice Installer icon.
setup ViaVoice. For a more detailed description of this
process, please see "Installing ViaVoice" on page 6.
The Installation Information window appears. (Consult the ReadMe file for
information about using previous versions of ViaVoice.)
2. Identify your Startup Disk and click Install. The installer’s Authorization window
appears.
3. Click the lock. The Authenticate window appears. Enter the Administrator name
and password to begin installing the application. You can also enter a different User
name that has Administrator privileges.
4. Follow the on-screen instructions to install ViaVoice on your computer by selecting a
destination disk, accepting license agreements, etc.
5. Complete the Program Registration form now or at a later time.
6. Follow the steps provided by the ViaVoice SetupAssistant to create your ViaVoice
User data. This step processes your Voice Model, a required procedure before you can
start working with ViaVoice.
To add other Voice Models or to adjust audio levels, run the ViaVoice SetupAssistant
again.
You may cut out this page for reference.
You are now ready to begin using ViaVoice for Mac OS X. Look in the What Can I Say
window for available voice commands.
4 ViaVoice Simply Dictation for Mac OS X
Page 9

Welcome
Welcome
About ViaVoice
Welcome to ViaVoice, now running on Mac OS X, the all-new operating system from
Apple. IBM’s ViaVoice incorporates the most advanced consumer speech-recognition
technology available. With ViaVoice, you have at your disposal a sophisticated tool that
can save you time and add great value to your computer activities.
What Can I Expect?
Every new technology brings innovation. Within its wide scope of possibilities, ViaVoice
and you work together, to develop speech patterns and recognition capabilities. With
frequent use, this may reduce the time required to perform many common tasks, such as
correction.
Can I Install ViaVoice?
Mac OS X is a multiuser operating system, therefore only users with Administrator
privileges can install ViaVoice, so make sure you have your Administrator password
handy. This program must be installed on the OS boot volume. Consult the ReadMe file
for information about using previous versions of ViaVoice and other information.
What Will I Need?
Have all components at hand, a compatible USB headset microphone, the installation
CD, and this User’s Guide. You need to carefully review the system requirements listed
on the box. Once you have established that your Macintosh
minimum system requirements, you can begin the installation process.
How Long Will it Take?
The amount of time it takes to set up ViaVoice depends on your hardware configuration
and other factors. After the initial installation is complete, the ViaVoice SetupAssistant
needs to process your Voice Model before you can start ViaVoice. It is estimated that this
step will take approximately 15 minutes.
®
meets or exceeds the
© Copyright IBM Corp. 1999-2002 5
Page 10
Welcome
Welcome
WelcomeWelcome
Welcome
Welcome
WelcomeWelcome
Installing ViaVoice
Now that you’re ready to begin the installation, please take out the
installation CD and the microphone headset you will be using with
ViaVoice. The software lets you know when to plug the microphone
headset into the appropriate jacks. If you need information pertaining
to your hardware or jacks, please refer to your Apple User’s Guide.
Follow the instructions below to have the application installer guide you through the
necessary steps for a successful setup. Consult the ReadMe file for information about
using previous versions of ViaVoice and other information.
This version of ViaVoice was designed exclusively for the
Mac OS X operating system. If you attempt to install this
version on OS 9 or earlier, the application will not install.
To begin the installation:
1. Insert the ViaVoice CD into the CD-ROM drive.
2. Double-click the ViaVoice Installer icon.
The Installation Information window appears.
If you know your Startup Disk, click Install. If you do not, open the Startup Disk
panel in System Preferences and identify your Startup Disk.
3. Once you have identified your Startup Disk, click Install to begin the installation.
6 Installing ViaVoice
Page 11

Welcome
Welcome
WelcomeWelcome
Welcome
Welcome
WelcomeWelcome
4. The Authenticate window appears. Click the lock.
The User/Password window appears.
Click the lock and enter your
Administrator password to
continue the installation.
5. You can enter a different user name that has Administrator privileges, if desired.
Otherwise, enter the Administrator password and click OK.
The ViaVoice Installer Welcome window appears.
6. Click Continue.
The Important Information window appears.
7. Read the information supplied and click Continue to move to the next step.
The Software License Agreement window appears.
To print any of the documents displayed, click Print.
TIP
TIP
TIPTIP
8. Read the terms of the agreement and click Continue to move to the next step.
ViaVoice displays the Agree window.
9. Click Agree to indicate your acceptance of the License Agreement and move to the
next step.
To save the documents displayed to disk, click Save.
IBM ViaVoice Simply Dictation for Mac OS X User’s Guide 7
Page 12
Welcome
Welcome
WelcomeWelcome
Welcome
Welcome
WelcomeWelcome
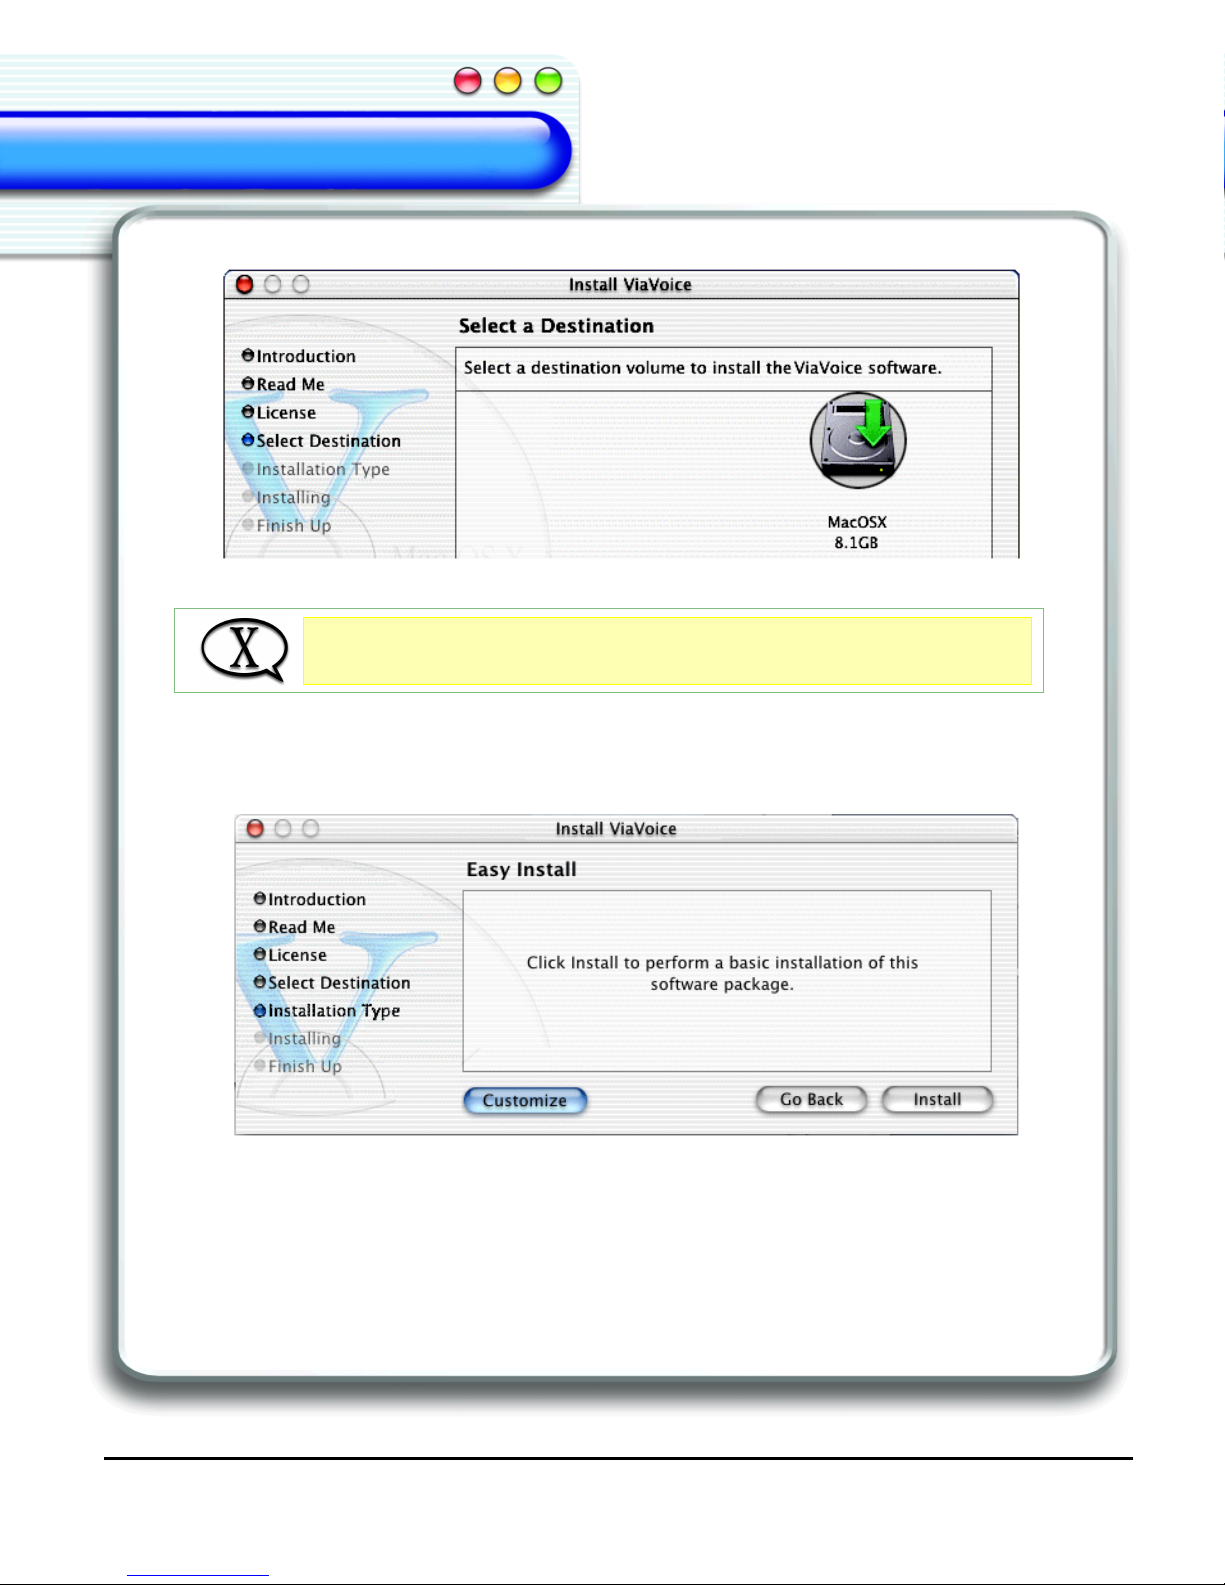
10. The Select a Destination window appears.
11. Click the appropriate disk icon to select a Destination volume.
ViaVoice must be installed on the same disk where Mac OS X
is located or it will not operate!
12. Click Continue.
The ViaVoice Easy Install window appears.
13. Click Install to perform a basic installation of the software package.
8 Installing ViaVoice
Page 13
Welcome
Welcome
WelcomeWelcome
Welcome
Welcome
WelcomeWelcome
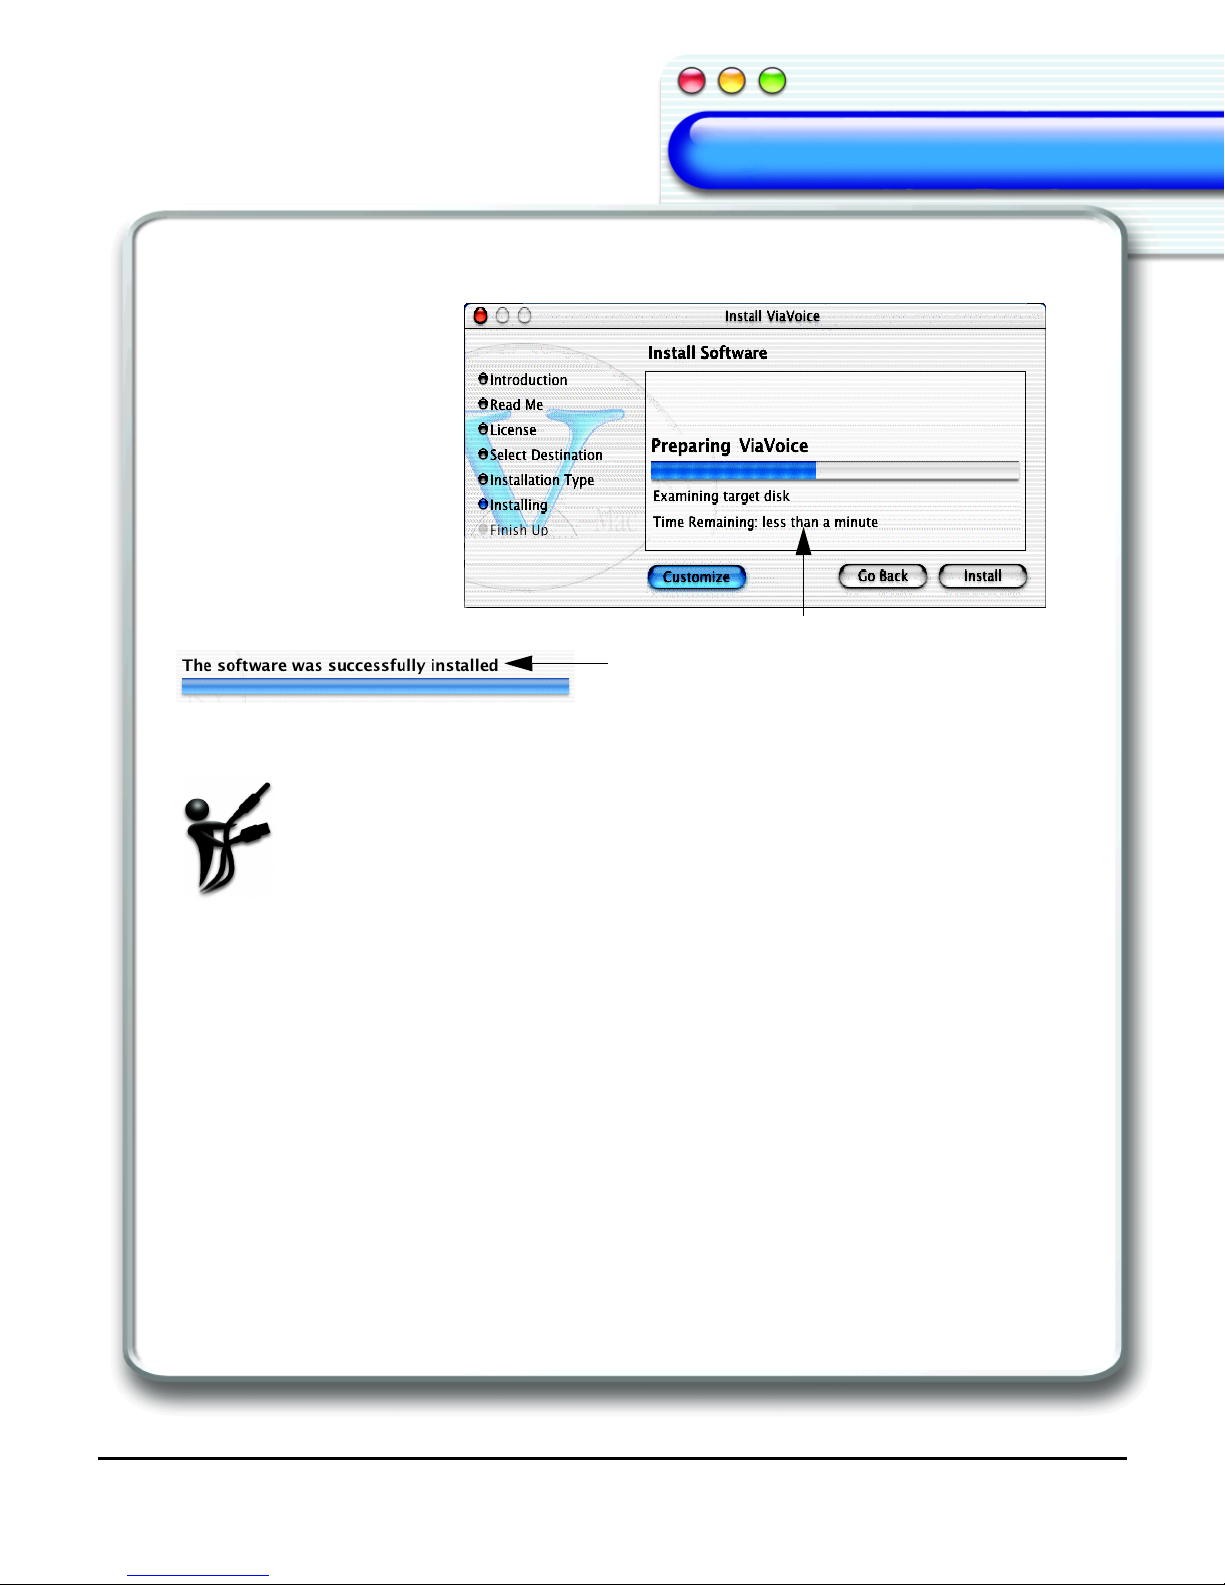
14. The Installer automatically begins installation. This procedure can take a few minutes
to complete.
The Message area within the window posts
information that is personalized to your operating
system and existing applications. It also advises
you about the status of the installation and time
remaining until completion.
If any problems are found, a message may indicate the problem and you
might be prompted to go back and correct it. In that event, click Go back
to return to the previous window and/or exit the installer until the situation
is resolved.
15. Click Close when the message “The software was successfully installed” is shown.
16. Click Proceed to register your ViaVoice application.
IBM ViaVoice Simply Dictation for Mac OS X User’s Guide 9
Page 14
Welcome
Welcome
WelcomeWelcome
Welcome
Welcome
WelcomeWelcome
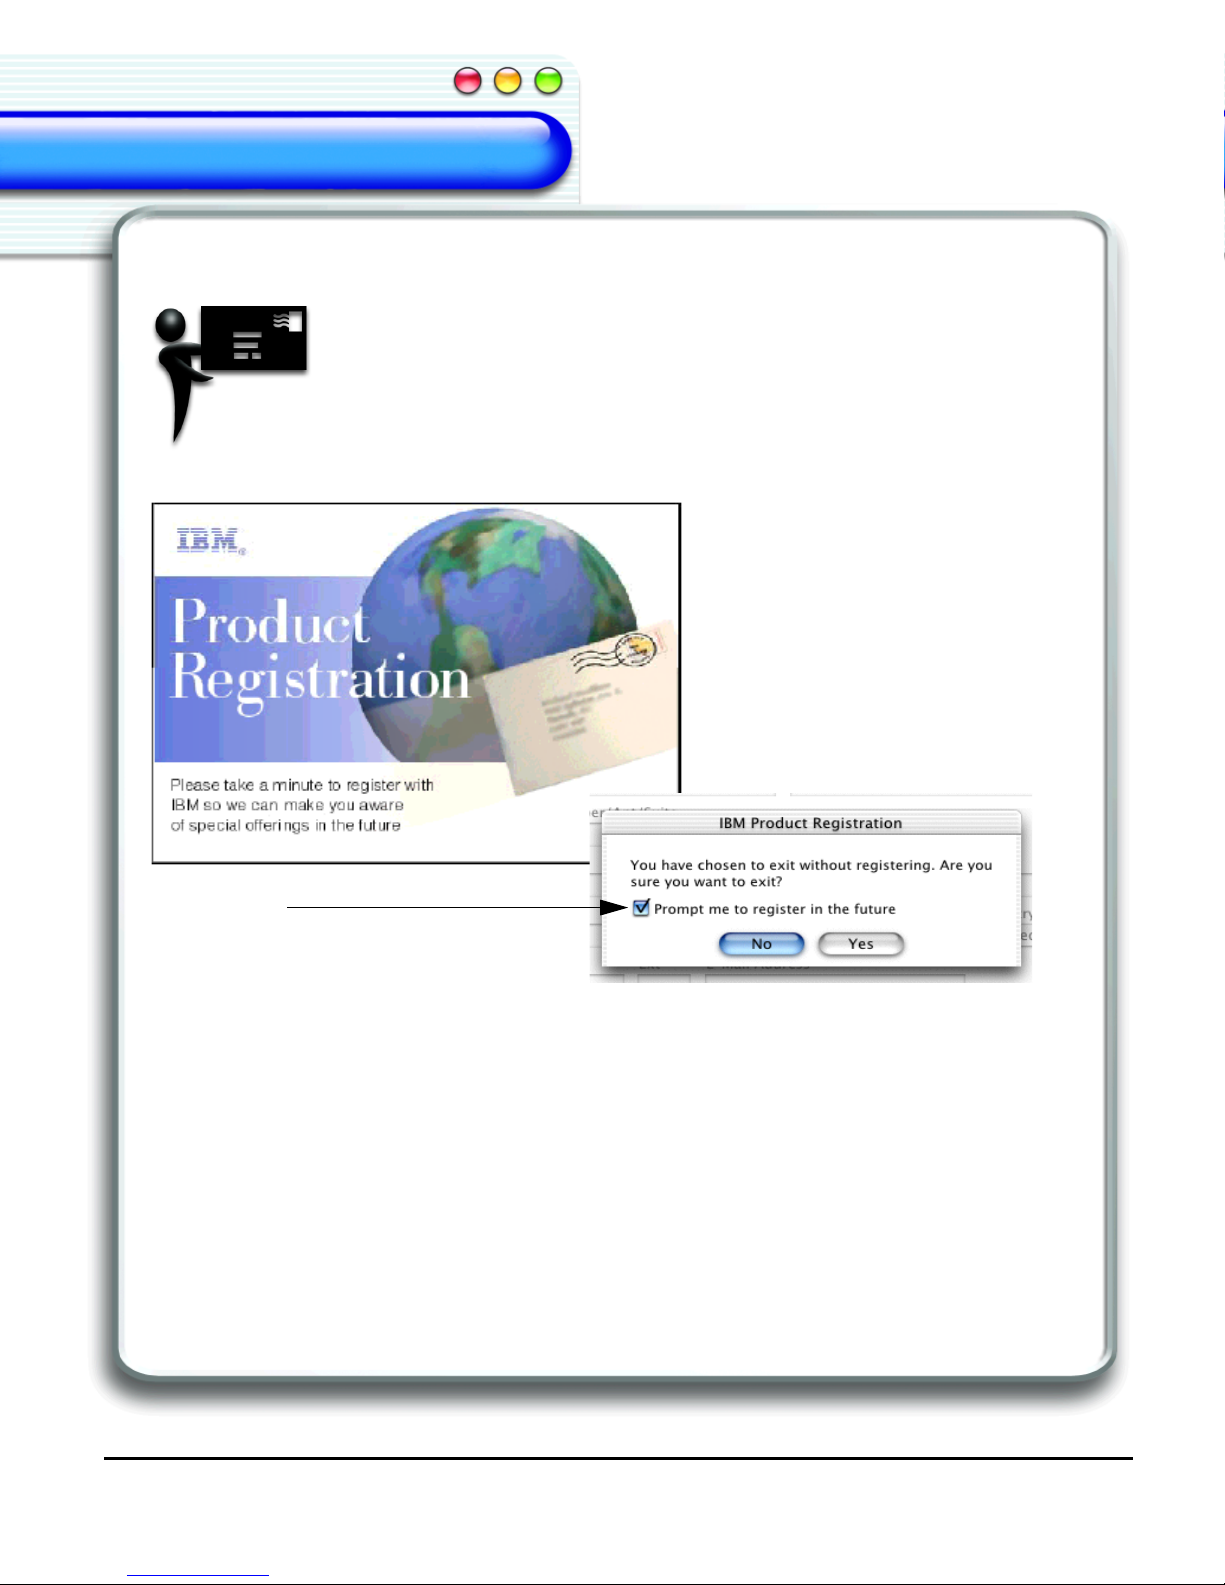
Registering ViaVoice
When you first install ViaVoice, you are asked to register your
ViaVoice application. It’s best to complete this important step at this
time, but you may prefer to get started with ViaVoice and leave the
registration for later. To do so, check the respective box on the
Product Registration window, and ViaVoice will remind you at set
intervals.
When you register your
ViaVoice product, you are
eligible for news, product
updates, timely information,
and technical support.
Check this box to have ViaVoice remind you to
register later.
For other installation issues, see the “Troubleshooting Guide” on page 77.
If you have a backed up user and then uninstall ViaVoice for Mac OS X, you can import
that same backed up user folder if you decide to re-install ViaVoice for Mac OS X, again.
After you install ViaVoice, drag and drop your backed up user folder onto the
SetupAssistant icon and follow the on-screen instructions to import the user.
Uninstalling ViaVoice
For information about removing ViaVoice, see "Uninstalling ViaVoice" on page 79.
10 Installing ViaVoice
Page 15

Welcome
Welcome
WelcomeWelcome
Welcome
Welcome
WelcomeWelcome
Setting Up ViaVoice
Before you can use ViaVoice, the ViaVoice SetupAssistant is going to
help you create your Voice Model. This a required procedure, as the
application needs to create your Voice Model and learn to understand
how you speak. The entire setup takes approximately 30 minutes,
depending on the story you choose.
If you start reading a story and need to quit the process midway
through, you can do so. The next time you start ViaVoice it remembers
and restarts exactly where you stopped.
Starting the ViaVoice SetupAssistant
The ViaVoice SetupAssistant begins automatically the first time you start ViaVoice. It
also opens each time a new Voice Model is created. When you want to adjust audio
settings or analyse your voice for greater accuracy, you can also access this component
manually from the VoiceCenter drawer menu or from the ViaVoice folder.
For more information, see "ViaVoice SetupAssistant" on page 72 or "The VoiceCenter"
on page 56
.
Creating Your First Voice Model
There are several steps involved in creating a Voice Model. The ViaVoice
SetupAssistant guides you through several procedures, including Audio
Setup, Analyze My Voice, and Analyze My Documents.
As a part of the installation, the ViaVoice SetupAssistant requires that you
follow the procedures for each of the Assistants. Follow the on-screen
instructions, complete all of the necessary steps for a successful
configuration of your ViaVoice speech recognition software, and you are
ready to begin dictating.
IBM ViaVoice Simply Dictation for Mac OS X User’s Guide 11
Page 16

Welcome
Welcome
WelcomeWelcome
Welcome
Welcome
WelcomeWelcome
Entering a User Name
The first window of the ViaVoice SetupAssistant displays your login user name by
default. The other items on the window represent default settings and are not editable.
1. Verify this is the login name you want to use for this Voice Model.
2. Click the right arrow to begin Audio Setup.
You can also create different Voice Models for different environments. For more
information, see “Creating a Voice Model” on page 34.
Audio Setup Assistant
This Assistant guides you through several steps to ensure proper setup of your audio
configuration. This interactive demonstration helps you to correctly install and connect
your hardware, as well as determine the proper positioning of your microphone. An
audio playback feature lets you adjust the playback levels. When you have configured
your audio hardware and completed all the tests, do the following.
1. Click the right arrow to continue on to Analyze My Voice.
2. Follow the on-screen instructions.
For more information, see "ViaVoice SetupAssistant" on page 72.
Analyze My Voice Assistant
This Assistant guides you through the several steps to train ViaVoice to recognize your
voice and create a Voice Model, which improves your recognition accuracy. As you read
a story, ViaVoice learns how you pronounce words. You can choose from several
different story segments. Once you have finished reading the story, the ViaVoice
SetupAssistant processes your Voice Model.
1. To read excerpts from the story of your choice, click on a story name to select it, and
click the right arrow to begin. Follow the on-screen instructions.
A Progress meter displays the current processing percentage, while an
Audio Level indicator displays color bars as a visual guide for your voice
input. Try to keep the bars displaying only in lime green, as fuchsia denotes
that you are either speaking too loudly or the microphone is too close to
12 Setting Up ViaVoice
Page 17

Welcome
Welcome
WelcomeWelcome
Welcome
Welcome
WelcomeWelcome
your face. To see the colours of the audio level indicator, see "The VoiceCenter" on page
15.
During your reading of the story, the ViaVoice SetupAssistant may post messages from
time to time, especially when the system was unable to understand some specific words.
The speech recognition engine is getting to know your voice and adjusting to your
particular speech patterns.
Don’t worry if you cannot finish reading the story; you can
NOTE
NOTE
NOTENOTE
2. When you finish reading your selection, you are given a choice to Continue Reading
or Analyze the portion you have just read.
• Select Continue Reading to read another part of the story.
•Or, select Analyze to start processing your Voice Model.
This can take a few minutes. A progress meter will indicate the remaining processing
time. To improve your voice recognition accuracy, you can activate this Assistant later
and complete the second part of the story or read a new segment.
come back to the same point in the story at any time.
ViaVoice, however, will not start until you complete this step.
3. When the application announces that Processing has finished, click the right arrow to
continue on to Analyze My Documents.
For more information, see "Users and Voice Models" on page 33.
Analyze My Documents Assistant
ViaVoice has a large base vocabulary and backup pronunciation dictionary. This
vocabulary includes many words that are used in everyday situations.
The Analyze My Documents Assistant searches through your existing text documents so
you can update your personal vocabulary with words you use frequently and improve
your recognition accuracy.
IBM ViaVoice Simply Dictation for Mac OS X User’s Guide 13
Page 18

Welcome
Welcome
WelcomeWelcome
Welcome
Welcome
WelcomeWelcome
This procedure helps ViaVoice determine your writing style and find words that are not in
the ViaVoice vocabulary.
We suggest you skip this step now and return to this
NOTE
NOTE
NOTENOTE
1. When you reach the Analysis Options, you will see that Ye s is the pre-selected
answer.
2. Select No, I prefer to do this later.
The application will ask you whether to go to the VoiceCenter or quit the ViaVoice
SetupAssistant.
3. Select Continue to go to the VoiceCenter.
4. The VoiceCenter appears on your desktop.
Assistant later, when you have had more time to use
ViaVoice or to select documents to submit for analysis.
VoiceCenter - Zoomed Out View
To learn how to start and use the Analyze My Documents Assistant at a later time, see
"Analyze My Documents" on page 35.
Congratulations!
You are ready to start using ViaVoice!
The next section is designed to introduce you to the many tools and
features that are available for your use in customizing the application to
your personal requirements. In this section, you will also dictate into
SpeakPad, ViaVoice’s own word processor, and complete a few easy
lessons in dictation, correction, and navigation.
14 Setting Up ViaVoice
Page 19

Getting Started
ViaVoice Simply Dictation for Mac OS X was designed to change the
way you use your computer. You should already have completed the
section "Setting Up ViaVoice" on page 11 and the VoiceCenter should
be active on your desktop. The VoiceCenter icon is located in the
ViaVoice folder, inside your Mac OS X Applications folder. Take a
moment now to become familiar with these components.
The ViaVoice Folder
Welcome
Welcome
WelcomeWelcome
Welcome
Welcome
WelcomeWelcome
In this section, you are introduced to the VoiceCenter and SpeakPad, the
components needed to get you up and running quickly. For more detailed
information on these and other ViaVoice tools, see "ViaVoice Components"
on page 55.
The VoiceCenter
The VoiceCenter is the central speech interface where you control many of
ViaVoice’s settings and preferences.
IBM ViaVoice Simply Dictation for Mac OS X User’s Guide 15
Page 20

Welcome
Welcome
WelcomeWelcome
Welcome
Welcome
WelcomeWelcome
Starting the VoiceCenter
Open the VoiceCenter by clicking its icon in the ViaVoice folder. This component is also
automatically displayed when you launch SpeakPad.
Microphone OFF
VoiceCenter - Zoomed Out
VoiceC ente r
Drawer
Audio Level
Indicator
The VoiceCenter contains the Microphone button, conveniently located so you may
quickly turn it ON or OFF. It also has standard Mac OS X action buttons to close, zoom,
and minimize the VoiceCenter. Click once on the VoiceCenter drawer handle to open and
access many ViaVoice components and preferences.
Microphone ON
Dictation Mode
Command Mode
Dictation and
Command Mode
VoiceCenter - Zoomed In
The speech mode default is Dictation and Command, since this is the mode you use
most frequently. This mode allows you to dictate and navigate at the same time using
ViaVoice. The other two modes allow you to dictate only or navigate only. You can
change the VoiceCenter start-up speech mode in VoiceCenter Preferences. For more
information, see"The VoiceCenter" on page 56.
16 Getting Started
Page 21

Dictating with SpeakPad
SpeakPad is ViaVoice’s word processor. Using SpeakPad, you can dictate
letters, reports, or other documents and save them or transfer the text to other
applications.
Make sure that your microphone is always positioned
NOTE
NOTE
NOTENOTE
correctly. For more information, see "Audio Setup Assistant"
on page 34.
There are two ways to dictate text with ViaVoice. One way is by dictating
into SpeakPad. SpeakPad’s integration with ViaVoice provides a simple way
to dictate your text and transfer it to another application. Another way is to
dictate into another application instead of SpeakPad. This process is called
DSR, short for Dictation Stream Redirection. Using this method, you can
dictate directly into most text-based applications.
Welcome
Welcome
WelcomeWelcome
Welcome
Welcome
WelcomeWelcome
In the Quick Tutorial section we will only use SpeakPad for dictation. For more
information on dictating directly into other applications, see "Using Dictation Stream
Redirection" on page 40.
Starting SpeakPad
1. If the VoiceCenter is open and the microphone is on, SAY> DICTATE TO
SPEAKPAD,
or open SpeakPad by double-clicking the SpeakPad icon in the ViaVoice folder.
IBM ViaVoice Simply Dictation for Mac OS X User’s Guide 17
Page 22

Welcome
Welcome
WelcomeWelcome
Welcome
Welcome
WelcomeWelcome
2. When SpeakPad is open, the blinking cursor indicates the place on the window where
your dictated text appears. Your voice commands appear in a yellow message screen
above the VoiceCenter, as shown in the graphic above.
For more information, see "SpeakPad" on page 60.
Dictating for the First Time
To dictate for the first time in SpeakPad, speak clearly using your natural pace and tone
of voice.
1. If SpeakPad is already open, skip to step 2. Open SpeakPad and click the button to
turn the microphone on. You can also place your mouse over the Speech Mode button
on the VoiceCenter to see the tool tip and ensure that you are in Dictation and
Command mode (as shown on page 16).
2. If you are using the US version of ViaVoice, begin dictating the following text and
then continue with step 4.
SAY> The new ViaVoice has arrived EXCLAMATION POINT NEW LINE
SAY> It contains many new features PERIOD NEW LINE
SAY> It’s easy to get started PERIOD NEW LINE
SAY> We hope you enjoy using the new ViaVoice PERIOD NEW LINE
SAY> MICROPHONE OFF
18 Getting Started
Page 23

Welcome
Welcome
WelcomeWelcome
Welcome
Welcome
WelcomeWelcome
3. The text you just dictated appears in the SpeakPad window as shown below.
Dictate at a moderate pace. If you are way ahead of what you
TIP
TIP
TIPTIP
4. Since the microphone is currently off and the microphone button on the VoiceCenter is
gray, close SpeakPad by selecting Quit SpeakPad from the SpeakPad menu.
Otherwise, SAY> QUIT SPEAKPAD to close the application. See "Closing
ViaVoice" on page 27.
see on the screen, you may be speaking too quickly.
5. When asked to save your first document, click Don’t Save. You will learn about
saving files later.
When you quit SpeakPad, the VoiceCenter remains open,
NOTE
NOTE
NOTENOTE
Congratulations! You are now using the latest technology in speech recognition. You are
also on your way to making the best possible use of your time at the computer. Don’t
worry if ViaVoice misrecognized some of the words you spoke. As you continue using
allowing you to work with other applications. When you quit
the VoiceCenter, SpeakPad also closes.
IBM ViaVoice Simply Dictation for Mac OS X User’s Guide 19
Page 24

Welcome
Welcome
WelcomeWelcome
Welcome
Welcome
WelcomeWelcome
ViaVoice and begin to correct misrecognized words, the application will learn how to
better identify your particular speech patterns and improve your success rate.
If someone else uses ViaVoice during your User login
session, it may alter your files and thus reduce the
application’s ability to recognize your own speech patterns
NOTE
NOTE
NOTENOTE
The next section introduces you to some of the correction techniques used by ViaVoice,
as well as other ways to augment your vocabulary through the use of word correction and
training.
later. To ensure that this does not happen, do not leave your
system unattended or log out when you are done. The
SetupAssistant prompts each new User to create a new Voice
Model once they login with their own name and attempt to run
ViaVoice.
20 Getting Started
Page 25

Welcome
Welcome
WelcomeWelcome
Welcome
Welcome
WelcomeWelcome
Quick Tutorial
This section is designed to get you started on your way to becoming familiar with
dictating to your computer “just by talking” to it. We recommend that you complete all
the exercises in this tutorial, but if you need to stop at any time, be sure to turn the
microphone on when you begin an exercise. Do not be concerned with your immediate
dictation results; they improve as you continue through this tutorial. ViaVoice also learns
how to better recognize your speech patterns.
NOTE
NOTE
NOTENOTE
Dictation is available in Dictation or Dictation and Command
mode.
Practicing Dictation
1. Open VoiceC ente r from the ViaVoice folder.
2. Place your mouse over the Speech Mode button on the VoiceCenter to see the tool tip
and ensure that you are in Dictation and Command mode (as shown on page 16).
3. Click the microphone On/Off button in the VoiceCenter to turn the microphone ON.
4. Position the microphone on your head the same way each time you dictate, and SAY>
DICTATE TO SPEAKPAD.
SpeakPad opens, displaying a blank window.
Click on the VoiceCenter and place the mouse pointer over any
TIP
TIP
TIPTIP
button in VoiceCenter, and a tool tip will show important
information. For more information, see "The VoiceCenter" on
page 56.
IBM ViaVoice Simply Dictation for Mac OS X User’s Guide 21
Page 26
Welcome
Welcome
WelcomeWelcome
Welcome
Welcome
WelcomeWelcome
Pausing Dictation
1. To temporarily pause dictation, SAY> GO TO SLEEP.
2. To resume dictating, SAY> WAKE UP.
To learn how to pause dictation by assigning a toggle key function, see "Microphone
Preferences" on page 64.
Formatting Text
The text you dictated earlier did not have any special formatting. If you are used to most
text processors, you know that special formatting features such as BOLD, Italics,
Underline
exercises show you how to use voice commands when you are dictating to format text.
For best results, pause briefly before saying the voice command, say the voice command
without pausing, then pause slightly after the voice command and continue dictating.
This way, ViaVoice distinguishes commands from dictation.
, etc., can be applied during or after the entering of text. The following
If you get a lot of misrecognized words using formatting
TIP
TIP
TIPTIP
With ViaVoice, you can select the process that is easier for you: applying special formats
while
you dictate, or after text has been entered. The following exercises will
demonstrate the commands and methods for formatting text while
might prefer to simply dictate an entire block of text and add formatting later. Practice
with this tutorial and it might help you decide which method works best for you.
Adding Capitalization
Place your cursor in the SpeakPad window to give the window focus. Remember to
pause briefly before each of the voice commands shown in all capital letters.
SAY> Our CAPITALIZE ON setup assistant CAPITALIZE OFF makes it easy
to get started NEW LINE
SpeakPad displays the text, including the selected capitalized words.
commands, you can use an Attention Word with voice
commands. For more information, see "Activating the Attention
Word" on page 45.
you dictate, but you
22 Quick Tutorial
Page 27

Welcome
Welcome
WelcomeWelcome
Welcome
Welcome
WelcomeWelcome
Adding Punctuation
SAY> ViaVoice also includes SpeakPad COMMA, our text editor NEW LINE
The dictated text, including the added punctuation, is displayed in SpeakPad.
Adding Special Formatting
SAY> SpeakPad makes it easy to BOLD ON transfer text to other applications
BOLD OFF NEW LINE
Your dictation appears on the SpeakPad window, including the special formatting.
Correcting Your Dictation
Now you have some text that shows text formatting. However, some parts of your
dictation may have been misrecognized by ViaVoice. The process of correcting your
dictation is dynamic; in other words, while you correct, you also help ViaVoice to learn
how to identify your own particular speech pattern and add each element of change to
your Voice Model.
Each time you dictate and make corrections, you make it easier for
ViaVoice to recognize your voice. Highlight the misrecognized word or
phrase and re-dictate or type the correct word. Get in the habit of correcting
misrecognized words every time you dictate. This, in turn, should result in
fewer corrections needed in future dictation sessions.
For the purpose of this tutorial, we will only cover some routine correction functions. For
more detailed information, see "Correcting Text in SpeakPad" on page 38.
TIP
TIP
TIPTIP
Correction is only available with dictated text in SpeakPad.
IBM ViaVoice Simply Dictation for Mac OS X User’s Guide 23
Page 28

Welcome
Welcome
WelcomeWelcome
Welcome
Welcome
WelcomeWelcome
Using the Correction Window
Use the Correction window to correct misrecognized text and update your personal
vocabulary, which helps improve dictation accuracy in future sessions. This window
displays these words or phrases and lists alternate choices, making it easier to select and
correct.
NOTE
NOTE
NOTENOTE
Displaying the Correction Window
1. Place your cursor in the SpeakPad window to give the window focus.
SAY> It’s easy to correct mistakes with ViaVoice PERIOD
2. From SpeakPad, highlight a word or a phrase that you have dictated.
SAY> SHOW CORRECTION WINDOW
The Correction window appears, displaying alternate “sounds like” words in the
Alternative Words field for any highlighted, misrecognized word. These suggestions are
numbered, as shown below.
The Correction window is only available in SpeakPad.
24 Quick Tutorial
Page 29

Welcome
Welcome
WelcomeWelcome
Welcome
Welcome
WelcomeWelcome
3. To correct any misrecognized text, select the misrecognized word or phrase.
SAY> PICK <n> where <n> is the number of the correct word.
In the example above, you would SAY> PICK ONE.
4. ViaVoice substitutes the misrecognized word with the one you chose from the
Alternate Words field in the Correction window.
Or, double-click on the word to insert it in the sentence.
For more information, see "Correcting Text in SpeakPad" on page 38.
Playback Dictated Text
Sometimes you cannot figure out what you were dictating when you are correcting
misrecognized text. You can hear the text you dictated read back in your own voice in
SpeakPad.
1. Highlight the desired text.
2. Select Playback Selection from the Dictation menu.
Basic Correction Using Commands
You can use the SCRATCH THAT command to delete text that you have dictated.
SAY> I made a mistake
SAY> SCRATCH THAT
SAY> I made a correction NEW PARAGRAPH
The last dictated text prior to the SCRATCH THAT command is removed from
SpeakPad, and you only see the sentence
Another command you can use is the UNDO ACTION command. This command works
like the Undo menu item and removes the last action performed.
SAY> What could be easier QUESTION MARK than
SAY> UNDO ACTION
Your dictated sentence is removed from SpeakPad.
I made a correction.
IBM ViaVoice Simply Dictation for Mac OS X User’s Guide 25
Page 30

Welcome
Welcome
WelcomeWelcome
Welcome
Welcome
WelcomeWelcome
Reading Text
Now that you have learned to enter and format text using voice commands, it’s time to
have ViaVoice read the sentences back to you. Highlight the desired text block and say
one of the following voice commands.
SAY> BEGIN READING
SAY> READ SELECTION
ViaVoice reads the highlighted text using the voice selected in the Voices panel in
ViaVoice Preferences. On applications with copy and selection capabilities, the Read
Selection menu item reads the text using the voice currently selected in the Voic es panel
in ViaVoice Preferences.
For more information, see "Playing Back Dictated Text in SpeakPad" on page 48.
Using the What Can I Say Window
This window shows all voice commands that are currently available. These
commands are sorted by tasks or applications.
1. Say the following to display the What Can
I Say window.
SAY> WHAT CAN I SAY
The What Can I Say window appears, listing
all available commands for the selected view.
2. Select the category of commands you want
displayed from the drop-down menu.
26 Quick Tutorial
Page 31

Welcome
Welcome
WelcomeWelcome
Welcome
Welcome
WelcomeWelcome
Closing ViaVoice
1. When you have finished with this tutorial SAY> QUIT SPEAKPAD.
Or, you can select Quit SpeakPad from the menu.
2. ViaVoice will prompt you to save the speech session. If you want to do so, click Save,
otherwise, click Don’t Save. The application closes.
IBM ViaVoice Simply Dictation for Mac OS X User’s Guide 27
Page 32

Welcome
Welcome
WelcomeWelcome
Welcome
Welcome
WelcomeWelcome
Viewing the Help Files
To view the ViaVoice Information Central online help files, click on the Information
Central button in the VoiceCenter drawer, then enter a search word, or select a topic
from the list.
You can also open Information Central from the SpeakPad> Help menu by using the
voice command, SAY> INFORMATION CENTRAL, or by clicking the ViaVoice
Help link in the Mac OS X Help Center.
Viewing the PDF Files
The following files are available in the ViaVoice/Utilities/Documentation folder.
• Users Guide.pdf (PDF version of this user’s guide)
• Command Reference.pdf (PDF version of the Command Reference Card)
• ReadMe.rtf (text file with last-minute software information)
The User’s Guide and Command Reference Card are available in Portable Document
Format (PDF) and can be viewed in Mac OS X Preview.
28 Viewing the Help Files
Page 33

Welcome
Welcome
WelcomeWelcome
Welcome
Welcome
WelcomeWelcome
Tips for Using ViaVoice
• Speak at a normal pace, not too quickly, not too slowly. If you are
speaking ahead of what you see ViaVoice currently displaying, you
might be speaking too quickly.
• Make sure you wear your microphone headset correctly and in the
same way each time you use ViaVoice.
• At first, dictate a paragraph or two at a time and then correct
misrecognized words.
• If you are speaking in a location with a lot of unusual background noise, wait until the
noise subsides before dictating.
• If you plan to dictate in locations that differ greatly in background noise, you should
create a different Voice Model for each location. For example, you can create a Home
Voice Model and an Office Voice Model. Open the ViaVoice UserSettings window to
create another Voice Model.
• Each time you dictate and make corrections, ViaVoice actually learns to recognize
your voice better. Get in the habit of correcting misrecognized words in your
dictation.
• Throughout this book the term “active” is used. It refers to the window that is
currently selected and has focus. It is important for you to give focus to the correct
window when you are dictating and using voice commands.
For example, the window below that is active shows lit action buttons.
• Anytime you try to dictate or say a command in an area that ViaVoice does not
support, you hear a beep tone. Make sure your cursor is in the right location or select
an alternate location.
IBM ViaVoice Simply Dictation for Mac OS X User’s Guide 29
Page 34

Welcome
Welcome
WelcomeWelcome
Welcome
Welcome
WelcomeWelcome
The next chapter, "Using ViaVoice" on page 33, introduces you to different dictation
methods, enhanced correction techniques, and the use of macros. All of these features are
designed to help you obtain the best possible results from your ViaVoice experience.
If you would like to get better acquainted with the ViaVoice menu tools and other
components such as UserSettings and ViaVoice Preferences, see the chapter "ViaVoice
Components" on page 55.
We hope you have enjoyed this tour of some of ViaVoice's powerful features.
You can find more detailed information about ViaVoice's other features
throughout this User’s Guide.
30 Viewing the Help Files
Page 35

32 Viewing the Help Files
Page 36

Using ViaVoice
Using ViaVoice
Users and Voice Models
ViaVoice for Mac OS X is designed to take advantage of the new operating system’s
multiuser support capability. ViaVoice creates User Speech Data for the user logged on to
OS X. At the same time, ViaVoice creates a Voice Model for that user, which contains
speech data collected by the Assistants as well as during dictation and correction.
Voi c e m o d e l s cannot be shared between different users. Each person who uses ViaVoice
on your computer must log onto OS X with their own user name, create a ViaVoice user,
successfully complete the ViaVoice SetupAssistant, and create a Voice Model.
For more information about creating OS X users, see MacHelp or your Mac OS X User’s
Guide.
Using the ViaVoice SetupAssistant
The components of the ViaVoice SetupAssistant include the following:
• Audio Setup
•Analyze My Voice
• Analyze My Documents
The ViaVoice SetupAssistant starts when you run SpeakPad or VoiceCenter without
creating a User. However, you can start it again to create additional Voice Models or to
analyze documents.
1. From the VoiceCenter drawer menu, click the SetupAssistant button.
Or, you can also click the ViaVoice SetupAssistant icon in the ViaVoice folder.
If you have not created a User yet, then the Audio Setup Assistant starts and you can
skip to the next section. Otherwise, the Welcome to ViaVoice SetupAssistant
window appears.
2. Select the Assistant function you want to use by clicking the respective button.
For more detailed information, see "ViaVoice SetupAssistant" on page 72.
The sections on the following pages describe the SetupAssistant components.
© Copyright IBM Corp. 1999-2002 33
Page 37

Using ViaVoice
Using ViaVoice
Audio Setup Assistant
This Assistant guides you through several steps to ensure that the microphone
is connected properly. It also demonstrates proper positioning of the
microphone, and helps you to adjust the audio playback level with the help of
an interactive presentation. You must resolve any audio issues found during
this procedure before you can use ViaVoice.
1. When you install ViaVoice, this Assistant starts automatically when you click the right
arrow on the User Information window or when you open SpeakPad.
To use it again at a later time, select the Audio Setup icon from the Welcome to
ViaVoice SetupAssistant window.
2. Follow the on-screen instructions.
Analyze My Voice Assistant
This Assistant guides you through the steps to create a Voice Model, which
improves your recognition accuracy. As you read a story, ViaVoice learns
how you pronounce words. You can create more than one Voice Model, if you
are going to be dictating in different environments with different background
noise levels. For example, you can create a Home Voice Model and an Office
Voice Model.
Creating a Voice Model
A Voice Model is collected speech data for a User. Most of this data is collected after you
read the story. ViaVoice collects more data when you dictate, correct, or train words. The
first step in creating a Voice Model is to process a short recording of your speech.
For best recognition accuracy, you should read all parts of the story. This can be done in
two or more sessions. If ViaVoice loses track of where you are reading, you hear an
audible alert. When you hear this alert, remember to resume reading at the underlined
blue word. A progress meter displays the remaining recording time. When ViaVoice
collects enough information or you finish reading, the application analyzes your voice
data and creates your Voice Model.
34 Users and Voice Models
Page 38

Using ViaVoice
Using ViaVoice
Recording your Speech
1. Click the SetupAssistant button from the VoiceCenter drawer, or click the ViaVoice
SetupAssistant icon in the ViaVoice folder.
The Welcome to ViaVoice SetupAssistant window appears.
2. Select the Analyze My Voice icon from the Welcome to ViaVoice SetupAssistant
window.
3. Follow the on-screen instructions.
4. Read the story using a normal tone of voice.
5. Once you complete a story you are prompted to continue reading or process your
Voice Model. Click Analyze to analyze your speech data.
Pausing the Assistant
If you cannot finish reading the entire story in one session, or if you have to
interrupt any portion of the processing, you may pause and restart at a later
time. The Assistant allows you to restart at the point you left off. The window
also shows you the percentage of the story already processed.
Analyze My Documents
One of the best ways to increase your personal vocabulary in ViaVoice is to
allow the application to read and analyze what you have written before.
ViaVoice has a large vocabulary, but you may need to dictate documents with
words that are not included in the vocabulary.
Analyzing a Document
You probably have documents on your computer that contain words and phrases much
like those you plan to dictate in the future. Analyzing these documents helps ViaVoice
find new words so you can add them to the ViaVoice vocabulary.
1. Click the SetupAssistant button from the VoiceCenter drawer, or click the ViaVoice
SetupAssistant icon in the ViaVoice folder.
The Welcome to ViaVoice SetupAssistant window appears.
2. Select the Analyze My Documents icon from the Welcome to ViaVoice
SetupAssistant window.
3. Follow the on-screen instructions.
IBM ViaVoice Simply Dictation for Mac OS X User’s Guide 35
Page 39

Using ViaVoice
Using ViaVoice
4. When the Select Documents window appears, click the Add button.
5. Select the folder where your document is stored.
6. Select the plain text (txt) file you want to analyze, and click Open.
The file you selected appears in the Document column. The Path column shows the
location of the file.
7. Add more files to be analyzed, if desired, by repeating the steps above.
8. Once you have selected all of the files to be analyzed, click the right arrow.
The Assistant displays a progress window.
9. When it has finished analyzing, the Choose Words window appears.
10. Review the word list by Word or Frequency.
• The Word column shows each individual word that has been found in
your document that is not in your personal vocabulary in alphabetical
order.
• The Frequency column shows the number of times each word appears in
the document, sorted numerically beginning with the highest number of
occurrences.
To view the different contexts for a particular word, highlight the word and click Next
Context.
11. If all of the words are important to add to your vocabulary, click Select All.
Otherwise, select only the words that you want to add by checking the box next to the
word. To un-check all the selected words, click Clear All.
12. Click the right arrow to continue.
13. If ViaVoice requires that a pronunciation be recognized, you need to record a
pronunciation. Select a word in the Train Word window.
14. Click the Record button, then say the selected word or phrase. After you have
recorded all the words, click the right arrow to continue.
15. The Analysis Results window appears, showing these statistics.
• Documents - The number of documents processed.
• Word Count - Total number of words processed.
• New Words Found - Quantity of new words found.
36 Users and Voice Models
Page 40

Using ViaVoice
Using ViaVoice
• New Words Added - Quantity of new words you chose to train and add to your
vocabulary.
16. Click the right arrow to complete the SetupAssistant.
To have your SpeakPad documents analyzed every time
TIP
TIP
TIPTIP
you save a file, select the Analyze When Saving
Documents option in SpeakPad Preferences. You must
select Save speech session or the document will not be
analyzed.
Dictating with ViaVoice
There are two methods you can use to dictate and process text with ViaVoice: dictating
into SpeakPad or using Dictation Stream Redirection (DSR), which allows you to dictate
into another application.
Make sure you select the correct speech mode button on
NOTE
NOTE
NOTENOTE
the VoiceCenter. You should probably select Dictation
and Command mode for most dictation and correction
activities. For more information, see page 56.
Dictating Into SpeakPad
This is the most common method for dictating, since SpeakPad is built upon Apple’s
TextEdit technology. This integration provides a simple and seamless way to dictate and
edit text. Additionally, correction is only available in SpeakPad. Once you dictate into
SpeakPad, you can easily edit, format, and transfer your text into other supported
applications.
1. Open SpeakPad from the ViaVoice folder.
2. Begin dictating your text.
IBM ViaVoice Simply Dictation for Mac OS X User’s Guide 37
Page 41

Using ViaVoice
Using ViaVoice
3. Correct any misrecognized words and save your document, if desired.
To prevent ViaVoice from picking up environmental noise and
TIP
TIP
TIPTIP
Using SpeakPad, you can format, edit, and correct your dictation before transferring it to
another text editor. Using the Playback feature, you can play back the text you just
dictated and use it to easily correct any errors with the Correction window. For more
information, see "Playing Back Dictated Text in SpeakPad" on page 48.
If you correct words in your document while dictating, you should allow ViaVoice to
check for new words in the documents automatically when you save your document in
SpeakPad. Select the Analyze When Saving Document option in SpeakPad
Preferences. For more information, see "SpeakPad Preferences" on page 60.
other room sounds, SAY> GO TO SLEEP to pause temporarily
when dictating or correcting. SAY> WAKE UP to resume.
Correcting Text in SpeakPad
Correcting words as you dictate in SpeakPad updates your personal
vocabulary, which helps improve recognition accuracy by immediately
teaching ViaVoice new words and phrases. This way, if you say the word
again while you are dictating the same document, ViaVoice is more likely
to recognize it correctly.
Delayed Correction
You can dictate a document, save the dictation session file, and delay correction or
editing until later. You can only use delayed correction if you have saved a previous
dictation session in SpeakPad. For more information, see "Saving a File" on page 62.
Hands-Free Correction
You can correct your misrecognized words, hands-free, by using voice
commands. Follow the steps below for the best results when correcting handsfree.
38 Dictating with ViaVoice
Page 42

Using ViaVoice
Using ViaVoice
Correcting a misrecognized word
1. If you find that a word that you dictated is misrecognized, SAY> CORRECT
<TEXT>, where <text> is the actual word that is incorrect. The Correction window
opens.
2. If the correct word or phrase is in the Alternate Words list, select it or SAY> PICK
<n>, where <n> is the number of the word or phrase. ViaVoice inserts the word you
picked from the list.
3. If the misrecognized word is not in the list, use spell mode, SAY> BEGIN SPELL to
spell out the correct word in SpeakPad. SAY> RETURN to exit spell mode and
continue dictating. For more information on spell mode, see “Spelling Words in Spell
Mode” on page 43.
4. If ViaVoice does not have a pronunciation for the word you spelled, you will be
prompted to record a pronunciation for it. Follow the on-screen instructions to train
the word. For more information, see "Recording a Pronunciation" on page 69.
Removing a misrecognized word
1. If you find that a word that you dictated is misrecognized, SAY> CORRECT
<TEXT>, where <text> is the actual word that is incorrect.
2. SAY> DELETE THIS.
Correction Voice Commands
To display a list of available voice commands for the Correction window, look in the
What Can I Say window. SAY> WHAT CAN I SAY.
The following is a list of some correction voice commands.
• Scratch that - Deletes the word or phrase you just dictated in your SpeakPad
document.
• Show/Open Correction Window - Displays the Correction window to correct a
word or phrase.
• Hide/Close Correction Window - Closes the Correction window.
• Correct <text> - Selects the specified word or phrase in your document, and then
displays it in the Correction window so you can correct it. Substitute the word “text”
IBM ViaVoice Simply Dictation for Mac OS X User’s Guide 39
Page 43

Using ViaVoice
Using ViaVoice
in the angle brackets for the actual word or phrase you want to correct in your
document.
• Pick <n> - Corrects your text based on the number <n> that corresponds to the text
from the Alternate words list in the Correction window.
Transferring Text to Other Applications
If you have supported applications installed on your computer, you can transfer the text
in your SpeakPad document, whether dictated or typed, by using a command for
transfers.
1. SAY > TRANSFER TO <Application Name>.
For a list of supported transfer applications, see the What Can I Say window.
NOTE
NOTE
NOTENOTE
2. The entire document or text you select is transferred to the application you specify in
the voice command.
3. After transferring your text, return to the SpeakPad window to continue dictating,
make corrections, save the text, or close SpeakPad. You can specify the transfer text
settings from the Other tab in SpeakPad Preferences.
For more information, see "SpeakPad Preferences" on page 60.
Correction features are only available when using SpeakPad.
Using Dictation Stream Redirection
Another method for dictation allows you to open and use another application to
dictate directly into it. The process of dictating into one of these programs
instead of using SpeakPad is called Dictation Stream Redirection. When
dictating directly, you can dictate into any text field area of a supported
application that will accept typed keystrokes.
Although correction and some voice commands are only supported when you dictate into
SpeakPad, your level of familiarity with another application may be the deciding factor
as to which method you use.
ViaVoice recognizes words using their sounds and their context with other words.
Remaining silent or pausing while waiting for words to appear may prevent ViaVoice
40 Dictating with ViaVoice
Page 44

Using ViaVoice
Using ViaVoice
from determining the context of your words. Do not pause or wait for words to appear,
except at the end of a sentence.
If the display of your text is distracting, try looking away from the screen while dictating.
Any time you try to dictate or say a command in an area that
NOTE
NOTE
NOTENOTE
ViaVoice does not support, you hear a beep tone. Make sure
your cursor is in the right location or select an alternate
location.
Text Editing and Formatting
You can edit and format text in your document using the voice commands listed in the
What Can I Say window. You can use text-editing voice commands to select, cut, copy,
and paste text. You can also use text-formatting voice commands to Capitalize,
UPPERCASE, lower case, bold, italicize, and underline
To view the list of voice commands that you can use to edit and format text while
dictating, say the command below.
.
SAY> WHAT CAN I SAY
For a list of text editing and text formatting voice commands, look in the What Can I
Say window. For more information, see "Navigating With Commands in SpeakPad" on
page 45.
Dictating Punctuation
Use commands for punctuation marks, such as PERIOD, COMMA, QUESTION
MARK, and SEMICOLON as you dictate your text. ViaVoice adjusts spacing and
capitalization accordingly.
For example, when you say PERIOD at the end of a sentence, ViaVoice types a period,
moves one space, and starts the next word with a capital letter. When you say NEW
PARAGRAPH, ViaVoice inserts a blank line, and starts the next word with a capital
letter. When you say NEW LINE, ViaVoice moves the cursor to the next line and starts
the next word with a capital letter.
Look in the What Can I Say window for a list of punctuation commands.
IBM ViaVoice Simply Dictation for Mac OS X User’s Guide 41
Page 45

Using ViaVoice
Using ViaVoice
General Dictation Tips
Each time you dictate using either method, we recommend that you follow the steps
listed below. They describe what you should do each time you dictate and list many of
the features you can use with ViaVoice.
• Put on your microphone and position it correctly. For more information, see "Audio
Setup Assistant" on page 34.
• If the microphone is off or asleep (the button appears gray), click the microphone
button to turn it on and begin dictating your document.
• Do not run the words together, as at first you might tend to speak quickly.
• Be patient and slow down a bit. Over time, you will find that you can increase your
rate of speaking with no loss of accuracy as long as you speak clearly.
• To view the list of voice commands that you can use to edit and format text while
dictating, say the command below.
SAY> WHAT CAN I SAY
• When you have finished speaking, always turn your microphone off.
• If you need to stop dictating for any reason, say the following command.
SAY> GO TO SLEEP
ViaVoice stops recognizing your speech as dictated text or voice commands until you
say the following voice command.
SAY> WAKE UP
• Dictate punctuation voice commands such as PERIOD, COMMA, and NEW
PARAGRAPH along with your text.
42 Dictating with ViaVoice
Page 46

Using ViaVoice
Using ViaVoice
Spelling Words in Spell Mode
ViaVoice has a Spell Mode feature that allows you to spell out words or insert symbols
and typographical characters (like & and +) when dictating.
1. SAY> BEGIN SPELL
at the place in your text where you want to spell the word.
2. Next, use one of the methods described in the next section to spell out words. Look in
the What Can I Say window for a list of symbols and other voice commands that are
available while in spell mode.
3. SAY> RETURN
or SAY> CANCEL to exit this mode.
Spelling Methods
Look in the What Can I Say window for more spell mode commands. Use any of the
methods below to spell out letters.
• Spelling with letters - Say any letter of the alphabet to spell out words.
• Spelling with the Phonetic Alphabet - Say any letter of the phonetic alphabet,
such as Alpha Delta Delta, to spell the word add.
• Spelling with a phrase - If you say a and ViaVoice types 8, you can say As in
Alpha and the system replaces the 8 with an a.
• Spell Mode with DSR - Say any letter of the phonetic alphabet, such as Alpha
Delta Delta, to spell the word add.
Dictating Numbers
When dictating, you can say numbers as a currencies, dates, times, or measurements the
way you normally would. ViaVoice formats these numbers correctly and in the format
you selected in ViaVoice Preferences on the Numbers tabs. For example, to get
“$589.00”, say the following command.
SAY> Five hundred eighty-nine dollars
IBM ViaVoice Simply Dictation for Mac OS X User’s Guide 43
Page 47

Using ViaVoice
Using ViaVoice
To dictate consecutive numbers, make sure you pause between numbers so ViaVoice can
recognize each number separately and to insert a space, say SPACEBAR. For example,
to dictate “I need to buy 10 12-packs of water,” say the following.
SAY> I need to buy ten [pause] SPACEBAR [pause] twelve packs of water
Number Formatting
You can select the type of formatting for numbers in the Numbers Preferences. Select
the actual digit or word from the Then You Get column to have the computer insert that
format, regardless of the sentence context. Select context to insert the digits or words
(Cardinal of 13 is 13 or thirteen and Ordinal of 13 is 13th or thirteenth) depending upon
the surrounding words in that sentence. Select the desired format for the Date, Time,
Currency, and Measures from the Then You Get column.
EXAMPLE:
SAY> I sold three feet of rope on November third at three pm for fifty dollars
PERIOD
When the fields are formatted in Numbers Preferences as follows:
Set the Date field to 5/1
Set the Time field to 10:15 p.m.
Set the Currency field to $50
Set the Measures field to 2 mg
Then, you see the following number formatting for the dictated sentence.
I sold 3 ft. of rope on 11/3 at 3:00 p.m. for $50.
For more information, see "Numbers Preferences" on page 64.
Dictating Numbers in Number Mode
To improve the recognition of digits and numbers in your text, particularly when you
want to dictate long sequences of numbers, like credit card numbers or symbols, enter
number mode during dictation.
1. SAY> BEGIN NUMBERS
at the place in your text where you want to dictate numbers.
44 Dictating with ViaVoice
Page 48

Using ViaVoice
Using ViaVoice
2. Next, say the name of a number or symbol. Look in the What Can I Say window for
a list of symbols and other voice commands that are available while in number mode.
3. SAY> RETURN
or SAY> CANCEL to exit this mode.
Navigating With Commands in
SpeakPad
You can navigate SpeakPad with your voice in Dictation and Command
mode. You can use the mouse, keyboard, or voice commands interchangeably.
You should pause briefly before and after each navigation command. Look in
the What Can I Say window for available voice commands.
1.Pause briefly before saying the voice command.
2. Speak the voice command without pausing, if there are multiple words.
3. Pause briefly after you say the voice command, then continue dictating your text.
This way, ViaVoice can translate your speech into a voice command. If ViaVoice
recognizes your voice command as dictated text, SAY> SCRATCH THAT to delete the
text, then pause and repeat your voice command.
If this happens again, check the What Can I Say window to make sure the command is
available. If it is, then use the Attention Word, such as Computer, before the voice
command.
Make sure you select the correct speech mode button on
NOTE
NOTE
NOTENOTE
the VoiceCenter. You can select Dictation and Command
mode for navigation activities. For more information, see
page 56.
Activating the Attention Word
1. Go to the Commands tab of ViaVoice Preferences.
2. Select the Require Attention Word check box. The default Attention Word is
“Computer”, but ViaVoice allows you to enter and use a word of your choice.
IBM ViaVoice Simply Dictation for Mac OS X User’s Guide 45
Page 49

Using ViaVoice
Using ViaVoice
3. Say the selected Attention Word before saying a voice command. Be sure not to pause
between the word “Computer” and the rest of the command. For example, SAY>
COMPUTER NEW PARAGRAPH.
You do not need to say the Attention Word before saying dictation macro names, such as
punctuation marks or macros that you create.
Anytime you try to dictate or say a command in an area that
NOTE
NOTE
NOTENOTE
ViaVoice does not support, you hear a beep tone. Make sure
your cursor is in the right location or select an alternate
location.
Creating Application-Specific Commands
Users can create user-customized voice commands for their applications using
Applescripts.
Using AppleScript
Commands can be added to ViaVoice by writing AppleScripts. These scripts can
perform any function that is “scriptable” on your computer. The name of the script
becomes a voice command that ViaVoice executes when you say it, thereby speechenabling your favourite application.
You can create scripts using the Script Editor that is installed with Mac OS X.
1. From the Applications folder, select the AppleScript folder.
2. Double-click on the Script Editor icon.
3. After creating the AppleScript, you can execute it by placing it in the folder Library/
Application Support/ViaVoice/Scripts/ViaVoice.
To learn how to create an AppleScript, visit: http://www.apple.com/applescript
.
46 Navigating With Commands in SpeakPad
Page 50

Using ViaVoice
Using ViaVoice
Reading E-mail
Provided your e-mail application supports the Select All and Copy to Clipboard
functions, you can have ViaVoice read back the text in your e-mail.
1. Open your e-mail application.
2. SAY> READ ALL
or, highlight the text you want to read and SAY> READ SELECTION.
The text selected is read using the currently selected voice in the Voice s panel in
ViaVoice Preferences.
3. Turn on the microphone and SAY> STOP READING to stop playback at any time.
The What Can I Say Window
The What Can I Say window displays all voice commands that are currently
available. All of the voice commands are organized by category names.
Expand each category to see available voice commands.
To display the What Can I Say window, SAY> WHAT CAN I SAY. Or, you can select
this item from the VoiceCenter drawer menu.
Some voice commands displayed in the What Can I Say window have one or more
words or phrases shown in angle brackets < >. Any word in angle brackets represents a
variable in the voice command. When you say the voice command, you must substitute a
word or phrase for the variable.
Some voice commands displayed have the word “(Untrained)” following the command
name. These voice commands do not have a recorded pronunciation available. Follow
these steps to train these voice commands.
1. Select the voice command name.
2. Select the Tra in Thi s menu item from the View menu. The Train Wor d window is
used to record and train the pronunciations of new or untrained words.
3. Click the Record button and say the voice command name.
4. Click Done when you are finished. For more information, see "Training a Command"
on page 69.
IBM ViaVoice Simply Dictation for Mac OS X User’s Guide 47
Page 51

Using ViaVoice
Using ViaVoice
Playing Back Dictated Text in SpeakPad
The Playback Selection feature in SpeakPad is useful when you are correcting your
dictated text. You can hear your own voice to help determine what you dictated.
Playback is limited to 1,000 words of dictated text (punctuation is included in the word
count). If your selection is over 1,000 words or contains typed text, you can use the Read
Selection feature to hear a computer-generated voice read the text aloud.
1. Highlight some dictated text.
2. SAY> PLAY THIS or select the Playback Selection menu item from the Dictation
menu.
3. You now hear your recorded voice played back.
4. Select Stop Playback from the menu to stop playback.
Reading Your Text
Provided your application supports the Select All and Copy to Clipboard functions, you
can have ViaVoice read back text aloud from almost any source, including documents
and e-mail messages.
1. Open the application.
2. SAY> READ ALL or, highlight the text you want to read and SAY> READ
SELECTION.
The text selected is read using the currently selected system voice.
3. Turn on the microphone and SAY> STOP READING to stop playback at any time.
48 Playing Back Dictated Text in SpeakPad
Page 52

Using ViaVoice
Using ViaVoice
Changing Voices
You can select the voice used when reading text.
1. Click the ViaVoice Preferences button on the VoiceCenter drawer.
2. Click the Voices icon.
3. From the Vo ice menu, select a new voice.
4. Press Play to hear a sample of your selection.
5. Click Apply, and close the window.
6. Any text read back from this point uses the voice you just selected.
Using Manage My Vocabulary
The Manage My Vocabulary window allows you to manage your personal vocabulary
by deleting or training how you say specific words. When you start Manage My
Vocabulary, it shows you all of the words you have added to your personal vocabulary.
Words shown in this window were added during dictation, correction, or when creating
voice commands.
1. SAY> MANAGE MY VOCABULARY or, click the Manage My Vocabulary
button from the VoiceCenter drawer.
2. Select the word to be re-trained.
3. Click the Tra in button.
The Train Word window appears.
4. Click the Record button and speak the word.
5. Click OK when you have trained the word.
If you want to check the quality of your recording, click the Play button.
Working With Dictation Macros
A dictation macro is a shortcut command, associated with a block of text that you define,
for inserting text quickly into your documents. When you say the voice command while
dictating, the associated block of text is inserted into your dictation. Use the dictation
IBM ViaVoice Simply Dictation for Mac OS X User’s Guide 49
Page 53

Using ViaVoice
Using ViaVoice
macro feature to save time when inserting closings, address information, web sites, or
text. The dictation macro you create is only available in the currently selected
vocabulary.
1. SAY > OPEN MACRO EDITOR or, you can click the Macros button from the
VoiceCenter drawer to open this window.
2. The Macro Editor window appears and you can edit existing macros. To learn how to
create your own macros, see "Creating a Dictation Macro" on page 50.
Macro Editor Window Components
The Macro Editor window contains fields and buttons that perform specific functions as
described below:
• Macro list - The existing macros are listed.
• Macro Name - The macro name (voice command).
• Description - The pronunciation of the voice command.
• What Appears - The text displayed for the macro.
• Join To - Selects the spacing option for displaying the macro.
• Formatting of Next Word - Selects options for the words that follow the macro.
Creating a Dictation Macro
1. Select the text you want to use for the dictation macro from your SpeakPad
document.The dictation macro you create is only available in the currently selected
vocabulary.
2. SAY > OPEN MACRO EDITOR or, you can click the Macros button from the
VoiceCenter drawer to open this window.
If you do not have text available to select, click the New button in the Macro Editor
window and type your text in the What Appears field.
3. In the Macro Name field, type a unique name for the new macro. It is a good idea to
use names for your macros that are not common words that you dictate. Otherwise,
whenever you dictate that word, the dictation macro appears instead of the word. A
good rule is to use compound words like “my-closing” as names for macros.
50 Working With Dictation Macros
Page 54

Using ViaVoice
Using ViaVoice
4. In the Join to field, select the spacing to display the macro. In the Formatting of
Next Word field, select the settings of the words that follow or precede the macro.
(This step is optional.)
5. Click Save when you are finished. If you need to train a pronunciation for the macro
name, the Trai n Word window appears.
6. Click the Record button and say the command name.
7. Click Done when you are finished. For more information, see "Training a Command"
on page 69.
Sample Dictation Macro
After creating a dictation macro, say the macro name as a voice command, while
dictating, to insert it in your document. For example, the following text was used to
create a dictation macro and named “my-closing.”
Mr. & Mrs. Example
1234 Happy Lane
Anywhere, USA 56789
To insert this macro, say the macro name.
SAY> my-closing
The system will insert the macro text at the current cursor position in the document. If the
system still does not recognize your macro names, you should re-train them.
Editing a Dictation Macro
You can use a dictation macro with any application that is supported by ViaVoice. You
may need to edit, rename, or delete a macro you have already created.
1. SAY > OPEN MACRO EDITOR or, you can click the Macros button from the
VoiceCenter drawer to open this window.
2. Select the macro you want to edit, rename, or delete from the list.
3. Make your changes.
4. Click Save when you are finished. Click Delete if you are deleting your macro. If you
need to train a pronunciation for the macro name, the Train Wo rd window appears.
IBM ViaVoice Simply Dictation for Mac OS X User’s Guide 51
Page 55

Using ViaVoice
Using ViaVoice
Managing ViaVoice Users
If you plan to dictate in locations that differ greatly in background noise, you should
create a different Voice Model for each location. For example, you can create a Home
Voice Model and an Office Voice Model. Open the ViaVoice UserSettings window to
create another Voice Model.
Adding a Voice Model
1. In the VoiceCenter, click the ViaVoice UserSettings button.
The ViaVoice UserSettings window appears.
2. Click the Add button.
3. The ViaVoice SetupAssistant’s Create Voice Model window appears.
4. Enter the name you want to use for this Voice Model.
5. Click the right arrow to begin Audio Setup, and follow the instructions.
When you have finished, the new Voice Model is active and you can select a Voice
Model from the list.
Backing Up a User
If you use more than one computer, you might want to copy your personal speech files
from one computer to another. You do this by backing up your user data on one computer
and then restoring the data on the other computer. If you plan to back up your user data
on diskettes, you should have several formatted diskettes on hand.
1. In the ViaVoice UserSettings window, click the Backup User button.
The Select your backup folder window appears.
2. Select the folder where you want to store the backup files and click Choose.
A window appears informing you that your backup was completed successfully.
3. Click OK to close the window.
If you have a backed up user and then uninstall ViaVoice for Mac OS X, you can import
that same backed up user folder if you decide to re-install ViaVoice for Mac OS X, again.
After you install ViaVoice, drag and drop your backed up user folder onto the
SetupAssistant icon and follow the on-screen instructions to import the user.
52 Managing ViaVoice Users
Page 56

53 Managing ViaVoice Users
Page 57

ViaVoice Components
ViaVoice Components
ViaVoice Components Overview
ViaVoice Simply Dictation includes a number of components, that allow you to dictate,
navigate, correct and customize the ViaVoice application. The following is a list of these
components. They can be accessed from the ViaVoice drawer menu or voice commands.
• VoiceCenter - This is the ViaVoice control center where you can access all of the
settings and options. The VoiceCenter functions, such as Preferences and UserSettings
are speech-enabled. For more information, see "The VoiceCenter" on page 56.
• SpeakPad - This is the ViaVoice text editor you use for dictation. Your dictated text
can be saved or transferred to another application. For more information, see
"SpeakPad" on page 60.
• ViaVoice Preferences - Includes the settings used to customize ViaVoice
components. For more information, see "ViaVoice Preferences" on page 63.
• CommandCenter - Allows you to switch between the What Can I Say, Correction,
and History windows. For more information, see "The CommandCenter" on page 65.
• ViaVoice SetupAssistant - Consists of the Audio Setup, Analyze My Voice, and
Analyze My Documents Assistants. For more information, see "ViaVoice
SetupAssistant" on page 72.
• UserSettings - Allows you to select Voice Models and personalize User information.
For more information, see "ViaVoice UserSettings" on page 74.
• Other components - For more information on the Macro Editor, see "Macro Editor
Window Components" on page 50. For more information about Manage My
Voc abulary, see "Using Manage My Vocabulary" on page 49. For more information
on Information Central, ViaVoice’s help file, see "Accessing Information Central"
on page 78.
© Copyright IBM Corp. 1999-2002 55
Page 58

ViaVoice Components
ViaVoice Components
The VoiceCenter
It’s worthwhile to get familiar with VoiceCenter, the control center of ViaVoice. After
installing ViaVoice, the VoiceCenter is displayed when you run ViaVoice.
VoiceCenter Components
Shown below is the VoiceCenter, from which you can access all of the settings and
options with a click of your mouse. All VoiceCenter functions, such as ViaVoice
Preferences and UserSettings are speech-enabled.
Action buttons
Microphone OFF
Microphone ON
Dictation mode only
Command mode only
Dictation and
Command mode
Drawer
Lime Green
The best recording level
Fuchsia
You are speaking too loud
Microphone Button
Click to turn ON or OFF.
Speech Mode Buttons
Switches between the three speech modes: Dictation, Command, and Dictation and
Command. The default is Dictation and Command mode, but you can change this
setting in VoiceCenter panel in ViaVoice Preferences.
Audio Level
Shows the loudness of your voice in lime green, a color-blind-friendly hue. If the Audio
Level is displaying the color fuchsia in a normal tone of voice, you are speaking too
56 The VoiceCenter
Page 59

ViaVoice Components
ViaVoice Components
loud. Try adjusting the audio settings or move the microphone away from your mouth. To
test or change audio levels, run the Audio Setup Assistant.
Action Buttons
Use these standard Mac OS X buttons to toggle between the Zoomed Out, Zoomed In,
and Minimized views of the VoiceCenter.
VoiceCenter Drawer
The VoiceCenter drawer menu allows easy access to most of the ViaVoice options,
functions, and information.
Correction
What Can I Say
Macros
Manage My Vocabulary
Information Central
SetupAssistant
Preferences
UserSettings
About ViaVoice
• What Can I Say - Displays a list of available voice commands.
• Correction - Displays the Correction window.
• Preferences - Use to customize functions of ViaVoice.
• Macros - Displays the Macro Editor window so you can create and edit dictation
macros.
• Manage My Vocabulary - Displays the Manage My Vocabulary window so you
can re-train the pronunciation of words.
• UserSettings - Use to add Voice Models or change other User information.
• Information Central - Displays Information Central, the ViaVoice online help file.
• SetupAssistant - Use to set up your audio, create a user or analyze documents.
• About ViaVoice - Displays the ViaVoice About box.
IBM ViaVoice Simply Dictation for Mac OS X User’s Guide 57
Page 60

ViaVoice Components
ViaVoice Components
Tool Tip Messages
The last voice command ViaVoice recognized is displayed in a one-line text area above
the VoiceCenter. As you say voice commands, glance at this area and dictate at a
moderate pace.
If you happen to be speaking too quickly, ViaVoice displays caution messages asking you
to slow down, or the application might even temporarily disable the microphone.
VoiceCenter - Zoomed In View
Tool Tip
Message
VoiceCenter - Zoomed Out View
VoiceCenter Views
If you want to change the look of the VoiceCenter, you can change the view. There are
three views available: Zoomed In, Zoomed Out, and Minimized.
The default for the VoiceCenter is the Zoomed Out view. To switch between views, click
the corresponding action button. You might want to have the VoiceCenter in Zoomed In
view, so that it does not take up as much room on your desktop.
Zoomed In View
The Zoomed In view shows a smaller VoiceCenter with only the Microphone button,
Speech Mode button, and Audio Level.
Zoomed Out View
The Zoomed Out view shows a larger VoiceCenter with the Microphone button, Audio
Level, Speech Mode button, and the VoiceCenter drawer.
58 The VoiceCenter
Page 61

ViaVoice Components
ViaVoice Components
Minimized View
The Minimized view displays the VoiceCenter as an icon in the Dock as shown below.
VoiceCenter Preferences
From this window, you can change the settings for the startup mode, window and font
settings.
1. From the VoiceCenter drawer menu or from the ViaVoice folder, click Preferences.
The ViaVoice Preferences window opens.
2. Click the VoiceCenter icon.
The VoiceCenter Preferences panel appears.
3. Make the desired changes to the following settings.
• Speech Mode - Select the speech mode you prefer at start-up, Command or
Dictation and Command.
• Window - Adjust the slider to the desired transparency mode or select the size
that you want VoiceCenter at start-up (Zoomed Out, Zoomed In, or Minimized).
• Message Font - Click Set to select the font to be used for any system messages
and tool tips. A sample of the font displays on the bottom part of the VoiceCenter
Preferences window.
4. Close the ViaVoice Preferences window.
NOTE
NOTE
NOTENOTE
Some changes are applied immediately while others are
made the next time you start the application.
IBM ViaVoice Simply Dictation for Mac OS X User’s Guide 59
Page 62

ViaVoice Components
ViaVoice Components
SpeakPad
You can access SpeakPad by clicking its icon in the ViaVoice folder. For more
information about using SpeakPad, see "Dictating with SpeakPad" on page 17.
SpeakPad Preferences
You can change any SpeakPad settings by following these steps when SpeakPad is open.
1. Click Preferences from the SpeakPad menu.
The SpeakPad Preferences window appears.
2. Make changes as desired and close the Preferences window.
You can customize the following settings on the Document tab.
• Document Saving - Select the checkbox to have your document saved
automatically. Enter the desired time interval in the minutes text box.
We suggest you select this checkbox to have your documents analyzed every
time you save, which updates your vocabulary.
• Select and Correct <text> Commands Search From Cursor - Select the
direction to move through the document.
• Default Document Font - Click the Set button to open the Font window. Select
the font type and size for any new SpeakPad document.
You can customize the following SpeakPad settings on the Other tab.
• At Startup, Set Speech Mode To - Select the speech mode you prefer at start-
up.
• On Transfer - Select settings for transferring documents.
NOTE
NOTE
NOTENOTE
Some changes are applied immediately while others are
made the next time you start the application.
60 SpeakPad
Page 63

ViaVoice Components
ViaVoice Components
SpeakPad Menu
The SpeakPad menus contain items that are similar in functionality to other word
processors.
Dictation Menu
The following items are available on the Dictation Menu.
• Playback Selection/Stop Playback - This option allows you to play back your
dictated text in your own voice. ViaVoice can play back up to 1,000 words
(punctuation is included in the word count). The playback feature is useful in
many instances, such as when you are correcting text. For more information, see
"Playing Back Dictated Text in SpeakPad" on page 48.
• Read Selection/Stop Reading - This option reads any text you have highlighted
in a computer-generated voice. You can use this feature to help you proofread
your documents. For more information, see "Reading Your Text" on page 48.
• Voice Preferences - This option displays the Voic es window, which allows you
to change the computer-generated voice. For more information, see "Voices
Preferences" on page 65.
Opening a File
SpeakPad supports opening SimpleText, Rich Text Format, and SpeakPad file formats.
You can open previously dictated Mac OS X SpeakPad documents and continue to
dictate in the document, but SpeakPad is unable to read files saved from earlier products.
To open a document, follow these steps.
1. Click File.
2. Select Open.
3. Locate and highlight the desired file, then click Open.
IBM ViaVoice Simply Dictation for Mac OS X User’s Guide 61
Page 64

ViaVoice Components
ViaVoice Components
Saving a File
SpeakPad saves the file as a SpeakPad text file with or without the dictation session data.
This is the audio you recorded while dictating.
Only save files with dictation information if you plan to correct them later. If
you save a file with dictation session information, it can be quite large and
take a while to save. It can also take a while to re-open.
To save your dictated text, follow these steps.
1. Click File and select Save or Save As.
2. In the Save field, type a name for the file.
3. If someone needs to review your voice recording at a later time, (for example, you
will be giving the file to someone else to correct) check the Save dictation session
information checkbox.
Closing SpeakPad
From the SpeakPad menu, select Quit SpeakPad or SAY> QUIT SPEAKPAD.
62 SpeakPad
Page 65

ViaVoice Components
ViaVoice Components
ViaVoice Preferences
To customize ViaVoice, use ViaVoice Preferences. There are many
application functions associated with this window.
Changes made in Preferences affect only the current User.
Each User must log in using their own password, and then
open ViaVoice Preferences to make individual adjustments.
With ViaVoice Preferences, you can:
• Fine-tune ViaVoice speech-recognition sensitivity and performance
• Configure the start-up state of the microphone
• Change the look of the VoiceCenter fonts
• Define the way ViaVoice types dictated numbers
• Set up Text Transfer parameters
Opening ViaVoice Preferences
1. In the VoiceCenter drawer menu, click the Preferences button.
The ViaVoice Preferences window appears.
2. To modify any settings, click any icon to open the desired panel and make your
changes.
3. To go back to ViaVoice Preferences window, click Show All.
NOTE
NOTE
NOTENOTE
Commands Preferences
The following settings are available from the Commands icon.
• Keys - You can use the keyboard function keys to toggle between speech modes.
Some changes are applied immediately while others are
made the next time you start the application.
IBM ViaVoice Simply Dictation for Mac OS X User’s Guide 63
Page 66

ViaVoice Components
ViaVoice Components
• Attention Word - Use this setting to help ViaVoice differentiate between voice
commands and dictation. The default Attention Word is “Computer.” If you want
to select another word, type that word in this text entry box.
Microphone Preferences
The following settings can be adjusted using the Microphone icon.
• At Startup Set To - Set the startup mode for the microphone button.
• Off Behavior - Select one of these settings.
Turn Off - The microphone button is inactive and ViaVoice does not
respond to voice commands. You must click the microphone button to turn it
back on.
Go to Sleep - The microphone button is inactive and ViaVoice responds
only to the voice command WAKE U P. You can click the microphone button
to turn it back on.
• To Activate Speech - Select this checkbox to turn the microphone on or off by
pressing a hot key. Choose the function key (F1 - F12) that you want to use as
your hot key.
Numbers Preferences
When you dictate numbers, they appear in the default formats shown on this panel.
The following settings can be changed using the Numbers icon.
• Types - Select the desired type by selecting from the Then You Get column.
Numbers may appear as either digits or words. Cardinal of 13 is 13 or thirteen
and Ordinal of 13 is 13th or thirteenth.
Use the same method above to adjust the preference settings in the Date & Time tab, as
well as defining Currency and Measures in the Other tab.
For more information on working with numbers, see "Dictating Numbers" on page 43.
Performance Preferences
The following settings can be adjusted using the Performance icon.
64 ViaVoice Preferences
Page 67

ViaVoice Components
ViaVoice Components
• Recognition Sensitivity - Adjust the slider until you reach the best settings for
your computer, from Best Guess to Exact Match. This setting only affects
recognition while saying commands.
• Recognition Performance/Accuracy - Make changes to recognition settings.
Voices Preferences
This page allows you to select the voice that reads your text and hear a sample played.
From the Speech, Pitch, and Voice Quality tabs, adjust the sliders until you reach the
desired settings. From the Options tab, select the hot key for reading text.
The CommandCenter
The CommandCenter allows you to switch between the What Can I Say, Correction,
and History window in a single, reusable window or as separate windows.
Reusable mode
What Can I Say
History
Correction
When any of the three windows are open using single reusable mode, the views can be
switched by clicking on the buttons (shown above) located on the top right-hand side of
the window.
IBM ViaVoice Simply Dictation for Mac OS X User’s Guide 65
Page 68

ViaVoice Components
ViaVoice Components
The CommandCenter is shown below in the separate window mode and each window
appears without the ability to switch between them.
Separate window mode
CommandCenter Preferences
You can switch the modes and change other settings from the Window tab,
found in ViaVoice Preferences by clicking on the CmdCenter icon.
The What Can I Say, Correction, and History tabs only allow you to modify
the default Font settings.
1. Click Set and select a new font from the list.
If you’re not sure which new font to select, a sample of the new font and size displays
on the window.
The following settings are available in the Window tab.
• Transparency - Adjust the slider until you reach the desired transparency level.
66 The CommandCenter
Page 69

ViaVoice Components
ViaVoice Components
• Components - Choose the method to display the components, as separate
windows, or as one reusable window with different views.
NOTE
NOTE
NOTENOTE
Some changes are applied immediately while others are
made the next time you start the application.
The What Can I Say Window
The What Can I Say window displays all voice commands that are currently available.
You can expand or collapse any of the folders in the window.
To display the What Can I Say window, SAY> WHAT CAN I SAY. Alternatively, you
can select this item from the VoiceCenter drawer menu.
Some voice commands displayed in the What Can I Say window have one or more
words or phrases shown in angle brackets < >. Any word in angle brackets represents a
variable in the voice command. When you say the voice command, you must substitute a
word or phrase for the variable.
IBM ViaVoice Simply Dictation for Mac OS X User’s Guide 67
Page 70

ViaVoice Components
ViaVoice Components
What Can I Say Window Components
Commands listed by category
Untrained Commands list
•The All view displays every voice command available by category. The list of
commands reflects the window that is currently active.
•In the Show Untrained Items view of the What Can I Say window, the voice
commands that require a pronunciation and need to be trained are marked with the
word (UNTRAINED) after the voice command. Select the voice command and then
select the Train This menu item from the View menu. The Train Wo rd window is
used to record and train the pronunciations of new or untrained words.
• Tool Ti p - Displays commands that you can say.
Training a Word or Phrase
Use the Trai n Word window to provide ViaVoice with a pronunciation of your words
that are not in the ViaVoice vocabulary or its backup dictionary.
68 The CommandCenter
Page 71

ViaVoice Components
ViaVoice Components
Before recording, you should select Use only new pronunciation (to use only the newest
pronunciation) or Use all pronunciations (to use all pronunciations of the word in your
personal vocabulary), depending on the word or phrase you want to train.
If the list contains more than one item, record a pronunciation for each one. Follow the
procedures to train a word for the appropriate window below.
• What Can I Say window - Highlight the untrained word or command and select
Train This from the View menu to display the Trai n Word window.
• Correction window - If you correct a word that does not have a pronunciation,
ViaVoice will display the Train Word window.
• Manage My Vocabulary window - If you want to add a new word, click the Train
button and type the word in the Written-like field.
Recording a Pronunciation
1. If the word does not sound like it is written, type the word or phrase the way that you
pronounce it in the Sounds-like spelling field. Remember to place a hyphen between
the words and letters.
For example, if you pronounce the word NCAA as NC double A, enter N-C-doubleA. If you pronounce NCAA as NCAA, enter N-C-A-A.
2. Click the Record (circle) button.
3. Click the Stop (square) button or let the recorder stop automatically when you finish
speaking.
4. A check mark appears next to the word or phrase after you record it.
5. If you want to check the quality of your recording, click the Play (triangle) button.
6. Click Done when you have trained the selected voice command.
If you use ViaVoice in locations that have significantly different background
noise (for example, a quiet room at home and a noisy office at work), create a
Voice Model in each location and then use the appropriate Voice Model.
For more information, see "Managing ViaVoice Users" on page 52.
Training a Command
1. Select the Show Untrained Items view in the What Can I Say window.
IBM ViaVoice Simply Dictation for Mac OS X User’s Guide 69
Page 72

ViaVoice Components
ViaVoice Components
2. Highlight the untrained word or command and select Train This from the View menu
to display the Train Word window.
3. In the Train Word window, click the Record (circle) button and say the selected
voice command.
4. Click the Stop (square) button or let the recorder stop automatically when you finish
speaking.
5. If you want to check the quality of your recording, click the Play (triangle) button.
6. Click DONE when you have trained the selected voice command.
The Correction Window
Even after repeated usage of ViaVoice, some words you dictate might still be
misrecognized. To display the Correction window, SAY> SHOW CORRECTION
WINDOW. For more information on using this window, see "Correcting Text in
SpeakPad" on page 38.
70 The CommandCenter
Alternate words field
Options menu
Page 73

ViaVoice Components
ViaVoice Components
Correction Window Components
The Correction window contains fields and buttons that perform specific functions as
described below.
• Alternate Words - Displays a list of alternate choices for the selected text.
• Options - Displays a menu with format and other settings for the selected word or
phrase.
• Add Word Or Phrase - Opens the Train Word window and corrects individual
words or words as a phrase. It is recommended that you use this setting only to
add words most frequently used.
• Turn Autoplay On/Turn Autoplay Off - Allows automatic playback of your
voice.
• Capitalize This - Capitalizes the selected text.
• Lowercase This - Lowercases the selected text.
• Uppercase This - Uppercases the selected text.
• Numeric - Changes numeric text to digits.
• Spell Out - Changes digits or abbreviations to words.
IBM ViaVoice Simply Dictation for Mac OS X User’s Guide 71
Page 74

ViaVoice Components
ViaVoice Components
The History Window
This window displays all voice commands that were used in the current session. In
addition, the commands and messages generated by the speech engine will also be shown
in this area. The commands and system messages are displayed in alphabetical order.
To display this window, SAY> OPEN HISTORY WINDOW.
ViaVoice SetupAssistant
Reusable single
window mode buttons
ViaVoice users must create their own Voice Model for each User of the application. The
speech-recognition engine needs to understand the natural differences between speakers
and in turn be able to offer greater recognition power. Additionally, each User can create
and store several Voice Models to accommodate various speaking environments, such as
noise levels or locations.
The components of the ViaVoice SetupAssistant include:
•User Setup
• Audio Setup
•Analyze My Voice
• Analyze My Documents
72 ViaVoice SetupAssistant
Page 75

ViaVoice Components
ViaVoice Components
Starting the ViaVoice SetupAssistant
The first time you use ViaVoice, the ViaVoice SetupAssistant automatically runs through
each separate procedure, guiding you until you create your first Voice Model.
Click to start the ViaVoice SetupAssistant.
You can also run any of the other assistants individually at any time, such as when you
need help with any audio or to learn proper microphone positioning.
1. Open the SetupAssistant from the ViaVoice drawer or click the ViaVoice
SetupAssistant icon in the ViaVoice folder.
2. The Welcome to ViaVoice SetupAssistant window appears.
3. Select the Assistant function you want to use by clicking the respective button.
For more detailed information, see "Using the ViaVoice SetupAssistant" on page 33.
IBM ViaVoice Simply Dictation for Mac OS X User’s Guide 73
Page 76

ViaVoice Components
ViaVoice Components
ViaVoice UserSettings
In the ViaVoice UserSettings window you can define global settings such as dictation
topics, select Voice Models, and backup or restore User speech files.
User Name
Voice Model Name
Vocabulary and Topics Selection
1. In the VoiceCenter drawer menu, click the UserSettings button.
The ViaVoice UserSettings window appears.
2. You can customize the following settings on the ViaVoice UserSettings window:
• User Name - Select a User.
• Backup User - Click this button to backup the User speech files. If you have a
backed up user and then uninstall ViaVoice for Mac OS X, you can import that
same backed up user folder if you decide to re-install ViaVoice for Mac OS X,
again. After you install ViaVoice, drag and drop your backed up user folder onto
the SetupAssistant icon and follow the on-screen instructions to import the user.
• Restore User - Click this button to restore the User speech files that you have
previously backed up.
74 ViaVoice UserSettings
Page 77

ViaVoice Components
ViaVoice Components
• Voi ce M o d e l - If you have previously created additional Voice Models, the new
names will show on this drop-down menu. Select the desired Voice Model from the
menu.
The following options are available.
• Add - Click this button to add a new Voice Model.
• Modify - Click this button to record additional story segments.
• Delete - Click this button to remove the selected Voice Model from your
computer.
A prompt appears to confirm that you want to delete the selected Voice Model.
Then, ViaVoice enables the next available Voice Model for the same User. (You
cannot delete a Voice Model for a User who has only one Model).
• Rename - Click this button to change the Voice Model's description.
NOTE
NOTE
NOTENOTE
Some changes are applied immediately while others are
made the next time you start the application.
Topics and Vocabularies
ViaVoice offers specialized Top ic s, which are mini-vocabularies containing words
specific to a given field, such as computers. You can also add specialized Vocabularies,
offering Legal or Medical terminology. These vocabularies are useful when dictating
words not normally encountered in everyday speech.
IBM ViaVoice Simply Dictation for Mac OS X User’s Guide 75
Page 78

76 ViaVoice UserSettings
Page 79

Getting Help
Getting Help
Troubleshooting Guide
Problem Possible Solution
ViaVoice will not install. Are you running Mac OS X? If not, you must upgrade
before proceeding.
You must install this application on the OS boot volume
and have Administrator privileges.
I cannot use ViaVoice. You must complete the Audio Setup and SetupAssistant
functions to create a User and Voice Model prior to
using ViaVoice.
My voice is not being
recognized well.
ViaVoice recognizes
voice commands as text.
ViaVoice is having a
problem recognizing
some words.
The system
misrecognizes macro
names.
Are you using the correct microphone? Only USB
digital microphones are supported. ViaVoice does not
support Analog microphones.
Run the SetupAssistant again to ensure your audio is
working correctly and possible read an additional story.
Check that speech mode you are using on the
VoiceCenter supports commands.
Use an Attention Word.
In Commands Preferences, select the Require
Attention Word checkbox, and use the default word
“Computer” (or another word of your choice) before
speaking voice commands.
Be sure to correct your misrecognized words while
dictating. The more you train ViaVoice to understand
your voice, the better your recognition. Also, you can retrain the pronunciation for voice commands and macros.
Re-train the pronunciation for the macro name using the
Macro Editor or the Train Word window.
© Copyright IBM Corp. 1999-2002 77
Page 80

Getting Help
Getting Help
Getting HelpGetting Help
Getting Help
Getting Help
Getting HelpGetting Help
Using the Help Features
Accessing Information Central
To view Information Central, the ViaVoice online help, SAY> INFORMATION
CENTRAL or select the Help menu item from SpeakPad.
Type your
question here
in any help
window and
click Ask.
You can also click the Information Central button in the VoiceCenter drawer menu or
click the Question mark (?) button and select ViaVoice Help from the HelpCenter
window, where applications that contain a help file are listed, as shown below.
Viewing PDFs
The User’s Guide and Command Reference Card are also available in PDF format for
easy online viewing and can be found in the ViaVoice/Utilities/Documentation folder.
The ReadMe file is also located in this folder.
78 Using the Help Features
Click this button in any help
window to open the Help Center.
Page 81

Getting Help
Getting Help
Getting HelpGetting Help
Getting Help
Getting Help
Getting HelpGetting Help
Uninstalling ViaVoice
There may be an occasion when you need to remove ViaVoice for Mac OS X from your
hard drive.
1. If you plan on re-installing ViaVoice for Mac OS X again, we recommend that you
backup your User speech files. After you install ViaVoice, drag and drop your backed
up user folder onto the SetupAssistant icon and follow the on-screen instructions to
import the user. For more information, see "ViaVoice UserSettings" on page 74.
2. From the ViaVoice application CD, double-click the Un-installer icon and follow the
on-screen instructions. See the ReadMe for additional uninstall information.
The Un-installer program removes the ViaVoice application from your computer, but
not your User data, in case you decide to re-install at a later date.
You must uninstall ALL Users with the ViaVoice uninstaller. If you have multiple Users on your computer, each
CAUTION
CAUTION
CAUTIONCAUTION
user must login and run the un-installer until all but one
user is left on the system. Then, run the un-installer and it
removes the ViaVoice application.
IBM ViaVoice Simply Dictation for Mac OS X User’s Guide 79
Page 82

Getting Help
Getting Help
Getting HelpGetting Help
Getting Help
Getting Help
Getting HelpGetting Help
Obtaining Technical Support
A solution to your problem might already exist!
Before you contact technical support, check the Frequently Asked Questions database
and the Tested Systems list.
The Internet address is: http://www.ibm.com/viavoice
Click the Support link in the left panel on the web page. Then, select your speech
product.
Information Required Before You Contact Technical
Support
Before calling or e-mailing a message to technical support, you must have the following
information readily available:
• Your name and Technical Support ID (see the label on the back cover of this book).
• Information about your computer: processor type and speed, amount of RAM
installed, available free hard-disk space, amount of cache (use the Apple System
Profiler), and make and model of your sound card.
• Product name and release number. This information is located in the About box, and
the ReadMe file.
• Any other applications you use in conjunction with ViaVoice.
• A record of specific error messages or codes that were displayed.
• A description of what you were doing when the error occurred. Try to re-create the
error before contacting the Technical Support Center.
80 Obtaining Technical Support
Page 83

Getting Help
Getting Help
Getting HelpGetting Help
Getting Help
Getting Help
Getting HelpGetting Help
E-mail Support
If you need help on a non-emergency basis, you can take advantage of this
service. Be prepared to wait for a response; there may be a queue of e-mail
ahead of you.
For questions about or support for the US English version of ViaVoice, send
your e-mail to:
vvmacus@uk.ibm.com
Be sure to include in your e-mail all of the information shown in "Information Required
Before You Contact Technical Support" on page 80. E-mail without this information
might not receive a response.
Telephone Support
When you call, you are automatically transferred to the ViaVoice
International Support Center, but you are charged only for the call to the
actual number you dialed.
USA and Canada
Monday through Friday
9AM - 5PM Central Time
USA (919)517-0222
Canada (416)383-7607
IBM ViaVoice Simply Dictation for Mac OS X User’s Guide 81
Page 84

Getting Help
Getting Help
Getting HelpGetting Help
Getting Help
Getting Help
Getting HelpGetting Help
Microphone Support
Refer to the warranty information that came with the microphone you
purchased.
Any information concerning the microphone functionality or claims related
to the product should be addressed to the manufacturer. Refer to the support
information provided with your product or contact your place of purchase.
82 Obtaining Technical Support
Page 85

Appendix
Notices
This information was developed for products and services offered in the United States. IBM may
not offer the products, services, or features discussed in this document in other countries. Consult
your local IBM representative for information on the products and services currently available in
your area. Any reference to an IBM product, program, or service is not intended to state or imply
that only that IBM product, program, or service may be used. Any functionally equivalent
product, program, or service that does not infringe any IBM intellectual property right may be
used instead. However, it is the user’s responsibility to evaluate and verify the operation of any
non-IBM product, program, or service.
IBM may have patents or pending patent applications covering subject matter in this document.
The furnishing of this document does not give you any license to these patents. You can send
license inquiries, in writing, to:
IBM Director of Licensing
IBM Corporation
North Castle Drive
Armonk, NY 10504-1785
USA
For license inquires regarding double-byte (DBCS) information, contact the IBM Intellectual
Property Department in your country or send inquiries, in writing, to:
IBM World Trade Asia Corporation
Licensing
2-31 Roppongi 3-chome, Minato-ku
Tokyo 106, Japan
The following paragraph does not apply to the United Kingdom or any country where such
provisions are inconsistent with local law:
INTERNATIONAL BUSINESS MACHINES CORPORATION PROVIDES THIS
PUBLICATION “AS IS” WITHOUT WARRANTY OF ANY KIND, EITHER EXPRESS OR
IMPLIED, INCLUDING, BUT NOT LIMITED TO, THE IMPLIED WARRANTIES OF NONINFRINGEMENT MERCHANTABILITY OR FITNESS FOR A PARTICULAR PURPOSE.
Some states do not allow disclaimer of express or implied warranties in certain transactions,
therefore, this statement may not apply to you.
© Copyright IBM Corp. 1999-2002 83
Page 86

This information could include technical inaccuracies or typographical errors. Changes are
periodically made to the information herein; these changes will be incorporated in new editions of
the publication. IBM may make improvements and/or changes in the product(s) and/or the
program(s) described in this publication at any time.
Any references in this information to non-IBM Web sites are provided for convenience only and
do not in any manner serve as an endorsement of those Web sites. The materials at those Web sites
are not part of the materials for this IBM product and use of those Web sites is at your own risk.
Licensees of this program who wish to have information about it for the purpose of enabling: (i)
the exchange of information between independently created programs and other programs
(including this one) and (ii) the mutual use of the information which has been exchanged, should
contact:
IBM Corporation
Department TL3
3039 Cornwallis Road
Research Triangle Park, NC 27709-2195
USA
Such information may be available, subject to appropriate terms and conditions, including in some
cases, payment of a fee.
The licensed program described in this information and all licensed material available for it are
provided by IBM under terms of the IBM Customer Agreement, IBM International Program
License Agreement, or any equivalent agreement between us.
Information concerning non-IBM products was obtained from the suppliers of those products,
their published announcements or other publicly available sources. IBM has not tested those
products and cannot confirm the accuracy of performance, compatibility or any other claims
related to non-IBM products. Questions on the capabilities of non-IBM products should be
addressed to the suppliers of those products.
If you are viewing this information softcopy, the photographs and color illustrations may not
appear.
84 Notices
Page 87

Trademarks
IBM and ViaVoice are trademarks of International Business Machines Corporation in the United
States or other countries or both.
Apple, AppleScript, Mac, and Macintosh are trademarks of Apple Computer, Inc., registered in
the U.S. and other countries.
Microsoft is a registered trademark of Microsoft Corporation in the United States and/or other
countries.
Other company, product, and service names may be trademarks or service marks of others.
IBM ViaVoice for Mac OS X User’s Guide 85
Page 88

Notes
86 Notes
Page 89

Index
A
action buttons 57
active window 29
adjusting audio levels 34
administrator password 7
Analyze My Documents Assistant 13
about 35
adding words 35
analyze SpeakPad documents 37
choosing words 36
record pronunciation 36
Analyze My Voice Assistant 12
about 34
audible alert 34
pausing 35
underlined blue word 34
assistants 12, 13
attention word
activating 45
audio level 56
audio level indicator 15
audio setup 34
Audio Setup Assistant 12, 34
B
beep tone 29
blue text 3
bold text 3
boot volume 5, 8
C
capitalization 22
changing voices 49
command mode 16, 45
attention word 45
command reference card pdf 28, 78
CommandCenter 65
preferences 66
conventions 3
correction 23
commands 25
Correction window 24, 38
hands-free correction 38
playback text 25
tips 29
Correction window 70
available commands 39
components 71
delayed correction 38
displaying Correction window 24
creating macros 50
D
destination volume 8
dictation
active window 29
audio setup 34
beep tone 29
commands list 26
correcting 23
correction commands 25
Correction window 24
dictation mode 16
different environments 34
DSR 17
editing and formatting 41
editing macros 51
example 18
formatting text 22
help 78
macro sample 51
macros 49, 50
navigation commands 45
number mode 44
numbers 43
numbers formatting 44
other applications 37, 40
playback dictation 48
playback text 25
punctuation 41
quit ViaVoice 27
read text 26
reading e-mail 47
reading text 48
SpeakPad 17, 37, 60
SpeakPad menus 61
speech modes 56
spell mode 43
tips 29
voice selection 26
Dictation menu 61
dictation stream redirection 17, 40
DSR
reading text 48
using 40
© Copyright IBM Corp. 1999-2002 87
Page 90

E
edit macros 49
e-mail support 81
F
focus 29
formatting text 22
capitalization 22
punctuation 22
G
getting started 15
closing ViaVoice 30
dictation tips 29
first time dictation 18
help files 28
pdf files 28
registering ViaVoice 10
technical support 80
troubleshooting 77
users and voice models 20
H
hands-free correction 38
help files 28, 78
History window 72
I
information central 28, 78
installation 1
analyze documents 13
assistants 12
boot volume 8
destination volume 8
first time dictation 18
help 78
Mac users 1
microphone 12
password 7
problems 9
quick setup guide 4
troubleshooting 77
uninstalling 79
voice model 11
introduction 1
L
list of voice commands 47
M
Mac
about ViaVoice 5
administrator password 5, 7
applications folder 15
help 78
multiusers 5, 33
quit ViaVoice 27
system requirements 1
troubleshooting 77
uninstalling ViaVoice 79
user name 7
ViaVoice installation 9
Macro Editor 49
components 50
creating 50
editing 51
sample 51
Manage My Vocabulary 49
microphone 12, 34
button 56
colors 56
positioning 29, 34
state 15
support 82
minimized view 58
misrecognized words 23
multiusers
log in 33
user and voice model 33
N
navigation
active window 29
attention word 45
beep tone 29
commands list 26
help 78
quit ViaVoice 27
reading e-mail 47
voice commands 45
number formatting 44
number mode 44
numbers 43
O
opening files 61
OS boot volume 5, 8
P
password 7
pdf files 28, 78
88 Index
Page 91

personal vocabulary 49
playback dictation 48
playback text 25
preferences 59, 63, 66
punctuation 22, 41
Q
quick setup guide 4
quitting ViaVoice 27
R
reading e-mail 47
reading text 26, 48
reading web pages 47
recording a pronunciation 69
registering ViaVoice 10
S
SetupAssistant 11, 12
anaylze your voice 34
audio setup 34
document analysis 35
software license 7
SpeakPad 60
analyze when saving documents 37, 38
Dictation menu 61
first time dictation 18
menus 61
opening files 61
playback dictation 48
quitting 27
reading text 48
starting 17
speech mode 56
command 45
spell mode 43
spelling methods 43
spelling words 43
starting ViaVoice 15
support 80, 81, 82
support number 80
system requirements 1
T
technical ID number 80
technical support 80
telephone numbers 81
text editing 41
text formatting 22, 41
tips 29
tool tips 58
topics 75
training commands 69
training ViaVoice 11
troubleshooting 77
U
uninstalling 79
user’s guide
blue text 3
bold text 3
contents 2
conventions 3
pdf 28, 78
tips/notes/cautions 3
users 33, 34
analyze my voice 34
audio setup 34
backing up 52
naming 7
set UK language 5
UserSettings 74
V
version OS 9 6
ViaVoice
about 5
action buttons 57
active window 29
add voice models 52
adding new words 35
administrator password 5, 7
analyze documents 13, 35
analyze my voice 34
anaylze speech data 37
assistants 12
audio setup 34
backup users 52
beep tone 29
CommandCenter 65
correction 23
correction commands 25
Correction window 24, 70
create macros 50
destination volume 8
dictating numbers 43
Dictation menu 61
editing macros 51
experienced Mac users 1
folder 15
getting started 15
help files 28, 78
History window 72
icons 15
installation problems 9
introduction 1
IBM ViaVoice Simply Dictation for Mac OS X User’s Guide 89
Page 92

license 7
Macro Editor 49
Manage My Vocabulary 49
microphone 12
microphone support 82
multiusers 5
navigation 45
navigation commands 45
new Mac users 1
number formatting 44
number mode 44
OS boot volume 5, 8
other applications 37, 40
pdf files 28, 78
playback dictation 48
playback text 25
preferences 59, 63, 66
processing 13
punctuation 41
quitting 27
reading e-mail 47
reading text 26, 48
recording a pronunciation 69
register 10
sample macro 51
setup 11
SpeakPad 17, 37, 60
spell mode 43
story 11, 13
system requirements 1
technical ID number 80
technical support 80
telephone support 81
text editing 41
text formatting 41
tips 29
tool tips 58
topics 75
training commands 69
troubleshooting 77
uninstalling 79
user name 7
users 33, 52
UserSettings 74
views 57, 58
vocabularies 13, 75
voice model 33, 52
Voice preference 49
voice selection 26
VoiceCenter 56
web site 80
web support 81
What Can I Say window 26, 47
ViaVoice Preferences
microphone 64
number formatting 44
starting 63
Voices 49
ViaVoice SetupAssistant 72, 73
vocabularies 49, 75
adding words 35
voice commands
attention word 45
listing 47
What Can I Say window 47
voice model 11, 33, 34
creating 33
recording your speech 35
sharing 33
voice selection 26
VoiceCenter 15, 56
audio level 56
buttons 56
components 15, 56
default speech mode 16
drawer 15, 56
drawer menu 57
microphone 56
modes 15
preferences 59
speech modes 56
starting 15, 16
tool tips 58
views 57, 58
voices 26, 49
W
web site 80
web support 81
What Can I Say window 47
CommandCenter 67
components 68
dictation 26
displaying 26
navigation 26
training a word or phrase 22
views 26
word processor 17
working with numbers 25
Z
zoomed in view 58
zoomed out view 58
90 Index
 Loading...