

Page 1

IBM TotalStorage NAS 200
Model 25T
Quick Start Instructions
Page 2

First Edition (October 2002)
© Copyright International Business Machines Corporation 2002. All rights reserved.
US Government Users Restricted Rights – Use, duplication or disclosure restricted by
GSA ADP Schedule Contract with IBM Corp.
Page 3
IBM TotalStorage™NAS 200Model 25T Quick Start
Instructions
Step 1: Read this first
Caution:
— Safety Information
Use safe practices when lifting this product.
Do not place any object weighing more than 82 kg (180 lb.) on top of
rack-mounted devices.
Notes:
1. Make sure the rack is stabilized before installing hardware, and always
load it starting at the bottom and moving upward to the top.
2. Visually inspect the unit to ensure that it was not damaged during
shipping. If any items are missing or damaged, contact your IBM
representative.
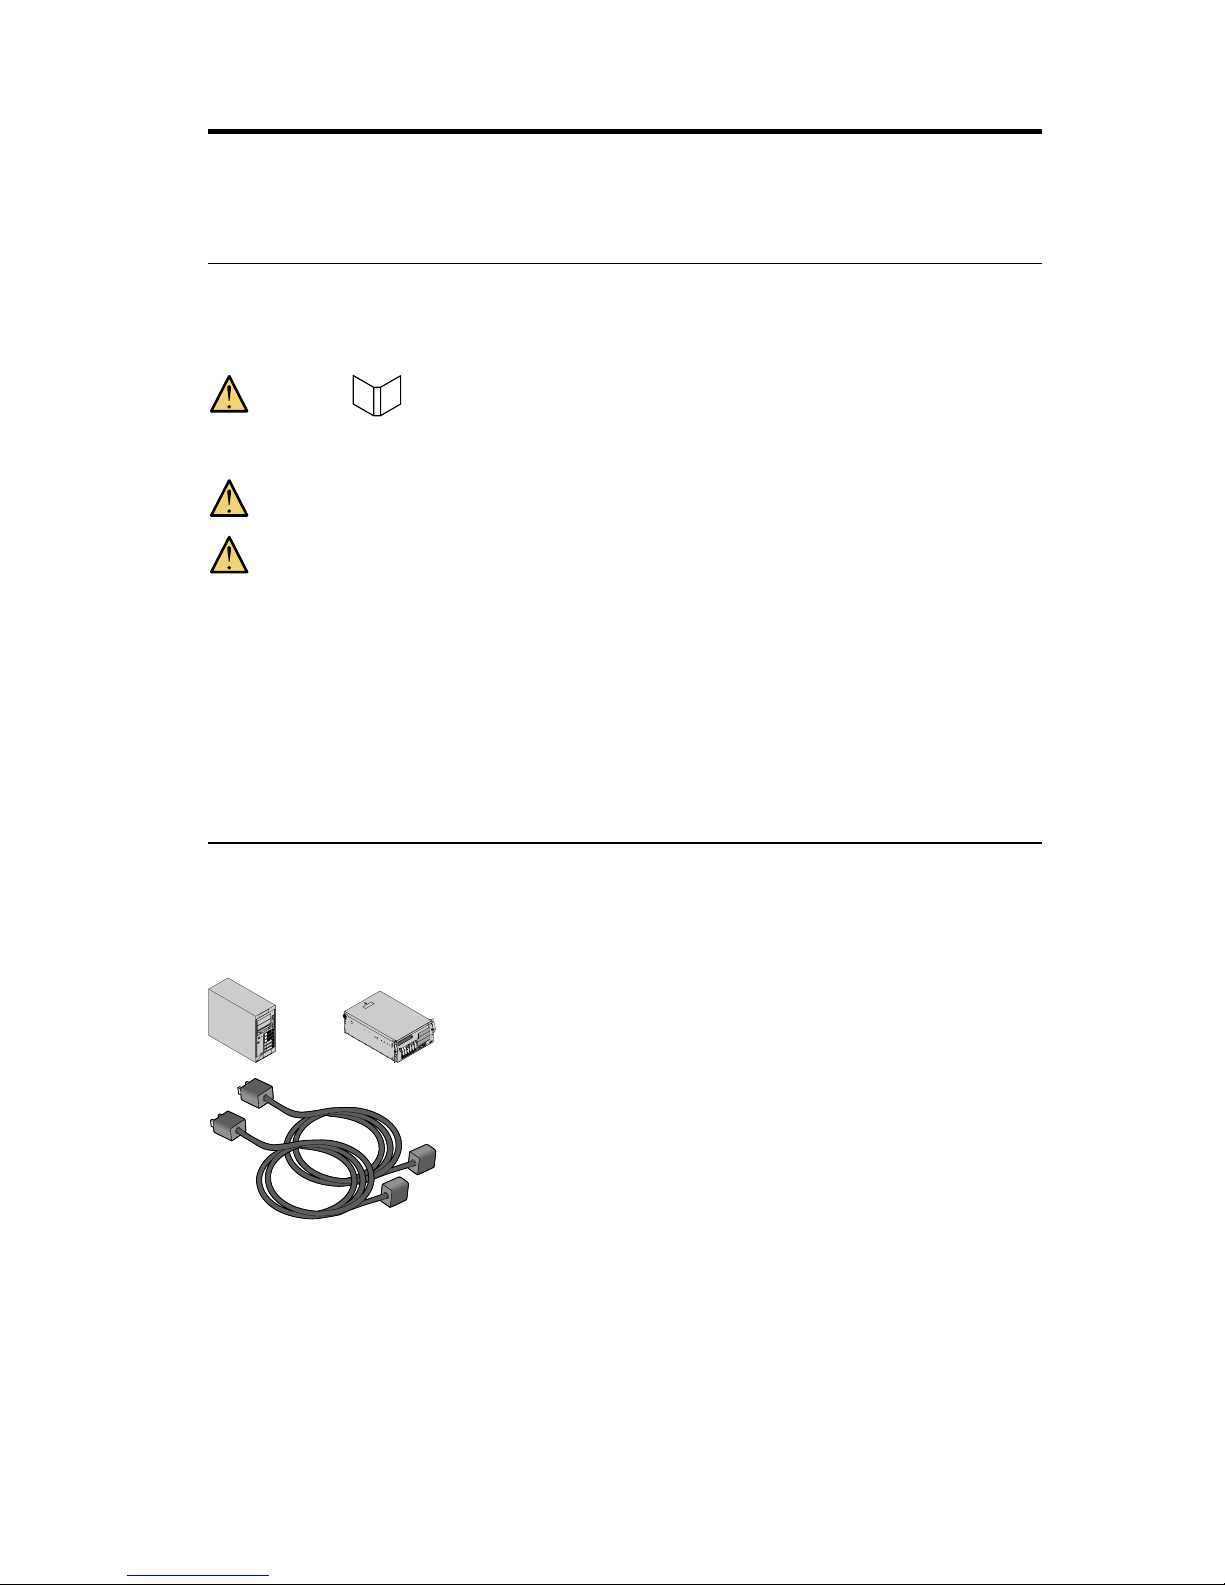
Step 2: Unpack the box
Items you find in the box (tower and rack configurations):
OR
v Model 25T
v Two power cables
© Copyright IBM Corp. 2002 1
Page 4
IBM TotalStorageNAS 200
HardwareI nstallation Guide
Software CD
Software CD
Software CD
Software CD
Documentation CD
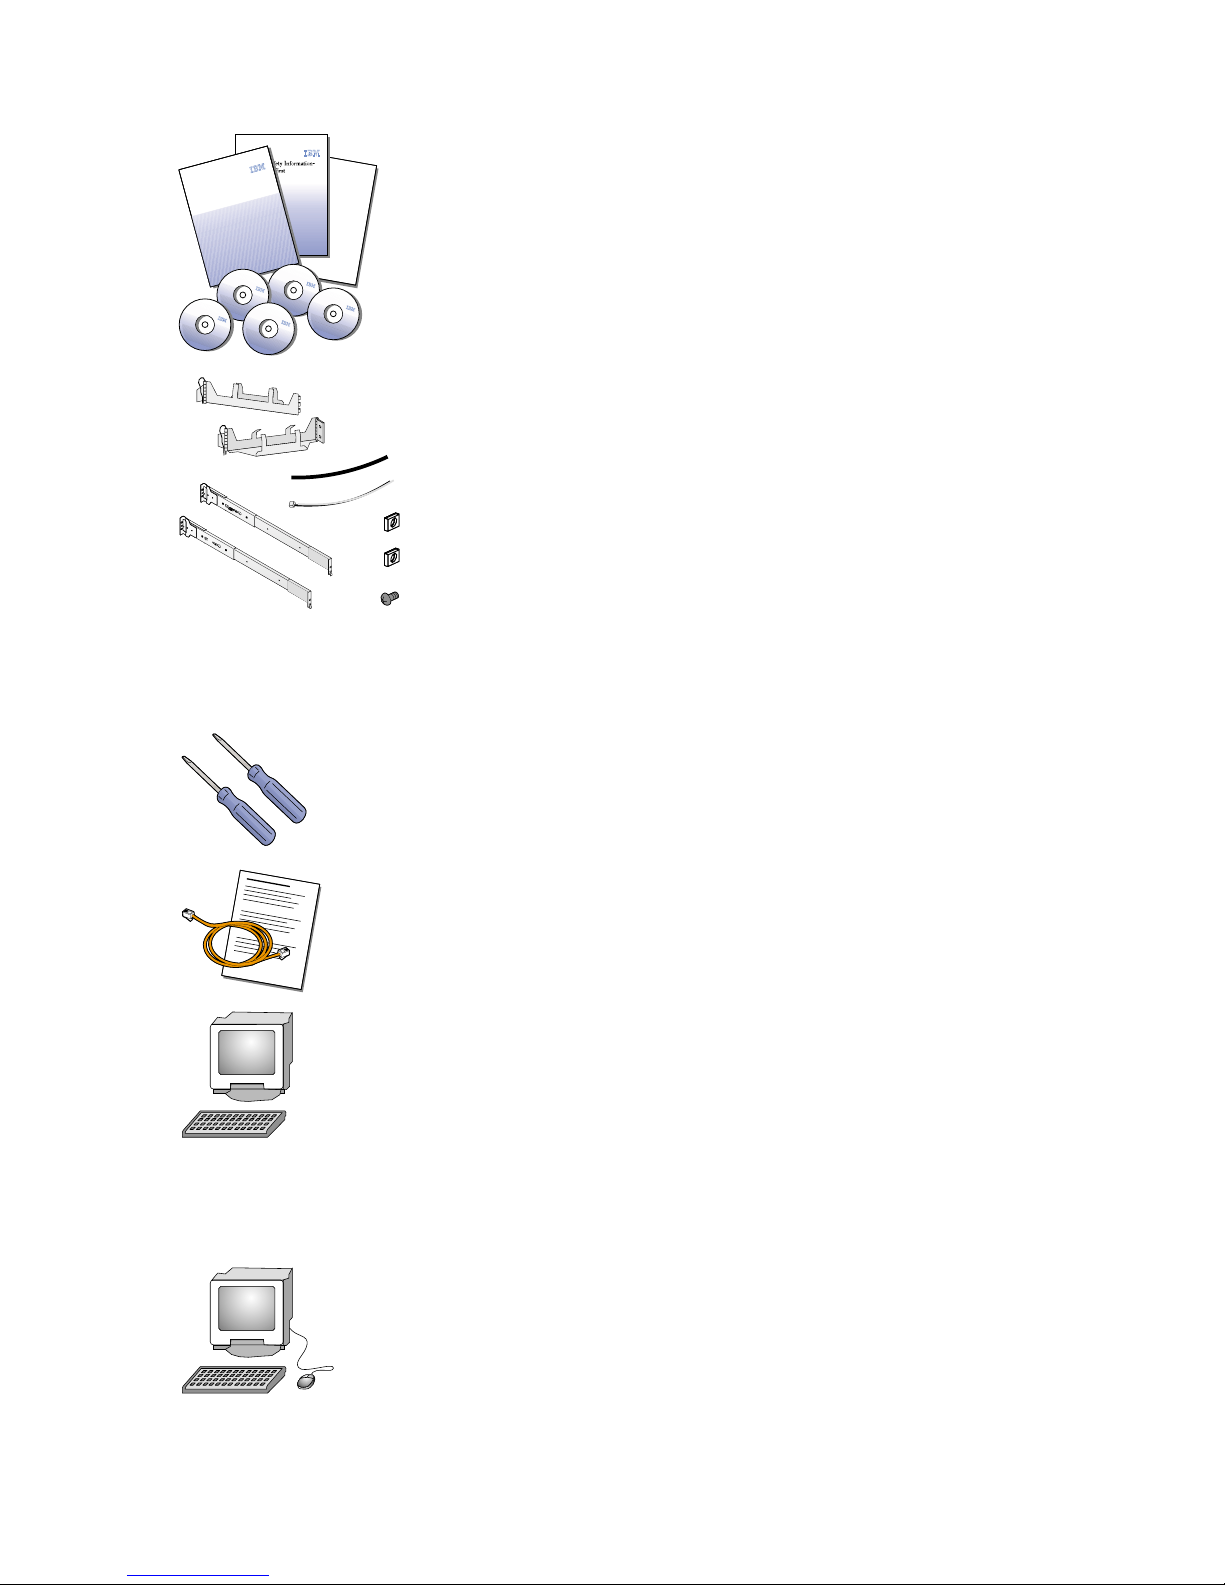
v One set of documentation including: Caution: Safety
Information – Read This First, IBM TotalStorage NAS 200
Hardware Installation Guide, Quick Start Instructions and
product and documentation CD-ROMs.
Rack configuration only
v One rack installation kit including: Cable-management
assembly, cable straps, cable ties, cage nuts, clip nuts,
screw packages and slide rails and Rack Mounting
Instructions.
Items you provide
v One Phillips #2 screwdriver
v One flat-blade screwdriver
v One One Ethernet cable (Cat5 copper cable if you are
using a copper Ethernet adapter) with connection
instructions and IP information from your network
administrator.
v One PC with a subnetwork connection, Windows 2000
or Windows NT 4.0 or later, Swing and XML Java
libraries, Advanced Appliance Configuration application,
and Universal Management Services browser.
Optional service and diagnostic equipment
v One monitor, keyboard and a PS/2 mouse
2 NAS 200 Model 25T Quick Start Instructions
Page 5
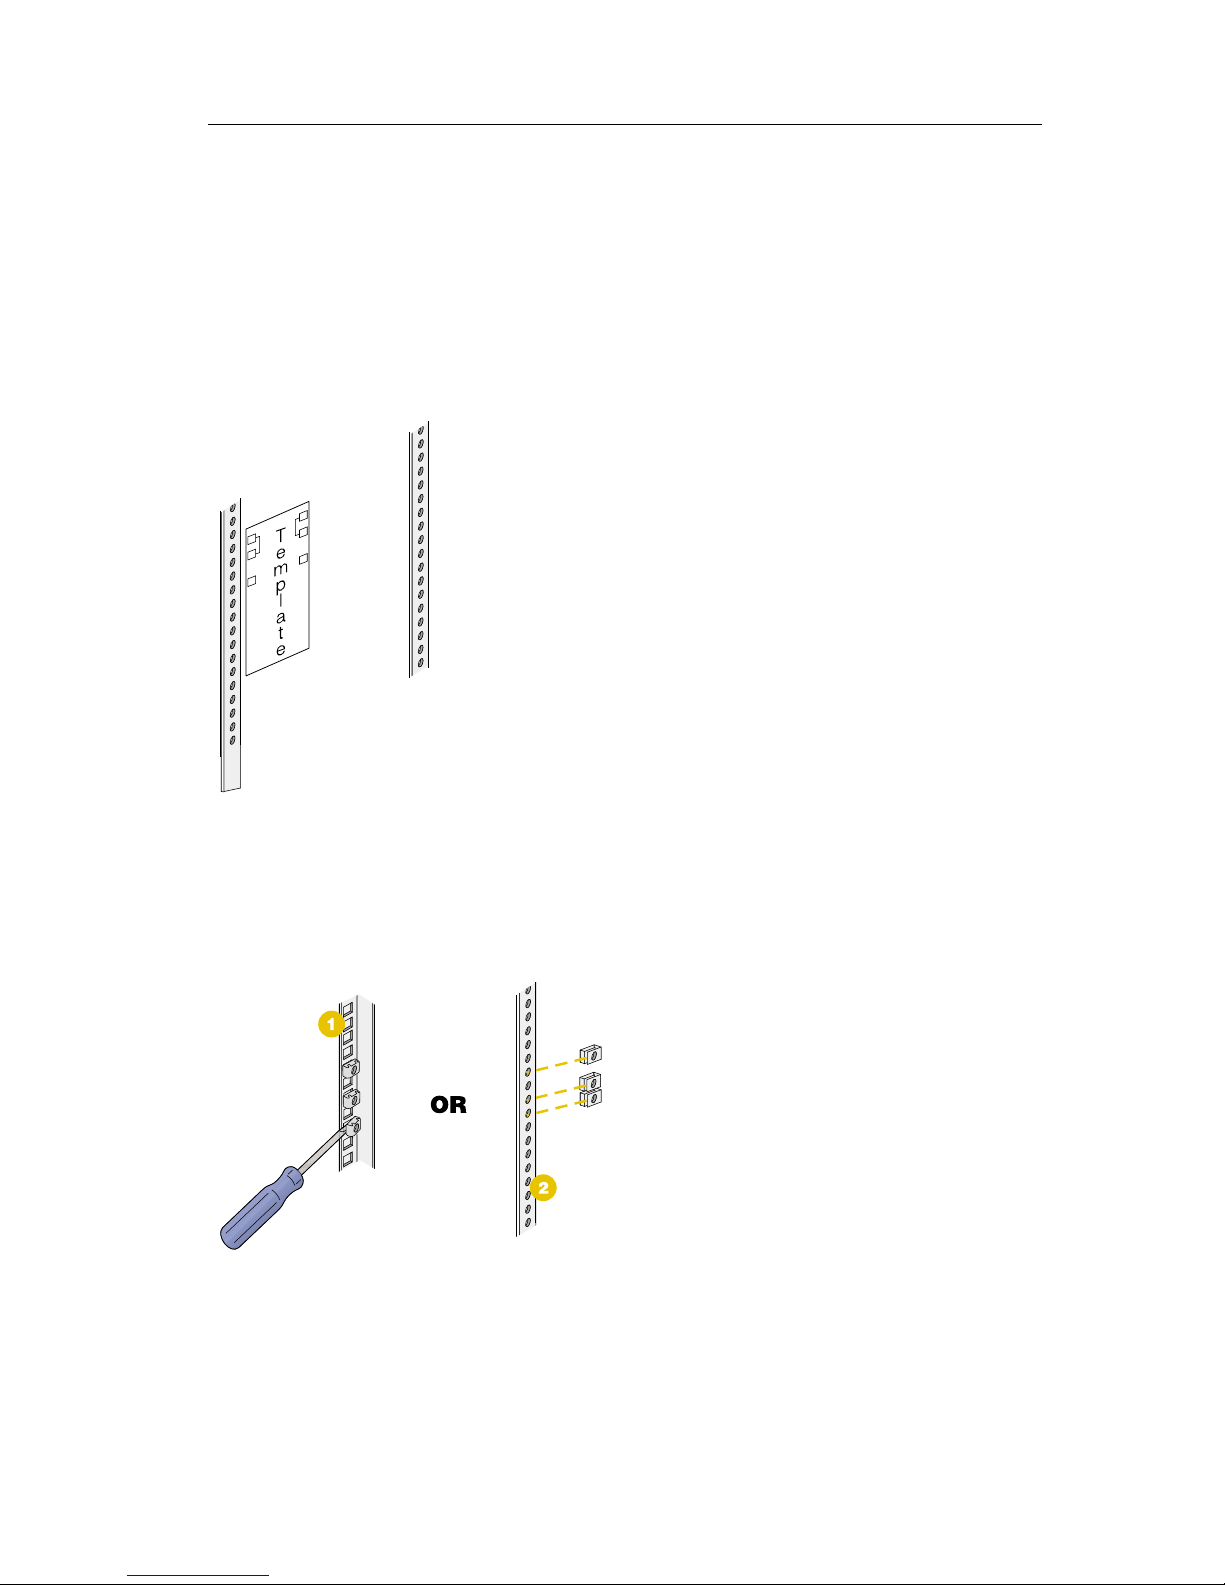
Step 3: Install the appliance
1. Tower configuration only: Place the tower configuration in its final location
and then go to “Step 4: Attach cables (Tower configuration)” on page 6.
Rack configuration only: Mark the rack-configuration location on the rack
by placing the provided stickers over the holes on the front and rear of the
rack indicated by the arrows on the template.
2. Insert the cage nuts using a screwdriver or the cage-nut insertion tool (or
slide on the clip nuts) into each marked hole.
IBM TotalStorage
™
NAS 200Model 25T Quick Start Instructions 3
Page 6

3. Align each slide rail to the rack using the pin as a guide. Then bolt the
slide rails to the rack using the M6 screws provided.
4. Attach the hinge bracket to the rear of the rack using the M6 screws
provided. Then attach the cable-management assembly to the slide rail by
sliding the hinge pin into the hinge.
4 NAS 200 Model 25T Quick Start Instructions
Page 7

5. Place the engine in the rack by fully extending the slide rails out of the
rack, lifting the engine above the rails, and resting the rack-support wheels
on the slide rails. Then lower the front of the engine onto the slide rails,
ensuring that the bracket notches on the front of the engine fit securely on
the tabs located on the front of the slide rails.
6. Secure the appliance to the rails using the M4 screws provided. Unscrew
the rack-support wheels and store them in a safe place. Go to “Step 5:
Attach cables (Rack configuration)” on page 7.
IBM TotalStorage
™
NAS 200Model 25T Quick Start Instructions 5
Page 8

Step 4: Attach cables (Tower configuration)
1. Connect the engine to your network by plugging the network cables to the
Ethernet ports and then into your network. Connect each power cable to
the receptacles on the back of the engine and then to different power source
outlets.
2. Route the power and network cables through the cable-restraint brackets on
the rear of the appliance. Go to “Step 7: Power on and verify LED status”
on page 9.
1
2
1
2
1
2
6 NAS 200 Model 25T Quick Start Instructions
Page 9

Step 5: Attach cables (Rack configuration)
1. Connect the engine to your network by pressing in on the safety latches,
sliding the engine halfway into the rack, and plugging the network cables
to the Ethernet ports and then into your network. Connect each power
cable to the receptacles on the back of the engine and then to different
power source outlets.
2. Route the cables through the cable-management assembly on the rack.
A
2
3
1
1
3
1
B
A
B
IBM TotalStorage
™
NAS 200Model 25T Quick Start Instructions 7
Page 10

Step 6: Complete the installation
Rack configuration only
Complete the installation by sliding the engine into the rack until the release
latches snap shut. Then insert the M6 screws provided through the
release-latch-bracket assembly on either side of the engine.
Note: Inserting the M6 screws is required if the rack is moved or in a
vibration-prone area.
8 NAS 200 Model 25T Quick Start Instructions
Page 11

Step 7: Power on and verify LED status
1. Wait at least 20 seconds after connecting the power cables before powering
on the engine. Power on by pressing the Power button on the front of the
engine.
2. Wait at least 5 minutes after power on for the initial diagnostics to
complete. Verify that the power-on LED is ON. If not, refer to the User’s
Reference on the Documentation CD.
Note: Depending on the system status, other LEDs may be on. Refer to the
User’s Reference on the Documentation CD for detailed LED
descriptions.
3. Keep the Recovery CD in a secure location near the appliance for future
use.
Step 8: Software configuration
You can use the NAS Setup Navigator configuration tool to map out the initial
configuration tasks and lead you through the tasks in the correct order. The
tool detects which NAS appliance it is running on and adjusts the menu and
content appropriately. You can follow links to more in-depth information and
to the configuration panels used to perform the steps. You can also tailor the
instructions to fit your needs by selecting optional topics. To start the NAS
Setup Navigator, click on the NAS Setup Navigator icon on the desktop.
If you choose to configure the software directly, follow these steps:
1. Set the date and time
Log on to the appliance using the following ID and password:
v User ID: Administrator
v Password: password
Set the appliance’s date and time using Windows Control Panel.
2. Change the computer name of the appliance (optional)
TX
RX
OK
1
/
1
2
3
4
5
6
7
IBM TotalStorage
™
NAS 200Model 25T Quick Start Instructions 9
Page 12

Set a unique name for the appliance. For example: NAS200.
3. Set up storage
To set up storage, you will need the following tools:
v ServeRAID
™
manager to create arrays and logical drives
v Disk Management to write signatures, create partitions and assign drive
letters
4. Complete storage access setup
For detailed instructions, refer to “Completing setup” in the User’s
Reference.
10 NAS 200 Model 25T Quick Start Instructions
Page 13

Trademarks
The following terms and logo are trademarks of International Business
Machines Corporation or Tivoli Systems Inc. in the United States or other
countries or both:
IBM
IBM logo
ServeRAID
TotalStorage
Microsoft, Windows, and Windows NT are trademarks or registered
trademarks of Microsoft Corporation.
Java and all Java-based trademarks and logos are trademarks or registered
trademarks of Sun Microsystems, Inc. in the United States, other countries, or
both.
Other company, product, and service names may be trademarks or service
marks of others.
© Copyright IBM Corp. 2002 11
Page 14

12 NAS 200 Model 25T Quick Start Instructions
Page 15

Page 16

Printed in U.S.A.
 Loading...