

Page 1

ThinkPadL460
HardwareMaintenanceManual
Page 2

Note:Beforeusingthisinformationandtheproductitsupports,besuretoreadthegeneralinformation
underAppendixA“Notices”onpage105.
FirstEdition(January2016)
©CopyrightLenovo2016.
LIMITEDANDRESTRICTEDRIGHTSNOTICE:IfdataorsoftwareisdeliveredpursuanttoaGeneralServices
Administration“GSA”contract,use,reproduction,ordisclosureissubjecttorestrictionssetforthinContractNo.
GS-35F-05925.
Page 3

Contents
Aboutthismanual...........iii
Chapter1.Safetyinformation......1
Generalsafety................1
Electricalsafety...............1
Safetyinspectionguide............2
Handlingdevicesthataresensitivetoelectrostatic
discharge..................3
Groundingrequirements............4
Safetynotices(multilingualtranslations)......4
Chapter2.Importantservice
information..............19
StrategyforreplacingFRUs.........19
Strategyforreplacingaharddiskdriveora
solid-statedrive............19
Importantnoticeforreplacingasystem
board................20
Howtouseerrormessage........20
StrategyforreplacingFRUsforCTO,special-bid,
andstandardmodels............20
Productdefinition............20
FRUidentification............20
Chapter3.Generalcheckout.....23
Whattodofirst..............23
Checkoutguide..............24
LenovoSolutionCenter.........24
Quicktestprograms...........24
UEFIdiagnosticprogram.........25
Bootablediagnosticprograms.......25
Powersystemcheckout...........26
Checkingtheacpoweradapter......27
Checkingtheexternalbatterypackandthe
operationalcharging..........27
Checkingthecoin-cellbattery.......28
Chapter4.Relatedservice
information..............29
Restoringthefactorycontentsbyusingthe
RecoveryDiscSet.............29
RecoveryoverviewfortheWindows10operating
system..................30
Resettingyourcomputer.........30
Usingadvancedstartupoptions......30
RecoveringyouroperatingsystemifWindows
10failstostart.............31
CreatingandusingarecoveryUSBdrive..31
Passwords................32
Power-onpassword...........32
Harddiskpassword...........32
Supervisorpassword..........32
Howtoremovethepower-onpassword...32
Howtoremovetheharddiskpassword...33
Powermanagement............33
Screenblankmode(fortheWindows7
operatingsystemonly)..........34
Sleepmode..............34
Hibernationmode...........34
Symptom-to-FRUindex...........35
Numericerrorcodes..........35
Errormessages............36
Beepsymptoms............37
No-beepsymptoms...........37
LCD-relatedsymptoms.........37
Intermittentproblems..........38
Undeterminedproblems.........38
Chapter5.Statusindicators.....41
Chapter6.Functionkeys.......43
Chapter7.Locations.........45
Locatingcomputercontrols,connectors,and
indicators.................45
Frontview...............45
Rearview...............46
Bottomview..............46
LocatingFRUsandCRUs..........47
MajorFRUsandCRUs..........48
LCDFRUs..............50
Miscellaneousparts...........51
Connectorandcableguide........51
LookingupFRUinformation.........55
Chapter8.FRUreplacement
notices................57
Screwnotices...............57
Retainingserialnumbers...........58
Restoringtheserialnumberofthesystem
unit.................58
RetainingtheUUID...........59
ReadingorwritingtheECAinformation...59
Chapter9.Removingorreplacinga
FRU..................61
Generalguidelines.............61
©CopyrightLenovo2016
i
Page 4

1010SIM-cardtray.............62
1020Externalbatterypack..........62
1030Keyboardrubbers...........63
1040Keyboard..............64
1050Basecoverassembly..........70
1060Dockingbracketordockingdummydoor..72
1070SIM-carddummycover.........74
1080Harddiskdriveorsolid-statedrive....74
1090Wireless-LANcard...........75
1100Wireless-WANcard..........78
1110Memorymodule............81
1120Speakerassembly...........82
1130Coin-cellbattery............84
1140LCDunit...............84
1150dc-incable..............86
1160Thermalfanassembly.........88
1170I/Obracket..............89
1180Smart-cardbracket..........91
1190Systemboardandsubcards.......92
1200Smartcardandsmart-cardcable,or
smart-carddummydoor...........95
1210Keyboardbezelassembly........96
2010LCD-bezelsheet............97
2020LCDpanel..............97
2030Camera/microphonemodule,camera
module,ormicrophonemodule........99
2040LCDhinges..............100
2050LCDcable..............101
2060Wireless-LAN/WANantennaassembly
orwireless-LANantenna,andLCDrear-cover
assembly.................102
AppendixA.Notices.........105
Electronicemissionsnotices.........106
Trademarks................106
AppendixB.Abbreviationtable...107
iiThinkPadL460HardwareMaintenanceManual
Page 5

Aboutthismanual
ThismanualcontainsserviceandreferenceinformationforthefollowingThinkPad
®
products.
ThinkPadL460
Machine Type (MT) 20FU and 20FV
Usethismanualalongwiththeadvanceddiagnosticteststotroubleshootproblems.
Important:ThismanualisintendedonlyfortrainedservicetechnicianswhoarefamiliarwithThinkPad
products.Usethismanualalongwiththeadvanceddiagnosticteststotroubleshootproblemseffectively.
BeforeservicingaThinkPadproduct,besuretoreadalltheinformationunderChapter1“Safetyinformation”
onpage1andChapter2“Importantserviceinformation”onpage19.
©CopyrightLenovo2016
iii
Page 6

ivThinkPadL460HardwareMaintenanceManual
Page 7

Chapter1.Safetyinformation
Thischapterpresentsfollowingsafetyinformationthatyouneedtobefamiliarwithbeforeyouservicea
ThinkPadnotebookcomputer.
•“Generalsafety”onpage1
•“Electricalsafety”onpage1
•“Safetyinspectionguide”onpage2
•“Handlingdevicesthataresensitivetoelectrostaticdischarge”onpage3
•“Groundingrequirements”onpage4
•“Safetynotices(multilingualtranslations)”onpage4
Generalsafety
Followtheserulestoensuregeneralsafety:
•Observegoodhousekeepingintheareaofthemachinesduringandaftermaintenance.
•Whenliftinganyheavyobject:
1.Makesurethatyoucanstandsafelywithoutslipping.
2.Distributetheweightoftheobjectequallybetweenyourfeet.
3.Useaslowliftingforce.Nevermovesuddenlyortwistwhenyouattempttolift.
4.Liftbystandingorbypushingupwithyourlegmuscles;thisactionremovesthestrainfromthe
musclesinyourback.Donotattempttoliftanyobjectthatweighsmorethan16kg(35lb)orthat
youthinkistooheavyforyou.
•Donotperformanyactionthatcauseshazardstothecustomer,orthatmakestheequipmentunsafe.
•Beforeyoustartthemachine,makesurethatotherservicetechniciansandthecustomer'spersonnelare
notinahazardousposition.
•Placeremovedcoversandotherpartsinasafeplace,awayfromallpersonnel,whileyouareservicing
themachine.
•Keepyourtoolcaseawayfromwalkareassothatotherpeoplewillnottripoverit.
•Donotwearlooseclothingthatcanbetrappedinthemovingpartsofamachine.Makesurethatyour
sleevesarefastenedorrolledupaboveyourelbows.Ifyourhairislong,fastenit.
•Inserttheendsofyournecktieorscarfinsideclothingorfastenitwithanonconductiveclip,about8
centimeters(3inches)fromtheend.
•Donotwearjewelry,chains,metal-frameeyeglasses,ormetalfastenersforyourclothing.
Attention:Metalobjectsaregoodelectricalconductors.
•Wearsafetyglasseswhenyouarehammering,drilling,soldering,cuttingwire,attachingsprings,using
solvents,orworkinginanyotherconditionsthatmightbehazardoustoyoureyes.
•Afterservice,reinstallallsafetyshields,guards,labels,andgroundwires.Replaceanysafetydevice
thatiswornordefective.
•Reinstallallcoverscorrectlybeforereturningthemachinetothecustomer.
•Fanlouversonthemachinehelptopreventoverheatingofinternalcomponents.Donotobstructfan
louversorcoverthemwithlabelsorstickers.
Electricalsafety
Observethefollowingruleswhenworkingonelectricalequipment.
Important:Useonlyapprovedtoolsandtestequipment.Somehandtoolshavehandlescoveredwithasoft
materialthatdoesnotinsulateyouwhenworkingwithliveelectricalcurrents.Manycustomershave,near
theirequipment,rubberfloormatsthatcontainsmallconductivefiberstodecreaseelectrostaticdischarges.
Donotusethistypeofmattoprotectyourselffromelectricalshock.
©CopyrightLenovo2016
1
Page 8

•Findtheroomemergencypower-off(EPO)switch,disconnectingswitch,orelectricaloutlet.Ifanelectrical
accidentoccurs,youcanthenoperatetheswitchorunplugthepowercordquickly.
•Donotworkaloneunderhazardousconditionsornearequipmentthathashazardousvoltages.
•Disconnectallpowerbefore:
–Performingamechanicalinspection
–Workingnearpowersupplies
–Removingorinstallingmainunits
•Beforeyoustarttoworkonthemachine,unplugthepowercord.Ifyoucannotunplugit,askthecustomer
topower-offthewallboxthatsuppliespowertothemachine,andtolockthewallboxintheoffposition.
•Ifyouneedtoworkonamachinethathasexposedelectricalcircuits,observethefollowingprecautions:
–Ensurethatanotherperson,familiarwiththepower-offcontrols,isnearyou.
Attention:Anotherpersonmustbetheretoswitchoffthepower,ifnecessary.
–Useonlyonehandwhenworkingwithpowered-onelectricalequipment;keeptheotherhandinyour
pocketorbehindyourback.
Attention:Anelectricalshockcanoccuronlywhenthereisacompletecircuit.Byobservingtheabove
rule,youmaypreventacurrentfrompassingthroughyourbody.
–Whenusingtesters,setthecontrolscorrectlyandusetheapprovedprobeleadsandaccessoriesfor
thattester.
–Standonsuitablerubbermats(obtainedlocally,ifnecessary)toinsulateyoufromgroundssuchas
metalfloorstripsandmachineframes.
Observethespecialsafetyprecautionswhenyouworkwithveryhighvoltages;Instructionsforthese
precautionsareinthesafetysectionsofmaintenanceinformation.Useextremecarewhenmeasuring
highvoltages.
•Regularlyinspectandmaintainyourelectricalhandtoolsforsafeoperationalcondition.
•Donotusewornorbrokentoolsandtesters.
•Neverassumethatpowerhasbeendisconnectedfromacircuit.First,checkthatithasbeenpoweredoff.
•Alwayslookcarefullyforpossiblehazardsinyourworkarea.Examplesofthesehazardsaremoistfloors,
nongroundedpowerextensioncables,powersurges,andmissingsafetygrounds.
•Donottouchliveelectricalcircuitswiththereflectivesurfaceofaplasticdentalmirror.Thesurfaceis
conductive;suchtouchingcancausepersonalinjuryandmachinedamage.
•Donotservicethefollowingpartswiththepoweronwhentheyareremovedfromtheirnormaloperating
placesinamachine:
–Powersupplyunits
–Pumps
–Blowersandfans
–Motorgenerators
–Similarunitsaslistedabove
Thispracticeensurescorrectgroundingoftheunits.
•Ifanelectricalaccidentoccurs:
–Usecaution;donotbecomeavictimyourself.
–Switchoffpower.
–Sendanotherpersontogetmedicalaid.
Safetyinspectionguide
Thepurposeofthisinspectionguideistoassistyouinidentifyingpotentiallyunsafeconditions.Aseach
machinewasdesignedandbuilt,requiredsafetyitemswereinstalledtoprotectusersandservicetechnicians
frominjury.Thisguideaddressesonlythoseitems.Y oushouldusegoodjudgmenttoidentifypotential
safetyhazardsduetoattachmentofnon- ThinkPadfeaturesoroptionsnotcoveredbythisinspectionguide.
Ifanyunsafeconditionsarepresent,youmustdeterminehowserioustheapparenthazardcouldbeand
whetheryoucancontinuewithoutfirstcorrectingtheproblem.
2ThinkPadL460HardwareMaintenanceManual
Page 9

Considertheseconditionsandthesafetyhazardstheypresent:
•Electricalhazards,especiallyprimarypower(primaryvoltageontheframecancauseseriousorfatal
electricalshock)
•Explosivehazards,suchasadamagedcathoderaytube(CRT)faceorabulgingcapacitor
•Mechanicalhazards,suchaslooseormissinghardware
Todeterminewhetherthereareanypotentiallyunsafeconditions,usethefollowingchecklistatthebeginning
ofeveryservicetask.Beginthecheckswiththepoweroff,andthepowercorddisconnected.
Checklist:
1.Checkexteriorcoversfordamage(loose,broken,orsharpedges).
2.Poweroffthecomputer.Disconnectthepowercord.
3.Checkthepowercordfor:
a.Athird-wiregroundconnectoringoodcondition.Useametertomeasurethird-wireground
continuityfor0.1ohmorlessbetweentheexternalgroundpinandtheframeground.
b.Thepowercordshouldbetheauthorizedtypespecifiedforyourcomputer.Goto:
http://www.lenovo.com/serviceparts-lookup
c.Insulationmustnotbefrayedorworn.
4.Checkforcrackedorbulgingbatteries.
5.Removethecover.
6.Checkforanyobviousnon- ThinkPadalterations.Usegoodjudgmentastothesafetyofany
non-ThinkPadalterations.
7.Checkinsidetheunitforanyobviousunsafeconditions,suchasmetalfilings,contamination,wateror
otherliquids,orsignsoffireorsmokedamage.
8.Checkforworn,frayed,orpinchedcables.
9.Checkthatthepower-supplycoverfasteners(screwsorrivets)havenotbeenremovedortamperedwith.
Handlingdevicesthataresensitivetoelectrostaticdischarge
Anycomputerpartcontainingtransistorsorintegratedcircuits(ICs)shouldbeconsideredsensitiveto
electrostaticdischarge(ESD).ESDdamagecanoccurwhenthereisadifferenceinchargebetweenobjects.
ProtectagainstESDdamagebyequalizingthechargesothatthemachine,thepart,theworkmat,andthe
personhandlingthepartareallatthesamecharge.
Notes:
1.Useproduct-specificESDprocedureswhentheyexceedtherequirementsnotedhere.
2.MakesurethattheESDprotectivedevicesyouusehavebeencertified(ISO9000)asfullyeffective.
WhenhandlingESD-sensitiveparts:
•Keepthepartsinprotectivepackagesuntiltheyareinsertedintotheproduct.
•Avoidcontactwithotherpeople.
•Wearagroundedwriststrapagainstyourskintoeliminatestaticonyourbody.
•Preventthepartfromtouchingyourclothing.Mostclothingisinsulativeandretainsachargeeven
whenyouarewearingawriststrap.
•Useagroundedworkmattoprovideastatic-freeworksurface.Thematisespeciallyusefulwhen
handlingESD-sensitivedevices.
•Selectagroundingsystem,suchasthoselistedbelow,toprovideprotectionthatmeetsthespecific
servicerequirement.
Note:TheuseofagroundingsystemtoguardagainstESDdamageisdesirablebutnotnecessary.
–AttachtheESDgroundcliptoanyframeground,groundbraid,orgreen-wireground.
Chapter1.Safetyinformation3
Page 10

–Whenworkingonadouble-insulatedorbattery-operatedsystem,useanESDcommongroundor
referencepoint.Y oucanusecoaxorconnector-outsideshellsonthesesystems.
–Usetheroundgroundprongoftheacplugonac-operatedcomputers.
Groundingrequirements
Electricalgroundingofthecomputerisrequiredforoperatorsafetyandcorrectsystemfunction.Proper
groundingoftheelectricaloutletcanbeverifiedbyacertifiedelectrician.
Safetynotices(multilingualtranslations)
Thesafetynoticesinthissectionareprovidedinthefollowinglanguages:
•English
•Arabic
•BrazilianPortuguese
•French
•German
•Hebrew
•Japanese
•Korean
•Spanish
•T raditionalChinese
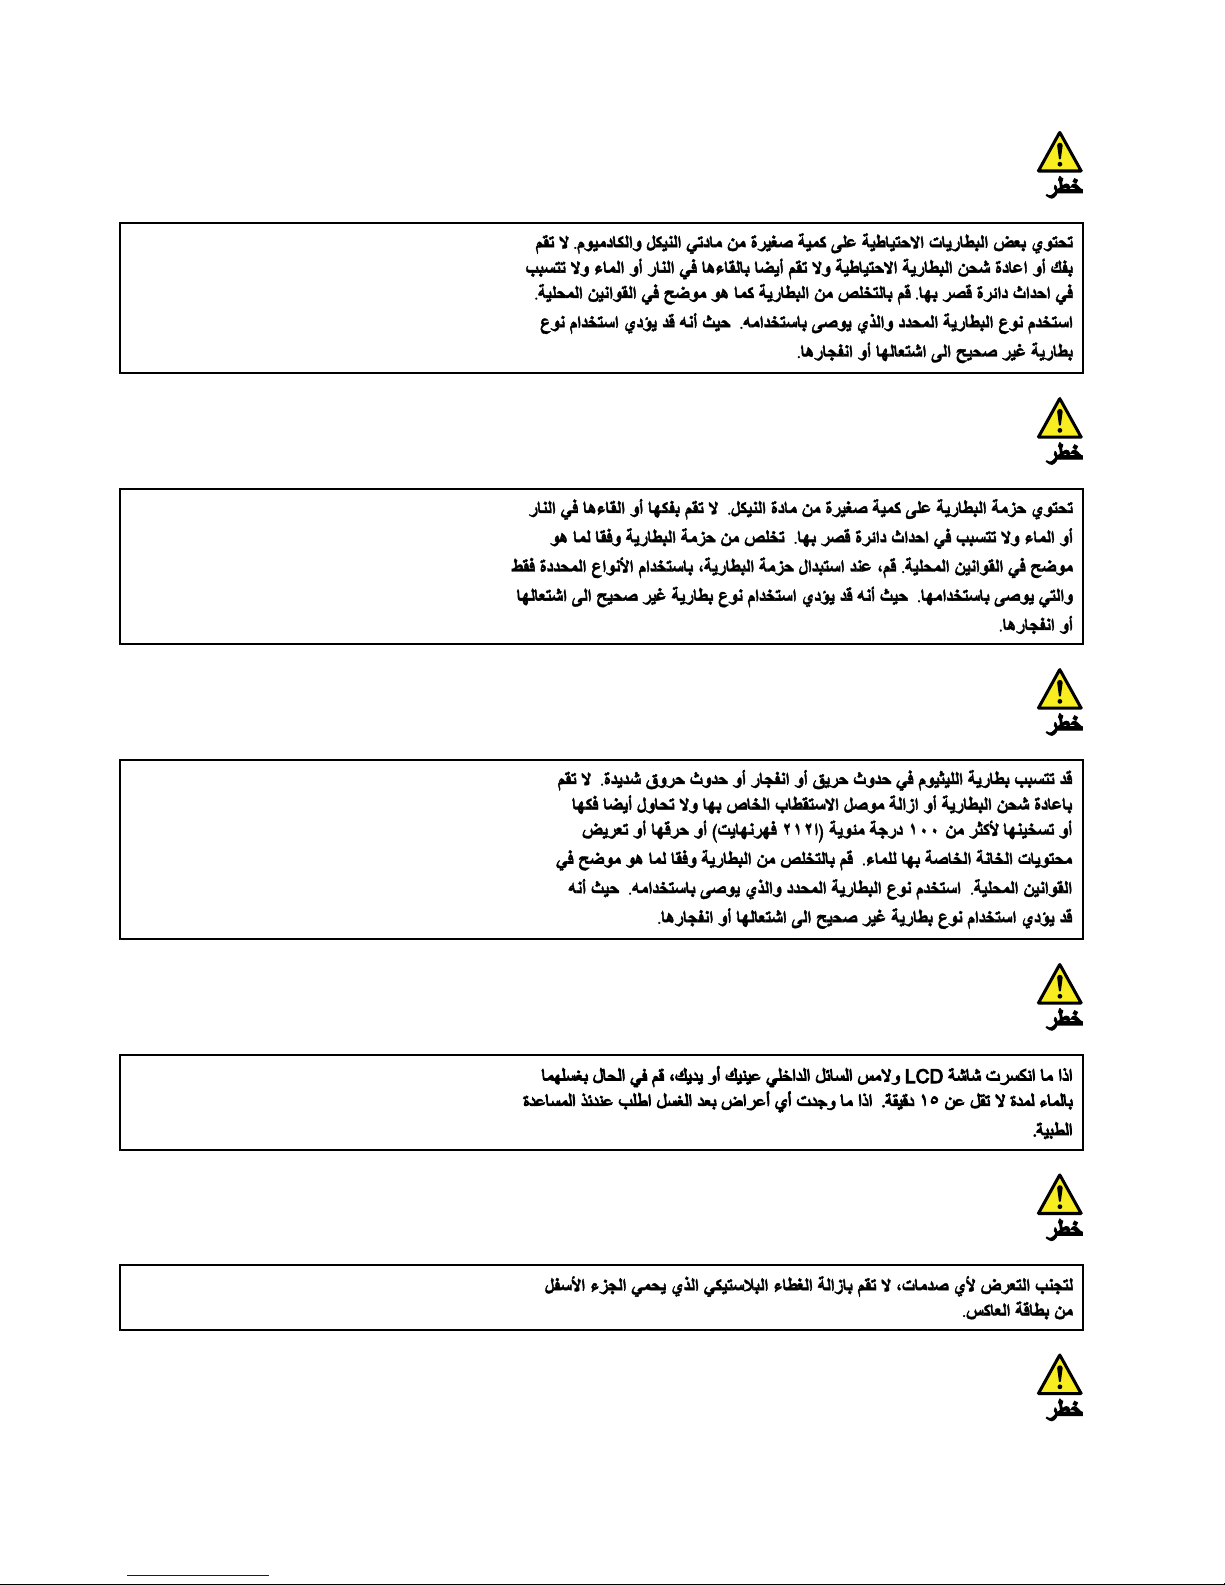
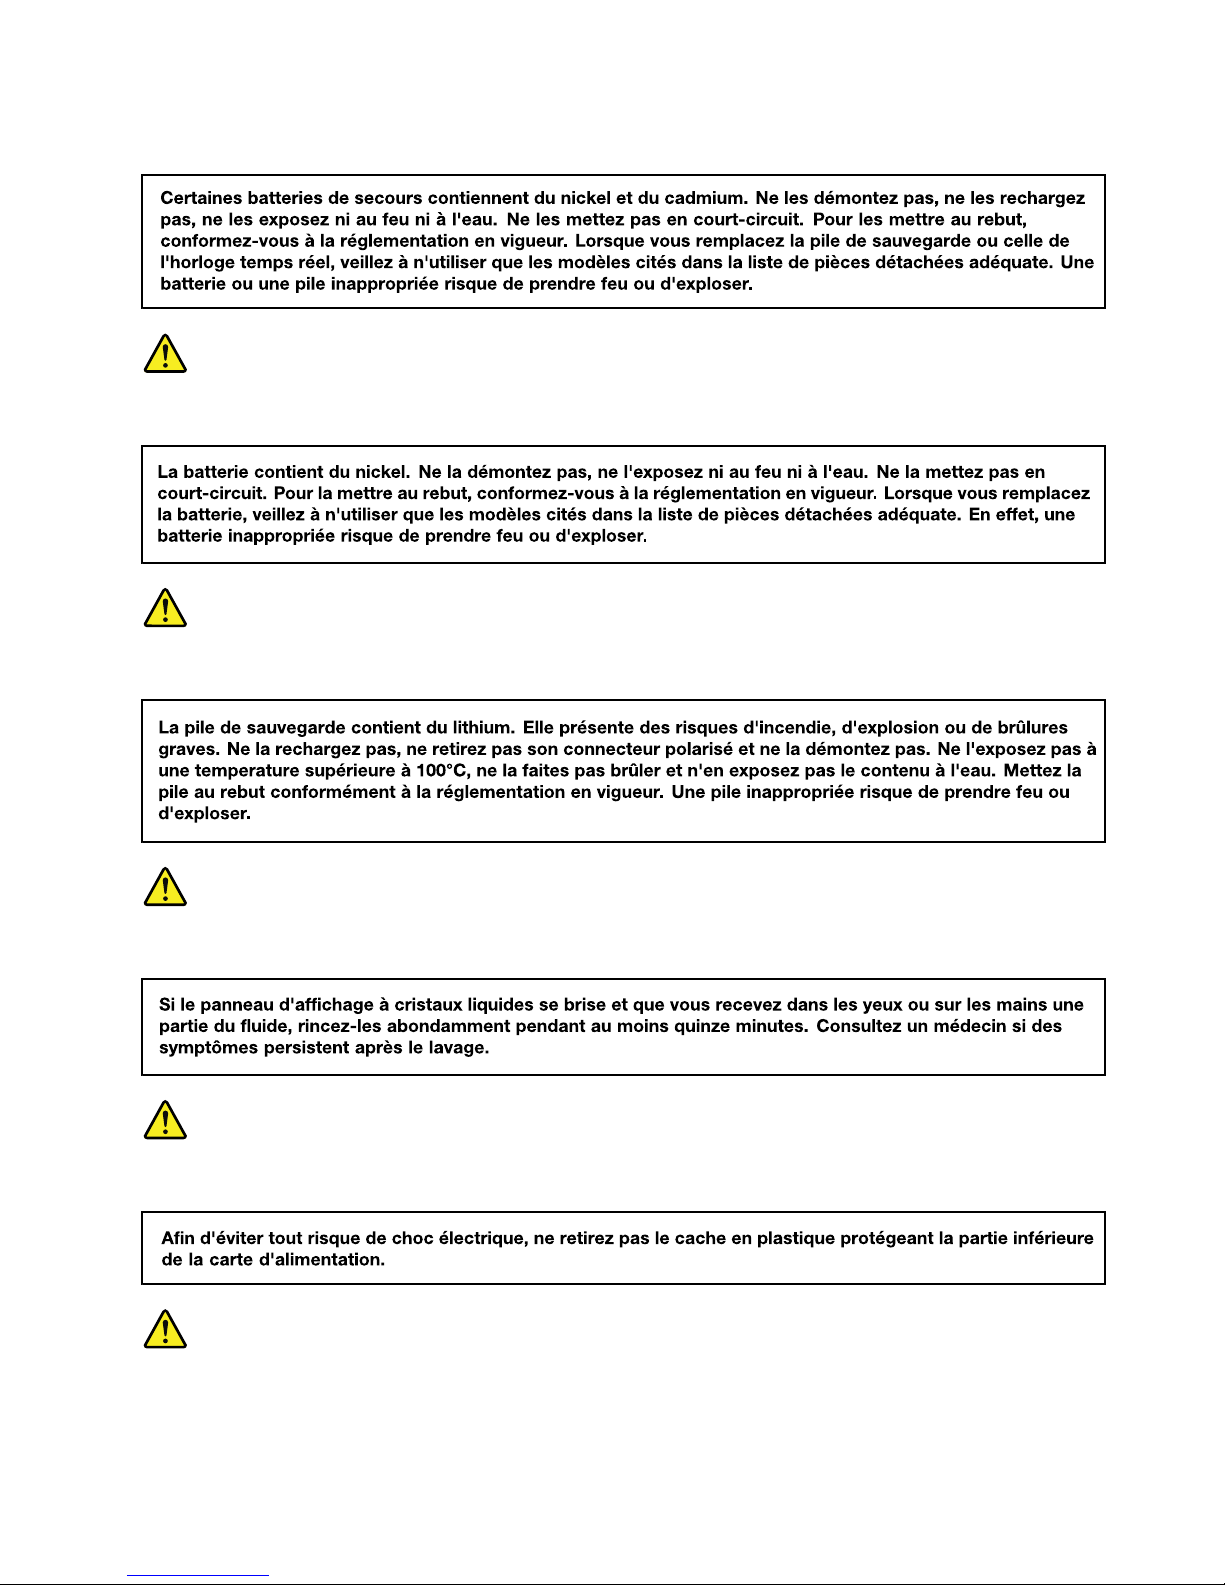
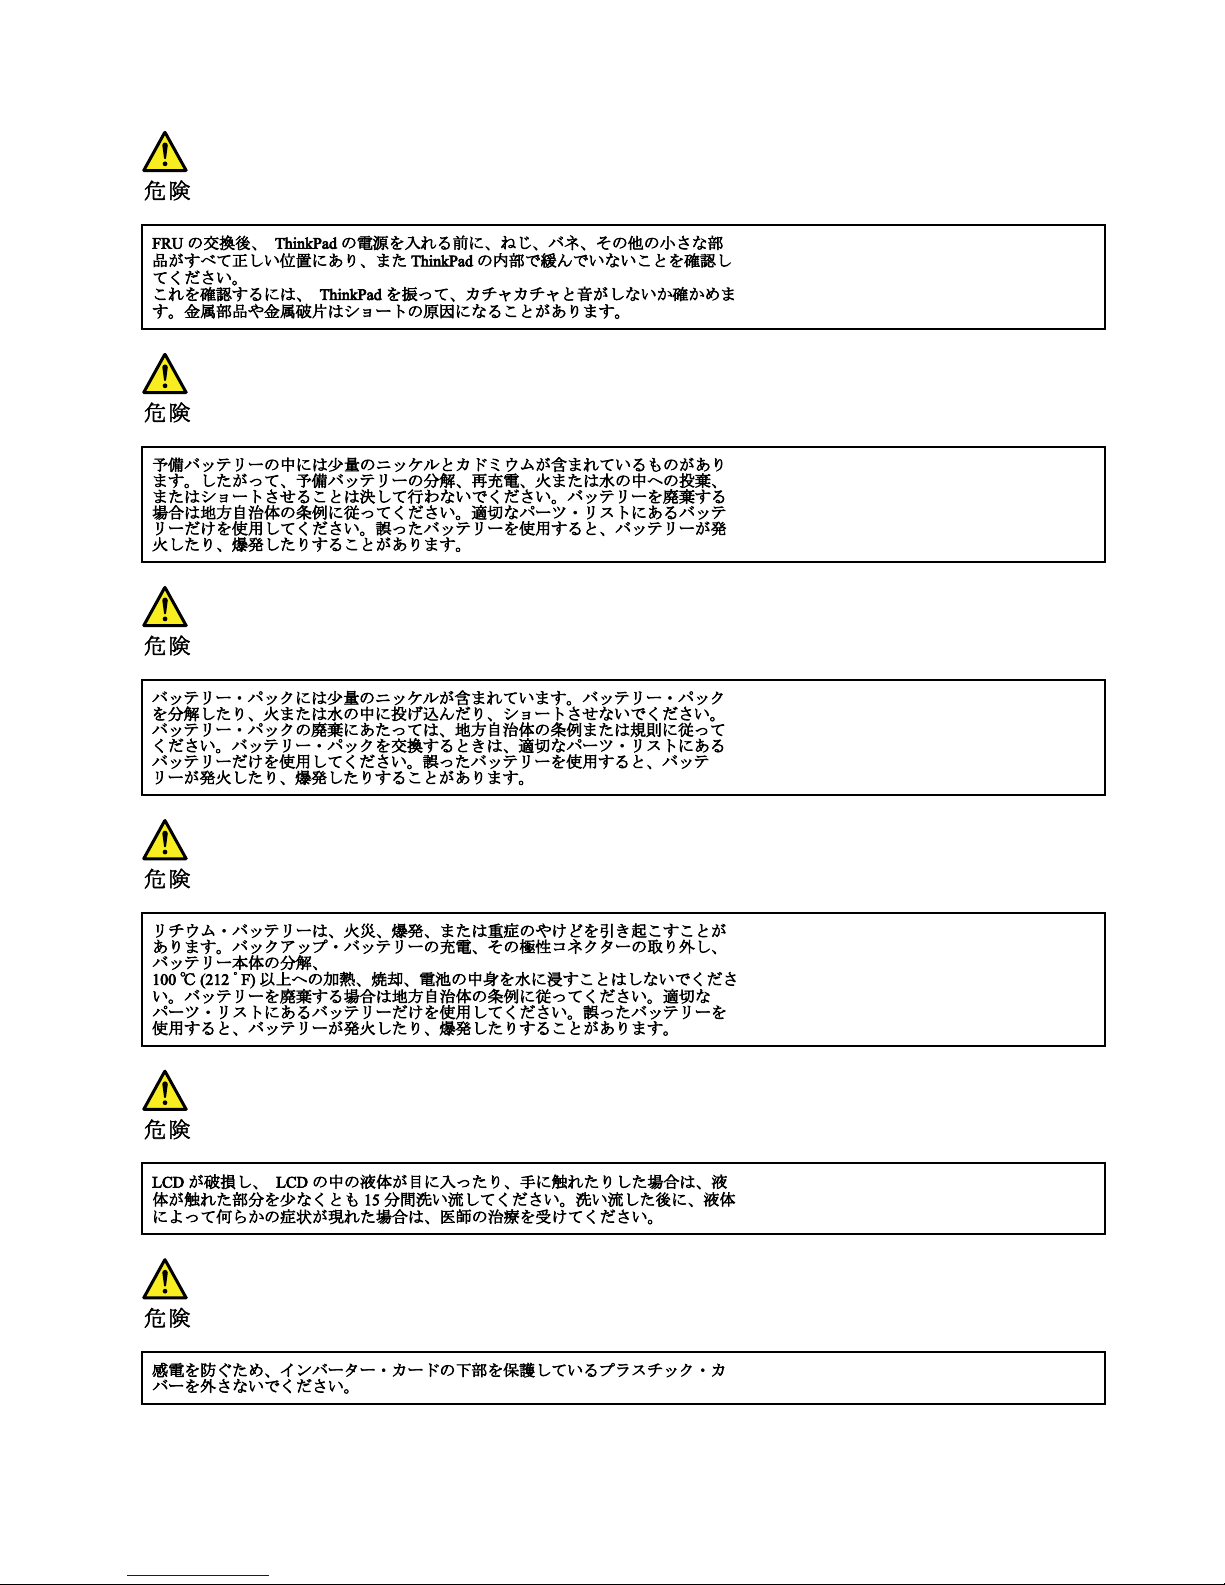
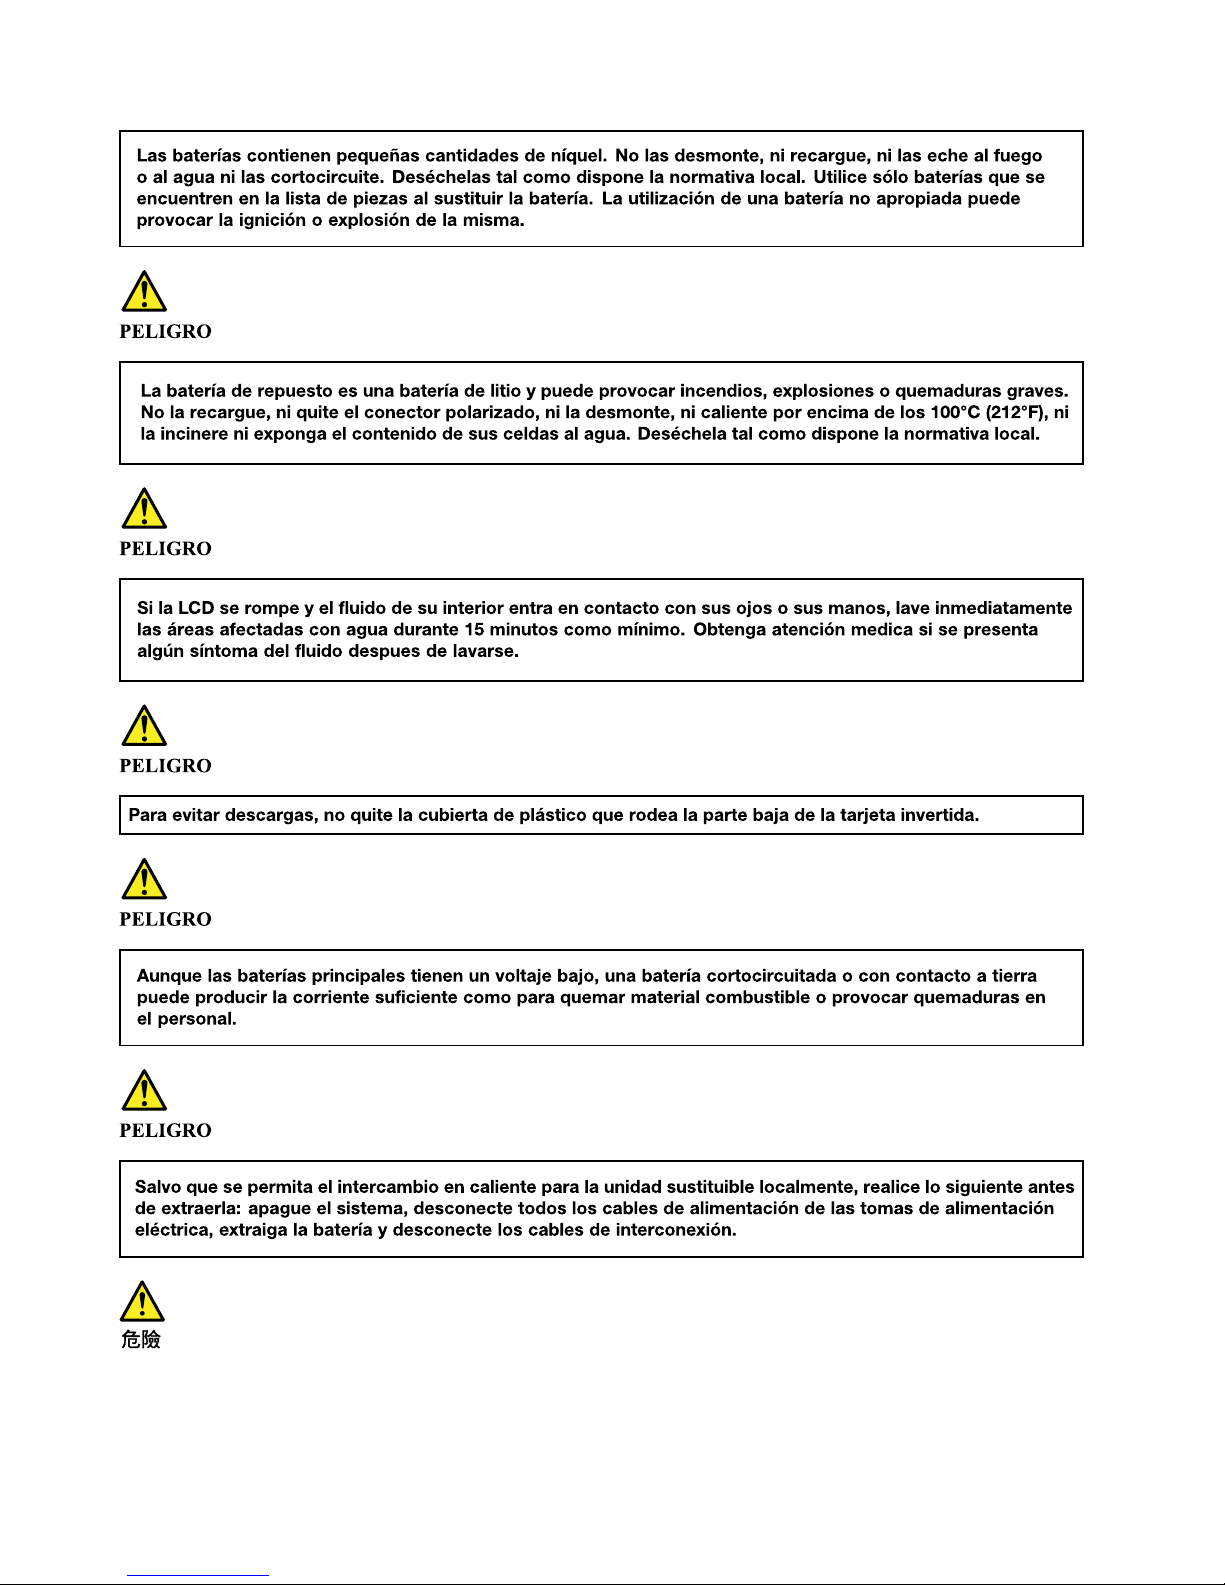
DANGER
DANGER
DANGER
4ThinkPadL460HardwareMaintenanceManual
Page 11

DANGER
DANGER
DANGER
DANGER
DANGER
Chapter1.Safetyinformation5
Page 12
6ThinkPadL460HardwareMaintenanceManual
Page 13

PERIGO
PERIGO
PERIGO
PERIGO
Chapter1.Safetyinformation7
Page 14

PERIGO
PERIGO
PERIGO
PERIGO
DANGER
8ThinkPadL460HardwareMaintenanceManual
Page 15
DANGER
DANGER
DANGER
DANGER
DANGER
DANGER
Chapter1.Safetyinformation9
Page 16

DANGER
VORSICHT
VORSICHT
VORSICHT
VORSICHT
10ThinkPadL460HardwareMaintenanceManual
Page 17

VORSICHT
VORSICHT
VORSICHT
VORSICHT
Chapter1.Safetyinformation11
Page 18

12ThinkPadL460HardwareMaintenanceManual
Page 19
Chapter1.Safetyinformation13
Page 20

14ThinkPadL460HardwareMaintenanceManual
Page 21

Chapter1.Safetyinformation15
Page 22
16ThinkPadL460HardwareMaintenanceManual
Page 23
Chapter1.Safetyinformation17
Page 24

18ThinkPadL460HardwareMaintenanceManual
Page 25

Chapter2.Importantserviceinformation
Thischapterintroducesfollowingimportantserviceinformationthatappliestoallmachinetypessupported
bythismanual:
•“StrategyforreplacingFRUs”onpage19
–“Strategyforreplacingaharddiskdriveorasolid-statedrive”onpage19
–“Importantnoticeforreplacingasystemboard”onpage20
–“Howtouseerrormessage”onpage20
•“StrategyforreplacingFRUsforCTO,special-bid,andstandardmodels”onpage20
–“Productdefinition”onpage20
–“FRUidentification”onpage20
Important:
•IfthecomputerisequippedwithbothaharddiskdriveandanM.2solid-statedrive,donotusetheM.2
solid-statedriveasabootabledevice.TheM.2solid-statedriveisdesignedanddevelopedfor“cache”
functionpurposeonly.
•AdvisecustomerstocontacttheLenovo
®
CustomerSupportCenteriftheyneedanyassistancein
obtainingorinstallinganysoftwarefixes,drivers,andUnifiedExtensibleFirmwareInterfacebasic
inputoutputsystem(UEFIBIOS)downloads.TelephonenumbersforLenovoSupportareavailableat:
http://www.lenovo.com/support/phone
•SystemDisassembly/ReassemblyvideosthatshowtheFRUremovalsorreplacementsfortheLenovo
authorizedservicetechniciansareavailableinthefollowingsupportsite:
http://www.lenovoservicetraining.com/ion/
StrategyforreplacingFRUs
Beforereplacingparts:
Ensurethatallsoftwarefixes,drivers,andUEFIBIOSdownloadsareinstalledbeforereplacinganyFRUs
listedinthismanual.
Afterasystemboardisreplaced,ensurethatthelatestUEFIBIOSisloadedtothesystemboardbefore
completingtheserviceaction.
Todownloadsoftwarefixes,drivers,andUEFIBIOS,gotohttp://www.lenovo.com/ThinkPadDriversand
followtheinstructionsonthescreen.
UsethefollowingstrategytopreventunnecessaryexpenseforreplacingandservicingFRUs:
•IfyouareinstructedtoreplaceaFRUbutthereplacementdoesnotcorrecttheproblem,reinstallthe
originalFRUbeforeyoucontinue.
•Somecomputershavebothaprocessorboardandasystemboard.Ifyouareinstructedtoreplaceeither
theprocessorboardorthesystemboard,andreplacingoneofthemdoesnotcorrecttheproblem,
reinstallthatboard,andthenreplacetheotherone.
•IfanadapteroradeviceconsistsofmorethanoneFRU,anyoftheFRUsmightbethecauseoftheerror.
Beforereplacingtheadapterordevice,removetheFRUs,onebyone,toseeifthesymptomschange.
ReplaceonlytheFRUthatchangedthesymptoms.
Strategyforreplacingaharddiskdriveorasolid-statedrive
Alwaystrytorunalow-levelformatbeforereplacingaharddiskdriveorasolid-statedrive.Thiswillcause
allcustomerdataonthedrivetobelost.Besurethatthecustomerhasacurrentbackupofthedata
beforedoingthistask.
©CopyrightLenovo2016
19
Page 26

Attention:Thedrivestartupsequenceinthecomputeryouareservicingmayhavebeenchanged.Be
extremelycarefulduringwriteoperationssuchascopying,saving,orformatting.Ifyouselectanincorrect
drive,dataorprogramscanbeoverwritten.
Importantnoticeforreplacingasystemboard
Somecomponentsmountedonasystemboardareverysensitive.Improperhandlingofasystemboardcan
causedamagetothosecomponents,andmaycauseasystemmalfunction.
Attention:Whenhandlingasystemboard:
•Donotdropasystemboardorapplyanyexcessiveforcetoit.
•Avoidroughhandlingofanykind.
•Avoidbendingasystemboardandhardpushingtopreventcrackingateachball-grid-array(BGA)chipset.
Howtouseerrormessage
Usetheerrorcodesdisplayedonthescreentodiagnosefailures.Ifmorethanoneerrorcodeisdisplayed,
beginthediagnosiswiththefirsterrorcode.Whatevercausesthefirsterrorcodemayalsocausefalseerror
codes.Ifnoerrorcodeisdisplayed,seewhethertheerrorsymptomislistedintheSymptom-to-FRU
Indexforthecomputeryouareservicing.
StrategyforreplacingFRUsforCTO,special-bid,andstandardmodels
ThistopicprovidesinformationaboutthemodeltypesandFRUidentification.
Productdefinition
Thistopicintroducesdifferentmodeltypesandhowtoidentifyeachtype.
Dynamicconfigure-to-order(CTO)model
ThismodelprovidestheabilityforacustomertoconfigureaLenovosolutionfromaWebSite,andhavethis
configurationsenttofulfillment,whereitisbuiltandshippeddirectlytothecustomer.Themachinelabeland
eSupportwillloadtheseproductsasthe4-characterMT ,4-charactermodel,and2-charactercountrycode.
Themodelis“CTO1”andthedefaultcountrycodeis“WW”(example:20AACTO1WW).
Special-bidmodel
ThisisauniqueconfigurationthathasbeennegotiatedbetweenLenovoandthecustomer.Auniquemachine
typemodel(MTM)consistsofa4-characterMT,a4-charactermodel,andanumeric2-charactercountry
codeisprovidedtothecustomertoplaceorders(example:20AA000955).Thecountrycodeassignedis
numericanddoesnotdesignateaspecificcountryorregion.ThecustommodelfactsheetfortheMTM
indicateswhichcountrythespecialbidMTMissetupfor.Special-bidofferingisnotgenerallyannounced.
Standardmodel
Standardmodels(fixedconfiguration)areannouncedandofferedtoallcustomers.TheMTMportionofthe
machinelabelconsistsofa4-characterMT,a4-charactermodel,andanalphabetic2-charactercountry
code.Thecountrycodeassignedisalphabeticandrepresentsadesignatedcountryorregion(example:
20AA0009UK).
FRUidentification
UseLenovoeSupporttoidentifymajorFRUs,FRUpartnumbers,andFRUdescriptionsforaproductat
anMT-serialnumberlevel.ExamplesofmajorFRUsareharddiskdrive,systemboard,andliquidcrystal
display(LCD).
ToidentifythemajorFRUsforaproduct,dothefollowing:
20ThinkPadL460HardwareMaintenanceManual
Page 27

1.Goto:
http://support.lenovo.com/ibasepartslookup
2.TypetheMachineTypeandSerialNumberinthecorrespondingfields.
3.ClickSubmit.
eSupportalsocanbeusedtoviewthegeneralFRUlistforaproduct.TheFRUlistisagenerallistof
componentsanddoesnotcontainspecificmodelinformation.
TogetthegeneralFRUlistforaproduct,dothefollowing:
1.Goto:
http://www.lenovo.com/support
2.Followtheinstructionsonthescreentoselectaproduct.
3.ClicktheProduct&Partstab.
4.SelectSystemServicePartstoviewageneralFRUlist.
Chapter2.Importantserviceinformation21
Page 28

22ThinkPadL460HardwareMaintenanceManual
Page 29

Chapter3.Generalcheckout
Thischapterintroducesfollowinginformation:
•“Whattodofirst”onpage23
•“Checkoutguide”onpage24
–“LenovoSolutionCenter”onpage24
–“Quicktestprograms”onpage24
–“UEFIdiagnosticprogram”onpage25
–“Bootablediagnosticprograms”onpage25
•“Powersystemcheckout”onpage26
Beforeyougotothecheckoutguide,besuretoreadthefollowingimportantnotes.
Importantnotes:
•Onlycertifiedtrainedpersonnelshouldservicethecomputer .
•BeforereplacinganyFRU,readtheentirepageonremovingandreplacingFRUs.
•WhenyoureplaceFRUs,itisrecommendedusenewnylon-coatedscrews.
•Beextremelycarefulduringsuchwriteoperationsascopying,saving,orformatting.Thesequence
ofthedrivesinthecomputerthatyouareservicingmighthavebeenaltered.Ifyouselectanincorrect
drive,dataorprogramsmightbeoverwritten.
•ReplaceaFRUonlywithanotherFRUofthecorrectmodel.WhenyoureplaceaFRU,ensure
thatthemodelofthemachineandtheFRUpartnumberarecorrectbyreferringtothewebsite:
http://www.lenovo.com/serviceparts-lookup
•AFRUshouldnotbereplacedbecauseofasingle,unreproduciblefailure.Singlefailurescanoccur
foravarietyofreasonsthathavenothingtodowithahardwaredefect,suchascosmicradiation,
electrostaticdischarge,orsoftwareerrors.ConsiderreplacingaFRUonlywhenaproblemrecurs.Ifyou
suspectthataFRUisdefective,cleartheerrorlogandrunthetestagain.Iftheerrordoesnotrecur,do
notreplacetheFRU.
•BecarefulnottoreplaceanondefectiveFRU.
Whattodofirst
WhenyoureturnaFRU,youmustincludethefollowinginformationinthepartsexchangeformorparts
returnformthatyouattachtoit:
1.Nameandphonenumberofservicetechnician
2.Dateofservice
3.Dateonwhichthemachinefailed
4.Dateofpurchase
5.Failuresymptoms,errorcodesappearingonthedisplay,andbeepsymptoms
6.ProcedureindexandpagenumberinwhichthefailingFRUwasdetected
7.FailingFRUnameandpartnumber
8.Machinetype,modelnumber,andserialnumber
9.Customer'snameandaddress
Note:Duringthewarrantyperiod,thecustomermayberesponsibleforrepaircostsifthecomputerdamage
wascausedbymisuse,accident,modification,unsuitablephysicaloroperatingenvironment,orimproper
maintenancebythecustomer.Followingisalistofsomecommonitemsthatarenotcoveredunderwarranty
andsomesymptomsthatmightindicatethatthesystemwassubjectedtostressbeyondnormaluse.
©CopyrightLenovo2016
23
Page 30

Beforecheckingproblemswiththecomputer,determinewhetherthedamageiscoveredunderthewarranty
byreferringtothefollowinglist:
Thefollowingarenotcoveredunderwarranty:
•LCDpanelcrackedfromtheapplicationofexcessiveforceorfrombeingdropped
•Scratched(cosmetic)parts
•Distortion,deformation,ordiscolorationofthecosmeticparts
•Plasticparts,latches,pins,orconnectorsthathavebeencrackedorbrokenbyexcessiveforce
•Damagecausedbyliquidspilledintothesystem
•Damagecausedbytheimproperinsertionofapersonal-computercard(PCcard)ortheinstallationof
anincompatiblecard
•Improperdiscinsertionoruseofanexternalopticaldrive
•Fusesblownbyattachmentofanonsupporteddevice
•Forgottencomputerpassword(makingthecomputerunusable)
•Stickykeyscausedbyspillingaliquidontothekeyboard
•Useofanincorrectacpoweradapteronlaptopproducts
Thefollowingsymptomsmightindicatedamagecausedbynonwarrantedactivities:
•Missingpartsmightbeasymptomofunauthorizedserviceormodification.
•Checkforobviousdamagetoaharddiskdrive.Ifthespindleofaharddiskdrivebecomesnoisy,thehard
diskdrivemighthavebeendroppedorsubjecttoexcessiveforce.
Checkoutguide
UsethefollowingproceduresasaguideinidentifyingandcorrectingproblemswiththeThinkPadnotebook
computers.
Note:ThediagnostictestsareintendedtotestonlyThinkPadproducts.Theuseofnon- ThinkPadproducts,
prototypecards,ormodifiedoptionscanleadtofalseindicationsoferrorsandinvalidsystemresponses.
1.Identifythefailingsymptomsinasmuchdetailaspossible.
2.Verifythesymptoms.T rytore-createthefailurebyrunningthediagnostictestorbyrepeatingthe
operation.
LenovoSolutionCenter
TheLenovoSolutionCenterprogramenablesyoutotroubleshootandresolvecomputerproblems.It
combinesdiagnostictests,systeminformationcollection,securitystatus,andsupportinformation,along
withhintsandtipsformaximumsystemperformance.
TheLenovoSolutionCenterprogramisavailablefordownloadathttp://www.lenovo.com/diags.
ToruntheLenovoSolutionCenterprogram,gotoControlPanelandclickSystemandSecurity➙Lenovo-
SystemHealthandDiagnostics,andthenfollowtheinstructionsonthescreen.
FormoreinformationabouttheLenovoSolutionCenterprogram,refertothehelpinformationsystem
oftheprogram.
Quicktestprograms
Runquicktestprogramstotroubleshootandresolvecomputerproblems,especiallywhenthecomputer
doesnothavetheLenovoSolutionCenterprograminstalled.
Lenovoprovidesthefollowingquicktestprograms:
•LenovoHardDriveQuickT est:Usethisprogramtotroubleshootandresolveinternalstorageproblems.
•LenovoMemoryQuickTest:Usethisprogramtotroubleshootandresolvememorymoduleproblems.
24ThinkPadL460HardwareMaintenanceManual
Page 31

Thequicktestprogramsareapplicableonthefollowingoperatingsystems:
•Microsoft
®
Windows
®
10
•MicrosoftWindows7
•MicrosoftWindowsXP
•MicrosoftWindowsServer
®
2003
•MicrosoftWindowsServer2008
Todownloadandinstallaquicktestprogram,gotohttp://www.lenovo.com/diags,andfollowtheinstructions
ontheWebsite.
Torunatestusingquicktestprogram,dothefollowing:
1.GototheC:\SWTOOLS\ldiagdirectory.
2.Double-clickthegui_lsc_lite.exefile.
3.WhentheUserAccountControlwindowopens,clickYes.
4.Selectthedeviceclasstobetested.
5.Selectthedevicestobetested.
6.Selectthetesttobeperformed.
7.Followtheinstructionsonthescreentostartthetest.Whenaproblemisdetected,information
messagesaredisplayed.Refertothemessagestotroubleshoottheproblem.
UEFIdiagnosticprogram
AUEFIdiagnosticprogramispreinstalledonthecomputer.Itenablesyoutotestmemorymodulesand
internalstoragedevices,viewsysteminformation,andcheckandrecoverbadsectorsoninternalstorage
devices.
ToruntheUEFIdiagnosticprogram,dothefollowing:
1.Turnonthecomputer.Ifthecomputercannotbeturnedon,goto“Powersystemcheckout”onpage26,
andcheckthepowersources.Ifanerrorcodeisdisplayed,goto“Symptom-to-FRUindex”onpage35
forerrorcodedescriptionsandtroubleshootinghints.
2.Whenthelogoscreenisdisplayed,repeatedlypressandreleasetheF10key.Themainscreenofthe
UEFIdiagnosticprogramisdisplayed.
3.Followtheinstructionsonthescreentousethediagnosticprogram.
Theoptionsonthemainscreenareasfollows:
Table1.ItemsonthemainscreenoftheUEFIdiagnosticprogram
TestsTools
•QuickMemoryT est
•QuickStorageDeviceT est
•LCDtest
•PCI-etest
•ExitApplication
•SystemInformation
•Generateconfigurationfile
•Executefromconfigurationfile
•RecoverBadSectorsTool*
*RecoverBadSectorsToolisonlyavailableoncomputersthathaveharddiskdrivesinstalled.
Bootablediagnosticprograms
IfthecomputeryouareservicingisnotinstalledwiththeUEFIdiagnosticprogram,youcandownloada
bootablediagnosticprogramfromtheLenovoSupportWebsite.Thebootablediagnosticprogramsenable
youtotestcomputermemoryandinternalstoragedevices,viewsysteminformation,andcheckandrecover
Chapter3.Generalcheckout25
Page 32

theinternalstoragedevices.Tousethebootablediagnosticprograms,youcancreateabootablediagnostic
mediumonaUniversalSerialBus(USB)deviceorCD.
Tocreateabootablediagnosticmedium,dothefollowing:
1.Gotohttp://www.lenovo.com/diags.
2.ClickLenovoBootableDiagnostics.
3.FollowtheinstructionsontheWebsitetocreateabootablediagnosticmediumonaUSBdeviceorCD.
Tousethediagnosticmediumyouhavecreated,dooneofthefollowing:
•IfyouhavecreatedthebootablediagnosticmediumonaUSBdevice,dothefollowing:
1.AttachtheUSBdevicetothecomputer.
2.Turnonthecomputer.Ifthecomputercannotbeturnedon,goto“Powersystemcheckout”onpage
26
,andcheckthepowersources.Ifanerrorcodeisdisplayed,goto“Symptom-to-FRUindex”on
page35forerrorcodedescriptionsandtroubleshootinghints.
3.Whenthelogoscreenisdisplayed,repeatedlypressandreleasetheF12key.WhentheBootMenu
windowopens,releasetheF12key.
4.UsethearrowkeystoselectUSBHDDandthenpressEnter.Thediagnosticprogramwillbe
launchedautomatically.
5.Followtheinstructionsonthescreentousethediagnosticprogram.
•IfyouhavecreatedthebootablediagnosticmediumonaCD,dothefollowing:
1.Turnonthecomputer.Ifthecomputercannotbeturnedon,goto“Powersystemcheckout”onpage
26,andcheckthepowersources.Ifanerrorcodeisdisplayed,goto“Symptom-to-FRUindex”on
page35
forerrorcodedescriptionsandtroubleshootinghints.
2.Connectanexternalopticaldrivetothecomputer,andinserttheCDintotheopticaldrive.
3.Restartthecomputer.
4.Whenthelogoscreenisdisplayed,repeatedlypressandreleasetheF12key.WhentheBootMenu
windowopens,releasetheF12key.
5.UsethearrowkeystoselectATAPICDx(x:0,1,...)andthenpressEnter.Thediagnosticprogram
willbelaunchedautomatically.
6.Followtheinstructionsonthescreentousethediagnosticprogram.
Powersystemcheckout
Toverifyifabatterypackoranacpoweradapterisfunctional,dothefollowing:
1.Turnoffthecomputer.
2.Connecttheacpoweradapter.
3.Turnonthecomputer.Ifthecomputercanbeturnedon,itmeansthateitherthebatterypackortheac
poweradapterisfunctional.
4.Insertastraightenedpaperclipintotheemergency-resetholetoresetthecomputer.Ifthecomputeris
stillpoweredon,itmeansthattheacpoweradapterisfunctional.
5.Turnoffthecomputer.
6.Disconnecttheacpoweradapterandturnonthecomputer.Ifthecomputercanbeturnedon,it
meansthatthebatterypackisfunctional.
Ifyoususpectapowerproblem,seetheappropriateoneofthefollowingpowersupplycheckouts:
•“Checkingtheacpoweradapter”onpage27
•“Checkingtheexternalbatterypackandtheoperationalcharging”onpage27
•“Checkingthecoin-cellbattery”onpage28
26ThinkPadL460HardwareMaintenanceManual
Page 33

Checkingtheacpoweradapter
Youareherebecausethecomputerfailsonlywhentheacpoweradapterisused.
•Ifthepowerproblemoccursonlywhenthedockingstationortheportreplicatorisused,replacethe
dockingstationortheportreplicator.
•Ifthesystem-statusindicatordoesnotblinkthreetimeswhenanacpowersourceisconnected,check
thepowercordoftheacpoweradapterforcorrectcontinuityandinstallation.
•Ifthecomputerdoesnotchargeduringoperation,goto“Checkingtheexternalbatterypackandthe
operationalcharging”onpage27
.
Tochecktheacpoweradapter,dothefollowing:
1.Unplugtheacpoweradaptercablefromthecomputer.
2.Measuretheoutputvoltageattheplugoftheacpoweradaptercable.Seethefollowingillustration:
Pin
Voltage(Vdc)
1+20
20
3
Ground
(20V)
1
3
2
Note:Outputvoltageofpin2oftheacpoweradaptermightdifferfromtheoneyouareservicing.
3.Ifthevoltageisnotcorrect,replacetheacpoweradapter.
4.Ifthevoltageisacceptable,replacethesystemboard.
Note:Noisefromtheacpoweradapterdoesnotalwaysindicateadefect.
Checkingtheexternalbatterypackandtheoperationalcharging
Checkingtheexternalbatterypack
Thiscomputersupportsonlybatteriesspeciallydesignedforthisspecificsystemandmanufacturedby
Lenovooranauthorizedbuilder.Thesystemdoesnotsupportunauthorizedbatteriesorbatteriesdesigned
forothersystems.Ifanunauthorizedbatteryorabatterydesignedforanothersystemsisinstalled,the
systemwillnotcharge.
Attention:Lenovohasnoresponsibilityfortheperformanceorsafetyofunauthorizedbatteries,and
providesnowarrantiesforfailuresordamagearisingoutoftheiruse.
Moveyourpointertothebattery-statusiconintheWindowsnotificationareatocheckthebatterystatus.
Thebattery-statusicondisplaysthepercentageofbatterypowerremainingandhowlongyoucanuse
yourcomputerbeforeyoumustchargethebattery.
Note:Iftheexternalbatterypackbecomeshot,itmaynotbeabletocharge.Removeitfromthecomputer
andleaveitatroomtemperatureforawhile.Afteritcoolsdown,reinstallandrechargeit.
Tochecktheexternalbatterypack,dothefollowing:
1.Poweroffthecomputer.
2.Removetheexternalbatterypackandmeasurethevoltagebetweenbatteryterminals1(+)and7
(-).Seethefollowingfigure:
Chapter3.Generalcheckout27
Page 34

Terminal
Voltage(Vdc)
1,2+0to+12.6
6,7
Ground(-)
1(+)
2(+)
3
4
5
6(-)
7(-)
3.Ifthevoltageislessthan+11.0Vdc,theexternalbatterypackhasbeendischarged.
Ifthevoltageisstilllessthan+11.0Vdcafterrecharging,replacetheexternalbatterypack.
4.Ifthevoltageismorethan+11.0Vdc,measuretheresistancebetweenbatteryterminals5and7.The
resistancemustbe4to30KΩ.Iftheresistanceisnotcorrect,replacetheexternalbatterypack.Ifthe
resistanceiscorrect,replacethesystemboard.
Checkingtheoperationalcharging
Tocheckwhetherthebatterypackchargesproperlyduringoperation,dothefollowing:
1.Dischargethebatterypackuntiltheremainedbatterypowerislessthan50%.
2.Connectthecomputertoacpowertochargethebatterypack.IfthebatterystatusiconintheWindows
notificationareaindicatesthatthebatterypackisnotcharging,removethebatterypackandletit
returntoroomtemperature.
3.Reinstallthebatterypack.Ifthebatterypackisstillnotcharging,replacethebatterypack.
4.Checkthebatterystatusiconagain.Ifthesameerrorstillexists,replacethesystemboard.
Checkingthecoin-cellbattery
Tocheckthecoin-cellbattery,dothefollowing:
1.Removethecoin-cellbattery.See“1130Coin-cellbattery”onpage84.
2.Measurethevoltageofthecoin-cellbattery.Seethefollowingillustration.
Wire
Voltage(Vdc)
Red+2.5to+3.2
Black
Ground
•Ifthevoltageiscorrect,replacethesystemboard.
•Ifthevoltageisnotcorrect,replacethecoin-cellbattery.
•Ifthecoin-cellbatterydischargesquicklyafterreplacement,replacethesystemboard.
28ThinkPadL460HardwareMaintenanceManual
Page 35

Chapter4.Relatedserviceinformation
Thischapterpresentsfollowinginformation:
•“RestoringthefactorycontentsbyusingtheRecoveryDiscSet”onpage29
•“RecoveryoverviewfortheWindows10operatingsystem”onpage30
•“Passwords”onpage32
•“Powermanagement”onpage33
•“Symptom-to-FRUindex”onpage35
ServiceWebsite:Whenthelatestmaintenancedisketteandthesystemprogramservicediskettebecome
available,theywillbepostedonhttp://www.lenovo.com/support
RestoringthefactorycontentsbyusingtheRecoveryDiscSet
Whenthemainstoragedriveisreplacedbecauseofafailure,noproductrecoveryprogramisonthenew
drive.Inthiscase,thecustomermustusetheRecoveryDiscSettorecoverthecomputer.Orderthe
RecoveryDiscSetandthedriveatthesametimesothatthecustomercanrestorethecomputertothe
factorydefaultsettingsbyusingtheRecoveryDiscSetafterthenewdriveisinstalled.Forinformationabout
whichdiscstoorder,gotohttp://www.lenovo.com/serviceparts-lookup.
Dependingonthemodel,thenumberofrecoverydiscsincludedintheRecoveryDiscSetdiffers.The
RecoveryDiscSetmightconsistoftheuserinstructionsandthefollowingsetofDVDstorestorethe
computertotheoriginalfactoryconfiguration.
•OperatingSystemRecoveryDisc(onedisc):ThisdiscrestorestheMicrosoftWindowsoperatingsystem.
Usethisdisctostarttherecoveryprocess.
•ApplicationsandDriversRecoveryDisc(oneormorediscs):Thisdiscrestoresthepreinstalled
applicationsanddriversonthecomputer.
•SupplementalRecoveryDisc:Thisdisccontainsadditionalcontent,suchasupdatestothesoftwarethat
waspreinstalledonthecomputer.NotallrecoverydiscsetscomewithaSupplementalRecoveryDisc.
Notes:
•Y oumusthaveaDVDdrivetousetherecoverydiscs.IfyoudonothaveaninternalDVDdrive,you
canuseanexternalUSBDVDdrive.
•Duringtherecoveryprocess,alldataonthedrivewillbedeleted.Ifpossible,copyanyimportantdata
orpersonalfilesthatyouwanttokeepontoremovablemediaoranetworkdrivebeforeyoustartthe
recoveryprocess.
•Recoverycantakeonetotwohourstocomplete.Thelengthoftimedependsonthemethodyouuse.If
youuserecoverydiscs,therecoveryprocesswilltakeabouttwohours.
TorestorethecomputertotheoriginalfactoryconfigurationusingtheRecoveryDiscSet,dothefollowing:
1.MaketheCD/DVDdrivethefirststartupdeviceinthestartupsequenceusingthefollowingprocedure:
a.PressandholddowntheF1key,andthenturnonthecomputer.Whenthelogoscreenisdisplayed
orwhenyouhearrepeatingbeeps,releasetheF1key.TheThinkPadSetupprogramopens.
b.UsethearrowkeystoselectStartup➙Boot.
c.SelecttheCD/DVDdriveasthe1stBootDevice.
2.InserttheOperatingSystemRecoveryDiscintotheDVDdrive.
3.PressF10tosavetheThinkPadSetupprogramconfigurationchanges.Followtheinstructionsonthe
screentobegintherecoveryprocess.
©CopyrightLenovo2016
29
Page 36

4.SelectyourlanguageandclickNext.
5.Readthelicense.Ifyouagreewiththetermsandconditions,selectIacceptthesetermsand
conditionsandthenclickNext.Ifyoudonotagreewiththetermsandconditions,followthe
instructionsonthescreen.
6.ClickYesinthedisplayedwindowtobegintheoperatingsystemrecoveryprocess.
7.InserttheApplicationsandDriversRecoveryDiscwhenpromptedandthenclickOKtobeginthe
processofrecoveringapplicationsanddrivers.
8.IfyouhaveaSupplementalRecoveryDisc,insertitwhenpromptedandclickYes.Ifyoudonothavea
SupplementalRecoveryDisc,clickNo.
9.Whenallofthedatahasbeencopiedfromthelastdiscinthesetandhasbeenprocessed,removethe
discandrestartthecomputer.
Note:Therestoftherecoveryprocessisfullyautomatedandnoactionfromyouisrequired.The
computerwillrestartintotheMicrosoftWindowsdesktopseveraltimesandyoumightexperience
periodswhennoactivityisapparentonthescreenforseveralminutesatatime.Thisisnormal.
10.Whentherecoveryprocessiscomplete,theSetUpWindowsscreenisdisplayed.Followthe
instructionsonthescreentocompletetheWindowssetup.
11.AfteryouhavecompletedtheWindowssetup,youmightwanttorestoretheoriginalstartupsequence.
StarttheThinkPadSetupprogramandthenpressF9torestorethedefaultsettings.PressF10tosave
changesandexittheThinkPadSetupprogram.
Note:Afterrestoringadrivetothefactorydefaultsettings,youmightneedtoreinstallsomedevicedrivers.
RecoveryoverviewfortheWindows10operatingsystem
TheWindowsrecoveryprogramsenableyoutoresetyourcomputeroruseadvancedstartupoptions.
ItisrecommendedthatyoucreatearecoveryUSBdriveasearlyaspossible.StoretherecoveryUSBdrive
asabackuporreplacementfortheWindowsrecoveryprograms.
Formoreinformation,see“CreatingandusingarecoveryUSBdrive”onpage31
.
Resettingyourcomputer
Ifyourcomputerdoesnotperformwell,youmightconsiderresettingyourcomputer.Intheresettingprocess,
youcanchoosetokeepyourfilesorremovethem,andthenreinstalltheWindowsoperatingsystem.
Toresetyourcomputer,dothefollowing:
Note:Thegraphicaluserinterface(GUI)itemsoftheoperatingsystemmightchangewithoutnotice.
1.OpentheStartmenuandthenclickSettings.IfSettingsisnotdisplayed,clickAllappstodisplayall
programs,andthenclickSettings➙Update&security➙Recovery.
2.IntheResetthisPCsection,clickGetstarted.
3.Followtheinstructionsonthescreentoresetyourcomputer.
Usingadvancedstartupoptions
Withadvancedstartupoptions,youcanchangethefirmwaresettingsofthecomputer,changethestartup
settingsoftheWindowsoperatingsystem,startthecomputerfromanexternaldevice,orrestorethe
Windowsoperatingsystemfromasystemimage.
Touseadvancedstartupoptions,dothefollowing:
Note:TheGUIitemsoftheoperatingsystemmightchangewithoutnotice.
30ThinkPadL460HardwareMaintenanceManual
Page 37

1.OpentheStartmenuandthenclickSettings.IfSettingsisnotdisplayed,clickAllappstodisplayall
programs,andthenclickSettings➙Update&security➙Recovery.
2.IntheAdvancedstartupsection,clickRestartnow➙Troubleshoot➙Advancedoptions.
3.Selectadesiredstartupoption,thenfollowtheinstructionsonthescreen.
RecoveringyouroperatingsystemifWindows10failstostart
TheWindowsrecoveryenvironmentonyourcomputeriscapableofoperatingindependentlyfromthe
Windows10operatingsystem.Thisenablesyoutorecoverorrepairtheoperatingsystemevenifthe
Windows10operatingsystemfailstostart.
Aftertwoconsecutivefailedbootattempts,theWindowsrecoveryenvironmentstartsautomatically.Then
youcanchooserepairandrecoveryoptionsbyfollowingtheinstructionsonthescreen.
Note:Ensurethatyourcomputerisconnectedtoacpowerduringtherecoveryprocess.
CreatingandusingarecoveryUSBdrive
YoucancreatearecoveryUSBdriveasabackupfortheWindowsrecoveryprograms.Withtherecovery
USBdrive,youcantroubleshootandfixtheproblemsevenifthepreinstalledWindowsrecoveryprograms
aredamaged.
CreatingarecoveryUSBdrive
TheUSBdrivethatyouusetocreatetherecoveryUSBdrivemustbeatleast16GBofstorage.Theactual
USBcapacitythatisrequireddependsonthesizeoftherecoveryimage.
Attention:ThecreationprocessdeletesanythingstoredontheUSBdrive.T oavoiddataloss,makea
backupcopyofallthedatathatyouwanttokeep.
TocreatearecoveryUSBdrive,dothefollowing:
Note:Ensurethatyourcomputerisconnectedtoacpowerduringthefollowingprocess.
1.ConnectaproperUSBdrive(atleast16GBofstorage).
2.Typerecoveryinthesearchboxonthetaskbar.ThenclickCreatearecoverydrive.
3.ClickYesintheUserAccountControlwindowtoallowtheRecoveryMediaCreatorprogramtostart.
4.IntheRecoveryDrivewindow,followtheon-screeninstructionstocreatearecoveryUSBdrive.
UsingtherecoveryUSBdrive
Ifyoucannotstartyourcomputer,usetherecoveryUSBdrivetorecoveryourcomputer.
TousearecoveryUSBdrive,dothefollowing:
Note:Ensurethatyourcomputerisconnectedtoacpower.
1.ConnecttherecoveryUSBdrivetothecomputer.
2.Turnonorrestartthecomputer.BeforetheWindowsoperatingsystemstarts,repeatedlypresstheF12
key.TheBootMenuwindowopens.
3.SelecttherecoveryUSBdriveasthebootdevice.
4.Selectapreferredkeyboardlayout.
5.ClickTroubleshoottodisplaytheoptionalrecoverysolutions.
6.Selectacorrespondingrecoverysolutionaccordingtoyoursituation.Thenfollowtheinstructionson
thescreentocompletetheprocess.
Chapter4.Relatedserviceinformation31
Page 38

Passwords
AsmanyasthreepasswordsmaybeneededforanyThinkPadnotebookcomputer:thepower-onpassword,
theharddiskpassword,andthesupervisorpassword.
Ifanyofthesepasswordshasbeenset,apromptforitwillbedisplayedonthescreenwheneverthe
computeristurnedon.Thecomputerdoesnotstartuntilthepasswordisentered.
Note:Ifonlyasupervisorpasswordisset,thepasswordpromptwillnotbedisplayedwhentheoperating
systemisstarted.
Power-onpassword
Apower-onpasswordprotectsthesystemfrombeingpoweredonbyanunauthorizedperson.The
passwordmustbeenteredbeforeanoperatingsystemcanbestarted.Forinstructionsonhowtoremove
thepower-onpassword,see“Howtoremovethepower-onpassword”onpage32
.
Harddiskpassword
Therearetwokindsofharddiskpasswords:
•Userharddiskpassword-fortheuser
•Masterharddiskpassword-forthesystemadministrator,whocanuseittogetaccesstotheharddisk
eveniftheuserhaschangedtheuserharddiskpassword
Note:Therearetwomodesfortheharddiskpassword:UseronlyandMaster+User.TheMaster+User
moderequirestwoharddiskpasswords;thesystemadministratorentersbothinthesameoperation.The
systemadministratorthenprovidestheuserharddiskpasswordtothesystemuser.
Attention:Iftheuserharddiskpasswordhasbeenforgotten,checkwhetheramasterharddiskpassword
hasbeenset.Ifithas,itcanbeusedforaccesstotheharddiskdrive.Ifnomasterharddiskpasswordis
available,neitherLenovonorLenovoauthorizedservicetechniciansprovideanyservicestoreseteither
theuserorthemasterharddiskpassword,ortorecoverdatafromtheharddiskdrive.Theharddiskdrive
canbereplacedforascheduledfee.
Forhowtoremovetheharddiskpassword,see“Howtoremovetheharddiskpassword”onpage33
.
Supervisorpassword
AsupervisorpasswordprotectsthesysteminformationstoredintheThinkPadSetup.Theusermustenter
thesupervisorpasswordinordertogetaccesstotheThinkPadSetupandchangethesystemconfiguration.
Attention:Ifthesupervisorpasswordhasbeenforgottenandcannotbemadeavailabletotheservice
technician,thereisnoserviceproceduretoresetthepassword.Thesystemboardmustbereplacedfor
ascheduledfee.
Howtoremovethepower-onpassword
Toremoveapower-onpassword,dothefollowing:
Ifnosupervisorpasswordhasbeenset,dothefollowingtoremovethepower-onpassword:
1.Turnoffthecomputer.
2.Removetheexternalbatterypack.Forinstructionsonhowtoremovetheexternalbatterypack,see
“1020Externalbatterypack”onpage62.
3.Removethecoin-cellbattery.Forinstructionsonhowtoremovethecoin-cellbattery,see“1130
Coin-cellbattery”onpage84
.Waitforafewseconds.
32ThinkPadL460HardwareMaintenanceManual
Page 39

4.Reinstallthecoin-cellbattery.Forinstructionsonhowtoinstallthecoin-cellbattery,see“1130Coin-cell
battery”onpage84.
5.Reinstalltheexternalbatterypack.Forinstructionsonhowtoinstalltheexternalbatterypack,see
“1020Externalbatterypack”onpage62.
6.Turnonthecomputerandwaituntilthepower-onself-test(POST)ends.AfterthePOSTends,the
passwordpromptdoesnotappear.Thepower-onpasswordhasbeenremoved.
Ifasupervisorpasswordhasbeensetandisknowntotheservicetechnician,dothefollowingtoremove
thepower-onpassword:
1.Turnonthecomputer.
2.Whenthelogoscreencomesup,immediatelypressthespeaker-mutekey.
3.TypethesupervisorpasswordtoentertheThinkPadSetupprogram.
4.SelectSecurity.
5.SelectPassword.
6.SelectPower-OnPassword.
7.TypethecurrentsupervisorpasswordintheEnterCurrentPasswordfield.thenleavetheEnter
NewPasswordfieldblank,andpressEntertwice.
8.IntheChangeshavebeensavedwindow,pressEnter.
9.PressthesearchkeytosavechangesandexittheThinkPadSetupprogram.
Howtoremovetheharddiskpassword
Attention:IfUseronlymodeisselectedandtheuserharddiskpasswordhasbeenforgottenandcannotbe
madeavailabletotheservicetechnician,neitherLenovonorLenovoauthorizedservicetechniciansprovide
anyservicestoresettheuserharddiskpasswordsortorecoverdatafromtheharddiskdrive.T oputthe
systembacktooperationalstatus,theonlyLenovoandLenovo-authorizedservicesolutionwouldbeto
replacetheharddiskdriveorsolid-statedrivewithascheduledfee.
Toremoveauserharddiskpasswordthathasbeenforgotten,whenthesupervisorpasswordandmaster
harddiskpasswordareknown,dothefollowing:
1.Turnonthecomputer.
2.Whenthelogoscreencomesup,immediatelypressthespeaker-mutekeytoentertheThinkPad
Setupprogram.
3.SelectSecurity.
4.SelectPassword.
5.SelectHarddiskxpassword,wherexistheletteroftheharddiskdrive.Apop-upwindowopens.
6.SelectMasterharddiskpassword.
7.TypethecurrentmasterharddiskpasswordintheEnterCurrentPasswordfield.ThenleavetheEnter
NewPasswordfieldblank,andpressEntertwice.
8.PressthesearchkeytosavechangesandexittheThinkPadSetupprogram.Theuserharddisk
passwordandthemasterharddiskpasswordhavebeenremoved..
Powermanagement
Toreducepowerconsumption,thecomputerhasthreepowermanagementmodes:screenblank,sleep,
andhibernation.
Chapter4.Relatedserviceinformation33
Page 40

Screenblankmode(fortheWindows7operatingsystemonly)
Ifthetimesetonthe“Turnoffmonitor”timerintheoperatingsystemexpires,theLCDbacklightturnsoff.
Toputthecomputerintoscreenblankmode,dothefollowing:
1.Right-clickthebatterystatusindicatoronthetaskbar.
2.SelectPoweroffdisplay.
Toendscreenblankmodeandresumenormaloperation,pressanykey.
Sleepmode
Whenthecomputerenterssleepmode,thefollowingeventsoccurinadditiontowhatoccursinscreen
blankmode:
•TheLCDispoweredoff.
•Theharddiskdriveorsolid-statedriveispoweredoff.
•Themicroprocessorstops.
Toputyourcomputerintosleepmode,dothefollowing:
•ForWindows7:OpentheStartmenu,thenclickthearrownexttotheShutdownbutton.ClickSleep
fromthemenudisplayed.
•ForWindows10:OpentheStartmenu,click
Power,andthenclickSleep.
Incertaincircumstances,thecomputergoesintosleepmodeautomatically:
•Afteraperiodofinactivityspecifiedinpowerplansettings
•Whenthebatterypowerislow
Hibernationmode
Inhibernationmode,thefollowingoccurs:
•Thesystemstatus,randomaccessmemory(RAM),videorandomaccessmemory(VRAM),andsetup
dataarestoredontheharddiskdriveorsolid-statedrive.
•Thesystemispoweredoff.
Note:Ifthecomputerentersthehibernationmodewhileitisdockedtothedockingstationortheport
replicator,donotundockitbeforeresumingnormaloperation.Ifyoudoundockitandthentrytoresume
normaloperation,youwillgetanerrormessage,andyouwillhavetorestartthesystem.
Ifyouhavedefinedoneofthefollowingactionsastheeventthatcausesthesystemtogointohibernation
mode,performthataction.
•Closingthelid.
•Pressingthepowerbutton.
Also,thecomputergoesintohibernationmodeautomaticallyafteraperiodofinactivityspecifiedinpower
plansettings.
Whenthepoweristurnedon,thecomputerreturnsfromhibernationmodeandresumesoperation.The
hibernationfileinthebootrecordontheharddiskdriveorsolid-statedriveisread,andsystemstatusis
restoredfromtheharddiskdriveorsolid-statedrive.
34ThinkPadL460HardwareMaintenanceManual
Page 41

Symptom-to-FRUindex
Thissectioncontainsfollowinginformation:
•“Numericerrorcodes”onpage35
•“Errormessages”onpage36
•“Beepsymptoms”onpage37
•“No-beepsymptoms”onpage37
•“LCD-relatedsymptoms”onpage37
•“Intermittentproblems”onpage38
•“Undeterminedproblems”onpage38
Thesymptom-to-FRUindexinthissectionlistssymptomsanderrorsandtheirpossiblecauses.Themost
likelycauseislistedfirst,inboldfacetype.
Note:DotheFRUreplacementorotheractionsinthesequenceshowninthecolumnheaded“FRUor
action,insequence. ”IfreplacingaFRUdoesnotsolvetheproblem,puttheoriginalpartbackinthe
computer.DonotreplaceanondefectiveFRU.
Thisindexcanalsohelpyoudetermine,duringregularservicing,whatFRUsarelikelytoneedtobe
replacednext.
AnumericerrorisdisplayedforeacherrordetectedinPOSTorsystemoperation.Inthedisplays,ncan
beanynumber.
Ifnonumericcodeisdisplayed,checkthenarrativedescriptionsofsymptoms.Ifthesymptomisnot
describedthere,goto“Intermittentproblems”onpage38
.
Note:ForadevicenotsupportedbydiagnosticcodesintheThinkPadnotebookcomputers,seethe
manualforthatdevice.
Numericerrorcodes
Table2.Numericerrorcodes
Symptomorerror
FRUoraction,insequence
0177
BadSVPdata,stopPOSTtask—Thechecksumofthe
supervisorpasswordintheEEPROMisnotcorrect.
Replacethesystemboard.
0183
BadCRCofSecuritySettingsinEFIVariable.Enterthe
ThinkPadSetupprogram.–ThechecksumoftheSecurity
settingsintheEFIVariableisnotcorrect.
1.RuntheThinkPadSetupprogram.Thesettings
willbecorrectedautomatically.Thensavethe
currentsettingsbypressingF10.
2.Replacethesystemboard.
0187
EAIAdataaccesserror—TheaccesstoEEPROMisfailed.
Replacethesystemboard.
0188
InvalidRFIDSerializationInformationArea.
Replacethesystemboard.
0189
InvalidRFIDconfigurationinformationarea—The
EEPROMchecksumisnotcorrect.
Replacethesystemboard.
0190
Criticallow-batteryerror
1.Chargethebatterypack.
2.Replacethebatterypack.
0191
SystemSecurity—InvalidRemoteChangerequested.
1.RuntheThinkPadSetupprogram,andthensave
currentsettingbypressingF10.
2.Replacethesystemboard.
Chapter4.Relatedserviceinformation35
Page 42

Table2.Numericerrorcodes(continued)
Symptomorerror
FRUoraction,insequence
0199
SystemSecurity—Securitypasswordretrycount
exceeded.
1.RuntheThinkPadSetupprogram.Theretrycount
willbereset.Thensavethecurrentsettingsby
pressingF10.
2.Replacethesystemboard.
1802
Unauthorizednetworkcardispluggedin—Turnoffand
removethenetworkcard.
1.Removenetworkcard.
2.Replacethesystemboard.
1820
Morethanoneexternalfingerprintreaderisattached.
Poweroffandremoveallbutthereaderthatyousetup
withinyourmainoperatingsystem.
Removeallbutthereaderthatyousetupforthe
authentication.
2000
ThinkVantageActiveProtectionsensordiagnosticsfailed.
Havethecomputerserviced.
2100
DetectionerroronHDD0(MainHDD)
1.Reseattheharddiskdrive.
2.Replacethemainharddiskdrive.
3.Replacethesystemboard.
2101
DetectionerroronSSD1(M.2)
1.ReseattheM.2solid-statedrive.
2.Replacethesolid-statedrive.
3.Replacethesystemboard.
2102
DetectionerroronSSD2(M.2)
1.ReseattheM.2solid-statedrive.
2.Replacethesolid-statedrive.
3.Replacethesystemboard.
2110
ReaderroronHDD0(MainHDD)
1.Reseattheharddiskdrive.
2.Replacethemainharddiskdrive.
3.Replacethesystemboard.
2111
ReaderroronSSD1(M.2)
1.ReseattheM.2solid-statedrive.
2.Replacethesolid-statedrive.
3.Replacethesystemboard.
2112
ReaderroronSSD2(M.2)
1.ReseattheM.2solid-statedrive.
2.Replacethesolid-statedrive.
3.Replacethesystemboard.
2200
MachineTypeandSerialNumberareinvalid.
Replacethesystemboard.
2201
MachineUUIDisinvalid
Replacethesystemboard.
Errormessages
Table3.Errormessages
Symptomorerror
FRUoraction,insequence
Fanerror.1.Replacethethermalfanassembly.
2.Applythermalgrease.
3.Replacethesystemboard.
Thermalsensingerror.Replacethesystemboard.
36ThinkPadL460HardwareMaintenanceManual
Page 43

Table3.Errormessages(continued)
Symptomorerror
FRUoraction,insequence
Thebatteryinstalledisnotsupportedbythissystem
andwillnotcharge.Pleasereplacethebatterywiththe
correctLenovobatteryforthissystem.PresstheESC
keytocontinue.
Replacethebatterypack.
Thissystemdoesnotsupportbatteriesthatarenot
genuineLenovomadeorauthorized.Thesystemwill
continuetoboot,butmaynotchargeunauthorized
batteries.PresstheESCkeytocontinue.
Attention:Lenovohasnoresponsibilityforthe
performanceorsafetyofunauthorizedbatteries,and
providesnowarrantiesforfailuresordamagearisingout
oftheiruse.
Replacethebatterypack.
Beepsymptoms
Table4.Beepsymptoms
Symptomorerror
FRUoraction,insequence
Fourcyclesoffourshortbeeps
Replacethesystemboard.
Oneshortbeep,pause,threeshortbeeps,pause,three
moreshortbeeps,pause,andoneshortbeep(1–3–3–1
beeps)
1.Replacethememorymodule.
2.Replacethesystemboard.
FiveshortbeepsReplacethesystemboard.
Onelongandtwoshortbeeps
Replacethesystemboard.
Threeshortbeeps,pause,oneshortbeep,pause,one
moreshortbeep,pause,andthreeshortbeeps(3–1–1–3
beeps)
Havethecomputerserviced.
Fiveshortbeeps,pause,fivemoreshortbeeps,and
pause
Replacethesystemboard.
No-beepsymptoms
Table5.No-beepsymptoms
Symptomorerror
FRUoraction,insequence
Nobeep,power-onindicatoron,LCDblank,andno
POST.
1.Ensurethateveryconnectorisconnectedtightly
andcorrectly.
2.Reseatmemorymodule.
3.Replacethesystemboard.
Nobeep,power-onindicatoron,andLCDblankduring
POST.
1.Reseatmemorymodule.
2.Replacethesystemboard.
Thepower-onpasswordpromptappears.Apower-onpasswordorasupervisorpasswordisset.
TypethepasswordandpressEnter.
Theharddiskpasswordpromptappears.Aharddiskpasswordisset.T ypethepasswordand
pressEnter.
LCD-relatedsymptoms
Important:TheTFTLCDforthenotebookcomputercontainsmanythin-filmtransistors(TFTs).The
presenceofasmallnumberofdotsthataremissing,discolored,oralwayslightedischaracteristicofTFT
Chapter4.Relatedserviceinformation37
Page 44

LCDtechnology,butexcessivepixelproblemscancauseviewingconcerns.IftheLCDyouareservicinghas
twoorlessvisibledefectivepixels,itshouldnotbeconsideredfaulty.However,iftheLCDhasthreeormore
visibledefectivepixels,itwillbedeemedasdefectivebyLenovoanditshouldbereplaced.
Notes:
•ThispolicyappliestoallThinkPadnotebookspurchasedon1January,2008orlater.
•LenovowillnotprovidewarrantyreplacementiftheLCDiswithinspecificationsbecausewecannot
guaranteethatanyreplacementLCDwillhavezeropixeldefects.
•OnepixelconsistsofR,G,Bsub-pixels.
Table6.LCD-relatedsymptoms
Symptomorerror
FRUoraction,insequence
Nobeep,power-onindicatoron,andablankLCDduring
POST.
Replacethesystemboard.
•LCDbacklightnotworking.
•LCDtoodark.
•LCDbrightnesscannotbeadjusted.
•LCDcontrastcannotbeadjusted.
1.ReseattheLCDcable.
2.ReplacetheLCDunit.
3.Replacethesystemboard.
•LCDscreenunreadable.
•Charactersmissingpixels.
•Screenabnormal.
•Wrongcolordisplayed.
1.Seeimportantnotefor“LCD-relatedsymptoms. ”
2.ReseatallLCDcable.
3.ReplacetheLCDunit.
4.Replacethesystemboard.
HorizontalorverticallinesdisplayedonLCD.ReplacetheLCDunit.
Intermittentproblems
Intermittentsystemhangproblemscanbeduetoavarietyofcausesthathavenothingtodowithahardware
defect,suchascosmicradiation,electrostaticdischarge,orsoftwareerrors.FRUreplacementshouldbe
consideredonlywhenaproblemrecurs.
Whenanalyzinganintermittentproblem,dothefollowing:
1.Runthediagnostictestforthesystemboardinloopmodeatleast10times.
2.Ifnoerrorisdetected,donotreplaceanyFRUs.
3.Ifanyerrorisdetected,replacetheFRUshownbytheFRUcode.Rerunthetesttoverifythatno
moreerrorsexist.
Undeterminedproblems
Ifthediagnostictestsdidnotidentifytheadapterordevicethathasfailed,ifwrongdevicesareinstalled,
orifthesystemsimplyisnotoperating,followtheseprocedurestoisolatethefailingFRU(donotisolate
FRUsthathavenodefects).
Verifythatallattacheddevicesaresupportedbythecomputer.
Verifythatthepowersupplybeingusedatthetimeofthefailureisoperatingcorrectly.See“Powersystem
checkout”onpage26.
1.Turnoffthecomputer.
2.VisuallycheckeachFRUfordamage.ReplaceanydamagedFRU.
3.Removeordisconnectallofthefollowingdevices:
a.Non- ThinkPaddevices
b.Devicesattachedtothedockingstationortheportreplicator
c.Printer,mouse,andotherexternaldevices
d.Batterypack
38ThinkPadL460HardwareMaintenanceManual
Page 45

e.Harddiskdriveorsolid-statedrive
f.Externaldiskettedriveoropticaldrive
g.Memorymodule
h.PCcards
4.Turnonthecomputer.
5.Determinewhethertheproblemhasbeensolved.
6.Iftheproblemdoesnotrecur,reconnecttheremoveddevicesoneatatimeuntilyoufindthefailingFRU.
7.Iftheproblemremains,replacethefollowingFRUsoneatatime(donotreplaceanondefectiveFRU):
a.Systemboard
b.LCDunit
Chapter4.Relatedserviceinformation39
Page 46

40ThinkPadL460HardwareMaintenanceManual
Page 47

Chapter5.Statusindicators
Thischapterpresentsthestatusindicatorsthatshowthestatusofthecomputer.
2
3
4
5
6
Table7.Statusindicators
IndicatorMeaning
1Speaker-muteindicatorOn:Thespeakersaremuted.
2Microphone-muteindicator
On:Themicrophonesaremuted.
3Camera-statusindicatorOn:Thecameraisinuse.
©CopyrightLenovo2016
41
Page 48

Table7.Statusindicators(continued)
IndicatorMeaning
46System-statusindicators
Blinksfast:Thecomputerisenteringsleeporhibernationmode.
Blinksforthreetimes:Thecomputerisinitiallyconnectedtopower.
Blinksslowly:Thecomputerisinsleepmode.
On:Thecomputerison(innormalmode).
Off:Thecomputerisofforinhibernationmode.
5FnLockindicator
Off:TheFnLockfunctionisdisabled.Toinitiatethespecialfunctionprintedas
anicononeachkey,pressthecorrespondingfunctionkeydirectly.ToinputF1F12,presstheFnkeyandthecorrespondingfunctionkey.
On:TheFnLockfunctionisenabled.ToinputF1-F12,pressthecorresponding
functionkeydirectly.Toinitiatethespecialfunctionprintedasanicononeach
key,presstheFnkeyandthecorrespondingfunctionkey.
42ThinkPadL460HardwareMaintenanceManual
Page 49

Chapter6.Functionkeys
Thefollowingtabledescribesthefunctionsoffunctionkeysandkeycombinations.
Table8.Functionkeys
Functionkeyand
keycombination
Description
Mutesorunmutesthespeakers.
Ifyoumutethesoundandturnoffyourcomputer,thesoundwillremainmutedwhenyou
turnonyourcomputeragain.Toturnonthesound,pressthespeaker-mutekey,
volume-downkey,orvolume-upkey.
Decreasesthespeakervolume.
Increasesthespeakervolume.
Mutesorunmutesthemicrophones.
Darkensthedisplay.
Brightensthedisplay.
Switchesthedisplayoutputlocationbetweenthecomputerdisplayandanexternalmonitor.
Enablesordisablesthewirelessfeatures.
ForWindows7:OpensControlPanel.
ForWindows10:OpenstheSettingswindow.
ForWindows7:OpensWindowsSearch.
ForWindows10:OpenstheCortana
®
searchbox.
Viewstheprogramsthatyouhaveopened.
ForWindows7:OpensComputer.
ForWindows10:Viewsalltheprograms.
Fn+Esc
YoucanconfiguretheFnkeyandfunctionkeysintheKeyboardPropertieswindowby
doingthefollowing:
1.GotoControlPanel.ChangetheviewofControlPanelfromCategorytoLargeicons
orSmallicons.
2.ClickKeyboard.IntheKeyboardPropertieswindow,clicktheFnandfunctionkeys
orThinkPadF1–F12keystab.
3.Selecttheoptionsofyourpreference.
PressFn+EsctoenableordisabletheFnLockfunction.
•WhentheFnLockfunctionisdisabled:TheFnLockindicatorisoff.Toinitiatethespecial
functionprintedasanicononeachfunctionkey,pressthecorrespondingfunctionkey
directly.ToinputF1-F12,presstheFnkeyandthecorrespondingfunctionkey.
©CopyrightLenovo2016
43
Page 50

Table8.Functionkeys(continued)
Functionkeyand
keycombination
Description
•WhentheFnLockfunctionisenabled:TheFnLockindicatorturnson.ToinputF1-F12,
pressthecorrespondingfunctionkeydirectly.Toinitiatethespecialfunctionprintedasan
icononeachfunctionkey,presstheFnkeyandthecorrespondingfunctionkey.
Fn+B
HasthesamefunctionastheBreakkeyonaconventionalkeyboard.
Fn+P
HasthesamefunctionasthePausekeyonaconventionalkeyboard.
Fn+SHasthesamefunctionastheSysRqkeyonaconventionalkeyboard.
Fn+K
HasthesamefunctionastheScrLKkeyonaconventionalkeyboard.
44ThinkPadL460HardwareMaintenanceManual
Page 51

Chapter7.Locations
Thischapterintroducesthelocationsofthehardwarecomponentsonyourcomputer.
Locatingcomputercontrols,connectors,andindicators
Thistopicintroducesthelocationsofthecomputercontrols,connectors,andindicators.
Frontview
12
13
11
10
1
2
2
3
4
5
6
7
8
9
1Camera(availableonsomemodels)2Microphones(availableonsomemodels)
3Powerbutton
4Security-lockslot
5VGAconnector
6Ethernetconnector
7MiniDisplayPort
®
connector
8USB3.0connectors
9SIM-cardslot(availableonsomemodels)10Fingerprintreader(availableonsomemodels)
11T rackpad12TrackPoint
®
buttons
13TrackPointpointingstick
©CopyrightLenovo2016
45
Page 52

Rearview
1
2
3
4
5
1Smart-cardslot(availableonsomemodels)
2Audioconnector
3AlwaysOnUSB3.0connector
4F anlouvers
5acpowerconnector
Bottomview
1
2
3
3
4
1Externalbatterypack
2Docking-stationconnector(availableonsomemodels)
3Speakers
4Keyboarddrainageholes
46ThinkPadL460HardwareMaintenanceManual
Page 53

LocatingFRUsandCRUs
Thistopicintroducesthefollowingserviceparts:
•“MajorFRUsandCRUs”onpage48
•“LCDFRUs”onpage50
•“Miscellaneousparts”onpage51
Notes:
•EachFRUisavailableforalltypesormodels,unlessotherwisespecified.
•FRUSmarkedwithOPareavailableasoptions.
•CRUstatementforcustomers:
Youcanresolvesomeproblemswithyourproductwithareplacementpartyoucaninstallyourself,calleda
“CustomerReplaceableUnit”or“CRU.”SomeCRUsaredesignatedasself-serviceCRUsandothersare
designatedasoptional-serviceCRUs.Installationofself-serviceCRUsisyourresponsibility.Foroptional-service
CRUs,youcaneitherinstalltheCRUyourselforyoucanrequestthataServiceProviderinstalltheCRUaccording
tothewarrantyserviceforyourproduct.IfyouintendoninstallingtheCRU,LenovowillshiptheCRUtoyou.CRU
informationandreplacementinstructionsareshippedwithyourproductandareavailablefromLenovoatanytime
uponrequest.Y oucanfindalistofCRUsforyourproductinthisHardwareMaintenanceManual.Anelectronic
versionofthismanualcanbefoundathttp://www.lenovo.com/support.Followtheon-screeninstructionstofind
themanualforyourproduct.Y oumightberequiredtoreturnthedefectivepartthatisreplacedbytheCRU.
Whenreturnisrequired:(1)returninstructions,aprepaidshippinglabel,andacontainerwillbeincludedwith
thereplacementCRU;and(2)youmightbechargedforthereplacementCRUifLenovodoesnotreceivethe
defectiveCRUwithinthirty(30)daysofyourreceiptofthereplacementCRU.SeeyourLenovoLimitedWarranty
documentationforfulldetails.
ThinkPadcomputerscontainthefollowingtypesofCRUs:
–Self-serviceCRUs:TheseCRUsunplugorareheldbynomorethantwoscrews.Examplesofthesetypes
ofCRUsincludetheacpoweradapter,powercord,andharddiskdrive.Otherself-serviceCRUsdepending
onproductdesignmightincludethememorymodule,wirelesscard,keyboard,andpalmrestwithfingerprint
readerandtouchpad.
–Optional-serviceCRUs:TheseCRUsareisolatedpartswithinthecomputerthatareconcealedbyanaccess
panelthatistypicallysecuredbymorethantwoscrews.Oncetheaccesspanelisremoved,thespecific
CRUisvisible.
Chapter7.Locations47
Page 54

MajorFRUsandCRUs
21
20
19
18
17
15
16
31
30
25
24
26
27
28
29
22
23
1
2
4
6
5
7
9
10
11
12
13
14
8
3
Note:Dependingonthecomputermodel,thekeyboardbezelassembly2ofyourcomputermightlook
differentfromtheillustrationabove.
Table9.MajorFRUsandCRUs
No.FRUdescription
Self-serviceCRUOptional-serviceCRU
1
LCDunit
NoNo
2KeyboardbezelassemblyNoNo
48ThinkPadL460HardwareMaintenanceManual
Page 55

Table9.MajorFRUsandCRUs(continued)
No.FRUdescription
Self-serviceCRUOptional-serviceCRU
3DockingbracketNoNo
4
Systemboard
NoNo
5
VGAboard
NoNo
6
I/Obracket
NoNo
7
MemorymoduleYesNo
8
Harddiskdriveorsolid-statedrive
*
)
YesNo
9
Speakerassembly
NoNo
10ExternalbatterypackYesNo
11
SIM-cardtray
*
YesNo
12
SIM-carddummycover
*
YesNo
13
LenovofactoryrecoveryUSBkey
*
NoNo
14Lenovorecoverydiscset
*
NoNo
15PowercordYesNo
16acpoweradapterYesNo
17DockingdummydoorNoNo
18BasecoverassemblyY esNo
19KeyboardrubbersNoNo
20
Coin-cellbattery
YesNo
21Wireless-WANcard
*
YesNo
22Wireless-LANcardYesNo
23
Smart-cardbracket
*
NoNo
24
Smart-cardcable
*
NoNo
25
Smartcard
*
NoNo
26
Smart-carddummydoor
*
NoNo
27
USBandaudioboard
NoNo
28
Thermalfanassembly
NoNo
29dc-incableNoNo
30KeyboardNo
31TrackPointcap OP NoNo
*
Availableonsomemodels
Note:TheLenovofactoryrecoveryUSBkey
13 andtheLenovorecoverydiscset 14 areusedtorestorethe
MicrosoftWindowsoperatingsystem.Theymightnotcomewiththecomputer,andausermightorderthem
fromhttp://www.lenovo.com/lenovorecovery,thoughadditionalshippingandhandlingfeesmightapply.
Chapter7.Locations49
No
Page 56

LCDFRUs
2
1
2
2
2
3
2
4
2
5
2
6
7
7
Table10.LCDFRUs
No.FRUdescriptions
Self-service
CRU
Optional-service
CRU
1
LCD-bezelsheet
NoNo
2
Camera/microphonemodule,cameramodule,ormicrophonemodule
(availableonsomemodels)
NoNo
3
LCDpanel
NoNo
4
Wireless-LAN/WANantennaassemblyorwireless-LANantenna
NoNo
5
LCDhinges
NoNo
6
LCDrear-coverassembly
NoNo
7
LCDcable
NoNo
50ThinkPadL460HardwareMaintenanceManual
Page 57

Miscellaneousparts
Table11.Miscellaneouspart
FRUdescriptions
Self-service
CRU
Optional-service
CRU
Screwpack
•M2xL4
•M2xL3
•M2xL5
•M2xL7
•M2.5xL5
•M2.5xL6
•D4.7;H3.5
NoNo
Rubberkit
•Keyboardrubber
•Speakerrubber
•Sponge
NoNo
Connectorandcableguide
ThissectionprovidesinformationforLenovoauthorizedservicetechnicianstohelpidentifyconnectorsand
cablesforreplacementpurpose.T ovieweachFRUandtheexplodedillustrationofthecomputer,see“Major
FRUsandCRUs”onpage48and“LCDFRUs”onpage50.
Note:Dependingonyourmodel,someconnectorsorcablesmightnotbeavailable.
Chapter7.Locations51
Page 58

Systemboardconnectorsandcables
1 2 3 4 5
6
7
8
910
1113 1214
15
16
17
18
19 20
21
22
Table12.Systemboard
No.
Connector/feature
Internalcablerequired
Cableconnection
1
Batteryconnector(internal)
No
Connecttheremovablebattery
directlytothisconnector.
2
Dockingconnector(internal)
No
Connectthesupporteddocking
stationdirectlytothisconnector.
3
dc-inconnector(internal)
dc-incable
Thepowerconnectorofthe
computercomeswiththedc-in
cable.Connectthecabletothis
connector.
4
Thermalfanconnector(internal)
ThermalfanassemblycableThethermalfanassemblycomes
withcable.Connectthecableto
thisconnector.
52ThinkPadL460HardwareMaintenanceManual
Page 59

Table12.Systemboard(continued)
No.
Connector/feature
Internalcablerequired
Cableconnection
5
EmbededDisplayPort(eDP)
connector(internal)
LCDcableConnectoneendtotheLCD
panelandtheotherendtothis
connector.
6
Coin-cellbatteryconnector
(internal)
Coin-cellbatterycable
Thecoin-cellbatterycomeswith
cable.Connectthecabletothis
connector.
7
Smart-cardconnector(internal)Smart-cardcable
Thesmart-cardcomeswith
cable.Connectthecabletothis
connector
8
Speakerassemblyconnector
(internal)
Speakerassemblycable
Thespeakerassemblycomeswith
cable.Connectthecabletothis
connector.
9
Memorymoduleslots(internal)
NoInsertthememorymodulesinto
theseslots.
10
HDDconnector(internal)
NoInserttheHDDdirectlyintothis
slot.
11
Trackpadconnector(internal)
Trackpadcable
Connectoneendtothetrackpad
andtheotherendtothisconnector.
12
Wireless-LANcardslot(internal)
NoInsertthewireless-LANcardinto
thisslot.
13
Wireless-WANcardslot(internal)
NoInsertthewireless-LANcardinto
thisslot.
14
Fingerprintreaderconnector
(internal)
Fingerprintreadercardcable
Connectoneendtothefingerprint
readercardandtheotherendto
thisconnector.
15
USB3.0connector(external)
No
ConnectUSB-compatibledevices
tothisconnector.
16
USB3.0connector(external)
No
ConnectUSB-compatibledevices
tothisconnector.
17
MiniDisplayPortconnector
(external)
No
Connectacompatibleprojector,
externalmonitor,orhigh-definition
televisiontothisconnector.
18
Ethernetconnector(external)
No
ConnectthecomputertoaLAN
throughthisconnector.
19
Keyboardconnector(internal)
KeyboardcableThekeyboardcomeswithcable.
Connectthekeyboardcableto
thisconnector.
20
TrackPointpointingstickconnector
(internal)
TrackPointpointingstickcableThekeyboardcomeswith
theTrackPointpointingstick
cable.Connectthecabletothis
connector.
21
MicroSIMcardslot(external)
No
Ifthecomputersupportswireless
WAN,insertamicroSIMcardinto
thisslottoestablishwireless-WAN
connections.
22
USBandaudioboardconnector
(internal)
No
ConnecttheUSBandaudioboard
tothesystemboarddirectly
Chapter7.Locations53
Page 60

USBandaudioboardconnectorsandcables
1
2
3
Table13.USBandaudioboard
No.
Connector/feature
Internalcablerequired
Cableconnection
1
USBandaudioboardconnector
(internal)
No
ConnecttheUSBandaudioboard
tothesystemboarddirectly
2
AlwaysOnUSBconnector
(external)
No
InsertUSB-compatibledevices
intotheUSBconenctor;
3
Audioconnector(external)
No
Connectheadphonesoraheadset
with3.5-mm(0.14-inch)4-pole
plugtotheaudioconnector.
VGAboardconnectorsandcables
1 2
Table14.VGAboardconnector
No.
Connector/feature
Internalcablerequired
Cableconnection
1
VGAconnector(external)
No
Connectacompatibleprojector,
externalmonitor,orhigh-definition
televisiontothisconnector
2
VGAboardconnector(internal)
No
ConnecttheVGAboardtothe
systemboarddirectly
Smart-cardconnectorandcable
1
54ThinkPadL460HardwareMaintenanceManual
Page 61

Table15.Smart-cardcard
No.
Connector/feature
Internalcablerequired
Cableconnection
1
Smart-cardconnector(internal)Smart-cardcableConnectoneendtothesystem
boardandtheotherendtothis
connector.
LookingupFRUinformation
FordetailedFRUinformation,includingpartnumbers,descriptions,andsubstitutionpartnumbers,goto:
http://www.lenovo.com/serviceparts-lookup
Chapter7.Locations55
Page 62

56ThinkPadL460HardwareMaintenanceManual
Page 63

Chapter8.FRUreplacementnotices
Thischapterpresentsnoticesrelatedtoremovingandreplacingparts.Readthischaptercarefullybefore
replacinganyFRU.
CRUstatementforcustomers:
Youcanresolvesomeproblemswithyourproductwithareplacementpartyoucaninstallyourself,called
a“CustomerReplaceableUnit”or“CRU.”SomeCRUsaredesignatedasself-serviceCRUsandothers
aredesignatedasoptional-serviceCRUs.Installationofself-serviceCRUsisyourresponsibility.For
optional-serviceCRUs,youcaneitherinstalltheCRUyourselforyoucanrequestthataServiceProvider
installtheCRUaccordingtothewarrantyserviceforyourproduct.IfyouintendoninstallingtheCRU,
LenovowillshiptheCRUtoyou.CRUinformationandreplacementinstructionsareshippedwithyour
productandareavailablefromLenovoatanytimeuponrequest.Y oucanfindalistofCRUsforyour
productinthisHardwareMaintenanceManual.Anelectronicversionofthismanualcanbefoundat
http://www.lenovo.com/support.ClickGuides&Manualsandthenfollowtheon-screeninstructionstofind
themanualforyourproduct.Y oumightberequiredtoreturnthedefectivepartthatisreplacedbytheCRU.
Whenreturnisrequired:(1)returninstructions,aprepaidshippinglabel,andacontainerwillbeincluded
withthereplacementCRU;and(2)youmightbechargedforthereplacementCRUifLenovodoesnot
receivethedefectiveCRUwithinthirty(30)daysofyourreceiptofthereplacementCRU.SeeyourLenovo
LimitedWarrantydocumentationforfulldetails.
Screwnotices
Loosescrewscancauseareliabilityproblem.IntheThinkPadnotebookcomputer,thisproblemisaddressed
withspecialnylon-coatedscrewsthathavethefollowingcharacteristics:
•Theymaintaintightconnections.
•Theydonoteasilycomeloose,evenwithshockorvibration.
•Theyarehardertotighten.
Dothefollowingwhenyouservicethismachine:
•Keepthescrewkitinyourtoolbag.Forthepartnumberofthescrewkit,goto
http://www.lenovo.com/serviceparts-lookup.
•Itisrecommendedtousenewscrews.
•Itisrecommendedtouseeachscrewonlyonce.
Tightenscrewsasfollows:
•Plastictoplastic
Turnanadditional90degreesafterthescrewheadtouchesthesurfaceoftheplasticpart.
90degreesmore
(Cross-section)
•Logiccardtoplastic
Turnanadditional180degreesafterthescrewheadtouchesthesurfaceofthelogiccard.
©CopyrightLenovo2016
57
Page 64

180degreesmore
(Cross-section)
Notes:
•Ensurethatyouusethecorrectscrew.Itisrecommendedtousenewscrewsforreplacements.Ifyou
haveatorquescrewdriver,tightenallscrewsfirmlytothetorquespecifiedinthescrewinformation
tableforeachstep.
•Ensurethattorquescrewdriversarecalibratedcorrectlyfollowingcountryspecifications.
Retainingserialnumbers
Thistopicprovidesinstructionsonthefollowing:
•“Restoringtheserialnumberofthesystemunit”onpage58
•“RetainingtheUUID”onpage59
Restoringtheserialnumberofthesystemunit
Whenthecomputerwasmanufactured,theEEPROMonthesystemboardwasloadedwiththeserial
numbersofthesystemandallmajorcomponents.Thesenumbersneedtoremainthesamethroughout
thelifeofthecomputer.
Ifyoureplacethesystemboard,youmustrestoretheserialnumberofthesystemunittoitsoriginalvalue.
Theserialnumberofthesystemunitiswrittenonthelabelattachedtothebottomofthecomputer.
Ifyoucannotfindtheserialnumberofthesystemunitonthebottomofthecomputer,trythefollowing
methodtogetthenumber:
Note:Beforeyouperformtheoperation,ensurethattheUEFI/LegacysettingwithintheStartupmenuin
theThinkPadSetupprogramissettoUEFIOnly.
1.ConnectaUSBmemorykeytothecomputer.
2.Gotohttp://www.lenovo.com/maintenanceutilitiesandfollowtheinstructionsonthescreentocreatea
MaintenanceKey.
Note:OnlyanauthorizedLenovoservicetechniciancanaccesstheaboveWebsite.
3.Restartthecomputer.
4.Whenthelogoisdisplayed,pressEsc.TheThinkPadConfigInformationUpdateUtilityinterfaceis
displayed.
5.Type1underEntertheactiondesired,thenpressEnter.TheThinkPadSerialNumberUpdateUtilityfor
AssetIDscreenisdisplayed.
6.Type2underEntertheactiondesired,thenpressEnter.Theserialnumberofeachdeviceinyour
computerisdisplayed;theserialnumberofthesystemunitislistedasfollows:
20-Serialnumber
7.Recordtheserialnumberofthesystemunit.
Afteryoureplacethesystemboard,dothefollowingtorestoretheserialnumberofthesystemunit:
1.ConnecttheMaintenanceKeytothecomputer.
58ThinkPadL460HardwareMaintenanceManual
Page 65

2.Whenthelogoisdisplayed,pressEsc.TheThinkPadConfigInformationUpdateUtilityinterfaceis
displayed.
3.Type1underEntertheactiondesired,thenpressEnter.TheThinkPadSerialNumberUpdateUtilityfor
AssetIDscreenisdisplayed.
4.Type1underEntertheactiondesired,thenpressEnter.Thenfollowtheinstructionsonthescreen
torestoretheserialnumberofthesystemunit.
RetainingtheUUID
TheUniversallyUniqueIdentifier(UUID)isa128-bitnumberuniquelyassignedtoyourcomputerat
productionandstoredintheEEPROMofyoursystemboard.
ThealgorithmthatgeneratesthenumberisdesignedtoprovideuniqueIDsuntiltheyearA.D.3400.Notwo
computersintheworldhavethesamenumber.
Whenyoureplacethesystemboard,performthefollowingstepstocreateanewUUIDforthesystem
boardifthesystemboarddoesnothaveaUUID:
Note:Beforeyouperformtheoperation,ensurethattheUEFI/LegacysettingwithintheStartupmenuin
theThinkPadSetupprogramissettoUEFIOnly.
1.ConnectaUSBmemorykeytothecomputer.
2.Gotohttp://www.lenovo.com/maintenanceutilitiesandfollowtheinstructionsonthescreentocreatea
MaintenanceKey.
Note:OnlyanauthorizedLenovoservicetechniciancanaccesstheaboveWebsite.
3.Restartthecomputer.
4.Whenthelogoscreenisdisplayed,pressEsc.TheThinkPadConfigInformationUpdateUtilityinterface
isdisplayed.
5.Type2underEntertheactiondesired,thenpressEnter.TheAutoUUIDgenerationutilityinterfaceis
displayed.
6.TypeyunderChangeUUID.OK?[Y/N],thenpressEnter.AnewUUIDiscreatedandwritten.Ifa
validUUIDalreadyexists,itisnotoverwritten.
ReadingorwritingtheECAinformation
InformationonEngineeringChangeAnnouncements(ECA)isstoredintheEEPROMofthesystemboard.
TheelectronicstorageofthisinformationsimplifiestheproceduretocheckiftheECAhasbeenpreviously
appliedtoamachine.ThemachinedoesnotneedtobedisassembledtocheckfortheECAapplication.
TocheckwhatECAshavebeenpreviouslyappliedtothemachine,usetheECAInformationRead/Write
functionontheLENOVOThinkPadHardwareMaintenanceDisketteorMaintenanceKey.
1.InsertthelatestversionofLENOVOThinkPadHardwareMaintenanceDisketteorMaintenanceKey,
andthenrestartthecomputer.
2.Fromthemainmenu,select6.SetECAInformation.
3.ToreadtheECAinformation,select2.ReadECA/reworknumberfromEEPROMandfollowthe
instructionsonthescreen;Toreadboxbuilddate,select5.ReadboxbuilddatefromEEPROM,and
followtheinstructionsonthescreen.
AfteranECAhasbeenappliedtothemachine,theEEPROMmustbeupdatedtoreflecttheECA's
application.UsethelatestversionofLENOVOThinkPadHardwareMaintenanceDisketteorMaintenance
KeytoupdatetheEEPROM.
Note:OnlytheECAnumberisstoredintheEEPROM.ThemachinetypeoftheECAisassumedtobethe
sameasthemachinetypeofthemachinethathadtheECAappliedtoit.
Chapter8.FRUreplacementnotices59
Page 66

1.InsertthelatestversionofLENOVOThinkPadHardwareMaintenanceDisketteorMaintenanceKey,
andthenrestartthecomputer.
2.Fromthemainmenu,select6.SetECAInformation.
3.TowritetheECAinformation,select1.WriteECA/reworknumberfromEEPROM,andfollowthe
instruction;Towriteboxbuilddate,select4.WriteboxbuilddatefromEEPROM,andfollowthe
instructiononthescreen.
Ifthesystemboardisbeingreplaced,trytoreadtheECAinformationfromtheoldsystemboardandtransfer
theinformationtothenewsystem.Ifthesystemboardisinoperable,thiswillnotbepossible.
60ThinkPadL460HardwareMaintenanceManual
Page 67

Chapter9.RemovingorreplacingaFRU
ThischapterprovidesinstructionsonhowtoremoveorreplaceaFRU.
CRUstatementforcustomers:
Youcanresolvesomeproblemswithyourproductwithareplacementpartyoucaninstallyourself,called
a“CustomerReplaceableUnit”or“CRU.”SomeCRUsaredesignatedasself-serviceCRUsandothers
aredesignatedasoptional-serviceCRUs.Installationofself-serviceCRUsisyourresponsibility.For
optional-serviceCRUs,youcaneitherinstalltheCRUyourselforyoucanrequestthataServiceProvider
installtheCRUaccordingtothewarrantyserviceforyourproduct.IfyouintendoninstallingtheCRU,
LenovowillshiptheCRUtoyou.CRUinformationandreplacementinstructionsareshippedwithyour
productandareavailablefromLenovoatanytimeuponrequest.Y oucanfindalistofCRUsforyourproduct
inthisHardwareMaintenanceManual.Anelectronicversionofthismanualisavailablefordownloadingat
http://www.lenovo.com/support.Y oumightberequiredtoreturnthedefectiveCRU.Whenreturnisrequired:
(1)returninstructions,aprepaidshippinglabel,andacontainerwillbeincludedwiththereplacement
CRU;and(2)youmightbechargedforthereplacementCRUifLenovodoesnotreceivethedefective
partwithinthirty(30)daysofyourreceiptofthereplacementCRU.SeeyourLenovoLimitedWarranty
documentationforfulldetails.
Generalguidelines
WhenremovingorreplacingaFRU,besuretoobservethefollowinggeneralguidelines:
1.Donottrytoserviceanycomputerunlessyouhavebeentrainedandcertified.Anuntrainedpersonruns
theriskofdamagingparts.
2.BeforereplacinganyFRU,reviewChapter8“FRUreplacementnotices”onpage57.
3.BeginbyremovinganyFRUsthathavetoberemovedbeforereplacingthefailingFRU.AnysuchFRUs
arelistedatthebeginningofeachFRUreplacementsection.Removethemintheorderinwhichthey
arelisted.
4.FollowthecorrectsequenceinthestepsforremovingaFRU,asgivenintheillustrationsbythe
numbersinsquarecallouts.
5.Whenturningascrew,turnitinthedirectionasgivenbythearrowintheillustration.
6.WhenremovingaFRU,moveitinthedirectionasgivenbythearrowintheillustration.
7.ToputthenewFRUinplace,reversetheremovalprocedureandfollowanynotesthatpertainto
replacement.
8.WhenreplacingaFRU,usethecorrectscrewsasshowninthereplacementprocedures.
DANGER
BeforeremovinganyFRU,turnoffthecomputer,unplugallpowercordsfromelectricaloutlets,and
thendisconnectanyinterconnectingcables.
Attention:AfterreplacingaFRU,donotturnonthecomputeruntilyouhavemadesurethatallscrews,
springs,andothersmallpartsareinplaceandnonearelooseinsidethecomputer.Verifythisbyshaking
thecomputergentlyandlisteningforrattlingsounds.Metallicpartsormetalflakescancauseelectrical
shortcircuits.
Attention:Thesystemboardissensitiveto,andcanbedamagedby,electrostaticdischarge(ESD).
Beforetouchingit,establishpersonalgroundingbytouchingagroundpointwithonehandorbyusingan
electrostaticdischargestrap.
©CopyrightLenovo2016
61
Page 68

1010SIM-cardtray
RemovalstepsoftheSIM-cardtray
2
1
1020Externalbatterypack
Importantnoticesforreplacingabatterypack
Attention:Lenovohasnoresponsibilityfortheperformanceorsafetyofunauthorizedbatteries,and
providesnowarrantiesforfailuresordamagearisingoutoftheiruse.
TheLenovoSolutionCenterprogramprovidesanautomaticbatterydiagnostictestthatdeterminesifthe
batterypackisdefective.AbatterypackFRUshouldnotbereplacedunlessthisdiagnostictestshows
thatthebatteryisdefective.Theonlyexceptiontothisisifthebatterypackisphysicallydamagedora
customerisreportingapossiblesafetyissue.
IftheLenovoSolutionCenterprogramisnotinstalledonthecomputer,thecustomershoulddownloadand
installtheprogramtodiagnosethebatterypack,beforegettinganon-physicallydamagedbatterypack
replaced.Notethatthereplacementofaphysicallydamagedbatterypackisnotcoveredbythewarranty.
Removalstepsoftheexternalbatterypack
DANGER
Useonlytheauthorizedbatteryspecifiedforyourcomputer.Anyotherbatterycouldigniteor
explode.
Note:Dependingonthecomputermodel,yourcomputermightlookdifferentfromthefollowingillustration.
Slidethebatterylatch
1totheunlockedposition,anddetachthebattery2fromthebasecoverontheleft.
62ThinkPadL460HardwareMaintenanceManual
Page 69

1
1
2
Slidetheotherbatterylatch3totheunlockedposition,anddetachthebattery4fromthebasecover
ontheright.
2
3
4
Removethebattery5.
5
1030Keyboardrubbers
Foraccess,removethisFRU:
•“1020Externalbatterypack”onpage62
Removalstepsofthekeyboardrubbers
Obtainakeyboardmulti-tool.
Chapter9.RemovingorreplacingaFRU63
Page 70

Usetheflatendofthekeyboardmulti-tooltoremovethekeyboardrubbers.
Note:Dependingonthecomputermodel,yourcomputermightlookdifferentfromthefollowingillustration.
1
1040Keyboard
Foraccess,removetheseFRUsinorder:
•“1020Externalbatterypack”onpage62
•“1030Keyboardrubbers”onpage63
64ThinkPadL460HardwareMaintenanceManual
Page 71

Removalstepsofthekeyboard
Note:Dependingonthecomputermodel,yourcomputermightlookdifferentfromtheillustrationsin
thistopic.
Usetheflatendofthekeyboardmulti-tooltoslidethekeyboardframeforwardby2.5mm(0.1inch).The
screwheadsbeneaththekeyboardframeareexposed.
Note:Donotpressorholdthekeyswhileslidingthekeyboardframe.Otherwise,thekeyboardframe
cannotbemoved.
1
Usethecrossendofthekeyboardmulti-tooltoloosenthescrews.
2
Pivotthekeyboardslightlyupwardasshownbythearrow3untilyoucanseetheconnectorsonthebottom
sideofthekeyboard.Thenturnoverthekeyboardasshownbythearrow4.
Chapter9.RemovingorreplacingaFRU65
Page 72

3
4
Putthekeyboardonthepalmrestanddetachtheconnectors.Thenremovethekeyboard.
8
9
6
7
5
Wheninstalling
Attachtheconnectorsandthenturnoverthekeyboard.
66ThinkPadL460HardwareMaintenanceManual
Page 73

2
1
4
3
5
6
Insertthekeyboardintothekeyboardbezel.Ensurethatthefrontedgeofthekeyboardisundertheframe
ofthekeyboardbezel.
7
7
Ensurethatthescrewheadsarecompletelyexposed.Otherwise,revealthescrewheadsbyslidingthe
keyboardframeforwardwiththeflatendofthekeyboardmulti-tool.
Chapter9.RemovingorreplacingaFRU67
Page 74
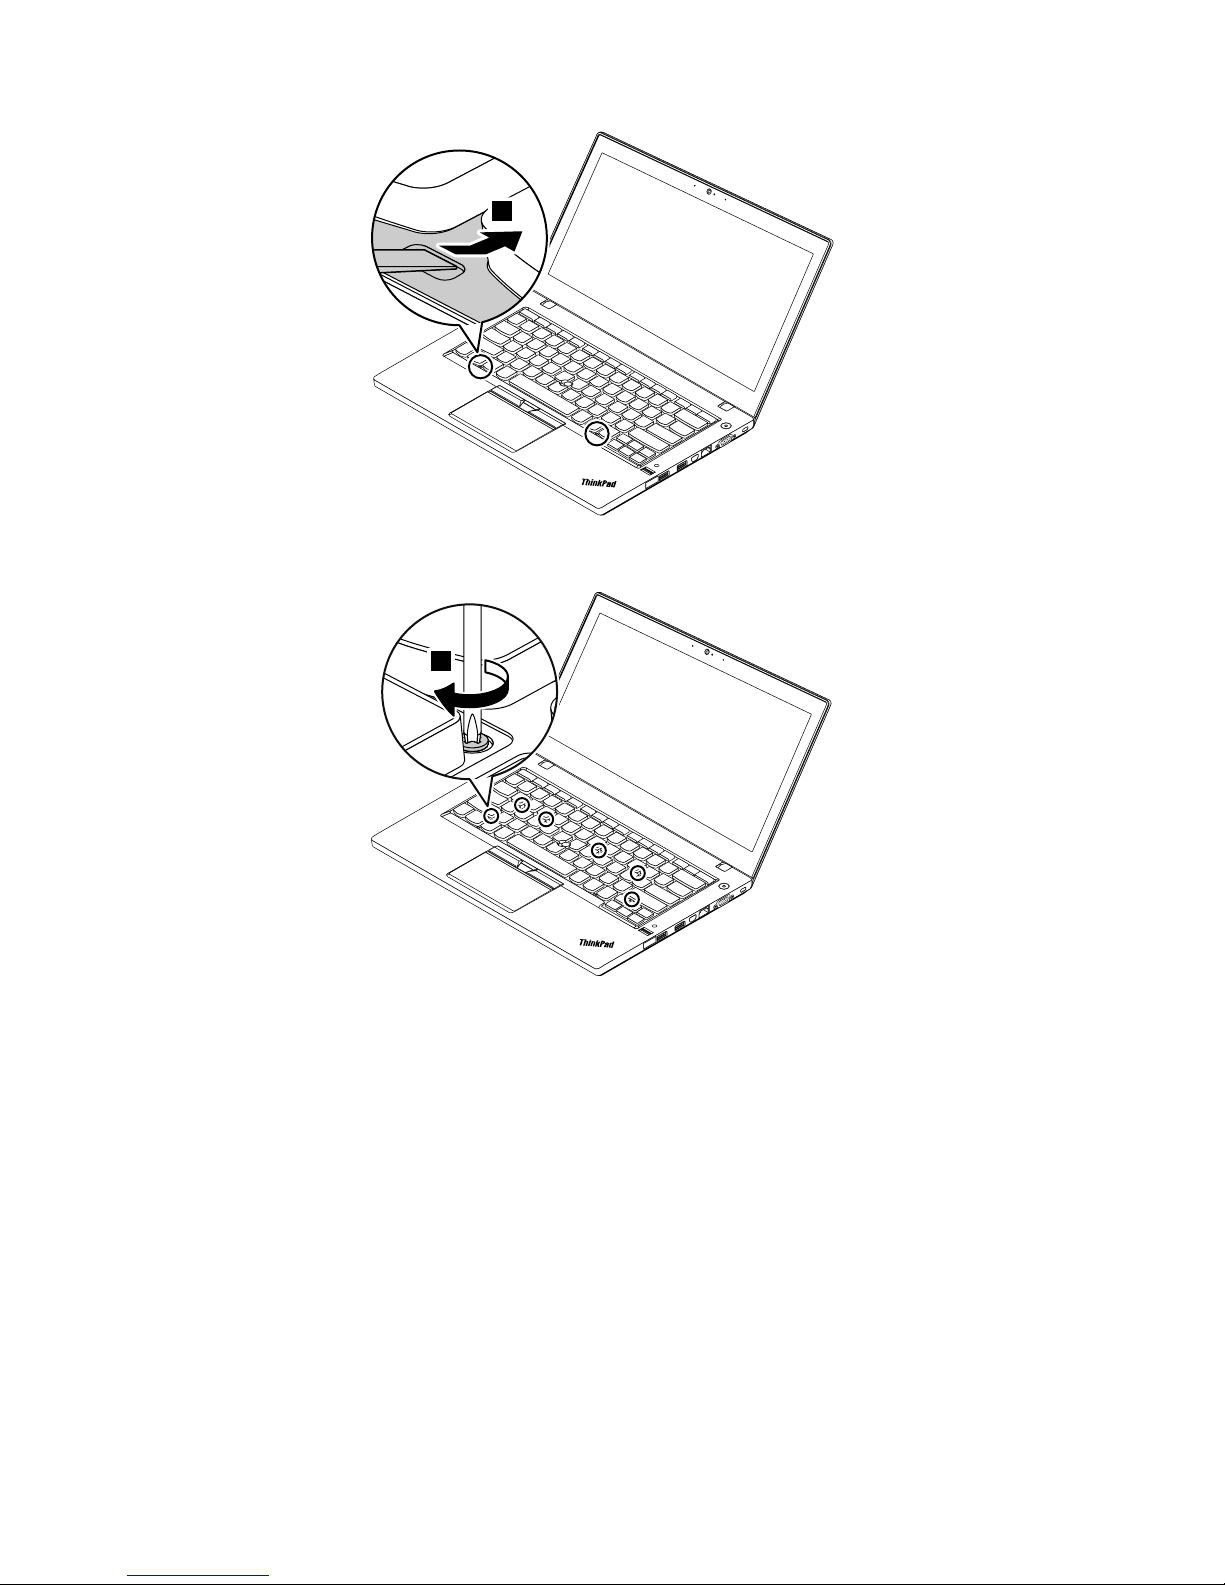
8
Tightenthescrewswiththecrossendofthekeyboardmulti-tooltosecurethekeyboardinplace.
9
Slidethekeyboardframebackwardby2.5mm(0.1inch)withtheflatendofthekeyboardmulti-tooltohide
thelatchesofthekeyboardframeunderthekeyboardbezel.
Note:Donotpressandholdthekeyswhileslidingthekeyboardframe.Otherwise,thekeyboardframe
cannotbemoved.
68ThinkPadL460HardwareMaintenanceManual
Page 75

10
10
Inserttheflatendofthekeyboardmulti-toolintothegapsbetweenthekeyboardframeandthekeystopush
thekeyboardframebackward.Ensurethatthereisnogapbetweenthekeyboardframeandkeyboardbezel.
Note:Donotpressandholdthekeyswhileslidingthekeyboardframe.Otherwise,thekeyboardframe
cannotbemoved.
11
Chapter9.RemovingorreplacingaFRU69
Page 76
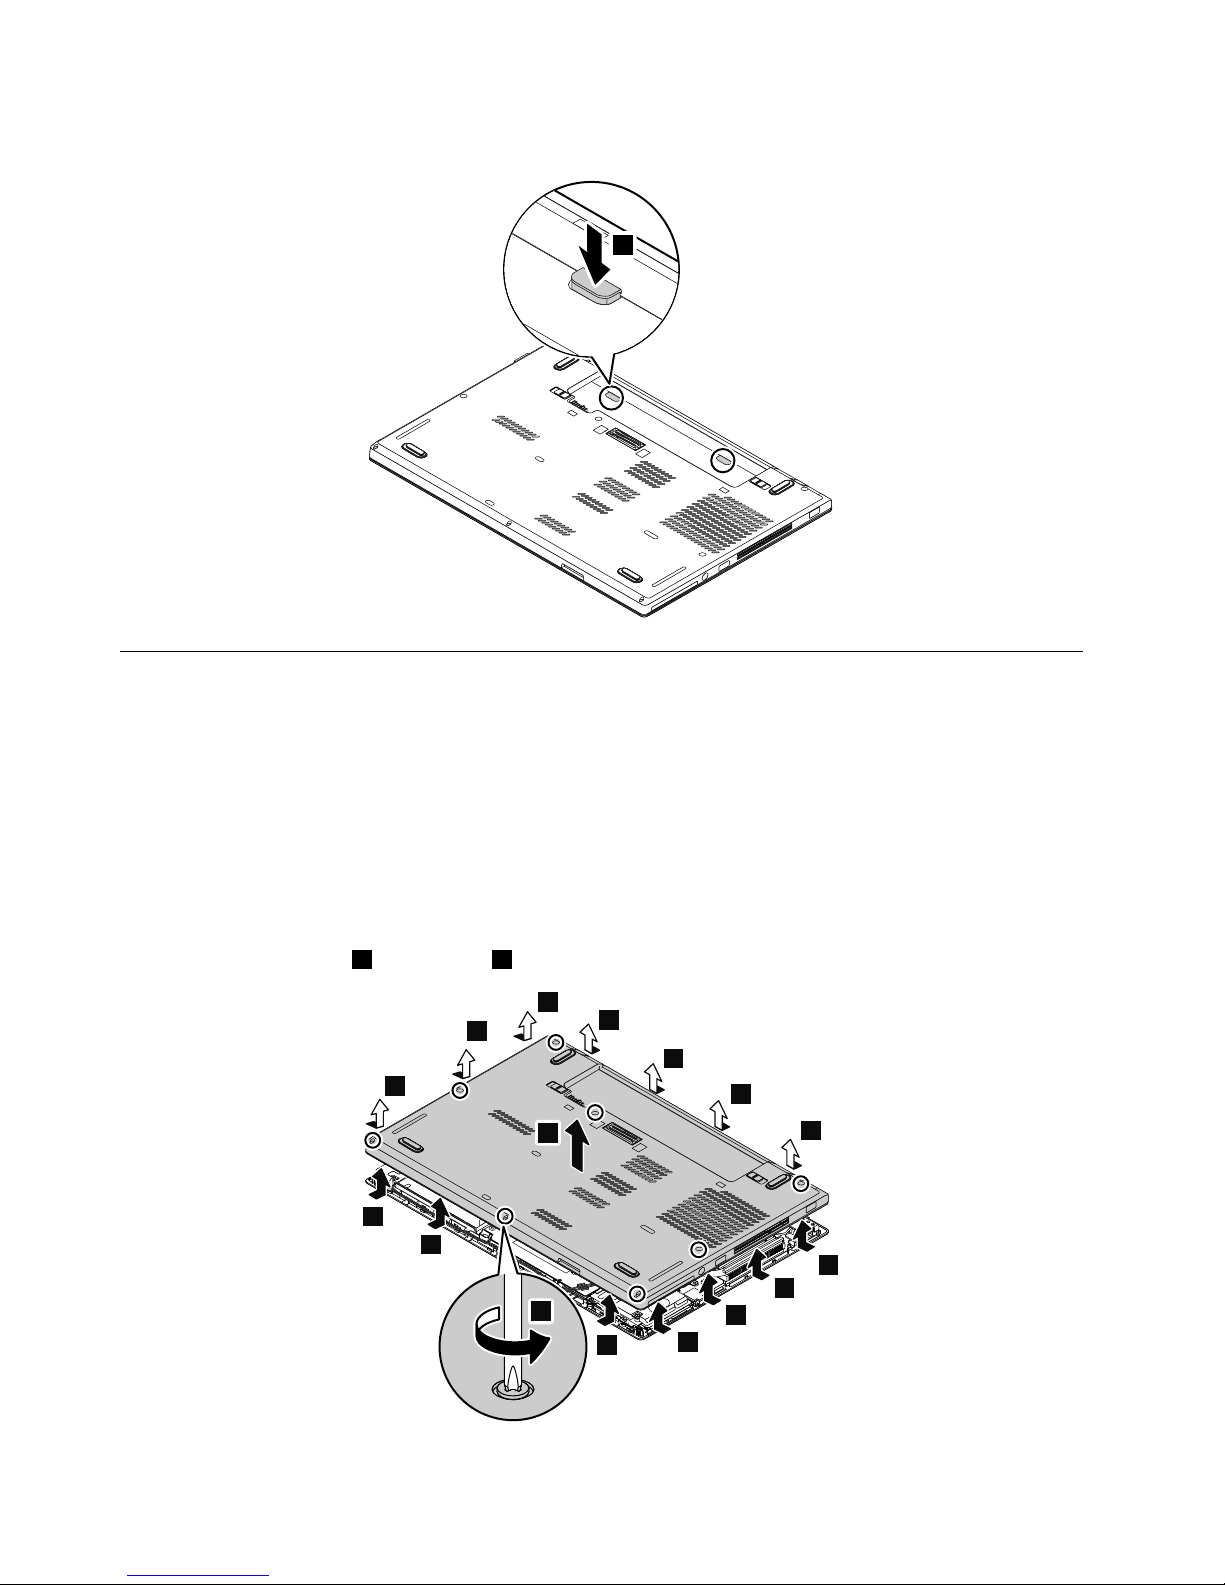
Installthekeyboardrubbers.
12
1050Basecoverassembly
Foraccess,removetheseFRUsinorder:
•“1010SIM-cardtray”onpage62
•“1020Externalbatterypack”onpage62
•“1030Keyboardrubbers”onpage63
Note:Dependingonthecomputermodel,yourcomputermightlookdifferentfromtheillustrationsin
thistopic.
Removalstepsofthebasecoverassembly
Note:Loosenthescrews1.Thescrews1cannotberemoved.
2
2
2
2
2
2
2
2
2
2
2
2
2
2
1
3
70ThinkPadL460HardwareMaintenanceManual
Page 77

Applyinglabelstothebasecoverassembly:
Thenewbasecoverassemblyisshippedwithakitcontaininglabelsofseveralkinds.Applythoselabels
whenyoureplacethebasecoverassembly.Forthelabelsthatarenotshippedwiththenewbasecover
assembly,peelthemfromtheoldbasecoverassembly,andadherethemtothenewone.
Thefollowingillustrationshowsthelocationofeachlabel.
Chapter9.RemovingorreplacingaFRU71
Page 78

1
9
13
12
14
15
16
17
18
19
10
11
20
2 3 4 5 6 7 8
222324 21
32
31
30
29
28
27
26
25
1Assettag
2Systemlabel
3Informationlabel
4WWANMAClabel
5FCClabel6S/Nlabel
7GEOlabel8Taiwan/KoreaWWANlabel
9Wirelesslabelforspecialbid
10IMEIlabel
11CECPlabel12GenuineMicrosoft(GM)label
13Certificateofauthenticity(COA)label14IndiaBISlabel
15KCClabel
16KRsafetylabel
17Indonesiaratinglabel18Non-encryptionlabel
19ChinaGEOlabel20GEOUSlabel
21WWANlabel
22ArgentinaCNClabel
23IndonesiaPOSTELlabel24SLPlabel
25IsraelHomo(WL/BT/3G)label26ChinaWWANlabel
27China3GWWANlabel28China3GLOGOWWANlabel
29BrazilAnatel(WL/BT/3G)label30ChinaTELCOMlabel
31ICASAlabel
32WLANlabel
1060Dockingbracketordockingdummydoor
Foraccess,removetheseFRUsinorder:
72ThinkPadL460HardwareMaintenanceManual
Page 79

•“1010SIM-cardtray”onpage62
•“1020Externalbatterypack”onpage62
•“1030Keyboardrubbers”onpage63
•“1050Basecoverassembly”onpage70
Removalstepsofthedockingbracket
1
1
1
StepScrew(quantity)Color
Torque
1
M2×5mm,flat-head,nylon-coated(3)
Black0.181Nm
(1.85kgf-cm)
2
3
Removalstepsofthedockingdummydoor
Wheninstalling:
Ensurethatthedockingdummydoorisfirmlyattached.
Chapter9.RemovingorreplacingaFRU73
Page 80

1070SIM-carddummycover
Foraccess,removetheseFRUsinorder:
•“1020Externalbatterypack”onpage62
•“1030Keyboardrubbers”onpage63
•“1050Basecoverassembly”onpage70
RemovalstepsoftheSIM-carddummycover
1080Harddiskdriveorsolid-statedrive
Foraccess,removetheseFRUsinorder:
•“1010SIM-cardtray”onpage62
•“1020Externalbatterypack”onpage62
•“1030Keyboardrubbers”onpage63
•“1050Basecoverassembly”onpage70
Attention:
•Donotdropthedriveorapplyanyphysicalshocktoit.Thedriveissensitivetophysicalshock.Improper
handlingcancausedamageandpermanentlossofdata.
•Beforeremovingthedrive,havetheusermakeabackupcopyofalltheinformationonitifpossible.
•Neverremovethedrivewhilethesystemisoperatingorinsuspendmode.
74ThinkPadL460HardwareMaintenanceManual
Page 81

Removalstepsoftheharddiskdriveorsolid-statedrive
1
StepScrew(quantity)Color
Torque
1
M2×3mm,flat-head,nylon-coated(1)
Black0.181Nm
(1.85kgf-cm)
2
Wheninstalling:
Ensurethattheharddiskdriveorsolid-statedriveisfirmlyattached.
1090Wireless-LANcard
Foraccess,removetheseFRUsinorder:
•“1010SIM-cardtray”onpage62
•“1020Externalbatterypack”onpage62
•“1030Keyboardrubbers”onpage63
Chapter9.RemovingorreplacingaFRU75
Page 82

•“1050Basecoverassembly”onpage70
RemovalstepsoftheWireless-LANcard
1
76ThinkPadL460HardwareMaintenanceManual
Page 83
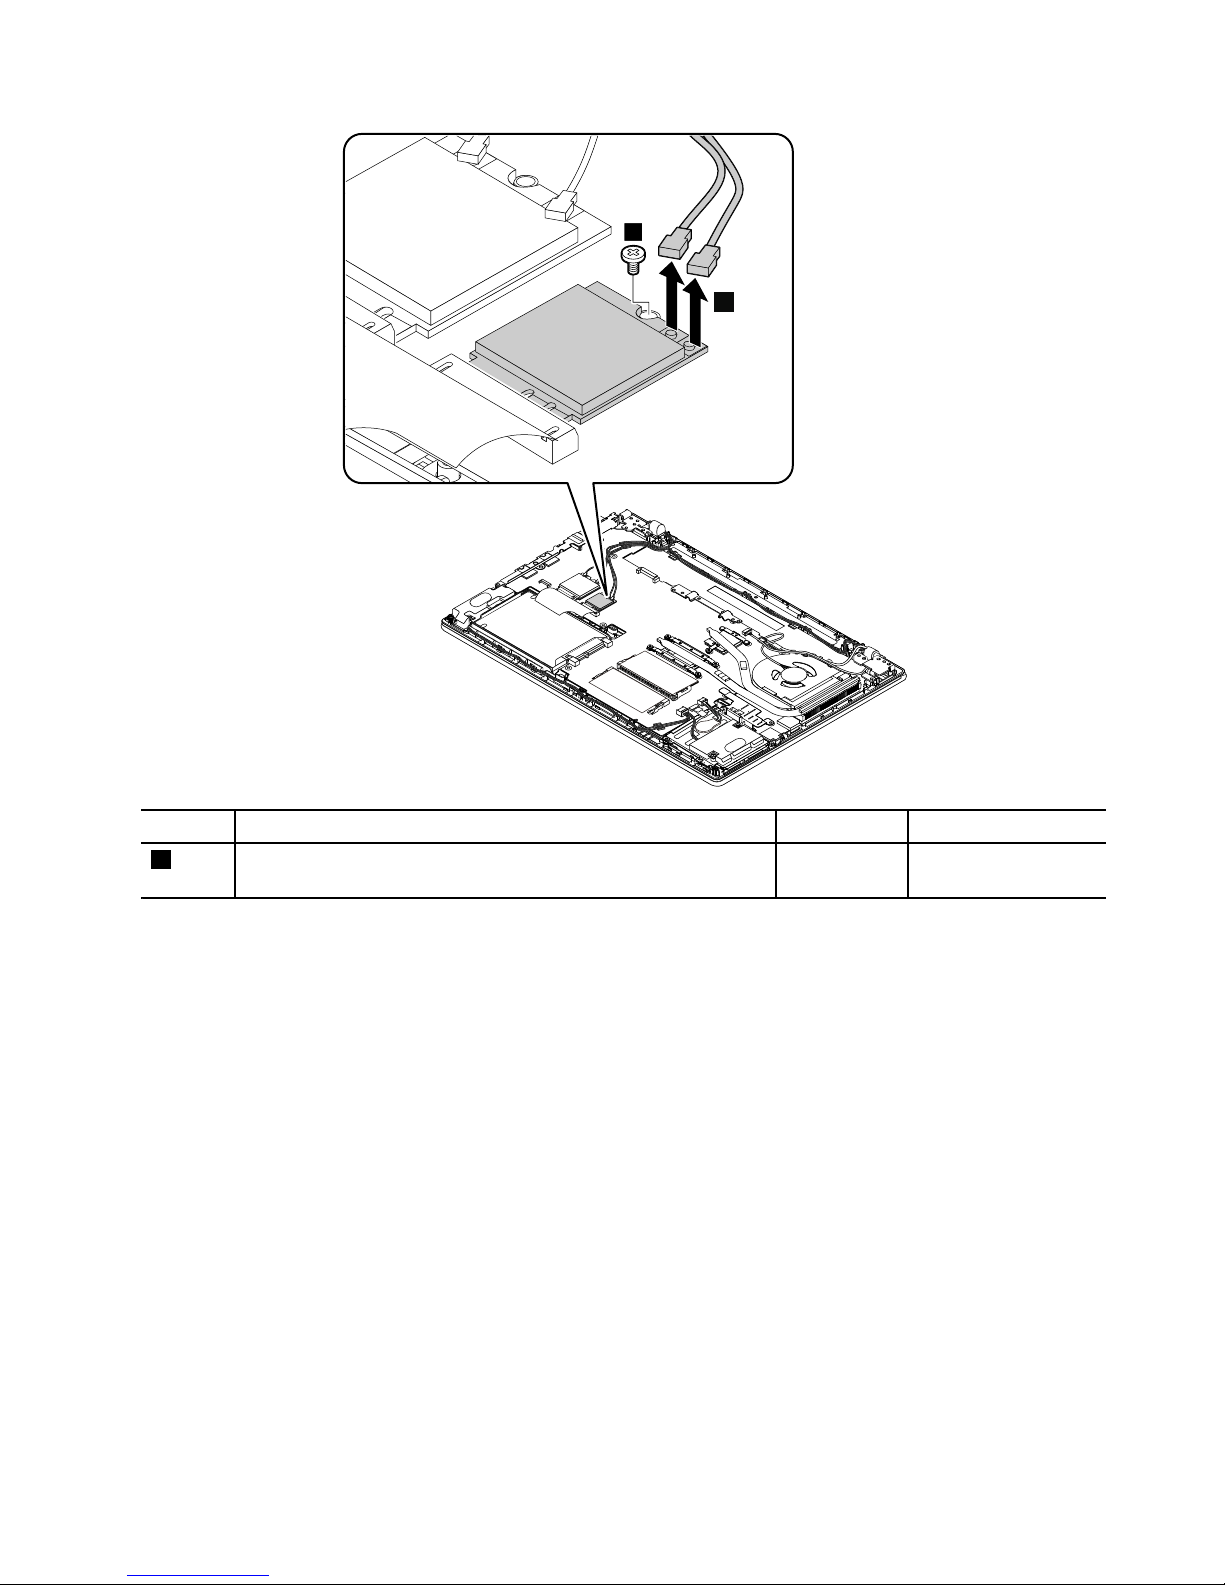
2
3
StepScrew(quantity)Color
Torque
3
M2×3mm,flat-head,nylon-coated(1)
Black0.181Nm
(1.85kgf-cm)
Chapter9.RemovingorreplacingaFRU77
Page 84

4
Wheninstalling:
PlugthegraycableintotheconnectorlabeledMainonthecard,andplugtheblackcableintotheconnector
labeledAuxonthecard.
1100Wireless-WANcard
Foraccess,removetheseFRUsinorder:
•“1010SIM-cardtray”onpage62
•“1020Externalbatterypack”onpage62
•“1030Keyboardrubbers”onpage63
•“1050Basecoverassembly”onpage70
78ThinkPadL460HardwareMaintenanceManual
Page 85

Removalstepsofthewireless-WANcard
1
Chapter9.RemovingorreplacingaFRU79
Page 86

2
2
3
StepScrew(quantity)Color
Torque
3
M2×3mm,flat-head,nylon-coated(1)
Black0.181Nm
(1.85kgf-cm)
80ThinkPadL460HardwareMaintenanceManual
Page 87

4
Wheninstalling:
PlugtheorangecableintotheconnectorlabeledMAINonthecard,andplugthebluecableintothe
connectorlabeledAUXonthecard.
1110Memorymodule
Foraccess,removetheseFRUsinorder:
•“1010SIM-cardtray”onpage62
•“1020Externalbatterypack”onpage62
•“1030Keyboardrubbers”onpage63
•“1050Basecoverassembly”onpage70
Chapter9.RemovingorreplacingaFRU81
Page 88

Removalstepsofthememorymodule
1
3
2
2
Wheninstalling:
Insertthenotchedendofthememorymoduleintothememoryslot.Pressthememorymoduleinfirmly,
andpivotitdownwarduntilitsnapsintoplace.Ensurethatthememorymoduleisfirmlyinstalledinthe
slotanddoesnotmoveeasily.
1120Speakerassembly
Foraccess,removetheseFRUsinorder:
•“1010SIM-cardtray”onpage62
•“1020Externalbatterypack”onpage62
•“1030Keyboardrubbers”onpage63
82ThinkPadL460HardwareMaintenanceManual
Page 89

•“1050Basecoverassembly”onpage70
Removalstepsofthespeakerassembly
1
2
2
2
2
4
4
4
3
3
3
3
StepScrew(quantity)Color
Torque
3
M2×4mm,bighead,nylon-coated(4)
Black0.181Nm
(1.85kgf-cm)
Wheninstalling:
•Ensurethatthespeakerrubbersarewellinstalled.
•Ensurethattheconnectorofthespeakerassemblyisattachedfirmly.
•Routethecablesasshowninthefollowingillustration.
Attention:Asyouroutethecables,ensurethattheyarenotsubjecttoanytension.Tensioncouldcause
thecablestobedamagedbythecableguides,orawiretobebroken.
Chapter9.RemovingorreplacingaFRU83
Page 90

1130Coin-cellbattery
Foraccess,removetheseFRUsinorder:
•“1010SIM-cardtray”onpage62
•“1020Externalbatterypack”onpage62
•“1030Keyboardrubbers”onpage63
•“1050Basecoverassembly”onpage70
DANGER
Useonlytheauthorizedbatteryspecifiedforyourcomputer.Anyotherbatterycouldigniteor
explode.
Removalstepsofthecoin-cellbattery
1
2
Wheninstalling:
Ensurethattheconnectorofthecoin-cellbatteryisattachedfirmly.
1140LCDunit
Foraccess,removetheseFRUsinorder:
•“1010SIM-cardtray”onpage62
•“1020Externalbatterypack”onpage62
•“1030Keyboardrubbers”onpage63
•“1050Basecoverassembly”onpage70
84ThinkPadL460HardwareMaintenanceManual
Page 91

RemovalstepsoftheLCDunit
3
2
1
4
5
6
6
6 6
6
6
6
8
8
7
7
7
7
StepScrew(quantity)Color
Torque
7
M2.5×6mm,flat-head,nylon-coated(4)
Black0.294Nm
(3.0kgf-cm)
8
M2×5mm,flat-head,nylon-coated(2)Silver
0.181Nm
(1.85kgf-cm)
Chapter9.RemovingorreplacingaFRU85
Page 92

9
10
10
Wheninstalling:
•Ensurethattheconnectorsareattachedfirmly.
•Ensurethatthecablesarenotsubjecttoanytension.T ensioncouldcausethecablestobedamagedby
thecableguides,orawiretobebroken.
1150dc-incable
Foraccess,removetheseFRUsinorder:
•“1010SIM-cardtray”onpage62
•“1020Externalbatterypack”onpage62
•“1030Keyboardrubbers”onpage63
•“1050Basecoverassembly”onpage70
86ThinkPadL460HardwareMaintenanceManual
Page 93

Removalstepsofthedc-incable
2
1
1
StepScrew(quantity)Color
Torque
1
M2.5×6mm,flat-head,nylon-coated(2)
Black0.294Nm
(3.0kgf-cm)
2
M2×5mm,flat-head,nylon-coated(1)Silver
0.181Nm
(1.85kgf-cm)
3
4
5
Chapter9.RemovingorreplacingaFRU87
Page 94

6
6
Wheninstalling:
Ensurethattheconnectorofthedc-incableisattachedfirmly.
1160Thermalfanassembly
Foraccess,removetheseFRUsinorder:
•“1010SIM-cardtray”onpage62
•“1020Externalbatterypack”onpage62
•“1030Keyboardrubbers”onpage63
•“1050Basecoverassembly”onpage70
Removalstepsofthethermalfanassembly
Notes:
•Loosenthescrews
3inascendingalphabeticalorderasillustrated.Thescrews3cannotberemoved.
•Thescrews3e,3f,and3gareavailableonlyonsomecomputermodels.
1
3d
3a
3c
3e
3b
3f
3g
2
88ThinkPadL460HardwareMaintenanceManual
Page 95

4
Wheninstalling:
•Ensurethattheconnectorofthethermalfanisattachedfirmly.
•Beforeyouattachthethermalfanassemblytothecomputer,applythermalgrease,atanamountof0.2
grams,onthepartsmarked
aandbasshowninthefollowingillustrations.Eithertoomuchortooless
applicationofgreasecancauseathermalproblemduetoimperfectcontactwithacomponent.Forthe
newthermalfanassembly,youmustpeelthethinfilmofffromtherubbers.
Forintegrated-graphicsmodels
a
Fordiscrete-graphicsmodels
a
b
1170I/Obracket
Foraccess,removetheseFRUsinorder:
•“1010SIM-cardtray”onpage62
•“1020Externalbatterypack”onpage62
•“1030Keyboardrubbers”onpage63
•“1050Basecoverassembly”onpage70
Chapter9.RemovingorreplacingaFRU89
Page 96

RemovalstepsoftheI/Obracket
2
1
2
1
2
StepScrew(quantity)Color
Torque
1
M2.5×6mm,flat-head,nylon-coated(2)
Black0.294Nm
(3.0kgf-cm)
2
M2×5mm,flat-head,nylon-coated(3)Silver
0.181Nm
(1.85kgf-cm)
3
Usethehexbitsockettoremovethehexagonalscrews.
90ThinkPadL460HardwareMaintenanceManual
Page 97

4
StepScrew(quantity)Color
Torque
4
Hexagonalscrews(2)Silver
0.181Nm
(1.85kgf-cm)
5
Wheninstalling:
EnsurethattheI/Obracketisattachedfirmly.
1180Smart-cardbracket
Foraccess,removetheseFRUsinorder:
•“1010SIM-cardtray”onpage62
•“1020Externalbatterypack”onpage62
•“1030Keyboardrubbers”onpage63
•“1050Basecoverassembly”onpage70
•“1130Coin-cellbattery”onpage84
•“1120Speakerassembly”onpage82
Chapter9.RemovingorreplacingaFRU91
Page 98

Removalstepsofthesmart-cardbracket
1
1
1
1
2
StepScrew(quantity)Color
Torque
1
M2×3mm,flat-head,nylon-coated(4)
Black0.181Nm
(1.85kgf-cm)
2
M2×5mm,flat-head,nylon-coated(1)Silver
0.181Nm
(1.85kgf-cm)
3
1190Systemboardandsubcards
Importantnoticesforhandlingthesystemboard
Whenhandlingthesystemboard,readthefollowing:
•Thesystemboardhasanaccelerometer,whichcanbebrokenwhenseveralthousandsofG-forces
areapplied.
Note:Droppingasystemboardfromaheightofaslittleas6inchessothatitfallsflatonahardbench
cansubjecttheaccelerometertoasmuchas6000G'sofshock.
•Becarefulnottodropthesystemboardonabenchtopthathasahardsurface,suchasmetal,wood,or
composite.
•Avoidroughhandlingofanykind.
•Ateverypointintheprocess,besurenottodroporstackthesystemboard.
•Ifyouputasystemboarddown,besuretoputitonlyonapaddedsurfacesuchasanESDmatora
corrugatedconductivematerial.
Foraccess,removetheseFRUsinorder:
•“1010SIM-cardtray”onpage62
92ThinkPadL460HardwareMaintenanceManual
Page 99
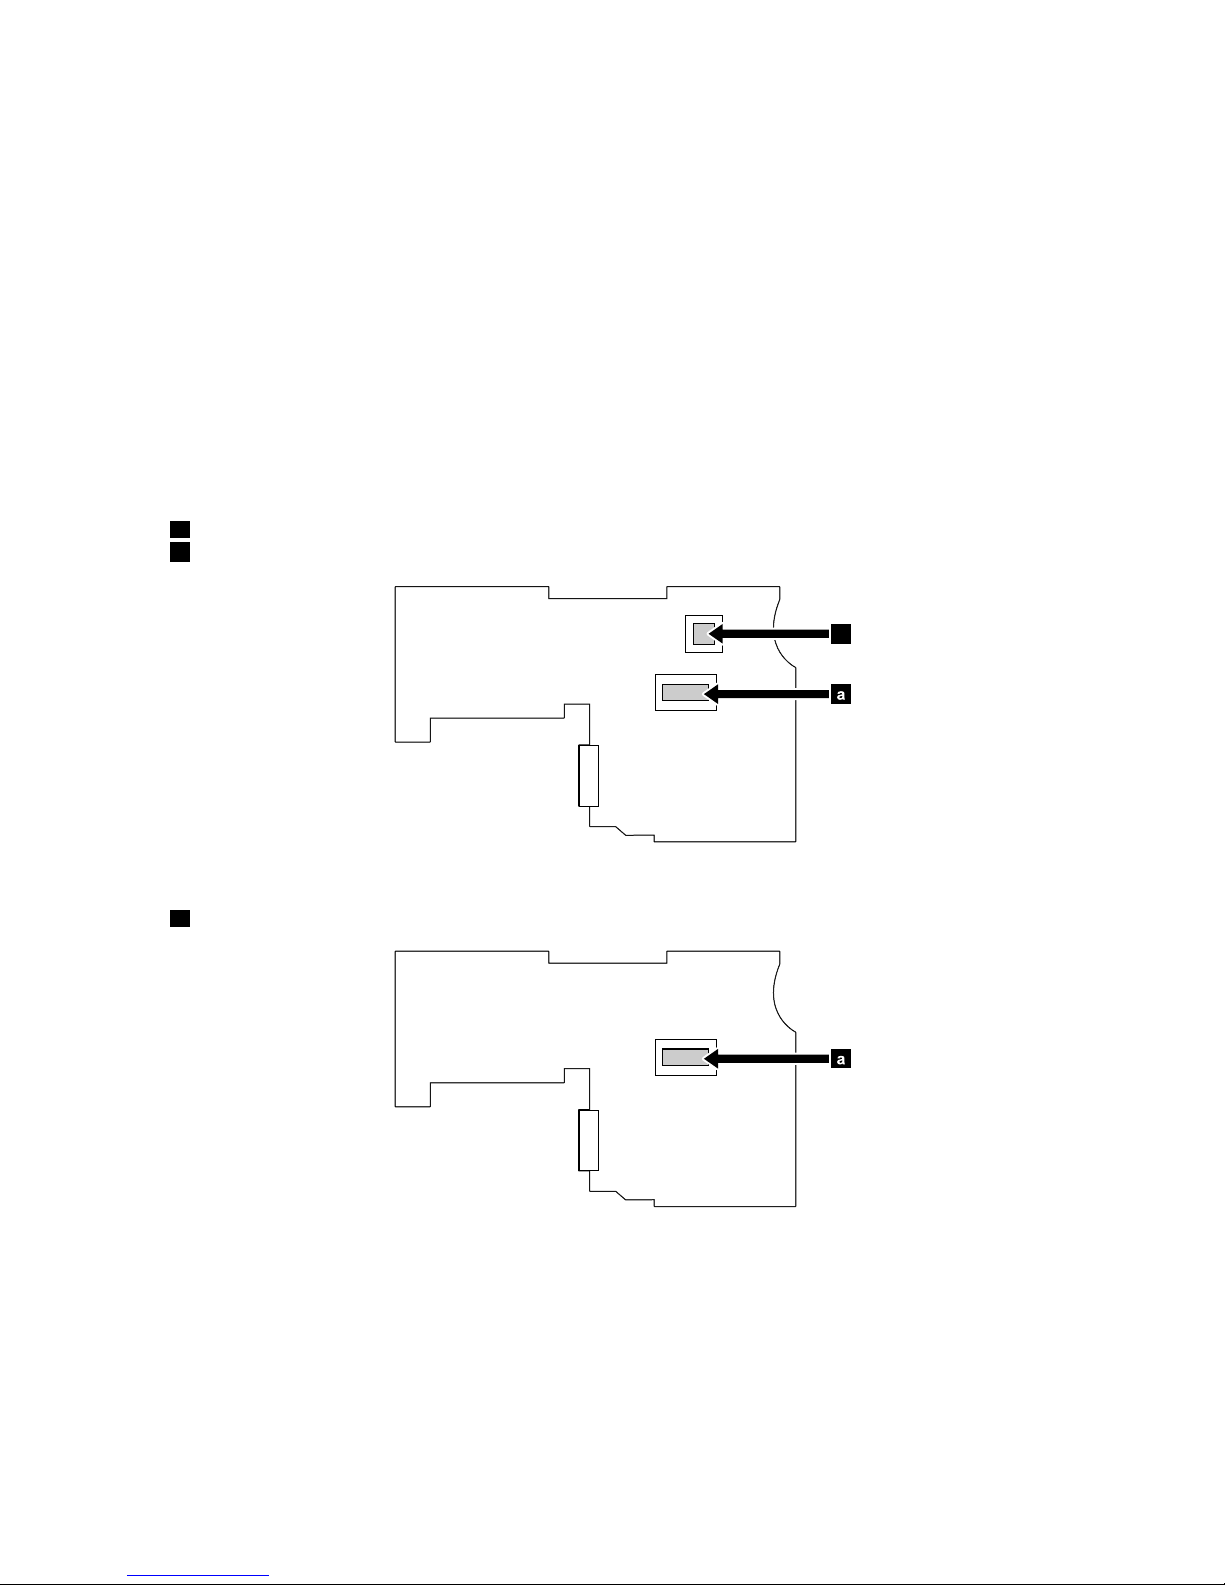
•“1020Externalbatterypack”onpage62
•“1030Keyboardrubbers”onpage63
•“1050Basecoverassembly”onpage70
•“1080Harddiskdriveorsolid-statedrive”onpage74
•“1090Wireless-LANcard”onpage75
•“1100Wireless-WANcard”onpage78
•“1110Memorymodule”onpage81
•“1130Coin-cellbattery”onpage84
•“1180Smart-cardbracket”onpage91
•“1160Thermalfanassembly”onpage88
•“1170I/Obracket”onpage89
Attention:Thefollowingcomponentssolderedonthetopsideofthesystemboardareextremelysensitive.
Whenyouservicethesystemboard,avoidanykindofroughhandling.
Formodelswithadiscretethermalmodule
aMicroprocessor
bGraphicsProcessingUnit(GPU)
a
b
Formodelswithanintegratedthermalmodule
aMicroprocessor
a
Chapter9.RemovingorreplacingaFRU93
Page 100

Removalstepsofthesystemboard
6
5
2
1
11
3
4
7
7
7
7
StepScrew(quantity)Color
Torque
7
M2×3mm,bighead,nylon-coated(4)
Black0.181Nm
(1.85kgf-cm)
8
94ThinkPadL460HardwareMaintenanceManual
 Loading...