

Page 1

User's Guide
C117 Color Monitor
Page 2

First Edition (October 2005)
© Copyright International Business Machines Corporation 2005. All rights reserved.
US Government Users Restricted Rights – Use, duplication or disclosure restricted by
GSA ADP Schedule Contract with IBM Corp.
Page 3

Contents
Packing list ----------------------------------------------------- 2
Safety read first-------------------------------------------------3
Precautions -----------------------------------------------------4
Installation Instructions -------------------------------------5
Swivel Base ----------------------------------------------5
Power cord ----------------------------------------------6
Video cable ---------------------------------------------6
Operating Instructions --------------------------------------7
General Instructions -------------------------------------7
Front panel control ---------------------------------------8
How to adjust a setting ---------------------------------8
Adjusting the picture -------------------------------------9
Features ------------------------------------------------------10
Green monitor --------------------------------------------10
Plug and play ---------------------------------------------11
Technical Support (FAQ) ---------------------------------12
Product recycling and disposal--------------------------13
Appendix A – Specifications -------------------------------- 14-15
Appendix B – Factory Preset Timing Table -------------- 16
PACKING LIST
The product package should include the following items:
1. Monitor
2. Quick set up guide
3. Power cord
4. Swivel base
5. CD manual
6. Safety and warranty booklet
Page 4

Page 5

Workplace preparation
Positioning the monitor
Choose a suitable place to position the monitor where it is not near
fluorescent desk lighting or any equipment that produces magnetic fields that
could cause interference. Ensure that the furniture or equipment can support
the weight of the monitor. Allow at least 2 in. (50 mm) ventilation space
around the monitor.
Height
The monitor should be positioned so that the top of the screen is slightly
below your eye level when you sit at your workstation.
Orientation
Choose a position that gives the least reflection from lights and windows,
usually at a right angle to any windows. Position the monitor directly in front
of you so that you do not have to twist your body. Tilt the monitor to a
comfortable viewing angle.
Work Practices
Caring for your Monitor
Be sure to disconnect the power cord from your monitor before you perform any maintenance on
the monitor. Clean your monitor as follows:
• Gently wipe the covers and the screen with a soft cloth, do not use solvents
or abrasives.
• Never drop water or other liquid into your monitor.
• Remove finger marks and grease with a damp cloth and mild detergent.
• Never use flammable cleaning materials to clean your IBM monitor or any
other electrical apparatus.
• Do not rub, touch, or tap the surface of the screen with sharp or abrasive
items such as a ballpoint pen or screwdriver. This type of contact may
result in a scratched picture tube.
• Do not use any type of cleaner containing an anti-static solution or similar
additive as this may scratch the screen's coating.
• Never apply detergent or other liquid directly to the screen. Dampen the
cloth and then wipe.
Page 6
Precautions
Rest
Take regular breaks. Vary your posture, and stand up and stretch
occasionally, as prolonged use of computer workstations c an be tiring.
Back
Sit back in the chair and use the back rest.
Hands
Use a light touch on the keyboard, keeping your hands and fingers relaxed.
Allow a space in front of the keyboard to rest your wrists when not typing.
Consider using a wristpad.
Eyesight
Working with monitors, in common with any prolonged close work, can be
visually demanding. Look away from the screen periodically and have your
eyesight checked regularly.
Screen settings
Set the screen brightness and contrast to a comfortable level. You might have
to adjust this as the lighting changes during the day. Many application
programs let you select color combinations which can help you to view in
comfort.
INSTALLATION INSTRUCTIONS
Swivel Base
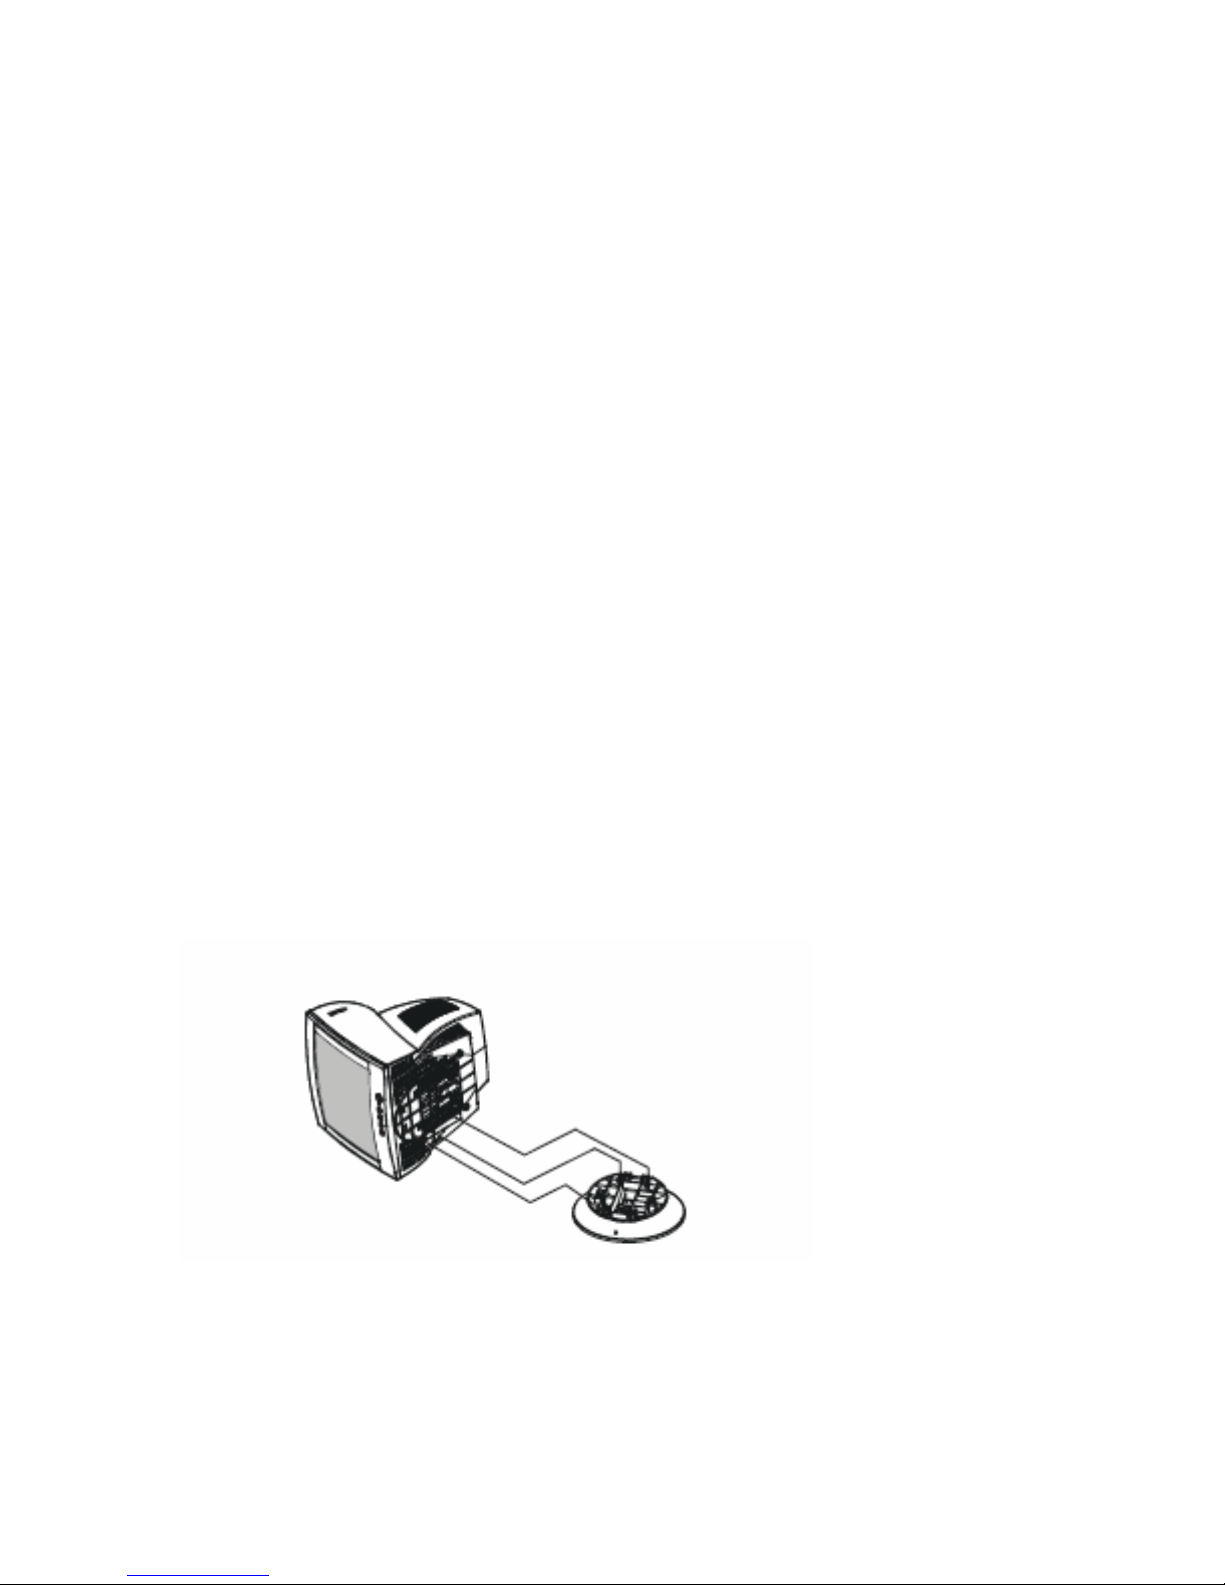
To attach the swivel base to the monitor, do the following:
1 Carefully turn the monitor on its side or upside down. (see figure 1)
2 Locate the cavities at the bottom front of the monitor.
3 Insert the pegs on the swivel base into these cavities. Push the swivel base
forward until the swivel base locks in place.
To remove the swivel base, hold the bottom of the swivel base, then push it out.
Figure 1 Installing and removing the Swivel Base
Page 7

Power Source:
1. Make sure the power cord is the correct type that is required in your area.
2. This monitor has a universal power supply that allows operation in
100/120V ac or 220/240V ac voltage (No user adjustment is required)
3. Connect the power cord into your monitor’s power input socket, and then
plug the other end into a 3-pin ac power outlet. The power cord can be
connected to either a wall power outlet or the power outlet socket on your
computer, depending on the type of power cord supplied with your
monitor.
1 2
Figure 2 Connecting cables
1. Power Cord 2. Signal Cable
Power cord:
Connecting the power cord: Plug the power cord into the monitor's ac
power socket. Then plug the power cord into a grounded ac outlet or ULapproved
power strip or the power output socket on your computer.
Attention: If the ac outlet is not grounded(only two holes), install the
proper grounding adapter (not supplied).
For safe operation, use the power cord supplied with the unit.
Video cable
Connecting the video cable: The monitor comes with a built-in video cable.
Plug the signal cable's 15-pin connector into the computer's video port and
tighten the two screws on the cable connector. (see figure 2)
Page 8

OPERATING INSTRUCTIONS
General Instructions
The power switch is located at front panel of the monitor. Press the power
switch to turn the monitor on or off. The other control knobs are located at
the base of the monitor (See Figure 3). By changing these settings, the picture
can be adjusted to your personal preferences.
• The power cord must be connected.
• Connect the video cable from the monitor to the video card.
• To turn the monitor on, press the POWER switch to ON position. The
power indicator will light up.
• Your monitor features a unique quick switch system which provides a
picture within seconds after the monitor is switched on.
Notes
• Do not install the monitor in a location near heat sources such as radiators
or air ducts , or in a place subject to direct sunlight , or excessive dust or
mechanical vibration or shock.
• Save the original shipping carton and packing materials, as they will come
in handy if you ever have to ship your monitor.
• For maximum protection, repackage your monitor as it was originally
packed at the factory.
• To keep the monitor looking new, periodically clean it with a soft cloth.
Stubborn stains can be removed with a cloth lightly dampened with a mild
detergent solution. Never use strong solvents such as thinner, benzene, or
abrasive cleaners, since these will damage the cabinet. As a safety
precaution, always unplug the monitor before cleaning it.
Front Panel Control
• Power : Press this knob to switch ON/OFF of monitor’s power.
• MENU : Active OSD menu or function adjust confirm.
• Contrast
• Brightness
• EXIT : Exit a function or inactive OSD menu.
: Adjust contrast or function adjust.
: Adjust brightness or function adjust.
Page 9

•
Power Indicator :
Green — Power On mode.
Orange — Off mode
.
How to adjust a setting
The monitor controls are accessed by pressing button MENU to enable OSD
(On-Screen-Display). The main menu will be displayed as follows.
Figure 4 The OSD Message
Note:
If adjustment or selection of any OSD menu is not made for more than 10 seconds,
the current setup will be saved and the OSD will disappear automatically.
ADJUSTING THE PICTURE
1
2
CONTRAST
BRIGHTNESS
Adjust the picture contrast.
Adjust the picture brightness.
3
H-CENTER
Adjust the horizontal position of the picture.
4
5
6
H-SIZE
V-CENTER
V-SIZE
Adjust the picture’s horizontal size.
Adjust the vertical position of the picture.
Adjust the picture’s vertical size.
7
ZOOM
8
PINCUSHION
Adjust the picture’s horizontal and vertical size
simultaneously.
Adjust the pincushion and barrel
9
TRAPEZOID
Adjust the picture’s trapezoid distortion.
10
PIN-BALANCE
Adjust to compensate the pincushion unbalance.
11
PARALLELOGRAM
Adjust the picture to be a rectangle.
12
ROTATION
Adjust the picture tilt to horizontal position.
Page 10

13
14
15
16
17
18
19
6500°K/9300°K
(COLOR
TEMPERATURE )
USER COLOR
( Red / Blue )
DEGAUSS
MOIRE REDUCE
RECALL Press RECALL to restore the monitor to factory settings
EXIT Close OSD window
SELECT LANGUAGER Select the language you like
The color temperature for 6500°K is x=0.313,
y=0.329 and 9300°K is x=0.283, y=0.297. It
presents two different color sets on the screen.
You can
If the 9300°K normal white or 6500°K warmer
white do not satisfy your desire, properly adjust R
. B GAIN controls to obtain your optimum
whiteness level.
If color impurity occurs when moving or
swiveling the monitor, press the MENU and
degauss to fix the picture condition.
osphor layout and the video signal. In some
cases, you may find the moire very noticeable.
Press the MENU to enter in the moire reduce
setting. Please adjust the level to the optimum
condition. Note: Too high of a setting will cause
the picture to shake.
FEATURES
Green monitor
• The monitor has a power saving function This feature will switch off your
monitor to conserve energy, after a user-specified period of inactivity.
The power-saving mode is indicated by the light-emitting diode (LED) on
the front panel:Properties.
Mode Signal Power
Cabel H-Sync V-Sync Video Indicator Consumption
On Attached Yes Yes Active Green
Stand-by Attached No Yes Blank Orange
Suspend Attached Yes No Blank Orange
Off Attached No No Blank Orange
W
W
W
W
* Power consumption at on mode is measured at 1152X864@75Hz
Page 11

IF THERE IS NO VIDEO INPUT SIGNAL OR THE MONITOR CABLE HAS BEEN
DISCONNECTED, THE FOLLOWING MESSAGE IS DISPLAYED: NO SIGNAL INPUT OR
CABLE DISCONNECTED.
This monitor is designed to conserve electrical energy by reducing power consumption
when there is no video input signal present. When there is no video input signal, this monitor following a
time-out period, will automatically switch to an OFF mode. This reduces the monitor's internal power
supply consumption. After the video input signal is restored, full power is restored and the display is
automatically redrawn. The appearance is similar to a "Screen Saver" feature except the display is
completely off. The display is restored by pressing a key on the keyboard or clicking the mouse.
Plug & Play
Plug & Play DDC2B Feature
This monitor is equipped with VESA DDC2B capability accord ing to the VESA DDC STANDARD. It
allows the monitor to inform the host system of its identity and, depending on the level of DDC used,
communicate additional information about its display capabilities.
The DDC2B is a bidirectional data channel based on the I2C protocol. The host can request EDID
information over the DDC2B channel.
Page 12

TECHNICAL SUPPORT (FAQ)
Problem & Question
Power LED is not on
No Plug & Play
Picture is fuzzy
Picture bounces or a wave
pattern is present in the picture
The power LED is ON
(orange) but there’s no video
or no picture.
Possible Solution
*Check if the Power Switch is in the ON
position
*Power Cord should be connected
*Check if the PC system is Plug &
Play compatible
*Check if the Video Card is Plug & Play
compatible
*Check if the D-15 plug pin of Video
Cable is bent
*Make sure the Monitor Drivers are installed
*Adjust the Contrast and Brightness
Controls.
*Move electrical devices that may cause
electrical interference.
*Computer Power Switch should be in
the ON position.
*Computer Video Card should be snugly
seated in its slot.
*Make sure monitor’s video cable is
properly connected to the computer.
*Inspect monitor’s video cable and make
sure none of the pins are bent.
*Make sure computer is operational by
hitting the CAPS LOCK key on the
keyboard while observing the CAPS
LOCK LED. The LED should either
turn ON or OFF after hitting the CAPS
LOCK key
Missing one of the primary
colors (RED, GREEN, or
BLUE)
*Inspect the monitor’s video cable and
make sure that none of the pins are
bent.
Page 13

Product recycling and disposal
This unit must be recycled or discarded according to applicable local and national regulations. IBM
encourages owners of information technology (IT) equipment to responsibly recycle their equipment when
it is no longer needed.
IBM offers a variety of product return programs and services in several countries to assist equipment
owners in recycling their IT products information on IBM product recycling offerings can be found on
IBM’s Internet site at http://www.ibm.com/ibm/environment/products/prp.shtml
.
Notice: This mark applies only to countries within the European Union (EU) and Norway.
This appliance is labeled in accordance with European Directive 2002/96/ECconcerning waste electrical
and electronic equipment (WEEE). The Directive determines the framework for the return and recycling of
used appliances as applicable throughou t the European Union. This label is applied to various products to
indicate that the product is not to be thrown away, but rather reclaimed upon end of life per this Directive.
Remarque : Cette marque s’applique uniquement aux pays de l’Union Européenne et à la Norvège.
L’etiquette du système respecte la Directive européenne 2002/96/EC en matière de Déchets des
Equipements Electriques et Electroniques (DEEE), qui détermine les dispositions de retour et de recyclage
applicables aux systèmes utilisés à travers l’Union européenne. Conformément à la directive, ladite
étiquette précise que le produit sur lequel elle est apposée ne doit pas être jeté mais être récupéré en fin de
vie.
In accordance with the European WEEE Directive, electrical and electronic equipment (EEE) is to be
collected separately and to be reused, recycled, or recovered at end of life. Users of EEE with the WEEE
marking per Annex IV of the WEEE Directive, as shown above, must not dispose of end of life EEE as
unsorted municipal waste, but use the collection framework available to customers for the return, recycling,
and recovery of WEEE. Customer participation is important to minimize any potential effects of EEE on
the environment and human health due to the potential presence of hazardous substances in EEE. For
Page 14

proper collection and treatment, contact your local IBM representative.
APPENDIX A – SPECIFICATIONS
CRT
Input
CRT Size
Viewable Image
Size
Type
Video 0.7 Vpp, R,G,B Analog
Separate Sync TTL Level
Scanning
Frequency
Max Resolution 1280 x 1024
Video dot rate 110 MHz
Factory preset mode:
User Programmable mode:
Power Source Universal 100 – 240 V ac, 50 Hz / 60 Hz
Operating 0 to 40º C (0 to 104º F)
Humidity 10% to 85% relative, non-condensing
H-Frequency 30 - 69 kHz
V-Frequency
43.2 cm (17 in.), 90º deflection,
29mm neck
40.6 cm (16.0 in.), diagonal
0.27 mm dot pitch.
Positive / Negative
50 - 130 Hz
9
8
Dimensions carton 495 mm (1.62 ft) °¡ 455mm (1.49 ft)
°¡ 525 mm (1.72 ft) (W °¡ H °¡ D)
(World wide)
540 mm (1.73 ft) °¡ 537mm (1.72 ft)
°¡ 570 mm (1.82 ft) (W °¡ H °¡ D)
(China market)
Monitor&Base 410 mm (1.35 ft) x 402 mm (1.32 ft)
x 420 mm (1.38 ft) (W x Hx D)
Weight Unit(net)
Carton(gross)
Signal cable Attached Mini D-sub 15 Male
15.5 kg ( Net )
18.0 kg ( Gross ) (World wide)
19.0kg ( Gross ) (China market)
Page 15

External Controls:
Switch
•Power On/Off switch
• MENU Key
• Contrast/ UP Key
• Brightness/ Down Key
• EXIT Key
Plug & Play
Function
Contrast
Brightness
H-Center
H-Size
V-Center
V-Size
Zoom
Pincushion
Trapezoid
Pin-Balance
Parallelogram
Rotation
K
User Color
K
Degauss
Moire Reduce
Recall
Exit
Select Language
DDC2B
Power Consumption*
Pre-set Display Area
Regulatory Compliance
* Power consumption at on mode is measured at 1152X864@75Hz
68W
300mm(11.81in)x230mm(9.06in)
CUL,CB,NEMKO,TUV,CCC,SASO,CE,FCC
EK,MIC,BSMI,C-tick,DHHS,DNHW,JEIDA,
VCCI,WEEE,TUV-ERGO,NOM,TUV-S
Page 16

Page 17

Page 18

Service Information
The following parts are for use by IBM service, or IBM authorized dealers,
to support the customer warranty. Parts are for service use only.
Model Type 4938 (for C117)
40K5325 4938-7NU FRU C117 Monitor - Northe rn Hemisphere BB
40K5326 4938-7NX FRU C117 Monitor - Northe rn Hemisphere BB
40K5327 4938-7SU FRU C117 Monitor - Southern Hemisphere BB
40K5328 4938-7SX FRU C117 Monitor - Southern Hemisphere BB
40K5329 4938-7EU FRU C117 Monitor -Equatorial BB
40K5330 4938-7EX FRU C117 Monitor -Equatorial BB
40K5343 ------------ C117 FRU - Tilt/Swivel Stand for 4938-7** models WW
39M5074 ------------ C117 FRU - US Line Cord for 4938-7** models WW
 Loading...