

Page 1
IBM 8285 Nways ATM Workgroup Switch IBM
Installation and User’s Guide
SA33-0381-01
Page 2

Page 3

IBM 8285 Nways ATM Workgroup Switch IBM
Installation and User’s Guide
SA33-0381-01
Page 4

Note!
Before using this information and the product it supports, be sure to read the general information
under “Notices” on page xv.
Second Edition (June 1996)
The information contained in this manual is subject to change from time to time. Any such changes will be reported in
subsequent revisions.
Order publications through your IBM representative or the IBM branch office serving your locality. Publications are not
stocked at the address given below.
A form for readers' comments appears at the back of this publication. If the form has been removed, address your
comments to:
IBM France
Centre d'Etudes et Recherches
Service 0798 - BP 79
06610 La Gaude
France
FAX: (33) 93.24.77.97
E-mail: FRIBMQF5 at IBMMAIL
IBM Internal Use: LGERCF at LGEPROFS
Internet: rcf_lagaude@vnet.ibm.com
When you send information to IBM, you grant IBM a non-exclusive right to use or distribute the information in any way
it believes appropriate without incurring any obligation to you.
Copyright International Business Machines Corporation 1995, 1996. All rights reserved.
Note to U.S. Government Users — Documentation related to restricted rights — Use, duplication or disclosure is
subject to restrictions set forth in GSA ADP Schedule Contract with IBM Corp.
Page 5

Contents
Figures . . . . . . . . . . . . . . . . . . . . . . . . . . . . . . . . . . . . . . . . . . . . . . . . . xi
Tables . . . . . . . . . . . . . . . . . . . . . . . . . . . . . . . . . . . . . . . . . . . . . . . . . xiii
Notices . . . . . . . . . . . . . . . . . . . . . . . . . . . . . . . . . . . . . . . . . . . . . . . . . xv
Product Page/Warranties . . . . . . . . . . . . . . . . . . . . . . . . . . . . . . . . . . . . . . . . xv
Industry Standards Reflected in This Product ............................. xvi
CE European Community Marking ................................... xvii
Electronic Emission Notices ...................................... xvii
Trademarks and Service Marks ................................... xviii
Safety . . . . . . . . . . . . . . . . . . . . . . . . . . . . . . . . . . . . . . . . . . . . . . . . . . xix
Laser Standards . . . . . . . . . . . . . . . . . . . . . . . . . . . . . . . . . . . . . . . . . . . xix
How to Use This Guide ........................................ xxi
Who Should Use This Guide ...................................... xxi
Contents of This Guide ......................................... xxi
Related Information . . . . . . . . . . . . . . . . . . . . . . . . . . . . . . . . . . . . . . . . . . xxiii
Prerequisite Knowledge . . . . . . . . . . . . . . . . . . . . . . . . . . . . . . . . . . . . . . . xxiii
Automatic Update Service ...................................... xxiv
Improved Decision Making .................................... xxiv
Asset Protection . . . . . . . . . . . . . . . . . . . . . . . . . . . . . . . . . . . . . . . . . . xxiv
Connectivity Improvements . . . . . . . . . . . . . . . . . . . . . . . . . . . . . . . . . . . . xxiv
Network Operations Productivity ................................. xxiv
Conventions Used in This Guide .................................... xxv
Part 1. Introduction . . . . . . . . . . . . . . . . . . . . . . . . . . . . . . . . . . . . . . . . 1
Chapter 1. Introduction to the IBM 8285 Nways ATM Workgroup Switch ............. 3
ATM Workgroup Switch Components .................................. 3
Base Unit . . . . . . . . . . . . . . . . . . . . . . . . . . . . . . . . . . . . . . . . . . . . . . . 3
Expansion Unit Feature ........................................ 4
The ATM Workgroup Switch Base Unit ................................. 5
ATM Ports on the Base Unit ..................................... 6
LEDs on the Base Unit ........................................ 7
Connectors and Controls on the Base Unit .............................. 8
The ATM Workgroup Switch Expansion Unit Feature .......................... 9
Slots for ATM Media Modules .................................... 10
LEDs on the Expansion Unit .................................... 10
Connectors and Controls on the Expansion Unit .......................... 10
Switch/Control Point Functionality ................................... 11
ATM Switching Functions ...................................... 11
Control Point Functions ....................................... 11
ATM Connections . . . . . . . . . . . . . . . . . . . . . . . . . . . . . . . . . . . . . . . . . . . . 13
LAN Emulation Over ATM ....................................... 14
Copyright IBM Corp. 1995, 1996 iii
Page 6

Highlights . . . . . . . . . . . . . . . . . . . . . . . . . . . . . . . . . . . . . . . . . . . . . . 14
Centralized LES/BUS . . . . . . . . . . . . . . . . . . . . . . . . . . . . . . . . . . . . . . . . 15
Integrated LAN Emulation Components ............................... 15
Networking Configurations . . . . . . . . . . . . . . . . . . . . . . . . . . . . . . . . . . . . . . . 16
ATM Remote Feeder ........................................ 16
Client/Server Workgroup . . . . . . . . . . . . . . . . . . . . . . . . . . . . . . . . . . . . . . 17
Floor Workgroup Switch ....................................... 18
Security Controls . . . . . . . . . . . . . . . . . . . . . . . . . . . . . . . . . . . . . . . . . . . . 19
Password Protection . . . . . . . . . . . . . . . . . . . . . . . . . . . . . . . . . . . . . . . . . 19
ATM Port Security .......................................... 19
ATM Media Module Security .................................... 19
Chapter 2. Installing the IBM 8285 Nways ATM Workgroup Switch ............... 21
Before You Start ............................................ 21
Procedure 1: Mounting the ATM Workgroup Switch Components .................. 22
Verifying Component Mounting ................................... 23
Procedure 2: Configuring the ATM Workgroup Switch ........................ 24
Verifying Configuration . . . . . . . . . . . . . . . . . . . . . . . . . . . . . . . . . . . . . . . 25
Procedure 3: Attaching ATM Devices to the ATM Workgroup Switch ................. 26
Verifying Device Attachment .................................... 27
Chapter 3. Building an ATM Campus Network ........................... 29
Overview . . . . . . . . . . . . . . . . . . . . . . . . . . . . . . . . . . . . . . . . . . . . . . . . 29
ATM Campus Network Components ................................ 30
Network Interfaces . . . . . . . . . . . . . . . . . . . . . . . . . . . . . . . . . . . . . . . . . . 32
Connecting ATM Devices to Form a Network ............................. 33
Linking User Devices (UNI Interface) ................................ 33
Linking Subsystems to Form a Cluster (SSI Interface) ....................... 34
Linking Clusters to Form a Subnetwork (NNI Interface) ...................... 36
Linking Subnetworks to Form a Campus Network ......................... 38
Example: Configuring a Static Route ................................ 39
Configuring Permanent Virtual Circuits (PVCs) ............................ 41
PVC Workarounds . . . . . . . . . . . . . . . . . . . . . . . . . . . . . . . . . . . . . . . . . . 41
General Guidelines for Configuring Trunks ............................... 44
Part 2. Mounting Workgroup Switch Components .................. 45
Chapter 4. Mounting the Base Unit ................................. 47
Contents of the Base Unit Shipping Group ............................... 47
Rack or Surface Mounting ....................................... 48
Rack Mounting the Base Unit .................................... 49
Surface Mounting the Base Unit .................................. 51
Chapter 5. Mounting the 155Mbps ATM I/O Card ......................... 53
Precautions . . . . . . . . . . . . . . . . . . . . . . . . . . . . . . . . . . . . . . . . . . . . . . . 53
Unpacking the I/O Card ........................................ 53
Mounting Procedure . . . . . . . . . . . . . . . . . . . . . . . . . . . . . . . . . . . . . . . . . . 55
iv IBM 8285 Nways ATM Workgroup Switch: Installation and User’s Guide
Page 7

Chapter 6. Mounting the Expansion Unit .............................. 59
Contents of the Expansion Unit Shipping Group ............................ 59
Rack or Surface Mounting ....................................... 60
Rack Mounting the Expansion Unit ................................. 61
Surface Mounting the Expansion Unit ................................ 64
Chapter 7. Mounting ATM Media Modules in the Expansion Unit ................ 65
Guidelines for Mounting ATM Media Modules ............................. 65
Mounting Procedure . . . . . . . . . . . . . . . . . . . . . . . . . . . . . . . . . . . . . . . . . . 66
Chapter 8. Power-On and Self Test ................................. 69
Power-On Procedure . . . . . . . . . . . . . . . . . . . . . . . . . . . . . . . . . . . . . . . . . . 69
Power-On Self Test (POST) ...................................... 70
Part 3. Configuration Procedures . . . . . . . . . . . . . . . . . . . . . . . . . . . . . 71
Chapter 9. Setting-Up and Using the Configuration Console ................... 73
Normal Mode and SLIP Mode ..................................... 73
Using the Configuration Console .................................... 74
Entering ATM Workgroup Switch Commands ............................ 74
Keyboard Functions . . . . . . . . . . . . . . . . . . . . . . . . . . . . . . . . . . . . . . . . . 74
Getting Help . . . . . . . . . . . . . . . . . . . . . . . . . . . . . . . . . . . . . . . . . . . . . 75
Command Completion . . . . . . . . . . . . . . . . . . . . . . . . . . . . . . . . . . . . . . . . 76
Setting Up a Configuration Console in Normal (ASCII) Mode ..................... 77
Setting Up a Configuration Console in SLIP Mode .......................... 78
Returning to Normal Mode ..................................... 79
SLIP Support . . . . . . . . . . . . . . . . . . . . . . . . . . . . . . . . . . . . . . . . . . . . 80
TELNET Sessions Via a Remote Switch ................................ 82
Minimum Local Configuration .................................... 83
Logon . . . . . . . . . . . . . . . . . . . . . . . . . . . . . . . . . . . . . . . . . . . . . . . . 83
Logoff . . . . . . . . . . . . . . . . . . . . . . . . . . . . . . . . . . . . . . . . . . . . . . . . 84
Timeout . . . . . . . . . . . . . . . . . . . . . . . . . . . . . . . . . . . . . . . . . . . . . . . 84
Automatic Modem Hangup ..................................... 84
Chapter 10. Configuring Basic Workgroup Switch Parameters .................. 85
Procedure . . . . . . . . . . . . . . . . . . . . . . . . . . . . . . . . . . . . . . . . . . . . . . . . 85
Setting Passwords . . . . . . . . . . . . . . . . . . . . . . . . . . . . . . . . . . . . . . . . . . . 86
Administrator Password . . . . . . . . . . . . . . . . . . . . . . . . . . . . . . . . . . . . . . . 86
User Passwords . . . . . . . . . . . . . . . . . . . . . . . . . . . . . . . . . . . . . . . . . . . 87
Setting the Internal Clock ........................................ 88
Customizing Workgroup Switch Default Parameters .......................... 89
Switch Name . . . . . . . . . . . . . . . . . . . . . . . . . . . . . . . . . . . . . . . . . . . . 89
Service Contact Information ..................................... 89
Console Prompt . . . . . . . . . . . . . . . . . . . . . . . . . . . . . . . . . . . . . . . . . . . 90
Console Timeout . . . . . . . . . . . . . . . . . . . . . . . . . . . . . . . . . . . . . . . . . . 90
Setting the ATM Address of the Workgroup Switch .......................... 92
Chapter 11. Configuring Ports and Media Modules ........................ 93
Contents v
Page 8

Procedure . . . . . . . . . . . . . . . . . . . . . . . . . . . . . . . . . . . . . . . . . . . . . . . . 93
Default Settings for ATM Modules and Ports ............................. 94
Connecting ATM Media Modules to the Network ........................... 95
Connecting an ATM Media Module ................................. 95
Isolating an ATM Media Module ................................... 95
Enabling ATM Ports and Setting Interface Types ........................... 96
Enabling Ports with SET MODULE ................................. 96
Disabling an ATM Port ....................................... 97
Chapter 12. Configuring Trunk Connections ............................ 99
Procedure . . . . . . . . . . . . . . . . . . . . . . . . . . . . . . . . . . . . . . . . . . . . . . . . 99
Setting Up Trunks (Logical Links) .................................. 100
Setting Static Routes to Other Subnetworks ............................. 100
Creating a PVC for Virtual Channel Connections .......................... 101
Creating a PVC for Virtual Paths Connections ............................ 102
Chapter 13. Configuring TCP/IP Parameters ........................... 103
Procedure . . . . . . . . . . . . . . . . . . . . . . . . . . . . . . . . . . . . . . . . . . . . . . . 103
IP Address and Subnetwork Mask .................................. 104
Default Gateway . . . . . . . . . . . . . . . . . . . . . . . . . . . . . . . . . . . . . . . . . . . 105
ARP Server . . . . . . . . . . . . . . . . . . . . . . . . . . . . . . . . . . . . . . . . . . . . . . 105
Chapter 14. Configuring LAN Emulation Parameters ...................... 107
Procedure . . . . . . . . . . . . . . . . . . . . . . . . . . . . . . . . . . . . . . . . . . . . . . . 107
Setting Up LAN Emulation Servers .................................. 108
Starting a LES ........................................... 108
Stopping a LES .......................................... 109
Displaying the LECs Connected to a LES ............................ 110
Setting Up a LAN Emulation Client .................................. 111
Setting the LECS ATM Address ................................... 113
LECS Well Known Address .................................... 113
ILMI MIB . . . . . . . . . . . . . . . . . . . . . . . . . . . . . . . . . . . . . . . . . . . . . . 113
Fixed PVC (0.17) ......................................... 114
Chapter 15. Configuring SNMP Parameters ........................... 115
Procedures . . . . . . . . . . . . . . . . . . . . . . . . . . . . . . . . . . . . . . . . . . . . . . 115
SNMP Using “Classical IP Over ATM” .............................. 115
SNMP Using “LAN Emulation Over ATM” ............................. 116
IP Address and Subnetwork Mask (IP only) ............................. 117
LAN Emulation Client (LE only) ................................... 117
Default Gateway (IP & LE) ...................................... 117
ARP Server (IP only) ......................................... 117
Community Table (IP & LE) ..................................... 118
Alerts (IP & LE) ............................................ 118
Chapter 16. Working With Configuration Settings ........................ 119
Saving Configuration Settings and Logging Off ........................... 119
Reverting Configuration Changes .................................. 121
vi IBM 8285 Nways ATM Workgroup Switch: Installation and User’s Guide
Page 9

Displaying Configuration Settings .................................. 122
Modifying Configuration Settings ................................... 123
Reconfiguring Console Port Settings ................................. 125
Saving Reconfigured Console Port Settings ........................... 125
Part 4. Device Attachment Procedures ......................... 127
Chapter 17. Attaching 25.6Mbps Devices to the ATM Workgroup Switch ........... 129
Before You Begin Cabling ...................................... 129
UTP/FTP/STP Cabling Information ................................ 130
Cabling Distances . . . . . . . . . . . . . . . . . . . . . . . . . . . . . . . . . . . . . . . . . 130
Connecting Devices to the 25.6Mbps ATM Ports .......................... 131
Via Building Wiring ........................................ 131
Direct Cabling . . . . . . . . . . . . . . . . . . . . . . . . . . . . . . . . . . . . . . . . . . . 131
Chapter 18. Attaching 155Mbps Devices to the I/O card .................... 133
Before You Begin Cabling ...................................... 133
Planning Cabling Distances in a Fiber Network .......................... 134
Connecting a Device to the Optional 155Mbps ATM I/O Card Port ................. 135
Via Building Wiring ........................................ 135
Direct Cabling . . . . . . . . . . . . . . . . . . . . . . . . . . . . . . . . . . . . . . . . . . . 135
Part 5. Management, Code Updates and Troubleshooting ............ 137
Chapter 19. Network and Switch Management .......................... 139
Managing the ATM Subsystem .................................... 139
SNMP Support . . . . . . . . . . . . . . . . . . . . . . . . . . . . . . . . . . . . . . . . . . . . 140
Accessing MIB Files ......................................... 141
Chapter 20. Updating Microcode and Picocode ......................... 143
Accessing Microcode and Picocode Updates ............................ 143
UPLOAD and DOWNLOAD Operations ............................... 144
Inband Operations . . . . . . . . . . . . . . . . . . . . . . . . . . . . . . . . . . . . . . . . . . 145
Updating Workgroup Switch Microcode .............................. 145
Updating FPGA Picocode in the Workgroup Switch ....................... 145
Uploading Dumps . . . . . . . . . . . . . . . . . . . . . . . . . . . . . . . . . . . . . . . . . 146
Uploading Traces . . . . . . . . . . . . . . . . . . . . . . . . . . . . . . . . . . . . . . . . . 146
Uploading the Error Log ...................................... 146
Manual Update Operations ...................................... 147
Out-of-band Operations . . . . . . . . . . . . . . . . . . . . . . . . . . . . . . . . . . . . . . . . 147
Fault Management . . . . . . . . . . . . . . . . . . . . . . . . . . . . . . . . . . . . . . . . . . 148
Chapter 21. Troubleshooting . . . . . . . . . . . . . . . . . . . . . . . . . . . . . . . . . . . 149
Procedure . . . . . . . . . . . . . . . . . . . . . . . . . . . . . . . . . . . . . . . . . . . . . . . 149
Problems with Status LEDs on the Base Unit ............................ 150
Problems with Status LEDs on the Expansion Unit ......................... 151
Expansion Unit Wrap Test .................................... 152
Contents vii
Page 10

Problems with Port LEDs on the Base Unit ............................. 153
Problems with LEDs on Expansion Unit Modules .......................... 154
Problems with the Configuration Console .............................. 155
Console Port Wrap Test ...................................... 157
Problems with Configuring Expansion Unit Modules ......................... 158
Problems with Configuring Ports ................................... 159
ATM Port Wrap Tests ....................................... 161
Problems with ATM Ports Attached to ATM Devices ........................ 162
Problems with ATM Address Registration .............................. 164
Problems with Hardware Configuration ................................ 165
Problems with PINGing ........................................ 166
Problems with Management (Netview/SNMP/TELNET) ....................... 168
Problems with IBM Proprietary LAN Emulation ........................... 171
Problems with ATM Forum Compliant LAN Emulation ........................ 174
Problems with Connections Between Switches ........................... 176
Other Problems . . . . . . . . . . . . . . . . . . . . . . . . . . . . . . . . . . . . . . . . . . . . 177
Further Assistance . . . . . . . . . . . . . . . . . . . . . . . . . . . . . . . . . . . . . . . . . . 179
Using Workgroup Switch Trap Messages .............................. 181
Part 6. Appendixes . . . . . . . . . . . . . . . . . . . . . . . . . . . . . . . . . . . . . . 183
Appendix A. Specifications . . . . . . . . . . . . . . . . . . . . . . . . . . . . . . . . . . . . 185
Environmental . . . . . . . . . . . . . . . . . . . . . . . . . . . . . . . . . . . . . . . . . . . . 185
Mechanical . . . . . . . . . . . . . . . . . . . . . . . . . . . . . . . . . . . . . . . . . . . . . . 185
Power Source . . . . . . . . . . . . . . . . . . . . . . . . . . . . . . . . . . . . . . . . . . . . . 186
Regulatory Compliance . . . . . . . . . . . . . . . . . . . . . . . . . . . . . . . . . . . . . . . . 187
Safety . . . . . . . . . . . . . . . . . . . . . . . . . . . . . . . . . . . . . . . . . . . . . . . 187
Emission . . . . . . . . . . . . . . . . . . . . . . . . . . . . . . . . . . . . . . . . . . . . . . 187
Appendix B. Cables, Pins and Connectors ............................ 189
Connecting to 25.6Mbps Ports .................................... 189
Twisted-Pair Cable . . . . . . . . . . . . . . . . . . . . . . . . . . . . . . . . . . . . . . . . 189
RJ-45 Connectors . . . . . . . . . . . . . . . . . . . . . . . . . . . . . . . . . . . . . . . . . 191
RJ-45 Wrap Plug ......................................... 191
Connecting to the 155Mbps I/O Port ................................. 192
SC Connector . . . . . . . . . . . . . . . . . . . . . . . . . . . . . . . . . . . . . . . . . . . 192
SC Wrap Plug and Attenuator ................................... 192
Connecting the Expansion Unit to the Base Unit .......................... 192
Expansion Interface Cable .................................... 192
Expansion and Base Connectors ................................. 193
Expansion Connector Wrap Plug ................................. 194
Connecting Devices to the Console Connector ........................... 195
RS-232 Connector . . . . . . . . . . . . . . . . . . . . . . . . . . . . . . . . . . . . . . . . . 195
Null-Modem Interposer . . . . . . . . . . . . . . . . . . . . . . . . . . . . . . . . . . . . . . 196
Attaching the Configuration Console to the Workgroup Switch ................... 196
Attaching a Modem to the Workgroup Switch ............................ 196
Modem Requirements . . . . . . . . . . . . . . . . . . . . . . . . . . . . . . . . . . . . . . . 197
Modem Attachment . . . . . . . . . . . . . . . . . . . . . . . . . . . . . . . . . . . . . . . . 197
viii IBM 8285 Nways ATM Workgroup Switch: Installation and User’s Guide
Page 11

Modem Configuration . . . . . . . . . . . . . . . . . . . . . . . . . . . . . . . . . . . . . . . 197
Fiber Cabling Guidelines ....................................... 199
Optical Power Budget ....................................... 200
Optical Power Loss Through Connectors ............................. 202
Optical Power Loss Through Splicing ............................... 203
Optical Power Loss by Fiber Cable Type ............................. 204
Optical Power Loss Through Patch Panels ............................ 205
Optical Power Loss Through Jumper Cables ........................... 206
Appendix C. Error and Information Codes ............................ 207
Q.2931 Error Codes for Clear Causes ................................ 207
Maintenance Codes . . . . . . . . . . . . . . . . . . . . . . . . . . . . . . . . . . . . . . . . . 209
IBM LAN Emulation Server Error Codes ............................... 210
Appendix D. ATM Address Formats in the ATM Workgroup Switch .............. 211
Network Prefix . . . . . . . . . . . . . . . . . . . . . . . . . . . . . . . . . . . . . . . . . . . 212
End System Part ......................................... 213
Glossary . . . . . . . . . . . . . . . . . . . . . . . . . . . . . . . . . . . . . . . . . . . . . . . 215
Bibliography . . . . . . . . . . . . . . . . . . . . . . . . . . . . . . . . . . . . . . . . . . . . . 225
Index . . . . . . . . . . . . . . . . . . . . . . . . . . . . . . . . . . . . . . . . . . . . . . . . . 227
Contents ix
Page 12

x IBM 8285 Nways ATM Workgroup Switch: Installation and User’s Guide
Page 13

Figures
1. Class 1 Laser Label ....................................... xix
2. Front Panel of the ATM Workgroup Switch Base Unit ...................... 5
3. ATM Ports on the ATM Workgroup Switch Base Unit ....................... 6
4. Status LEDs for the ATM Workgroup Switch ........................... 7
5. LEDs for 25.6Mbps ATM Ports .................................. 7
6. LEDs for the 155Mbps ATM Port ................................. 7
7. Front Panel of the ATM Workgroup Switch Expansion Unit .................... 9
8. Status LEDs for the Expansion Unit ............................... 10
9. ATM Workgroup Switch in Remote Feeder Configuration .................... 16
10. ATM Workgroup Switch in Client/Server Configuration ..................... 17
11. ATM Workgroup Switch in Floor Workgroup Configuration ................... 18
12. Components of an ATM Campus Network ........................... 29
13. ATM Address Hierarchy ..................................... 30
14. Connections to User Devices (UNI) ............................... 33
15. Connections Within a Cluster (SSI) ............................... 34
16. Parallel Trunk Links ....................................... 35
17. NNI Trunks Between Clusters .................................. 36
18. Connections Within a Subnetwork or Campus Network (NNI) ................. 37
19. NNI Trunks Between Subnetworks ............................... 38
20. Example of Logical Links and Static Routes .......................... 39
21. PVC Workaround for Cross-NNI Links .............................. 42
22. PVC Workaround for Early Hub Versions ............................ 43
23. Contents of the ATM Workgroup Switch Shipping Group .................... 47
24. Rack Mounting the Base Unit .................................. 50
25. Attaching the Mounting Brackets for Surface Mounting ..................... 52
26. Removing the Dummy Slot Cover ................................ 55
27. Inserting the 155Mbps ATM I/O Card .............................. 56
28. Pressing the I/O card into Place ................................. 57
29. Contents of the Expansion Unit Shipping Group ........................ 59
30. Rack Mounting the Expansion Unit ............................... 62
31. Attaching the Expansion Interface Cable ............................ 63
32. Attaching the Mounting Brackets for Surface Mounting ..................... 64
33. Removing the Dummy Module .................................. 66
34. ATM Media Module Ejectors ("Open" and "Closed" Positions) ................. 67
35. Inserting an ATM Media Module in the Expansion Unit ..................... 68
36. Pattern of the Status LEDs during Power-On Self-Test ..................... 70
37. Working in Remote ATM Workgroup Switch Sessions ..................... 82
38. Upload and Download Operations for the ATM Workgroup Switch .............. 144
39. Straight-Through UTP Cable .................................. 189
40. RJ-45 Connector . . . . . . . . . . . . . . . . . . . . . . . . . . . . . . . . . . . . . . . . 191
41. SC Connector . . . . . . . . . . . . . . . . . . . . . . . . . . . . . . . . . . . . . . . . . 192
42. Pin Assignment: Expansion Connector Wrap Plug ...................... 194
43. RS-232 Connector . . . . . . . . . . . . . . . . . . . . . . . . . . . . . . . . . . . . . . . 195
44. Pin Assignment: RS-232 Interposer .............................. 196
45. Example: IBM 7855-10 Modem Configuration ......................... 198
Copyright IBM Corp. 1995, 1996 xi
Page 14

46. NSAP Address Formats Supported in the Workgroup Switch ATM Subsystem ....... 211
xii IBM 8285 Nways ATM Workgroup Switch: Installation and User’s Guide
Page 15

Tables
1. ATM Connections Supported in ATM Workgroup Switches ................... 13
2. Maximum PING and TELNET Lengths ............................. 15
3. UTP/FTP/STP Cabling Details ................................. 130
4. ATM Device Cabling Distances ................................ 130
5. Trap Messages . . . . . . . . . . . . . . . . . . . . . . . . . . . . . . . . . . . . . . . . . 181
6. Pin Assignments for Cabling Non-ATM Forum Compliant Devices .............. 190
7. Pin Assignments for Cabling SSI and NNI Connections ................... 190
8. Pin-Signal Assignments for 25.6Mbps Port Connectors .................... 191
9. Pin-Signal Assignments for the Expansion and Base Connectors .............. 193
10. Pin-Signal Assignments for RS-232 Console Connector ................... 195
11. Optical Power Budget for workgroup switch 155Mbps Port-to-Device Connections (ATM
Forum V3.1) . . . . . . . . . . . . . . . . . . . . . . . . . . . . . . . . . . . . . . . . . . 201
12. Optical Power Budget for workgroup switch 155Mbps Port-to-Port Connections ....... 201
13. Optical Power Loss per Connector .............................. 202
14. Optical Power Loss per Splice ................................. 203
15. Optical Power Loss by Cable Type .............................. 204
16. Optical Power Loss per Patch Panel ............................. 205
17. Optical Power Loss per Jumper Cable ............................ 206
18. Q.2931 Error Codes for Clear Causes in the ATM Workgroup Switch ............ 207
19. Maintenance Codes and Meanings .............................. 209
20. IBM LAN Emulation Server Error Codes ........................... 210
Copyright IBM Corp. 1995, 1996 xiii
Page 16

xiv IBM 8285 Nways ATM Workgroup Switch: Installation and User’s Guide
Page 17

Notices
References in this publication to IBM products, programs, or services do not imply that IBM intends to
make these available in all countries in which IBM operates. Any reference to an IBM product, program,
or service is not intended to state or imply that only IBM's product, program, or service may be used.
Any functionally equivalent product, program, or service that does not infringe any of IBM's intellectual
property rights may be used instead of the IBM product, program, or service. Evaluation and verification
of operation in conjunction with other products, except those expressly designated by IBM, is the user's
responsibility.
IBM may have patents or pending patent applications covering subject matter in this document. The
furnishing of this document does not give you any license to these patents. You can send license
inquiries, in writing, to the IBM Director of Licensing, IBM Corporation, 500 Columbus Avenue,
Thornwood, New York 10594, U.S.A.
Product Page/Warranties
The following paragraph does not apply to the United Kingdom or to any country where such
provisions are inconsistent with local law.
INTERNATIONAL BUSINESS MACHINES CORPORATION PROVIDES THIS PUBLICATION "AS IS" WITHOUT
WARRANTY OF ANY KIND, EITHER EXPRESS OR IMPLIED, INCLUDING, BUT NOT LIMITED TO, THE
WARRANTIES OF MERCHANTABILITY OR FITNESS FOR A PARTICULAR PURPOSE.
Some states do not allow disclaimer of express or implied warranties in certain transactions, therefore
this statement may not apply to you.
Copyright IBM Corp. 1995, 1996 xv
Page 18

Industry Standards Reflected in This Product
The IBM 8285 Nways ATM Workgroup Switch complies with the following ATM standards:
ATM User-Network Interface (UNI) Specification V3.0 and V3.1, ATM Forum
LAN Emulation Over ATM Specification V1.0, ATM Forum
Q.2110 Service Specific Connection-Oriented Protocol (SSCOP), ITU, March 17, 1994
Q.2130 Service Specific Coordination Function (SSCF) for support of signaling at the user-network
interface, March 17, 1994
The IBM 8285 Nways ATM Workgroup Switch is designed according to the specifications of the following
industry standards as understood and interpreted by IBM as of September 1994:
RFC854 - TELNET protocol
RFC1350 - Trivial File Transfer Protocol (TFTP)
RFC1577 - Classical IP and ARP (Address Resolution Protocol) over ATM
SNMP:
– RFC1155 - Structure and Identification of Management Information (SMI) for TCP/IP based
Internet.
– RFC1156 - Management Information Base (MIB) for network management of TCP/IP based
Internets (MIB-I)
– RFC1157 - Simple Network Management Protocol (SNMP)
– RFC1212 - Concise MIB definitions
– RFC1213 - Management Information Base (MIB) for network management of TCP/IP based
Internets (MIB-II)
– RFC1215 - Convention for defining traps for use with SNMP
xvi IBM 8285 Nways ATM Workgroup Switch: Installation and User’s Guide
Page 19

CE European Community Marking
The CE marking has been applied to this product, meaning its compliance to the following directives:
EMC Directive 89/336/EEC and amendment 93/31/EEC
Low Voltage Directive 73/23/EEC
Telecommunications Directive 91/263/EEC
Machinery Directive 89/392/EEC
Directive 93/68/EEC (Marking)
Electronic Emission Notices
Federal Communications Commission (FCC) Statement
Note: This equipment has been tested and found to comply with the limits for a Class A digital device,
pursuant to Part 15 of the FCC Rules. These limits are designed to provide reasonable protection
against harmful interference when the equipment is operated in a commercial environment. This
equipment generates, uses, and can radiate radio frequency energy and, if not installed and used in
accordance with the instruction manual, may cause harmful interference to radio communications.
Operation of this equipment in a residential area is likely to cause harmful interference, in which case the
user will be required to correct the interference at his own expense.
Properly shielded and grounded cables and connectors must be used in order to meet FCC emission
limits. IBM is not responsible for any radio or television interference caused by using other than
recommended cables and connectors or by unauthorized changes or modifications to this equipment.
Unauthorized changes or modifications could void the user's authority to operate the equipment.
This device complies with Part 15 of the FCC Rules. Operation is subject to the following two conditions:
(1) this device may not cause harmful interference, and (2) this device must accept any interference
received, including interference that may cause undesired operation.
Industry Canada Compliance Statement
This Class A digital apparatus meets the requirements of the Canadian Interference-Causing Equipment
Regulations.
Avis de conformité aux normes d'Industrie Canada
Cet appareil numérique de la classe A respecte toutes les exigences du Règlement sur le matériel
brouilleur du Canada.
Notices xvii
Page 20

Japanese Voluntary Control Council For Interference (VCCI) Statement
This equipment is in the 1st Class category (information equipment to be used in commercial and/or
industrial areas) and conforms to the standards set by the Voluntary Control Council for Interference by
Information Technology Equipment aimed at preventing radio interference in commercial and industrial
areas.
Consequently, when used in a residential area or in an adjacent area thereto, radio interference may be
caused to radios and TV receivers, and so on.
Read the instructions for correct handling.
Korean Communications Statement
Please note that this device has been approved for business purpose with regard to electromagnetic
interference. If you find this is not suitable for your use, you may exchange it for a non-business one.
New Zealand Radiocommunications (Radio) Regulations
Attention: This is a Class A product. In a domestic environment this product may cause radio
interference in which case the user may be required to take adequate measures.
Trademarks and Service Marks
The following terms, indicated by an asterisk (*) in this publication, are trademarks or service marks of
the IBM Corporation in the United States or other countries:
IBM OS/2
NetView for AIX TURBOWAYS
Nways
The following terms, indicated by a double asterisk (**) in this publication, are trademarks of other
companies:
Microsoft Microsoft Corporation
Windows Microsoft Corporation
xviii IBM 8285 Nways ATM Workgroup Switch: Installation and User’s Guide
Page 21

Safety
This product complies with IBM and international safety standards.
See the
IBM 8285 Nways ATM Workgroup Switch: Safety and Service Catalog
, SA33-0398 for the
translations of the DANGER and CAUTION notices concerning this product.
Laser Standards
The laser is a Class 1 Laser Product and complies with the following safety standards:
IEC 825-1: 1993 EN 60825-1: 1993
IEC 825-2: 1993 EN 60825-2: 1993
IEC 950: 1991 + Amdt 1: 1992 + Amdt 2: 1993
EN 60950: 1992 + Amdt 1: 1992 + Amdt 2: 1993
The compliance label on the 155Mbps ATM I/O Card is shown in Figure 1.
CLASS 1 LASER PRODUCT - LUOKAN 1 LASERLAITE
APPAREIL ALASER DE CLASSE 1 - LASER KLASSE 1
Figure 1. Class 1 Laser Label
Notices xix
Page 22

xx IBM 8285 Nways ATM Workgroup Switch: Installation and User’s Guide
Page 23

How to Use This Guide
This guide describes the installation and operation of the IBM 8285 Nways ATM Workgroup Switch (also
referred to as the ATM Workgroup Switch). The information in this guide enables you to:
Install the IBM 8285 Nways* ATM Workgroup Switch either as an independent workgroup switch or
as part of an ATM network.
Configure switch parameters for the ATM Workgroup Switch.
Manage the ATM Workgroup Switch using the Simple Network Management Protocol (SNMP).
Diagnose and solve problems associated with the operation of the ATM Workgroup Switch.
Who Should Use This Guide
This guide is intended for:
ATM network administrators
ATM network operators
Authorized service personnel
Contents of This Guide
This guide contains the following main parts:
Part 1, Introduction
Chapter 1, Introduction to the IBM 8285 Nways ATM Workgroup Switch describes the
ATM Workgroup Switch and its main functions. It also presents examples of how to use the
workgroup switch in various network configurations.
Chapter 2, Installing the IBM 8285 Nways ATM Workgroup Switch contains the complete
procedure for mounting, configuring, and attaching ATM devices to the ATM Workgroup
Switch.
Chapter 3, Building an ATM Campus Network describes the ATM address of the ATM
Workgroup Switch and its relation to other ATM campus network components, and describes
the strategy for building a network of ATM switches.
Part 2, Mounting Workgroup Switch Components
Chapter 4, Mounting the Base Unit describes how to mount the Base Unit in a rack or on
a surface.
Chapter 5, Mounting the 155Mbps ATM I/O Card describes how to unpack mount the
155Mbps ATM I/O Card in the Base Unit.
Chapter 6, Mounting the Expansion Unit describes how to mount the Expansion Unit in a
rack or on a surface.
Chapter 7, Mounting ATM Media Modules in the Expansion Unit describes how to mount
ATM media modules in the Expansion Unit.
Copyright IBM Corp. 1995, 1996 xxi
Page 24

Chapter 8, Power-On and Self Test describes the power-on procedure and the automatic
Power-On Self Test (POST) routine.
Part 3, Configuration Procedures
Chapter 9, Setting-Up and Using the Configuration Console describes how to setup and
use the a console with the ATM Workgroup Switch.
Chapter 10, Configuring Basic Workgroup Switch Parameters describes how to
configure the ATM Workgroup Switch local switch parameters.
Chapter 11, Configuring Ports and Media Modules describes how to configure ports on
the Base Unit and on ATM media modules in the Expansion Unit.
Chapter 12, Configuring Trunk Connections describes how to configure trunk connections
between ATM switches and set up PVCs.
Chapter 13, Configuring TCP/IP Parameters describes how to configure the workgroup
switch to provide Classical IP Over ATM functions.
Chapter 14, Configuring LAN Emulation Parameters describes how to configure the
workgroup switch to provide LAN Emulation Over ATM functions.
Chapter 15, Configuring SNMP Parameters describes how to configure the workgroup
switch for management by an SNMP management application.
Chapter 16, Working With Configuration Settings describes how to save and work with
configuration settings.
Part 4, Device Attachment Procedures
Chapter 17, Attaching 25.6Mbps Devices to the ATM Workgroup Switch describes how
to attach 25.6Mbps devices to ports on the Base Unit or on ATM media modules in the
Expansion Unit.
Chapter 18, Attaching 155Mbps Devices to the I/O card describes how to attach
155Mbps devices to the 155Mbps ATM I/O Card on the Base Unit.
Part 5, Management, Code Updates and Troubleshooting
Chapter 19, Network and Switch Management provides guidelines for managing the ATM
Workgroup Switch.
Chapter 20, Updating Microcode and Picocode provides guidelines for upgrading
microcode and picocode, and for performing upload and download operations.
Chapter 21, Troubleshooting describes how to diagnose and solve problems associated
with the operation of the ATM Workgroup Switch.
Part 6, Appendixes
Appendix A, Specifications describes the specifications for the ATM Workgroup Switch.
Appendix B, Cables, Pins and Connectors provides cabling and connector guidelines for
connecting a console and ATM devices to the ATM Workgroup Switch Base Unit.
Appendix C, Error and Information Codes list the return codes displayed for the Q.2931
and TFTP protocols.
Appendix D, ATM Address Formats in the ATM Workgroup Switch shows complete
definitions of all ATM address formats supported by the ATM Workgroup Switch.
xxii IBM 8285 Nways ATM Workgroup Switch: Installation and User’s Guide
Page 25

Glossary describes terms and abbreviations used in this manual.
Bibliography lists the documents in which you can find additional information on the
functions and technology used in the ATM Workgroup Switch.
Index lists the concepts, terms, and tasks described in this manual and the page numbers
on which you can find the information.
Related Information
To understand the information presented in this guide and to use the ATM Workgroup Switch more
effectively, refer to the supplementary documents listed in “Bibliography” on page 225.
Prerequisite Knowledge
To understand the information presented in this book, you should be familiar with:
Features and characteristics of the IBM 8285 Nways ATM Workgroup Switch, as described in the
IBM 8285 Nways ATM Workgroup Switch: Specification Sheet
Principles of asynchronous transfer mode (ATM) technology
ATM Forum UNI Specification V3.1
ATM Forum LAN Emulation Over ATM Specification V1.0.
, GA33-0380.
How to Use This Guide xxiii
Page 26

Automatic Update Service
The
Automatic Update Service (AUS)
your hardware modules are up-to-date with the latest code functions and improvements. Available on a
3-year subscription basis, AUS subscriptions cover all your feature modules with independently
upgradable code components. With AUS subscriptions, you automatically receive the newest versions of
code when they are made available.
To subscribe to AUS from Europe, the Middle East or Africa, fill out the form that comes in the ATM
Workgroup Switch package and return it to the IBM address indicated. ATM Workgroup Switch software
updates will then be sent to you at the address you specify. If you reside in the U.S.A., it is not
necessary to fill out the form in order to receive ATM Workgroup Switch software updates.
subscription is a simple and cost-effective way of ensuring that
Improved Decision Making
With the 3-year subscription, it is easy to predict the annual cost of upgrading your network with the latest
code functions. Also, since you always have the latest version of management modules, fewer planning
considerations are required when ordering new media and interconnect modules.
Asset Protection
The automatic distribution of the latest code versions ensures that your hardware is always up-to-date
with the latest set of functions, thereby expanding the life of your network, and reducing compatibility
problems.
Connectivity Improvements
With the latest version of code in place, your management and interconnect modules are automatically
upgraded with the latest performance and configuration improvements, as well as new bridging or routing
features.
Network Operations Productivity
The AUS subscription ensures that the ATM Workgroup Switch or modules (of a given type) in your
network are kept at the same level of code, therefore making network operations simpler and more
consistent. Also, with the latest version of the management module installed, the network manager can
perform configuration and problem management for all the newly announced hub components and
modules without restrictions.
For more information about the
your authorized reseller.
xxiv IBM 8285 Nways ATM Workgroup Switch: Installation and User’s Guide
Automatic Update Service
, contact your IBM marketing representative or
Page 27

Conventions Used in This Guide
The following text conventions are used in this guide:
Text
Convention
Bold Text emphasis Selective backpressure temporarily stops one virtual connection.
Italics
Monospace Command syntax
Meaning Example
Global backpressure temporarily stops an ATM link.
Special term This is known as a
Document titles Refer to the
more information.
SET PORT slot.port ENABLE
(parameters and
variables)
User input (including
carriage return)
System messages
and screen displays
To display detailed information, enter the following command:
show port 1.2 verbose [ENTER]
1.12:UNI enabled UP-OKAY
Signalling Version : with ILMI
Flow Control : Off
ATM User-Network Interface Specification - Version 3.1
hot swap
.
for
How to Use This Guide xxv
Page 28

xxvi IBM 8285 Nways ATM Workgroup Switch: Installation and User’s Guide
Page 29

Part 1. Introduction
Chapter 1. Introduction to the IBM 8285 Nways ATM Workgroup Switch ............. 3
ATM Workgroup Switch Components .................................. 3
The ATM Workgroup Switch Base Unit ................................. 5
The ATM Workgroup Switch Expansion Unit Feature .......................... 9
Switch/Control Point Functionality ................................... 11
ATM Connections . . . . . . . . . . . . . . . . . . . . . . . . . . . . . . . . . . . . . . . . . . . . 13
LAN Emulation Over ATM ....................................... 14
Networking Configurations . . . . . . . . . . . . . . . . . . . . . . . . . . . . . . . . . . . . . . . 16
Security Controls . . . . . . . . . . . . . . . . . . . . . . . . . . . . . . . . . . . . . . . . . . . . 19
Chapter 2. Installing the IBM 8285 Nways ATM Workgroup Switch ............... 21
Before You Start ............................................ 21
Procedure 1: Mounting the ATM Workgroup Switch Components .................. 22
Procedure 2: Configuring the ATM Workgroup Switch ........................ 24
Procedure 3: Attaching ATM Devices to the ATM Workgroup Switch ................. 26
Chapter 3. Building an ATM Campus Network ........................... 29
Overview . . . . . . . . . . . . . . . . . . . . . . . . . . . . . . . . . . . . . . . . . . . . . . . . 29
Connecting ATM Devices to Form a Network ............................. 33
Configuring Permanent Virtual Circuits (PVCs) ............................ 41
General Guidelines for Configuring Trunks ............................... 44
Copyright IBM Corp. 1995, 1996 1
Page 30

2 IBM 8285 Nways ATM Workgroup Switch: Installation and User’s Guide
Page 31

Chapter 1. Introduction to the IBM 8285 Nways ATM Workgroup
Switch
The following sections describe:
ATM Workgroup Switch Components
The ATM Workgroup Switch Base Unit and Expansion Unit
Workgroup Switch Functionality
LAN Emulation Over ATM
Networking Configurations
Security Controls
ATM Workgroup Switch Components
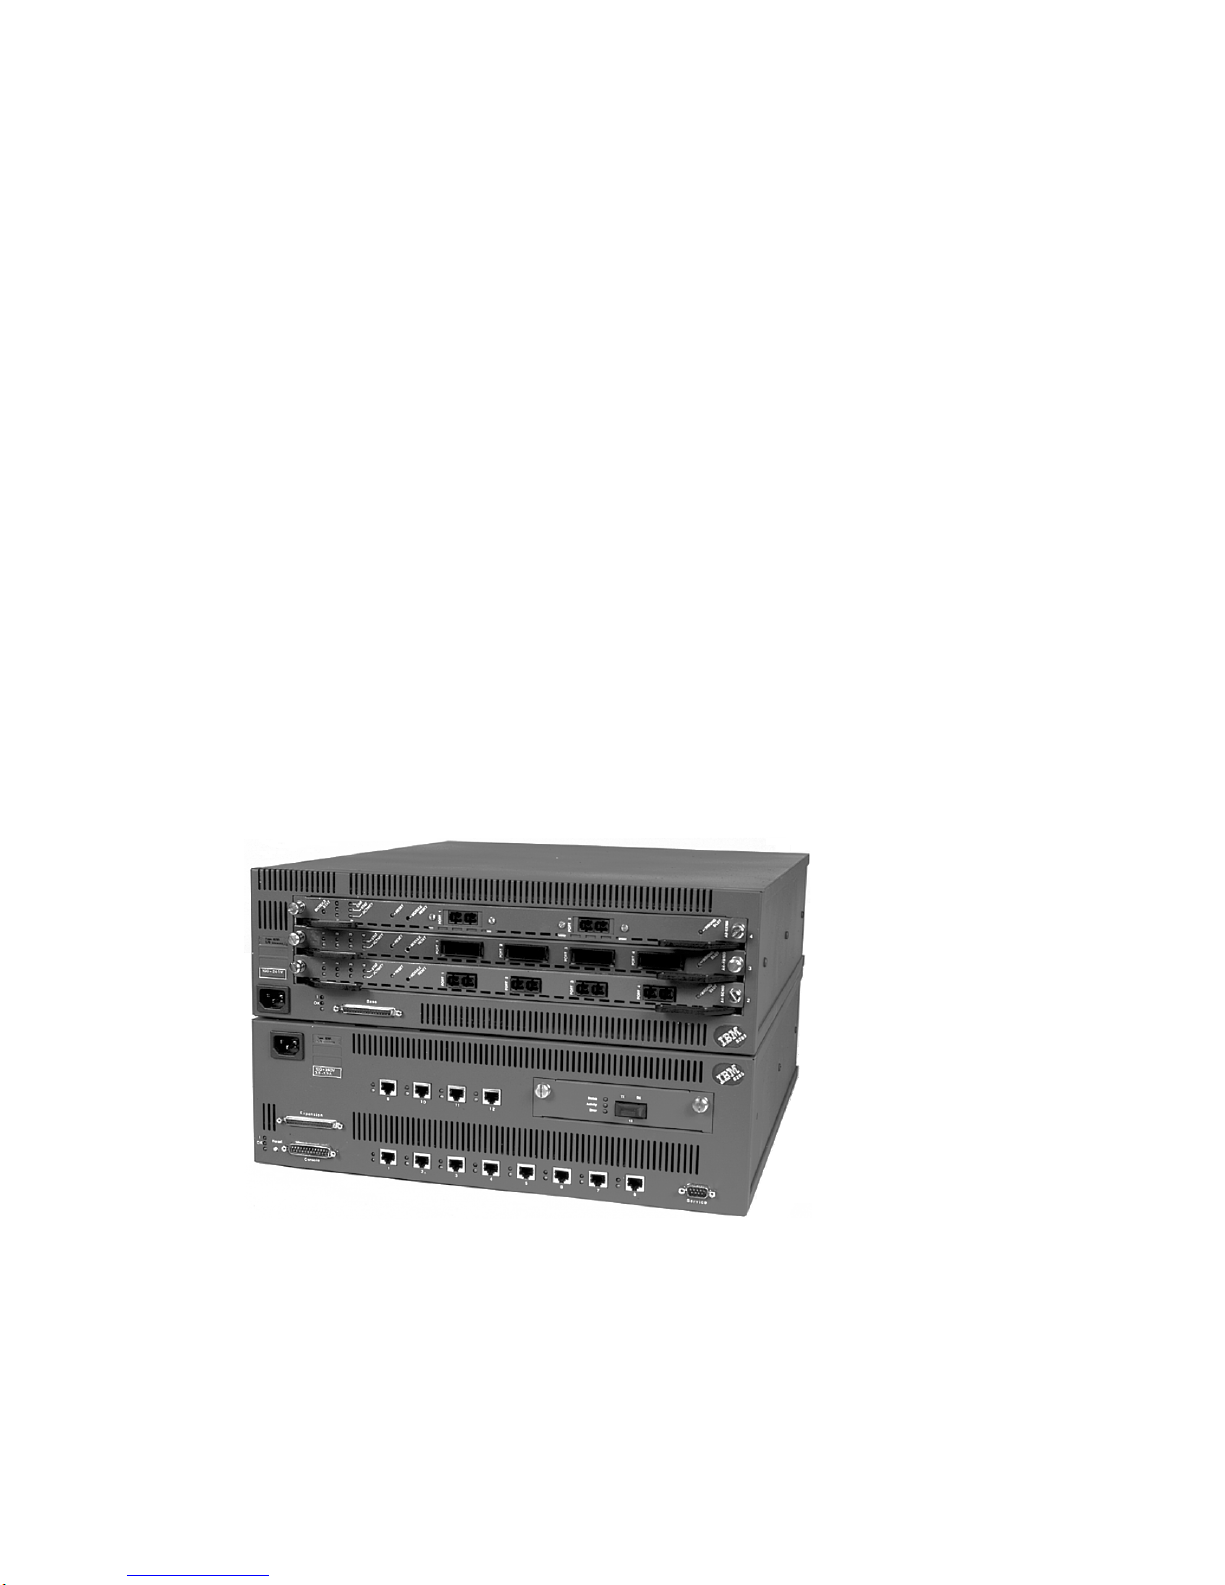
The IBM 8285 Nways ATM Workgroup Switch comprises two desktop or rack-mountable units:
A Base Unit and
An optional Expansion Unit feature
Base Unit
The ATM Workgroup Switch Base Unit is a self-contained ATM Switch and Control Point unit with 12
ATM ports (25.6Mbps) and a slot for one of the optional 155Mbps ATM I/O Card features: Multimode
Fibre (FC 5500) or Single-Mode Fibre (FC 5501).
The I/O card can be linked to:
A local server
An ATM network consisting of other ATM Workgroup Switches or 8260 hubs
Other products that are compliant with ATM Forum specifications for 155Mbps links.
(Refer to “Fiber Cabling Guidelines” on page 199 for guidelines and recommendations for using fiber
cabling.)
The Base Unit has an auto-sense power supply that adapts automatically to local voltage requirements.
The Base Unit may be installed either in a standard rack or on a surface, such as a desktop.
Copyright IBM Corp. 1995, 1996 3
Page 32

Expansion Unit Feature
The Expansion Unit feature provides three slots to add IBM 8260 ATM modules that can provide up to 36
additional ATM ports. The ATM modules that are currently available include:
ATM Media modules (25, 100, and 155Mbps)
ATM LAN Bridge modules
Modules developed under the ATM kit Development Program
One Expansion Unit can be connected to the Base Unit via an Expansion Interface cable.
Modules installed in the Expansion Unit form an integral part of the ATM Workgroup Switch. The slots
are interconnected by the same type of ATM backplane found in the 8260 hub, and ports on ATM
modules in the Expansion Unit can be switched to any other port in either the Base Unit or the Expansion
Unit.
The Expansion Unit has an auto-sense power supply that adapts automatically to local voltage
requirements. The Expansion Unit may be rack mounted or may be stacked on top of the Base Unit
when installed on a desktop.
4 IBM 8285 Nways ATM Workgroup Switch: Installation and User’s Guide
Page 33

The ATM Workgroup Switch Base Unit
All ATM ports, controls, LEDs and connectors are located on the front panel of the ATM Workgroup
Switch, as shown in Figure 2.
AC Power
Input
Status
LEDS
Console
Port
Reset
Button
Figure 2. Front Panel of the ATM Workgroup Switch Base Unit
25.6Mbps ATM Ports
and their LEDs
91011
12
Expansion Unit
Connector
12
3
4
25.6Mbps ATM Ports
and their LEDs
56
Optional
155Mbps Feature
I/O Card
8
7
Advanced Diagnostics
Connector
Chapter 1. Introduction to the IBM 8285 Nways ATM Workgroup Switch 5
Page 34

ATM Ports on the Base Unit
The ATM Workgroup Switch Base Unit provides two types of ATM port:
25.6Mbps Ports
The Base Unit has 12 ATM ports (numbered 1–12) for attaching 25.6Mbps ATM devices via
twisted-pair cables.
155Mbps Port (optional)
The optional I/O port feature (port 13) connects to a 155Mbps ATM device, such as a local server
or an 8260 hub. Two features are currently offered:
FC 5500 - 155Mbps Multimode Fiber I/O Port with SC connector
FC 5501 - 155Mbps Single Mode Fiber I/O Port with SC connector
The arrangement and numbering of ports on the Base Unit is shown in Figure 3.
Figure 3. ATM Ports on the ATM Workgroup Switch Base Unit
6 IBM 8285 Nways ATM Workgroup Switch: Installation and User’s Guide
Page 35

LEDs on the Base Unit
The port LEDs and ATM Workgroup Switch status LEDs are shown in figures 4, 5, and 6.
Base Unit Status LEDs
Figure 4. Status LEDs for the ATM Workgroup Switch
25.6Mbps Port LEDs
Figure 5. LEDs for 25.6Mbps ATM Ports
155Mbps Port LEDs
Figure 6. LEDs for the 155Mbps ATM Port
Chapter 1. Introduction to the IBM 8285 Nways ATM Workgroup Switch 7
Page 36

Connectors and Controls on the Base Unit
The ATM Workgroup Switch Base Unit also has four non-ATM connectors and one control button on its
front panel:
Power Input
This connects the Base Unit auto-sense power supply to the mains.
Console Port
This RS-232 connector is used to attatch a console for initial configuration of the workgroup
switch. It may also be used to attach a modem to the workgroup switch.
Expansion Connector
This connector attaches to an optional ATM Workgroup Switch Expansion Unit (available in a
future release).
Advanced Diagnostics Connector
This connector is only used by authorized service personnel for advanced diagnostic testing.
Reset Button
The reset button resets both the Base Unit and the optional Expansion Unit.
8 IBM 8285 Nways ATM Workgroup Switch: Installation and User’s Guide
Page 37

The ATM Workgroup Switch Expansion Unit Feature
All LEDs, connectors and slots for ATM media modules are located on the front panel of the Expansion
Unit, as shown in Figure 7.
ATM
Media Modules
AC Power
Input
Figure 7. Front Panel of the ATM Workgroup Switch Expansion Unit
Status
LEDs
Base Unit
Connector
Dummy
Module
IBM
Chapter 1. Introduction to the IBM 8285 Nways ATM Workgroup Switch 9
Page 38

Slots for ATM Media Modules
The ATM Workgroup Switch Expansion Unit provides three slots for IBM 8260 ATM media modules. The
slots on the Expansion Unit are numbered 2 - 4, beginning at the bottom.
LEDs on the Expansion Unit
The Expansion Unit status LEDs are shown in figure 8.
Figure 8. Status LEDs for the Expansion Unit
Connectors and Controls on the Expansion Unit
The ATM Workgroup Switch Expansion Unit has two connectors on its front panel:
Power Input
This connects the Expansion Unit auto-sense power supply to the mains.
Base Connector
This connector is used to attach the Expansion Connector cable to the workgroup switch Base
Unit.
10 IBM 8285 Nways ATM Workgroup Switch: Installation and User’s Guide
Page 39

Switch/Control Point Functionality
The IBM 8285 Nways ATM Workgroup Switch integrates the same ATM switching functions and network
control functions that are used in the IBM 8260 hub, such as call setup processing, topology discovery,
and route selection.
ATM Switching Functions
The ATM Switch fabric switches ATM cells from one ATM port to another ATM port in the ATM
Workgroup Switch.
Control Point Functions
The ATM Workgroup Switch requires a control program (as do all ATM switching devices) to perform the
functions associated with the establishment and management of ATM circuits. These functions are
integrated into the switching element of each ATM Workgroup Switch.
ATM control functions are fully distributed instead of being centralized. This means that all nodes
participate as peers in the control algorithms. Distribution of control functions provide for availability,
scalability, and growth in an ATM network. The Control Point in each ATM Workgroup Switch provides
the following functions:
Control Plane Functions
Support of ATM signaling (SVCs) according to ATM Forum V3.1 specifications
Switch-to-switch interface (SSI) based on an extension of the ATM Forum UNI V3.1 as stated in the
ATM Forum P-NNI framework
Topology services and route computation based on TRS, with automatic bypass of failed nodes and
links only for SSI connections (TRS is an extension of OSPF, Open Shortest Path First.)
Interconnection of local ATM networks over an ATM WAN (‘SONET Lite’/P-NNI phase 0) that
provides a permanent virtual path, allowing switched connections to be set up between end systems
on both sides of the WAN (VP tunneling)
Internal SVC APIs to support node management and services over switched ATM connections
Support of permanent virtual path (VP) and permanent virtual channel (VC) point-to-point
connections
Support of IP Over ATM (RFC 1577) for node management and services over a Classical IP
subnetwork; PING message: 916 bytes maximum
Support of Ethernet (802.3) and Ethernet V.2 (DIX) LAN Emulation Client for node management and
services over a LAN Emulation subnetwork; PING and TELNET message: Maximum length depends
on the maximum SDU size supported on the corresponding emulated LAN (see Table 2 on page 15)
Support of 802.3 and 802.5 LAN Emulation Servers and Broadcast Unknown Servers (LES/BUS)
Chapter 1. Introduction to the IBM 8285 Nways ATM Workgroup Switch 11
Page 40

Management Plane Functions
Full SNMP support (get, getnext, set, and traps)
MIB-II support
IETF AToMIB
Full Interim Local Management Interface (ILMI) support at UNI and from the network management
station
OSPF MIB support for managing topology and route computation
IBM extension
– Hub-specific: switch, modules and ports
– Enhanced PVC management (automatic route computation and recovery)
– Signalling (Q.2931 and SAAL) configurations and statistics
– ATM statistics
Services for local and remote administration.
User Plane Functions (hardware)
ATM layer (switching)
Support of Reserved Bandwidth (RB) connection
Support of Unspecified Bit Rate (UBR or "best effort") connection.
The SNMP ATM agent is a function of the Control program in the ATM Workgroup Switch and
implements the ATM MIB defined in the V3.1 UNI Specification of the ATM Forum.
The AToMIB is defined by the IETF and by the IBM extensions. It can be driven by SNMP managers,
such as IBM NetView for AIX*. The following ATM management applications can be used by a LAN
administrator to better tune the system:
Nways Campus Manager ATM for AIX Version 1
Nways Campus Manager ATM for HP-OV Version 1
Nways Campus Manager ATM for Windows Version 1
Both PVCs and SVCs are supported. The signaling is upwardly compatible with the ATM Forum V3.1
UNI. Control messages are encapsulated in the SAAL Adaptation Layer.
The ILMI (ATM Forum V3.1) is fully supported. End-systems can register their local address to the ATM
Workgroup Switch and receive notification of their network address. ILMI messages are SNMP-formatted
and conveyed using the AAL5 Adaptation Layer.
12 IBM 8285 Nways ATM Workgroup Switch: Installation and User’s Guide
Page 41

ATM Connections
The Control Point in the ATM Workgroup Switch provides a complete set of functions to control an ATM
campus network and to interconnect local ATM networks over ATM wide area networks.
The Control Point supports an extensive set of ATM connections, including:
Switched (SVC) and permanent (PVC)
Point-to-point and point-to-multipoint
Reserved Bandwidth (RB) and Unspecified Bit Rate (UBR).
Table 1. ATM Connections Supported in ATM Workgroup Switches
Type of Virtual Connection Connection Type Connection Class Connection Mode
Virtual Path Connection (VP) Permanent Reserved Bandwidth
and Unspecified Bit
Rate
Virtual Channel Connection (VC) Switched Reserved Bandwidth
and Unspecified Bit
Rate
Virtual Channel Connection (VC) Permanent Reserved Bandwidth
and Unspecified Bit
Rate
Point-to-point
Point-to-point and
point-to-multipoint
Point-to-point
Chapter 1. Introduction to the IBM 8285 Nways ATM Workgroup Switch 13
Page 42

LAN Emulation Over ATM
The IBM 8285 Nways ATM Workgroup Switch supports LAN emulation, as defined in ATM Forum
specifications, using two different servers:
LAN Emulation Server (LES)
Broadcast and Unknown Server (BUS)
The LAN emulation servers are integrated in the IBM 8285 Nways ATM Workgroup Switch Control Point,
and they are configured and operate in tandem.
The IBM 8285 Nways ATM Workgroup Switch also includes a basic LAN Emulation Client (LEC) and
supports external LAN Emulation Configuration Servers (LECSs).
Highlights
IBM’s implementation of LAN emulation in the ATM Workgroup Switch complies with Version 1.0 of the
ATM Forum specifications for LAN emulation, and supports:
Both 802.5 (Token Ring) and 802.3/Ethernet V.2 (DIX) LAN types for the LES/BUS.
Up to two separate emulated LANs simultaneously, of the same or different LAN types.
802.3 LAN types for the LEC.
Both UNI 3.0 and 3.1 LECs, concurrently.
Up to 128 LECs (combined total).
LES addresses that are either configured directly in each LEC or supplied through a dialog with an
external LECS.
LECS locations that may be:
– Set to the well known anycast LECS ATM address
– Supplied by the LECS ATM address field in the ILMI MIB
– Set to the well known PVC (VPI=0, VCI=17)
All maximum frame sizes defined in ATM Forum specifications:
– Control frames: 1516 octets
– Data frames: 1516, 4544, 9234, 18190 octets
Best Effort connections with Quality of Service set to 0. Bearer classes supported are:
– BCOB-X and BCOB-C for incoming calls
– BCOB-X for outgoing calls.
IBM’s current implementation of LAN emulation does not support:
Communication over PVCs
Internal LECS
Broadcast Manager, which is not standardized.
14 IBM 8285 Nways ATM Workgroup Switch: Installation and User’s Guide
Page 43

Centralized LES/BUS
The ATM Workgroup Switch LAN servers are centralized, such that each emulated LAN belongs to only
one LES/BUS. Distributed, or multiple, emulated LAN servers are not yet standardized.
The LAN emulation function translates LAN (MAC) addresses to ATM addresses, and performs broadcast
and multicast LAN services.
While the ATM Workgroup Switch does support two separate emulated LANs, the two emulated LANs
cannot communicate directly with each other; a router or bridge is required. This configuration is not
currently recommended.
If desired, you can disable the LAN emulation functions of the ATM Workgroup Switch and use ‘external’
LAN emulation servers, attached, for example, to an 8260 hub.
Integrated LAN Emulation Components
LAN Emulation Server (LES)
The LES provides control and address resolution functions.
Broadcast and Unknown Server (BUS)
The BUS provides broadcast and multicast functions.
No separate configuration commands are required to start the BUS, as it is started automatically
when starting the LES.
LAN Emulation Client (LEC)
An integrated ‘Lite’ LAN Emulation Client is also provided in the Control Point, which allows TFTP,
TELNET and SNMP functions to be run over an 802.3 or Ethernet V.2 (DIX) emulated LAN. This
client may work with the integrated LES/BUS or with an external ATM Forum compliant LES/BUS.
The maximum length of PING and TELNET messages depends on the maximum SDU size
supported on the corresponding emulated LAN. Table 2 lists the correspondence (in bytes):
Table 2. Maximum PING and TELNET Lengths
Maximum SDU -
802.3 ELAN
1516 1492 1500
4544 4520 4528
9234 9210 9218
18190 18166 18176
Chapter 1. Introduction to the IBM 8285 Nways ATM Workgroup Switch 15
Maximum Length PING -
802.3 LEC
Maximum Length PING -
DIX LEC
Page 44

Networking Configurations
The ATM Workgroup Switch is a self-contained ATM subsystem, and may be configured as a stand-alone
workgroup switch, unconnected to external ATM networks.
In addition, the ATM Workgroup Switch may be deployed in various ATM network configurations, such
as:
Remote Feeder
Client/Server Workgroup
Floor Workgroup Switch
The following sections illustrate these configurations. Notice, however, that the ATM Workgroup Switch
can be used in any combination with other ATM switches, such as other ATM Workgroup Switches or
8260 hubs.
ATM Remote Feeder
When used as a remote feeder node, the workgroup switch’s 155Mbps ATM I/O Card allows you to
connect to the main network via ATM bearer services or privately owned fiber links.
Figure 9. ATM Workgroup Switch in Remote Feeder Configuration
16 IBM 8285 Nways ATM Workgroup Switch: Installation and User’s Guide
Page 45

Client/Server Workgroup
The workgroup switch can be configured with:
Client workstations connected to the 25.6Mbps ATM ports
The server connected to the 155Mbps ATM I/O Card interface.
Figure 10. ATM Workgroup Switch in Client/Server Configuration
Chapter 1. Introduction to the IBM 8285 Nways ATM Workgroup Switch 17
Page 46

Floor Workgroup Switch
In larger networks, the workgroup switch can function as part of a larger ATM backbone to bring ATM to
the desktop of every floor in a building. Multiple 155Mbps uplinks can be used to connect the workgroup
switch to the main backbone for added reliability and increased bandwidth.
In addition, the workgroup switch provides switching between local workstations.
Figure 11. ATM Workgroup Switch in Floor Workgroup Configuration
18 IBM 8285 Nways ATM Workgroup Switch: Installation and User’s Guide
Page 47

Security Controls
Password Protection
To prevent unauthorized access to an ATM subsystem, the ATM Workgroup Switch provides two
password levels to protect against network tampering and unauthorized access to the ATM Workgroup
Switch console.
The administrator password allows full use of all ATM Workgroup Switch commands; the user
password allows use of a limited set of ATM Workgroup Switch commands that do not let you change
configuration settings.
ATM Port Security
The ports of the ATM Workgroup Switch are disconnected the first time you install it, and they must be
enabled before they can carry ATM traffic. This is an additional security feature to prevent unauthorized
access to the ATM subsystem.
ATM Media Module Security
The media modules in the ATM Workgroup Switch Expansion Unit are isolated the first time you install
them, and must be connected to the network before they can carry ATM traffic. This is an additional
security feature to prevent unauthorized access to the ATM subsystem.
Chapter 1. Introduction to the IBM 8285 Nways ATM Workgroup Switch 19
Page 48

20 IBM 8285 Nways ATM Workgroup Switch: Installation and User’s Guide
Page 49

Chapter 2. Installing the IBM 8285 Nways ATM Workgroup Switch
This chapter contains the three procedures for installing the ATM Workgroup Switch:
Procedure 1: Mounting the ATM Workgroup Switch Components
Procedure 2: Configuring the ATM Workgroup Switch
Procedure 3: Attaching ATM Devices to the ATM Workgroup Switch
Before You Start
To install the ATM Workgroup Switch components, you need the following items:
Rack Mounting
If the unit will be mounted in a rack, you need:
A rack inventory chart and a cabling chart from your network administrator.
Four screws appropriate for your rack and a screwdriver.
The cable management bracket (shipped with the workgroup switch).
Desktop Mounting
If the unit will be mounted on a surface such as a desktop, you will need:
A cabling chart from your network administrator.
A screwdriver for reversing the mounting brackets on the workgroup switch.
Copyright IBM Corp. 1995, 1996 21
Page 50

Procedure 1: Mounting the ATM Workgroup Switch Components
To install the ATM Workgroup Switch perform the following steps in sequence:
1 Mount the Base Unit by following the instructions in Chapter 4, “Mounting the Base Unit” on
page 47.
2 Mount the (optional) 155Mbps ATM I/O Card by following the instructions in Chapter 5,
“Mounting the 155Mbps ATM I/O Card” on page 53.
3 Mount the optional Expansion Unit feature by following the instructions in Chapter 6,
“Mounting the Expansion Unit” on page 59.
4 Mount ATM media modules in the optional Expansion Unit by following the instructions in
Chapter 7, “Mounting ATM Media Modules in the Expansion Unit” on page 65.
5 Before starting the next procedure, check that the ATM Workgroup Switch components have
been mounted correctly, as described in “Verifying Component Mounting” on page 23.
22 IBM 8285 Nways ATM Workgroup Switch: Installation and User’s Guide
Page 51

Verifying Component Mounting
To verify that the workgroup switch components are correctly mounted:
1 Power-on the ATM Workgroup Switch, noting the progress of the Power On Self Test (POST)
as described in Chapter 8, “Power-On and Self Test” on page 69.
2 Check that the Status LEDs on the front panels of both the Base Unit and the Expansion Unit
are lit as shown here:
3 Check that all 25.6Mbps Port LEDs on the Base Unit are lit as shown here:
4 Check that the Port LEDs on the optional 155Mbps ATM I/O Card are lit as shown here:
5 Check that the Port LEDs on Expansion Unit modules are lit correctly, as described in the
documentation for the specific module.
Incorrect:
“Troubleshooting” on page 149. Do not start the next procedure until all LEDs are correctly lit.
Correct:
Configuring the ATM Workgroup Switch” on page 24.
Chapter 2. Installing the IBM 8285 Nways ATM Workgroup Switch 23
If the any of the LEDs are incorrectly lit, follow the troubleshooting procedures in Chapter 21,
If all LEDs are correctly lit, you are finished with this procedure. Continue with “Procedure 2:
Page 52

Procedure 2: Configuring the ATM Workgroup Switch
Before configuring the ATM Workgroup Switch, you must:
Successfully complete “Procedure 1: Mounting the ATM Workgroup Switch Components” on
page 22.
Power-on the workgroup switch.
To configure the ATM Workgroup Switch perform the following steps in sequence:
1 Set up and attach a configuration console to the ATM Workgroup Switch Base Unit as
described in Chapter 9, “Setting-Up and Using the Configuration Console” on page 73.
If no prompt appears or if the console does not function as expected, follow the
troubleshooting procedures in “Problems with the Configuration Console” on page 155.
2 Configure the basic parameters of the workgroup switch, as described in Chapter 10,
“Configuring Basic Workgroup Switch Parameters” on page 85.
3 Configure the ports in the Base Unit and the ports and ATM media modules in the
Expansion Unit, as described in Chapter 11, “Configuring Ports and Media Modules” on
page 93.
4 If the workgroup switch will form part of an ATM Campus Network, configure the trunks to
the other switches and PVCs, as described in Chapter 12, “Configuring Trunk Connections”
on page 99.
5 If you will be using Classical IP Over ATM, configure the TCP/IP parameters, as described in
Chapter 13, “Configuring TCP/IP Parameters” on page 103.
6 If you will be using LAN Emulation Over ATM, configure the LAN Emulation parameters, as
described in Chapter 14, “Configuring LAN Emulation Parameters” on page 107.
7 If you will be using an SNMP application to manage the ATM Workgroup Switch, configure
the SNMP parameters, as described in Chapter 15, “Configuring SNMP Parameters” on
page 115.
8 Save your configuration settings and logoff from the configuration console, as described in
“Saving Configuration Settings and Logging Off” on page 119.
9 Before starting the next procedure, check that the workgroup switch is correctly configured
and that ports are ready for attachment to ATM devices by following the steps in “Verifying
Configuration” on page 25.
24 IBM 8285 Nways ATM Workgroup Switch: Installation and User’s Guide
Page 53

Verifying Configuration
To verify that the workgroup switch is correctly configured:
1 Enter the SHOW MODULE ALL command.
2 Check that all ports on the Base Unit and on all connected modules show a status of
UP-NO ACTIVITY.
Incorrect:
procedures in Chapter 21, “Troubleshooting” on page 149. Do not start the next procedure until all
ports show the correct status.
Correct:
with “Procedure 3: Attaching ATM Devices to the ATM Workgroup Switch” on page 26.
If any of the ports show a status other than UP-NO ACTIVITY, follow the troubleshooting
If all ports show a status of UP-NO ACTIVITY, you are finished with this procedure. Continue
Chapter 2. Installing the IBM 8285 Nways ATM Workgroup Switch 25
Page 54

Procedure 3: Attaching ATM Devices to the ATM Workgroup Switch
To attach ATM devices to the ATM Workgroup Switch perform the following steps in sequence:
1 Power-off the workgroup switch by disconnecting the power cords from the electrical outlet
and from both the Base Unit and the Expansion Unit.
2 Attach 25.6Mbps devices to the Base Unit ports by following the instructions under
Chapter 17, “Attaching 25.6Mbps Devices to the ATM Workgroup Switch” on page 129. For
information on cables, connectors and part numbers, see Appendix B, “Cables, Pins and
Connectors” on page 189.
3 If you have the optional 155Mbps ATM I/O Card, attach a 155Mbps device by following the
instructions under Chapter 18, “Attaching 155Mbps Devices to the I/O card” on page 133.
For information on cables, connectors and part numbers, see Appendix B, “Cables, Pins and
Connectors” on page 189.
4 If you have the optional Expansion Unit Feature, attach devices to the Expansion Unit
modules by following the instructions that accompany the module.
5 Check that all devices are correctly attached by following the steps in “Verifying Device
Attachment” on page 27.
26 IBM 8285 Nways ATM Workgroup Switch: Installation and User’s Guide
Page 55

Verifying Device Attachment
To verify that all devices are correctly attached you must check that all LEDs display the correct patterns,
and check that all ports show the correct status.
Part 1: Check LED Patterns
1 Power-on the ATM Workgroup Switch as described in Chapter 8, “Power-On and Self Test”
on page 69 and check the port LEDs on the ATM Workgroup Switch:
2 Check that the 25.6Mbps Port LEDs on the Base Unit are lit as described below:
If a port has a device attached that is powered on, and if the port has been enabled, the
expected pattern is as shown here:
If a port does not have a device attached, or if the attached device is not powered on,
the expected pattern is:
– Port Enable LED (green) BLINKING
– Output Activity LED (yellow) OFF
If a port is not enabled, the expected pattern is:
– Port Enable LED (green) OFF
– Output Activity LED (yellow) OFF
3 Check that the 155Mbps I/O Port LEDs on the Base Unit are lit as described below:
If the port has a device attached that is powered on, and if the port has been enabled,
the expected pattern is as shown here:
If the port does not have a device attached, or if the attached device is not powered on,
the expected pattern is:
– Status LED (green) BLINKING
– Output Activity LED (yellow) OFF
– Error LED (yellow) OFF
If the port is not enabled, the expected pattern is:
– Status LED (green) OFF
– Output Activity LED (yellow) OFF
– Error LED (yellow) OFF
Chapter 2. Installing the IBM 8285 Nways ATM Workgroup Switch 27
Page 56

4 Check that the Port LEDs on all Expansion Unit modules are lit correctly, as described in the
documentation for the specific media module.
Incorrect:
in Chapter 21, “Troubleshooting” on page 149. Do not proceed to “Part 2: Check Status of Ports”
until all LEDs are correctly lit.
Correct:
If any of the port LEDs do not show the correct pattern, follow the troubleshooting procedures
If all port LEDs are correctly lit, proceed to “Part 2: Check Status of Ports.”
Part 2: Check Status of Ports
1 Enter the SHOW MODULE ALL command. All ports should show a status of OKAY.
Incorrect:
Chapter 21, “Troubleshooting” on page 149. Do not attempt to apply normal ATM traffic to the
workgroup switch until all ports show the correct status.
Correct:
If any ports do not show a status of OKAY, follow the troubleshooting procedures in
If all ports show a status of OKAY, you have finished installing the ATM Workgroup Switch.
28 IBM 8285 Nways ATM Workgroup Switch: Installation and User’s Guide
Page 57

Chapter 3. Building an ATM Campus Network
This chapter describes the components of the ATM Campus Network and their relation the elements of
an ATM address.
Overview
The purpose of an ATM network is to set up connections via one or more ATM subsystems between two
ATM user devices. ATM subsystems can be interconnected to build a local, privately owned and
administered ATM Campus Network.
Figure 12. Components of an ATM Campus Network
Copyright IBM Corp. 1995, 1996 29
Page 58

ATM Campus Network Components
The various parts of the ATM address form a hierarchy of network components, as shown in Figure 13.
Figure 13. ATM Address Hierarchy
For a full description of the ATM address formats supported by the ATM Workgroup Switch, see
Appendix D, “ATM Address Formats in the ATM Workgroup Switch” on page 211.
The terms used to describe the components of an ATM Campus Network are defined here:
ATM Campus Network
One or more ATM subnetworks interconnected using NNI interfaces.
This set of subnetworks is controlled by one administrative domain and a single
private owner using one network access protocol (UNI).
An ATM campus network is identified by:
The first 9 bytes of the unique network prefix.
ATM Subnetwork One or more ATM clusters interconnected using NNI interfaces.
An ATM subnetwork is identified by:
The first 9 bytes of the network prefix, which are the same for all subnetworks
in a campus network, plus
A 2-byte routing domain number (RDN), which is unique within the ATM
Campus Network.
30 IBM 8285 Nways ATM Workgroup Switch: Installation and User’s Guide
Page 59

ATM Cluster One or more ATM subsystems interconnected using SSI interfaces.
An ATM cluster is identified by:
The first 11 bytes of the network prefix, which are the same for all clusters in
an ATM subnetwork, plus
A 1-byte ATM Cluster Number (ACN), unique within the ATM subnetwork,
which ranges from 0 to 255.
ATM Subsystem An individual self-contained switching unit, such as a hub or workgroup switch.
The components of the ATM subsystem in an ATM Workgroup Switch include:
Integrated ATM Control Point and Switch functions
The UNI, SSI, and NNI ATM interfaces
Ports for connecting to ATM devices
ATM media modules installed in the Expansion Unit.
An ATM subsystem is identified by:
The first 12 bytes of the network prefix, which are the same for all subsystems
in a cluster, plus
A 1-byte Hub Number (HN), unique within the ATM Cluster, which ranges from
0 to 255.
ATM User Device An end system that encapsulates data into ATM cells and forwards them to the
ATM subsystem across a UNI interface. Examples of ATM user devices are:
Servers and workstations equipped with ATM adapters
ATM concentrators or workstations equipped with ATM adapters
Routers with ATM adapters
LAN ATM bridges.
An ATM user device is identified by:
The first 13 bytes of the network prefix, which are the same for all user
devices attached to an ATM subsystem, plus
A 6-byte End System Identifier (ESI), unique within the ATM Subsystem, plus
A 1-byte Selector field that may be used by the user device.
The ATM Workgroup Switch passes the network prefix of an ATM address to
attached end systems using the Interim Local Management Interface (ILMI)
protocol.
Chapter 3. Building an ATM Campus Network 31
Page 60

Network Interfaces
ATM standards define three protocols used across the interfaces between ATM campus network
components:
UNI Defines the interface between an ATM user device (such as a terminal, router, bridge,
server, workstation, or concentrator equipped with an ATM adapter) and the ATM network.
The ATM subsystem supports the private UNI defined by the ATM Forum UNI Specification
V3.1.
SSI Defines the interface between two ATM switches in the same ATM cluster.
The SSI fully supports networking functions without the need of operator intervention, such
as routing, node failure and node recovery, backup, and topology management by the
Topology Routing Service (TRS) program.
You can define multiple SSI connections between two ATM switches. The SSI has been
developed from the Public-NNI for use in IBM ATM subnetworks.
NNI Defines the interface between two ATM switches belonging to different ATM Clusters in the
same subnetwork or in different subnetworks.
Operator intervention is required in order to manage networking functions such as routing,
backup, topology changes, and so on.
You can define only one NNI connection between two ATM switches.
32 IBM 8285 Nways ATM Workgroup Switch: Installation and User’s Guide
Page 61

Connecting ATM Devices to Form a Network
The following sections provides guidelines for building an ATM Campus Network:
Linking user devices to a switch (via UNI interface)
Linking switches together (via SSI interface) to form clusters
Linking clusters together (via NNI interface) to form subnetworks
Linking subnetworks together (via NNI) to form a Campus Network
Linking User Devices (UNI Interface)
ATM devices that can be connected to a Switch using the UNI interface include terminals and
workstations, routers, bridges, concentrators and servers.
Figure 14. Connections to User Devices (UNI)
Guidelines for Configuring UNI Ports on the ATM Workgroup Switch:
Both PVCs and SVCs can be defined on the same physical port
For SVCs, the connection identifiers (VPI:VCI) have VPI equal to 0.
For PVCs, both Virtual Path (VP) connections and Virtual Channel (VC) connections are supported:
– VP Identifiers (VPI) are in the range:
- 0-7 over 25.6Mbps ports
- 0-15 over all other ports
– VC Identifiers (VCI) are in the range 32-1023.
The Well-Known PVC 0.17 (ATM Forum LAN Emulation) is supported. This PVC can be defined
using the SET PVC command, or using Nways Campus Manager ATM version 1.1.2.
ILMI is not required for ATM connection through PVC.
The maximum number of ILMI registered addresses per switch is 1024.
Chapter 3. Building an ATM Campus Network 33
Page 62

Linking Subsystems to Form a Cluster (SSI Interface)
An ATM cluster is a group of ATM switches connected by SSI trunks.
Figure 15. Connections Within a Cluster (SSI)
Guidelines for SSI Trunks:
The bandwidth you specify (or default) must be identical at both ends of an SSI link.
The total bandwidth budget for all SSI ports defined in the Base Unit and Expansion Unit is
212Mbps.
The total Reserved Bandwidth of the Base Unit and Expansion Unit (for class-A PVCs and NNI
ports, for example) cannot exceed 180Mbps.
See also “General Guidelines for Configuring Trunks” on page 44 for further information.
Performance Considerations:
Each cluster should contain no more than 25 switches
Switches should not be separated from each other by more than 5 hops. (Call set up and cell transit
time are proportional to the number of hops.)
34 IBM 8285 Nways ATM Workgroup Switch: Installation and User’s Guide
Page 63

Parallel SSI Trunk Links:
For increased availability or throughput, parallel SSI trunk links may be
defined between switches as shown in Figure 16.
Figure 16. Parallel Trunk Links
Note: The bandwidth provided by parallel links between switches cannot be shared, that is, two parallel
links between 25.6Mbps ports does not provide 51.2Mbps bandwidth.
Chapter 3. Building an ATM Campus Network 35
Page 64

Linking Clusters to Form a Subnetwork (NNI Interface)
An ATM subnetwork is a group of ATM clusters connected by NNI trunks. Each NNI trunk connects the
‘boundary switch’ in one cluster to the boundary switch in another cluster, as shown in Figure 17.
Figure 17. NNI Trunks Between Clusters
Configuring NNI Trunks Between Clusters:
an NNI trunk, you will:
Configure the port for the trunk as an NNI port (using the SET PORT command)
Configure a ‘logical link’ for that port (using the SET LOGICAL_LINK command) by specifying:
– Virtual Path Identifier (VPI) number
– ATM cluster number (ACN) for the remote boundary switch
– Bandwidth available on the virtual path
– Signalling role for Q.2931 protocol.
You can configure multiple logical links over the same physical port. However, you can only
configure one logical link (using one pair of ATM ports) for each ATM cluster-to-cluster trunk
connection.
On each of the boundary switches that will be linked by
Guidelines for NNI Trunks:
You can establish NNI links both over physical links and over Virtual Path connections (VP
tunneling).
You can define a maximum of 16 logical links per NNI port, with VPIs in the range:
– 0-7 over 25.6Mbps ports
– 0-15 over all other ports
The total bandwidth reserved for NNI links is:
– 21.2Mbps per 25.6Mbps port
– 131Mbps per 155Mbps port
36 IBM 8285 Nways ATM Workgroup Switch: Installation and User’s Guide
Page 65

The total Reserved Bandwidth of the Base Unit and Expansion Unit (for class-A PVC and NNI
ports, for example) cannot exceed 180Mbps.
According to ATM Forum recommendations, PVCs cannot cross NNI links. To set up a PVC across
an NNI link, see the workaround described in “PVCs Between clusters” on page 42.
Multicast VCCs are supported on NNI links, with VPIs in the range:
– 0-7 over 25.6Mbps ports
– 0-15 over all other ports
See also “General Guidelines for Configuring Trunks” on page 44 for further information.
Adjacent Clusters:
Due to the lack of dynamic routing on NNI links, all clusters within the same
subnetwork must be adjacent, as shown in Figure 18.
Figure 18. Connections Within a Subnetwork or Campus Network (NNI)
Parallel NNI Trunk Links:
Parallel NNI trunk links may also be defined between clusters for increased
availability or throughput, as shown in Figure 16 on page 35.
Parallel NNI links must begin from the same switch and end at the same switch.
Chapter 3. Building an ATM Campus Network 37
Page 66

Linking Subnetworks to Form a Campus Network
An ATM Campus Network is a group of ATM subnetworks connected by NNI trunks. Each NNI trunk
connects the ‘boundary switch’ in one subnetwork to the boundary switch in another subnetwork, as
shown in Figure 19.
Figure 19. NNI Trunks Between Subnetworks
Configuring NNI Trunks Between Subnetworks:
by an NNI trunk, you will:
Configure the port for the trunk as an NNI port (using the SET PORT command)
Define a ‘static route’ (using SET STATIC_ROUTE) that associates a local cluster number (ACN) with the
address of the remote boundary switch
Configure a ‘logical link’ to the local ACN associated with the remote switch (using SET
LOGICAL_LINK)
You can configure multiple logical links over the same physical port. However, you can only
configure one logical link (using one pair of ATM ports) for each ATM cluster-to-cluster trunk
connection.
Guidelines for NNI Trunks via Static Routes:
Parallel NNI links may be defined between clusters in separate subnetworks.
The maximum number of Static Routes associated to local ATM Cluster Numbers (ACNs) is 50.
Due to the lack of dynamic routing on NNI links, it is recommended that you design networks where
all the clusters are adjacent, as shown in Figure 18 on page 37.
See also “General Guidelines for Configuring Trunks” on page 44 for further information.
38 IBM 8285 Nways ATM Workgroup Switch: Installation and User’s Guide
On each of the boundary switches that will be linked
Page 67

Example: Configuring a Static Route
The following example demonstrates the steps required to configure a connection between two ATM user
devices attached to different subnetworks. Figure 20 shows the trunks that must be configured to allow
Workstation Kouros and Workstation Sphinx to communicate,
Figure 20. Example of Logical Links and Static Routes
Chapter 3. Building an ATM Campus Network 39
Page 68

From Sphinx to Kouros:
must know the local ACN for cluster C (02). You would then start from ATM Workgroup Switch F, the
entry point to cluster A in subnetwork Y:
1. From ATM Workgroup Switch F (entry point in cluster A), enter the SET STATIC_ROUTE command
with the local ACN for Cluster B (02).
2. From Hub G (boundary hub), enter the SET LOGICAL_LINK command with the local ACN for Cluster
B (02).
3. From Hub H (the entry point in cluster B), enter the SET STATIC_ROUTE command with a dummy
ACN (for example, 33) that will represent Cluster C (local ACN=02) in Subnetwork X.
4. From Hub H (which is also a boundary hub), enter the SET LOGICAL_LINK command using the
same dummy ACN (33).
The ATM address of Workstation Kouros is known in cluster C by the updates received at each ATM
switch by the Topology Routing Service (TRS).
To configure the route from Workstation Sphinx to Workstation Kouros, you
From Kouros to Sphinx:
know the local ACN for cluster A (01). You would start from Hub J, the entry point to cluster C in
subnetwork X:
1. From Hub J, enter the SET STATIC_ROUTE command with a dummy ACN (for example, 44) that
will represent Cluster A (local ACN=01 in Subnetwork Y).
2. From Hub I (boundary hub), enter the SET LOGICAL_LINK command using the same dummy ACN
(44) for Cluster A.
3. From Hub H (boundary hub), enter the SET LOGICAL_LINK command with the ACN for cluster A
(01).
The ATM address of Workstation Sphinx is known in cluster A by the TRS updates.
To configure the route for communication in the opposite direction, you must
40 IBM 8285 Nways ATM Workgroup Switch: Installation and User’s Guide
Page 69

Configuring Permanent Virtual Circuits (PVCs)
Permanent Virtual Circuits (PVCs) can be defined to connect two ATM ports within the same cluster.
Two types of PVC are supported:
PVCs for virtual channel connections (VCCs)
PVCs for virtual path connections (VPCs), also known as permanent virtual path (PVP).
For each PVC you must define:
The hub number (HN) of the remote switch
The ports that form the local and remote end points
A unique PVC identifier
The type of PVC (path or channel)
The bandwidth allocation algorithm (best effort or reserved)
The maximum number of PVCs that can exist in an workgroup switch is 100.
PVC Workarounds
Workarounds are necessary to create PVCs in certain circumstances:
PVCs across NNI trunks.
PVCs to 8260 hubs with CPSW modules earlier than version 2.1.0
Chapter 3. Building an ATM Campus Network 41
Page 70

PVCs Between clusters:
According to ATM Forum recommendations, PVCs cannot cross NNI links.
To set up a PVC that works across an NNI link between clusters:
Set up the two PVCs within the clusters that will be joined by the NNI link
Join both PVCs by fibre or cable, as shown in Figure 21
Configure the two “boundary” ports with the same VPI:VCI.
Figure 21. PVC Workaround for Cross-NNI Links
42 IBM 8285 Nways ATM Workgroup Switch: Installation and User’s Guide
Page 71

PVCs to Early IBM 8260 ATM Control Point and Switches:
Internal management of PVCs in the ATM
Workgroup Switch is not compatible with versions of the IBM 8260 ATM Control Point and switch prior to
version 2.1.0.
To set up a PVC to an 8260 hub with a CPSW earlier than version 2.1.0, you must:
Define one PVC among the ‘pre-v.2.1.0’ switches only
Define one PVC among the later version switches
Join the two PVCs by fibre or cable, as shown in Figure 22
Configure the two “boundary” ports with the same VPI:VCI.
Figure 22. PVC Workaround for Early Hub Versions
Chapter 3. Building an ATM Campus Network 43
Page 72

General Guidelines for Configuring Trunks
The ATM Workgroup Switch does not police traffic on its ATM ports. If an attached device does not
comply with the agreed bandwidth, or if, for example, you forward traffic from a 155Mbps port to a
25.6Mbps port, cells will be lost.
When traffic on a Reserved Bandwidth connection exceeds the agreed bandwidth, the traffic on
Non-Reserved Bandwidth connections is reduced.
If you are using PVCs and you think the traffic will reach the limits of the ports or of the workgroup
switch, it is recommended that you define these PVCs as reserved_bandwidth.
The following maximum numbers of connections apply to switched Virtual Circuits (SVC) and
Permanent Virtual Circuits (PVC).
Maximum number of connections per switch
The maximum number of connections depends on their type, Point-to-Point (PtP) or
Point-to-Multipoint (PtM), and for PtM connections on the number of branches per connection.
The following rules apply:
– The switch has 2048 control blocks
– 2 control blocks are required per PtP connection (up to 1024 PtP connections)
– 1 control block is required per branch of a PtM connection
– The switch has 2048 party control blocks (2 party control blocks are required per party)
– The maximum number of parties over point-to-multipoint connections is 1000.
– The maximum number of PVCs that can be defined and saved per switch is 100. PVC
definitions are stored in non-volatile RAM for automatic restart
Maximum number of connections per port
The maximum number of PtP plus PtM connections is 992.
Maximum number of connections per Base Unit.
The maximum number of PtP plus PtM connections on the Base Unit is 992.
Maximum number of Clients in the LAN-Emulation Server
The integrated LAN-Emulation Server can accept up to 128 client registrations.
Important: Problems in the normal operation of your ATM subnetwork may occur when the
maximum number of virtual connections (VCs) allowed on the ATM Workgroup Switch Base Unit is
exceeded.
44 IBM 8285 Nways ATM Workgroup Switch: Installation and User’s Guide
Page 73

Part 2. Mounting Workgroup Switch Components
Chapter 4. Mounting the Base Unit ................................. 47
Contents of the Base Unit Shipping Group ............................... 47
Rack or Surface Mounting ....................................... 48
Chapter 5. Mounting the 155Mbps ATM I/O Card ......................... 53
Precautions . . . . . . . . . . . . . . . . . . . . . . . . . . . . . . . . . . . . . . . . . . . . . . . 53
Unpacking the I/O Card ........................................ 53
Mounting Procedure . . . . . . . . . . . . . . . . . . . . . . . . . . . . . . . . . . . . . . . . . . 55
Chapter 6. Mounting the Expansion Unit .............................. 59
Contents of the Expansion Unit Shipping Group ............................ 59
Rack or Surface Mounting ....................................... 60
Chapter 7. Mounting ATM Media Modules in the Expansion Unit ................ 65
Guidelines for Mounting ATM Media Modules ............................. 65
Mounting Procedure . . . . . . . . . . . . . . . . . . . . . . . . . . . . . . . . . . . . . . . . . . 66
Chapter 8. Power-On and Self Test ................................. 69
Power-On Procedure . . . . . . . . . . . . . . . . . . . . . . . . . . . . . . . . . . . . . . . . . . 69
Power-On Self Test (POST) ...................................... 70
Copyright IBM Corp. 1995, 1996 45
Page 74

46 IBM 8285 Nways ATM Workgroup Switch: Installation and User’s Guide
Page 75

Chapter 4. Mounting the Base Unit
This chapter describes the procedures for mounting the Base Unit.
See the
DANGER and CAUTION notices that concern this product, and their translations.
IBM 8285 Nways ATM Workgroup Switch: Safety and Service Catalog
, SY33-2113 for
Contents of the Base Unit Shipping Group
Figure 23 illustrates the contents of the ATM Workgroup Switch Base Unit shipping group.
ATM
Workgroup Switch
Base Unit
Mounting
Bracket
Figure 23. Contents of the ATM Workgroup Switch Shipping Group
Copyright IBM Corp. 1995, 1996 47
Cable Management
Bracket
Page 76

The Base Unit shipping group contains:
An ATM Workgroup Switch Base Unit with mounting brackets attached – P/N 58G9654
A cable management bracket – P/N 92G8549
An RS-232 wrap plug (not shown) – P/N 58G9868
An RS-45 wrap plug (not shown) – P/N 42H0540
RS-232 connectors for the ATM Workgroup Switch configuration console (not shown), consisting of:
– Cable – P/N 6323741
– Null-modem interposer – P/N 58F2861
– Gender changer – P/N 58G4422
A power cord (not shown) suitable for the country
The following publications (not shown):
–
IBM 8285 Nways ATM Workgroup Switch: Installation and User’s Guide
manual)
–
IBM 8285 Nways ATM Workgroup Switch: Safety and Service Catalog
–
IBM 8285/8260: ATM Command Reference Guide
If any item is missing or damaged, contact your place of purchase.
, SA33-0385
, SA33-0381 (this
, SA33-0398
Rack or Surface Mounting
Use the cabling chart provided by your network administrator to determine whether the Base Unit will be
mounted on a surface or in a rack. If you are using the ATM Workgroup Switch Cabling Chart that came
with the
in the top portion of that chart.
IBM 8250/8260/8285: Planning and Site Preparation Guide
, GA33-0285, this information is found
Notes:
1. Make sure that there is adequate space around the Base Unit to provide sufficient ventilation for the
unit. The Base Unit requires at least 100 mm (4 in) spacing at the front and 300 mm (12 in) at the
back.
2. Make sure the mounting location meets the environmental requirements of the Base Unit
(temperature, humidity, ventilation, and so on) as described in Appendix A, “Specifications” on
page 185.
3. Before installing the Base Unit, be sure to read “Electronic Emission Notices” on page xvii.
If the Base Unit is to be:
Rack mounted (the preferred mounting style), continue with “Rack Mounting the Base Unit” on
page 49.
Surface mounted, go to “Surface Mounting the Base Unit” on page 51.
48 IBM 8285 Nways ATM Workgroup Switch: Installation and User’s Guide
Page 77

Rack Mounting the Base Unit
Notes:
1. At the discretion of the installer, a second person may help install the Base Unit in the equipment
rack.
You must support the Base Unit while you are tightening the screws to avoid dropping it on the floor
or on other equipment beneath it in the rack. The Base Unit weighs approximately 12.8 kg (28.2 lb).
2. It is recommended that you use a screw starter when installing the Base Unit in the rack.
Follow these steps to mount the Base Unit in a rack:
1 Look at the rack inventory chart provided by your network administrator to determine where in
the rack the Base Unit should be mounted.
2 Insert the lower left-hand screw into the Base Unit, and then lift the Base Unit into position,
lining up the screw and the mounting hole in the rack.
Partially tighten the screw.
3 Align the hole in the cable management bracket with the holes on the right-hand mounting
bracket and the rack. Using one screw, secure the cable management bracket and the lower
right-hand side of the unit in the rack. This is shown in Figure 24 on page 50.
Chapter 4. Mounting the Base Unit 49
Page 78

Figure 24. Rack Mounting the Base Unit
4 Insert and partially tighten the upper two screws.
5 Tighten all four screws securely with a screwdriver.
6 Return to “Procedure 1: Mounting the ATM Workgroup Switch Components” on page 22.
50 IBM 8285 Nways ATM Workgroup Switch: Installation and User’s Guide
Page 79

Surface Mounting the Base Unit
Note: For safety purposes, the mounting surface must be able to support a minimum of 100 kg (200
lbs).
1 Using a screwdriver, loosen the four flat-head screws that attach the two mounting brackets to
the sides of the Base Unit. The middle screw with the Phillips head is visible but should not
be loosened.
2 Rotate the brackets and reattach them to the Base Unit as shown in Figure 25 on page 52.
The bracket stamped
bracket stamped
stays on the left side of the Base Unit (from the front) and the
on the right side.
Chapter 4. Mounting the Base Unit 51
Page 80

A
A
Note tab position
Figure 25. Attaching the Mounting Brackets for Surface Mounting
3 Place the Base Unit on the surface where it is to be used.
B
B
4 Return to “Procedure 1: Mounting the ATM Workgroup Switch Components” on page 22.
52 IBM 8285 Nways ATM Workgroup Switch: Installation and User’s Guide
Page 81

Chapter 5. Mounting the 155Mbps ATM I/O Card
This chapter describes the installation procedures for the optional 155Mbps ATM I/O Card:
Precautionary procedures
Unpacking the I/O card
Installing the I/O card in the ATM Workgroup Switch
No special tools are needed to install the I/O card. The procedure is the same for both the single mode
I/O card and the multi-mode I/O card.
See the
DANGER and CAUTION notices that concern this product, and their translations.
Precautions
Electrostatic discharge (ESD) can damage static-sensitive devices on circuit boards. Follow these
precautions when you handle the 155Mbps ATM I/O Card.
Warnings:
1. Do not remove the board from its anti-static shielding bag until you are ready to inspect or install it.
2. Handle the board by the faceplate only.
Use one of the following proper grounding techniques, if possible, when you install the 155Mbps ATM I/O
Card:
Use a foot strap and grounded mat or wear a grounded static discharge wrist strap.
Touch the grounded rack or other source of ground just before you handle the I/O card
IBM 8285 Nways ATM Workgroup Switch: Safety and Service Catalog
, SY33-2113 for
Unpacking the I/O Card
To unpack the 155Mbps ATM I/O Card:
1. Verify that the I/O card is the feature that you ordered by checking the MFI Part Number listed on the
side of the shipping carton:
P/N 47H2290 - Multimode Fiber (MMF) I/O card
P/N 51H3860 - Single Mode Fiber (SMF) I/O card
2. Remove the I/O card from the shipping carton.
3. Remove the I/O card from the anti-static shielding bag, and inspect it for damage.
Always handle the I/O card by the faceplate, being careful not to touch the components. If the I/O
card appears to be damaged, return it to the anti-static shielding bag, repack in the shipping carton,
and contact your local supplier.
Copyright IBM Corp. 1995, 1996 53
Page 82

Keep the shipping carton and anti-static shielding bag in which your 155Mbps ATM I/O Card was shipped
for future storage or shipment.
Record the serial number of the I/O card you received.
54 IBM 8285 Nways ATM Workgroup Switch: Installation and User’s Guide
Page 83

Mounting Procedure
To install the 155Mbps ATM I/O Card, perform the following steps in sequence:
1Be sure to power off the ATM Workgroup Switch by unplugging the power cord before you
begin, because the 155Mbps ATM I/O Card is not hot-pluggable. If you do not unplug the
power cord, you risk damaging the ATM Workgroup Switch.
2Loosen the knurled screws on both sides of the dummy slot cover and remove it from the front
panel of the Base Unit.
Figure 26. Removing the Dummy Slot Cover
Store the dummy slot cover in a safe place in case the I/O card needs to be removed in the
future.
3Insert the I/O card in the open slot and ensure that the edges of the module are inside the guide
rails.
Chapter 5. Mounting the 155Mbps ATM I/O Card 55
Page 84

Guide Rail
Figure 27. Inserting the 155Mbps ATM I/O Card
4Slide the module into the Base Unit until it snaps into place and is flush with the front panel of the
Base Unit.
56 IBM 8285 Nways ATM Workgroup Switch: Installation and User’s Guide
Page 85

Figure 28. Pressing the I/O card into Place
5Push in and finger-tighten the knurled screws on both sides of the I/O card.
6Return to “Procedure 1: Mounting the ATM Workgroup Switch Components” on page 22.
Chapter 5. Mounting the 155Mbps ATM I/O Card 57
Page 86

58 IBM 8285 Nways ATM Workgroup Switch: Installation and User’s Guide
Page 87

Chapter 6. Mounting the Expansion Unit
This chapter describes the procedures for mounting the Expansion Unit.
See the
DANGER and CAUTION notices that concern this product, and their translations.
IBM 8285 Nways ATM Workgroup Switch: Safety and Service Catalog
, SY33-2113 for
Contents of the Expansion Unit Shipping Group
Figure 29 illustrates the contents of the ATM Workgroup Switch Expansion Unit shipping group.
ATM
Workgroup Switch
Expansion Unit
Mounting
Bracket
Figure 29. Contents of the Expansion Unit Shipping Group
Copyright IBM Corp. 1995, 1996 59
Cable Management
Bracket
Page 88

The Expansion Unit shipping group contains:
An ATM Workgroup Switch Expansion Unit with mounting brackets attached – P/N 47H2422
A cable management bracket – P/N 92G8549
A power cord (not shown) suitable for the country
An Expansion Interface cable (not shown) – P/N 58G9738
An Expansion Connector wrap plug (not shown) – P/N 58G9869
If any item is missing or damaged, contact your place of purchase.
Rack or Surface Mounting
Use the cabling chart provided by your network administrator to determine whether the Expansion Unit
will be mounted on a surface or in a rack. If you are using the ATM Workgroup Switch Cabling Chart
that came with the
information is found in the top portion of that chart.
Notes:
1. Make sure that there is adequate space around the Base Unit to provide sufficient ventilation for the
unit. The Base Unit requires at least 100 mm (4 in) spacing at the front and 300 mm (12 in) at the
back.
2. Make sure the mounting location meets the environmental requirements of the Base Unit
(temperature, humidity, ventilation, and so on) as described in Appendix A, “Specifications” on
page 185.
3. Before installing the Expansion Unit, be sure to read “Electronic Emission Notices” on page xvii.
IBM 8250/8260/8285: Planning and Site Preparation Guide
, GA33-0285, this
If the Expansion Unit is to be:
Rack mounted (the preferred mounting style), continue with “Rack Mounting the Expansion Unit” on
page 61.
Surface mounted, go to “Surface Mounting the Expansion Unit” on page 64.
60 IBM 8285 Nways ATM Workgroup Switch: Installation and User’s Guide
Page 89

Rack Mounting the Expansion Unit
Notes:
1. At the discretion of the installer, a second person may help install the Expansion Unit in the
equipment rack.
2. You must support the Expansion Unit while you are tightening the screws to avoid dropping it on the
floor or on other equipment beneath it in the rack. The Expansion Unit weighs approximately 12.8 kg
(28.2 lb).
3. It is recommended that you use a screw starter when installing the Expansion Unit in the rack.
Follow these steps to mount the Expansion Unit in a rack:
1 Look at the rack inventory chart provided by your network administrator to determine where in
the rack the Expansion Unit should be mounted.
2 Insert the lower left-hand screw into the Expansion Unit, and then lift the Expansion Unit into
position, lining up the screw and the mounting hole in the rack.
Partially tighten the screw.
3 Align the hole in the cable management bracket with the holes on the right-hand mounting
bracket and the rack. Using one screw, secure the cable management bracket and the lower
right-hand side of the unit in the rack. This is shown in Figure 30 on page 62.
Chapter 6. Mounting the Expansion Unit 61
Page 90

Figure 30. Rack Mounting the Expansion Unit
4 Insert and partially tighten the upper two screws.
5 Tighten all four screws securely with a screwdriver.
62 IBM 8285 Nways ATM Workgroup Switch: Installation and User’s Guide
Page 91

6 Attach one end of the Expansion Interface cable to the Base Connector on the Expansion
Unit, as shown in Figure 31.
Figure 31. Attaching the Expansion Interface Cable
Attach the other end of the cable to the Expansion Connector on the Base Unit in the same
way. Finger-tighten the two jack screws on each connector.
7 Return to “Procedure 1: Mounting the ATM Workgroup Switch Components” on page 22.
Chapter 6. Mounting the Expansion Unit 63
Page 92

Surface Mounting the Expansion Unit
Note: For safety purposes, the mounting surface must be able to support a minimum of 100 kg (200
lbs).
1 Using a screwdriver, loosen the four flat-head screws that attach the two mounting brackets to
the sides of the Expansion Unit. The middle screw with the Phillips head is visible but should
not be loosened.
2 Remove the brackets and reattach the screws to the Expansion Unit as shown in Figure 32.
Retain the brackets for possible future rack mounting.
Figure 32. Attaching the Mounting Brackets for Surface Mounting
3 Place the Expansion Unit on top of the Base Unit that it will be connected to.
4 Attach one end of the Expansion Interface cable to the Base Connector on the Expansion
Unit, as shown in Figure 31 on page 63. Attach the other end of the cable to the Expansion
Connector on the Base Unit in the same way. Finger-tighten the two jack screws on each
connector.
5 Return to “Procedure 1: Mounting the ATM Workgroup Switch Components” on page 22.
64 IBM 8285 Nways ATM Workgroup Switch: Installation and User’s Guide
Page 93

Chapter 7. Mounting ATM Media Modules in the Expansion Unit
This chapter describes general procedures for mounting ATM media modules in the Expansion Unit. For
specific installation instructions, see the documentation for the individual module.
See the
DANGER and CAUTION notices that concern this product, and their translations.
Note: It is not necessary to power off the workgroup switch when installing or removing modules. (????)
All and all ATM media modules can be installed or removed from the workgroup switch without causing
any disruption to workgroup switch operation.
IBM 8285 Nways ATM Workgroup Switch: Safety and Service Catalog
, SY33-2113 for
Guidelines for Mounting ATM Media Modules
Observe these general guidelines when handling, installing, or removing an ATM media module.
Electrostatic discharge (ESD) can damage static-sensitive devices on circuit boards.
– Do not remove an ATM media module from its anti-static shielding bag until you are ready to
inspect it.
– To ensure that static charge is removed, touch any installed module's fastener screw before
installing a new module. This will help to dissipate charge energy through the chassis to the
grounded power cord.
– Handle an ATM media module by the faceplate only.
Do not twist or otherwise force ATM media modules into the workgroup switch when inserting them
in the workgroup switch’s left and right card guides.
To assure proper installation, simply match the left and right card guides as you slide the module
cleanly into place. Do not attempt to push the module all the way into the workgroup switch until you
have verified that module ejectors are OPEN. (See Figure 34 on page 67.)
When removing any installed ATM media module (and especially when removing an ATM media
module on which submodules are installed), carefully pull the ATM media module straight out of the
slot. This helps to ensure that installed submodules and host circuit board components are not
damaged as the host module is being removed.
Complete any ATM media module installation by simultaneously closing the left and right ejectors
before tightening the faceplate screws that secure the module to the front of the workgroup switch.
We recommend that you use a screwdriver to tighten and loosen the faceplate screws.
After installing an ATM media module, record its slot location on the Hub Planning Chart provided in
the
IBM 8250/8260/8285: Planning and Site Preparation Guide
chart shipped with each ATM media module. The Hub Planning Chart also makes it easy to record
network connections for any installed module, and to enter remarks that will help you to operate your
workgroup switch in the most convenient and efficient manner possible.
, GA33-0285 and the module planning
Copyright IBM Corp. 1995, 1996 65
Page 94

Mounting Procedure
For each ATM media module you will mount in the ATM Workgroup Switch perform the following steps:
1 If the slot is filled with a dummy module, loosen the knurled screws on both sides of the
cover and remove it from the front panel of the Expansion Unit.
Figure 33. Removing the Dummy Module
Store the dummy module in a safe place in case the ATM media module needs to be
removed in the future.
66 IBM 8285 Nways ATM Workgroup Switch: Installation and User’s Guide
Page 95

2 Make sure that both ejectors (left and right) are in the open position before attempting to
install the module as shown in Figure 34.
Figure 34. ATM Media Module Ejectors ("Open" and "Closed" Positions)
3 Match the module circuit board to the slot's left and right card guides. The easiest way to do
this is to line up the module circuit board with the number at the left of the selected slot
before you insert the circuit board in the card guides.
Chapter 7. Mounting ATM Media Modules in the Expansion Unit 67
Page 96

Figure 35. Inserting an ATM Media Module in the Expansion Unit
4 Slide the circuit board into the slot's left and right card guides. Push the module in at a point
to the right of the "half height" level for smoother travel. See Figure 34 on page 67.
5 Push the end of each ejector toward the horizontal center of the ATM media module to pull
the module into the slot. When the module makes contact with the backplane connectors,
seat the module into the connectors by pressing each ejector simultaneously into the closed
position.
6 Fasten the spring-loaded screws on the front panel of the module to the workgroup switch
using your fingers. Do not overtighten.
7 Return to “Procedure 1: Mounting the ATM Workgroup Switch Components” on page 22.
68 IBM 8285 Nways ATM Workgroup Switch: Installation and User’s Guide
Page 97

Chapter 8. Power-On and Self Test
This chapter describes the Power-On procedure and the ATM Workgroup Switch’s subsequent Power-On
Self Test (POST) routine.
Power-On Procedure
To power-on the ATM Workgroup Switch, perform the following steps:
1 Connect the power cords first to the Base Unit and Expansion Unit and then to an electrical
outlet.
Note: Neither the ATM Workgroup Switch Base Unit nor the Expansion Unit have a power
switch. They are powered on when you plug in the power cord.
2 Check that the Power LEDs (|) on the front panels of the Base Unit and the Expansion Unit
are lit (step 1 in Figure 36 on page 70).
If they are not lit, check that the power outlet is working correctly.
If the outlet is working and the Power LEDs are not lit, check the power cords.
If the power cords are working and the Power LEDs are still not lit, contact your IBM
service representative.
3 Verify that the Power-On Self Test (POST) has been completed successfully:
If none of the LEDs is lit or if any of the LEDs is not in the normal state, go to
Chapter 21, “Troubleshooting” on page 149 and proceed with troubleshooting
procedures.
If the POST has been completed successfully and all of the LEDs are in the normal state
(step 3 in Figure 36 on page 70), the ATM Workgroup Switch is running normally.
4 Return to the main installation procedure.
Copyright IBM Corp. 1995, 1996 69
Page 98

Power-On Self Test (POST)
The ATM Workgroup Switch automatically performs a POST once it is connected to a power supply. The
POST should last about 10 seconds. Figure 36 shows the patterns of the Status LEDs on the Base Unit
and Expansion Unit as the ATM Workgroup Switch performs its POST.
Figure 36. Pattern of the Status LEDs during Power-On Self-Test
70 IBM 8285 Nways ATM Workgroup Switch: Installation and User’s Guide
Page 99

Part 3. Configuration Procedures
Chapter 9. Setting-Up and Using the Configuration Console ................... 73
Normal Mode and SLIP Mode ..................................... 73
Using the Configuration Console .................................... 74
Setting Up a Configuration Console in Normal (ASCII) Mode ..................... 77
Setting Up a Configuration Console in SLIP Mode .......................... 78
TELNET Sessions Via a Remote Switch ................................ 82
Chapter 10. Configuring Basic Workgroup Switch Parameters .................. 85
Procedure . . . . . . . . . . . . . . . . . . . . . . . . . . . . . . . . . . . . . . . . . . . . . . . . 85
Setting Passwords . . . . . . . . . . . . . . . . . . . . . . . . . . . . . . . . . . . . . . . . . . . 86
Setting the Internal Clock ........................................ 88
Customizing Workgroup Switch Default Parameters .......................... 89
Setting the ATM Address of the Workgroup Switch .......................... 92
Chapter 11. Configuring Ports and Media Modules ........................ 93
Procedure . . . . . . . . . . . . . . . . . . . . . . . . . . . . . . . . . . . . . . . . . . . . . . . . 93
Default Settings for ATM Modules and Ports ............................. 94
Connecting ATM Media Modules to the Network ........................... 95
Enabling ATM Ports and Setting Interface Types ........................... 96
Chapter 12. Configuring Trunk Connections ............................ 99
Procedure . . . . . . . . . . . . . . . . . . . . . . . . . . . . . . . . . . . . . . . . . . . . . . . . 99
Setting Up Trunks (Logical Links) .................................. 100
Setting Static Routes to Other Subnetworks ............................. 100
Creating a PVC for Virtual Channel Connections .......................... 101
Creating a PVC for Virtual Paths Connections ............................ 102
Chapter 13. Configuring TCP/IP Parameters ........................... 103
Procedure . . . . . . . . . . . . . . . . . . . . . . . . . . . . . . . . . . . . . . . . . . . . . . . 103
IP Address and Subnetwork Mask .................................. 104
Default Gateway . . . . . . . . . . . . . . . . . . . . . . . . . . . . . . . . . . . . . . . . . . . 105
ARP Server . . . . . . . . . . . . . . . . . . . . . . . . . . . . . . . . . . . . . . . . . . . . . . 105
Chapter 14. Configuring LAN Emulation Parameters ...................... 107
Procedure . . . . . . . . . . . . . . . . . . . . . . . . . . . . . . . . . . . . . . . . . . . . . . . 107
Setting Up LAN Emulation Servers .................................. 108
Setting Up a LAN Emulation Client .................................. 111
Setting the LECS ATM Address ................................... 113
Chapter 15. Configuring SNMP Parameters ........................... 115
Procedures . . . . . . . . . . . . . . . . . . . . . . . . . . . . . . . . . . . . . . . . . . . . . . 115
IP Address and Subnetwork Mask (IP only) ............................. 117
LAN Emulation Client (LE only) ................................... 117
Default Gateway (IP & LE) ...................................... 117
ARP Server (IP only) ......................................... 117
Copyright IBM Corp. 1995, 1996 71
Page 100

Community Table (IP & LE) ..................................... 118
Alerts (IP & LE) ............................................ 118
Chapter 16. Working With Configuration Settings ........................ 119
Saving Configuration Settings and Logging Off ........................... 119
Reverting Configuration Changes .................................. 121
Displaying Configuration Settings .................................. 122
Modifying Configuration Settings ................................... 123
Reconfiguring Console Port Settings ................................. 125
72 IBM 8285 Nways ATM Workgroup Switch: Installation and User’s Guide
 Loading...