

Ibaby M7 User Manual
iBaby Labs, Inc.
iBaby Monitor User Manual
2
Deleted: 12
Contents
1 PRODUCT OVERVIEW ............................................................................................................... 3
1.1 Package List ............................................................................................................................ 3
1.2 Interface Introduction ............................................................................................................ 3
1.3 Product Specifications ........................................................................................................... 4
2 INSTALLATION GUIDE ............................................................................................................... 5
2.1 App Download ........................................................................................................................ 5
2.2 Getting Started ....................................................................................................................... 5
2.3 Register and Login .................................................................................................................. 5
2.4 Device Activation ................................................................................................................... 5
2.4.1 Apple Users Activation ........................................................................................................... 6
2.4.2 Android Users Activation ....................................................................................................... 7
3 APP OPERATION AND FUNCTION ......................................................................................... 9
3.1 The Main Viewing Screen ...................................................................................................... 9
3.2 App Function Menu ..............................................................................................................11
3.3 Frequently Used Function ....................................................................................................11
4 HELP BUTTON ON THE BASE ............................................................................................ 16
4.1 Moonlight ............................................................................................................................. 16
4.2 VOIP ...................................................................................................................................... 16
5 FREQUENTLY ASKED QUESTIONS .................................................................................. 17
5.1 LED Status Light .................................................................................................................... 17
5.2 Installation FAQ .................................................................................................................... 17
5.3 Loading Wheel ...................................................................................................................... 20
5.4 Features FAQ ........................................................................................................................ 23
6 CONTACT INFORMATION ..................................................................................................... 24
7 FCC CAUTION .......................................................................................................................... 24
iBaby Monitor User Manual
3
Deleted: Indicator
Deleted: i
1 Product Overview
1.1 Package List
ü iBaby Monitor
ü Base
ü Power Adapter
ü User Manual
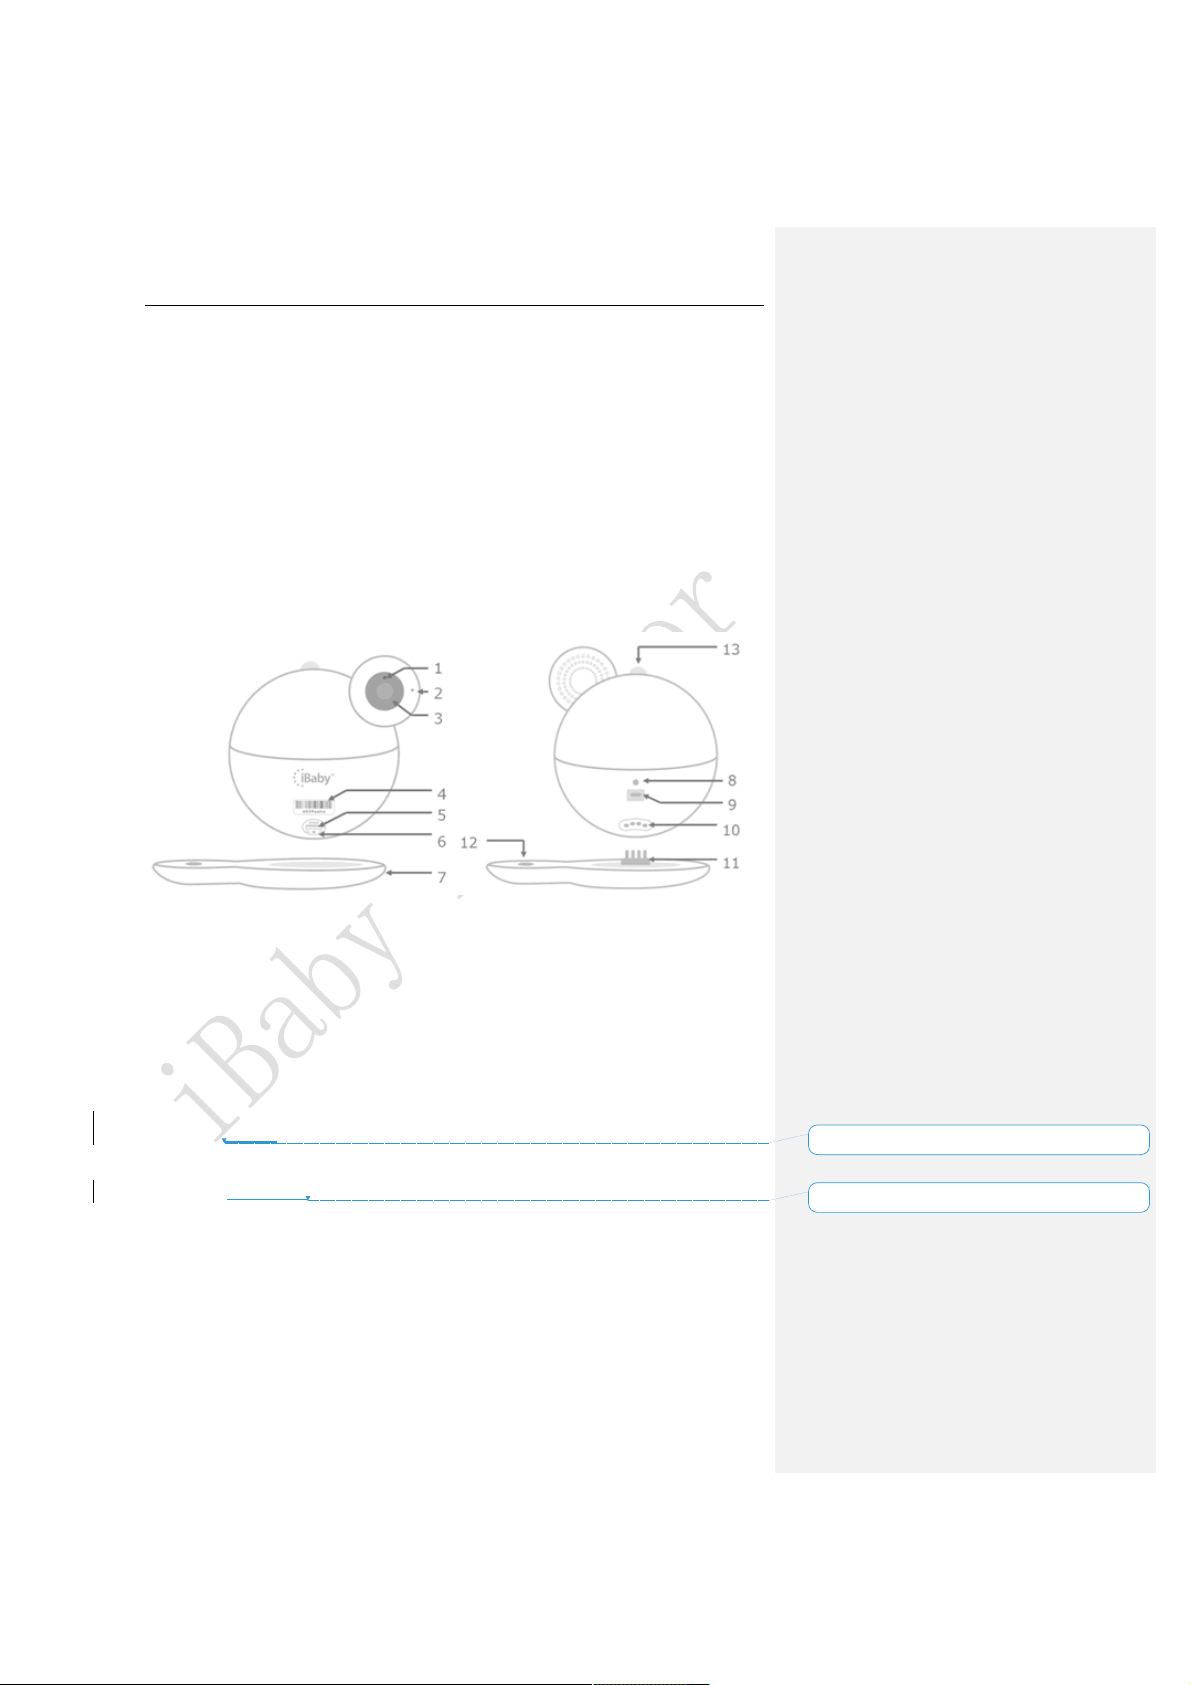
1.2 Interface Introduction
Figure 1
1) Night Vision Sensor
2) Microphone
3) Camera Lens
4) Monitor Serial Number:Monitor unique ID, such as “708Qaaaa”
5) USB Port: To Install the monitor for iPhone User Only.
6) Reset Button:hold for 30 seconds to reset
7) Base
8) LED Status Light:Shows status of monitor. Refer to Table 1 of Section 4.1
9) Power Source
10) Tempe ratur e/Hum idi ty Sen sor:detect temperature and humidity
11) Metal prong insert
12) Help Button
13) Moonlight

iBaby Monitor User Manual
4
Model:M7
Video
Compression
H.264
Frame rate
1~12 frame
Resolution
Ultra (1920*1080),HD(1280*720),VGA(640*480)
Camera
Standard:4.0mm F=2.2fixed aperture (3 million
camera lens) view angle 87.6°
Online users
Support 4 users online simultaneously
Audio
Compression
G711
Sampling frequency
8Kpbs
Input
Audio input/built-in microphone
Output
Audio output/built-in speaker
Intercom
Full duplex :two-way voice intercom simultaneously
Night vision
Night vision control
Photo resistance control infrared opening
automatically (Lowest Illumination 0LUX)
Night vision effect
9 940 LEDs night vision 8 meters
Platform
Control
Built-in motor
Rotate angle
Horizontal direction 360°Vertical direction 135°
Network Protocol
Network protocol
TCP/IP,HTTP, UDP, DHCP, UPNP, NTP,P2P
Support IP address
Dynamic IP address
Wireless
Wireless protocol
Support Wi-Fi 802.11 a/b/g/n
Wi-Fi module
Support 2.4GHz and 5GHz Wi-Fi
Encryption
Support WPA/WPA2 encryption
Antenna interface
1
Other Interface
USB interface
1
Temperature/Humidity
module
Built-in 1
Reset
1
Projector(Moonlight)
1
Power adapter
interface
Micro USB 5V 2A
Air quality
detection
Ethanol、limonene、acetone、IAQ mixture、
butylacetate、toluene、formaldehyde、hydrogen、
carbon monoxide、carbon dioxide
Others
Shape material
Plastic
Use environment
Indoor
Power consumption
Nobody view within 2.5W in the day,Infrared
opening within 3W in the evening
Work environment
Temperature :-10~40 °C,Humidity :40℃ ≤75%
1.3 Product Specifications
iBaby Monitor User Manual
5
Storage environment
Temperature :-40℃~55℃, Humidity:55℃ ≤90%
Size
Monitor size: 132*142*110MM (W x D x H )
Package size: 165*165*165MM (W x D x H)
Weight
Gross weight :2 lbs
System Requirement
Mobile phone
operation system
Above iOS 8.0;Above Android 4.0
Certification
Certificate
FCC CE ROSH RCM KC
Deleted: into
Deleted: color
Deleted: installing
Deleted: It can login automatically after registering.
Deleted: they
Deleted: they
Deleted: their
2 Installation Guide
2.1 App Download
Apple Users:Search on the App Store for“iBaby Care”
Android Users:Search on the Google Play Store for“iBaby Care”
The icon of the app is as follows:
2.2 Getting Started
Connect your device to power adapter and wait for the iBaby jingle. The LED light on the
back of the monitor will turn to a blinking red light after 30 seconds. The red blinking and
jingle indicates that the device is ready for installation.
Note: If the device has been previously activated, it will not jingle when connected to the
power adapter.
For the LED status, please refer to Table 1 of section 4.1.
2.3 Register and Login
1.New users
Follow the prompt on the app to register an account. Use an active email address and use
a password must contain letters (case sensitive) and numbers. The length of it must be
over 6 characters. You can have the option to login automatically after registering.
Note: Active email can support users to find their password if they forget.
2.Users with account
Login with email and password you previously registered before. If you forget your
password, please click“Forgot Password”to reset your password.
2.4 Device Activation
Please confirm that your mobile phone used for activating the device is connected to your
Wi-Fi network. And then login with the registered account after the monitor is ready to
iBaby Monitor User Manual
6
Deleted: as
install.
2.4.1 Apple Users Activation
1.Open the USB cover on the bottom of the device, then connect your iPhone or iPad to
the device with the original iPhone USB cable.
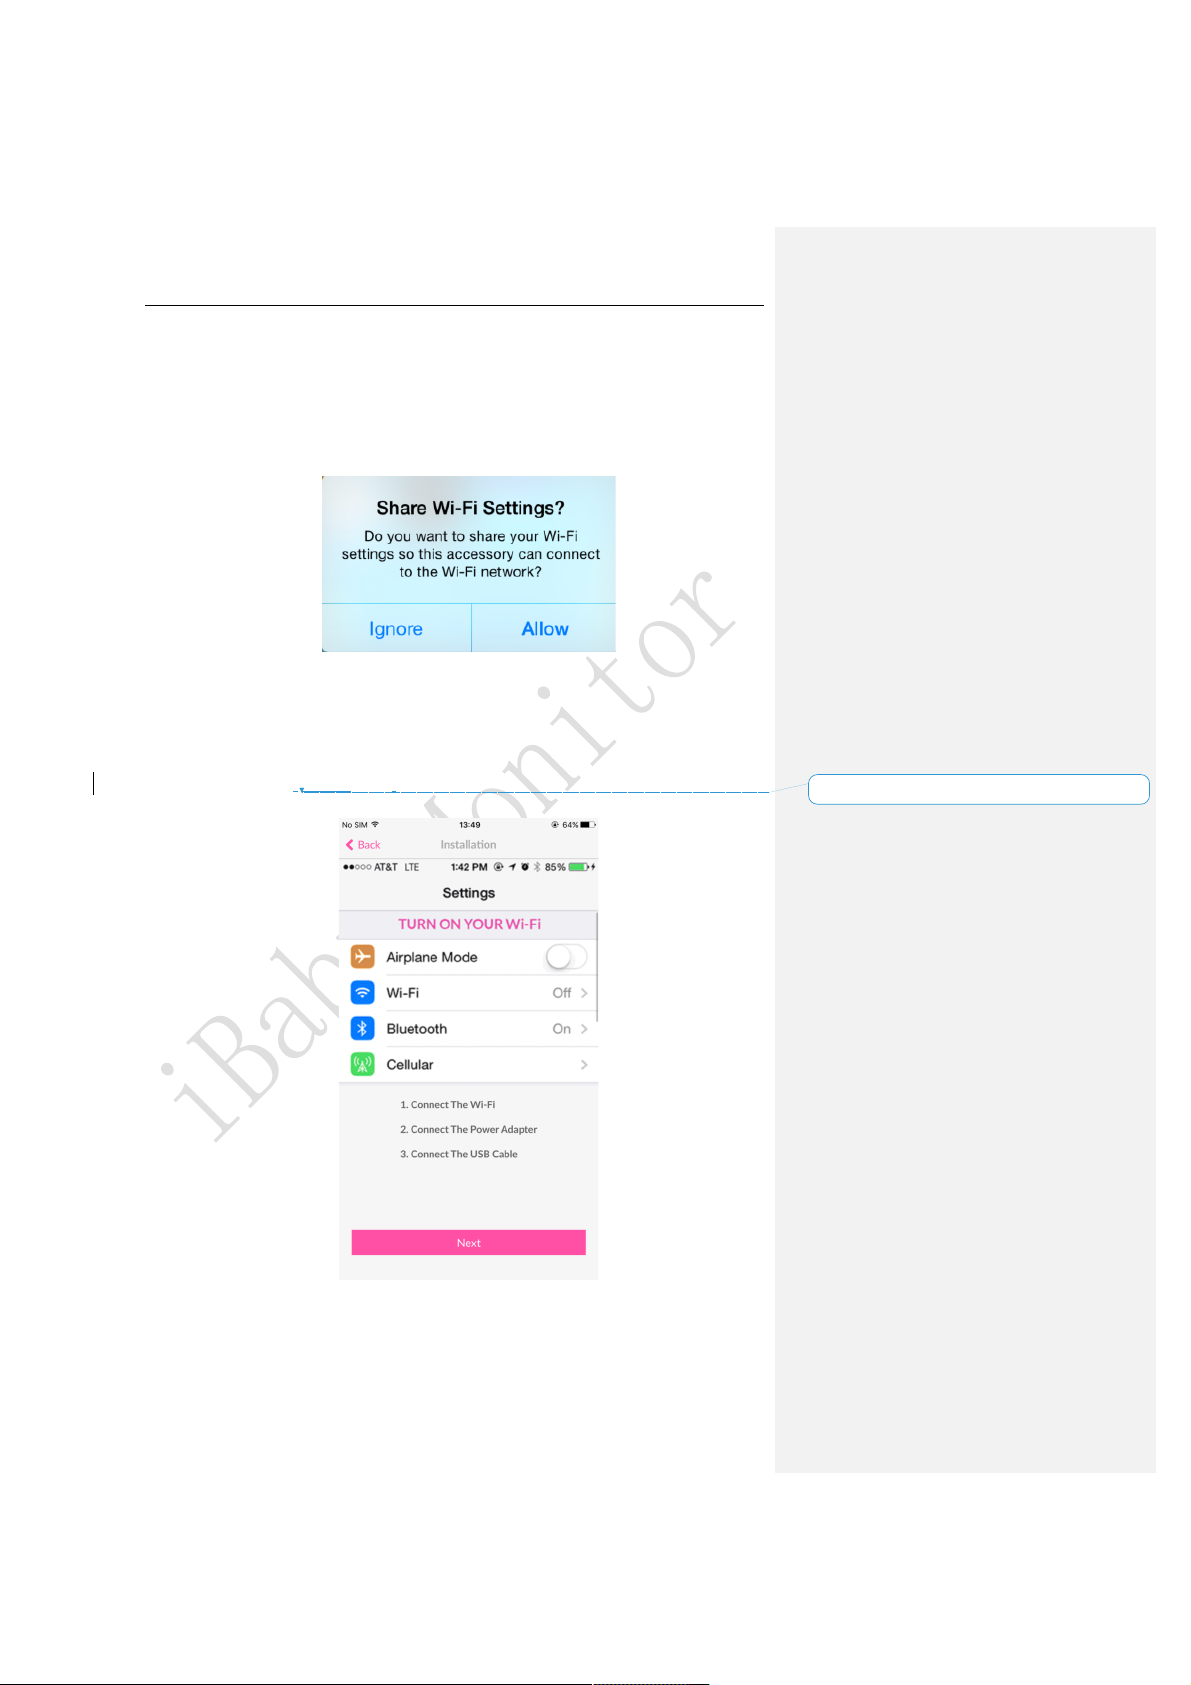
2.You will see a “Share Wi-Fi Settings?”prompt on your screen. Once this window shows,
click “Allow”. The LED status light will then turn into a blinking green light.
Figure 2
Note:
1) If the prompt does not show, unplug and re-plug the USB cable.
2) If the LED status light does not turn a blinking green, please contact Customer Service
or refer to the FAQ of section 4.2 for help.
3.It will show a scene, shown below, on the app after selecting the monitor you have, then
click “Next”to activate the device.
Figure 3
4.Once the device is activated, unplug the USB cable. Put the USB cover back on and
place the device on the base.
iBaby Monitor User Manual
7
Note: If you still cannot activate the device, please refer to the “Installation Issues”in
section 4.2.
2.4.2 Android Users Activation
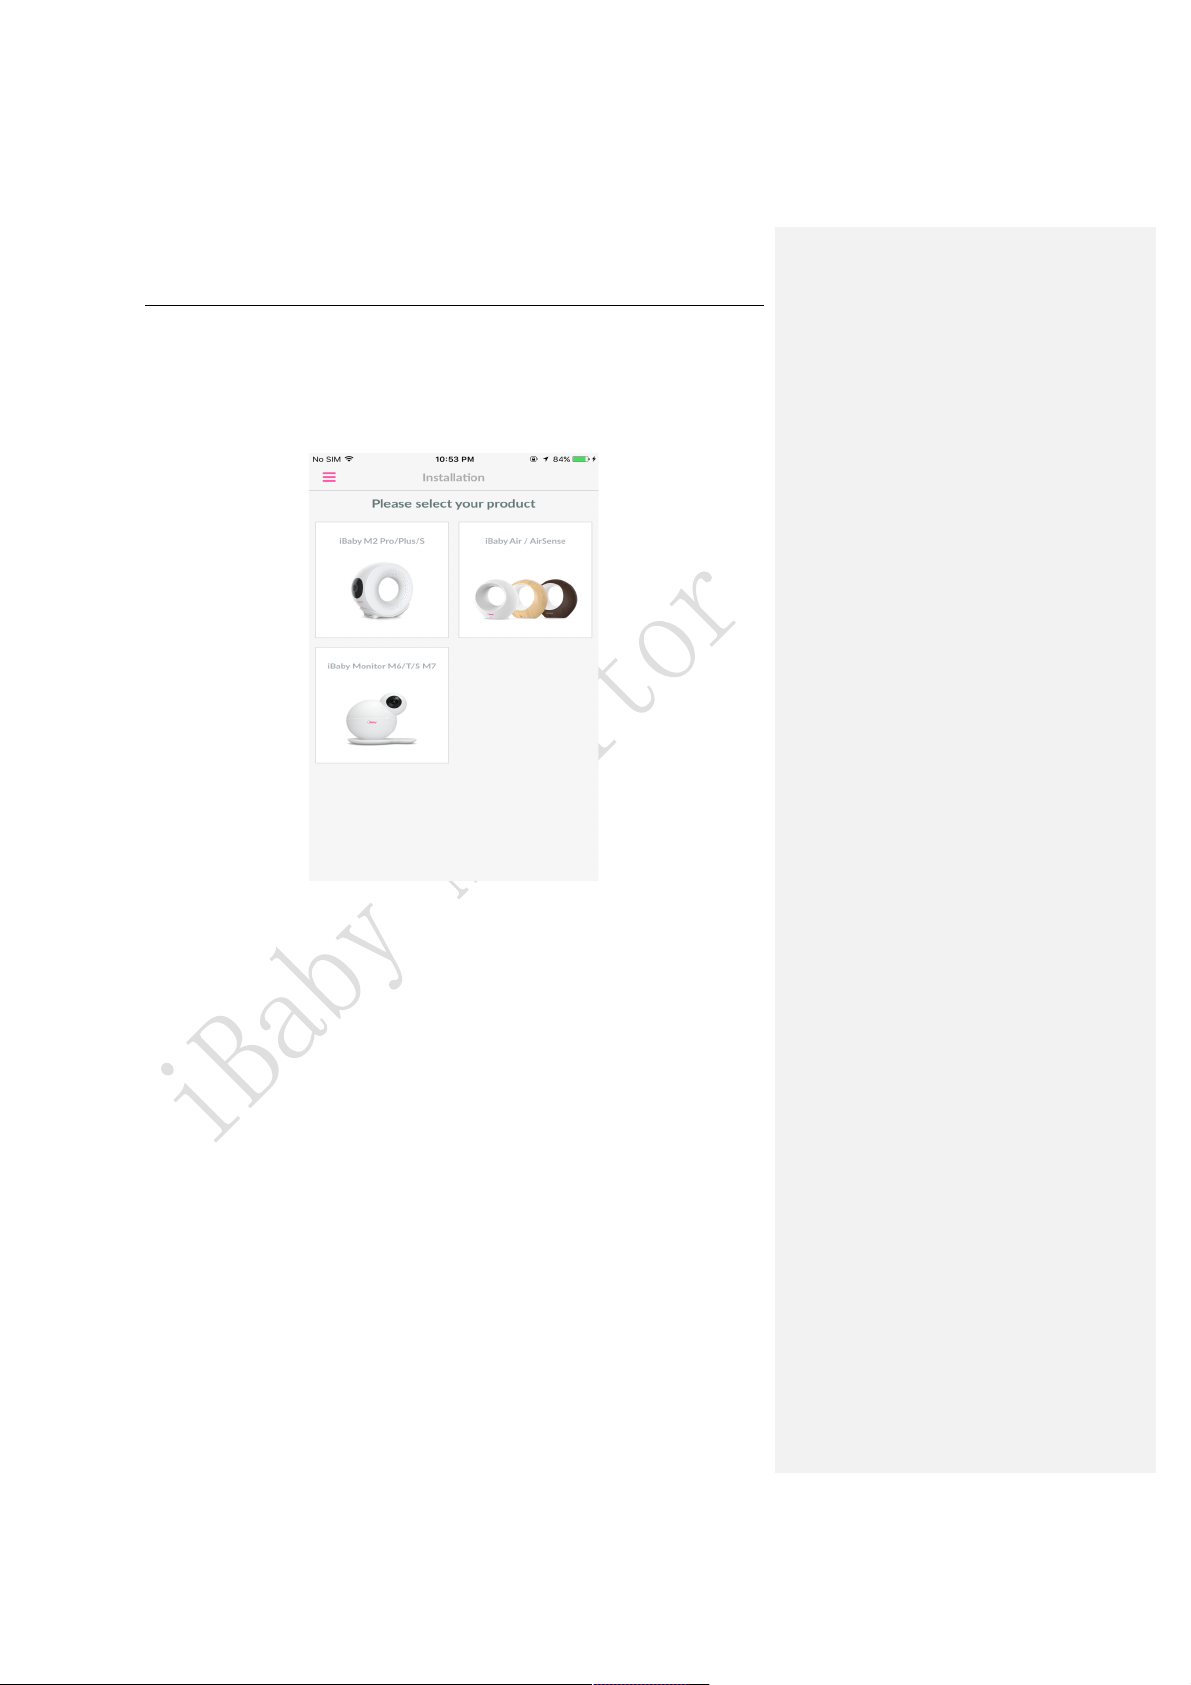
1.From the “Add a Device”menu, select the device you want to install.
Figure 4
2.Connect your Android device to a Wi-Fi network. Then, connect the power adapter to the
monitor. Click “Next”once these steps are completed.
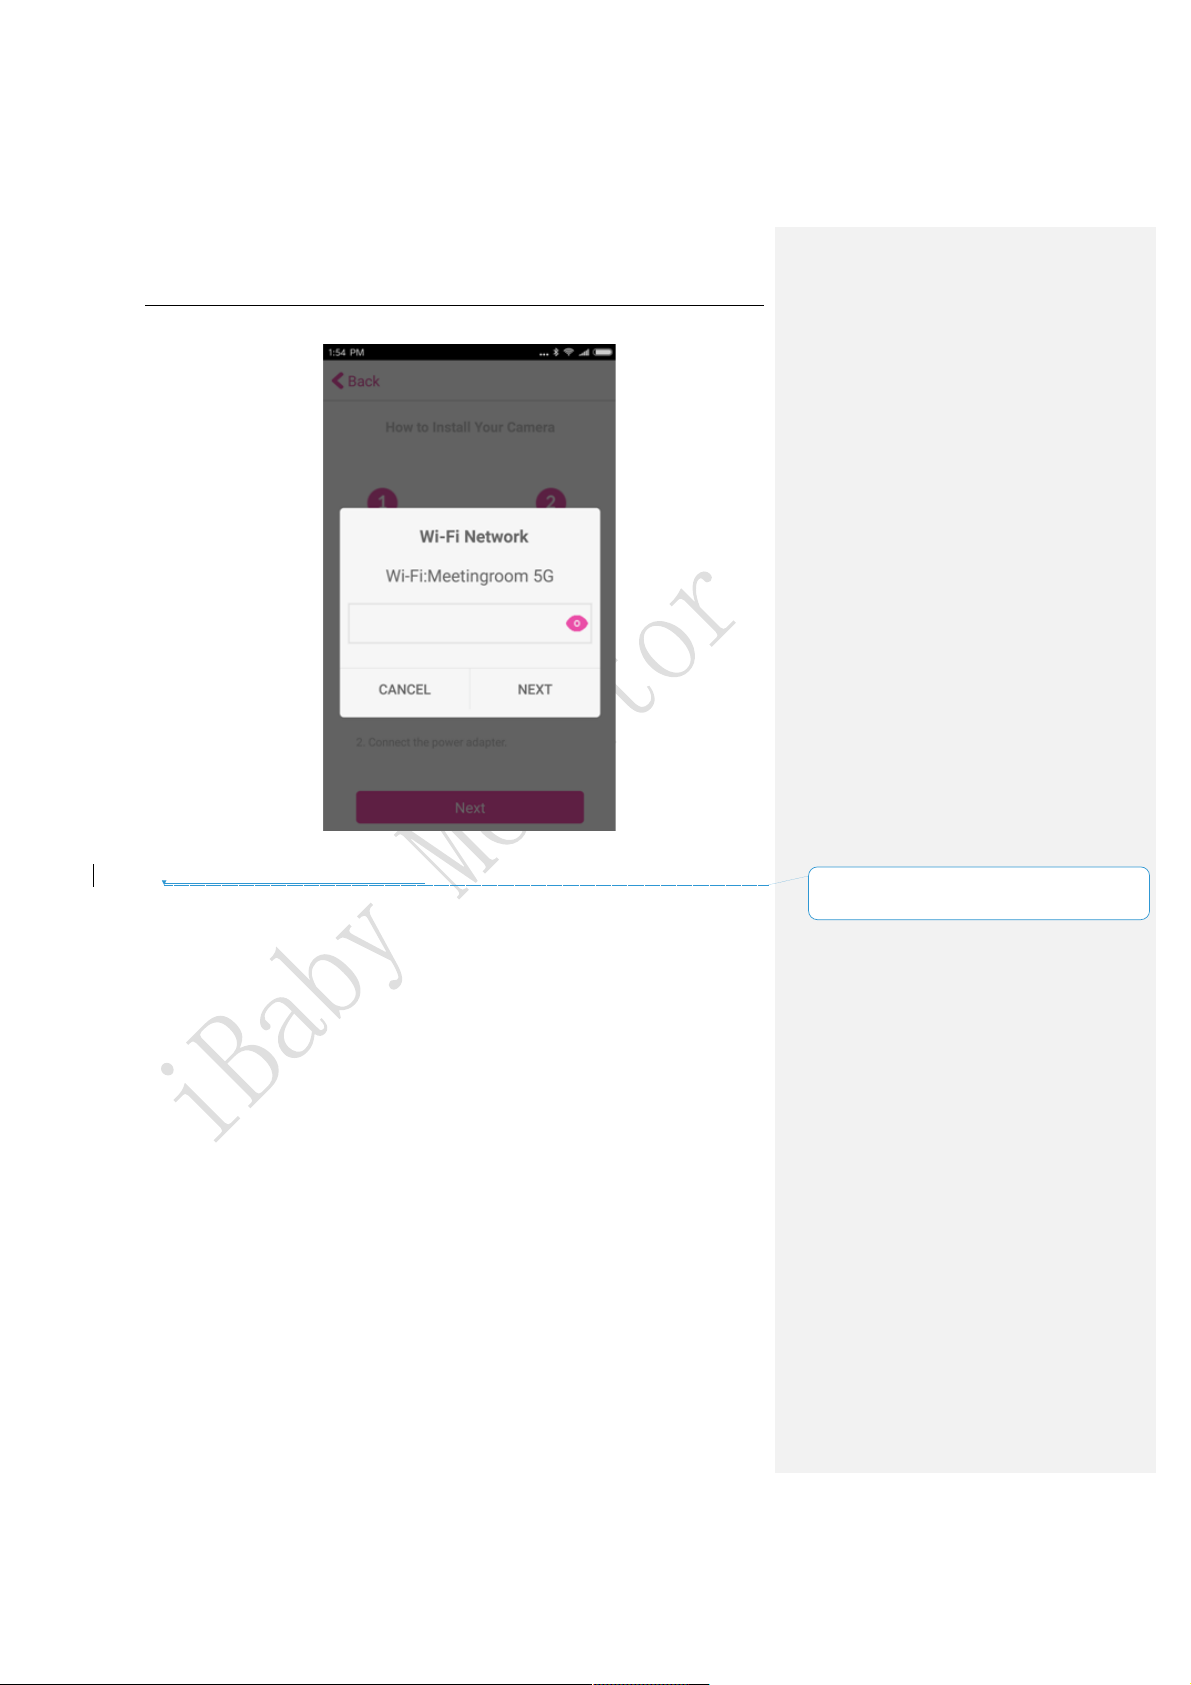
3.The screen will appear as below. Click“Next”after entering the correct Wi-Fi password.
iBaby Monitor User Manual
8
Deleted: There are two processing bar during the
installation.
Figure 5
4. The processing bar will fill up to 100%
Note: If you are unable to activate the device, please refer to“Installation Issues”in section
4.2.
 Loading...