

Page 1

BK
디오디오2VALUE
Car Multimedia System | Quick Guide
Page 2

In order to improve the product performance, the functions and services in this manual are subject to change without notice. In case of
[
software update, the screens in this manual may dier from actual ones on the product.
Functions and services in this manual may dier from those in the actual vehicle. For more details, refer to the owner’s manual or brochure
[
of your vehicle.
The design and specication of the system may change without prior notice for performance improvement.
[
This multimedia system contains open source software, including without limitation, software distributed and/or modied under the GNU
[
General Public license, Version 2, June 1991, and the GNU lesser General Public License, Version 2.1, February 1999.
For additional information and to obtain related materials including without limitation, the previous referred to licenses and software,
please contact us at MOBIS_OSSrequest@mobis.co.kr
1
Page 3
Available materials for operation
Quick Guide
Provided in the format of a booklet. It provides brief information of the system,
including basic controls and main functions.
Symbols in this User’s Manual
Indicates very important information directly related to user safety. Failure to follow
Warning
Caution
Note
If equipped
instructions may cause serious injury.
Indicates important information directly related to user safety. Failure to follow
instructions may cause minor injury or vehicle damage or breakdown.
Indicates helpful information for operation of the product.
Displays optional or unequipped features.
This User’s Manual handles all trim models and all optional features.
Accordingly, some features may not be available in your vehicle.
2
Page 4

Safety Warnings
Be sure to keep the following instructions. Otherwise, it may
cause serious injury or accident.
Driving
Ý
Keep trac regulations while driving.
Relying solely on the navigation system may cause violation of trac rules
•
and regulations, resulting in an accident.
In order to check the vehicle speed, see the speedometer rst,
not the speed on the navigation system.
The speed on the navigation system may dier from actual vehicle speed.
•
While driving, refrain from watching the screen.
An accident may occur by negligence in keeping your eyes forward.
•
To manipulate the screen or buttons requiring multiple steps, be sure to
•
stop your vehicle.
To use your mobile phone, rst stop your vehicle.
If you use your mobile phone while driving, it may disperse your attention,
•
resulting in an accident.
When making a call while driving, use the Bluetooth Hands-free function
•
and if possible, minimise the call time.
Make sure that the volume of the phone is suciently low so
that the external sound is audible.
When you drive with no external sound present may cause a trac accident.
•
When you drive for a long time with a loud audio volume, it may aect your
•
hearing.
For emergency services (e.g. hospital, re station), do not rely
solely on the navigation system..
Some emergency services may not be included in the navigation map.
•
Obtain information in advance for emergency situations.
System handling
Ý
Do NOT arbitrarily disassemble or modify the system.
It may cause accident, re, or electric shock.
•
Exercise caution to make sure that no liquid or foreign
materials enter the system.
It may cause smoke generation, re ignition, or system failure.
•
When the screen is not displayed, the volume is muted, or
other system failures occur, immediately stop using the
system.
Otherwise, it may cause re, electric shock, or fatal system failure.
•
AA
When a problem is found, contact the customer service centre
or service agency of the company.
3
Page 5
Safety Precautions
Be sure to keep the following instructions. Otherwise, it may
cause minor injury or system damage.
Operation
Ü
Use the system with the vehicle started.
When you use the system for a long time with the vehicle stopped, it may
•
cause battery discharge.
Do NOT arbitrarily install an aftermarket product not
authorised by KIA Motors Company.
It may cause system errors.
•
Any problems caused by an unauthorised aftermarket product are not
•
covered by the warranty.
System handling
Ü
Do NOT apply excessive force to the system.
When you apply excessive pressure to the screen, the LCD panel or touch
•
panel may get damaged.
To clean the screen or button panel, rst turn o the vehicle
and then use a dry, soft cloth to wipe it.
Do not wipe using a rough or hard cloth, chemical ber, organic solvent (e.g.
•
alcohol, benzene, thinner), or air freshener. The panel surface may become
scratched or damaged due to chemical reaction.
When you install an air freshener on the air conditioner vent,
the surface may be deformed due to leakage.
AA
When a problem is found, contact the customer service centre
or service agency of the company.
4
Page 6

01
System overview
Component names and functions
Turning the system on or o
Using the touch screen
Home screen
All menus screen
Using the Favourites
Split screen
Page 7
Component names and
functions
Control panel
AA
The system shape and menu arrangement may dier
depending on the vehicle model and specications.
PWR button/VOL
knob
Custom button
(
)
Press the button to turn on or o the
•
AVN (radio/media).
Press and hold the button to turn o
•
the screen and sound.
Turn the knob left or right to adjust
•
the system volume.
Turn the knob while hearing a
•
guidance message to adjust the
volume.
Runs the user-dened function.
•
Press and hold the button to display
•
the custom settings screen.
SEEK/TRACK
button
RADIO button
MEDIA button
SETUP button
Changes the broadcast program,
•
channel, music, or le while using the
AV function.
Press and hold the button to search a
•
broadcast program while listening to
radio.
Press and hold the button to fast
•
forward or rewind during playback
(not applicable in Bluetooth audio
mode).
Turns on the radio.
•
When you press the button
•
repeatedly with the radio turned on, it
toggles between FM and AM modes.
Runs the connected medium.
•
When you press the button twice
•
with a medium connected, the media
selection window appears.
Displays the Settings screen.
•
When you press and hold the button
•
the System Info screen appears.
1-2
Page 8
TUNE knob/FILE
knob/ENTER
button
System Reset
button
Turn the knob to change the
•
frequency and channel while listening
to radio.
Turn the knob to search music or le
•
while playing media.
Press the button to select a channel,
•
music, or le during a search.
Turn the knob on the map screen to
•
zoom in or out the map (if equipped).
> see TUNE Knob function.”
When you press and hold the button,
•
the TUNE Knob Function screen
appears.
Resets the system.
•
Steering wheel remote control
AA
The system shape and menu arrangement may dier
depending on the vehicle model and specications.
MODE button
Move lever ( / ) •Changes the broadcast program,
Press the button repeatedly to toggle
•
among radio and media modes.
Press and hold the button to display
•
the settings for the steering wheel
mode button: > see “System status
indicator icons.”
channel, music, or le while using the
AV function.
Push and hold the lever to search a
•
broadcast program while listening to
radio.
Push and hold the lever to fast
•
forward or rewind while playing
media (except for Bluetooth Audio
mode).
Volume lever (+/-)
Mute button ( )
Push the lever up or down to adjust
•
the volume.
Press the button to mute or unmute
•
the volume (except for navigation
sound).
Press the button to pause or resume
•
during playback.
1-3
Page 9
Call button ( )
End Call button
(
)
Voice Recognition
button (
)
Before connection of Bluetooth: Press
•
to display the Bluetooth connection
window.
After connection of Bluetooth: Press
•
to display the recent calls list, press
and hold to redial the last number,
and press for an incoming call to
answer it.
On a Bluetooth call: Press to switch
•
to Call Waiting and press and hold
to switch between the system and
mobile phone.
During a Bluetooth call, press to place
•
the call on hold.
Press to ignore a call with the
•
Bluetooth connected.
Press and hold to start voice
•
recognition on your smartphone
through Phone Projection; press to
end voice recognition.
Press and hold the button to end the
•
function.
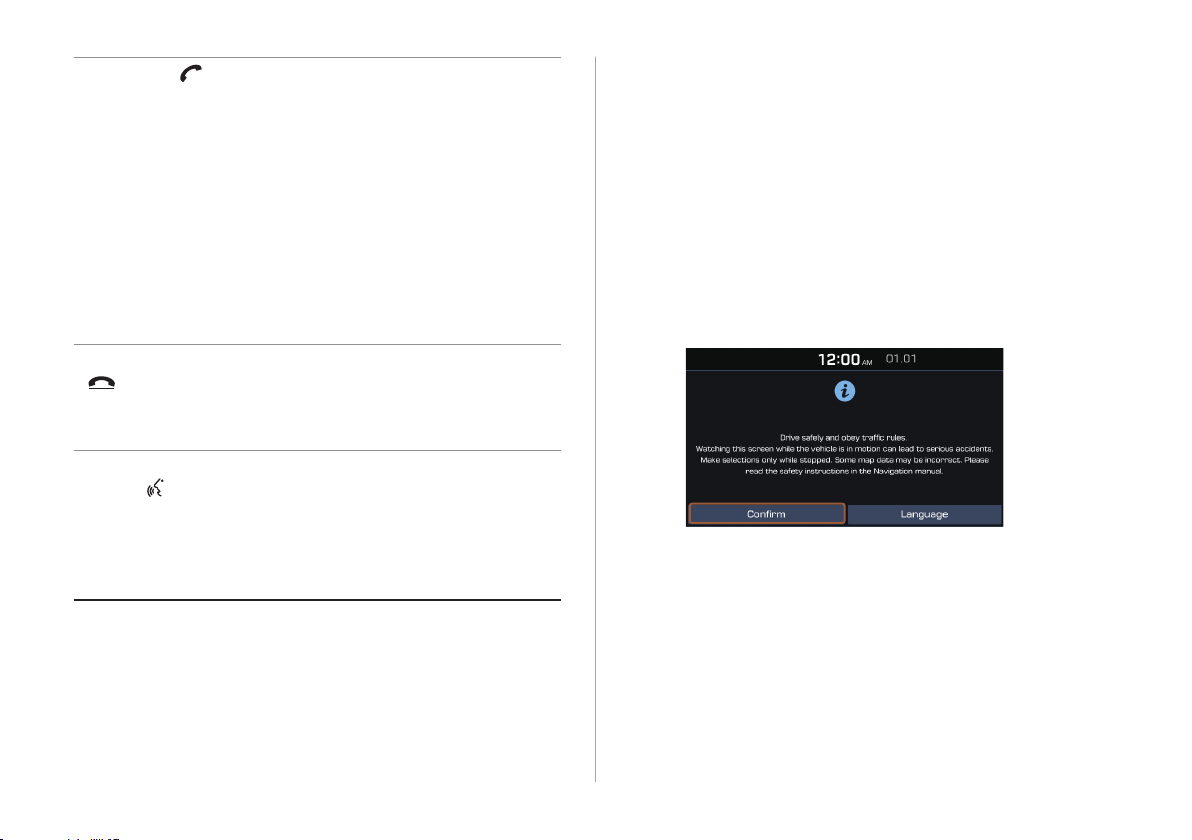
Turning the system on or o
Turning on the system
Turn on the vehicle.
1
When a safety warning message appears, read it
2
and touch Conrm.
AA
To change the display language, touch Language.
1-4
Page 10
Turning o the system
To turn o the system while driving, press and hold
the [PWR] button on the panel.
The screen and sound are turned o.
AA
To use the system again, press the [PWR] button.
AA
When you turn o the vehicle, the system automatically turns
o.
Warning
Ý
Some functions may not be active while driving to ensure
•
safety. Those functions run only when the vehicle is stationary.
In order to use them, rst stop the vehicle.
When the screen is not displayed, the volume is muted, or
•
other system failures occur, immediately stop using the
system. When you use the faulty system continuously, it may
cause re, electric shock, or fatal system failure.
Caution
Ü
The system can be turned on even when the ignition switch is
•
in “ACC” or “ON.” However, when you use the system without
turning on the vehicle for a long time, it may cause battery
discharge. To use the system for a long time, be sure to turn
on the vehicle.
When you use the system with the vehicle turned on, the
•
battery warning message appears. The warning message
disappears as soon as you turn on the vehicle.
1-5
Page 11
AA
When you turn o and on the vehicle, the system is turned on
with the mode and settings used when the vehicle was turned
o.
AA
To prevent audio from playing loud when you turn on the
vehicle, adjust the system volume to an adequate level.
AA
To automatically decrease the system volume, move to the All
menus screen and touch Settings > Sound > Volume ratio
>
Start-up Volume Limit to set the function.
Using the touch screen
This system is equipped with a touch-type screen. You can use
various practices by using this feature.
Caution
Ü
Do not press the touch screen with excessive force or a sharp
•
object. The touch screen may become damaged.
Be careful for the touch screen not to contact any electrically
•
charged object. Static or other electric shock may cause the
system to malfunction or damage the touch screen.
AA
The touch screen will not respond when you are wearing
gloves. Take o the gloves or wear electrostatic touch gloves.
“Touch” gesture
Lightly touch the desired item and release the nger.
The corresponding function is run or the corresponding menu is
selected.
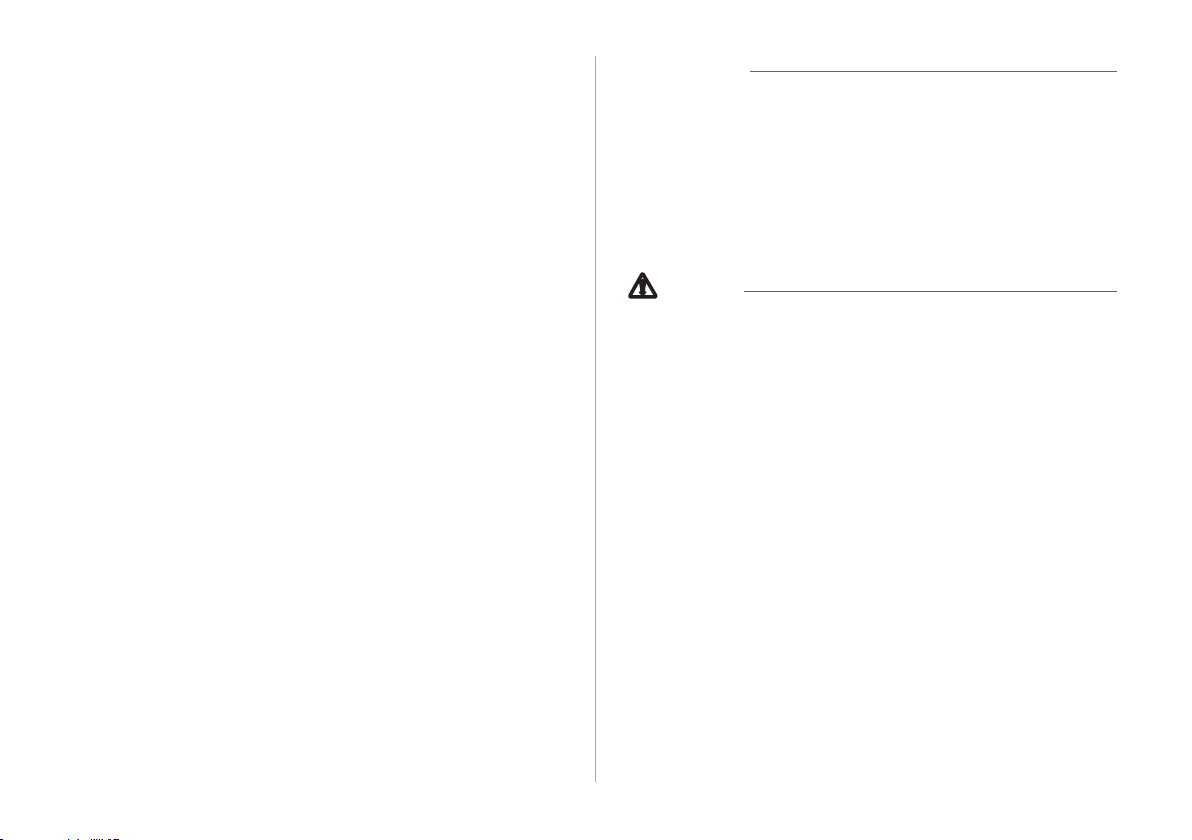
“Touch and hold” gesture
Touch and hold the desired item.
It is used to fast forward or rewind during playback.
1-6
Page 12
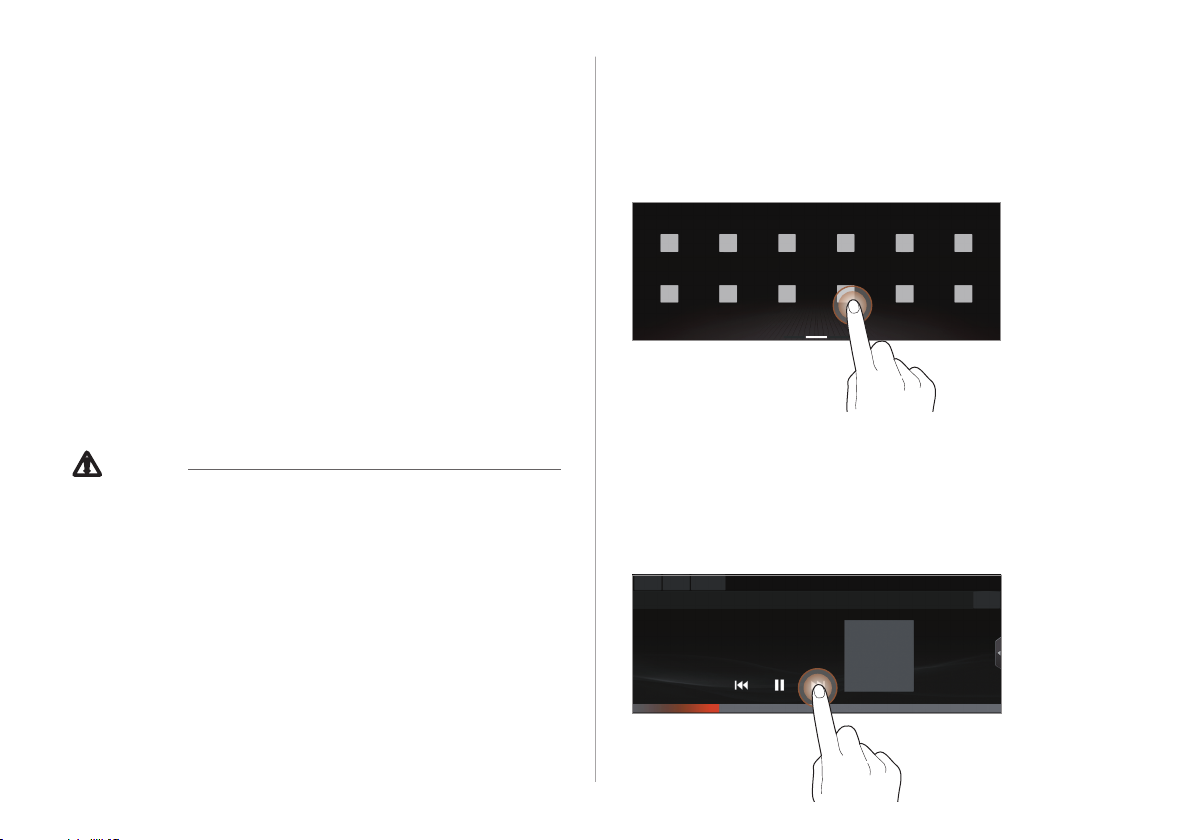
“Slide” gesture
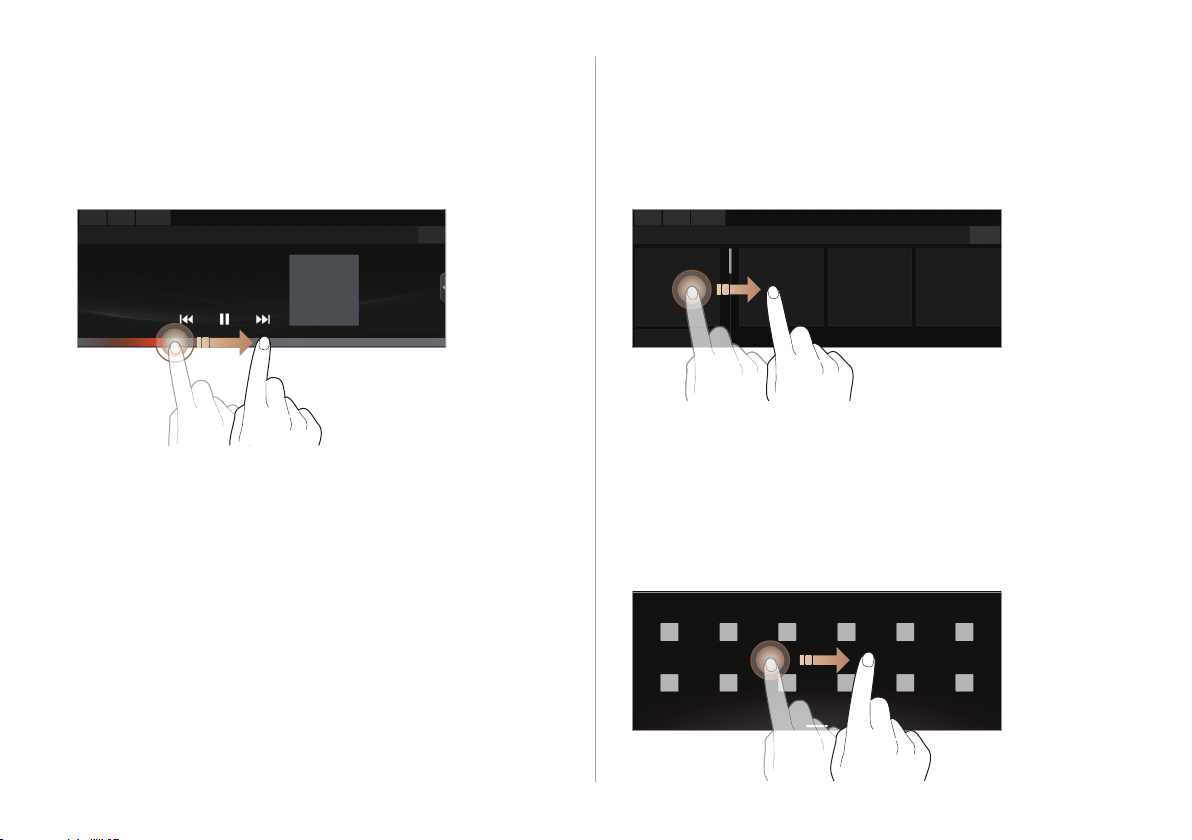
“Drag” gesture
On the media playback screen, touch the slide bar to
change the playback position.
You can change the playback position during playback.
Touch and hold the desired item and drag it to
another position.
The selected item moves to the new position.
“Swipe” gesture
Lightly swipe the screen in the desired direction.
It is used to move fast vertically or horizontally across the menu
screen or options list.
1-7
Page 13
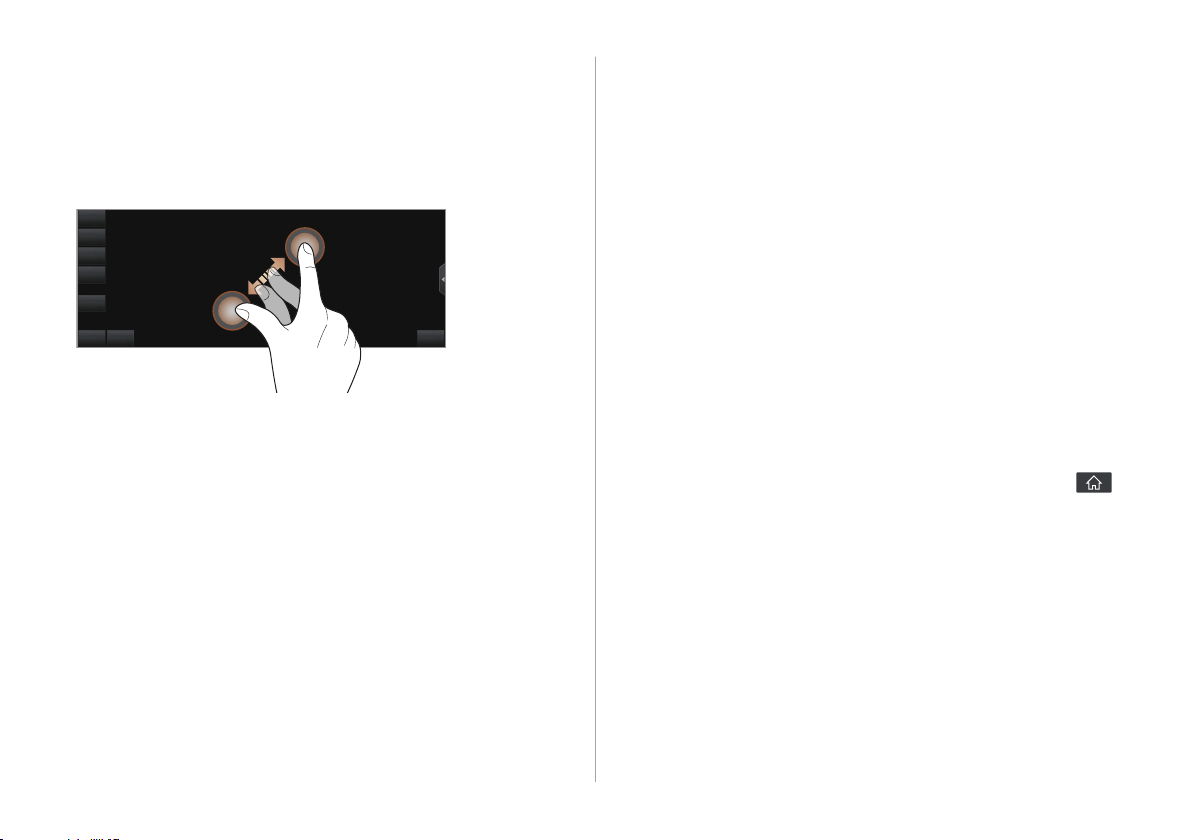
“Spread/pinch” gesture
Home screen
On the map screen, touch and hold the screen with
two ngers and spread or pinch the ngers.
It is used to zoom in or out the map.
The Home screen provides various functions.
The Home screen is provided with two dierent types: One page
Home screen and Multi-page Home screen. The characteristics
of each type are as follows.
The way to access the All menus screen diers depending on
•
the type. > see “All menus screen.”
The One page Home screen provides widgets and shortcut
•
icons. The map widget position is xed. The other two widgets
and icons can be customised to suit your preferences.
The Multi-page Home screen can display three dierent
•
widgets. All widgets can be customised to suit your
preferences.
AA
This User’s Manual provides operation descriptions based on
the initial state of the Multi-page Home screen.
AA
To return to the Home screen from other screens, touch .
1-8
Page 14

Setting the Home screen type
One page Home screen
You can set the Home screen type.
On the Home screen, touch Menu > Edit Home
1
layout.
Select the desired type.
2
The layout of the One Page Home screen is as follows:
Displays the current date and time.
a
Displays the icon to let you know the current status. > see
b
“System status indicator icons.”
Displays active widgets. When a widget is touched, the
c
corresponding function runs in full screen.
widgets on the One page Home screen.”
Displays the map widget. When the map widget is touched,
d
the map appears in full screen.
The All menus screen appears. In this case, all menus appear
e
on the One Page Home screen.
> see “Editing
1-9
Page 15
Displays the Call screen.
f
When the phone projection is connected, the corresponding
g
screen appears.
Can display the direction of Mecca upon a prayer time.
h
Displays the Favourites screen. > see “Using the Favourites.”
i
The list of menu items appears.
j
Edit Home widgets: Used to edit the types and positions
•
of widgets on the Home screen.
Edit Home icons: Used to edit the types of icons on the
•
Home screen.
Edit Home layout: Used to change the Home screen type
•
to the One page Home screen or Multi-page Home screen.
Manual: Displays the QR code that provides access to the
•
online user manual for the system.
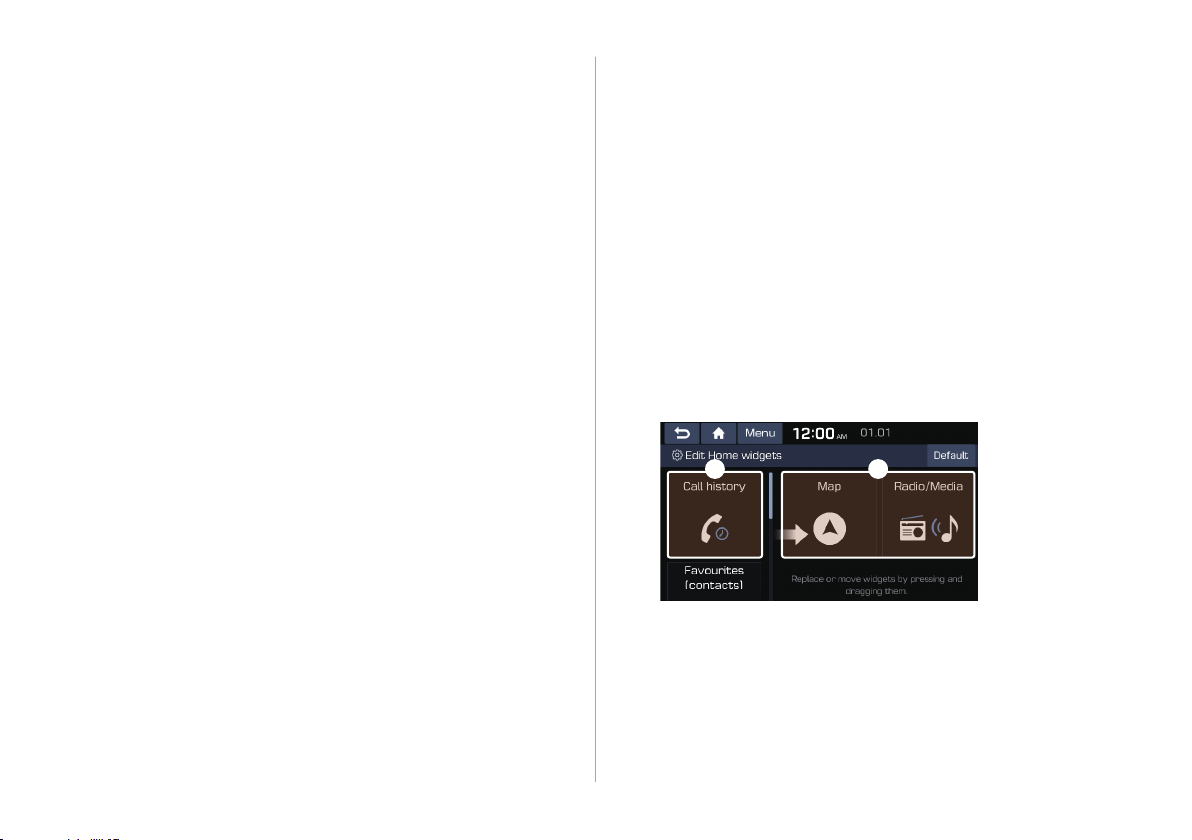
Editing widgets on the One page Home screen
You can edit the types and positions for widgets to display on the
One page Home screen.
On the Home screen, touch Menu > Edit Home
1
widgets.
Perform any of the following options:
2
To change the widget type, touch and hold the desired
•
widget and then drag it from the widget list to the widget
area.
To change the location of a widget, touch and hold the
•
widget and then drag it in the widget area to the desired
position.
a b
List of widgets
a
Widget area
b
AA
You cannot change the map widget to another one on the
One page Home screen.
AA
To initialise the types and positions of widgets, touch
Default.
1-10
Page 16

Editing icons on the One page Home screen
Multi-page Home screen
You can arrange frequently used icons at the bottom of the One
page Home screen to run the functions directly.
On the Home screen, touch Menu > Edit Home
1
icons.
Perform any of the following options:
2
To change the icon type, touch and hold the desired icon
•
and then drag it from the icon list to the icon area.
To change the location of an icon, touch and hold the icon
•
and then drag it in the icon area to the desired position.
AA
To initialise the types and positions of icons, touch
Default.
The layout of the Multi-page Home screen is as follows:
Displays the current date and time.
a
Displays the icon to let you know the current status. > see
b
“System status indicator icons.”
Displays active widgets. When a widget is touched, the
c
corresponding function runs in full screen.
widgets on the Multi-page Home screen.”
The list of menu items appears.
d
Edit Home widgets: Used to edit the types and positions
•
of widgets on the Home screen.
Edit Home icons: Used to edit the types of icons on the
•
Home screen.
Edit Home type: Used to change the Home screen type to
•
the One page Home screen or Multi-page Home screen.
Manual: Displays the QR code that provides access to the
•
online user manual for the system.
AA
To see all menus in Multi-page Home screen, swipe the screen
to the left.
> see “Editing
1-11
Page 17
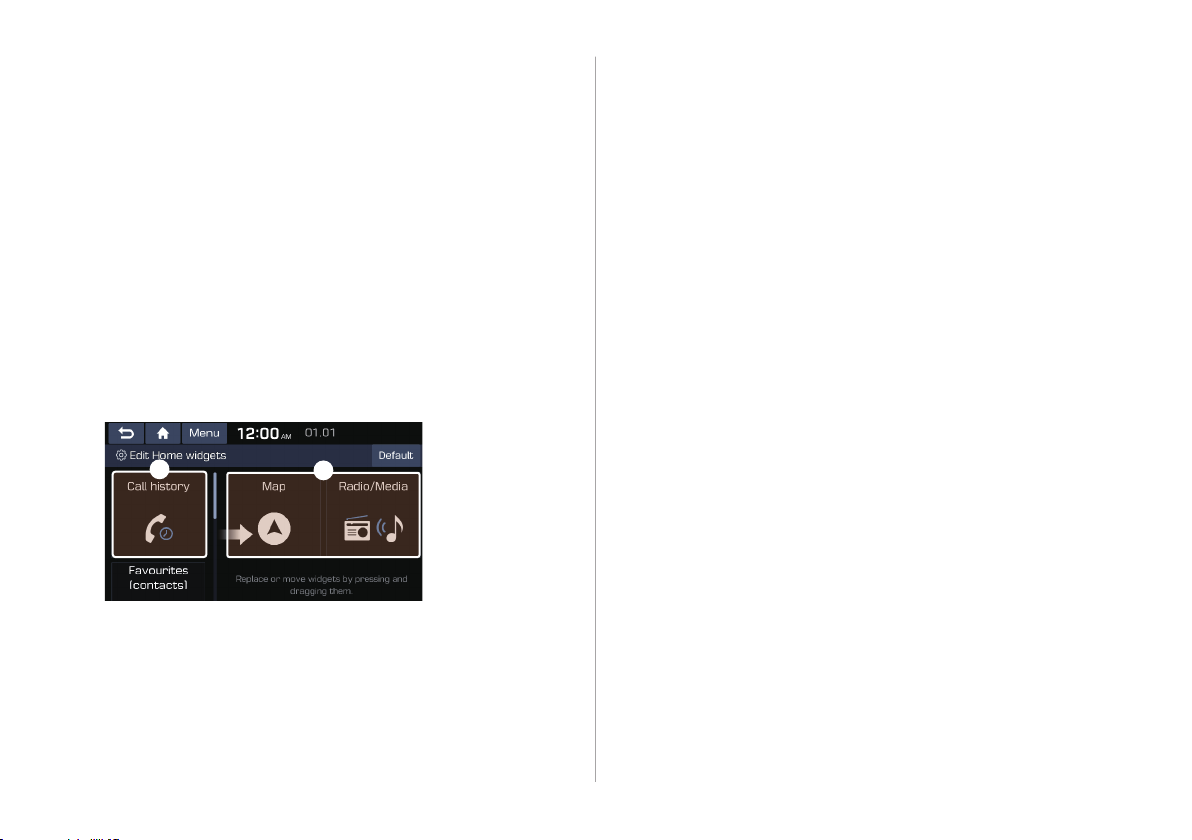
Editing widgets on the Multi-page Home screen
Editing icons on the Multi-page Home screen
You can edit the types and positions of the widgets to display on
the Multi-page Home screen.
On the Home screen, touch Menu > Edit Home
1
widgets.
Perform any of the following options:
2
To change the widget type, touch and hold the desired
•
widget and then drag it from the widget list to the widget
area.
To change the location of a widget, touch and hold the
•
widget and then drag it in the widget area to the desired
position.
a
List of widgets
a
Widget area
b
AA
To initialise the types and positions of widgets, touch
Default.
b
You can see and rearrange the list of icons in the Multi-page
Home screen.
On the Home screen, touch Menu > Edit Home
1
icons.
To change the location of an icon, touch and hold,
2
and drag the icon to the desired position.
AA
To return an icon’s position to the default setting, touch
Default.
1-12
Page 18

All menus screen
You can see all menus for each Home on a single screen.
Viewing the list of all menus on One
page Home Screen
On the Home screen, touch the icon for All menus.
Seeing all menus on the Multi-page
Home screen
Touch and gently swipe the Home screen to the left
as shown below.
The All menus screen appears.
1-13
Page 19

Using the Favourites
You can add frequently used menus as favourite icons and run
the icons directly on the Home screen or All menus screen.
Adding a favourite menu
On the All menus screen, touch Favourites > Add
1
to favourites.
Arranging the items in Favourites
You can change the order of items in Favourites.
On the All menus screen, touch Favourites
1
Menu > Rearrange.
Touch and hold an item and then drag it to the
2
desired position.
AA
You can only change the order of icons. You cannot move
an icon to a blank space.
Deleting items in Favourites
You can delete items from the list of favourites.
>
1-14
AA
When there is any previously added favourite icon, move
to the Favourites screen and touch Menu > Add.
AA
You can add favourite icons up to 24 menus.
Select an item to add and touch Add > Yes.
2
On the All menus screen, touch Favourites
1
Menu > Delete.
Select an item(s) to delete and touch Delete
2
Yes.
>
>
Page 20

Split screen
You can set to display various information such as map, AV info,
driving info, and clock on the split system screen.
Opening the split screen
Touch the split screen button.
The split screen appears on the right.
AA
When the Menu button exists at the top of the screen, you
can open the split screen by touching Menu > Split screen.
Editing the split screen
You can change information on the split screen.
Touch and hold, and then drag the split screen up or
down to select the desired information item.
Closing the split screen
Touch the split screen button when the split screen is
open.
AA
When the Menu button exists at the top of the screen, you
can close the split screen by touching Menu > Split screen.
*****
1-15
Page 21

Page 22

02
Useful functions
Using the phone projection function
Driving assist video
Page 23

Using the phone projection
function
When you connect an Android smartphone or iPhone to the
vehicle with a USB cable, you can run and control applications
on the phone through the wide screen using its user-friendly
interface.
Paring to an Android smartphone via
Android Auto
On the All menus screen, touch Settings
2
Device Connection > Android Auto and select
the Enable Android Auto checkbox.
>
When you connect an Android smartphone to the vehicle with
Android Auto, you can run and control applications on the phone
through the wide screen using its user-friendly interface.
To use Android Auto, rst check the following.
1
Visit the Android Auto website at https://www.android.
•
com/auto to check the list of countries, device types, and
models that support Android Auto.
Download and install the Android Auto application from
•
Google Play Store. It is not possible to install Android Auto
in countries that do not support the feature.
2-2
Connect a smartphone to the multimedia USB
3
port on your vehicle by using the USB cable.
AA
When connection is made for the rst time, the system
screen displays a notication window. Check the details
and then touch OK.
AA
To end the Android Auto and disconnect from the
smartphone, remove the USB cable from the system.
Caution
Ü
Do not repeatedly connect and remove the USB connector
within a short time. It may cause device errors or system
failures.
Page 24

When the smartphone is locked, unlock it rst and
4
then consent to the use of Android Auto.
After the smartphone is recognised, the Home screen displays
the Android Auto menu.
On the All menus screen, touch Android Auto.
5
Perform the desired function.
6
To run the functions for phone, music, or navigation on
•
the smartphone, touch the corresponding app icon.
To use the Google voice recognition, press the [ ] button
•
on the steering wheel.
To run a media app on the smartphone through the
•
system, press the [MODE] button on the steering wheel.
To make a Bluetooth call, press the [ ] button on the
•
steering wheel.
AA
You cannot change the Android Auto settings when
connected via a USB cable.
AA
The icons on the screen are subject to change according to
the policy of Google Corporation.
AA
Applications or functions used through Android Auto
are subject to change according to the policy of Google
Corporation. For supportable functions, visit the Android
website at https://www.android.com/auto.
AA
To use the functions on your smartphone with the minimised
system settings, update the smartphone OS to the latest
version.
AA
The recognition time may dier depending on the device
type, rmware, and OS version.
AA
Charges may apply for any mobile data used while Android
Auto is running.
AA
Some functions may not work properly depending on the
network signal strength.
AA
Avoid interacting with the smartphone while using Android
Auto.
AA
You cannot use the following functions when Android Auto is
in use.
USB mode
-
Browse function using the [TUNE/FILE] knob
-
Apple CarPlay
-
2-3
Page 25

Paring to an iPhone via Apple CarPlay
After you connect an iPhone to the vehicle with Apple CarPlay,
you can run and control applications on the phone through the
system screen.
To use Apple CarPlay, rst check the following:
1
For iPhone models that support Apple CarPlay, visit the
•
Apple website at https://www.apple.com/kr/ios/carplay.
Make sure that the Apple CarPlay is activated in the iPhone
•
settings. When Apple CarPlay is not available, update to
the latest version of iOS.
On the All menus screen, touch Settings
2
Device Connection > Apple CarPlay and then
check Enable Apple CarPlay.
>
Connect an iPhone to the multimedia USB port on
3
the vehicle by using the provided USB cable.
AA
When connection is made for the rst time, the system
screen displays a notication window. Check the details
and then touch OK.
AA
To end the Apple CarPlay and disconnect from the iPhone,
remove the USB cable from the system.
Caution
Ü
Do not repeatedly connect and remove the USB connector
within a short time. It may cause device errors or system
failures.
When the iPhone is locked, unlock it rst and then
4
consent to the use of Apple CarPlay.
After the iPhone is recognised, the Home screen displays the
Apple CarPlay menu.
On the All menus screen, touch Apple CarPlay.
5
2-4
Page 26

Perform the desired function.
6
To run any of functions (phone, messaging, navigation,
•
etc.) on your iPhone, touch the corresponding function
icon.
To display the system Home screen, touch
•
To run the media application in the iPhone, press the
•
[MODE] button on the steering wheel.
To run the Siri voice recognition, press the [
•
the steering wheel.
To answer a call, press the [
•
wheel.
] button on the steering
.
] button on
AA
You cannot change the Apple CarPlay settings when
connected via a USB cable.
AA
Applications or functions used through Apple CarPlay
are subject to change according to the policy of Apple
Corporation. For supportable functions, visit the Apple
Corporation website at http://www.apple.com/ios/carplay.
AA
To use the functions on your smartphone with the minimised
system settings, update the smartphone OS to the latest
version.
AA
The recognition time may dier depending on the device
type, rmware, and OS version.
AA
Charges may apply for any mobile data used while Apple
CarPlay is running.
AA
Some functions may not work properly depending on the
network signal strength.
AA
Avoid interacting with the smartphone while using Apple
CarPlay.
AA
You cannot use the following functions when Apple CarPlay is
in use.
Bluetooth
-
USB mode
-
Browse function using the [TUNE/FILE] knob
-
Android Auto
-
2-5
Page 27

d
e
Driving assist video
You can see the view outside the vehicle through the system
screen.
AA
The displayed screen may dier depending on the vehicle
model.
Warning
Ý
Using the rear-view video
Press the “R” (Reverse) button shifter (or move the
1
shift lever to “R” in a previous vehicle model) with
the vehicle turned on.
The system automatically displays the rear view with parking
assist guide lines.
When backing up, make sure to follow the guidelines below:
Before entering your vehicle, always check the area behind
•
your vehicle.
Do not solely rely on the rear view camera when backing up.
•
Always ensure that it is safe to back up by checking behind
you and looking in the rearview mirrors.
Always back up slowly and stop immediately if you suspect
•
that a person, especially a child, might be behind you.
Caution
Ü
The distance shown on the screen may dier from the actual one.
Be sure to check the rear and left and right sides with your own
eyes for safety.
2-6
Safely park your vehicle, checking the rear view
2
and guide lines.
f
b
Moving direction lines (yellow)
a
Displays the vehicle’s moving direction based on the
steering angle.
Neutral steering lines (blue)
b
Displays the moving direction if you reverse the vehicle in
neutral. Noting these lines, you can determine whether
the vehicle is stopped in correct direction and the
distances to the neighboring vehicles are adequate.
a
a
c
Page 28

Collision warning lines (red)
c
Used to prevent collision.
Rear top view button
d
Touch the button to display the rear top view.
Parking distance warning
e
While parking the vehicle, the warning color changes for
three dierent levels (1/2/3) depending on the distance to
obstacles.
Camera image adjustment
f
Used to adjust the brightness and contrast of camera
images.
AA
The rear view screen remains active even if you shift to any
position other than "R" (Reverse) after reversing. However,
the parking guides do not appear on the screen. When you
shift to "P" (Park) or drive at a predetermined speed or faster,
the rear view screen will be deactivated and the system will
display the previous screen automatically.
AA
You can change the operation setting for the rear view
camera. On the All menus screen, touch Settings >
Advanced > Extend rear camera use (if equipped).
AA
Noting the parking assist guide lines based on the steering,
you can see the moving direction.
AA
A warning sound is heard when the vehicle approaches
obstacles while parking. When you set to automatically lower
the audio volume while parking, it can prevent accidents
caused by failure to hear the warning sound. On the All
menus screen, touch Settings > Sound > Volume ratio >
Proximity Warning.
2-7
Page 29

Page 30

03
Radio
Manipulating the radio
Page 31

Manipulating the radio
You can scan radio channels by using various options. Save your
favourite channels to the presets list.
Perform any of the following options:
On the All menus screen, touch Radio.
•
On the control panel, press the [RADIO] button.
•
Radio screen
The radio screen provides various functions while listening to
radio broadcasts.
a
c
h
d
b
f
e
g
Used to return to the previous screen.
a
Can change the radio mode.
b
Presets list
c
Radio broadcast information
d
You can delete or save the current frequency to the presets
e
list.
Split Screen: Can turn on or o the split screen mode.
f
You can listen to each radio channel for a short time and
g
select a desired channel.
The list of menu items appears.
h
Station list: Can see the list of available radio stations.
•
Auto-sort favourites: Used to sort the presets according
•
to the order of radio station frequencies.
Reorder favourites: Can change the location of a channel
•
by dragging on the presets list.
Delete favourites: Can delete a registered channel from
•
the presets list.
Sound settings: Can congure system sound settings.
•
> see “Conguring the sound settings.”
Manual: Displays the QR code that provides access to the
•
online user manual for the system.
Split screen: Can turn on or o the split screen mode.
•
AA
The broadcast station names and local information are
displayed using GPS data. Those information may not appear
when there is no GPS data received.
AA
The displayed broadcast station names may not match the
actual ones.
3-2
Page 32

Changing the radio mode
Changing the radio channel
Perform any of the following options:
On the Radio screen, touch FM/AM repeatedly.
•
On the control panel, press the [RADIO] button repeatedly.
•
The radio mode changes in the order of FM > AM.
Perform any of the following options:
On the Radio screen, touch a desired channel from the
•
presets list.
AA
You can change the channel simply by pushing the
[ / ] lever on the steering wheel.
On the control panel, press the [ SEEK] or [TRACK ] button.
•
You can move to the previous or next channel with good
reception.
When you know an accurate frequency, turn the [TUNE/FILE]
•
knob on the control panel to change the frequency.
You can listen to the changed radio broadcast.
3-3
Page 33

Using the scan function
Registering the current radio channel
You can listen to each broadcast briey and select a desired one.
On the Radio screen, touch
1
Only the channels with good reception can be listened for 5
seconds in turn.
When you nd the desired broadcast, touch
2
You can continue listening to the scanned channel.
SCAN
.
SCAN
When you register the current channel, you can easily select it
later.
Perform any of the following options:
While listening to a broadcast, touch and hold an empty
•
preset number with no channel on the radio screen.
While listening to a broadcast, touch in the middle of the
•
screen.
The current channel is added to the presets list.
.
AA
Touch and hold a previously congured preset number to
reassign it with the currently listening channel.
AA
You can register up to 40 channels.
3-4
Page 34

Editing the radio channel list
Changing the order of registered channels
On the Radio screen, touch Menu > Reorder
1
favourites.
On the presets list, touch next to the channel
2
you want to move, then drag it to reposition.
The presets list is updated with the sequences changed.
Deleting a registered channel
On the Radio screen, touch Menu > Delete
1
favourites.
Select the channel to delete and touch Delete
2
Yes.
The channel is deleted and the preset number is emptied.
AA
When the current channel is already assigned to the presets
list, touch the
icon to remove the channel from the list.
>
3-5
Page 35

Page 36

04
Media
Using media
Page 37

Using media
a
l
You can use the USB mode to play music or video les on a
connected mobile device, such as USB device and MP3 player. You
can also play Bluetooth music by connecting a Bluetooth device,
which supports a Bluetooth function.
Perform any of the following options:
2
On the Home screen, touch the AV info widget.
•
On the control panel, press the [MEDIA] button.
•
AA
When multiple media are connected, press the [MEDIA]
button once more and then touch the desired media
source from the media selection window.
Listening to music from a USB device
Connect a media device to play to the multimedia
1
USB port.
AA
Playback may start automatically depending on the media
type.
AA
For more information about supportable devices and le
4-2
types:
> see “USB mode.”
AA
The shapes and arrangement of the buttons and
multimedia USB port may dier depending on the vehicle
model and specications.
USB music screen
b
d
hki j
Used to return to the previous screen.
a
Moves to the le list screen.
b
Displays the sequence number of the current le and the total
c
number of les for playback.
Displays the information of the current music.
d
Used to change the repeat playback mode.
e
Used to turn on or o the random playback mode.
f
c
e
f
g
Page 38

Used to hide the current music.
g
Restart playing the current le or previous le.
h
Can pause or resume playback.
i
Can play the next le.
j
Can see the duration of the playing song and the current
k
playback position.
The list of menu items appears.
l
Media Sources: Opens the media selection window.
•
Songs for this artist: Moves to the list of the artist’s songs.
•
Songs for this album: Moves to the list of music albums
•
that contain the current song.
Sound settings: Can congure system sound settings.
•
> see “Conguring the sound settings.”
Manual: Displays the QR code that provides access to the
•
online user manual for the system.
Split screen: Can turn on or o the split screen mode.
•
Pause/Resume
You can pause or resume playback of a USB music le.
Perform any of the following options:
On the USB music playback screen, touch or .
•
On the steering wheel, press the [ ] button.
•
Rewind/Fast-forward
You can listen to music in the USB device from the desired point
by using this function.
Perform any of the following options:
On the USB music playback screen, touch and hold or
•
.
On the control panel, press and hold the [ SEEK] or
•
[TRACK ] button.
On the steering wheel, press and hold the [ / ] lever.
•
4-3
Page 39

Resuming playback of the current music
You can play the current music in the USB device from the
beginning.
Perform any of the following options:
On the USB music playback screen, touch
•
On the control panel, press the [
•
On the steering wheel, press up the [
•
AA
When you touch the
playback has started, the current le is played from the
beginning.
AA
When you touch the
playback starts, the previous le is played.
button after 3 seconds once
button within 3 seconds after
SEEK] button.
.
/ ] lever.
Changing the repeated playback mode for USB
music
You can change the repeated playback mode for USB music:
Repeat One and Repeat All.
On the USB music playback screen, touch
repeatedly.
Each time the icon is touched, the playback repetition modes are
toggled and the activated mode icon appears on the screen.
AA
The active mode diers depending on the playing media or
list.
Turning on/o the random playback
Playing the current or next music le
You can play the current or next music le in the USB device.
Perform any of the following options:
To play the previous le on the USB playback screen, double-
•
. Alternatively, double-press the [ SEEK] button
. Alternatively, press the [TRACK ] on the control panel.
/ ] lever on the steering wheel.
4-4
touch
on the control panel.
To play the next le on the USB music playback screen, touch
•
AA
You can also use the [
AA
On the control panel, turn the [TUNE/FILE] knob to search for
a music le and press the knob within 5 seconds to play it.
AA
When there is no input for 5 seconds, the search stops and
the system displays the information of the current le.
You can turn on or o the random playback mode for USB music.
On the USB music playback screen, touch
repeatedly.
Each time the icon is touched, the random playback mode is
turned on and o. When the random playback is active, the les
are played randomly with no sequence.
Page 40

USB music list screen
d
You can search and play the desired music from the list by
touching List on the USB music playback screen.
a
Used to return to the previous screen.
a
Moves to the upper folder or category.
b
Displays the folder/category name.
c
Can see music les for each category.
d
The list of menu items appears.
e
e
b
Media Sources: Opens the media selection window.
•
Show current track: Moves to the folder where the
•
playing le is located. This option is disabled when the le
belongs to the current list.
Split screen: Can turn on or o the split screen mode.
•
c
Caution
Ü
Be sure to start the vehicle before connecting a USB device.
•
When you start the vehicle after connecting a USB device, the
USB device may get damaged.
Be careful of static electricity when connecting or removing a
•
USB device. It may cause a system failure.
Be careful for your body or any object not to contact the
•
multimedia USB port. It may cause an accident or system
failures.
Do not repeatedly connect and remove the USB connector
•
within a short time. It may cause device errors or system
failures.
Do not use a USB device for purposes other than playback.
•
When you connect a USB for charging or heating, the system
performance may decrease or it may cause system failures.
4-5
Page 41

AA
When connecting a USB storage, do not use a separate
extension cable and directly connect to the multimedia USB
port. When you connect a USB storage via a USB hub or
extension cable, the device may not be recognised.
AA
Push the USB connector all the way into the multimedia
USB port. When the connector is not fully inserted, a
communication problem may occur.
AA
Noise may occur when removing a USB device from the
system.
AA
You can play only the les that have been encoded in the
standard format.
AA
The following USB devices may not be recognised or may not
work properly.
Encrypted MP3 players
-
USB devices that are not recognised as removable disks
-
AA
USB devices may not be recognised depending on the device
status.
AA
Some USB devices may not be supported due to compatibility
issues.
AA
USB device recognition may take longer than usual depending
on the device type, capacity, and le formats on the device.
AA
Some devices may not be charged through USB connection. It
depends on the USB specications.
AA
You can hide les only in the USB device formatted in exFAT/
NTFS/FAT16/32. The hidden les can be found in the “Hidden_”
folder.
Playing video from a USB device
Connect a media device to play to the multimedia
1
USB port.
AA
Playback may start automatically depending on the media
type.
AA
For more information about supportable devices and le
types: > see “USB mode.”
AA
The shapes and arrangement of the buttons and
multimedia USB port may dier depending on the vehicle
model and specications.
Perform any of the following options:
2
On the Home screen, touch the AV info widget.
•
On the control panel, press the [MEDIA] button.
•
AA
When multiple media are connected, press the [MEDIA]
button once more and then touch the desired media
source from the media selection window.
4-6
Page 42

USB video screen
j
a
c
Used to return to the previous screen.
a
Moves to the le list screen.
b
Displays the folder and le names.
c
Displays the sequence number of the current le and the total
d
number of les for playback.
Restart playing the current le or previous le.
e
Can pause or resume playback.
f
Can play the next le.
g
Used to change the repeat playback mode.
h
Can see the information details.
i
Can see the duration of the currently playing video and the
j
current playback position.
k
b
d
e f g ih
The list of menu items appears.
k
Media Sources: Can see the media selection window.
•
Info: Can see the information of the playing video le.
•
Change Audio: Can change the audio track. This option is
•
available when the playing video contains multiple audio
tracks.
Sound settings: Can congure system sound settings.
•
> see “Conguring the sound settings.”
Display settings: Can congure system screen settings.
•
> see “Conguring the display settings.”
Manual: Displays the QR code that provides access to the
•
online user manual for the system.
Split screen: Can turn on or o the split screen mode.
•
4-7
Page 43

Pause/Resume
Resuming playback of the current video
You can pause or resume playback of a USB video le.
Perform any of the following options:
On the USB video playback screen, touch or .
•
On the steering wheel, press the [ ] button.
•
Rewind/Fast-forward
You can watch video in the USB device from the desired point by
using this function.
Perform any of the following options:
On the USB video playback screen, touch and hold or
•
.
On the control panel, press and hold the [ SEEK] or
•
[TRACK ] button.
On the steering wheel, press and hold the [ / ] lever.
•
You can play the current video in the USB device from the
beginning.
Perform any of the following options:
On the USB video playback screen, touch .
•
On the control panel, press the [ SEEK] button.
•
On the steering wheel, press up the [ / ] lever.
•
AA
When you touch the button after 3 seconds once
playback has started, the current le is played from the
beginning.
AA
When you touch the button within 3 seconds after
playback starts, the previous le is played.
4-8
Page 44

Playing the current or next video le
USB video list screen
You can play the current or next video le in the USB device.
Perform any of the following options:
To play the previous video le on the USB playback screen,
•
double-touch . Alternatively, double-press the [ SEEK]
button on the control panel.
To play the next video le on the USB playback screen, touch
•
. Alternatively, press the [TRACK ] on the control panel.
AA
You can also use the [ / ] lever on the steering wheel.
AA
On the control panel, turn the [TUNE/FILE] knob to search for
a video le and press the knob within 5 seconds to play the
le.
AA
When there is no input for 5 seconds, the search stops and
the system displays the information of the current le.
Changing the repeated playback mode for USB
video
You can change the repeated playback mode for USB video:
Repeat One and Repeat All.
On the USB video playback screen, touch
repeatedly.
Each time the icon is touched, the playback repetition modes are
toggled and the activated mode icon appears on the screen.
AA
The active mode diers depending on the playing media or
list.
You can search and play the desired video from the list by
touching List on the USB video playback screen.
a
b
Used to return to the previous screen.
a
Moves to the upper folder.
b
Displays the folder name.
c
The list of menu items appears.
d
•
•
•
d
c
Media Sources: Can see the media selection window.
Show current track: Moves to the folder where the
playing le is located. This option is disabled when the le
belongs to the current list.
Split screen: Can turn on or o the split screen mode.
4-9
Page 45

Caution
Ü
Be sure to start the vehicle before connecting a USB device.
•
When you start the vehicle after connecting a USB device, the
USB device may get damaged.
Be careful of static electricity when connecting or removing a
•
USB device. It may cause a system failure.
Be careful for your body or any object not to contact the
•
multimedia USB port. It may cause an accident or system
failures.
Do not repeatedly connect and remove the USB connector
•
within a short time. It may cause device errors or system
failures.
Do not use a USB device for purposes other than playback.
•
When you connect a USB for charging or heating, the system
performance may decrease or it may cause system failures.
AA
When connecting a USB storage, do not use a separate
extension cable and directly connect to the multimedia USB
port. When you connect a USB storage via a USB hub or
extension cable, the device may not be recognised.
AA
Push the USB connector all the way into the multimedia
USB port. When the connector is not fully inserted, a
communication problem may occur.
AA
Noise may occur when removing a USB device from the
system.
AA
You can play only the les that have been encoded in the
standard format.
AA
The following USB devices may not be recognised or may not
work properly.
Encrypted MP3 players
-
USB devices that are not recognised as removable disks
-
AA
USB devices may not be recognised depending on the device
status.
AA
Some USB devices may not be supported due to compatibility
issues.
AA
USB device recognition may take longer than usual depending
on the device type, capacity, and le formats on the device.
AA
Some devices may not be charged through USB connection. It
depends on the USB specications.
4-10
Page 46

a
k
i
Listening to music via Bluetooth
Bluetooth audio playback screen
To use a Bluetooth device for audio playback, connect a device
that supports Bluetooth communication such as mobile phone
and MP3 player.
For more information about Bluetooth connection: > see
“Connecting a Bluetooth device.”
AA
The controls or display screens may dier depending on the
connected Bluetooth device, phone model, and music player
application.
AA
The steaming may not be supported in some music player
applications.
AA
Some functions may not be available depending on the
connected Bluetooth device or phone model.
AA
When a media device or mobile phone is connected by both
the Bluetooth and USB cable at the same time, the device
or system may not work properly. To use the Bluetooth
connection, remove all cables from the device.
The media player runs when you play a music le from a
connected audio device via Bluetooth.
j
b
c
d e f
Used to return to the previous screen.
a
Name of the connected Bluetooth device
b
Displays the information of the current music.
c
Restart playing the current le or play the previous le.
d
Can pause or resume playback.
e
Can play the next le.
f
Used to change the repeat playback mode.
g
Used to turn on or o the random playback mode.
h
Can see the duration of the playing song and the current
i
playback position.
Moves to the le list screen.
j
AA
The list of Bluetooth audio les may not appear
depending on the connected device or app.
g
h
4-11
Page 47

The list of menu items appears.
k
Connections: Can congure the Bluetooth connection
•
settings. > see “Connecting a Bluetooth device.”
Sound settings: Can congure system sound settings.
•
> see “Conguring the sound settings.”
Media Sources: Opens the media selection window.
•
Manual: Displays the QR code that provides access to the
•
online user manual for the system.
Split screen: Can turn on or o the split screen mode.
•
Pause/Resume
You can pause or resume playback of a Bluetooth audio le.
Perform any of the following options:
On the Bluetooth audio playback screen, touch or .
•
On the steering wheel, press the [ ] button.
•
Resuming playback of the current Bluetooth
audio le
You can play the current Bluetooth audio le from the beginning.
Perform any of the following options:
On the Bluetooth audio playback screen, touch .
•
On the control panel, press the [ SEEK] button.
•
On the steering wheel, press up the [ / ] lever.
•
AA
The actions required may dier depending on the connected
device.
4-12
Page 48

Playing the current or next audio le
You can play the current or next Bluetooth audio le.
Perform any of the following options:
To play the previous audio le on the Bluetooth playback
•
screen, double-touch . Alternatively, double-tap the
[ SEEK] button on the control panel.
To play the next audio le on the Bluetooth playback screen,
•
touch . Alternatively, press the [TRACK ] button on the
control panel.
AA
You can also use the [ / ] lever on the steering wheel.
AA
On the control panel, turn the [TUNE/FILE] knob to search for
a music le and press the knob within 5 seconds to play it.
AA
When there is no operation for 5 seconds, the search stops
and the system displays the information of the playing
content.
AA
The actions required may dier depending on the connected
device.
Changing the repeated playback mode for
Bluetooth audio
You can change the repeated playback mode for Bluetooth audio:
Repeat One and Repeat All.
On the Bluetooth audio playback screen, touch
repeatedly.
Each time the icon is touched, the playback repetition modes are
toggled and the activated mode icon appears on the screen.
AA
The active mode diers depending on the playing media or
list.
4-13
Page 49

Turning on/o the random playback
You can turn on or o the random playback mode for Bluetooth
audio.
On the Bluetooth audio playback screen, touch
repeatedly.
Each time the icon is touched, the random playback mode is
turned on and o. When the random playback is active, the les
are played randomly with no sequence.
AA
The active random playback mode diers depending on the
playing media or list.
4-14
Page 50

06
Phone
Connecting a Bluetooth device
Making a call via Bluetooth
Accepting an incoming call over Bluetooth
Checking a new message over Bluetooth
Page 51

Connecting a Bluetooth device
Bluetooth is a short-range wireless networking technology.
The Bluetooth communication function allows you to exchange
data by connecting a Bluetooth device to another neighboring
Bluetooth device without a cable connection. With this function,
you can use dierent types of devices more eciently.
To make a phone call or play audio from a Bluetooth device, check
the following rst:
For a device that is not registered to the system, > see
•
“Registering a device.”
A registered device will automatically connect to the system
•
when you bring it near the system. If it does not automatically
connects, > See “Connecting a registered device.“, “Disconnecting a
registered device.”
Warning
Ý
Pull over the vehicle at a safe place before connecting a Bluetooth
device to the system. When a trac accident occurs while
attempting connection, it may cause severe or fatal injury.
AA
The Bluetooth connection function supports only the hands-
free and audio related functions. Connect your mobile phone,
MP3 player, or device that supports the hands-free or audio
function.
AA
For more information about compatible devices, visit the
company website at http://www.kia.com.
Registering a device
To connect a Bluetooth device to the system, rst add the device
to the list of Bluetooth devices on the system.
AA
You can add Bluetooth devices up to 6.
On the All menus screen, touch Settings >
1
Device Connection > Bluetooth > Connection
settings > Add new.
AA
To register a device for the rst time, press the [ ] button
on the steering wheel or by touching Phone on the All
menus screen.
Select the function to connect.
2
6-2
Page 52

Turn on Bluetooth on the Bluetooth device to
3
connect and select the vehicle system on the list
of searched devices.
AA
The system’s Bluetooth name can be seen on the Add new
window.
Check that the authentication code on the
4
Bluetooth device screen matches the one on the
system screen and approve the connection on the
device.
When your Bluetooth device is a mobile phone,
5
to download the contacts and messages from the
phone, you must allow the access request on the
mobile phone.
AA
Access is only required to use Bluetooth calling. There will
be no access request when you connect an audio device.
AA
After the access request is approved, it may take a while until
Bluetooth connection is completed. As soon as Bluetooth
connection is completed, the Bluetooth connection indicator
icon appears at the top of the screen.
AA
Access to data can be enabled or disabled by using the
Bluetooth Settings menu on the mobile phone. For more
details, refer to the mobile phone’s user manual.
AA
You cannot register another device while operating a
Bluetooth device.
AA
In order not to use the automatic Bluetooth connection, turn
o the Bluetooth function on the device.
6-3
Page 53

Connecting a registered device
To use a Bluetooth device, rst connect a registered Bluetooth
device to the system.
AA
You can add one Bluetooth hands-free kit or up to two
Bluetooth audio devices.
On the All menus screen, touch Settings >
1
Device Connection > Bluetooth > Connection
settings.
Touch the device name to connect or touch
2
Connect.
AA
If you cannot connect your device, check to make sure its
Bluetooth option is enabled.
AA
When the connection is terminated abnormally due to
being out of range or device failures, the connection is
automatically restored as soon as the device returns to
the connection range or normal state.
AA
When connection is unstable due to a Bluetooth
communication error, on the All menus screen, touch
Settings > Device Connection > Bluetooth > Factory
settings to reset the Bluetooth function and connect the
device again.
6-4
Page 54

d
ga
e f
Bluetooth connection screen
c
b
Used to return to the previous screen.
a
Add or delete a Bluetooth device.
b
AA
You can also add or delete devices by touching their
name.
Choose to use the hands-free function or Bluetooth audio.
c
View a list of registered Bluetooth devices.
d
Add a new device to the system.
e
Delete a registered device from the system.
f
The list of menu items appears.
g
Manual: Displays the QR code that provides access to the
•
online user manual for the system.
Split screen: Can turn on or o the split screen mode.
•
Disconnecting a registered device
On the All menus screen, touch Settings >
1
Device Connection > Bluetooth > Connection
settings.
Touch the connected device name or touch
2
Disconnect.
Deleting a registered device
If you will no longer use a Bluetooth device or you want to add
a new device when 6 devices are already registered, delete an
existing registered device.
On the All menus screen, touch Settings >
1
Device Connetion > Bluetooth > Connection
settings > Delete devices.
Select a device to delete and touch Delete.
2
To delete all registered devices, touch Mark all > Delete.
Touch Yes.
3
AA
Deleting a registered device will remove all associated
contacts and the call history from the system.
6-5
Page 55

Making a call via Bluetooth
You can connect a Bluetooth device with the hands-free function
to use a Bluetooth phone. The Bluetooth connection allows you
to view call details directly from the system screen, and to make
calls safely and easily using the system microphone and speaker.
Warning
Ý
Dialing from the recent call list
Make calls directly from call history of your mobile device.
When you connect your mobile device and system over Bluetooth,
the list of recent calls from the device will be downloaded to the
system and you can call them again by selecting them from the
system screen. The system has a built-in microphone and speaker
that allows using phone safely and easily.
6-6
Pull over the vehicle at a safe place before connecting
•
your mobile phone. When a trac accident occurs while
attempting connection, it may cause severe or fatal injury.
While driving, do not make a call by dialing a phone number
•
or do not pick up your phone to talk. Distraction by the use
of a mobile phone may cause you not to recognise trac
ow around and not to cope with unexpected situations. As
a result, a trac accident may occur. If necessary, use the
Bluetooth hands-free function and make the call as short as
possible.
Perform any of the following options:
1
On the All menus screen, touch Phone.
•
On the steering wheel, press the [ ] button.
•
On the Bluetooth Call screen, touch .
2
Choose a call from the list.
3
The system dials the selected number.
AA
You can move to a desired number by pushing the
[ / ] lever on the steering wheel without touching on
the screen.
 Loading...