How it Works
Log In / Sign Up
Buy Points
How it Works
FAQ
Contact Us
Questions and Suggestions
Users
Hyundai
Loading...
H
H-MA309
H-MAC100
H-MAC120
H-MAC160
H-MAC180
H-MAC220
H-MC100
H-MC120
H-MC140
H-MC150
H-MC160
H-MC170
H-MC180
H-MC200
H-MC220
H-MC240
H-MC280
H-MC320
H-MP318
H-MP510
H-MP520
H-MP718
2
H-MP728
H-MP738
H-MP800
H-MS100
H-MS1100
2
H-MS1101
4
H-MS1102
2
H-MS1104
3
H-MS1105
H-MS1106
H-MS1107
2
H-MS1108
H-MS1109
2
H-MS1110
H-MS1111
H-MS1112
H-MS1113
H-MS1114
H-MS1115
H-MS1117
H-MS1118
H-MS1119
2
H-MS120
H-MS160
H-MS200
H-MS220
H-MS2300
H-MS2301
H-MS2302
H-MS2303
H-MS2304
H-MS2310
H-MS240
H-MS260
H-MW1017
H-MW1020
2
H-MW1021
H-MW1023
H-MW1025
2
H-MW1028
2
H-MW1030
2
H-MW1031
H-MW1117
H-MW1120
H-MW1121
H-MW1123
H-MW1125
H-MW1217
H-MW1220
H-MW1221
H-MW1225
H-MW1230
H-MW1317
H-MW1320
2
H-MW1325
H-MW1420
2
H-MW1425
H-MW1517
H-MW1520
H-MW1521
H-MW1525
2
H-MW1620
H-MW1625
2
H-MW1717
H-MW1725
H-MW1817
2
H-MW1825
H-MW2017
H-MW2117
H-MW2317
H-MW2417
H-MW3020
2
H-MW3023
H-MW3025
H-MW3120
2
H-MW3220
2
H-MW3225
H-MW3317
2
Loading...
Loading...
Nothing found
H-MS2302
Instruction Manual
36 pgs
1.08 Mb
0
Table of contents
Loading...
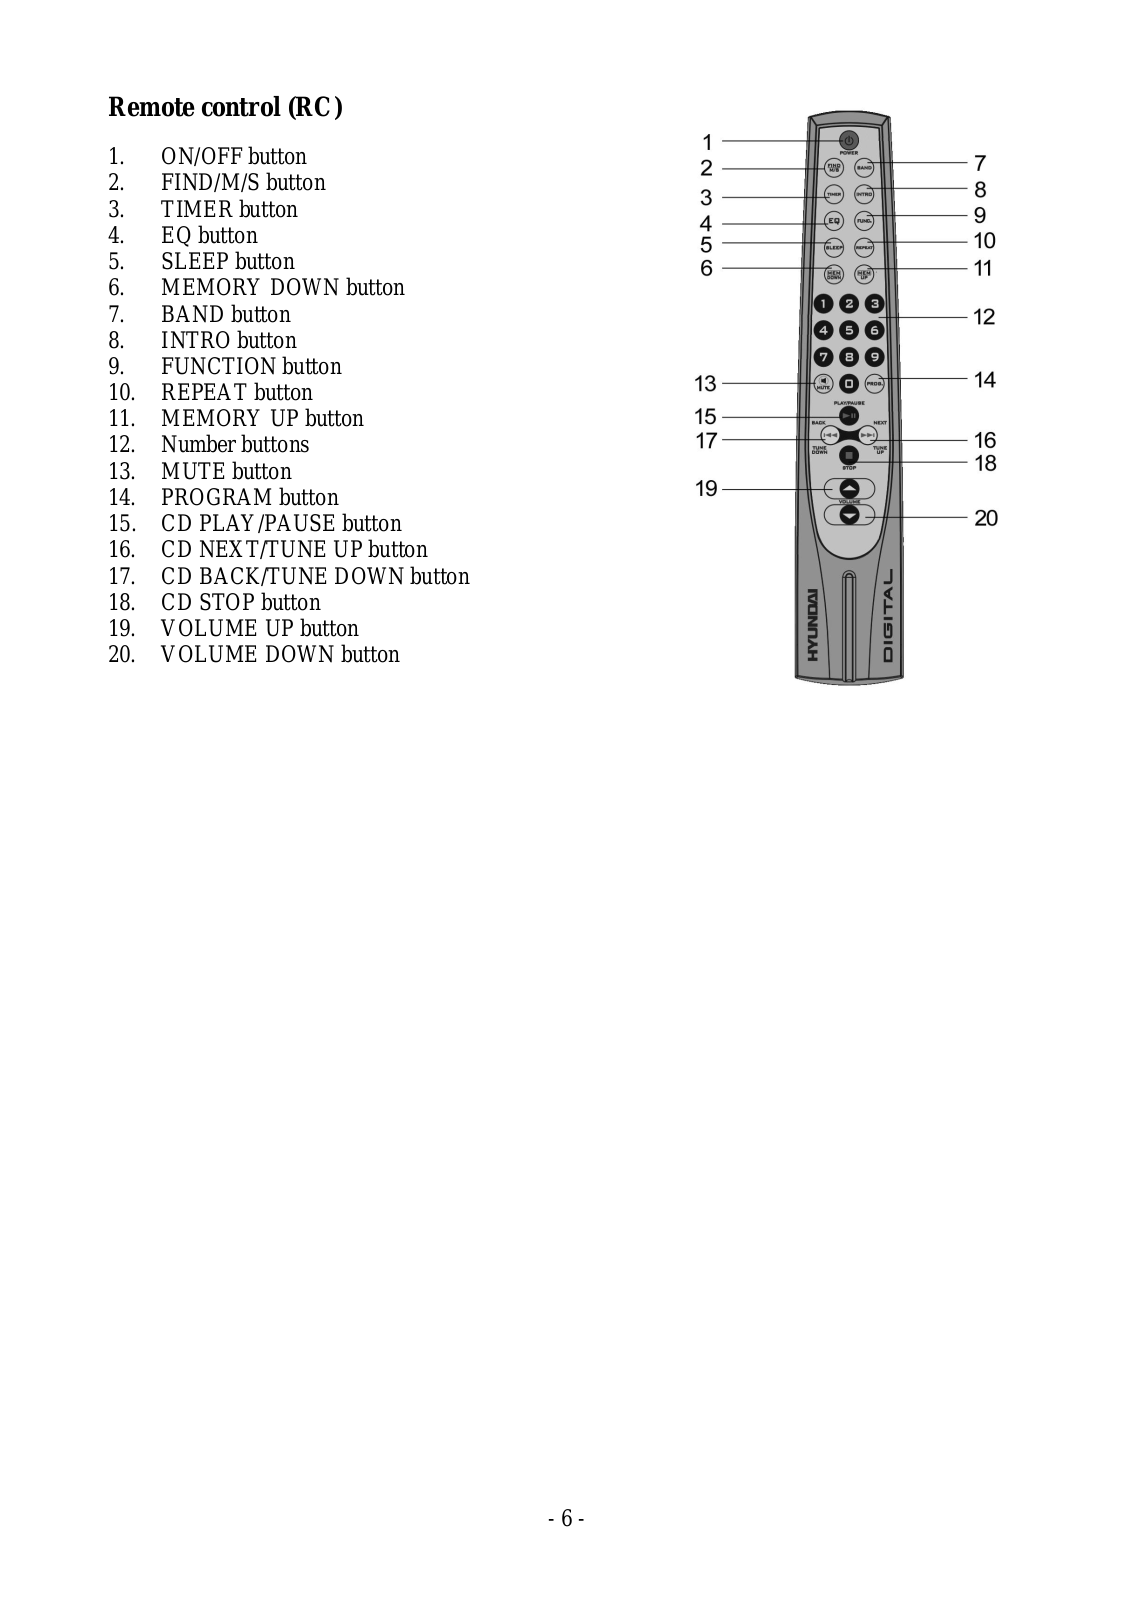
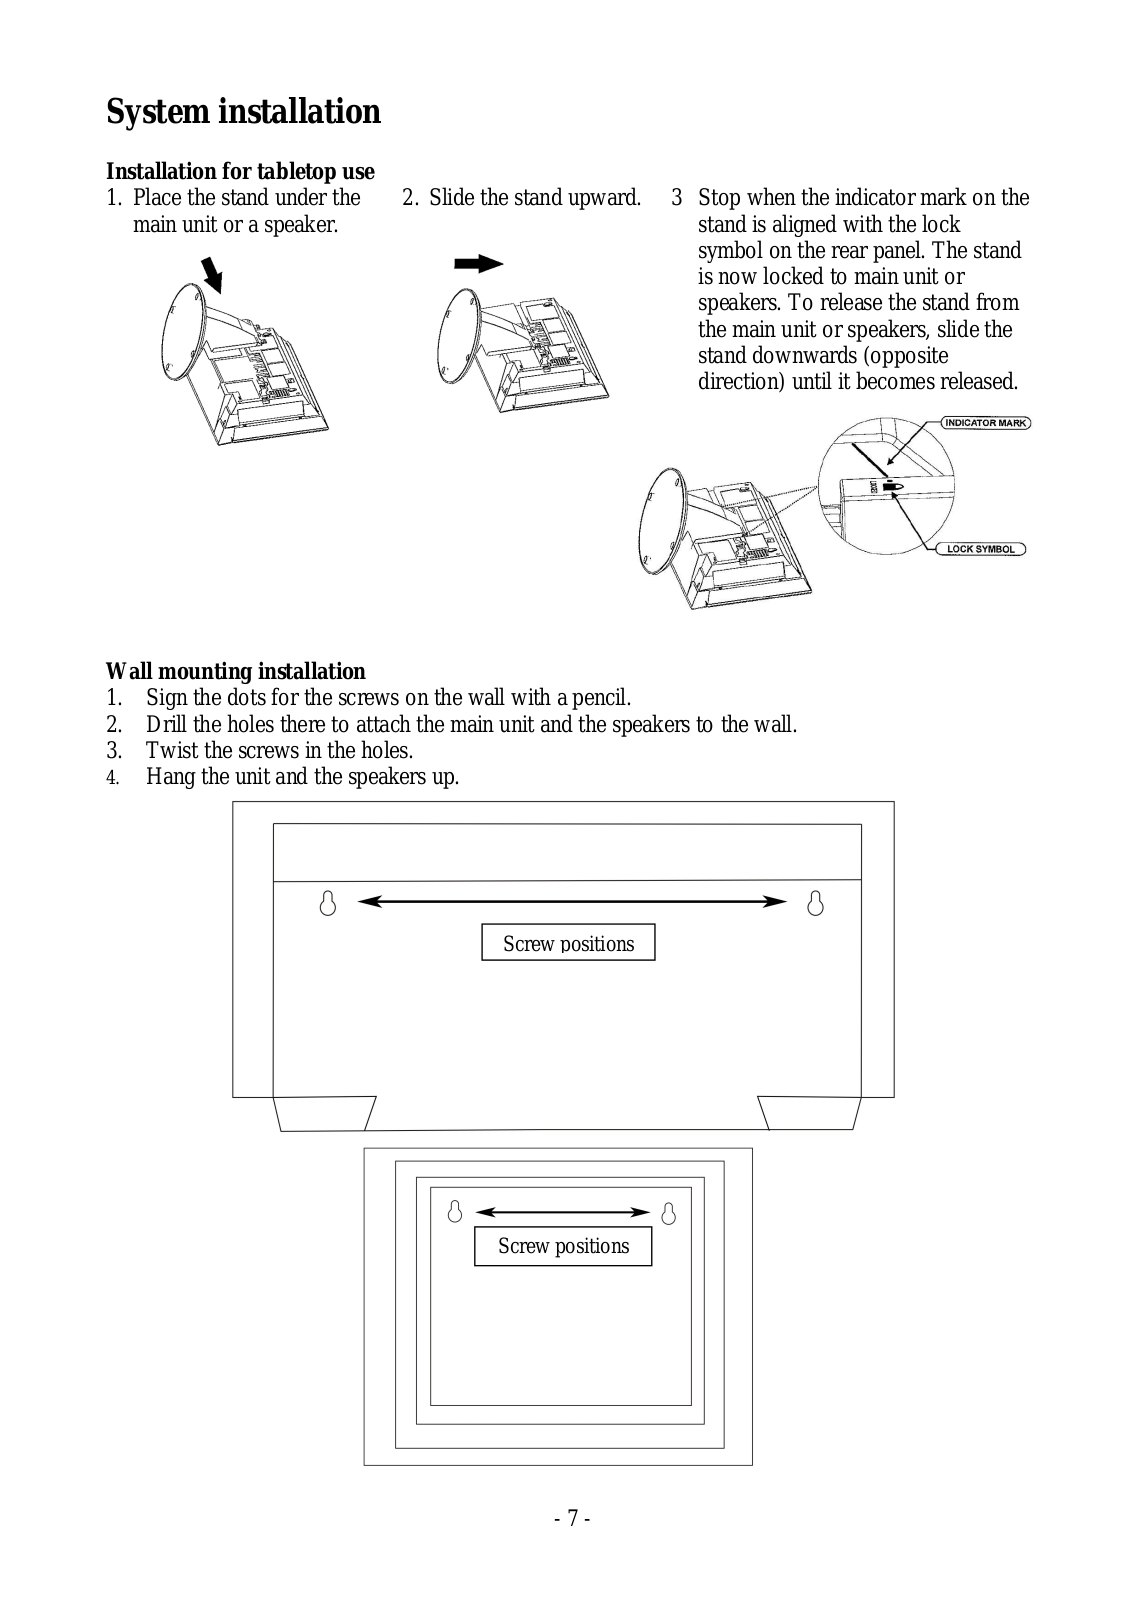
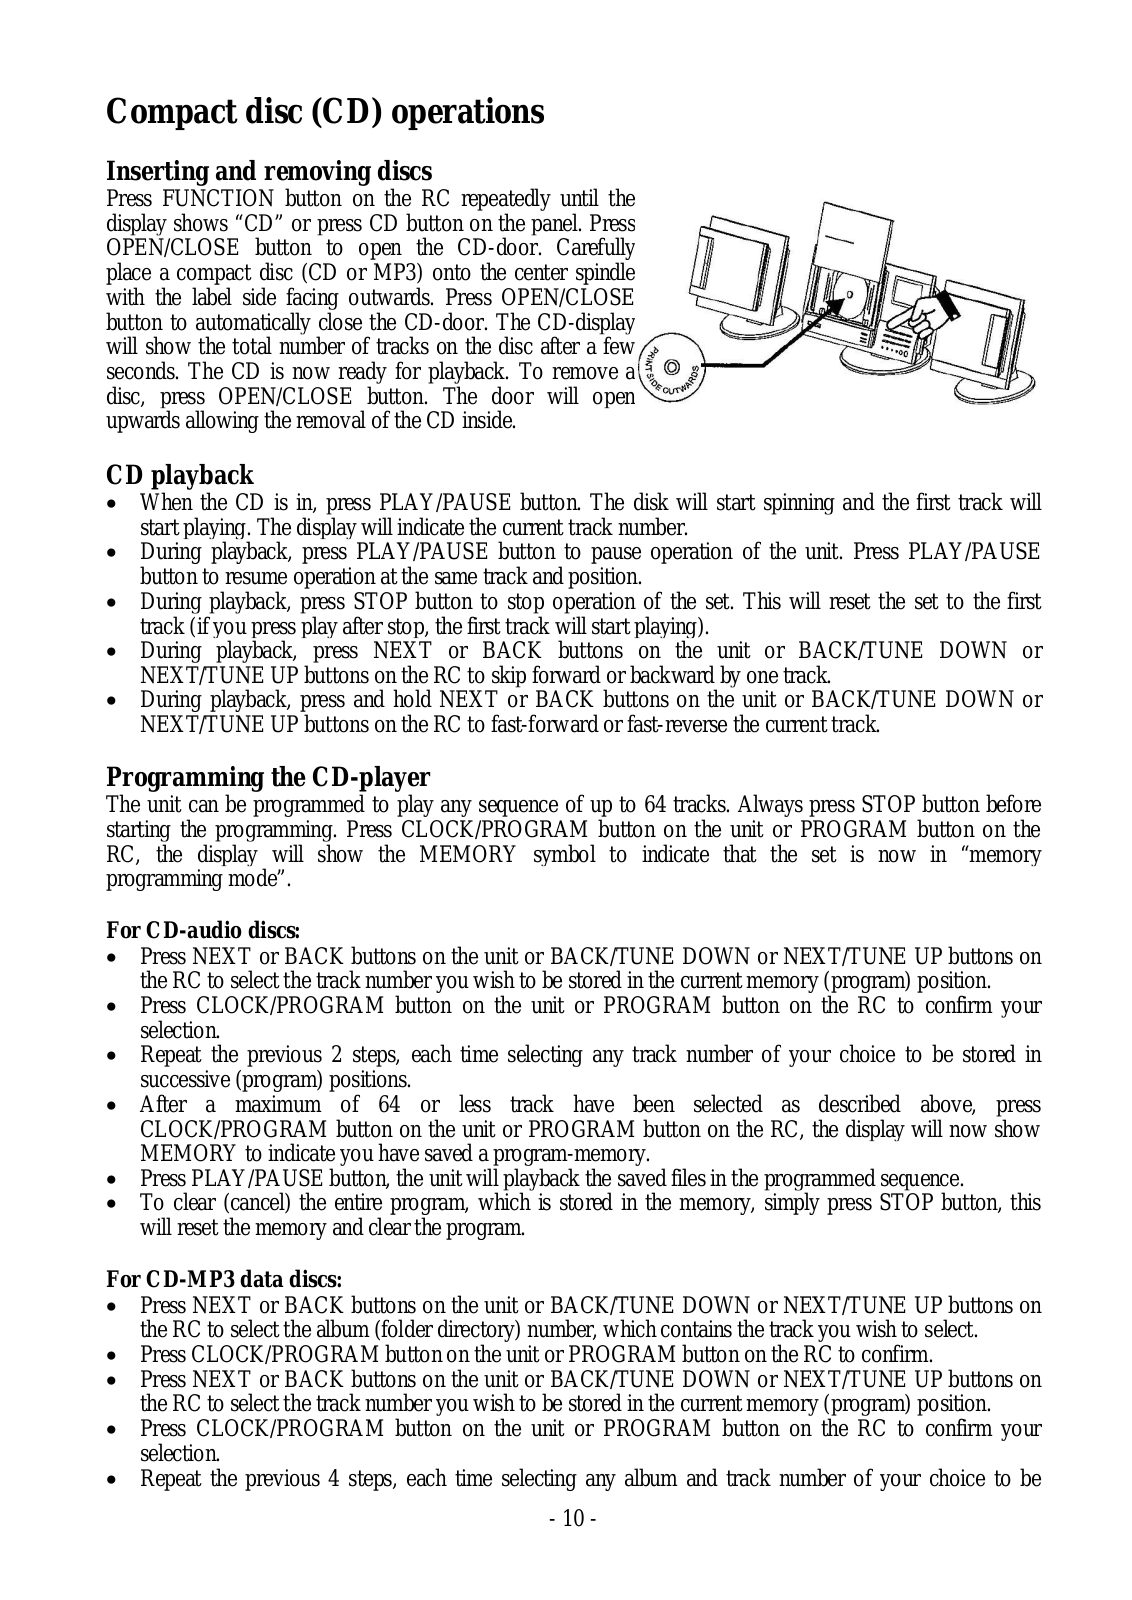
Hyundai H-MS2302 Instruction Manual
...
Hyundai Instruction Manual
Download
Specifications and Main Features
Frequently Asked Questions
User Manual
Download
Loading...
+
25
hidden pages
Unhide
You need points to download manuals.
1 point = 1 manual.
You can buy points or you can get point for every manual you upload.
Buy points
Upload your manuals