

Page 1

H-LCDVD3200
LCD TV WITH BUILT-IN DVD
PLAYER
ТЕЛЕВИЗОР
ЦВЕТНОГО ИЗОБРАЖЕНИЯ
С ЖИДКОКРИСТАЛЛИЧЕСКИМ
ЭКРАНОМ И ВСТРОЕННЫМ
DVD-ПРОИГРЫВАТЕЛЕМ
Руководство по эксплуатации Instruction manual
Page 2

Table of contents Before you start
Dear customer!
Thank you for purchasing our product. For safety, it is strongly recommended to read
this manual carefully before connecting, operating and/or adjusting the product and keep
the manual for reference in the future.
Table of contents
Before you start
Utilization of the product
Important safeguards
Connection/Installation
Stand installation
Wall mounting
Connection
Outdoor antenna connection
Other connections
Operation
Control elements
Front and lateral panel
Back panel
Remote controller
Changing the battery
General operations
AV signal sources
Teletext operations
PC screen
OSD operation
Picture setting
Sound setting
TV tuning setup
Time setting
Function setting
DVD player operation
Basic play
Turn ON/OFF
Insert disc
Play the disc
Menu playback
Title playback
Program playback
DVD operating instruction
Play
Previous/Next
Forward/Backward
2
Slow motion
3
Pause
3
Repeat
3
Display
5
Goto
5
Preview
5
Audio
6
Languages
6
Subtitle
6
Angle
7
Mute
7
Zoom
7
Repeat A-B
7
Step
8
Volume
8
MP3/JPEG playback
9
DVD setting
9
System setup
9
10
10
10
10
10
11
12
13
13
13
13
13
13
13
13
14
14
14
14
Language setup
Audio setup
Digital setup
General information
Troubleshooting
Causes of interference
Accessories
Specifications
14
14
14
15
15
15
15
16
16
16
16
16
16
16
16
16
17
17
18
18
18
19
19
19
20
21
2 3
Page 3

Utilization of the product
If you want to dispose this product, do not mix it with general household waste. There is
a separate collection system for used electronic products in accordance with legislation
that requires proper treatment, recovery and recycling.
Please contact your local authorities for the correct method of disposal. By doing so,
you will ensure that your disposed product undergoes the necessary treatment, recovery
and recycling and thus prevent potential negative effects on the environment and human
health.
Important safeguards
• Please unplug the power cord from the AC
outlet and contact a service center for repair
if following occurs: any obvious abnormality
appears in the unit, such as smoky, peculiar
smell or strange sound; liquid has been spilled or
other objects have fallen into the unit; no picture
or sound; cover or panel is broken; although you
have operated the unit following the operating
instructions, it still cannot work normally.
• This unit should only be connected to a
wall socket having grounding.
• Always disconnect the power cord and
antenna during a storm.
• Do not fix the power cord with a metal nail.
• Unplug the power cord from the AC outlet;
also unplug the signal cables from the input
ports when the unit is unused for long periods
of time.
• When unplugging the plug, always hold
the wide slot, do not touch the metal part, and
do not destroy, refit, twist, pull or roast the
power cord.
• Please contact the service center
immediately if you found that the core is
showed in the air or has been broken.
• Please replace the AC outlet if the metal
bolt cannot be inserted into the power socket
completely or it cannot be fastened even when
it was pushed in, otherwise, any accidents of
shocks and fires would happen.
• Never touch the antenna lie or power plug
if it stars to thunder.
• Do not touch the power plug with wet
hands.
• Do not use any non-rated power socket
with numerous devices jointed on one power
socket or cable device. The wire of nondesignated capacity may cause the fire due to
the generation of heat.
• All instructions must be read and
understood well before you operate the unit.
Heed all warnings and follow all instructions.
• Please use the accessories provided
by the manufacturer. Using inadequate
accessories may result in accidents.
• Please adjust the product through the
panel buttons or the remote controller, do
not remove the cover or attempt to service
the product by yourself. Do not disassemble
back cover and do not make maintenance by
yourself to avoid the electric shock.
• Over-press the panel may destroy the
product.
• Do not place the product on an unstable
cart, stand surface, tripod, bracket, or table.
The product may fall, causing serious accidents
as well as the damage to the product.
• Please place the product on a flat surface
in a well-ventilated location. Keep it away from
the burning-light, direct sunlight, vibration,
high-temperature and humidity. Store the
product with a temperature from –20
0
C ~500C;
otherwise you may destroy the product.
Page 4

Before you start
• Do not place any vase, potted plant, cup,
medicine and any container with water on this
product. If the liquid is spilt, it may cause the
fire, electric shock or breakdown.
• Do not install it at the place on the strong
magnetic field or current field. It may cause
break down. This equipment may be observed
deterioration of the picture by electromagnetic
radiation in electromagnetic environment.
• Fasten the wheel of the product or shelf
with wheels when installing this product. If it
moves or is tipped over, it may be damaged.
• Do not place any fire source such as
candlelight close to this product or place it on
this product. If it is tipped over or fallen down, it
may cause damage or fire.
• Do not place the unit into closed space
of TV for better ventilation; it can reduce the
product lifetime. Keep a space at list 10cm at
above, left, and right of the TV.
• Please place all the signal cords behind of
rear panel.
• Do not overexert or touch the panel when
you convey the product. Do not transfer the
LCD TV up or down display direction.
• Do not transport it with the power cord
or the connection cable connected. If you
move this product with the power cord or the
connection cable connected, the damaged
power cord, connection cable or connection
terminal may cause the fire, the electric shock
or breakdown.
• 2 persons or more shall transport the
device, which is heavier than 18 kg. If you drop
or tip over the device, it may damage it.
• The temperature of the product’s body
becomes a little higher after a long period use.
This phenomenon indicates that heat exchange
in normal working mode, thus please do not
let children or anyone who is sensitive of
temperature to touch.
All images provided herein are schematic
drawings of real objects and may differ
from their real images.
4
Page 5

Сonnection/Installation
Installation
Stand installation
Fix the support to the stand by screws (3
pieces A-type screws) as shown in the picture:
Fix the finished stand assy to the unit by
screws (4 pieces B-type screws) as shown in
the picture:
Wall mounting
Fix the support to the unit by screws (4
pieces B-type screws) as shown in the picture:
Use 4 screws to fix the unit on the wall
mount bracket. Please find there are 4 VESA
holes on the back of the unit:
5
Page 6

Connection/Installation
Connection
Antenna cable connector
75 Ohm co-axis cable
Outdoor Antenna Connection
Use 75Ω coaxial cable plug or 300-75Ω
impedance converter to plug in antenna input
terminal on the rear of the cabinet.
Other connections
• Connect the audio sources (Including
DVD, VCDR, CAMCORDER and PC) to the
proper AUDIO input jacks ‘L’ and ‘R’.
• Connect the video source to the VIDEO
jack by RCA cable.
• If the video source has a SCART output
jack, you can connect the signal to the monitor
by the SCART cable.
• Connect the video source to the S-VIDEO
input jack of the monitor by the S-video cable
(provided that the video source has S-video
output jack).
• When using the LCD as a computer
screen, connect the PC to the VGA jack from
TVRF antenna jack
the monitor by the relevant cable.
• This unit has PC audio in jack. Connect
this jack to PC main unit with related audio
cable in PC mode and adjust the volume to
what you want.
• If the video source has a HDMI output
jack, you can connect the signal to the monitor
by the HDMI cable.
6
Page 7

Operation
Control elements
Front and lateral panel
Back panel
1
2
3
4
6
8
10
12
14
15
16
17
18
5
7
9
11
13
1. PLAY/PAUSE button
1
2. STOP button
2
3. OPEN/CLOSE button
3
4. VOL-/LEFT cursor button
4
5. VOL+/RIGHT cursor button
5
6. CH-/DOWN cursor button
7. CH+/UP cursor button
6
8. MENU button
7
9. TV/AV button
8
10. IR sensor
9
11. POWER button
10
11
1. HDMI 1 input
2. HDMI 2 input
3. PC VGA input
4. PC audio input
5. S-Video input
6. Pb input
7. Pr input
8. Y input
9. CVBS input
10. YPbPr R audio input
11. CVBS R audio jack
12. YPbPr L audio input
13. CVBS L audio jack
14. SCART 1 input
15. SCART 2 in/out jack
16. Antenna RF input
17. AC power socket
18. Disc slot
7
Page 8

Operation Operation
button
Remote controller (RC)
1
2
3
4
5
6
7
8
9
10
11
12
13
14
15
16
17 35
18
19
20
21
22
23
24
25
26
27
28
29
30
31
32
33
34
36
37
14.
15. button
16. D.MENU button
17. TITLE button
18. PROGRAM/red button
19. INTRO/green button
20. AUTO/OPEN/CLOSE buttons
21. MUTE button
22. button
23. NICAM button
24. CH+/CH- button
25. DVD SETUP button
26. S.MODE button
27. SLEEP button
28. PGUP/SLOW button
29. PGDW/STEP button
30. SUBPAGE/ZOOM button
31. REVEAL/AUDIO button
32. D.SUB button 35. D.DISP button
33. ANGLE button 36. A-B/yellow button
34. GOTO button 37. REPEAT/cyan button
Changing the battery
1. Remove the battery compartment cover
on the back of the RC.
2. Insert the batteries into the battery
compartment making sure that the correct
polarity is observed.
3. Install the cover back.
1. POWER button
2. Number buttons
3. ASPECT button
4. VOL+/VOL- buttons
5. DISPLAY button
6. ENTER button/cursor buttons ( / /
/ )
7. LCD MENU button
8. P.MODE button
9. INPUT button
10. HOLD/STOP button
11. TEXT/PLAY/PAUSE button
12. /INDEX button
13. /SIZE button
8 9
1
• Use two AAA batteries for the RC. The RC
should be pointed at remote sensor within 8
meters and within 30 degrees at the left or the
right side.
• Take the battery out of the RC if it is not
used for a long time. Do not mix new and used
batteries or different types of batteries. Weak
batteries can leak and severely damage the RC.
• Do not expose the RC to shock, liquids, and
do not place it in an area with high humidity.
2
3
Page 9
General operations
• Press POWER button on the unit or on
the RC to switch on the power, the indication
light will be in blue color. Press POWER button
again to switch off the power, and the light will
be in red color.
• The picture setup, sound setup, previous
channel can be memorized before you switch
off the unit. The unit will restart under the
previous state when you switch on it again.
• Press VOL- button repeatedly to decrease
the volume; press VOL+ button repeatedly to
increase the volume from 0 to 100.
• Press SLEEP button repeatedly to set the
sleep time (from 0 to 120 min).
• Press INPUT button on the RC to select
the TV function mode. Channel ‘1’ will appear
on the right top corner after channel searching
is completed. Press CH-/CH+ buttons to select
previous or next channels; or press number
buttons to enter a channel number directly;
or press -/-- button until the screen displays
‘-’ or ‘--’, then use number buttons to enter a
channel number from 1 to 99.
• Press
from the present channel and the previously
displayed channel.
• Press P.MODE button repeatedly to cycle
through the available video picture modes from
the following 6 types: Standard => Personal =>
Movie => Sport => Mild => Game.
• Press S.MODE button repeatedly to
cycle through the available sound modes from
the following 4 types: Music => Theatre =>
Personal => Voice.
• Press MUTE button to cut off sound, press
this button again to resume sound.
• Press DISPLAY button to display the
preset TV channel play information.
• Press ASPECT button repeatedly to select
a screen display size from the available list:
FullScreen => ZOOM1 => ZOOM2 => Auto =>
4:3 => 14:9 => 16:9 => Subtitle.
Available aspects may differ for different
signal sources.
button on the RC to select
AV signal sources
Press INPUT button on the RC, then press
/ cursor buttons to cycle through
the available source list as follows: TV - CVBS S-VIDEO - SCART1 - SCART2 - VGA - HDMI1 HDMI2 - DVD. Press
cursor button to confirm.
TELETEXT operations (option)
• Press INPUT button to select the TV
mode. Then press CH-/CH+ buttons to select
TV channel in order to pick up the picture
signal of TELETEXT.
• Press PGUP/PGDW buttons to select the
previous page or the next page; use number
buttons and the {-/- -} button to enter into a page.
• Teletext button functions are as follows:
TEXT: Press TEXT button to enter into
TEXT mode. Press this button again to return
to the channel you are watching.
PGDW: Press this button to view the next
teletext page’s program.
PGUP: Press this button to view the previous
teletext page’s program.
HOLD: Press this button to stop the move to
the next page, and the hold symbol will appear
in the top left hand corner of the screen. Press
this button again to cancel operation.
INDEX: Press this button to go to the index
page.
SIZE: Press this button to enlarge the text
shown on the teletext screen, and one half of
page could be shown.
Press this button again to view the second
half of this page.
Press this button third time to normal size
text page view.
REVEAL: Press this button to reveal the
cancelled information. Press this button again
to cancel the information.
SUBPAGE: Press this button to select sub
page, and the sub-page symbol will appear in
the left top hand corner of the screen. Enter the
number of sub page and use numeric buttons
in the format 0001 for sub page 1.The teletext
will search for the sub page.
Red/Green/Yellow/Blue buttons: Press
these 4 color buttons to access directly to
Page 10

Operation
corresponding color page displayed at the
lower parts of teletext screen.
PC screen
Press INPUT button to select the VGA input
(TV into PC) mode. The unit has a VGA jack
for a normal computer. Connect the monitor
with a PC by this jack and the unit can be used
as the monitor for the PC.
OSD operation
Press LCD MENU button on the RC to enter
a setting menu paged displayed on the screen.
Press / buttons to go to the
needed item, then use
/ buttons to select
available setting or to adjust the selected item.
Press ENTER button to confirm
After setting press LCD MENU button to
return to the root menu or exit menu setting.
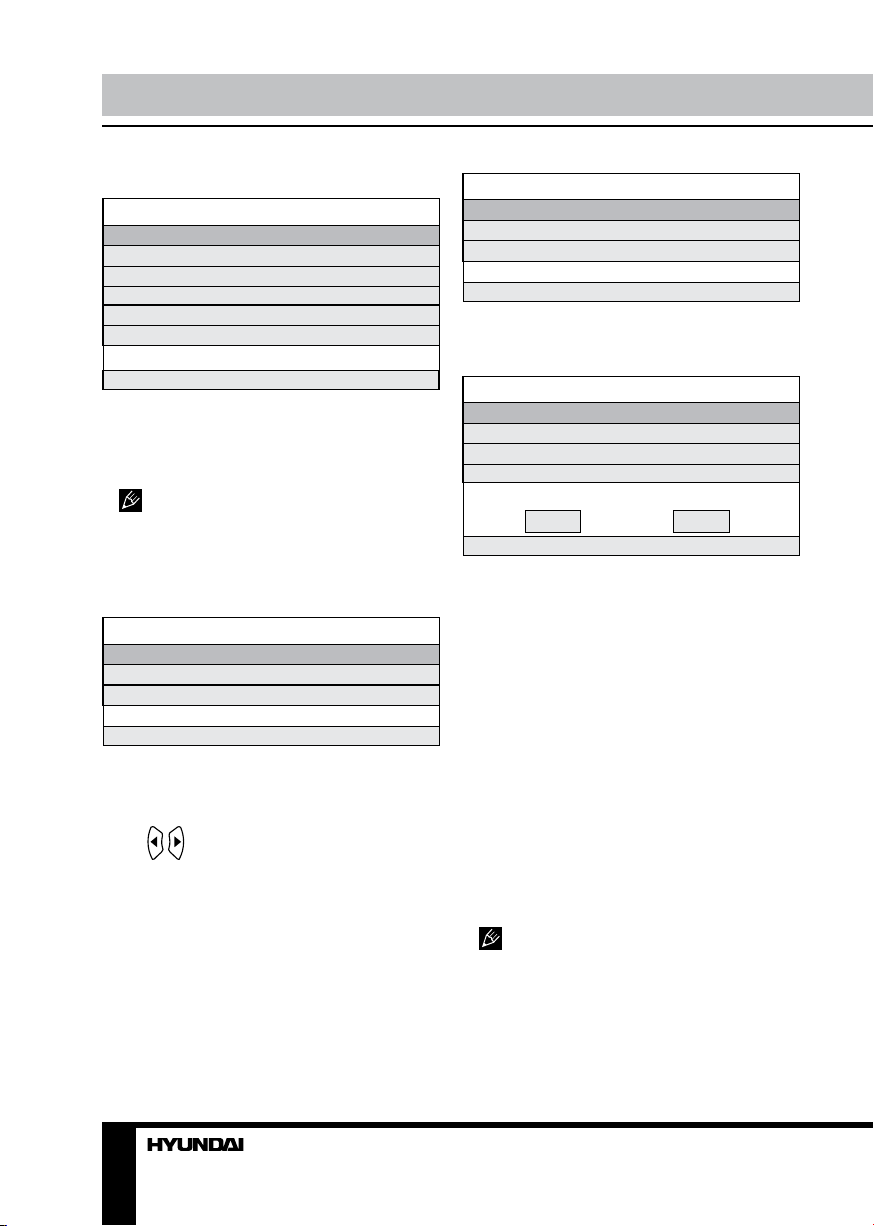
Picture setting
PICTURE
Picture Mode
Contrast
Brightness
Colour
Tint
Sharpness
Colour Temperature
DNR
Select Adjust
• Picture Mode: Standard/Personal/Movie/
Sport/Mild/Game.
• Contrast
• Brightness
• Colour. Note: This item is invalid in VGA
PC mode, and it will be shown in gray.
• Tint: adjust the tone of color when your
system is in NTSC.
• Sharpness
• Colour Temperature. Note: This item is
valid in VGA PC mode only.
• DNR: Digital Noise Reduction effect for
reducing the video noise level: Off/Low/Mid/
High, if the broadcast signal received is weak.
Sound setting
SOUND
Volume
Sound Mode
Bass
Treble
Balance
Select Adjust
• Volume
• Sound Mode: Personal/Voice/Music/
Theatre.
• Bass
• Treble
• Balance: adjust output between left and
right speakers.
TV tuning setup (for analogue TV
signal source only)
SETUP
Country
Auto Tuning
Manual Tuning
Program Edit
Select Adjust
• Country
• Auto Tuning: enter into auto tuning menu.
Then press ENTER button to start auto tuning.
• Manual Tuning: enter into manual tuning
menu:
Manual Tuning
Program
Sound System
Colour System
Program Label
AFT
Manual Search
Select Adjust
10
Page 11

Operation
• Program: select lower or upper program.
• Sou nd System: select corresponding
sound system.
• Colour System: select corresponding
colour system.
• Program Label: this item allows you to
name a channel, or rename the program
that you named also. In this item, you could
move white cursor by
available character by
If you wish to delete the character, you
have to press / buttons until the
current cursor disappears.
• AFT: this item allows you to fine tune
a channel selected due to weak or wrong
antenna configuration, some of the channels
may not be turned to the best reception. Select
AFT (Auto Fine Tune) On/Off.
• Manual Search: this item allows you to
select preset channel’s frequency one by one
with
/ buttons.
• Program Edit: this item allows you to sort
TV programs according to your preferences.
Enter into program edit menu:
/ buttons, and input
/ buttons.
the current item, it means you have selected
favorite program. Press GREEN button again,
the mark
current favorite program selection.
• Skip
Press / buttons to move cursor to
selected program channel. And press YELLOW
button, X mark will display on the current item, it
means the current program will be skipped and
could not be searched. Press YELLOW button
again, the mark X will disappear, it means you
cancel skip program selection.
• Lock
Press / buttons to move cursor
to selected program channel, And press CYAN
button, mark will display on the current item,
it means the current program will be locked
and could not be watched. Press CYAN button
again, the mark will disappear, it means you
cancel lock program selection.
• Move
This function allows you to change the
program of channels in the list:
Press / buttons to move cursor
to selected current program channel 1. And
press
Then press / buttons to move
cursor to target program channel 2. And press
button to confirm.
will disappear, it means you cancel
button to confirm.
A mark displayed on item, means it is
playing current channel’s program.
• Favorite (option)
Press / buttons firstly to move
cursor to selected program channel. And
press GREEN button, a mark will display on
Time setting
TIMER
Sleep Timer
OSD Timer
Adjust Enter
• Sleep Timer: use / button to select
sleep time to let unit go into standby state
automatically.
• OSD Timer: use
OSD menu displayed last time.
/ button to select
11
Page 12
Operation Operation
Function setting
FUNCTION
Language
Video Size
Blue Screen
Child Lock
First Time Installation
Reset
Select Adjust
• Language: select available OSD menu
language
• Video Size: select the best available LCD
screen display aspect size which corresponds
to your viewing requirements.
This available aspect size may be
different in different input source.
• Blue Screen: select On/Off. Selecting On
means the screen background colour could be
in blue if there is no or weak signal.
• Child Lock: enter Child Lock menu:
Child lock
Child Lock
Key Lock
Change PIN Code
Select Adjust
• Child Lock: select On/Off.
• Key Lock: This item allows you to lock a
button on the unit, so that a child could not
change accidentally your viewing preferences.
Press
buttons, then input a new password you want
to set. Press ENTER button to confirm the new
password.
/ buttons to select On/Off.
• Change PIN Code
Enter the original password 4711 by number
Change PIN code
Old PIN code
New PIN code
Enter again
Select Delete Input Confirm
• First Time Installation: enter First Time
Installation menu:
First Time Installation
Country
Language
Delete Analog Program
Analog Program Search
OK Cancel
Select Adjust
• Country: select corresponding country.
• Language: select corresponding language.
• Delete Analog Program: press ENTER
button, and a mark √ will display on this item,
meaning you selected this item operation. Press
ENTER button again, the mark √ will disappear,
meaning you cancelled this item operation.
• Analog Program Search: press ENTER
button, and the mark √ will dis-play on this
item, meaning you selected this item operation.
Press ENTER button again, the mark √ will
disappear, meaning you cancelled this item
operation. After above items selection, please
move the cursor to OK or Cancel item. And
press ENTER button to confirm or cancel this
menu selection.
• Reset: setting to the factory default.
In this manual, the OSD Menu maybe
changed and different from your real TV’s
screen shown without further notice. This
manual is just a sample to help you how to
operate TV menu setting.
12 13
Page 13

DVD player operation
Basic play
Turn ON and OFF the DVD function
Turn on the LCD TV and then press INPUT
button to select DVD source.
Insert Disc to DVD
Insert the disc to the disc slot, the player will
load the disc automatically. There will be an
indication ”CLOSE” then “READ” on screen.
After loading the disc content, it will switch to
play mode automatically. If the disc is already
placed inside, the disc will read automatically.
• Insert disc with reflective data side
facing the front of the unit. When inserting the
disc incorrectly, you may damage the DVD
mechanism. Some slight picture noise and
some sounds are produced when the disc is
loading, unloading and during playback, this is
normal and can be ignored.
• For some discs, after loading the content
of the disc, you need to press PLAY/PAUSE
button or select from the disc menu to start.
Play the disc
According to the disc content, menu will
display for your selection. When playing the
disc, you may use PLAY/PAUSE button to
toggle between Play and Pause mode. This
product also supports Menu, Title, Sequential
and Program playback.
Menu playback
(1) Press D.MENU button to display disc
menu or return to the root menu when playing
the disc.
• For DVD discs, the screen will display the
DVD disc menu (Root Menu).
Please use navigation buttons to select and
play the highlighted contents.
• For Super VCD and VCD2.0 discs, the
screen will display the super VCD and VCD2.0
disc menu (press D.MENU button to display
the PBC status --- PBC: [OFF], Playback the
super VCD and VCD2.0, the default PBC status
is ON). Please use the numeric buttons to play
your favorite content directly (Note: PBC should
be OFF).
(2) Press ENTER or PLAY/PAUSE button to
start from highlighted content.
(3) Press STOP button once to stop, press
PLAY/PAUSE button to resume from where you
stopped; Press STOP button twice to stop, press
PLAY/PAUSE button to start from beginning.
• For different discs, D.MENU button
may have different menu display information.
• In order to protect the disc, press STOP
button, then press OPEN/CLOSE button to
take disc out. When the disc is ejected, hold
the disc edge slightly and take it from the eject
direction to prevent scratches.
• When not using the DVD function (in
standby or using other sources for a long time),
please take out the disc to protect the DVD
mechanism and the disc.
Title playback (usually for DVD title
disc only)
Press TITLE button, there will be indication
”TITLE” on the screen. Press the direction or
number buttons to select your favorite title, it
will play from the first chapter of selected title.
Program playback
Using Program playback, you could select
max. 16 tracks from the disc to playback in
programmed order. And OSD for program
playback is as below for your check and
reference only (this is different for various
types of discs):
Page 14

Operation
• If it is PBC ON status, using program
playback will turn to PBC OFF automatically.
• According to the highlight area input the
title and chapter number by numeric buttons,
press PLAY/PAUSE button to start; or move the
cursor to the PLAY by buttons, press ENTER
button to start.
• While playing the program, you may press
PROGRAM button to display the program
menu for edit. To clear the program move the
cursor to CLEAR and press ENTER button. Or
press STOP button to end the program. When
press PLAY/PAUSE button again, the disc will
play subsequently.
• While playing the program, there will be
indication “PRG PLAY” and the current title and
chapter number.
Do not insert or play 8 cm discs, they
can get stuck.
DVD operating instructions
Play
(1) For DVD discs, press PLAY/PAUSE
button from root or title menu; while playing the
DVD, you may play your favorite title directly
with title selection by pressing TITLE button.
(2) For Super-VCD and VCD discs, while
playing the disc, you may play your favorite
tracks by number buttons.
(3) For CD discs, while playing the disc, you
may play your favorite tracks by numeric buttons.
(4) For MP3/JPEG discs, while playing
the disc, you may play your favorite tracks by
numeric buttons from the content menu.
If input track number is not valid, it will
not function.
• For DVD discs, the above functions may
be varied due to different DVD discs’ structure.
Forward/Backward
Press button to toggle between different
fast forward speeds in sequent: (x2/x4/x8/
x20/play). Press
different backward speeds in sequent (x2/x4/
x8/x20/play).
• While in backward or forward, you may use
PLAY/PAUSE button to resume normal speed.
• For CD, HDCD, MP3, backward or forward
has no audio output.
• For DVD discs, if backward to first title/
chapter, it will start from the beginning.
• For Super-VCD and VCD discs, in PBC
ON status, if backward to the first track, it will
start from the beginning.
During forward or backward, the sound
will be off.
button to toggle between
Slow motion
Press PGUP/SLOW button to toggle
between different speeds consequently (SF1/2,
SF1/3, SF1/4, SF1/5, SF1/6, SF1/7, play).
While in slow motion, you may press PLAY/
PAUSE button to resume normal speed.
During slow motion, the sound will be off.
Pause
• For CD, CD-G, HD-CD and MP3/JPEG
discs, press PLAY/PAUSE button to pause and
press PLAY/PAUSE button again to resume.
• For DVD, Super-VCD, VCD discs, press
PLAY/PAUSE button to pause and press PLAY/
PAUSE button again to resume.
Previous/Next
• While playing the discs: press button to
play the last Title/Chapter/Track; Play button
to play the next Title/Chapter/Track;
• For Super-VCD and VCD discs, in PBC
OFF status: If the current track is the first one,
press button to stop the playback; If the
current track is the last one, press button to
stop the playback.
14
Repeat
Press REPEAT button once to display the
current repeat mode.
• For Super-VCD, VCD, CD, CD-G, HDCD discs, while playing in sequent, you may
use the repeat playback. There are 3 repeat
modes, press REPEAT button to toggle
between different modes in sequent (Repeat
OFF/Repeat 1/Repeat ALL).
Page 15

Operation
• For DVD discs, you may setup the repeat
playback mode. There are 4 repeat modes,
press REPEAT button to toggle between
different modes in sequent (Repeat OFF/
Repeat Chapter/Repeat Title/Repeat All).
• For MP3/JPEG discs, while playing the
disc, you may use the repeat playback. There
are 4 repeat modes, press REPEAT to toggle
between different modes in sequent (Repeat
OFF/Repeat 1/Repeat DIR/Repeat ALL).
Display
Press D.DISP to activate the roll-down menu
on screen for the current Title, Chapter, Time
and other information.
• For DVD discs, (2 Pages):
Press D.DISP button once to display first
page as follows: Disc type, Title number
(current/full), Chapter number (current/full),
Elapsed disc time.
Press D.DISP button again to display the
second page as follows: Audio (current/full),
Language, Audio type, Subtitle (current/full),
Angle on/off.
Press D.DISP button again to turn off the
display on screen.
• For Super VCD discs, (2Pages) :
Press D.DISP button once to display first
page as follows: Disc type, Track -/- - (Current/
Full), Mute status, PBC status, Repeat mode
status, Current track time.
Press D.DISP button again to display the
second page as follows: Audio -/-- (Current/
Full) or OFF, Audio type, Language, Subtitle
-/-- (Current/Full) or OFF.
Press D.DISP button again to turn off the
display on screen.
• For CD,CD-G,HD-CD,MP3/JPEG discs
Press D.DISP button once to display page:
Disc type, Track-/-(Current/Full), Mute
status, Repeat mode status, Current track time.
Press D.DISP button again to turn off the
display on screen.
Goto
This function allows you to play your favorite
Title/Chapter/Track. Press GOTO button to
activate the scroll-down menu for edit on
screen. According to the highlighted area, input
your favorite Title/Chapter/Track number by
numeric buttons or input the playback time.
After editing, press ENTER to start.
• If the input is invalid, it will not function.
• While editing, GOTO button is not function.
• If it is in PBC ON status, this function will
switch to OFF.
Preview
For Super-VCD and VCD discs, while the
disc is stopped, press INTRO button.
• The screen will split to 9 small displays to
play each track by 3 seconds according to the
tracks order.
• If it is in PBC on status, this function will
switch it to OFF.
• Press
small screens.
• Press PLAY/PAUSE button to playback the
current selection.
• Press 1-9 numeric buttons to activate
corresponding small screen directly.
For CD, CD-G, HD-CD discs, while the disc
had stopped, press INTRO button. It will start
to play each track by 15 sec. according to the
track order.
• Press numeric buttons directly to select
the tracks for preview.
• Press PLAY/PAUSE button to playback the
current selection.
• Press 1-9 number buttons to activate
corresponding small screen directly.
button will not function.
• If the current track started over 15
seconds, this function will start from next track.
or buttons to navigate the 9
• If disc menu has been started, INTRO
Audio
Press AUDIO button once to display current
audio mode. Press AUDIO button again to toggle
between different audio modes in sequent.
Switching to Audio L/R audio channel
may be varied due to different disc contents or
types. Bilingual VCD discs could use AUDIO
button to switch between different languages.
15
Page 16

Operation
Languages (for DVD and Super VCD
discs only)
Press AUDIO button once to display current
language. Press AUDIO button again to toggle
between different language modes in sequent.
For Multi-languages DVD and SuperVCD discs, you can press AUDIO button to
select your favorite language.
Subtitle (for DVD and Super VCD discs
only)
Press D.SUB button once to display current
subtitle. Press D.SUB button again to toggle
between different subtitle modes in sequent.
For Multi-languages subtitle DVD and
Super-VCD discs, you could press D.SUB
button to select your favorite subtitle language.
Angle
Press ANGLE button once to display current
playback angle. Press ANGLE button again to
toggle between different layback angle modes
in sequent.
Only suitable for DVD discs with multiangle, press ANGLE button to select your
favorite playback angle. Selectable playback
angle depends on the availability of the DVD
contents.
Mute
Press MUTE button to mute the audio output.
Press MUTE button again to cancel, or press
VOL+ button to cancel and adjust volume. In
case there is no audio output, please try to
press MUTE button to cancel mute.
ZOOM
Press ZOOM button to zoom out or in the
picture. There are 6 zoom modes you can
select. ZOOM button is to toggle between
different zoom modes in sequence: ZOOM2
- ZOOM3 - ZOOM4 - ZOOM1/2 - ZOOM1/3 ZOOM1/4 - ZOOM OFF.
In ZOOM2~4, you could use the
navigation buttons to pan the picture for your
favorite portion.
Repeat A-B
In normal playback, fast forward or fast
reverse:
You could press A-B button at where you
want to start the repeat portion, there is
indication “REPEAT A-” on the screen.
Press A-B button again at where you want to
stop the repeat portion, and there is indication
“REPEAT A-B”. That means the repeat
function start to play the portion from A to B
automatically.
Press A-B button third time, there is an
indication “A-B CANCEL”, that means you
cancel this AB repeat playback function.
• For Super-VCD, VCD and CD discs,
repeat AB is the only function within the same
track. When playing the others, repeat A-B will
cancel automatically.
• For DVD discs, repeat AB is the only
function within the same title/chapter. When
playing the others, repeat A-B will cancel
automatically.
STEP
When STEP button on the RC is pressed
once, the picture will become still on the screen.
By pressing this button repeatedly, the picture
will advance frame by frame. To return to
normal play, press PLAY/PAUSE button. Please
note that the sound is cut off, and the picture
becomes silent while playing in this mode.
Volume
Press VOL+ or VOL- buttons to adjust the
output volume.
MP3/JPEG Playback
After loading an MP3/JPEG disc, it will start
to scan for stored MP3/JPEG folders. And then
It will display the MP3 contents automatically
(see interface below) and start to play the first
file (highlighted file).
16
Page 17

Operation
1 2 3 4 5
1. Current folder
2. MP3 file playback
3. JPEG file playback
4. Current file
5. Scroll bar
• Press
/ / / buttons to move
to highlight the folders, files or mode selection.
• Press number buttons to select the
contents directly.
• When playback MP3 Files, there is no
picture display, only there is audio output.
• When play or pause with picture playback,
you could use navigation to flip or rotate the
picture.
• When play or pause with picture playback,
you could use D.MENU button to enter into
preview mode to display 12 pictures. Press
or button to select next or last page or press
number buttons to view the corresponding
pictures.
DVD setting
Press DVD SETUP button to enter the
DVD setup menu. Press / / /
buttons to move and select category (highlight)
between different submenu, then press ENTER
button to confirm. Press DVD SETUP button
again to return to the root menu or exit the
setting menu.
In this manual, the Menu may be
different from your real TV’s screen shown.
Because this manual is just a sample to help
you operate DVD menu setting.
System Setup
SYSTEM SETUP
TV SYSTEM
TV TYPE
PASSWORD
RATING
DEFAULT
EXIT SETUP
• TV SYSTEM
This menu enables you to set the picture
format for your TV/DVD between NTSC/PAL/
AUTO according to your request and local TV
system.
• TV TYPE
This menu enables you to select one of the
three aspect ratios: 4:3 PS/4:3LB/16:9.
4:3PS (Normal): Normal Pan and Scan is
used for most normal television broadcasts and
it is the default setting. It has an aspect ratio
of 4:3. If you select this setting when viewing a
DVD, the picture will fill the screen but you will
not see the left and right edges of the picture.
4:3LB (Normal): Normal Letter Box will
show the DVD in its original aspect ratio .So
depending on size of your television screen,
you could see black boards above and below
the picture.
16:9 (Wide): Choose this setting if you have
a widescreen television.
Playback screen size may vary
according to disc contents. For discs with 4:3
contents, using any mode would only display
4:3 screen. Screen ratio selection should be
according to the connected TV or display
aspect ratio.
17
Page 18

Operation General information
• PASSWORD
The default setting is locked. No rating
selection or change password could be done.
To edit the Rating setting please enter default
password “0000” by number buttons, then
press ENTER button to confirm.
To change password you could input any 4
digit number when the lock is unlocked. Once
the 4 digit number is entered, that will be new
password.
• RATING
Playback for some discs with rating. You
could select the rating setting according to your
preference. Rating restriction divided in eight
different category from KID SAFE to ADULT.
• DEFAULT SETTING
Press ENTER button to restore factory default.
Language Setup
LANGUAGE SETUP
OSD LANGUAGE
AUDIO LANG
SUBTITLE LANG
MENU LANG
EXIT SETUP
Audio Setup
AUDIO SETUP
AUDIO OUT
TONE
EXIT SETUP
AUDIO OUTPUT
Select SPDIF/OFF, SPDIF/RAW or SPDIF/
PCM audio output mode.
TONE
Use
/ buttons to adjust Tone setting.
Digital Setup
DIGITAL SETUP
DYNAMIC RANGE
DUAL MONO
You can choose the suitable language as
EXIT SETUP
displayed menu on the screen.
DYNAMIC RANGE
When switch the compress mode to “Audio
Output”, adjust the compress ratio for different
effect: When selected FULL, the peak signal
value is smallest; When selected OFF, the
peak signal value is biggest.
DUAL MONO
You could select 4 different audio output
same as the menu displayed on the screen:
STEREO/MONO L/MONO R/MIX MONO.
18 19
Page 19

Troubleshooting
Below is a table describing simple measures that can help you eliminate most problems likely
to emerge when this unit is in use. If below measures do not help, turn to a service center or to the
nearest dealer.
Symptom Cause Solution
No picture, no
sound, and no
indicator light
Picture and
sound with
abnormity
Picture is spotted
or with snow
Blue background No video signal or the signal cord is
PC Picture is not
in the middle of
the screen
No sound No audio signal or the signal cord is
Disc playing
abnormally
Disc not playing Disc placed upside down. Turn the disc right side up.
The RC does not
work
The power cord is not plugged in.
Contrast, brightness, sharpness, color
and volume are all in the minimum
value or TV is in mute mode.
Contrast and color are set improperly.
Color system is set improperly.
Sound system is set improperly.
Signal source is low-grade or the
signal is in a lower quality.
improperly/not connected.
Picture is not well adjusted. Press the CH+/CH- buttons at one
im-properly/not connected.
Disc dirty or scratched. Clean or change the disc.
Batteries are improperly installed or
exhausted.
Plug the power cord in.
Alter the value of contrast,
brightness, sharpness, color and
volume.
Set the value of Contrast and color
properly.
Set the sound system properly.
Use the qualified signal cord.
Connect the signal cord properly.
time to adjust it.
Adjust H/V position manually to
adjust it.
Connect the audio signal cord
properly.
Set the sound system properly.
Make sure the positive and the
negative polarities are correct.
Reattach the battery lid.
Replace the batteries.
Causes of interference
Incorporated in your TV receiver are the most up-to-date devices to eliminate interference.
Local radiation however, can create disturbances, which visibly affect your picture. Proper
installations, a good aerial are your best safeguards against these disturbances.
• RF INTERFERENCE: Moving ripples across the screen are caused by nearby transmitting or
receiving short-wave radio equipment.
• DIATHERMY: Herringbone pattern and partial picture loss can result from the operation of
diathermy equipment from a nearby doctor’s surgery or hospital.
• SNOW: Weak TV signals from long distant stations result in an instead picture and give the
Page 20

General information General information
effect of falling snow. An antenna adjustment
or antenna amplifier may be needed.
• GHOST: Multiple image, caused by
TV signals reflected back from surrounding
buildings, hills, aircraft, etc. is minimized by
correct aerial positioning.
• CAR IGNITION: Nearby cars and electrical
motors can cause small streaks across the
picture or make the picture roll.
Accessories
1. LCD TV 1 pc
2. Remote controller 1 pc
3. RCA cable 1 pc
4. Power cord 1 pc
5. Stand support 1 pc
6. Stand 1 pc
7. Screws (A-type 4X14 mm) 3 pcs
8. Screws (B-type 4X16 mm) 4 pcs
9. Consumer information 1 pc
10. Warranty card 1 pc
11. Instruction manual 1 pc
20 21
Page 21

Specifications
Size (diagonal) 32” (81 cm)
Brightness 500 cd/m
2
Contrast 3000:1
Response time 8 ms
Resolution 1366 x 768
Aspect ratio 16:9
Color system PAL, SECAM
Sound system DK, I, BG, L
Disc support DVD-R/-RW/+R/+RW/CD-R/-RW
Format support DVD/DVCD/SVCD/VCD/CDDA/MP3/HDCD/JPEG/Kodak
Picture CD/DVD Audio/Super Audio CD/MPEG4(DivX)
AV RCA in +
Component video (Y Pb/CB Pr/Cr) +
SCART + (2 pcs)
PC audio input +
HDMI + (2 pcs)
VGA +
S-Video +
Russian and English OSD +
Progressive scan +
Digital comb filter +
Quantity of channels 99
Teletext +
Power supply ~110-240V, 50/60Hz
Power consumption 170 W
Unit dimensions 799 x 220 x 600 mm
Net/Gross weight 12 kg/16 kg
The LCD panel is a high technology product with many thin film transistors that can
give you a fine picture details. Occasionally, a few non-active pixels may appear on the screen
as a fixed point of blue, green, red, black or white, please note that this does not affect the
performance of your LCD TV.
Warning: Specifications may be subject to change without notice for improvement.
Page 22

Содержание Перед началом эксплуатации
Уважаемый покупатель!
Благодарим Вас за покупку нашего изделия. Чтобы понять, как правильно и безопасно пользоваться приобретенным устройством, рекомендуется тщательно изучить
настоящее руководство перед подключением и эксплуатацией изделия. Сохраняйте
руководство для использования в будущем.
Содержание
Перед началом эксплуатации
Утилизация изделия
Меры предосторожности
Установка/подключение
Установка
Установка на стойку
Настенный монтаж
Подключение
Подключение внешней антенны
Прочие подключения
Управление устройством
Элементы управления
Передняя и боковая панели
Задняя панель
Пульт дистанционного управления
Установка батареек
Общие операции
Источники аудио-видео сигнала
Операции с телетекстом
Монитор ПК
Экранное меню
Настройка изображения
Настройка звука
Настройка ТВ
Таймер
Страница настроек Функция
Операции с DVD-плеером
Основные операции
Выключение/включение DVD-плеера
Загрузка диска
Воспроизведение DVD
Воспроизведение меню
Воспроизведение разделов
Программируемое воспроизведение
Операции при воспроизведении
дисков
Воспроизведение
22
23
23
23
25
25
25
25
26
26
26
27
27
27
27
28
28
29
29
29
30
30
30
30
30
32
32
33
33
33
33
33
33
34
34
34
34
Предыдущий/следующий трек
Перемотка назад/вперед
Замедленное воспроизведение
Пауза
Повтор
Отображение информации на экране
Переход
Предварительный просмотр
Аудио
Язык
Субтитры
Угол обзора
Отключение звука
Изменение масштаба
Повтор фрагмента А-В
Покадровое воспроизведение
Громкость
Воспроизведение MP3/JPEG дисков
Настройка DVD
Основные настройки
Выбор языка
Настройка аудио
Цифровые настройки
Общая информация
Руководство по устранению
неисправностей
Источники помех
Комплект поставки
Технические характеристики
34
34
35
35
35
35
35
36
36
36
36
36
36
36
36
37
37
37
37
38
38
39
39
40
40
41
41
42
22 23
Page 23

Утилизация изделия
Если вы желаете утилизировать данное изделие, не выбрасывайте его вместе с
обычным бытовым мусором. Существует отдельная система сбора использованных
электронных изделий в соответствии с законодательством, которая предполагает
соответствующее обращение, возврат и переработку.
Обращайтесь в органы местного управления за инструкциями по правильной
утилизации продукта. Тем самым Вы обеспечите утилизацию Вашего изделия с
соблюдением обязательных процедур по обработке, утилизации и вторичной переработке и, таким образом, предотвратите потенциальное негативное воздействие на
окружающую среду и здоровье людей.
Меры предосторожности
• Пожалуйста, извлеките шнур питания из розетки и свяжитесь с сервисной
службой в следующих случаях: если в
устройстве имеются явные неисправности,
например, из него идет дым, чувствуется
специфический запах или слышен нехарактерный звук; если внутрь устройства
попала жидкость или посторонние предметы; если нет изображения или звука; если
поврежден корпус или панель; если Вы
пользуетесь устройством согласно инструкции, но оно не работает должным образом.
• Устройство можно подключать только к
розетке, имеющей заземление.
• Во избежание поражения электрическим током защищайте шнур питания от
возможного нажатия на него или защемления, особенно рядом с разъемами.
• Не закрепляйте шнур питания метизами.
• Если Вы не пользуетесь устройством
длительное время или в случае грозы
обязательно отключайте шнур питания из
розетки, а также отключайте все сигнальные кабели от входных разъемов.
• При отключении вилки из розетки всегда держитесь за утолщение на вилке, не
касайтесь металлических частей, не тяните
за шнур и не ломайте и не перегибайте его,
не ремонтируйте, не перекручивайте и не
нагревайте.
• Немедленно свяжитесь с сервисным
центром, в случае если имеются какие-либо
неисправности шнура питания, в нем оголились жилы или он поврежден.
• Замените сетевую розетку, если в
нее невозможно вставить вилку или вилка
плохо закрепляется в розетке. Иначе могут
возникнуть неисправности или произойти
несчастные случаи или возгорания.
• Не прикасайтесь к проводам мокрыми
руками.
• Запрещается использование розетки, в
которую подключено несколько устройств.
Перегрузка такой розетки может привести
к пожару.
• Перед работой с устройством необходимо полностью прочитать и понять все
инструкции. Необходимо соблюдать все предупреждения и следовать всем инструкциям,
приведенным в настоящем руководстве.
• Пожалуйста, используйте только рекомендованные производителем аксессуары.
Использование других аксессуаров может
привести к неисправностям.
• Пожалуйста, проводите все настройки
и регулировки только с помощью кнопок
на передней и боковой панелях или на
пульте дистанционного управления. Ни в
Page 24

Перед началом эксплуатации Установка/подключение
коем случае не снимайте заднюю панель
и не пытайтесь самостоятельно проводить
техническое обслуживание устройства,
так как существует опасность поражения
электрическим током, а также возможно
возникновение неисправностей.
• Не устанавливайте устройство на
непрочные или неровные поверхности,
тележки, стойки, треноги, кронштейны
или столы. Устройство может упасть, в
результате чего могут возникнуть неисправности или произойти несчастные случаи.
Используйте только те приспособления,
которые рекомендованы производителем
или продавцом.
• Пожалуйста, устанавливайте устройство на горизонтальной поверхности в
местах с хорошей вентиляцией. Не допускайте воздействия на устройство вибрации, прямого солнечного света, высокой
температуры, а также попадания пыли и
влаги. Храните устройство при температуре от –20°С до +50°С. В противном случае
устройство может выйти из строя.
• Не ставьте на устройство вазы, сосуды
с жидкостью. Попадание жидкости внутрь
аппарата может привести к пожару или поломке устройства.
• Не устанавливайте устройство в зоне
магнитных волн. Это может привести к поломке устройства. В зоне электромагнитного излучения может наблюдаться искажение изображения.
• Не устанавливайте вблизи устройства
источники открытого огня, например, свечи.
В случае их падения устройство может быть
повреждено или может произойти возгорание.
• Установка телевизора в замкнутое
пространство при эксплуатации может сократить срок службы устройства; поэтому
необходимо обеспечить минимальную
дистанцию между LCD-телевизором и
внутренними границами приспособления
под аппарат для нормальной вентиляции
(минимум по 10 см свободного пространства со всех сторон).
• Располагайте кабели позади устройства. Не закрепляйте их метизами, не перегибайте, не ремонтируйте и не нагревайте.
• При перемещении телевизора не
нажимайте и не касайтесь панели. Не переносите телевизор в положении, при котором
экран направлен вверх или вниз.
• Не перемещайте устройство при подключенном проводе питания или других
подключенных проводах. Повреждение провода питания, подключенный провод или
подключенные устройства могут стать причиной пожара, электрошока или поломки.
• Если устройство тяжелее 18 кг, его
должны перемещать не менее 2 человек.
При падении устройство может повредиться.
• Слишком сильное нажатие на панель
может повредить устройство.
• При длительном использовании может
немного повысится температура корпуса
устройства. Это явление свидетельствует о
теплоотдаче в нормальном рабочем режиме. Однако не позволяйте детям и людям с
повышенной температурной чувствительностью касаться устройства.
Все иллюстрации, приведенные в настоящем руководстве, являются схематическими изображениями реальных
объектов, которые могут отличаться от
их реальных изображений.
24 25
Page 25

Установка
Установка на стойку
Прикрепите держатель к стойке с помощью 3 винтов типа А, как показано на
рисунке:
Получившуюся конструкцию прикрепите к
телевизору с помощью 4 винтов типа В, как
показано на рисунке:
Настенный монтаж
Прикрепите держатель к телевизору с
помощью 4 винтов типа В, как показано на
рисунке:
С помощью 4 винтов и 4 отверстий на
задней панели телевизора прикрепите
телевизор к стенному кронштейну.
Page 26

Установка/подключение Управление устройством
Подключение
Штекер антенного кабеля
Кабель 75 Ом
Подключение внешней антенны
Подсоедините антенну к соответствующему разъему. Используйте коаксиальный
кабель 75 Ом при подключении внешней
антенны или преобразователь с сопротивлением 300-75 Ом.
Прочие подключения
• Подключите источник сигнала к разъему для антенны. Источником сигнала может
быть приемная антенна, сеть спутникового
вещания или сеть КТВ. Для подключения
наружной антенны используйте коаксиальный кабель 75 Ом.
• Подключите источник аудио сигнала (в
т.ч. DVD, VDCR, CAMCORDER и PC) к соответствующим аудио разъемам «L» (левый)
и «R» (правый).
• Подсоедините источник видео сигнала
к разъему видео с помощью RCA кабеля.
• Если источник видео сигнала имеет
Разъем для антенны
разъем SCART, Вы можете подключить
источник сигнала к телевизору с помощью
SCART кабеля.
• При использовании телевизора в качестве монитора ПК подсоедините ПК к VGA
выходу телевизора при помощи соответствующего кабеля.
• Если видео источник имеет HDMI выход, подключите источник к телевизору с
помощью HDMI кабеля.
26 27
Page 27

Элементы управления
Передняя и боковая панели
Задняя панель
1
2
3
4
6
8
10
12
14
15
16
17
18
5
7
9
11
13
1. Кнопка PLAY/PAUSE
2. Кнопка STOP
3. Кнопка OPEN/CLOSE
4. Кнопка VOL-/ВЛЕВО
5. Кнопка VOL+/ВПРАВО
6. Кнопка СН-/ВНИЗ
7. Кнопка СН+/ВВЕРХ
8. Кнопка MENU
9. Кнопка TV/AV
10. Сенсор ПДУ
1
2
3
4
5
6
7
8
9
11. Кнопка POWER
10
11
1. Вход HDMI 1
2. Вход HDMI 2
3. Вход VGA
4. Компьютерный аудио
вход
5. S-Video вход
6. Pb вход
7. Pr вход
8. Y вход
9. CVBS вход
10. Аудиовход YPbPr (прав.)
11. Аудиовход CVBS (прав.)
12. Аудиовход YPbPr (лев.)
13. Аудиовход CVBS (лев.)
14. Разеъм SCART 1
15. Разъем SCART 2
16. Разъем для антенны
17. Разъем для питания
18. Слот для дисков
Page 28

Управление устройством Управление устройством
Пульт дистанционного управления
20
1
2
3
4
5
6
7
8
9
10
11
12
13
14
15
16
17 35
18
19
21
22
23
24
25
26
27
28
29
30
31
32
33
34
36
37
14. Кнопка
15. Кнопка
16. Кнопка D.MENU
17. Кнопка TITLE
18. Кнопка PROGRAM/красная кнопка
19. Кнопка INTRO/зеленая кнопки
20. Кнопка AUTO/OPEN/CLOSE
21. Кнопка MUTE
22. Кнопка
23. Кнопка NICAM
24. Кнопки CH+/CH-
25. Кнопка DVD SETUP
26. Кнопка S.MODE
27. Кнопка SLEEP
28. Кнопка PGUP/SLOW
29. Кнопка PGDW/STEP
30. Кнопка SUBPAGE/ZOOM
31. Кнопка REVEAL/AUDIO
32. Кнопка D.SUB 35. Кнопка D.DISP
33. Кнопка ANGLE 36. Кнопка A-B/желтая
34. Кнопка GOTO 37. Кн. REPEAT/голубая
Установка батареек
1. Снимите крышку отсека для батареек на
задней части ПДУ.
2. Поместите батарейки в отсек для батареек с правильным соблюдением полярности.
3. Установите крышку отсека на место.
1 2 3
1. Кнопка POWER
2. Кнопки с цифрами
3. Кнопка ASPECT
4. Кнопки VOL+/VOL-
5. Кнопка DISPLAY
6. Кнопка ENTER/кнопки курсора ( / /
/ )
7. Кнопка LCD MENU
8. Кнопка P.MODE
9. Кнопка INPUT
10. Кнопка HOLD/STOP
11. Кнопка TEXT/PLAY/PAUSE
12. Кнопка /INDEX
13. Кнопка /SIZE
28 29
• Вставьте две батарейки AAA/1.5V в
отсек для батарей ПДУ. Мощность сигнала,
необходимую для приемного датчика, обеспечивается на расстоянии до 8 метров и в
пределах 30 градусов влево и вправо.
• Не используйте одновременно новые и
использованные батарейки или батарейки
разных типов.
Page 29

Общие операции
• Нажмите кнопку POWER на панели
телевизора или кнопку STANDBY на ПДУ,
чтобы включить питание. Индикатор загорится синим цветом. Нажмите кнопку
кнопку еще раз, чтобы выключить питание;
индикатор загорится красным цветом.
• Настройки изображения, звука и
канала можно сохранить перед тем, как
телевизор будет выключен. При следующем включении телевизор начнет работу с
сохраненными настройками.
• Нажмите кнопки VOL-/VOL+ для регулирования уровня громкости звука. Значение
громкости изменяется от 0 до 100.
• Нажмите кнопку INPUT на ПДУ, чтобы
выбрать режим TV. После завершения
поиска каналов в левом верхнем углу
появится цифра 1, обозначающая канал 1.
Нажимайте кнопки CH-/CH+, чтобы выбрать
предыдущий или следующий канал. С помощью кнопок с цифрами 0-9 можно непосредственно выбрать номер нужного канала.
Чтобы выбрать канал от 1 до 99, нажмите
кнопку <-/-->; на экране отобразится «-» или
«--». Затем нажимайте кнопки с цифрами
0-9, чтобы ввести номер нужного канала.
• Нажмите кнопку на ПДУ для переключения между текущим и предыдущим
каналами.
• Нажимайте кнопку P.MODE для перемещения по меню режимов изображения,
состоящему из 6 следующих пунктов:
Стандартный-Пользователь-Кино-СпортУмеренный-Игра.
• Нажимайте кнопку A.MODE для перемещения по меню режимов звука, состоящему из 4 следующих пунктов: МузыкаТеатр-Пользователь-Голос.
• Нажмите кнопку MUTE для отключения
звука. Для включения звука нажмите эту
кнопку повторно.
• Нажмите кнопку DISPLAY для отображения информации о канале.
Источники аудио-видео сигнала
(DVD/VCR/CAMCORDER)
Нажимайте кнопку INPUT на ПДУ для переключения между следующими источниками сигнала: TV - CVBS - S-VIDEO - SCART1
- SCART2 - VGA - HDMI1 - HDMI2 - DVD.
Если после извлечения диска Вы хотите изменить режим с DVD на TV, подождите,
пока на экране не отобразится «NO MEDIA».
Операции с телетекстом (опция.
функция может не поддерживаться)
• Нажмите кнопку INPUT для выбора
режима TV. Затем с помощью кнопок CH-/
CH+ выберите телеканал, поддерживающий телетекст.
• Кнопки телетекста на ПДУ имеют следующие функции:
Кнопка TEXT: нажмите для входа в режим TEXT. Нажмите повторно для возврата
к просмотру телеканала.
Кнопка MIX: Нажмите эту кнопку для
просмотра страницы телетекста поверх
изображения ТВ программы.
Кнопка HOLD: Нажмите, чтобы остановить переход к следующей странице. В
левом верхнем углу экрана появится значок
остановки. Нажмите кнопку повторно, чтобы отменить эту операцию.
Кнопка PICTURE: Нажмите эту кнопку
для выхода из телетекста и возврата к изображению ТВ программы.
Кнопка INDEX: нажмите для перехода к
странице индекса.
Кнопка SIZE: Нажмите для увеличения
текста, отображаемого на странице телетекста, или отображения половины страницы.
Нажмите повторно для отображения
второй половины страницы.
Нажмите кнопку еще раз для отображения текста в нормальном размере.
Кнопка REVEAL: Нажмите эту кнопку для
отображения скрытой информации.
Нажмите эту кнопку повторно, чтобы
скрыть информацию.
Кнопка SUBPAGE: Нажмите эту кнопку для
выбора подстраницы. В левом верхнем углу
Page 30

Управление устройством Управление устройством
экрана появится значок подстраницы. Ввведите номер подстраницы в формате 0001.
Красная/Зеленая/Желтая/Голубая кнопки:
Используйте четыре цветовых кнопки для
непосредственного перехода на страницу,
имеющую цветовой код, которая отображается в нижней части страницы телетекста.
Монитор ПК
Нажимайте кнопку INPUT для выбора
режима VGA. Телевизор оснащен VGA
разъемом для подключения ПК. Подсоедините ПК через этот разъем, чтобы использовать телевизор в качестве монитора ПК.
Экранное меню
Нажмите кнопку LCD MENU на ПДУ,
чтобы войти на страницу меню настроек,
отображаемого на экране. Нажимайте
кнопки / , чтобы выбрать нужный
параметр, затем с помощью кнопок
/
выберите настройку или отрегулируйте
параметр. Нажмите кнопку ENTER, чтобы
подтвердить выбор.
После выполнения настройки нажмите
кнопку LCD MENU, чтобы выйти из экранного меню.
Настройка изображения
ИЗОБРАЖЕНИЕ
Режим изображения
Контрастность
Яркость
Цветность
Оттенок
Четкость
Температура цвета
Сниж. шумов
Выбрать Регулировать
• Режим изображения: выберите режим
Стандартный/Пользователь/Кино/Спорт/
Умеренный/Игра.
• Контрастность
• Яркость
• Цветность. Примечание: Этот режим
не доступен в режиме VGA PC.
• Оттенок. Примечание: Этот режим до-
ступен только в режиме NTSC.
• Резкость
• Температура цвета. Примечание: этот
режим доступен только в режиме VGA PC.
• Снижение шумов: Выберите режим
коррекции цветовых шумов: Выкл./Низкий/
Средний/Высокий, в том случае если сигнал
плохой.
Настройка звука
ЗВУК
Громкость
Режим звучания
Низ. частоты
Выс. частоты
Баланс
Выбрать Регулировать
• Громкость: регулирование уровня
громкости звука;
• Режим звучания: выберите звуковой
эффект: Музыка/Театр/Пользователь/Голос.
• Никие частоты: регулирование низких
частот.
• Высокие частоты: регулирование вы-
соких частот;
• Баланс: выберите баланс между пра-
вым и левым динамиком.
Настройка ТВ (только для
аналогового сигнала)
НАСТРОЙКА
Страна
Автонастройка
Ручная настройка
Редактирование программ
Выбрать Регулировать
30 31
Page 31

• Страна: выберите страну проживания.
• Авто настройка: войдите в меню автонастройки и нажмите кнопку ENTER, чтобы
запустить автоматическую настройку.
• Ручная настройка: войдите в меню
ручной настройки:
Ручная настройка
Программа
Система звука
ТВ система
Название программы
АПЧ
Ручной поиск
Выбрать Регулировать
• Программа: выберите номер программы.
• Система звука: выберите необходимую
систему звука.
• ТВ система: выберите необходимую
систему цветности.
• Название программы: В этом меню вы
можете задать имя программе. С помощью
кнопок курсора
и вводите символы с помощью кнопок
/ перемещайте курсор
/ .
Примечание: если Вам нужно удалить
символ, нажимайте кнопки
/ , пока теку-
щий символ не исчезнет.
• АПЧ: включите или выключите режим
точной настройки для более точной настройки программы. В результате неправильной конфигурации антенны некоторые
каналы не подлежат точной настройке.
• Ручной поиск: выберите этот режим
для настройки каналов вручную с помощью
кнопок курсора / .
• Редактирование программ: вы можете сортировать ТВ программы в соответствии с Вашими предпочтениями. Войдите
в меню редактирования программ:
Перечень каналов
Обозначения
Любимые Пропус Заблок. Переместить
Символ означает, что данный канал
воспроизводится в настоящее время.
• Любимые каналы (опция)
Символ
рядом с номером канала
означает, что этот канал сейчас занесен в
список “любимых”. Для того чтобы добавить
канал в этот список, переместите курсор на
него с помощью кнопок
/ , затем
нажмите зеленую кнопку. Нажмите зеленую
кнопку еще раз, для того чтобы убрать
данный канал из списка “любимых”.
• Невидимые каналы
Символ
X рядом с номером канала озна-
чает, что этот канал сейчас занесен в список
“невидимых”. Для того чтобы добавить канал
в этот список, переместите курсор на него с
помощью кнопок
/ , затем нажмите желтую кнопку. Эта функция позволяет
пропускать те каналы, которые вы не хотите
просматривать при переключении. Нажмите желтую кнопку еще раз, для того чтобы
убрать данный канал из списка “невидимых”.
• Заблокированные каналы
Символ
рядом с номером канала
означает, что этот канал сейчас занесен в
список “заблокированных”. Для того чтобы
добавить канал в этот список, переместите
курсор на него с помощью кнопок
/ , затем нажмите голубую кнопку.
Эта функция позволяет “блокировать” те
каналы, которые вы не хотите смотреть.
Нажмите синюю кнопку еще раз, для того
Page 32

Управление устройством Управление устройством
чтобы убрать данный канал из списка “заблокированных”.
• Перемещение
Эта функция позволяет вам менять оче-
редность каналов в перечне.
Нажмите кнопки курсора
/
, чтобы переместить курсор на текущий
канал 1. Нажмите кнопку
для подтверж-
дения. Затем нажмите кнопки курсора
/ , чтобы переместить курсор на
выбранный канал 2. Нажмите кнопку
для
подтверждения.
Таймер
ТАЙМЕР
Таймер
OSD таймер
Регулировать Enter
• Таймер: с помощью кнопок /
выберите время, по истечении которого
устройство перейдет в спящий режим.
• OSD таймер: с помощью кнопок
/
выберите время, по истечении которого
экранное меню закроется.
Страница настроек Функция
ФУНКЦИЯ
Язык меню
ТВ формат
Синий экран
Блок. от детей
Первичная настройка
Сброс
Выбрать Регулировать
• Язык меню: выберите язык экранного
меню.
• ТВ формат: выберите нужный формат
ТВ экрана.
Формат экрана может зависеть от ис-
пользуемого источника видео сигнала.
• Синий экран: при выборе опции ВКЛ
фон экрана будет синим при отсутствии
сигнала или слабом сигнале.
• Блокировка от детей: войдите в меню
блокировки от детей:
Блокировка от детей
Блокировка от детей
Блокировка кнопок
Изменить PIN-код
Выбрать Регулировать
• Блокировка от детей: выберите Вкл/
Выкл.
• Блокировка кнопок: С помощью копок
/ выберите Вкл/Выкл. Включение этой
функции помогает предотвратить случайное нажатие кнопок.
• Изменить PIN-код: с помощью кнопок
с цифрами введите исходный пароль 4711,
затем введите собственный пароль. Нажмите кнопку ENTER для подтверждения.
Изменить PIN-код
Старый PIN-код
Новый PIN-код
Введите заново
Выбрать Удалить Ввести Подтвердить
• Первичная настройка: войдите в меню
исходных настроек:
Первичная установка
Страна
Язык меню
Удалить аналоговый канал
Поиск аналогового канала
OK Отмена
Выбрать Регулировать
• Страна: выберите нужную страну.
• Язык меню: выберите соответствующий
32 33
Page 33

язык.
• Удалить аналоговый канал: установите курсор на этот пункт и нажмите кнопку
ENTER; напротив этого пункта отобразится
символ √, означающий, что функция активирована. С помощью тех же операций Вы
можете отключить функцию.
• Поиск аналогового канала: установите
курсор на этот пункт и нажмите кнопку
ENTER; напротив этого пункта отобразится
символ √, означающий, что функция активирована. С помощью тех же операций Вы
можете отключить функцию.
После настройки вышеописанных функций переместите курсор на пункт OK или
ОТМЕНА и нажмите кнопку ENTER.
• Сброс: возврат к исходным заводским
настройкам устройства.
Экранное меню Вашего телевизора
может быть изменено без предварительного уведомления и, следовательно, отличаться от меню, представленного в настоящем
Руководстве.
Операции с DVD-плеером
Основные операции
Включение/отключение DVD
проигрывателя
Включите телевизор и нажимайте кнопку
INPUT, чтобы выбрать источник сигнала DVD.
Загрузка диска
Вставьте диск в слот для дисков; загрузка произойдет автоматически. На дисплее
появится надпись «ЗАКРЫТЬ», затем «ЧТЕНИЕ». После этого устройство автоматически переключится в режим воспроизведения.
• Вставьте диск зеркальной стороной
к телевизору. Неправильно вставленный
диск может повредить механизм DVD
плеера. При загрузке и воспроизведении
диска могут иметь место небольшие шумы
изображения и посторонние звуки, это
нормальное явление.
• Для некоторых дисков после загрузки
следует нажать кнопку PLAY/PAUSE или
выбрать пункт меню диска для запуска воспроизведения.
Воспроизведение DVD
На экране отобразится меню содержания
диска. При воспроизведении Вы можете
нажимать кнопку PLAY/PAUSE для приостановки и возобновления воспроизведения.
Данное устройство также поддерживает
режимы воспроизведения меню, воспроизведения разделов, последовательного и
программируемого воспроизведения.
Воспроизведение меню
1. Нажмите кнопку D.MENU для отображения меню на экране или для возврата к
корневому меню во время воспроизведения.
• Для DVD дисков: на экране отобразится
корневое меню диска. С помощью кнопок
курсора выберите нужный пункт меню для
воспроизведения.
• Для Super-VCD и VCD2.0 дисков: на
экране отобразится соответствующее
меню. (Нажмите кнопку D.MENU для отображения статуса PBC (вкл/выкл). По умолчанию функция PBC активна) С помощью
кнопок с цифрами введите номер нужного
пункта меню для воспроизведения (для этого функция PBC должна быть отключена).
2. Нажмите кнопку ENTER или кнопку
PLAY/PAUSE для запуска воспроизведения.
3. Для остановки нажмите кнопку STOP,
для возобновления воспроизведения нажмите кнопку PLAY/PAUSE. Для полной
остановки нажмите кнопку STOP дважды,
теперь при нажатии кнопки PLAY/PAUSE
воспроизведение начнется с начала.
• Чтобы избежать повреждения
диска, перед его извлечением нажмите
кнопку STOP. Затем нажмите кнопку OPEN/
CLOSE, чтобы извлечь диск.
Page 34

Управление устройством Управление устройством
• Если Вы не используете DVD плеер,
извлеките диск из устройства во избежание
повреждения диска или устройства.
Воспроизведение разделов
(только для DVD дисков)
Нажмите кнопку TITLE, на дисплее отобразится надпись «РАЗДЕЛ». С помощью
кнопок курсора или кнопок с цифрами выберите нужный раздел; начнется воспроизведение первой главы выбранного раздела.
Программируемое
воспроизведение
Данный режим позволяет создать программу воспроизведения содержимого
диска, состоящую максимум из 16 пунктов.
Представленное ниже меню программирования служит для наглядности и может
отличаться от меню Вашего устройства:
ВОСПР.ПРОГ. ОЧИСТИТЬ
• Если функция PBC включена, она
автоматически отключится в режиме программирования.
• В выделенной области введите номер
раздела и главы с помощью кнопок с
цифрами. Для запуска воспроизведения нажмите кнопку PLAY/PAUSE или с помощью
кнопок курсора перейдите к пункту ВОСПР.
и нажмите кнопку ENTER.
• Во время запрограммированного воспроизведение Вы можете нажать кнопку
PROGRAM для отображения меню программирования, если Вы хотите изменить программу. Для очистки программы перейдите
к пункту ОЧИСТИТЬ и нажмите кнопку
ENTER. Для завершения запрограммированного воспроизведения нажмите кнопку
STOP. Если после этого Вы нажмете кнопку
PLAY/PAUSE, начнется последовательное
воспроизведение.
• При воспроизведении программы
на дисплее будет отображена надпись
«ВОСПР. ПРОГ.» и номер текущего раздела и главы.
Использовать 8 см диски нельзя; они
могут застрять в загрузочном механизме.
Операции при воспроизведении
дисков
Воспроизведение
Для DVD дисков: находясь в корневом
меню или в меню разделов, нажмите кнопку PLAY/PAUSE.
Для Super VCD и VCD дисков: во время
воспроизведения Вы можете вводить номер
нужного трека с помощью цифровых кнопок.
Для CD дисков: Вы можете вводить номер
нужного трека с помощью цифровых кнопок.
Для MP3/JPEG дисков: Вы можете
вводить номер нужного трека из меню содержания с помощью цифровых кнопок.
Предыдущий/следующий трек
При воспроизведении дисков нажмите
кнопку
го раздела/главы/трека; нажмите кнопку
для воспроизведения следующего раздела/
главы/трека.
ция PBC отключена) если текущий трек
является первым, нажмите кнопку
остановить воспроизведение; если текущий
трек является последним, нажмите кнопку
ции могут различаться в зависимости от
разновидности DVD диска.
для воспроизведения предыдуще-
Для Super VCD и VCD дисков: (функ-
, чтобы
, чтобы остановить воспроизведение.
Для DVD дисков: вышеописанные функ-
Перемотка вперед/назад
Нажимайте кнопку , чтобы изменять
34 35
Page 35

скорость перемотки вперед в следующем
порядке: x2/x4/x8/x20/нормальное воспроизведение. Нажимайте кнопку
изменять скорость перемотки назад в следующем порядке: x2/x4/x8/x20/нормальное
воспроизведение.
• В процессе перемотки Вы можете
вернуться к нормальному воспроизведению
путем нажатия кнопки PLAY/PAUSE.
• Для CD, HDCD, MP3 дисков: при перемотке звук не воспроизводится.
Для остальных дисков звук при пере-
мотке воспроизводиться не будет.
, чтобы
Замедленное воспроизведение
Нажимайте кнопку PGUP/SLOW, чтобы
изменять скорость воспроизведения в следующем порядке: 1/2, 1/3, 1/4, 1/5, 1/6, 1/7,
нормальное воспроизведение. В процессе
замедленного воспроизведения Вы можете
вернуться к нормальному воспроизведению
путем нажатия кнопки PLAY/PAUSE.
При замедленном воспроизведении
звук воспроизводиться не будет.
Пауза
• Для CD, HDCD и MP3/JPEG дисков: нажмите кнопку PLAY/PAUSE для временной
приостановки воспроизведения; нажмите эту
кнопку для возобновления воспроизведения.
• Для DVD, Super VCD, VCD дисков: нажмите кнопку PLAY/PAUSE для временной
приостановки воспроизведения; нажмите
эту кнопку для возобновления воспроизведения.
Повтор
Нажимайте кнопку REPEAT для выбора
режима повторного воспроизведения.
• Для Super VCD, VCD, CD, CD-G, HD-CD
дисков: при последовательном воспроизведении Вы можете использовать функцию
повторного воспроизведения. Доступны
три режима повтора: Повтор ВЫКЛ/Повтор
ТРЕК/Повтор ВСЕ.
• Для DVD дисков: вы можете выбрать
один из 4 режимов повторного воспроизведения: Повтор ВЫКЛ/Повтор ГЛАВА/Повтор
РАЗДЕЛ/Повтор ВСЕ.
• Для MP3/JPEG дисков: вы можете
выбрать один из 4 режимов повторного воспроизведения: Повтор ВЫКЛ/Повтор ТРЕК/
Повтор ПАПКИ/Повтор ВСЕ.
Отображение информации на
экране
Нажмите кнопку D.DISP для отображения
экранного меню, содержащего информацию о текущем разделе, главе, времени
воспроизведения и др.
• Для DVD дисков:
Тип диска, Раздел (текущ./полн.), Глава
(текущ./полн.), Истекшее время диска.
Повторное нажатие кнопки D.DISP:
Аудио (текущ./полн.), Язык, Тип аудио,
Субтитры (текущ./полн.), Угол обзора вкл/
выкл.
Нажмите еще раз кнопку D.DISP, чтобы
отключить отображение информации на
экране.
• Для Super VCD дисков:
Тип диска, Трек -/-- (текущ./полн.), звук
ВКЛ/ВЫКЛ, статус PBC, режим повтора,
текущее время трека.
Повторное нажатие кнопки D.DISP:
Аудио -/-- (текущ./полн.) или ВЫКЛ, тип
аудио, язык, субтитры -/- (текущ./полн.) или
ВЫКЛ.
Нажмите еще раз кнопку D.DISP, чтобы
отключить отображение информации на
экране.
• Для CD, HDCD, MP3/JPEG дисков:
Тип диска, трек -/- (текущ./полн.), звук
ВКЛ/ВЫКЛ, режим повтора, текущее время
трека.
Нажмите повторно кнопку D.DISP, чтобы
отключить отображение информации на
экране.
Переход
Нажмите кнопку GOTO для вызова редактируемого меню. В выделенной области
Page 36

Управление устройством Управление устройством
введите номер нужного раздела/главы/
трека с помощью цифровых кнопок или
введите нужное время начала воспроизведения. Затем нажмите кнопку ENTER для
запуска воспроизведения.
• При введении неверных данных
функция работать не будет.
• Во время введения данных кнопка
GOTO не действует.
• Использование данной функции авто-
матически отключает функцию PBC.
Предварительный просмотр
Для Super-VCD и VCD дисков, в режиме
остановки нажмите кнопку INTRO.
• На экране отобразится 9 миниатюрных
изображений соответствующих доступным
для воспроизведения трекам.
• Использование данной функции автоматически отключает функцию PBC.
• С помощью кнопок
ется навигация по этим миниатюрам.
• Нажмите кнопку PLAY/PAUSE, для воспроизведения выбранного трека.
• Для непосредственного выбора миниатюры используйте кнопки с цифрами 1-9.
• Для CD, CD-G, HDCD дисков: в режиме
остановки нажмите кнопку INTRO. Каждый
трек будет воспроизводиться в течение 15
секунд в установленном порядке.
• С помощью цифровых кнопок выберите
трек для предпросмотра.
• Нажмите кнопку PLAY/PAUSE, для воспроизведения выбранного трека.
• При активном меню диска кнопка
INTRO нефункциональна.
• После 15-секундного воспроизведения
трека начнется воспроизведение следующего трека.
и осуществля-
Аудио
Нажмите кнопку AUDIO для отображения
текущего режима аудио. Нажимайте кнопку
AUDIO для переключения между разными
режимами аудио.
Режимы аудио могут различаться в
зависимости от содержания или типа диска.
Для VCD дисков, записанных на нескольких
языках, кнопка AUDIO служит для переключения между разными языками.
Язык (только для DVD и Super VCD
дисков)
Нажмите кнопку AUDIO для отображения
текущего используемого языка аудио. Нажимайте кнопку AUDIO для переключения
между доступными на диске языками аудио.
Субтитры (только для DVD и Super
VCD дисков)
Нажмите кнопку D.SUB для отображения
текущего языка субтитров. Нажимайте
кнопку D.SUB для переключения между доступными на диске языками субтитров.
Угол обзора
Нажмите кнопку ANGLE для отображения
текущего угла обзора. Нажимайте кнопку
ANGLE для переключения между доступными на диске углами просмотра эпизодов.
(напр. угол -/-(текущ./полн.) или ВЫКЛ).
Наличие и количество доступных
углов обзора эпизодов зависит от типа и
содержания конкретного диска.
Отключение звука
Нажмите кнопку MUTE чтобы отключить
звук. Для возобновления звука нажмите
повторно кнопку MUTE или используйте
кнопку VOL+.
Изменение масштаба
Нажимайте кнопку ZOOM для изменения масштаба изображения в следующей
последовательности: Х2-Х3-Х4-Х1/2-Х1/3Х1/4-нормальный режим.
В режиме увеличенного изображения
используйте кнопки курсора для смещения
изображения.
Повтор фрагмента A-B
Нажмите кнопку A-B на том моменте,
36 37
Page 37

с которого Вы хотите начать повторное
воспроизведение фрагмента. На экране
отобразится надпись «ПОВТОР A-». Нажмите кнопку A-B повторно на желаемом
месте окончания фрагмента для повтора;
на экране отобразится надпись «ПОВТОР
A-B». Выделенный фрагмент будет воспроизводиться повторно. Для отмены повтора
фрагмента нажмите еще раз кнопку A-B, на
экране отобразится надпись «A-B ВЫКЛ».
• Для Super VCD, VCD и CD дисков: повтор фрагмента возможен только
в пределах одного трека. При переходе к
воспроизведению другого трека повтор
фрагмента автоматически отменяется.
• Для DVD дисков: повтор фрагмента
возможен только в пределах одной главы/
раздела. При переходе к воспроизведению
другого раздела или главы повтор фрагмента автоматически отменяется.
Покадровое воспроизведение
Нажмите кнопку STEP на ПДУ; видеоизображение будет установлено на паузу.
Нажимайте эту кнопку несколько раз для
покадрового воспроизведения видеоизображения. Для возврата к нормальному
режиму воспроизведения нажмите кнопку
PLAY/PAUSE. При покадровом воспроизведении звук будет отключен.
Громкость
Нажимайте кнопки VOL+ и VOL- для регулирования уровня громкости звука.
Воспроизведение MP3/JPEG дисков
После загрузки MP3/JPEG диска устройство осуществит поиск содержащихся на
диске папок с файлами MP3/JPEG. Затем
на экране автоматически отобразится содержание диска и начнется воспроизведение первого файла (он будет выделен).
1 2 3 4 5
1. Текущая папки
2. Воспроизведение файла MP3
3. Воспроизведение файла JPEG
4. Текущий файл
5. Полоса прокрутки
• Нажимайте кнопки курсора для перемещения к нужной папке, файлу или выбору
режима.
• Нажимайте кнопки с цифрами для выбора нужного содержания непосредственно.
• При воспроизведении MP3 файлов
воспроизводится только звук, картинка
отсутствует.
• При воспроизведении изображений с
помощью кнопок курсора Вы можете вращать изображение.
• При воспроизведении изображений нажмите кнопку D.MENU чтобы войти в режим
предпросмотра; на экране отобразятся 12
миниатюр. Нажимайте кнопки и чтобы
перейти к следующему или предыдущему
изображению или используйте кнопки с
цифрами, чтобы непосредственно выбрать
нужное изображение.
Настройка DVD
Нажмите кнопку DVD SETUP, чтобы
войти в меню настроек. С помощью кнопок
Page 38

Управление устройством Управление устройством
курсора выберите (выделите) страницу
меню, затем нажмите кнопку ENTER для
подтверждения выбора. Для возврата к корневому меню или выхода из меню настроек
нажмите кнопку DVD SETUP.
Описание и изображение меню настроек в настоящем руководстве служат
для наглядности. Меню может быть изменено без предварительного уведомления и,
следовательно, отличаться от меню Вашего
телевизора.
Основные настройки
ОСНОВНЫЕ НАСТРОЙКИ
ТВ СИСТЕМА
ТВ ФОРМАТ
ПАРОЛЬ
РЕЖ. КОНТРОЛЯ
ПО УМОЛЧАНИЮ
ВЫХОД
• ТВ СИСТЕМА
В данном меню Вы можете выбрать систему ТВ. Доступны три системы ТВ: NTSC/
PAL/Авто.
• ТВ ФОРМАТ
Вы можете выбрать один из форматов
экрана: 4:3 PS/4:3LB/16:9
4:3PS (стандарт): Данный формат экрана
используется для большинства стандартных систем вещания и является установкой
по умолчанию. Правый и левый края изображения будут обрезаны.
4:3LB (стандарт): При выборе данной
опции DVD изображение будет воспроизводиться в оригинальном формате. Сверху
и снизу экрана будут отображаться черные
полосы.
16:9 (широкий): Используется при широкоформатном режиме вещания.
• ПАРОЛЬ
По умолчанию установлена блокировка,
что не позволяет изменить пароль или
установить рейтинг контроля. Для разблокировки введите фабричный пароль «0000»
с помощью кнопок с цифрами, затем нажмите кнопку ENTER для подтверждения.
Для изменения пароля введите свой
четырехзначный пароль с помощью кнопок
с цифрами.
• РЕЖИМ КОНТРОЛЯ
Вы можете выбрать одну из 8 категорий
контроля просмотра детьми содержания
дисков, на которых могут присутствовать
сцены эротики и насилия или другие нежелательные для просмотра детьми сцены.
• ПО УМОЛЧАНИЮ
Выберите эту опцию и нажмите кнопку
ENTER, чтобы вернуть исходные заводские
настройки.
Выбор языка
ВЫБОР ЯЗЫКА
ЯЗЫК МЕНЮ
ЯЗЫК АУДИО
ЯЗЫК СУБТИТРОВ
ЯЗЫК МЕНЮ
ВЫХОД
Выберите нужный язык из списка доступных языков.
38 39
Page 39

Настройка аудио
НАСТРОЙКА АУДИО
ВЫХОД АУДИО
ТОН
ВЫХОД
• ВЫХОД АУДИО
Выберите один из режимов выхода аудио:
SPDIF/OFF, SPDIF/RAW или SPDIF/PCM.
• ТОН
Используйте кнопки курсора для регули-
рования данного параметра.
Цифровые настройки
ЦИФРОВЫЕ НАСТРОЙКИ
ДИНАМИЧ. ДИАП
ДВОЙНОЙ МОНО
ВЫХОД
• ДИНАМИЧЕСКИЙ ДИАПАЗОН
При выборе опции «Полн.», значение
максимального уровня сигнала будет
минимальным. При выборе ВЫКЛ значение максимального уровня сигнала будет
максимальным.
• ДВОЙНОЙ МОНО
Вы можете выбрать четыре варианта:
СТЕРЕО/МОНО ЛЕВ./МОНО ПРАВ./СМЕШАН. МОНО.
Page 40

Общая информация Общая информация
Руководство по устранению
неисправностей
Ниже приводится таблица, в которой описаны простые меры, способные помочь Вам
устранить большую часть проблем, могущих возникнуть при использовании данного
устройства. Если нижеуказанные меры не помогли, обратитесь в сервисный центр или к
ближайшему дилеру.
Неисправность Причина Решение
Изображение и
звук отсутствуют, индикатор
не горит
Изображение
и звук низкого
качества
Изображение
«заснеженное»
Синий фон
В режиме VGA
изображение
находится не в
центре экрана
Звук отсутствует
Диск воспроизводится некорректно
Диск не воспроизводится
Шнур питания не подсоединен.
Контрастность, яркость, резкость,
цвет и громкость установлены
на минимальное значение или
телевизор находится в беззвучном
режиме.
Контрастность и цвет настроены
неверно.
Установлена неверная система
цвета.
Установлена неверная система
звука.
Сигнал низкого качества.
Отсутствует видео сигнал или
кабель плохо подсоединен/не подсоединен.
Изображение не настроено должным образом.
Отсутствует аудио сигнал или
кабель плохо подсоединен/не подсоединен.
Диск поцарапан, загрязнен или
поврежден.
Диск вставлен в слот неправильной стороной.
Подсоедините шнур питания.
Установите нужное значение
контрастности, яркости, резкости, цвета и громкости.
Настройте контрастность и цвет.
Установите правильную систему
звука.
Используйте исправный и качественный кабель.
Подсоедините кабель должным
образом.
Одновременно нажмите кнопки
CH+/CH- для настройки положения изображения.
Выполните вертикальную/ горизонтальную центровку вручную.
Подсоедините кабель должным
образом.
Установите правильную сигнальную систему.
Почистите или замените диск.
Вставьте диск в слот правильной стороной.
40 41
Page 41

ПДУ не работает
Батарейки установлены неправильно или устарели.
Убедитесь, что полярность соблюдена.
Замените батарейки на новые.
Источники помех
В Вашем телевизоре приняты все самые
современные меры для устранения возможных помех, тем не менее, изображение может искажаться под воздействием местных
электромагнитных излучений. Лучше всего
в подобных случаях попытаться перенести
телевизор в другое место и подвести к нему
лучшую антенну.
• РАДИОЧАСТОТНЫЕ ПОМЕХИ
Появление на изображении ряби может
свидетельствовать о наличии вблизи телевизора коротковолнового радиопередатчика или радиоприемника.
• МЕДИЦИНСКОЕ ОБОРУДОВАНИЕ
Появление на экране «елочки» или частичное исчезновение изображения может быть
связано с работой медицинского оборудования в близлежащей больнице или клинике.
• «СНЕГ» НА ЭКРАНЕ
В зоне приема слабых сигналов отдаленных телевизионных станций изображение
становится нестабильным, а на экране появляются мерцающие белые пятна, так называемый эффект «падающего снега». В этом
случае помогает более точная настройка
антенны и применение антенного усилителя.
• ФАНТОМНЫЕ ИЗОБРАЖЕНИЯ
Появление на экране нескольких контуров
изображения объясняется тем, что телевизионный сигнал отражается от окружающих построек, холмов, самолетов и других
объектов. Свести такой эффект к минимуму
можно, изменив направление антенны.
• АВТОМОБИЛЬНЫЕ ДВИГАТЕЛИ
Работающие неподалеку автомобильные
двигатели и электромоторы могут создавать
помехи в изображении в виде небольших полосок или дрожания изображения на экране.
Комплект поставки
1. Телевизор 1 шт
2. Пульт дистанционного управления 1 шт
3. RCA-кабель 1 шт
4. Кабель питания 1 шт
5. Держатель 1 шт
6. Стойка 1 шт
7. Винты (типа A 4X14 мм) 3 шт
8. Винты (типа B 4X16 мм) 4 шт
9. Информация для потребителя 1 шт
10. Гарантийный талон 1 шт
11. Руководство по эксплуатации 1 шт
Page 42

Общая информация
Технические характеристики
Размер (диагональ) 32” (81 см)
Яркость 500 кд/м2
Контрастность 3000:1
Время отклика 8 мс
Разрешение 1366 x 768
Формат экрана 16:9
Система цветности PAL, SECAM
Система звука DK, I, BG, L
Поддерживаемые диски DVD-R/-RW/+R/+RW/CD-R/-RW
Поддерживаемые форматы DVD/DVCD/SVCD/VCD/CDDA/MP3/HDCD/JPEG/Kodak
Picture CD/DVD Audio/Super Audio CD/MPEG4(DivX)
Аудио-видео RCA вход +
Компонентный видеовход +
Разъем SCART + (2 шт)
Компьютерный аудиовход +
HDMI вход + (2 шт)
VGA +
S-video вход +
Экранное меню на русском
и английском языках +
Прогрессивная развертка +
Цифровой гребенчатый фильтр +
Количество каналов 99
Телетекст +
Электропитание ~110-240 В, 50/60 Гц
Потребляемая мощность 170 Вт
Размеры устройства 799 x 220 x 600 мм
Вес нетто/брутто 12 кг/16 кг
Технические характеристики могут быть изменены заводом-изготовителем без предварительного уведомления. Указанные геометрические размеры имеют приблизительные
значения.
42
Page 43

 Loading...