


H- CD7017
POPTABLE CD PLAYER ПОРТАТИВНЫЙ CD ПЛЕЕР
Instruction manual Руководство по эксплуатации

Dear customer!
Thank you for purchasing our product. For safety, it is strongly recommended to read this manual carefully before
connecting, operating and/or adjusting the product and keep the manual for reference in the future.
Table of contents
Table of contents................................................................................................................................................................... 2
Locating controls (player)...................................................................................................................................................... 3
Locating controls (remote control) ........................................................................................................................................ 4
Anti-shock operation ............................................................................................................................................................. 5
Lock Button Operation .......................................................................................................................................................... 5
LCD screen ........................................................................................................................................................................... 6
Playing disk ........................................................................................................................................................................... 7
Playback mode...................................................................................................................................................................... 7
Program mode....................................................................................................................................................................... 8
EQ mode ............................................................................................................................................................................... 8
Power supply and battery recharge ...................................................................................................................................... 8
Troubleshooting guide......................................................................................................................................................... 11
Precautions ......................................................................................................................................................................... 12
Notes: .................................................................................................................................................................................. 14
Accessories ......................................................................................................................................................................... 15
Important safeguards .......................................................................................................................................................... 16
Specification ........................................................................................................................................................................ 17
2

Locating controls (player)
3
Line-control/earphone line-out jack
LINE OUT: Use to record to another audio equipment or to listen through
external audio equipment (Speaker etc.)
DC IN 4.5V: Connect the Adapter to charge rechargeable batteries or use
external power. Insert them by matching the + and – polarity.
EXT BATT: Connect Ext Battery Pack to use AA type batteries.
HOLD switch
Earphone jack
Back forward/Previous track
Volume +
Volume -
Fast forward/Next track
Stop/OFF
Play/Pause
OPEN button

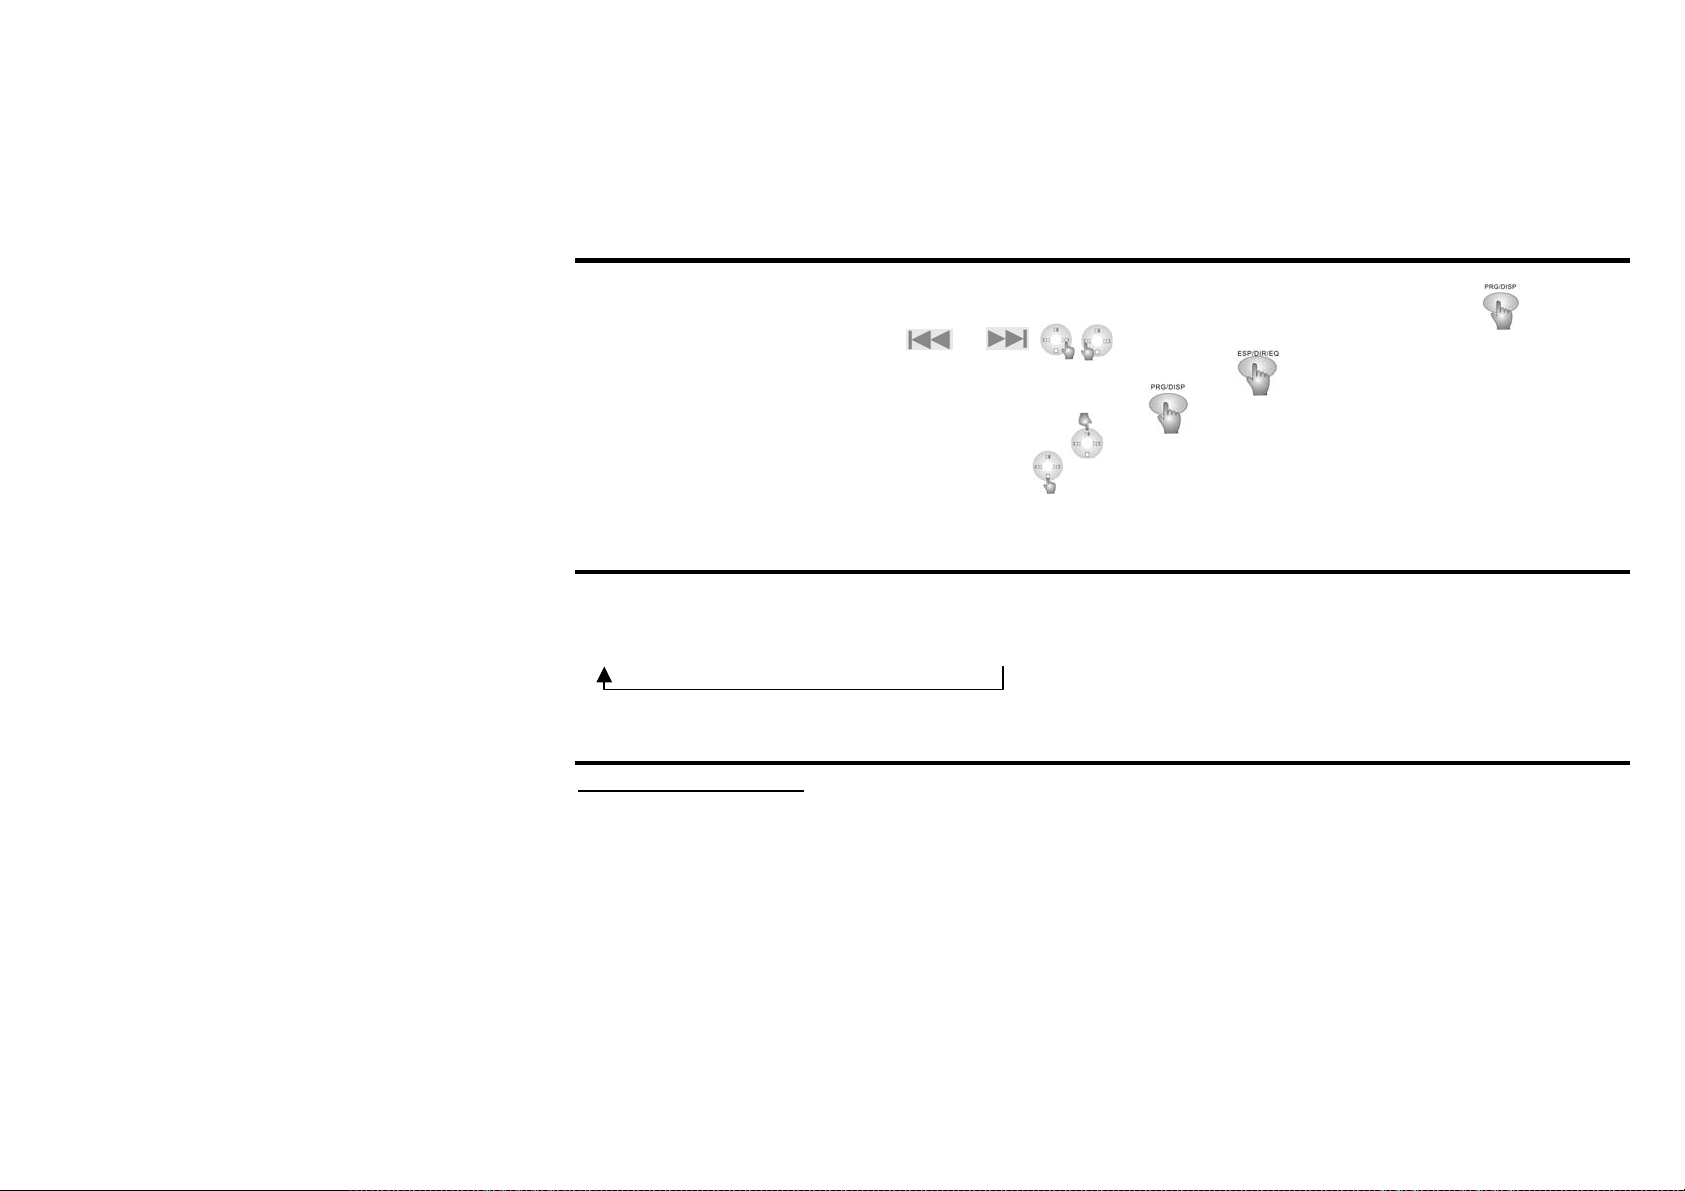
Locating controls (remote control)
1. ESP/DIR/EQ
A: Press: Anti shock (CD) / Scroll directory (MP3)
B: Long press: To shift between sound effects
2. HOLD
To Start/Shut off Hold key function
3.
A. Press: Previous track
B. Hold: Fast backward.
4. PLAY/PAUSE
Press to Start/Play/Pause/Confirm
In a stop status, press this button to activate charging function when the player is on "HOLD ON" mode.
5.
A. Press: next track.
B. Hold: Fast forward
6. EARPHONE jack
7. STOP
Press to stop/cancel/turn off
8. VOL +. Push VOL + to increase volume.
9. VOL -. Push VOL - to decrease volume.
10. MODE
A: Press: Play mode selection
11. PROG/DISP
4

A. Press: File number display/Folder name display/ID3 display selection
B. Hold (from STOP status): enter programming function
Anti-shock operation
A. Press ESP/DIR/EQ (electronic shockproof) key during audio CD playback and the player will activate ESP protection
function. CD may have better sound effects when anti-shock function is disabled.
B. Shockproof function will automatically start while playing MP3/WMA and cannot be disabled.
C. Activation of anti-shock function in audio CD mode may decrease playing time and reduce batteries life.
Lock Button Operation
To avoid maloperation, the player has a lock button function:
1. Push HOLD bar on the player body to an arrow-indicated position to lock the buttons. The buttons on the player body
will lose their functionality.
2. Push HOLD bar on the line controller to an arrow-indicated position to lock the push buttons on the line controller. The
buttons on the line controller will lose their functionality.
Note: The LCD information zone of the player will display HOLD when the buttons on the player body have been locked.
5

LCD screen
CD MP3 WMA
DIR
ALL
INTRO
PRG
SHUF
HOLD
Battery indication
LCD backlight
Press any key on Remote Control and LCD backlight on Remote Control will light up for 6 seconds.
Disc type
Single song repeat
Directory repeat
All disc repeat
Introductive play
Programmed play
Random play
Anti-shock memory
Button lock indication mark
Information display zone
6

Playing disk
CAUTION: The unit is shipped with a dummy CD “transit card” inside the CD compartment. The purpose of it is to
prevent the laser from moving during shipment of the product. This card must be removed before using the player.
• Slide the OPEN switch to the right to open the upper cover, remove the transit card from the player and discard
it.
• Slide the open button on the side of the player and Insert the disk with the disk label facing out.
• Connect Remote Control and Earphone.
• Slide HOLD Switch on the unit and RC to Off position.
• Press the “PLAY” button to play.
Playback mode
You can enjoy various ways of playing by using playback mode.
When “MODE” button switch is pushed, icon in the playback mode indicator is changed.
DIR
ALL
INTRO
RND
After RANDOM play mode the player returns to the normal playing status.
Single music repeat. Play a single track repeatedly
Directory repeat. Play all tracks in the folder repeatedly.
All disc repeat. Play all tracks on the disc repeatedly.
Introductive play. Play beginning 10 seconds of each track in sequential order
Random play.
7
Program mode
Program mode: Play tracks in your own playlists.
A. Press and hold “PROG/DISP” button on the RC after stop playing to enter program playing mode.
B. Select music number by pressing
C. Press “ESP/DIR/EQ” button to select directory of music (For MP3 only).
D. Press “PROG/DISP” button to save previous selected music.
E. Press the “PLAY” button to play programmed music.
F. Press the “STOP” button to exit program mode.
Note: to program more than one track please repeat operation B, C and D.
or .
EQ mode
Press and hold the “ESP/DIR/EQ” button to display the current EQ. Keep pressing the button and the EQ mode scrolls in
sequential order:
NORMAL → CLASSIC → ROCK → JAZZ → POP
Power supply and battery recharge
Using AC power adaptor
Use only an original AC adapter
Connect the Adapter to 4.5V DC jack on the player and AC outlet.
Notes for using specified adapter
• If adaptor is plugged with battery loaded, it will automatically shift to AC power and thus disconnects battery.
• When shifting between battery and AC power, music being played will stop. Press PLAY to resume normal play.
8
CAUTION!
Disconnect Adapter when not in use.
Do not handle this player with a wet hand.
Using rechargeable batteries:
• Lift the cover of player and remove the covers of batteries compartment.
• Insert two rechargeable batteries (Ni-MH) by matching the + and -polarity in the battery compartments and close
the covers.
NOTE: When the batteries have been exhausted, please take them out and begin to use the adaptor.
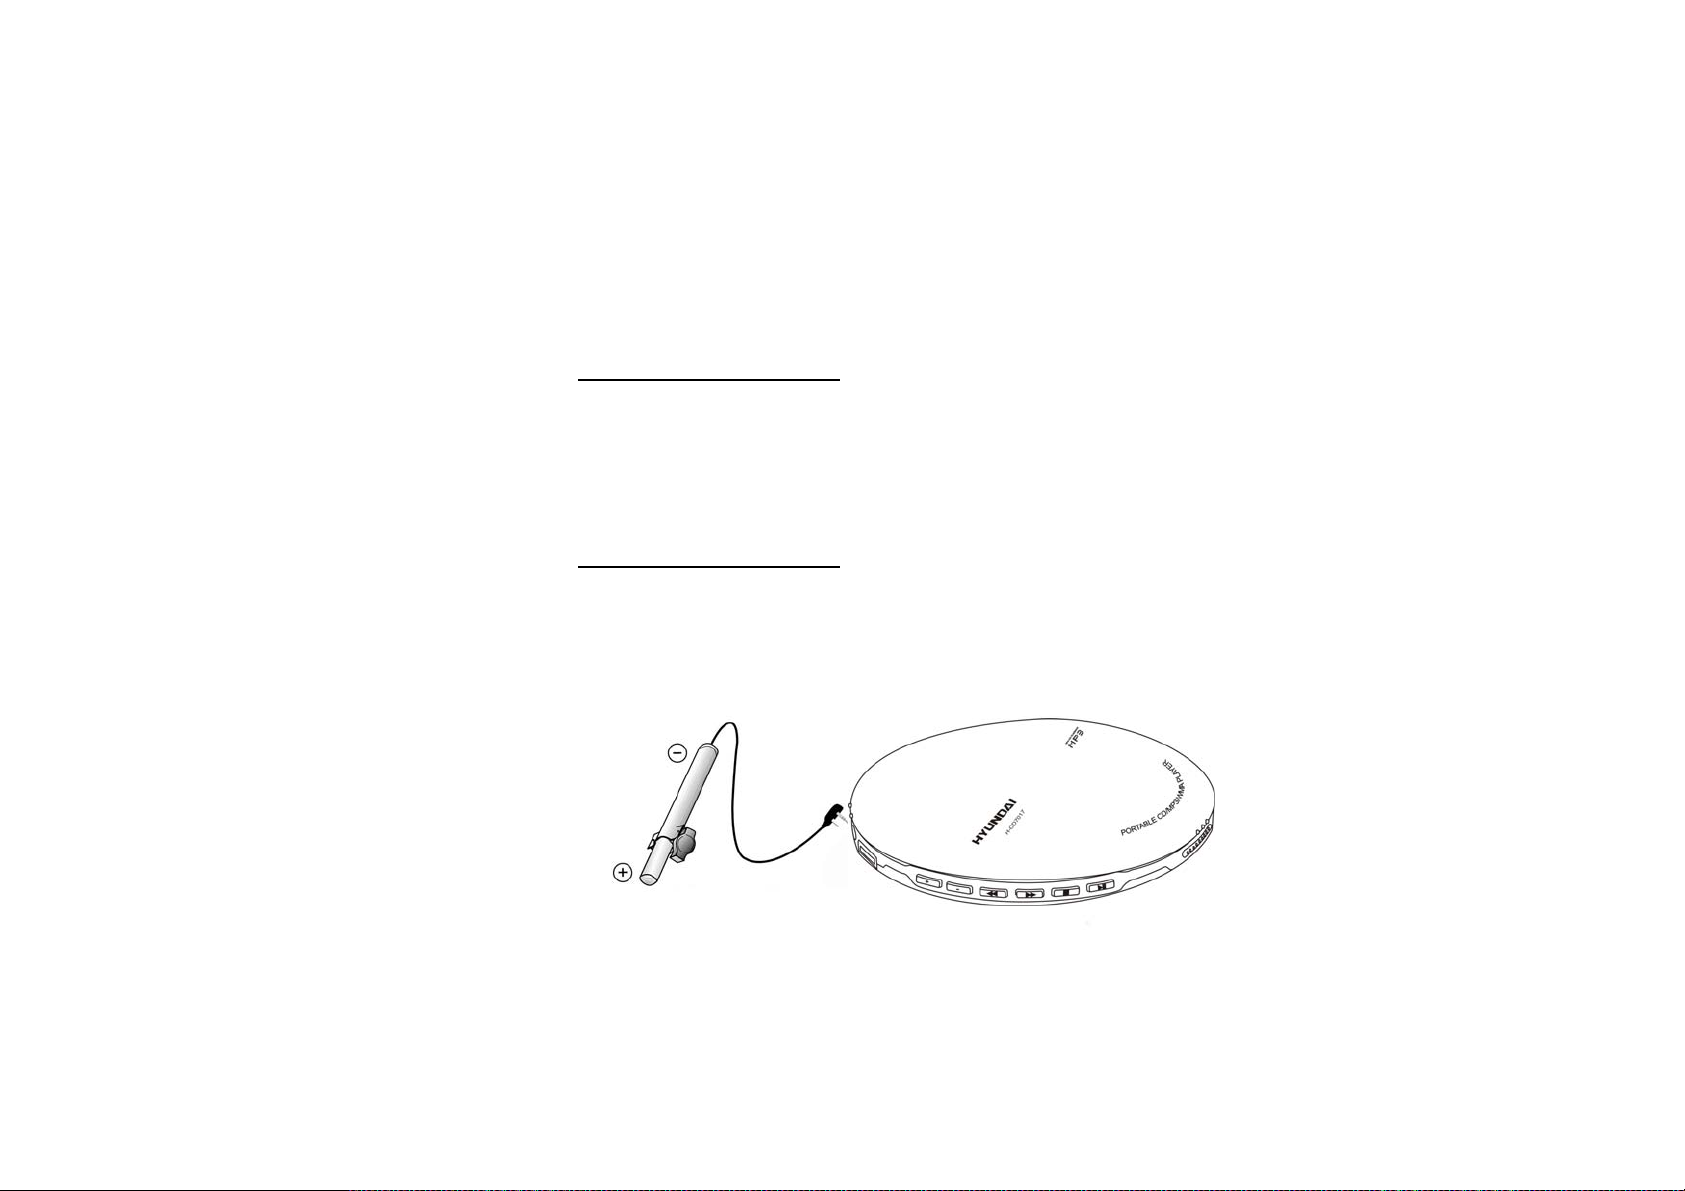
Using external batteries' pack
The external battery pack can be attached as shown in the figure. Two AA size alkaline batteries are used in the external
battery pack.
9

CAUTION!
• Do not mix rechargeable batteries with dry batteries.
• Do not use different types of batteries together.
• When the batteries are not to be used for a long time, remove them.
• If battery leaks, wipe off any residue in the battery compartment and insert new batteries.
• Do not charge non-rechargeable batteries
NOTE: Take out the gum batteries out of the player if you use an external battery box.
Recharging method
1. Install rechargeable batteries.
2. Connect the AC adapter to the player.
3. Put HOLD switch on the unit into active position.
4. Press PLAY button to power on the player and then it starts to charge. Display shows CHARGING and timer.
Note:
• The player automatically powers off when done charging.
10
 Loading...