

Page 1
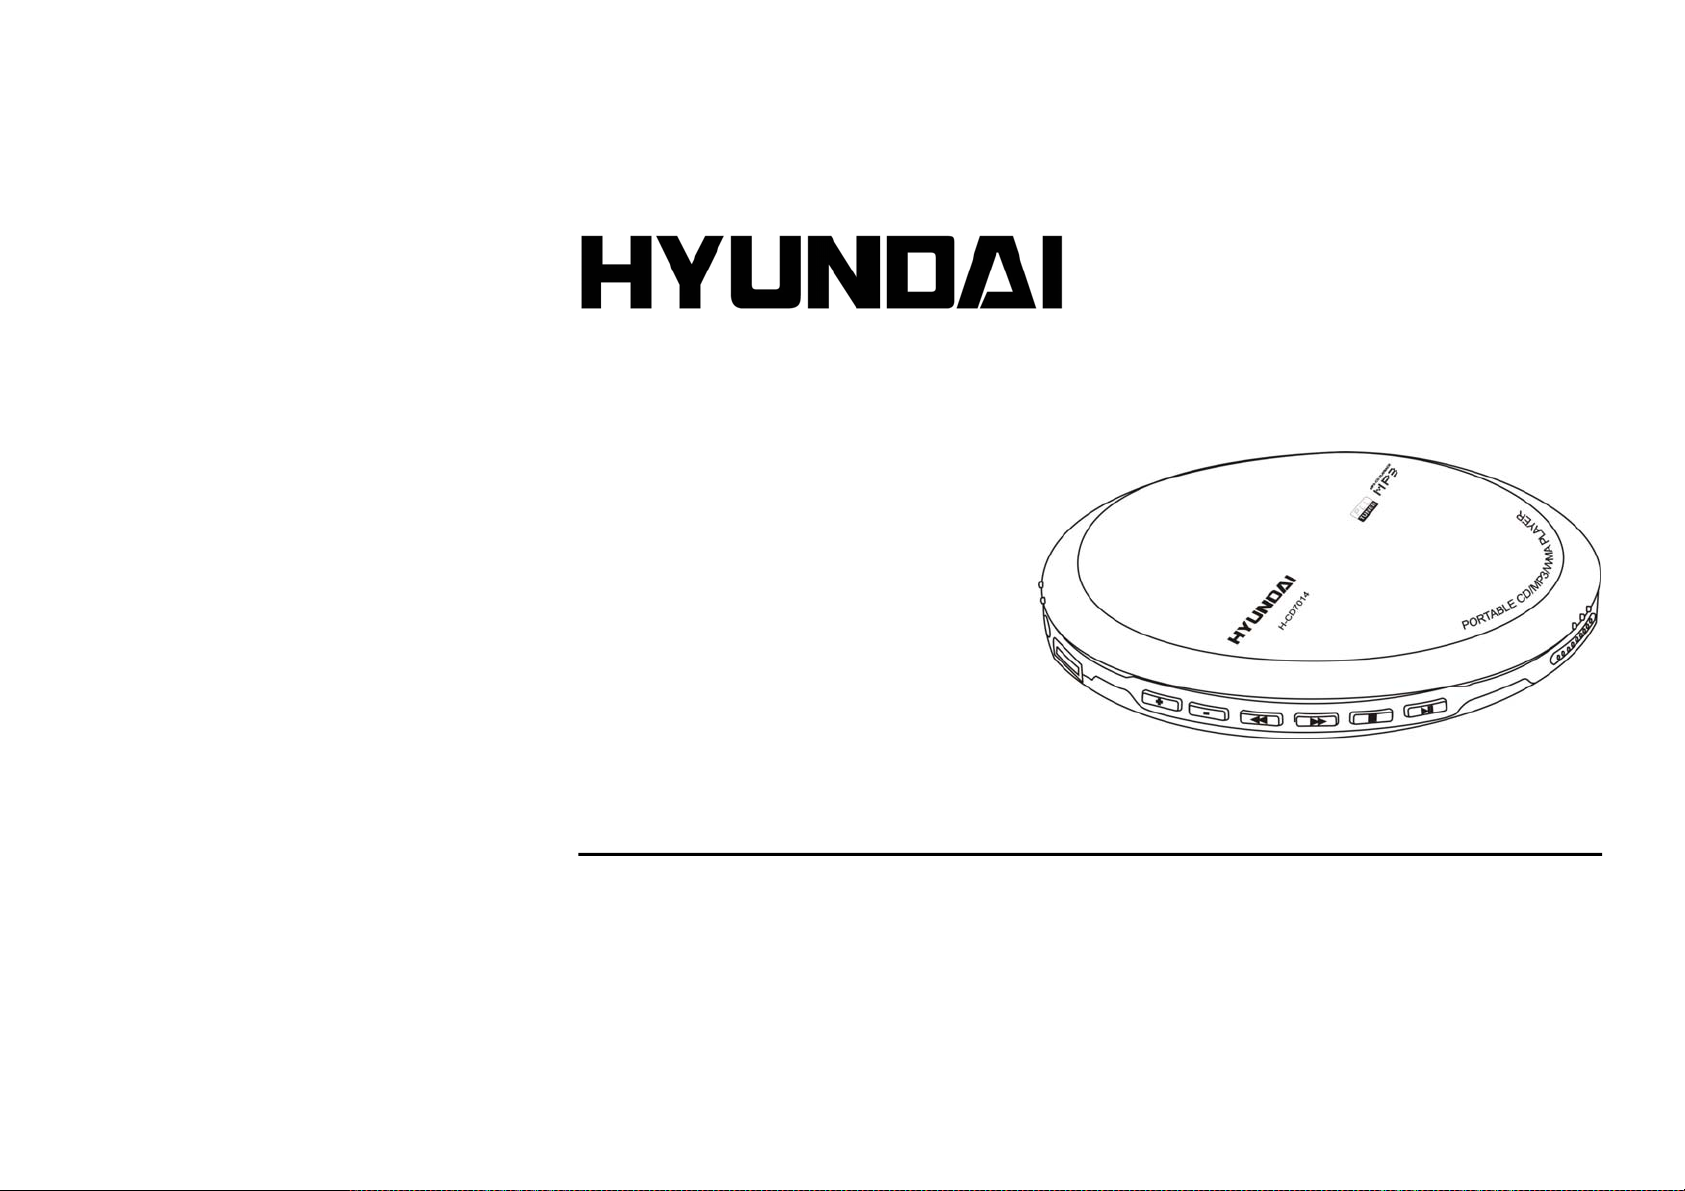
H- CD7014
POPTABLE CD PLAYER ПОРТАТИВНЫЙ CD ПЛЕЕР
Instruction manual Руководство по эксплуатации
Page 2

Dear customer!
Thank you for purchasing our product. For safety, it is strongly recommended to read this manual carefully before
connecting, operating and/or adjusting the product and keep the manual for reference in the future.
Table of contents
Table of contents................................................................................................................................................................... 2
Locating controls (player)...................................................................................................................................................... 3
Locating controls (remote control) ........................................................................................................................................ 4
Anti-shock operation ............................................................................................................................................................. 5
Lock Button Operation .......................................................................................................................................................... 5
LCD screen ........................................................................................................................................................................... 6
Playing disk ........................................................................................................................................................................... 7
Playback mode...................................................................................................................................................................... 7
Program mode....................................................................................................................................................................... 8
EQ mode ............................................................................................................................................................................... 8
Power supply and battery recharge ...................................................................................................................................... 8
Radio operation ................................................................................................................................................................... 10
Troubleshooting guide......................................................................................................................................................... 12
Precautions ......................................................................................................................................................................... 13
Notes: .................................................................................................................................................................................. 15
Accessories ......................................................................................................................................................................... 16
Important safeguards .......................................................................................................................................................... 17
Specification ........................................................................................................................................................................ 18
2
Page 3
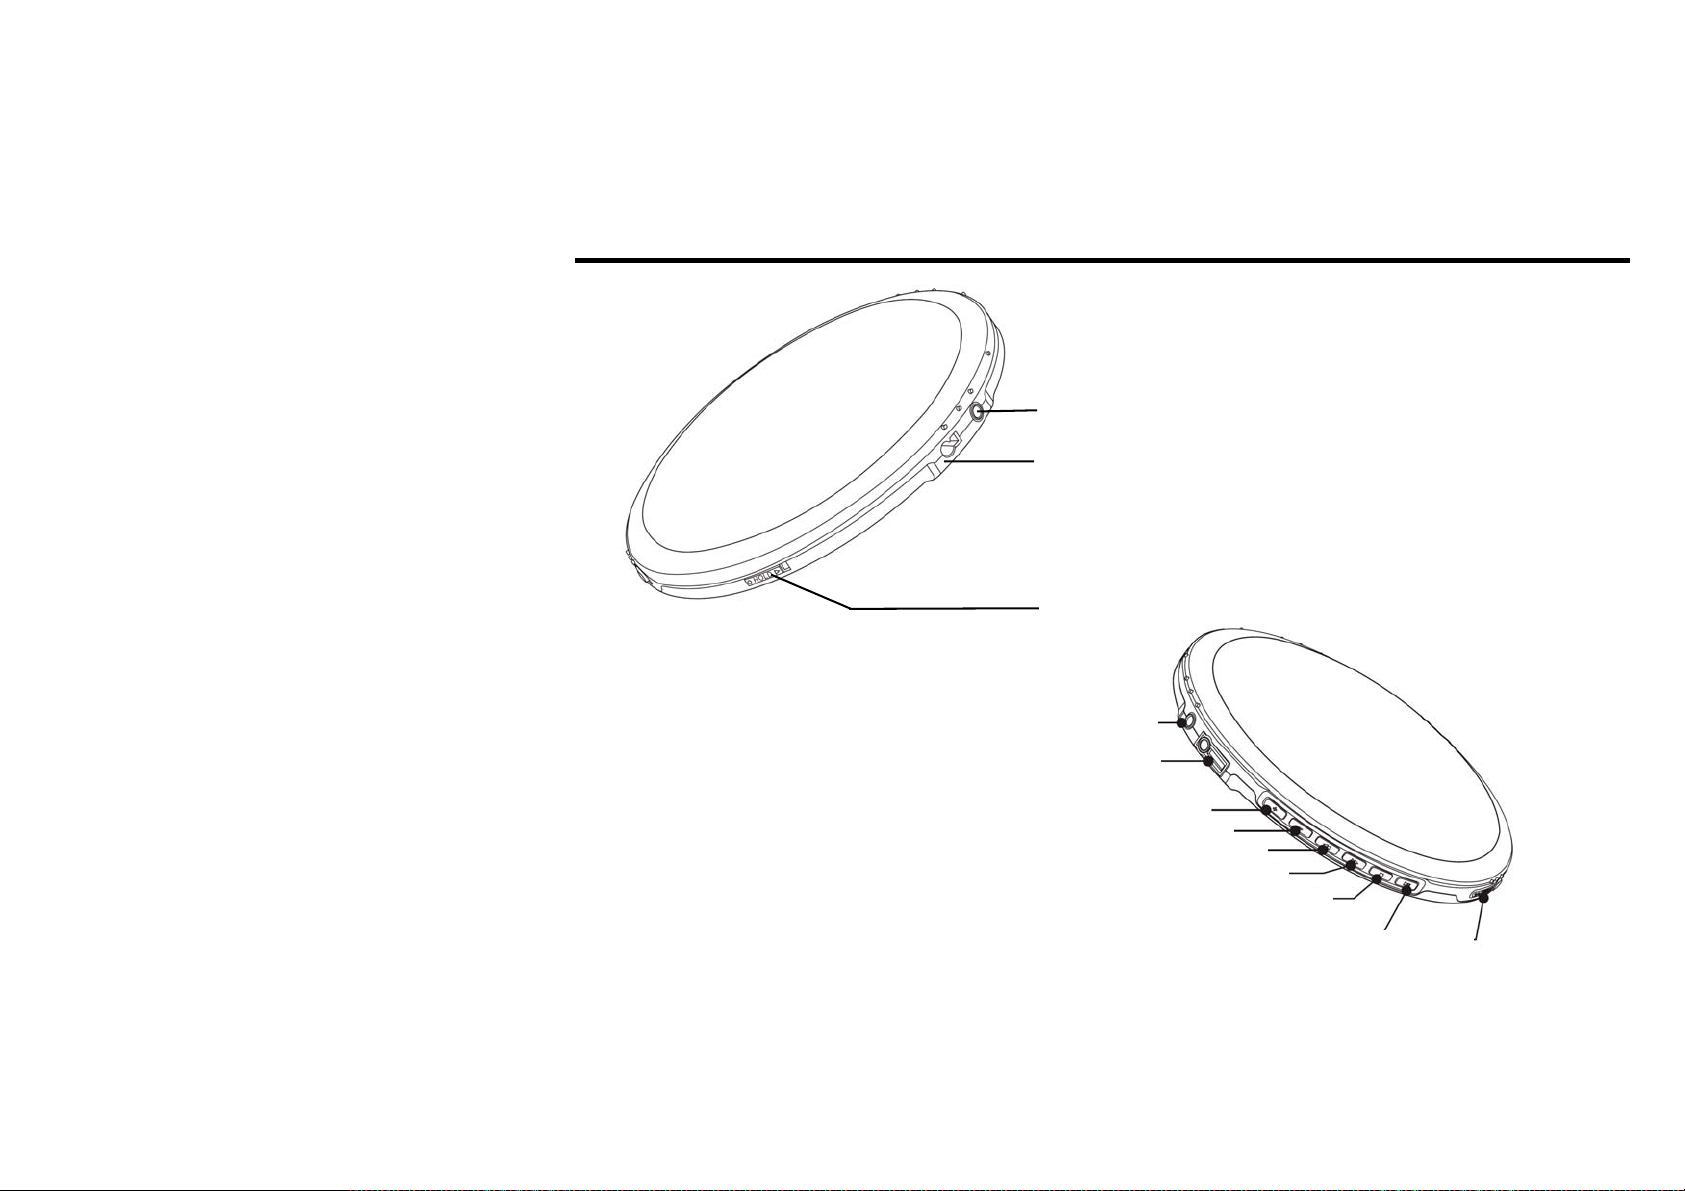
Locating controls (player)
3
Line-control/earphone line-out jack
LINE OUT: Use to record to another audio equipment or to listen through
external audio equipment (Speaker etc.)
DC IN 4.5V: Connect the Adapter to charge rechargeable batteries or use
external power. Insert them by matching the + and – polarity.
EXT BATT: Connect Ext Battery Pack to use AA type batteries.
HOLD switch
Earphone jack
Back forward/Previous track
Volume +
Volume -
Fast forward/Next track
Stop/OFF
Play/Pause
OPEN button
Page 4
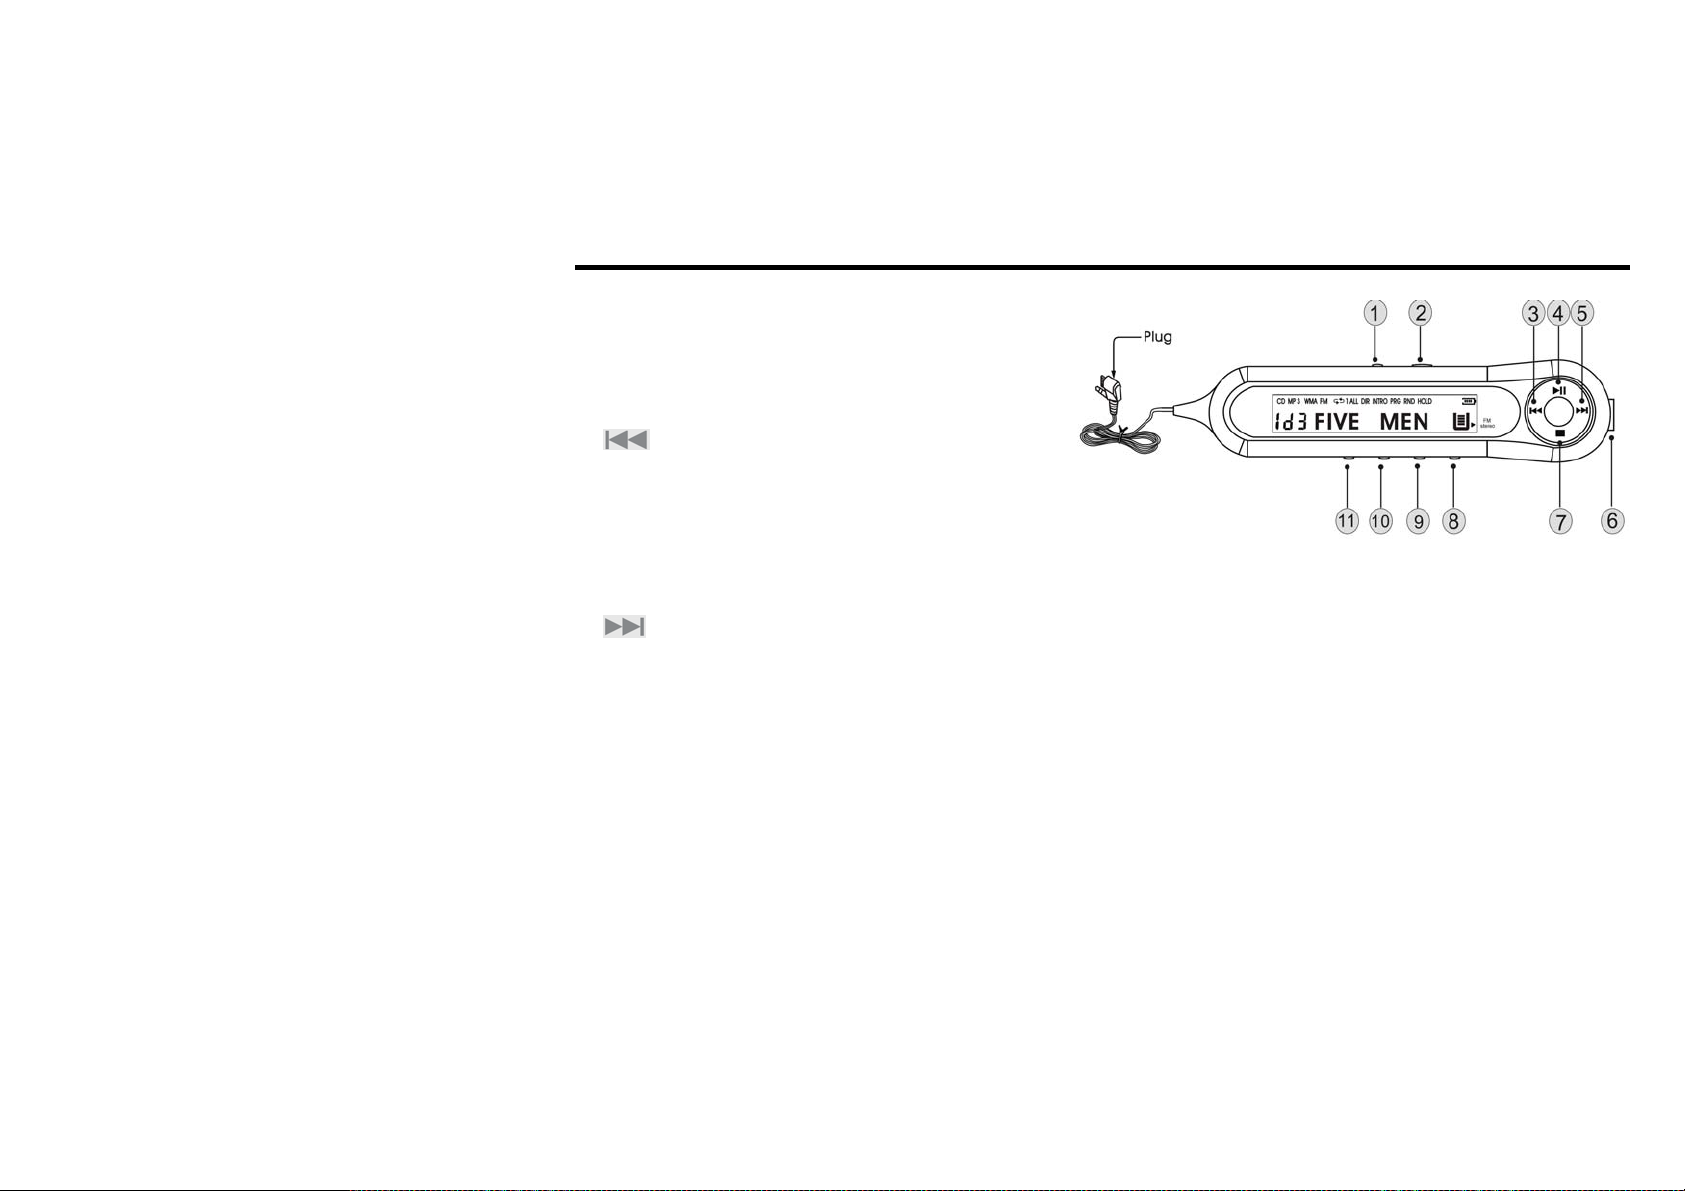
Locating controls (remote control)
1. ESP/DIR/EQ
A: Press: Anti shock (CD) / Scroll directory (MP3)
B: Long press: To shift between sound effects
2. HOLD
To Start/Shut off Hold key function
3.
A. Press: Previous track
B. Hold: Fast backward.
4. PLAY/PAUSE
Press to Start/Play/Pause/Confirm
In a stop status, press this button to activate charging function when the player is on "HOLD ON" mode.
5.
A. Press: next track.
B. Hold: Fast forward
6. EARPHONE jack
7. STOP
Press to stop/cancel/turn off
8. VOL +. Push VOL + to increase volume.
9. VOL -. Push VOL - to decrease volume.
10. MODE/FM
A: Press to select CD/FM
B: Hold: Play mode selection
4
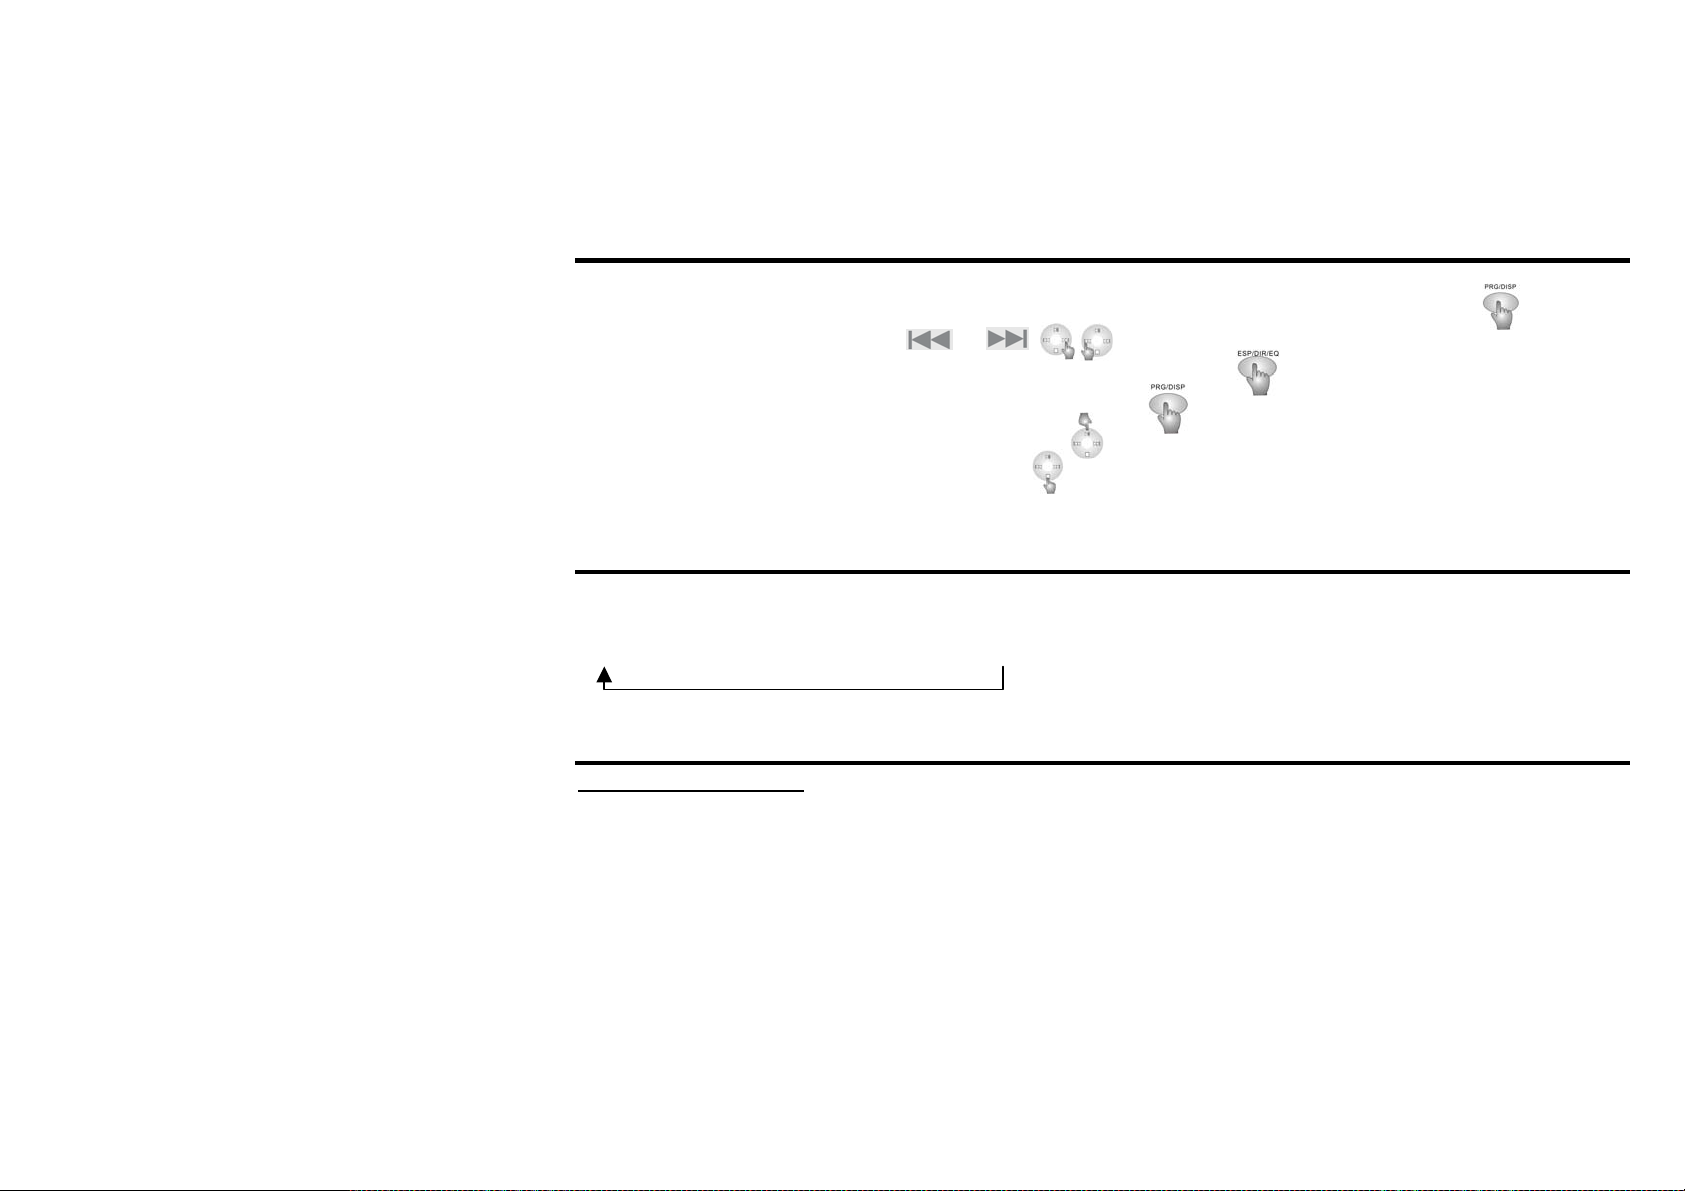
Page 5

11. PROG/DISP
A. Press: File number display/Folder name display/ID3 display selection
B. Hold (from STOP status): enter programming function
Anti-shock operation
A. Press ESP/DIR/EQ (electronic shockproof) key during audio CD playback and the player will activate ESP protection
function. CD may have better sound effects when anti-shock function is disabled.
B. Shockproof function will automatically start while playing MP3 and cannot be disabled.
C. Activation of anti-shock function in audio CD mode may decrease playing time and reduce batteries life.
Lock Button Operation
To avoid maloperation, the player has a lock button function:
1. Push HOLD bar on the player body to an arrow-indicated position to lock the buttons. The buttons on the player body
will lose their functionality.
2. Push HOLD bar on the line controller to an arrow-indicated position to lock the push buttons on the line controller. The
buttons on the line controller will lose their functionality.
Note: The LCD information zone of the player will display HOLD when the buttons on the player body have been locked.
5
Page 6
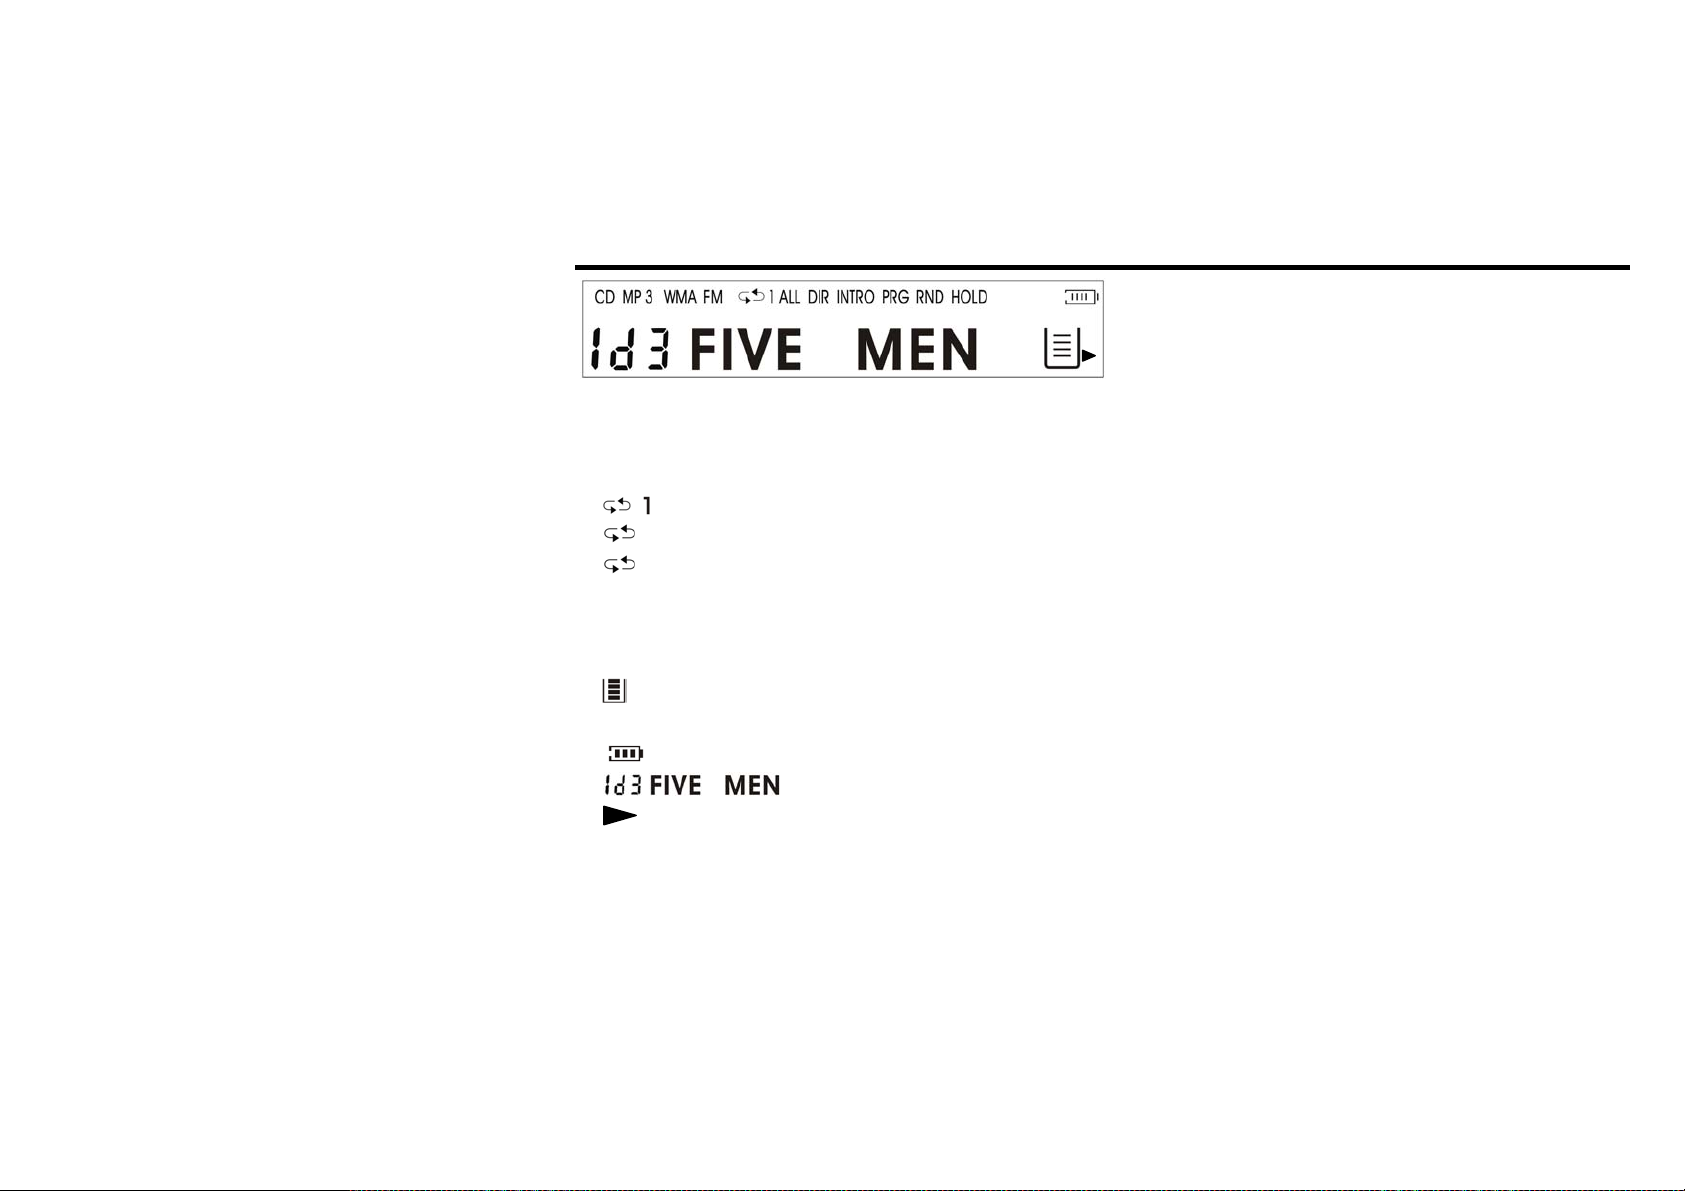
LCD screen
CD MP3 WMA
FM
DIR
ALL
INTRO
PRG
SHUF
HOLD
Battery indication
FM stereo indication
LCD backlight
Press any key on Remote Control and LCD backlight on Remote Control will light up for 6 seconds.
6
Disc type
FM tuner
Single song repeat
Directory repeat
All disc repeat
Introductive play
Programmed play
Random play
Anti-shock memory
Button lock indication mark
Information display zone
Page 7

Playing disk
CAUTION: The unit is shipped with a dummy CD “transit card” inside the CD compartment. The purpose of it is to
prevent the laser from moving during shipment of the product. This card must be removed before using the player.
• Slide the OPEN switch to the right to open the upper cover, remove the transit card from the player and discard
it.
• Slide the open button on the side of the player and Insert the disk with the disk label facing out.
• Connect Remote Control and Earphone.
• Slide HOLD Switch on the unit and RC to Off position.
• Press the “PLAY” button to play.
Playback mode
You can enjoy various ways of playing by using playback mode.
When “MODE/FM” button switch is pushed, icon in the playback mode indicator is changed.
DIR
ALL
INTRO
RND
After RANDOM play mode the player returns to the normal playing status.
Single music repeat. Play a single track repeatedly
Directory repeat. Play all tracks in the folder repeatedly.
All disc repeat. Play all tracks on the disc repeatedly.
Introductive play. Play beginning 10 seconds of each track in sequential order
Random play.
7
Page 8
Program mode
Program mode: Play tracks in your own playlists.
A. Press and hold “PROG/DISP” button on the RC after stop playing to enter program playing mode.
B. Select music number by pressing
C. Press “ESP/DIR/EQ” button to select directory of music (For MP3 only).
D. Press “PROG/DISP” button to save previous selected music.
E. Press the “PLAY” button to play programmed music.
F. Press the “STOP” button to exit program mode.
Note: to program more than one track please repeat operation B, C and D.
or .
EQ mode
Press and hold the “ESP/DIR/EQ” button to display the current EQ. Keep pressing the button and the EQ mode scrolls in
sequential order:
NORMAL → CLASSIC → ROCK → JAZZ → POP
Power supply and battery recharge
Using AC power adaptor
Use only an original AC adapter
Connect the Adapter to 4.5V DC jack on the player and AC outlet.
Notes for using specified adapter
• If adaptor is plugged with battery loaded, it will automatically shift to AC power and thus disconnects battery.
• When shifting between battery and AC power, music being played will stop. Press PLAY to resume normal play.
8
Page 9
CAUTION!
Disconnect Adapter when not in use.
Do not handle this player with a wet hand.
Using rechargeable batteries:
• Lift the cover of player and remove the covers of batteries compartment.
• Insert two rechargeable batteries (Ni-MH) by matching the + and -polarity in the battery compartments and close
the covers.
NOTE: When the batteries have been exhausted, please take them out and begin to use the adaptor.
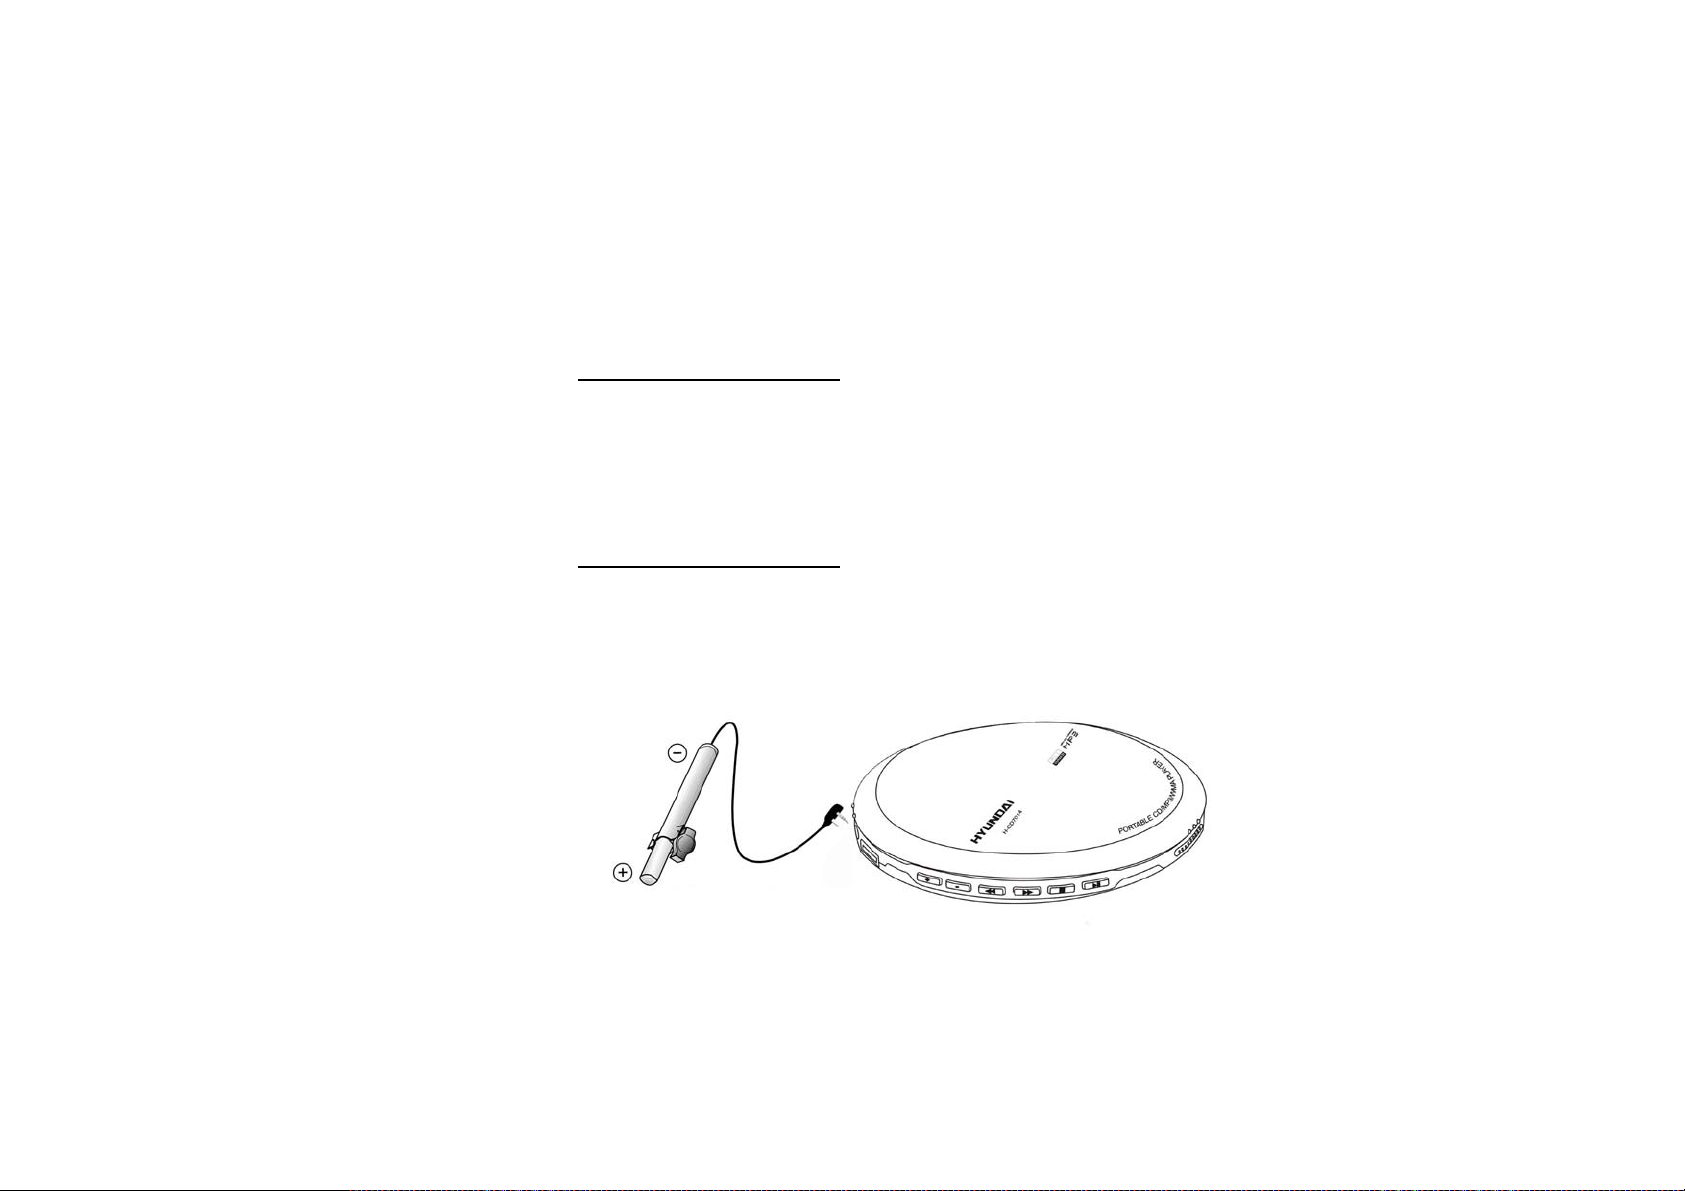
Using external batteries' pack
The external battery pack can be attached as shown in the figure. Two AA size alkaline batteries are used in the external
battery pack.
9
Page 10

CAUTION!
• Do not mix rechargeable batteries with dry batteries.
• Do not use different types of batteries together.
• When the batteries are not to be used for a long time, remove them.
• If battery leaks, wipe off any residue in the battery compartment and insert new batteries.
• Do not charge non-rechargeable batteries
NOTE: Take out the gum batteries out of the player if you use an external battery box.
Recharging method
1. Install rechargeable batteries.
2. Connect the AC adapter to the player.
3. Put HOLD switch on the unit into active position.
4. Press PLAY button to power on the player and then it starts to charge. Display shows CHARGING and timer.
Note:
• The player automatically powers off when done charging.
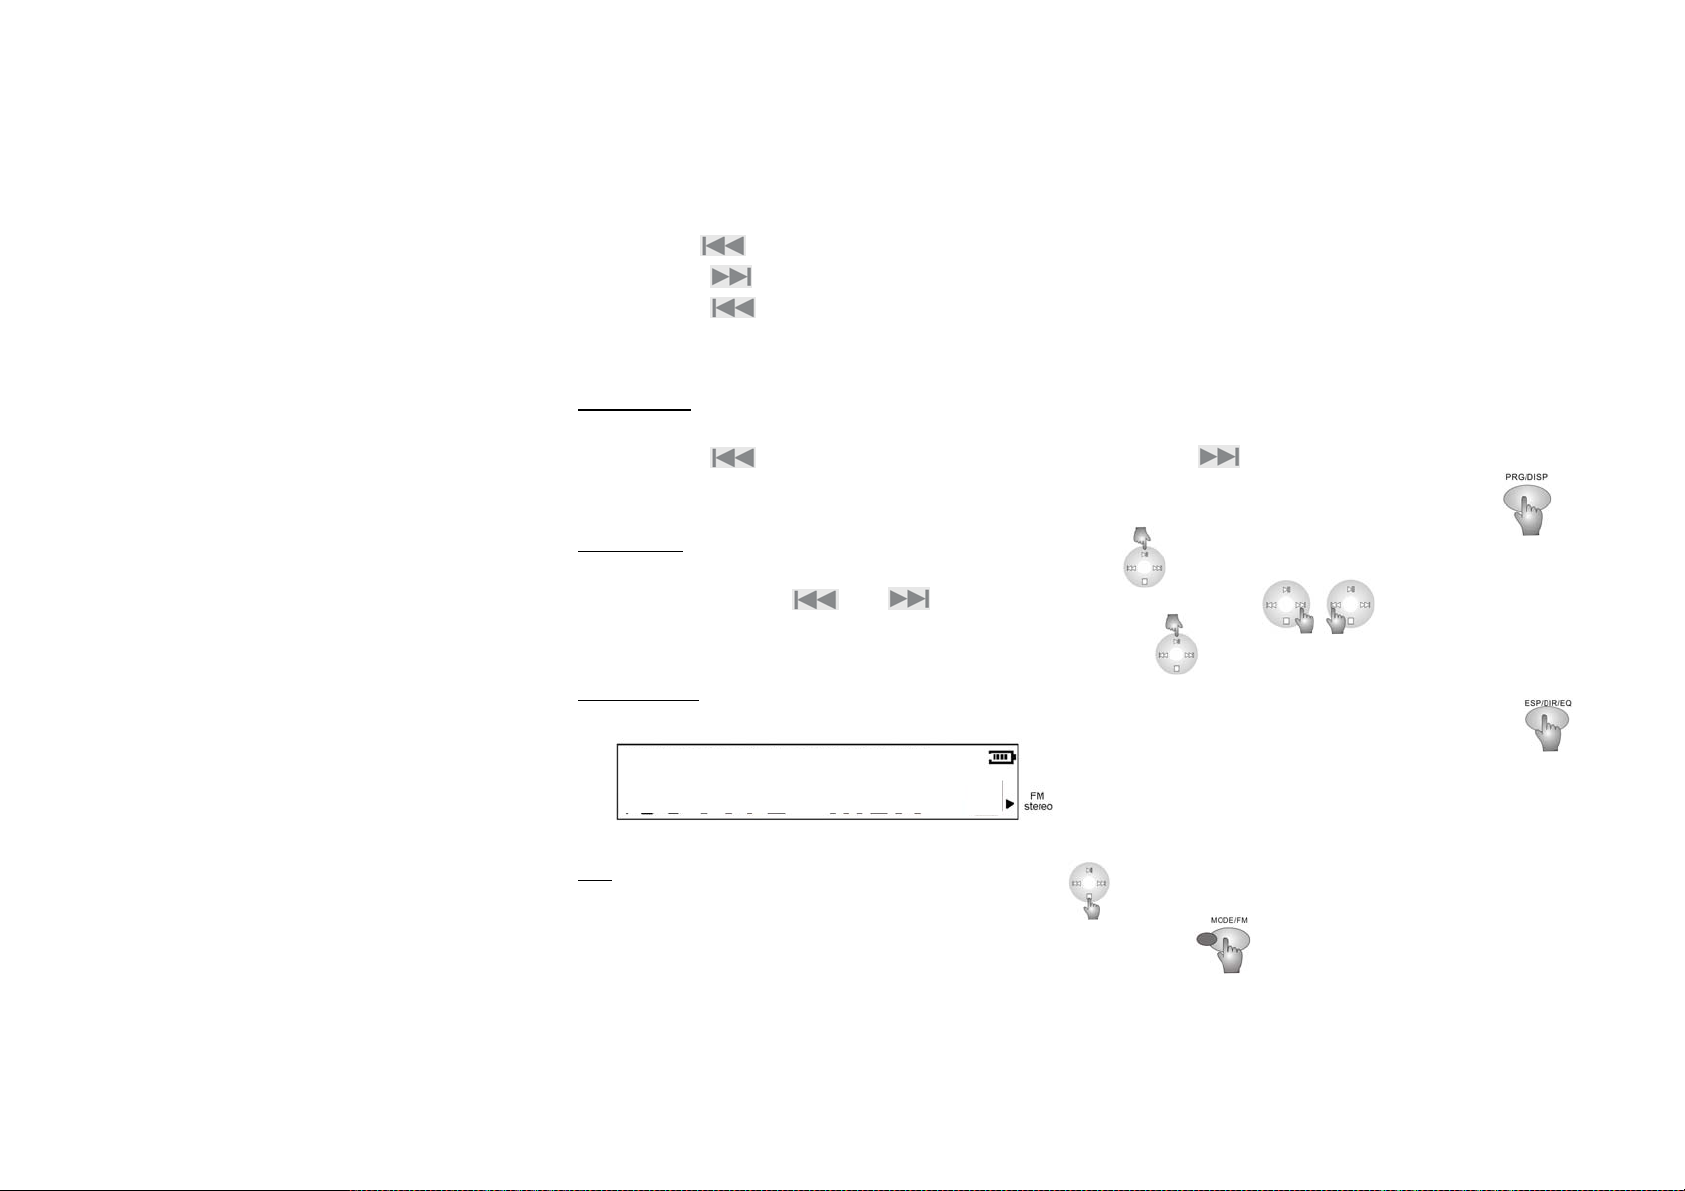
Radio operation
Turn on the radio
Press the CD-FM button on the online remote to switch the player to the radio mode, then the FM radio symbol will be
shown on the LCD screen.
Search station
1. Hold
to search stations upward automatically, frequency increases, it will stop when a station is found.
10
Page 11
2. Hold to search stations downward automatically, frequency reduces, it will stop when a station is found.
3. Press
4. Press
to adjust frequency upward manually.
to adjust frequency downward manually.
Note: the above operation do not works in the mode of Preset station.
Store station
1. Press “PROG/DISP”, PRG and channel № will be displayed on the screen, and the channel № will be flashing.
2. Press
to select the number of station downward, press to select the number of station upward.
3. Then press “PROG/DISP”, the radio will store current frequency on the selected station number.
Set stations
Press “PLAY/PAUSE” to switch to Preset station mode.
1. You may press
and to choose your favorable stations.
2. Press “PLAY/PAUSE” to exit Preset station operation.
Stereo switch
Press “ESP/DIR/EQ” on on-line remote to switch channel stereo. The stereo symbol will be displayed.
Exit
Press “STOP” to stop radio and power off player.
1. Press “MODE/FM” button to switch to the disc playing mode.
11
Page 12

Troubleshooting guide
No Power On
Check whether the batteries have been inserted in proper polarity (+ and -).
Check whether the HOLD switch on remote and unit is ON (Switch to OFF position)
Check whether the player door is opened.
Check whether the rechargeable batteries are not charged.
Loading stopped or
'No DISC displayed
on LCD
Check whether the CD is dirty or defective (clean it or change to new CD).
Check whether the CD is inserted properly.
Check whether dirt are attached in optical lens (remove the dirt with a soft cloth).
Check whether moisture condensation has occurred (leave the CD player aside for
several hours until the moisture evaporates).
Check whether the CD is inserted.
Problem may occur due to the characteristic deviation between CD-RW recorder and
CD-R/RW disc (burn the disc in low speed).
Use packet write disc with full formatting done.
No Sound or noise is
heard
Check whether VOLUME is set to "0".
Connect the earphone/remote plug firmly.
Check whether the plug is dirty (clean the plug with a dry and soft cloth).
Corrupted MP3 file may have a noise or sound cut off. Try another file again.
Excessive jolting may affect MP3, and audio CD discs to proper playback.
12
Page 13

AC adapter does not
work.
Be sure that the power supply voltage of the area where this player will be used meets
the required voltage.
Check whether the plug is connected to the proper jack on the player.
Remote control does
not work.
Battery lifetime differs
Precautions
On handling Disc
On handling Disc
Avoid touching the surface (bright side) where data is stored.
Disc Cleaning
Avoid cleaning the disc surface. If necessary, clean the disc surface with a soft cloth following the directions
described.
Do not stick papers or tape labels onto the surface (bright side).
Avoid using chemicals to clean the surface.
Check whether the HOLD switch is ON (Switch to OFF position.)
Connect the earphones/remote plug firmly.
Ensure the rechargeable batteries are fully charged.
Avoid the excessive operation of remote control.
13
Page 14

On Sa fe ty On Handling Disc
• Should any solid objects or liquid fall into the console, unplug it and have it checked by qualified personnel
before operating it any further.
• Do not put objects in the DC IN 4.5Vjack(External Power output).
• Use only the adapter provided with the player.
On Player
• Do not leave the CD player in a location near heat sources, or in a place subject to direct sunlight, excessive dust or
sand, moisture, rain, mechanical shock, unleveled surface, or in a car with its windows closed.
• Keep the lens on the CD player clean and do not touch it. If you do so, the lens may be damaged and the CD player
will not operate properly.
• Do not put any heavy objects on top of the CD player. The CD player and the CD may be damaged.
• Do not wrap the player with cloth or blanket that may cause malfunction.
On Headphones and Earphones
Road Safety
Do not use headphones/earphones while driving, cycling, or operating any motorized vehicle. It may create a traffic
hazard and is illegal in some areas. It can also be potentially dangerous to play your headsets at high volume while
walking, especially at pedestrian crossings. You should exercise extreme caution or discontinue use in potentially
hazardous situations.
Preventing hearing damage
Avoid using headphones/earphones at high volume. Hearing experts advise against listening to continuous, loud and
extended play. If you experience a ringing in your ears, reduce volume or discontinue use.
14
Page 15

Consideration for others
Keep the volume at a moderate level. This will allow you to hear outside sound and to be considerate of the people around
you.
Notes:
• During playback, CDs damaged with dirt or a scratch may make a pop sound, clipping sound, or cut off.
• Tracks with damaged or corrupted parts are skipped or forwarded to next track.
• Battery lifetime indicator may vary depending on the battery type and operation mode (CD/Charge).
15
Page 16

Accessories
Please check if the following accessories are accompanied with:
1. AC Adaptor
5. Rechargeable batteries (2 Ni-MH)
2. Stereo Earphone
3. Remote Control
6. Carrying Case
7. External battery pack
4. Instruction Manual, Consumer info, warranty card
16
Page 17

Important safeguards
CAUTION
Use of controls, adjustments or performance of procedures other than those
specified herein may result in hazardous radiation exposure.
CAUTION-INVISIBLE LASER RADIATION WHEN OPEN AND INTER
LOCKS DEFEATED, AVOID EXPOSURE TO BEAM.
• In order to prevent from fire and electric shock, please use accessories supplied by our company and don’t expose
the player in rain or moisture.
• In order to prevent from electronic shock, don’t disassemble the case of AC adaptor because there are no reparable
components in it to you. In case of breakdown please contact servicing personnel.
• Certain countries may regulate disposal of the battery used to power this product. Please consult with your local
authority.
• Listening for many hours at maximum volume may damage your hearing.
CLASS 1 LASER PRODUCT KLASSE 1
LASER PRODUKT LUOKAN 1 LASER
LAITE KLASS1LASER APPARAT
PRODUCTO LASER CLASE 1
17
Page 18

Specification
Type Item Specification
CD
FM
Disk type CD CD-R, CD, CD-RW(MP3), UDF packet write, CD-extra and
File type
Power
Size
Earphone output 15 mW(L)+15 mW(R) at 32(Ω) MAX.Volume
LINE OUT standard 0.57 vrms (47 kΩ)
Signal/Noise ratio >90 dB
Range of Frequency 75 – 108 MHz
Earphone output 15 mW(L)+15 mW(R) at 32(Ω) MAX.Volume
LINE OUT standard 0.57 vrms (47 kΩ)
Signal/Noise ratio >57 dB
Received by Earphone antenna
CD-mixed mode discs
File type Audio CD, WMA, MPEG 1/2/2.5, layer 3
ID3 ID3 V1.0.0, V1.1.1, V2.0.0, V2.3.0, V2.4.0
Bitrate 8K bps-320Kbps, VBR
Power adaptor DC 4.5V 650 mA
Rechargeable battery STICK TYPE Ni-MH battery
External battery Two "AA" alkaline batteries
Dimension About 133*133*14.7 mm
Weight Net Weight: about 193g
0
Operating temperature 0-40
C
18
Page 19

Anti-shock
period
MP3 120 sec
CD 40 sec
WMA 240 sec
19
Page 20

Уважаемый покупатель!
Благодарим Вас за покупку нашего изделия. Для обеспечения безопасности рекомендуется тщательно изучить
настоящее руководство перед подключением, эксплуатацией и/или регулировкой изделия, и сохраняйте
руководство для использования в будущем.
Содержание
Содержание ....................................................................................................................................................................... 20
Органы управления (плеер) ............................................................................................................................................. 21
Органы управления (дистанционное управление) ........................................................................................................ 22
Функция анти-шок.............................................................................................................................................................. 23
Функция блокировки клавиш ............................................................................................................................................ 23
ЖК дисплей ........................................................................................................................................................................ 24
Воспроизведение диска.................................................................................................................................................... 25
Режим воспроизведения .................................................................................................................................................. 25
Режим программирования................................................................................................................................................ 26
Режим эквалайзера (EQ) .................................................................................................................................................. 26
Источники питания ............................................................................................................................................................ 26
Использование радио ....................................................................................................................................................... 29
Устранение неисправностей ............................................................................................................................................ 31
Меры предосторожности .................................................................................................................................................. 33
Справочная информация ................................................................................................................................................. 35
Аксессуары в комплекте................................................................................................................................................... 35
Меры по безопасному использованию ........................................................................................................................... 36
Технические характеристики............................................................................................................................................ 37
20
Page 21

Органы управления (плеер)
21
Line-control/earphone line-out jack
LINE OUT: линейный выход. Используется для записи на другую аудиоаппаратуру
или для прослушивания записей через внешние аудиоустройства (колонки и т.д.)
DC IN 4.5V: Вход постоянного тока на 4,5 В. Подключение адаптера для подзарядки
аккумулятора или питания от сети. Следите за соответствием полярности.
ЕХТ ВАТТ: Питание от внешних батареек. Используются батарейки типа АА.
Кнопка блокировки
Разъем для наушников
Увеличение громкости
Уменьшение громкости
Предыдущий трек/Перемотка назад
Следующий трек/Перемотка вперед
Стоп/Выкл
Воспроизведение/ Пауза
Кнопка откры тия
Page 22

Органы управления (дистанционное управление)
1. ESP/DIR/EQ
A: Короткое нажатие: Включение анти-шока (при
воспроизведении Audio CD) / Переход к следующей
папке (в режиме MP3)
B: Нажать и удерживать: Переключение между
режимами эквалайзера.
2. HOLD
Включение/Отключение блокировки клавиш
3.
A. Короткое нажатие: Переход к предыдущему треку
B. Нажать и удерживать: Перемотка назад
4. PLAY/PAUSE (Воспроизведение/пауза)
Нажмите для включения/воспроизведения/паузы/подтверждения
В режиме остановки нажмите эту кнопку для активации режима зарядки, если плеер находится в режиме
блокировки.
5.
A. Короткое нажатие: Переход к следующему треку
B. Нажать и удерживать: Перемотка вперед
6. Разъем для наушников.
7. STOP
Остановка воспроизведения диска, отмена, выключение питания
22
Page 23

8. VOL +. Нажмите VOL +, чтобы увеличить громкость.
9. VOL -. Нажмите VOL -, чтобы уменьшить громкость.
10. MODE/FM
A: Короткое нажатие: выбор между режимами CD/FM.
B: Нажмите и удерживайте для переключения между режимами.
11. PROG/DISP
А. Короткое нажатие: выбор отображения номера трека, названия папки, ID3 информации.
В. Нажать и удерживать (в режиме СТОП): вход в режим программирования.
Функция анти-шок
A. Нажмите кнопку ESP/DIR/EQ во время воспроизведения Audio CD для включения анти-шока.
B. При воспроизведении MP3 файлов функция анти-шок включается автоматически.
C. Активация функции анти-шок для Audio CD может уменьшить время работы от батарей.
Функция блокировки клавиш
Во избежание неправильной работы плеера используйте функцию блокировки клавиш:
1. Передвиньте переключатель HOLD на плеере по направлению стрелки, чтобы заблокировать кнопки. Теперь
кнопки на плеере не реагируют на нажатие.
2. Передвиньте переключатель HOLD на пульте управления по направлению стрелки, чтобы заблокировать
кнопки. Теперь кнопки на пульте управления не реагируют на нажатие.
Примечание: когда кнопки
на плеере будут заблокированы, на дисплее появится значок HOLD.
23
Page 24

ЖК дисплей
CD MP3 WMA
FM
DIR
ALL
INTRO
PRG
SHUF
HOLD
Состояние батареек
Индикация FM стерео
Подсветка дисплея
Нажмите любую клавишу на пульте управления, подсветка дисплея будет гореть в течение 6 секунд.
Тип диска
FM тюнер
Повтор одного трека
Повтор всех треков в папке
Повтор всех треков диска
Ознакомление
Режим программирования
Случайный порядок
Анти-шок
Блокировка
Область отображения информации
24
Page 25

Воспроизведение диска
ВНИМАНИЕ: Плеер поставляется с картонным защитным диском, установленным в отсек CD. Он предназначен
для защиты линзы от повреждения во время транспортировки изделия. Этот диск должен быть устранен перед
началом эксплуатации изделия.
• Сдвиньте переключатель OPEN вправо, чтобы открыть крышку CD, выньте защитный диск из плеера.
• Сдвиньте кнопку OPEN на боку плеера и вставьте диск изображением вверх.
• Подсоедините пульт дистанционного управления и наушники.
• Сдвиньте переключатели HOLD в позицию OFF.
• Для воспроизведения нажмите кнопку PLAY/STOP.
Режим воспроизведения
Режим воспроизведения предоставляет широкие возможности при прослушивании дисков.
При нажатии кнопки “MODE/FM” иконки индикации режима воспроизведения меняются.
DIR
ALL
INTRO
RND
После режима случайного порядка воспроизведения плеер возвращается к нормальному режиму
воспроизведения.
Повторяет один трек.
Повторно воспроизводит все треки диска.
Повторно воспроизводит все треки в папке.
Последовательно воспроизводит первые 10 секунд каждого трека.
Случайный порядок воспроизведения.
25
Page 26

Режим программирования
Режим программирования позволяет воспроизводить треки в соответствии с вашим собственным списком.
A. После остановки воспроизведения нажмите и удерживайте кнопку “PROG/DISP” на пульте для входа в режим
программирования.
B. Выберите номер трека с помощью кнопок
C. С помощью кнопки “ESP/DIR/EQ” выберите папку (Только для MP3).
D. Для сохранения выбранного трека однократно нажмите кнопку “PROG/DISP”.
E. Нажмите кнопку “PLAY” для воспроизведения запрограммированных треков.
F. Нажмите кнопку “STOP” для выхода из режима программирования.
Примечание: для программирования более, чем одного трека повторите шаги B, C и D.
и .
Режим эквалайзера (EQ)
Нажмите и удерживайте кнопку “ESP/DIR/EQ” для отображения текущего состояния эквалайзера. При удержании
этой кнопки конфигурация меняется в последовательном порядке:
NORMAL → CLASSIC → ROCK → JAZZ → POP
Источники питания
Использование адаптера
Пользуйтесь только оригинальным адаптером.
Подсоедините адаптер к плееру (вход 4.5 В постоянного тока) и к сетевой розетке.
Замечания по питанию от сети
• Если Вы подсоедините адаптер в то время, как в плеере будут вставлены батарейки, он автоматически
26
Page 27

переключится на питание от сети и отключит батарейки.
• Во время переключения питания воспроизведение музыки прекратится. Нажмите кнопку PLAY для
возобновления воспроизведения.
ВНИМАНИЕ!
Если Вы не пользуетесь адаптером, отсоедините его.
Не берите плеер мокрыми руками.
Использование перезаряжаемых батареек:
• Поднимите крышку плеера и снимите крышки с отсеков для батареек.
• Вставьте две аккумуляторных батарейки (Ni-MH) в отсеки, строго соблюдая полярность + и -, и закройте
крышки
Примечание: Если заряд батареек кончился, выньте их и подключите адаптер.
Использование внешнего батарейного блока
Вставьте две алкалиновые батарейки в батарейный бл ок, строго соблюдая полярность + и - (см. рисунок внизу), и
закройте крышку.
27
Page 28

ВНИМАНИЕ!
• Не пользуйтесь одновременно аккумуляторными (перезаряжаемыми) и обычными батарейками.
• Не пользуйтесь одновременно батарейками разных марок.
• Если батарейки долгое время не используются, извлеките их.
• В случае протечки электролита удалите грязь из отсека и вставьте новые батарейки.
• Не заряжайте обычные (неаккумуляторные) батарейки.
Примечание: Выньте Ni-MH батареи, если Вы используете внешний батарейный блок.
Процедура перезарядки
1. Вставьте перезаряжаемые батарейки.
2. Подсоедините адаптер к плееру.
3. Установите переключатель HOLD на плеере в активное положение.
4. Нажмите кнопку PLAY, чтобы включить плеер и начать его зарядку. На дисплее появится надпись
CHARGING и таймер.
Примечание: Зарядка автоматически отключается по завершении.
28
Page 29

Использование радио
Включение радио
Нажмите кнопку CD-FM на ПДУ для перехода в режим радио, на дисплее появится символ FM радио.
Поиск станций
1. Нажмите и удерживайте кнопку
станции при этом увеличивается, когда будет найдена ближайшая станция с сильным сигналом, поиск
остановится.
2. Нажмите и удерживайте кнопку
станции при этом уменьшается, когда будет найдена ближайшая станция с сильным сигналом, поиск
остановится.
3. Нажмите кнопку
4. Нажмите кнопку
Примечание: вышеописанные операции не работают в режиме выбора сохраненных станций.
Сохранение станций в память
1. Нажмите кнопку “PROG/DISP”, на экране отобразится PRG и номер станции, который будет мигать.
2. Нажмите кнопки
3. Нажмите кнопку “PROG/DISP”, частота текущей станции будет сохранена в ячейку с выбранным
номером.
29
для автоматического поиска станций вверх по диапазону. Частота
для автоматического поиска станций вниз по диапазону. Частота
для ручного поиска станций вверх по диапазону.
для ручного поиска станций вниз по диапазону.
и для выбора номера станции.
Page 30

Выбор сохраненных станций
1. Нажмите кнопку “PLAY/PAUSE” для перехода в режим выбора сохраненных станций.
2. С помощью кнопок
и выберите нужную станцию.
3. Нажмите кнопку “PLAY/PAUSE” для выхода из режима выбора сохраненных станций.
Индикация стерео
Нажмите кнопку “ESP/DIR/EQ” на ПДУ для перехода в режим стерео. На дисплее появится значок стерео.
Выход
1. Нажмите кнопку “STOP” для выключения радио и выключения питания.
2. Нажмите кнопку “MODE/FM” для перехода в режим воспроизведения.
30
Page 31

Устранение неисправностей
Отсутствует питание
Загрузка не
проходит или на
дисплее стоит
сообщение 'No
DISC'
Убедитесь в том, что батарейки вставлены в соответствии с полярностью (+ и -).
Убедитесь в том, что переключатель HOLD на пульте дистанционного управления
установлен в положение OFF.
Проверьте, закрыта ли крышка плеера.
Проверьте , заряжены ли аккумуляторные батарейки.
Проверьте CD-диск. Он может быть грязным или с дефектами. (Очистите диск или
поставьте новый).
Проверьте, правильно ли вставлен диск.
Проверьте, не налипла ли грязь на оптическую линзу. (Удали те грязь сухой, мягкой
тканью).
Проверьте, не попал ли на линзу конденсат. (Оставьте плеер открытым на несколько
часов, пока влага не испарится).
Проверьте, вставлен ли диск вообще.
Проблема может возникнуть из-за несоответствия технических характеристик
CD-RW рекодера и CD-R/RW диска. (Запишите диск на низкой скорости).
Используйте полностью отформатированный диск с пакетной записью.
31
Page 32

Нет звука или слышен
шум
Проверьте уровень громкости. Возможно, он установлен на значение "0".
Полностью вставьте в разъем штекер наушников.
Проверьте, не испачкан ли штекер. (Почистите штекер сухой, мягкой тканью).
Испорченные файлы МРЗ могут издавать шум или звучать со сбоями.
Чрезмерная тряска может затруднить воспроизведение дисков МРЗ и Audio CD
Не работает сетевой
адаптер
Не работает пульт
дистанционного
Проверьте напряжение сети.
Убедитесь в том, что выходной штекер адаптера подсоединен к нужному разъему
плеера.
Убедитесь в том, что переключатель HOLD установлен в положение OFF.
Плотно воткните штекер наушников /пульта дистанционного управления.
управления
Батарейки "садятся"
слишком быстро
Убедитесь в том, что аккумуляторные батарейки полностью заряжены.
Избегайте излишне частого использования пульта дистанционного управления.
32
Page 33

Меры предосторожности
Обращение с диском
Как обращаться с диском.
Не касайтесь верхней блестящей стороны диска, на которой хранятся данные.
Чистка диска
Избегайте чистки диска. В случае необходимости осторожно протрите верхнюю сторону диска сухой,
мягкой тканью в направлении, указанном на рисунке.
Не наклеивайте ярлыков и не надписывайте диск на верхней блестящей стороне.
Избегайте использования химических веществ при чистке диска.
Безопасность
• Не допускайте падения на плеер твердых предметов или попадание воды. Если это произошло,
отсоедините плеер от источника питания и, прежде, чем включать его, покажите плеер
квалифицированному технику.
• Не вставляйте посторонних предметов в разъем постоянного тока (вход внешнего питания).
• Используйте только сетевой адаптер, входящий в комплект поставки плеера
33
Page 34

Плеер
• Не оставляйте плеер вблизи источников тепла, в местах, где на него может попасть прямой солнечный свет, в
местах с повышенной запыленностью или влажностью, под дождем. Не подвергайте плеер сильным
механическим воздействиям и ударам. Не кладите плеер на наклонные поверхности. Не оставляйте плеер в
жарком месте, в машине с закрытыми окнами.
• Содержите в чистоте линзу плеера, не прикасайтесь к ней руками. Загрязнение или повреждение линзы
может привести к поломке или неправильному функционированию плеера.
• Не кладите на плеер тяжелых предметов. Вы можете повредить плеер и диск
Наушники
Дорожная безопасность
Не пользуйтесь наушниками во время вождения, езды на велосипеде или мопеде. Это может вызвать аварийную
ситуацию и в некоторых странах и регионах запрещено законом. Использование наушников на полную громкость
может быть потенциально опасным также при хождении пешком, особенно на пешеходных переходах. В
ситуации повышенной опасности следует проявлять особую осторожность в пользовании наушниками или
прекратить ими пользоваться.
Повреждение слуха
Избегайте пользоваться наушниками на полную громкость. Медицинские специалисты не рекомендуют долго
прослушивать записи на высоком уровне громкости. Если у вас начинается "звон в ушах", незамедлительно
уберите громкость или прекратите прослушивание.
Восприимчивость к внешним звукам и реакции окружающих
Поддерживайте громкость на умеренном уровне. Это позволит вам слышать другие звуки и осознавать реакцию
окружающих
34
Page 35

Справочная информация
• Испачканные или поцарапанные CD-диски при воспроизведении могут издавать резкий шум, шипение и
сопровождаться обрывами звука.
• Поврежденный трек при воспроизведении следует пропустить.
• Индикатор состояния батареек может работать по-разному в зависимости от типа батареек и режима работы
плеера (CD/Зарядка).
Аксессуары в комплекте
Проверьте наличие аксессуаров в комплекте:
1. Сетевой адаптер
5. Две аккумуляторные батарейки (2 Ni-MH)
2. Наушники
3. Пульт дистанционного
управления
4. Руководство пользования, гарантийный талон, информация для потребителя
35
7. Блок внешнего питания
6. Чехол
Page 36

Меры по безопасному использованию
ВНИМАНИЕ
Использование процедур управления и регулировки, отличающихся от
тех, которые указаны в настоящем руководстве, может привести к
облучению.
ПРИ ОТКРЫВАНИИ КРЫШКИ В СЛУЧАЕ ПОЛОМКИ ЗАМКОВ
КОРПУСА СУЩЕСТВУЕТ РИСК ПОДВЕРГНУТЬСЯ ОБЛУЧЕНИЮ
НЕВИДИМЫМ ПУЧКОМ ЛАЗЕРА
• Чтобы избежать возгорания и удара электрическим током, не оставляйте плеер под дождем и не подвергайте
плеер воздействию влаги.
• Чтобы избежать удара электрическим током, не открывайте корпус плеера. Обслуживание и ремонт плеера
должен проводить только квалифицированный специалист.
• В некоторых странах и регионах хранение батареек и источников питания, которые используются настоящим
устройством, регулируется законом. Пожалуйста, проконсультируйтесь у представителя местных органов
власти.
• Длительное прослушивание плеера на максимальном уровне громкости может привести к повреждению
слуха
ИЗДЕЛИЕ С ЛАЗЕРОМ КЛАССА 1
CLASS 1 LASER PRODUCT KLASSE 1
LASER PRODUKT LUOKAN 1 LASER
LAITE KLASS1LASER APPARAT
PRODUCTO LASER CLASE 1
36
Page 37

Технические характеристики
Категория Пункт Спецификация
Audio (CD)
FM
Тип диска CD CD-R, CD, CD-RW(MP3), UDF packet write, CD-extra and
Тип файла
Питание
Габариты
Анти шок MP3 120 сек
37
Выход наушников 15 мВт (Л)+15 мВт (П) на 32(Ом) макс. Громкость
Стандарт LINE OUT 0.57 vrms (47 кОм)
Отношение сигнал/шум >90 дБ
Частотный диапазон 75 – 108 МГц
Выход наушников 15 мВт (Л)+15 мВт (П) at 32(Ом) макс. Громкость
Стандарт LINE OUT 0.57 vrms (47 кОм)
Отношение сигнал/шум >57 дБ
Источник Антенна наушников
CD-mixed mode discs
Тип файла Audio CD, WMA, MPEG 1/2/2.5, layer 3
ID3 ID3 V1.0.0, V1.1.1, V2.0.0, V2.3.0, V2.4.0
Битрайт 8 Kbps-320Kbps, VBR
Сетевой адаптер DC 4.5 В 650 мА
Перезаряжаемые батареи Батареи Ni-MH
Внешние батареи 2 "AA" алкалиновые батареи
Размеры Около 133*133*14.7 мм
Вес Вес нетто: около 193 г
0
Диапазон рабочих температур 0-40
C
Page 38

CD 40 сек
WMA 240 сек
38
 Loading...