

Hyundai Azera 2008 Owner's Manual

2008

A010A03A-AAT
WARRANTIES FOR YOUR HYUNDAI VEHICLE
Please consult your Owner's Handbook & Warranty Information booklet for your vehicle's
specific warranty coverage.
A020A01A-AAT
RESPONSIBILITY FOR MAINTENANCE
The maintenance requirements for your new Hyundai are found in Section 5. As the owner, it is your
responsibility to see that all maintenance operations specified by the manufacturer are carried out
at the appropriate intervals. When the vehicle is used in severe driving conditions, more frequent
maintenance is required for some operations. Maintenance requirements for severe operating
conditions are also included in Section 5.

OWNER'S MANUAL
A030A01TG-AAT
Operation
Maintenance
Specifications
A030A01TG-A
All information in this Owner's Manual is current at the time of publication. However, Hyundai reserves the right to make changes
at any time so that our policy of continual product improvement may be carried out.
This manual applies to all Hyundai models and includes descriptions and explanations of optional as well as standard equipment.
As a result, you may find material in this manual that does not apply to your specific vehicle.
F1

A070A01A-AAT
Your Hyundai should not be modified in any way. Such modifications may adversely affect the
performance, safety or durability of your Hyundai and may, in addition, violate conditions of the limited
warranties covering the vehicle. Certain modifications may also be in violation of regulations
established by the U.S. Department of Transportation and other federal or state agencies.
CAUTION: MODIFICATIONS TO YOUR HYUNDAI
!
F2
A080A01S-AAT
TWO-WAY RADIO OR CELLULAR TELEPHONE INSTALLATION
Your vehicle is equipped with electronic fuel injection and other electronic components. It is possible
for an improperly installed/adjusted two-way radio or cellular telephone to adversely affect electronic
systems. For this reason, we recommend that you carefully follow the radio manufacturer's instructions or consult your Hyundai dealer for precautionary measures or special instructions if you choose
to install one of these devices.

A090A01A-AAT
SAFETY AND VEHICLE DAMAGE WARNING
This manual includes information titled as WARNING, CAUTION and NOTE.
These titles indicate the following:
!
!
WARNING:
CAUTION:
This indicates that a condition may result in harm, serious injury or death to you or other persons
if the warning is not heeded. Follow the advice provided with the warning.
This indicates that a condition may result in damage to your vehicle or its equipment if the caution
is not heeded. Follow the advice provided with the caution.
NOTE:
This indicates that interesting or helpful information is being provided.
F3

F4
A110A01A-AAT
VEHICLE DATA COLLECTION AND EVENT DATA RECORDERS
Your Hyundai vehicle is equipped with many high technology, electronically controlled systems
that help to ensure your vehicle operates properly and provides the performance that you
expect. These systems utilize computers to monitor the operation of various systems and
components and help to control their operation. These computerized system operations are
wide-ranging and involve components to reduce emissions, to continuously evaluate the
readiness of the airbag and seat belt pretensioner systems, to determine when the airbag and
seat belt pre-tensioner systems should be deployed and then to activate the deployment, and
if equipped, to operate anti-lock braking, traction control and electrical stability control to assist
the driver to control the vehicle in difficult driving situations. These systems electronically store
information that is useful to service technicians when they need to diagnose and repair these
systems. Additional information is stored only when a crash occurs that results in the
deployment of the airbags or seat belt pre-tensioners. This type of data storage is done by
devices called event data recorders(EDR).
After a crash event, the airbag and seat belt pre-tensioner computer system, known as the
Supplemental Restraint System Control Module (SRSCM) or Airbag Control Unit (ACU), may
record some information about the condition of the vehicle and how it was being operated. This
information consists of data related to seat belt usage and if there was diagnostic information
in the airbag or seat belt systems at the time that a crash occurred, and if the ACU sensed that
a crash of sufficient severity occurred to require seat belt pre-tensioner or airbag deployment.
To retrieve this information, special equipment is needed and access to the vehicle or the device
that stores the data is required. Hyundai will not access information about a crash event or share
it with others except:
o in response to an official request of police or similar government office, or
o with the consent of the vehicle owner or, if the vehicle is leased, with the consent of the lessee,
or
o as part of Hyundai’s defense of litigation, or
o as required by law.

A040A01A-AAT
FOREWORD
Thank you for choosing Hyundai. We are pleased to welcome you to the growing number of discriminating
people who drive a Hyundai. The advanced engineering and high-quality construction of each Hyundai we
build is something of which we're very proud.
Your Owner's Manual will introduce you to the features and operation of your new Hyundai. It is suggested
that you read it carefully because the information it contains can contribute greatly to the satisfaction you
receive from your new car.
The manufacturer also recommends that all service and maintenance on your car be performed by an
authorized Hyundai dealer. Hyundai dealers are prepared to provide high-quality service, maintenance and
any other assistance that may be required.
A050A04A-AAT
HYUNDAI MOTOR COMPANY
Note: Because future owners will also need the information included in this manual, if you sell this Hyundai,
please leave the manual in the vehicle for their use. Thank you.
!
Severe engine and transaxle damage may result from the use of poor quality fuels and lubricants that
do not meet Hyundai specifications. You must always use high quality fuels and lubricants that meet
the specifications listed on Page 9-4 in the Vehicle Specifications section of the Owner's Manual and
which also appear in the Service Station Information on the back cover of the Owner's Manual.
Copyright 2007 Hyundai Motor Company. All rights reserved. No part of this publication may be reproduced,
stored in any retrieval system or transmitted in any form or by any means without the prior written permission
of Hyundai Motor Company.
CAUTION:
F5
A100A03A-AAT
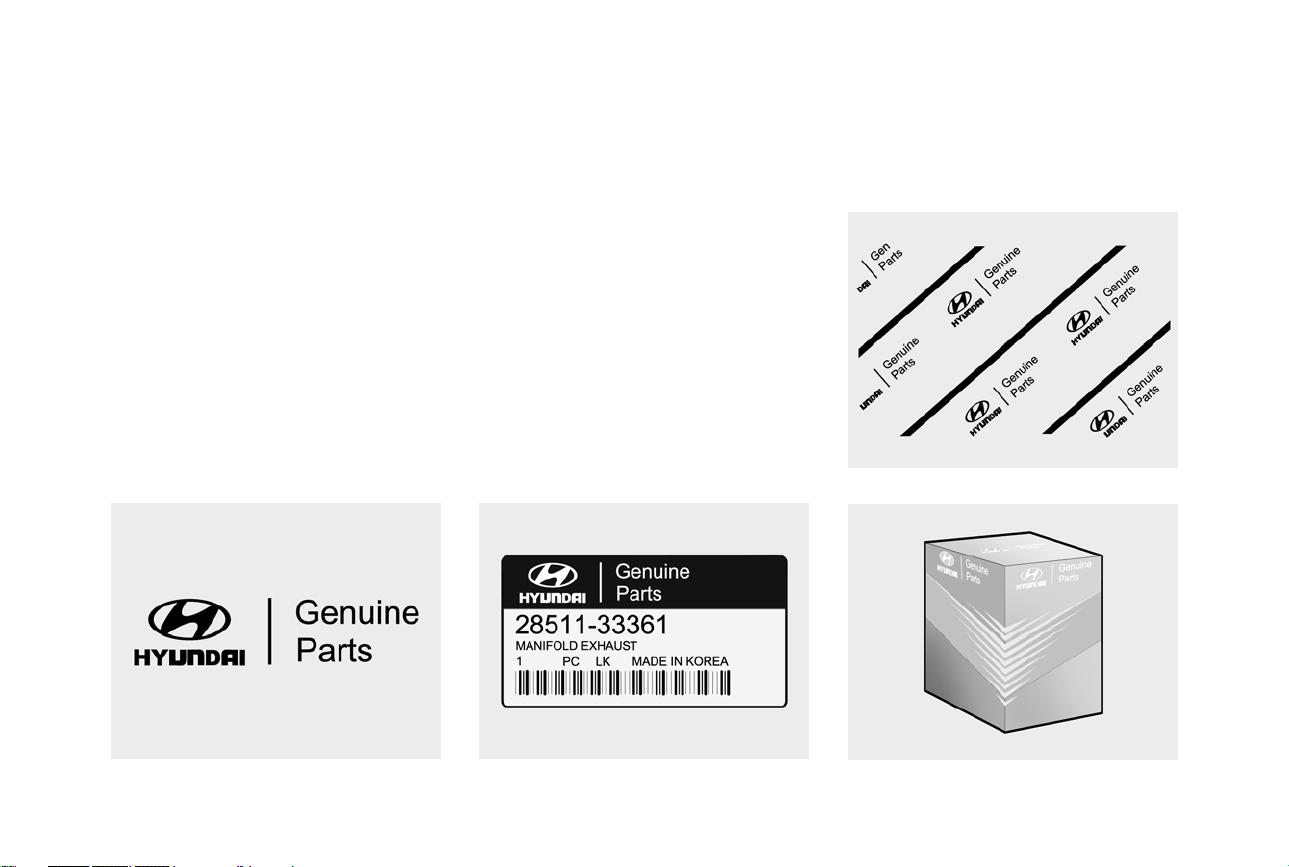
Guide to Hyundai Genuine Parts
1. What are Hyundai Genuine Parts?
Hyundai Genuine Parts are the same
parts used by Hyundai Motor Company
to manufacture vehicles. They are designed and tested for the optimum safety,
performance, and reliability to our customers.
2. Why should you use genuine parts?
Hyundai Genuine Parts are engineered
and built to meet rigid manufacturing
requirements. Using imitation, counterfeit or used salvage parts is not covered
under the Hyundai New Vehicle Limited Warranty or any other Hyundai
warranty. In addition, any damage to or
failure of Hyundai Genuine Parts caused
by the installation or failure of an imitation, counterfeit or used salvage part is
not covered by any Hyundai Warranty.
3. How can you tell if you are purchasing
Hyundai Genuine Parts?
Look for the Hyundai Genuine Parts
Logo on the package (see below).
Hyundai Genuine Parts exported to the
United States are packaged with labels
written only in English.
Hyundai Genuine Parts are only sold
through authorized Hyundai
Dealerships.
To find the closest authorized dealer
call 1-800-826-CARS
A100A03L
F6
A100A01L A100A02L A100A04L

TABLE OF CONTENTS
SECTION
FEATURES OF YOUR HYUNDAI
DRIVING YOUR HYUNDAI
WHAT TO DO IN AN EMERGENCY
CORROSION PREVENTION & APPEARANCE CARE
VEHICLE MAINTENANCE REQUIREMENTS
DO-IT-YOURSELF MAINTENANCE
EMISSION CONTROL SYSTEMS
CONSUMER INFORMATION, REPORTING SAFETY DEFECTS &
BINDING ARBITRATION OF WARRANTY CLAIMS
VEHICLE SPECIFICATIONS
INDEX
1
2
3
4
5
6
7
8
9
10
F7
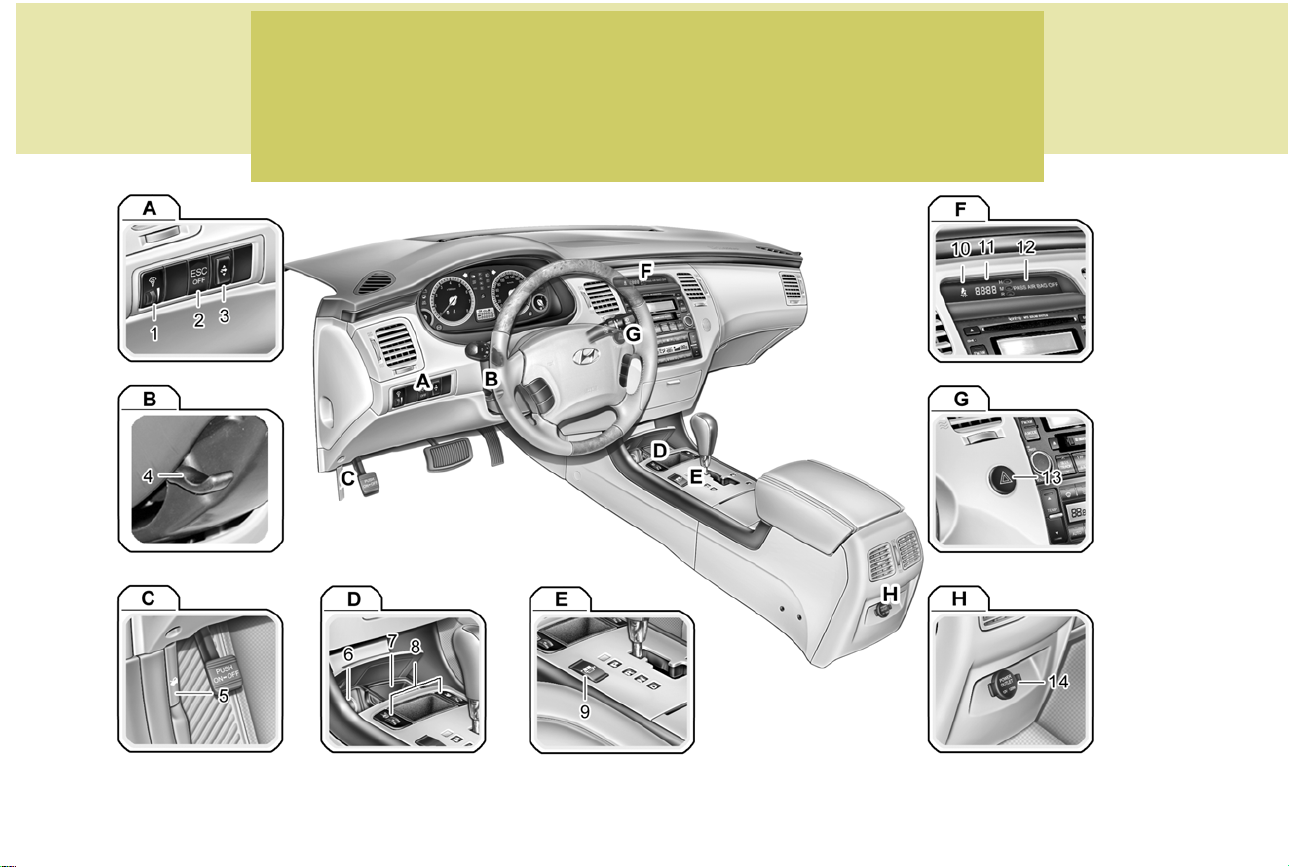
B250A01TG-AAT
INSTRUMENTS AND CONTROLS (I)
F8
B250A01TG-A
1. Panel Brightness Control Knob (Rheostat Switch) ........ 1-88
2. Electronic Stability Control (ESC) Switch (If Installed) ... 2-11
3. Power Adjustable Pedals Switch (If Installed) ................ 2-10
4. Steering Wheel Tilt & Telescopic Lever ....................... 1-118
5. Hood Release Lever..................................................... 1-114
6. Cigarette Lighter ............................................................. 1-88
7. Front Ashtray ................................................................... 1-89
!
CAUTION:
When installing a container of liquid air freshener inside the vehicle, do not place it near the instrument cluster
nor on the instrument panel surface. If there is any leakage from the air freshener onto these areas
(Instrument cluster, instrument panel or air ventilator), it may damage these parts. If the liquid from the air
freshener does leak onto these areas, wash them with water immediately.
8. Front Seat Warmer Switches (If Installed) ...................... 1-24
9. Rear Window Curtain Switch (If Installed) ....................1-118
10. Passenger's Seat Belt Warning Light ............................. 1-68
11. Digital Clock .................................................................... 1-88
12. "PASSENGER AIR BAG OFF" Indicator ......................... 1-51
13. Hazard Warning Switch .................................................. 1-87
14. Power Outlet ................................................................... 1-89
F9
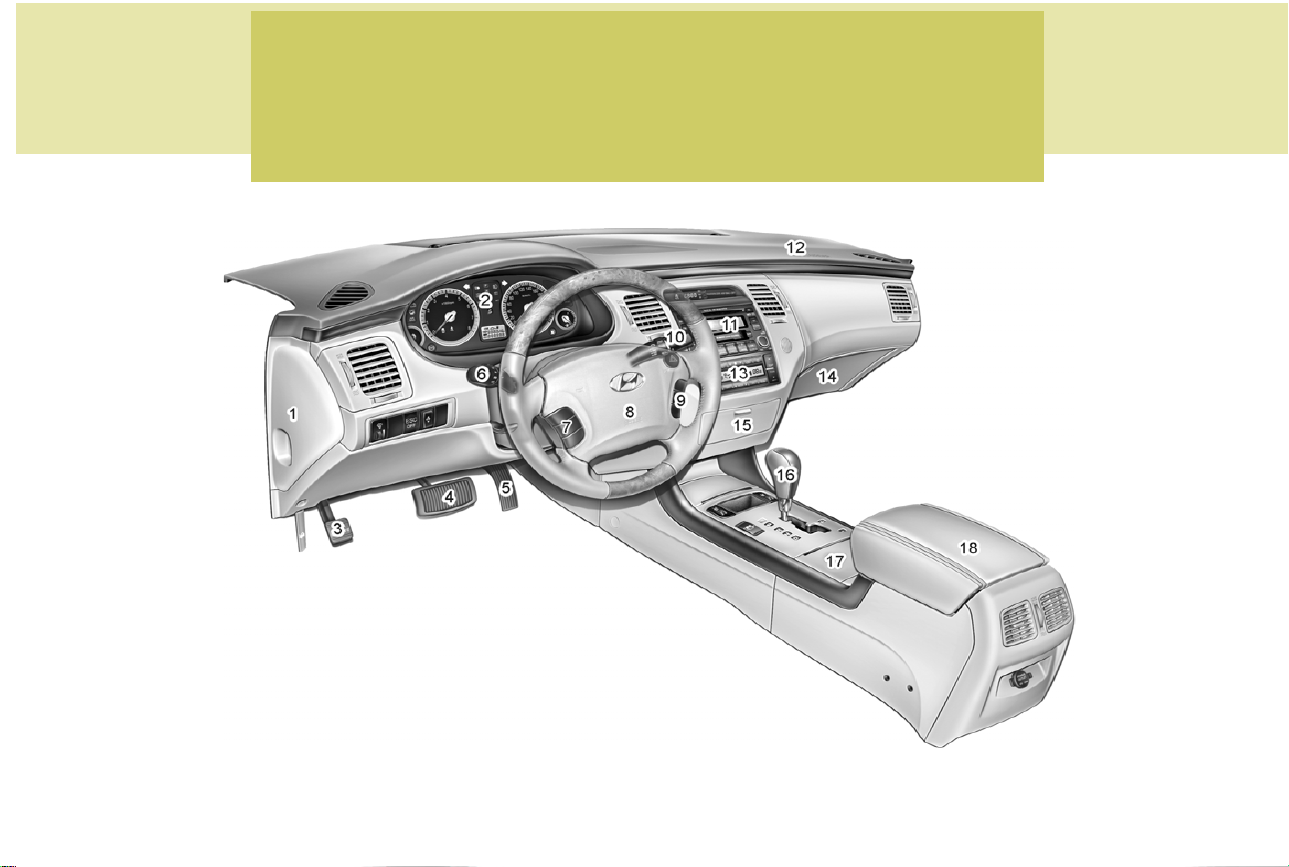
B250B01TG-AAT
INSTRUMENTS AND CONTROLS (II)
F10
B250B01TG-A
1. Fuse Box ......................................................................... 6-19
2. Instrument Cluster ........................................................... 1-60
3. Parking Brake Pedal ..................................................... 1-108
4. Brake Pedal .................................................................... 2-10
5. Accelerator Pedal ........................................................... 2-10
6. Multi-Function Light/Front Fog Light Switch ......... 1-80, 1-82
7. Audio Remote Control Switch (If Installed) ................... 1-122
8. Horn and Driver's Front Airbag ........................... 1-117, 1-44
9. Cruise Control Switch ................................................... 1-119
!
When installing a container of liquid air freshener inside the vehicle, do not place it near the instrument cluster
nor on the instrument panel surface. If there is any leakage from the air freshener onto these areas
(Instrument cluster, instrument panel or air ventilator), it may damage these parts. If the liquid from the air
freshener does leak onto these areas, wash them with water immediately.
CAUTION:
10. Windshield Wiper/Washer Switch .................................. 1-83
11. Audio System (If Installed) ............................................ 1-137
12. Passenger's Front Airbag ............................................... 1-44
13. Heating/Air Conditioning Control Panel ....................... 1-125
14. Glove Box ........................................................................ 1-97
15. Accessory Box ................................................................ 1-98
16. Shift Lever ......................................................................... 2-6
17. Drink Holder .................................................................... 1-90
18. Center Console ............................................................... 1-98
F11
YOUR VEHICLE AT A GLANCE
B255A02TG-AAT
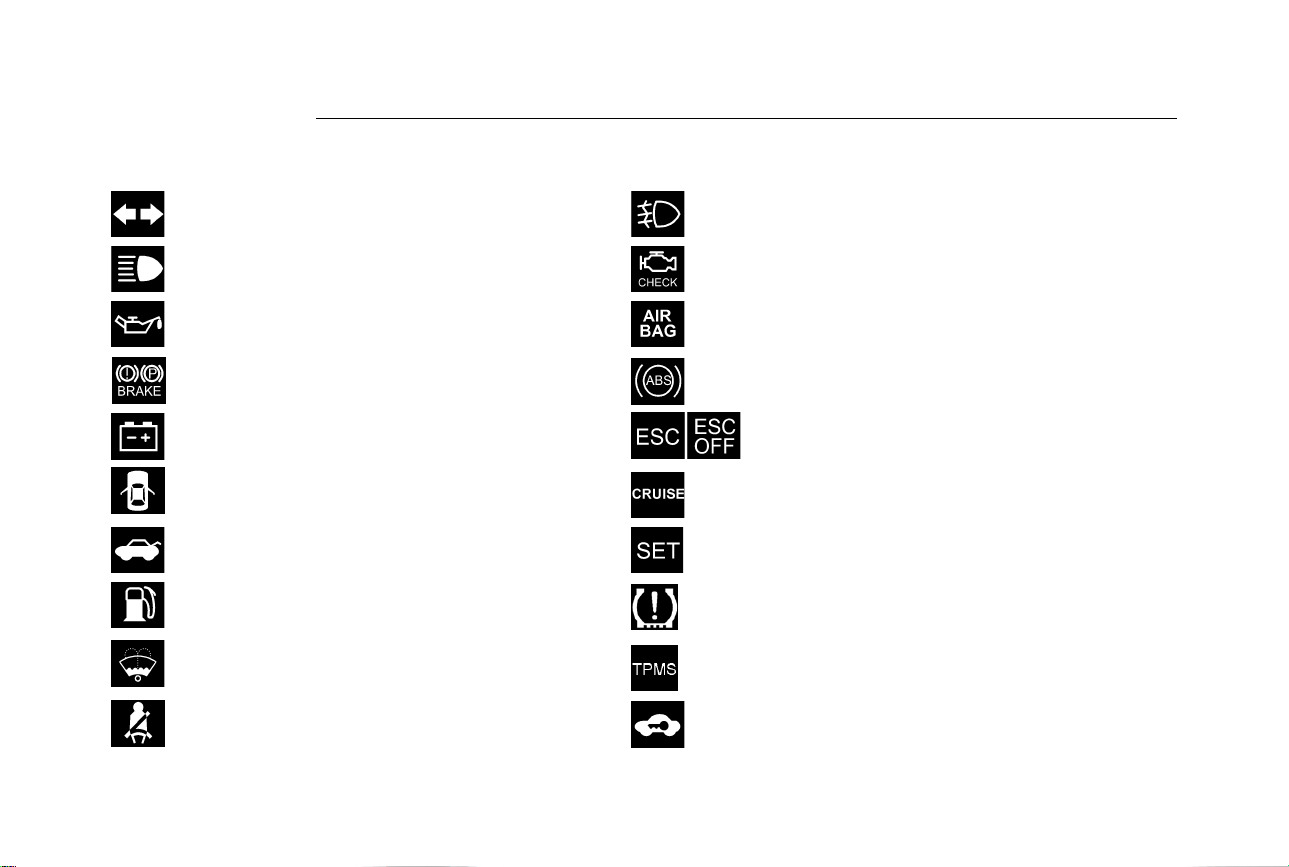
INDICATOR SYMBOLS ON THE INSTRUMENT CLUSTER
Turn Signal Indicator Lights
High Beam Indicator Light
Low Oil Pressure Warning Light
Parking Brake/Low Brake Fluid Level
Warning Light
Charging System Warning Light
Door Ajar Warning Light
Trunk Lid Open Warning Light
Low Fuel Level Warning Light
Low Windshield Washer Fluid Level Warning Light
Seat Belt Warning Light
F12
* More detailed explanations of these items will be found beginning on page 1-64.
Front Fog Lamp Indicator Light
Check Engine - Malfunction Indicator Light (MIL)
SRS (Airbag) Warning Light
ABS Service Reminder Indicator (If Installed)
Electronic Stability Control (ESC) Indicator
Lights (If Installed)
Cruise Indicator Light
Cruise SET Indicator Light
Low Tire Pressure Telltale (If Installed)
TPMS (Tire Pressure Monitoring System) Malfunction
Indicator (If Installed)
Immobilizer Warning Light

FEATURES OF YOUR HYUNDAI
Fuel Recommendations ....................................................1-2
Breaking in Your New Hyundai .........................................1-3
Immobilizer System ...........................................................1-3
Door Locks ........................................................................1-7
Theft-Alarm System ........................................................1-11
Windows .......................................................................... 1-14
Seats ................................................................................1-18
I.M.S (Integrated Memory System) ................................1-22
Seat Belts ........................................................................1-27
Child Restraint System ....................................................1-34
Advanced Supplemental Restraint (AIRBAG)
System (SRS) ................................................................1-43
Instrument Cluster and Indicator Lights .........................1-60
Warning and Indicator Lights ..........................................1-64
Trip Computer .................................................................1-75
Multi-Function Light Switch .............................................1-80
Windshield Wiper and Washer Switch ............................1-83
Sunroof ............................................................................1-91
Mirror ...............................................................................1-99
Homelink Mirror ............................................................ 1-102
Hood Release ............................................................... 1-114
Cruise Control............................................................... 1-119
Heating and Cooling Control ........................................ 1-123
Stereo Sound System .................................................. 1-135
Audio System................................................................ 1-137
Antenna ........................................................................ 1-198
1
1
FEATURES OF YOUR HYUNDAI
1
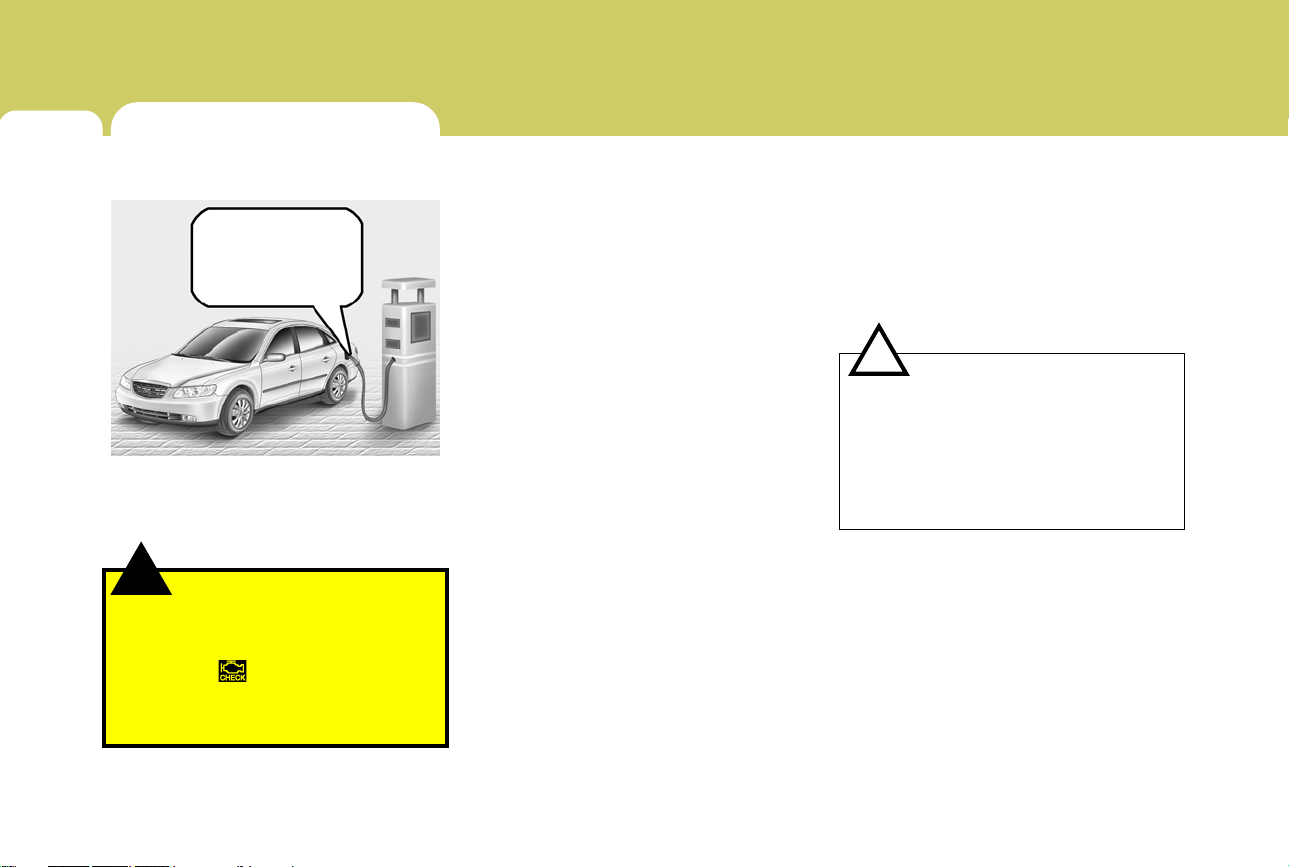
FUEL RECOMMENDATIONS
2
B010A02NF-AAT
Use Unleaded Gasoline
UNLEADED
FUEL ONLY
B010A01TG-A
Unleaded gasoline with a Pump Octane
Rating of 87 (Research Octane Number
91) or higher must be used in your
Hyundai.
!
o Do not "top off" after the nozzle auto-
o Tighten the cap until it clicks, other-
o Always check that the fuel cap is
WARNING:
matically shuts off when refueling.
wise the "
installed securely to prevent fuel spillage in the event of an accident.
" light will illuminate.
B010B01A-AAT
What About Gasohol?
Gasohol (a mixture of 90% unleaded gasoline and 10% ethanol or grain alcohol)
may be used in your Hyundai. However, if
your engine develops driveability problems, the use of 100% unleaded gasoline
is recommended. Fuels with unspecified
quantities of alcohol, or alcohols other
than ethanol, should not be used.
B010C01A-AAT
Use of MTBE
Hyundai recommends that fuels containing MTBE (Methyl Tertiary Butyl Ether)
over 15.0% vol. (Oxygen Content 2.7%
weight) should not be used in your
Hyundai.
Fuel containing MTBE over 15.0% vol.
(Oxygen Content 2.7% weight) may reduce vehicle performance and produce
vapor lock or hard starting.
B010D01A-AAT
Do Not Use Methanol
Fuels containing methanol (wood alcohol) should not be used in your Hyundai.
This type of fuel can reduce vehicle performance and damage components of the
fuel system.
!
CAUTION:
Your Hyundai's New Vehicle Limited Warranty may not cover damage to the fuel
system and any performance problems
that are caused by the use of fuels containing methanol or fuels containing
MTBE (Methyl Tertiary Butyl Ether) over
15.0% vol. (Oxygen Content 2.7% weight.)

B010E01A-AAT
Gasolines for Cleaner Air
To help contribute to cleaner air, Hyundai
recommends that you use gasolines
treated with detergent additives, which
help prevent deposit formation in the engine. These gasolines will help the engine
run cleaner and enhance performance of
the Emission Control System.
B010F01A-AAT
Operation in Foreign Countries
If you are going to drive your Hyundai in
another country, be sure to:
o Observe all regulations regarding reg-
istration and insurance.
o Determine that acceptable fuel is avail-
able.
BREAKING IN YOUR NEW
HYUNDAI
B020A01TG-AAT
During the First 1,200 Miles (2,000
Km)
No formal "break-in" procedure is required
with your new Hyundai. However, you can
contribute to the economical operation
and durability of your Hyundai by observing the following recommendations during the first 1,200 miles (2,000 km).
o Don't drive faster than 55 MPH (88 km/
h).
o While driving, keep your engine speed
(rpm, or revolutions per minute) between 2,000 rpm and 4,000 rpm.
o Use moderate acceleration. Don't start
quickly or depress the accelerator pedal
fully.
o For the first 200 miles (300 km), try to
avoid hard stops.
o Whether going fast or slow, vary your
speed from time to time.
o Don't let the engine idle longer than 3
minutes at one time.
o Don't tow a trailer during the first 1,200
miles (2,000 km) of operation.
FEATURES OF YOUR HYUNDAI
IMMOBILIZER SYSTEM
B880A01TG-AAT
The immobilizer system is an anti-theft
device, designed to deter automobile theft.
NOTE:
This device complies with Part 15 of the
FCC rules. Operation is subject to the
following two conditions:
(1) This device may not cause harmful
interference, and (2) this device must
accept any interference received, including interference that may cause
undesired operation.
!
Changes or modifications not expressly
approved by the party responsible for
compliance could void the user's authority to operate the equipment.
CAUTION:
1
3
FEATURES OF YOUR HYUNDAI
1
4
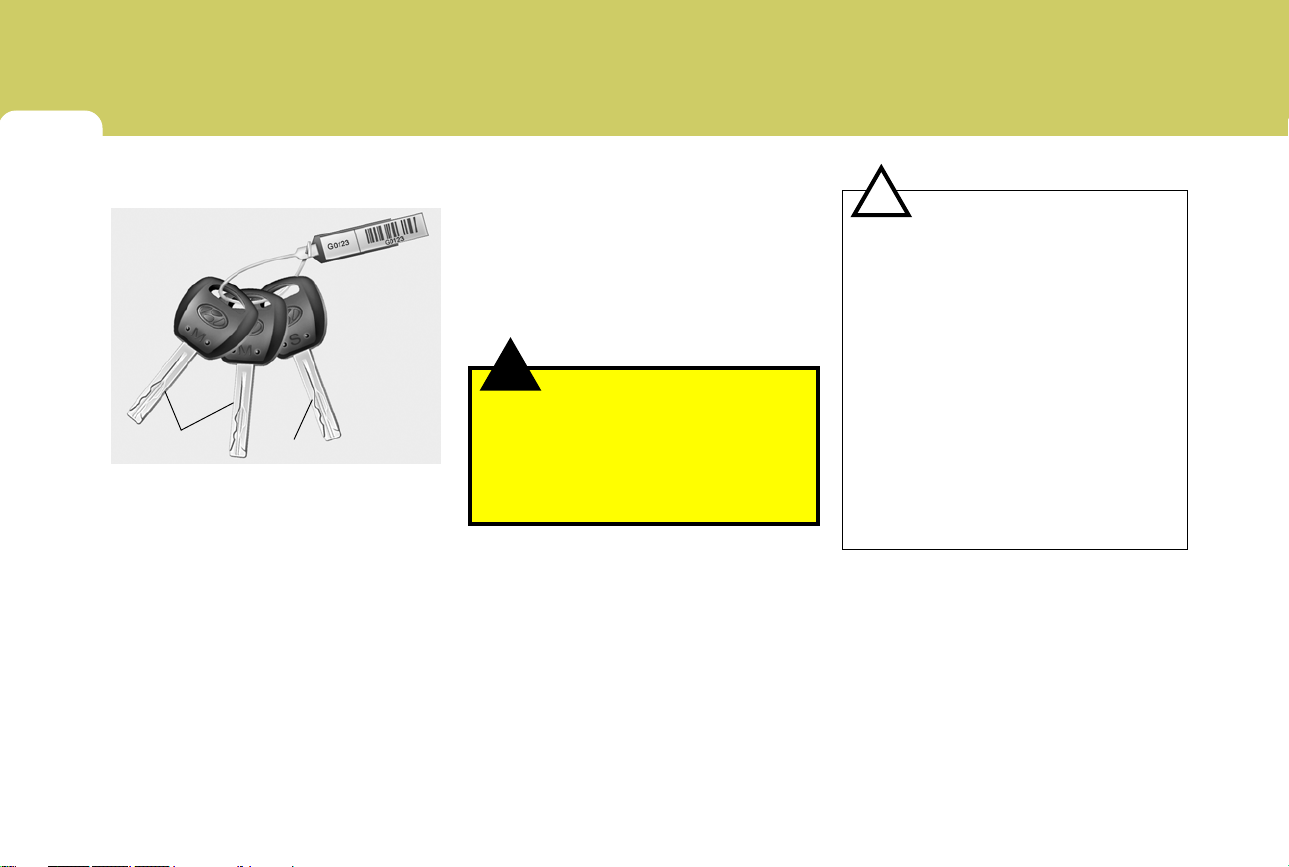
B880B03TG-AAT
Two Types of Keys
Master key
For greater convenience, your Hyundai
has two types of keys as shown in the
illustration.
1) Master key
This key is for general use. It will open all
locks on your vehicle. One side of the key
has the Hyundai logo and the other side
has the "M" symbol.
2) Sub key
Similar to the master key, this key will
only function in the ignition and the door
locks, but it will not operate the trunk and
the glove box.
Sub key
B880B01TG
One side of the key has the Hyundai
logo and the other side has an "S"
symbol.
Leaving your sub key with a parking
attendant will ensure that your vehicle's
trunk, trunk lid release, glove box compartment and rear trunk access may not
be unlocked in your absence.
!
In order to prevent theft of your vehicle,
do not leave spare keys anywhere in
your vehicle. Your immobilizer password
is a customer unique password and
should be kept confidential. Do not leave
this number anywhere in your vehicle.
WARNING:
!
o If you make your own duplicate key,
o When starting the engine, do not use
o Do not install the metal accessories
CAUTION:
you will not be able to cancel the system or start the engine.
the key with other immobilizer keys in
close proximity; otherwise, the engine may not start or may stop soon
after it starts.
Keep each key separated from one
another.
near the key or ignition switch.
The engine may not start for the metal
accessories may interrupt the transponder signal from normally transmitting.

FEATURES OF YOUR HYUNDAI
1
5
B031A01TG-AAT
Before leaving sub key with parking
attendant
B541A01TG
When leaving the sub key with a parking
attendant, the following procedures will
ensure that your vehicle's trunk and glove
box can not be unlocked in your absence.
1. Unlock the glove box with the master
key and open it.
2. Set the trunk lid control button in the
glove box to the "OFF" position (not
depressed). In the "OFF" position, the
trunk can not be unlocked with either
the trunk release lever or trunk open
button of transmitter.
3. Close the glove box, and lock the glove
box using the master key.
4. Switch the rear seatback knobs to the
"LOCK" position (refer to page 1-26).
5. Leave the sub key with the attendant.
Trunk and glove box are secured because the sub key only allows ignition
and door lock operation.
B880C01NF-GAT
Key Numbers
B880C01TG
The vehicle key number is recorded on a
number tag attached to the keys when the
vehicle is first delivered to you.
The key number should be recorded and
kept in a safe place in case the need to
order further keys arises. New keys are
available from any Hyundai dealer by
quoting the relevant key number.
In the interest of security, the number tag
attached to the keys which bears the key
number should be removed from the key
string after you receive your new vehicle.
In addition, key numbers cannot be provided by Hyundai for security reasons.
If you need additional keys or if you should
lose your keys, your authorized Hyundai
dealer can make new keys if you can
supply the key number and master key.

FEATURES OF YOUR HYUNDAI
1
6
B880D01TG-AAT
"Limp Home" Mode and Related
Procedures
HNF2011
If the immobilizer warning indicator blinks
for five seconds when the ignition key is
turned to the "ON" position, this indicates
the immobilizer system requires service.
The engine cannot be started without using the procedure below.
The following procedure describes how to
start the engine using the limp home function (0, 1, 2, 3 as a sample password).
NOTE:
You can get a limp home password when
the vehicle is first delivered to you. If you
do not have a password, consult your
authorized Hyundai dealer.
1. To activate the password, turn the ignition key "ON" and "OFF" according to
the digit numbers. The immobilizer indicator will blink along with the operation
of the ignition key. For example, turn the
ignition key once for digit number "1",
and twice for "2", and so on. For the digit
number "0", you must cycle the ignition
key 10 times.
2. Wait for 3~10 seconds.
3. You may set the remaining number of
digits by following steps 1 and 2.
4. If all of the four password digits have
been successfully entered, turn the ignition key "ON" and check that the immobilizer indicator illuminates. From
this time, you have to start your engine
within 30 seconds. If you try to start your
engine after 30 seconds, your engine
will not start.
NOTE:
If the engine stalls while driving in the
"limp home" mode, you can start your
engine within 3 seconds without re-entering the password.
If the immobilizer indicator blinks for five
seconds, you must re-enter the password
(steps 1~4).
After performing the limp home activation
procedure, consult with your authorized
Hyundai dealer as soon as possible.
!
CAUTION:
o If the password is entered incorrectly
three consecutive times, wait for about
one hour to perform the limp home
activation procedure again.
o If you cannot start your engine using
the limp home activation procedure,
have your vehicle towed by an authorized Hyundai dealer.

DOOR LOCKS
FEATURES OF YOUR HYUNDAI
1
7
B030C01JM-AAT
ILLUMINATED IGNITION SWITCH
B030C01E
Whenever either front door is opened, the
ignition switch will be illuminated for your
convenience, provided the ignition switch
is not in the "ON" position.
The light will go off approximately 10 seconds after closing the door or when the
ignition switch is turned on.
B040A01A-AAT
!
WARNING:
o Before you drive away (especially if
there are children in the car), be sure
that all the doors are securely closed
and locked so that the doors cannot
be opened from the inside. This helps
ensure that the doors will not be
opened accidentally. Also, when combined with the proper use of seat belts,
locking the doors helps keep occupants from being ejected from the car
in case of an accident.
o Before opening the door, always look
for and avoid oncoming traffic.
B040B01O-AAT
Locking, unlocking front doors with
a key
UNLOCK
LOCK
HTG2008
o The door can be locked or unlocked
with a key.
o Lock the door by turning the key toward
the front of the vehicle and unlock it by
turning the key toward the rear.
NOTE:
The driver's door can be unlocked by
turning the key once toward the rear. If
you wish to unlock all doors, turn the key
again toward the rear within 4 seconds.

FEATURES OF YOUR HYUNDAI
1
8
B040C02Y-AAT
Locking from the Outside
B040C01TG-A
The doors can be locked without a key. To
lock the doors from the outside, first push
the inside lock switch to the "LOCK" position, so that the red mark on the switch is not
visible, then close the door.
The door will not lock if the key is left in the
ignition switch when the front doors are
closed. This is normal operation.
NOTE:
o When locking the door this way, be
careful not to lock the door with the
key left in the vehicle.
o To discourage theft, always remove
the ignition key, close all windows and
lock all doors when leaving your vehicle unattended.
B040D01NF-AAT
Locking from the Inside
UNLOCK
To lock the doors from the inside, simply
close the door and push the lock switch to
the "LOCK" position.
LOCK
HTG2009
NOTE:
o When the door is locked, the red mark
on the switch is not visible.
o The driver's and front passenger's
doors can be opened by pulling the
inside door handle even if the inside
lock switch is pushed to the "LOCK"
position.
!
WARNING:
Be careful not to pull the inside door
handle while driving. If you pull the inside
door handle, the door can be opened and
you may be ejected from the vehicle and
can be injured or killed.
FEATURES OF YOUR HYUNDAI
1
9
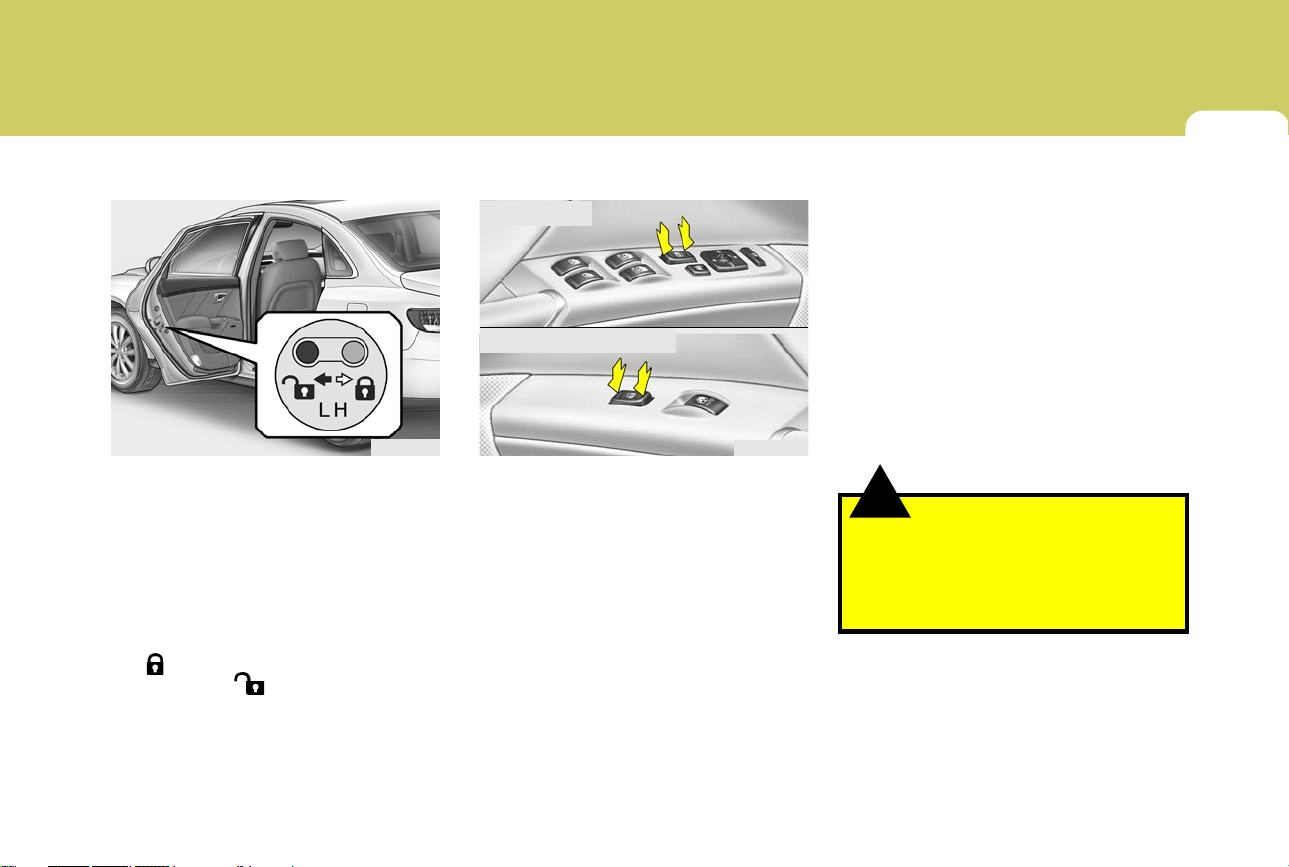
B040E04A-AAT
Child-Protector Rear Door Lock
HTG2011-1
Your Hyundai is equipped with left and
right side "child-protector" rear door locks.
When the lock mechanism is engaged, the
rear door cannot be opened from the inside. Its use is recommended whenever
there are small children in the rear seat.
To engage the child-protector feature so
that the door cannot be opened from the
inside, move the child-protector lever to
" position and close the door. Move
the "
the lever to the "
door operation is desired.
To open the door from the outside, pull the
outside door handle.
" position when normal
B040G02NF-AAT
Central Door Locks
Driver's side
Front passenger's side
UNLOCK
LOCK
The central door locking switch is located
on the driver's and front passenger's armrest. It is operated by depressing the door
lock switch. If any door is open when the
switch is depressed to the "LOCK" position, the door will remain locked when
closed.
LOCK
UNLOCK
B040G01TG
NOTE:
o When depressing the front portion of
the driver's or front passenger's door
lock switch, all vehicle doors will lock.
o When depressing the rear portion of
these switches, all vehicle doors will
unlock.
o The driver's and front passenger's
doors can be opened by pulling the
inside door handle even if the front
portion of the driver's or front
passenger's central door locking
switch has been depressed to lock
the doors.
o If the door is locked/unlocked multiple
times in rapid succession with either
the vehicle key or door lock switch,
the system may stop operating temporarily in order to protect the circuit
and prevent damage to system components.
!
WARNING:
Be careful not to pull the inside door
handle while driving. If you pull the inside door handle, the door can be opened
and you may be ejected from the vehicle and can be injured or killed.

FEATURES OF YOUR HYUNDAI
1
10
D050400BEN-EU
Auto door lock/unlock feature
(If Installed)
o All doors will be automatically locked
when shifting the transaxle shift lever
out of P(Park).
o All doors will be automatically unlocked
when shifting the transaxle shift lever
into P(Park).
NOTE:
An authorized Hyundai dealer can activate or deactivate some auto door lock/
unlock features as follows;
o Speed sensing auto door locking
o Auto door unlock by using the driver's
door lock button
o Auto door unlock when the ignition
key is removed from the ignition
switch
o Auto door lock/unlock when shifting
the transaxle shift lever out of P(Park)
or into P (Park)
If you want to activate or deactivate
some auto door lock/unlock features,
consult an authorized Hyundai dealer.
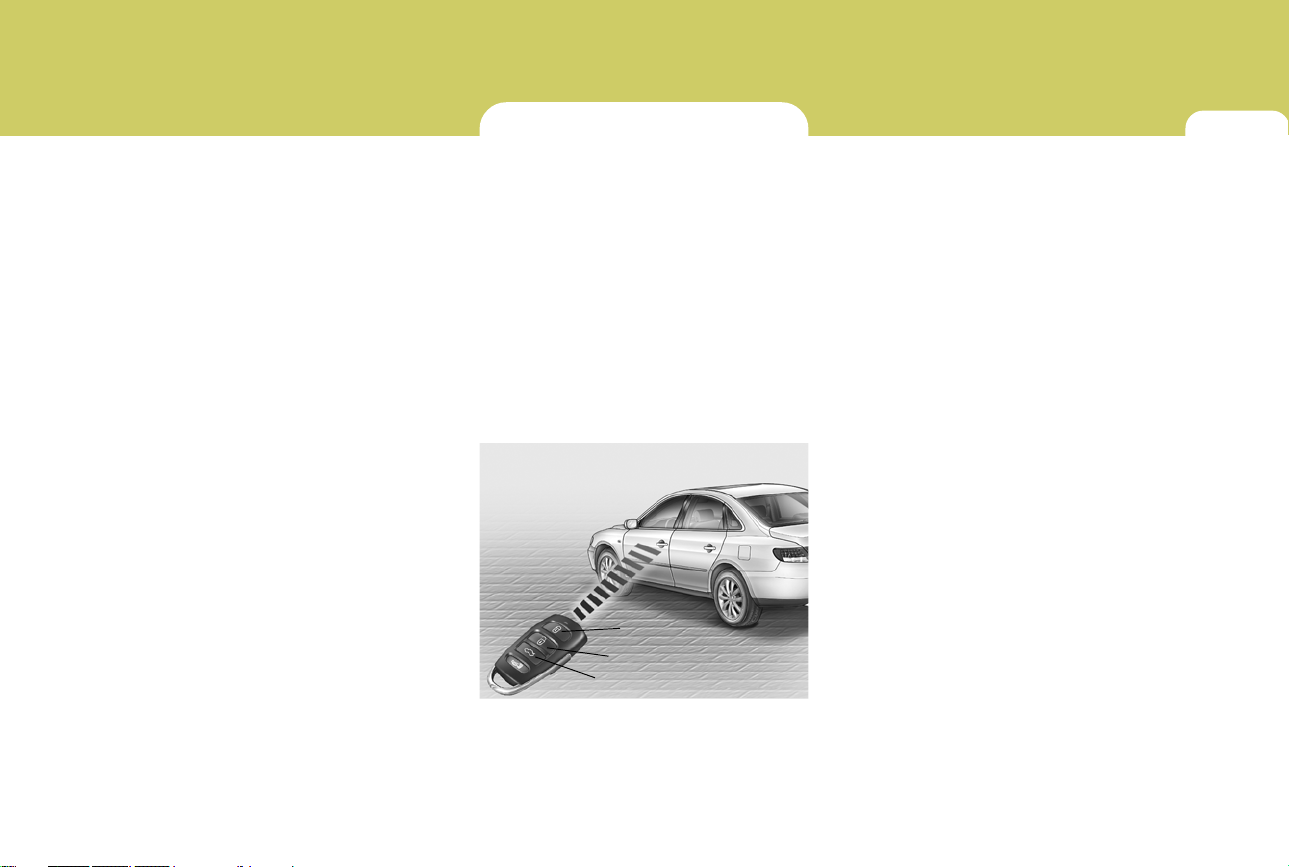
B070F02NF-AAT
KEYLESS ENTRY SYSTEM
NOTE:
This device complies with Part 15 of the
FCC rules. Operation is subject to the
following two conditions:
(1) This device may not cause harmful
interference, and (2) this device must
accept any interference received, including interference that may cause
undesired operation.
!
CAUTION:
Changes or modifications not expressly
approved by the party responsible for
compliance could void the user's authority to operate the equipment.
Locking doors
1. Close all doors.
2. Push the "LOCK (
transmitter.
3. At the same time, all doors lock and the
turn signal lights will blink once to indicate that the system is armed.
)" button on the
Unlocking doors
1. Push the "UNLOCK ( )" button on the
transmitter.
2. At the same time, the driver's door unlocks and the turn signal lights will blink
twice to indicate that the system is disarmed.
NOTE:
If you wish to unlock all the doors, press
the "UNLOCK" button on the transmitter
again within 4 seconds.
Releasing the trunk lid
Push the trunk lid release button ( ) on
the transmitter for longer than 1 second.
THEFT-ALARM SYSTEM
FEATURES OF YOUR HYUNDAI
1
11
NOTE:
The transmitter will not work if any of
following occur:
- The ignition key is in ignition switch.
- You exceed the operating distance
limit (10 m).
- The battery in the transmitter is weak.
- Other vehicles or objects may be
blocking the signal.
- The weather is extremely cold.
- The transmitter is close to a radio
transmitter such as a radio station or
an airport which can interfere with
normal operation of the transmitter.
When the transmitter does not work
correctly, open and close the door with
the ignition key. If you have a problem
with the transmitter, contact an authorized Hyundai Dealer.
NOTE:
Keep the transmitter away from water or
any liquid. If the keyless entry system is
inoperative due to exposure to water or
liquids, it will not be covered by your
manufacturer vehicle warranty.
B070A01A-AAT
This system is designed to provide protection from unauthorized entry into the car.
This system is operated in three stages :
the first is the "Armed" stage, the second is
the "Alarm" stage and the third is the "Disarmed" stage. If triggered, the system provides an audible alarm with blinking of the
turn signal lights.
B070B01TG-AAT
Armed Stage
Lock
Unlock
Trunk Unlock
Park the car and stop the engine. Arm the
system as described below.
B070B02TG-A
1) Remove the ignition key from the ignition switch.
2) Make sure that the engine hood and
trunk lid are closed and latched.
3) Lock the doors using the transmitter of
the keyless entry system or lock the
driver's door using the key after closing
the all doors.
If the steps are completed as above, the
security LED lamp on the passenger’s
crash pad will illuminate for about 30 seconds, and then the lamp will blink continuously when the system is entered into the
armed stage. The turn signal lights will
blink and audible alarm will sound once to
indicate that the system is armed.
NOTE:
1) If any door, trunk lid or engine hood
remains open, the system will not be
armed.
2) If this happens, rearm the system as
previously described.

FEATURES OF YOUR HYUNDAI
1
12
NOTE:
Do not arm the system until all passengers have left the car. If the system is
armed while a passenger(s) remains in
the car, the alarm may be activated when
the remaining passenger(s) leaves the
car.
B070C02TG-AAT
Alarm Stage
B070C01TG-A
The alarm will be activated if any of the
following occurs while the car is parked
and the system is armed.
1) A front or rear door is opened without
using the transmitter or the ignition key.
2) The trunk lid is opened without using
the transmitter or the ignition key.
3) The engine hood is opened.
The alarm horn will sound and the turn
signal lights will blink continuously for 27
seconds (This will repeat 3 times). To turn
off the system, unlock the door or trunk lid
with the transmitter or the ignition key.
B070D01TG-AAT
Disarmed Stage
The system can be disarmed by using the
transmitter or the ignition key.
Only the driver's door is unlocked by depressing once the "UNLOCK (
)" button
on the transmitter. If you wish to unlock all
doors, press the "UNLOCK (
)" button on
the transmitter again within 4 seconds.
Whenever the step above is completed,
the turn signal lights will blink and audible
alarm will sound twice to indicate that the
system is disarmed.
NOTE:
Although the system is disarmed, the
security LED lamp will blink continuously. Insert the key in the ignition key
cylinder to turn off the lamp.
If any door, trunk lid or engine hood is not
opened or the ignition key is not inserted
in the ignition switch within 30 seconds,
the system will be rearmed.
FEATURES OF YOUR HYUNDAI
1
13
NOTE:
When the system is disarmed while the
"DOOR" button for the interior light switch
is depressed, the interior light will illuminate for 30 seconds.
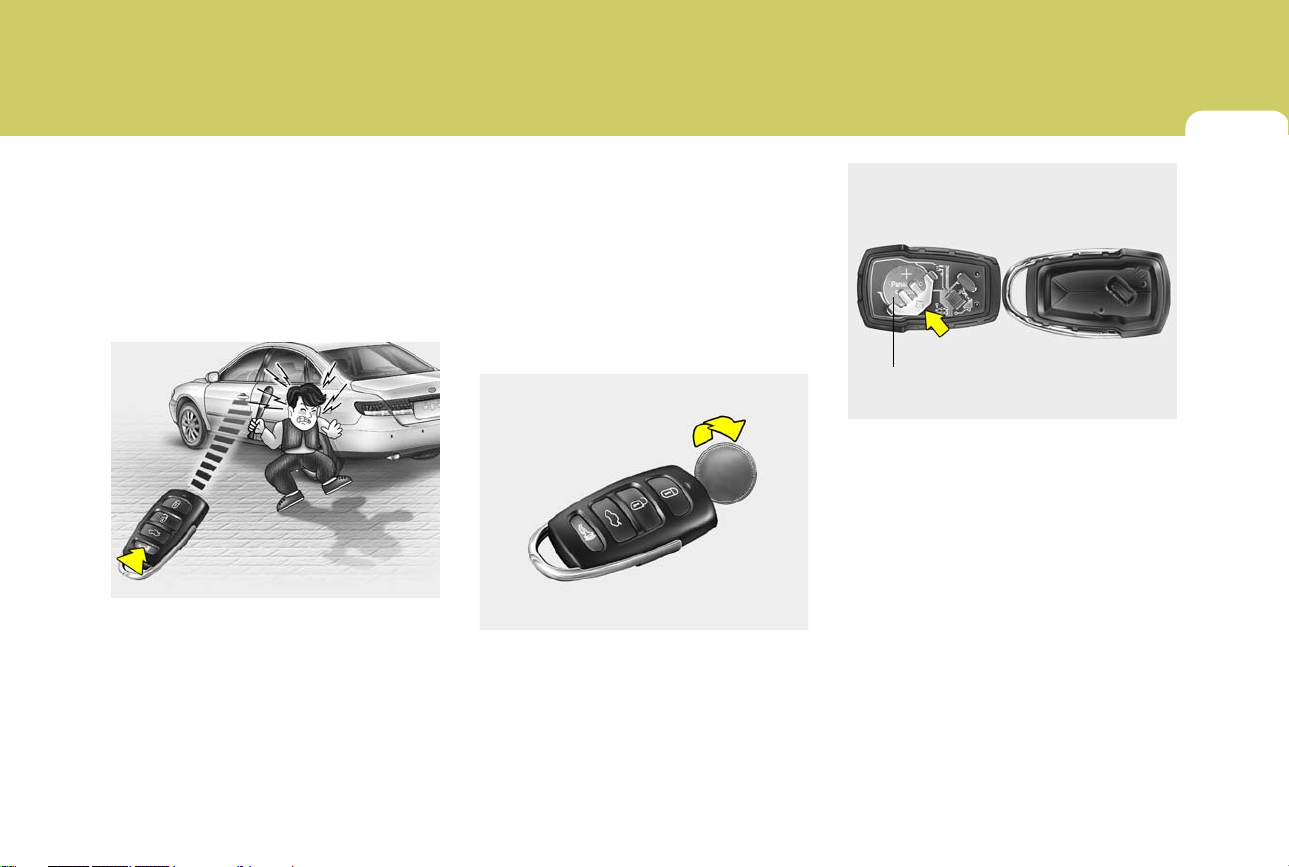
B070E01TG-AAT
Panic Warning
B070E04TG-A
1. Push the "PANIC" button on the transmitter.
2. At the same time, the alarm horn will
sound and the turn signal lights will
blink continuously for 30 seconds.
3. To turn off the system, push the "PANIC"
button again on the transmitter.
B070E01NF-GAT
Replacing the battery
When the transmitter's battery begins to
get weak, it may take several pushes on
the button to lock or unlock the doors, and
the LED will not light. Replace the battery
as soon as possible.
Battery type : CR2032
Replacement instructions:
Battery
HTG2006
2. Remove the old battery from the case
and note the polarity. Make sure the
polarity of the new battery is the
same(+side facing up), then insert it in
the transmitter.
B070E03TG-A
1. Carefully separate the case with a coin
as shown in the illustration.

FEATURES OF YOUR HYUNDAI
1
WINDOWS
14
B060D01NF-GAT
1. Driver's door power window switch
2. Front passenger's door power window
switch
3. Rear passenger's door power window
switch (left side)
4. Rear passenger's door power window
switch (right side)
5. Window lock switch
B060D01TG

FEATURES OF YOUR HYUNDAI
1
15
B060A01TG-GAT
POWER WINDOWS
Open
The power windows operate when the
ignition key is in the "ON" position. The
main switches are located on the driver's
armrest and control the front and rear windows on both sides of the vehicle. The
windows may be opened by depressing
the appropriate window switch and closed
by pulling up the switch. To open the window on the driver's side, press the switch
halfway down. The window moves as long
as the switch is operated.
Close
B060A01TG
Front Auto Up/Down Windows
Driver's side
Front passenger's side
B060A02TG
The auto up/down window is controlled by
the window switch on the driver's and front
passenger's armrest.
To fully open the window automatically,
press the switch fully down. To fully close
the window automatically, pull the switch
fully up. In automatic operation, the window will fully open or close even if you let
go of the switch. To stop the window at the
desired position while the window is in
operation, pull up or depress and release
the switch to the opposite direction of the
movement.
NOTE:
If the battery has been recharged or
disconnected, the auto up/down window
system must be reset as follows;
1. Turn the ignition key to "ON" position.
2. Close each window and continue pulling up on each power window switch
for at least 0.5 second after the window is completely closed.
If the auto up/down window is not reset,
the feature may not operate properly.
FEATURES OF YOUR HYUNDAI
1
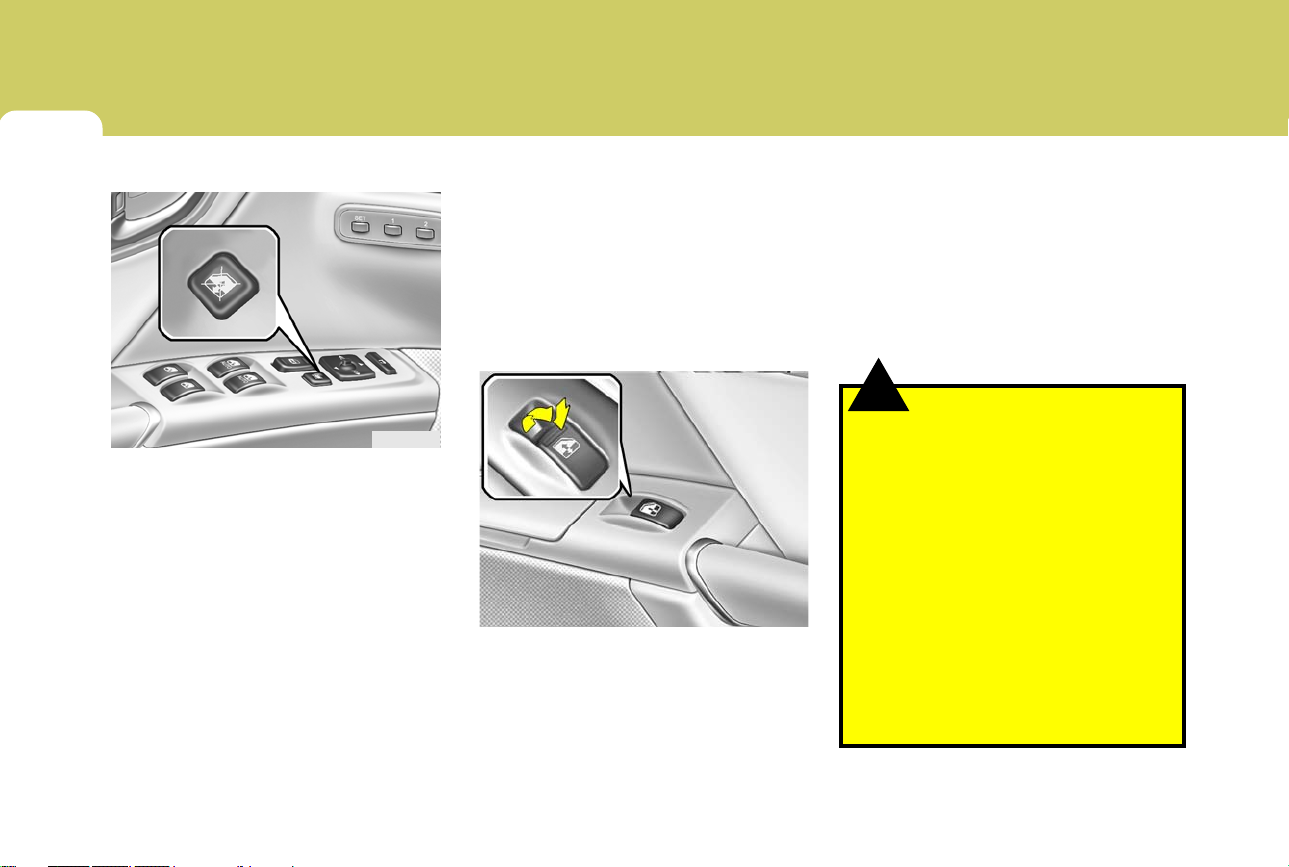
16
Window Lock
B060A04TG
In order to prevent operation of the passenger front and rear windows, a window
lock switch is provided on the armrest of
the driver's door. To disable the power
windows, press the window lock switch. To
revert to normal operation, press the window lock switch a second time.
NOTE:
The power windows can be operated for
30 seconds after the ignition key is
turned to the "ACC" or "LOCK" positions, or removed from the ignition
switch.
If the front doors are opened during this
30 second period, the power windows
can no longer be operated without the
ignition key turned to the "ON" position.
Close
Open
B060A03TG
B060C02TG-AAT
Front Window Automatic Reverse
Feature
If the upward movement of the window is
blocked by an object or part of the body, the
window will detect the resistance and will
stop upward movement. The window will
then lower approximately 11.8 in.(30cm)
to allow the object to be cleared.
!
WARNING:
o The automatic reverse feature for the
front window is only active when the
“auto up” feature is used by fully pulling up the switch. The automatic reverse feature will not operate if the
window is raised using the halfway
position on the power window switch.
o Always check for obstructions be-
fore raising any window to avoid injuries or vehicle damage. If an object
less than 0.16 in. (4 mm) in diameter
is caught between the window glass
and the upper window channel, the
automatic reverse window may not
detect the resistance and will not stop
and reverse direction.
 Loading...