

Page 1

User’s Guide
Kia UVO Audio System
1
Page 2

TABLE OF CONTENTS
TABLE OF CONTENTS .................................................................................................................................
RECOMMENDATION .................................................................................................................................
WELCOME..................................................................................................................................................
WARNING & SAFETY INFORMATION .....................................................................................................
Safety Symbols ..................................................................................................................................
FCC Information ................................................................................................................................
Canadian Compliance........................................................................................................................
Safety Precautions ............................................................................................................................
COPYRIGHTS & TRADEMARKS................................................................................................................
PART I. GETTING STARTED.....................................................................................................................
1. Main Features................................................................................................................................
2. Controls and Features...................................................................................................................
1. Head Unit ................................................................................................................................
2. Steering Wheel .......................................................................................................................
3. Basic Features ...............................................................................................................................
1. System Power.........................................................................................................................
Turning System Power On ..................................................................................................
2
12
13
14
14
14
15
15
16
17
17
17
17
19
21
21
21
Turning System Power Off..................................................................................................
2. Turn Display On and Off ........................................................................................................
3. Select Display Language........................................................................................................
4. Resetting and Initializing UVO..............................................................................................
Resetting the system ..........................................................................................................
22
22
24
25
25
2
Page 3

Initializing the system ........................................................................................................ 26
4. Sound and Display Settings .........................................................................................................
1. Sound Settings .......................................................................................................................
FADER/BALANCE .................................................................................................................
TONE .....................................................................................................................................
Touch Screen Beep ..............................................................................................................
Speed Dependent Volume Control .....................................................................................
Variable EQ (Optional) ........................................................................................................
Power Bass (Optional) ........................................................................................................
2. Display Settings......................................................................................................................
Setting Brightness ...............................................................................................................
Automatic Brightness Control......................................................................................
Manual Brightness Control...........................................................................................
Turning Display On and Off .......................................................................................................
Turn Text Scroll On and Off .......................................................................................................
PART II. AUDIO FEATURES .....................................................................................................................
1. FM/AM MODE .......................................................................................................................................
FM/AM Mode Screens and Features .........................................................................................
27
27
28
29
30
30
31
32
33
34
34
35
36
37
40
40
40
Listening to the FM/AM radio....................................................................................................
Selecting a broadcast frequency........................................................................................
Selecting through SEEK................................................................................................
Selecting through manual search ...............................................................................
Selecting through preset..............................................................................................
Storing presets.....................................................................................................................
Scanning FM/AM broadcast frequencies...........................................................................
Preset Scan...........................................................................................................................
41
42
42
42
42
43
44
44
3
Page 4

Listening to HD radio........................................................................................................... 44
Viewing FM/AM Station information .................................................................................
2. SIRIUS MODE.......................................................................................................................................
SIRIUS Mode Screen and Features...........................................................................................
Listening to the SIRIUS radio ...................................................................................................
Selecting a SIRIUS channel................................................................................................
Selecting through SEEK................................................................................................
Selecting through manual search ...............................................................................
Selecting through preset..............................................................................................
Selecting through channel search...............................................................................
Selecting through SIRIUS category list......................................................................
Using Skip.............................................................................................................................
Storing preset ......................................................................................................................
Viewing SIRIUS channel information................................................................................
3. MEDIA MODE........................................................................................................................................
Common Features ......................................................................................................................
Play/Pause ...........................................................................................................................
REW/FF.................................................................................................................................
45
45
45
46
46
46
47
47
48
48
49
50
51
52
52
53
53
Jump .....................................................................................................................................
Using Repeat........................................................................................................................
Using Shuffle........................................................................................................................
1. AUDIO CD MODE ...........................................................................................................................
Cautions upon handling Audio CDs...........................................................................................
Precautions upon handling discs........................................................................................
For safe and efficient operation .........................................................................................
Supported disc format.........................................................................................................
54
54
54
55
55
55
55
56
4
Page 5

Disc/content format and compatibility ............................................................................. 56
AUDIO CD Mode Screen and Features......................................................................................
Inserting/Ejecting a Disc...........................................................................................................
Inserting a Disc....................................................................................................................
Ejecting a Disc......................................................................................................................
Listening to an Audio CD ...........................................................................................................
Selecting a CD track ...................................................................................................................
Selecting through Track Up/Down ....................................................................................
Selecting through manual search ......................................................................................
Creating a Virtual CD..................................................................................................................
2. MP3 CD MODE ...............................................................................................................................
Cautions upon handling MP3 CD...............................................................................................
MP3 CD Mode Screen and Features ..........................................................................................
Listening to a MP3 CD ................................................................................................................
Selecting an MP3 CD song .........................................................................................................
Selecting through song Up/Down......................................................................................
Selecting through manual search ......................................................................................
Selecting from MP3 list .......................................................................................................
57
58
58
59
59
60
60
60
60
62
62
63
63
64
64
64
64
by Artist, Albums, Genres, Songs, Composers, .................................................................
Explore CD...................................................................................................................................
Viewing song information .........................................................................................................
Copying songs into My Music ....................................................................................................
Copying the current song....................................................................................................
Copying songs from list.......................................................................................................
3. USB MODE......................................................................................................................................
Cautions upon handling USB MP3.............................................................................................
65
67
67
68
68
69
71
71
5
Page 6

Precautions upon handling USB................................................................................................ 72
Connecting your USB device .....................................................................................................
USB Mode Screen and Features ................................................................................................
Listening to music songs ...........................................................................................................
Selecting music songs................................................................................................................
Selecting through song up/down ......................................................................................
Selecting through manual search ......................................................................................
Selecting from the playlist..................................................................................................
by Folder, Artist, Albums, Genres, Songs, Composers ..................................................... 75
Explore USB.................................................................................................................................
Viewing song information .........................................................................................................
Copying song into My Music ......................................................................................................
Copying the current song....................................................................................................
Copying songs from list.......................................................................................................
4. iPod MODE .....................................................................................................................................
About iPod...................................................................................................................................
Trademark ............................................................................................................................
Connecting your iPod Device..............................................................................................
73
73
74
74
74
75
75
77
78
79
79
80
82
82
82
82
Supported iPod devices.......................................................................................................
iPod Mode Screen and Features................................................................................................
Listening to your iPod ................................................................................................................
Selecting iPod music ..................................................................................................................
Selecting through song up/down ......................................................................................
Selecting through manual search ......................................................................................
Selecting from the playlist..................................................................................................
By Artist, Albums, Genres, Songs, Podcasts, Co
mposers, Audiobooks........................... 85
82
83
83
84
84
84
84
6
Page 7

Viewing song information ......................................................................................................... 86
5. zune MODE.....................................................................................................................................
About zune ..................................................................................................................................
Trademark ............................................................................................................................
Connecting your zune Device .............................................................................................
zune Mode Screen and Features ...............................................................................................
Listening to your zune ...............................................................................................................
Selecting zune music..................................................................................................................
Selecting through song up/down ......................................................................................
Selecting through manual search ......................................................................................
Selecting from the playlist..................................................................................................
By Artist, Albums, Genres, Songs, Composers..................................................................
Viewing song information .........................................................................................................
6. AUX MODE......................................................................................................................................
AUX Mode Screen .......................................................................................................................
Connecting an AUX media device .............................................................................................
Listening to AUX media..............................................................................................................
7. BT AUDIO MODE............................................................................................................................
87
87
87
87
88
88
89
89
89
89
90
91
93
93
94
94
94
BT Mode Screen and Features...................................................................................................
Listening to music from your Bluetooth device.......................................................................
Selecting a song .........................................................................................................................
REW/FF a song ...........................................................................................................................
4. JUKEBOX MODE....................................................................................................................................
Virtual CD Mode.................................................................................................................................
Virtual CD Mode Screen and Features ......................................................................................
Listening to a Virtual CD............................................................................................................
95
95
96
96
97
97
98
98
7
Page 8

Selecting a Virtual CD ................................................................................................................ 99
Listening to all Virtual CDs ......................................................................................................
My Music Mode ................................................................................................................................
My Music Mode Screen and Features......................................................................................
Listening to My Music ..............................................................................................................
Selecting My Music...................................................................................................................
Selecting through song up/down ....................................................................................
Selecting through manual search ....................................................................................
Selecting from the playlist................................................................................................
by Artist, Album, Genres, Songs, Composers..................................................................
Adding Favorites.......................................................................................................................
Playing Favorites ......................................................................................................................
Memory Management .....................................................................................................................
Checking System Information.................................................................................................
Deleting Virtual CDs and My Music................................................................................................
Deleting Virtual CDs .................................................................................................................
Deleting My Music ....................................................................................................................
Deleting all files........................................................................................................................
100
100
100
101
101
101
102
102
103
104
105
107
107
108
108
109
110
PART III. PHONE FEATURES .................................................................................................................
1. Using your Bluetooth Handsfree system ..................................................................................
2. Smart driving practices ..............................................................................................................
3. Pairing your handset device to the handsfree system ............................................................ 113
Pairing a Bluetooth device for the first time .........................................................................
Deleting a paired handset device............................................................................................
Connecting a handset device ..................................................................................................
Disconnecting a handset device..............................................................................................
112
112
112
113
115
116
118
8
Page 9

Setting Priority ......................................................................................................................... 119
4. Using the phone features ...........................................................................................................
Phone Mode Screens and Features.........................................................................................
When a mobile phone is connected .................................................................................
When making a call ...........................................................................................................
When receiving an incoming call .....................................................................................
When on a call....................................................................................................................
When there is a call waiting .............................................................................................
Answering an incoming call.....................................................................................................
Rejecting an incoming call ......................................................................................................
Call waiting ...............................................................................................................................
Placing a call .............................................................................................................................
by dialing a number...........................................................................................................
by contact list.....................................................................................................................
By recent calls....................................................................................................................
Contact list.......................................................................................................................................
Downloading contact list (from mobile phone).....................................................................
Searching your contacts ..........................................................................................................
120
120
120
121
122
122
123
125
125
126
126
126
128
129
130
130
132
by name .............................................................................................................................. 132
by number ..........................................................................................................................
Checking missed calls .....................................................................................................................
SMS...................................................................................................................................................
Downloading SMS messages (from mobile phone)............................................................... 138
Checking an SMS message ......................................................................................................
Sending an SMS message (Custom Messages)......................................................................
Editing Custom Messages ........................................................................................................
134
136
138
138
139
139
9
Page 10

Using text to speech feature ................................................................................................... 139
Switching the call between handsfree and handset device ................................................. 140
Transferring the handsfree call to your Handset device ...................................................... 140
Transferring a call on your Handset device to handsfree..................................................... 141
5. Phone settings.............................................................................................................................
Setting Phone Volume..............................................................................................................
Turn Streaming Audio On and Off...........................................................................................
Contacts Sync ...........................................................................................................................
SMS ............................................................................................................................................
Changing passkey.....................................................................................................................
PART IV. VOICE COMMANDS ................................................................................................................
1. Conditions for voice command system .....................................................................................
2. Operating Voice Command.........................................................................................................
Using Voice Command .............................................................................................................
Voice Command Help ...............................................................................................................
Turning Command Feedback On and Off ...............................................................................
Adjusting Voice Command Volume.........................................................................................
3. Speaker Adaptation ....................................................................................................................
Creating a Voice Profile ...........................................................................................................
Selecting a Previous Voice Profile ..........................................................................................
Deleting a Voice Profile............................................................................................................
142
142
142
143
144
145
147
147
147
148
148
149
150
151
152
154
156
4. Voice Command List ...................................................................................................................
Command List – General Commands......................................................................................
Command List – Audio Commands .........................................................................................
1. FM/AM Radio ........................................................................................................................
2. SIRIUS...................................................................................................................................
157
158
158
158
158
10
Page 11

3. MEDIA.................................................................................................................................... 158
4. Jukebox .................................................................................................................................
Command List – Phone Commands ........................................................................................
PART V. REAR VIEW CAMERA ...............................................................................................................
1. About Rear View Camera ...........................................................................................................
APPENDIX ...............................................................................................................................................
PRODUCT SPECIFICATION....................................................................................................................
TROUBLESHOOTING .............................................................................................................................. 163
160
161
162
162
163
163
11
Page 12

RECOMMENDATION
Please read this manual to get the full benefit of the system.
These operating instructions are designed to ensure that you can operate the Kia UVO Audio System in a safe and convenient way.
We recommend that this manual be kept in the car. That way, it will be easier for you to find information in case of an emergency.
If you cannot find the information you need in this manual or in the "Troubleshooting” section, your local authorized retailer will be pleased to clarify any
inquiries you may have with the system or operations.
Kia Motors recommends the use of only parts and accessories that have been tested and approved by Kia Motors in terms of function, safety and suitability.
12
Page 13

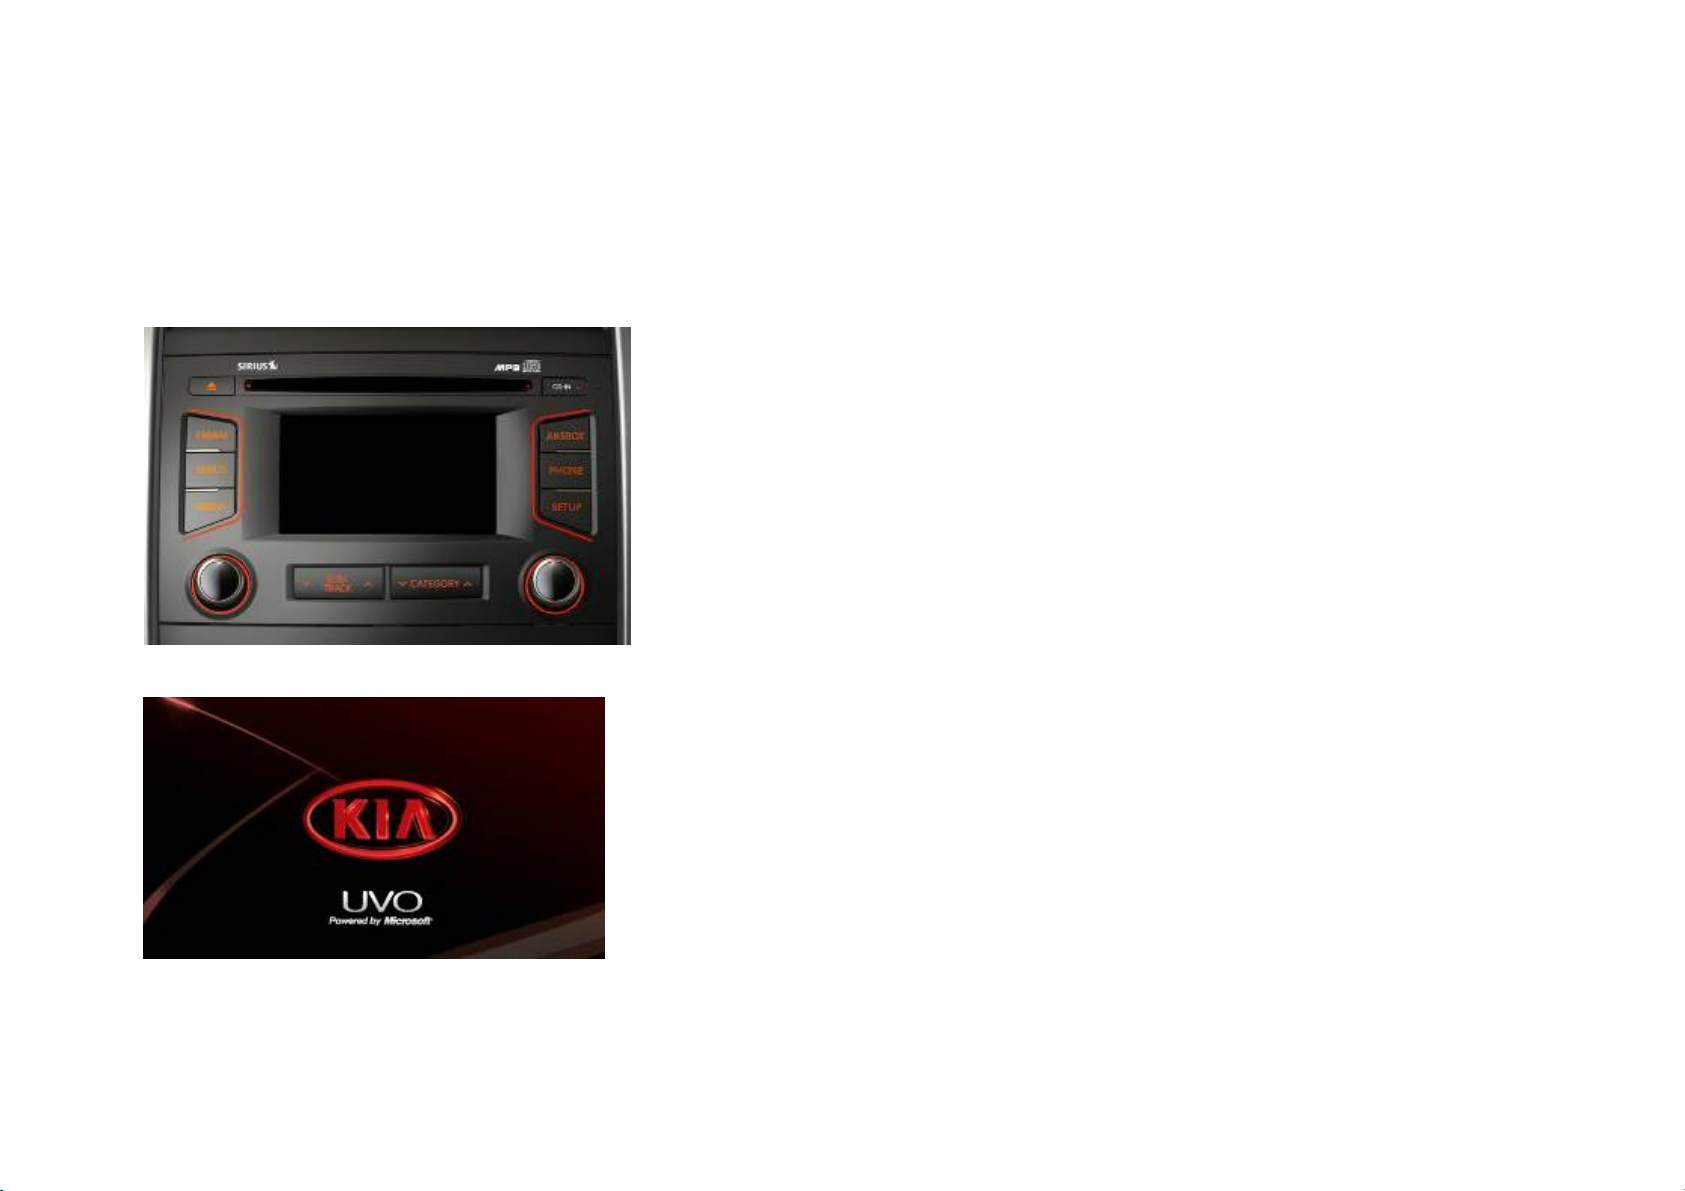
WELCOME
Congratulations on the Purchase of your new Kia UVO Audio System!
Your new Kia UVO Audio System allows you to enjoy various audio and multimedia features through the main audio system.
For the latest information about this product and other Kia products and accessories, visit http:www.kia.co.kr.
The Kia UVO Audio System offers:
Introduce general features here (for information priority, discuss with HY)
13
Page 14

WARNING & SAFETY INFORMATION
Safety Symbols
Warning: When encountering this symbol in the manual, you must follow these recommendations to avoid irreparable damage to your car,
system or connected devices or to avoid accidents with injuries or death.
Caution:
car, system or connected devices or to avoid injury.
When encountering this symbol in the manual, you must be very careful and follow the recommendations to avoid damage to your
Note: Information which you must be aware of or recommendations for your convenience and for optimal operation of your system.
FCC Information
This device complies with part 15 of the FCC Rules. Operation is subject to the following two conditions:
(1) This device may not cause harmful interference, and
(2) This device must accept any interference received, including interference that may
cause undesired operation.
FCC notification to users
This equipment has been tested and found to comply with the limits for a CLASS B digital device, pursuant to Part 15 of the FCC Rules. These limits are
designed to provide reasonable protection against harmful interference when the equipment is operated in a commercial environment. This equipment
generates, uses, and can radiate radio frequency energy and, if not installed and used in accordance with the instructions, may cause harmful interference to
14 15
Page 15

radio communications. However, there is no guarantee that interference will not occur in a particular installation. If this equipment does cause harmful
interference to radio or television reception, which can be determined by turning the equipment off and on, the user is encouraged to try to correct the
interference by one or more of the following measures:
Caution
Any changes or modifications made to this device that are not expressly approved by Kia Motors may void the user’s authority to operate the equipment.
Canadian Compliance
Update later
Safety Precautions
Warning
Read and understand all instructions before you use the system. If damage is caused by failure to follow instructions, the warranty will not apply.
Do not operate the audio system while driving.
Do not dismantle, assemble, or modify the AV system.
Do not stare at the screen for long periods of time while driving.
To reduce the risk of traffic accidents, do not watch the screen when driving.
Set the volume to a level which allows you to be aware of external conditions.
Use only the supplied mounting hardware for safe operation.
Caution
Do not operate the AV system for prolonged periods of time with the vehicle ignition in ACC. Such operations may lead to battery discharge.
Do not expose the device to rain or water.
Never insert foreign objects into the slots or other openings on the device.
Do not cause severe shock to the device. Direct pressure to the front side of the monitor may cause damage to the LCD or touch panel.
In case of product malfunction, contact your place of purchase or service center.
When cleaning the touch screen, make sure to turn off the device and use a dry and smooth cloth. Never use abrasive materials, chemical cloths, or
solvents, such as alcohol, ammonia, benzene, thinners, etc. Such materials may damage the touch panel or cause color and quality deterioration.
Apply relevant warning / caution images
Page 16

COPYRIGHTS & TRADEMARKS
© 2010 Kia Motors. All Rights Reserved.
- Copyright / Trademark information
- Relevant logos, trademarks, related descriptions
The making of unauthorized copies of copy-protected material, including computer programs, files, broadcasts and sound recordings, may be an infringement
of copyrights and constitute a criminal offense.
This equipment should not be used for such purposes.
16
Page 17
PART I. GETTING STARTED
1. Main Features
List of Main Features here across all system features
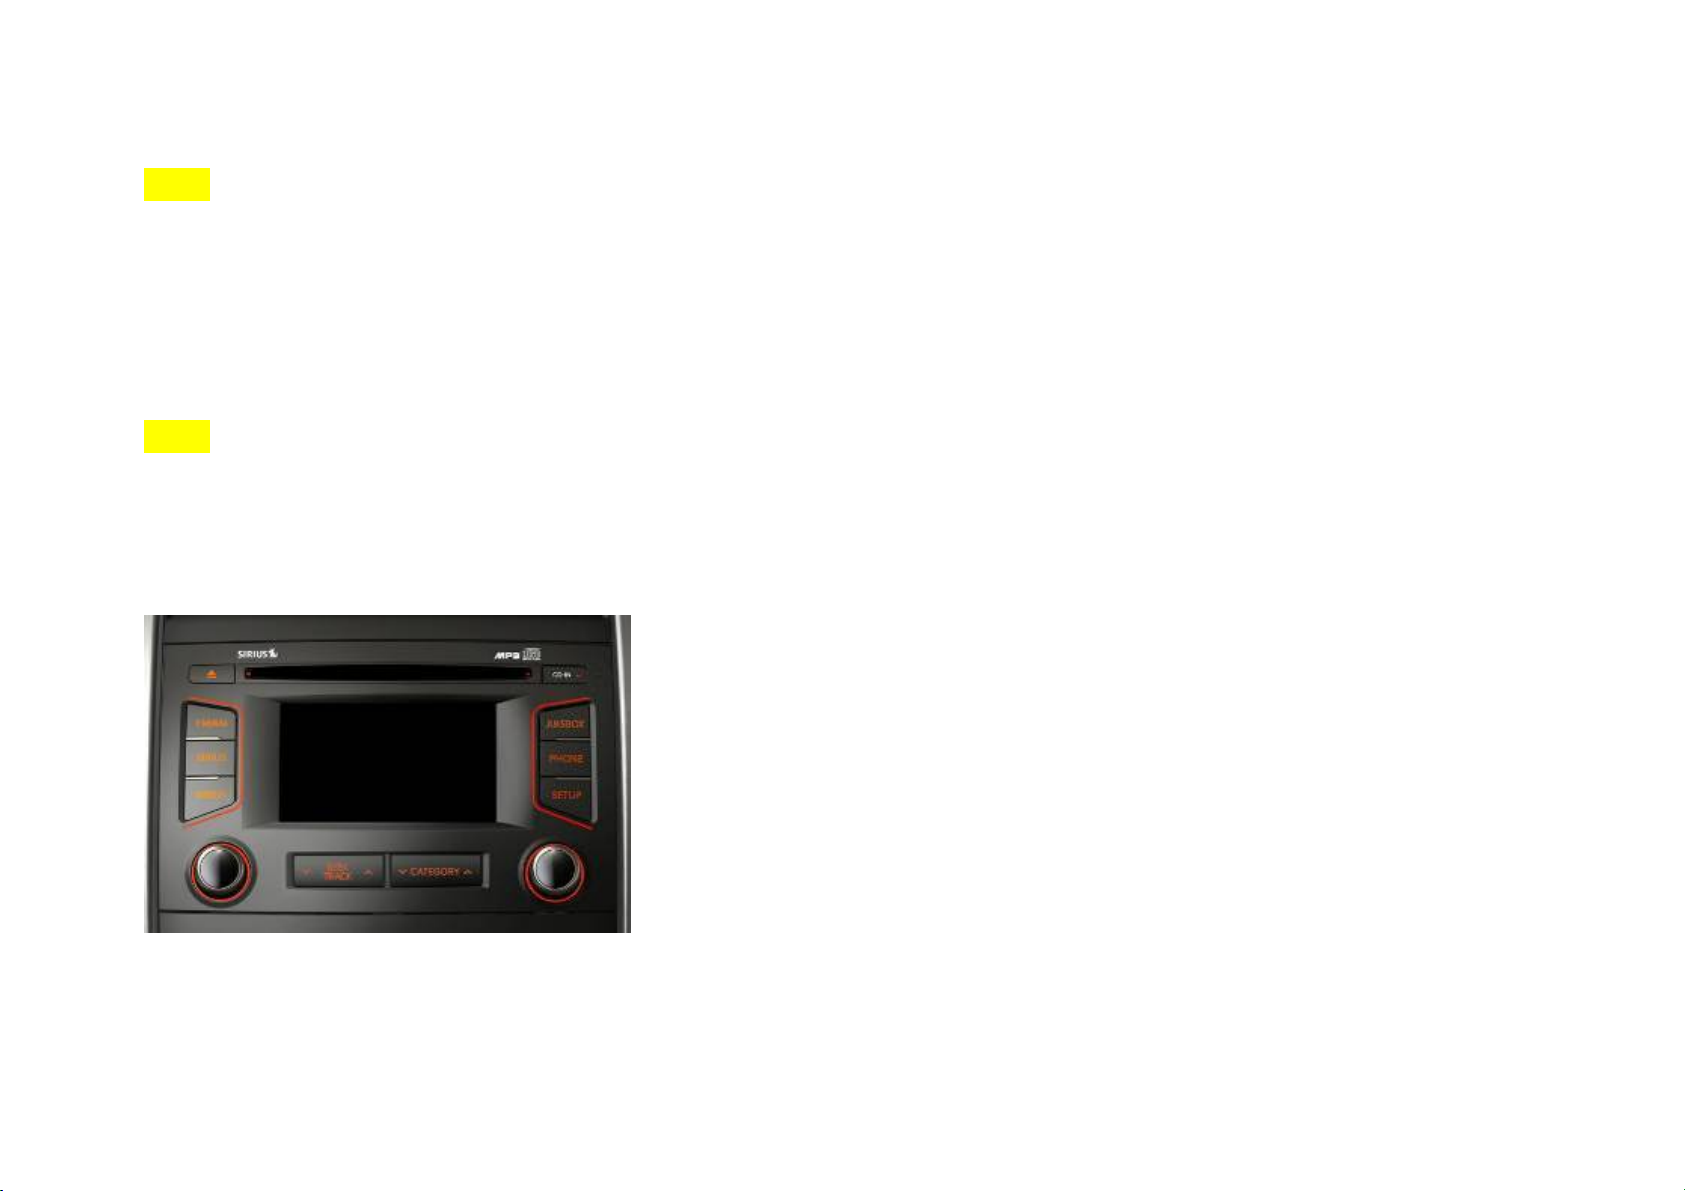
2. Controls and Features
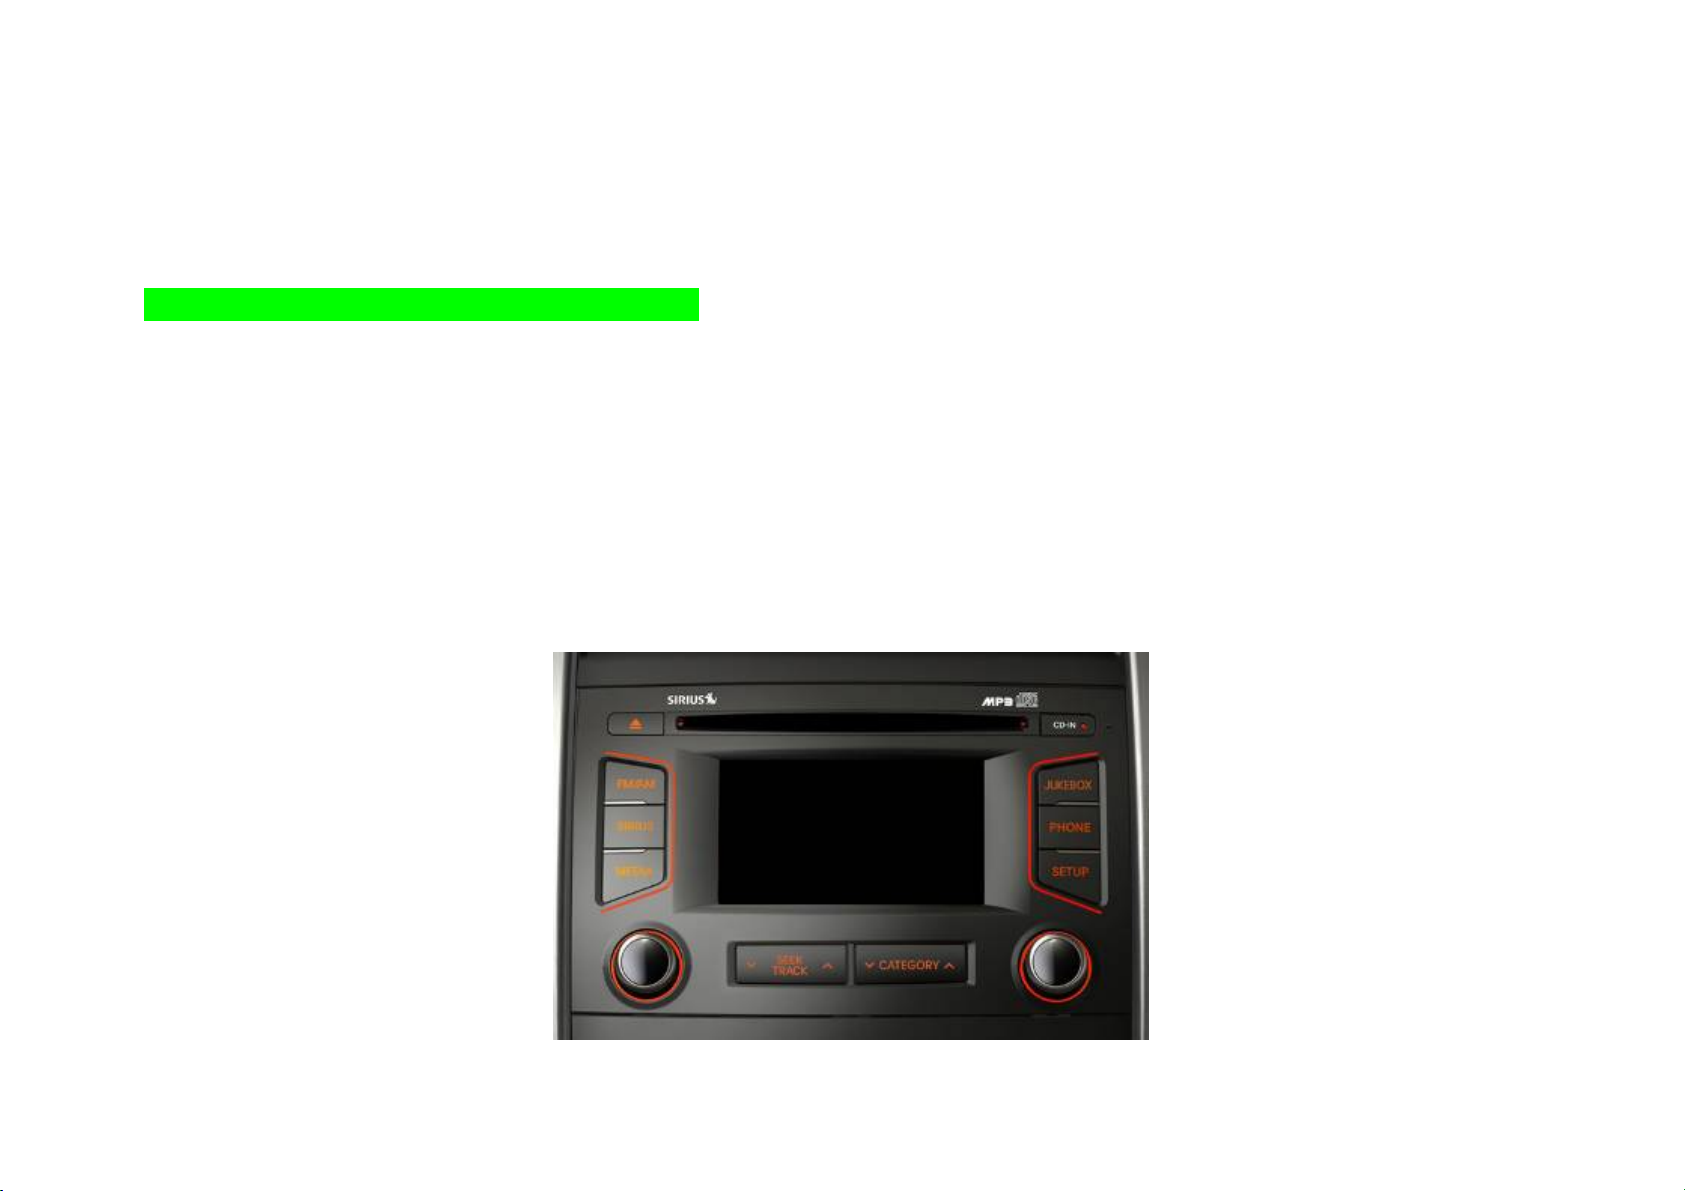
1. Head Unit
17 18
Page 18

Key Feature
(1) DISC EJECT Ejects the inserted disc.
(2) FM/AM Turns on FM/AM mode. Each press of the [FM/AM] key will change the band in
the order of FM -> AM -> FM.
(3) SIRIUS Turns on SIRIUS mode.
(4) MEDIA Turns on MEDIA mode. Each press of the [MEDIA] key will change the mode in
the order of CD -> USB/iPod/zune -> AUX -> BT Audio -> CD.
(5) POWER/VOLUME Push: Turns Power On/Off.
Dial: Turns Volume Up/Down.
(6) ∨SEEK TRACK∧ Short (under 0.8 seconds)
In FM/AM mode, automatically searches and plays the previous or next
frequency.
In SIRIUS mode, automatically searches and plays the previous or next channel.
In MEDIA mode (CD, MP3, USB, IPOD, ZUNE, BT AUDIO), plays the previous or
next track, song, or file
In JUKEBOX mode, plays the previous or next track.
Long (over 0.8 seconds)
In FM/AM mode, quickly moves through the frequencies when the button is
pressed and held. Once released, automatically searches and plays the previous
or next frequency.
In SIRIUS mode, quickly moves to the previous or next channel.
In MEDIA mode (CD, MP3, USB, IPOD, ZUNE, BT AUDIO), REW/FF the current
track, song, or file.
In JUKEBOX mode, REW/FF the current track.
(7) ∨ CATEGORY ∧ In SIRIUS mode, moves to the previous or next SIRIUS category.
(8) TUNE In FM/AM mode, turn the knob to manually search for frequencies. Press the
knob to receive the selected frequency.
In SIRIUS mode, turn the knob to manually search for channels. Press the knob
to receive the selected channel.
In MEDIA mode (CD, MP3, USB, IPOD, ZUNE), turn the knob to manually search
for the previous or next track, song, or file. Press the knob to receive the
selected track, song, or file.
In JUKEBOX mode, turn the knob to manually search for the previous or next
track. Press the knob to receive the selected track.
(9) SETUP Displays SETUP mode.
(8) PHONE Displays Bluetooth Phone mode.
(9) JUKEBOX Displays JUKEBOX mode.
(10) CLOCK Displays Clock setup.
Page 19
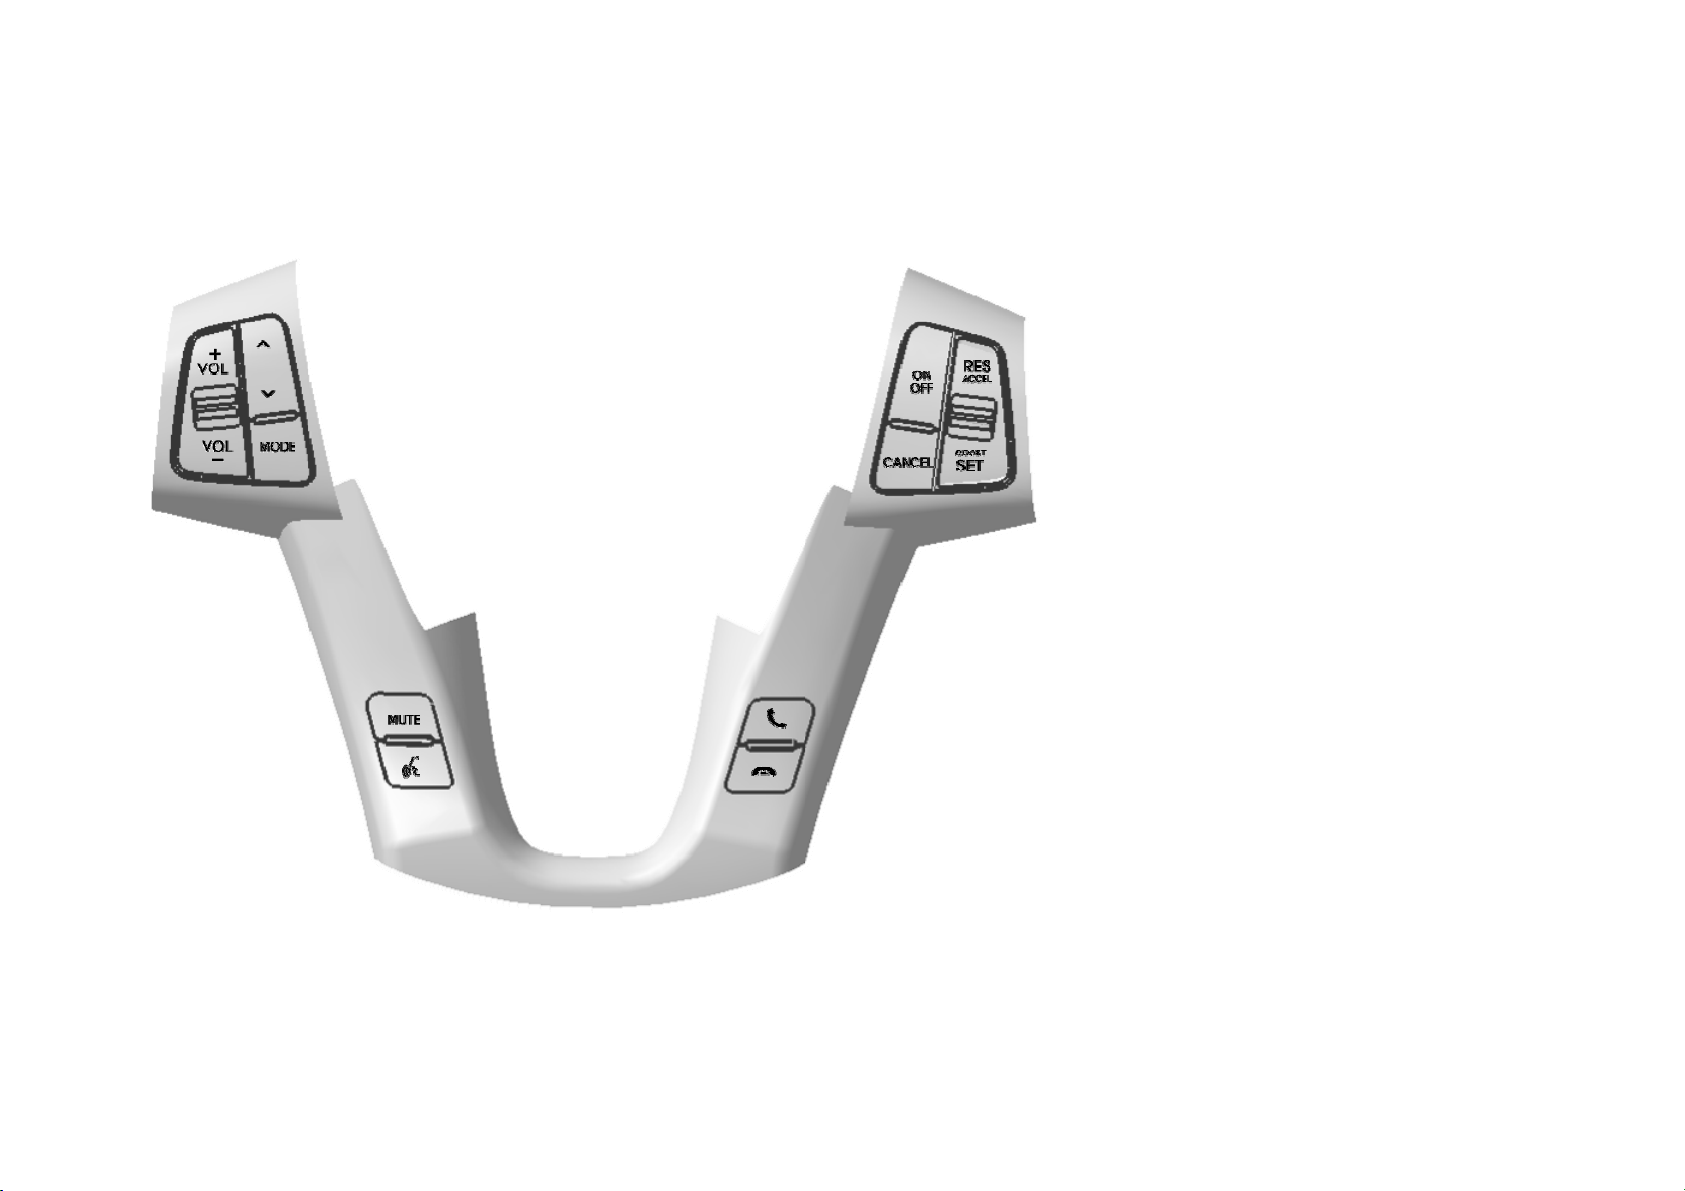
2. Steering Wheel
19 20
Page 20

Key Feature
(2) ∨SEEK TRACK∧ Short (under 0.8 seconds)
In FM/AM mode, automatically searches and plays the previous or next preset
frequency.
In SIRIUS mode, automatically searches and plays the previous or next preset
channel.
In MEDIA mode (CD, MP3, USB, IPOD, ZUNE, BT AUDIO), plays the previous or
next track, song, or file.
In JUKEBOX mode, plays the previous or next track.
Long (over 0.8 seconds)
In FM/AM mode, quickly moves through the frequencies when the button is
pressed and held. Once released, automatically searches and plays the previous
or next frequency.
In SIRIUS mode, quickly moves to the previous or next channel.
In MEDIA mode (CD, MP3, USB, IPOD, ZUNE, BT AUDIO), REW/FF the current
track, song, or file.
In JUKEBOX mode, REW/FF the current track.
(2) + VOLUME - Turns Volume Up/Down.
(3) MODE Changes the mode. Each press will change modes in the order of FM
AM SIRIUS CD USB/iPod/zune AUX BT Audio JUEKBOX (Virtual
CD / My Music) FM.
(4) MUTE Mutes the sound.
(5) Voice Command Short (under 0.8 seconds)
If Voice recognition is off, turns on Voice recognition.
If Voice recognition is on, waits for Voice command.
Long (over 0.8 seconds)
If Voice recognition is on, turns off Voice recognition.
(6) Bluetooth Phone Pressing this key will receive an incoming call. If the Audio is on, the Bluetooth
phone screen will be displayed.
When a SMS message is received, reads back message.
(7) End Bluetooth Phone Pressing this key will reject an incoming call. If pressed during a call, the current
call will be ended.
When a SMS message is received, ignores message.
Page 21
3. Basic Features
1. System Power
Turning System Power On
1. Turn on the ignition.
2. While the system is off, press the [POWER/VOLUME] knob to turn the system on.
3. The system will automatically restore to the most recently played mode. For example, pressing the [POWER/VOLUME] knob will turn on the system and
display FM radio mode if FM mode had been the last operated mode prior to turning off the system.
21
Page 22
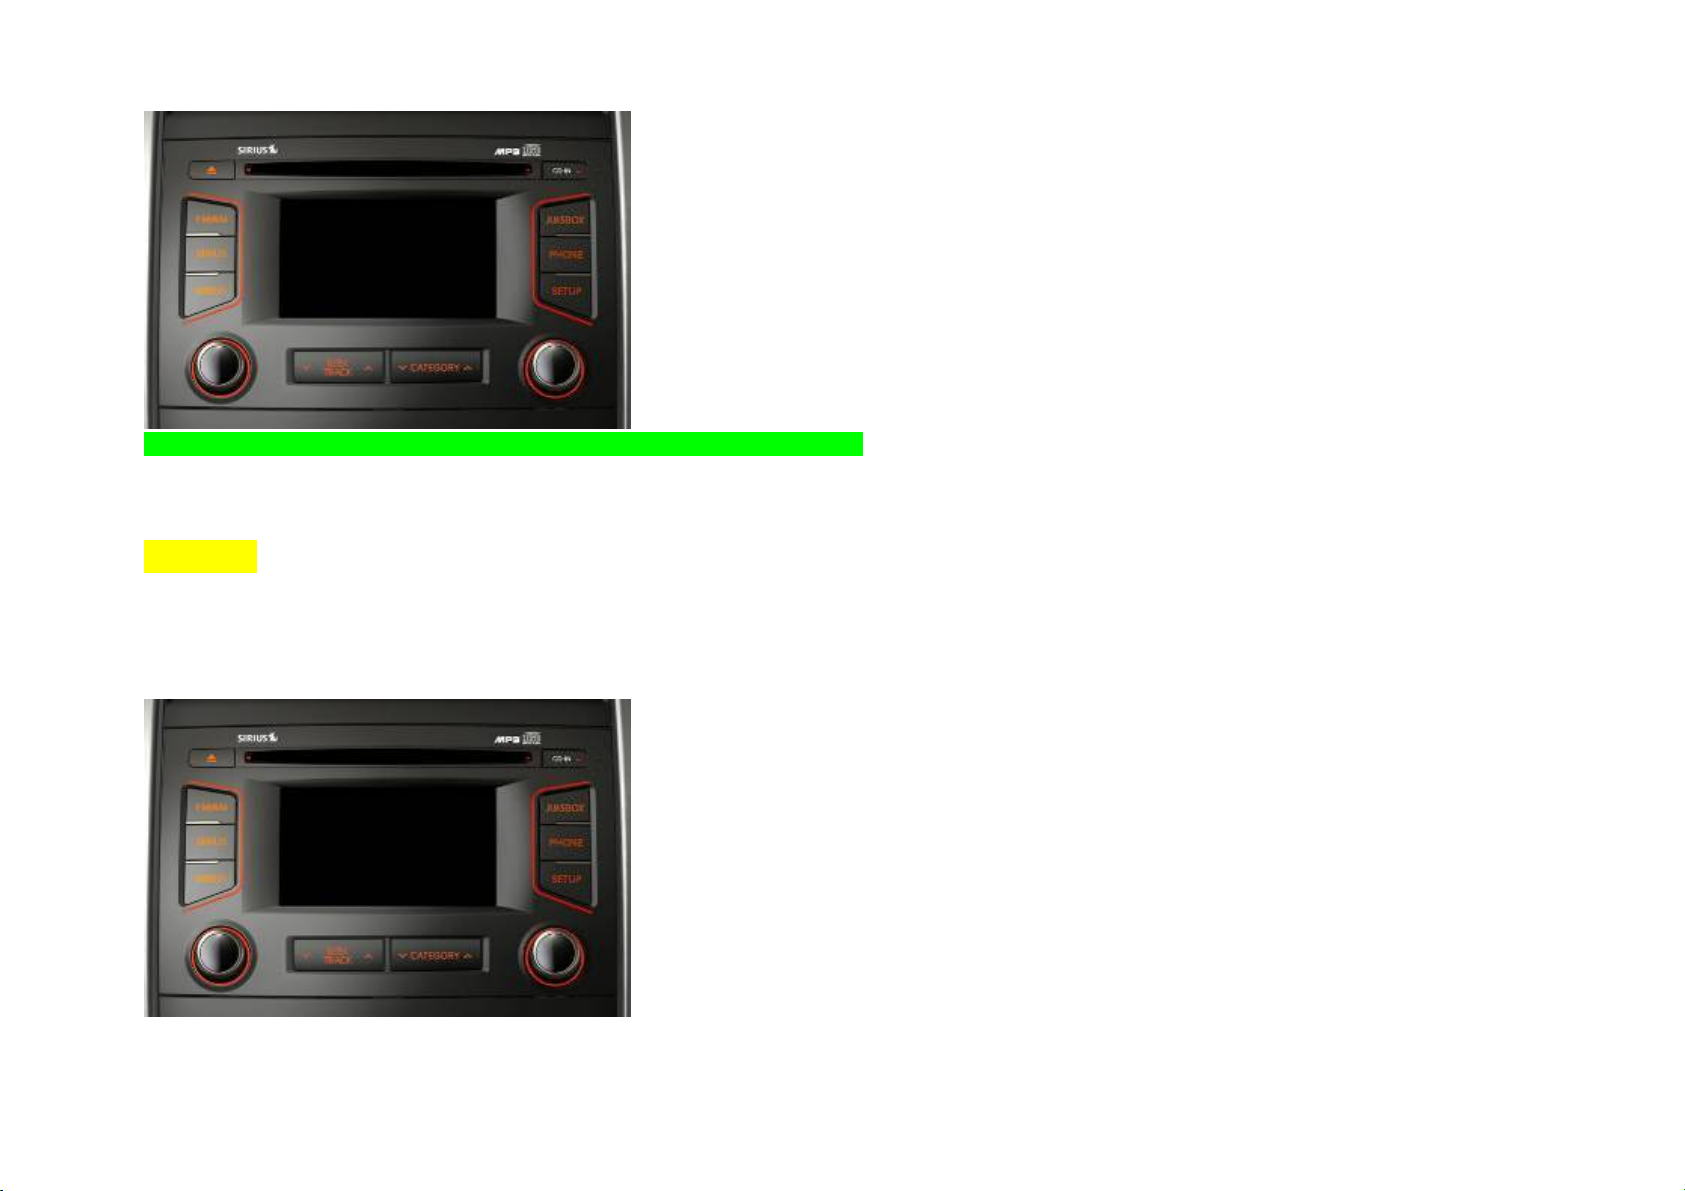
4. You can also turn the system on by pressing the [FM/AM], [SIRIUS], [MEDIA] and [JUKEBOX] keys.
NOTE
Pressing any one of the [FM/AM], [SIRIUS], [MEDIA] and [JUKEBOX] keys will turn on the system and display the last mode corresponding to each key.
For example, pressing the [MEDIA] key will turn on the system and display CD mode if the last operated MEDIA mode prior to turning off the system had been
CD mode.
Turning System Power Off
1. While the system is on, press the [POWER/VOLUME] knob to turn off the system.
NOTE
If the system power was on when the ignition was turned off, the system will turn back on automatically. Reversely, if the system power was off when
the ignition was turned off, the system will remain off.
2. Turn Display On and Off
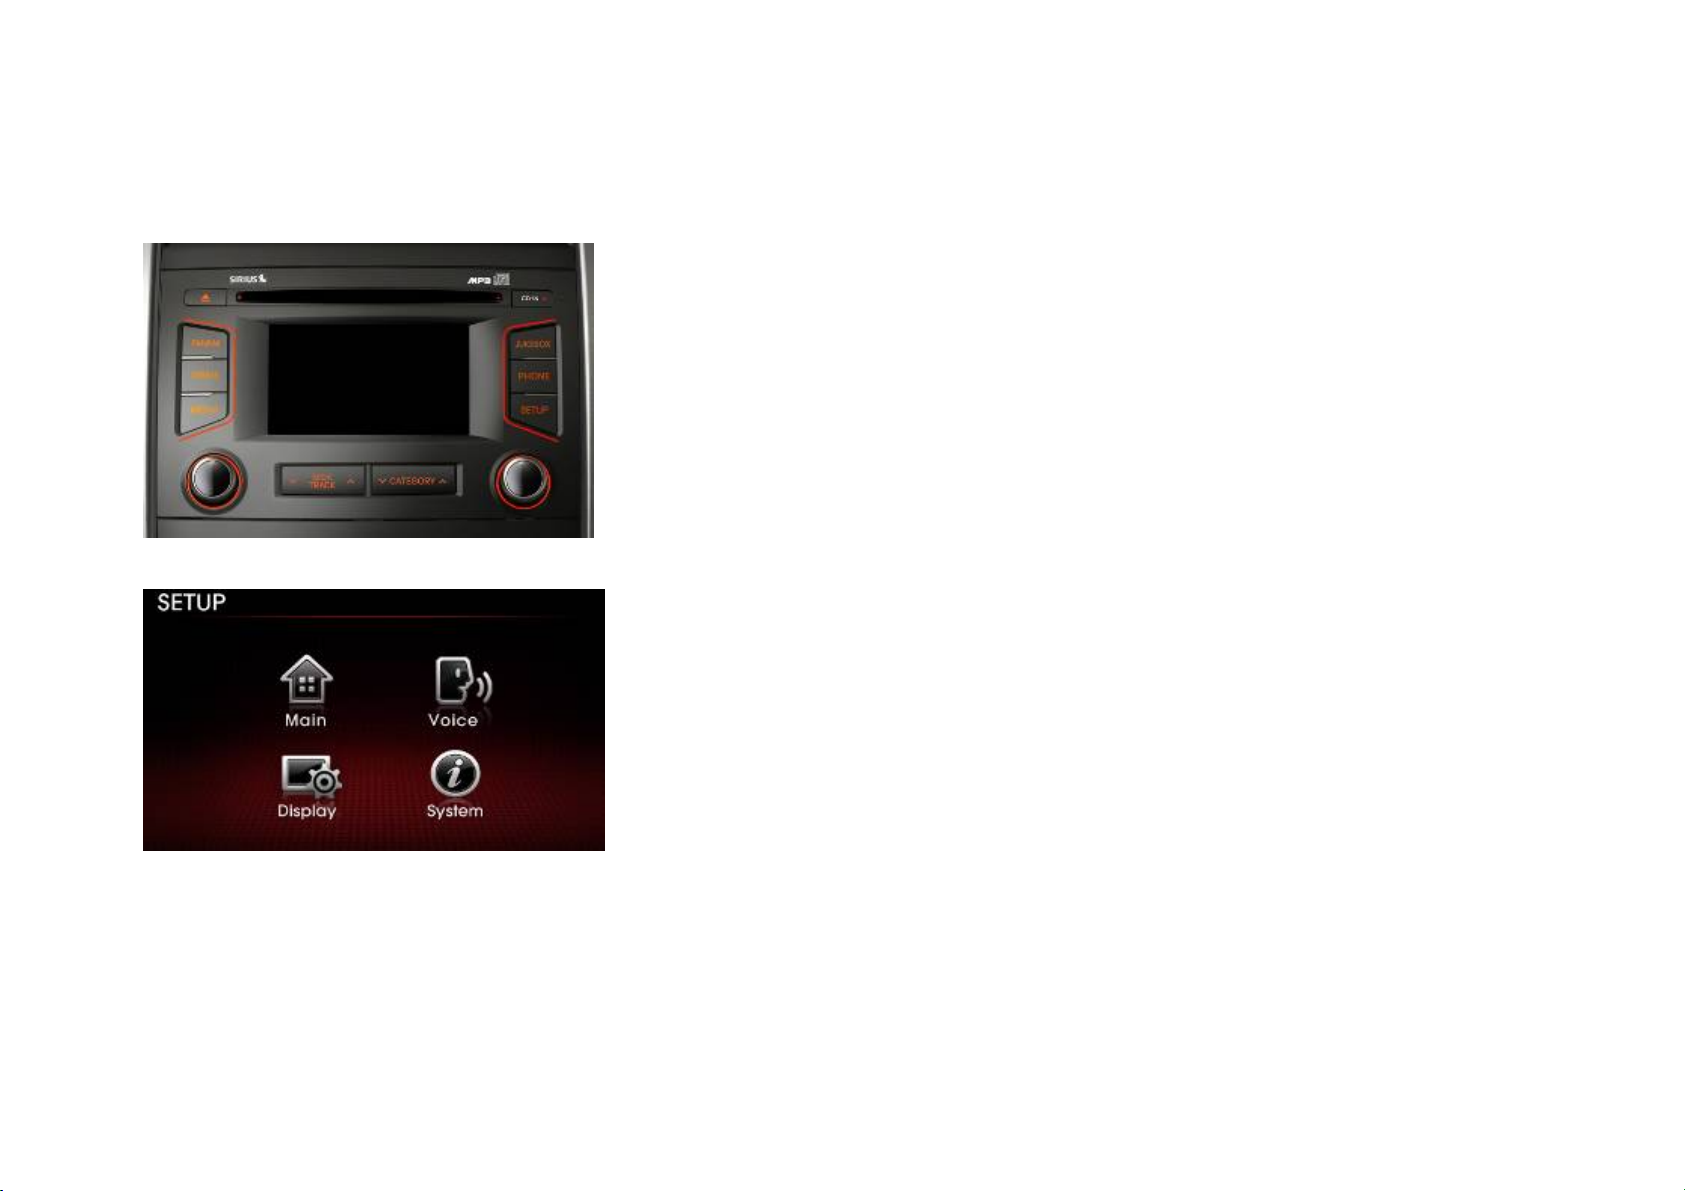
1. Press the [SETUP] key on the control panel.
22
Page 23
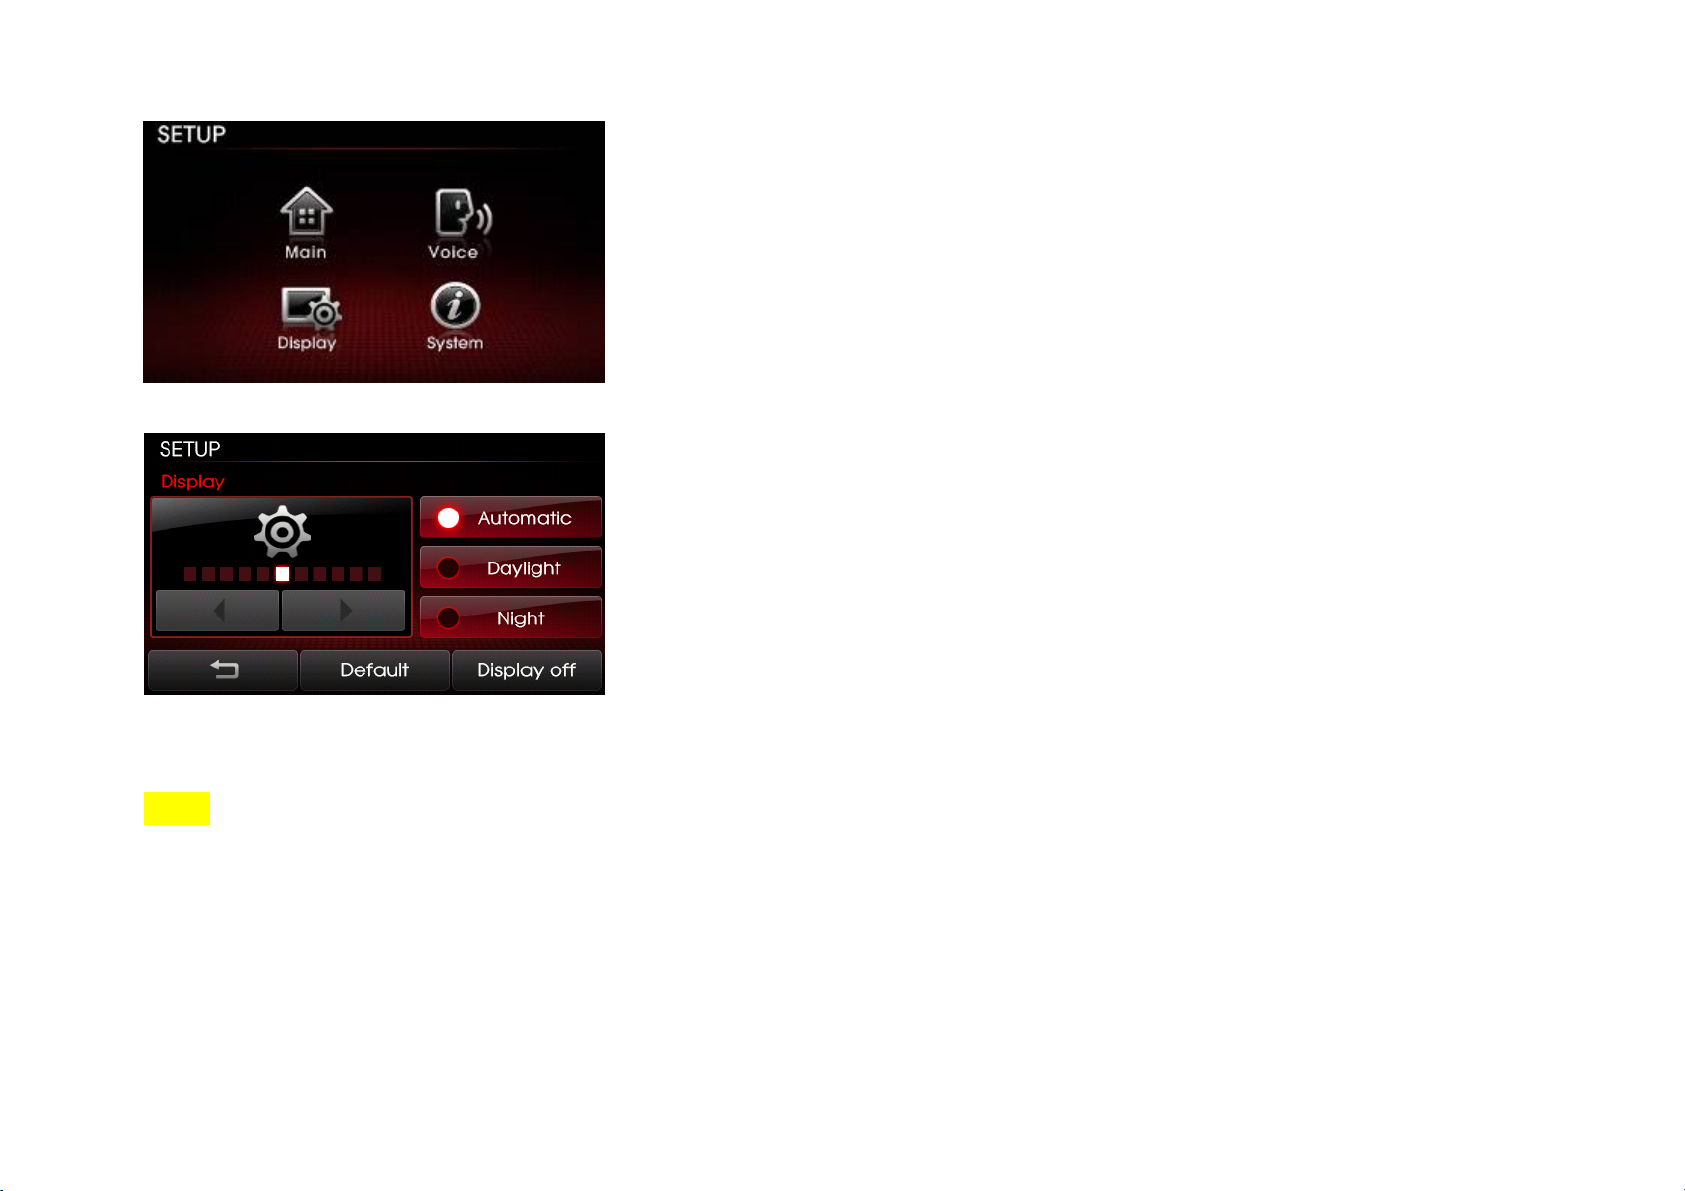
2. Press the [Display] button.
3. Press the [Display off] button.
4. Press any key on the control panel or steering wheel controller to turn the display back on excluding the [SEEK TRACK ∧] or [SEEK TRACK ∨] keys.
NOTE
>
Touching any part of the screen will also turn the display back on.
> When the display is turned off and you press the [SEEK TRACK ∧] or [SEEK TRACK ∨] keys, it will operate normal SEEK/TRACK features. For example, if
the display is turned off while in CD Mode, pressing the [SEEK TRACK ∧] or [SEEK TRACK ∨] keys for under 0.8 seconds will play the previous/next track.
Pressing the keys for over 0.8 seconds will REW/FF the currently playing track.
23
Page 24
3. Select Display Language
The Kia UVO system allows you to select the preferred display language for maximum convenience and system usability. The system provides you options of
with three languages - English, French (Canadian) and Spanish. The default language is English.
1. Press the [SETUP] key on the control panel.
2. Press the [Main] button.
24
Page 25
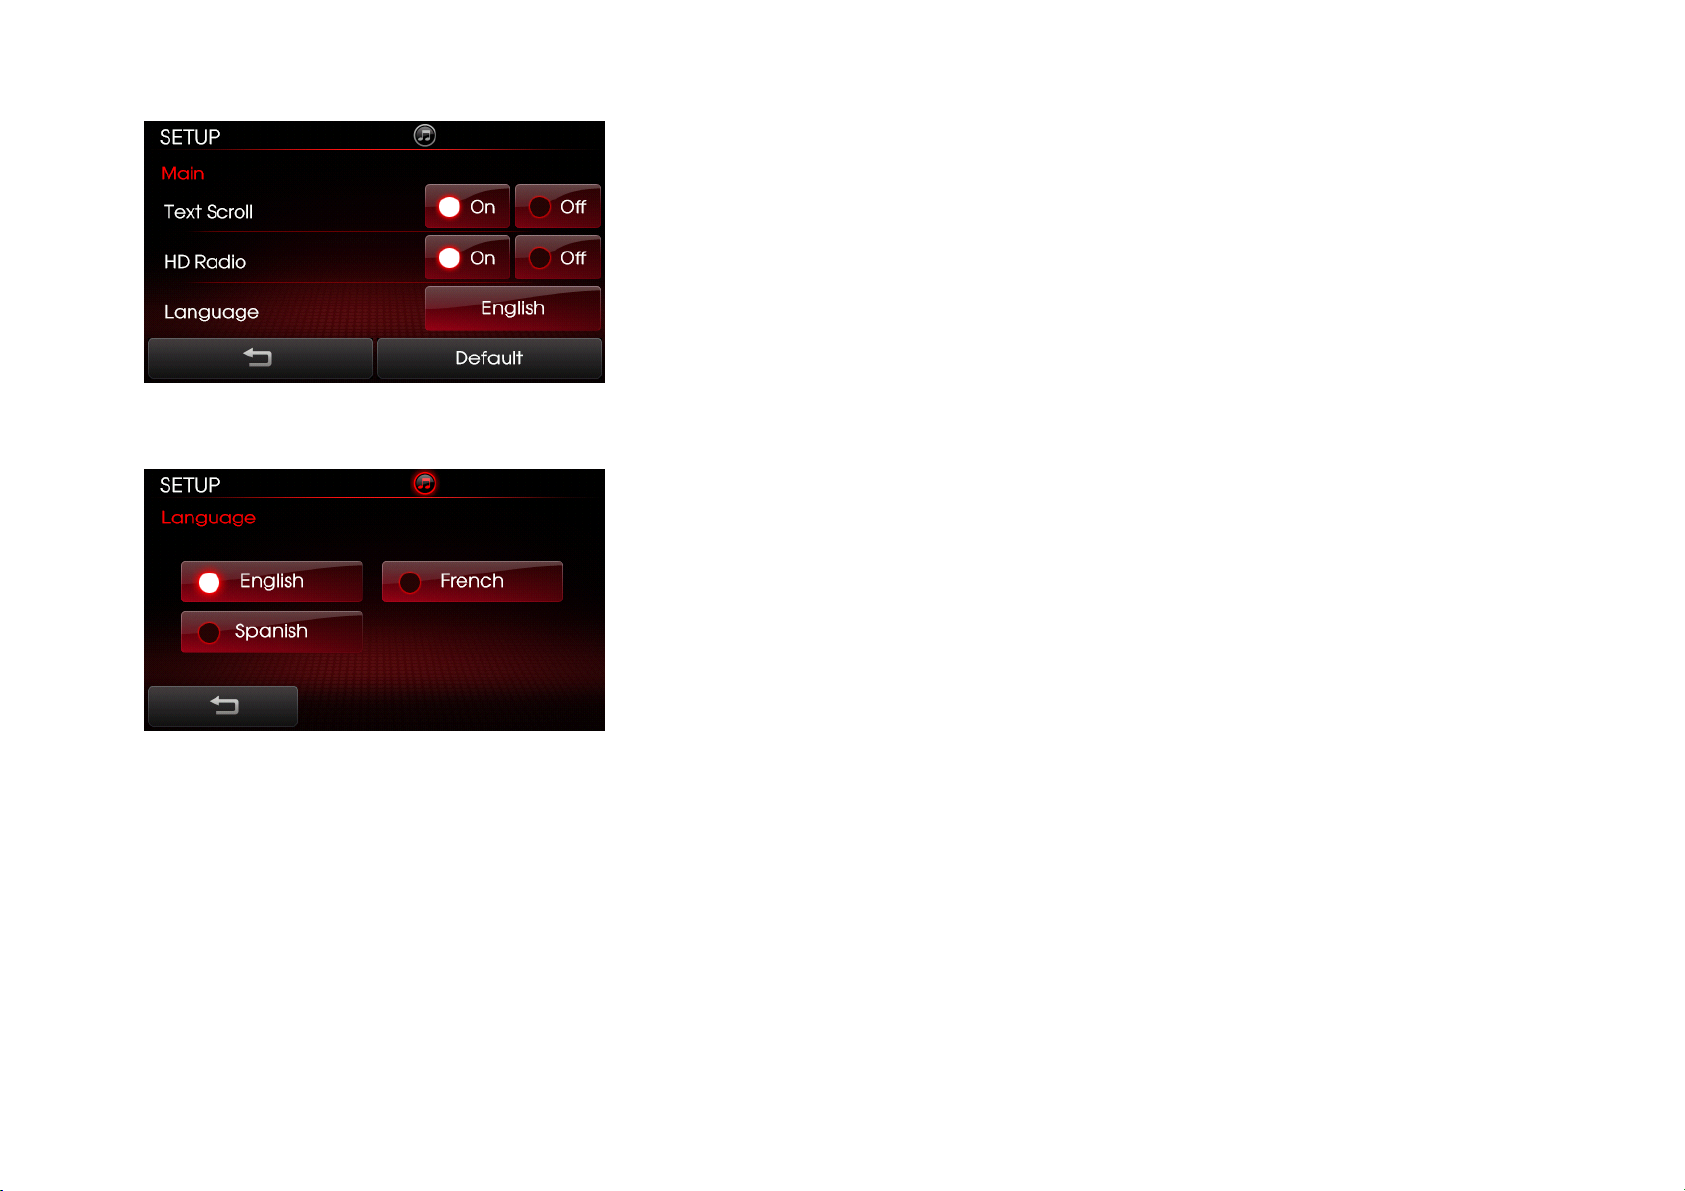
3. Press the [English] button next to the Language menu.
4. Select the desired language.
5. The system will reboot and automatically restore the most recent mode in the new language
4. Resetting and Initializing UVO
Resetting the system
If the system is behaving abnormally, use the reset button to reset the system.
.
25
Page 26
(image showing ball-point pen or similar object, being pressed into reset needed)
1. Use a ball-point pen or similar object to press the [RESET] button.
2. The system will reboot and automatically restore the most recent mode.
CAUTION
The reset button should only be used in case of system malfunction. Never use the reset key while the system is operating normally.
If you wish to reset while the system is operating normally, turn the power off first then reset.
Initializing the system
1. Press the [SETUP] key on the control panel.
26
Page 27

2. Press the [System] button.
3. Press the [Factory defaults] button.
NOTE
Initializing the system will erase all Phone settings, and other changes which you have made to the system. Make sure you have backed up all
important files before initializing to factory default settings.
4. Sound and Display Settings
1. Sound Settings
Sound settings can be adjusted from any audio mode. The system allows you to optimize various sound settings to add convenience when listening to the
system.
27
Page 28
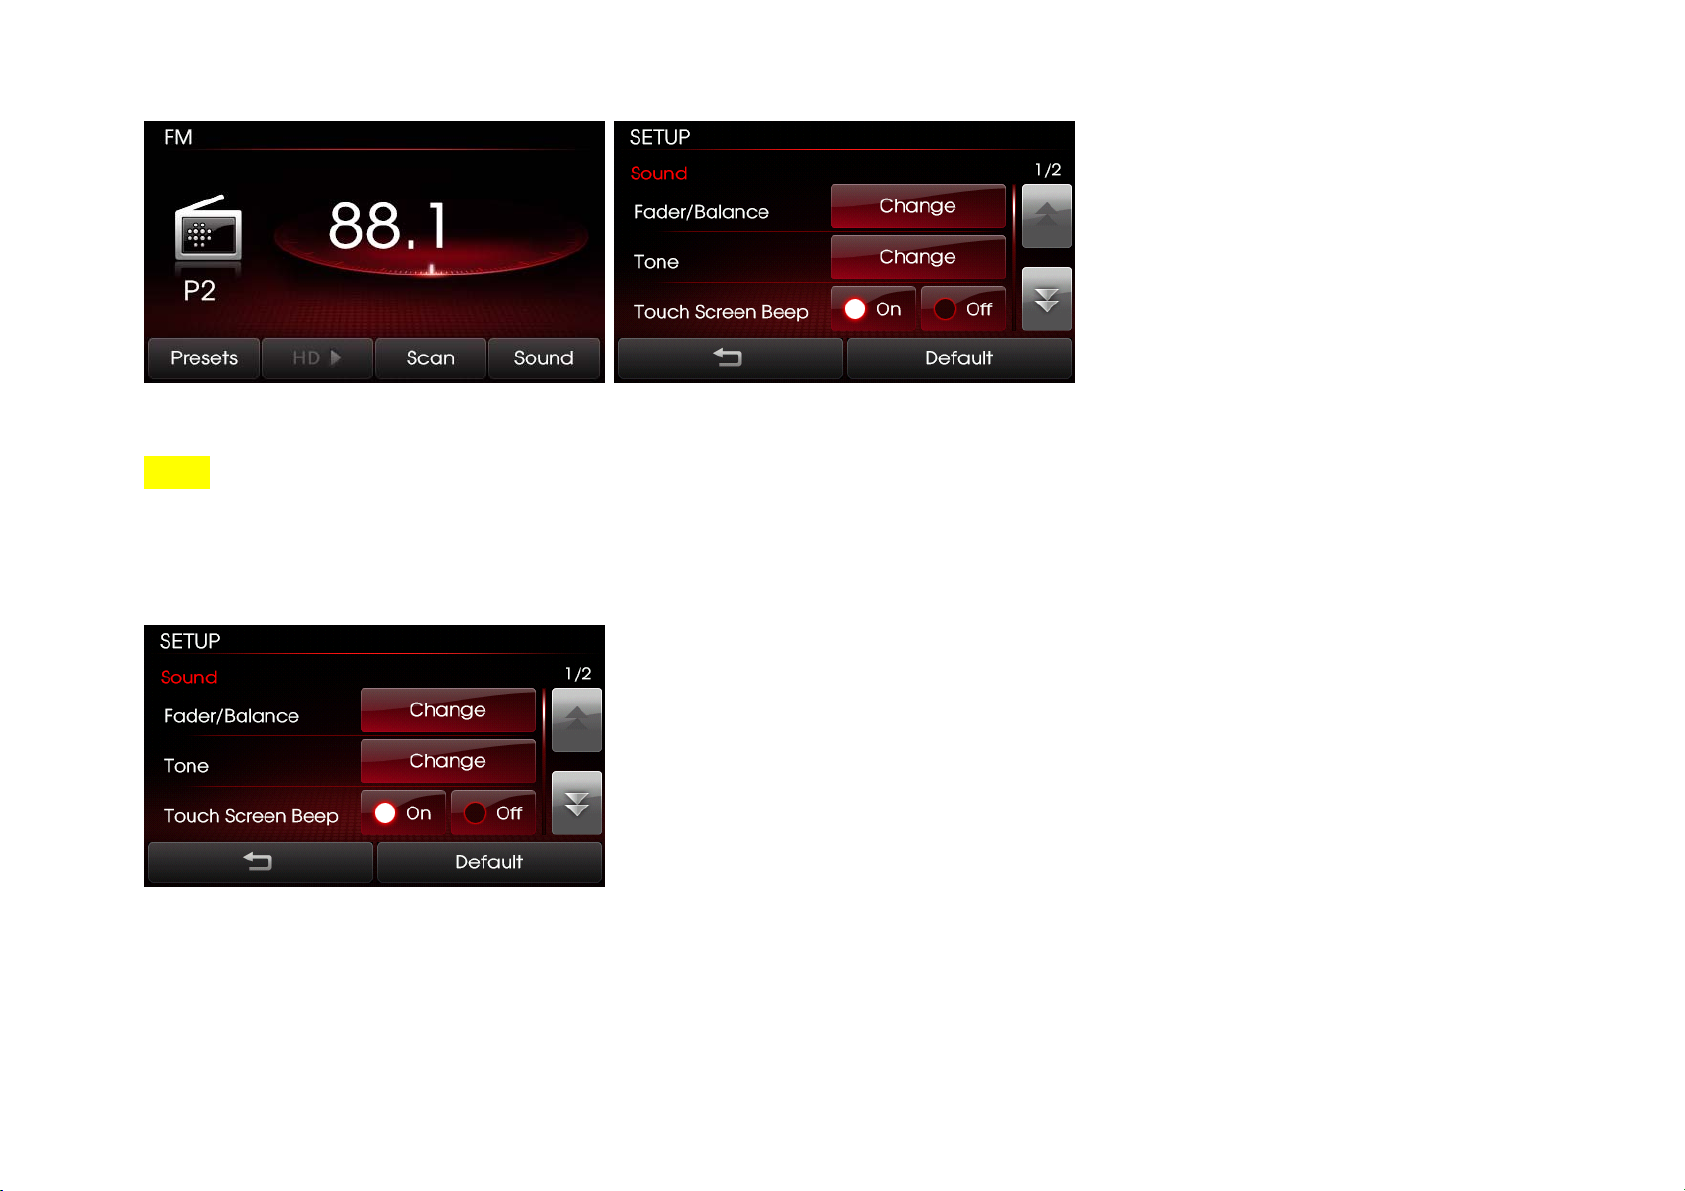
1. Press the [Sound] button on the main screen of each audio mode (FM/AM, SIRIUS, MEDIA, JUKEBOX) to enter Sound Setup.
NOTE
> Changes are saved as they are made. In other words, once you change a setting, the new setting will become saved.
FADER/BALANCE
Fader/Balance allows you to adjust the position of sound within the vehicle. For instance, adjusting the sound so that it is closer to the driver-side seat will
proportionally lower the volume in the passenger-side and rear seats.
1. Press the Fader/Balance setup button.
28
Page 29
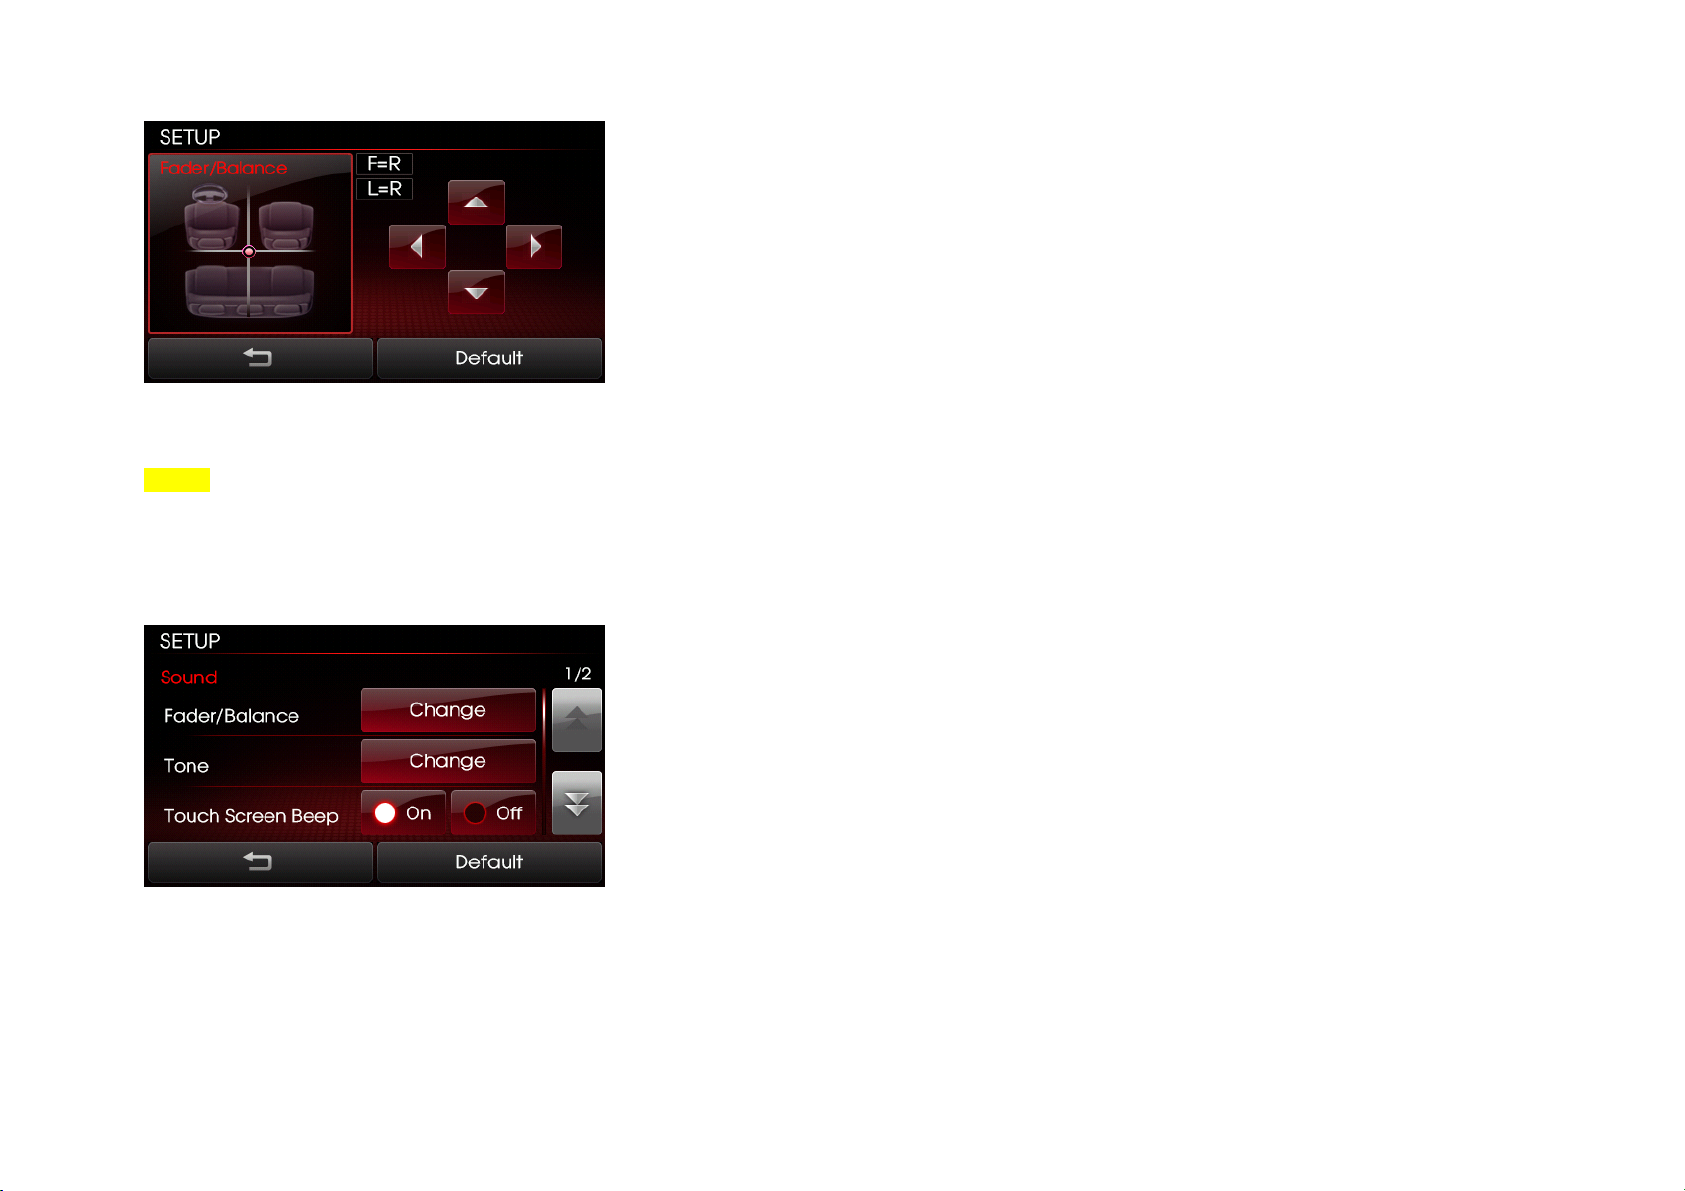
2. Use the top/down/left/right (arrow) buttons to make adjustments to the sound position
3. Press the [] button to return to Sound Setup.
NOTE
> Press the [Default] button to restore the default setting.
TONE
Tone allows you to make changes to the Treble, Middle and Bass settings.
1. Press the Tone setup button.
29
Page 30
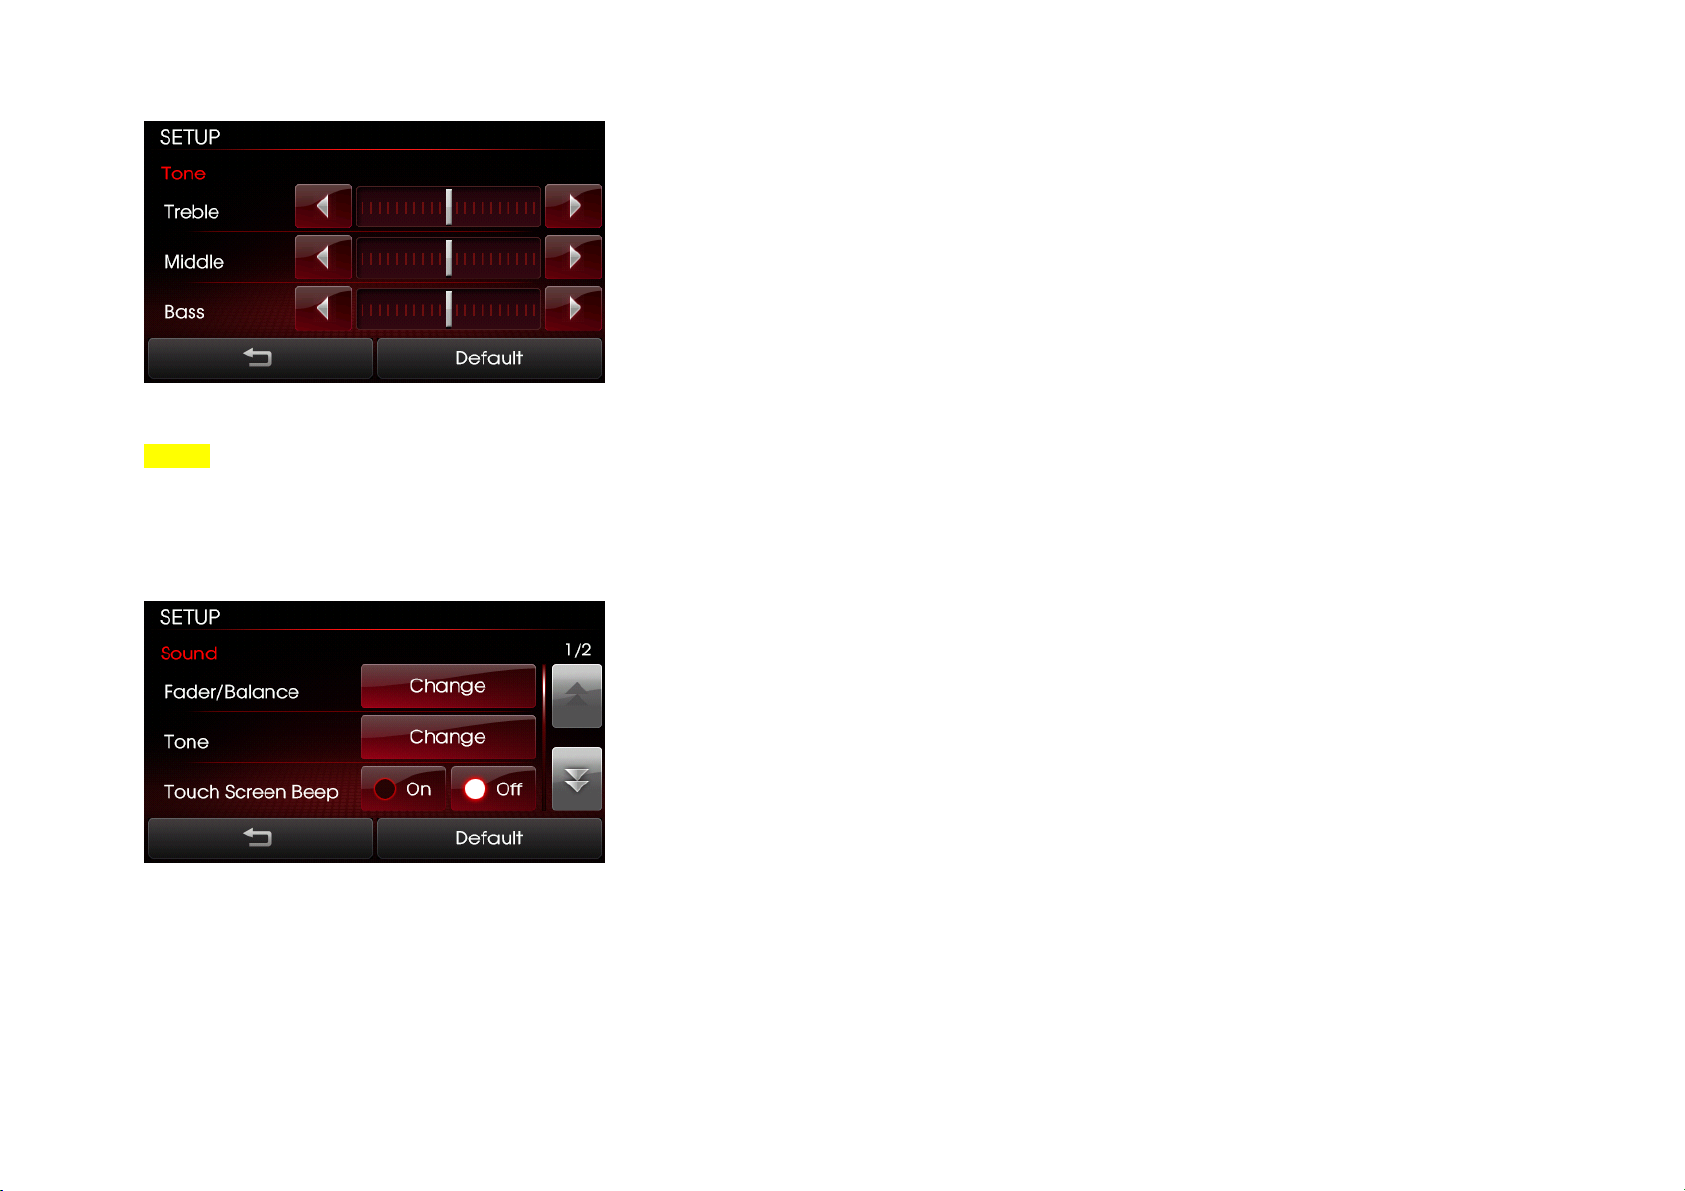
2. Use the left/right (arrow) buttons to make adjustments to the Treble, Middle and Bass. Press the [] button to return to Sound Setup.
NOTE
> Press the [Default] button to restore the default setting.
Touch Screen Beep
Touch Screen Beep allows you to turn on/off the beep that sounds when you touch the screen.
1. In Sound Setup, press the [On] or [Off] button next to the Touch Screen Beep menu to turn the feature on or off.
Speed Dependent Volume Control
Speed Dependent Volume Control allows you to automatically control the volume according to the speed of the vehicle. This feature will gradually increase the
volume as speed increases to offset outside noise.
30
Page 31

1. Press the [On] or [Off] button next to the Speed Dependent Volume Control menu to turn the feature on or off.
Variable EQ (Optional)
Within the Variable EQ setting, there are three types of EQ setups which you can use according to your personal preferences. Select among the setups of
Normal, Powerful and Concert.
1. Press the Variable EQ setup button.
31
Page 32

2. Select the desired Variable EQ setting from [Normal], [Dynamic] or [Concert]. Brief descriptions of each option are displayed on the screen.
3. Press the [] button to return to Sound Setup.
NOTE
> Press the [Default] button to restore the default setting.
Power Bass (Optional)
1. Press the Power Bass setup button.
32
Page 33

2. Select the desired Power Bass setting from [Off], [Low], [Middle] or [High]. Press the [] button to return to Sound Setup.
NOTE
> Press the [Default] button to restore the default setting.
2. Display Settings
The various Display setup options offered within the Kia UVO system allows you to change display settings according to your personal preference.
1. Press the [SETUP] key on the control panel.
33
Page 34

2. Press the [Display] button to enter Display Setup mode.
NOTE
> Changes are saved as they are made. In other words, once you change a setting, the new setting will become saved.
Setting Brightness
The UVO audio system allows you to control the screen brightness automatically and manually.
Automatic Brightness Control
When the Display brightness is set to automatic, the brightness will be controlled automatically by assessing the amount of ambient light.
1. Press the [Display] button.
34
Page 35

2. Press the [Automatic] button.
Manual Brightness Control
1. Press the [Display] button.
35
Page 36

2. Press the [Daylight] or [Night] buttons.
3. Use the left/right (image) arrow buttons to make adjustments to the display brightness. Press the [] button to return to Display Setup.
NOTE
> When Brightness control is set to [Automatic], the manual left/right (image) arrow buttons are not active.
> Press the [Default] button to restore the default setting.
Turning Display On and Off
This feature turns off the display, allowing you to listen only to the audio. It is a useful feature when you are driving at night and wish to eliminate glare from
the display. Even when the display is off, audio will still be played.
36
Page 37

1. Press the [Display] button.
2. Press the [Display off] button.
3. Press any key on the control panel or steering wheel controller to turn the display back on excluding the [SEEK TRACK ∧] or [SEEK TRACK ∨] keys.
NOTE
> When the display is turned off and you press the [SEEK TRACK ∧] or [SEEK TRACK ∨] keys, it will conduct the normal SEEK/TRACK operation. For example,
if the display is turned off while in CD mode, pressing the [SEEK TRACK ∧] or [SEEK TRACK ∨] keys for under 0.8 seconds will play the previous/next track.
Pressing the keys for over 0.8 seconds will REW/FF the currently playing track.
> Touching any place on the screen will also turn on the display.
Turn Text Scroll On and Off
37
Page 38

Text shown on the screen can be scrolled. Turning on this feature is helpful when viewing long lines of text on the screen.
1. Press the [SETUP] key on the control panel.
2. Press the [Main] button.
38
Page 39

3. Press the [On] or [Off] button next to the Text Scroll menu to turn the feature on or off.
39
Page 40

PART II. AUDIO FEATURES
1. FM/AM MODE
FM/AM Mode Screens and Features
40
Page 41

No Button
1 Mode display Displays the FM /AM mode.
2 PRESET indicator If listening to a preset, displays the preset number.
3 Frequency Displays the current frequency.
4 STEREO indicator If the current frequency is a stereo broadcast, displays the indicator.
5 Program Type If data is being transmitted, displays the program type.
6 Program Service If data is being transmitted, display the program service.
7 Radio text If data is being transmitted, displays radio text information.
8 HD radio Becomes active when HD radio broadcast is being played.
9 Radio Icon When listening to RBDS or HD radio, displays information about the current station
10 Presets Enters Preset list screen.
11 Scan Scans all frequencies or just the preset frequencies for 5 seconds each.
12 Sound Enters Sound Setup.
13 HD Station Number HD) 1/3 Displays the current HD station number.
14 HD Station name Displays the name of the HD Station
15 Artist name Displays the artist name.
16 Song Title Displays the title name.
Name Description
(frequency, station, artist, title).
Listening to the FM/AM radio
1. Press the [FM/AM] key on the control panel. The most recently played FM/AM radio band will automatically begin playing.
2. Press the [FM/AM] key to switch to the desired radio band.
41
Page 42

NOTE
Each press of the [FM/AM] key will change the band in the order of FM -> AM -> FM.
Even when the system power is off, press the [FM/AM] key to turn on the most recently played FM/AM mode.
The RBDS (Radio Broadcast Data System) radio operates in areas with FM stations broadcasting RBDS signals.
Selecting a broadcast frequency
The Kia UVO System provides you with various ways to search for radio broadcasts. There are 3 ways to select radio broadcasts – selecting through SEEK,
selecting through manual search, and selecting through presets.
Selecting through SEEK
1. Press the [SEEK TRACK ∧] or [SEEK TRACK ∨] keys on the control panel for under 0.8 seconds or the [∧] or [∨] keys on the steering wheel
controller for over 0.8 seconds. As SEEK operates, the previous or next radio broadcasts with superior reception will automatically be searched and played.
NOTE
While SEEK is operating, pressing the same [∧ SEEK TRACK ∨] key will terminate SEEK. Pressing the opposite key will operate SEEK in the reverse
direction.
Press and hold the [SEEK TRACK ∧] or [SEEK TRACK ∨] keys (over 0.8 seconds) to quickly move through the frequencies while the button is pressed
and held. Once released, the system will automatically search and play the previous or next frequency.
Selecting through manual search
1. Turn the [TUNE] knob on the control panel in clockwise or counter-clockwise direction. Each click will increase or decrease the frequency by 1 step
(FM: 0.2MHz, AM: 10kHz).
2. When you find the desired radio broadcast, stop turning the [TUNE] knob to listen to the selected frequency.
Selecting through preset
42
Page 43

1. Press the [Presets] button.
2. Select the desired preset and press the button to start listening.
NOTE
- Press the [∨] [∧] keys (under 0.8 seconds) on the steering wheel controller to flip through the presets sequentially.
- Press and hold the [∨] [∧] keys (over 0.8 seconds) on the steering wheel controller to operate SEEK.
Storing presets
Presets are a way for you to save your favorite radio broadcasts. Up to 12 presets can be saved in FM mode while up to 6 frequencies can be saved in AM
mode.
1. Select the desired radio broadcast.
2. Press the [Presets] button.
3. From the preset list, press and hold (over 0.8 seconds) the preset number button to which you wish to save.
4. The current radio broadcast will automatically be saved to the present number. A beep will signify that the preset has been saved.
43
Page 44

Scanning FM/AM broadcast frequencies
Radio broadcasts can be scanned to conveniently find radio broadcasts with superior reception. Each radio broadcast will be played for 5 seconds. This feature
is particularly useful when traveling in new areas.
1. Press the [SCAN] button.
NOTE
When scanning has completed an entire revolution, the scan function will terminate automatically and the previously played frequency will be restored.
Preset Scan
Preset scan will scan presets in the current band (FM- 12 presets, AM- 6 presets) in sequential order. Each preset will be played for 5 seconds.
Listening to HD radio
HD Radio is a digital radio technology used by AM and FM radio stations to transmit audio and data via a digital signal in conjunction with their analog signals.
44
Page 45

1. While listening to the radio, the HD icon will become displayed if receiving an HD radio broadcast.
2. Press the [HD >] button to change to a different HD broadcast.
Viewing FM/AM Station information
When listening to a HD or RBDS radio stations, you will be able to view station information.
1. Press the Radio icon.
2. Information about the current station (frequency, station, artist, title) will be displayed.
2. SIRIUS MODE
SIRIUS Mode Screen and Features
45
Page 46

No Button Name Description
1 Mode Display Displays the current mode as SIRIUS mode.
2 Channel number Displays the current channel number.
3 PRESET indicator If listening to a preset, displays the preset number.
4 Category name Displays the category name.
5 Channel name Displays the channel name.
6 SIRIUS Icon Displays information about the current channel (artist,
title, composer and other information).
7 Presets Enters Preset list screen.
8 List Displays the channel or category list.
9 Search Displays the channel search screen.
10 Sound Enters Sound Setup.
11 Artist Displays the artist name.
12 Title Displays the title.
Listening to the SIRIUS radio
1. Press the [SIRIUS] key on the control panel. The most recently played SIRIUS channel will automatically begin playing.
NOTE
Even when the system power is off, pressing the [SIRIUS] key will turn on the most recently played SIRIUS channel.
Selecting a SIRIUS channel
Selecting through SEEK
1. Press the [SEEK TRACK ∧] or [SEEK TRACK ∨] keys on the control panel for under 0.8 seconds or the [∧] or [∨] keys on the steering wheel controller for
over 0.8 seconds. As SEEK operates, the previous or next SIRIUS channel with superior reception will automatically be searched and played.
46
Page 47

NOTE
While SEEK is operating, pressing the same [∧ SEEK TRACK ∨] key will terminate SEEK while pressing the opposite key will operate SEEK in the
reverse direction.
Press and hold the [SEEK TRACK ∧] or [SEEK TRACK ∨] keys (over 0.8 seconds) to quickly move through the channels while the button is pressed
and held. Once released, the system will automatically search and play the previous or next channel.
Selecting through manual search
1. Turn the [TUNE] knob on the control panel in clockwise or counter-clockwise direction. Each click will display the corresponding channel information.
2. When you find the desired SIRIUS channel, press the [TUNE] knob to listen to the selected channel.
Selecting through preset
1. Press the [Presets] button.
2. Select the desired preset and press the button to start listening.
NOTE
47
Page 48

Press the [∨] [∧] keys (under 0.8 seconds) on the steering wheel controller to flip through the presets sequentially.
Press and holding the [∨] [∧] keys (over 0.8 seconds) on the steering wheel controller to operate SEEK.
Selecting through channel search
1. Press the [Search] button. The channel search screen will be displayed.
2. Input the desired channel number and press the [Done] button. To delete entries, press the [Delete] button.
NOTE
If you input a number where there is no channel, the [DONE] button will become inactive.
Selecting through SIRIUS category list
1. Press the [List] button.
48
Page 49

2. Select the desired channel to start listening or press the [Category List] button to display the channels in the selected category.
Using Skip
1. Press the [List] button.
49
Page 50

2. Press the [Skip Setting] button.
3. Select the channels you wish to skip. When selected, a [check mark] will be displayed next to the selected channel.
Storing preset
Presets are a way for you to save your favorite SIRIUS channels. Up to 18 presets can be saved in SIRIUS mode.
1. Select the desired SIRIUS channel.
50
Page 51

2. Press the [Preset] button.
3. From the preset list, press and hold (over 0.8 seconds) the preset number button to which you wish to save.
4. The current radio broadcast will automatically be saved to the present number. A beep will signify that the preset has been saved.
Viewing SIRIUS channel information
51
Page 52

1. Press the SIRIUS icon.
2. Information about the current channel (channel, category, artist, title) will be displayed.
3. MEDIA MODE
The MEDIA mode within your Kia UVO system offers a variety of media modes which allow you convenience and ease in operating your system. Media mode
includes a variety of modes, such as audio CD, MP3 CD, USB, iPod, Zune, BT audio, and Aux. The features listed below describe common features which you
will encounter when operating Audio CD, MP3 CD, USB, iPod, zune, and Jukebox My Music modes.
Common Features
52
Page 53

Play/Pause
1. Insert or connect the desired media (Audio CD, MP3 CD, USB, iPod, zune) or press the [MEDIA] key on the control panel if the desired media has already
been inserted or connected.
2. Each press of the [MEDIA] key will change the mode in the order of CD -> USB/iPod/zune -> AUX -> BT AUDIO -> CD.
3. When a desired media is playing and you wish to pause, press the [pause] button next to the progress bar. Press the [ ] button to ► restart the media.
REW/FF
1. Press and hold the [SEEK TRACK ∧] or [SEEK TRACK ∨] keys (over 0.8 seconds) on the control panel or the [ ] keys on the steering wheel ∧∨
controller.
2. The media will rewind or fast-forward at a rate 20 times faster than normal while the key is being held.
3. Release the key to play from the current position.
NOTE
If you rewind to the beginning of the current media, the current media will automatically begin playing.
53
Page 54

If you fast-forward to the end of the current media, the next media will automatically begin playing.
Jump
1. You can jump to different points in a media by touching the position on the progress bar.
NOTE
The Jump feature is not supported in iPod or iPhone devices.
Using Repeat
The repeat setting can be used to repeat the currently playing media.
1. Press the [Repeat] button. The 'Repeat’ icon will be displayed.
2. Press once to turn on the Repeat setting and again to turn off.
Using Shuffle
54
Page 55

The Shuffle setting can be used to play all media in the current mode randomly.
1. Press the [Shuffle] button. The ‘Shuffle’ icon will be displayed.
2. Press once to turn on the Shuffle setting and again to turn off.
NOTE
The Repeat and Shuffle settings cannot be used simultaneously.
1. AUDIO CD MODE
Cautions upon handling Audio CDs
Precautions upon handling discs
● Store discs within their intended cases to prevent scratches.
● Never use heart-shaped, octagon-shaped or any other abnormally shaped discs.
● Never expose discs to direct sunlight for prolonged periods of time. Such exposure may lead to disc deformation.
● Never clean with solvents, such as antistatic sprays, cleaners, benzene, or thinners.
● Dust, scratch, and other foreign substances may cause popping sounds as well as sound deterioration.
● Never place paper on either side of the disc or write on disc surfaces.
● Clean fingerprints and dust off the signal surface (coated side) of the disc with a soft cloth.
● Copy-protected CDs, such as S-type CDs may not operate properly in the system.
● DATA CDs are not supported by the system.
For safe and efficient operation
● Never disassemble the CDP for repair purposes. Contact your place of purchase in case of malfunction. (Full service assistance will not be provided if the
user disassembles the device.)
● Never use water to clean the system.
● Heed caution not to introduce foreign substances into the disc slot.
55 56
Page 56

● The system may not operate in extremely hot or cold temperatures. (The operational temperature range is: -10°C ~ 65°C).
● Steam may condense on the fiber optic lens due to rain, wet conditions, or heat caused by system operation.
● Never clean the system with chemical solvents. Always use a clean and dry cloth.
Supported disc format
● The disc types supported by this device are as shown below.
Disc format Disc media Format
CD CD
CD-R
CD-RW
Multisession CD
SACD SACD
SACD (Hybrid)
Disc Size
5inch (12.7cm)
Disc Format Audio Format
CD LPCM
MP3
WMA Ver. 9
● CD-R or CD-RW DISC burned with a bulk CD without quality guarantees may not be recognized by the device.
● Inserting an abnormal disc may result in faulty operation.
MPEG1, Layer3
MPEG2, Layer3
MPEG2.5
CD-DA
MP3
WMA
DTS-CD
CD-ROM
CD-G
CD-EXTRA
CD-TEXT
Disc/content format and compatibility
Ordinary disc compatibility
● This system has been designed to be compatible with software bearing the following logo marks.
Page 57

Audio-CD CD-R CD-RW
● CD-R/RW discs (Audio CD and MP3 CD) created with CD-writing devices or personal computers may not operate properly.
Special formats or special features regarding software
CD-R/RW Compatibility
●This system operates as a CD-ROM and supports CD-R and CD-RW discs in CD audio or MP3 CD format.
●CD-R/RW discs burned as audio CDs which have not been finalized are not supported by the device. However, some information, such as play time, may
still be displayed.
PC-created DISC compatibility
●When burning a disc with a personal computer, even discs compatible with the formats described above may not operate properly due to software settings
within the burning application. In such cases, contact the software developer.
●Additional information regarding compatibility can be found on the CD-R/RW software disc box. DVD-R/RW discs are not supported by the device.
Compressed audio compatibility
This system plays audio files compressed by MPEG-1 audio stream layer 3(MP3) using 32, 44.1 and 48kHz fixed bit rates. Incompatible files are not supported.
●Variable bit rate files may operate, but the play time information may not be properly displayed.
●Physical formats of CD: Model 1, Model 2 XA format 1.
●This system only supports tracks with file extension of ".MP3" or ".WMA".
●This system does not support multisession discs.
●This system supports a maximum of 256 folders and maximum 512 files. Folders and files which exceed this limit will not be supported.
●There are various bit rates which can be encoded onto MP3 files. This system has been designed to be compatible with various bit rates. Audio which has
been encoded at 128kbps will sound similar to CD audio sound quality. Although this device supports low bit rate MP3 files, such files may result in a low
quality sound.
●For stable operation, the use of files in 95kbps ~ 192kbps bit rate range and 44.1kHz sampling frequency is recommended.
● For Mixed CDs (MP3+WAV), only WAV files will be recognized and supported.
AUDIO CD Mode Screen and Features
57
Page 58

No Button Name Description
1 Mode Display Displays that the current mode is CD mode.
2 Copy Copies the entire CD as a Jukebox Virtual CD.
3 Repeat If Repeat is operating, the current track will be
repeated and the corresponding icon will be displayed.
4 Shuffle If Shuffle is operating, the tracks will be played in
random order and the corresponding icon will be
displayed.
5 Track Number Displays the track number
6 Play Time Displays the play time.
7 Sound Enters Sound Setup.
Inserting/Ejecting a Disc
Inserting a Disc
Insert the disc into the slot. The disc will begin playing automatically after it has been inserted.
58
Page 59

Ejecting a Disc
Press the [ ] button.
The disc will immediately be stopped and ejected.
NOTE
If the disc is straddled on the slot without removing for approximately 10 seconds, the disc will be re-inserted automatically into the disc player. In such
cases, the disc will not begin playing automatically.
Listening to an Audio CD
1. Insert a CD or press the [MEDIA] key on the control panel if the CD has already been inserted.
2. When a track is playing and you wish to pause, press the [pause] button next to the progress bar. Press the [ ] button to ► restart the track.
59 60
Page 60

NOTE
When playing a Text-Audio CD, the title and artist will also be displayed.
Selecting a CD track
Selecting through Track Up/Down
1. Press the [SEEK TRACK ∧] or [SEEK TRACK ∨] keys (under 0.8 seconds) on the control panel or the [ ] keys on the stee∧∨ ring wheel controller to
play the desired track.
2. The previous or next track will begin playing.
NOTE
If the [SEEK TRACK ] key ∨ on the Control panel or [ ] key on the steering wheel controller∨ are pressed and released after the track has played for
more than 3 seconds, the start of the current track will begin playing. If the track has been playing for less than 3 seconds, the start of the previous track will
begin playing.
Selecting through manual search
1. Turn the [TUNE] knob on the control panel in clockwise or counter-clockwise direction. Each click will display information about the selected track.
2. Press the [TUNE] knob to play the selected track.
NOTE
The current track will continue playing even as you search tracks through the [TUNE] knob.
Creating a Virtual CD
Audio Ripping is a new feature in the Kia UVO audio system which allows you to copy an Audio CD to the Virtual CD with JUKEBOX. For more information on
creating virtual CDs, refer to the JUKEBOX mode section.
Page 61

1. Press the [Copy] button.
2. Select an empty CD slot to which you wish to save the CD.
3. Once copying is complete, you can listen to copied CDs in Virtual CD mode.
61 62
Page 62

Note
When creating a Virtual CD, you are free to listen to all modes except CD mode and Virtual CD mode.
Copying can be canceled at anytime. While copying is in progress, press the [Cancel] button. However, if one or more tracks have already been copied,
a virtual CD will be created.
Depending on the duration of an Audio CD, copying may take some time. For instance, a 60 minute audio CD may take up to 25 minutes to complete
copying.
You can create up to 5 Virtual CDs. If the memory is already full, you must delete a previously stored Virtual CD from the JUKEBOX. For more
information on deleting virtual CDs, refer to the ‘Deleting a Virtual CD’ section.
2. MP3 CD MODE
Cautions upon handling MP3 CD
The MP3 file standards supported by the device are as follows.
● Acceptable standard: MPEG1 AUDIO LAYER 3
● Acceptable sampling frequency: 32, 44.1, 48 (KHz)
● Acceptable bit rate: 32, 40, 48, 56, 64, 80, 96, 112, 128, 160, 192, 224, 256, 320 (kbps)
● Recommended bit rate & reference sampling frequency: 96,128, 192 kbps fixed bit rate /44.1KHz
ID3 tag
●This device supports ID3v1.0, ID3v1.1, ID3v2.2, ID3v2.3, and ID3v2.4 ID3 tags.
Supported media
●The MP3 media supported by the device are CD-ROM and USB.
Supported media formats
● This device supports ISO9660 LEVEL1 and LEVEL2. Detailed specification is as below.
●Maximum directory layers: 8 layers
●Maximum folder length: 64 Bytes, file name length: 64 Bytes
●Maximum number of folders which can be stored onto one disc: 256 folders (including ROOT directory)
●Maximum number of files which can be stored onto one disc: 512 files
Precautions upon burning MP3 files
●The use of ISO 9660 LEVEL 2 JULIET format is recommended when burning MP3 files. Burning in other formats may abnormally display the file names.
Page 63

●It is possible to display up to 32 characters for file and folder names in case of UNICODE, and up to 64 characters in case of ASCII.
Although the full length of the file name can be displayed by using the scroll function, the full length of folder names may not be displayed as the scroll
function does not operate when displaying folder names.
Precaution
● Use an MP3 bit rate which is less than 128 kbps. The sound quality cannot be guaranteed for MP3s exceeding 128kbps.
MP3 CD Mode Screen and Features
No Button Name Description
1 Mode Display Displays that the current mode is MP3 CD mode.
2 List Displays the MP3 folders and file lists for the disc.
3 Copy Copies current song into Jukebox My Music.
4 Repeat If Repeat is operating, the current song will be repeated
and the corresponding icon will be displayed.
5 Shuffle If Shuffle is operating, the song will be played in
random order and the corresponding icon will be
displayed.
6 Play Time Displays the play time.
7 Artist name Displays the artist name.
8 Song Title Displays the song title.
9 Sound Enters Sound Setup.
Listening to a MP3 CD
1. Insert an MP3 CD or press the [MEDIA] key on the control panel if the CD has already been inserted.
63
Page 64

2. When a song is playing and you wish to pause, press the [pause] button next to the progress bar. Press the [ ] button to ► restart the song.
NOTE
For some media formats, the system requires time for media indexing. In the case of MP3 CDs, the system will take 1.5sec / song.
Selecting an MP3 CD song
Selecting through song Up/Down
1. Press the [SEEK TRACK ∧] or [SEEK TRACK ∨] keys (under 0.8 seconds) on the control panel or the [ ] keys on the steering wheel controller to ∧∨
play the desired track or song.
NOTE
If the [SEEK TRACK ] key ∨ on the Control panel or [ ] key on the steering wheel controller∨ are pressed and released after the song has played for
more than 3 seconds, the start of the current song will begin playing. If the song has been playing for less than 3 seconds, the start of the previous song will
begin playing.
Selecting through manual search
1. Turn the [TUNE] knob on the control panel in clockwise or counter-clockwise direction. Each click will display information about the selected song.
2. Press the [TUNE] knob to play the selected song.
Selecting from MP3 list
64
Page 65

1. Press the [List] button.
2. Press the name of the song from the list. The song will automatically start playing.
NOTE
In the MP3 list screen, the [∨] [∧] keys on the steering wheel controller and the [TUNE] knob can also be used to select songs.
by Artist, Albums, Genres, Songs, Composers,
65
Page 66

1. Press the [List] button.
2. Press the [Home] button.
66
Page 67

3. Choose the category through which you wish to select the song. MP3 CD mode allows you to select by Playlists, Artists, Albums, Genres, Songs, and
Composers.
Explore CD
Explore CD is a feature which allows you to browse files and folders of the CD by the names of categories.
1. While in the MP3 CD Home screen, press the [Explore CD] button.
2. Search the corresponding files and folders to select the desired song.
Viewing song information
When listening to an MP3 CD song, you can browse through song details and information.
67
Page 68

1. Press the Album art icon.
2. The song information (Title, Album, Artist, Genre) for the current MP3 song will be displayed.
3. Press the [] button to return to the previous screen.
NOTE
>Even as you browse through song information, you can use the [SEEK TRACK ∧] or [SEEK TRACK ∨] keys on the control panel or [∨] [∧] keys on the
steering wheel controller to select different MP3 songs. For more information, refer to the ‘Selecting a music song’ section.
Copying songs into My Music
Copying the current song
The Kia UVO audio system allows you to copy songs from an MP3 CD into My Music.
68
Page 69

1. Press the [Copy] button.
2. Once copying is complete, you can listen to copied music in My Music mode.
NOTE
> When copying one song, the [Cancel] button will be inactive.
Copying songs from list
Copying MP3 songs from lists allows you to simultaneously select several songs to copy into My Music.
69
Page 70

1. Press the [List] button.
2. Press the [Edit] button.
3. Select the songs you wish to copy. When selected, a [check mark] will be displayed next to the song. To select all songs in the play list, press the
70
Page 71

4. After sele
cting the desired songs, press the [Copy] button.
5. Once copying is complete, you can listen to copied music in My Music mode.
NOTE
If memory is already full and songs can no longer be copied, the “Memory full! Please delete music from your JUKEBOX” message will be displayed
and you must delete songs from My Music. For more information on deleting My Music songs, refer to the 'Managing My Music’ section.
When copying MP3 CD songs, you can listen to all modes except CD mode and My Music mode.
Copying can be canceled at anytime. While copying is in progress, press the [Cancel] button.
3. USB MODE
Cautions upon handling USB MP3
The MP3 file standards supported by the device are as follows.
●Acceptable standard: MPEG1 AUDIO LAYER 3
●Acceptable sampling frequency: 32, 44.1, 48 (kHz)
●Acceptable bit rate: 32, 40, 48, 56, 64, 80, 96, 112, 128, 160, 192, 224, 256, and 320 (kbps)
●Recommended bit rate & reference sampling frequency: 96,128, 192 kbps fixed bit rate /44.1kHz
ID3 tag
●This device supports ID3v1.0, ID3v1.1, ID3v2.2, ID3v2.3, and ID3v2.4 ID3 tags.
Supported media
●The MP3 media supported by the device are CD-ROM and USB.
71 72
Page 72

Supported media formats
●This device supports ISO9660 LEVEL1 and LEVEL2. Detailed specification is as below.
●Maximum directory layers: 20 layers
●Maximum length of folder name/file name: 250Bytes
●Maximum number of folders which can be stored onto one USB: 2,000 folders (including ROOT directory)
●Maximum number of files which can be stored onto one USB: 6,000 files
Precautions upon formatting USB & downloading MP3 files
●The device only supports FAT type USB file system. The device will not play USB media content if the USB is NTFS type.
Precautions
●Use an MP3 bit rate which is less than 192kbps and a fixed bit rate. The sound quality cannot be guaranteed for MP3s exceeding 192Kbps. Certain features
may operate abnormally when playing MP3 formats with variable bit rates, such as being limited to FF/REW.
Precautions upon handling USB
●When using an external USB device, make sure to connect the device some time after turning on the ignition. The USB device may be damaged if
connected before the ignition is turned on. (
● The USB device may fail to operate when playing formats other than MP3 or WMA formats.
● Only MP3 files with compression rates between 8kbps~320kbps are supported.
● Only WMA files with compression rates between 8kbps~320kbps are supported.
● Be cautious of static electricity when connecting/disconnecting an external USB device.
● Encoded MP3 Players will not be recognized when connected as an external device.
● When connecting a USB device, the system may not properly recognize some USB states.
● When formatting an external USB device, the system may not properly recognize byte/sector selections other than 512Byte or 2048Byte.
● The device will recognize only USB devices formatted in FAT 12/16/32.
● Some USB devices may not operate properly due to compatibility issues. Verify that the external device is supported by the system before use.
● Avoid contact between the USB connector with bodily parts and foreign substances.
● Repeatedly connecting/disconnecting the USB in a short period of time may damage the system.
● A sound may occasionally occur when disconnecting the USB device.
● Do not disconnect a USB device when it is operating. Make sure to disconnect the USB device only after the audio power is turned off or when operating a
different mode.
● The time required to recognize a USB device may differ depending on the type, size, or file formats stored on the USB. Such differences in time are not
indications of malfunction. Please wait until the system becomes recognized.
● This system supports only USB devices used to play music files.
● Do not use the USB I/F to charge batteries or USB accessories that generate heat. This may lead to worsened performance or system damage.
● This system may not recognize the USB device if a separately purchased USB hub or extension cable is used. Connect the USB device directly to the
do we really need this statement?)
Page 73

terminal in the vehicle.
● Some mass storage USB devices may have multiple logical drives partitioned for user convenience. In such cases, only music files within the top-level
logical drive will be supported.
● This system may not operate normally if the USB terminal is used to connect MP3 Players, mobile phones, digital cameras, or other electronic devices (USB
devices not recognized as portable disk drives).
● This system may not operate normally when using a USB memory type other than a metal cover type USB device.
● This system may not operate normally when using HDD, CF, or SD memory formats.
● This system does not support DRM (Digital rights management) locked files.
● The device may not operate normally during severe vehicle vibrations.
● Avoid using USB devices also used as key chains or mobile phone accessories.
Connecting your USB device
Connect the USB as shown in the picture.
Image
USB Mode Screen and Features
No Button Name Description
1 Mode Display Displays that the current mode is USB mode.
2 List Displays the USB folders and file lists for the disc.
3 Copy Copies current song into Jukebox My Music.
4 Repeat If Repeat is operating, the current song will be repeated and the
corresponding icon will be displayed.
5 Shuffle If Shuffle is operating, the song will be played in random order and the
73
Page 74

corresponding icon will be displayed.
6 Play Time Displays the play time.
7 Artist name Displays the artist name.
8 Song Title Displays the song title.
9 Sound Enters Sound Setup.
Listening to music songs
1. Connect a USB device or press the [MEDIA] key on the control panel if a USB device has already been connected.
2. When a song is playing and you wish to pause, press the [pause] button next to the progress bar. Press the [ ] button to ► restart the song.
NOTE
For some media formats, the system requires time for media indexing. In the case of USB mp3 songs, the system will take 1.5ms/song (Flash/HDD) or
40ms/song (mp3 players).
Selecting music songs
Selecting through song up/down
2. Press the [SEEK TRACK ∧] or [SEEK TRACK ∨] keys (under 0.8 seconds) on the control panel or the [ ] keys on the steering wheel controller to ∧∨
play the desired song.
NOTE
If the [SEEK TRACK ] key ∨ on the Control panel or [ ] key on the∨ steering wheel controller are pressed and released after the song has played for
more than 3 seconds, the start of the current song will begin playing. If the song has been playing for less than 3 seconds, the start of the previous song will
begin playing.
74
Page 75

Selecting t
1. Turn the [TUNE] knob on the control panel in clockwise or counter-clockwise direction. Each click will display information about the selected song.
2. Press the [TUNE] knob to play the selected song.
hrough manual search
Selecting from the playlist
1. Press the [List] button.
2. Press the name of the song from the list. The song will automatically start playing.
NOTE
In the MP3 list screen, the [∨] [∧] keys on the steering wheel controller and the [TUNE] knob can also be used to select songs.
by Folder, Artist, Albums, Genres, Songs, Composers
75
Page 76

1. Press the [List] button.
2. Press the [Home] button.
76
Page 77

3. Choose the category through which you wish to select a song. USB Mode allows you to select by Playlists, Artists, Albums, Genres, Songs, and
Composers.
Explore USB
Explore USB is a feature which allows you to browse files and folders of the USB by the names of categories.
1. While in the USB Home screen, press the [Explore USB] button.
77
Page 78

2. Search the corresponding files and folders to select the desired song.
Viewing song information
When listening to USB music songs, you can browse through song details and information.
1. Press the Album art icon.
78
Page 79

2. The song information (Title, Album, Artist, Genre) for the current USB song will be displayed. Press the [] button to return to the previous screen.
NOTE
>Even as you browse through song information, you can use the [SEEK TRACK ∧] or [SEEK TRACK ∨] keys on the control panel or [∨] [∧] keys on the
steering wheel controller to select different USB songs. For more information, refer to the ‘Selecting a music song’ section.
Copying song into My Music
Copying the current song
The Kia UVO audio system allows you to copy songs from your USB device into My Music.
1. Press the [Copy] button.
79
Page 80

2. Once copying is complete, you can listen to copied music in My Music mode.
NOTE
> When copying one song, the [Cancel] button will be inactive.
Copying songs from list
Copying USB music songs from lists allows you to simultaneously select several songs to copy into My Music.
1. Press the [List] button.
80
Page 81

2. Press the [Edit] button.
3. Select the songs you wish to copy. When selected, a [check mark] will be displayed next to the song. To select all songs in the play list, press the
[Select All] button.
4. After selecting the desired songs, press the [Copy] button.
81 82
Page 82

5. Once copying is complete, you can listen to copied music in My Music mode.
NOTE
If memory is already full and songs can no longer be copied, the “Memory full! Please delete music from your JUKEBOX” message will be displayed
and you must delete songs from My Music. For more information on deleting My Music songs, refer to the 'Managing My Music’ section.
When copying USB songs, you can listen to all modes except USB mode and My Music mode.
Copying can be canceled at anytime. While copying is in progress, press the [Cancel] button.
4. iPod MODE
About iPod
Trademark
iPod® is a registered trademark of Apple, Inc.
Connecting your iPod Device
Connect your iPod device as shown in the picture.
Image here
The identification of the iPod device, battery recharge, and other functions provided by the iPod device can be normally supported only by using a separated
sold iPod connector cable.
If the USB cable provided upon purchasing the iPod for charging is used as the connector cable, the device will be recognized as a USB and may not properly
operate or display all of the display information.
Supported iPod devices
Supported iPod List here
Page 83

CAUTION
If a playing iPod is connected to the audio system, a high-pitched tone may occur for approximately 1-2 seconds. Please turn the iPod device to pause/stop
prior to connecting it to the vehicle.
iPod Mode Screen and Features
No Button Name Description
1 Mode Display Displays that the current mode is iPod mode.
2 List Displays the iPod folders and file lists for the disc.
3 Repeat If Repeat is operating, the current song will be repeated
and the corresponding icon will be displayed.
4 Shuffle If Shuffle is operating, the song will be played in
random order and the corresponding icon will be
displayed.
5 Play Time Displays the play time.
6 Artist name Displays the artist name.
7 Song Title Displays the song title.
8 Sound Enters Sound Setup.
Listening to your iPod
1. Connect an iPod device or press the [MEDIA] key on the control panel if an iPod device has already been connected.
2. When a file is playing and you wish to pause, press the [pause] button next to the progress bar. Press the [ ] button to ► restart the file.
83
Page 84

Selecting iPod music
Selecting through song up/down
1. Press the [SEEK TRACK ∧] or [SEEK TRACK ∨] keys (under 0.8 seconds) on the control panel or the [ ] keys on the steering wheel controller to play ∧∨
the desired file.
NOTE
If the [SEEK TRACK ] key ∨ on the Control panel or [ ] key on the steering wheel controller∨ are pressed and released after the file has played for
more than 3 seconds, the start of the current file will begin playing. If the file has been playing for less than 3 seconds, the start of the previous file will begin
playing.
Selecting through manual search
3. Turn the [TUNE] knob on the control panel in clockwise or counter-clockwise direction. Each click will display information about the selected file.
4. Press the [TUNE] knob to play the selected file.
Selecting from the playlist
1. Press the [List] button.
84
Page 85

2. Press the name of the file from the list. The file will automatically start playing.
NOTE
In the iPod list screen, the [∨] [∧] keys on the steering wheel controller and the [TUNE] knob can also be used to select the desired file.
By Artist, Albums, Genres, Songs, Podcasts, Composers, Audiobooks
1. Press the [List] button.
85
Page 86

2. Press the [Home] button.
3. Choose the category through which you wish to select. iPod mode allows you to select by Playlists, Artists, Albums, Genres, Songs, Podcasts,
Composers and Audiobooks.
Viewing song information
When listening to your iPod, you can browse through file details and information.
86
Page 87

1. Press the Album art icon.
2. The file information (Title, Album, Artist) for the current iPod file will be displayed.
3. Press the [] button to return to the previous screen.
5. zune MODE
About zune
Trademark
zune® is a registered trademark of Microsoft, Inc.
Connecting your zune Device
Connect your zune device as shown in the picture.
87
Page 88

Image here
zune Mode Screen and Features
No Button Name Description
1 Mode Display Displays that the current mode is zune mode.
2 List Displays the zune folders and file lists for the disc.
3 Repeat If Repeat is operating, the current song will be repeated
and the corresponding icon will be displayed.
4 Shuffle If Shuffle is operating, the song will be played in
random order and the corresponding icon will be
displayed.
5 Play Time Displays the play time.
6 Artist name Displays the artist name.
7 Song Title Displays the song title.
8 Sound Enters Sound Setup.
No Button Name Description
Listening to your zune
1. Connect a zune device or press the [MEDIA] key on the control panel if a zune device has already been connected.
2. When a file is playing and you wish to pause, press the [pause] button next to the progress bar. Press the [ ] button to ► restart the file.
NOTE
88
Page 89

When connecting some external media formats, the system requires time for media indexing. In the case of zune files, the system will take 60ms/song.
Selecting zune music
Selecting through song up/down
1. Press the [SEEK TRACK ∧] or [SEEK TRACK ∨] keys (under 0.8 seconds) on the control panel or the [ ] keys on the steering wheel controller to play ∧∨
the desired file.
NOTE
If the [SEEK TRACK ] key ∨ on the Control panel or [ ] key on the steering wheel controller∨ are pressed and released after the file has played for
more than 3 seconds, the start of the current file will begin playing. If the file has been playing for less than 3 seconds, the start of the previous file will begin
playing.
Selecting through manual search
1. Turn the [TUNE] knob on the control panel in clockwise or counter-clockwise direction. Each click will display information about the selected file.
2. Press the [TUNE] knob to play the selected file.
Selecting from the playlist
1. Press the [List] button.
89
Page 90

2. Press the name of the file from the list. The file will automatically start playing.
By Artist, Albums, Genres, Songs, Composers
1. Press the [List] button.
90
Page 91

2. Press the name [Home] button.
3. Choose the category through which you wish to select. zune mode allows you to select by Songs, Genres, Albums, Composers, and Playlists.
Viewing song information
When listening to your zune, you can browse through file details and information.
91
Page 92

1. Press the Album art icon.
2. The file information (Title, Album, Artist) for the current MP3 file will be displayed.
3. Press the [] button to return to the previous screen.
92
Page 93

6. AUX MODE
AUX Mode Screen
No Button Name Description
1 Mode Display Displays that the current mode is AUX mode.
2 AUX Status Displays the AUX connection status
93
Page 94

3 Sound Enters Sound Setup.
Connecting an AUX media device
Connect a cable from the headphone jack on your AUX device to the jack located in your vehicle.
Image here
NOTE
Connecting your AUX device with the vehicle will not provide power to your AUX device. If you plan on using your AUX device for long periods of time,
make sure to charge with a cigarette jack power adaptor or a separate USB cable.
Listening to AUX media
1. Connect an AUX device or press the [MEDIA] key on the control panel if the AUX device has already been connected.
2. Once in AUX mode, the connected audio will automatically begin playing from the car system.
7. BT AUDIO MODE
BT Audio mode is a feature which allows you to stream music stored in your handset device via a Bluetooth connection. Music saved in the handset device can
be played in the car through Bluetooth audio streaming. Phone music can be played only when a handset device has been connected. To play phone music,
pair a handset device with the system. If Bluetooth is disconnected while playing BT audio, music play will be discontinued. The audio streaming function may
94
Page 95

not be supported in some handset devices. Only one function can be used at a time between the Bluetooth handsfree or Phone music function. Playing music
from the car is not possible when there are no music files stored in the handset device
BT Mode Screen and Features
No Button Name Description
1 Mode Display Displays the current mode as BT Audio mode.
2 Bluetooth device information Displays information about the Bluetooth device
3 Song Title Displays the song title.
4 Play/Pause Plays/pauses the song.
5 Sound Enters Sound Setup.
Listening to music from your Bluetooth device
1. Pair your Bluetooth device to the handsfree system. *For more information on pairing your Bluetooth devices, refer to the ‘Pairing your handset device
to the handsfree system’ section.
2. Press the [MEDIA] key on the control panel to turn on BT audio mode.
3. When streaming music from your Bluetooth device and you wish to pause, press the [pause] button next on the screen. Press the [►] button to restart
music.
NOTE
> While music saved in the Bluetooth device will automatically begin playing after converting to the BT Audio screen, this music player function may not be
supported in some Bluetooth devices.
> If music does not begin playing even after converting to the Phone music screen, try starting the music directly from the Bluetooth device
.
95 96
Page 96

Selecting a song
1. Press the [SEEK TRACK ∧] or [SEEK TRACK ∨] keys (under 0.8 seconds) on the control panel or the [ ] keys on the steering wh∧∨ eel controller to
play the desired song.
2. The previous or next song will begin playing.
NOTE
> File selection may not be supported in some Bluetooth devices.
REW/FF a song
1. Press and hold the [SEEK TRACK ∧] or [SEEK TRACK ∨] keys (over 0.8 seconds) on the control panel or the [ ] keys on the steering wheel ∧∨
controller.
2. The track will rewind or fast-forward at a rate 20 times faster than normal while the key is being held.
3. Release the key to play from the current position.
NOTE
The play/pause, song selection and REW/FF features are supported only in handset devices with AVRCP Ver. 1.3 or higher. If play control features are
not working, first check the AVRCP version of your Bluetooth device.
When such operations are not supported, use the handset device to make controls.
Page 97

4. JUKEBOX MODE
JUKEBOX Mode is a new feature in the Kia UVO Audio System which allows you to copy music from audio CDs, MP3 CDs, and USB music files to save in the
system.
JUKEBOX Mode can largely be divided into Virtual CD mode and My Music mode. Virtual CD mode refers to copied virtual CDs. The Kia UVO system offers you
maximum convenience by allowing you to copy audio CDs and stores them as Virtual CDs within the system. My Music mode allows you to copy songs in MP3
CDs or USB devices to store in the system.
Virtual CD Mode
The Kia UVO Audio System allows you to copy up to 5 physical audio CDs and store them in the system as Virtual CDs, simplifying the process of storing and
managing CDs. For more information on creating Virtual CDs, refer to the ‘Creating a Virtual CD’ section.
97
Page 98

Virtual CD Mode Screen and Features
No Button Name Description
1 Mode Display Displays that the current mode is Virtual CD mode.
2 List Displays the Virtual CD list screen.
3 Repeat If Repeat is operating, the current track will be
repeated and the corresponding icon will be displayed.
4 Shuffle If Shuffle is operating, the tracks will be played in
random order and the corresponding icon will be
displayed.
5 CD Number Displays the Virtual CD disc number.
6 Track Number Displays the track number
7 Play Time Displays the play time.
8 Sound Enters Sound Setup.
Listening to a Virtual CD
1. Press the [JUKEBOX] key on the control panel to turn to Virtual CD mode. Each press of the [JUKEBOX] key will change the mode in the order of
Virtual CD -> My Music -> Virtual CD.
98
Page 99

2. The system will automatically restore the most recently played Virtual CD.
Selecting a Virtual CD
1. While playing a Virtual CD, press the [List] button.
99
Page 100

2. Select the virtual CD from the list.
Listening to all Virtual CDs
1. While playing a Virtual CD, press the [List] button.
2. Press the [All CDs] button from the list.
3. All songs in all available CDs will be played.
My Music Mode
The Kia UVO system offers you with maximum convenience by allowing you to copy songs in your MP3 CD and USB and store them as My Music within the
system. For more information on copying songs into My Music, refer to the ‘Copying songs into My Music’ section.
My Music Mode within the JUKEBOX of your KIA UVO Audio System allows you to copy music and audio files from MP3 CDs and USB and store them in the
system.
My Music Mode Screen and Features
100
 Loading...