

Page 1
Restaurant Application
Quick Reference Guide
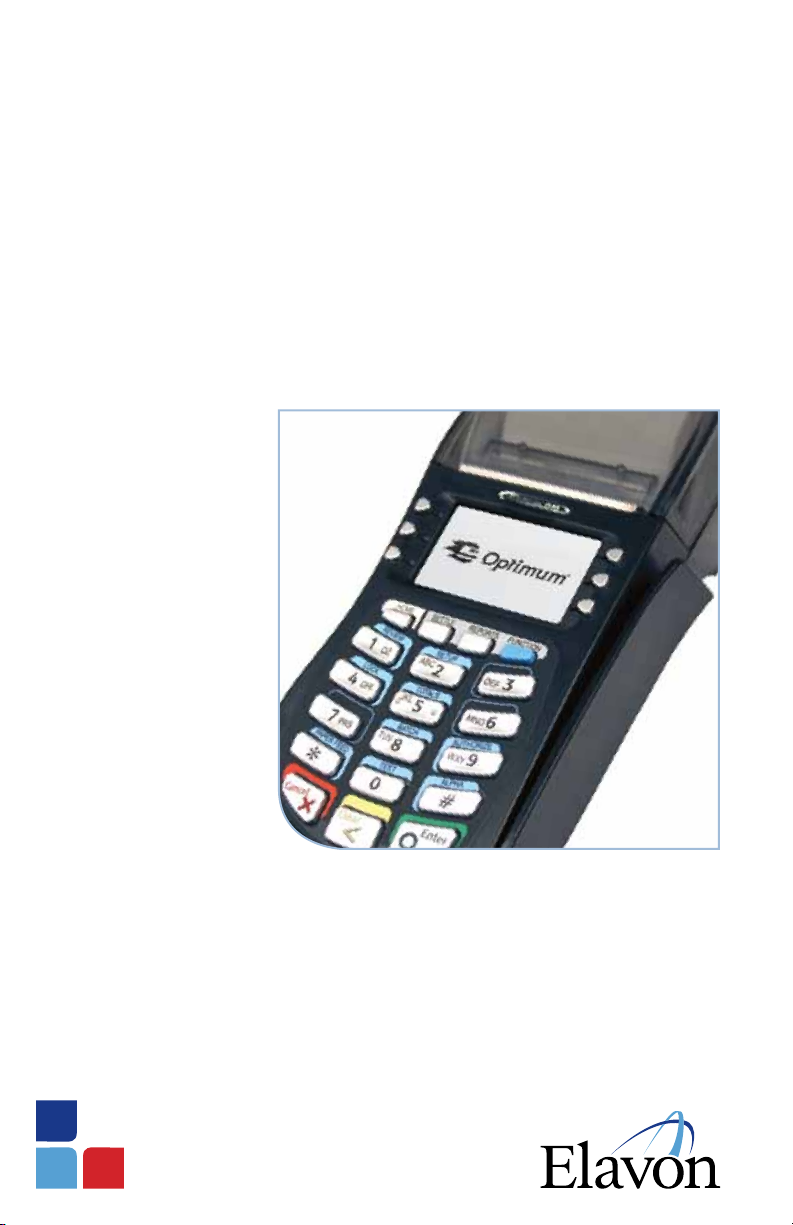
Hypercom® T4200 Series
English & Français
Page 2

English
Credit Sale
> Have customer insert chip card
into reader
> If prompted, have customer select
language (English, Français)
OR
> Press [ENTER]
> Select [TRANSACTION]
> Select [SALE]
> Select [CREDIT]
> Swipe the card
> If prompted, enter the last 4 digits of the
card number and press [ENTER]
> If prompted enter the server # and
press [ENTER]
> Enter the base $ amount and press
[ENTER]
> If prompted select the tip % and press
[ENTER] or scroll for other options
> If prompted input a specific tip amount
and press [ENTER]
Manual Sale
> Press [ENTER]
> Select [TRANSACTION]
> Select [SALE]
> Select [CREDIT]
> Input the account # and press [ENTER]
> Input the expiration date (MMYY) and
press [ENTER]
> If prompted press [ENTER] for card
present or [CLEAR] if the card is not
present
> If the card is not present select the
verification code listed
> If prompted enter the 3 digit CVV2
value from the back of the card and
press [ENTER]
> Enter the base dollar amount and press
[ENTER]
> If prompted enter the tax amount and
press [ENTER]
> If prompted select the tip % and press
[ENTER] or scroll for other options
NOTE: If the tip amount is not known at
the time of sale press [ENTER] and the tip
can be entered later
> The terminal will display the total.
If correct press [ENTER] to continue or
[CLEAR] to return to the main screen
> If prompted, have customer enter PIN
and press [ENTER]
> Print second receipt – [ENTER] for Yes
or [CLEAR] for No
> If prompted input a specific tip amount
and press [ENTER]
NOTE: if the tip amount is not known at the
time of sale press enter and the tip can be
entered later.
> The terminal will display the total.
If correct press [ENTER] to continue or
[CLEAR] to return to the main screen.
> If prompted enter the address
> If prompted enter the postal code
> Print second receipt – [ENTER] for Yes
or [CLEAR] for No
Page 3

Debit Sale
> Press [ENTER]
Authorization Only
> Press [ENTER]
> Select [TRANSACTION]
> Select [SALE]
> Select [DEBIT]
> Swipe the card
OR
> Have customer insert chip card
into reader
> If prompted, have customer select
language (English, Français)
> If prompted [ENTER] the server #
and press [ENTER]
> Enter the base $ amount and press
[ENTER]
> If prompted select the tip percentage
and press [ENTER] or scroll for other
options
> If prompted input a specific tip amount
and press [ENTER]
> If prompted enter the cash back amount
and press [ENTER]
> The terminal will display the total.
If correct press [ENTER] to continue or
[CLEAR] to return to the main screen
> Have customer select Chequing or
Savings
> Select [TRANSACTION]
> Use the arrow key to scroll to
[AUTH ONLY] and select it
> Have customer insert chip card
into reader
> If prompted, have customer select
language (English, Français)
OR
> Swipe or manually enter card # and
press [ENTER]
> If prompted input the expiration date
(MMYY) and press [ENTER]
> If prompted enter the last 4 digits of the
card # and press [ENTER]
> If prompted enter the server # and
press [ENTER]
> If prompted press [ENTER] for card
present or [CLEAR] if the card is not
present
> If the card is not present select the
verification code listed
> Enter the base $ amount and press
[ENTER]
> If prompted select the tip percentage
and press [ENTER] or scroll for other
options
> Have the customer enter their PIN #
and press [ENTER]
> Print second receipt – [ENTER] for Yes
or [CLEAR] for No
> If prompted input a specific tip amount
and press [ENTER]
> The terminal will display the total.
If correct press [ENTER] to continue or
[CLEAR] to return to the main screen
> If prompted, have customer enter PIN
and press [ENTER]
> Print second receipt – [ENTER] for Yes
or [CLEAR] for No
Page 4

Credit Force
> Press [ENTER]
Tip Adjustment
> Press [ENTER]
> Select [TRANSACTION]
> Select [OFFLINE]
> Swipe or manually enter card #
and press [ENTER]
> If prompted input the expiration date
(MMYY) and press [ENTER]
> If prompted enter the last 4 digits of the
account # and press [ENTER]
> If prompted enter the server # and
press [ENTER]
> Enter the base $ amount and press
[ENTER]
> If prompted select the tip percentage
and press [ENTER] or scroll for other
options
> If prompted input a specific tip amount
and press [ENTER]
NOTE: If the tip amount is not known at the
time of sale press enter and the tip can be
entered later.
> The terminal will display the total.
If correct press [ENTER] to continue or
[CLEAR] to return
> Input the approval code and press
[ENTER]
> Select [TRANSACTION]
> Use the arrow key to scroll to the
[ADJUSTMENT] option and select it
> Enter the invoice # to be adjusted
> The total will display if no prior tips
have been entered. If it is correct and
no adjustments are needed press
[ENTER]. Press [CLEAR] to enter the new
adjusted amount and press [ENTER]
> If a previous tip has not been entered the
total will display with an option to
enter a tip
> Enter the tip amount and press [ENTER]
> The total will display again if correct
press [ENTER]
> The terminal will prompt for another
adjustment transaction. If you don’t have
any more press [CLEAR] to return to the
main menu
Key Exchange
> Press [FUNCTION]
> Press [93] [ENTER]
Terminal will communicate to the Host and
perform a key exchange
> Print second receipt – [ENTER] for Yes
or [CLEAR] for No
Public Key Load (Host Init)
> Press [FUNCTION]
> Press [61] [ENTER]
> Enter password and press [ENTER]
Terminal communicates to the Host and
gets the most recent public keys for EMV
Page 5

Void
> Press [ENTER]
Print Server Report
> Press [REPORTS]
> Select [TRANSACTION]
> Use the arrow key to scroll to [VOID]
and select it
> Select Last or Invoice (Last will void the
last transaction if voidable; Invoice will
prompt for an Invoice #)
> Have customer insert chip card into
reader
OR
> Swipe Customer card or enter card #
> Follow prompts
> The terminal will display the total.
If correct press [ENTER] to continue or
[CLEAR] to return
> Print second receipt – [ENTER] for Yes
or [CLEAR] for No
Sign-On Server
> Press [FUNCTION]
> Press [77] [ENTER]
> Enter Server # and press [ENTER]
> Sign-On? Press [ENTER]
Sign-Off Server
> Press [FUNCTION]
> Press [77] [ENTER]
> Enter Server # and press [ENTER]
> Select [SERVER]
> Enter Password and press [ENTER]
> Select [DETAIL], [SUMMARY],
or [UNADJUSTED]
Report will print
Credit Refund
> Press [ENTER]
> Select [TRANSACTION]
> Select [REFUND]
> Have customer insert chip card into
reader
> If prompted, have customer select
language (English, Français)
OR
> Swipe or manually enter card # and
press [ENTER]
> If prompted input the expiration date
(MMYY) and press [ENTER]
> If prompted enter the last 4 digits of the
account # and press [ENTER]
> If prompted enter the server # and
press [ENTER]
> Enter the $ amount and press [ENTER]
> Print second receipt – [ENTER] for Yes
or [CLEAR] for No
> Sign-Off? Press [ENTER]
Page 6

Debit Refund
> Press [ENTER]
Find
> Press [ENTER]
> Select [TRANSACTION]
> Select [REFUND]
> Select [DEBIT]
> Have customer insert chip card into
reader
> If prompted, have customer select
language (English, Français)
OR
> Swipe card
> If prompted enter the server # and
press [ENTER]
> Enter the $ amount and press [ENTER]
> Have the customer enter their PIN #
and press [ENTER]
> Print second receipt – [ENTER] for Yes
or [CLEAR] for No
Reprint
> Press [ENTER]
> Use the arrow key to scroll to [REPRINT]
and select it
> Enter password and press [ENTER]
> Select [LAST] to reprint the last
transaction or [INVOICE] to reprint a
specific invoice #
> Select [BATCH]
> Use the arrow key to scroll to [FIND]
and select it
> Input the invoice # and press [ENTER]
Transaction displays on screen
Settlement
> Press [SETTLE]
OR
> Press [ENTER]
> Select [BATCH]
> Select [SETTLE]
> Enter the manager password and press
[ENTER]
> The terminal will display the sale total.
If correct press [ENTER] to continue or
[CLEAR] to return
> The terminal will display the refund
total If correct press [ENTER] to
continue or [CLEAR] to return
The terminal will settle the batch and print
a settlement report
NOTE: If totals are incorrect run a batch
audit report to determine what transactions
are missing and re-run them.
> Select [CUSTOMER] or
[MERCHANT COPY]
The transaction will reprint
Page 7

Batch Review
> Press [ENTER]
Detail Report
> Press [REPORTS]
> Select [BATCH]
> Select [REVIEW]
> If prompted enter the server # and
press [ENTER]
> Use the [CLEAR] key to view the
previous transaction or [ENTER] to
view the next transaction
Totals Report
> Press [ENTER]
> Select [BATCH]
> Select [TOTAL]
The batch is scanned and the total $
amount for the batch displays
> Press [ENTER] to review net sales by
card type and continue to do so, as
needed
OR
> Press [ENTER]
> Select [REPORTS]
> Select [AUDIT]
> Select [ALL TRANS]
A detailed breakdown of the
transactions will print
Summary Report
> Press [REPORTS]
OR
> Press [ENTER]
> Select [REPORTS]
> Select [SUMMARY]
> Select [ALL TRANS]
The report will print
History Report
> Press [REPORTS]
OR
> Press [ENTER]
> Select [REPORTS]
> Use the arrow keys to scroll to
[HISTORY] and select it
> Select the length of days history you
want to print
The report will print
Page 8

Français
Vente par carte de crédit
> Invitez le client à insérer sa carte à puce
dans le lecteur
> Si demandé, invitez le client à
sélectionner la langue (English, Français)
OU
> Appuyez sur [ENTER]
> Sélectionnez [TRANSACTION]
> Sélectionnez [VENTE]
> Sélectionnez [CRÉDIT]
> Faites glisser la carte
> Si demandé, saisissez les 4 derniers
chiffres du no de la carte, puis appuyez
sur [ENTER]
> Si demandé, saisissez le no du serveur,
puis appuyez sur [ENTER]
> Saisissez le montant de base en $, puis
appuyez sur [ENTER]
> Si demandé, sélectionnez le % du
pourboire, puis appuyez sur [ENTER] ou
faites défiler pour d’autres options
> Si demandé, saisissez un montant
particulier pour le pourboire, puis
appuyez sur [ENTER]
REMARQUE : Si vous ne connaissez pas
le montant du pourboire au moment de la
vente, appuyez sur [ENTER] et le pourboire
pourra être saisi plus tard.
> Le terminal affichera le total.
S’il est exact, appuyez sur [ENTER] pour
continuer ou sur [CLEAR] pour revenir à
l’écran principal
> Si demandé, invitez le client à saisir son
NIP, puis appuyez sur [ENTER]
Vente manuelle
> Appuyez sur [ENTER]
> Sélectionnez [TRANSACTION]
> Sélectionnez [VENTE]
> Sélectionnez [CRÉDIT]
> Saisissez le no de compte, puis appuyez
sur [ENTER]
> Saisissez la date d’expiration (MMAA),
puis appuyez sur [ENTER]
> Si demandé, appuyez sur [ENTER] si la
carte est disponible ou sur [CLEAR] si la
carte n’est pas disponible
> Si la carte n’est pas disponible,
sélectionnez le code de vérification indiqué
> Si demandé, saisissez le code de
sécurité à 3 chiffres CVV2 au dos de la
carte, puis appuyez sur [ENTER]
> Saisissez le montant de base en dollars,
puis appuyez sur [ENTER]
> Si demandé, saisissez le montant de la
taxe, puis appuyez sur [ENTER]
> Si demandé, sélectionnez le % du
pourboire, puis appuyez sur [ENTER] ou
faites défiler pour d’autres options
> Si demandé, saisissez un montant
particulier pour le pourboire, puis
appuyez sur [ENTER]
REMARQUE : si vous ne connaissez pas
le montant du pourboire au moment de la
vente, appuyez sur [ENTER] et le pourboire
pourra être saisi plus tard.
> Le terminal affichera le total.
S’il est exact, appuyez sur [ENTER] pour
continuer ou sur [CLEAR] pour revenir à
l’écran principal
> Impression d’un deuxième reçu – [ENTER]
pour Oui ou [CLEAR] pour Non
> Si demandé, saisissez l’adresse
> Si demandé, saisissez le code postal
> Impression d’un deuxième reçu – [ENTER]
pour Oui ou [CLEAR] pour Non
Page 9

Vente par carte de débit
> Appuyez sur [ENTER]
Autorisation seulement
> Appuyez sur [ENTER]
> Sélectionnez [TRANSACTION]
> Sélectionnez [VENTE]
> Sélectionnez [DÉBIT]
> Faites glisser la carte
OU
> Invitez le client à insérer sa carte à puce
dans le lecteur
> Si demandé, invitez le client à sélectionner
la langue (English, Français)
> Si invité, saisissez le no du serveur puis
appuyez sur [ENTER]
> Saisissez le montant de base en $, puis
appuyez sur [ENTER]
> Si demandé, sélectionnez le pourcentage
du pourboire, puis appuyez sur [ENTER]
ou faites défiler pour d’autres options
> Si demandé, saisissez un montant
particulier pour le pourboire, puis
appuyez sur [ENTER]
> Si demandé, saisissez le montant de
retrait d’argent liquide, puis appuyez sur
[ENTER]
> Le terminal affichera le total.
S’il est exact, appuyez sur [ENTER] pour
continuer ou sur [CLEAR] pour revenir à
l’écran principal
> Invitez le client à sélectionner le compte
Chèque ou Épargne
> Invitez le client à saisir son NIP, puis
appuyez sur [ENTER]
> Impression d’un deuxième reçu – [ENTER]
pour Oui ou [CLEAR] pour Non
> Sélectionnez [TRANSACTION]
> Servez-vous de la flèche pour faire défiler
jusqu’à [AUTO SEUL], puis sélectionnez-le
> Invitez le client à insérer sa carte à puce
dans le lecteur
> Si demandé, invitez le client à sélectionner
la langue (English, Français)
OU
> Faites glisser la carte ou saisissez le no
manuellement, puis appuyez sur [ENTER]
> Si demandé, saisissez la date d’expiration
(MMAA), puis appuyez sur [ENTER]
> Si demandé, saisissez les 4 derniers
chiffres du no de la carte, puis appuyez
sur [ENTER]
> Si demandé, saisissez le no du serveur,
puis appuyez sur [ENTER]
> Si demandé, appuyez sur [ENTER] si la
carte est disponible ou sur [CLEAR] si la
carte n’est pas disponible
> Si la carte n’est pas disponible,
sélectionnez le code de vérification indiqué
> Saisissez le montant de base en $, puis
appuyez sur [ENTER]
> Si demandé, sélectionnez le pourcentage
du pourboire, puis appuyez sur [ENTER]
ou faites défiler pour d’autres options
> Si demandé, saisissez un montant
particulier pour le pourboire, puis
appuyez sur [ENTER]
> Le terminal affichera le total.
S’il est exact, appuyez sur [ENTER] pour
continuer ou sur [CLEAR] pour revenir à
l’écran principal
> Si demandé, invitez le client à saisir son
NIP, puis appuyez sur [ENTER]
> Impression d’un deuxième reçu – [ENTER]
pour Oui ou [CLEAR] pour Non
Page 10

Imposition du crédit
> Appuyez sur [ENTER]
Rajustement du pourboire
> Appuyez sur [ENTER]
> Sélectionnez [TRANSACTION]
> Sélectionnez [HORS LIGNE]
> Faites glisser la carte ou saisissez le no
manuellement, puis appuyez sur [ENTER]
> Si demandé, saisissez la date d’expiration
(MMAA), puis appuyez sur [ENTER]
> Si demandé, saisissez les 4 derniers
chiffres du no de compte, puis appuyez
sur [ENTER]
> Si invité, saisissez le no du serveur, puis
appuyez sur [ENTER]
> Saisissez le montant de base en $, puis
appuyez sur [ENTER]
> Si demandé, sélectionnez le pourcentage
du pourboire, puis appuyez sur [ENTER]
ou faites défiler pour d’autres options
> Si demandé, saisissez un montant
particulier pour le pourboire, puis
appuyez sur [ENTER]
REMARQUE : si vous ne connaissez pas
le montant du pourboire au moment de la
vente, appuyez sur [ENTER] et le pourboire
pourra être saisi plus tard.
> Le terminal affichera le total.
S’il est exact, appuyez sur [ENTER] pour
continuer ou sur [CLEAR] pour revenir
> Saisissez le code d’autorisation, puis
appuyez sur [ENTER]
> Impression d’un deuxième reçu – [ENTER]
pour Oui ou [CLEAR] pour Non
> Sélectionnez [TRANSACTION]
> Servez-vous de la flèche pour faire
défiler jusqu’à l’option [RAJUSTEMENT],
puis sélectionnez-la
> Saisissez le no de la facture qui doit être
rajustée
> Le total s’affichera si aucun autre
pourboire a été saisi. S’il est exact et
qu’aucun rajustement est nécessaire,
appuyez sur [ENTER]. Appuyez sur
[CLEAR] pour saisir le nouveau montant
rajusté, puis appuyez sur [ENTER]
> Si aucun pourboire n’a été saisi, le total
s’affichera avec une option vous invitant
à saisir un pourboire
> Saisissez le montant du pourboire, puis
appuyez sur [ENTER]
> Le total s’affichera encore une fois, s’il
est exact appuyez sur [ENTER]
> Le terminal vous invitera à effectuer une
autre transaction de rajustement. Si vous
n’en avez plus d’autres, appuyez sur
[CLEAR] pour revenir à l’écran principal
Échange de clés
> Appuyez sur [FONCTION]
> Appuyez sur [93] [ENTER]
Le terminal communiquera avec l’hôte et
procédera à un échange de clés
Charge à clés publiques
(Hôte Init)
> Appuyez sur [FONCTION]
> Appuyez sur [61] [ENTER]
> Saisissez le mot de passe, puis appuyez
sur [ENTER]
Le terminal communique avec l’hôte et obtient
les clés publiques les plus récentes pour l’EMV
Page 11

Annulation
> Appuyez sur [ENTER]
> Sélectionnez [TRANSACTION]
> Servez-vous de la flèche pour faire
défiler jusqu’à l’option [ANNULER] puis
sélectionnez-la
> Sélectionnez Dernière ou Facture
(Dernière annulera la dernière transaction
si elle peut être annulée; Facture vous
demandera un no de facture)
> Invitez le client à insérer sa carte à puce
dans le lecteur
OU
> Faites glisser la carte du client ou
saisissez le no de la carte
> Suivez les invites
> Le terminal affichera le total.
S’il est exact, appuyez sur [ENTER] pour
continuer ou sur [CLEAR] pour revenir
> Impression d’un deuxième reçu – [ENTER]
pour Oui ou [CLEAR] pour Non
Impression du rapport de
serveur
> Appuyez sur [RAPPORTS]
> Sélectionnez [SERVEUR]
> Saisissez le mot de passe, puis appuyez
sur [ENTER]
> Sélectionnez [DÉTAIL], [SOMMAIRE], ou
[NON RAJUSTÉ]
Le rapport s’imprimera
Remboursement sur carte de
crédit
> Appuyez sur [ENTER]
> Sélectionnez [TRANSACTION]
> Sélectionnez [REMBOURSEMENT]
> Invitez le client à insérer sa carte à puce
dans le lecteur
> Si demandé, invitez le client à
sélectionner la langue (English, Français)
OU
Ouverture de session sur le
serveur
> Appuyez sur [FONCTION]
> Appuyez sur [77] [ENTER]
> Saisissez le no du serveur, puis appuyez
sur [ENTER]
> Ouverture de session? Appuyez sur [ENTER]
Fermeture de session sur le
serveur
> Appuyez sur [FONCTION]
> Appuyez sur [77] [ENTER]
> Saisissez le no du serveur, puis appuyez
sur [ENTER]
> Fermeture de session? Appuyez sur [ENTER]
> Faites glisser la carte ou saisissez le no
manuellement, puis appuyez sur [ENTER]
> Si demandé, saisissez la date d’expiration
(MMAA), puis appuyez sur [ENTER]
> Si demandé, saisissez les 4 derniers
chiffres du no de compte, puis appuyez
sur [ENTER]
> Si invité, saisissez le no du serveur, puis
appuyez sur [ENTER]
> Saisissez le montant en $, puis appuyez
sur [ENTER]
> Impression d’un deuxième reçu – [ENTER]
pour Oui ou [CLEAR] pour Non
Page 12

Remboursement sur carte de
débit
> Appuyez sur [ENTER]
> Sélectionnez [TRANSACTION]
> Sélectionnez [REMBOURSEMENT]
> Sélectionnez [DÉBIT]
> Invitez le client à insérer sa carte à puce
dans le lecteur
> Si demandé, invitez le client à
sélectionner la langue (English, Français)
OU
> Faites glisser la carte
> Si invité, saisissez le no du serveur, puis
appuyez sur [ENTER]
> Saisissez le montant en $, puis appuyez
sur [ENTER]
> Invitez le client à saisir son NIP, puis
appuyez sur [ENTER]
> Impression d’un deuxième reçu – [ENTER]
pour Oui ou [CLEAR] pour Non
Recherche
> Appuyez sur [ENTER]
> Sélectionnez [LOT]
> Servez-vous de la flèche pour faire
défiler jusqu’à l’option [RECHERCHE]
puis sélectionnez-la
> Saisissez le no de la facture, puis
appuyez sur [ENTER]
La transaction s’affichera à l’écran
Règlement
> Appuyez sur [RÉGLER]
OU
> Appuyez sur [ENTER]
> Sélectionnez [LOT]
> Sélectionnez [RÉGLER]
> Saisissez le mot de passe du gérant,
puis appuyez sur [ENTER]
> Le terminal affichera le total de la vente.
S’il est exact, appuyez sur [ENTER] pour
continuer ou sur [CLEAR] pour revenir
Réimpression
> Appuyez sur [ENTER]
> Servez-vous de la flèche pour faire
défiler jusqu’à l’option [RÉIMPRIMER]
puis sélectionnez-la
> Saisissez le mot de passe, puis appuyez
sur [ENTER]
> Sélectionnez [DERNIÈRE] pour
réimprimer la dernière transaction ou
[FACTURE] pour réimprimer un no de
facture particulier
> Sélectionnez [CLIENT] ou [COPIE DU
MARCHAND]
La transaction se réimprimera
> Le terminal affichera le total du
remboursement s’il est exact, appuyez
sur [ENTER] pour continuer ou sur
[CLEAR] pour revenir
Le terminal règlera le lot, puis il imprimera
un rapport de règlement
REMARQUE : si les totaux sont inexacts,
produisez un rapport de vérification du
lot afin d’établir quelles transactions sont
manquantes, puis produisez-les à nouveau.
Page 13

Révision du lot
> Appuyez sur [ENTER]
Rapport de ventes détaillé
> Appuyez sur [RAPPORTS]
> Sélectionnez [LOT]
> Sélectionnez [RÉVISION]
> Si invité, saisissez le no du serveur, puis
appuyez sur [ENTER]
> Servez-vous de la touche [CLEAR] pour
visionner la transaction précédente ou
[ENTER] pour visionner la transaction
suivante
Rapport sur le total des ventes
> Appuyez sur [ENTER]
> Sélectionnez [LOT]
> Sélectionnez [TOTAL]
Le lot est scanné et le montant total en $
pour le lot s’affiche
> Appuyez sur [ENTER] pour réviser les
chiffres de ventes nettes par type de
carte et continuez à ce faire, au besoin
OU
> Appuyez sur [ENTER]
> Sélectionnez [RAPPORTS]
> Sélectionnez [AUDITER]
> Sélectionnez [TOUTES LES TRANS]
Une ventilation détaillée des transactions
s’imprimera
Rapport de ventes sommaire
> Appuyez sur [RAPPORTS]
OU
> Appuyez sur [ENTER]
> Sélectionnez [RAPPORTS]
> Sélectionnez [SOMMAIRE]
> Sélectionnez [TOUTES LES TRANS]
Le rapport s’imprimera
Rapport sur l’historique
> Appuyez sur [RAPPORTS]
OU
> Appuyez sur [ENTER]
> Sélectionnez [RAPPORTS]
> Servez-vous de la flèche pour faire
défiler jusqu’à l’option [HISTORIQUE],
puis sélectionnez-la
> Sélectionnez le nombre de jour de
l’historique que vous souhaitez imprimer
Le rapport s’imprimera
Page 14

MerchantConnect.com
The Online Window To Your Payment
Processing Account
MerchantConnect is your one-stop destination for online
customer service. It contains everything you need to manage
your electronic payment activity:
My Account
Manage your account online. View statements, view or
update your profile, request new products and track equipment
shipments.
My Reports
Provides you with timely and secure accounting information
such as deposit summaries, transaction activity, chargeback and
retrieval status and more.
Support
Find resource information about transaction processing, industry
mandates, product support and practical tips to help improve
your bottom line.
Getting Started Is:
Fast, Easy, Secure And Free!
Go to www.MerchantConnect.com
QRG-1319-CAE Rev0611 ©2011 Elavon Inc
 Loading...