

Page 1
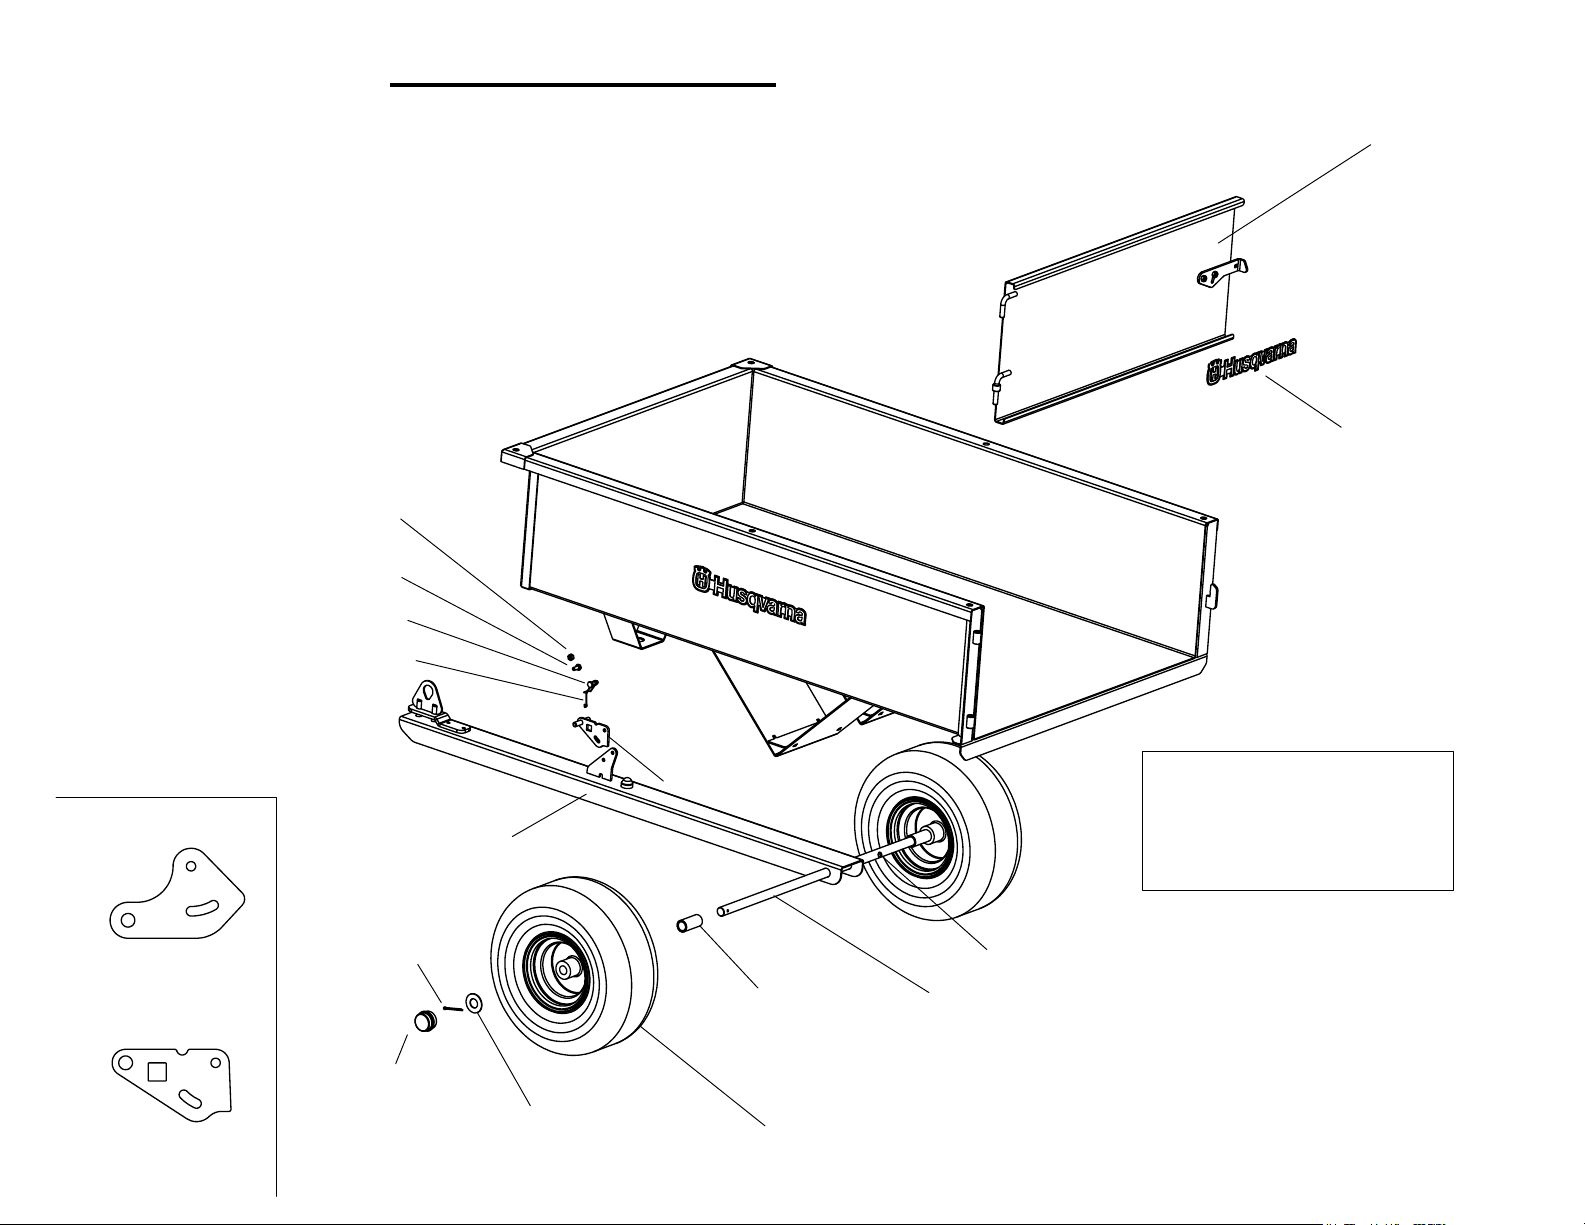
Assembly Instructions
1. Remove all parts from box.
2. Place axle in one side of axle support (V shape on underside of cart).
3. Install Hitch (black channel) with 3/4" hole aligned with axle (make sure hitch & dump latch are facing correct direction)
Slide axle through Hitch, then through other support, you may need to rotate axle to allow anti-rotation pin to engage
properly.
4. Install axle spacer on exposed portion of axle.
5. Install tire assembly (valve stem side facing out).
6. Install large washer on axle.
7. Instale large cotter pin and bend around to clear outside diameter of washer.
8. Install plastic hubcap over washer.
9. Repeat installation on other side.
10. Using a grease gun, lubricate grease fitting on each wheel until grease is visible
www.mymowerparts.com
between axle and wheel bushing.
*Nut (2)
1/4-20 Center Lock
*Bolt (1)
1/4-20 x 3/4" - G5
*Bolt (1)
1/4-20 x 1" - G5
Latch Spring (1) Fits All
531 30 01-28
Tailgate Assy. (1)
531 30 01-00
Decal (3)
531 03 10-66
For Husqvarna Parts Call 606-678-9623 or 606-561-4983
Dump Latch - Units
produced prior to July-2003
531 30 01-31
Dump Latch - Units
produced after July-2003
Will not fit prior production
Hitch Channel Assy. (1)
531 30 01-30
*Cotter Pin (2)
1/8" x 1 1/2"
Hubcap (2)
532 10 47-57
* source locally
Washer (2)
532 12 17-48
Dump Latch (1) After 7-03
531 30 01-29
Axle Spacer (2)
531 30 01-32
Tire Assembly (2)
Service Parts Breakdown
532 10 62-22 - Tire
532 13 83-36 - Rim
532 06 51-39 - Valve Stem
532 05 91-92 - Valve Cap
532 12 49-57 - Grease Fitting
532 12 49-59 - Flanged Bushing
*Anti-Rotation Pin
Axle (1)
531 30 01-33
- Existing Product Upgrade Add the Latch Spring &
replace the upper 3/4" long
1/4-20 bolt with a 1" long bolt.
This will help maintain the
dump latch in the closed position
for units produced in 2002
Husqvarna HDC-10
Heavy Duty Dump Cart
531 03 10-07
7-03
 Loading...