

Humminbird STH 7W, STH 7 User Manual
Bronze Thru-Hull Transducer
1
Thank You
Thank you for choosing Humminbird®, America’s #1 name in fishfinders. Humminbird® has
built its reputation by manufacturing top-quality, thoroughly reliable marine equipment.
Genuine Humminbird® accessories offer the opportunity to upgrade and expand the
capabilities of your Humminbird® product.
About Thru-Hull Installation
Following are instructions for the installation of the Bronze Thru-Hull Transducer. We
encourage you to read these instructions thoroughly to fully benefit from your
Humminbird® accessory. This accessory requires drilling a hole in the hull of the boat;
therefore, installation should be performed by a qualified marine technician.
Prior to installation, test the transducer to ensure that no damage occurred during shipping.
After connecting the transducer to the fishfinder, hold the transducer in the water over the
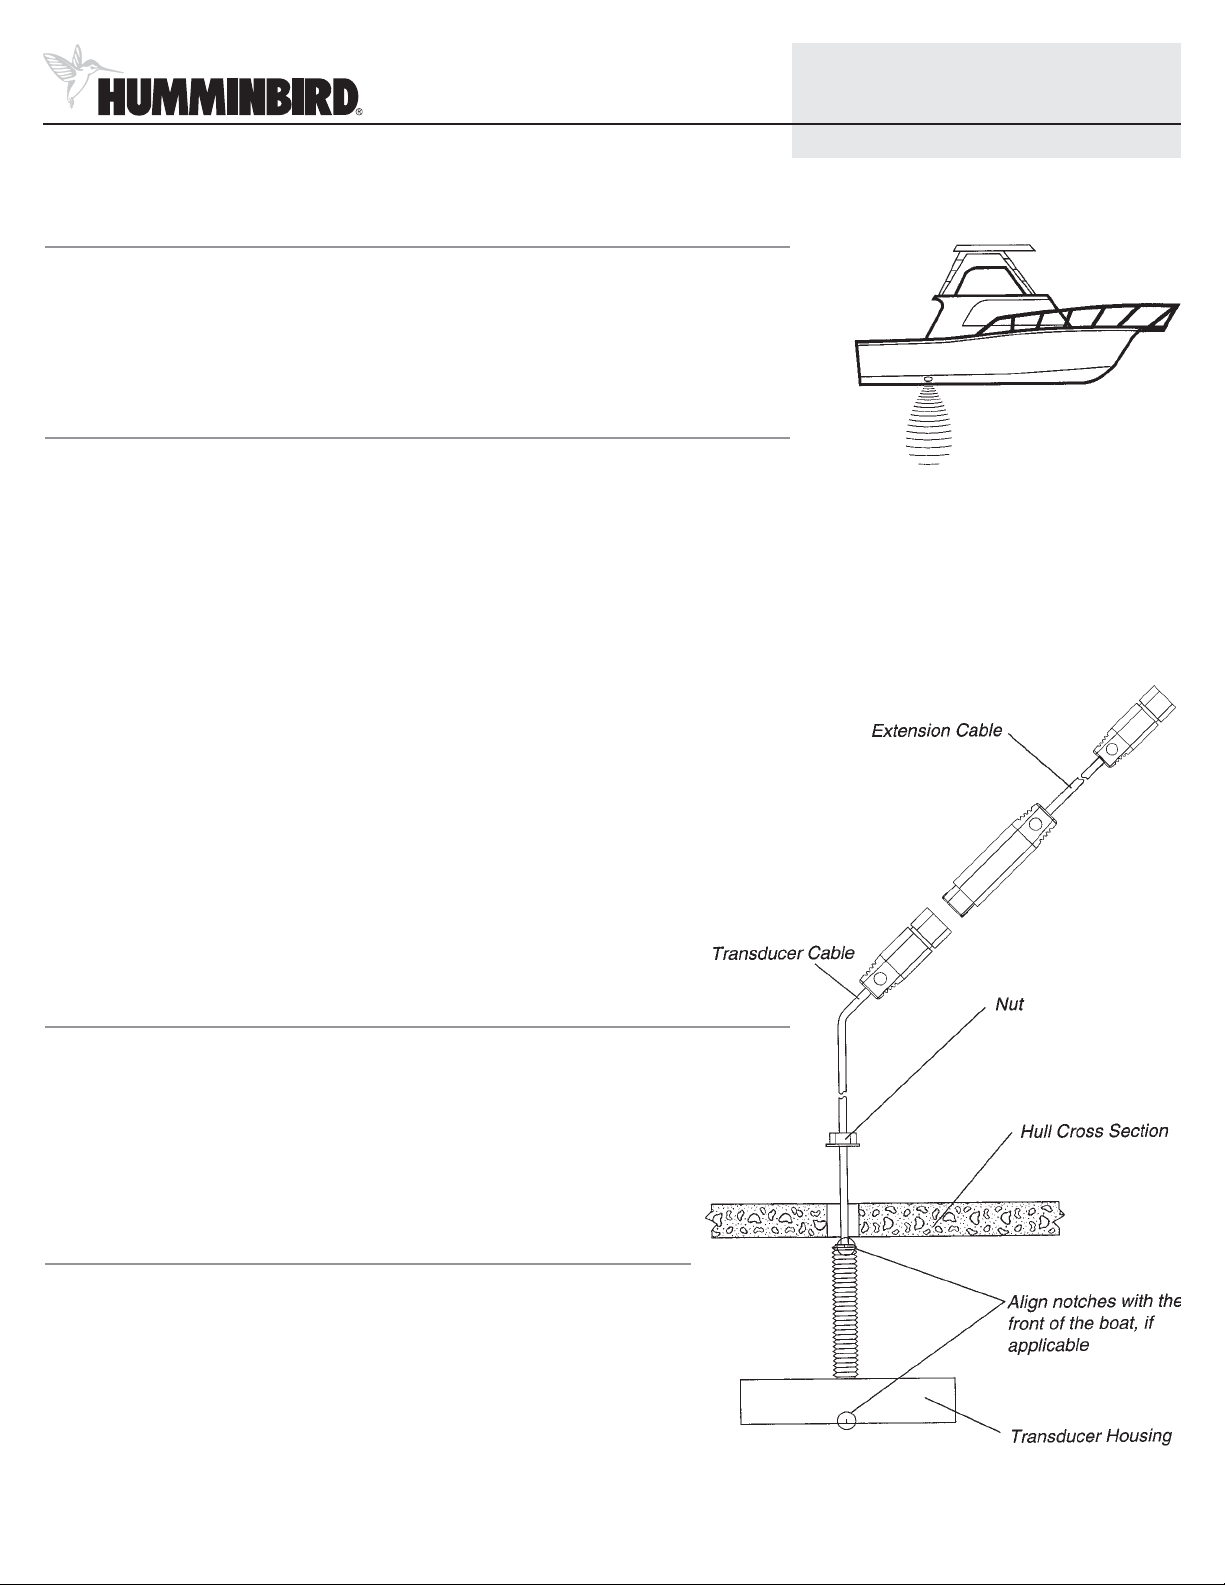
side of the boat to confirm proper operation. Determine the best mounting location for the
transducer. Outside the boat, the best location will be aft midship, as close to the centerline
of the boat as possible. The transducer should be mounted forward of the propellers on
inboard boats, and separated adequately from other transducers, strakes, rivet lines, or other
protrusions. Inside the boat, there must be roomt to access the mounting location for
installation and cable routing.
NOTE: This type of transducer installation is not recommended for trailerable boats.
Additionally, if the selected mounting location has a hull deadrise angle of 10 degrees or
greater, a fairing block should be used to level the transducer housing and direct the
sonar signal straight down.
Before You Start
If you find that any items are missing from your installation kit, call our Customer
Resource Center at 1-800-633-1468.
In addition to the hardware supplied with your transducer, you will need a drill, a small
drill bit for a pilot hole, a hole saw to fit the threaded stem of the transducer, a large
adjustable wrench, and marine sealant.
Attaching the Transducer
Select a location for the transducer and drill a small pilot hole. Use the pilot hole (from
the outside of the hull) to drill a hole sized to fit the threaded stem of the transducer. If
you are using a fairing block, drill the hole perpendicular to the water line. If you are
mounting the transducer body directly to the hull, drill the hole perpendicular to
the hull. Thoroughly clean and deburr the drilled hole and clean the outside of
the hull.
If you are using a fairing block, the block should be cut to match the angle of the deadrise
of the hull. Two pieces will be required. The first piece mounts outside the hull and is
shaped to match the profile of the transducer. The second piece mounts inside the hull
530513-2_A
Thru-Hull Installation
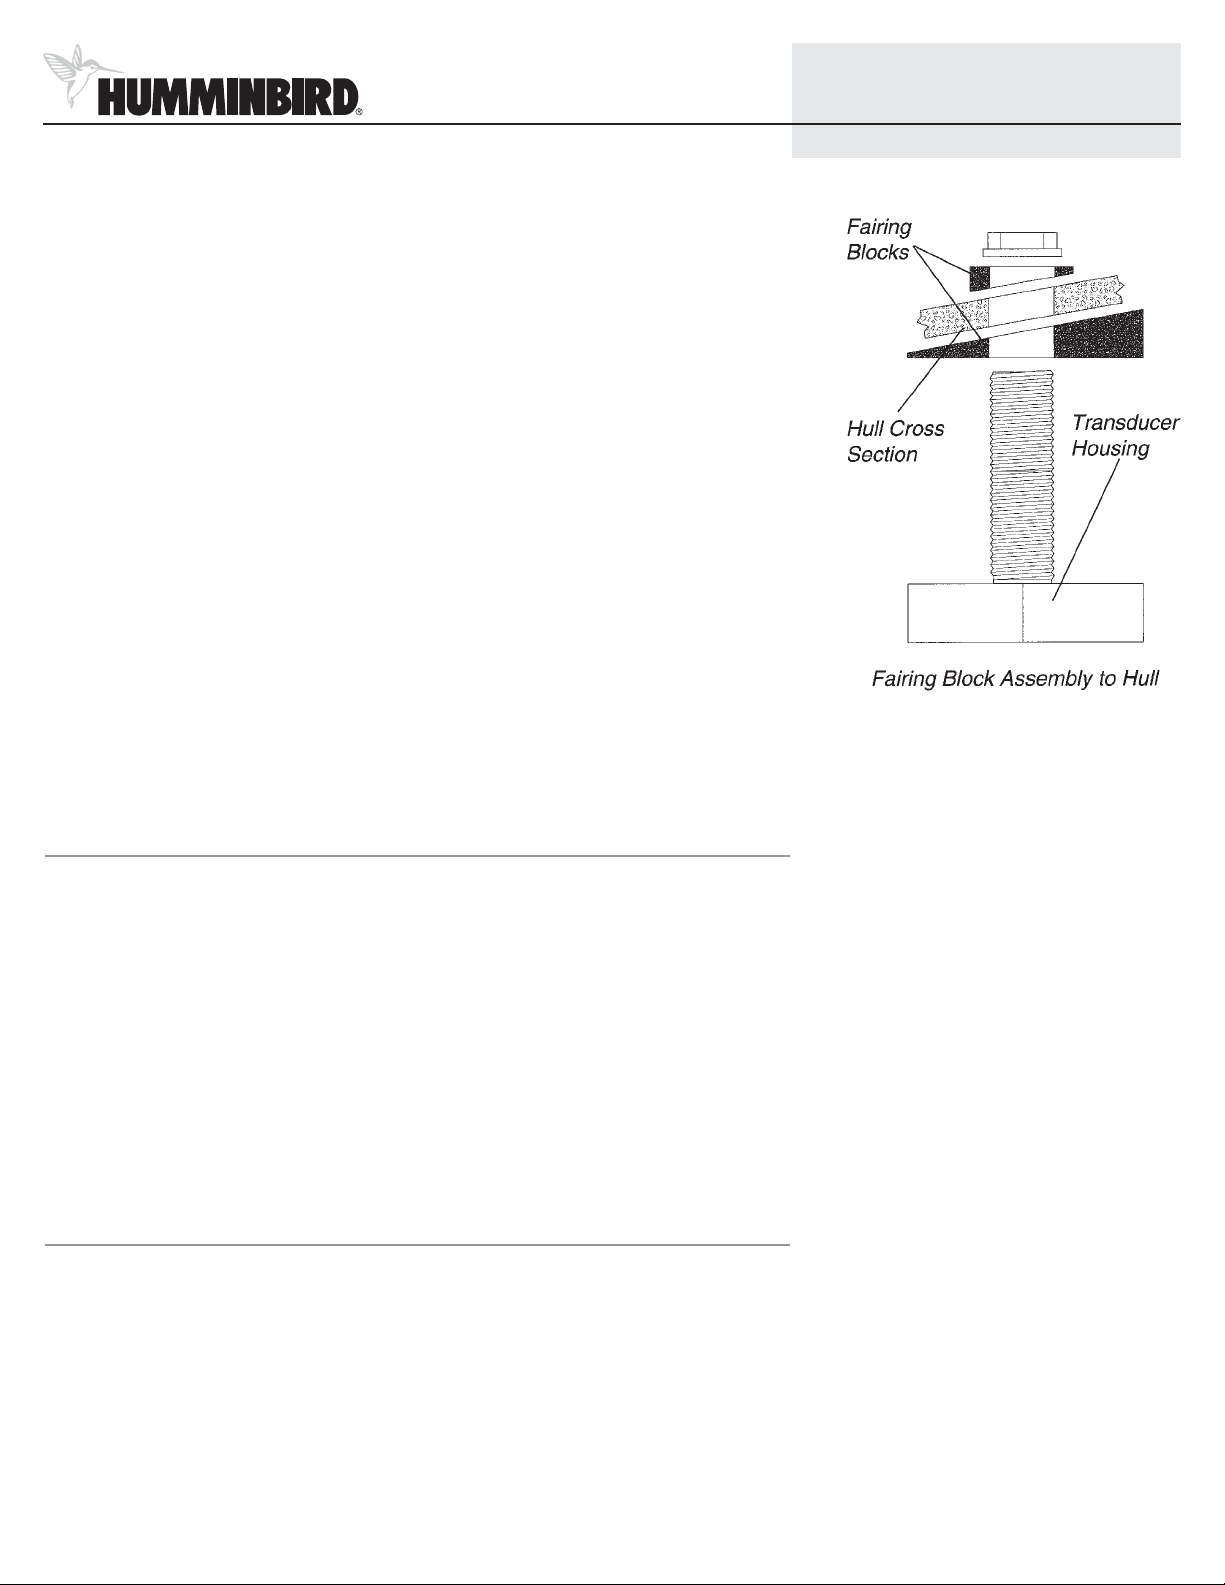
and provides a level surface for the fasteners. A fairing block (usually made of wood) can
also serve to create a hydrodynamic water flow around the transducer body. A fairing
block is required for round body transducers. The design and fabrication of this block
varies greatly with different hull shapes; therefore, it should be customized by a qualified
marine technician.
If the transducer is round, a notch on the housing and stem indicates the forward side of
the transducer. This type of transducer is directional in nature and must be aligned with
with the front of the boat (the direction of travel). Failure to align the transducer notches
with the front of the boat will result in incorrect bottom readings.
Temporarily install the transducer to check the fit. Then apply a generous amount of
marine sealant or slow curing epoxy inside the drilled hole and along the mating surfaces
of the transducer housing. If you are using a fairing block, seal the mating edges of the
block as well.
Insert the transducer into the drilled hole from outside the boat, then install the nut onto
the threaded stem from inside the boat. If you are using a fairing block outside the hull,
you must use a similar block inside the hull to provide a level bearing surface. Tighten the
nuts to 10 ft/lbs or use moderate pressure on an adjustable wrench. Do not over-tighten
the nuts. If the hull or fairing block is wood, it will swell when wet.
Routing the Cable
Connect the extension cables to the transducer housing and route the cable to your
fishfinder. Route and secure the cable, avoiding areas where it may be damaged or
interfere with normal boating operations.
Insert the transducer cables into the appropriate terminal slots on the unit. The slots are
keyed to prevent reversed installation, so be careful not to force the connector into the
holder.
Refer to your owner’s manual for the correct procedure for installing the connector holder
to the mounting base.
Your fishfinder is now ready for operation.
Customer Support
Your Humminbird® accessory is designed for trouble-free operation and is backed by the
same one-year warranty as our fishfinders, VHF Marine-Band radios, and GPS Navigation
equipment. Refer to your Humminbird® product Operations Manual for the specific
details of this warranty. If you have any questions, call our Humminbird® Customer
Resource Center at 1-800-633-1468. Throughout the U.S. and Canada, hours are MondayFriday 8:05 am to 4:30 pm Central Standard Time.
Humminbird
678 Humminbird Lane
Eufaula, AL 36027
Bronze Thru-Hull Transducer
2
 Loading...