

Human Elisys Uno User manual
E
lisys Uno
| User Manual
|
Cat.No. 1
735
0/1

Revision List of the Manual
No.
Rev./DATE
REVISION DESCRIPTION
01
01/2006
-06First edition
02
02/2008
-02Adaptation to new corporate design
0303/2009
-05Performance
check kit added


a
NOTICE
Analytical instruments for in vitro diagnostic application involve the handling of human samples and controls
which should be considered at least potentially infectious. Therefore every part and accessory of the respective
instrument which may have
come into contact with such samples must equally be considered as potentially
infectious.
BIOHAZARD
The „BIOHAZARD“ warning label must be affixed to instrument prior to first use with biological material !
Servicing Note:
Before doing any servicing
on the instrument it is very important to thoroughly disinfect all possibly contaminated
parts. Before the instrument is removed from the laboratory for disposal or servicing, it must be decontaminated.
Decontamination should be performed by authorised wel
l-trained personnel only, observing all necessary safety
precautions. Instruments to be returned have to be accompanied by a decontamination certificate completed by
the responsible laboratory manager. If a decontamination certificate is not supplied, the
returning laboratory will
be responsible for charges resulting from non
-
acceptance of the instrument by the servicing centre, or from
authority’s interventions.
HUMAN
Gesellschaft für Biochemica und Diagnostica mbH
| Max
-
Planck
-
Ring 21 · 65205 Wiesba
den · Germany
| Tel.: +49 61 22/99 88
-
0 · Fax: +49 61 22/99 88
-
100
| e-Mail: human@human.de ·
www.human.de

b

I
1
INTRODUCTION
This manual is considered as a part of the instrument; it has to be at the operator’s hand as well as at the
maintenance operator’s availability. For accurate installation, use and maintenance, please read the following
instructions carefully.
In order to avoid instrument or personal damages, carefully read the ”GENERAL SAFETY
WARNINGS”, describing the suitable operating procedures. In case of breakdowns or any troubles with the
instrument, apply to the local Technical Service.
2
USER WARRANTY
HUMAN warrants that instruments sold by one of its authorised representatives shall be free of any defect in
material or workmanship, provided that this warranty shall apply only to defects which become apparent within
one year from the date of delivery of
the new instrument to the purchaser.
The HUMAN representative shall replace or repair any defective item at no charge, except for transportation
expenses to the point of repair.
This warranty excludes the HUMAN representative from liability to replace any
item considered as expendable in
the course of normal usage, e.g.: lamps, valves, syringes, glassware, fuses, diskettes, tubing etc.
The HUMAN representative shall be relieved of any liability under this warranty if the product is not used in
accordance w
ith the manufacturer's instructions, altered in any way not specified by HUMAN, not regularly
maintained, used with equipment not approved by HUMAN or used for purposes for which it was not designed.
HUMAN shall be relieved of any obligation under this war
ranty, unless a completed installation / warranty
registration form is received by HUMAN within 15 days of installation of this product.
This warranty does not apply to damages incurred in shipment of goods. Any damage so incurred shall be re
-
ported
to th
e freight carrier for settlement or claim.
3
INTENDED USE OF THE INSTRUMENT
[IVD]
The instrument has to be used for the expected purposes and in perfect technical conditions, by qualified
personnel, in working conditions and maintenance operations as descri
bed in this manual, according to the
GENERAL SAFETY WARNINGS. This manual contains instructions for professional qualified operators.
4
GENERAL SAFETY WARNINGS
Use only chemical reagents and accessories specified and supplied by HUMAN and/or mentioned in
this manual.
Place the product so that it has proper ventilation.
The instrument should be installed on a stationary flat working surface, free from vibrations.
Do not operate in area with excessive dust.
Work at room temperature and humidity, according to
the specifications listed in this manual.
Do not operate this instrument with covers and panels removed.
Only use the power cord specified for this product, with the grounding conductor of the power cord connected to
earth ground.
Use only the fuse type a
nd rating specified by the manufacturer for this instrument, use of fuses with improper
ratings may pose electrical and fire hazards.
To avoid fire or shock hazard, observe all ratings and markings on the instrument.
Do not power the instrument in potenti
ally explosive environment or at risk of fire.
Prior to cleaning and/or maintaining the instrument, switch off the instrument and remove the power cord.
For cleaning use only materials specified in this manual, otherwise parts may become damaged.
It is rec
ommended always to wear protective apparel and eye protection while using this instrument.
Respective warning symbols, if appearing in this manual, should be carefully considered.

II
5
DISPOSAL MANAGEMENT CONCEPT
The currently valid local regulations governin
g disposal must be observed. It is in the responsibility of the user to
arrange proper disposal of the individual components.
All parts which may comprise potentially infectious materials have to be disinfected by suitable validated
procedures (autoclavin
g, chemical treatment) prior to disposal. Applicable local regulations for disposal have to be
carefully observed.
The Instruments and electronic accessories (without batteries, power packs etc.) must be disposed of according to
the regulations for the di
sposal of electronic components.
Batteries, power packs and similar power source have to be dismounted from electric/electronic parts and disposed
off in accordance with applicable local regulations.
6
INSTRUMENT DISINFECTION
Analytical instruments for in
vitro diagnostic involve the handling of human samples and controls which should be
considered at least potentially infectious. Therefore every part and accessory of the respective instrument which
may have come into contact with such samples must equally
be considered as potentially infectious.
Before doing any servicing on the instrument it is very important to thoroughly disinfect all possibly contaminated
parts. Before the instrument is removed from the laboratory for disposal or servicing, it must be
d
econtaminated/disinfected. Decontamination/disinfection should be performed by a authorised well
-
trained
personnel, observing all necessary safety precautions. Instruments to be returned have to be accompanied by a
disinfection certificate completed by the
responsible laboratory manager. If a disinfection certificate is not
supplied, the returning laboratory will be responsible for charges resulting from non
-
acceptance of the instrument
by the servicing centre, or from authority’s interventions.
7
NOTICE
Eve
ry effort has been made to avoid errors in text and diagrams, however, HUMAN GmbH assumes no
responsibility for any errors which may appear in this publication. It is the policy of HUMAN GmbH to improve
products as new techniques and components become avai
lable. HUMAN GmbH therefore has to reserve the right
to change specifications if necessary in the course of such improvements.

III

IV

Contents
1
Introduction
................................
................................
................................
................................
................................
................................
...11.1
Intended Use
................................
................................
................................
................................
................................
...........................
1
1.2
Warning Markings
................................
................................
................................
................................
................................
................
2
1.2.1
Safety Symbols
................................
................................
................................
................................
................................
.............
2
1.3
Safety Precautions
................................
................................
................................
................................
................................
................
3
1.4
Operating Precautions
................................
................................
................................
................................
................................
........52
Installation
................................
................................
................................
................................
................................
................................
.....72.1
Instrument Setup
................................
................................
................................
................................
................................
..................
7
2.2
Instrument Check Out
................................
................................
................................
................................
................................
......
11
3
Principles and S
pecifications
................................
................................
................................
................................
................................
13
3.1
Technical Specifications
................................
................................
................................
................................
................................
...144
ELISYS UNO Manager
................................
................................
................................
................................
................................
..............
17
4.1
Opening the Software and Security
................................
................................
................................
................................
............
17
4.1.1
Opening the ELISYS UNO Program
................................
................................
................................
................................
.....174.1.2
Password Security and Logging In
................................
................................
................................
................................
......174.1.3
Security Menu Options
................................
................................
................................
................................
...........................
18
4.2Alignment Setup
................................
................................
................................
................................
................................
.................
19
4.2.1
Alignment
................................
................................
................................
................................
................................
....................
19
4.2.2
Rack2 Dispense Height
................................
................................
................................
................................
...........................
25
4.2.3
Filter Voltages
................................
................................
................................
................................
................................
............
26
4.2.4
Channel Blanks
................................
................................
................................
................................
................................
..........274.2.5
Display Instrument Parameters
................................
................................
................................
................................
..........294.2.6
Restore Instrument Parameters
................................
................................
................................
................................
..........294.2.7
ELISYS UNO Manager Toolbar Icons
................................
................................
................................
................................
..294.3
ELISYS UNO Manager Tabs
................................
................................
................................
................................
.............................
30
4.3.1
Layout
Tab
................................
................................
................................
................................
................................
...................
30
4.3.2
Sample Tab
................................
................................
................................
................................
................................
.................
34
4.3.3
Test List Tab
................................
................................
................................
................................
................................
................
35
4.3.4
Report Tab
................................
................................
................................
................................
................................
...................
36
4.4
Main Menu Selections and Features
................................
................................
................................
................................
...........
39
4.4.1
Management Menu
................................
................................
................................
................................
................................
39
4.4.2
Routines Menu
................................
................................
................................
................................
................................
..........424.4.3
Lot # Registration
................................
................................
................................
................................
................................
.....434.4.4
QC Tracking
................................
................................
................................
................................
................................
.................
43
4.4.5
Sample DB
................................
................................
................................
................................
................................
...................
44
4.4.6
Settings
................................
................................
................................
................................
................................
........................
44
4.4.7
Secu
rity
................................
................................
................................
................................
................................
.........................
44
4.4.8
Help
................................
................................
................................
................................
................................
................................
45
5
Running ELISYS UNO
................................
................................
................................
................................
................................
...............
51
5.1
General Settings
................................
................................
................................
................................
................................
.................
51
5.1.1
Auto Wash
................................
................................
................................
................................
................................
...................
51

ii/iv
Human
Elisys Uno User Manual
5.1.2
Software Settings
................................
................................
................................
................................
................................
.....525.2
Start of Day
................................
................................
................................
................................
................................
...........................
57
5.2.1
Run Start of Day
................................
................................
................................
................................
................................
........575.2.2
Sample Database Setup
................................
................................
................................
................................
.........................
59
5.2.3
Calibrators
................................
................................
................................
................................
................................
...................
65
5.3
Running Samples
................................
................................
................................
................................
................................
................
706Assay Editor
................................
................................
................................
................................
................................
................................
756.1
Main Menu and Toolbar
................................
................................
................................
................................
................................
..776.1.1
Assay
................................
................................
................................
................................
................................
..............................
77
6.1.2
View
................................
................................
................................
................................
................................
...............................
77
6.1.3
Substances
................................
................................
................................
................................
................................
..................
78
6.1.4
Panels
................................
................................
................................
................................
................................
............................
79
6.1.5
Indices
................................
................................
................................
................................
................................
...........................
79
6.1.6
Security
................................
................................
................................
................................
................................
.........................
81
6.1.7
Settings
................................
................................
................................
................................
................................
........................
82
6.1.8
Icons
................................
................................
................................
................................
................................
...............................
83
6.2
Creating ELISA Assays
................................
................................
................................
................................
................................
.......846.3
Assay Steps
................................
................................
................................
................................
................................
...........................
88
6.3.1
Select Step
................................
................................
................................
................................
................................
...................
88
6.3.2
Edit Step
................................
................................
................................
................................
................................
.......................
96
6.3.3Arrow Buttons
................................
................................
................................
................................
................................
...........
96
6.3.4
Delete Step
................................
................................
................................
................................
................................
..................
97
6.3.5
Copy Step
................................
................................
................................
................................
................................
.....................
97
6.4
Interpretation Settings
................................
................................
................................
................................
................................
.....986.5
Special Groups Assay Editor
................................
................................
................................
................................
.........................
100
6.6
Standards
................................
................................
................................
................................
................................
............................
103
6.7
Blank
................................
................................
................................
................................
................................
................................
......
106
6.8
Controls
................................
................................
................................
................................
................................
................................
1077Enzyme Immuno Assay Editor
................................
................................
................................
................................
...........................
113
7.1
Assay Editor and ELISAs
................................
................................
................................
................................
................................
..
113
7.1.1
ELISA Specifi
c Modes
................................
................................
................................
................................
.............................
114
7.2
Assay
-
Select Steps
-
................................
................................
................................
................................
................................
.......
117
7.3
QC Criteria
................................
................................
................................
................................
................................
...........................
1188ELISYS UNO Manager and ELISAs
................................
................................
................................
................................
......................
121
8.1
Running ELISAs
................................
................................
................................
................................
................................
..................
121
8.2
Accepting and Adjusting Standard Curves
................................
................................
................................
.............................
1259Troubleshooting
................................
................................
................................
................................
................................
......................
133
9.1
Flags and Error Messages
................................
................................
................................
................................
..............................
133
9.1.1
Flags
................................
................................
................................
................................
................................
.............................
133
9.1.2
Error Mes
sages
................................
................................
................................
................................
................................
........
135

iii/iviv/ivHuman

Elisys Uno User Manual

1/1
38
1
Introduction
ELISYS UNO
is a computer controlled instrument system, capable of automating any or all stages of ELISA assay
processing that involve these functions
:
Fluid Handling
aspirates and dispenses from 5 µL to 1.95 ml
Incubating
heating temperature
s-coil heats to 37°C, plate heats to 25°C or 37°C,
or no temperature control (ambient).
Mixing
reaction plate only
Timing
from 1 second to 24 hours
Optical Reading
UV/visible range
Calculating
uses numerous pre
-
programmed equations
Data Storage
unlimit
ed capacity
Data Reporting
many options and customisations to choose from
The system allows one to define and program an unlimited number of customised protocols by selecting displayed
menu options from a Microsoft Windows® software program (see Operatin
g Precautions, Section 1.4).
ELISYS UNO
may also be used in production processes involving micro volume dispensing, diluting, incubating, and
reading.
ELISYS UNO
is a unique automatic system. Reactions occur in standard plastic microwells Reagent bottles
and
sample tubes are placed into the removable instrument racks. The instrument is programmed to pick up from one
place, dispense to another, wash the probe, read
the wells, incubate, mix, etc.
1.1
Intended Use
FOR IN
-
VITRO DIAGNOSTIC USE
This instrument i
s designed for use in processing ELISA tests for in vitro diagnostic application. It is an instrument
intended to be used by trained laboratory professionals who are capable of selecting the appropriate features and
options for each specific cli
nical appli
cation.
2/138Human
Elisys Uno User Manual
1.2
Warning Markings
1.2.1
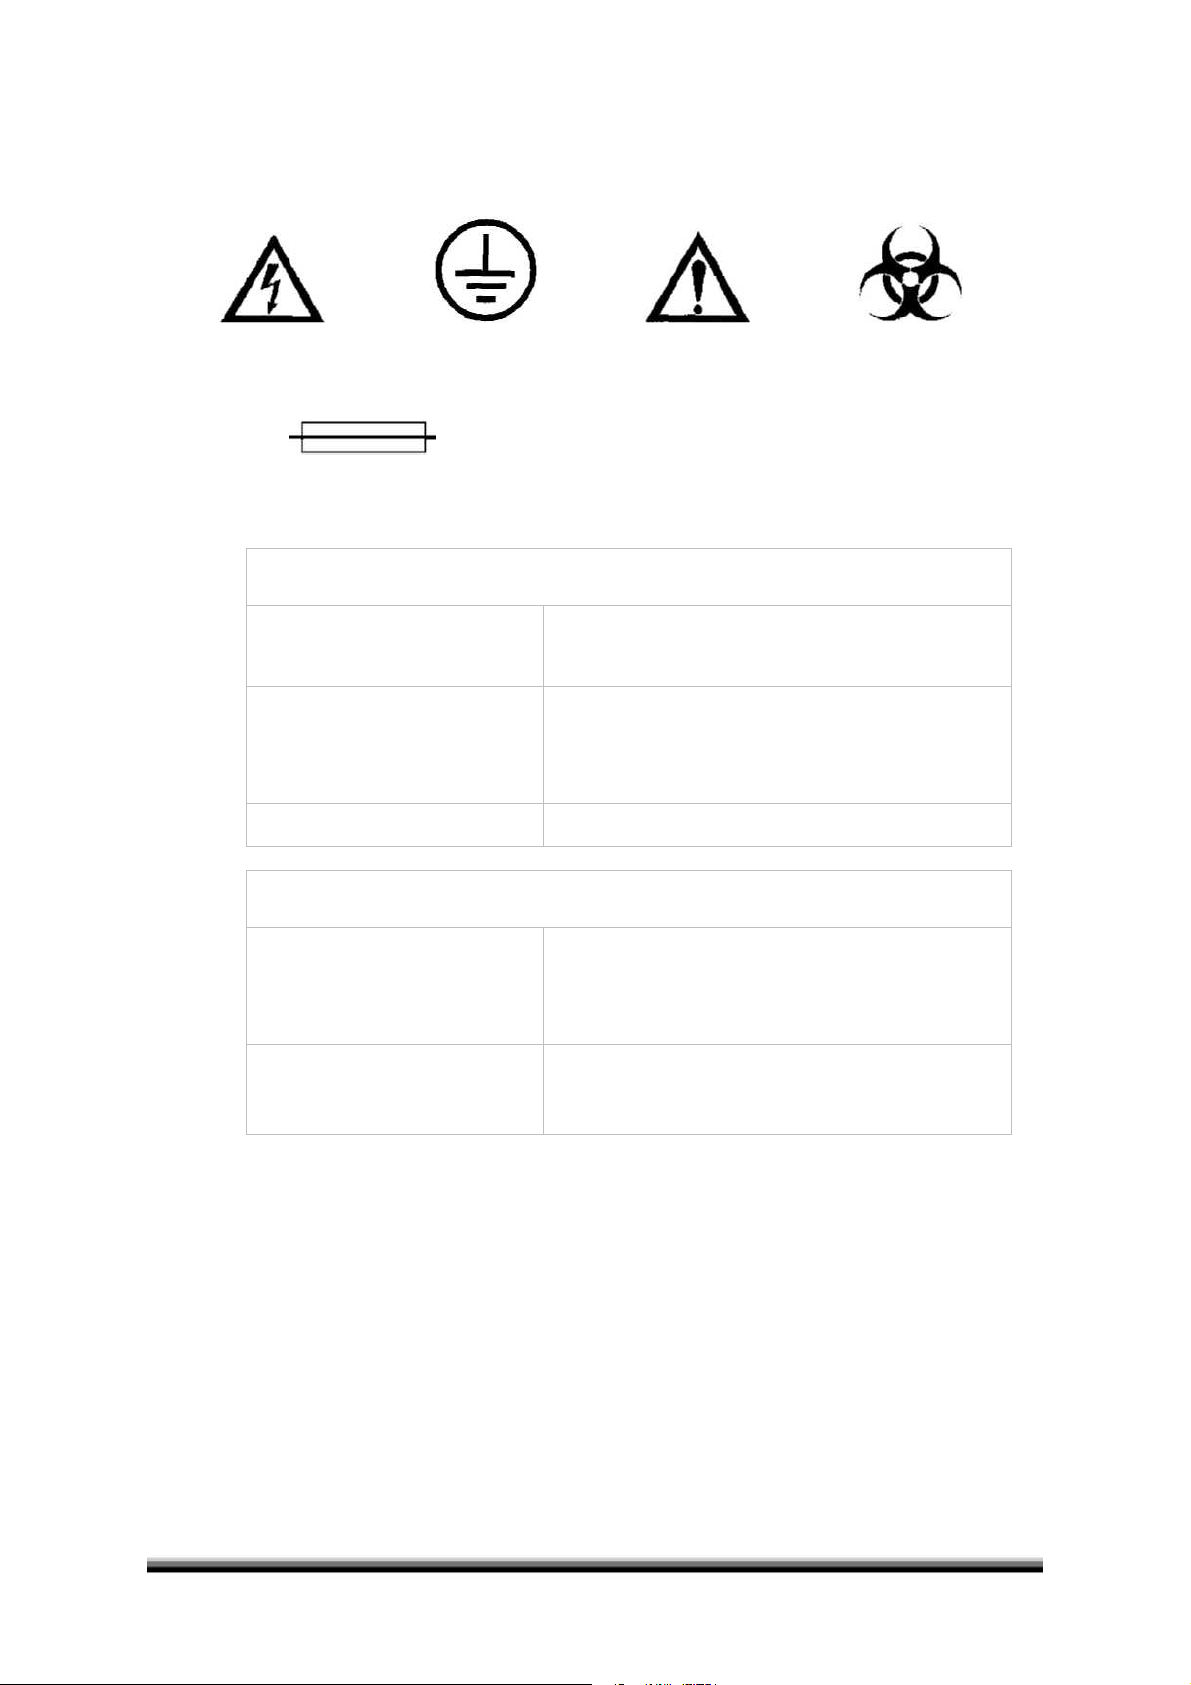
Safety Symbols
Symbols t
hat may appear on the product:
WARNING
Protective Ground
CAUTION
BIOHAZARD
Risk of Shock
(Earth) Terminal
Refer To Manual
Risk of Infection
FUSE: For continued protection against ris
k of fire, replace with fuse only with one of the specified type and current
ratings. Disconnect equipment from supply before replacing fuse.
These terms may appear on the product:
DANGER
indicates an injury immediately accessible as you read
this marki
ng
WARNING
indicates an injury hazard not immediately accessible as
you read this marking
CAUTION
indicates a hazard to property, including the product
These terms may appear in this manual:
WARNING
WARNING statements identify conditions or practices
that could result in injury or loss of life. WARNING
indicates an injury hazard not immediately accessible as
you read this marking.
CAUTION
CAUTION statements identify conditions or practices
that could result in damage to this product or other
property.

3/1
38
1.3
Safety Precautions
To assure operator safety and prolong the life of your instrument, carefully follow all instructions outlined below.
-
Read Instructions
Please take the time to read this manual carefully before using this instrument. Review the
follo
wing safety precautions to avoid injury and prevent damage to this instrument or any products connected
to it. To avoid potential hazards, use this instrument only as specified. For best results, familiarise yourself
with the instrument and its capabilitie
s before attempting any clinical diagnostic tests. Refer any questions to
your instrument service provider.
-
Servicing
There are no user
-
serviceable parts inside the instrument. Refer servicing to qualified service personnel.
Use only factory
-
authorised pa
rts. Failure to do so may void the warranty.
-
Wear Protective Apparel
Many diagnostic assays utilise materials that are potential biohazards. Always wear
protective apparel and eye protection while using this instrument. Always operate this instrument with
the
aerosol shield lowered
.
-
Follow Operating Instructions
Do not use this instrument in a manner not specified by the manual, or the
protection provided by the instrument may be impaired.
-
Use Proper Power
Cord Use only the power cord specified for this
product and certified for the country of use.
-
Ground the Product
This product is grounded through the grounding conductor of the power cord. To avoid
electric shock, the grounding conductor must be connected to earth ground. An optional method is to a
ttach a
ground strap from the external grounding terminal on the rear panel of the instrument to a suitable ground
such as a grounded pipe or some metal surface to earth ground.
-
Observe All Terminal Ratings
To avoid fire or shock hazard, observe all rat
ings and markings on the instrument.
Consult this manual for further ratings information before making connections to the instrument.
-
Install as Directed
Install the instrument on a sturdy, level surface capable of safely supporting the instrument’s
we
ight (45 kg). The mounting surface should be free of vibrations. The instrument does not require fastening
to the bench top
.
-
Provide Proper Ventilation
Refer to the installation instructions for details on installing the product so it has
proper venti
lation. The instrument should be surrounded by the following clearances: 46cm on each side,
117cm on top, 15
cm in front, and 18cm in back.
-
Do Not Operate Without Protective Covers
Do not operate this instrument with covers and panels removed.
-
Do Not O
perate Without Probe Shield
Do not operate this instrument with shield removed. Doing so risks the
operator to biohazard injury from the probe
.
-
Use Proper Fuse
Use only the fuse type and rating specified by the manufacturer for this instrument.
-
Avoid
Exposed Circuitry
Do not touch exposed connections and components when power is present.
-
Avoid Excessive Dust
Do not operate in an area with excessive dust
.
-
Do Not Operate With Suspected Failures
If you suspect there is damage to this instrument,
have it inspected by
a qualified service person.
-
Do Not O
perate in Wet/Damp Conditions
-
Do Not Ope
rate In An Explosive Atmosphere
Keep Instrument Surfaces Clean and Dry
Solvents such as acetone or thinner will damage the instrument. Do not
use solvent
s to clean the unit. Avoid abrasive cleaners; the aerosol shield is liquid
-
resistant, but easily scratched.
Clean the exterior of the instrument with a soft cloth using plain water. If needed, a mild all
-
purpose or

4/138Human
Elisys Uno User Manual
nonabrasive cleaner may be used. Use
as a disinfectant a 10% solution of chlorine bleach (5.25% Sodium
Hypochlorite) or 70% isopropyl alcohol. Take special care not to spill liquid inside the instrument.

5/1
38
1.4
Operating Precautions
WARNING:
Insufficient RAM will adversely affect the performance
of your instrument. Therefore, if using
Windows® ME, the minimum RAM required is 96 MB. For Windows® XP, the minimum RAM required is 128 MB.
-
Watch the instrument during "Start of Day" operation to ensure that the probe and wash head dispense
functions are
operating properly.
-
Be sure to run a sufficient number of controls in each assay. If controls are not within their acceptable limits; or if
incomplete, or non
-
uniform washing is suspected, disregard test results.
-
Since the ambient light may interfere with
the optical sensors used to monitor mechanical movements, always
operate the instrument with the top cover down.
-
Do not operate the instrument if the probe is damaged or the pressure is unstable.
-
Do not operate the instrument if the wash head probes are d
amaged.
-
If the Waste bottle is overturned during operation, set it upright. When the run has finished, check that the filter
has not become wet, and replace it if necessary. If the hydrophobic filter becomes wet due to an overturned
Waste bottle, it will b
e blocked.
Continued use of the instrument with a blocked filter will impair washer
effectiveness and may result in damage to the instrument.
-
Do not fill reagent bottles past the neck. Doing so may cause the system to inadvertently aspirate air.
-
Do not fil
l Wash or Rinse bottles into the neck to prevent fluid from entering the pressure tube.
-
The Wash and Rinse bottles are pressurised during normal operation, and the Waste bottle is under vacuum.
-
Do not remove bottle caps or tubing connections while the bo
ttles are pressurised/evacuated.
-
Turn the instrument off or click the Pause Engine in the Management menu before adding more solution,
changing bottles, or connecting tubing.
The quality of washing often affects the validity of test results. To assure ad
equate washing follow these
precautions:
-
Perform “End of Day” to clean probe with bleach and flush wash head with H2O
-
Handle and store the wash head carefully to prevent damage.
-
Use the prime cycle before each wash.

6/138Human
Elisys Uno User Manual
Notes:

7/1
38
2
Installation
How to unpack, set up, and check out your ELISYS UNO instrument.
ELISYS UNO
is carefully packaged in a custom
-
made container to assure its safe arrival. If upon receipt the outer
packaging is damaged report damage to your freight carrier imm
ediately.
When shipping, it is important that the instrument be anchored and packaged in the original manner to prevent
shipping damage.
Therefore, retain all shipping screws and packaging in the event the instrument requires future
relocation
. The detail
s how to unpack the instrument once it is removed from its crate can be found in the
Unpacking Instructions Manual (Cat. No. 17350/4).
2.1
Instrument Setup
1.
Connect the drain tube to the drain tube connector on the bottom of the instrument by pushing the
tubi
ng over the fitting on the connector.
2.
Place the other end of the drain tube into a drain container (at least 2L
–
not included). Next, the bottle
must be placed at a level below the instrument, either by using an access hole on the lab bench, or by
routing
the tubing to the front or the back of the instrument as desired. The drain line may also be
connected to an approved permanent drain.
CAUTION: Do not allow the end of the tubing to rest in the drain container below the expected level of the waste
liquid
.3.Match the colo
ur-
coded connectors on the three bottle cap assemblies to the colo
u
red connectors on the
right side of the instrument. Turn each connector about 1/4 turn clockwise to lock it in place. Insert the
sensor cable jacks, matching the colo
u
red t
ie wrap with the colo
ur-
coded connectors.
Figure 2.1
-
1 Connectors
CAUTION: The hydrophobic filter on the waste bottle is designed to protect the pump from liquid and may become
clogged when wet. Arrange the tubing so that the filter hangs down below the
connecter on the side of the
ELISYS
UNO to prevent clogging.
8/138Human
Elisys Uno User Manual
4.
Put de
-
ionised water into the bottle marked Rinse. Put wash buffer provided into the bottle marked Wash
for ELISA tests. Leave the Waste bottle empty. Check that each bottle cap is securely f
astened and that no
sensor wires are crossed. Note that the Waste bottle has short sensor leads in order to detect when waste
is nearly full. Rinse and Wash bottles have long leads in order to sense when bottles are nearly empty.
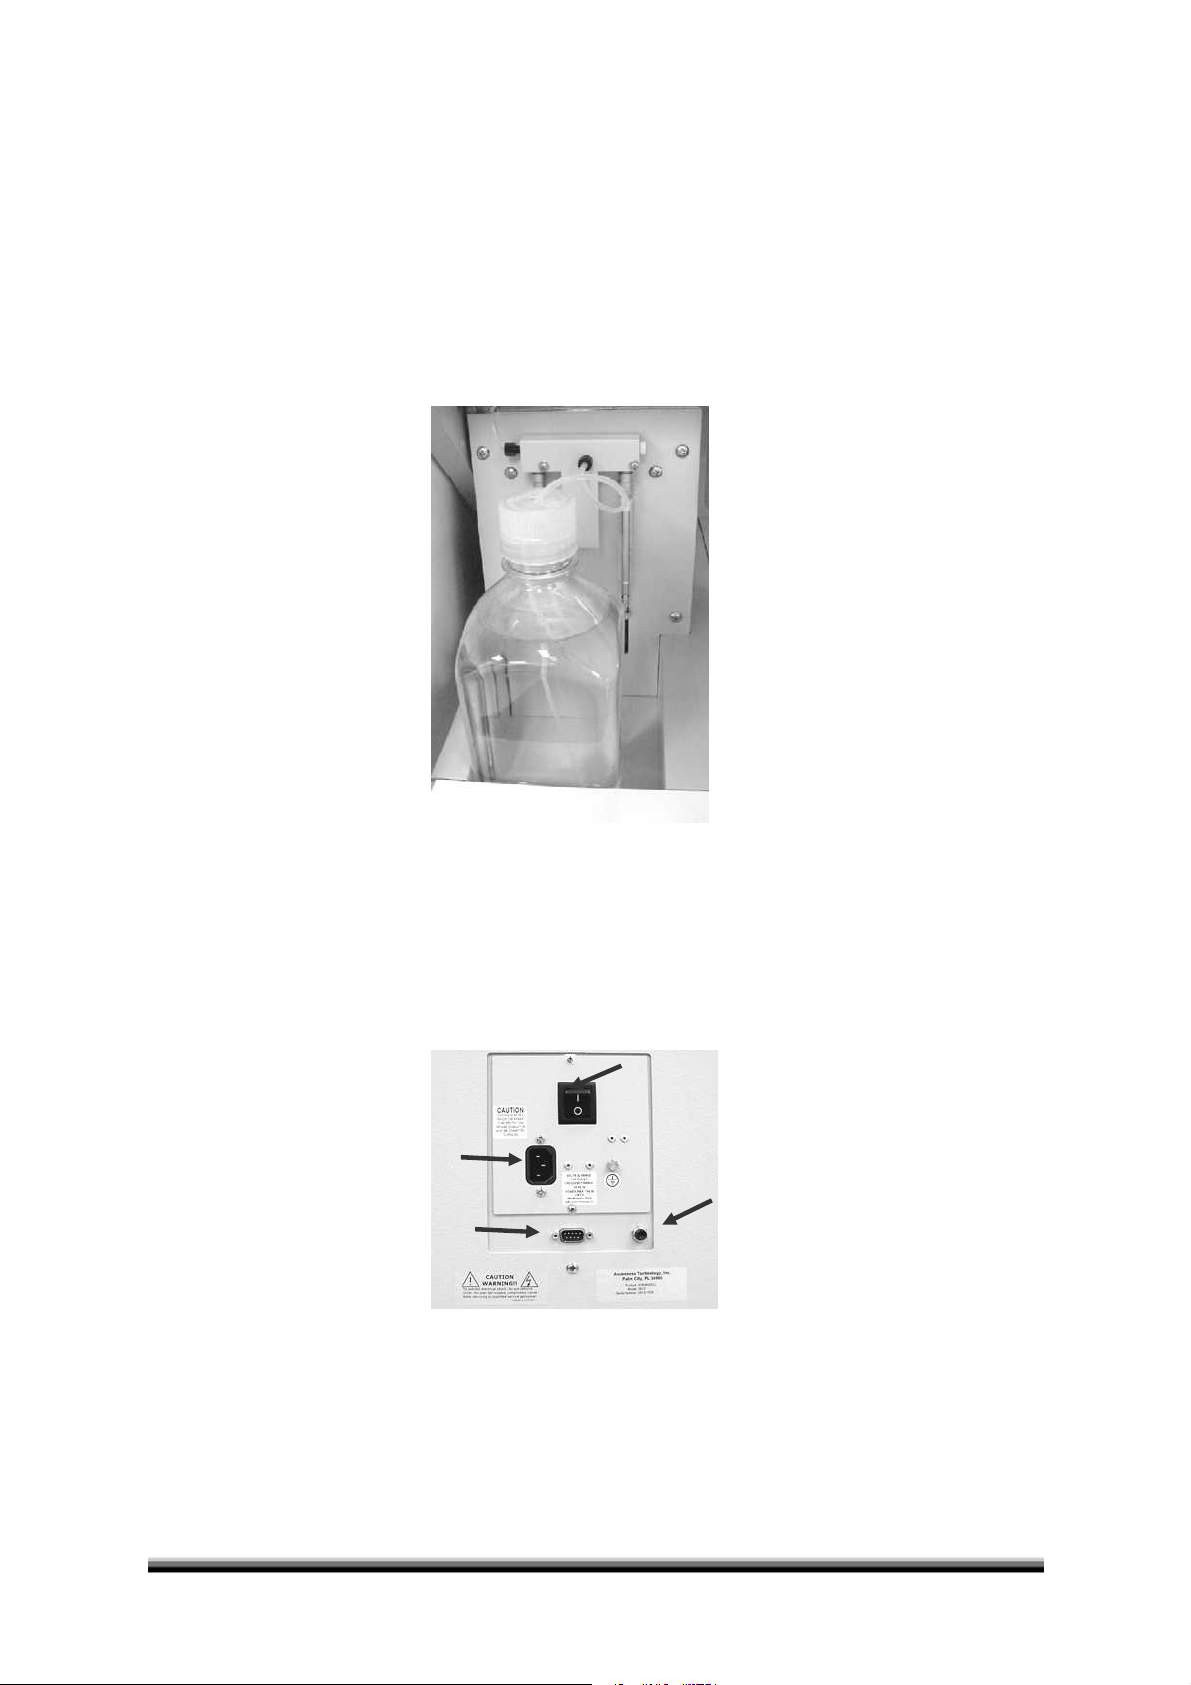
5.
Fill the Prime bottle
with fresh, clean de
-
Ionised water. This should be done each day
-
this water enters
the precision calibrated syringe pump and therefore must be very pure to avoid damage and prolong the
life of these components. Prime bottle installed as shown in
Figure 2
.1-2.Figure 2.1
-
2 Install Prime Bottle
6.
Using
the serial cable provided, connect the computer’s serial port to the
ELISYS UNO
serial port (reference
Figure 2.
1-3 Back of Instrument).
If necessary, purchase a USB to serial converter, available thro
ugh other
sources.
Figure 2.1
-
3 Back of Instrument
Power
Switch
Power Cord
Connection
Serial Port
Reset Button
9/1
38
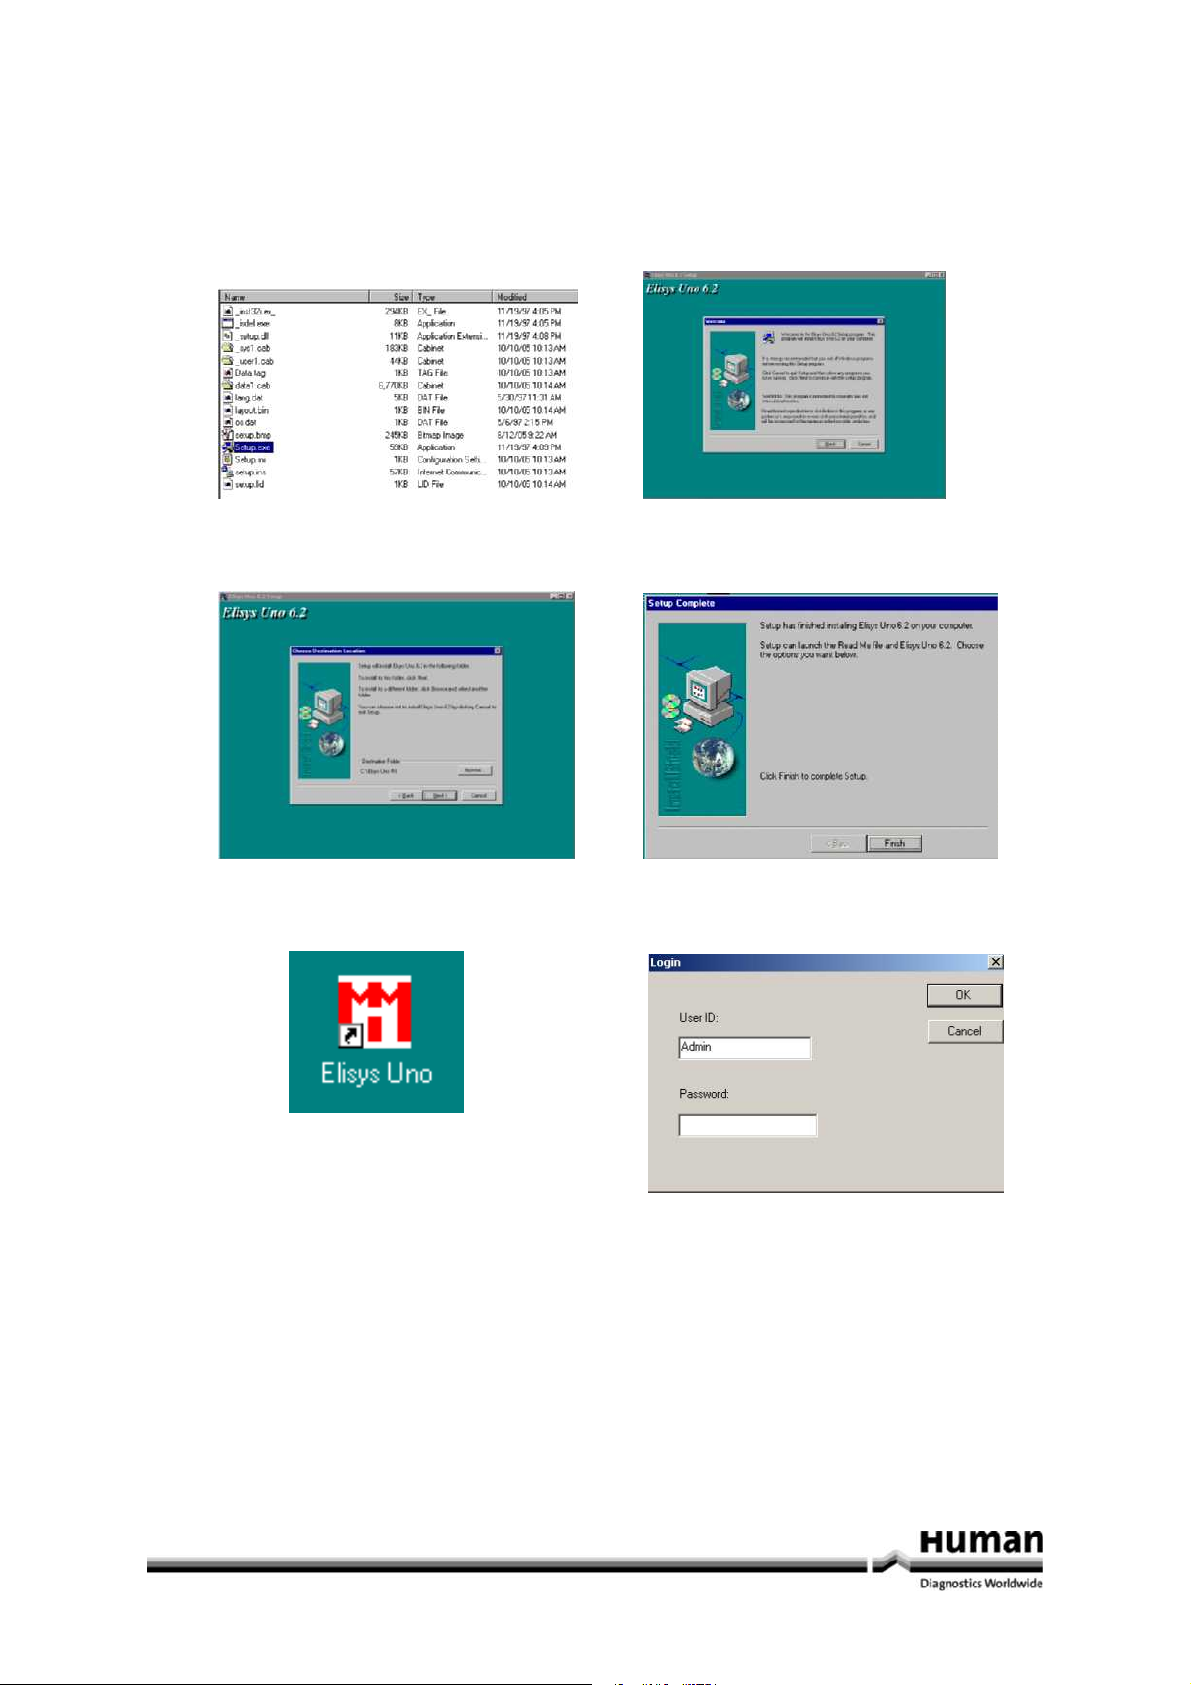
7.
Turn on the computer and insert the installation CD. The installer should automatically start, if not, select
“Run” from the Windows® Start Menu, run CD ROM drive:
\setup, and follow the prompts for installing
the program. Run the
ELISYS UNO
program after installation. Enter
Admin
as the user ID and
Admin
as the
password. (Reference
Figures 2.
1-4 through 2.
1-9
below.)
Figure 2.1
-
4 Double
-
Click to Begin Setup
Figure 2.1
-
5 Welcome to ELISYS UNO 6.2
Figure 2.1
-
6 Choose Destination Folder
Figure 2.1
-
7 Finish Installation
Figure 2.1
-
8 Icons Appear on Desktop
Figure 2.1
-
9 Admin Login
8.
Connect the
power cord to the instrument, then to an approved power source. It is strongly advised that a
UPS (Uninterruptible Power Supply) be used to avoid power interruptions to the
ELISYS UNO
and to the
computer.
10/138Human
Elisys Uno User Manual
9.
Place a rack onto each of the two rack holders. T
he default positioning places the Reagent rack on the left
and the Sample rack on the right. Place the plate loaded with microwells into the plate carrier at the right.
10.
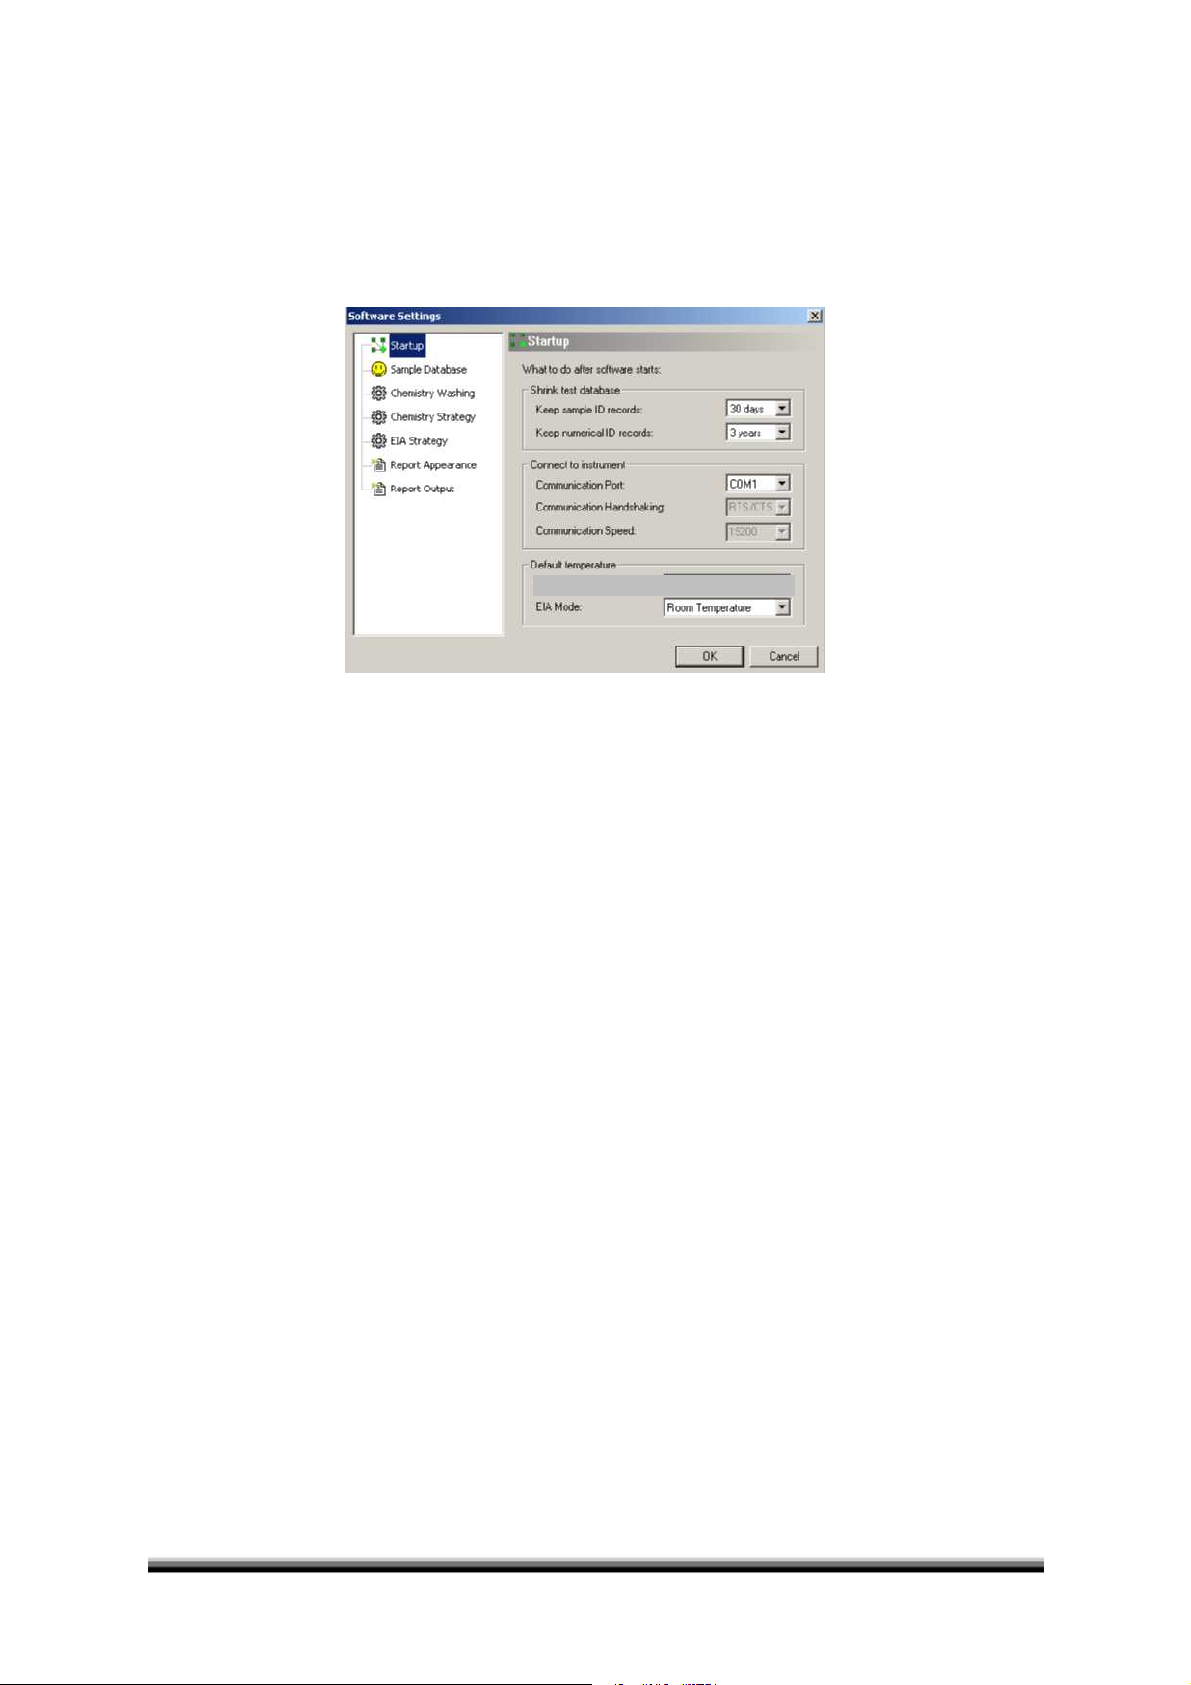
The program default is to use COM1 for communication with the instrument. If connectin
g the
instrument to a different port, go to the Settings Menu and select Software. Select a communications port
and click “OK”.
Figure 2.1
-
10 Software Settings
The Default Mode is
greyed
out if working with an instrument with no washe
r. (Reference
Figure 2.1
-10)
11/1
38
2.2
Instrument Check Out
With the instrument connected to a computer, start the
ELISYS UNO
software, and switch on the instrument.
When the instrument powers up, note the following actions:
-
All racks move to the front (home) posi
tions-The probe moves to its home position (to the left), over the plate, and then to the wash cup
-
The syringe pump primes
-
The instrument and the optical system lights come on
These events are controlled by firmware installed in your instrument however, t
he software must be running for
proper operation.
If the instrument’s power comes on, but these actions do not occur and the beep sound continues, there is a
problem with the communications setup. Check the serial cable connections and COM port settings.
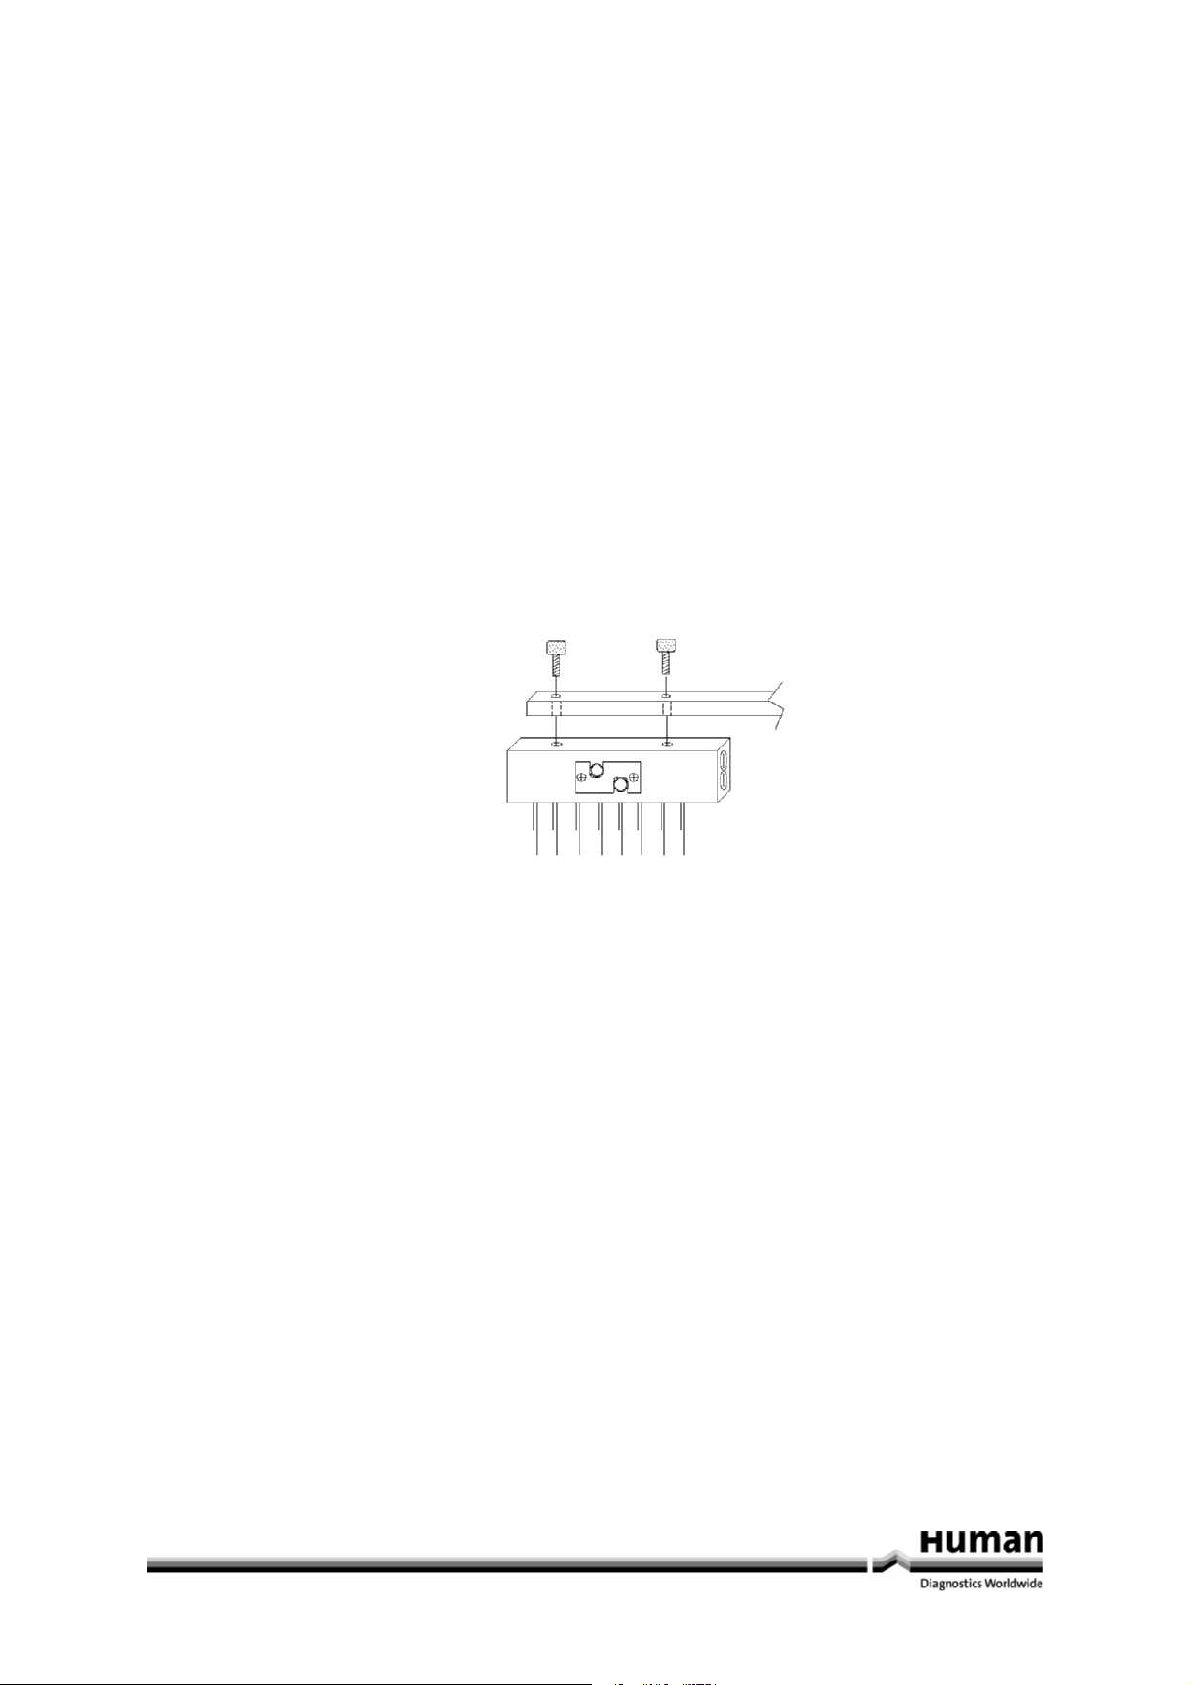
For the Instrument with Washer:
At this time, the wash arm is raised from its shipping position. Install the wash head (found in the accessories
carton) to the wash arm using the two attached thumbscrews. The luer fittings must face outward (toward the
u
ser), and the colour
-
coded fittings on the tubing should be fastened finger
-
tight to the wash head. Refer to
Figure
2.2-
1 Wash Head Installation.
Figure 2.2
-
1 Wash Head Installation

12/138Human
Elisys Uno User Manual

13/1
38
3
Principles and Specifications
The syringe pump is used to make preci
se dilutions. The syringe measures volumes of 2.5 ml or less. The single
probe moves left and right as well as vertically. It is equipped with a liquid surface detection mechanism that stops
the probe automatically when the tip is sufficiently submerged.
Probe washing uses de
-
ionised H2O from the
prime bottle and drains to the bottle below.
Each of the two racks and the plate move independently toward the front and back of the instrument. Commonly
referred to as a
r
eagent rack, a Sample rack, and a React
ion plate. However, reagents can be placed in the Sample
rack, or two racks can be used to perform pre
-
dilutions. Each rack has an arrangement of holes or grooves
configured to hold different types of tubes, bottles, micro tubes, microwells, and other con
tainers. Racks are
identified in the software in order to tell the instrument which configuration is to be used. They are also displayed
graphically.
The incubator plate/well can be set to heat to 25°C, 37°C, or remain at ambient room temperature. The
plate/well
will heat to 25°C providing the ambient room temperature is below 25°C. (It should be noted that the option of
heating the plate/well to 25°C should only be used when the ambient room temperature is consistently below
20°C.)
When the probe ca
rries a reagent to an incubated reaction plate, the temperature
-
controlled coil can be set to pre
-
warm the liquid before dispensing.
Reagent racks can be loaded and unloaded with bottles from run to run. The location of each reagent is indicated
using a c
olour
-
coded computer screen. Alternately, preferred reagent rack setups can be stored in panels. For
convenience, multiple pre
-
loaded racks can be stored in the refrigerator ready to load and use.
When taking an optical reading, the reaction plate automa
tically positions itself under the 4
-
channel optical
system. Four lamps are aligned to simultaneously shine down through four wells. A filter wheel with eight filters
rotates constantly below the plate. The filter wheel is designed so that four filters
align with the four lit wells for
absorbance readings.
Depending on the setup, reports may be displayed or printed to create permanent lab records and physician
reports.

14/138Human
Elisys Uno User Manual
3.1
Technical Specifications
Overall:
Dimensions
86cm W x 51cm L x 40cm H, approx. weig
ht = 35kg
-
Reagent and Sample Dispensing:
Capabilities:
Dilutions, predilutions, single or multiple reagents
Pumps:
One syringe pump, sized: 2.5 ml
Probe:
316 stainless steel for maximum reagent compatibility, level
sensing
Minimum and Maximum Volume:
5 µl–1.95 ml
Maximum number of specimens:
96 (including calibrators and controls)
Maximum number of reagents:
Typically 27 or 44
o
Assorted replaceable racks and custom designed racks
are available for various bottle sizes.
o
Reagents can also be programmed
to go to the Sample
rack.
Reaction vessel:
Standard microwells, strips
Instrument bottles:
1L Priming bottle, 2L Wash bottle w/ low volume warning
sensor,1L Rinse bottle (or 2nd wash) w/ low volume
warning sensor
-
Incubation, timing and temperature cont
rol:
Thermal control:
Plate/Well 25°C, 37°C, or ambient temperature
o
Temperature controlled to 25°C providing the ambient
room temperature is below 25°C
o
Sample Rack is not temperature controlled.
-
Washing
Wash Head:
8-probe, automatic prime and rinse
Programs:
Create and run user programmable protocols (aspirate,
dispense, soak). Can wash wells for re
-
use as applicable
-
Reading:
Optical design:
Reads absorbance in four simultaneous channels; NIST
traceable calibration; user selects monochromatic or
bi
chromatic results
Light Source:
Tungsten
-
Xenon lamp
4 position filter wheel:
405, 450, 490, 630
Interference filters:
Long life, hard coat, ion
-
assisted deposition, +/
-
2nm, 10nm
typical half
band pass
Linear range:
-
0.2 to 3.0A
Photometric Accuracy
:
± (1% of the reading +0.005A from 0 to 1.5A)
± (2% of the reading +0.005A from 1.5 to 3.0A)

15/1
38
-
Software:
Format:
CD-Rom and Internet upgrades
Operating Systems:
Windows® 98, 2000, ME, NT 4.0, or XP
Minimum System:
Pentium®/133 MHz, 64 MB RAM, SVGA moni
tor, Serial port
or USB port with Serial adapter
Recommended system:
PentiumII®/333 MHz, 128 MB RAM, CD drive, Windows® 98
or above
Secondary menu options:
Create/edit protocols, import/export data, etc., Control,
Run, Setup
Calculation modes:
Absorbance,
single standard, factor, fixed time kinetics,
kinetics by standard or factor, multi
-
calibrator point
-to-
point, linear regressions, log
-
logit, cubic spline, and
nonlinear regressions (curve fit).
Self monitoring modes:
Lamp, bottle volume, filters, pressure
, vacuum, mechanical
function, and more
QC options:
Store control data, print Levey
-
Jennings or QC range plots,
calculate SDs
Serial port:
RS232 output only, 19200 Baud,1 start bit, 8 data, 1 stop,
no parity, no handshake, Serial cable provided
-
Power:
Vol
tage Range:
100-250VAC
Frequency Range:
50-60Hz
Power Maximum:
160W
-
Environmental Conditions for Safe Operation:
Mains supply voltage:
Fluctuations not to exceed ±10% of the nominal voltage
Altitude:
Up to 2000 m
Humidity:
80% for temperatures up to 31°C
decreasing linearly to 50%
humidity at 40°C
Temperature:
5°C to 40°C (See NOTE)
-
Recommended Environmental Conditions:
Operating Temperature:
18-35°C recommended
Operating Humi
dity:
Less than 85% recommended

16/138Human
Elisys Uno User Manual

17/1
38
4
ELISYS UNO Manager
4.1
Opening the Software and Security
ELISYS UNO uses the standard Windows® controls, windows, and dialogs. Refer to your Windows® documentation
to become familiar with these controls and how to use them
4.1.1
Opening the ELISYS UNO Program
-
Pow
er on the instrument.
-
Double
-
click on the
ELISYS UNO
icontoopen the
ELISYS UNO
Manager
software.
NOTE: It is not necessary to turn the instrument off when restarting the software.
4.1.2
Password Security and Logging In
-
When either the
ELISYS UNO
Manager or A
ssay Editor software are opened for the first time, a User name
and a
Password must be entered.
-
For User name, type
Admin
-
For Password, type
Admin
There are three security access levels: Administrator, Manager and Operator. View
Figure 4.1.2
-1for secur
ity levels.
Security Level
Administrator
Manager
Operator
Disable Security
YNN
Enable Security
YNN
Create Manager
YNN
Create Operator
YYN
Remove Manager
YNN
Remove Operator
YYN
Change Password
YYY
View Log File
YNN
Figure 4.1.
2-1 Security Levels
 Loading...