

Page 1
User Guide
Page 2

Contents
Exciting Features
New Device
Tips 1
Smart Life 2
Highlights: Turn Your Photos into a Personalised Video 6
More Features 7
Connecting to the Internet
Smart Charging: Charge Your Device Faster and Safer 9
Getting Help 10
Gestures and Operation
Screenshots and Screen Recording
Home Screen
Quick Switch
Notication and Status Bar 18
Shortcuts 21
Home Screen Management 23
Contacts
Managing Business Cards
Managing Contacts 28
Dialling
9
14
17
27
Message
Camera
Gallery
Basic Calling Functions
Block Nuisance Calls: Get the Peace and Quiet You Deserve 33
Basic Messaging Functions
Basic Camera Functions
Panorama: Capture the World in Wide-angle 41
Pro Mode 42
Beautication 46
Light Painting Mode 47
Use Time-lapse to Condense Hours into Minutes 51
Discover New Possibilities with Customised Shooting Modes 52
Highlights
Photo Management 55
31
34
36
53
i
Page 3

Tablet Manager
Use One-touch Optimisation 58
Optimise Power Consumption 58
Use Virus Scan to Keep Your Tablet Safe 59
Email
Add Email Accounts 60
Manage Email Accounts 60
Manage VIP Email Contacts 61
Set Auto Response for Exchange Email 61
Calendar
Contents
Calendar: Your Event Management Centre
Navigate the Calendar 62
Import To-Dos to Keep Your Work Organised 63
View Global Holidays 64
Clock
Use the Clock
Notepad
Manage Your Notes to Keep Your Records in Order
Utilities
Use Recorder to Make Audio Notes
Tablet Clone 68
Huawei ID and Multiple Users
Multiple Users
Device Connection
62
65
67
68
70
Bluetooth
Multi-screen Display 74
Connecting USB Device 75
Transfer Files Using Huawei Share 77
Security and Privacy
Fingerprint
Location Information Protection 81
PrivateSpace 82
Use App Lock to Lock Important Apps 83
More Security Settings 84
Backup and Restoration
Data Backup: Prevent Data Loss
Back Up Your Data to a microSD Card 86
72
79
86
ii
Page 4

Back Up Your Data to Internal Storage 86
Back Up Your Data to a USB Storage Device 87
Back Up Your Data to a Computer 87
Wi-Fi and Network
Wi-Fi 88
Connecting to the Internet 91
Share Your Mobile Network with Other Devices 91
Contents
Apps and
Notications
App Twin: Log in to Two Social Media Accounts at Once
Sound and Display
Congure
Congure Your Sound Settings 94
Change the Display Settings 95
Smart Assistance
Navigation Bar and Navigation Dock
System
Change the Input Method
General Settings 99
System Update
Performing an Online Update
93
Do Not Disturb Mode 94
98
99
104
iii
Page 5
Exciting Features
Tips
Use Shortcuts to Access Frequently Used Features
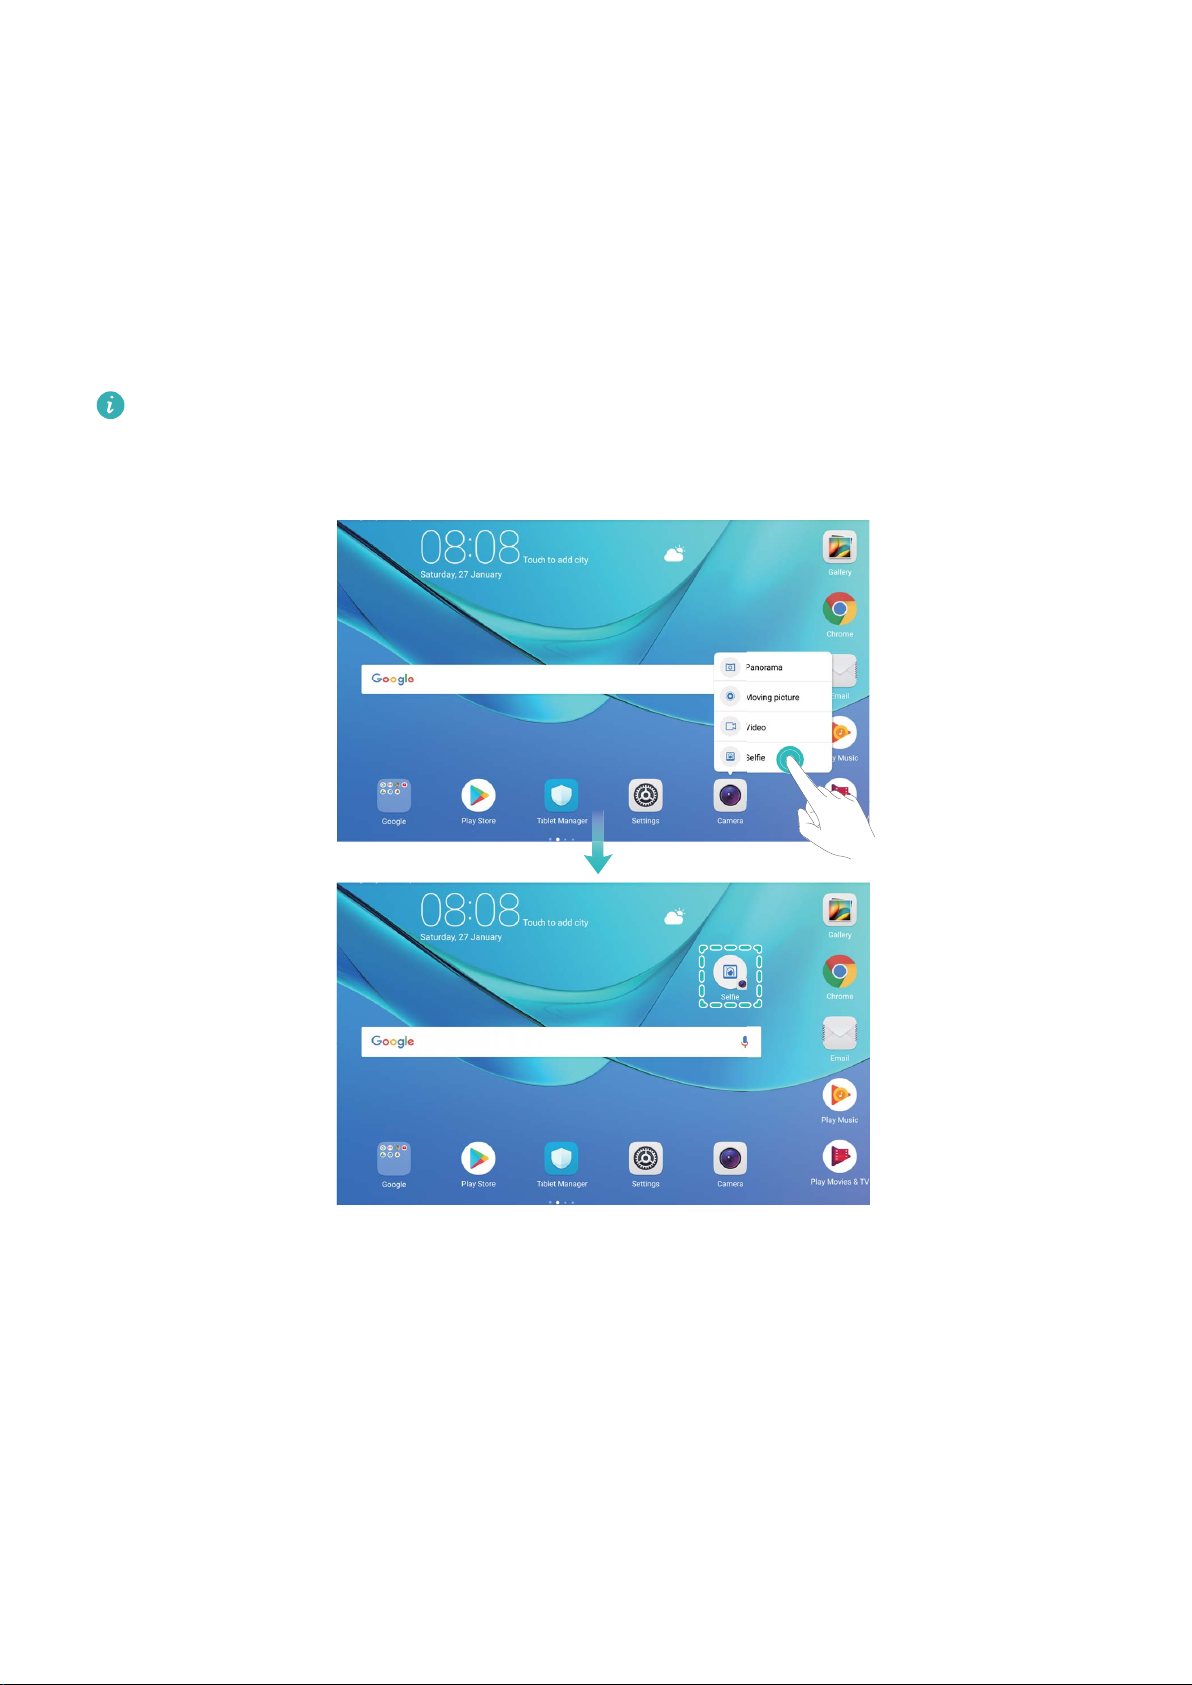
Touch and hold an app icon to display a menu of frequently used features for quick access. You can
also touch and hold a feature and drag it to your home screen to create a shortcut.
If you touch and hold an app icon and a shortcut is not created, the app does not support home
screen shortcuts.
Quickly access frequently used app features: Touch and hold an app icon on your home screen,
and then touch a frequently used feature to access it. Each app supports up to four frequently used
features. These are preset by the app and cannot be changed. For example, to take a sele, touch and
hold the camera icon, and then touch Sele in the pop-up menu.
Add shortcuts to your home screen: Touch and hold an app icon on your home screen to bring up
the menu. Touch and hold the desired feature, and then drag it to your home screen to create a
shortcut. For example, you can add a shortcut for the camera's sele feature for quick access to the
sele camera.
1
Page 6
Huawei Share
Exciting Features
Transfer Files Using Huawei Share
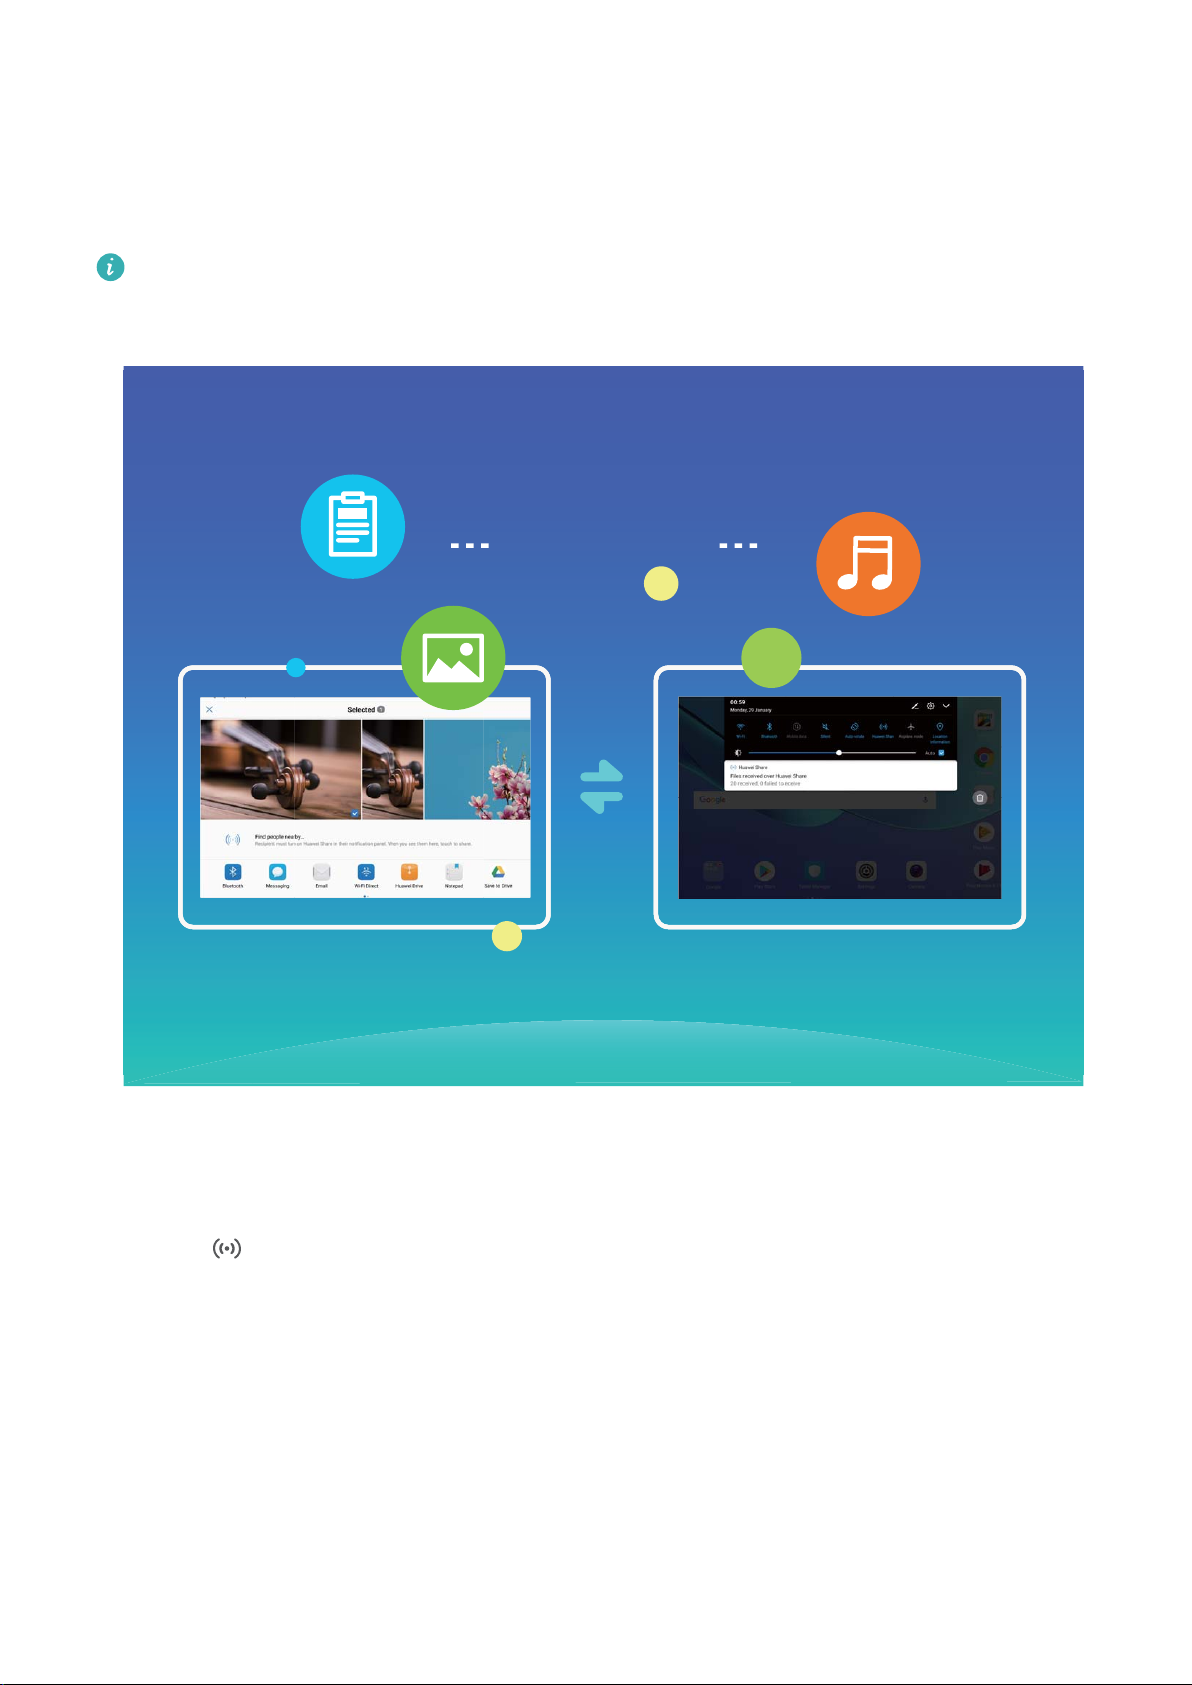
You can use Huawei Share to quickly transfer photos, videos and other les between Huawei devices.
Huawei Share uses Bluetooth to detect nearby Huawei devices and Wi-Fi to quickly transfer les
without using mobile data.
Huawei Share uses Wi-Fi and Bluetooth to transfer data. When Huawei Share is enabled, Wi-Fi
and Bluetooth are automatically enabled.
Use Huawei Share to send les: Select the le you want to share and touch Share. Select the
receiving device from the list of nearby devices to send the le.
Use Huawei Share to receive les: Swipe down from the status bar, open the shortcuts panel, and
then touch to enable Huawei Share. Touch Accept when a le transfer notication is displayed.
Received les are saved to the Huawei Share folder in Files by default.
Smart Life
Kids Corner: Your Child's Exclusive Entertainment Platform
More and more parents are using Tablets to keep their children quiet. However, kids may sometimes
gain access to inappropriate information or indulging apps that turn playing into endless worries.
With Kids Corner, you can integratedly manage the usage time of your child's Tablet and limit the
types of apps he or she can download and install.
2
Page 7

Exciting Features
Kids Corner offers the following features:
l App management: Control which apps your child can use.
l Media library management: Control which pictures and videos your child can access from his or
her Tablet.
l Time limit: Control the number of times your child can access Kids Corner, as well as his or her
usage time and resting period between each use on a daily basis.
l Kids ngerprint: Your child can use his or her ngerprint to quickly and easily unlock his or her
Tablet and access Kids Corner.
l Restrict outside data: Prevent malicious charges from third-party apps (such as through unwanted
text messages). This feature is not supported on Wi-Fi only tablets.
Multiple Users: Create Separate User Accounts on Your Tablet
Want to lend your Tablet to someone else but don't want them accessing your private les and
information? Add multiple users and user types to protect your information privacy when lending your
Tablet to others. Your settings and les will not be affected. You can also log in to your Tablet with
two user accounts, such as one for work and one for personal use, and quickly switch between them
with a single touch.
You can create three different types of users:
l Owner: The Tablet's owner. Log in as the owner when you are using your device. As the owner, you
have access to all actions, such as adding or deleting users and guests, and giving users permission
to make calls and send text messages.
l User: Add family members and close friends as users. Users can perform most actions but cannot
perform actions that will affect the owner, such as restoring the device to factory settings or
enabling Do not disturb mode.
l Guests: Add casual acquaintances as guests. Guests can only perform a limited number of actions.
Enable Kids Corner
Worried about the various types of apps available online that are not suitable for your child? Enable
Kids Corner, the exclusive parental-controlled entertainment platform on your child's Tablet.
Before using Kids Corner, ensure that you have set a screen unlock password. Otherwise, go to
Settings > Security & privacy > Screen lock & passwords > Password, and set a screen
unlock password.
Open Children's Corner. Follow the onscreen instructions to set a Kids Corner password, enter
your child's name, gender, date of birth, and record his or her ngerprint. Once the set up is
complete, you can start using Kids Corner.
In Kids Corner, you can:
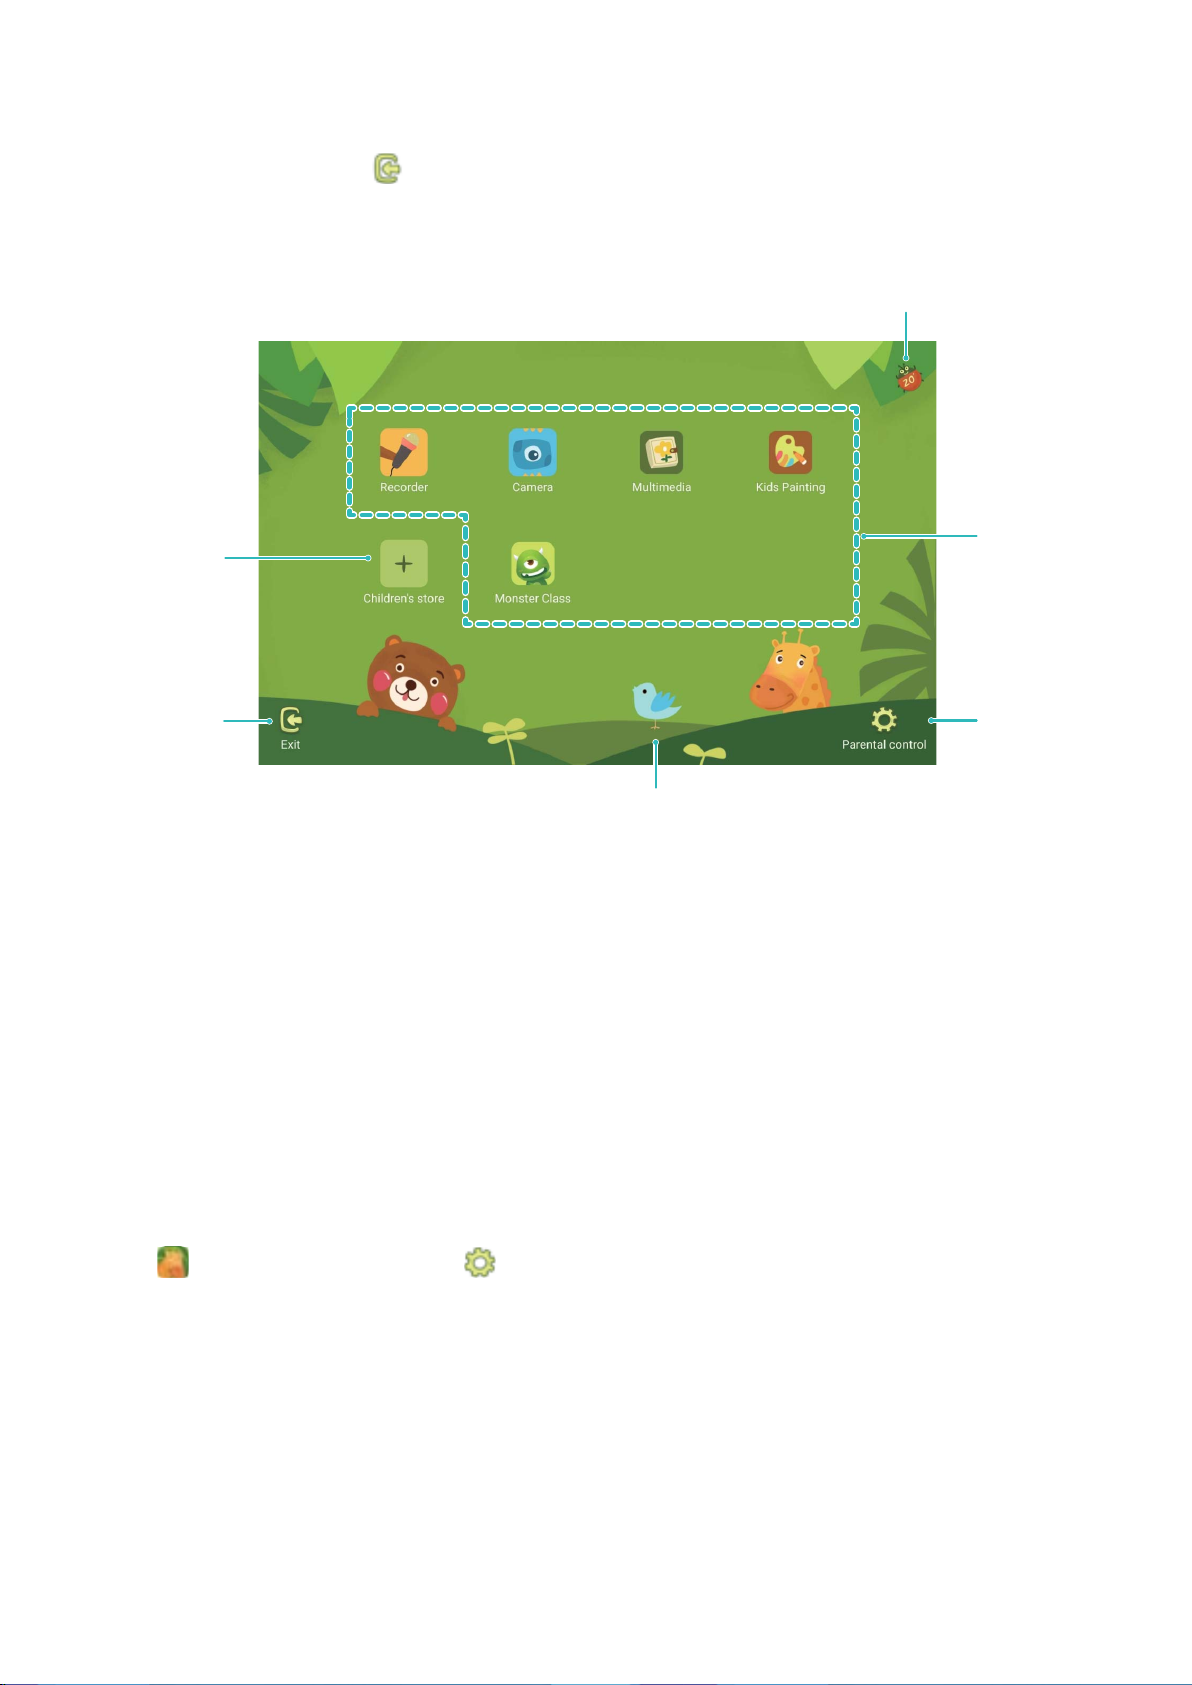
l Set parental controls: Go to Parental control to control how your child uses his or her Tablet
(such as managing the available apps, images, and multimedia your child would have access to,
3
Page 8
Remaining time of session
Enter
parental
controls
Exit Kids
Corner
Enter Kids
Store
Apps
permitted
Turn on/off background music
Exciting Features
limiting the daily durations and number of times you would allow your child to access his or her
Tablet, as well as enabling resting periods).
l Exit Kids Corner: Touch Exit, and enter your Kids Corner password to exit Kids Corner.
Enable Parental Control
Worried about the inappropriate contents your child can access through his or her Tablet? Want to
prevent your child from indulging in his or her Tablet? With Parental control, you can supervise how
your child uses his or her Tablet (such as managing the available apps, images, and multimedia your
child would have access to, limiting the daily durations and number of times you would allow your
child to access his or her Tablet, as well as enabling resting periods) through simple settings.
Open Children's Corner, go to Parental control, and follow the onscreen instructions to
enter your Kids Corner password.
In Parental control settings, you can:
l Edit your child's information: Go to Kid's prole > Edit prole to edit your child's name,
gender, date of birth, and upload his or her prole picture.
l Manage apps: Go to Apps management > Add to add the apps you would allow your child to
access. When entering Kids Corner again, he or she will only be able to access the allowed apps.
4
Page 9

Exciting Features
l Set Media Library permissions: Go to Multimedia > Add to add pictures and videos that you
would allow your child to view. When entering Kids Corner again, he or she will only be able to
access the allowed pictures and videos.
l Limit the duration of use, the daily access times, and enable resting periods: Touch Time
limit to limit the daily durations and number of times you would allow your child to access his or
her Tablet, as well as resting periods.
l Set parameters: Touch Settings to set a Kids Corner password, and modify network parameters
and security settings.
l Record your child's ngerprint: Touch Settings, enable Go straight to Kids Corner, and record
your child's ngerprint. This allows your child to quickly unlock his or her Tablet and easily access
Kids Corner.
l Prevent third-party charges: Touch Settings, and enable Disable outgoing messages to
prevent your child from misusing third-party apps that may lead to accidental charges (such as
through text messages). This feature is not supported on Wi-Fi only tablets.
Set up Your Child's Fingerprint
Tired of having to unlock your child's Tablet each time he or she uses Kids Corner? Once you set up
your child's ngerprint, your child can use his or her own ngerprint to quickly unlock his or her Tablet
and easily access Kids Corner.
1 There are two ways to set up your child's ngerprint:
l When you use Kids Corner for the rst time, you can set up your child's ngerprint through the
Kids Corner conguration wizard.
l If you did not set up your child's ngerprint through the Kids Corner conguration wizard, you
can also open Children's Corner, touch Parental control, and follow the onscreen
instructions to enter your Kids Corner password, then go to Settings > Add a new kid's
ngerprint, follow the onscreen instructions to enter the screen unlock password and set up
your child's ngerprint.
2 Go to Parental control > Settings, and enable Go straight to Kids Corner.
App Twin: Log in to Two Social Media Accounts at Once
Have you ever wished you could log in to two WeChat and Facebook accounts on your Tablet without
the hassle of constantly switching between them? App twin lets you log in to two WeChat and
Facebook accounts at the same time, allowing you to keep your work and private life separate.
The App twin feature only works with WeChat, QQ, LINE, Facebook, Snapchat, WhatsApp, and
Messenger. Download the latest versions of these apps before using this feature.
Open Settings. Go to Apps & notications > App twin and enable App twin for WeChat, QQ,
LINE, Facebook, Snapchat, WhatsApp, or Messenger as required.
5
Page 10
Exciting Features
When App twin is enabled, two WeChat, QQ, LINE, Facebook, Snapchat, WhatsApp, or Messenger
app icons are displayed on the home screen. This means that you can log in to two accounts at the
same time. Touch and hold the twinned app icon on the home screen to quickly disable App twin.
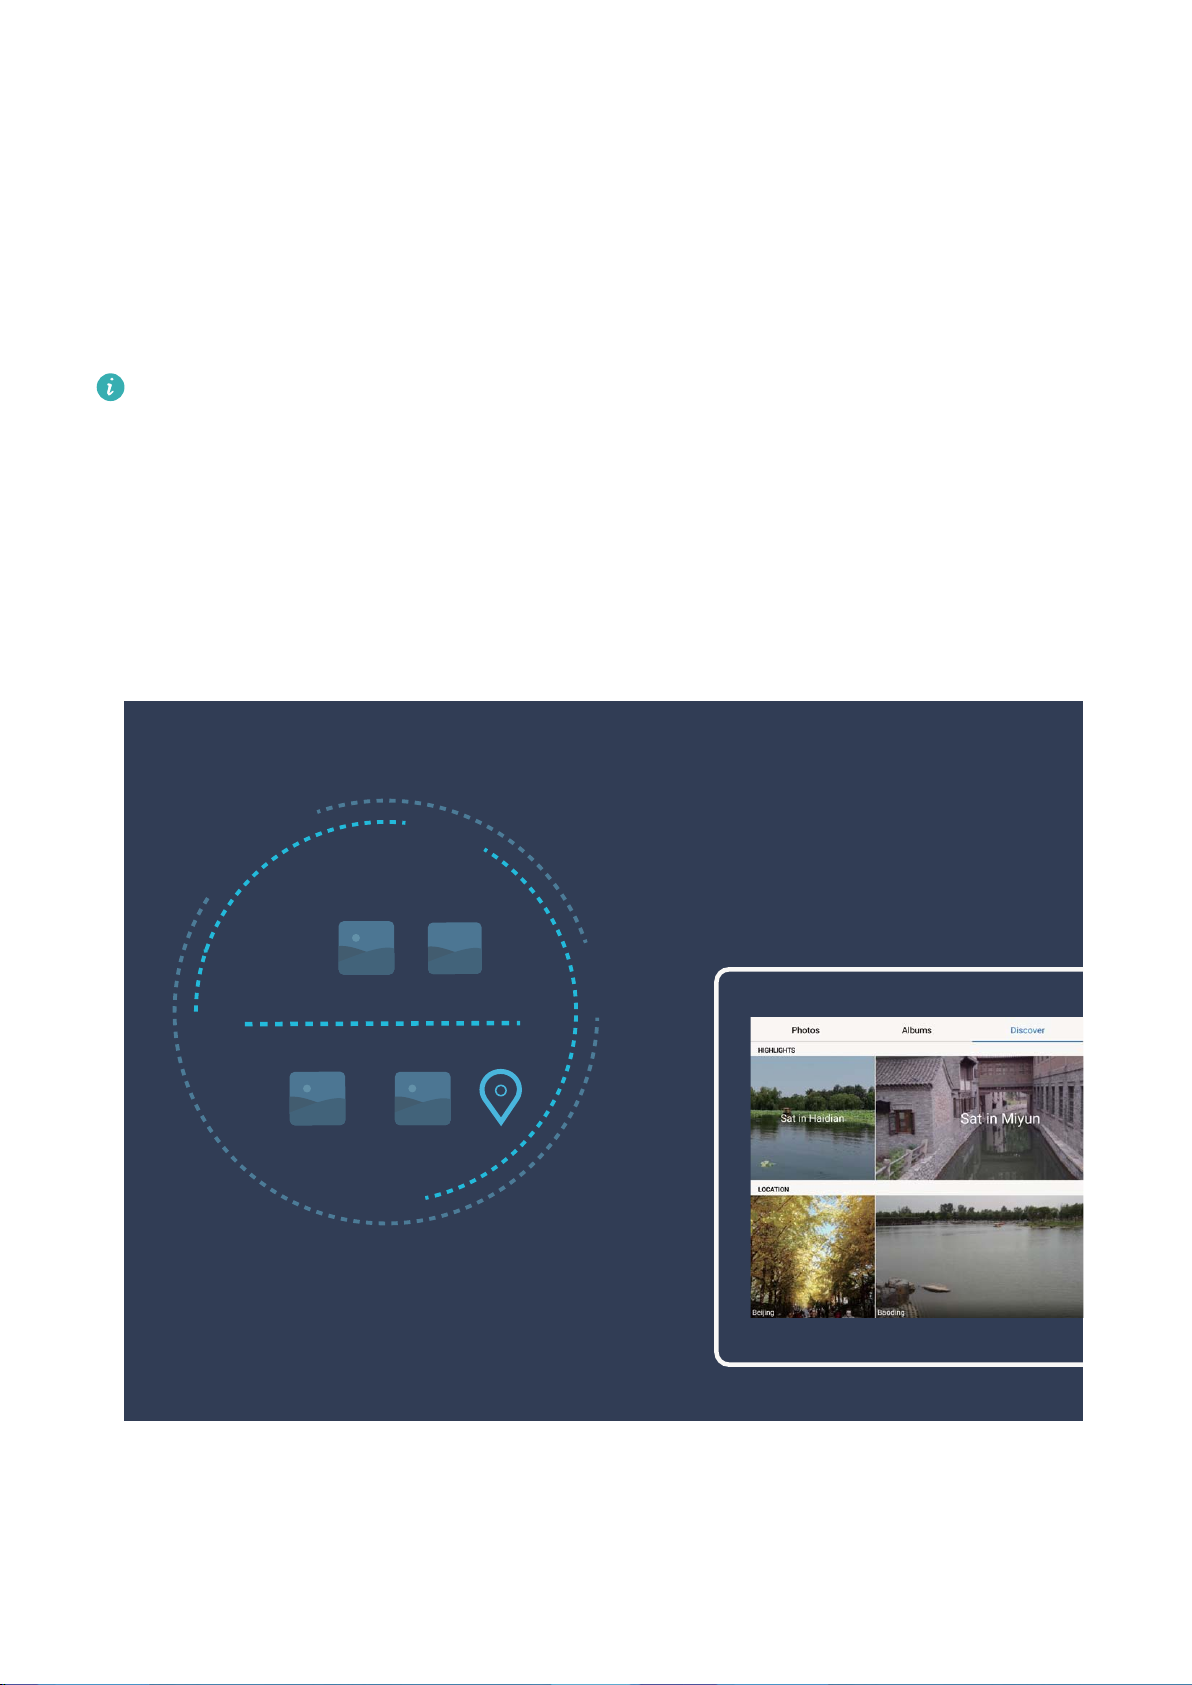
Highlights: Turn Your Photos into a Personalised Video
Highlights creates short video clips from your photos based on location information. You can add
animation effects and choose from a range of background music.
l Highlights automatically creates videos based on the geographical information in your photos.
To use this feature, open Camera, go to Settings, and check that GPS tag is enabled.
l Check that your Tablet is connected to the Internet.
l Highlights albums are created automatically when your Tablet is charging, the screen is
switched off, and the battery is at least 10% charged. It may take some time for your Tablet to
create the album. Your Tablet will not create a Highlights album if there is an
insufcient
number of photos or videos in your Gallery.
6
Page 11
Exciting Features
More Features
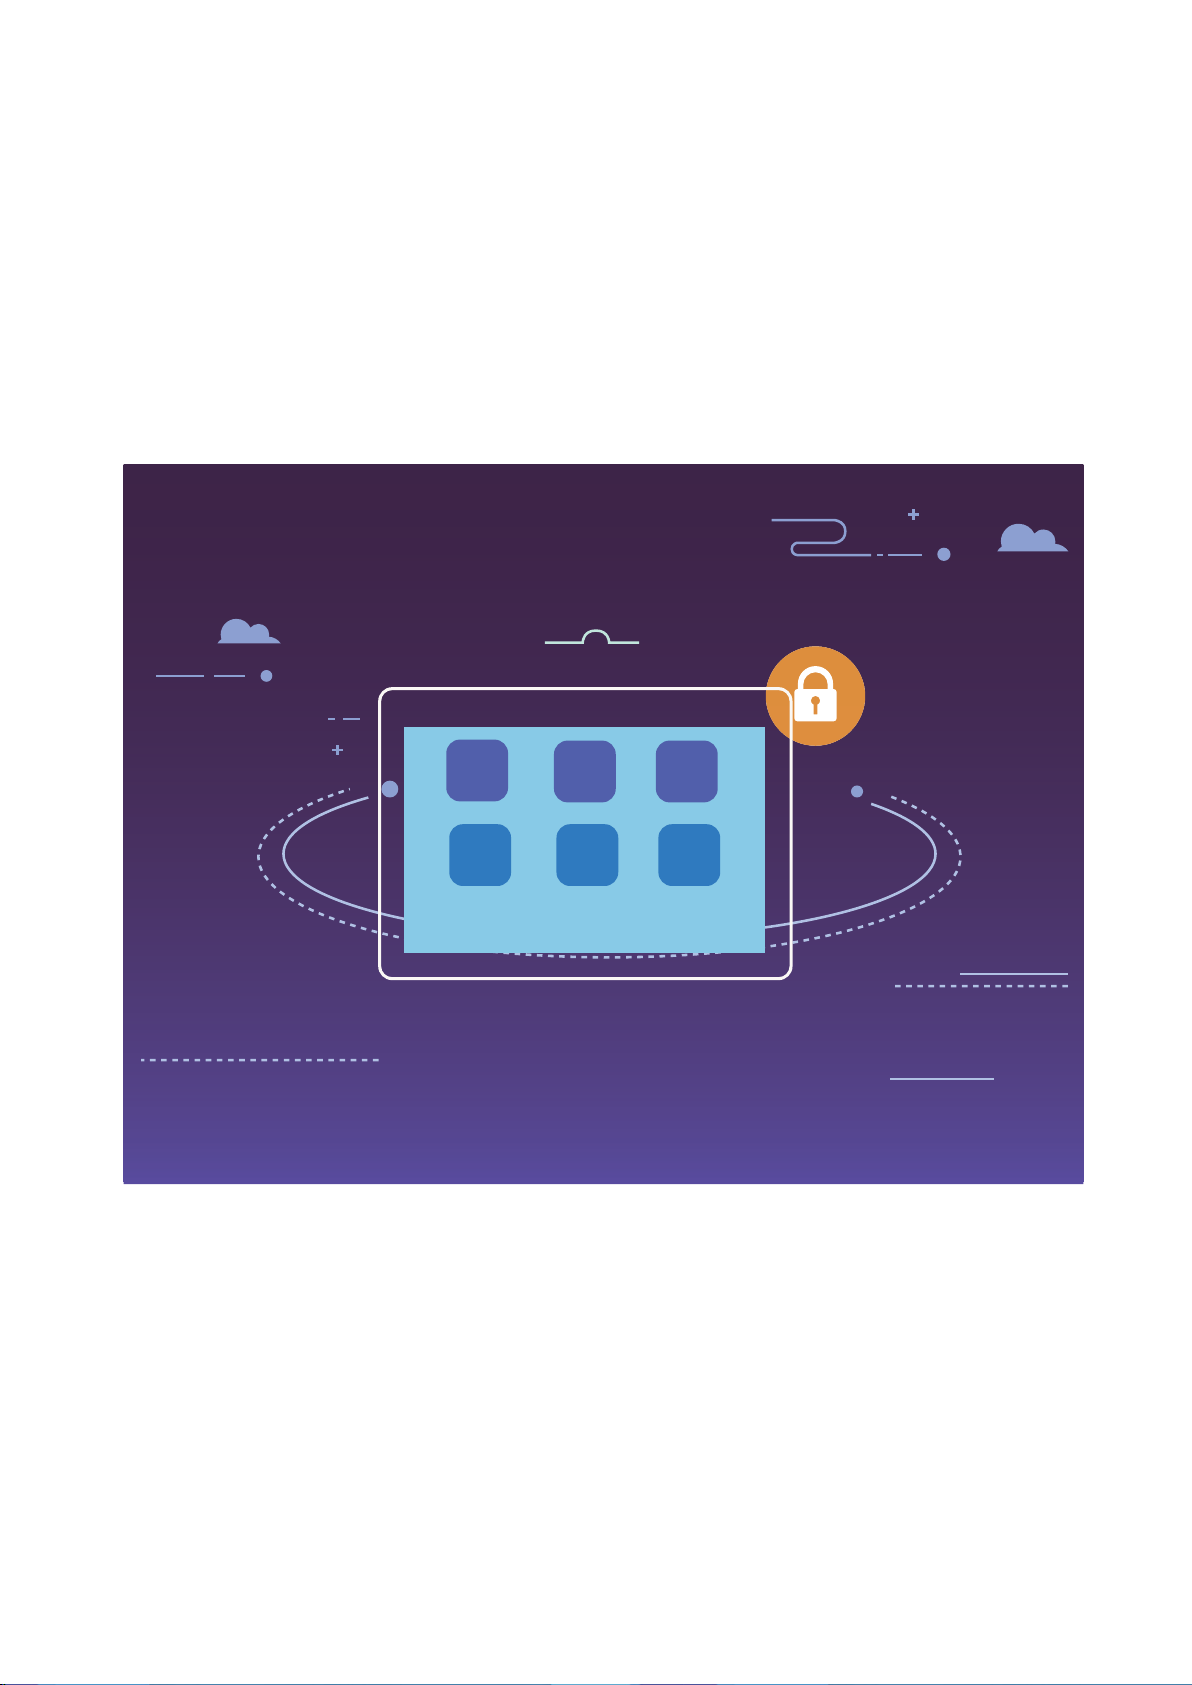
PrivateSpace: Keep Your Private Information Hidden
Want to keep your personal apps and data (such as photos and videos) hidden on your Tablet, secure
from other users? Look no further than PrivateSpace. With PrivateSpace, you can create an
independent space on your device to keep your private information. For example, you can install a
separate WeChat in both your MainSpace and PrivateSpace, keeping the two apps completely
independent of each other.
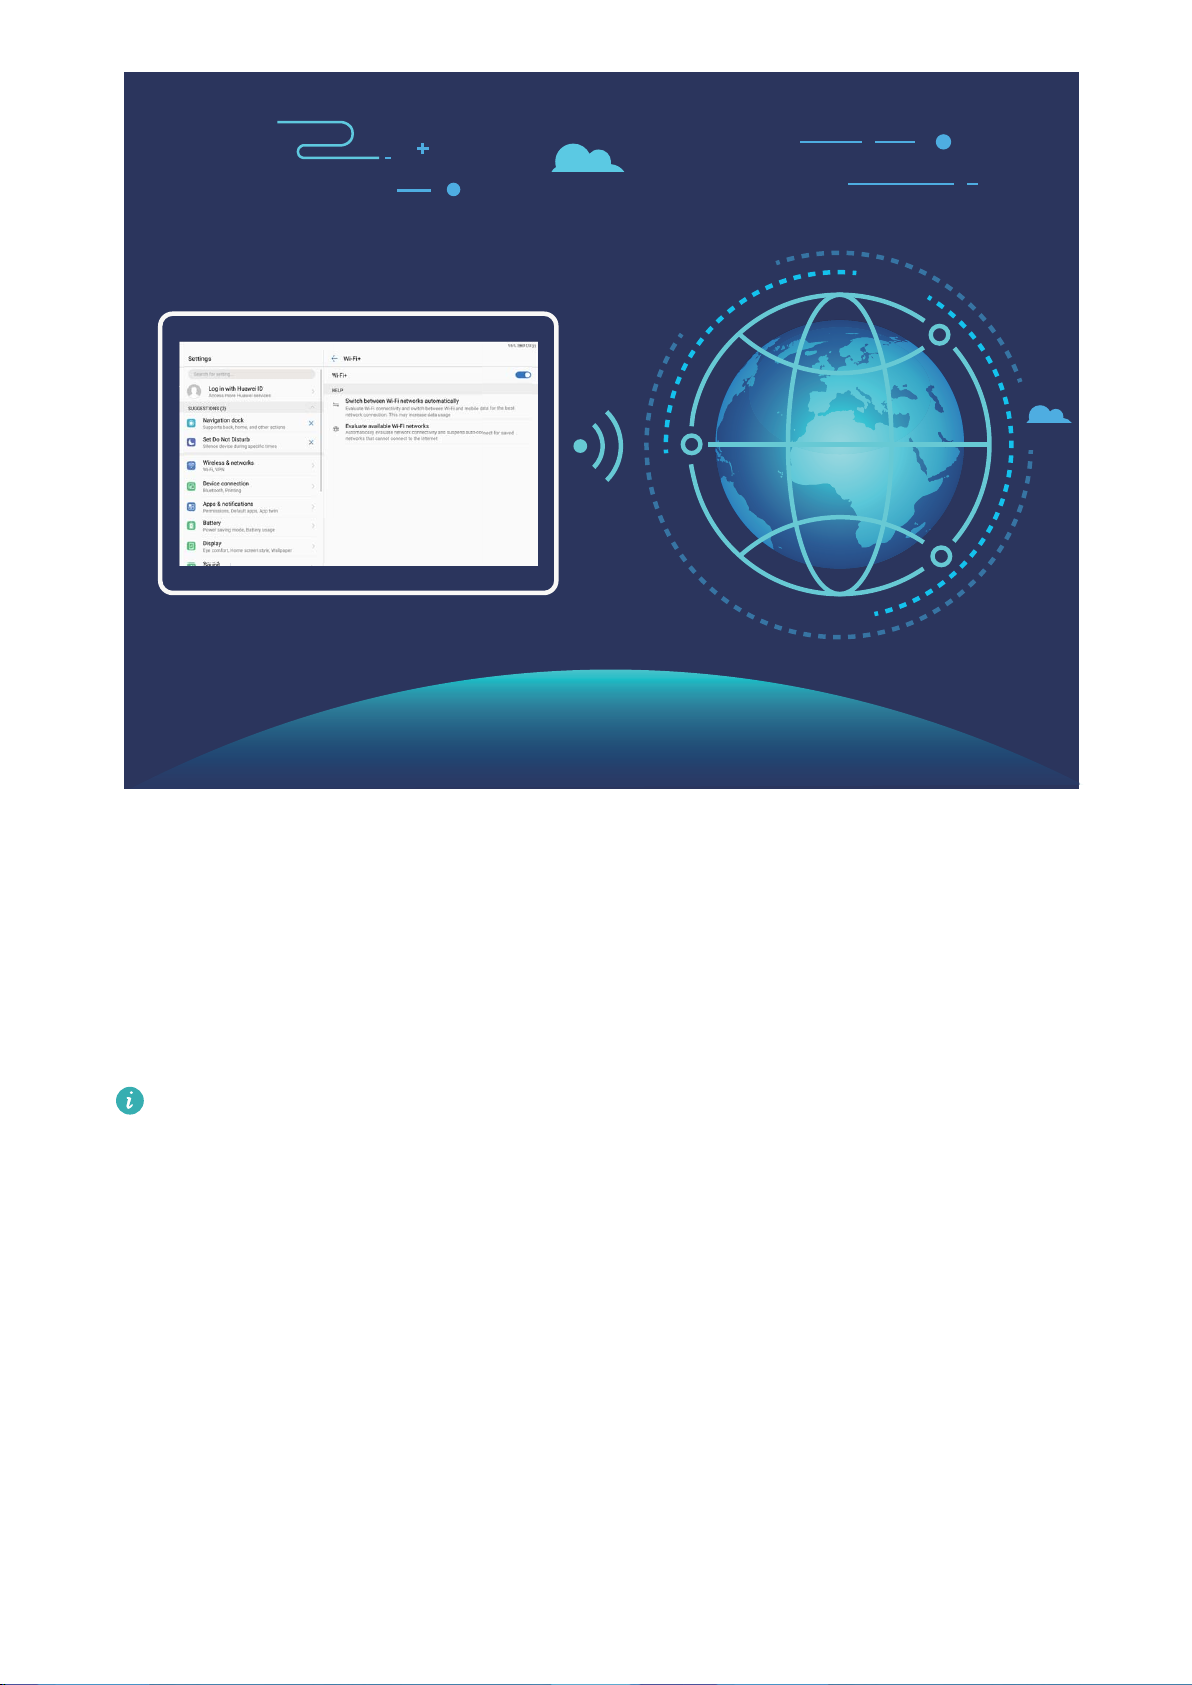
Wi-Fi+: Your Smart Connectivity Assistant
Wi-Fi+ intelligently connects to Wi-Fi networks to save mobile data consumption. When your device
detects a known or free Wi-Fi network, it will automatically turn on Wi-Fi and connect to the network.
Your device will also automatically select the optimal network in the area for the best Internet
connection.
7
Page 12
Exciting Features
Once you have enabled Wi-Fi+, your device will:
l Automatically select and connect to the optimal network: Automatically select and connect to
Wi-Fi networks you've previously connected to, free networks, or your mobile data network,
depending on the signal strength at your current location.
l Automatically turn Wi-Fi on and off: Depending on the Wi-Fi networks you have connected to
previously, Wi-Fi will be automatically enabled or disabled in specic locations. This will prevent your
device from constantly searching for new networks.
This feature is not supported on Wi-Fi only tablets.
l Assess the quality of available networks: Evaluate currently available network hotspots and
prevent your device from automatically connecting to networks with no Internet connection.
8
Page 13
New Device
Connecting to the Internet
Connect to Wi-Fi networks effortlessly with your device.
Connecting to a Wi-Fi network
1 Swipe down from the status bar to open the notication panel.
2 Touch and hold to open the Wi-Fi settings screen.
3 Switch on Wi-Fi. Your device will list all available Wi-Fi networks at your location.
4 Select the Wi-Fi network you want to connect to. If you select an encrypted network, you will also
need to enter the Wi-Fi password.
Connecting using mobile data
Before using mobile data, ensure that you have a data plan with your network provider to avoid
incurring excessive data charges. Mobile data is not supported on Wi-Fi only tablets.
1 Swipe down from the status bar to open the notication panel.
2 Touch to enable mobile data.
When you don't need to access the Internet, disable mobile data to save battery power and
reduce data usage.
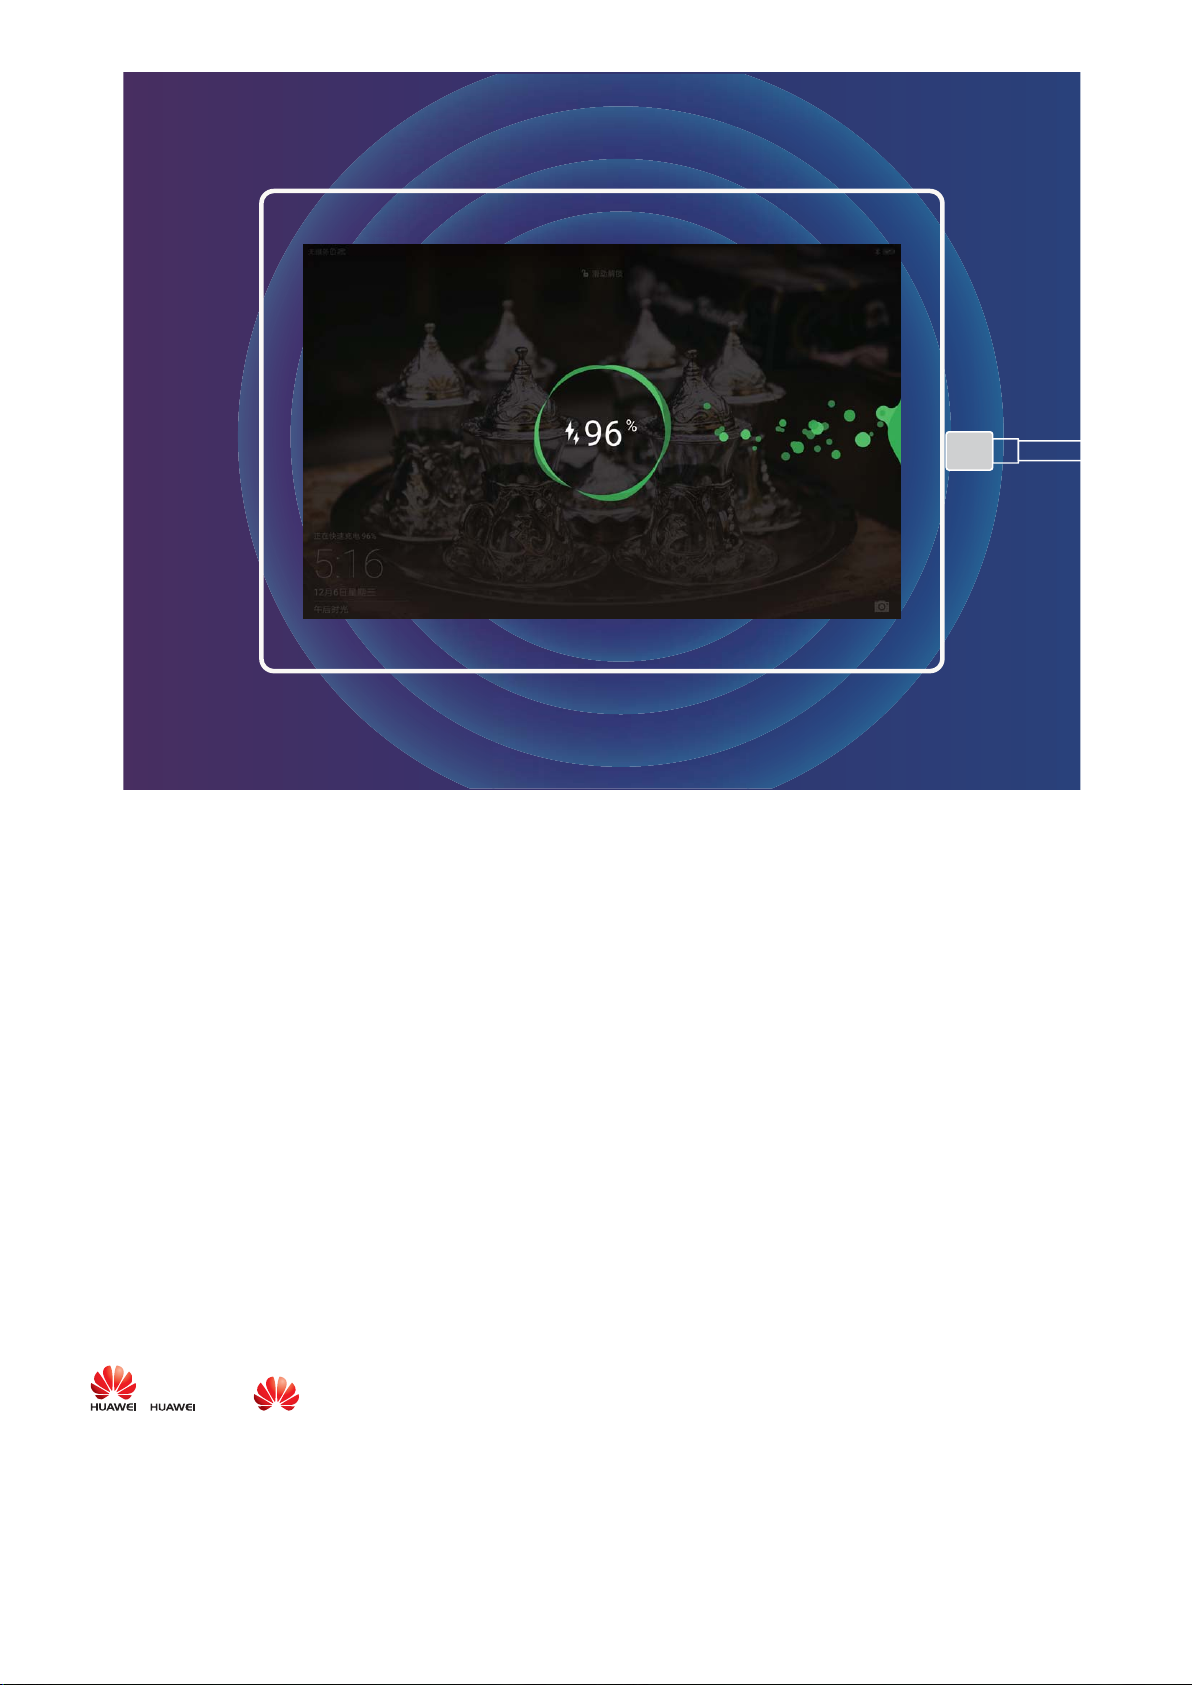
Smart Charging: Charge Your Device Faster and Safer
Many people
more: Super charging has you covered. Super charging establishes a direct connection between the
Tablet and the charger and intelligently coordinates the charging voltage and current based on the
battery power of the Tablet to provide a smarter, faster, and safer charge.
Make sure you are using the original charger and USB cable when charging your Tablet. Using a
third-party charger or USB cable may cause repeated restarts, longer charges, overheating, and in
extreme cases, Tablet battery damage or even explosion.
nd ordinary charging too slow, but worry about the safely of fast-charging. Worry no
9
Page 14
New Device
Getting Help
Legal Notice
Copyright © Huawei Technologies Co., Ltd. 2018. All rights reserved.
This document, whether in part or whole, shall not be reproduced or transmitted in any way, shape,
or form without the prior written consent of Huawei Technologies Co., Ltd. and its afliates
("Huawei").
The product described in this document may include software that is the copyright of Huawei or its
licensors. Such software shall not be reproduced, distributed, modied, decompiled, disassembled,
decrypted, extracted, reverse engineered, leased, assigned, or sublicensed unless such restrictions are
prohibited by law or such actions are approved by the copyright holder.
Trademarks and Permissions
, , and are trademarks or registered trademarks of Huawei Technologies Co., Ltd.
Android™ is a trademark of Google Inc.
The Bluetooth® word mark and logos are registered trademarks owned by Bluetooth SIG, Inc. and any
use of such marks by Huawei Technologies Co., Ltd. is under license.
ENERGY STAR® MARK
10
Page 15

New Device
For information related to ENERGY STAR®, please visit the website www.energystar.gov.
Other trademarks, products, services and company names mentioned herein may be the property of
their respective owners.
Notice
Some features of the product and its accessories described herein rely on the software installed or the
capacities and settings of the local network, and therefore may not be activated or may be limited by
local network operators or network service providers.
Therefore, the descriptions herein may not exactly match the purchased product or its accessories.
Huawei reserves the right to change or modify any information or
specications contained in this
document at any time without prior notice and without any liability.
Third-Party Software Statement
Huawei does not own the intellectual property of the third-party software and applications that are
delivered with this product. Therefore, Huawei will not provide any warranty of any kind for third-
party software and applications. Neither will Huawei provide support to customers who use third-
party software and applications, nor be responsible or liable for the functions or performance of third-
party software and applications.
Third-party software and applications services may be interrupted or terminated at any time, and
Huawei does not guarantee the availability of any content or service. Third-party service providers
provide content and services through network or transmission tools outside of the control of Huawei.
To the greatest extent permitted by applicable law, it is explicitly stated that Huawei shall not
compensate or be liable for services provided by third-party service providers, or the interruption or
termination of third-party contents or services.
Huawei shall not be responsible for the legality, quality, or any other aspects of any third-party
software installed on this product, or for any uploaded or downloaded third-party works in any form,
including but not limited to texts, images, videos, or software etc. Customers shall bear the risk for
any and all effects, including incompatibility between the software and this product, which result from
installing software or uploading or downloading the third-party works.
This product is based on the open-source Android™ platform. Huawei has made necessary changes to
the platform. Therefore, this product may not support all the functions that are supported by the
standard Android platform or may be incompatible with third-party software. Huawei does not
provide any warranty or representation in connect with any such compatibility and expressly excludes
all liability in connection with such matters.
DISCLAIMER
ALL CONTENTS OF THIS DOCUMENT ARE PROVIDED "AS IS". EXCEPT AS REQUIRED BY APPLICABLE
LAWS, NO WARRANTIES OF ANY KIND, EITHER EXPRESS OR IMPLIED, INCLUDING BUT NOT LIMITED
TO, THE IMPLIED WARRANTIES OF MERCHANTABILITY AND FITNESS FOR A PARTICULAR PURPOSE,
ARE MADE IN RELATION TO THE ACCURACY, RELIABILITY OR CONTENTS OF THIS DOCUMENT.
11
Page 16

New Device
TO THE MAXIMUM EXTENT PERMITTED BY APPLICABLE LAW, UNDER NO CIRCUMSTANCES SHALL
HUAWEI BE LIABLE FOR ANY SPECIAL, INCIDENTAL, INDIRECT, OR CONSEQUENTIAL DAMAGES, OR
LOSS OF PROFITS, BUSINESS, REVENUE, DATA, GOODWILL SAVINGS OR ANTICIPATED SAVINGS
REGARDLESS OF WHETHER SUCH LOSSES ARE FORSEEABLE OR NOT.
THE MAXIMUM LIABILITY (THIS LIMITATION SHALL NOT APPLY TO LIABILITY FOR PERSONAL INJURY
TO THE EXTENT APPLICABLE LAW PROHIBITS SUCH A LIMITATION) OF HUAWEI ARISING FROM THE
USE OF THE PRODUCT DESCRIBED IN THIS DOCUMENT SHALL BE LIMITED TO THE AMOUNT PAID BY
CUSTOMERS FOR THE PURCHASE OF THIS PRODUCT.
Import and Export Regulations
All applicable export or import laws and regulations must be complied with and all necessary
governmental permits and licenses must be obtained before exporting or importing the product,
including the software and technical data, described in this document.
Personal Information and Data Security
The use of some functions or third-party applications on your device could result in your personal
information and data being lost or becoming accessible to others. Use the following measures to help
you protect your personal information:
l Put your device in a safe place to prevent unauthorised use.
l Set your device screen to lock and set a password or unlock pattern.
l Periodically back up personal information stored on your SIM card, memory card or your device
memory. If you change to a different device, be sure to move or delete any personal information on
your old device.
l Periodically back up personal information stored on your memory card or your device memory. If
you change to a different device, be sure to move or delete any personal information on your old
device.
l Do not open messages or emails from strangers to prevent your device from becoming infected
with a virus.
l When using your device to browse the Internet, do not visit websites that might pose a security risk
to avoid your personal information from being stolen.
l If you use services such as the portable Wi-Fi hotspot or Bluetooth, set passwords for these services
to prevent unauthorised access. Turn these services off when they are not in use.
l Install device security software and regularly scan for viruses.
l Be sure to obtain third-party applications from a legitimate source. Downloaded third-party
applications should be scanned for viruses.
l Install security software or patches released by Huawei or authorised third-party application
providers.
l Using unauthorised third-party software to update your device may damage your device or put your
personal information at risk. It is recommended that you update through your device's online
update feature or download
ofcial update packages for your device model from Huawei.
12
Page 17

New Device
l Some applications require and transmit location information. As a result, a third-party may be able
to share your location information.
l Some third-party application providers may collect detection and diagnostic information on your
device to improve their products and services.
13
Page 18
Gestures and Operation
Screenshots and Screen Recording
Take Scrolling Screenshots to Capture Entire Pages
Tired of having to take several screenshots to capture long articles or chat records? You can use your
Tablet's scrolling screenshot feature to take a screenshot that scrolls down to the bottom of the page,
capturing all the information on the page in a single screenshot.
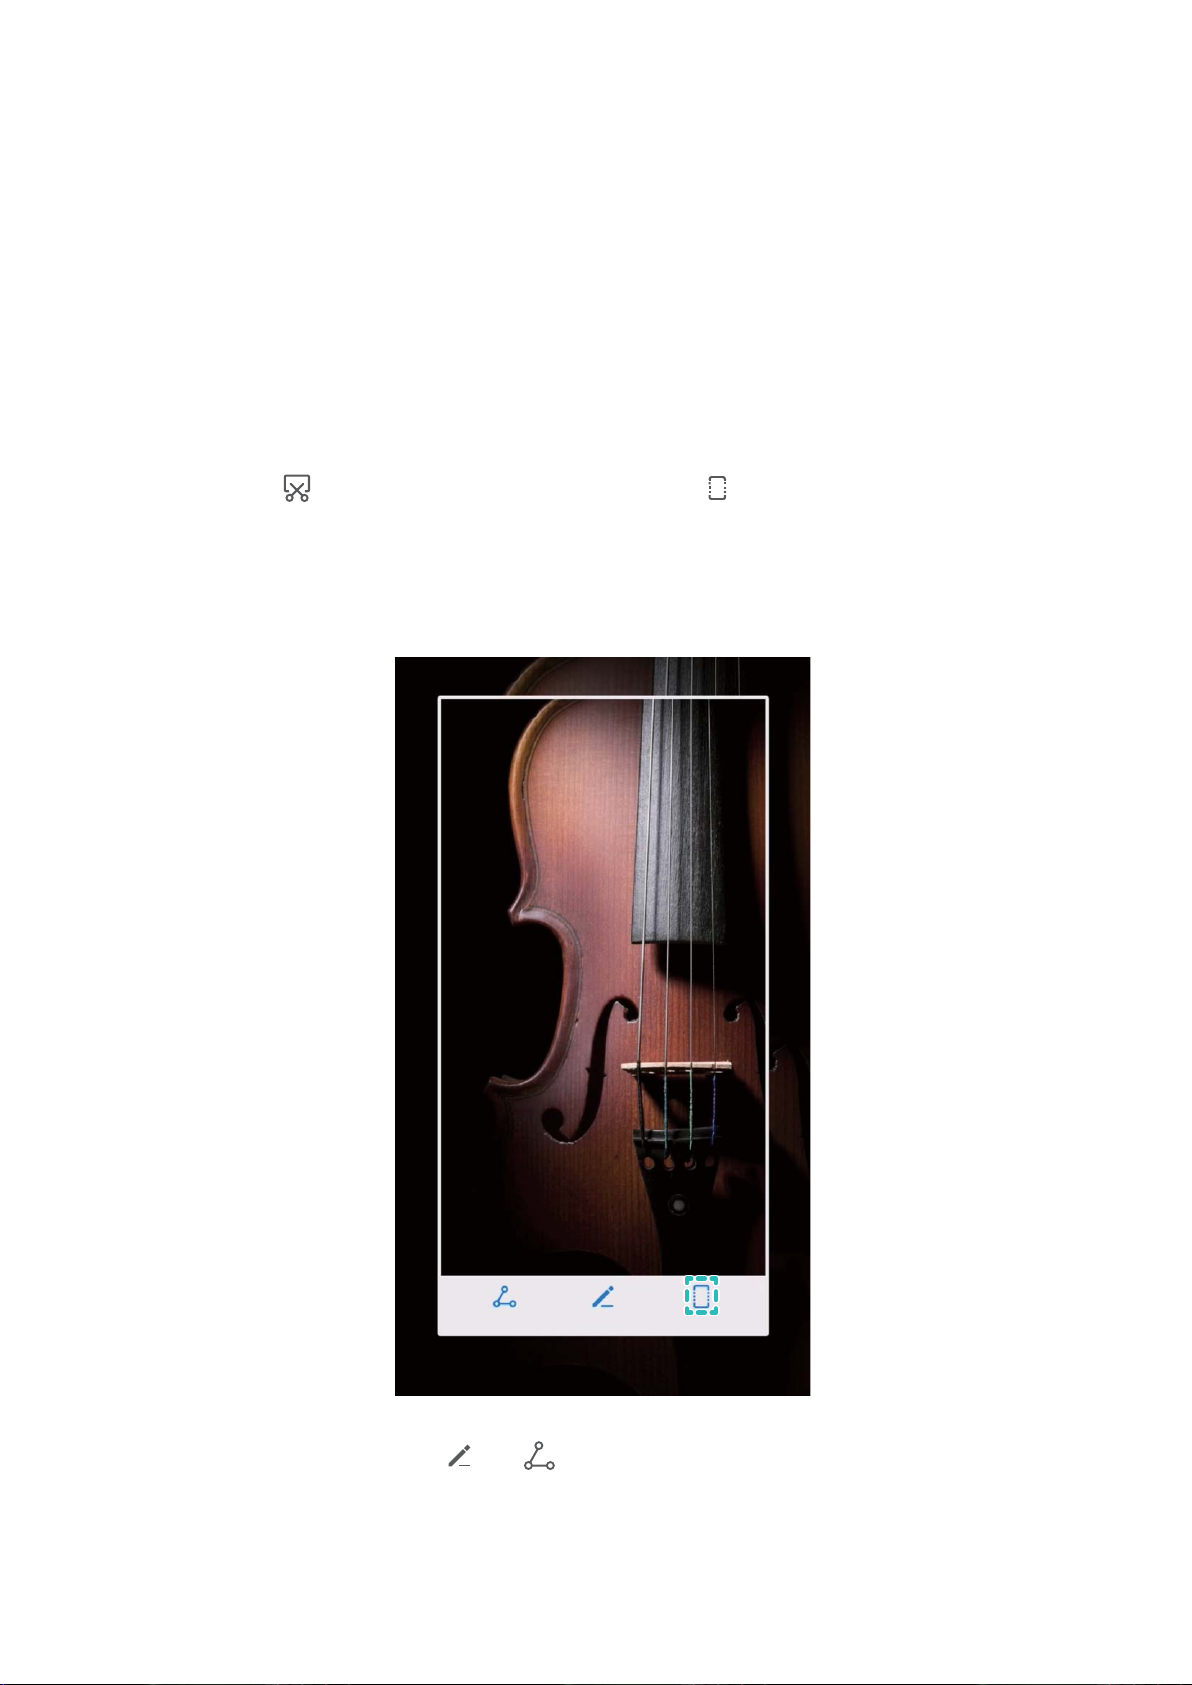
Use shortcuts to take scrolling screenshot: Swipe down from the status bar, open the shortcuts
panel, then touch to take a scrolling screenshot. Touch within three seconds of taking the
screenshot and the screen will automatically scroll down and keep taking the screenshot. During the
scrolling process, touch the scrolling area to end the screenshot.
After taking the screenshot, touch or to edit or share the screenshot. The screenshot will be
saved in Gallery by default.
14
Page 19
Gestures and Operation
Record Exciting Moments on Your Screen
The screen recording feature comes in handy when you are making tutorial videos or want to record
exciting gaming moments on your Tablet.
Screen recording will end if you make or answer a call.
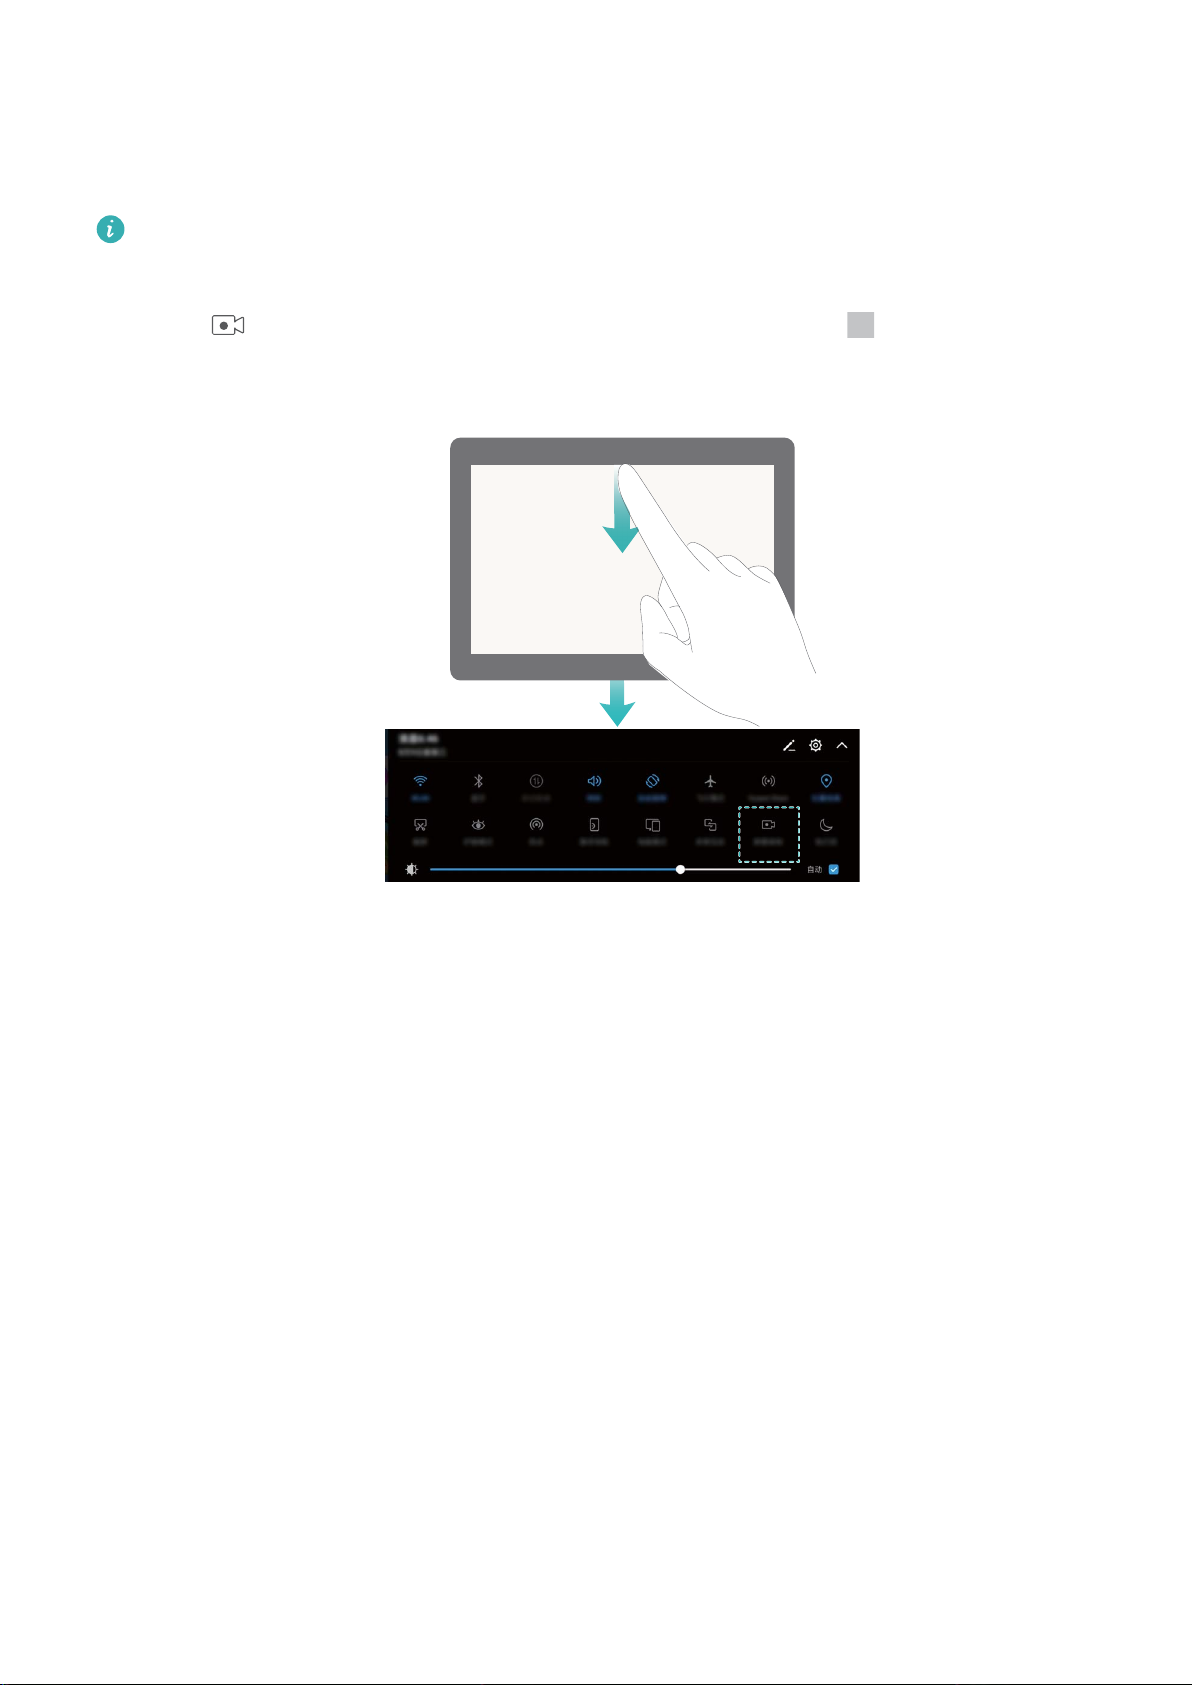
Use shortcut to start recording: Swipe down from the status bar and open the shortcuts panel,
then touch to start recording the screen. To end the recording, touch in the upper left
corner of the screen.
Use combo key to start recording: Simultaneously press the Power button and the Volume up
button to begin recording. To end the recording, simultaneously press the Power button and the
Volume up button again.
15
Page 20
Gestures and Operation
You can view screen recordings in Gallery.
Take a Screenshot of Your Entire Screen
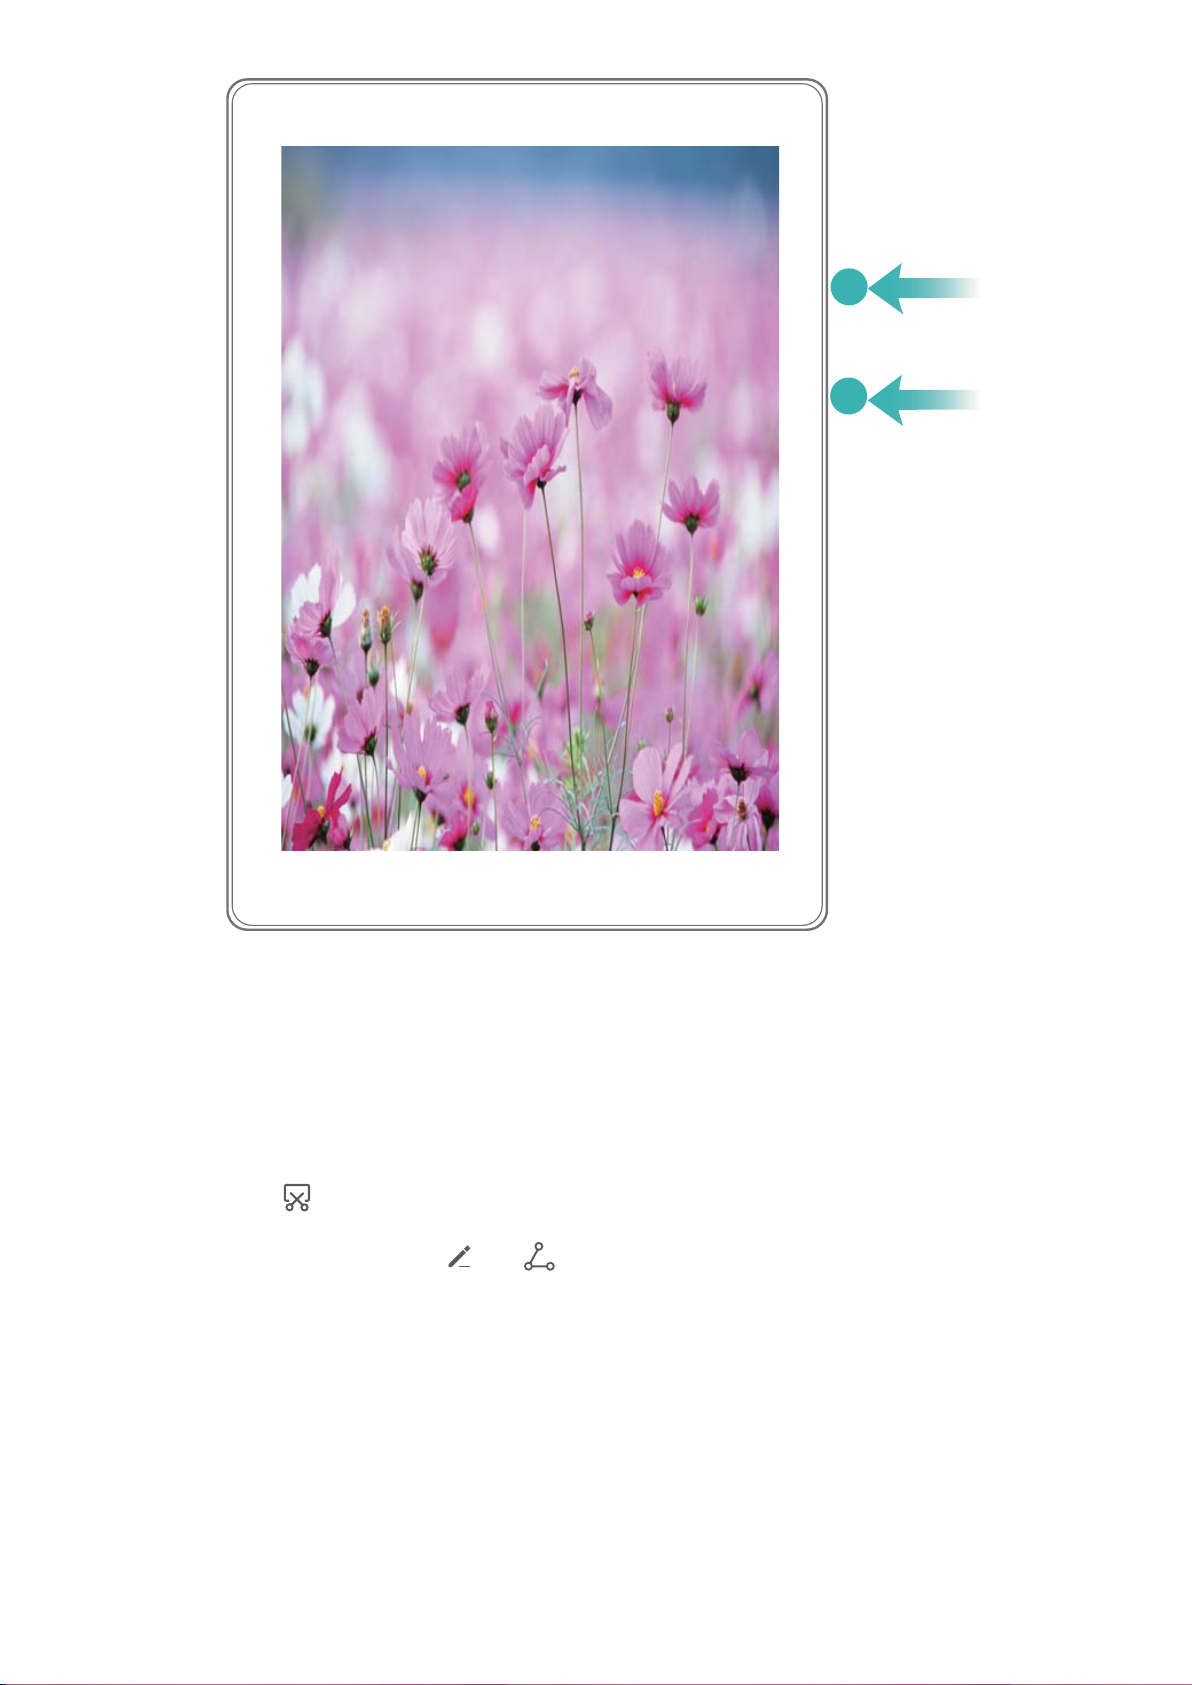
Use combo key to take screenshot: Simultaneously press and hold the Power button and the
Volume down button to take a screenshot of the full screen.
Use shortcut switch to take screenshot: Swipe down from the status bar and open the shortcuts
panel, then touch to take a screenshot of the full screen.
After taking the screenshot, touch or to edit or share the screenshot. The screenshot will be
saved in Gallery by default.
16
Page 21
Home Screen
Quick Switch
Adjust the Position of Shortcut Switches to Your Liking
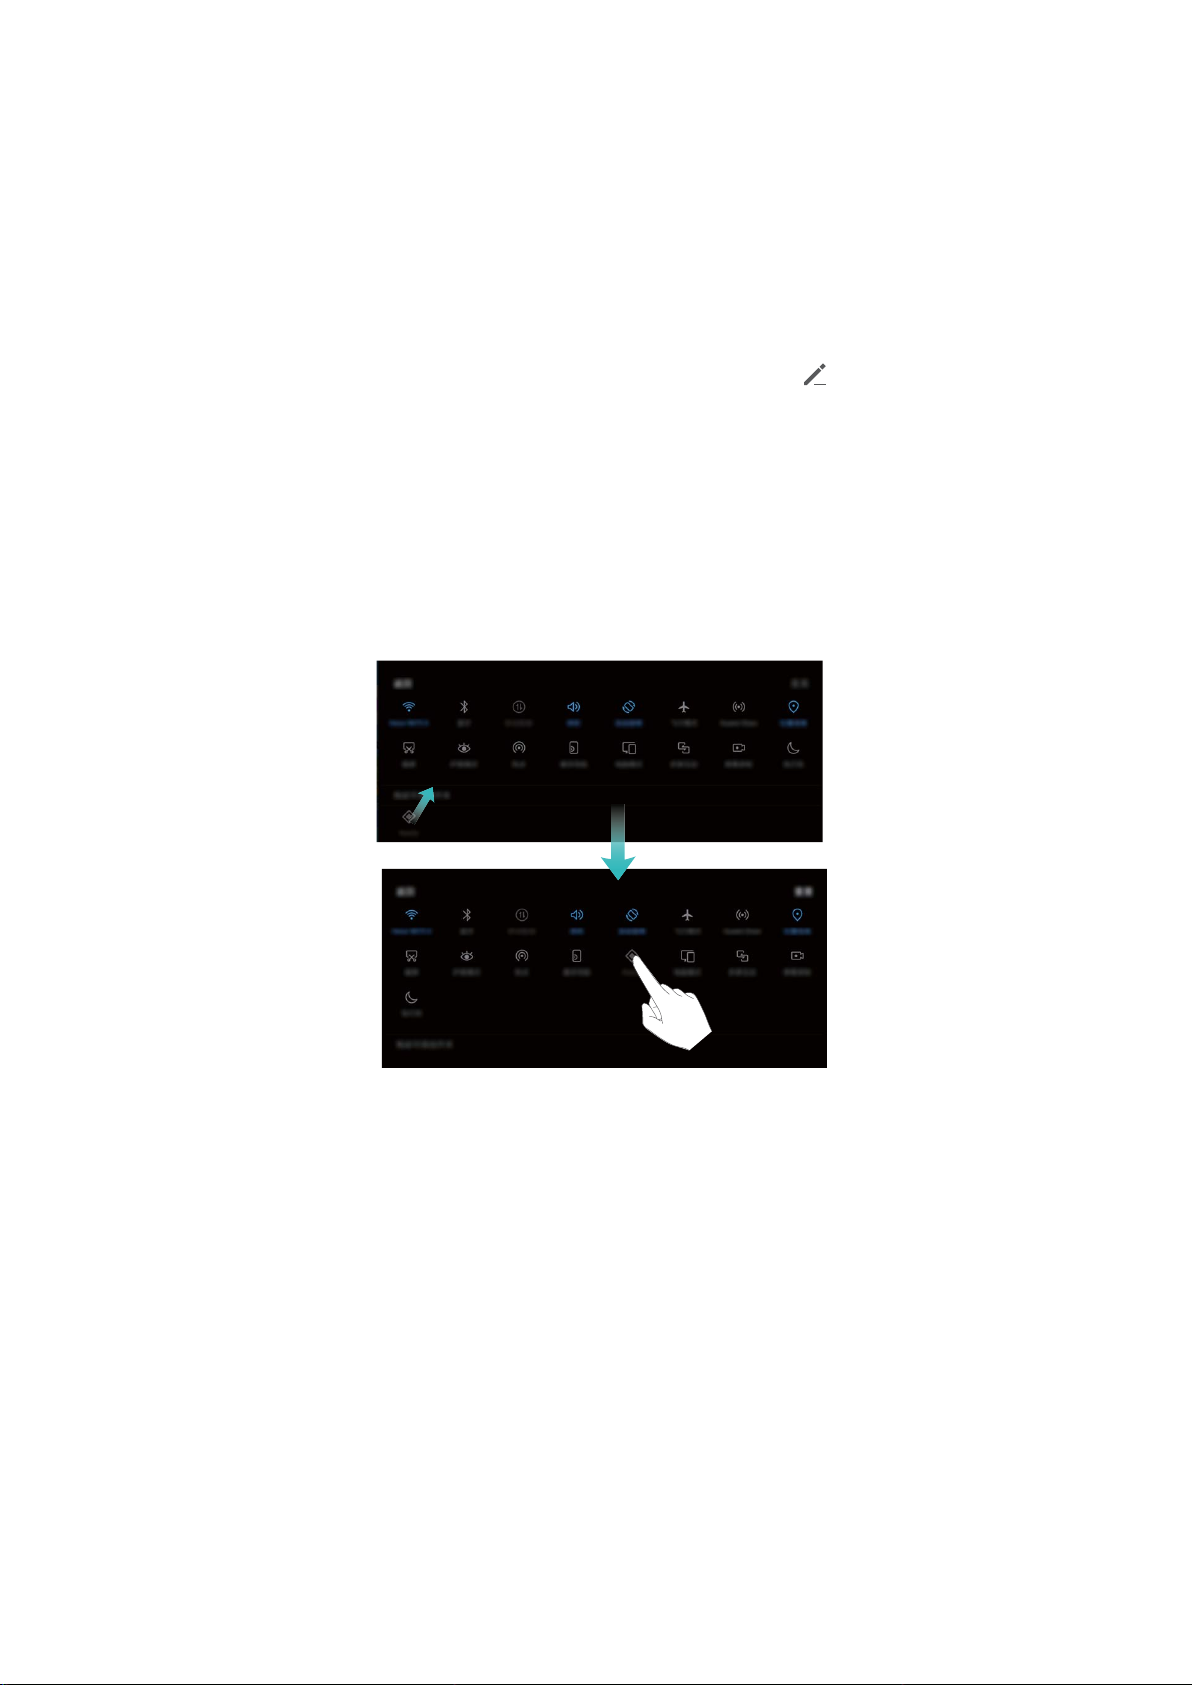
Adjust the positions of the shortcut switches to put the ones you use regularly at the top.
Swipe down from the status bar, open the shortcuts panel, and touch . From the shortcuts panel,
you can:
Rearrange shortcut switches: Touch and hold a shortcut switch and then drag the icon to a
position of your choice.
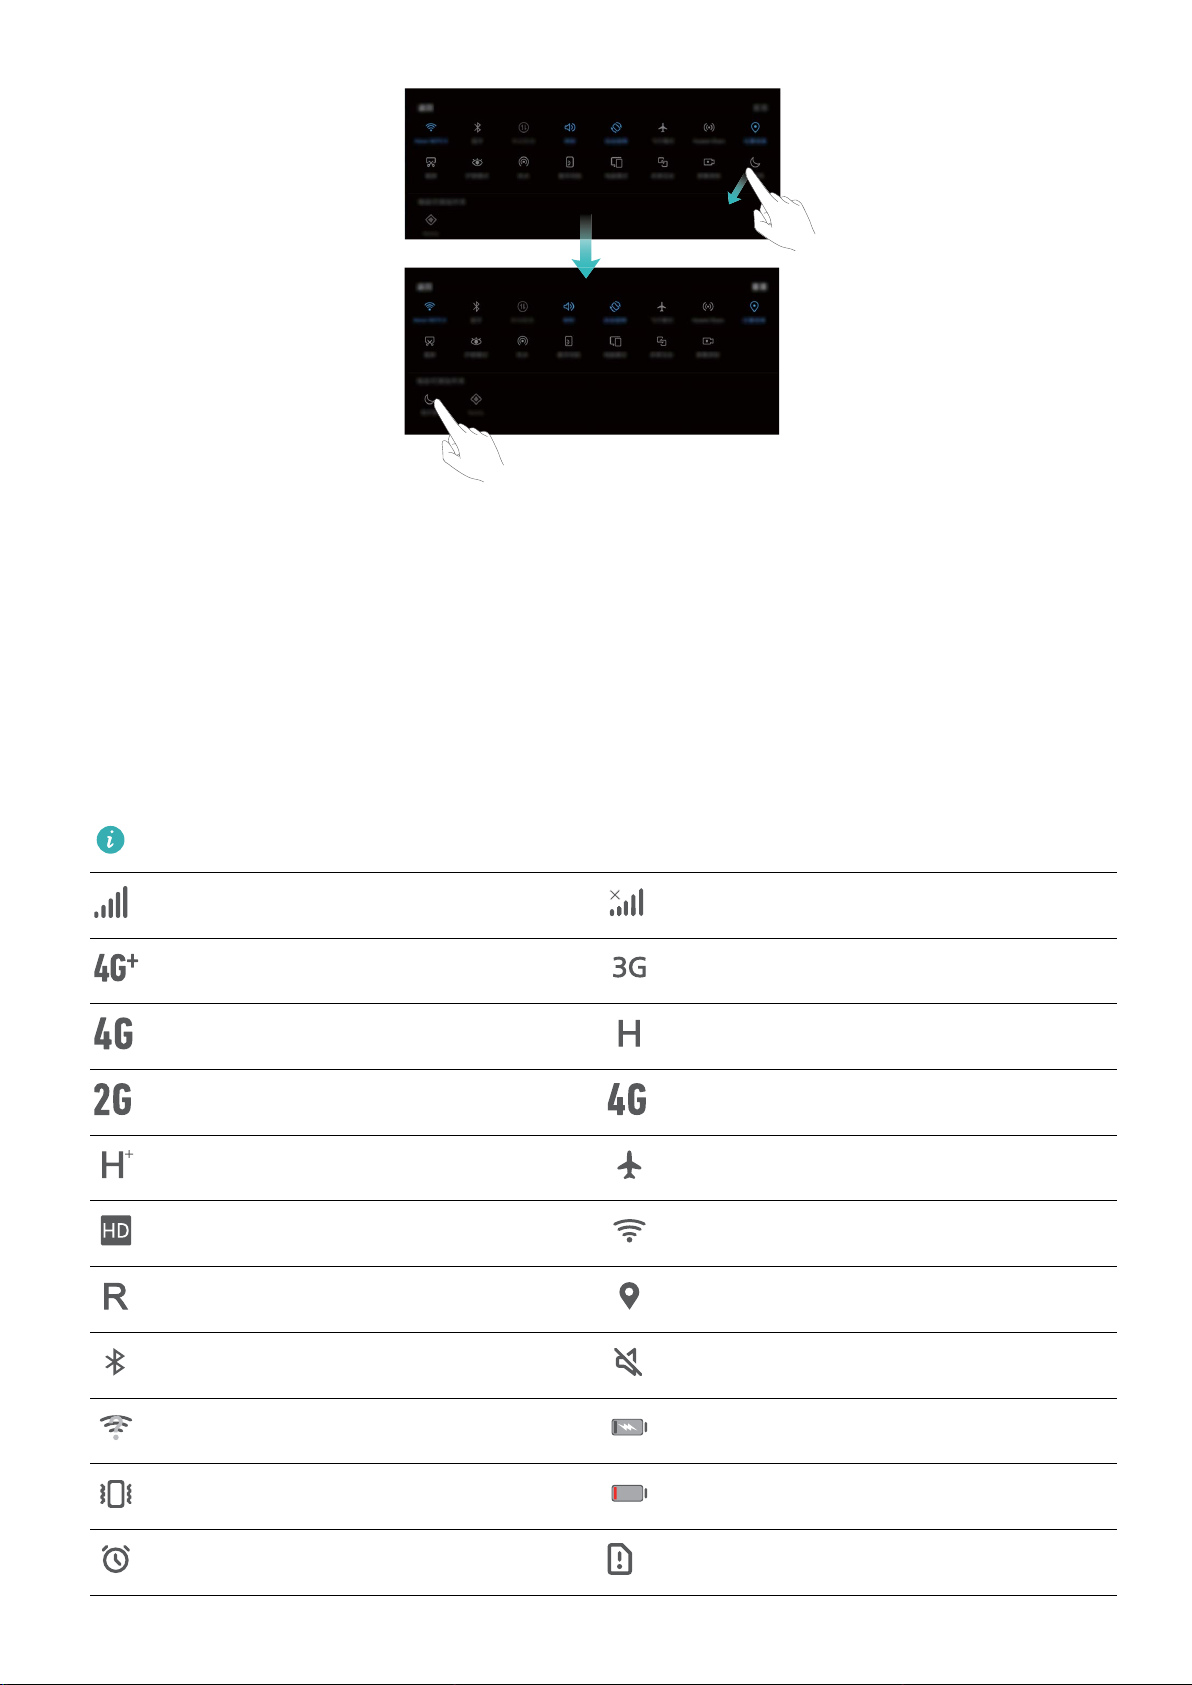
Add a shortcut switch: Drag a shortcut switch from the hidden area of the panel to the displayed
area, then touch BACK.
Delete shortcut switches: Drag a shortcut switch from the displayed area of the panel to the hidden
area, then touch BACK.
17
Page 22
Notication and Status Bar
Home Screen
Understanding Status Bar Icons
Use the status bar to view connection information, check the remaining battery level, and check for
new notications.
Status icons: Status icons tell you about your Tablet's status, including network connections, signal
strength, battery level, and time.
Status icons may vary according to your region or carrier.
Signal strength No signal
Connected over 4G+ Connected over 3G
Connected over 4G Connected over HSPA+
Connected over 2G Connected over LTE
Connected over HSPA Airplane mode enabled
VoLTE enabled Connected over Wi-Fi
Roaming Receiving location data from GPS
Bluetooth enabled Silent mode enabled
Wi-Fi network available Charging
Vibration mode enabled Battery low
Alarms activated No SIM card found
18
Page 23
Home Screen
Battery full
Notication icons: Notication icons are displayed on the left-hand side of the status bar when you
receive a new message, notication, or reminder.
Missed calls New emails
Downloading data New voicemail
Upcoming events Uploading data
Synchronizing data Tablet memory full
Log in or synchronization error Synchronization failed
Connected to a VPN More notications
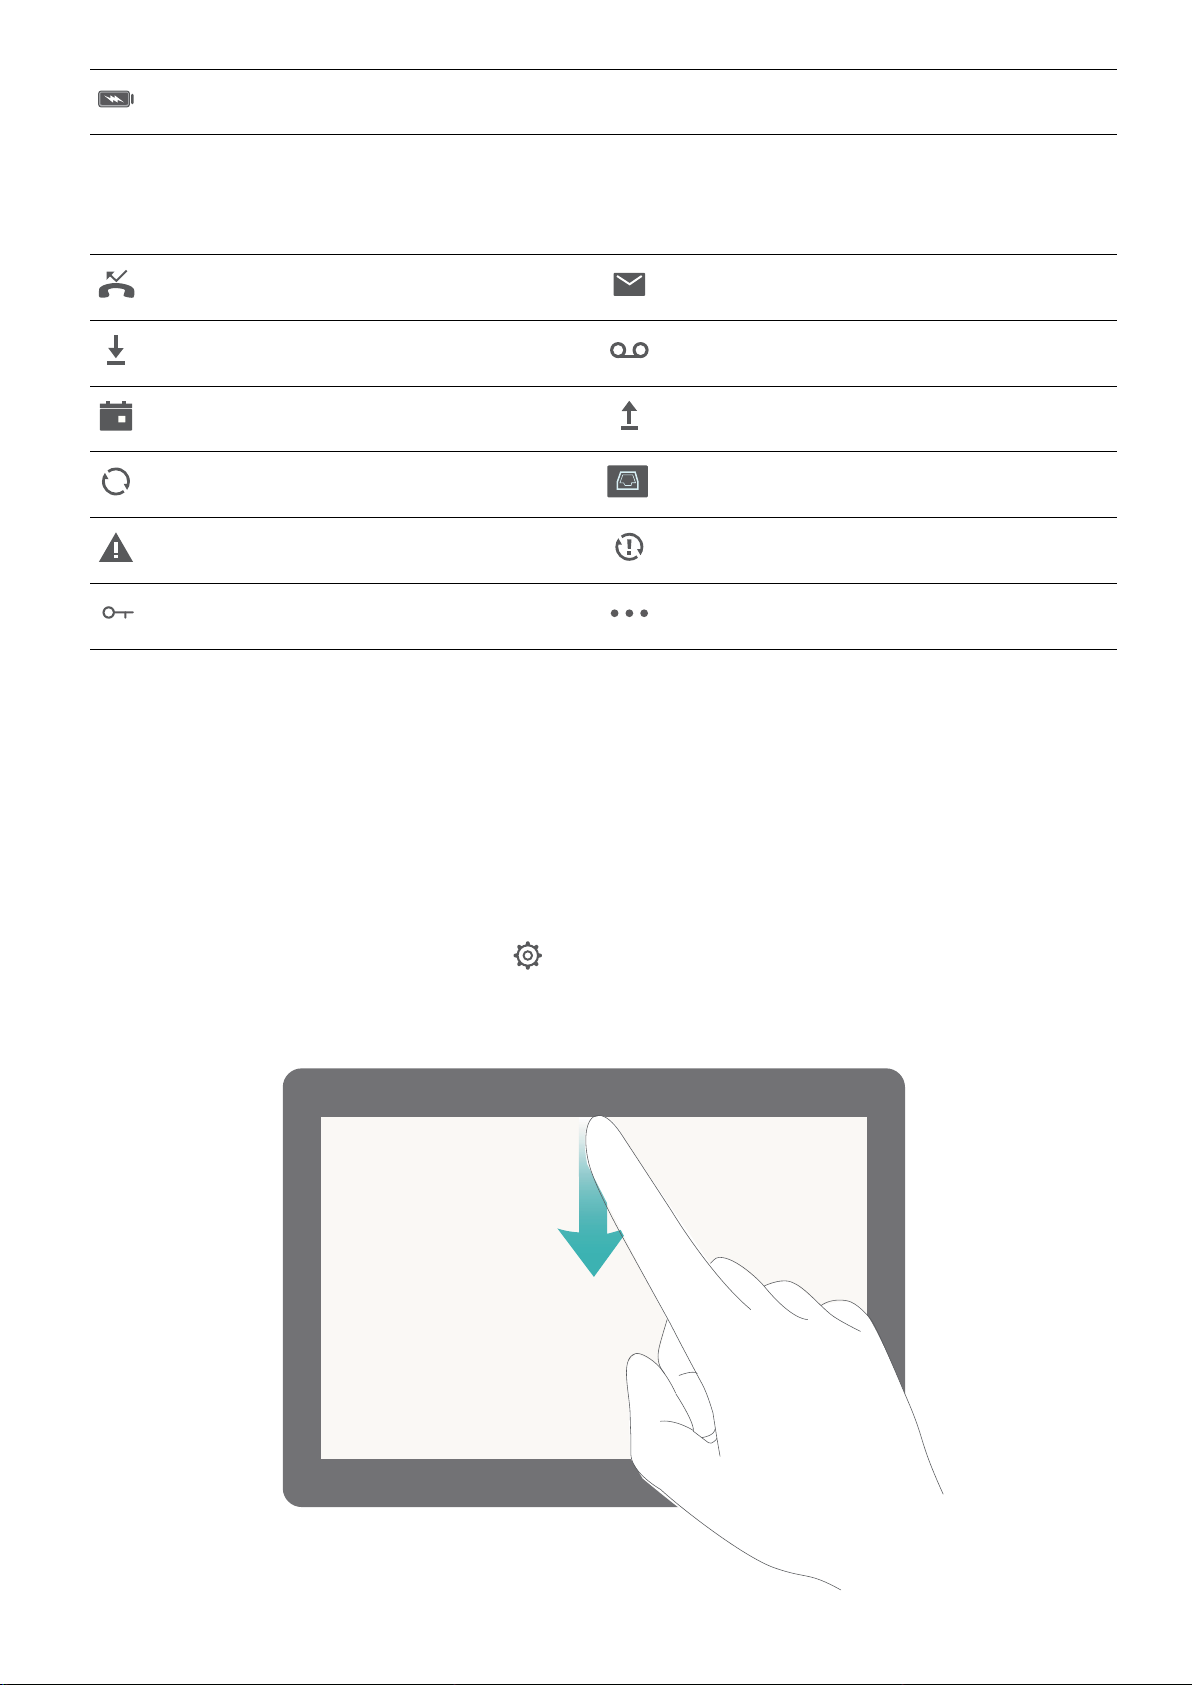
Open the Notication Panel to Get Important Information
Want to ensure that you do not miss out on any important notications? From your Tablet's status
bar, you can view real time notication information and your device's operating status.
When there is a notication reminder, you can turn on the screen and swipe down from the status bar
to view the notication. You can access notication and status bar settings in the following ways:
l Access notication and status bar settings when the screen is locked: Turn on the screen and
swipe down from the status bar, touch , enter your password, and then go to Apps &
notications > Notications & status bar.
19
Page 24
Home Screen
l Access notication and status bar settings when the screen is unlocked: Go to Settings
and then go to Apps & notications > Notications & status bar.
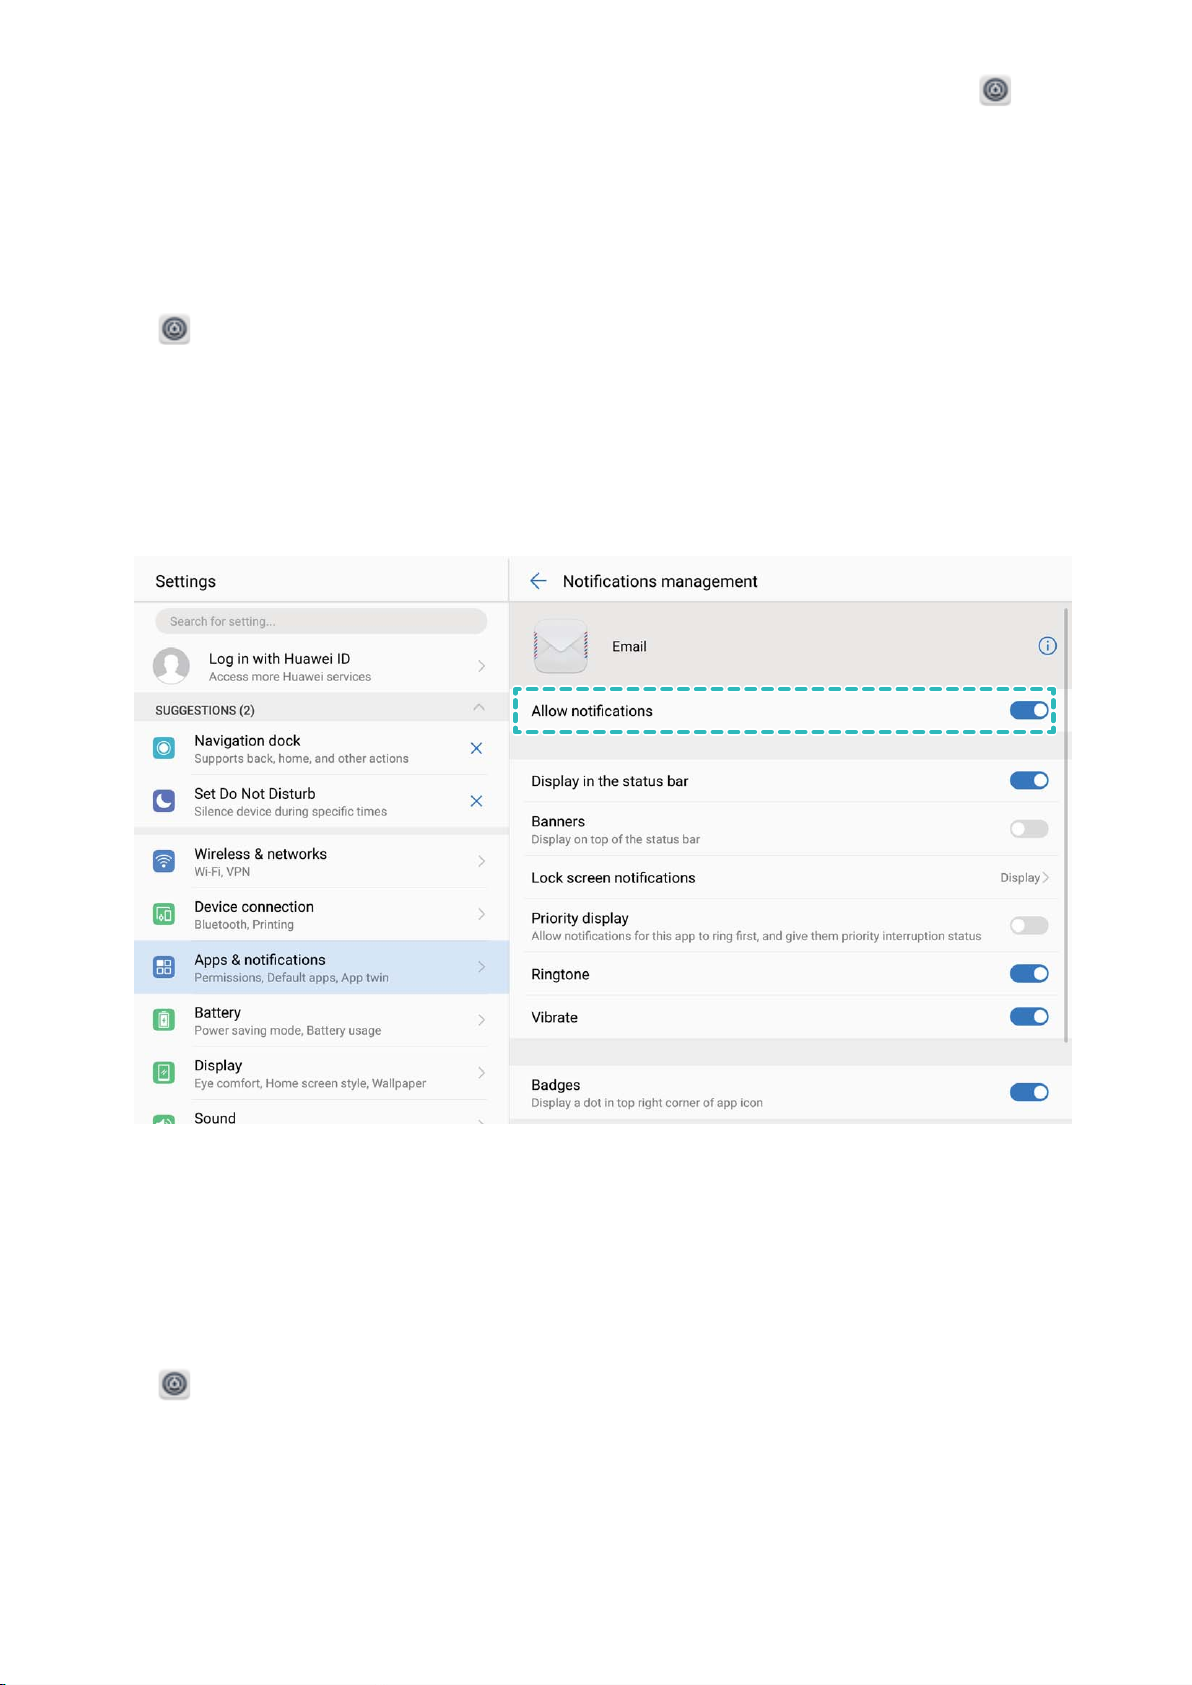
Disable Disruptive App Notications
Find it annoying to receive so many different types of app notications? You can set and disable app
notications to prevent this from happening.
Go to Settings, then go to Apps & notications > Notications management. From here,
you can disable all app notications. You can also select a particular app and disable its notications
by conguring the app's settings.
Customise Notications to Your Liking
Not a fan of the default notication reminders? You can customize notication reminders so that you
get notications the way you want them.
Go to
l Enable notications turn on screen: Enable Notications turn on screen. When your Tablet
screen is off, it will turn on when a notication is received.
l Set notication light to pulse: Enable Pulse notication light and the notication light will
icker when you receive new notications.
Settings, then go to Apps & notications > Notications & status bar. You can:
20
Page 25
Home Screen
l Display more information in the status bar: Depending on your preferences, you can enable
Display carrier name and Display network speed. You can also set the Notication method
and choose how the Battery percentage is displayed.
Shortcuts
Use Shortcuts to Access Frequently Used Features
Touch and hold an app icon to display a menu of frequently used features for quick access. You can
also touch and hold a feature and drag it to your home screen to create a shortcut.
If you touch and hold an app icon and a shortcut is not created, the app does not support home
screen shortcuts.
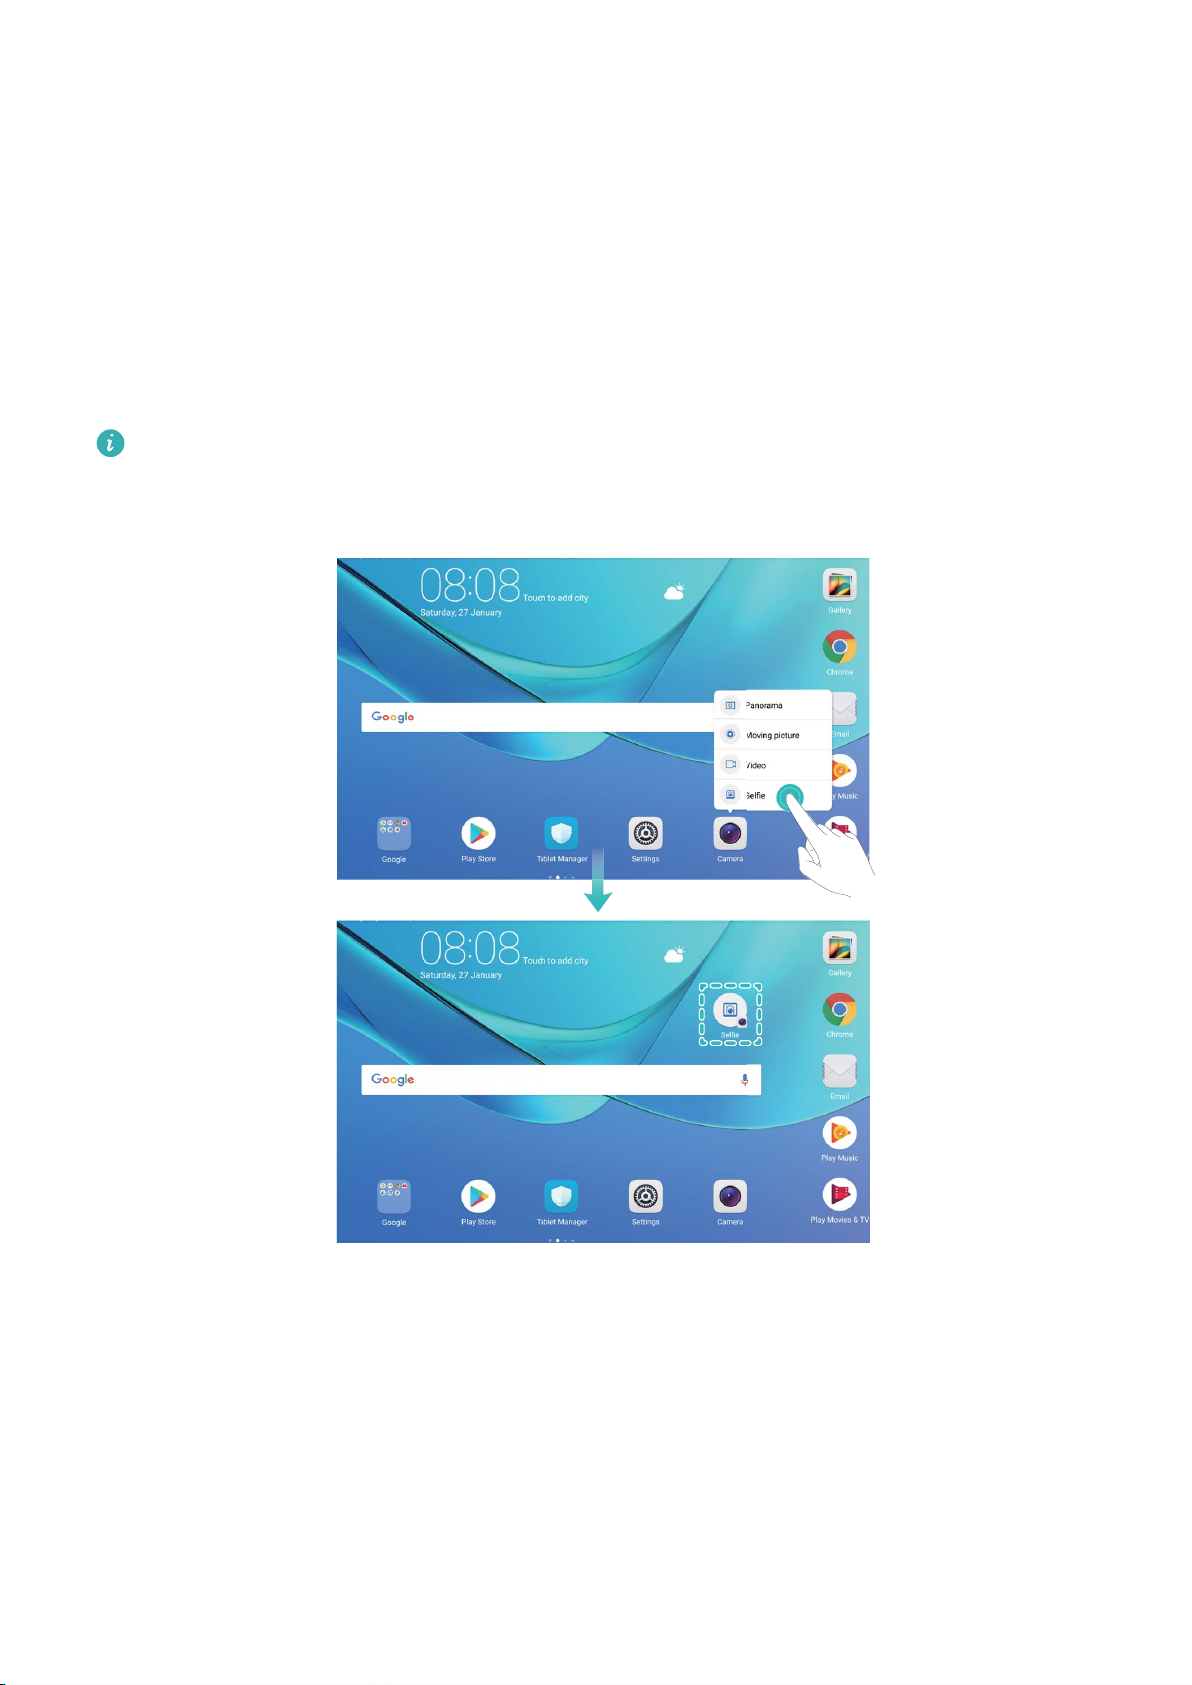
Quickly access frequently used app features: Touch and hold an app icon on your home screen,
and then touch a frequently used feature to access it. Each app supports up to four frequently used
features. These are preset by the app and cannot be changed. For example, to take a sele, touch and
hold the camera icon, and then touch Sele in the pop-up menu.
Add shortcuts to your home screen: Touch and hold an app icon on your home screen to bring up
the menu. Touch and hold the desired feature, and then drag it to your home screen to create a
shortcut. For example, you can add a shortcut for the camera's sele feature for quick access to the
sele camera.
21
Page 26
Home Screen
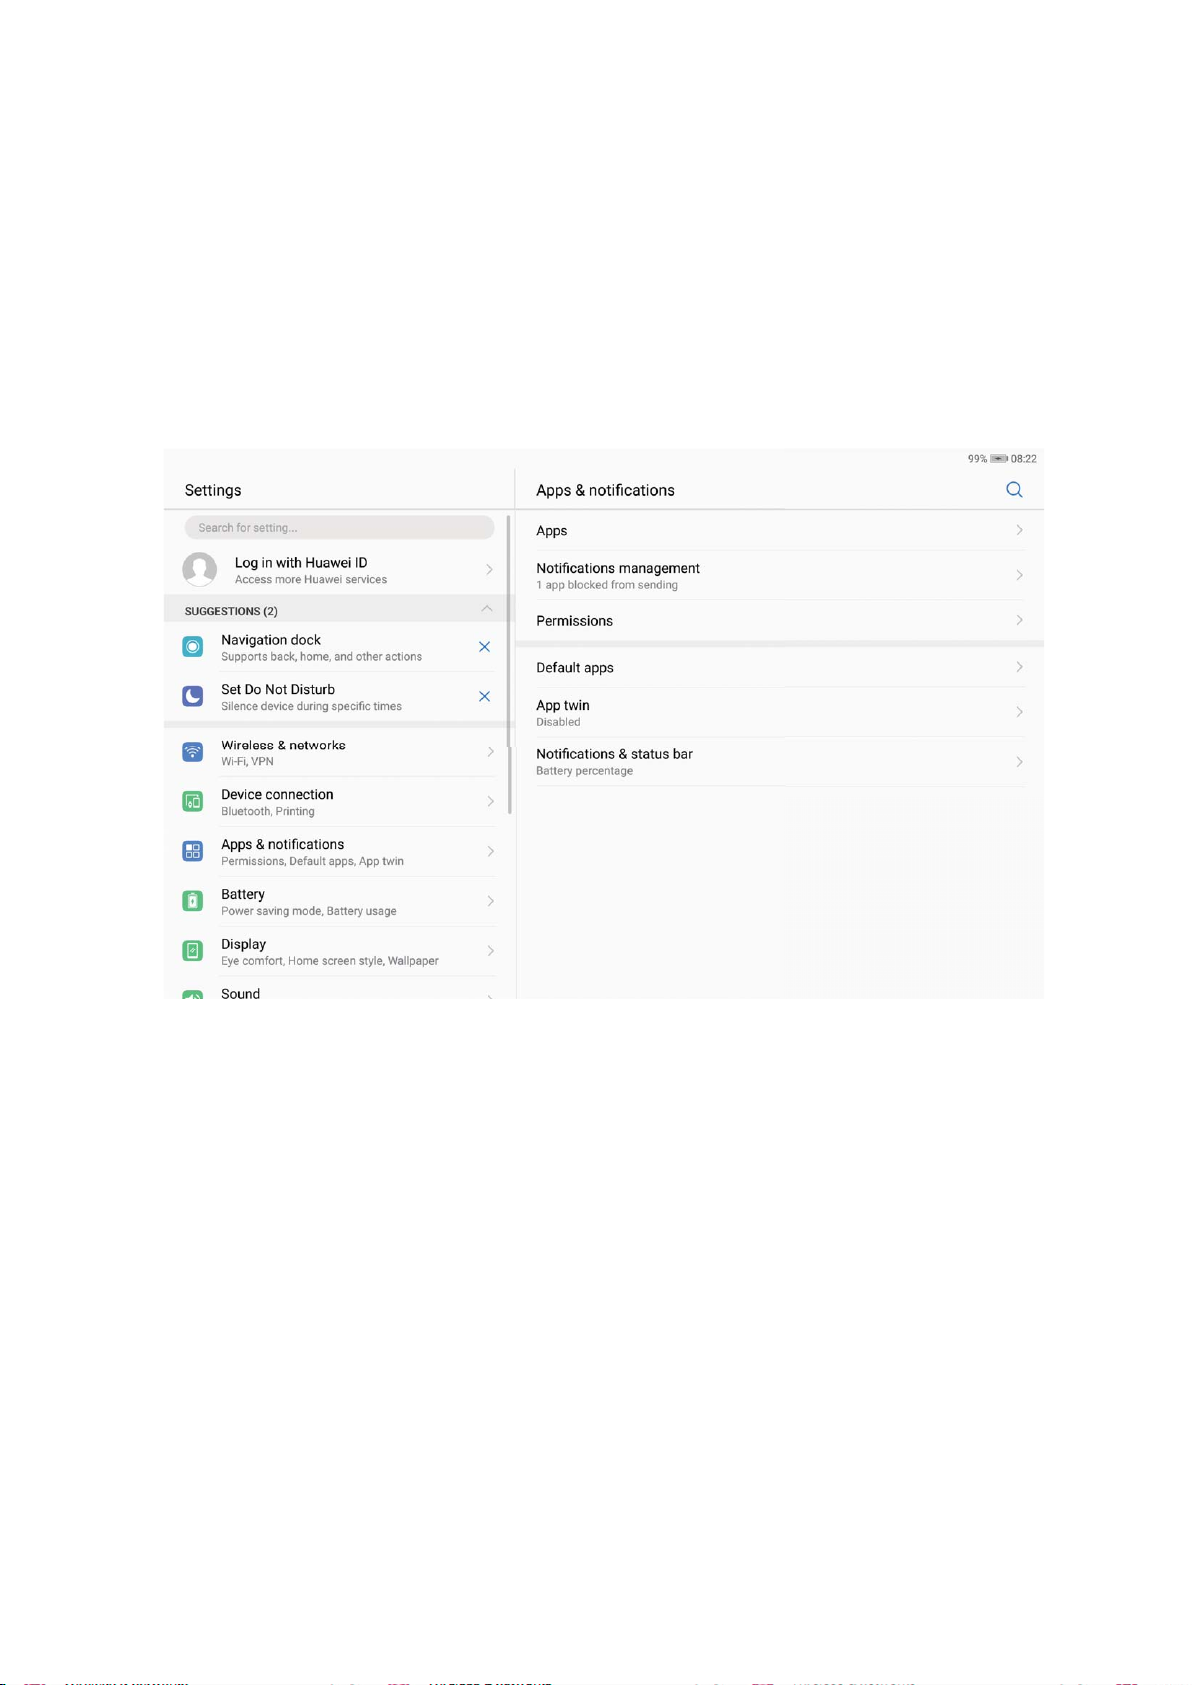
Consolidated Settings: Making Customisation Simpler
Having a hard time nding the settings you need? Do you nd manually changing your settings too
frustrating? EMUI 8.0 has made things simpler by grouping related settings together. A clustered
display makes the main settings screen clearer, and voice activation of settings has been added.
Update 1: Simplication and consolidation of settings
EMUI 8.0's settings menu is responsive to your usage habits, and will change the settings order and
clustering accordingly. This helps keep everything simple and clear.
App Shortcuts: Making App Features Start Faster
Do you love to take seles, and want to be able to take them in just one step? EMUI 8.0 offers app
feature shortcuts for you to use with your most frequently used features, letting you add them to the
home screen and open them in a single step.
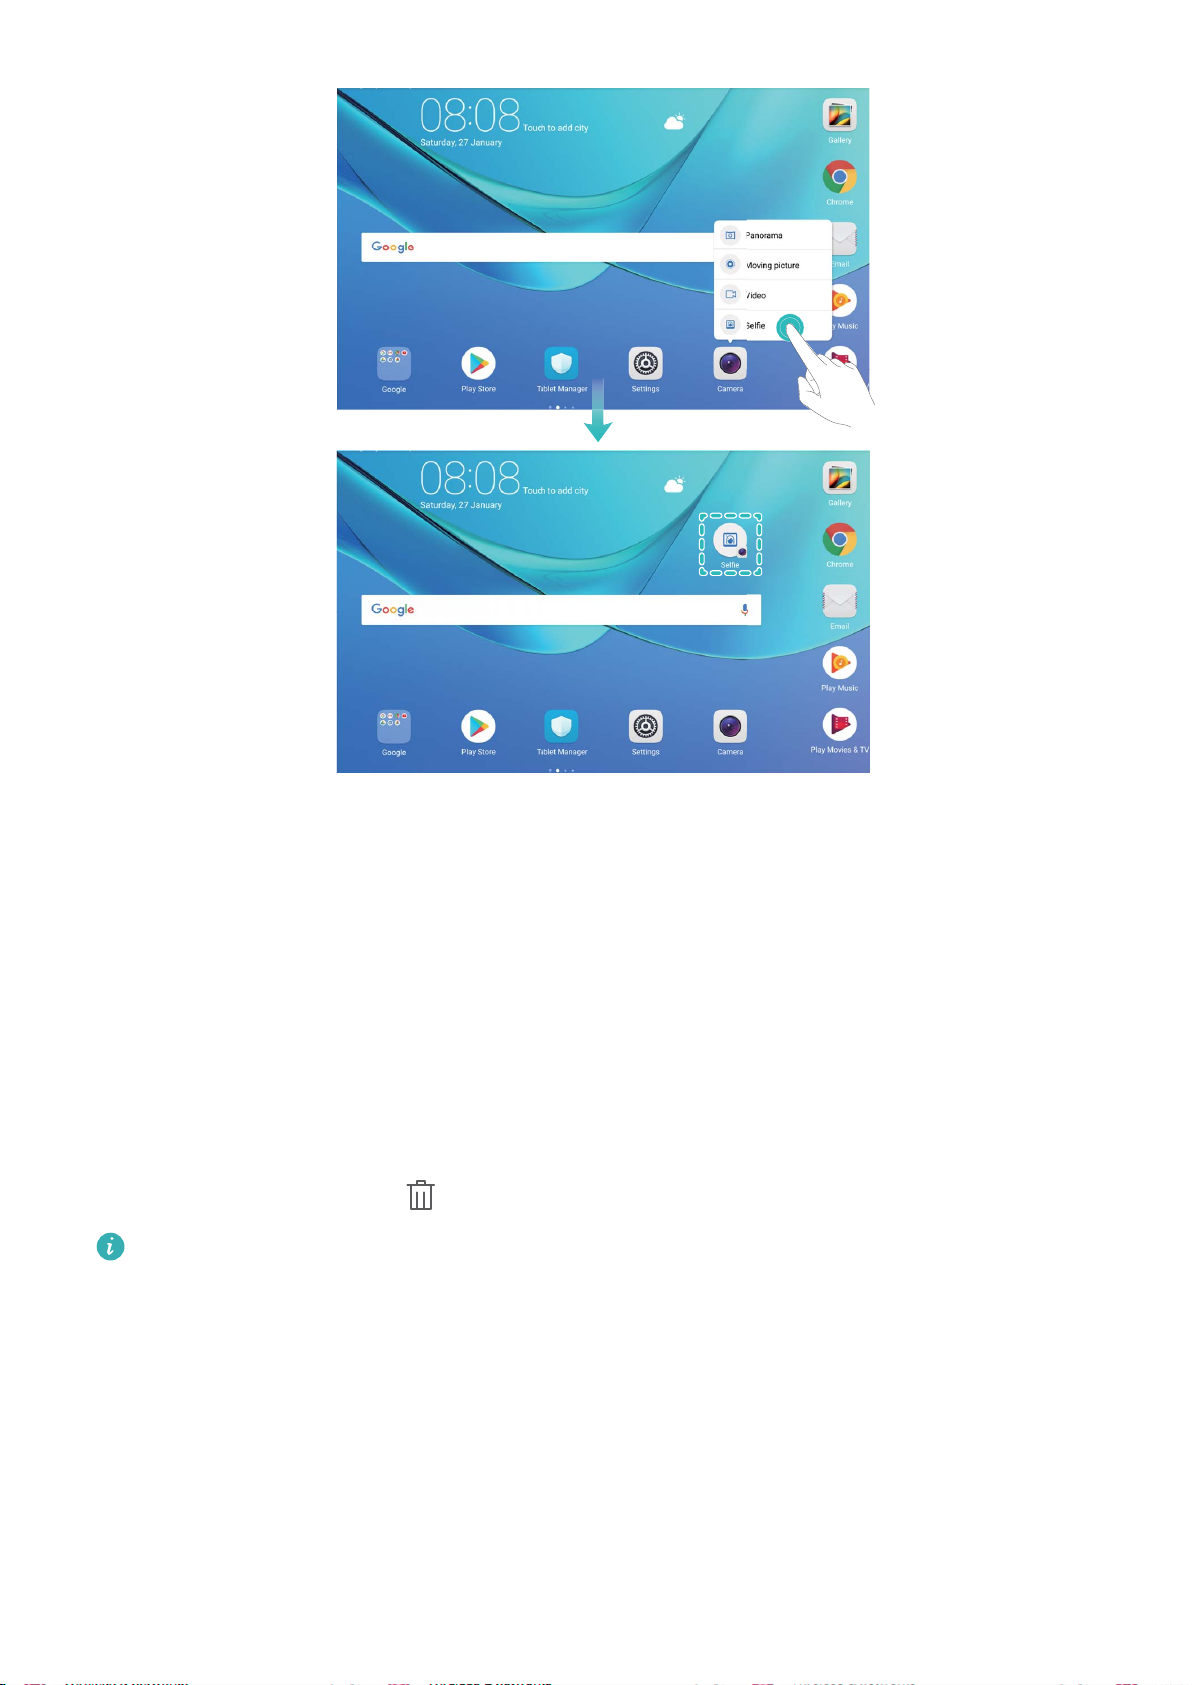
Using shortcuts to access frequently used features: EMUI 8.0 has added shortcuts to access
frequently used features. On the home screen, touch and hold the icon of a frequently used app, and
select the desired feature in the pop-up menu to quickly launch it.
How to add an App feature shortcut to the home screen: EMUI 8.0 supports adding app feature
shortcuts to the home screen. Touch and hold any app icon on your home screen, touch and hold the
desired feature in the pop-up menu, then drag it to your home screen to create a feature shortcut.
22
Page 27
Home Screen
Home Screen Management
Manage Home Screen Icons
Is your home screen cluttered with app icons? You can move or delete icons from the home screen or
sort and move them to folders for more convenient use.
Move a home screen icon: From the home screen, touch and hold an app until your Tablet vibrates,
then drag it to any position on the screen.
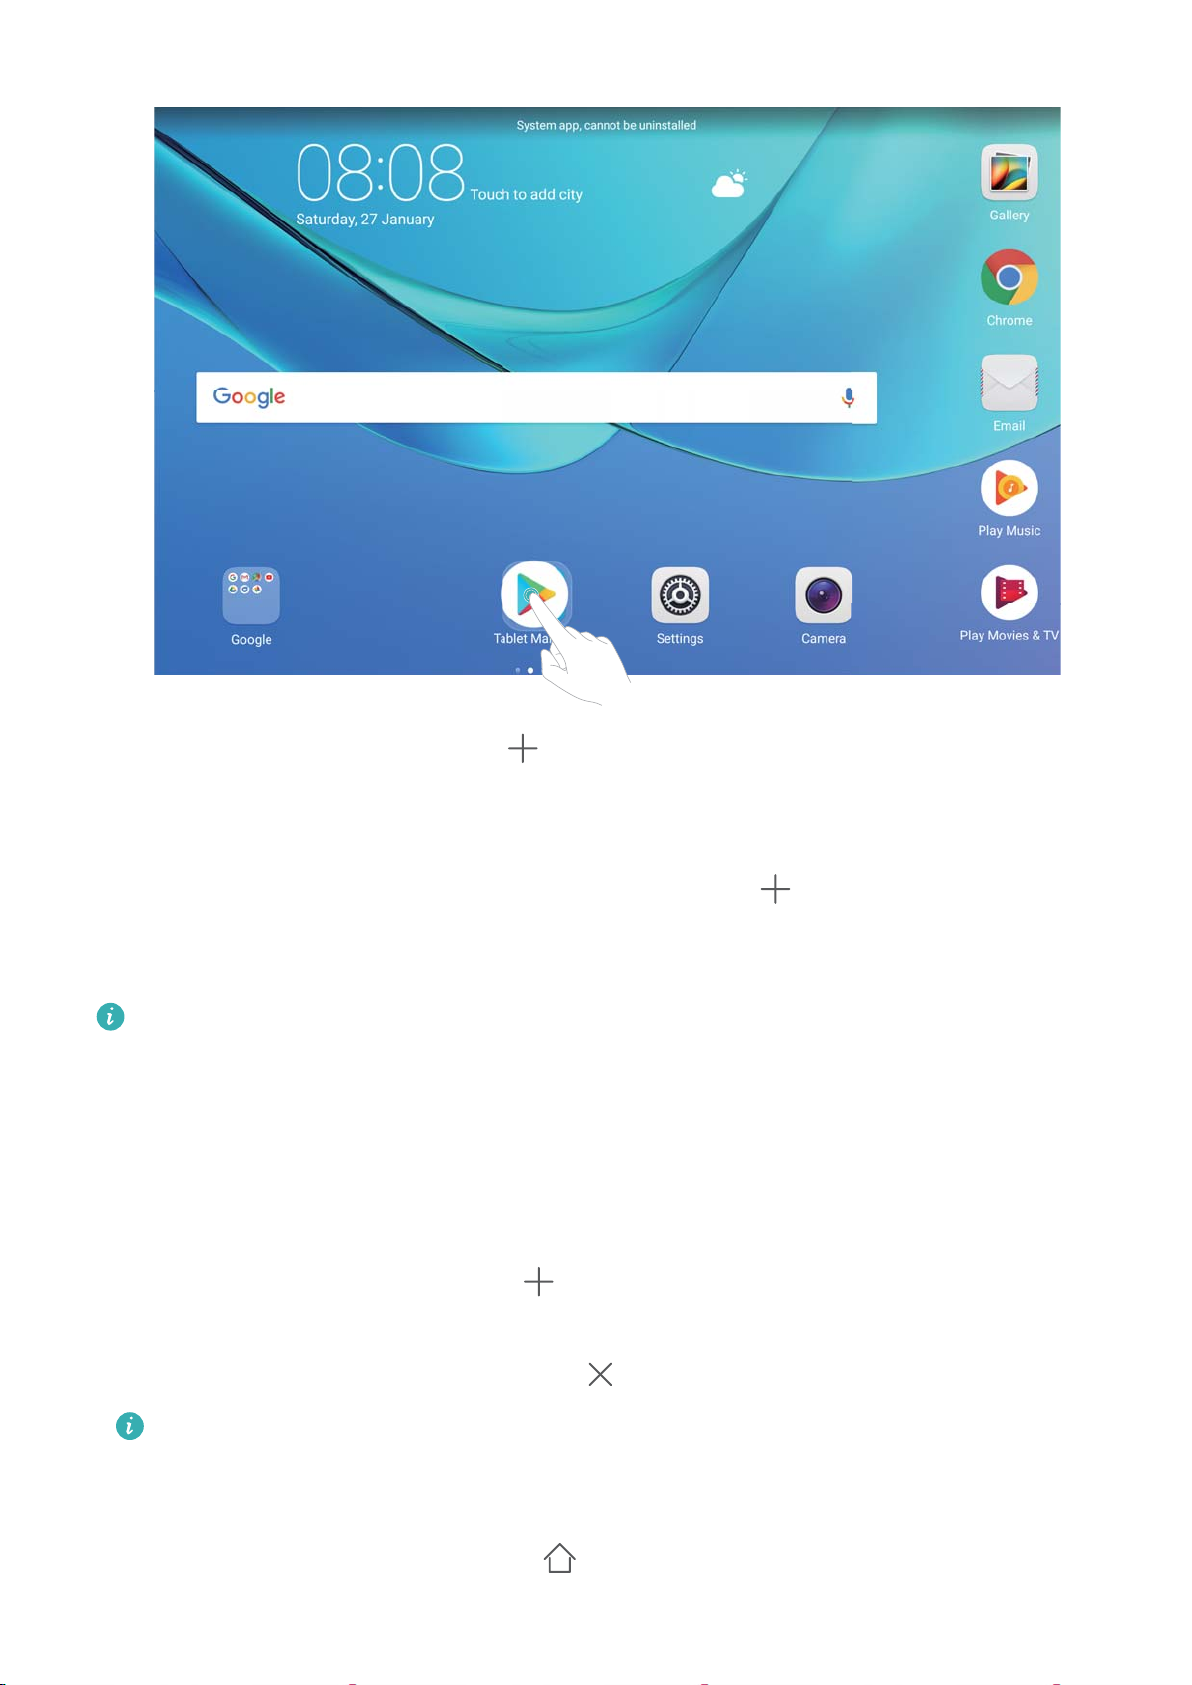
Delete an app: From the home screen, touch and hold the app you want to uninstall until your
Tablet vibrates, then drag it to . Follow the onscreen prompts to delete the app.
To ensure that the system runs normally, some preinstalled system apps cannot be uninstalled.
Create a folder to store app icons: From the home screen, touch and hold an app until your Tablet
vibrates, then drag it on top of another app. The two apps will now be placed in a new folder.
23
Page 28
Home Screen
Delete a folder: Open the folder, touch , deselect all the apps, then touch OK. The folder will be
deleted automatically and all the apps in the folder will be moved to your home screen.
Rename a folder: Open the folder, touch the folder name and enter a new name.
Add or delete app icons from a folder: Open the folder, touch , select or deselect apps as
required and then touch OK. The selected apps will be automatically added to the folder while the
deselected apps will be removed from the folder.
Another way to remove an app from a folder is to touch and hold the app in the folder until your
Tablet vibrates, and then drag it to the home screen.
Manage Your Home Screen
Too many icons on your home screen? You can add a new page to your home screen and customise it
to your liking.
Touch and hold an empty area on the home screen to enter home screen editing mode. You can then:
l Add a new home screen page: Touch at the left or right side of the screen to add a new
home screen page.
l Delete an empty home screen page: Touch
on a blank screen to delete the page.
Home screen pages with app icons or widgets on them cannot be deleted.
l Modify home screen page order: Touch and hold the home screen page you want to shift, then
drag it to the position of your choice.
l Set a default home screen page: Touch in the upper part of the home screen to set the
selected home screen page as your default home screen page.
24
Page 29
Home Screen
Set Your Home Screen Wallpaper
Want to set a picture you like as your home screen wallpaper? Personalise your wallpaper to make
your home screen stand out.
Go to Settings, then go to Display > Wallpaper. You can:
l Set a picture as your home screen wallpaper: Touch Set wallpaper. From More or Gallery,
select a picture that you like and follow the onscreen instructions to select Lock screen, Home
screen or Both.
l Randomly switch wallpaper: Enable Randomly change home screen wallpaper and set the
Interval and Album to display.
Set a picture in your Gallery as your wallpaper: Have a great picture you want to set as your
wallpaper? Open Gallery, open the picture that you like and then go to > Set as >
Wallpaper to set the picture as your home screen wallpaper.
Manage Your Home Screen Widgets
Want to quickly add widgets such as one-touch lock screen, memo browser, or diary to your home
screen? You can add, move or delete home screen widgets to tidy up your home screen and make it
easier to use.
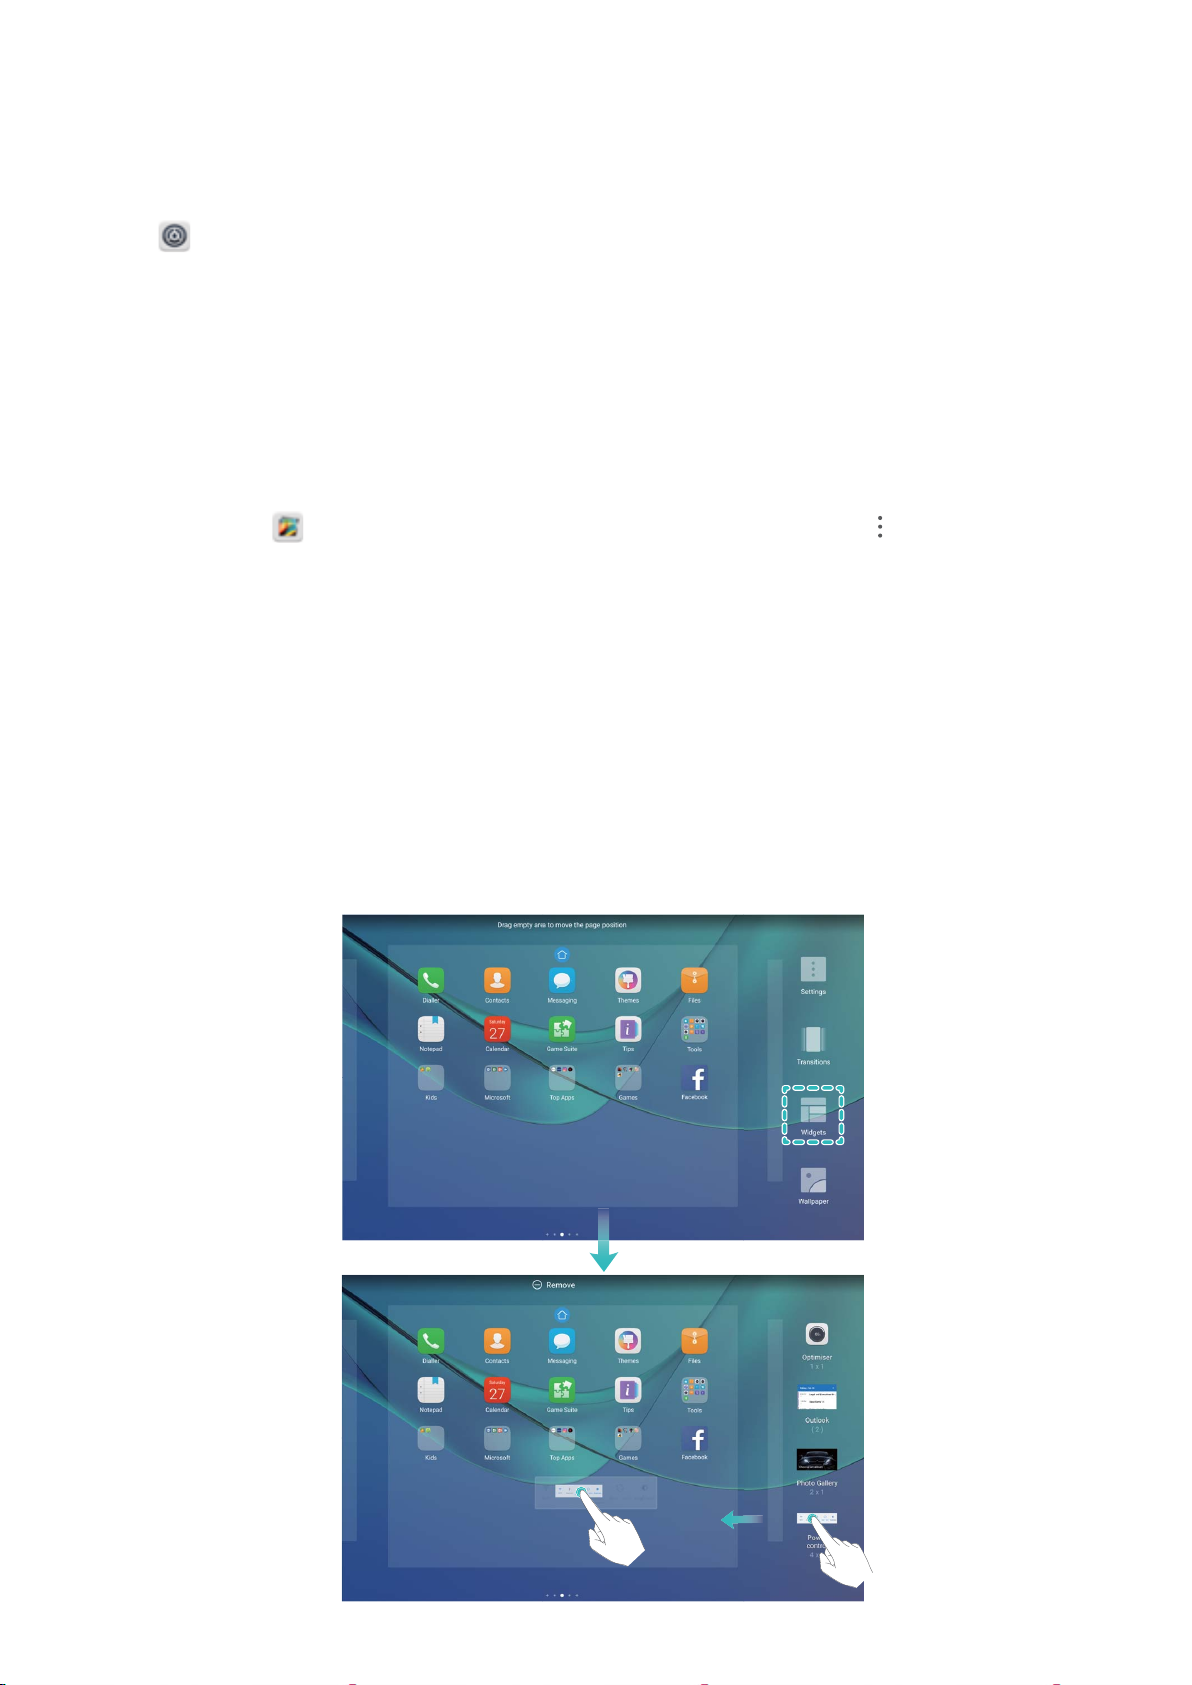
Add widgets: Touch and hold an empty area on the home screen to enter home screen editing
mode. Touch Widgets, select a widget and drag it to an empty area on the home screen.
25
Page 30

Home Screen
Check that there is enough empty space on the home screen to put the widget. If there is not
enough space, add another home screen page or free up some space on the current home screen
page.
Delete widgets: Touch and hold a widget on the home screen until your Tablet vibrates. Drag the
widget to Remove at the top of the screen.
Move widgets: Touch and hold a widget on the main screen until your Tablet vibrates, then drag the
widget to any position on the main screen.
Use App Drawer to Store Apps
Want to store your apps in one location on your home screen to give your home screen a neater look?
You can enable the app drawer on your home screen to store all your apps and free up space on your
home screen.
Open Settings, go to Display > Home screen style, and select Drawer. If you want to switch
back to a standard home screen, select Standard.
Add an app icon from the app drawer to the home screen: After you enable the app drawer,
touch
icon that you want to add and drag it to any position on the home screen.
on the home screen to enter the app list. From the app list, touch and hold the app
26
Page 31
Contacts
Anna Wu
Managing Business Cards
Business Card Management: Add and Share Business Cards with Ease
Find it laborious to enter the content of paper business cards into your Tablet contacts? Want an
easier way to share your Tablet contacts with friends? Business card management allows you to
conveniently add and share business cards.
Business card management supports the following features:
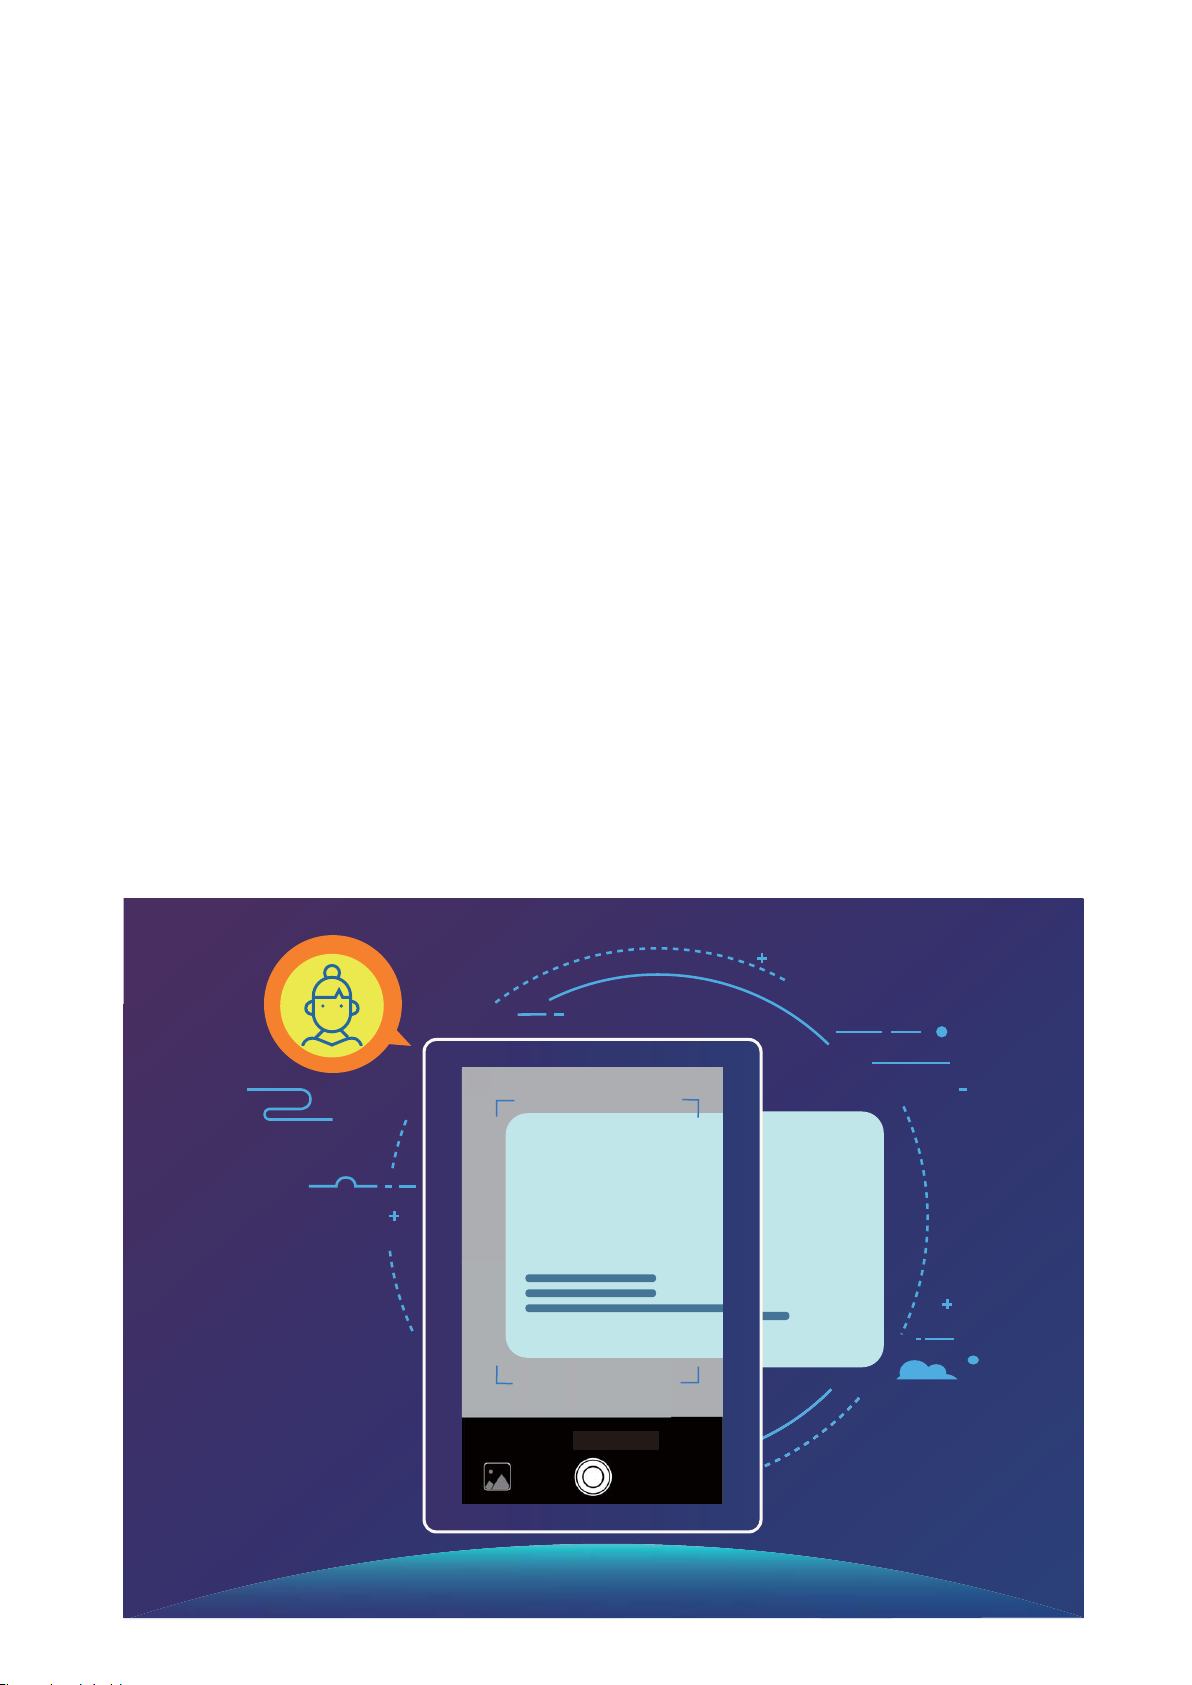
l Add business cards to your contacts: Want to quickly add multiple paper business cards into
your contacts? Simply place a paper business card in front of the camera to save the information
(including name, telephone number, and title) to your contacts.
l Scan QR code to add a contact: Scan the QR code on a business card to quickly save the
information to your contacts.
l Share your personal business card: Create your personal business card in your contacts and your
device will automatically generate a QR code. You can then quickly share your business card using
the QR code.
l Share contacts: Select the contact you want to share and touch the QR code at the top of the
contact details screen to quickly share the contact.
27
Page 32
Contacts
Share Contacts Using Electronic Business Cards
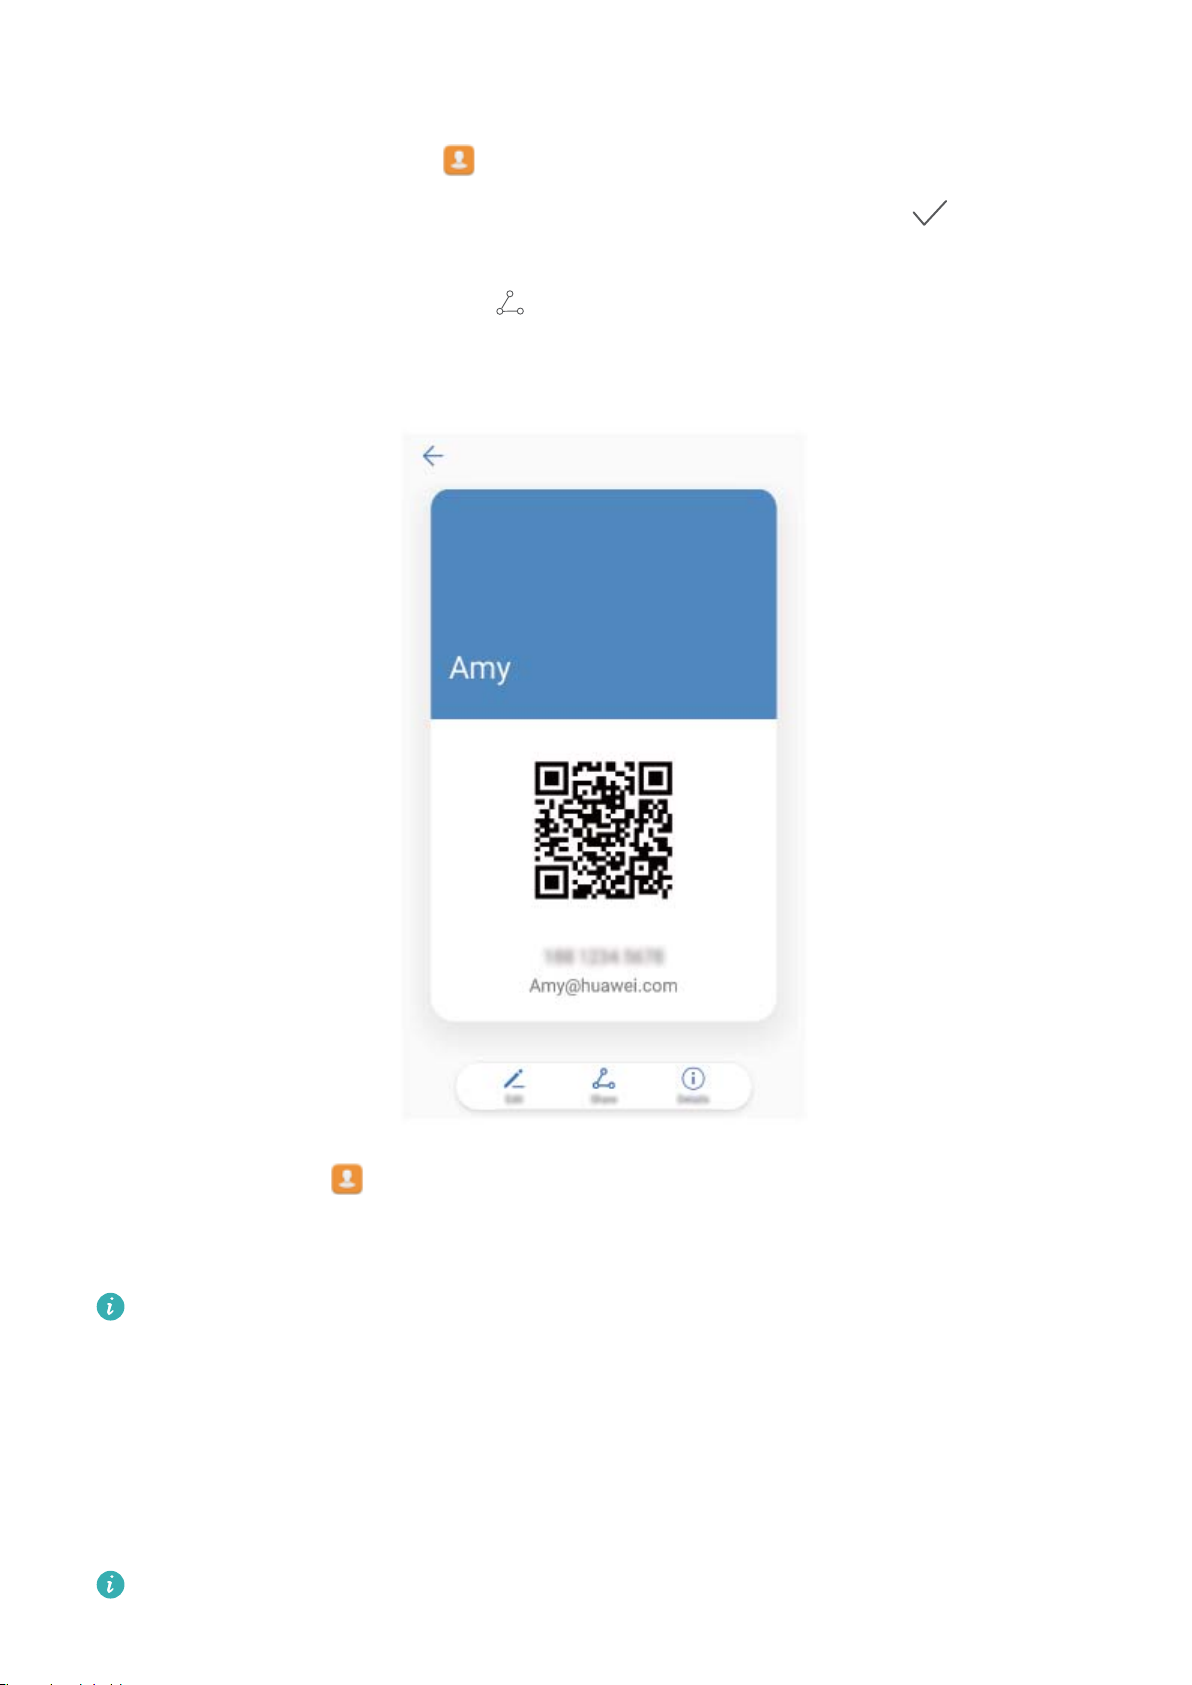
Share your business card: Open Contacts and touch Me to set your prole picture and enter
your name, work address, telephone number, and other information. Then touch and your device
will automatically generate your QR code business card. You can share your business card directly
using the QR code. Alternatively, touch , select a sharing method, and follow the onscreen
instructions to share.
Share contacts: Open Contacts, select the contact you want to share, and touch the QR code
icon in the upper right corner to share the contact using the QR code. You can also touch Share,
select a sharing method, and follow the onscreen instructions to complete the sharing process.
If the other party's device supports QR code analysis, they can directly take pictures of or scan QR
codes to add contacts.
Managing Contacts
Import and Export Contacts
When you switch to a new Tablet, you'll need to transfer your existing contacts.
SIM cards are not supported on Wi-Fi only tablets.
28
Page 33

Contacts
Open Contacts, go to > Import/Export, and then select one of the following:
l Import contacts: Select Import from storage , Import from SIM , Import from another device
and follow the instructions.
l Export contacts: Select Export to storage or Export to SIM , Share contacts and follow the
onscreen instructions. By default, .vcf les exported through Export to storage are saved in the
root directory of your device's internal storage. Open Files to view exported les.
You can also import or export contacts using the Backup feature. Backup records are saved in the
Huawei folder of Files > Local > Internal storage by default.
Manage Your Contacts
The Contacts app gives you a host of features for managing your contacts. You can simplify your
contacts list, choose to only view contacts on your Tablet or SIM card, and easily nd your frequent
contacts.
Merge duplicate contacts: If there are duplicates in your contacts list, you can use the Merge
duplicate contacts function to merge duplicate contacts. From the contacts list, Go to >
Organise contacts > Merge duplicate contacts, select the contacts you want to merge, and then
touch .
Display contacts for different accounts: Want to only view contacts on your Tablet or SIM card?
Go to
l Enable Simple layout: Want to hide the prole pictures, companies, and titles in the contacts list?
> Display preferences, and select the accounts that you want to display. You can also:
From the contacts list screen, go to > Display preferences, and enable Simple layout.
l View contact storage space: Want to check your contact storage space? From the contacts list,
go to > Display preferences. In the Accounts section, you can see the total storage space
available on your device or SIM card.
Manage Contact Groups
Want to send a message to a group of colleagues or host a get-together? Smart groups automatically
groups your contacts by company, city, and most recent contact time, so you can quickly send a group
email or message.
Create a contact group: From the groups list, touch , enter the group name (such as Family or
Friends), and then touch OK. Follow the onscreen instructions to add contacts, and then touch .
Send a message to smart group contacts: From the groups list, from the Smart groups section,
open a group and touch
to send a message or to send an email.
Edit a group: From the groups list, select the group you want to edit and touch to add a
contact, or touch to Remove members, Delete group or Rename.
Delete a group: From the groups list, touch and hold a group, and then touch Delete.
29
Page 34

Contacts
Add Contacts to the Blacklist
You can add a contact number to the blacklist to avoid receiving harassing or spam calls from them.
This feature is not supported on Wi-Fi only tablets.
Open Contacts, touch and hold the contact you want to add to the blacklist, and then touch
Add to blacklist. Your device will block all calls and messages from contacts in the blacklist.
View blacklisted contacts: Open Tablet Manager, go to Blocked > , and then touch
Numbers blacklist to view the blacklist.
Remove a contact from the blacklist: Open
remove from the blacklist, and then touch Remove from blacklist.
Contacts, touch and hold the contact you want to
Erase Call and Message Records
Use Erase traces to erase call and message records for a contact to protect your privacy.
Open Contacts, select a contact, and go to > Erase trace > Erase. All of your call and
message records for that contact will be erased.
30
Page 35
Dialling
Basic Calling Functions
Make Emergency Calls
In an emergency situation, if your Tablet is powered on and within the service area, you can make
emergency calls even if the screen is locked or there is no mobile reception.
Calling services are not supported on Wi-Fi only tablets.
The emergency call feature is subject to your local regulations and Internet service provider.
Network issues or environmental interference may lead to failed emergency calls. In emergency
situations, do not rely on your Tablet as your only method of communication.
Open Dialler or touch Emergency call on the lock screen, enter the local emergency number on
the dialler, and then touch . If your location has strong mobile reception and your Tablet is
connected to the Internet, your location will be obtained and displayed on your screen for your
reference.
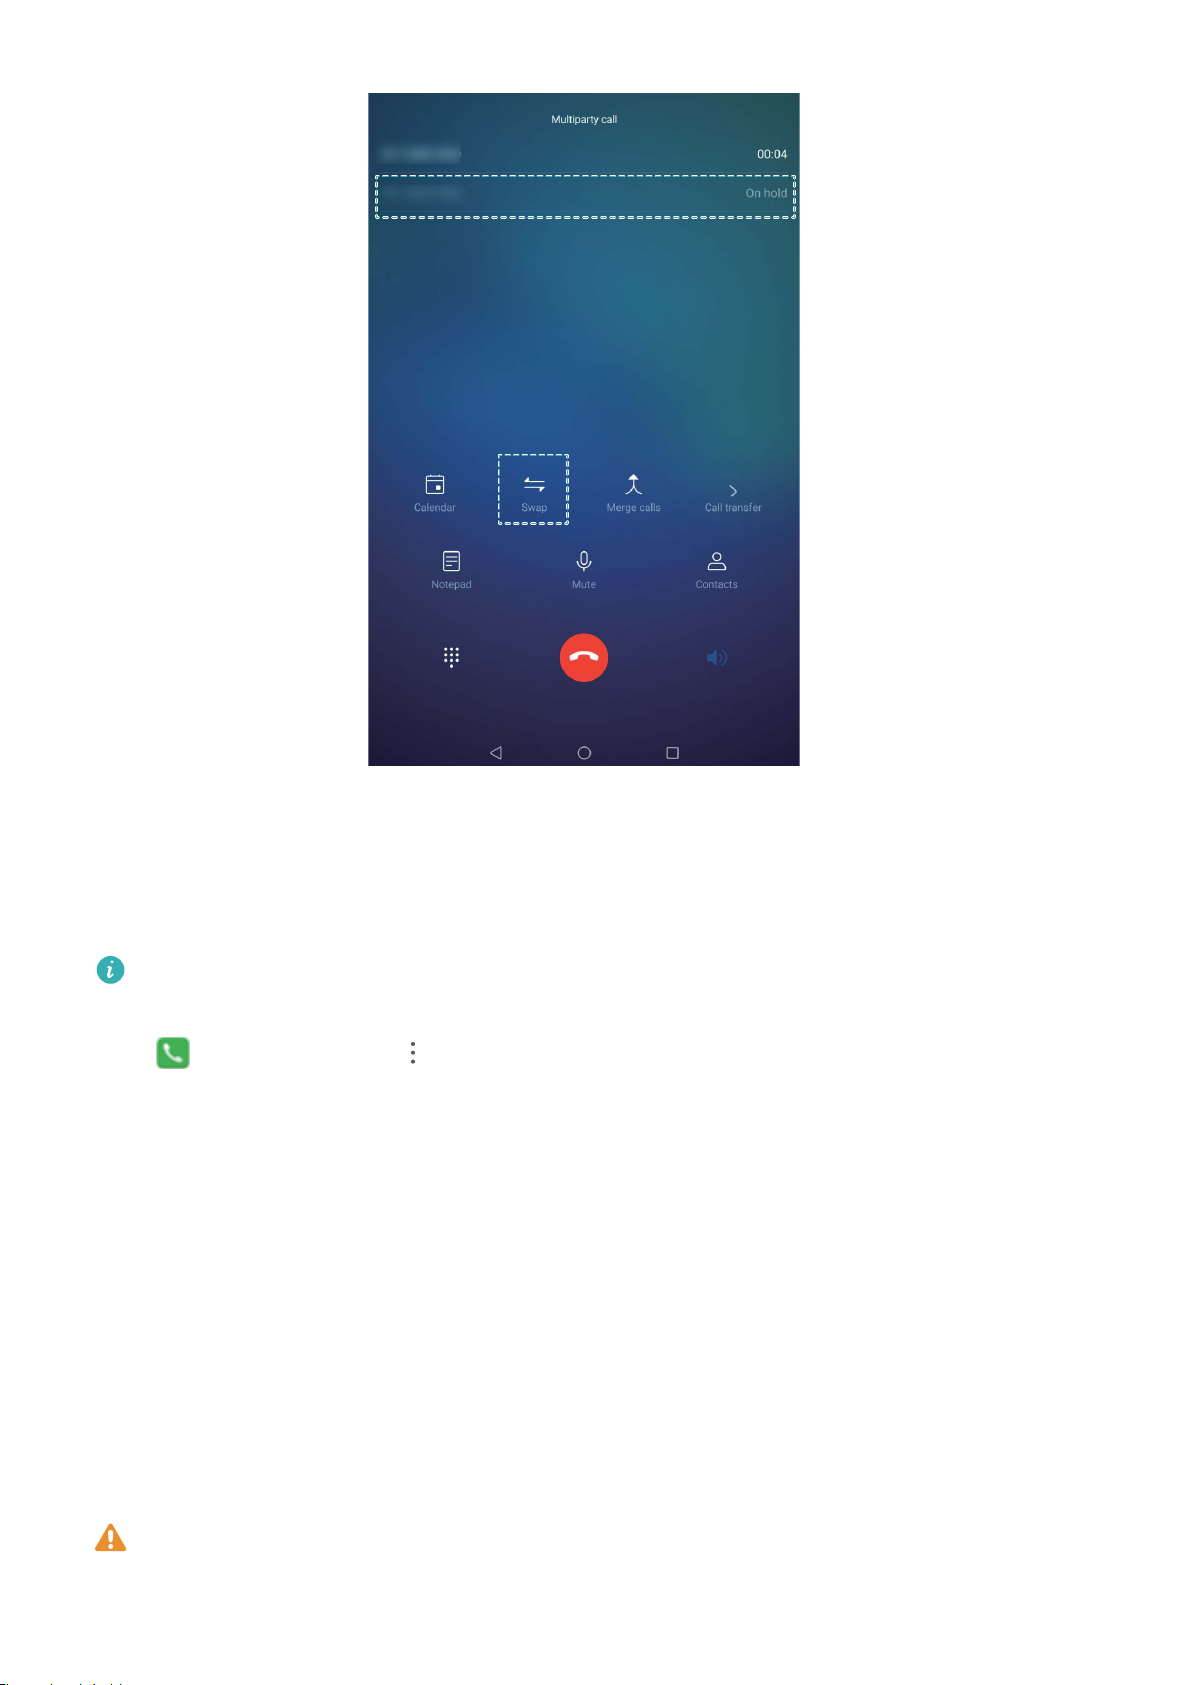
Enable Call Waiting to Never Miss Important Third-Party Calls
Receiving an incoming call while you're already on a call? Call waiting allows you to answer the new
call and then switch between the two calls.
Some carriers may not support this feature.
Calling services are not supported on Wi-Fi only tablets.
Open Dialler, go to > Settings > Additional settings, and enable Call waiting. When
receiving another call, touch to answer the call and place your rst call on hold. Touch or
the call on hold in the call list to switch between calls.
31
Page 36
Dialling
Enable Call Forwarding and Never Miss a Call
If you are unavailable to answer a call, you can set your device to forward all your calls to another
number.
Calling services are not supported on Wi-Fi only tablets.
Some carriers may not support this feature.
Open Dialler, then go to > Settings > Call forwarding.
Select a forwarding method: Select how you want to forward your calls. Enter the number you
want to forward your calls to, then conrm. When call forwarding is enabled, your device will
automatically forward all calls which meet the necessary conditions to the preset number.
l Always forward: Forward all of a mobile user's incoming calls to a third-party user.
l Forward when busy: Forward a mobile user's incoming calls to a third-party user when the rst
user's line is busy.
l Forward when unanswered: When a mobile user has received an incoming call message from the
network and has not responded before the timer expires, that call will be forwarded to a third-party
user.
l Forward when unreachable: When a mobile user loses the connection to the network, and the
mobile user is called, that call will be forwarded to a third-party user.
If you need to temporarily enable the Always forward setting, please remember to cancel the
setting afterwards. Otherwise your Tablet number will never receive incoming calls.
32
Page 37
Delete Call Logs
You can delete call logs that you no longer need.
Calling services are not supported on Wi-Fi only tablets.
Open Dialler and touch to hide the dialpad. You can now perform one of the following:
l Delete a single record: Touch and hold an entry, then touch Delete entry.
l Delete multiple records: Touch , select the entries you want to delete or touch Select all,
then touch .
Block Nuisance Calls: Get the Peace and Quiet You
Deserve
Fed up of nuisance calls and telephone scams? Try using Blocked.
Dialling
Calling services are not supported on Wi-Fi only tablets.
Congure interception rules: Open Dialler, go to > Blocked, and then touch .
Congure the interception rules and blacklist or whitelist according to your preferences.
33
Page 38
Message
Basic Messaging Functions
Send Messages
Text messages give you a quick and easy way to communicate with friends, family and colleagues. In
addition to text, you can also add emojis or insert pictures and audio les to enrich your messages.
SMS services are not supported on Wi-Fi only tablets.
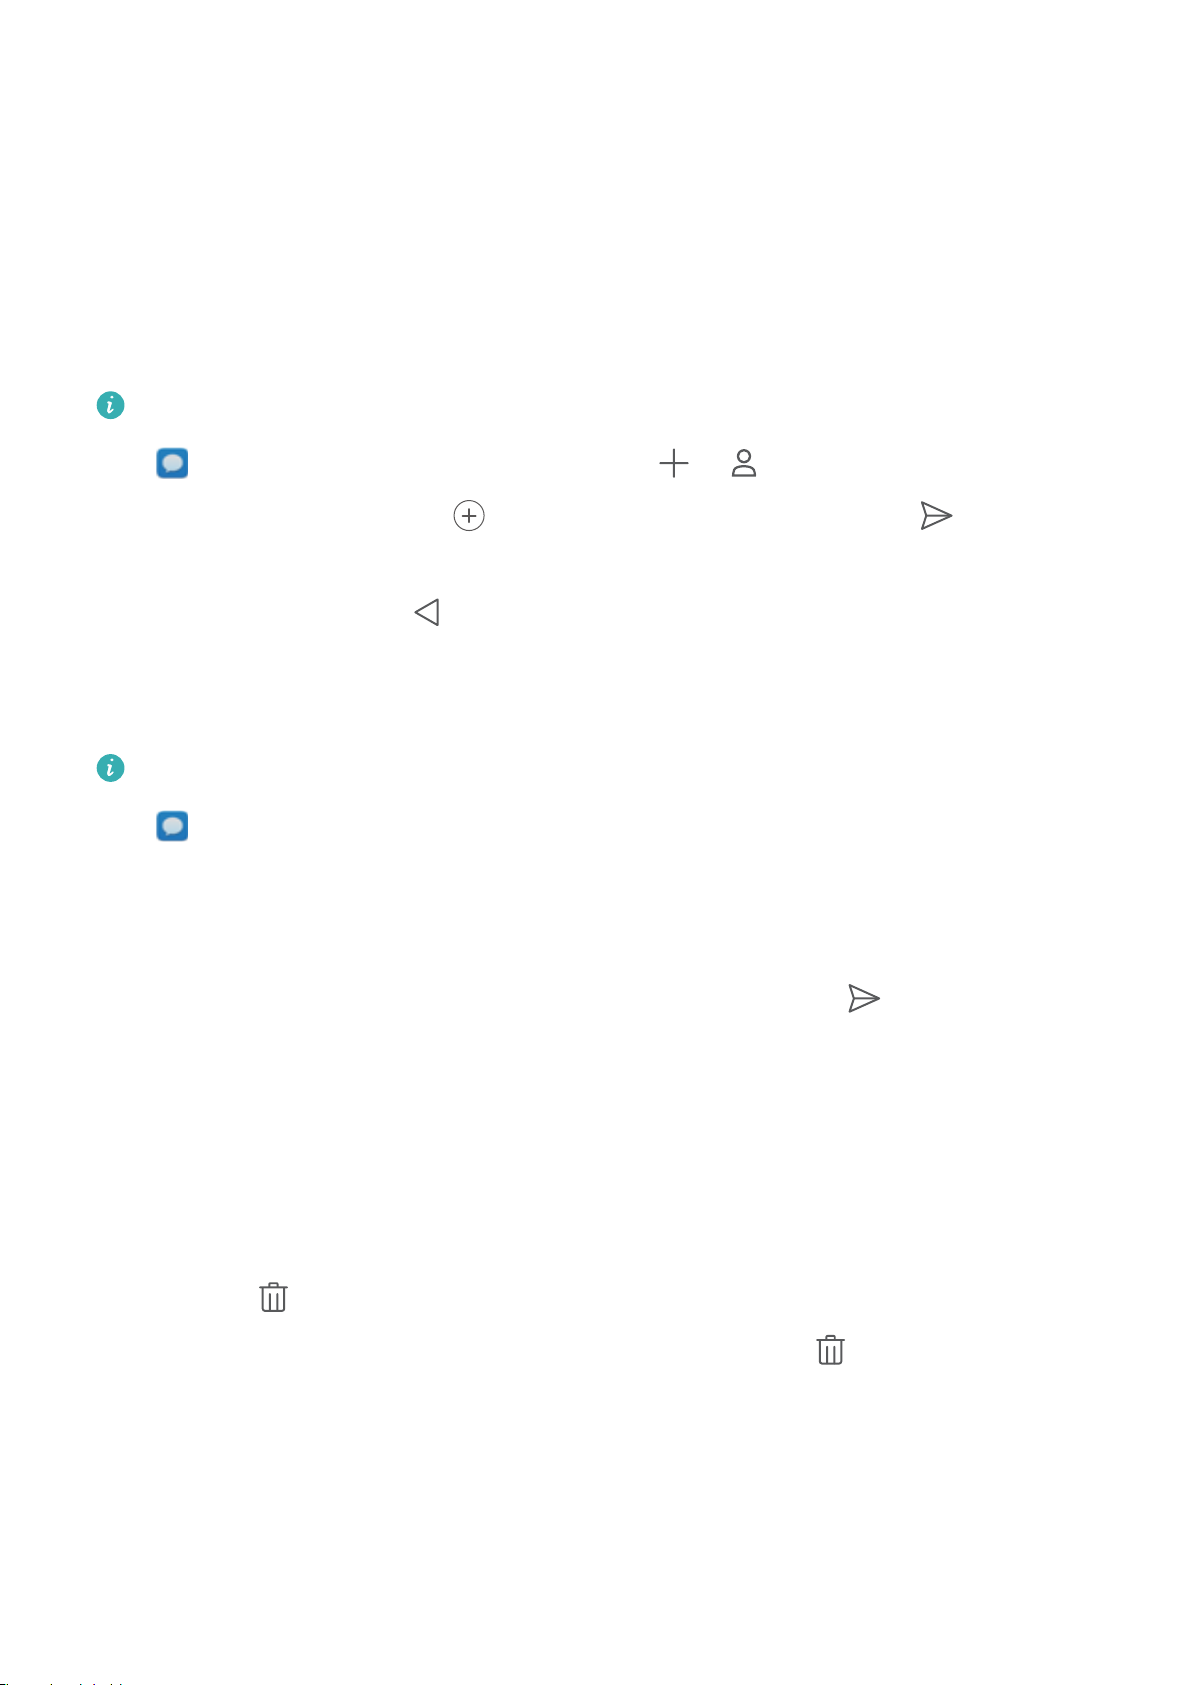
Open Messaging. From the list of messages, go to > and select contacts or groups.
Enter your message content, touch to add other types of content, and touch to send the
message.
Save a draft message: Touch
to save a message as a draft.
Manage Messages
The Messaging app makes it easy to stay on top of your messages.
SMS services are not supported on Wi-Fi only tablets.
Open Messaging. From the list of messages, touch a contact or telephone number to view your
conversations with them. Open an unread message and the system will automatically identify and
highlight the telephone number, website address, email, time, and other information within the
message. Touch the relevant information to initiate an operation.
Reply to messages: Enter the message content in the text box and touch .
Add a message to favourites: Worried about accidentally deleting an important message? Touch
and hold a message and follow the onscreen prompts to add the message to favourites or lock it.
Forward a message: Want to share a message with your friends? Touch and hold a message and
follow the onscreen prompts to forward or share it.
Delete a message: Tired of the clutter created by too many messages? Delete unneeded
conversations or messages to clean up your message list. Swipe the message or conversation to the
left, then touch . To delete notication messages, touch and hold the message or conversation to
enter the editing screen, select the conversation or message, and go to
messages cannot be recovered.
Quickly reply to a message: Want to quickly reply to a message you received? New messages will
be displayed in the notication panel. Touch to quickly reply.
Search messages: Want to quickly nd a message? From the list of messages, enter the keywords in
the search bar and the relevant results will be displayed beneath the search bar.
> Delete. Deleted
34
Page 39

Message
Pin to top: Want to pin an important message to the top of the list? From the list of messages, touch
and hold a message to select it, then touch . Pinned messages will be displayed below
notication messages. To pin unread messages to the top, go to > Settings > Pin unread
messages.
Block Spam Messages
Tired of receiving spam messages? Enable message blocking to say goodbye to spam messages!
SMS services are not supported on Wi-Fi only tablets.
Open Messaging. On the list of messages, go to > Blocked, touch and congure the
interception rules, whitelist, and blacklist.
Attach a Signature to a Text Message
You can create a signature to add to the end of every text message to give your messages a more
formal touch.
SMS services are not supported on Wi-Fi only tablets.
Open Messaging, go to > Settings > Advanced > Signature, and enable Attach signature.
Touch Edit signature, enter your signature, and touch OK.
35
Page 40
Camera
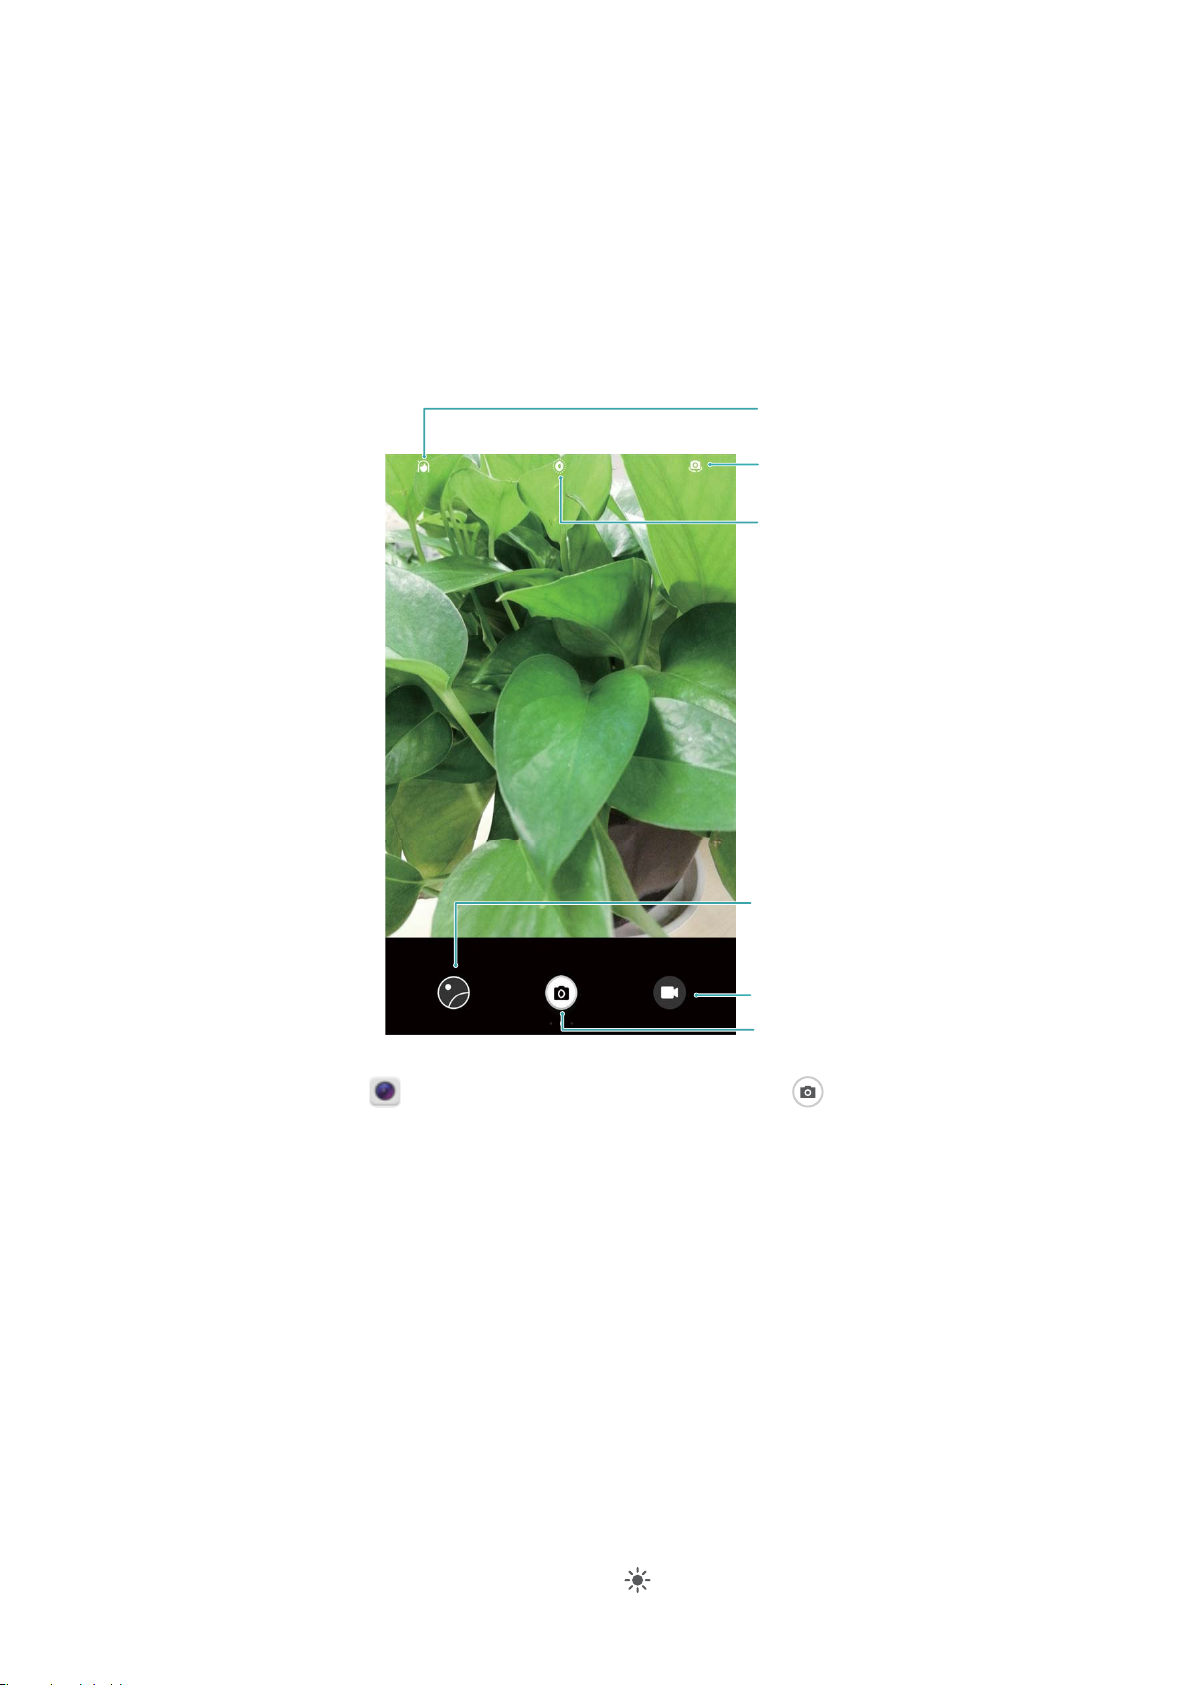
View recorded photos
and videos
Switch to video mode
Take a photo
Switch between
front/rear camera
Enable Beauty mode
Enable Moving
picture mode
Basic Camera Functions
Use Your Camera's Basic Functions
Understand your camera's basic functions to help you take better pictures.
Basic photo mode: Open Camera and in the viewnder, touch to take a picture. You can
also congure the Volume down button to work as a shutter button for your camera.
Select a photo mode: From the viewnder, swipe right to enter the photo mode screen. Here you
can change the photo mode according to your needs.
Zoom your camera in or out: From the viewnder, touch the screen with two ngers and pinch
them together to zoom in or move them apart to zoom out. If you zoom in beyond your camera's
optical zoom limit, the image quality will decrease. After you touch the screen with two ngers and
zoom in or out, a zoom bar will appear on the side of the screen, which you can also use to zoom
your camera in or out.
Adjust your camera's exposure: Your camera will adjust its exposure automatically depending on
the ambient light level. Increasing the exposure will make pictures appear brighter whereas decreasing
the exposure will make pictures appear darker. You can adjust the exposure manually from the
viewnder by touching the screen and dragging the icon up or down.
36
Page 41
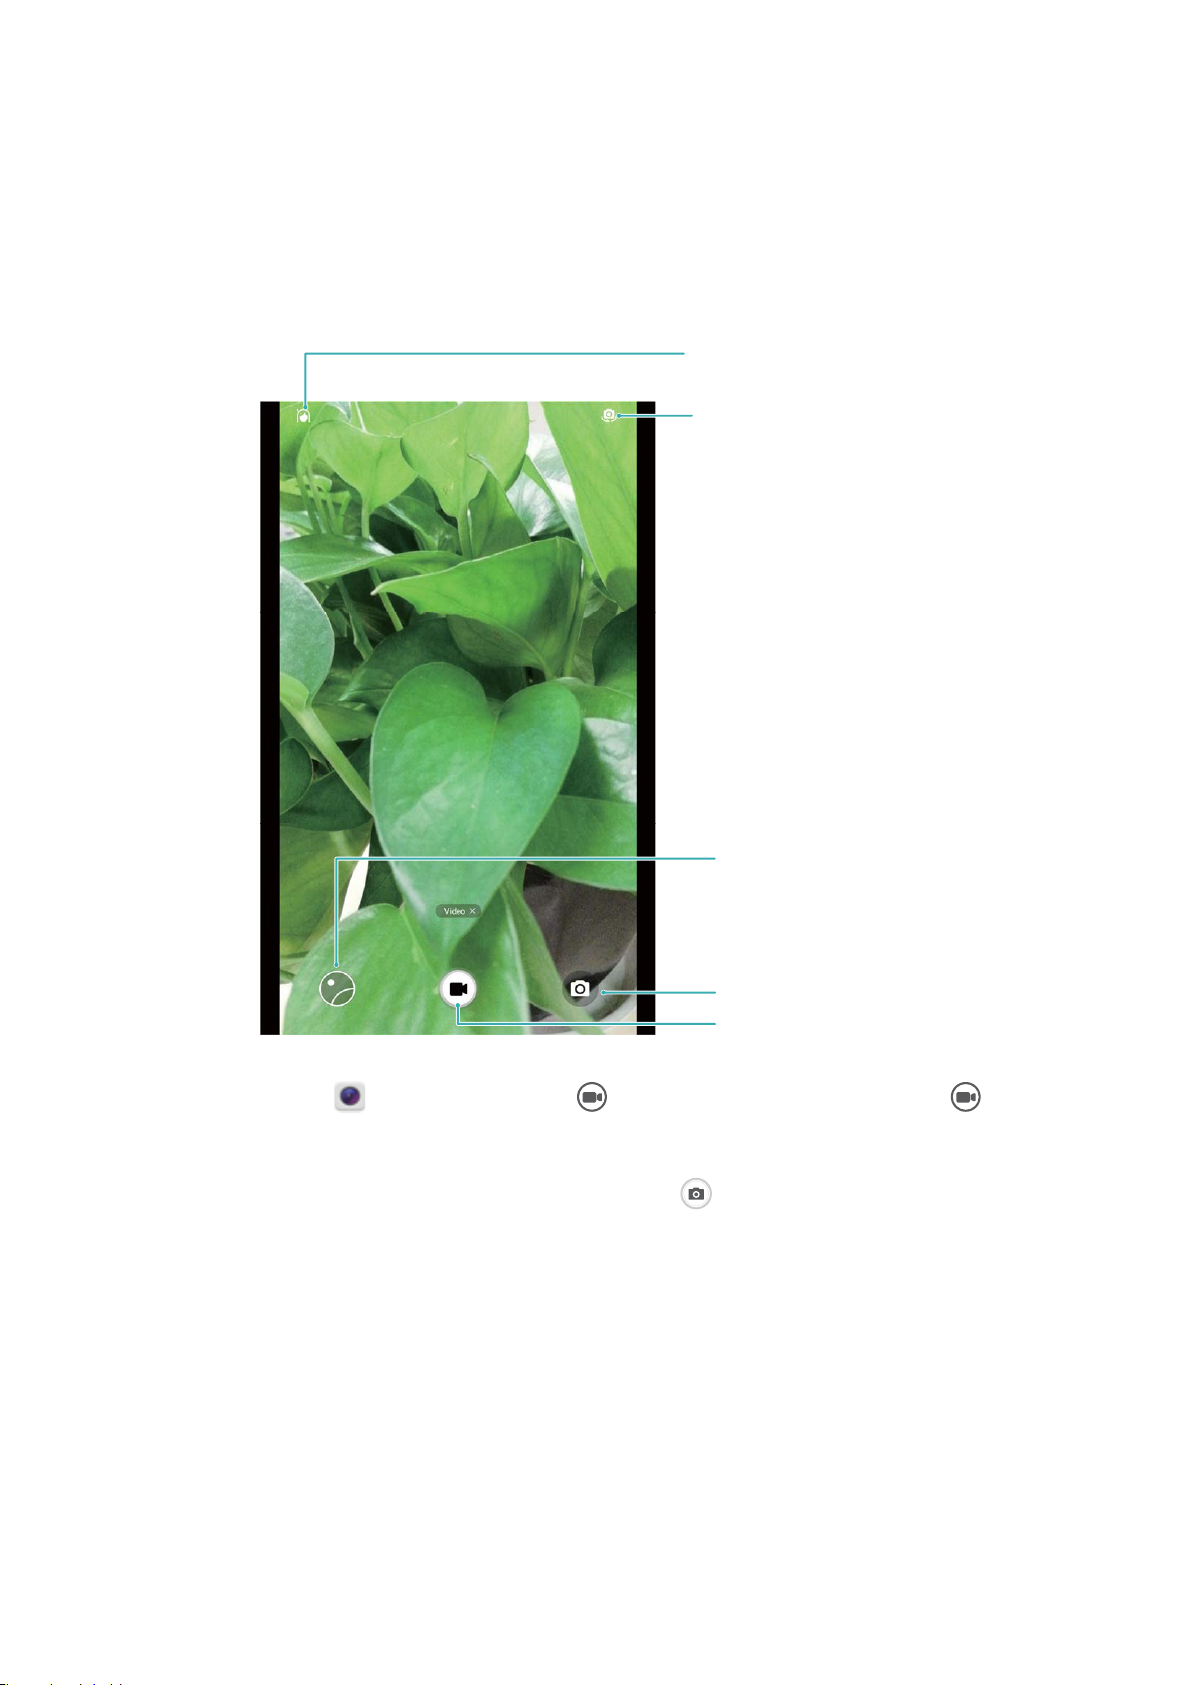
Switch between front/rear camera
View recorded video
Switch to photo mode
Record video
Enable Beauty mode
Camera
Enable geolocation: Records your geographic location when you take a picture to allow you to
search through your pictures by location. From the viewnder, swipe left to enter the settings menu
and enable GPS tag.
Use Camera to Record Videos
Besides taking pictures, you can also use the camera to capture high resolution videos with sound.
Record a video: Open Camera and touch to switch to video mode. Touch to start
recording a video.
Take a picture while recording a video: You can touch when recording a video to take a
picture.
Zoom your camera in or out: From the viewnder, touch the screen with two ngers and pinch
them together to zoom in or move them apart to zoom out. If you zoom in beyond your camera's
optical zoom limit, the image quality will decrease. After you touch the screen with two ngers and
zoom in or out, a zoom bar will appear on the screen, which you can also use to zoom your camera in
or out.
Adjust Camera Settings
In the settings page of Camera you can adjust a variety of camera settings, modes, and specications
to suit your usage needs.
37
Page 42

Camera
Touch viewnder to shoot: Open Camera, swipe left to open Settings and enable Touch to
capture. Now when you touch an object in the viewnder, the camera will focus and take a picture
automatically.
Capture smiles automatically: From Settings, enable Capture smiles. The camera will now take a
picture automatically when it detects a smile in the viewnder.
Lock focus distance: From Settings, touch Touch & hold shutter button and select Lock focal
length. Now when you touch and hold the shutter button, the camera will no longer auto focus.
Use the volume button to take pictures, focus a shot, or zoom in or out: From Settings, touch
Volume button function and select Shutter, Zoom, or Focus mode according to your usage needs.
Save pictures to RAW format: RAW format pictures record all data from the camera lens, giving
you a much higher quality image and allowing you to perform much more detailed editing and post-
processing. In Pro mode, swipe left on the screen to enter Settings and then enable RAW format.
Now when you take a picture, the picture will be saved in RAW format as well as the standard picture
format, and stored in a special folder in Gallery.
RAW format pictures take up more storage space than traditional pictures. Please check that you
have enough free space available.
Use an Assistive Grid to Help You Compose Your Photos
If you don't know where to place the subject in your photos, try using the assistive grid feature to
improve your composition.
To select an assistive grid, open Camera and swipe left on the viewnder to open the Settings
screen. Touch Assistive grid and select a grid type.
The rule of thirds: Select the Grid or Phi grid grid. The four points where grid lines intersect are the
focal points of the photo. Position the subject under one of these points to create an interesting
composition.
38
Page 43

Camera
The golden spiral: Select the Fibonacci spiral (left) or Fibonacci spiral (right) grid. The centre of
the spiral is the focal point of the photo. Position the subject here to lead the viewer around the
image in a natural ow.
39
Page 44

Camera
Take moving pictures
Want to take more exciting and vivid photos? Take a moving picture and prolong life's wonderful
moments.
With Moving pictures, you can record a scene approximately 1 second before and after the shutter
button is pressed. When browsing the gallery, not only can you view the photo captured, but also
play the moving image and sound.
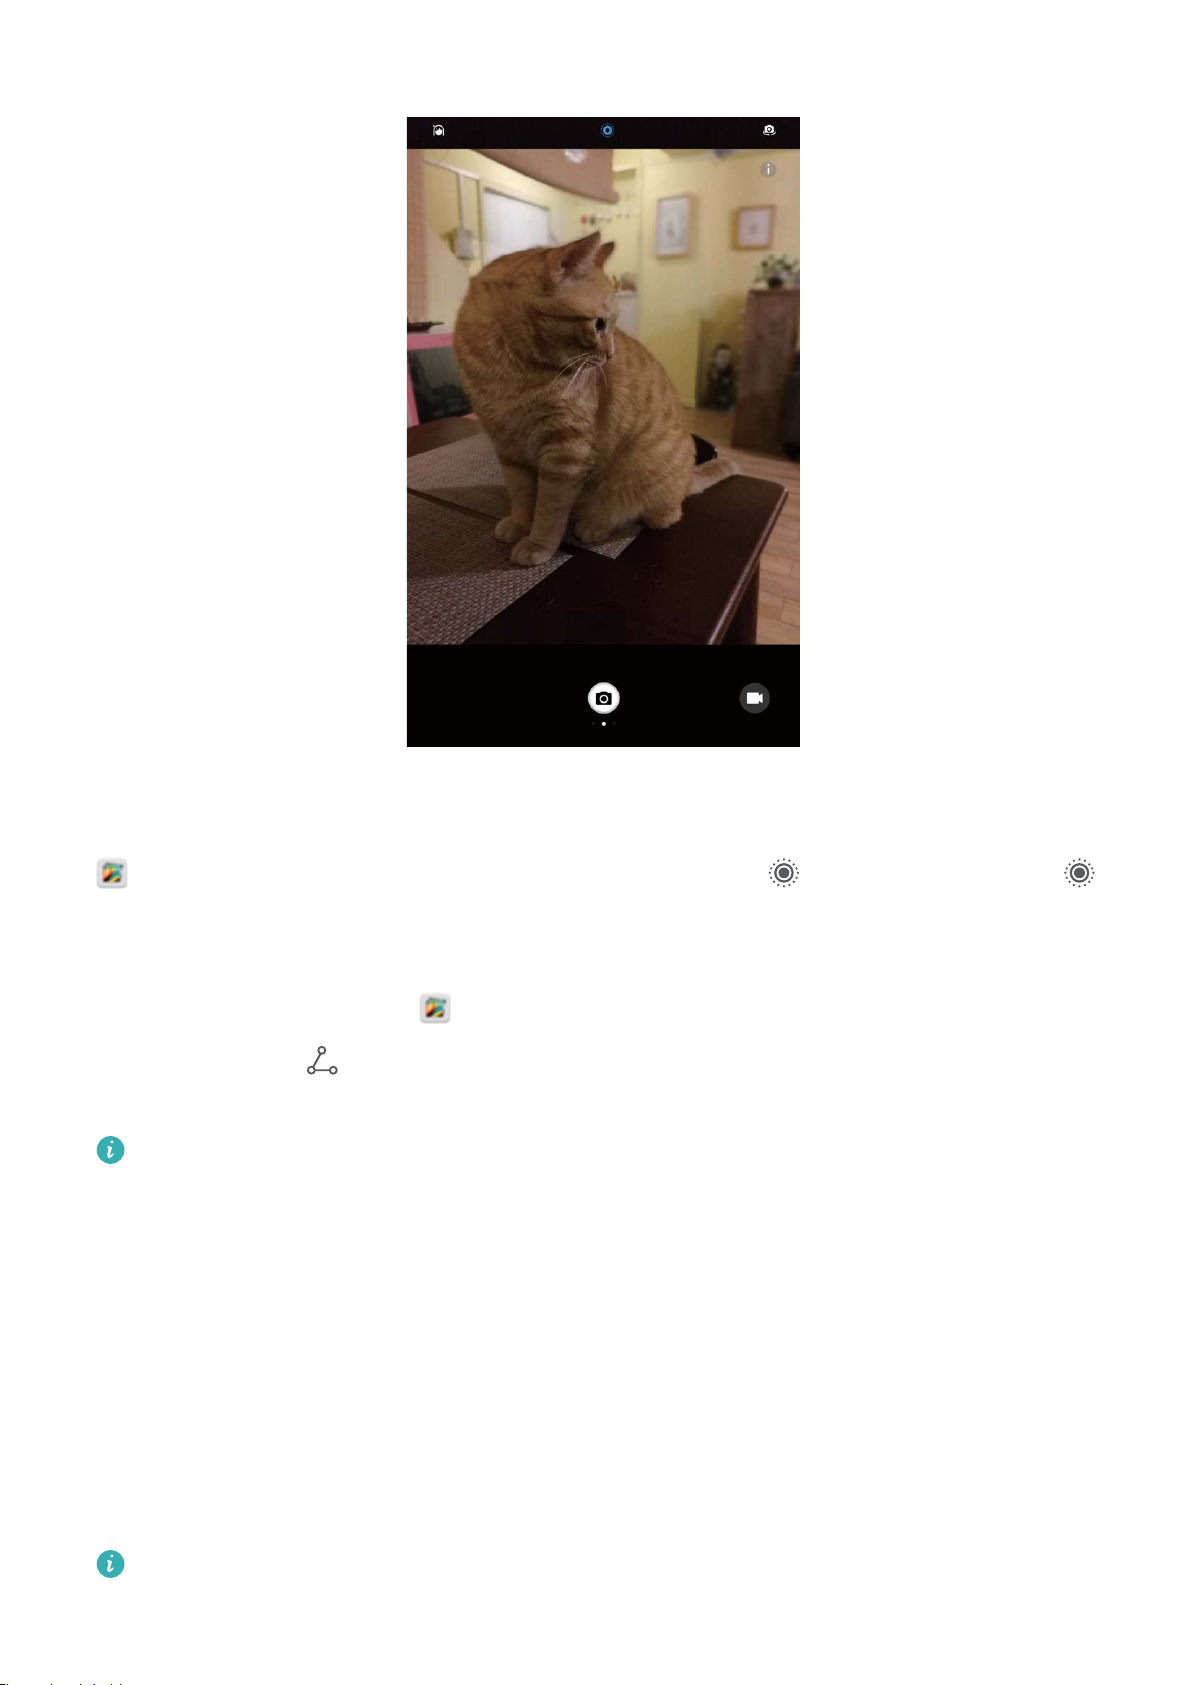
Take Moving pictures: Open Camera, touch on the top of your screen, then touch to
capture.
40
Page 45
Camera
View Moving pictures: The captured moving picture will be saved to Gallery in JPG format. Go to
Gallery > Albums > Camera, touch the moving photo with a tag, and then touch the
icon at the top of the photo to view the moving photo effect. Moving photo effects will stop
automatically after the playback ends. You can also touch the screen to stop the playback manually.
Share Moving pictures: Go to Gallery > Albums > Camera, touch the moving photo you want
to share, then touch
the sharing.
Moving pictures can be shared directly through Wi-Fi, Bluetooth, Huawei Share, and more. The
receiving device must be a Huawei device that supports the capture of moving pictures in order to
play the moving photo effects. When sharing moving pictures to third-party apps or unsupported
devices, moving pictures are displayed in static images.
, select a sharing method and follow the onscreen instructions to complete
Panorama: Capture the World in Wide-angle
Panoramas provide a wider viewing angle than ordinary photos, letting you take sweeping landscape
shots.
To capture a panorama shot, the camera takes multiple photos of objects within our visual
stitches them together into a single photo.
When taking a panorama,
and try to avoid backgrounds that are all in one colour.
nd a wide, open space that is some distance away from the subject
eld and
41
Page 46

Camera
Open Camera. Swipe right on the screen, and then touch Panorama. In Panorama mode, touch
at the top of the screen to congure the shooting direction.
Hold your Tablet steady, and then touch to start shooting. Slowly move the Tablet in the direction
indicated, holding the device steady and ensuring that the arrow stays level with the centre line.
Touch when you are nished. The camera will automatically stitch the photos together to create
a panorama.
Pro Mode
Pro Camera: Use Light to Tell Your Story
Pro camera lets you adjust exposure, shutter speed, and a range of other settings, putting you in
charge of your camera.
Pro camera is a pre-installed camera mode in your Tablet. In Pro camera mode, you can adjust various
camera parameters to produce photos and videos with results comparable to professional cameras.
42
Page 47
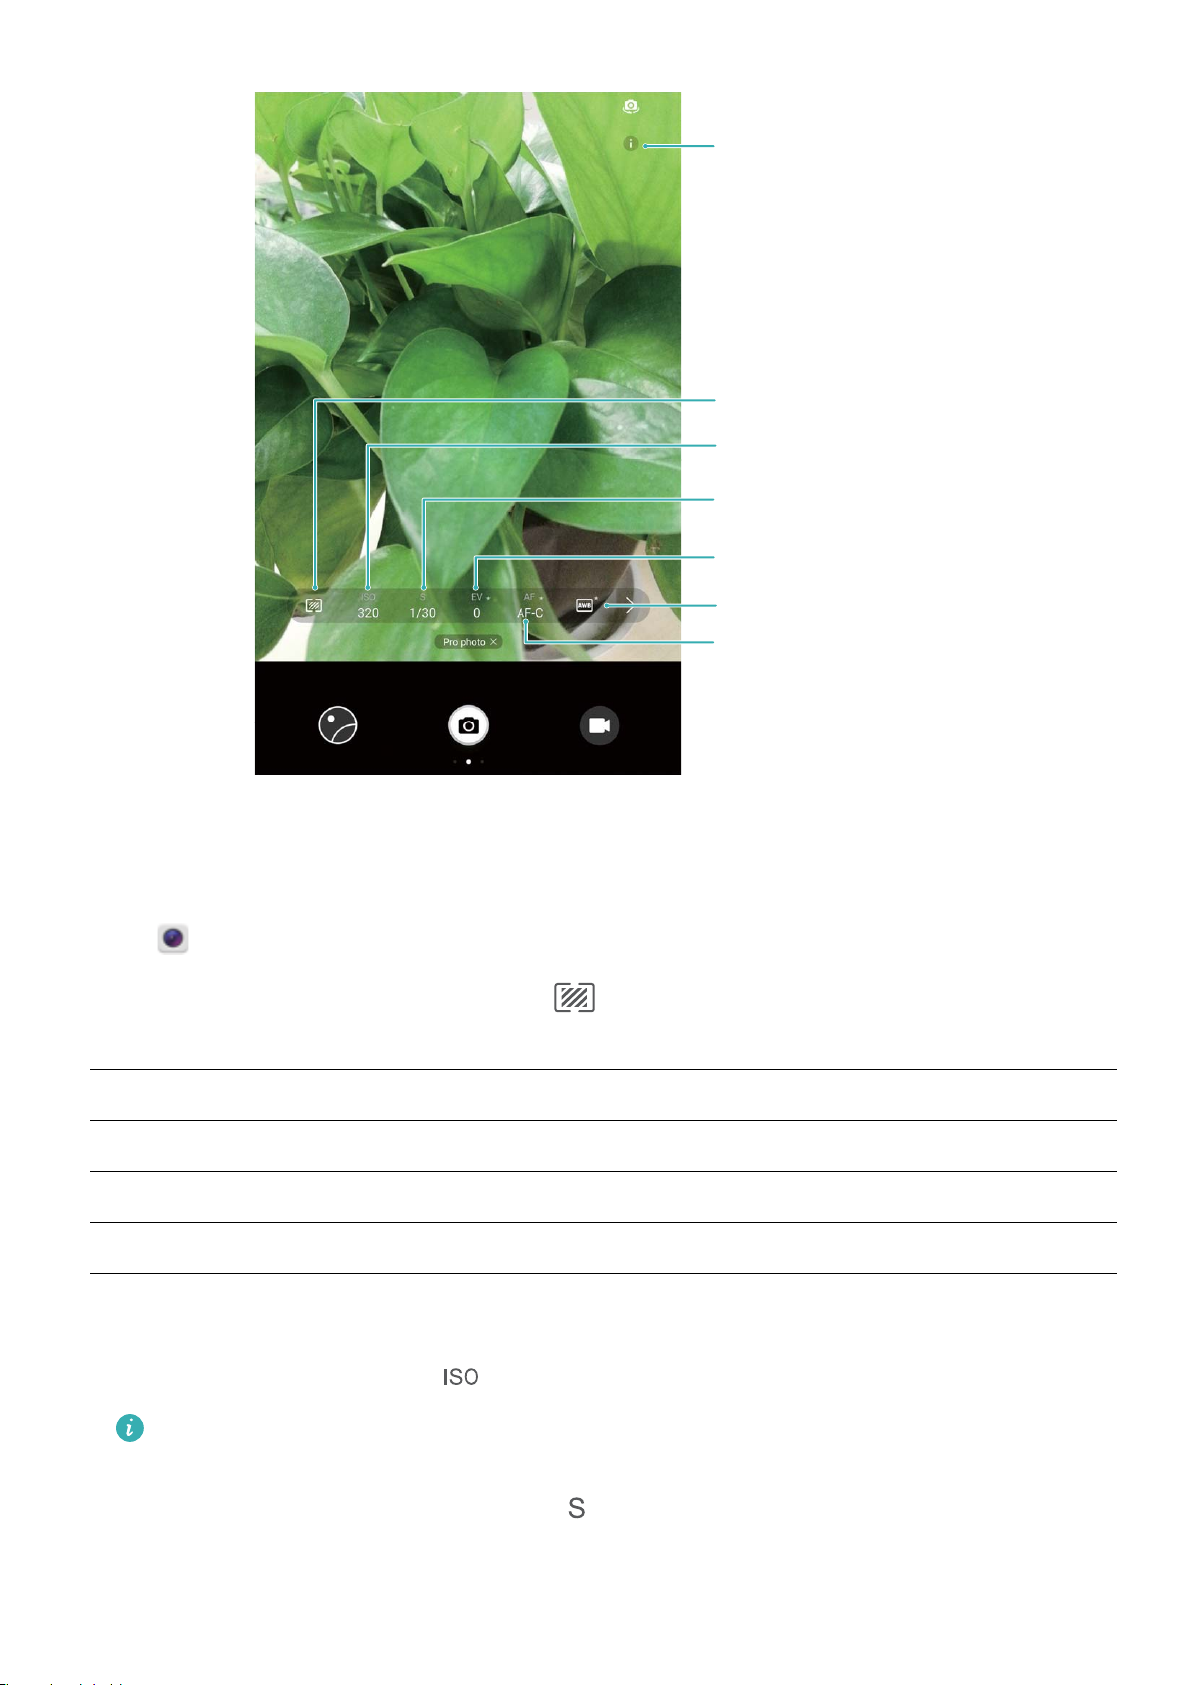
Pro mode info
Select metering mode
Adjust ISO
Adjust shutter speed
Adjust exposure value
Select white balance mode
Select focus mode
Camera
Use Pro Camera Mode to Take Landscape Shots
Use Pro camera mode to customise camera settings and capture landscape shots that stand out.
Open Camera and swipe right, touch Pro photo to enable Pro camera mode.
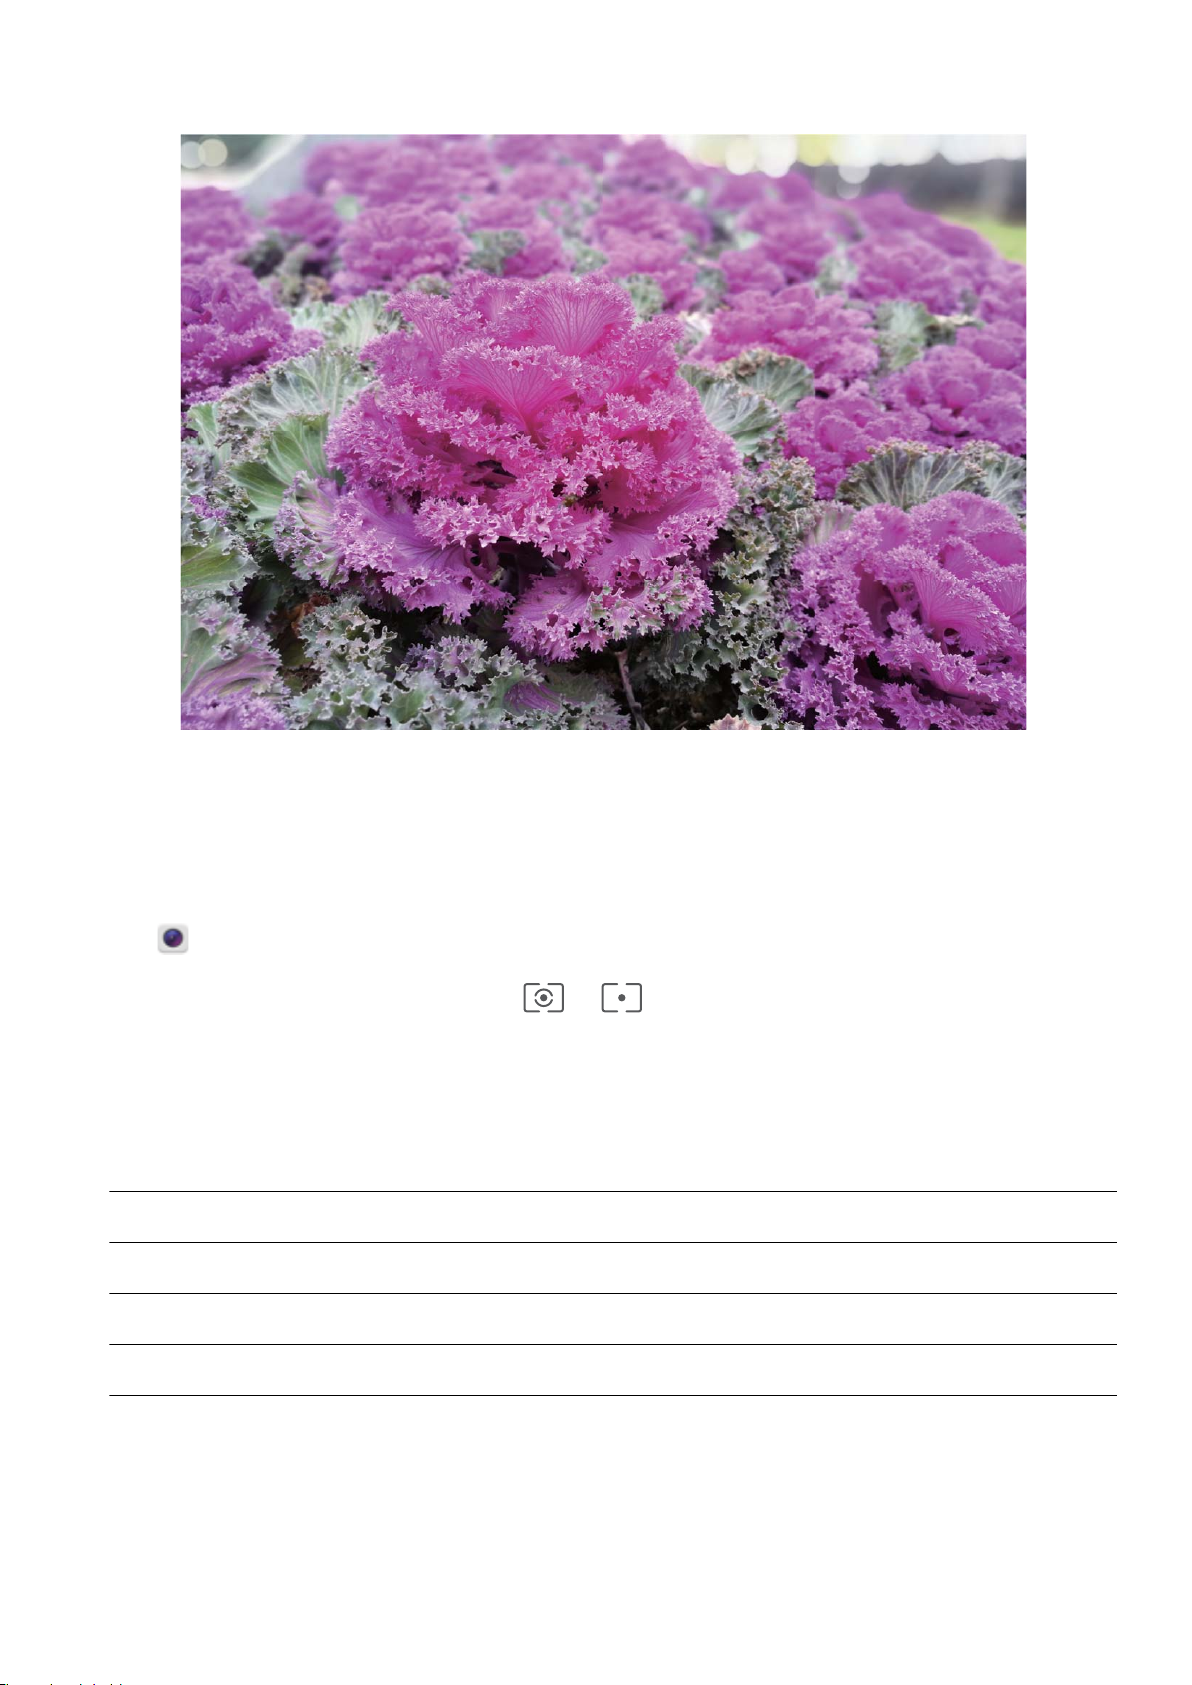
Metering mode: In Pro camera mode, touch . Select the appropriate metering mode for the
scene.
Metering mode
Scene
Matrix Wide landscapes (coastal views, mountains)
Centre Photos with a central subject that is separated from the background.
Spot Photos with subjects that you want to isolate, such as owers or trees.
Brightness settings
l ISO: In Pro camera mode, touch
and then slide the ISO slider horizontally to change the value.
An ISO of 400 or less is recommended to prevent excessive noise. For daytime shooting, set the
ISO to 100–200; for night scenes, set the ISO to around 400.
l Shutter speed: In Pro camera mode, touch and drag the slider until the desired value is
highlighted.
43
Page 48
For static scenes (such as mountains), a shutter speed between 1/80 and 1/125 is
&7
AWB
"'
recommended; for moving scenes (such as waves), it is recommended that you mount your
Tablet on a tripod and set a slower shutter speed (less than one second).
Camera
l Exposure compensation: In Pro camera mode, touch
and drag the EV slider until your
preferred value is highlighted.
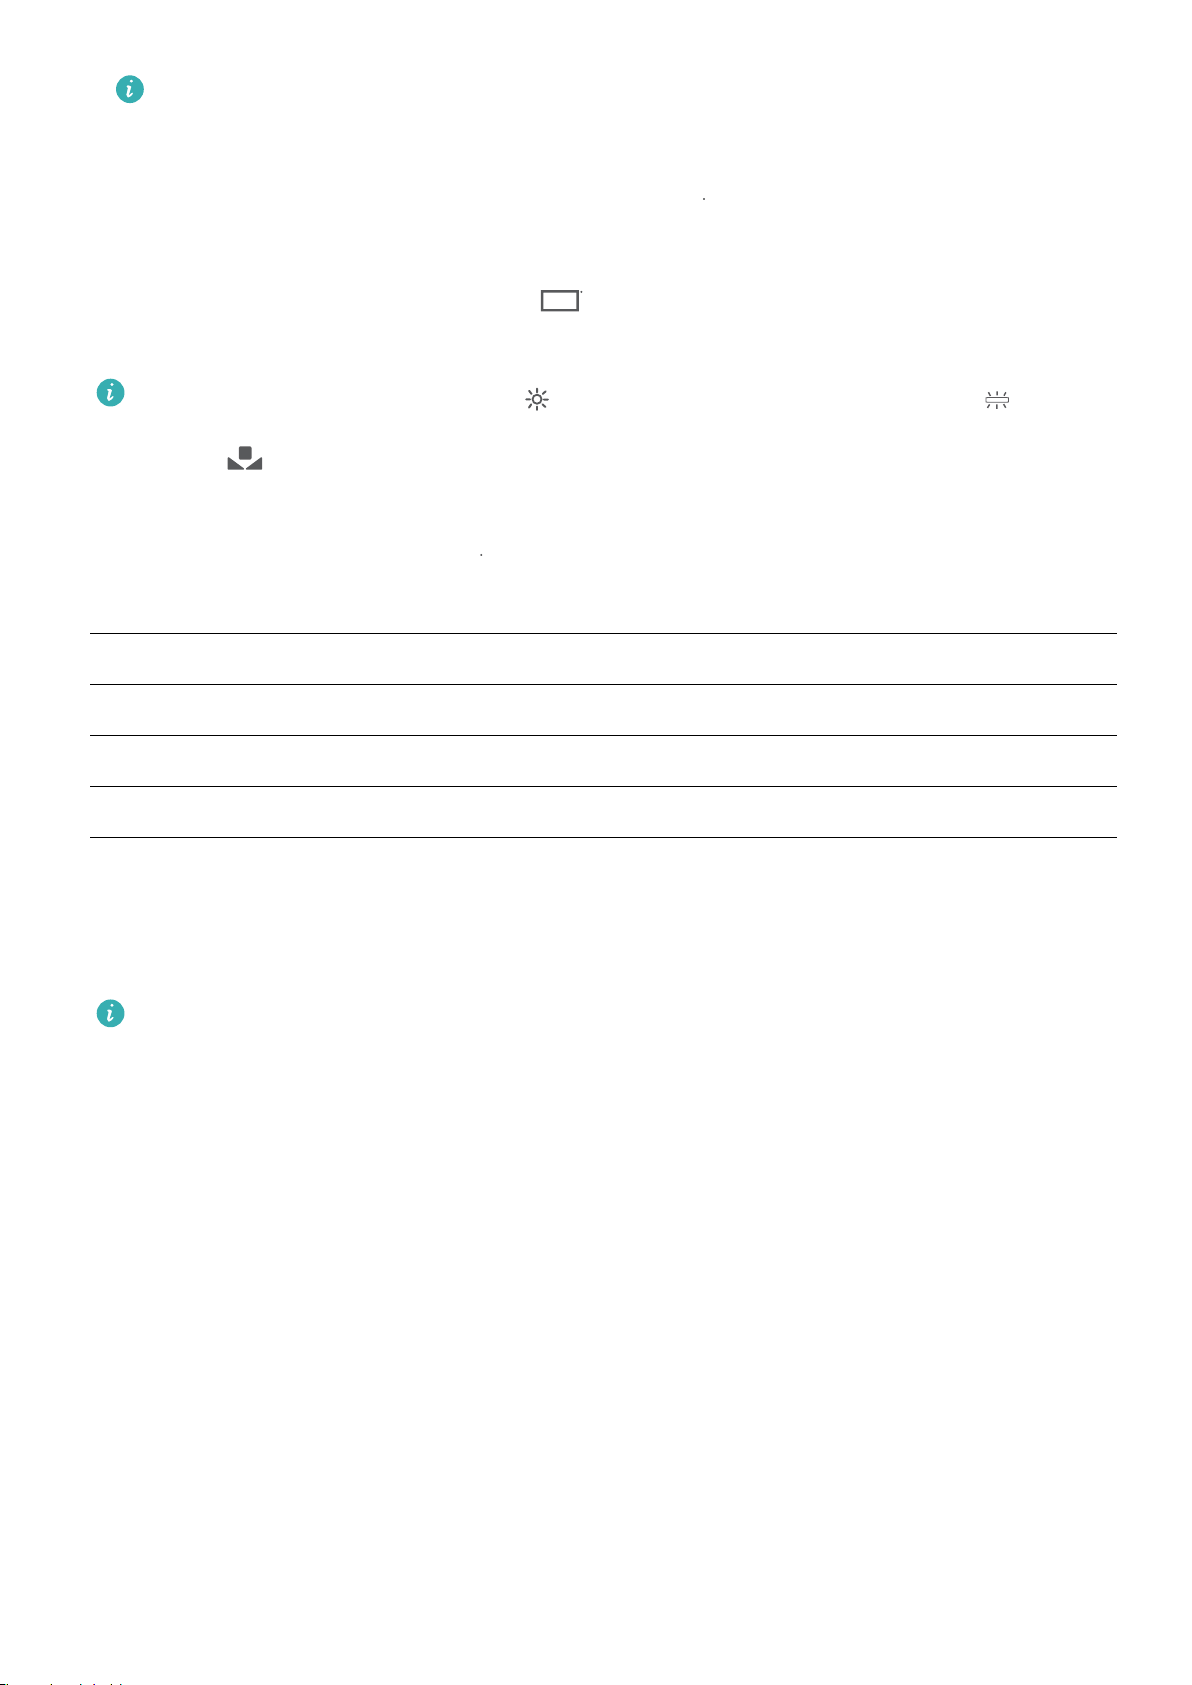
White balance: In Pro camera mode, touch
and drag the AWB slider until your preferred value is
highlighted.
l If shooting in direct sunlight, select ; if conditions are dark or overcast, select .
l Select to change the colour temperature. To compose a photo with warmer tones or a
vintage look, set a higher K value; for colder light or a sense of stillness, set a lower K value.
Focus: In Pro camera mode, touch
and drag the AF slider until your preferred value is
highlighted.
Focus mode
Scene
AF-S Static scenes (such as mountains)
AF-C Moving scenes (such as waves)
MF Isolated subjects (such as owers)
Keep your device level: In Pro camera mode, swipe left on the viewnder and enable Horizontal
level. This feature displays a spirit level in the viewnder. Ensure that the dotted line lines up with the
solid line. This indicates that your device is level.
l In Pro camera mode, when one setting is changed, other settings may also change
automatically.
l The above settings are guidelines only. For optimal results, adjust camera settings according to
the actual shooting conditions.
44
Page 49
Camera
Use Pro Camera Mode to Take Portrait Shots
Use Pro camera mode to customise camera settings and create your own unique portrait style.
Open Camera and swipe right, touch Pro photo to enable Pro camera mode.
Metering mode: For portrait shots, select or and position the subject in the centre of the
photo.
Brightness settings
l ISO: For portrait shots, a low ISO setting is recommended to prevent excessive noise. In mixed
lighting conditions, you may need to experiment to nd the right ISO setting.
Scene
Outdoors 100–200
Indoors 400
Night scenes 400–800
l Shutter speed: Use slower shutter speeds for dark scenes and higher shutter speeds for well-
Recommended ISO value
illuminated scenes. For static subjects, use a shutter speed of 1/80 to 1/125. For moving subjects,
use a shutter speed of 1/125 or higher.
l Exposure compensation: If the subject and background are too dark, increase the EV value; if they
are too bright, lower the EV value.
45
Page 50

Camera
White balance: Choose a white balance mode that suits your scene. If shooting in direct sunlight,
select ; if conditions are dark or overcast, select .
Focus: For portrait shots, it is recommended that you select Manual Focus (MF) mode. Touch the part
of the photo that you want to isolate with the focus (such as a face) and then capture your shot.
l In Pro camera mode, when one setting is changed, other settings may also change
automatically.
l The above settings are guidelines only. For optimal results, adjust camera settings according to
the actual shooting conditions.
Beautication
Beauty Mode: Always Look Your Best
Want to always look your best in your seles? Beauty mode lets you adjust a range of beautication
settings with ease. It can also create a personalised beauty information database tailored to you.
If you take a
sele at night or in low light conditions, your Tablet will detect the low ambient light
and automatically enable Night mode to improve the quality of seles. This mode does not have a
switch and is automatically enabled when your device detects low ambient light. Your device will
prompt you when it enables this mode.
l Beauty mode: Enable Beauty mode to automatically apply beautication effects to everyone in the
frame.
l Perfect sele: Enable Perfect sele and your Tablet will create a custom beauty plan for you. The
higher the beautication level, the more pronounced the effects.
Use Beauty Mode to Always Look Your Best
Want to bring out your beauty in seles and group shots? Beauty mode helps you look your best in
every photo you take.
Enable Beauty mode to capture more beautiful photos: Open Camera, touch , and then
touch the icon in the viewnder. Drag the sliders left and right to adjust beautication effects. A
higher Beauty level translates to more pronounced
beautication effects. After adjusting, touch
to take photos in Beauty mode.
Enable Perfect sele mode and customise beauty parameters: Open Camera, touch ,
then swipe left on the screen to enter Camera settings. Touch Perfect sele, then enable Perfect
sele. Take photos of yourself looking to the front, sides, and downwards as prompted, and then set
the beauty parameters. A larger value translates to more pronounced slimming and beautication
effects. After conguration, touch to save your personalised beauty information.
46
Page 51

Camera
l Reset personal information: Under Camera settings, go to Perfect sele > Edit personal info,
and follow the onscreen prompts to re-take photos of yourself looking to the front, sides, and
downwards. This will reset the beauty parameters.
l Adjust beauty parameters: Under Camera settings, go to Perfect sele > Set beauty effects to
adjust parameters such as the smoothness of skin.
Light Painting Mode
Light Painting: Shoot Light Trails
Light painting mode automatically sets a slow shutter speed to take long-exposure shots of light trails.
This mode produces stunning photos that have an ethereal quality.
Light painting mode offers four creative shooting modes for different subjects and light conditions:
l Tail light trails: Capture light trails created by cars at night.
l Light grafti: Capture trails created by a moving light source in low-light conditions.
l Silky water: Capture silky-smooth photos of waterfalls and
l Star track: Capture stunning photos of star trails in the night sky.
owing water.
Tail Light Trails: Capture the Lights of the City
Tail light trails lets you create artistic photos of car tail lights at night.
47
Page 52

Camera
l Shoot from a distance and slightly above your subject for best results. Ensure that car
headlights do not point directly at the camera, as this can overexpose the image.
l Position your device on a tripod so that it does not move during the exposure.
Open Camera. Swipe right on the screen and then go to Light painting > Tail light trails. Hold
your Tablet steady, and then touch to start shooting. A preview of the image is displayed in the
viewnder. Touch when you are nished.
Light Grafti: Paint a Photo with Light
Light grafti lets you create patterns or write words by moving a light source in front of the camera.
l
Find a dark location away from other light sources and ensure that the subject's silhouette is
not visible. Choose a suitably bright light source of an appropriate colour, such as a small torch
or glow stick.
l Position your device on a tripod so that it does not move during the exposure.
Open Camera. Swipe right on the screen and then go to Light painting > Light grafti. Hold
your Tablet steady, and then touch
viewnder. Touch when you are nished.
to start shooting. A preview of the image is displayed in the
48
Page 53

Camera
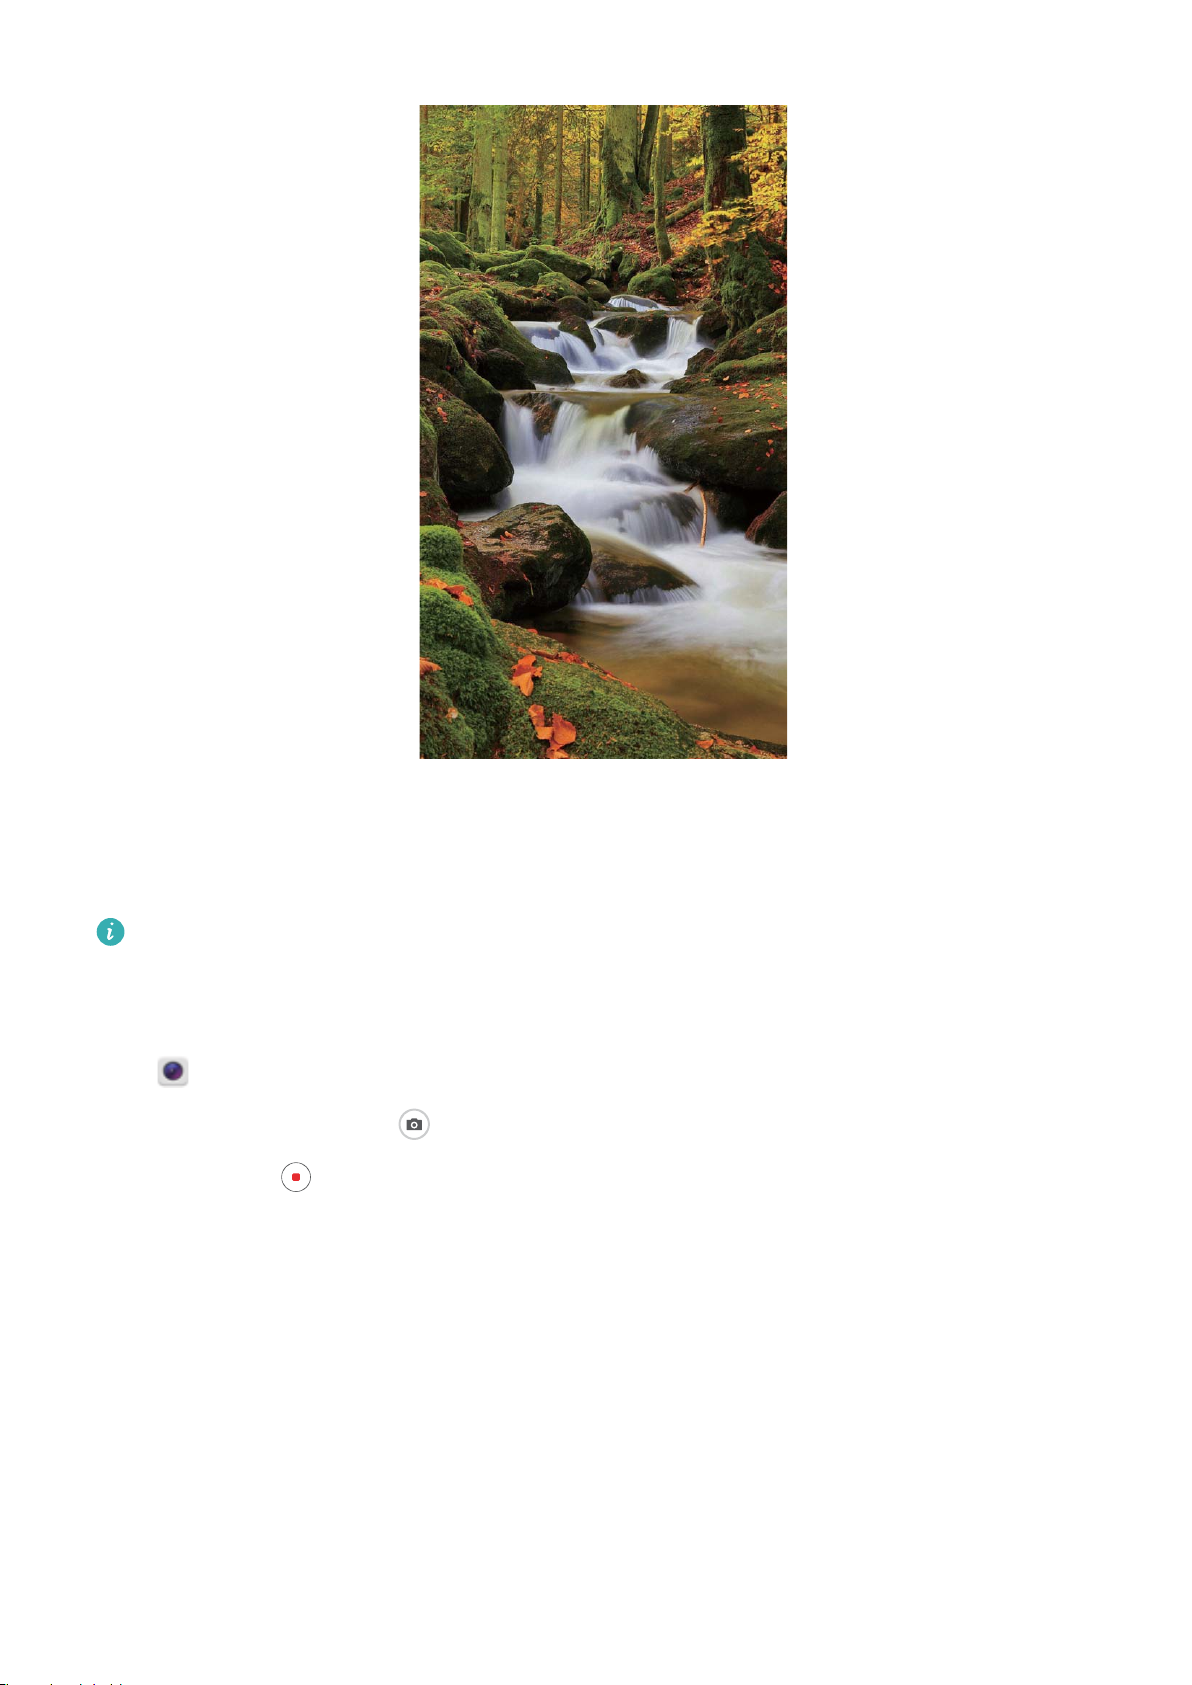
Silky Water: Capture Silky-smooth Streams and Waterfalls
Silky water lets you capture silky smooth photographs of waterfalls and rivers.
l For better results,
l Position your device on a tripod so that it does not move during the exposure.
Open Camera. Swipe right on the screen and then go to Light painting > Silky water. Hold
your Tablet steady, and then touch to start shooting. A preview of the image is displayed in the
viewnder. Touch when you are nished.
nd a stream or waterfall with lots of water.
49
Page 54
Camera
Star Track: Capture the Beauty of the Stars
Star track lets you use your camera to capture the movement of stars in the night sky.
l For best results, choose a location free of light pollution with an unobstructed view of the sky,
and on a clear night.
l Position your device on a tripod so that it does not move during the exposure.
Open Camera. Swipe right on the screen and then go to Light painting > Star track. Hold your
Tablet steady, and then touch to start shooting. A preview of the image is displayed in the
viewnder. Touch when you are nished.
50
Page 55

Camera
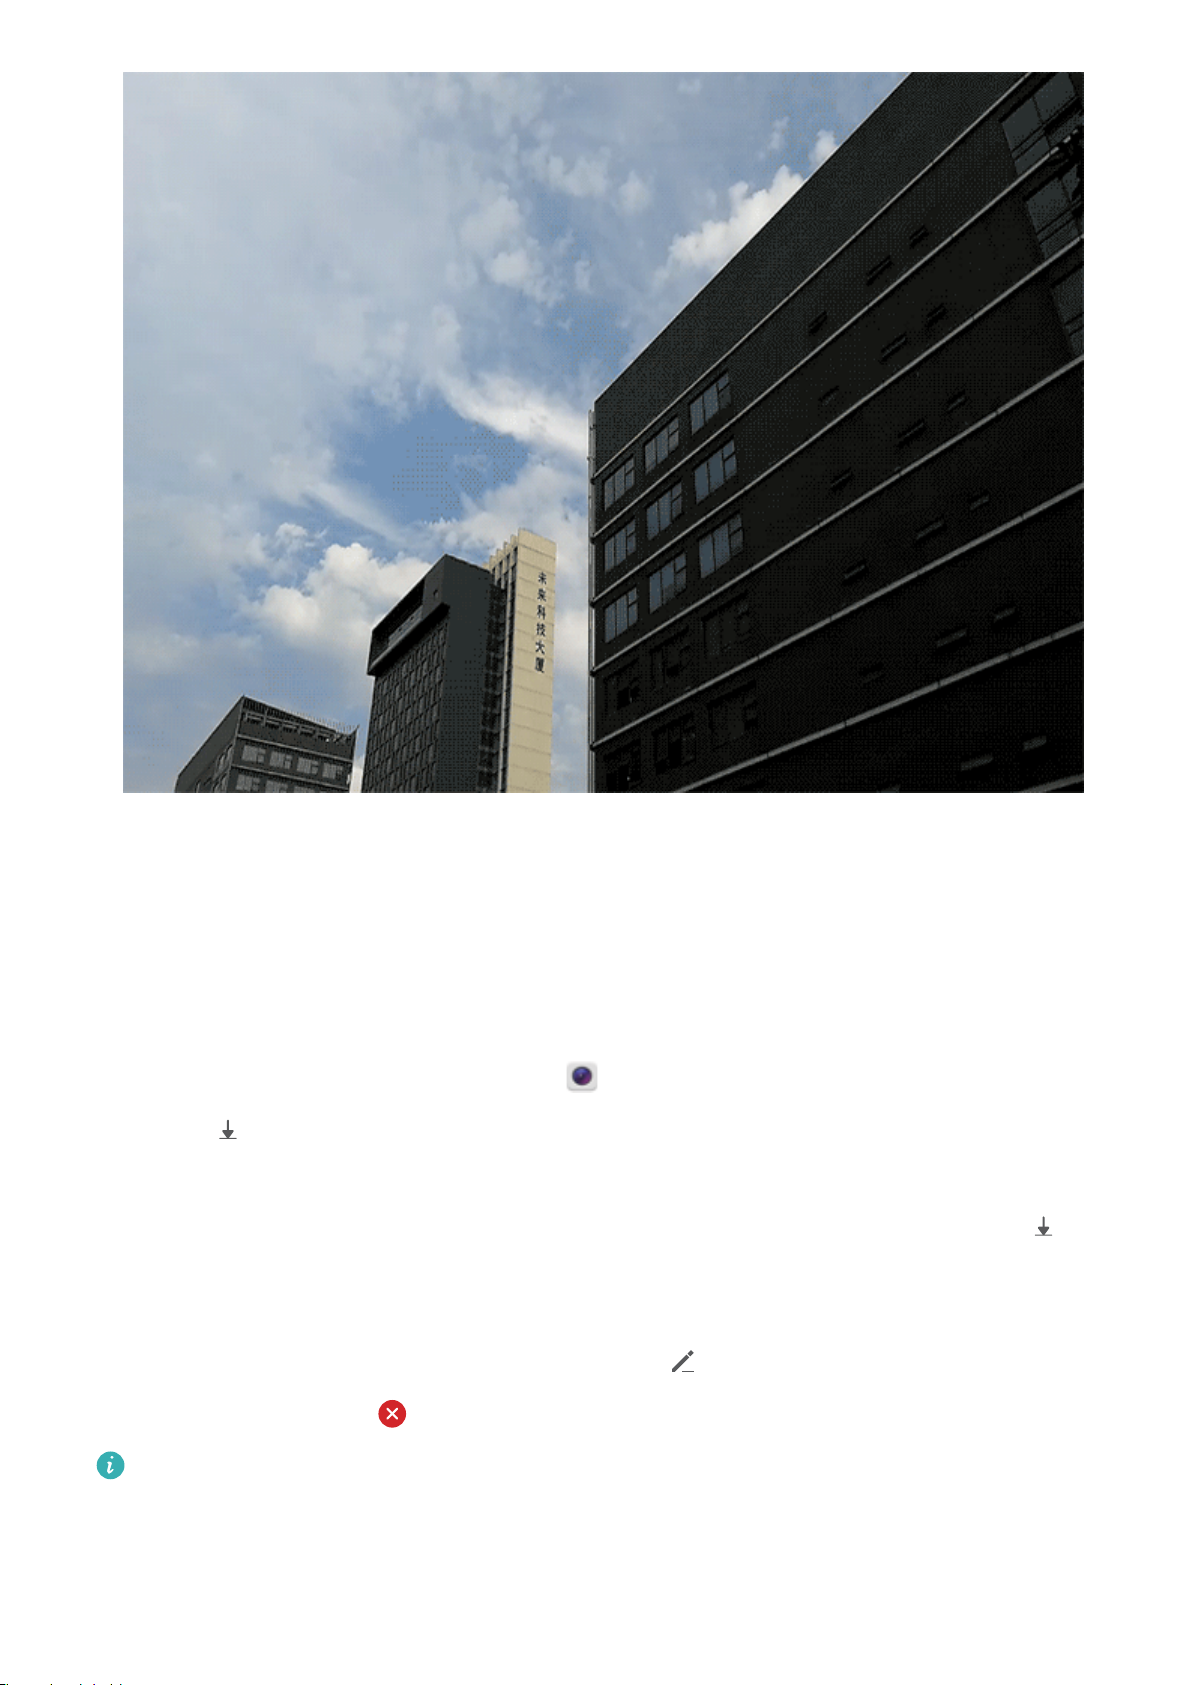
Use Time-lapse to Condense Hours into Minutes
You can use time-lapse to capture images over a long period of time and condense them into a short
video, allowing you to view owers blooming, the ebb and ow of city trafc, and the formation of
clouds during the day and the movement of stars in the night sky.
l Avoid recording time-lapse for too long as it will use up your battery power and storage space.
l Use a sturdy tripod to reduce device movement during time-lapse recording.
Before starting the time-lapse, ensure that the scene is well lit and the camera is in focus. Position the
camera carefully to avoid capturing irrelevant background objects.
Open Camera. Swipe right on the screen, and then touch Time-lapse. Touch to start
recording. Touch to nish recording.
Go to Gallery to play your time-lapse video.
51
Page 56
Camera
Discover New Possibilities with Customised Shooting
Modes
Want to discover new ways of using your camera besides the preset functions? You can download or
delete shooting modes based on your needs.
Downloading more shooting modes: Open
then touch to view the available modes. Select the shooting modes you want, and touch ADD.
After downloading, you can see the downloaded shooting modes under Modes.
Updating shooting modes: To update shooting modes, go to the Modes page, and touch
shooting modes with available updates will have red dots next to them. You can follow the onscreen
prompts to update them.
Deleting shooting modes: On the Modes page, touch near the top of the screen to go into
Edit mode, and then touch to delete unneeded shooting modes.
Camera, swipe right to go to the Modes page,
. The
To ensure that Camera works normally, preset shooting modes cannot be deleted.
52
Page 57
Gallery
Highlights
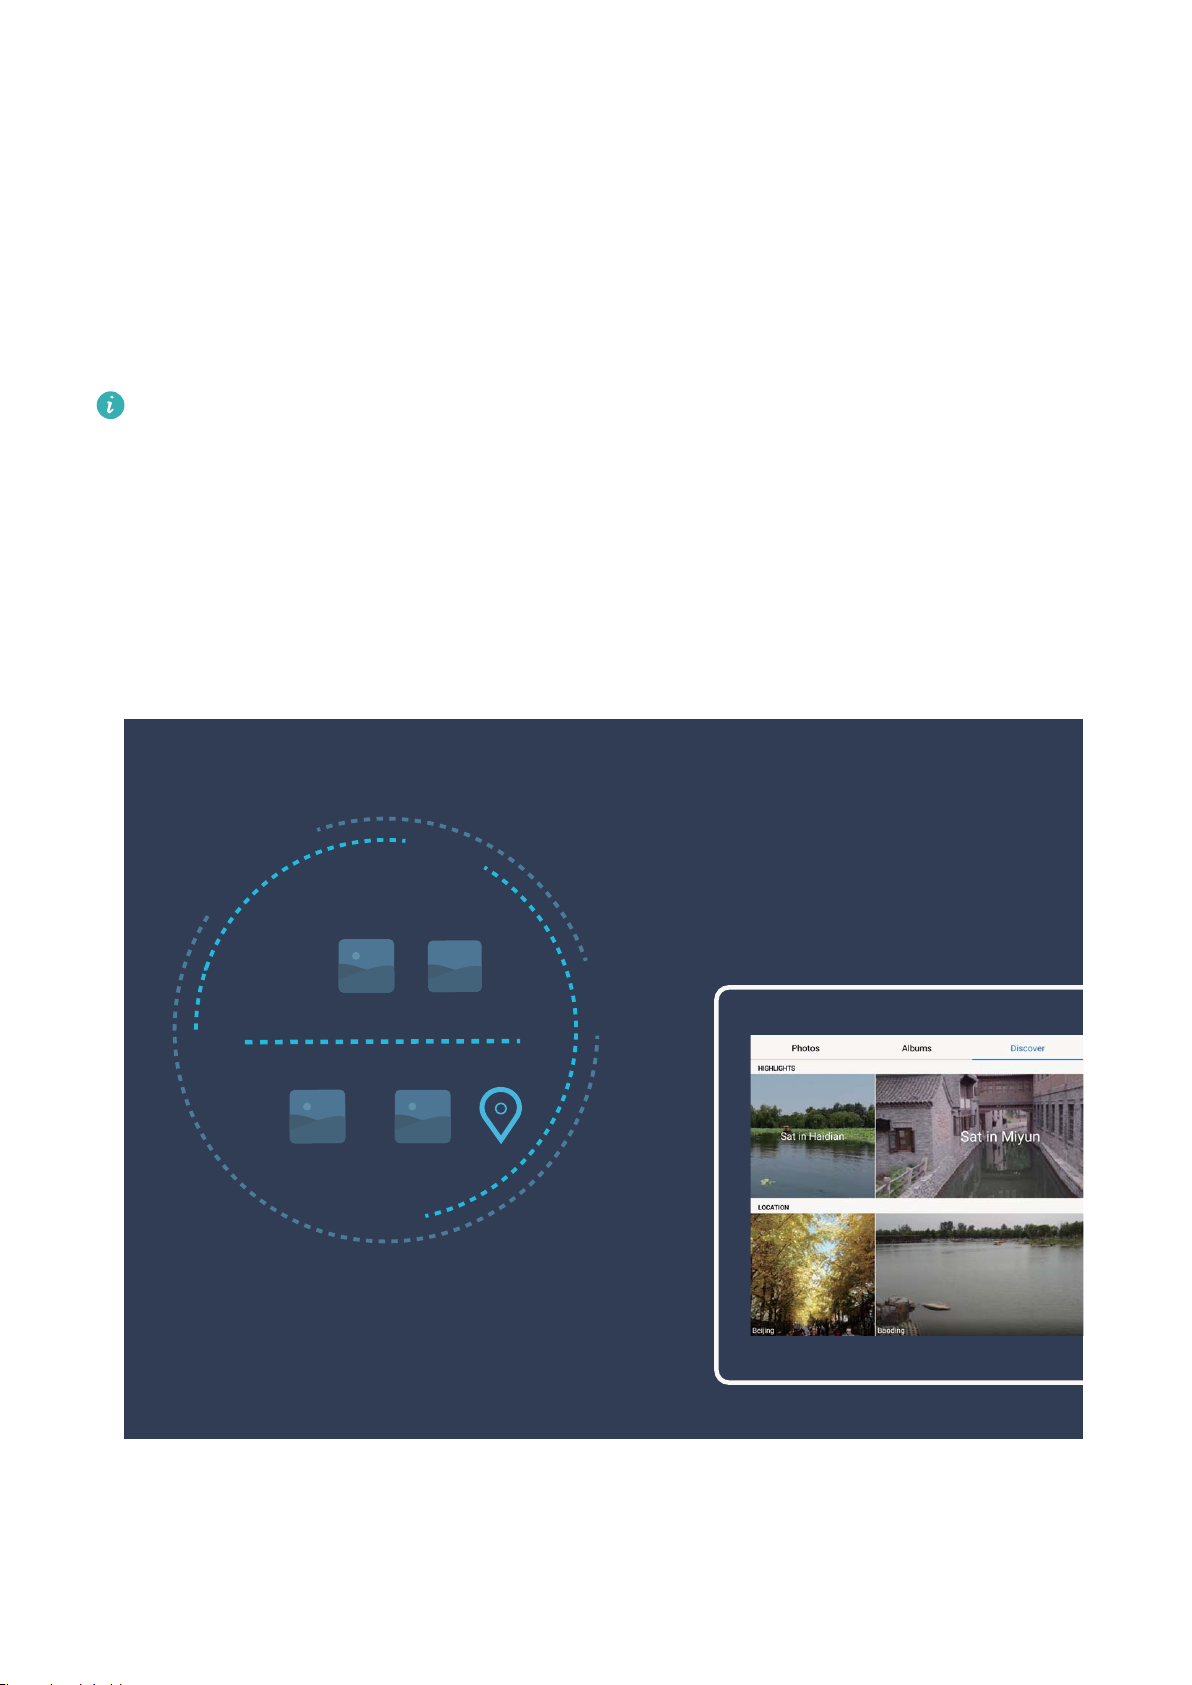
Highlights: Turn Your Photos into a Personalised Video
Highlights creates short video clips from your photos based on location information. You can add
animation effects and choose from a range of background music.
l Highlights automatically creates videos based on the geographical information in your photos.
To use this feature, open Camera, go to Settings, and check that GPS tag is enabled.
l Check that your Tablet is connected to the Internet.
l Highlights albums are created automatically when your Tablet is charging, the screen is
switched off, and the battery is at least 10% charged. It may take some time for your Tablet to
create the album. Your Tablet will not create a Highlights album if there is an
number of photos or videos in your Gallery.
insufcient
Edit the Highlights Album
Want to change the background music or video template for Highlights? You can edit a Highlights
video and personalise it with the background music and template you like.
53
Page 58
Gallery
l Highlights automatically creates videos based on the geographical information in your photos.
To use this feature, open Camera, go to Settings, and check that GPS tag is enabled.
l Check that your Tablet is connected to the Internet.
l Highlights albums are created automatically when your Tablet is charging, the screen is
switched off, and the battery is at least 10% charged. It may take some time for your Tablet to
create the album. Your Tablet will not create a Highlights album if there is an insufcient
number of photos or videos in your Gallery.
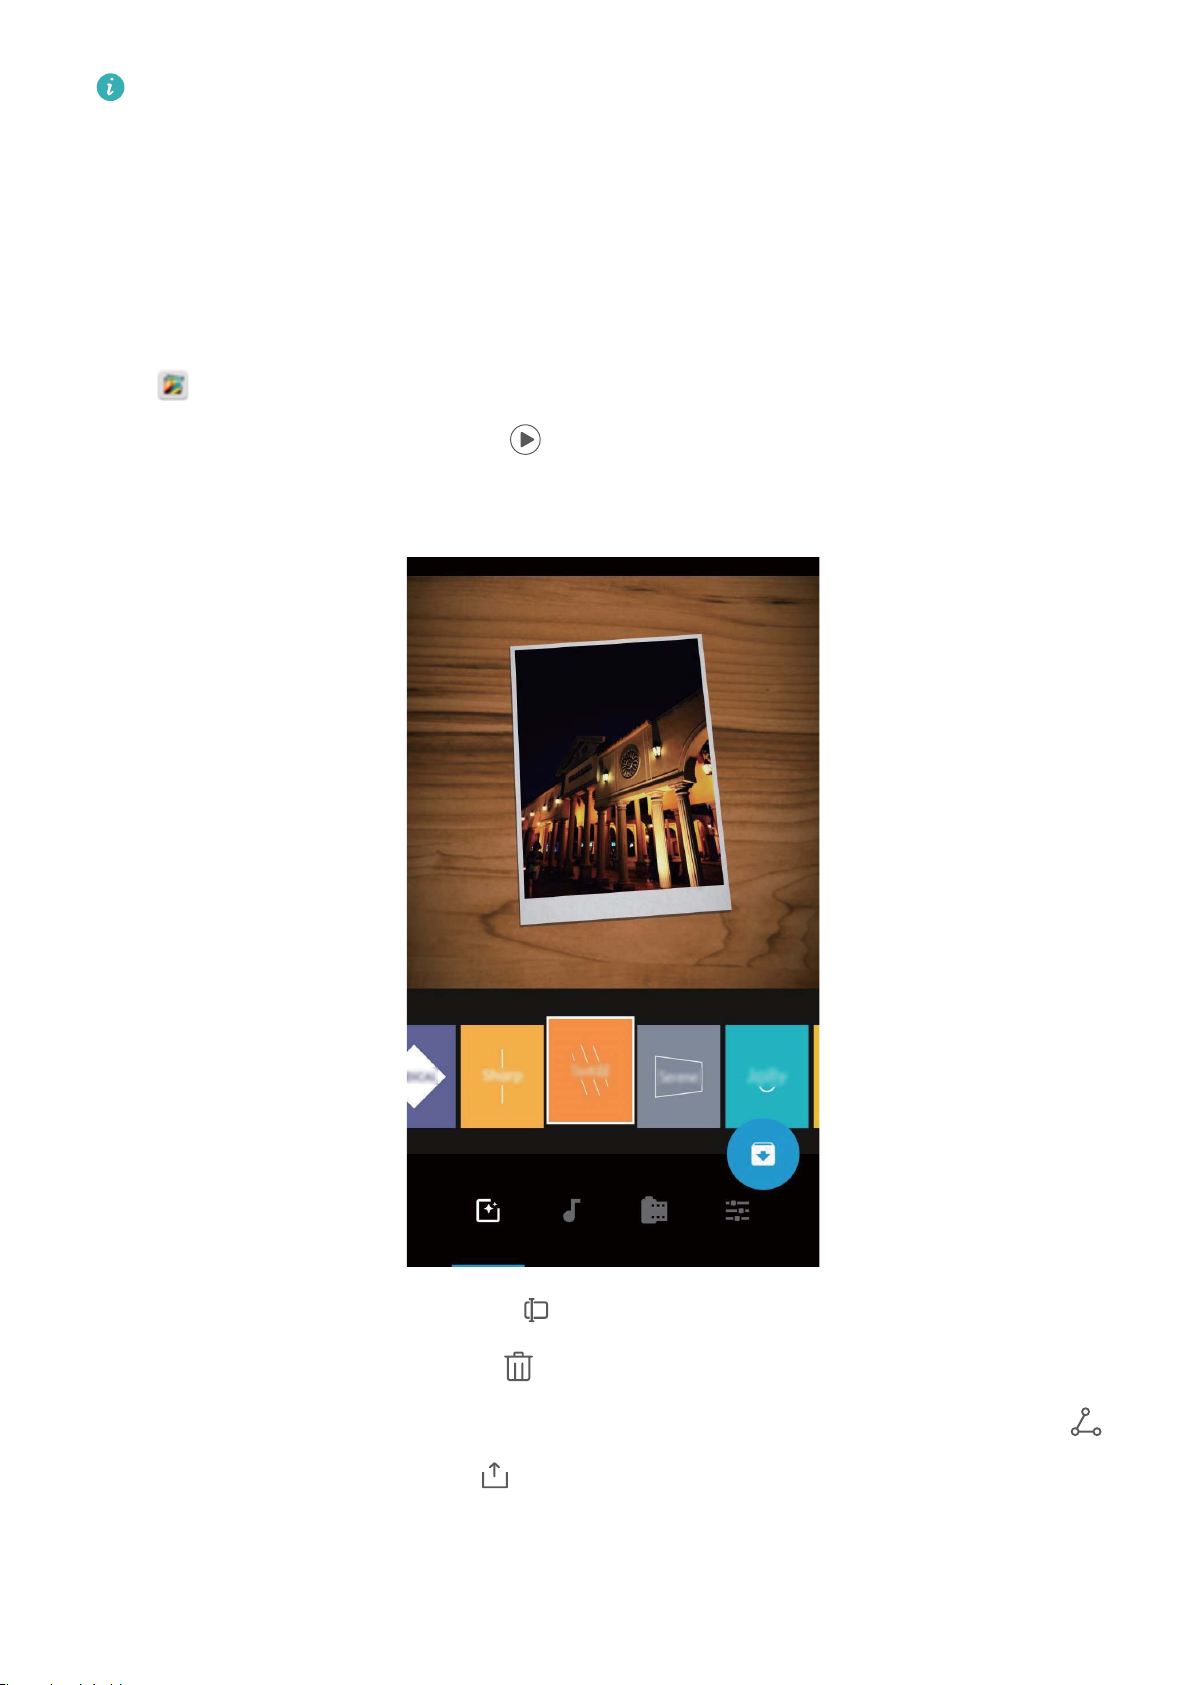
Open Gallery, and touch the Highlights album you want to view or edit under Discover.
l Playing or editing Highlights: Touch , and you can edit the video's template or background
music using the options bar near the bottom of the screen during playback.
l Renaming a Highlights album: Touch and enter the new name.
l Deleting a Highlights album: Touch , and then touch Delete.
l Sharing or removing photos: Touch and hold any photo in the Highlights album, then touch
and select a sharing method. Touch , and then touch Move to remove photos from the
Highlights album.
54
Page 59

Gallery
Photo Management
Edit Videos
Crop a video: Open Gallery, select the video you want to edit, and touch to enter the video
editing screen. You can drag the slider in the crop area to select the segment you want to keep, and
touch to nish cropping the video.
Adjust the video resolution: As you drag the slider to select the video segment you want to keep,
you can touch to preview the cropped video. You can also touch the video resolution options
(such as Full HD , HD or Standard) on the editing screen to adjust the video resolution.
The higher the resolution, the clearer the video, but also the greater the storage space required.
Choose according to your needs.
Edit Photos
Want to edit a picture you just took to make it even better? You can use the Gallery's editing features
to crop, rotate, and apply a variety of effects (such as grafti, personalised watermarks, and lters) to
your photos to make them more striking.
Go to
Gallery, select the photo you want to edit, and touch to enter the photo editing
screen. You can use the following features to edit your photos:
l Rotate a photo: Touch , and slide the angle dial to customise the rotation angle of the photo.
You can also touch Rotate or Mirror to rotate your photo 90 degrees or ip it.
l Crop a photo: Touch , and drag the grid tool box or its corners to make your selection. You
can also select a xed crop ratio and drag the corners of the grid tool to crop the photo.
l Add lter effects: Touch , and select your desired lter effect.
l Colour retention: Touch , and follow the onscreen instructions to select the colours you want
to keep. The areas selected to retain colours will be highlighted.
l Blur a photo: Touch , select the blur mode you desire, and drag the slider to adjust the degree
of the blur.
l Adjust photo effects: Touch
to adjust the photo's brightness, contrast, saturation, and other
parameters according to your preferences.
l Beautify a portrait photo: When the system detects a portrait photo, it will automatically provide
you with the Beauty feature. You can touch in the photo editing screen to apply features such
as Smooth, Blemish, Thin face, and Enhance eyes to make your portrait shot more attractive.
l Create photo mosaics: Touch , and select your desired mosaic style and size to create a photo
mosaic.
55
Page 60

Gallery
l Grafti on photos: Touch , and select your desired brush and colour to grafti on photos.
l Add watermarks: Touch , and select your desired watermark (such as Time, Location,
Weather, or Mood) to personalise your photos.
l Add a tag: Touch , and select an annotation style and font format to enrich your photos.
Browse and Share Photos and Videos
Browsing through old photos or videos in your free time can bring back precious memories. Your
photos and videos are stored in Gallery. You can view them by time, location, or by selecting an
album.
View photos in full screen: Open Gallery, and touch a photo to view it in full screen mode.
Touch the screen again to hide the menu. When viewing photos in full screen mode, you can:
l Zoom in or out on a photo: Place two ngers on the screen and separate them to zoom in on the
photo, or close them to zoom out.
l View shooting parameters: To view the shooting parameters of a photo, touch , and swipe
up and down on the details window to view the ISO (sensitivity), EV (exposure compensation),
resolution, and other parameters of the photo.
l Rename a photo: Go to
l Set photo as contact photo or desktop wallpaper: Go to > Set as, and set the photo as a
> Rename, and enter a new name for the photo.
Wallpaper or Contact photo.
Share a photo or video: Open Gallery, touch and hold any le to enter the selection screen,
then select the les you want to share and touch . Select a sharing method and follow the
onscreen instructions to complete sharing.
Set automatic photo rotation: Want to make your photos and videos follow the screen's rotation?
From the Gallery screen, go to > Settings > Photo orientation, and select Always rotate.
View by shooting time: You can view the shooting time of your photos and videos in the Photos
tab. Go to > Settings, and enable Show time to display the shooting date when viewing photos
in full screen mode. From the Photos tab, you can separate or close two ngers to zoom out or in on
the screen, and switch between day and month display for photos and videos.
View by shooting location: If you took a photo or video with GPS tag enabled in the Camera
settings menu, you can view photos and videos in map mode. From the Photos tab, touch
, and
the photos or videos containing location information will be marked at the corresponding shooting
locations on the map. You can separate two ngers to zoom in on the map and view the details of a
photo. Touch the photo thumbnail to view all the photos and videos taken at that location.
View by album: You can view photos and videos by albums in the Albums tab. Some photos and
videos are stored in default albums specied by the system. For example, videos recorded with the
56
Page 61
Gallery
camera are saved in the Camera videos album. Screenshots and screen recordings are saved in the
Screenshots album.
Play slideshows: From the Photos tab, go to > Slideshow, and the system will automatically
play a photo slideshow. Touch the screen to stop playing.
Organise Photo Albums
Add photos or videos to a new album: From the Albums tab, touch , enter an album name,
and then touch OK. Select the images or videos that you want to add to the new album.
Move photos or videos: Combine photos and videos from separate albums for easier viewing. Open
an album, touch and hold a photo or video until appears, and then select the photos or videos to
be moved. Touch
and select the destination album. After you move a photo or video, it will be
removed from the original album.
Declutter albums: If your album list is too cluttered, you can move some albums to Others. Touch
and hold an album until appears, select the albums to be moved, and then touch to move
the albums to Others. If you want to restore albums to their original location, open Others, touch
and hold the albums to be restored, and then touch .
l You cannot move the Camera, Camera videos or Screenshots albums to Others.
l Moving an album created by a third-party app to Others will not affect the app.
Reorder albums
: Move albums that you use frequently to the top of the list for easier viewing. Touch
and hold an album until appears. Touch and hold and drag with your nger to move an
album up or down the list. When you are done, touch to save changes.
You cannot reorder the Camera, or Screenshots albums.
Hide albums: Hide private albums that you don't want others to see. From the Albums tab, go to
> Hide albums and toggle on the switches for albums that you want to hide.
You cannot hide the
Camera, or Screenshots albums.
Delete photos or videos: Touch and hold a photo or video until appears, select the photos or
videos to be deleted, and then touch > Delete. Deleted photos and videos are kept in the
Recently deleted album and are marked with an icon that indicates the number of days before they
will be permanently deleted. To permanently delete photos or videos, go to Recently deleted, select
the photos or videos to be deleted, and then touch > Delete.
Restore deleted photos and videos: Open the Recently deleted album and touch and hold a
photo or video until
appears. Select the photos or videos to be restored and touch to
restore them to the original album. The original album will be recreated if it no longer exists.
57
Page 62

Tablet Manager
Use One-touch Optimisation
Have you noticed that your Tablet has slowed down recently? Do you worry that it might be
vulnerable to malware and other security threats? Use one-touch optimisation to make your Tablet run
smoother and protect it from security threats.
Go to Tablet Manager and touch OPTIMISE. Your Tablet will increase its running speed, check
for security risks, optimise power consumption, and monitor and intercept unknown phone numbers
and harassing calls.
Optimise Power Consumption
Running out of battery at an inopportune time can cause many inconveniences. Power saving features
can help to prolong the battery life of your Tablet, allowing you to play games or enjoy other features
for longer.
Open and touch remaining to perform the following:
l View power consumption details: Touch Battery usage to view power consumption details. In
the Battery usage details section, the blue marks beneath Charging indicate the times when your
device was charging. Gaps between the marks indicate times when your device was not charging.
This feature does not consume power. Touch Battery usage to view which apps and hardware are
consuming the most power.
l Comprehensive power consumption check and optimisation: Touch Optimise to check for
power consumption problems and automatically optimise performance.
l Enable Power saving mode: Enable Power saving mode. Choose the appropriate power saving
mode based on your Tablet's battery level to extend battery life.
l Adjust screen resolution to save power: Enable Smart resolution. Your device will
automatically lower the screen resolution to save power. You can also manually set the screen
resolution to save power when high resolution is unnecessary.
l Display remaining battery percentage in status bar: Enable Battery percentage to display the
remaining battery percentage in the status bar.
l Manage app launches to save power: Touch Launch to automatically or manually manage app
auto-launch, secondary launch, and background activity. The system will automatically manage
power usage to save power.
You will receive a
Follow the onscreen instructions to optimise app settings.
notication when there are power-intensive apps running in the background.
58
Page 63

Tablet Manager
Use Virus Scan to Keep Your Tablet Safe
Opening the wrong advertisement can cause Trojan viruses and malware to secretly install and run on
your device, stealing your contacts information and other personal data. Virus scan can locate and
remove potential threats to keep your Tablet in good shape.
Open , touch Virus scan, and your device will automatically scan for and delete security threats.
At the same time, you can touch to perform the following options:
l Cloud virus scan: Enable Cloud scan and your Tablet will add a dynamic, cloud-based scan to its
standard scan, keeping the Tablet safe from new threats.
l Virus scan reminder: Enable Scan reminder and the system will notify you if you do not perform
an anti-virus scan for more than 30 days.
l Quick scan: Select Quick scan. The system will quickly scan key locations and apps on your device
during routine maintenance.
l Full scan: Select Full scan. The system will comprehensively scan your device for malicious les at
regular intervals. This process takes longer, but covers a wider range and ensures your device is
protected from threats.
l Virus library update: Enable Auto-update and Only update over Wi-Fi. The system will
automatically update the virus database over Wi-Fi, keeping its threat removal capabilities up to
date.
59
Page 64

Add Email Accounts
Add your email account to your Tablet for convenient email access at any time. If you have questions
about specic settings while conguring your email, please consult your email account provider.
Add a personal email account: Open , select an email service provider or touch Others, enter
your email address and password, then touch Sign in and follow the onscreen instructions to
congure your account. The system will automatically connect to the server and check server settings.
Add an Exchange account: Exchange is developed by Microsoft and used by companies as their
internal email system. If your company email uses Exchange servers, you can log in to your work email
on your Tablet. Go to > Exchange, enter your email address, username, and password, then
touch Sign in and follow the onscreen instructions to congure your account. The system will
automatically connect to the server and check server settings.
After conguration, the system will open the Inbox screen by default.
Manage Email Accounts
You can add one or more email accounts.
Open Email. You can:
Check emails: On the Inbox screen, touch
your emails. Swipe down to refresh the list of emails. Open an email to read, reply, forward, or delete
it. Swipe left or right on the screen to view the previous or next email. To delete multiple emails,
touch the prole picture or touch and hold an email to go to the email management screen, select the
emails, and touch .
Sync emails: Swipe down on the Inbox screen to refresh the emails list. Go to > Settings,
touch an account, and then enable Sync Email. To sync automatically, touch Sync frequency and
select the syncing time to complete conguration.
, and then select an email account to view the list of
Search emails: On the emails list screen, touch the search bar, and enter the keywords, such as email
subject, content.
Add multiple email accounts: Go to > Settings > , select your email service provider, and
enter your information.
Switch email accounts: On the accounts screen, touch
picture to switch.
, and then touch an account prole
60
Page 65

Congure email accounts: On the account screen, go to > Settings, select an account to set
the Account name, Default account, or Remove account.
Manage VIP Email Contacts
Worried about missing an important contact's email among a sea of emails? You can add important
contacts to the VIP list. Your device will automatically move emails from VIP contacts to the VIP
mailbox.
Open Email and go to > Settings > VIP contacts. From the VIP list screen, go to Add >
Create or Add from contacts.
Add or remove VIP contacts: On the VIP list screen, touch or to manage VIP contacts.
Email
Change email
> VIP notications.
notication for VIP contacts: From your email home screen, go to > Settings
Set Auto Response for Exchange Email
Unable to reply to emails on vacation? Enable auto responses to automatically reply to emails.
Open Email, go to > Settings, and select your Exchange account. Touch Automatic
replies, enable Automatic replies, set the content and time of your auto response, and then touch
Done.
61
Page 66
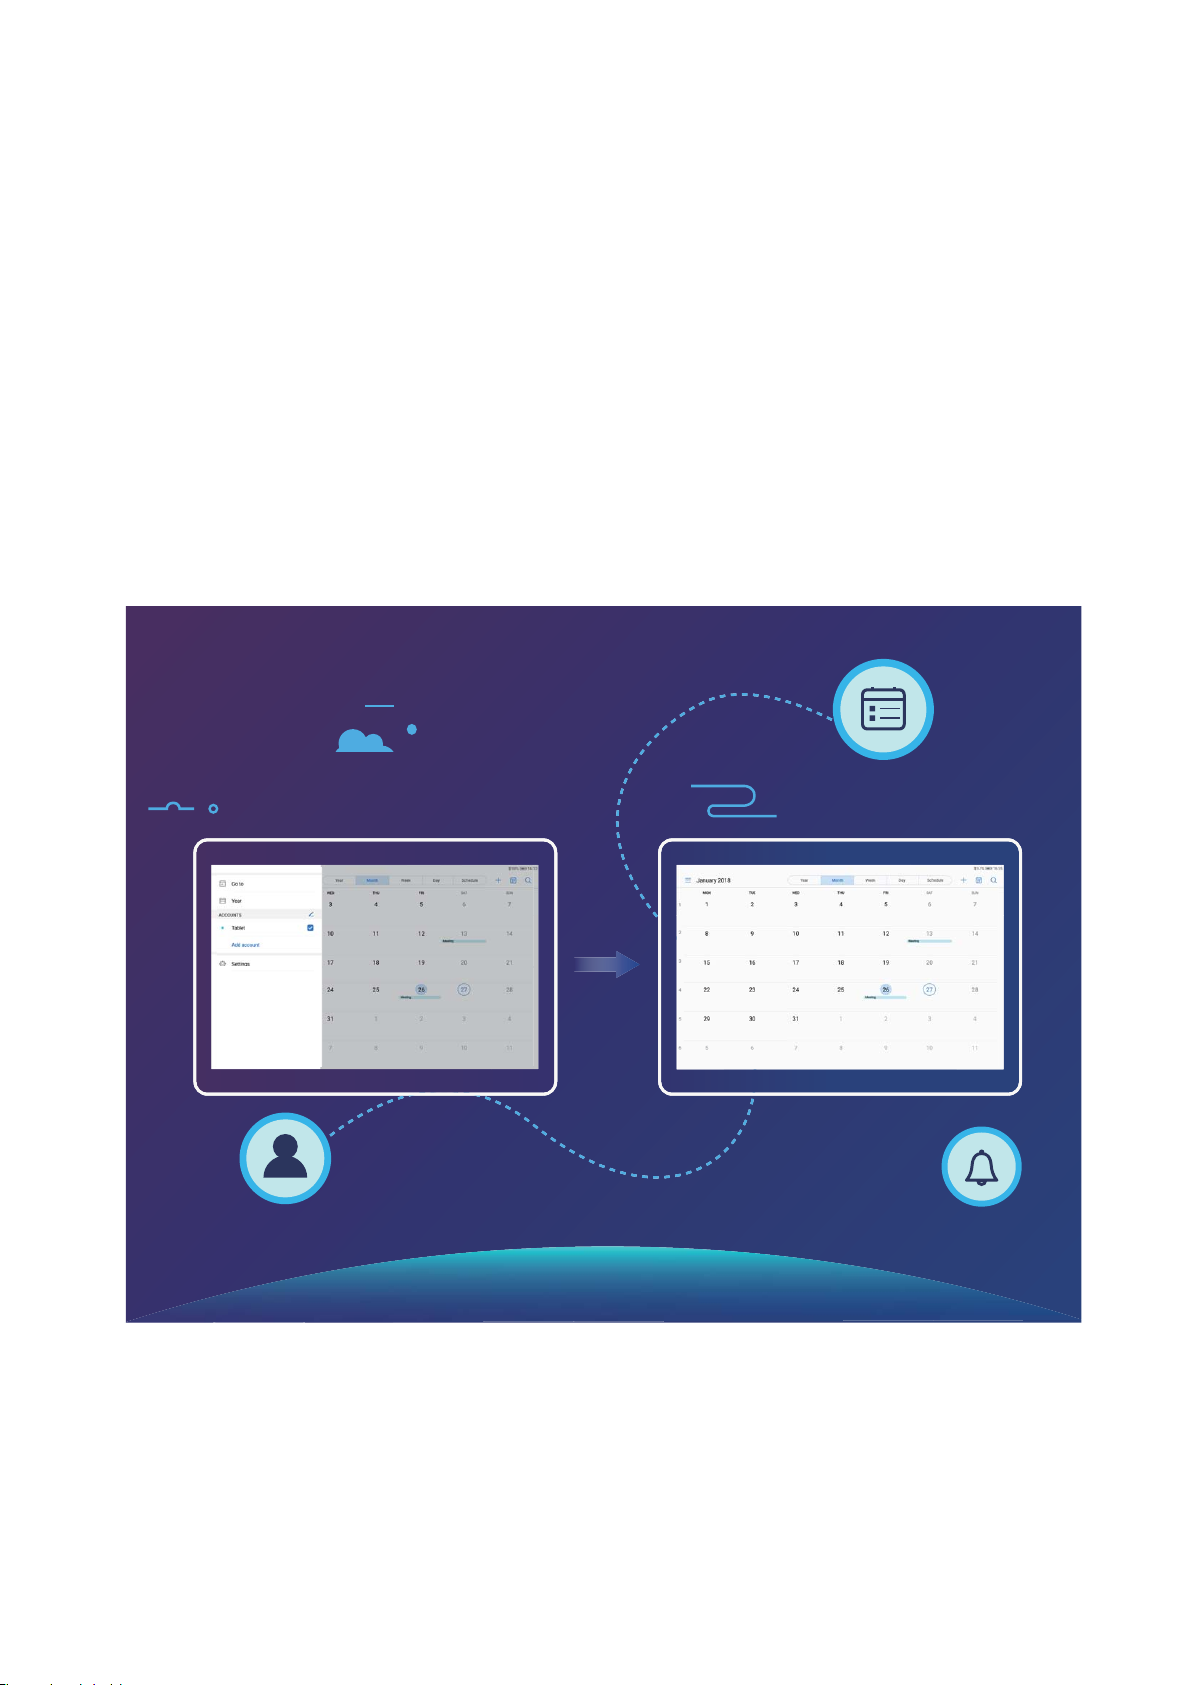
Calendar
Calendar: Your Event Management Centre
Too many events to keep track of? Calendar provides you with comprehensive event management,
making your professional and personal lives easier.
Calendar provides the following functions:
l Meeting reminders: Worried about missing an important work meeting? Add your work email
(Exchange account) in Calendar to check meeting reminders and receive a reminder from your Tablet
before the meeting begins.
l Share events: Want to share your schedule and invite your friends to an event? There are multiple
sharing methods to choose from.
Navigate the Calendar
62
Page 67
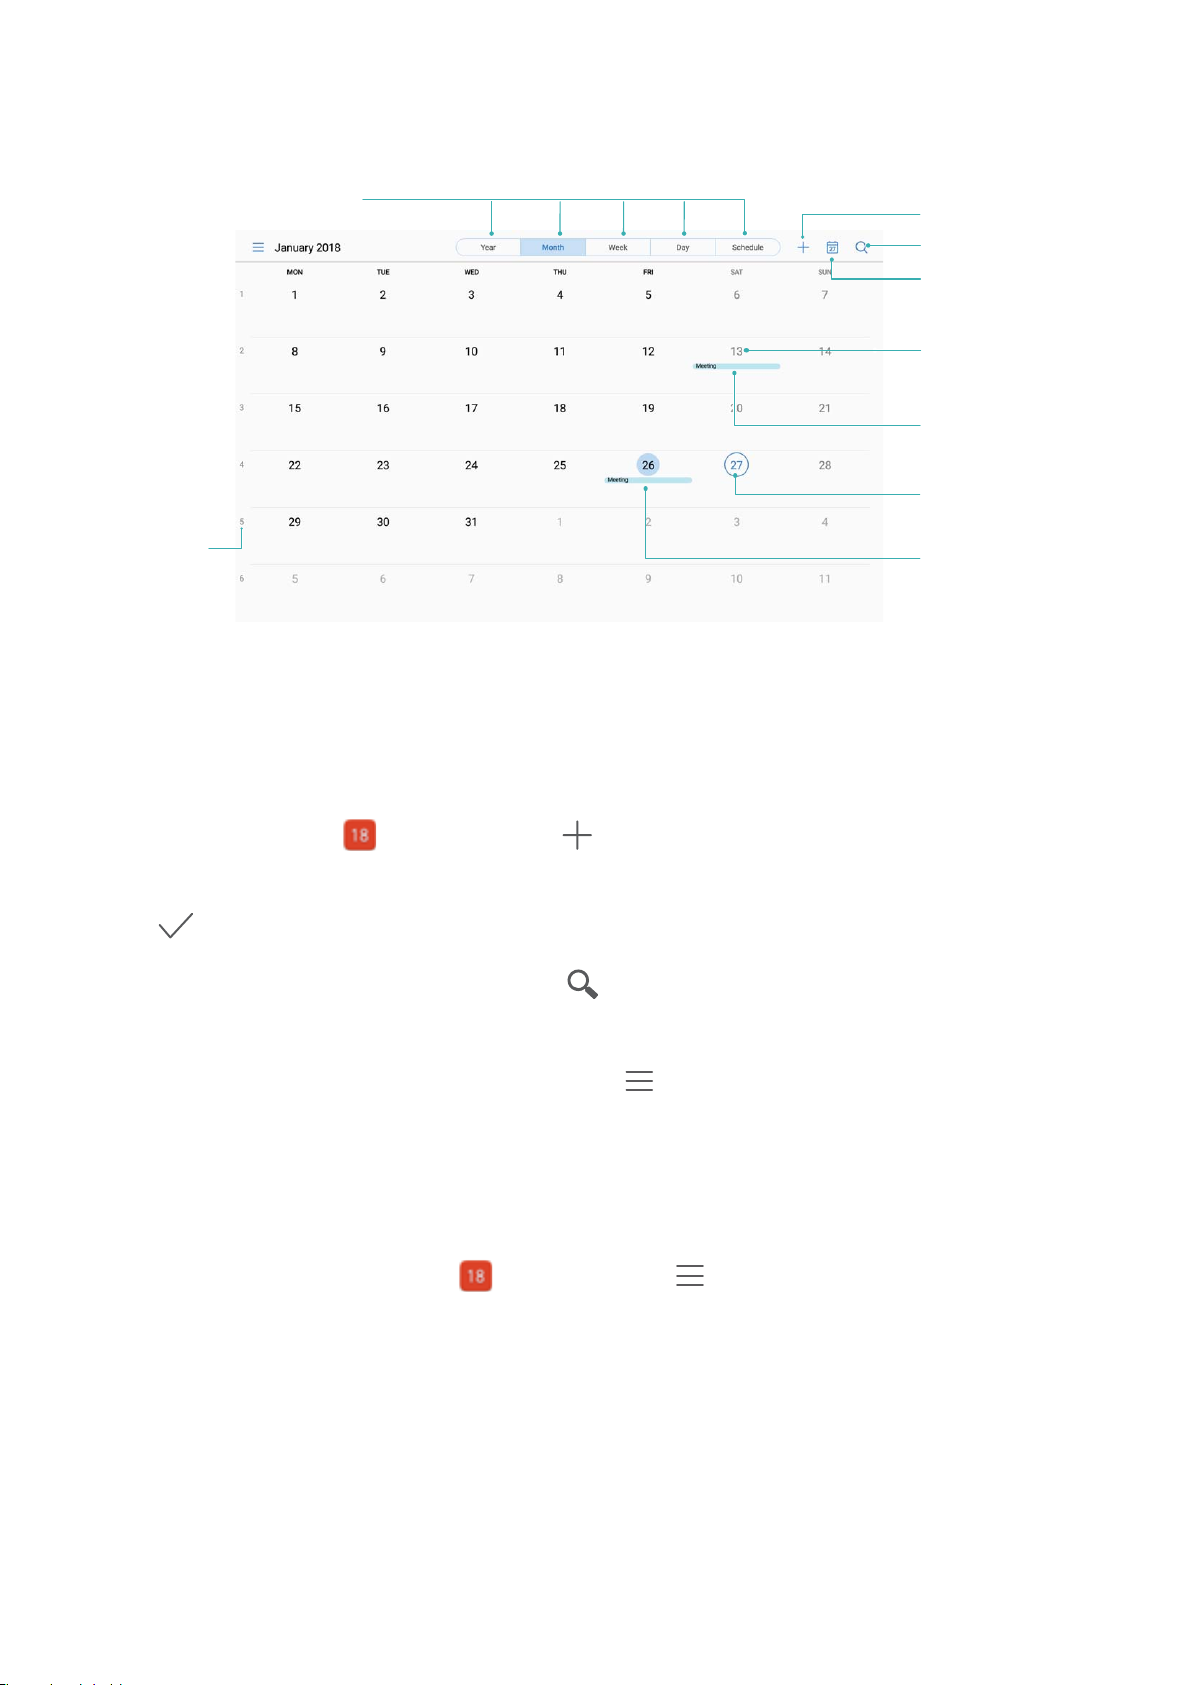
Go to today
Search events
Week
number
Today
Currently
displayed day
Events for
the day
Events for the
currently
displayed day
Switch between
month, week, day
and schedule view
Add new event
Calendar
Create an event: Open Calendar, touch , enter your event information including title,
location, and start and end times. Go to More > Remind to add a reminder for your event, then
touch .
Search events: On the Calendar page, touch
location.
Congure Calendar: On the Calendar page, go to > Settings to customise calendar display
and reminders.
Import To-Dos to Keep Your Work Organised
Import meeting reminders: Open
account > Add account, and follow the onscreen prompts to add your work email (Exchange
account) in Calendar to check meeting reminders.
and enter the event keywords, such as title or
Calendar, go to > Add account > Add and edit
63
Page 68
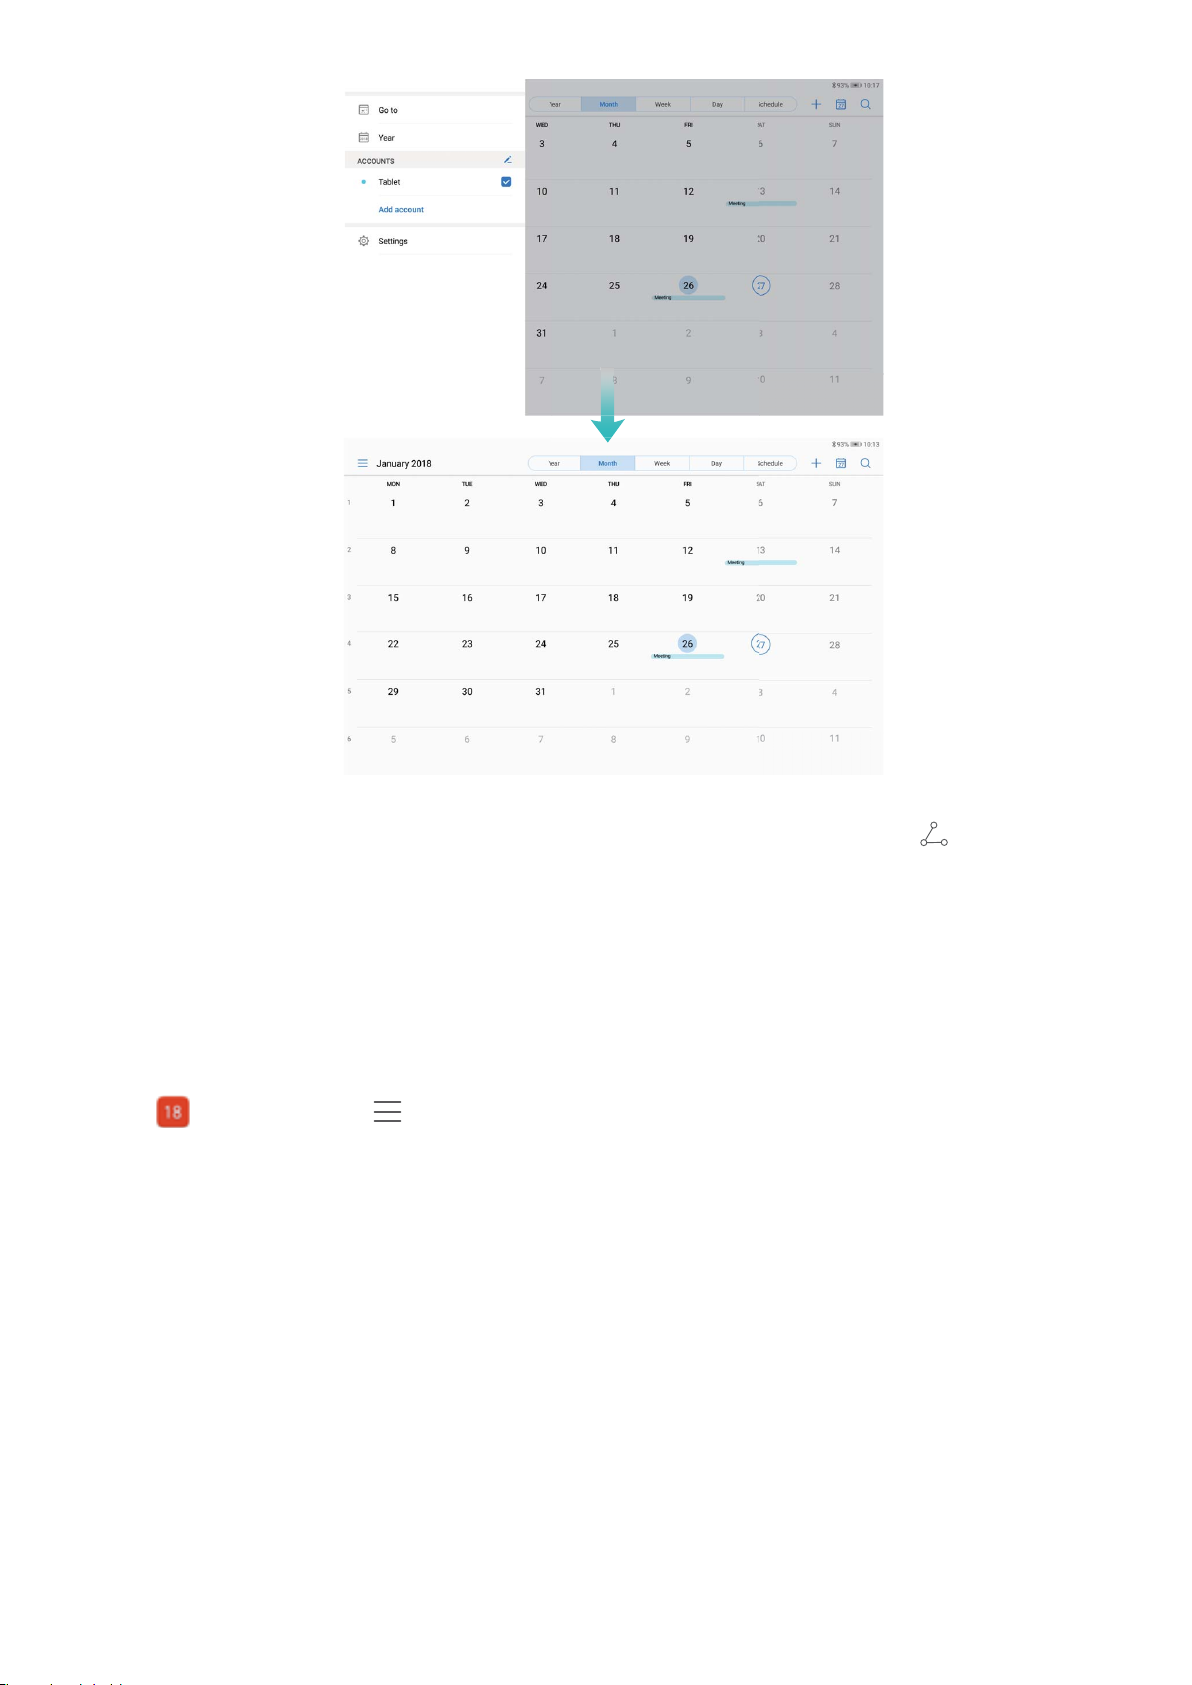
Calendar
Share an event: Touch an event on the calendar or under Schedule, then touch and follow the
onscreen prompts to share the event using any of the multiple methods.
View Global Holidays
Travelling overseas for work or holiday? Download your destination country's holiday information
ahead of time to better plan your work and schedule.
Open Calendar, go to > Settings > Global holidays, and enable the corresponding switch
for your destination country. Your device will automatically download the holiday information.
64
Page 69
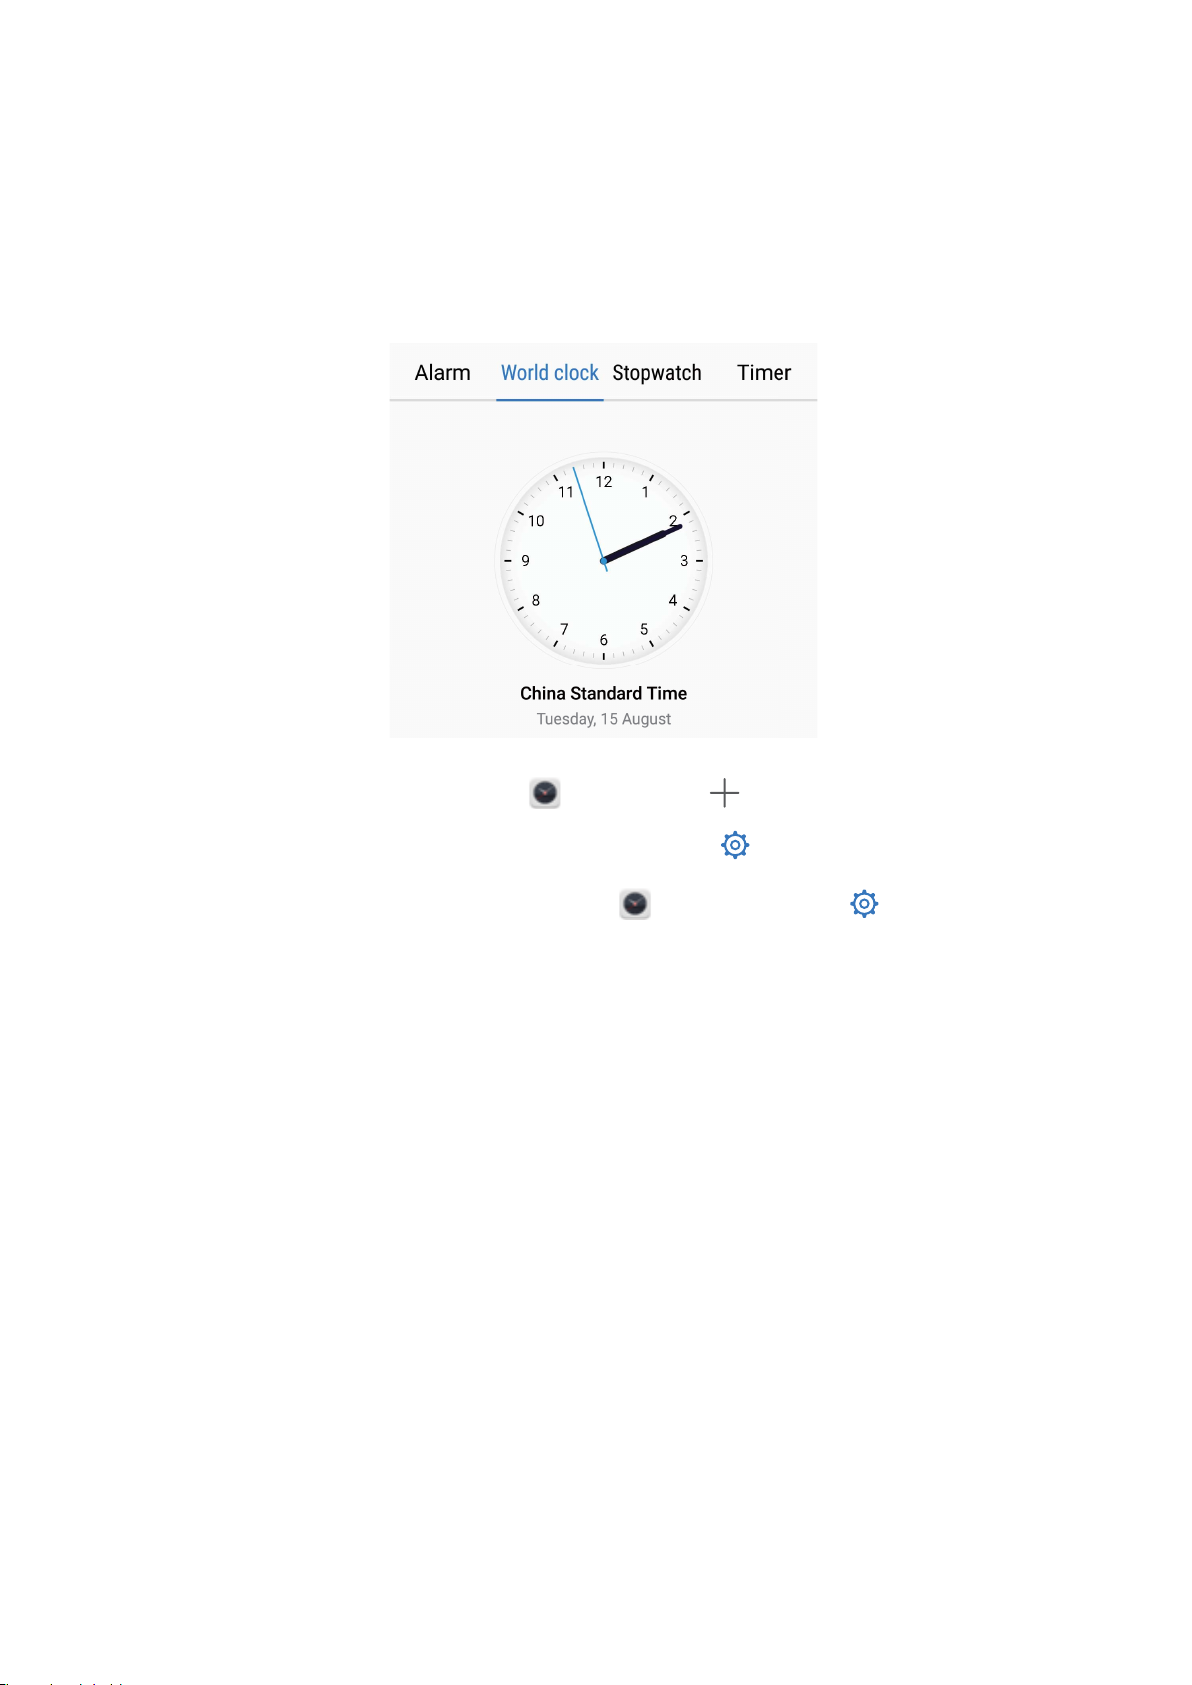
Clock
Use the Clock
With many powerful features and lots of information, the humble Clock has a lot to offer. The Clock
can be used as an alarm, a world clock, stopwatch, or a timer.
View the time all over the world: Go to Clock, touch on the World clock tab and enter
the name of a city or select a city from the list of cities. Touch to set the date and time.
Display the time in two different regions: Go to
World clock tab. Enable Dual clocks, touch Home city, and select your city of residence from the
city list.
Clock, then go to > Date & time in the
65
Page 70
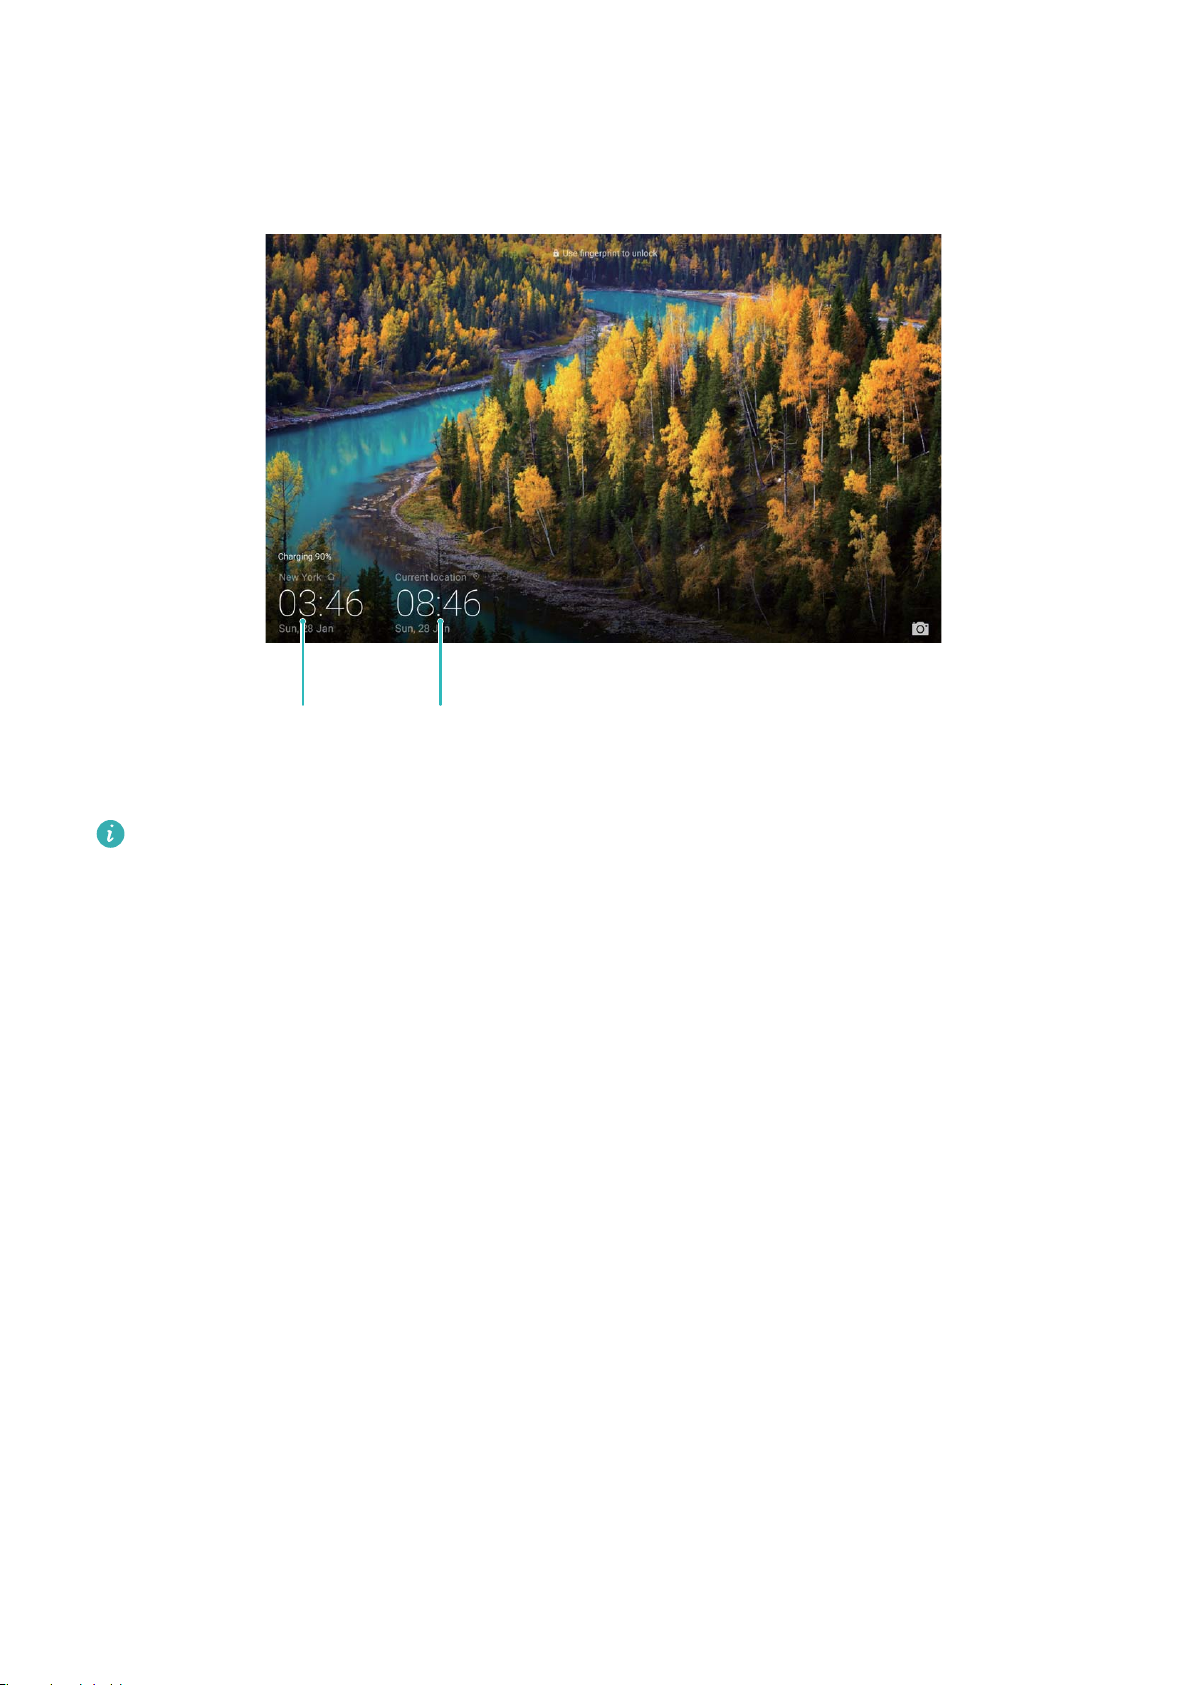
Network-provided date and time
Time and date in
your selected city
Clock
If the time in your current region is the same as that of your home city, the lock screen will only
display one time.
66
Page 71
Notepad
Manage Your Notes to Keep Your Records in Order
Want to share important notes or add something to favourites? Manage your notes to keep your
records in order.
Share a note: Want to send your meeting notes to your colleague? On the list page of Notepad,
open the note you want to share, then touch to select a sharing method and follow the onscreen
prompts.
Add a note to favourites: Want to add a note to favourites so you can refer to it later? On the list
page of Notepad, swipe left on a note and touch . Alternatively, open the note you want to add
to favourites and touch .
Delete a note: Want to delete an outdated note? On the list page of Notepad, swipe left on a note,
then touch
delete, and touch .
Search notes: Want to quickly nd a note? Touch the search bar on the list page of Notepad and
enter the keywords of your search. Alternatively, swipe down on the home screen to access the search
bar, and enter the keywords of your search.
Generate a to-do list: Want to create a shopping list? On the editing page of Notepad, touch ,
enter an item, and then touch . Add multiple items to generate a to-do list.
After completing an item, go to the editing page of Notepad, and select on the left of the
completed item.
Add tags to notes: Want to easily view the categories of your notes? On the editing page of
Notepad, touch , and use different coloured tags to categorise different content for a clearer
view of your notes.
. Alternatively, touch and hold a note to view options, select the note(s) you want to
67
Page 72
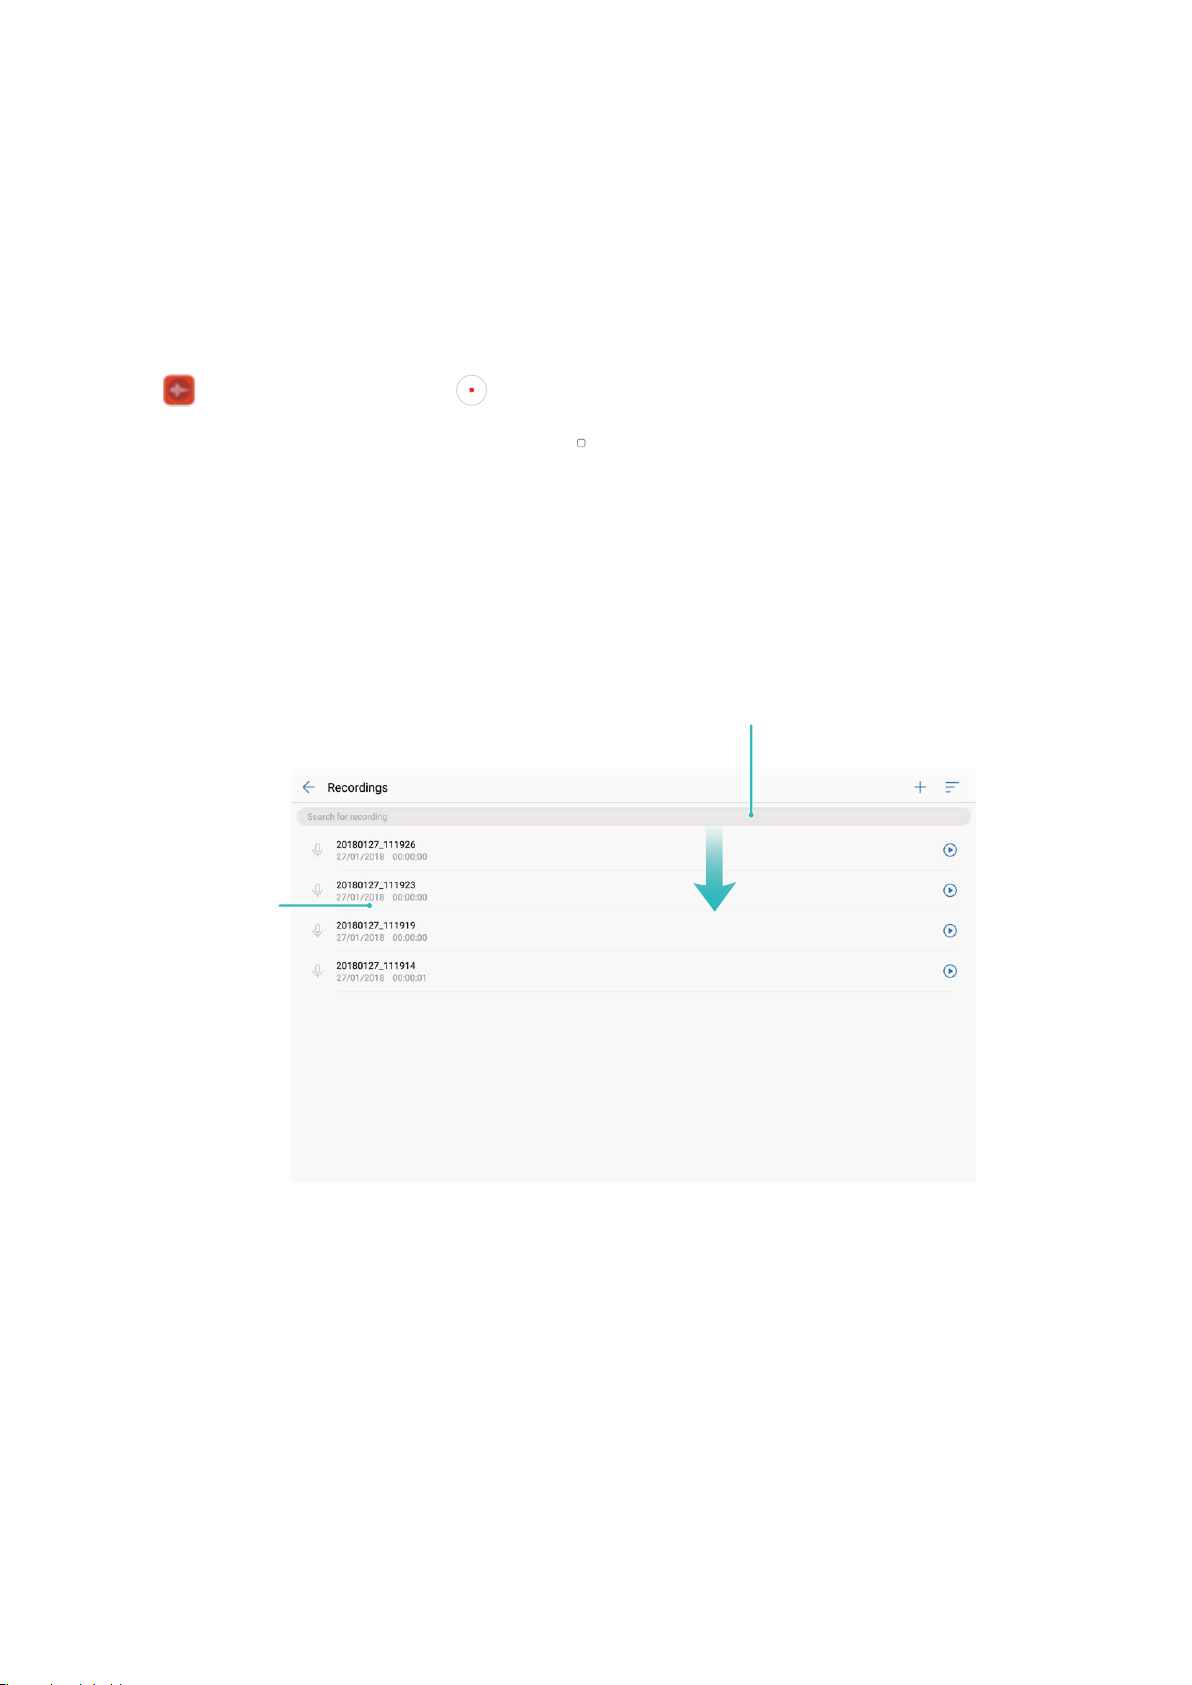
Utilities
Swipe down on the screen to display the search bar
Touch and hold
to manage the
recording
Use Recorder to Make Audio Notes
Not enough time to write down all the important details during a meeting? Need to sort out a pile of
notes from an interview or class? Recorder lets you record audio les that you can conveniently play
back later.
Enable Sound Recorder. Touch to begin recording. In the process of recording, you can add
tags at important points as you require. Touch to nish recording and save the audio le.
After the recording is completed, you can:
l Manage recordings: Touch Recordings to access options such as sorting and sharing recordings.
Tablet Clone
Data Transfer: Copy Data from an Existing Tablet to Your New Tablet
Want to quickly and conveniently export important les from an existing Tablet to your new Tablet?
Use Data transfer to move data seamlessly from an existing Tablet to your new Tablet.
Data transfer provides the following functions:
68
Page 73
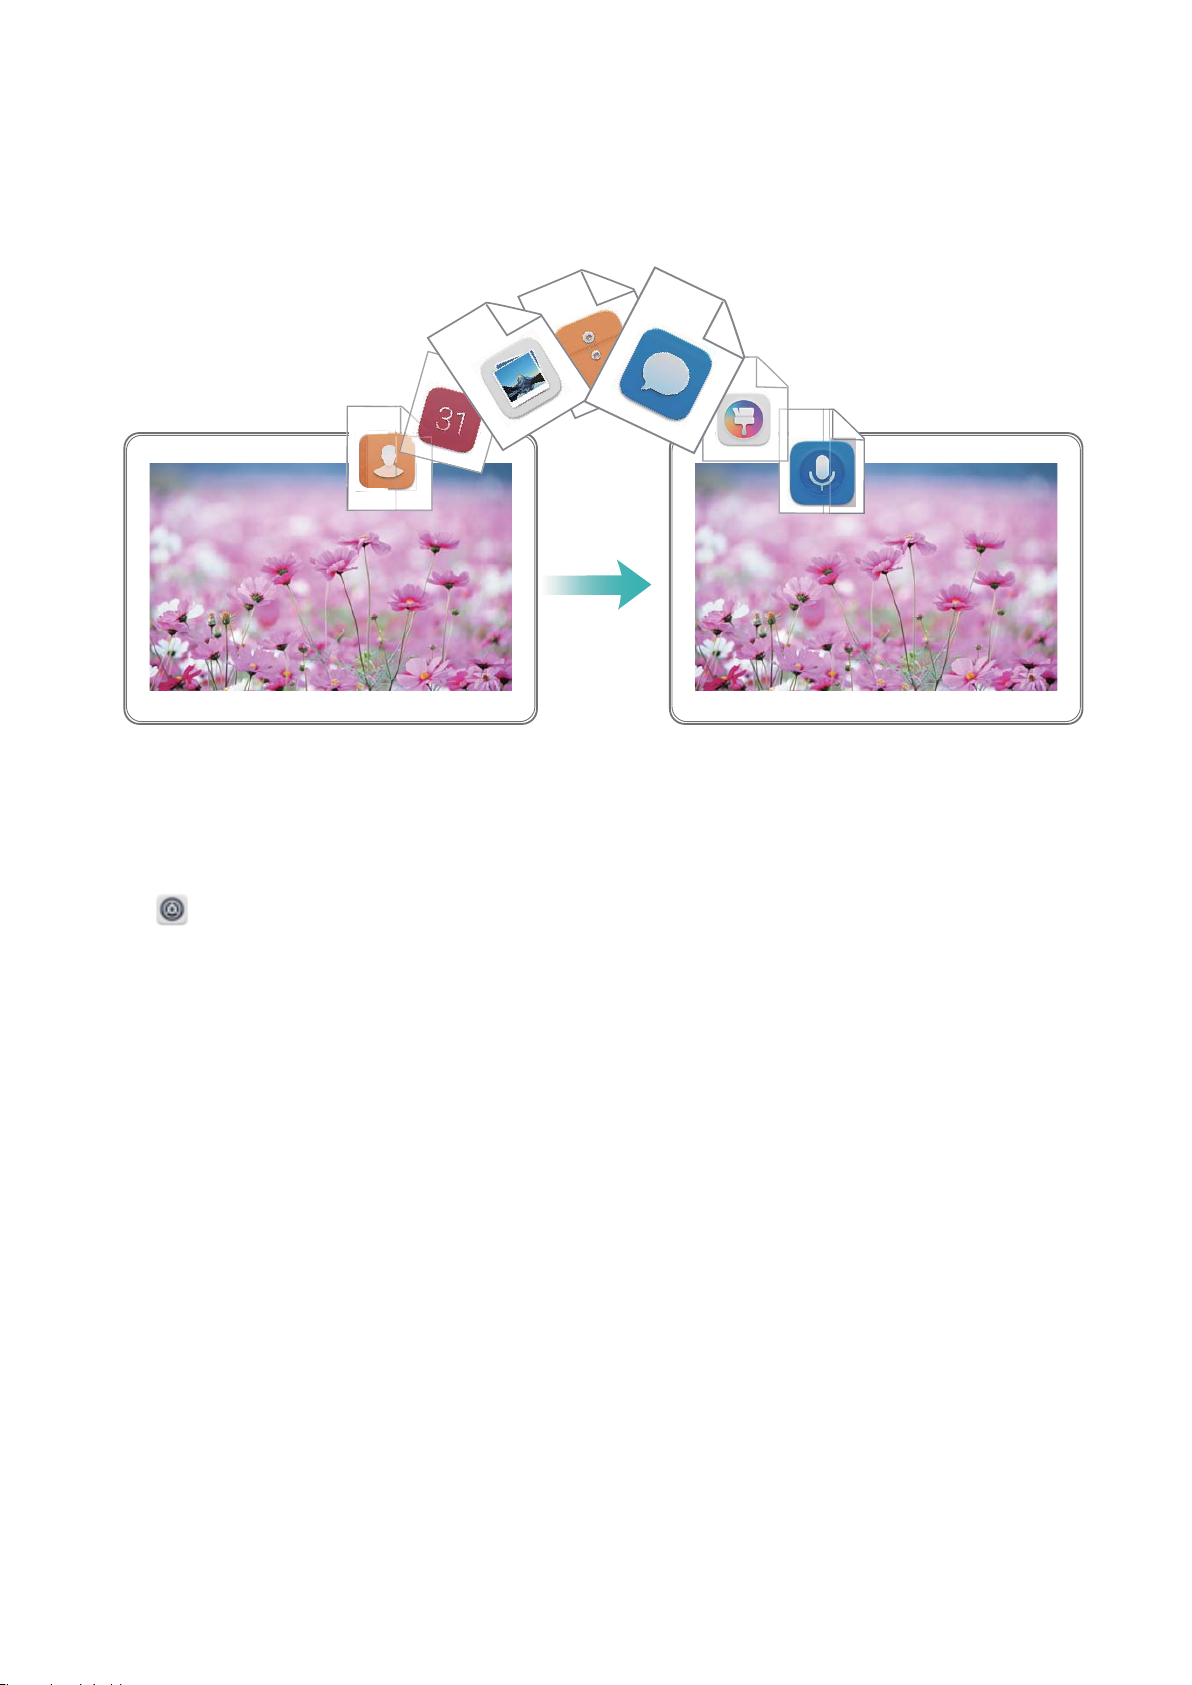
Utilities
l Import data from other Android devices: You can also conveniently import data from other non-
Huawei Android devices to your Tablet.
l Import data from iOS devices: You can use the Phone Clone app to import data to your Tablet
from iOS devices as well.
Import Data from Other Android Devices
Want to import data from a non-Huawei Android device to your new Tablet? You can use Phone
Clone to transfer data quickly without needing a data cable or using mobile data.
Open
onscreen instructions to install Phone Clone on your existing Android device. Open Phone Clone on
your existing device and follow the onscreen instructions to scan the QR code displayed on your new
Tablet. Alternatively, connect your existing device to your new Tablet's Wi-Fi hotspot to establish a
connection. After establishing a connection, select and transfer data from your existing Android
device to your new device.
Settings and go to System > Data transfer > Phone Clone > Android. Follow the
69
Page 74

Huawei ID and Multiple Users
Multiple Users
Multiple Users: Create Separate User Accounts on Your Tablet
Want to lend your Tablet to someone else but don't want them accessing your private les and
information? Add multiple users and user types to protect your information privacy when lending your
Tablet to others. Your settings and les will not be affected. You can also log in to your Tablet with
two user accounts, such as one for work and one for personal use, and quickly switch between them
with a single touch.
You can create three different types of users:
l Owner: The Tablet's owner. Log in as the owner when you are using your device. As the owner, you
have access to all actions, such as adding or deleting users and guests, and giving users permission
to make calls and send text messages.
l User: Add family members and close friends as users. Users can perform most actions but cannot
perform actions that will affect the owner, such as restoring the device to factory settings or
enabling Do not disturb mode.
l Guests: Add casual acquaintances as guests. Guests can only perform a limited number of actions.
Add Multiple Users to Your Device
Want to have more than one user account on your Tablet to keep your work and personal life
separate? You can add multiple users to your Tablet and switch between them with a single touch.
Open
l Add a user: Touch Add user, enter a name for the user and touch ADD. After you add a new user,
you can switch to the new user and follow the onscreen instructions to congure the user's account
settings.
l Delete a user: Log in with the owner account and open the Users screen. Select the user you want
to delete and touch Delete user > DELETE to delete the user.
Settings and go to Users & accounts > Users. From here you can:
A maximum of three users can be added.
Alternatively, swipe down from the status bar and touch > More settings. Select the user
you want to delete and touch Delete user > DELETE.
l Add or delete guests: From the Users screen, touch Add guest > ADD to add a new guest user.
To delete a guest user, from the same screen, go to Guest > Delete guest > DELETE.
l Switch to a different user: From the Users screen, touch the prole picture of the user you want
to switch to and then touch Switch user. Alternatively, swipe down on the status bar, touch
and then touch the prole picture of the user you want to switch to. If the owner has set a lock
screen password for the device, you will be prompted to enter the password when switching back
to the owner from another user.
70
Page 75

Huawei ID and Multiple Users
l Change a user account name or prole picture: From the Users screen, switch to the relevant
user and touch . Follow the onscreen instructions to change the user's name or prole picture.
l Allow a user to make calls and share call records: Log in with the owner account. From the
Users screen, select a user and then select Allow calls and messages and sharing of
communication history.
This feature is not supported on Wi-Fi only tablets.
71
Page 76
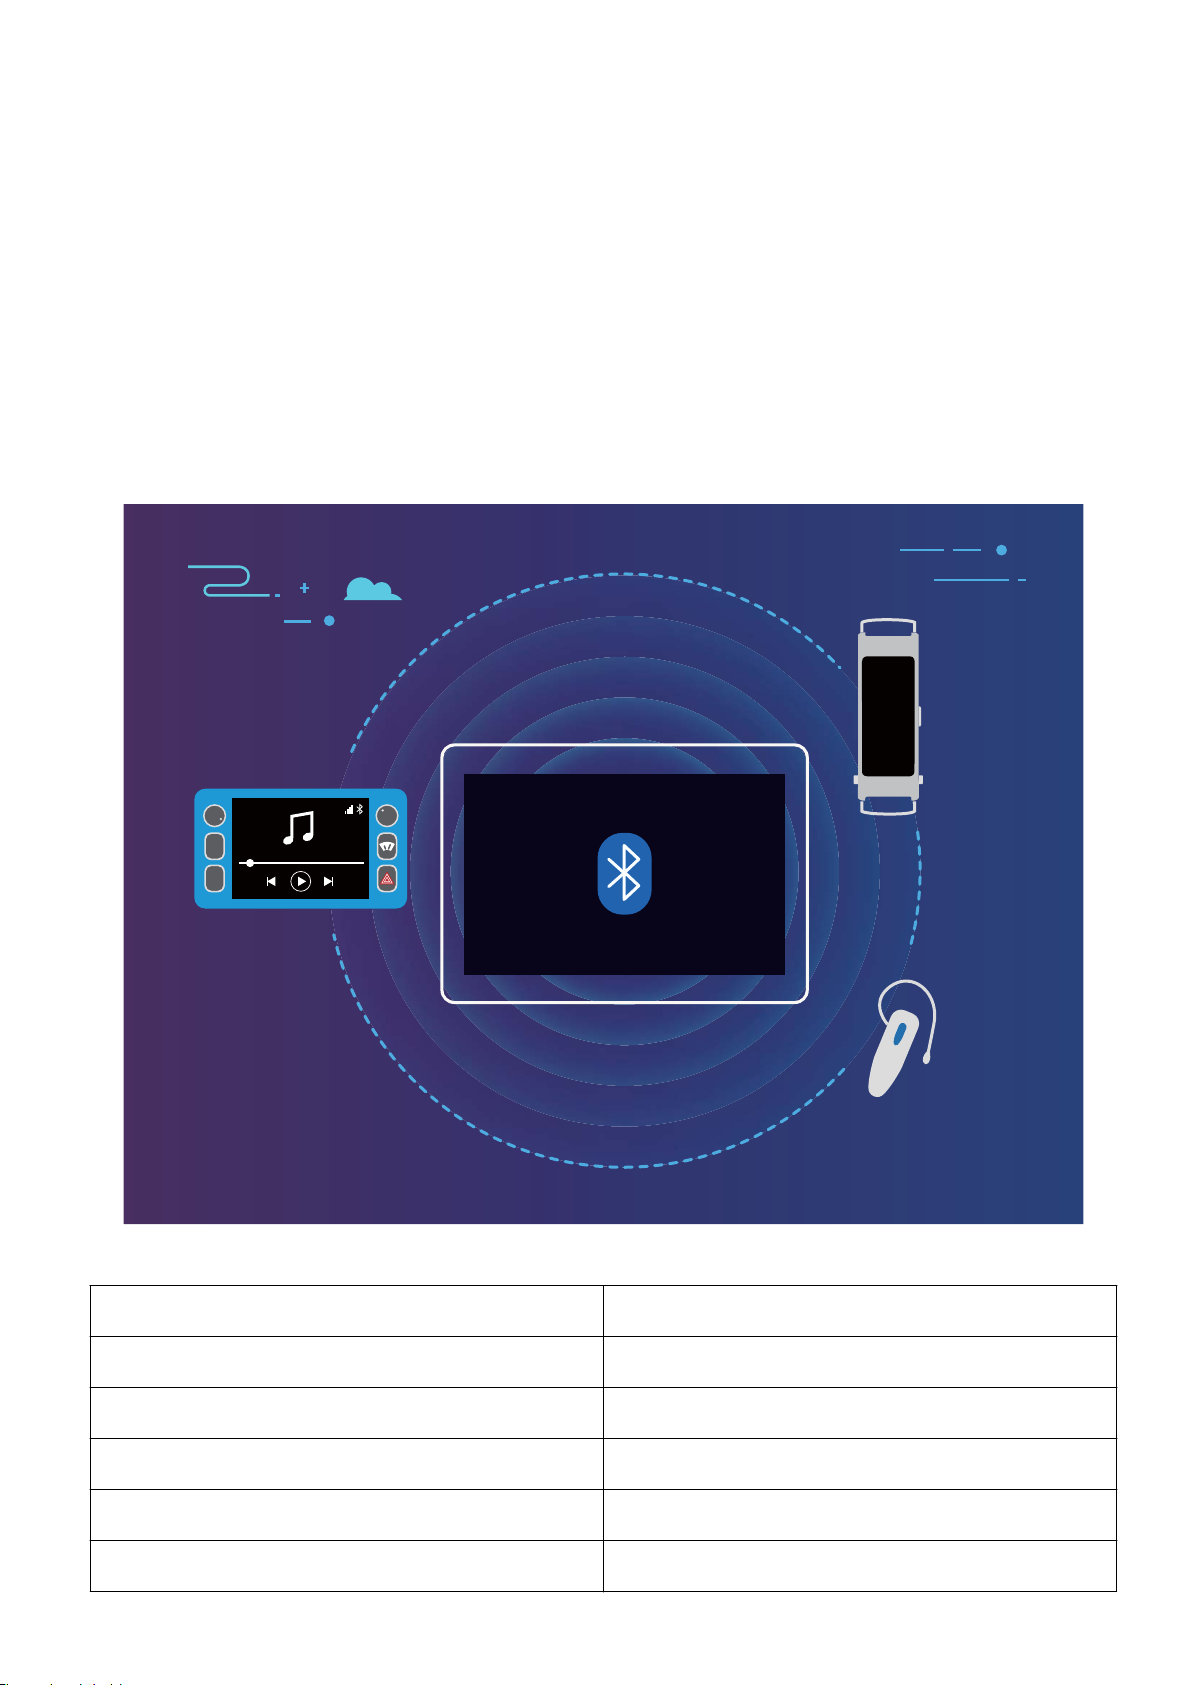
Device Connection
AM
FM
Bluetooth
Connect Your Tablet to Bluetooth Devices
Use Bluetooth to connect your Tablet to Bluetooth headsets and in-car Bluetooth to navigate or listen
to music while you drive. You can also connect your Tablet to Bluetooth wearables to record and
manage tness data. Connecting Bluetooth devices to your Tablet does not increase power
consumption signicantly.
Bluetooth protocols used by Huawei devices and their functions:
HFP, HSP
A2DP Play music
AVRCP Control music playback
OPP Transfer les
PBAP Sync contacts
MAP Sync text messages
Make calls
72
Page 77
Device Connection
HID Operate Bluetooth keyboards and mouses
PAN Tethering
BLE Connect to Bluetooth Low Energy (BLE) devices
Enable or disable Bluetooth: From the home screen, swipe down from the status bar, open the
shortcuts panel, and then touch to enable or disable Bluetooth. Touch and hold to open the
Bluetooth settings screen.
Pair a Bluetooth device: Enable Bluetooth from the Bluetooth device's settings screen. Check that
the Bluetooth device is set to visible. From Available devices, touch the device you want to pair and
then follow the onscreen instructions to complete pairing.
Unpair a Bluetooth device: Enable Bluetooth from the Bluetooth device's settings screen. Touch
next to the name of the paired device and then touch Unpair.
Change Bluetooth device name: From the Bluetooth settings screen, enable Bluetooth. Touch
Device name, enter a new name for the device, and then touch Save.
View Bluetooth help: From the Bluetooth settings screen, touch to view information on how to
establish Bluetooth connections with in-car systems, headsets, speakers, wearables, phones, tablets,
and computers.
Use Bluetooth to Share Data
Connect your Tablet to another device over Bluetooth to share data, import and export contacts, and
set up Internet tethering.
Use Bluetooth to send les: Ensure that your Tablet is within Bluetooth range of the other device
(10 m or 32 ft). You can then establish a Bluetooth connection and share multimedia les, web pages,
contacts, documents, and apps between the two devices. Open
you want to send, and then go to More > Share > Bluetooth. Follow the onscreen instructions to
enable Bluetooth. When the other device is detected (Bluetooth must be enabled and the device must
be visible), touch the name of the device to establish a connection and start sending les.
Files, touch and hold the le that
Receive les over Bluetooth: From the home screen, swipe down from the status bar, open the
shortcuts panel, and then touch to enable Bluetooth. Touch Accept on the le transfer
notication to begin receiving the les. Received les are saved to the bluetooth folder in Files by
default.
Import or export contacts over Bluetooth: Open Contacts and go to > Import/Export
to perform the following:
l Import contacts: Touch Import from another phone and select Supports Bluetooth. Follow the
onscreen instructions to establish a Bluetooth connection with the other device. Contacts from the
other device will then be imported to your Tablet automatically.
73
Page 78
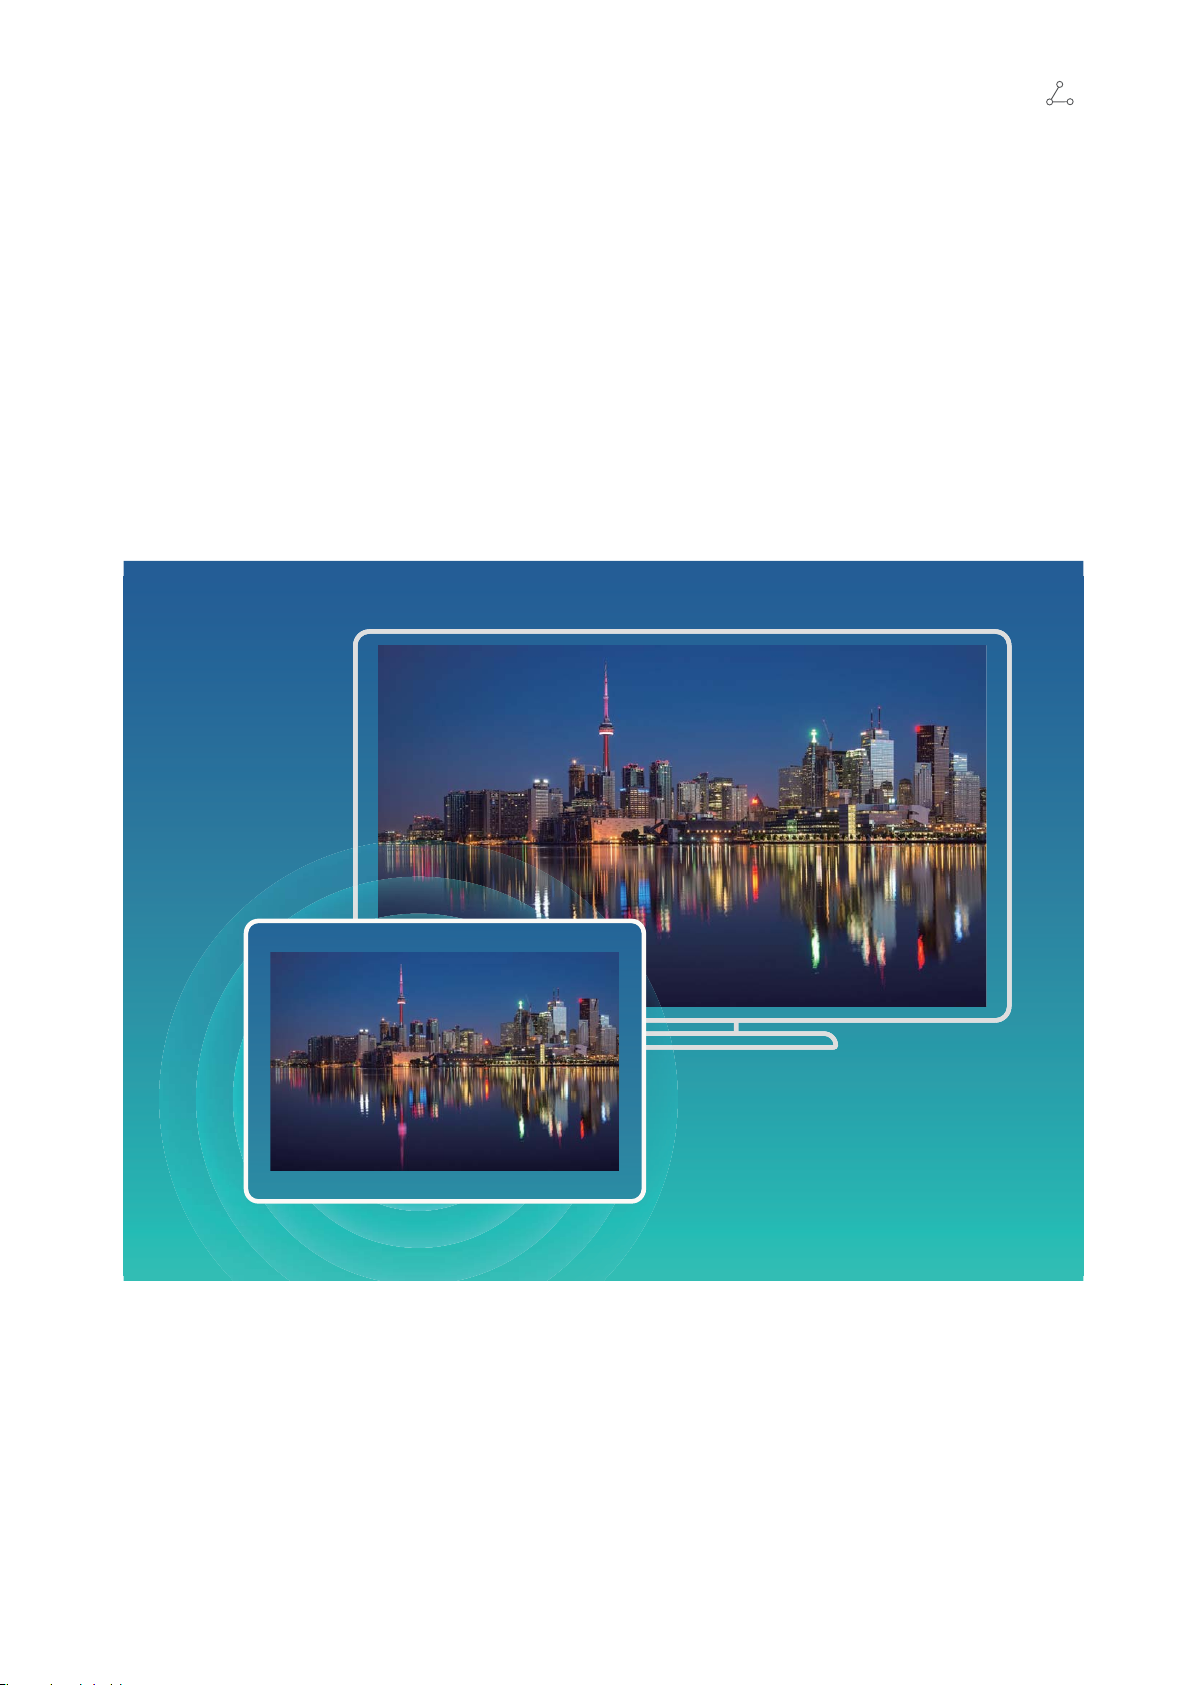
Device Connection
l Export contacts: Touch Share contacts, select the contacts that you want to share, touch
and select Bluetooth. Follow the onscreen instructions to establish a Bluetooth connection with the
other device. Those contacts selected will be exported from your Tablet to the other device
automatically.
Multi-screen Display
Multi-screen: Share Your Device's Content on a Larger Screen
Connect your Tablet and your TV/streaming box to the same Wi-Fi network to use multi-screen
sharing. When you look at pictures, you can display them on your TV and share happy memories with
your friends and family.
74
Page 79

Device Connection
Protocol
Type
Miracast
Protocol
Connection
Instructions
Mirror what is shown
on your device's
screen on a separate
device that supports
Miracast (like a TV,
projector, or other
Connection
Methods
Directly connect over
Wi-Fi and turn on the
screen sharing
function (like
Miracast) on the
external device.
Image Sharing Method
Everything displayed on your device will be
shared to the display on the external device.
When playing music and videos, only the
image will be shown on your device; no
audio will play.
display).
Multi-screen: Mirror Your Screen
Select a display device: Swipe down from the status bar and open the shortcuts panel. Touch
to open multi-screen. After a display device is discovered, choose one of the supported connection
methods, as indicated by the icons ( ). If your display device does not support the above
connection methods, you can buy an Android set-top box and connect it to your display device.
: Miracast is supported. You can mirror your screen to the display device.
Mirror the screen to a display device: Swipe down from the status bar and open the shortcuts
panel. Touch
to open multi-screen. Select the display device you want to use from the list. Enable
the Miracast feature on the display device if necessary. See the device manual for instructions.
To stop mirroring your screen, touch > Disconnect.
Connecting USB Device
Transfer Data Between Your Tablet and Computer
Use a USB cable to connect your Tablet to your computer and transfer data.
Select USB connection mode
Swipe down from the status bar to open the notication panel, and then touch Charging via USB to
select a USB connection method.
l Charge only: Use the USB connection only to charge your Tablet.
l Transfer les: Transfer les between your Tablet and computer.
l Transfer photos: Transfer pictures between your Tablet and a computer. If your computer does not
support MTP, you can use PTP to transfer
l Reverse charging: Connect your Tablet to another device with a USB Type-C cable to charge the
les and pictures between your Tablet and computer.
other device.
l MIDI: Use your Tablet as a MIDI input device and play music on your computer.
Connect your Tablet to your computer using a USB cable to transfer data and perform other tasks.
75
Page 80

Device Connection
l Send les: MTP (Media Transfer Protocol) is a protocol that allows you to transfer media les. You
can use it to transfer les between your Tablet and computer. Before using MTP, please install
Windows Media Player 11 or later on your computer.
Swipe down from the status bar to open the notication panel, and then set your USB connection
method to Transfer les. Your computer will then install the necessary drivers. On your computer,
open the drive that is named after your Tablet's model to browse les stored on your Tablet. You
can also browse multimedia content on your Tablet using Windows Media Player.
l Transfer images: PTP (Picture Transfer Protocol) is a protocol that allows you to transfer images.
You can use it to transfer images between your Tablet and computer more conveniently. Swipe
down from the status bar to open the notication panel, and then set your USB connection method
to Transfer photos. Your computer will then install the necessary drivers. On your computer, open
the drive that is named after your Tablet's model to browse images stored on your Tablet.
l Transfer MIDI data to your Tablet: MIDI (Musical Instrument Digital Interface) is an industry
standard audio format for composers and electronic instrument manufacturers.
Swipe down from the status bar to open the notication panel, and then set your USB connection
method to MIDI. You will now be able to transfer MIDI data between your Tablet and other devices.
Transfer Data Between Your Tablet and a USB Device
USB OTG (USB On-The-Go) lets you transfer data directly between your Tablet and other devices (such
as phones, tablets, cameras, and printers) without requiring a computer. You can also use an USB OTG
cable to connect your Tablet directly to a USB storage device and transfer les.
Transfer data between your Tablet and a USB storage device
You can use an OTG cable to access USB storage devices (including USB drives and card readers)
directly from your Tablet.
l This feature is only available on Tablets with USB OTG support.
l If your Tablet has a USB Type-C port, you will need to buy a
Huawei-certied Micro USB to USB
Type-C adapter or a USB OTG cable with a USB Type-C connector.
1 Connect the USB drive to your Tablet using a USB OTG cable.
76
Page 81
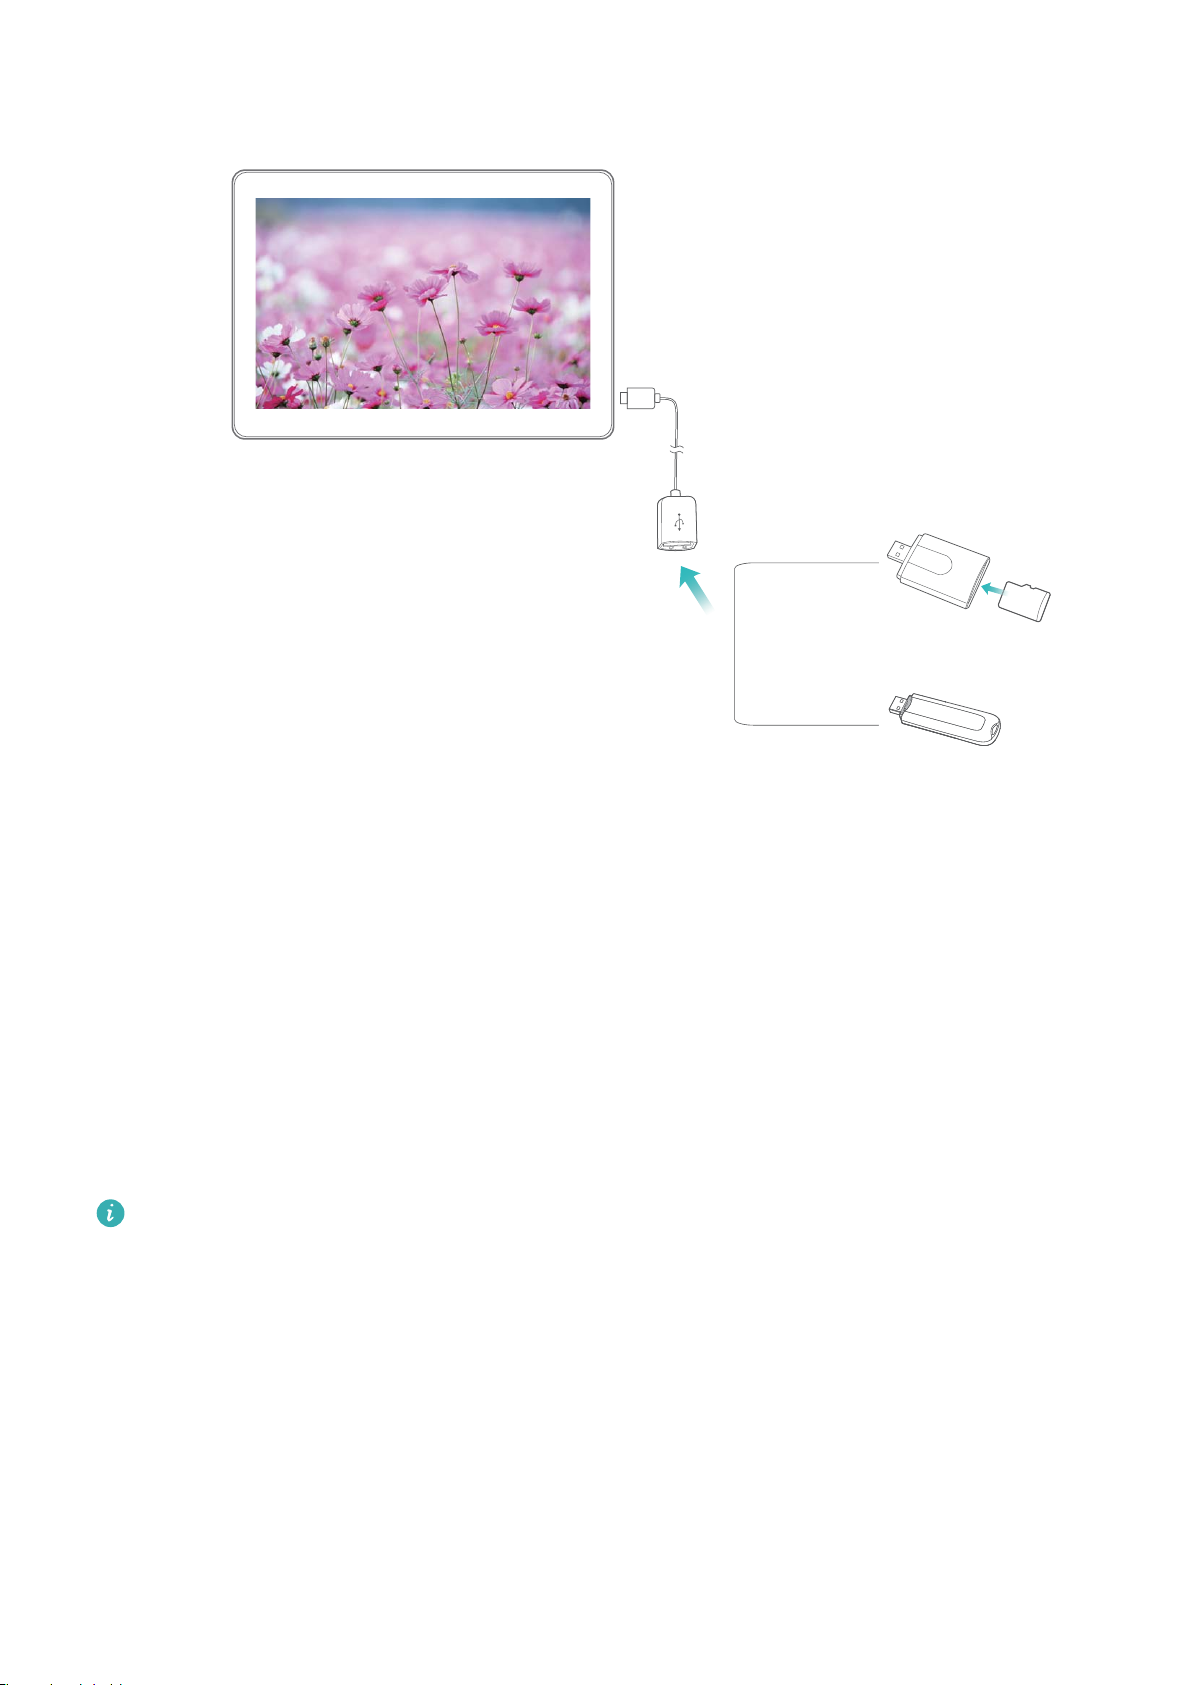
USB OTG cable
Device Connection
2 Go to Files > Local > USB drive, navigate to the USB drive, select the data that you want to copy,
and then copy it to the target folder.
3 Once the transfer is complete, go to Settings > Storage > USB drive > Eject.
4 Disconnect the USB OTG cable and USB cable from the two devices.
Transfer Files Using Huawei Share
You can use Huawei Share to quickly transfer photos, videos and other
Huawei Share uses Bluetooth to detect nearby Huawei devices and Wi-Fi to quickly transfer les
without using mobile data.
Huawei Share uses Wi-Fi and Bluetooth to transfer data. When Huawei Share is enabled, Wi-Fi
and Bluetooth are automatically enabled.
les between Huawei devices.
77
Page 82
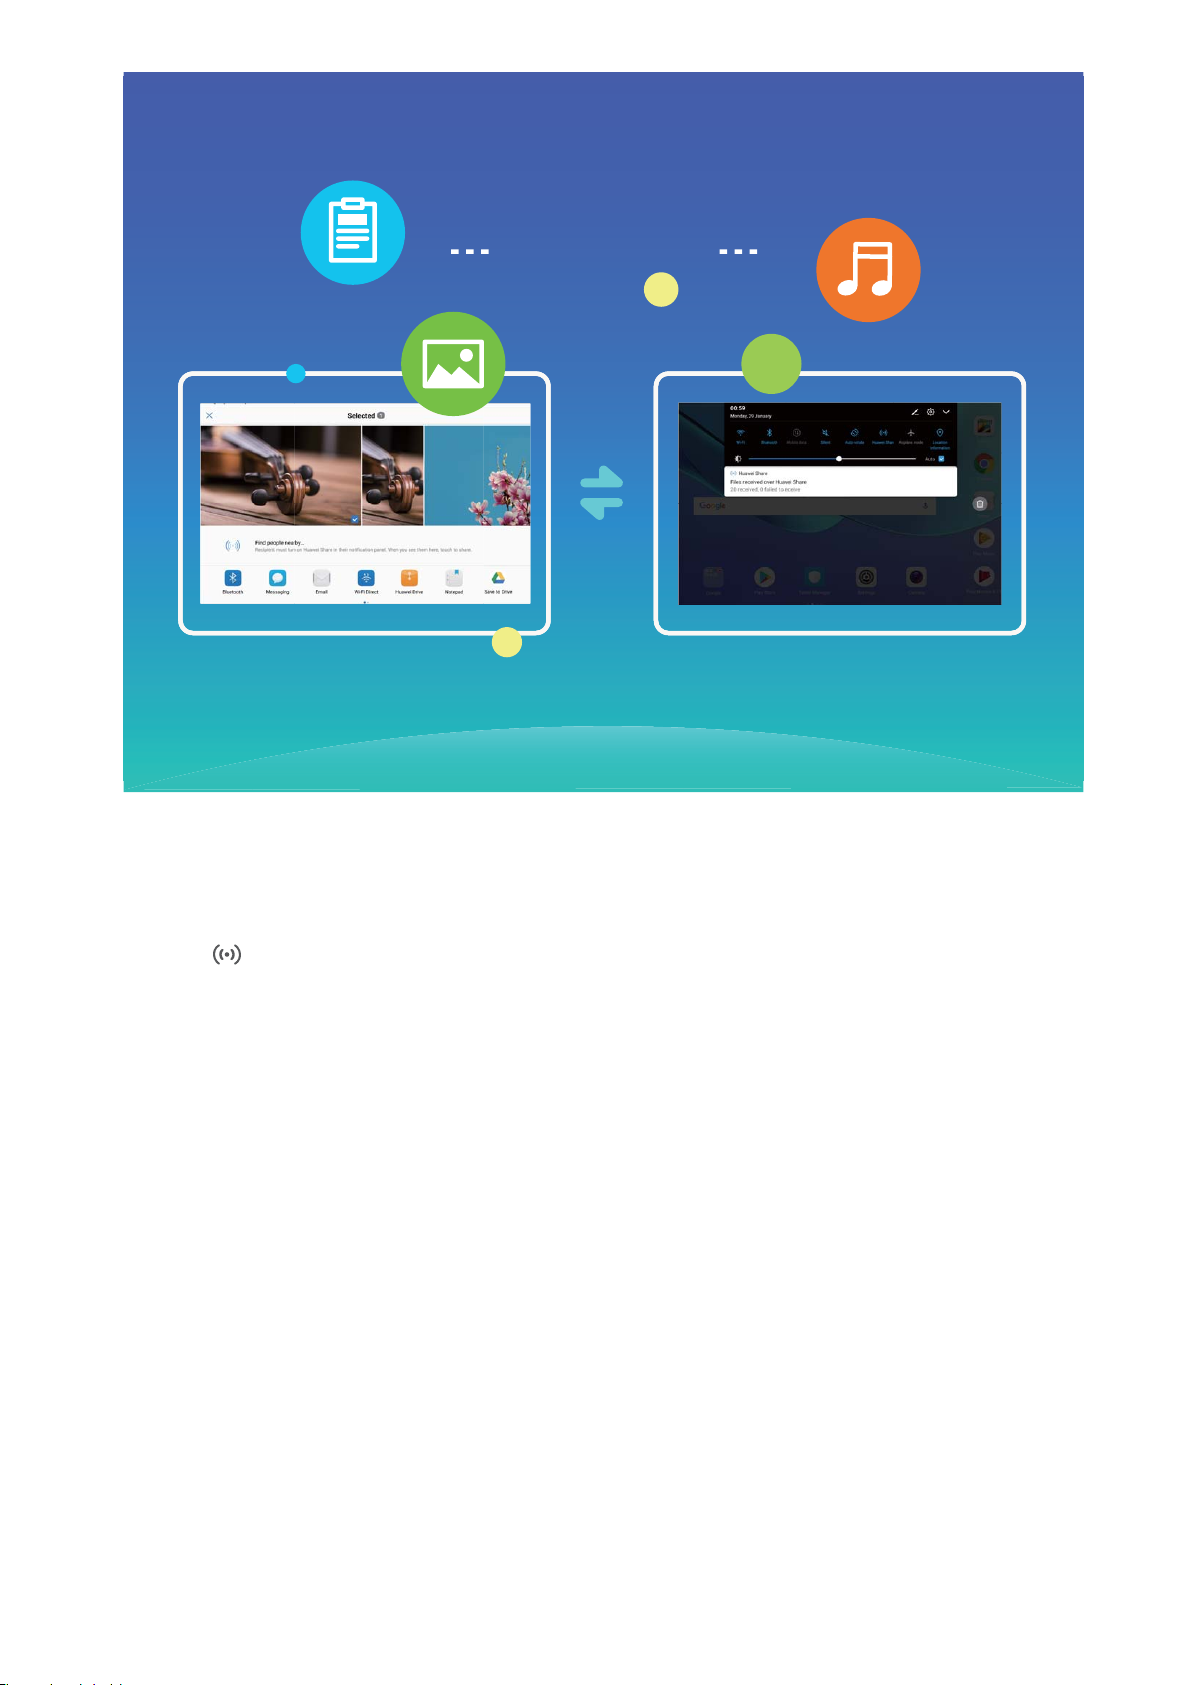
Huawei Share
Device Connection
Use Huawei Share to send les: Select the le you want to share and touch Share. Select the
receiving device from the list of nearby devices to send the le.
Use Huawei Share to receive les: Swipe down from the status bar, open the shortcuts panel, and
then touch to enable Huawei Share. Touch Accept when a le transfer notication is displayed.
Received les are saved to the Huawei Share folder in Files by default.
78
Page 83
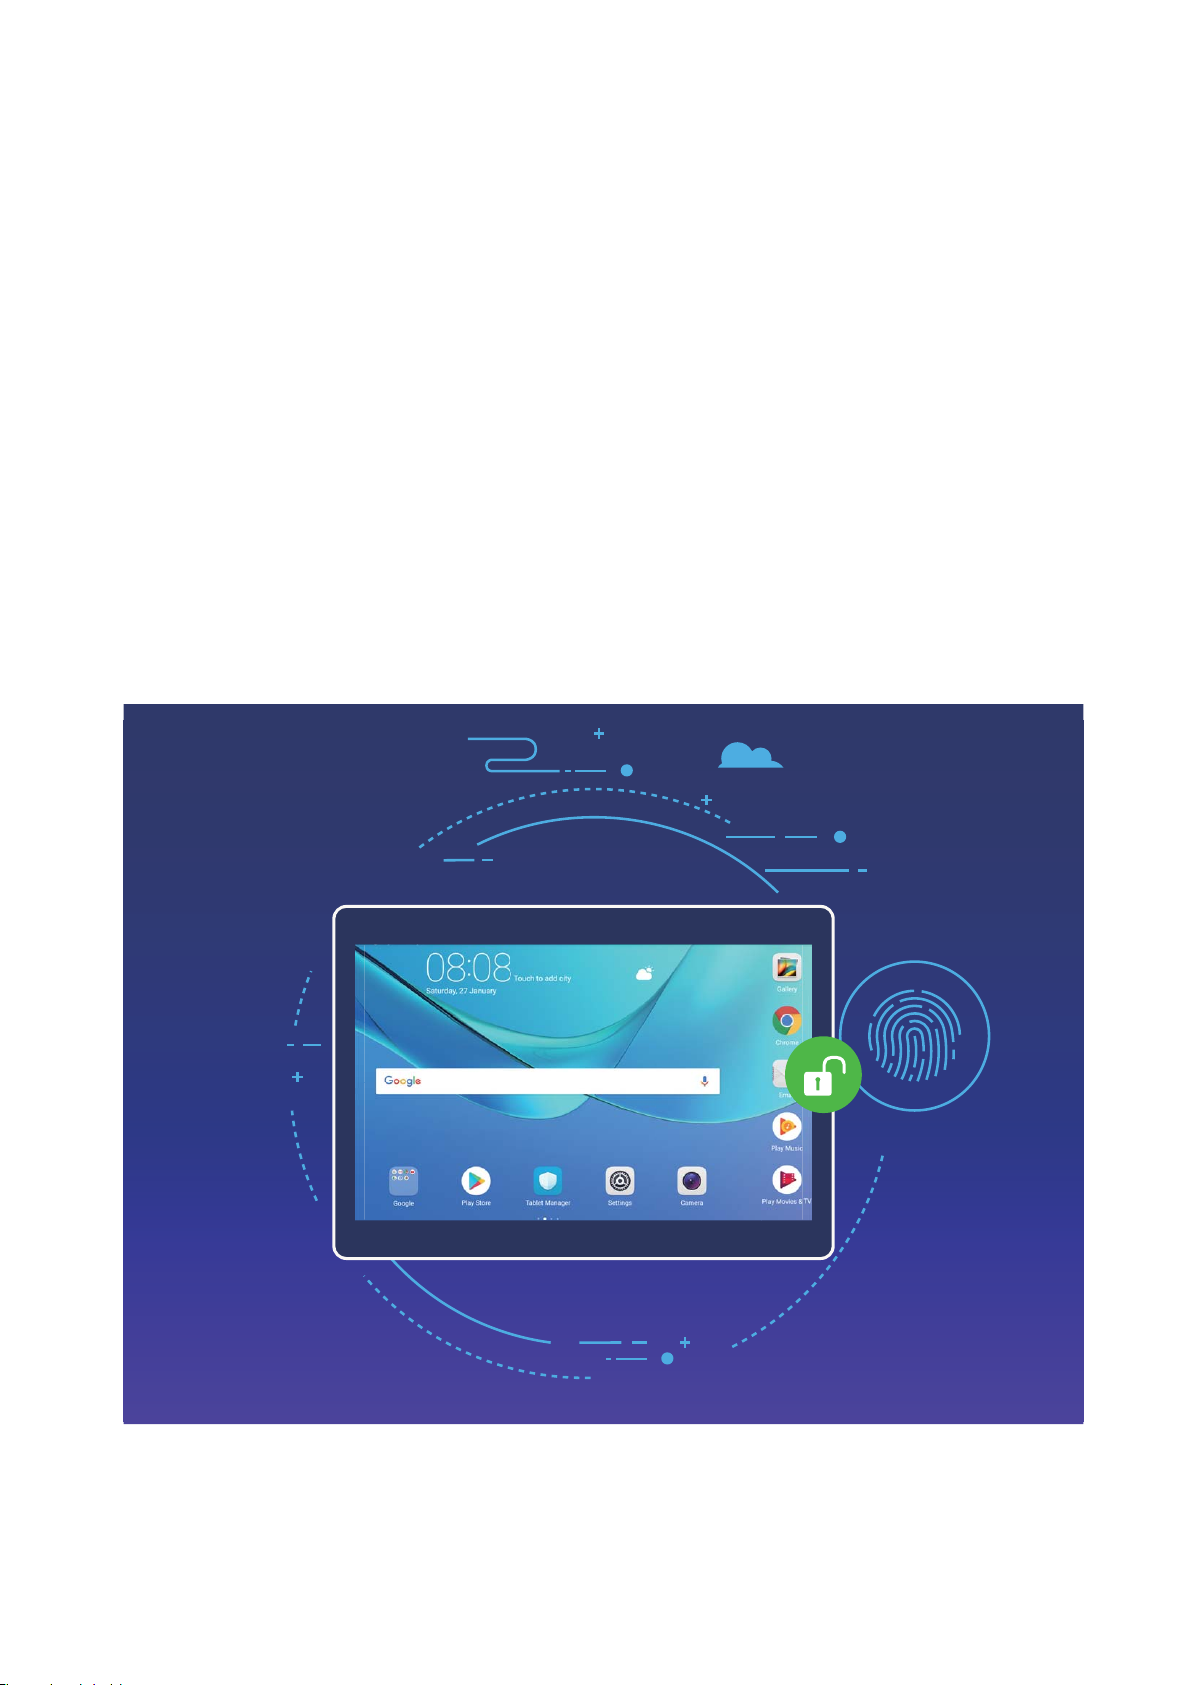
Security and Privacy
Fingerprint
Fingerprint Recognition: Enjoy Faster Navigation and Enhanced Security
Fingerprint recognition not only allows you to unlock your Tablet faster, it also provides added security
to your personal information.
Your ngerprint can be used to:
l Unlock your screen with a single touch: Want to avoid the hassle of using PIN codes and
patterns to unlock your screen? Use your ngerprint to quickly and securely unlock your screen with
a single touch.
l Access your private les: Afraid of forgetting your password for the Safe or App Lock, or having it
fall into the hands of someone you don't trust? Set ngerprint access for the Safe and App Lock to
keep your les and apps secure and accessible by only you.
Enrol a Fingerprint
You can enrol a ngerprint on your Tablet and then use your ngerprint to unlock your screen or
access your Safe or App Lock without a password.
79
Page 84

Security and Privacy
l Fingerprint unlocking is only available when your Tablet's unlock method is set to Pattern,
PIN, or Password. You will be required to unlock your Tablet using the lock screen password
after the device is restarted or if your ngerprint is not recognized.
l Before enrolling a ngerprint, make sure your nger is clean and dry.
1 Open Settings.
2
Go to Security & privacy > Fingerprint ID, select Pattern, PIN, or Password, and then follow
the onscreen instructions to set an unlock password.
3 Once you have set an unlock password, touch New ngerprint to enrol a ngerprint.
4 Place your ngertip on the ngerprint sensor. Press down lightly on the sensor until your device
vibrates. Repeat this step using different parts of your ngertip.
5 After enrolment is complete, touch OK.
To unlock the screen, simply place your
ngertip on the ngerprint sensor.
Add, Delete, or Rename a Fingerprint
You can enrol a maximum of ve ngerprints on your device. You can also delete or rename your
ngerprints.
1 Open Settings.
2 Go to Security & privacy > Fingerprint ID.
3 Enter the lock screen password and touch Next.
4 In the Fingerprint list section, you can:
l Touch New ngerprint to enrol a new ngerprint.
l Touch a previously enrolled ngerprint to rename or delete it.
l Touch Fingerprint recognition to identify and highlight enrolled ngerprints.
Use a Fingerprint to Quickly Access Private Information
Tired of having to enter a password each time you want to access private information in your Safe or
a locked app? You can use your
ngerprint to quickly and securely access your private information.
1 Open Settings.
2 Go to Security & privacy > Fingerprint ID.
3 Enter the lock screen password and touch Next. Touch Access safe, Access app lock, and then
follow the onscreen instructions to enter the passwords. Now you can:
l Use a ngerprint to access the Safe: Open Files and touch Safe, you can then access
the Safe using your ngerprint.
l Use a ngerprint to access apps locked by App lock: You can now open locked apps on
your home screen using your ngerprint.
80
Page 85

Security and Privacy
Location Information Protection
Location Services: Determine the Location of Your Tablet
Location Services collects and provides location information for location-based apps (such as weather,
maps, travel, and shopping apps) on your Tablet. The approximate location of your Tablet is
determined by GPS positioning (if GPS is enabled and the service is available), mobile network data,
and Wi-Fi positioning (if enabled). If GPS positioning is disabled, apps can still collect location
information in other ways.
Enable or Disable Location Services
After obtaining the location information permission, apps can obtain your location at any time. If your
location information is obtained by a malicious app, you may be at risk of harm or fraud. You can
enable or disable location services as needed and regularly monitor and manage the allowed
permissions for your apps to protect your privacy and security.
Enable or disable location services: Open Settings, go to Security & privacy > Location
services, and enable or disable Access to my location. When location services are enabled, you can
also set the appropriate positioning mode. When location services are disabled, aside for pre-installed
software (such as Find my Tablet), your Tablet will stop all apps and services from collecting and using
your location information. The system will ask you to enable location services when you attempt to
use these apps.
l Use Wi-Fi and mobile networks: Calculates your Tablet's location using carrier base station
location information or nearby Wi-Fi router location information. The accuracy of the location
information depends largely upon location information gathered from the base station or Wi-Fi
network. Accuracy normally ranges from 100 metres to several kilometres. Network positioning has
low accuracy, but allows for positioning while indoors and uses less battery power.
l Use GPS only: Only uses satellites found by your Tablet's GPS to determine your position. No
network connection is needed. GPS satellite positioning is more accurate but also uses more battery.
It is accurate within tens of metres. However, indoor positioning may be inaccurate.
l Use GPS, Wi-Fi and mobile networks: Combines the benets of GPS positioning and networking
positioning for accurate indoor and outdoor positioning.
l
Features may vary depending on your carrier.
l Mobile data is not supported on Wi-Fi only tablets.
l Huawei only uses location data to provide you with necessary functions and services, not for
the purpose of identifying and collecting your private information.
Set indoor positioning assistance: Open Settings, go to Security & privacy > Location
services > > Scan settings, and enable or disable Wi-Fi and Bluetooth scanning. Scanning Wi-Fi
networks and Bluetooth devices will improve the accuracy of indoor positioning.
81
Page 86
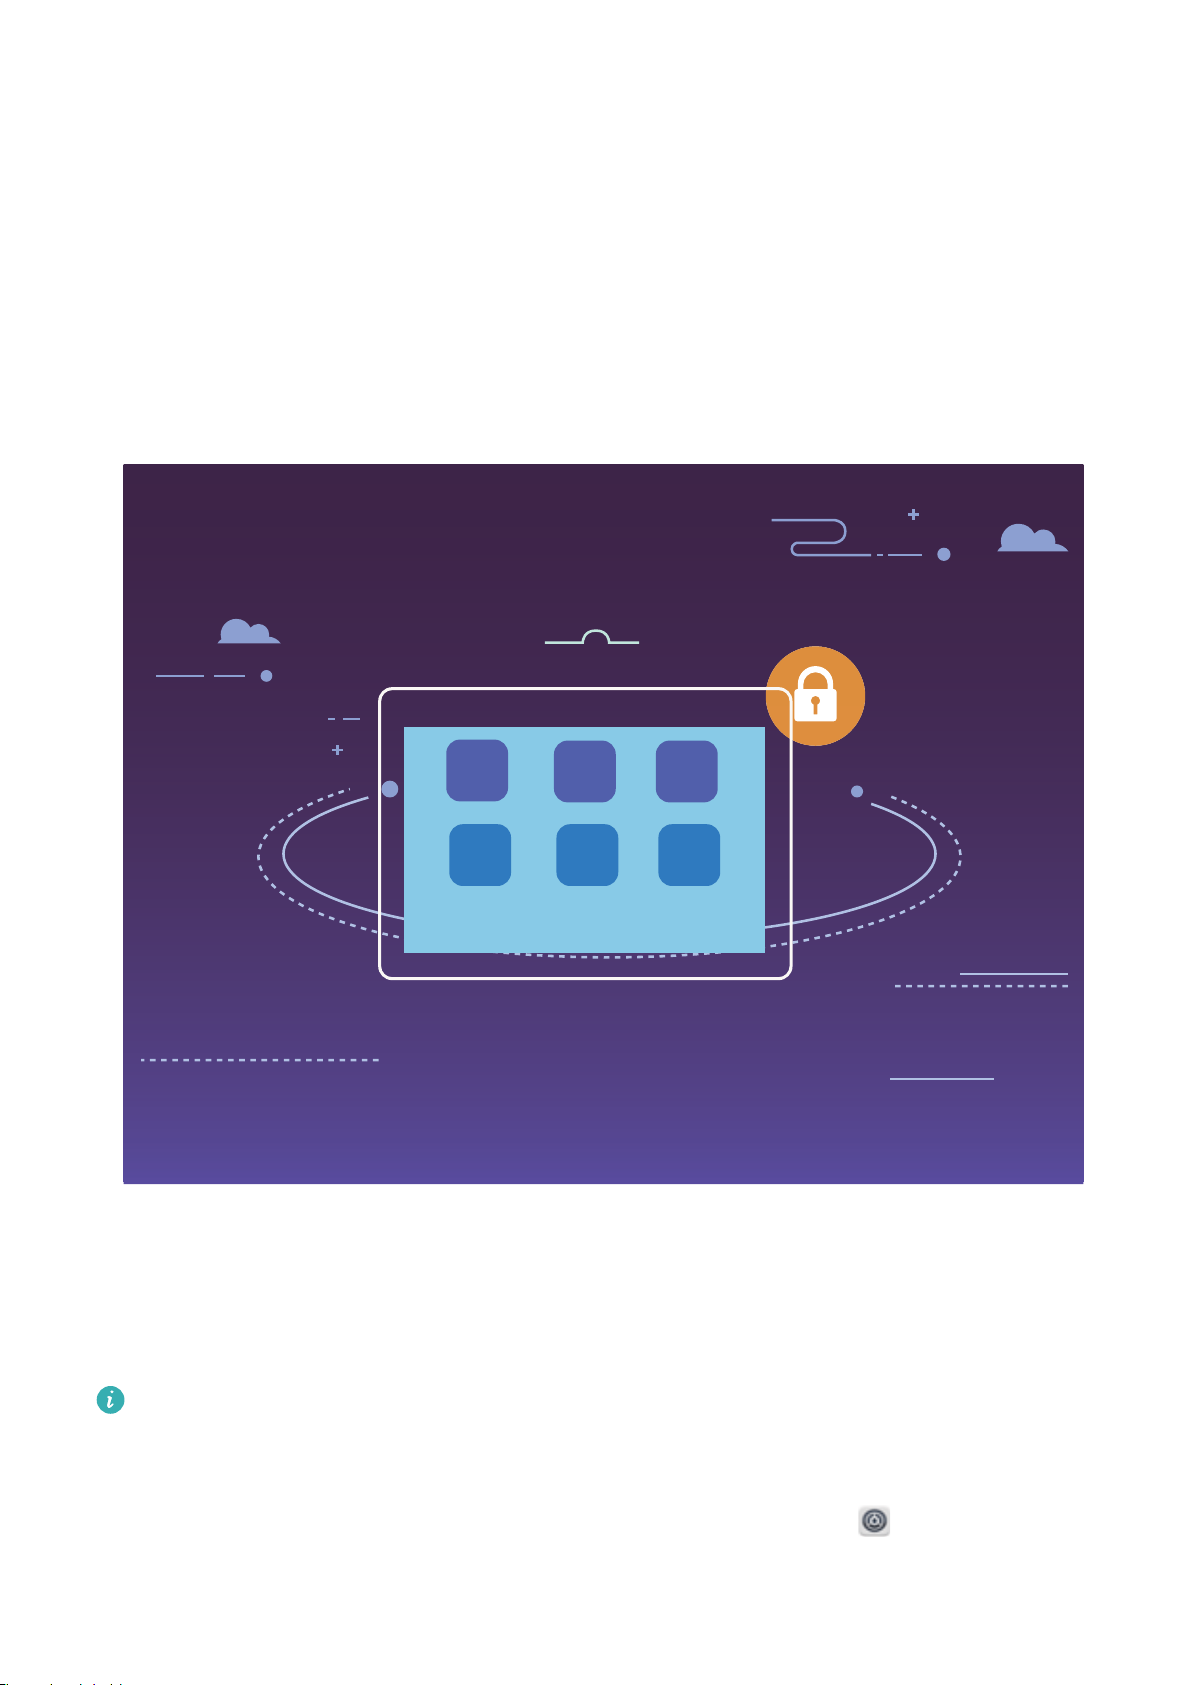
Security and Privacy
PrivateSpace
PrivateSpace: Keep Your Private Information Hidden
Want to keep your personal apps and data (such as photos and videos) hidden on your Tablet, secure
from other users? Look no further than PrivateSpace. With PrivateSpace, you can create an
independent space on your device to keep your private information. For example, you can install a
separate WeChat in both your MainSpace and PrivateSpace, keeping the two apps completely
independent of each other.
Protect Your Private Information with PrivateSpace
Do you worry that your private information might be seen by your friends and coworkers when you're
showing them photos and other things on your Tablet? PrivateSpace lets you store private information
in a hidden space within your device that can only be accessed with your ngerprint or password.
TabletA maximum of three account can be added through
accounts have already been added under Settings > Users & accounts > Users > Add user,
then PrivateSpace cannot be added.
Enable PrivateSpace: If you are using PrivateSpace for the rst time, open Settings, go to
Security & privacy > PrivateSpace > Enable, and follow the onscreen instructions to create your
PrivateSpace.
PrivateSpace and Users. If three
82
Page 87

Security and Privacy
You can only create one PrivateSpace.
Quickly switch between MainSpace and PrivateSpace: From the lock screen, you can quickly
switch between spaces using your ngerprint or password. After you restart your Tablet, you are
required to rst enter the MainSpace using your password. You can then switch between spaces from
your lock screen.
Enter PrivateSpace: You can enter your PrivateSpace directly from the lock screen using your
ngerprint or password. Alternatively, open Settings, and go to Security & privacy >
PrivateSpace > Log in to enter your PrivateSpace.
Exit PrivateSpace: When you exit your PrivateSpace, all system memory used by the PrivateSpace
will be freed. You can still switch back to your PrivateSpace when you want. To exit PrivateSpace,
open Settings, and go to Security & privacy > PrivateSpace > Quit PrivateSpace.
Delete PrivateSpace: Deleting your PrivateSpace will permanently delete all apps and data stored
within the space. You can delete your PrivateSpace in the following ways:
l From the MainSpace, open
touch .
l From the PrivateSpace, open Settings, then go to Security & privacy > PrivateSpace >
Delete PrivateSpace.
Settings, then go to Security & privacy > PrivateSpace and
Hide the Entrance to Your PrivateSpace
Want to keep all traces of your PrivateSpace hidden from other people? You can hide the entrance to
your PrivateSpace in the MainSpace, keeping your PrivateSpace hidden and secret.
After entering your PrivateSpace, open Settings, go to Security & privacy > PrivateSpace, and
enable Hide PrivateSpace. After you hide the entrance to your PrivateSpace, you can only enter the
space by using your ngerprint or password on the lock screen.
Use App Lock to Lock Important Apps
App lock allows you to set a password for your WeChat, Alipay, and other important apps. Once you
restart your Tablet or unlock the Tablet screen, you will be asked to enter your App lock password
when initially opening the apps. App lock enhances the protection of your private information and
prevents unauthorised access to important apps on your device.
Enable App lock: Open
onscreen instructions to set a password, then enable App lock for the apps you want to protect.
When you initially open a locked app, follow the onscreen instructions to enter your password and
the answer to your security question.
Settings. Go to Security & privacy > App lock, and follow the
83
Page 88

Security and Privacy
If you have set up a ngerprint to unlock your Tablet and are setting up your App lock password
for the rst time, you can follow the onscreen instructions to associate your ngerprint for easier
app unlocking.
Modify your App lock password: Touch on the App lock screen and touch Change password
or Change password protection to modify your App lock password.
More Security Settings
Enhanced Data Protection: Defend Your Privacy
Worried that your photos, bank account information, or other private data might get leaked if your
Tablet is lost or stolen? Huawei Tablets now feature security chips in addition to the combined
protection provided by the trusted root key and lock screen password. Whether your data is stored in
a microSD card or internal storage, it will receive the highest level of protection.
Stronger encryption and safeguards: Huawei Tablets use a hardware key that cannot be used to
decrypt data when separated from the Tablet. Based on the trusted root key, the encrypted
components are incorporated into the memory control chip to enhance the data protection capability
of the hardware. This works together with your lock screen password to protect your private data.
When you use PrivateSpace, Multi-user, encrypted microSD
personal information, or other personal data, the only way your data can possibly be decrypted is if
the trusted root key, lock screen password, and security chip are simultaneously cracked.Not all
devices support microSD cards.
les, or other features to encrypt photos,
84
Page 89
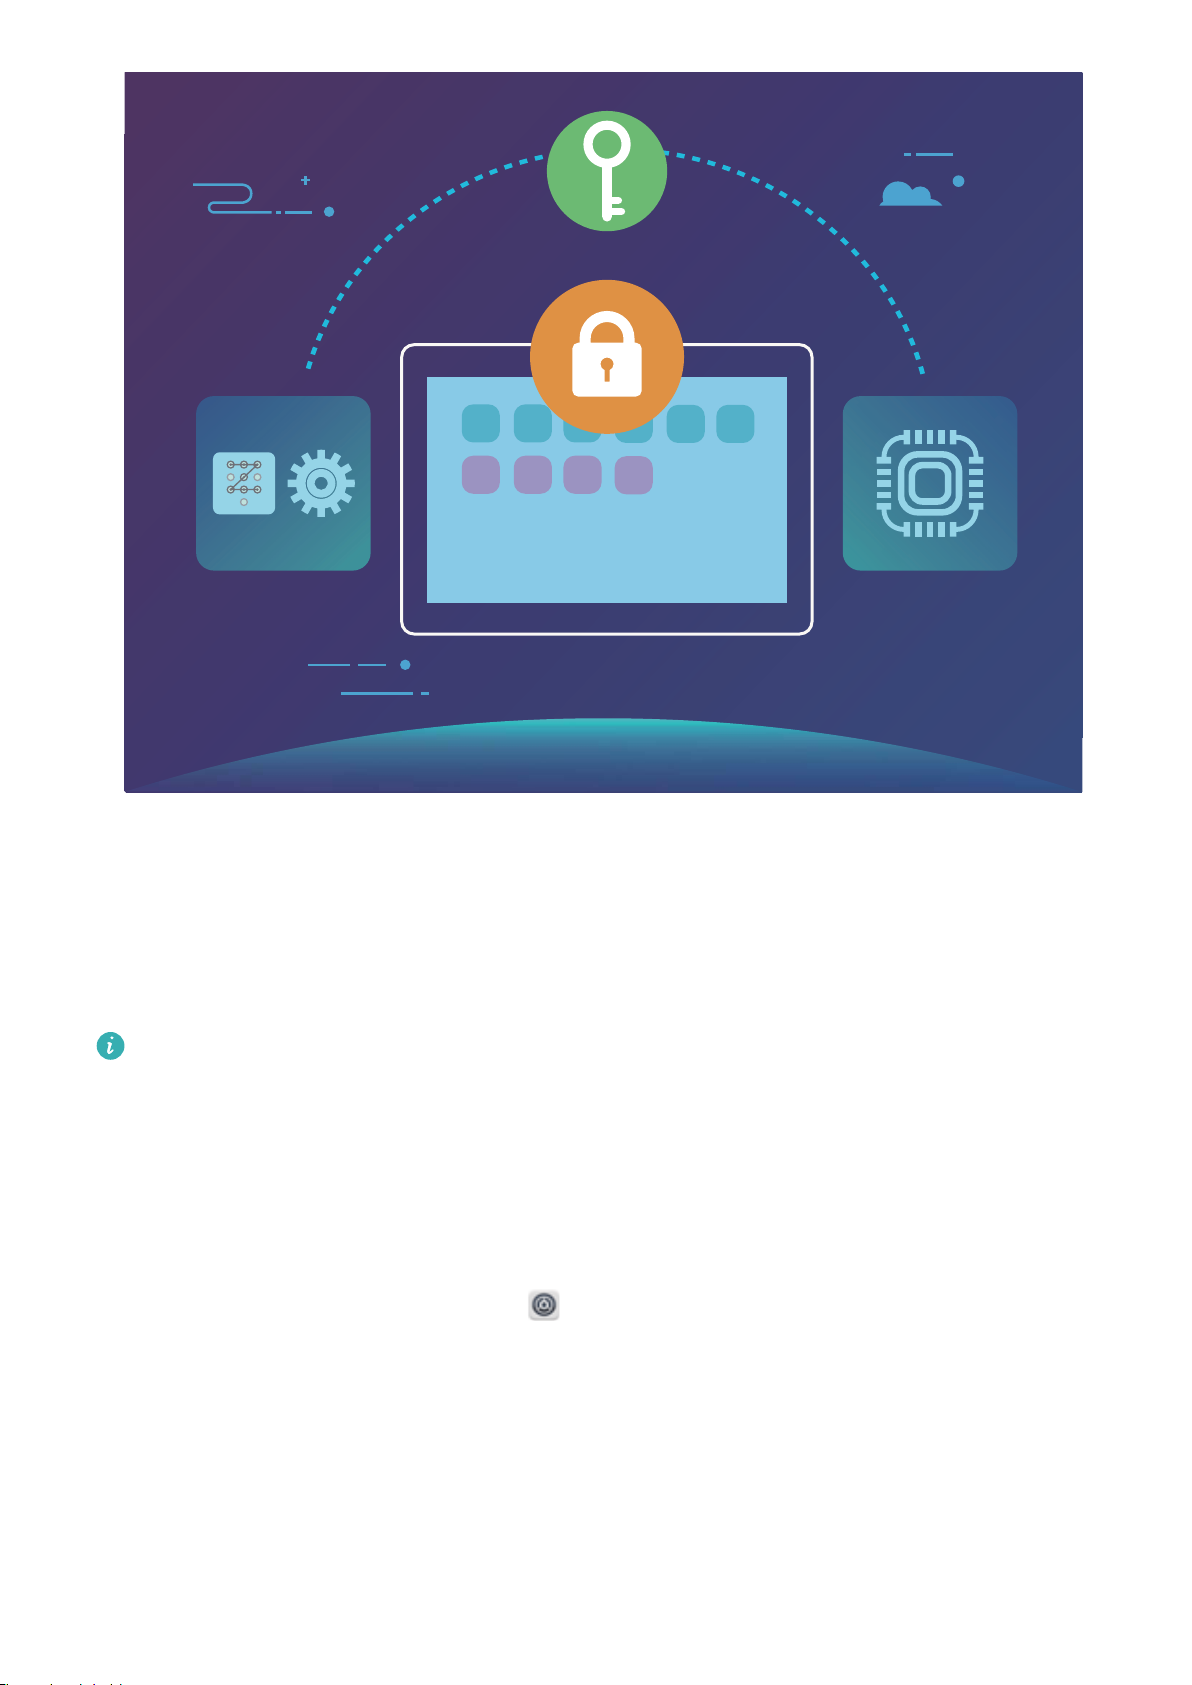
Security and Privacy
Lock Your microSD Card with SD Card Lock
If you lose your Tablet, your microSD card can be ejected from your device and your personal data will
be at risk of disclosure. SD card lock allows you to set a password to lock your microSD card. When
the locked microSD card is inserted into another device for the rst time, the password will be
required in order to use the storage space or access stored data.
l Some brands of microSD cards may not support SD card lock and may not lock and unlock
properly. It is recommended that you back up important data before locking the microSD card.
l Devices that do not support SD card lock may not be able to recognise the microSD card after
it is locked.
l Please remember your microSD card password. If you forget your password, you will be
required to erase the microSD card password and all data stored on the card.
Set your microSD card password: Open Settings. Go to Security & privacy > More > Set SD
card password and follow the onscreen instructions to set your microSD card password.
Modify or delete your SD card password: After setting your microSD card password, you can:
l Touch Change SD card password to set a new microSD card password and replace the old one.
l Touch Clear SD card password to delete your current microSD card password. Your microSD card
will not be password protected.
85
Page 90

Backup and Restoration
Data Backup: Prevent Data Loss
Ever worry that important personal data on your Tablet might be accidentally deleted or lost? Back up
your data regularly to prevent data loss and increase your peace of mind.
There are four ways to back up your Tablet's data:
l microSD card: If your Tablet supports microSD cards, you can back up your data to a microSD card
at any time, giving you a convenient way to prevent data loss.
l Device internal storage: You can back up smaller les to your device's internal storage.
l USB storage device: If you're running out of space in your Tablet's internal storage, you can
connect your Tablet to a USB storage device using a USB OTG cable to back up your data.
l Computer backup: You can back up important data, pictures, and large les from your Tablet to a
computer to prevent data loss and free up your Tablet's internal storage.
Back Up Your Data to a microSD Card
Worried about losing your data during a system update? Want to transfer data from an old device to
your new Tablet? If your Tablet supports microSD cards, you can back up your data to a microSD card
at any time, giving you a convenient way to protect yourself from data loss.
l Not all devices support microSD cards.
l Features may vary depending on your carrier.
l Always remember your backup password as you will not be able to retrieve your backup
without it.
To back up your data to your microSD card, open Backup, go to Back up > SD card > Next,
select the data you want to back up and touch Back up. A backup password is not required for
pictures, audio and video les, and documents but is required for other types of data. Follow the
onscreen instructions to set a backup password and security question.
You can view your backup les from the Huawei\Backup folder in Files > Local > SD Card.
les
Back Up Your Data to Internal Storage
You can back up your Tablet's data to internal storage to prevent data loss. You are advised to back
up relatively small les to your internal storage.
l
Features may vary depending on your carrier.
l Always remember your backup password as you will not be able to retrieve your backup les
without it.
86
Page 91

Backup and Restoration
To back up your data to internal storage, open Backup, go to Back up > Internal storage >
Next, select the data you want to back up and touch Back up. A backup password is not required for
pictures, audio and video les, and documents but is required for other types of data. Follow the
onscreen instructions to set a backup password and security question.
You can view your backup les from the Huawei\Backup folder in Files > Local > Internal storage.
Back Up Your Data to a USB Storage Device
If you are running out of storage space on your Tablet or you want to back up your important data to
an external storage device, you can connect your Tablet to a USB storage device using a USB OTG
cable to back up data. USB storage devices compatible with your Tablet include USB ash drives, card
readers, and devices that have a microSD card inserted.
l Features may vary depending on your carrier.
l Not all devices support microSD cards.
l Always remember your backup password as you will not be able to retrieve your backup
without it.
To back up your data to a USB storage device, open Backup, go to Back up > USB storage >
Next, select the data you want to back up and touch Back up. A backup password is not required for
pictures, audio and video les, and documents but is required for other types of data. Follow the
onscreen instructions to set a backup password and security question.
You can view your backup les from the Huawei\Backup folder in Files.
les
Back Up Your Data to a Computer
Do you have important data, pictures, or large les stored on your Tablet? You can back up your
important data to a computer to prevent data loss and free up storage space on your Tablet.
Always remember your backup password as you will not be able to retrieve your backup
without it.
Please install the HiSuite app on your computer before using it to back up or restore les from your
les
Tablet.
Back up data to your computer: Connect your Tablet to your computer using a USB data cable. The
HiSuite app will automatically open on your computer. From the HiSuite app, select the data you want
to back up, and follow the onscreen instructions to back up the data to your computer.
Import data to your Tablet: Connect your Tablet to your computer using a USB data cable. Open
the HiSuite app and go to the data recovery page to copy data from your computer to your Tablet. If
the backup data is password protected, enter the password when prompted.
87
Page 92
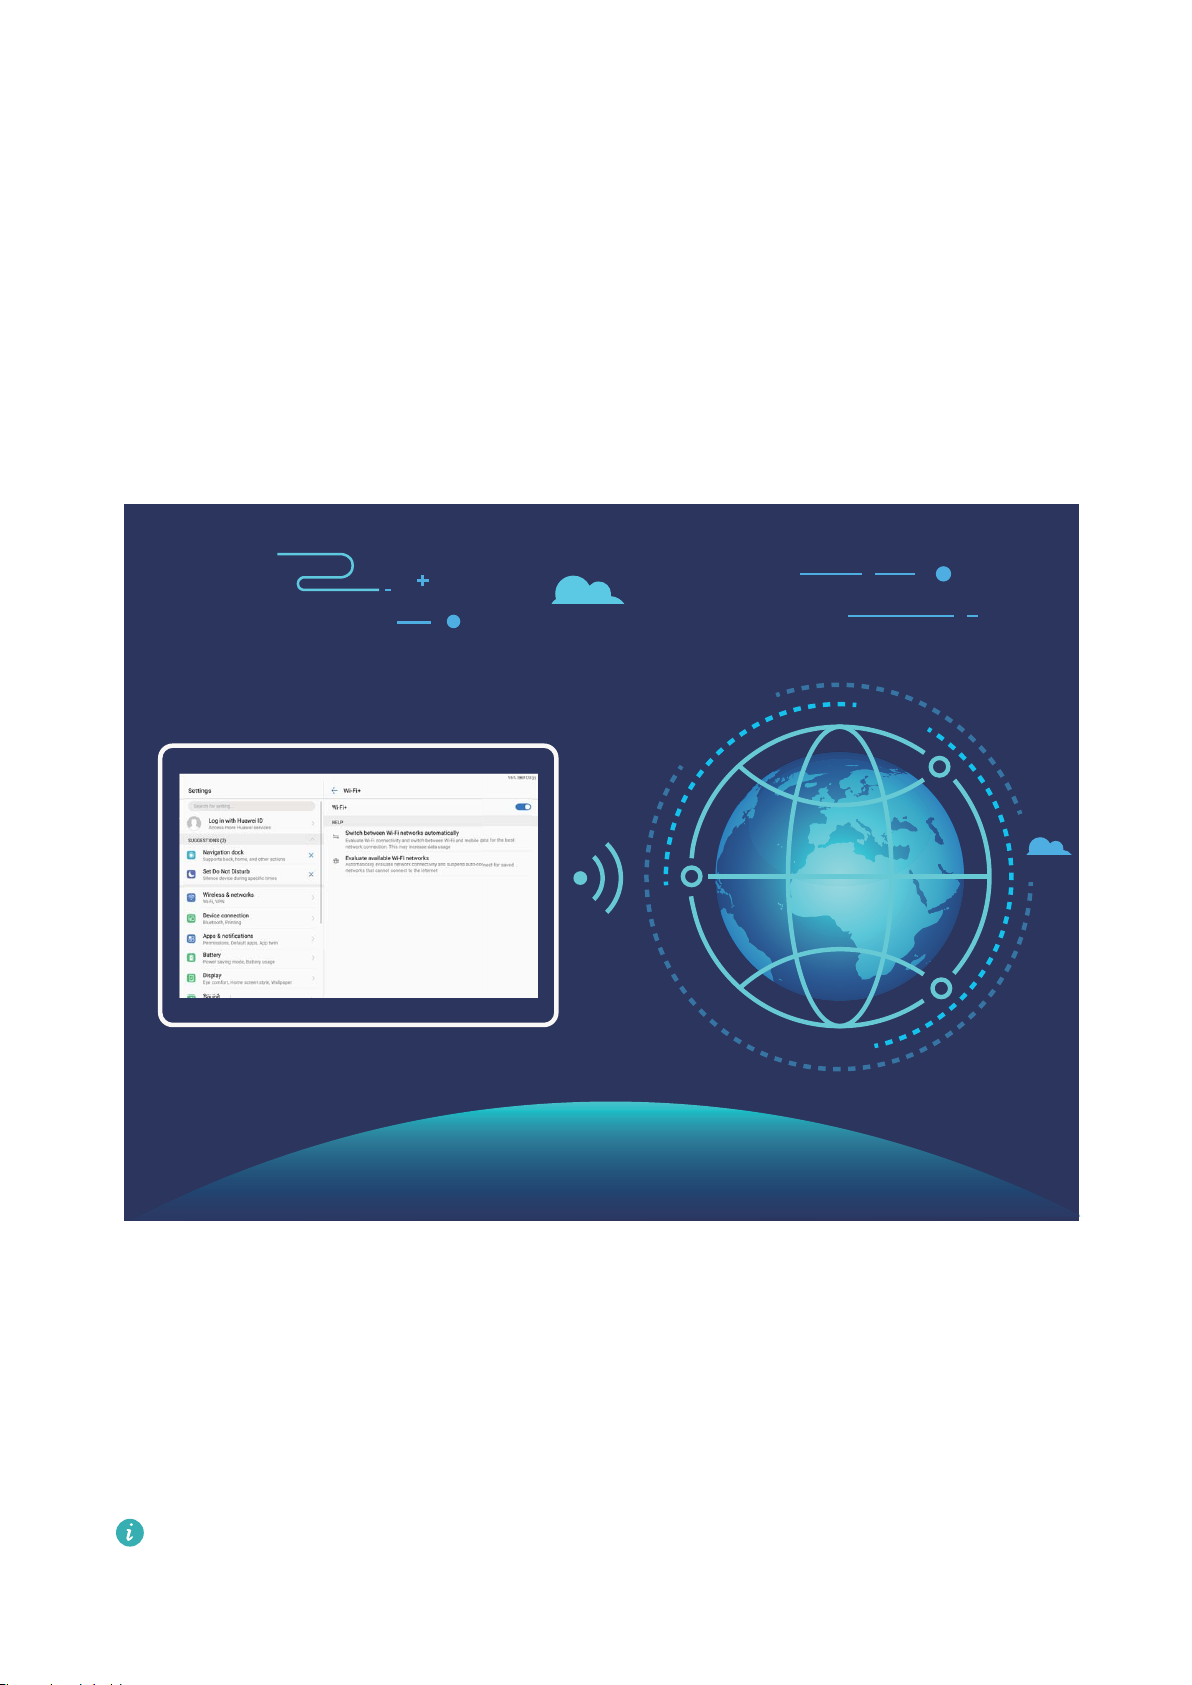
Wi-Fi and Network
Wi-Fi
Wi-Fi+: Your Smart Connectivity Assistant
Wi-Fi+ intelligently connects to Wi-Fi networks to save mobile data consumption. When your device
detects a known or free Wi-Fi network, it will automatically turn on Wi-Fi and connect to the network.
Your device will also automatically select the optimal network in the area for the best Internet
connection.
Once you have enabled Wi-Fi+, your device will:
l Automatically select and connect to the optimal network: Automatically select and connect to
Wi-Fi networks you've previously connected to, free networks, or your mobile data network,
depending on the signal strength at your current location.
l Automatically turn Wi-Fi on and off: Depending on the Wi-Fi networks you have connected to
previously, Wi-Fi will be automatically enabled or disabled in specic locations. This will prevent your
device from constantly searching for new networks.
This feature is not supported on Wi-Fi only tablets.
88
Page 93
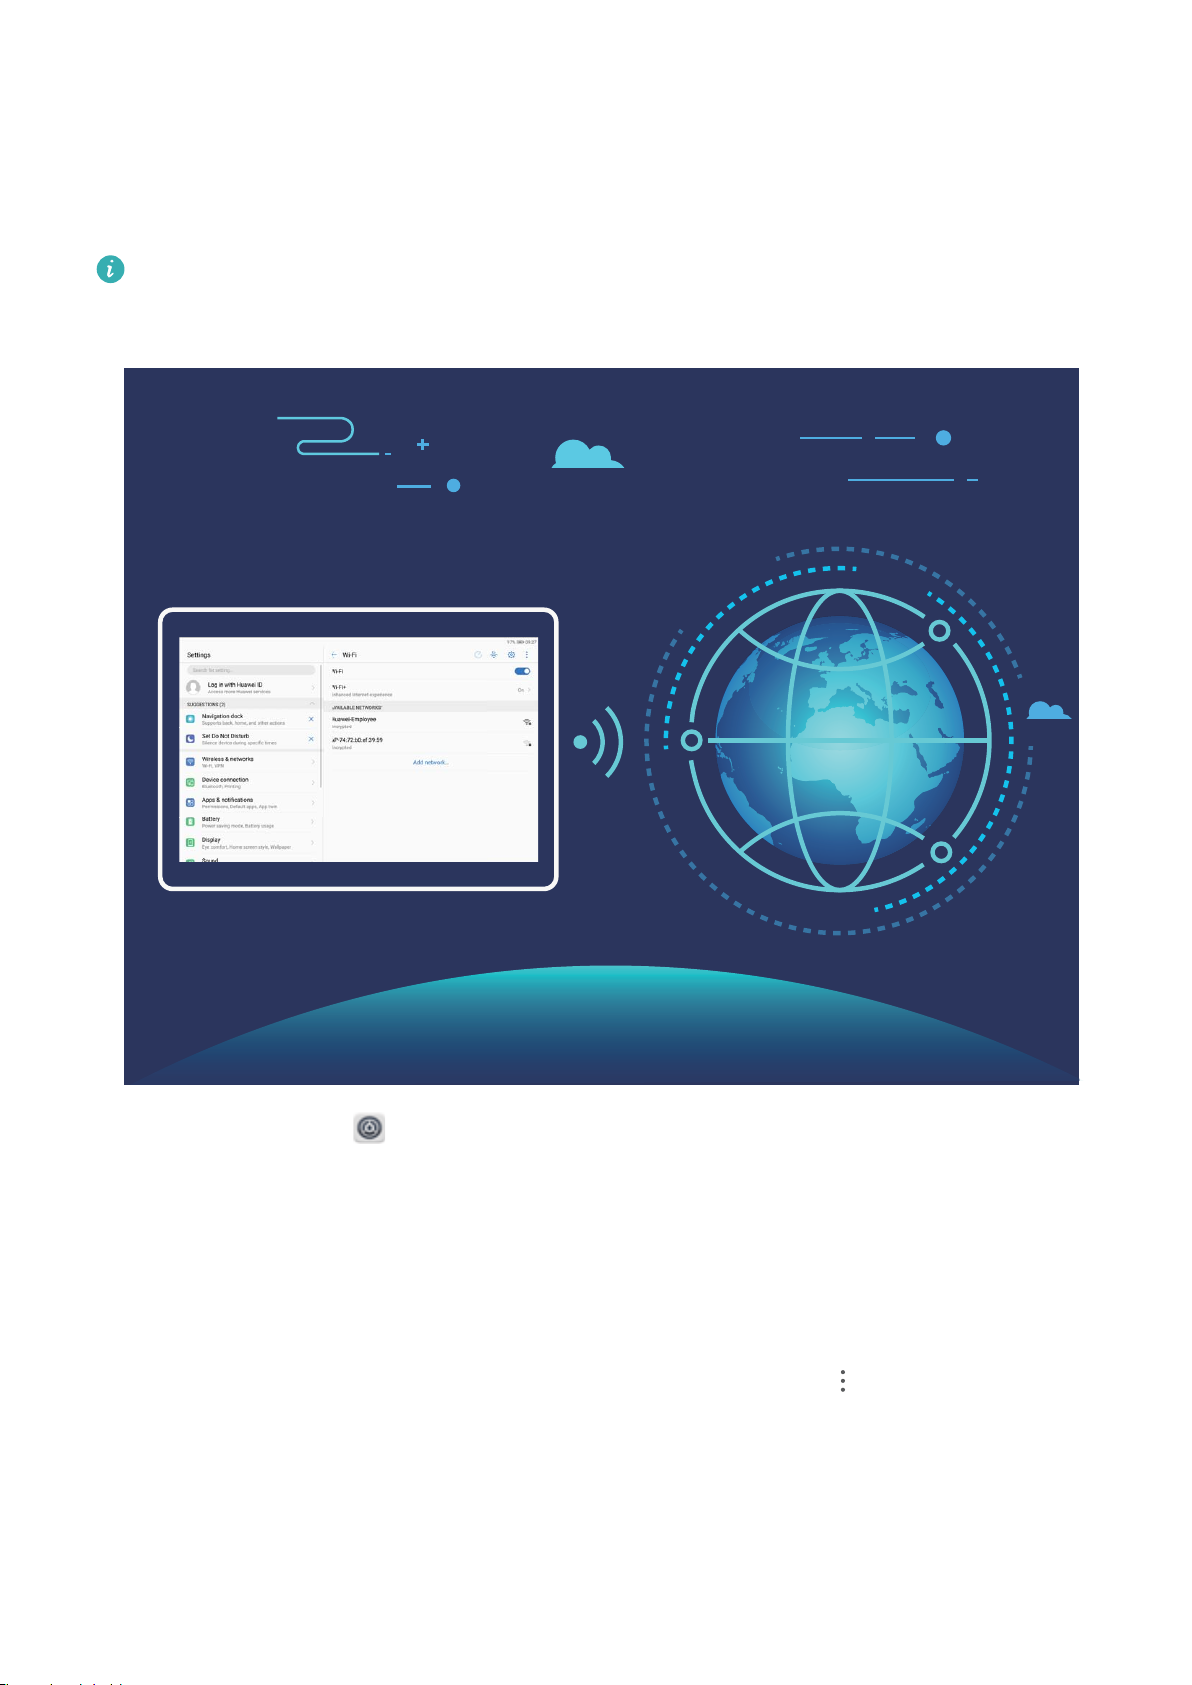
Wi-Fi and Network
l Assess the quality of available networks: Evaluate currently available network hotspots and
prevent your device from automatically connecting to networks with no Internet connection.
Connect to Wi-Fi
Connect to a Wi-Fi network to conserve your mobile data.
To prevent unauthorised access to your personal data and nancial information, always exercise
caution when connecting to public Wi-Fi networks.
Connect to Wi-Fi: Open Settings, go to Wireless & networks > Wi-Fi and enable Wi-Fi. Select
the network you want to connect to. Depending on the network settings, you may have to enter a
password. Follow the onscreen instructions to complete authentication if required.
l Refresh a Wi-Fi hotspot: Touch Scan to search again for available wireless networks.
l Manually add a Wi-Fi hotspot: Scroll to the bottom of the menu, touch Add network…, and
follow the onscreen instructions to enter the network SSID and password.
Connect to a Wi-Fi network through WPS: In the Wi-Fi screen, go to > Advanced Wi-Fi
settings > WPS connection. Press the WPS button on your router to establish a connection.
Connecting to a WPS-enabled router over WPS allows you to quickly connect to the network without
entering a password.
89
Page 94
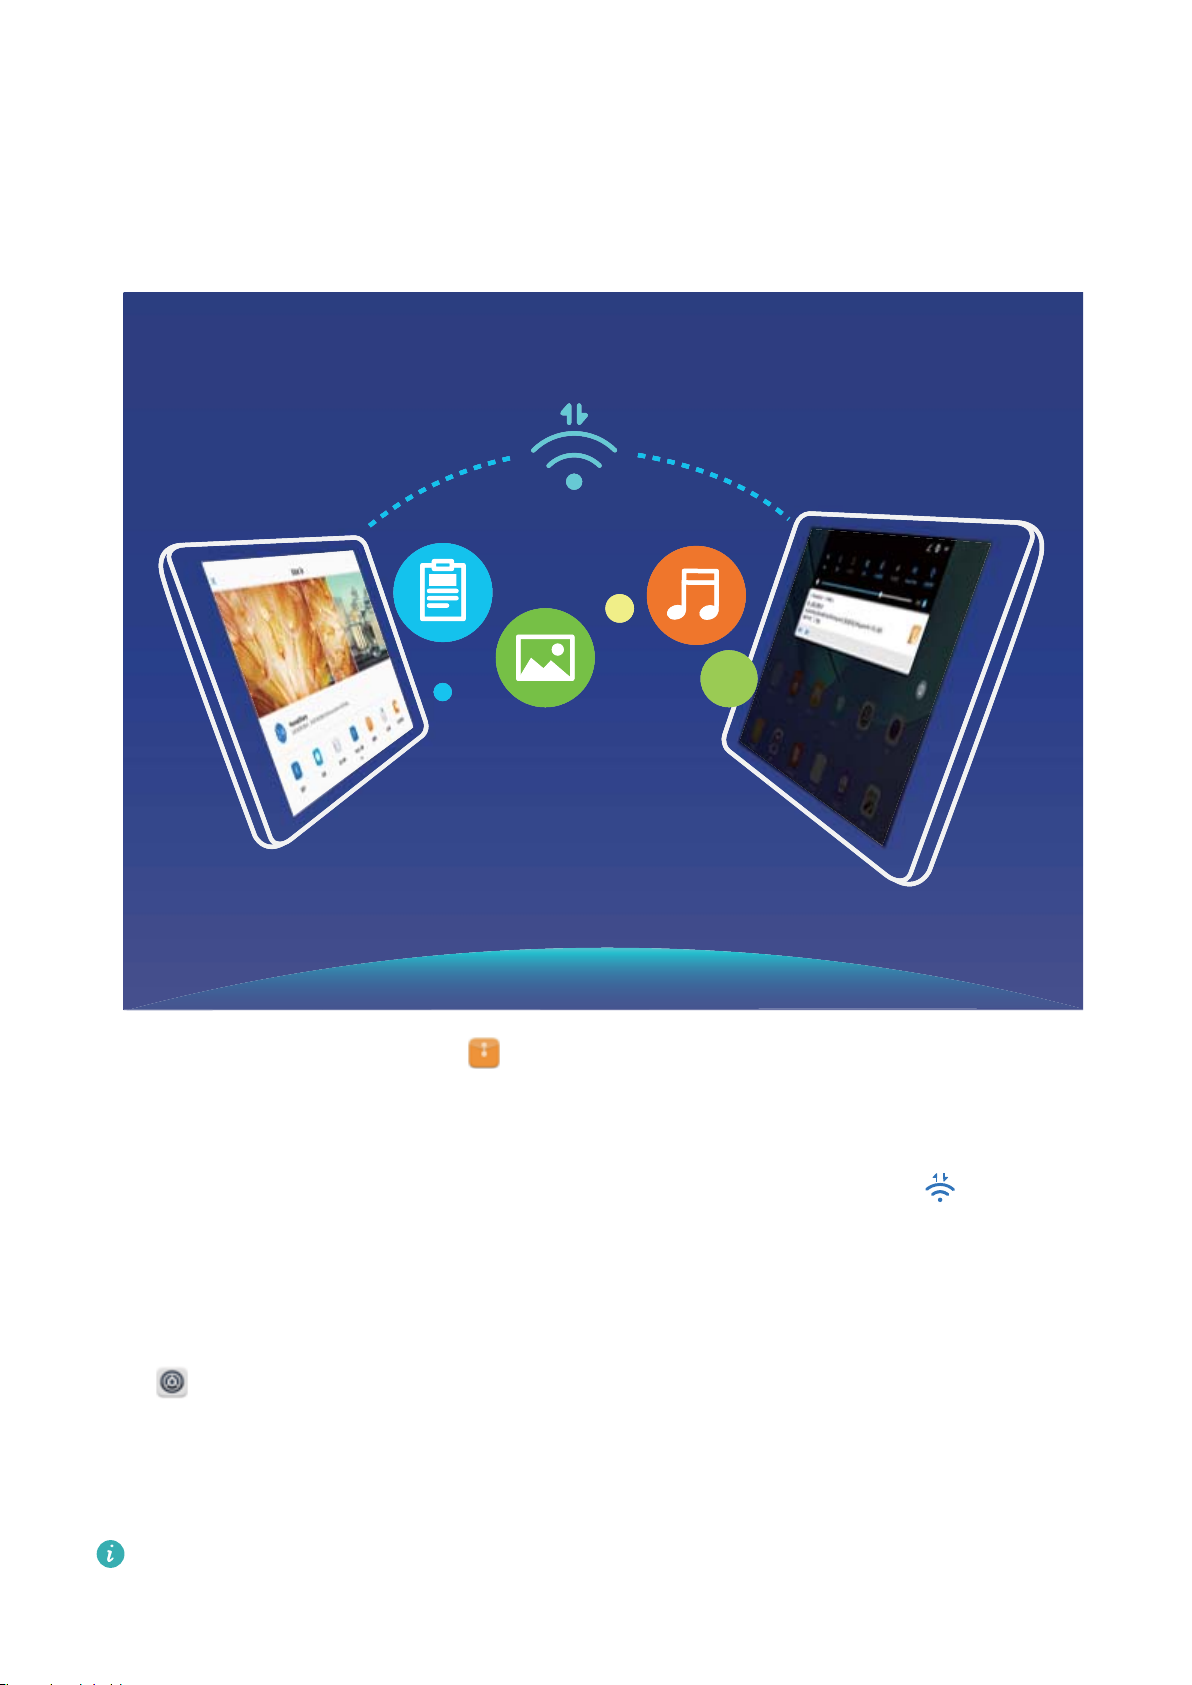
Wi-Fi and Network
Transfer Data Using Wi-Fi Direct
Wi-Fi Direct allows you to rapidly transfer data between Huawei devices. Wi-Fi Direct is faster than
Bluetooth and does not require devices to be paired. It is better suited to transferring large les over
short distances.
Send les with Wi-Fi Direct: Open Files, touch and hold a le you want to send, and go to
More > Share > Wi-Fi Direct. When another device is detected, touch its name to establish the
connection and begin le transfer.
Receive les with Wi-Fi direct: Enable Wi-Fi. In the Wi-Fi settings screen, touch to enable
detection. When you receive an incoming le prompt, touch Accept to begin the transfer. The
received le will be saved under Files in the Wi-Fi Direct folder by default.
Enable Wi-Fi+ to Automatically Connect to the Best Network
Open Settings, go to Wireless & networks > Wi-Fi > Wi-Fi+, and enable Wi-Fi+.
When the device is in a location with a weak Wi-Fi signal, Wi-Fi+ may automatically switch to a
mobile data network. Using mobile data to download or view videos and other large les may incur
additional charges. To avoid excessive data charges, purchase an appropriate data plan.
This feature is not supported on Wi-Fi only tablets.
90
Page 95

Wi-Fi and Network
Connecting to the Internet
Connect to Wi-Fi networks effortlessly with your device.
Connecting to a Wi-Fi network
1 Swipe down from the status bar to open the notication panel.
Touch and hold to open the Wi-Fi settings screen.
2
Switch on Wi-Fi. Your device will list all available Wi-Fi networks at your location.
3
Select the Wi-Fi network you want to connect to. If you select an encrypted network, you will also
4
need to enter the Wi-Fi password.
Connecting using mobile data
Before using mobile data, ensure that you have a data plan with your network provider to avoid
incurring excessive data charges. Mobile data is not supported on Wi-Fi only tablets.
1 Swipe down from the status bar to open the notication panel.
2 Touch to enable mobile data.
When you don't need to access the Internet, disable mobile data to save battery power and
reduce data usage.
Share Your Mobile Network with Other Devices
Have extra mobile data at the end of the month? You can share it with your friends.
Before using mobile data, ensure that you have a data plan with your network provider to avoid
incurring excessive data charges. Mobile data is not supported on Wi-Fi only tablets.
91
Page 96
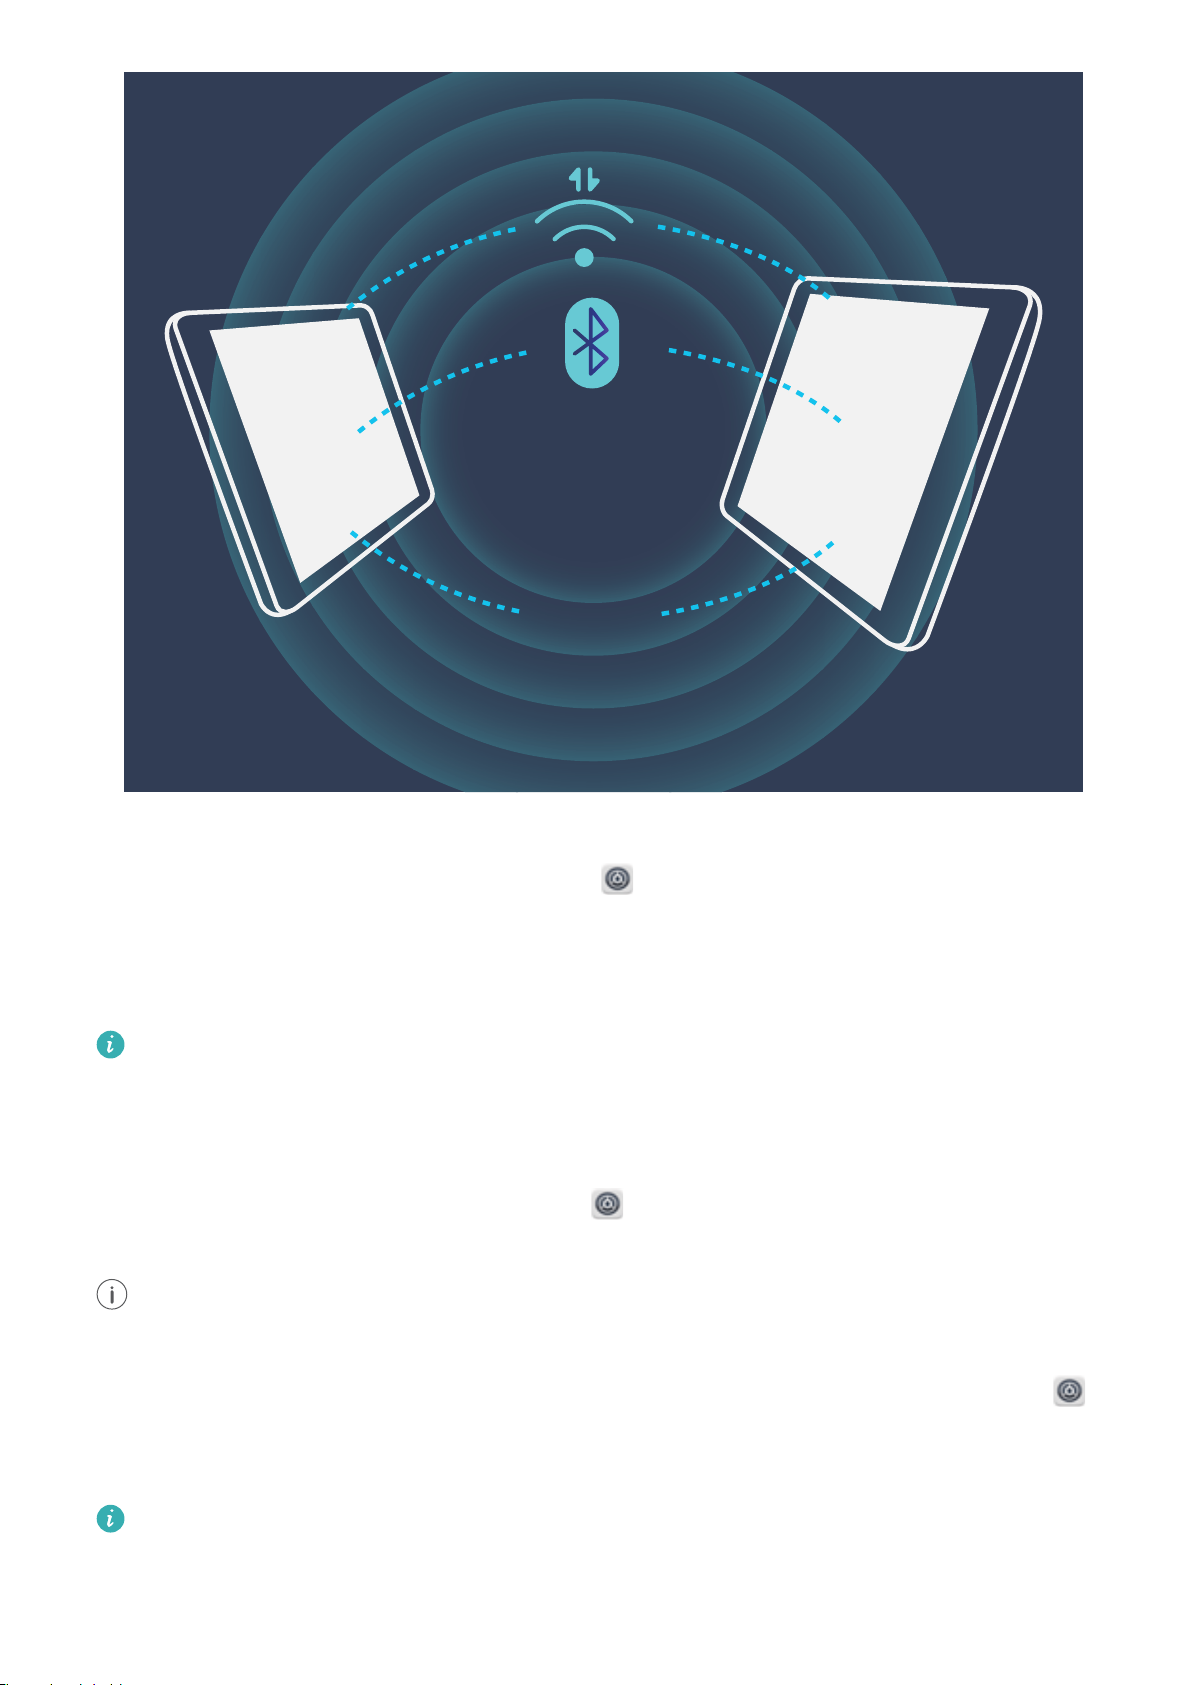
64#
(
(
Wi-Fi and Network
You can use Wi-Fi hotspot, a USB cable, or Bluetooth to share your mobile data with other devices.
Use Wi-Fi hotspot to share mobile data: Open Settings and go to Wireless & networks >
Tethering & portable hotspot > Portable Wi-Fi hotspot > Congure Wi-Fi hotspot. Set the
network name, encryption type, and password for the Wi-Fi hotspot, then touch Save and enable the
hotspot to use it.
Worried other devices will have unlimited access to your hotspot data? On the Settings
screen, touch Data limit to set the data limit for a single session. When the data sharing limit is
reached, your device will automatically disable hotspot sharing.
Use Bluetooth to share mobile data: Establish a Bluetooth connection and pair the devices before
using Bluetooth to share your mobile data. Open Settings, go to Wireless & networks >
Tethering & portable hotspot, and enable Bluetooth tethering. On the Bluetooth screen, touch
next to the paired device, and enable Internet access to establish an Internet connection and
share your mobile data.
Use USB to share mobile data: Use a USB cable to connect your device to a computer. Open
Settings, go to Wireless & networks > Tethering & portable hotspot, and enable USB tethering
to start sharing your mobile data.
Depending on the operating system, you may need to install drivers or establish the relevant
network connection on your computer before using this function. Refer to your computer's
operating system guide for more information.
92
Page 97

Apps and Notications
App Twin: Log in to Two Social Media Accounts at
Once
Have you ever wished you could log in to two WeChat and Facebook accounts on your Tablet without
the hassle of constantly switching between them? App twin lets you log in to two WeChat and
Facebook accounts at the same time, allowing you to keep your work and private life separate.
The App twin feature only works with WeChat, QQ, LINE, Facebook, Snapchat, WhatsApp, and
Messenger. Download the latest versions of these apps before using this feature.
Open Settings. Go to Apps & notications > App twin and enable App twin for WeChat, QQ,
LINE, Facebook, Snapchat, WhatsApp, or Messenger as required.
When App twin is enabled, two WeChat, QQ, LINE, Facebook, Snapchat, WhatsApp, or Messenger
app icons are displayed on the home screen. This means that you can log in to two accounts at the
same time. Touch and hold the twinned app icon on the home screen to quickly disable App twin.
93
Page 98

Sound and Display
Congure Do Not Disturb Mode
Do not disturb mode blocks calls from strangers and only noties you when you receive calls and
messages from chosen contacts.
Open Settings and go to Sound > Do not disturb. Toggle on the Enable now switch, then
touch Do not disturb mode and select one of the following options:
l Allow calls and messages from important contacts: Select Allow only priority interruptions,
and then touch Dene priority interruptions to congure which contacts can call or message
you.
l Allow alarm ringtones: Select Alarms only to only allow alarm ringtones.
l Disable all interruptions: Select Don't interrupt to disable ringtones and vibrations and prevent
the screen from turning on for incoming calls, messages, and alarms.
l Alternatively, swipe down from the status bar and touch on the shortcuts panel to quickly
enable or disable Do not disturb mode.
l Some third-party apps may continue to ring when Do not disturb mode is enabled. Congure
the in-app settings to mute notications from these apps.
Time rule: Prevent interruptions at set times, such as weekends or evenings. Touch Time to congure
the time period and repeat interval, then toggle on the Time switch.
Event rule: Prevent interruptions during meetings or events. Touch Event to enable Do not disturb
mode during calendar events.
Congure Your Sound Settings
When you are watching movies or playing games, your device will automatically switch to stereo
sound to enhance your audio experience. You can also set ringtones and audio reminders for a variety
of different scenarios.
Adjust system volume: Press a volume button and touch to adjust your ringtone, media, alarm,
or call volume.
You can also adjust volume in your system settings. Open Settings, touch Sound and drag
the volume slider to adjust your volume.
Switch between sound, vibration, and silent mode: Swipe down from the status bar and open
the shortcuts panel. Touch
to switch quickly between Sound, Silent and Vibration mode.
94
Page 99
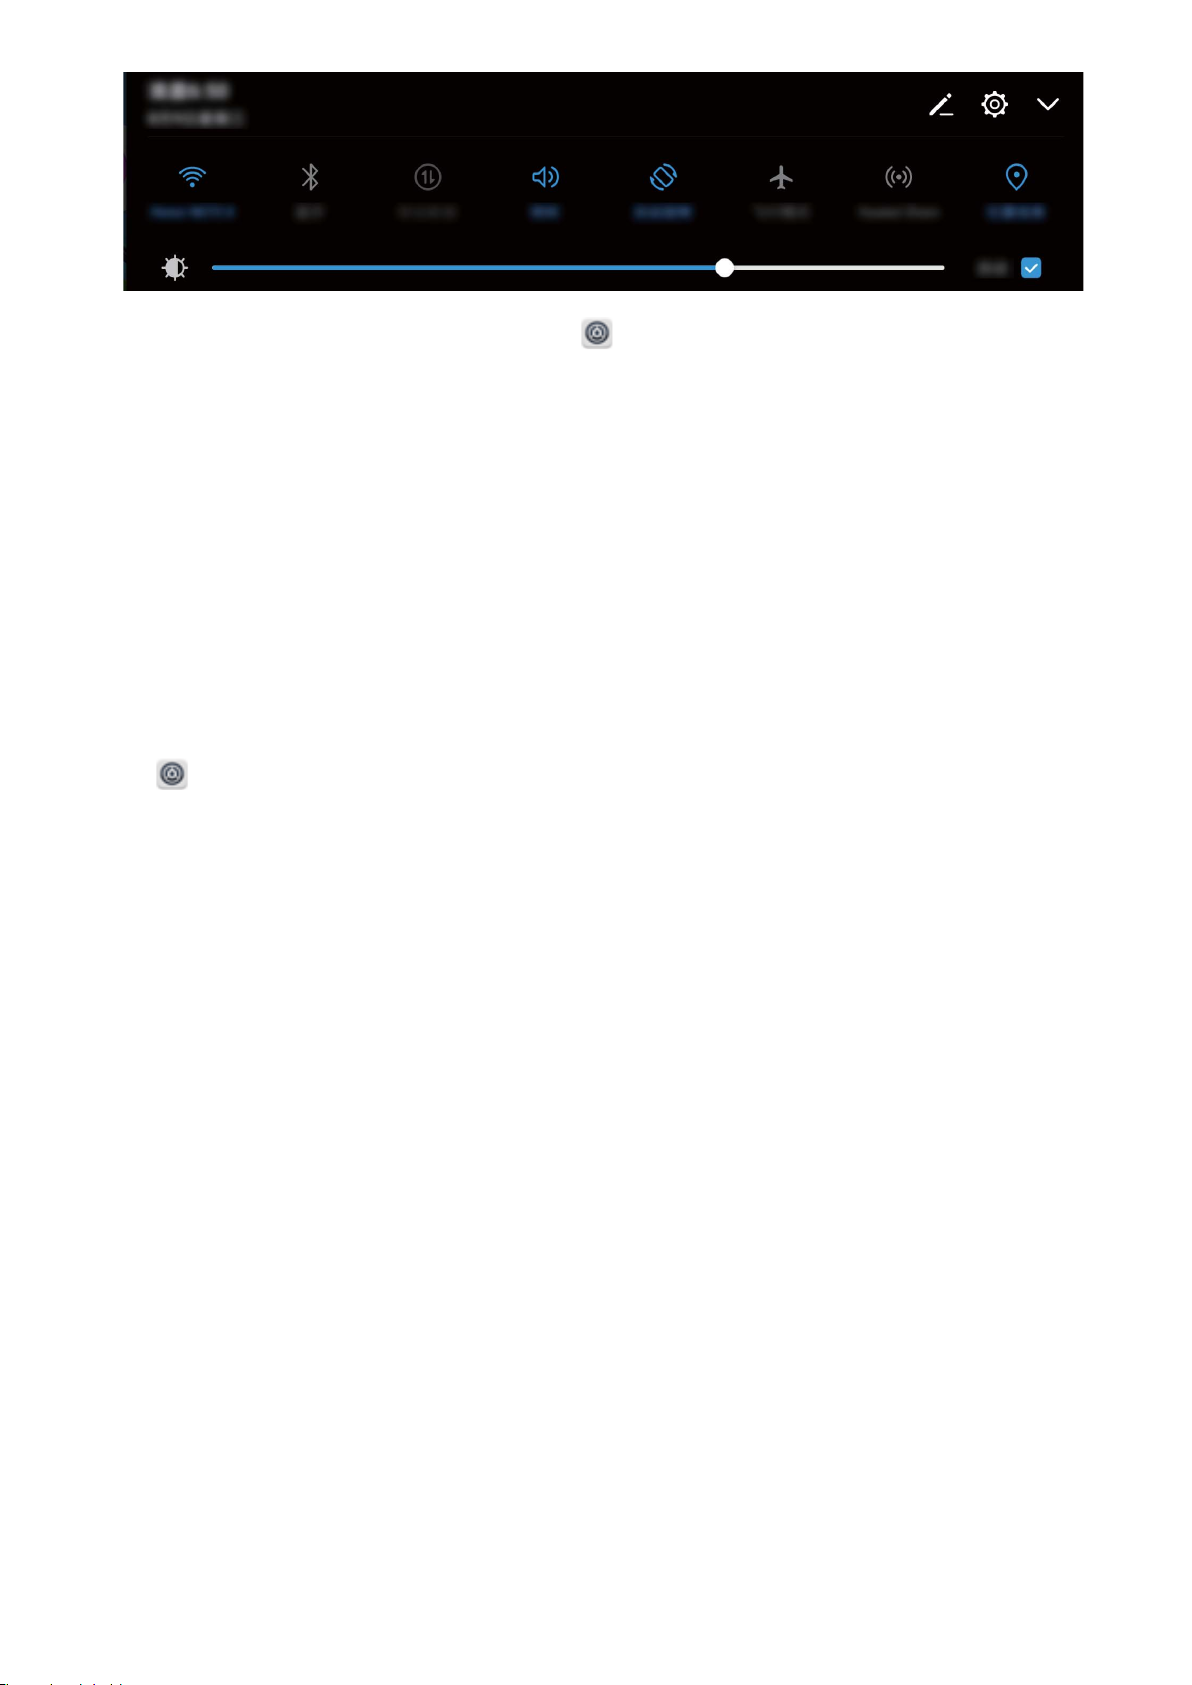
Sound and Display
Enable keypad and notication tones: Open Settings and go to Sound > More sound
settings to enable or disable keypad and notication tones.
Set your Tablet to Silent mode: From the Sound screen, enable Silent mode. After you enable
Silent mode, enable Vibrate in silent mode. Now when you receive an incoming call, your screen
will light up and your device will vibrate.
Customise your ringtone and notication tone: From the Sound screen, select a custom ringtone
or use the Default notication sound.
Change the Display Settings
Change the font size and adjust the screen brightness to suit your needs.
Open
l Change the image and text size: Touch View mode and select a display mode to suit your
needs.
l Change the text size: Touch Text size and select the desired size.
Settings and touch Display. From here you can:
95
Page 100
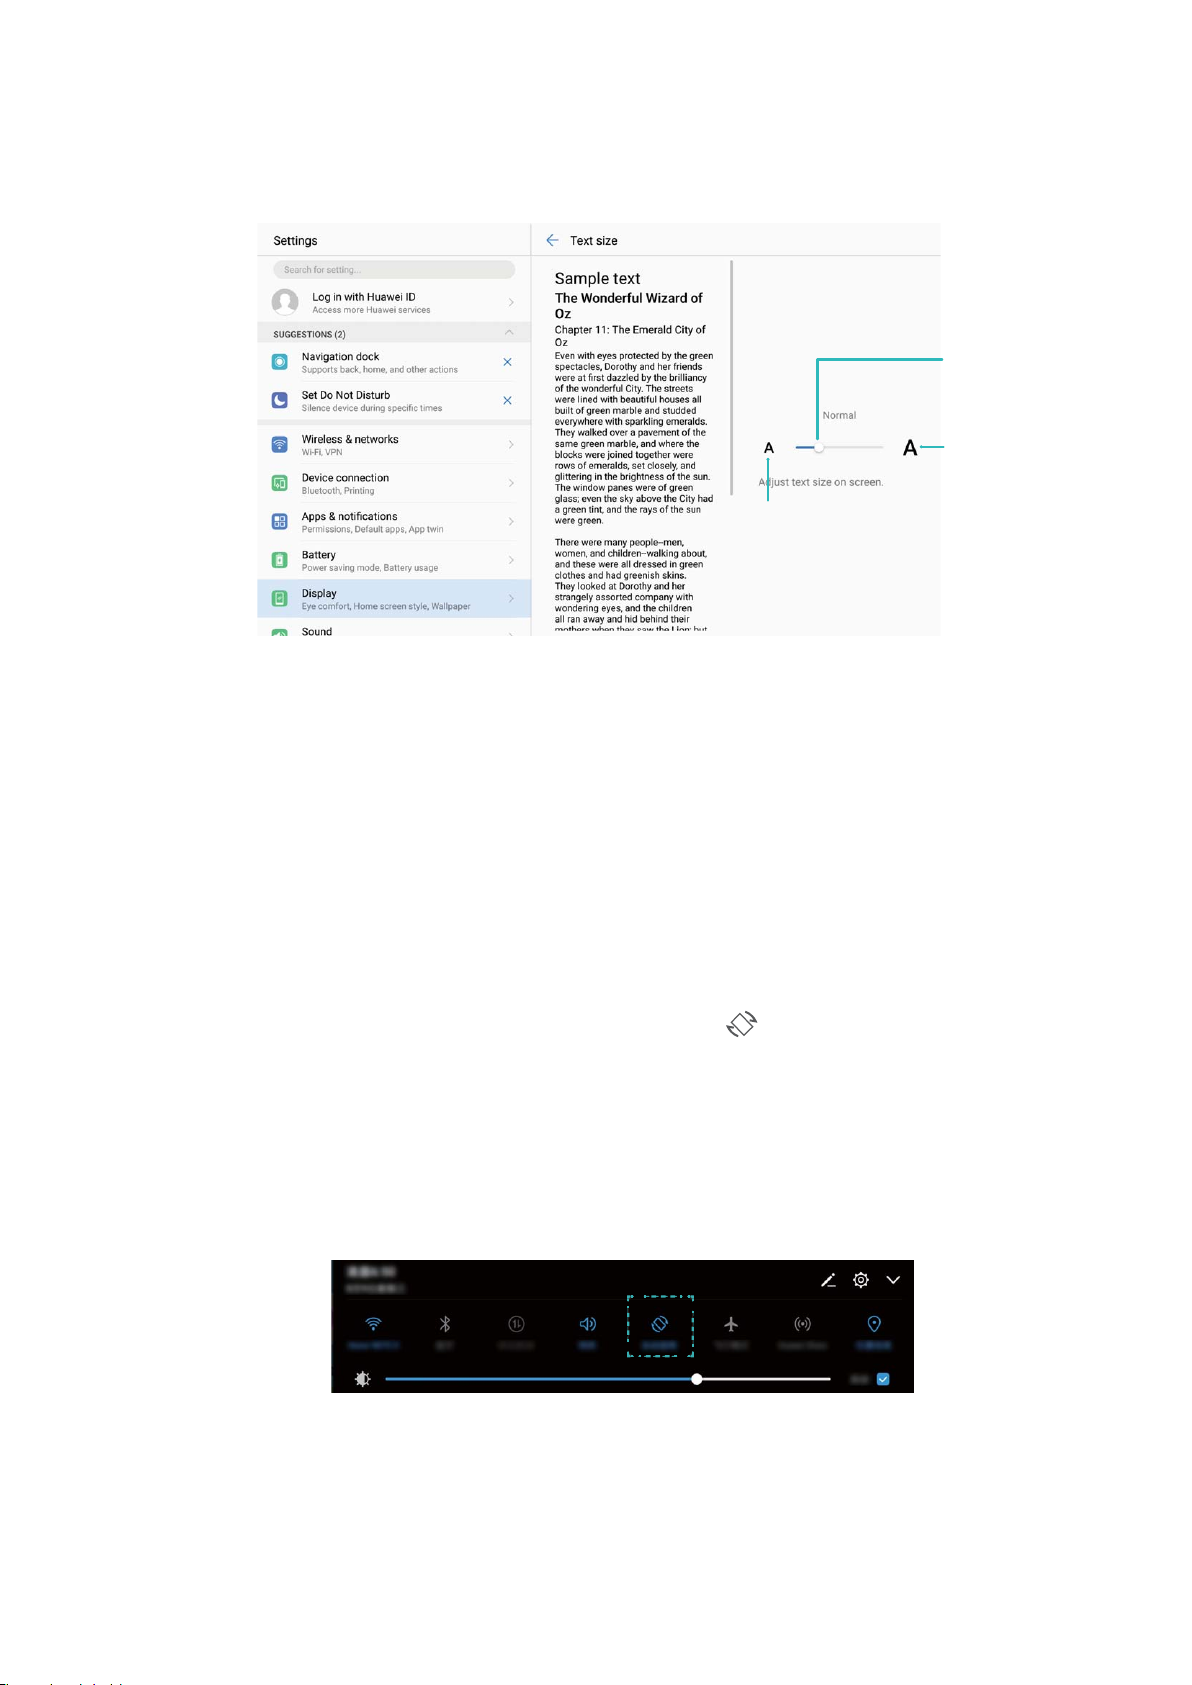
Touch to shrink text
Drag to adjust
text size
Touch to
enlarge text
Sound and Display
l Adjust the screen brightness: From Brightness, select the check box next to Automatic. When
this option is enabled, your Tablet will automatically adjust the screen brightness based on the
ambient brightness. To manually adjust the brightness, drag the brightness slider, or swipe down on
the status bar to open the notication panel and access the brightness settings.
l Enable automatic screen rotation: Enable Auto-rotate screen. Alternatively, swipe down from
the status bar, open the shortcuts panel, and then switch on .
96
 Loading...