

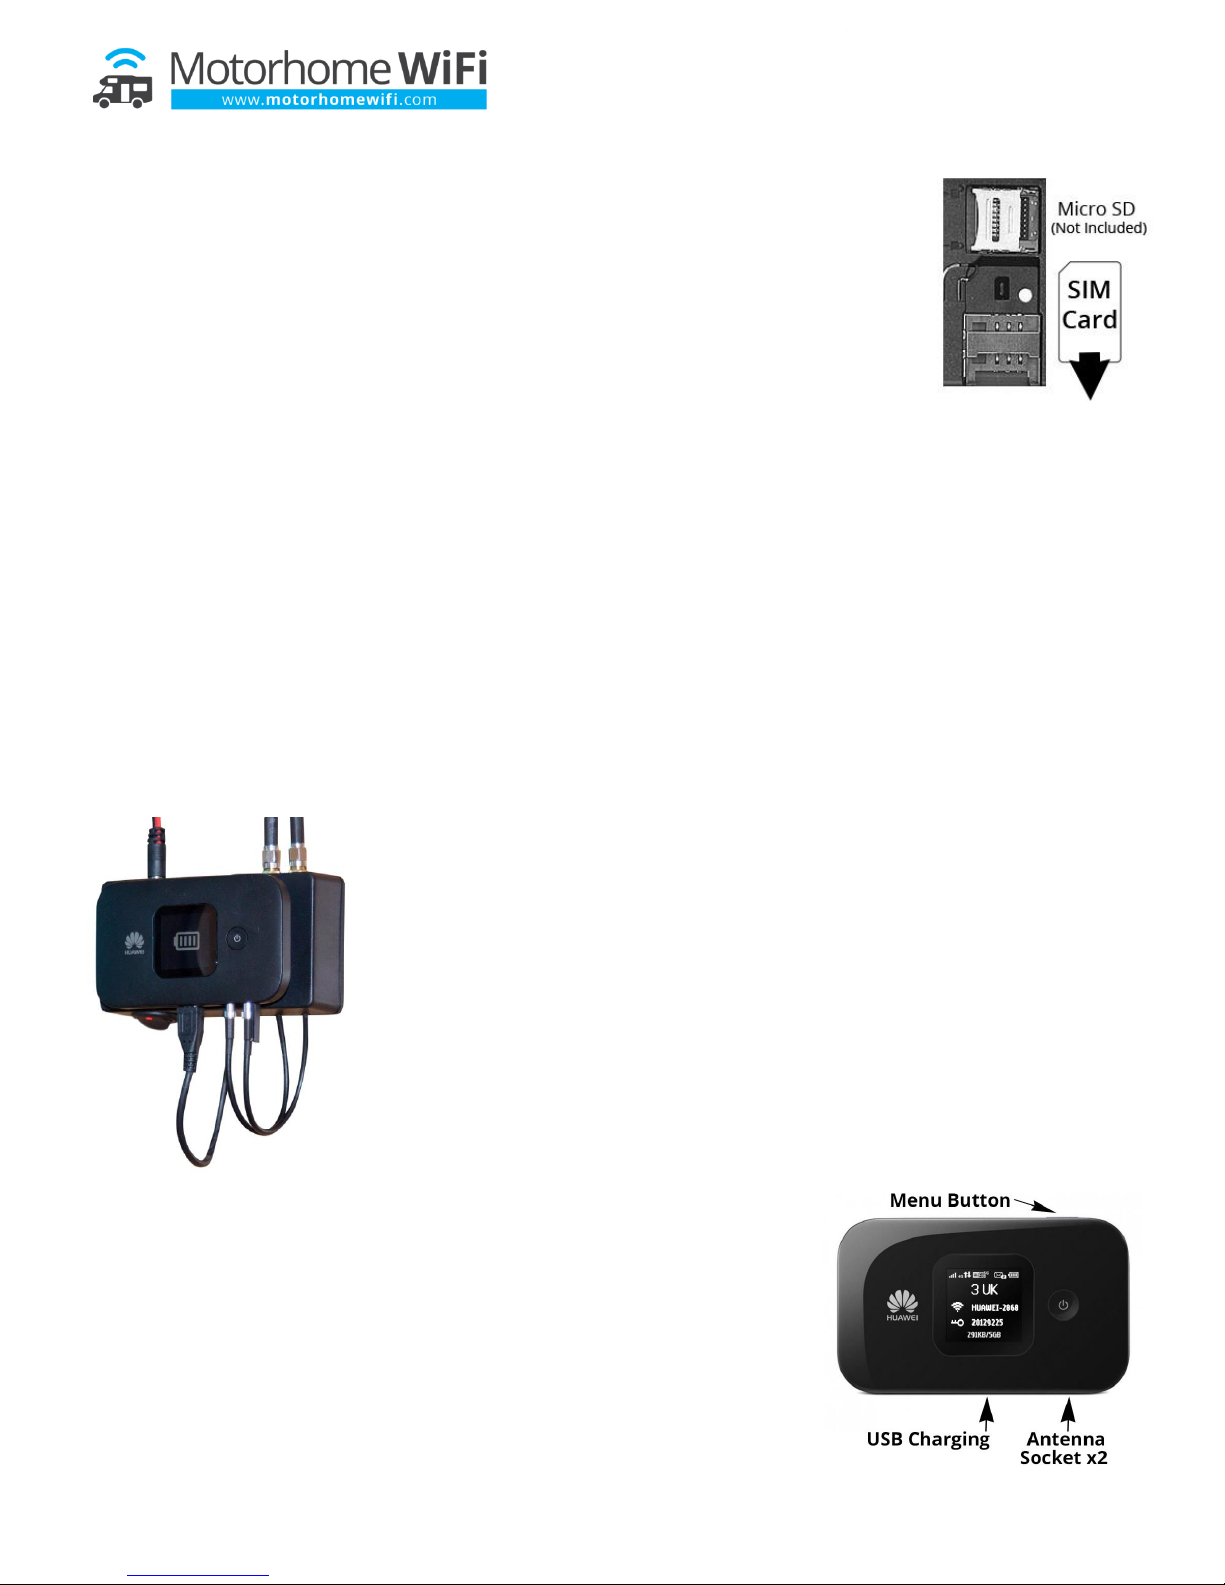
Inserting the SIM Card & Battery
The E5577 is a mobile 3/4G MiFi (meaning ‘My WiFi’) device which connects to the cellular
network and provides a WiFi connection inside your vehicle for up to 10 devices to connect to.
Your Built in WiFi includes a pre-paid SIM card from Three which gives you 12GB of data valid
for up to 12 months, of which 60 days can be used abroad.
Start by inserting the SIM card into the MiFi. The back of the device can be removed to reveal
two slots, the larger of which is the SIM card slot. Insert the SIM card face down with the cut
corner in the same position as on the marking. Once the SIM has been inserted under the
retaining bar, insert the battery and replace the back cover.
Powering On The Device & Connecting to the WiFi Network
You can now power on the device by pressing and holding the power button on the front for 2-3 seconds until the
Huawei logo is displayed. The device is now turned on and will attempt to connect to a Mobile Network.
On the display is the name of your WiFi network starting with Huawei-XXXX and under this is your unique wireless
passkey. You connect to the device in the same way you would connect to a new wireless network, entering the
passkey when prompted. Nobody will be able to join this network unless you provide them with this key.
Connecting to the Roof Aerial via the Quick Mount
Located in a locker in your vehicle is your 4G Quick Mount on which to attach,
connect, power and store your MiFi device.
To connect to the Quick Mount, first locate the antenna connections on the MiFi
device – these can be found under a flap to the right of the USB charging socket (see
diagram bottom right). Open the flap to reveal two small brass TS9 connections.
On the quick mount you will see two corresponding cables on the right hand side of
the mount with a silver push fit TS9 connection. There is no right or wrong way around
to connect the antenna cables, simply push on into each of the antenna connections.
Once these have been successfully connected, you can now connect the USB charging
cable. This cable can only be inserted one way, so to be sure to rotate it 180 degrees if
you feel it is met with resistance in the socket.
Finally, you can now offer the MiFi device onto the rubber mounting plate onto
the quick mount as seen in the image above. There is a switch with an LED
indicator on the bottom left of the mount to allow you to turn the charging
facility on/off. You can leave this powered on all the time, as once the device is
fully charged the power draw will be minimal with the device turned on, or you
can turn it on/off as you wish.
Once the internal battery is fully charged, the MiFi device will run from your
leisure battery. Should you wish to remove the MiFi device from your van and
use as a portable device, the battery will be fully charged.
Operating instructions for Huawei E5577
when supplied with 4G Quick Mount
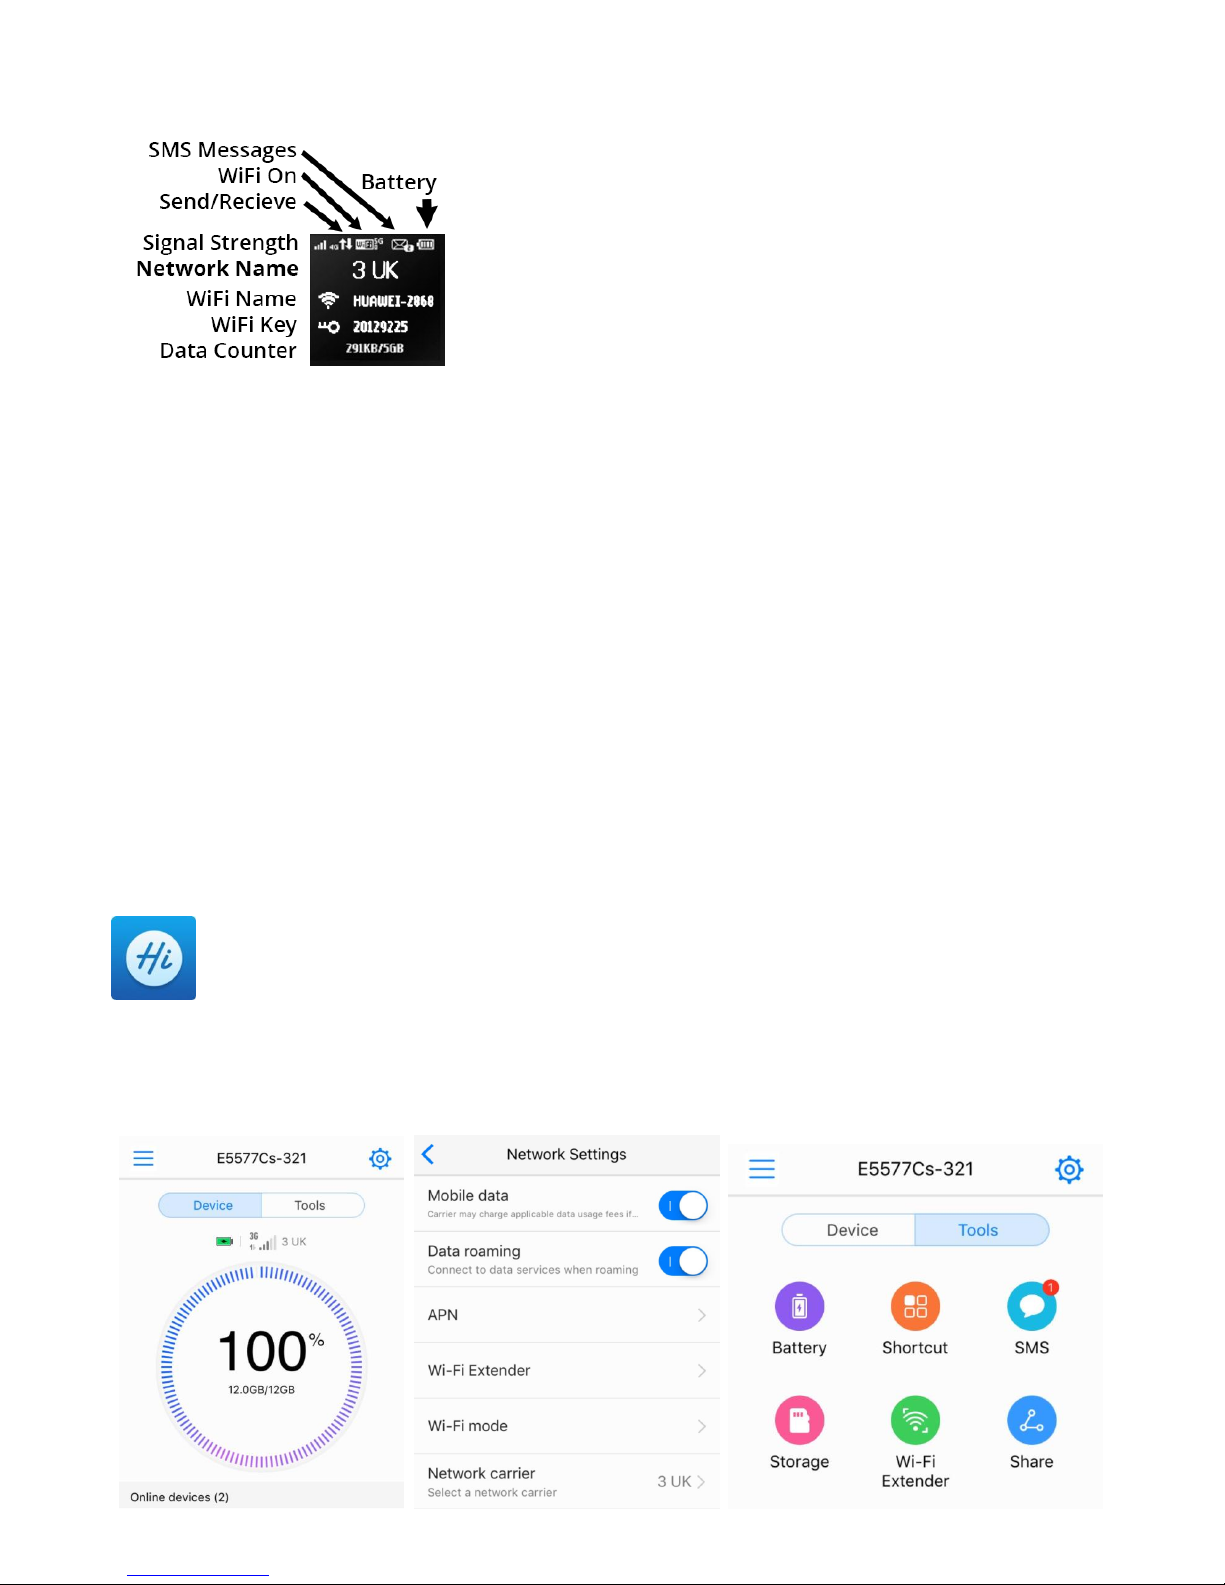
Understanding the On-Screen Display
Once connected, take note of the information displayed on the screen. The
top left hand corner shows the signal strength, ideally this needs to show
3G or 4G. A 2G connection will be very slow.
The name of the network is displayed next to the WiFi symbol and the
password is displayed next to the key symbol and is made up of 8 numbers
which are unique to every device.
Roaming & Using Your Device Abroad
To use this device abroad, you will need to enable roaming. Roaming does not necessarily mean that you will be
charged any more just that you can use a SIM card in a country other than the one in which it is registered.
The easiest way to do this is using the menu on the device itself. 1.) Power on the device. 2.) Once the device has
started up, press the MENU button on the top seven times until the DATA ROAMING option is highlighted. 3.) Press
the POWER button on the front of the device until a tick is now displayed in the box. Data roaming is now enabled.
You may see while completing the above a WiFi Extender Mode. Enabling this mode stops the 3/4G connection, so
keep this disabled. If you struggle to get online, check it hasn’t been enabled by accident. It doesn’t really extend a
WiFi source since there is no external antenna connection for WiFi.
Advanced Usage of the Device
The E5577 has many features, not all of them we are able to provide support on. We’d advise not to change any
settings or passwords. There is a RESET button under the battery cover if you find that a change you have made
prevents the device from working as intended.
There are two ways you can access additional settings on the device. The easiest is using the Huawei
HiLink App. You can download this for free from the Apple App Store or the Google Play Store, search for
‘Huawei’ and the icon on the left and download the free App. The App will only work when you are
connected to your MiFi device via WiFi. Once connected, open the app which will now display information
in addition to what can be displayed on its build in screen.
There is a useful data counter which can be reset by tapping on the data counter and choosing Settings > Clear
Statistics History. This is especially useful when you insert a new SIM Card and which to monitor your usage.
 Loading...