


Copyright © 2008 Huawei Technologies Co., Ltd.
All Rights Reserved
No part of this document may be reproduced or transmitted in any form or by any
means without prior written consent of Huawei Technologies Co., Ltd.
Trademarks and Permissions
and other Huawei trademarks are trad emarks of Huawei T echnolo gies Co. ,
Ltd.
All other trademarks and trade names mentioned in this document are the
property of their respective holders.
Notice
The information in this document is subject to change without notice. Every effort
has been made in the preparation of this document to ensure accuracy of the
contents, but all statements, information, and recommendations in this document
do not constitute the warranty of any kind, express or implied.

Table of Contents
Getting to Know the E176....................................................................... 1
Requirements for the PC......................................................................... 4
Preparing the E176 ................................................................................ 4
Installation Guide .................................................................................. 6
Safety Information................................................................................10
i

Thank you for purchasing Huawei E176 HSPA USB
Stick.
Note:
This manual briefly describes the preparation, the process for
installing/uninstalling, and safety precautions for using Huawei E176 HSPA
USB Stick (hereinafter referred to as the E176).
You are recommended to read the manual before using the E176.
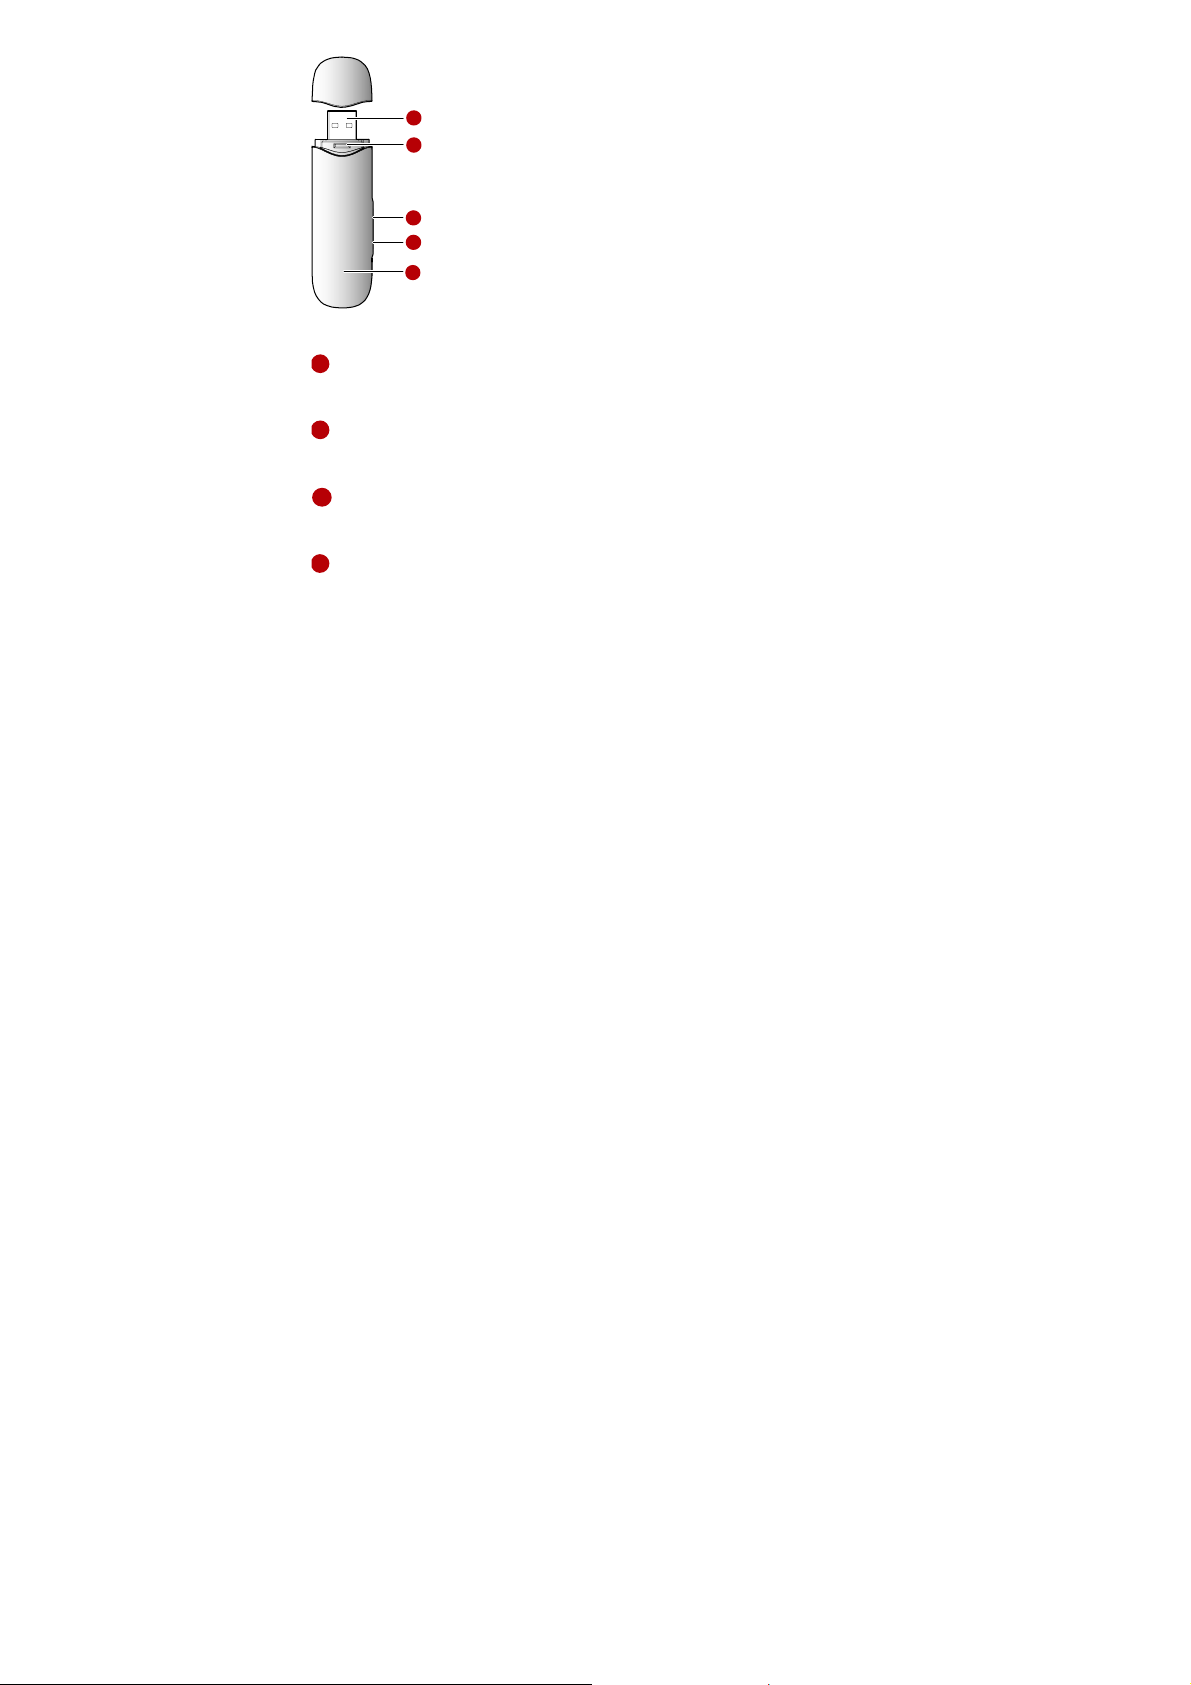
Getting to Know the E176
The following figures show the appearance of the E176. The actual product may
differ.
1
1
2
3
4
5
1
USB Interface
Connects to the USB interface of the PC.
2
USIM/SIM card slot
Holds the USIM/SIM card.
3
Micro SD card slot
Holds the Micro SD card.
4
RF Test slot
Connects to RF cable for RF test.
2

5
Indicator
Indicates the status of the E176.
Green, blinking twice every 3s: The E176 is powered on.
Green, blinking once every 3s: The E176 is registered to the
GSM/GPRS/EDGE network.
Blue, blinking once every 3s: The E176 is registered to the WCDMA/HSDPA
network.
Green, always on: The GPRS/EDGE connection is set up.
Blue, always on: The WCDMA connection is set up.
Cyan, always on: The HSDP A connection is set up.
Off: The E176 is removed from the PC.
3
Requirements for the PC
To use the E176, the PC must meet the following requirements:
Standard USB interface.
Windows 2000 SP4, Windows XP SP2, Windows Vista.
The hardware of your PC must meet or exce ed the recommended system
requirements for the installed version of OS.
Display resolution: 800 × 600 or above.
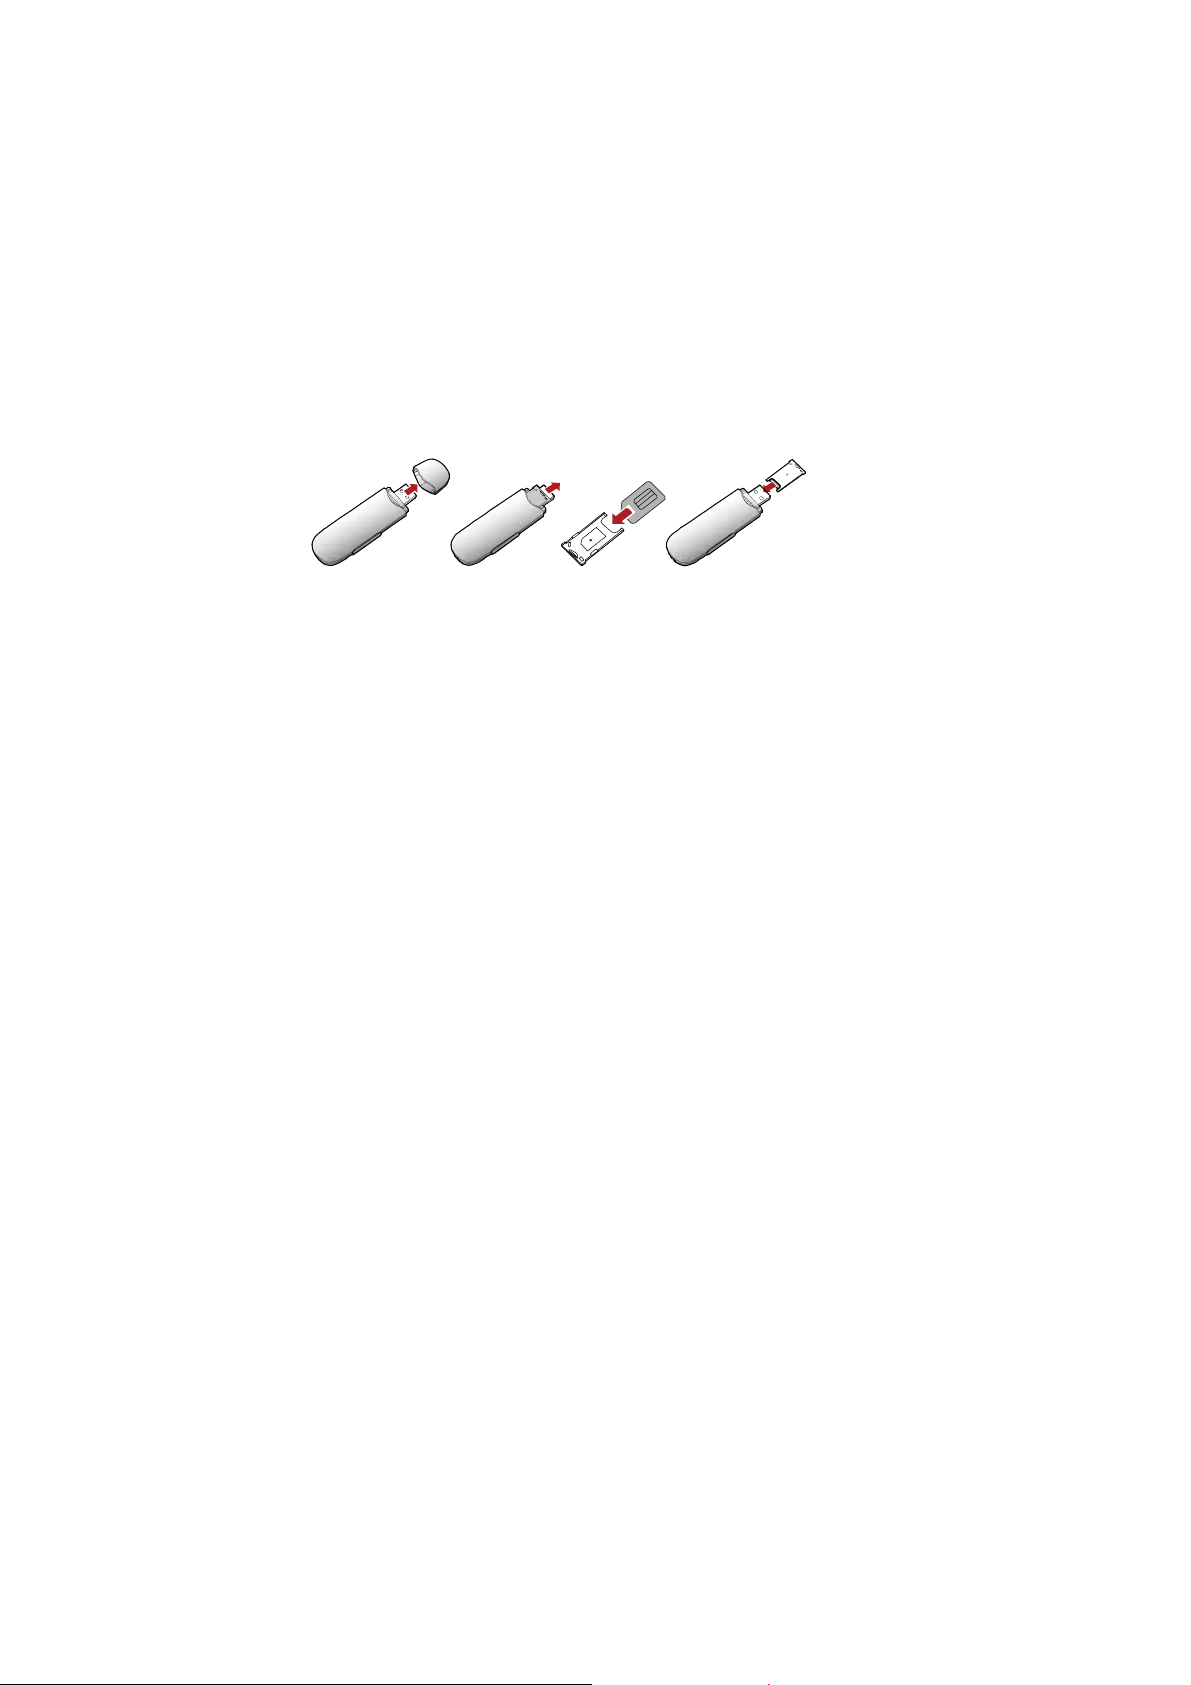
Preparing the E176
Inserting the USIM/SIM Card
Insert the USIM/SIM card into the card slots. Make sure that the cards are
properly inserted.
4
 Loading...