

Page 1

Atlas Intelligent Edge
V100R020C00
CANN Software Installation Guide
(A500-3000, A500-3010)
Issue 01
Date 2021-03-02
HUAWEI TECHNOLOGIES CO., LTD.
Page 2

Copyright © Huawei Technologies Co., Ltd. 2021. All rights reserved.
No part of this document may be reproduced or transmitted in any form or by any means without prior
written consent of Huawei Technologies Co., Ltd.
Trademarks and Permissions
and other Huawei trademarks are trademarks of Huawei Technologies Co., Ltd.
All other trademarks and trade names mentioned in this document are the property of their respective
holders.
Notice
The purchased products, services and features are stipulated by the contract made between Huawei and
the customer. All or part of the products, services and features described in this document may not be
within the purchase scope or the usage scope. Unless otherwise specied in the contract, all statements,
information, and recommendations in this document are provided "AS IS" without warranties, guarantees
or representations of any kind, either express or implied.
The information in this document is subject to change without notice. Every eort has been made in the
preparation of this document to ensure accuracy of the contents, but all statements, information, and
recommendations in this document do not constitute a warranty of any kind, express or implied.
Issue 01 (2021-03-02) Copyright © Huawei Technologies Co., Ltd. i
Page 3

Atlas Intelligent Edge
CANN Software Installation Guide (A500-3000,
A500-3010) Contents
Contents
1 Installation Scenarios............................................................................................................. 1
2 Installing the Development Environment......................................................................... 2
2.1 Obtaining Software Packages............................................................................................................................................. 2
2.2 Preparations for Installation................................................................................................................................................3
2.2.1
Conguring Ubuntu x86.................................................................................................................................................... 3
2.3 Procedure................................................................................................................................................................................... 9
2.4 Conguring the Compilation Environment.................................................................................................................. 11
2.5 Developing Applications..................................................................................................................................................... 12
2.6 Verifying Applications..........................................................................................................................................................12
2.6.1 Verication Description................................................................................................................................................... 12
2.6.2 Creating an Inference Container Image.................................................................................................................... 12
2.6.3 Starting and Verifying a Container Image................................................................................................................16
3 Installing the Operating Environment............................................................................. 19
3.1 Data Planning........................................................................................................................................................................ 19
3.1.1 AI Edge Station Network Ports..................................................................................................................................... 19
3.1.2 Typical Networking........................................................................................................................................................... 20
3.1.3 Drive Partition Planning.................................................................................................................................................. 22
3.2 Obtaining Software Packages...........................................................................................................................................22
3.3 Default Information............................................................................................................................................................. 22
3.4 Scenarios.................................................................................................................................................................................. 23
3.5 Scenario 1: Batch
3.5.1 Installing and Running SmartKit.................................................................................................................................. 24
3.5.2 Batch Conguration Using a Template......................................................................................................................26
3.6 Scenario 2: Single-Device Conguration.......................................................................................................................31
3.6.1 Initial
3.6.2 Managing Atlas 500 AI Edge Stations on FusionDirector................................................................................... 31
3.7 Deploying Applications....................................................................................................................................................... 38
Conguration......................................................................................................................................................... 31
Conguration Using SmartKit (Recommended).....................................................................24
4 Common Operations............................................................................................................ 39
4.1 Conguring a System Network Proxy............................................................................................................................39
4.2 Uninstalling the CANN Software.....................................................................................................................................40
4.3 Setting User Account Validity Period............................................................................................................................. 41
5 FAQs..........................................................................................................................................43
Issue 01 (2021-03-02) Copyright © Huawei Technologies Co., Ltd. ii
Page 4

Atlas Intelligent Edge
CANN Software Installation Guide (A500-3000,
A500-3010) Contents
5.1 What Do I Do If "Could not nd a version that satises the requirement xxx" Is Displayed When
pip3.7.5 install Is Run?................................................................................................................................................................43
6 References...............................................................................................................................45
6.1 Parameters.............................................................................................................................................................................. 45
6.2 About CCEC Compiler.......................................................................................................................................................... 47
6.3 HCC Overview........................................................................................................................................................................ 48
A Change History...................................................................................................................... 50
Issue 01 (2021-03-02) Copyright © Huawei Technologies Co., Ltd. iii
Page 5

Atlas Intelligent Edge
CANN Software Installation Guide (A500-3000,
A500-3010) 1 Installation Scenarios
1 Installation Scenarios
Installing the Development Environment
The development environment refers to an environment used by a user to develop
an application program. It is usually deployed a PC or a server.
The development kit must be installed in the development environment. In the
scenario where the operating environment is deployed on an ARM device and the
development environment is deployed on an x86-architecture device, you need to
install the development kits of both the x86 and ARM architectures and the cross
compilation tool in the development environment.
Installing the Operating Environment
The operating environment is the environment for running applications developed
by users. The operating environment requires the
devices. See Atlas 500 AI edge station.
Create a container image using the
run the container image on an Ascend AI device.
conguration of Ascend AI
oine inference engine and applications, and
Issue 01 (2021-03-02) Copyright © Huawei Technologies Co., Ltd. 1
Page 6

Atlas Intelligent Edge
CANN Software Installation Guide (A500-3000,
A500-3010) 2 Installing the Development Environment
2 Installing the Development Environment
2.1 Obtaining Software Packages
2.2 Preparations for Installation
2.3 Procedure
Conguring the Compilation Environment
2.4
2.5 Developing Applications
2.6 Verifying Applications
2.1 Obtaining Software Packages
Downloading Software Packages
Before installing the software, obtain software packages. The versions of the
software packages must be consistent.
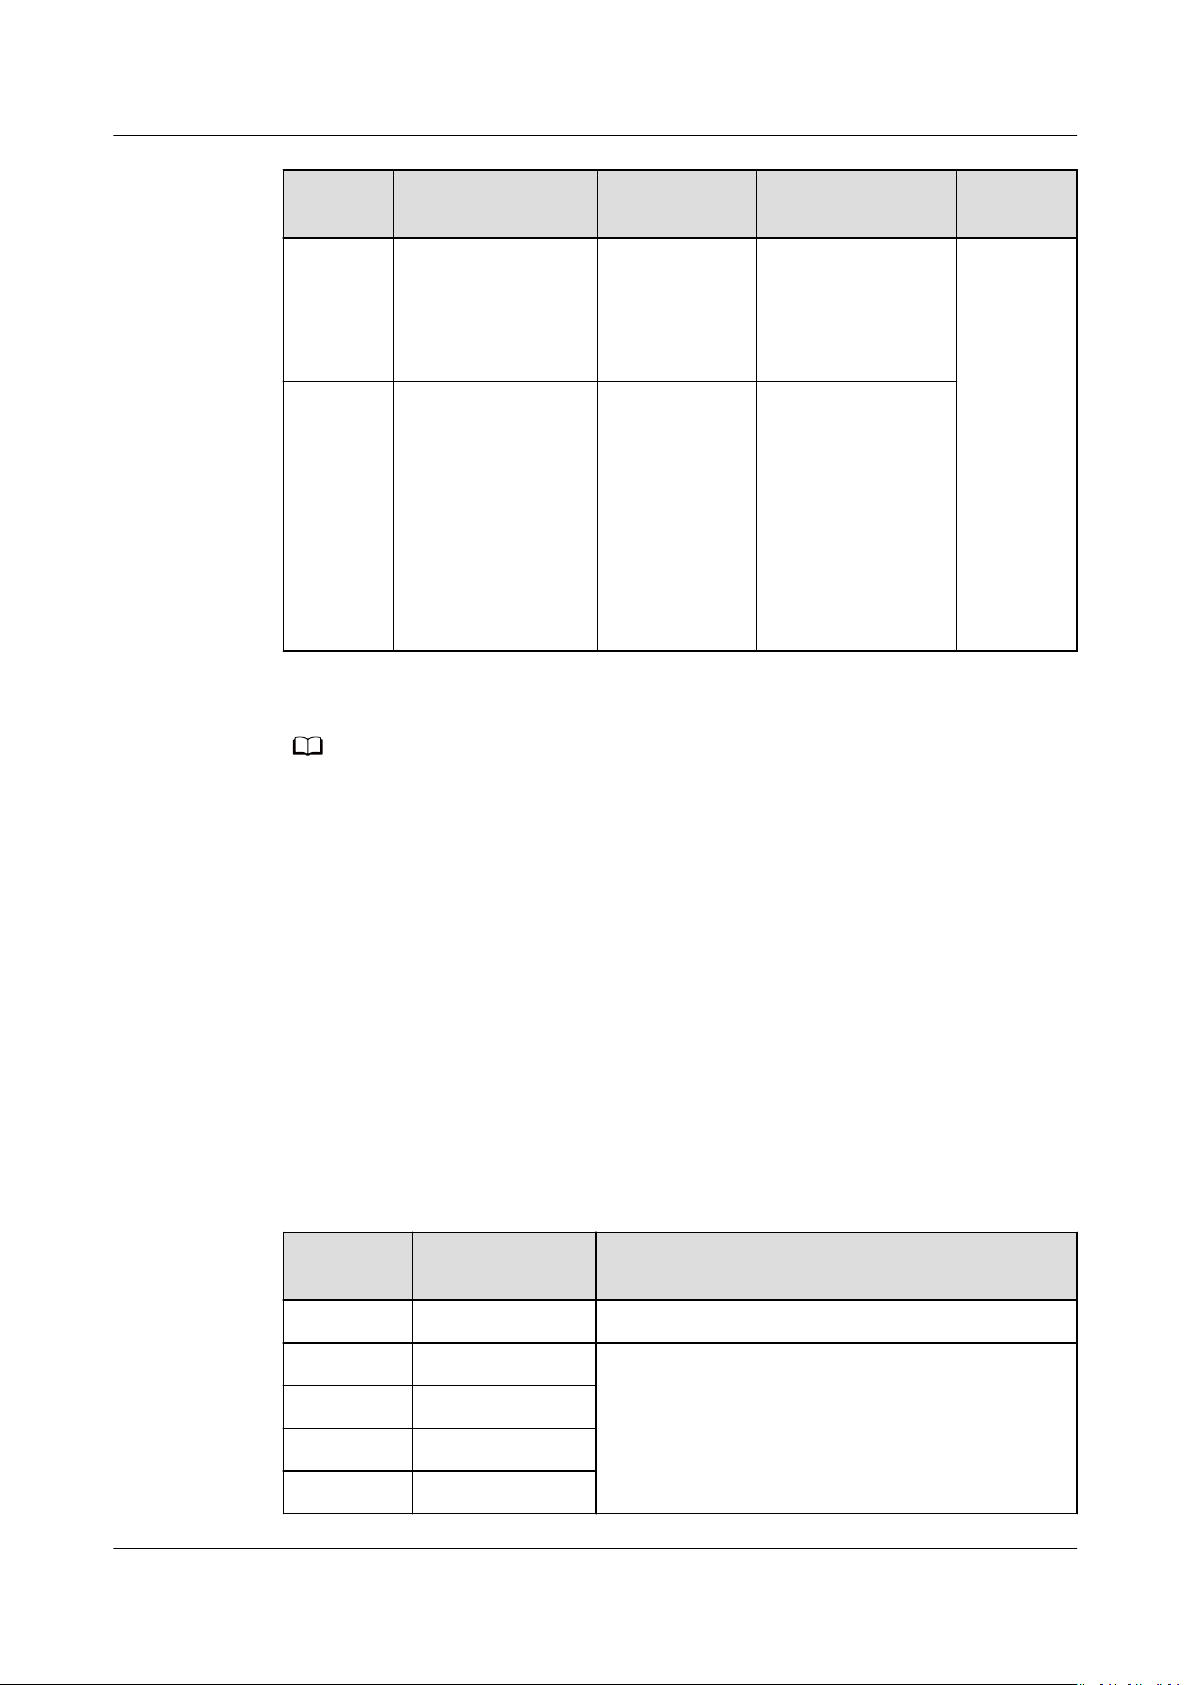
Table 2-1 Software packages
Name
Develop
ment kit
Package OS
Architecture
Ascend-canntoolkit_
nuxx86_64_gcc7.3.0.ru
n
{version}
Ubuntu X86 It is used for
_li
Description How to
Obtain
Link
application
development,
custom operator,
and model
conversion. The
development kit
contains the
library
required for
developing
applications and
development
les
Issue 01 (2021-03-02) Copyright © Huawei Technologies Co., Ltd. 2
Page 7
NO TE
Atlas Intelligent Edge
CANN Software Installation Guide (A500-3000,
A500-3010) 2 Installing the Development Environment
Name Package OS
Ascend-cann-
Oine
inference
engine
package
toolkit_
nuxaarch64_gcc7.3.0.r
un
Ascend-cannnnrt_
xaarch64_gcc7.3.0.r
un
{version}
{version}
_li
_linu
Description How to
Architecture
Ubuntu Arm auxiliary tools
such as the ATC
model conversion
tool.
Ubuntu ARM
container
basic image
It contains the
ACL library ACLlib,
which is used for
model inference
of applications.
The package is
used for 2.6.2
Creating an
Inference
Container Image.
Obtain
{version}
indicates the software version.
2.2 Preparations for Installation
2.2.1 Conguring Ubuntu x86
Environment Requirements
Prepare an x86 server (or PC) for setting up the development environment. You
need to install the Ubuntu x86 on the server in advance.
The hardware and OS of the development environment must meet the
requirements listed in Table 2-2.
Table 2-2 Ubuntu x86 version information
Parameter
OS 18.04 Ocial website
Python 3.7.5 See Installing Dependencies.
Version
Restriction
How to Obtain
cmake 3.5.1+
protobuf 3.11.3+
g++ 7.3.0 or later
Issue 01 (2021-03-02) Copyright © Huawei Technologies Co., Ltd. 3
Page 8

Atlas Intelligent Edge
CANN Software Installation Guide (A500-3000,
A500-3010) 2 Installing the Development Environment
Parameter Version
Restriction
gcc 7.3.0 or later
Checking the umask of the root User
1. Log in to the installation environment as the root user.
2. Check the umask value of the root user.
umask
3. If the umask value is not 0022, append "umask 0022" to the le and save the
le:
a. Run the following command in any directory to open the .bashrc le.
vi ~/.bashrc
Append umask 0022 to the end of the le.
b. Run the :wq! command to save the le and exit.
c. Run the source ~/.bashrc command for the modication to take eect
immediately.
How to Obtain
Creating Installation and Running Users
Table 2-3 lists the users for installing and running the rmware and CANN
software.
Table 2-3 Installation and running user list
Package
Type
CANN
software
packages
● For installation as the root user:
After installation as the root user, you must switch to a non-root user for
execution (the running user must not belong to the root user group).
Therefore, you need to create a running user before the installation.
– If the created user is HwHiAiUser, you can directly install the software
– If the created user is not HwHiAiUser, you need to specify the running
● For installation as a non-root user:
Installation User Running User
The user can be root or
non-root. For details, see
the content below the
table.
packages as the HwHiAiUser user. The default installation user is
HwHiAiUser.
user (by using the --install-username=
usergroup=
user group
parameter) when installing the software package.
Perform the following operations to create a user.
The user must be a non-root user.
user name
--install-
Issue 01 (2021-03-02) Copyright © Huawei Technologies Co., Ltd. 4
Page 9

NO TE
NO TE
Atlas Intelligent Edge
CANN Software Installation Guide (A500-3000,
A500-3010) 2 Installing the Development Environment
In this scenario, the installation and running users must be the same.
– If a non-root user exists, you do not need to create one.
– If you want to use a new non-root user, you need to create the user rst.
To create a non-root user, run the following commands as the root user:
1. Create a non-root user.
groupadd
useradd -g
usergroup
usergroup
-d /home/
username
-m
username
2. Set the password of the non-root user.
passwd
username
● The created running user cannot belong to the root user group.
● After the HwHiAiUser user is created, do not disable the login authentication function
of the user.
● The password validity period is 90 days. You can change the validity period in the /etc/
login.defs
Validity Period.
le or using the chage command. For details, see 4.3 Setting User Account
Conguring Permissions for the User
Before installing the development kit, you need to download the dependencies,
which require sudo apt-get permission. Run the following commands as the root
user:
1. Open the /etc/sudoers
chmod u+w /etc/sudoers
vi /etc/sudoers
2. Add the following content under # User privilege specication of the le:
root ALL=(ALL:ALL) ALL
username
mkdir, /bin/rm, /bin/sh, /bin/cp, /bin/bash, /usr/bin/make install, /bin/ln -s /usr/local/python3.7.5/bin/
python3 /usr/bin/python3.7, /bin/ln -s /usr/local/python3.7.5/bin/pip3 /usr/bin/pip3.7, /bin/ln -s /usr/
local/python3.7.5/bin/python3 /usr/bin/python3.7.5, /bin/ln -s /usr/local/python3.7.5/bin/pip3 /usr/bin/
pip3.7.5, /usr/bin/unzip,
visudo,/bin/mv,/bin/echo,/bin/chown,/usr/bin/killall,/usr/bin/kill,/usr/bin/yum,/usr/bin/zypper,/usr/sbin/
userdel,/usr/sbin/groupadd,/bin/cat,/usr/sbin/usermod,/usr/bin/passwd,/usr/bin/touch,/usr/sbin/
useradd,/usr/sbin/sshd,/bin/dd,/bin/df,/usr/sbin/groupdel,/bin/grep,/usr/sbin/service,/bin/ls,/bin/egrep,/
sbin/ldcong,/usr/bin/du,/bin/readlink,/usr/bin/sqlite3,/usr/sbin/iotop,
ltrace, /usr/bin/nd
ALL=(ALL:ALL) NOPASSWD:SETENV:/usr/bin/apt-get, /usr/bin/pip, /bin/tar, /bin/
Replace username with the actual installation userfor installation as a nonroot user. Replace username with the actual running user (HwHiAiUser by
default) for installation as the root user.
le:
/bin/su,/bin/sed,/bin/chmod,/usr/bin/add_sudo.sh,/usr/bin/test,/usr/sbin/
/usr/bin/perf, /usr/bin/
Ensure that the /etc/sudoers le contains #includedir /etc/sudoers.d. If the le does
not contain #includedir /etc/sudoers.d, manually add it to the end of the
le.
3. Run the :wq! command to save the le.
4. Run the following command to revoke the write permission on the /etc/
sudoers le:
chmod u-w /etc/sudoers
Issue 01 (2021-03-02) Copyright © Huawei Technologies Co., Ltd. 5
Page 10

NO TE
Atlas Intelligent Edge
CANN Software Installation Guide (A500-3000,
A500-3010) 2 Installing the Development Environment
Checking the Source Validity
Development kit installation requires the download of related dependencies.
Ensure that the installation environment can be connected to the network.
Run the following command as the root user to check whether the source is valid:
apt-get update
If an error is reported during command execution or dependency installation,
check whether the network connection is normal, or replace the source in
the /etc/apt/sources.list
details about how to
le with an available source or use an image source. For
congure a network proxy, see 4.1 Conguring a System
Network Proxy.
Installing Dependencies
● If you install Python and its dependencies as the root user, perform 1 to 3. Note that
the sudo keywords in the commands need to be deleted if any.
● If you install Python and its dependencies as a non-root user, run the su - username
command to switch to the non-root user and perform Step 1 to Step 3.
Step 1 Check whether the Python dependencies and GCC software are installed.
Run the following commands to check whether the dependencies such as GCC,
Make, and Python are installed:
gcc --version
g++ --version
make --version
cmake --version
dpkg -l zlib1g| grep zlib1g| grep ii
dpkg -l zlib1g-dev| grep zlib1g-dev| grep ii
dpkg -l libsqlite3-dev| grep libsqlite3-dev| grep ii
dpkg -l openssl| grep openssl| grep ii
dpkg -l libssl-dev| grep libssl-dev| grep ii
lib-dev| grep lib-dev| grep ii
dpkg -l
dpkg -l unzip| grep unzip| grep ii
dpkg -l pciutils| grep pciutils| grep ii
dpkg -l net-tools| grep net-tools| grep ii
If the following information is displayed, the installation is complete. Go to the
next step.
gcc (Ubuntu 7.3.0-3ubuntu1~18.04) 7.3.0
g++ (Ubuntu 7.3.0-3ubuntu1~18.04) 7.3.0
GNU Make 4.1
cmake version 3.10.2
zlib1g:amd64 1:1.2.11.dfsg-0ubuntu2 amd64 compression library - runtime
zlib1g-dev:amd64 1:1.2.11.dfsg-0ubuntu2 amd64 compression library - development
libsqlite3-dev:amd64 3.22.0-1ubuntu0.3 amd64 SQLite 3 development
openssl 1.1.1-1ubuntu2.1~18.04.5 amd64 Secure Sockets Layer toolkit - cryptographic utility
libssl-dev:amd64 1.1.1-1ubuntu2.1~18.04.5 amd64 Secure Sockets Layer toolkit - development
lib-dev:amd64 3.2.1-8 amd64 Foreign Function Interface library (development les)
unzip 6.0-21ubuntu1 amd64 De-archiver for .zip les
pciutils 1:3.5.2-1ubuntu1.1 amd64 Linux PCI Utilities
net-tools 1.60+git20161116.90da8a0-1ubuntu1 amd64 NET-3 networking toolkit
les
les
Otherwise, run the following command to install the software. You can change the
following command to install only some of them as required.
Issue 01 (2021-03-02) Copyright © Huawei Technologies Co., Ltd. 6
Page 11

CA UTION
Atlas Intelligent Edge
CANN Software Installation Guide (A500-3000,
A500-3010) 2 Installing the Development Environment
● If you install dependencies as the root user, delete sudo from the commands in
steps 1 and 2.
● If Python and its dependency are installed as a non-root user, run the su -
username
command to switch to the non-root user, and then perform step 1
to step 3.
● libsqlite3-dev must be installed before the Python installation. If the Python
3.7.5 environment has been installed in the user's OS and libsqlite3-dev is
installed after the Python 3.7.5 environment is installed, you need to rebuild
the Python environment.
sudo apt-get install -y gcc g++ make cmake zlib1g zlib1g-dev libsqlite3-dev openssl libssl-dev lib-dev
unzip pciutils net-tools
Step 2 Check whether the Python development environment is installed.
The development kit depends on the Python environment. Run the python3.7.5 --
version and pip3.7.5 --version commands to check whether Python has been
installed. If the following information is displayed, Python has been installed. Go
to the next step.
Python 3.7.5
pip
19.2.3
from /usr/local/python3.7.5/lib/python3.7/site-packages/pip (python 3.7)
Otherwise, use the following procedure to install Python 3.7.5:
1. Run the wget command to download the source code package of Python
3.7.5 to any directory of the installation environment. The command is as
follows:
wget https://www.python.org/ftp/python/3.7.5/Python-3.7.5.tgz
2. Run the following command to go to the download directory and decompress
the source code package:
tar -zxvf Python-3.7.5.tgz
3. Go to the decompressed folder and run the following conguration, build, and
installation commands:
cd Python-3.7.5
./congure --prex=/usr/local/python3.7.5 --enable-loadable-sqlite-extensions --enable-shared
make
sudo make install
--prex parameter species the Python installation path. You can change
The
it based on the site requirements. The --enable-shared parameter is used to
compile the libpython3.7m.so.1.0 dynamic library. The --enable-loadable-
sqlite-extensions parameter is used to load libsqlite3-dev.
This document uses
--prex=/usr/local/python3.7.5 as an example. After the
conguration, compilation, and installation commands are executed, the
installation package is output to the /usr/local/python3.7.5 directory, and the
libpython3.7m.so.1.0 dynamic library is output to the /usr/local/
python3.7.5/lib/libpython3.7m.so.1.0 directory.
4. Check whether libpython3.7m.so.1.0 exists in /usr/lib64 or /usr/lib. If yes,
skip this step or back up the libpython3.7m.so.1.0
le provided by the system
and run the following command:
Copy the compiled le libpython3.7m.so.1.0 to /usr/lib64:
sudo cp /usr/local/
python3.7.5/lib/
libpython3.7m.so.1.0 /usr/lib64
Issue 01 (2021-03-02) Copyright © Huawei Technologies Co., Ltd. 7
Page 12

Atlas Intelligent Edge
CANN Software Installation Guide (A500-3000,
A500-3010) 2 Installing the Development Environment
When the following information is displayed, enter y to overwrite the
libpython3.7m.so.1.0 le provided by the system.
cp: overwrite 'libpython3.7m.so.1.0'?y
If the /usr/lib64 directory does not exist in the environment, copy the le to
the /usr/lib directory.
sudo cp /usr/local
/python3.7.5/lib
/libpython3.7m.so.1.0 /usr/lib
Replace the path of the libpython3.7m.so.1.0 le as required.
5. Run the following commands to set the soft link:
sudo ln -s /usr/local/python3.7.5/bin/python3 /usr/bin/python3.7
sudo ln -s /usr/local/python3.7.5/bin/pip3 /usr/bin/pip3.7
sudo ln -s /usr/local/python3.7.5/bin/python3 /usr/bin/python3.7.5
sudo ln -s /usr/local/python3.7.5/bin/pip3 /usr/bin/pip3.7.5
If a message indicating that the link already exists is displayed during the
command execution, run the following commands to delete the existing link
and run the commands again:
sudo rm -rf /usr/bin/python3.7.5
sudo rm -rf /usr/bin/pip3.7.5
sudo rm -rf /usr/bin/python3.7
sudo rm -rf /usr/bin/pip3.7
6. Run the following commands to set the soft link:
sudo ln -s /usr/local/python3.7.5/bin/python3 /usr/local/python3.7.5/bin/python3.7.5
sudo ln -s /usr/local/python3.7.5/bin/pip3 /usr/local/python3.7.5/bin/pip3.7.5
7. Set the Python 3.7.5 environment variables.
a. Run the vi ~/.bashrc command in any directory as the running user to
open the .bashrc
# Set the Python 3.7.5 library path.
export LD_LIBRARY_PATH=/usr/local/python3.7.5/lib:$LD_LIBRARY_PATH
# If multiple Python 3 versions exist in the user environment, specify Python 3.7.5.
export PATH=/usr/local/python3.7.5/bin:$PATH
b. Run the :wq! command to save the
le and append the following content to the le:
le and exit.
c. Run the source ~/.bashrc command for the modication to take eect
immediately.
8. After the installation is complete, run the following commands to check the
installation version. If the required version information is displayed, the
installation is successful.
python3.7.5 --version
pip3.7.5 --version
Step 3 Install the Python 3 development environment.
Before the installation, run the pip3.7.5 list command to check whether the
dependencies have been installed. If yes, skip this step. If not, run the following
command to install the dependencies: (If only some of the software is not
installed, modify the following command to install selected software only.)
If you install Python and its dependencies as a non-root user, add --user at the
end of each command in this step to ensure that the installation is successful.
Example command: pip3.7.5 install attrs --user
pip3.7.5 install attrs
pip3.7.5 install psutil
pip3.7.5 install decorator
pip3.7.5 install numpy
pip3.7.5 install protobuf==
pip3.7.5 install scipy
pip3.7.5 install sympy
pip3.7.5 install
c
3.11.3
Issue 01 (2021-03-02) Copyright © Huawei Technologies Co., Ltd. 8
Page 13

NO TE
Atlas Intelligent Edge
CANN Software Installation Guide (A500-3000,
A500-3010) 2 Installing the Development Environment
pip3.7.5 install grpcio==1.32.0
pip3.7.5 install grpcio-tools==1.32.0
pip3.7.5 install requests
During the command execution, if the network connection fails and the message
"Could not nd a version that satises the requirement
xxx
" is displayed, rectify
the fault by referring to 5.1 What Do I Do If "Could not nd a version that
satises the requirement xxx" Is Displayed When pip3.7.5 install Is Run?.
----End
2.3 Procedure
Prerequisites
You have prepared for the installation by referring to 2.2 Preparations for
Installation.
Procedure
Step 1 Log in to the installation environment as the installation user of the software
Step 2 Upload the development kit obtained in 2.1 Obtaining Software Packages to any
Step 3 Go to the directory where the software package is stored.
Step 4 Grant the execute permission on the software package.
Obtain the development kit packages Ascend-cann-toolkit_
x86_64_gcc7.3.0.run and Ascend-cann-toolkit_
{version}
{version}
_linux-
_linux-
aarch64_gcc7.3.0.run by referring to 2.1 Obtaining Software Packages.
package.
Ensure that the installation user of the software packages is the same as the
installation dependency user in 2.2 Preparations for Installation.
directory (for example, /home/package) in the installation environment.
You need to obtain the two software packages applicable to Ubuntu x86 and
Ubuntu ARM, upload the two software packages, and perform the entire
installation process from Step 4 to Step 7.
chmod +x *.run
In the preceding command, *.run indicates the development kit Ascend-canntoolkit_
{version}
_linux-
{arch}
_gcc7.3.0.run. Replace it with the actual package name.
Step 5 Run the following command to check the consistency and integrity of the software
package installation
le:
./*.run --check
Step 6 Create a software installation path.
● If you need to specify the installation path, you need to create it rst. For
example, if the installation path is /home/work, run the mkdir -p /home/
work command to create an installation path and then select the path to
install the software.
Issue 01 (2021-03-02) Copyright © Huawei Technologies Co., Ltd. 9
Page 14

Atlas Intelligent Edge
CANN Software Installation Guide (A500-3000,
A500-3010) 2 Installing the Development Environment
● If you do not specify an installation path, the software is installed in the
default path. Table 2-4 lists the default paths.
Table 2-4 Software package installation paths
Item Directory
Default
installation
path of
software
packages
Installation log
path
Path for
recording
information
such as the
software
package
version, CPU
architecture,
GCC version,
and installation
path after the
installation
– root user: /usr/local/Ascend
– Non-root user:
${install_path}
gcc
x.x.x
/ascend_install.log
${install_path}
gcc
x.x.x
/ascend_toolkit_install.info
${HOME}
/Ascend
/ascend-toolkit/
/ascend-toolkit/
{version}/{arch}
{version}/{arch}
-linux-
-linux-
Table 2-5 describes the variables in Table 2-4.
Table 2-5 Variable description
Variable
Description
{version} Version directory, which is named after the
version number of a software package.
NOTE
Multiple versions can be installed, which are
dierentiated by version numbers.
{arch}
-linux-gcc
x.x.x
Architecture directory, which is named after
the combination of the CPU architecture,
Linux branch, and GCC version of a software
package.
NOTE
Multiple versions can be installed.
${HOME} Current user name.
${install_path} Software package installation path.
Issue 01 (2021-03-02) Copyright © Huawei Technologies Co., Ltd. 10
Page 15

NO TE
Atlas Intelligent Edge
CANN Software Installation Guide (A500-3000,
A500-3010) 2 Installing the Development Environment
Step 7 Install the software. (The following commands support --install-for-all and --
install-path=
<path>
. For details about the parameters, see 6.1 Parameters.)
● If the installation is performed as a non-root user, run the following
command:
./*.run --install
● If the installation is performed as the root user:
– As the default running user HwHiAiUser, run the following command:
./*.run --install
– As a
specied running user, run the following command:
./*.run --install-username=
username
--install-usergroup=
usergroup
--
install
where, --install-username and --install-usergroup are used to specify
the running users.
● If the installation is performed by the root user, do not to specify the installation path in
the directory of a non-root user. Otherwise, the root user le may be replaced by a nonroot user for privilege escalation.
● The --quiet option is not supported when the development kit Ascend-cann-
toolkit_
● If the following information is displayed during the installation of the development kit
Ascend-cann-toolkit_
asking you whether to perform a hot reset, enter n. After the installation is complete,
restart the OS for the setting to take
The installation of aicpu_kernels needs to restart the device to take eect, do you want to
hot_reset the device? [y/n] n
For more installation modes, see 6.1 Parameters.
{version}
_linux-
{arch}_{gcc_version}
{version}
.run is installed in an x86 system.
_linux-
{arch}_{gcc_version}
eect. In the current version, only n is supported.
.run in the x86 system,
If the following information is displayed, the software is successfully installed:
[INFO]
xxx
[INFO] process end
xxx
install success
indicates the name of the software package to be installed.
----End
2.4 Conguring the Compilation Environment
The OS and architecture of the development environment are dierent from those
of the operating environment. Therefore, you need to install the cross-compiler in
the development environment. For details, see Table 2-6.
Issue 01 (2021-03-02) Copyright © Huawei Technologies Co., Ltd. 11
Page 16

Atlas Intelligent Edge
CANN Software Installation Guide (A500-3000,
A500-3010) 2 Installing the Development Environment
Table 2-6 Cross-compiler installation
OS and
Architectu
re of the
Developm
ent
Environm
ent
Ubuntu18.
04+x86_64
OS and
Archite
cture of
the
Operati
ng
Environ
ment
Ubuntu
18.04+A
rm64
Compilation Environment Conguration
Run the aarch64-linux-gnu-g++ --version command in
the development environment as the installation user of
the software package to check whether g++ has been
installed. If not, run the following command to install g
++:
sudo apt install g++-aarch64-linux-gnu
2.5 Developing Applications
After the development environment is set up, developers can develop applications
in the development environment. For details, see the
Solution V100R020C00 Application Software Development Guide
Atlas Intelligent Edge
.
2.6 Verifying Applications
2.6.1 Verication Description
Prepare an Atlas 500 AI edge station by referring to 3 Installing the Operating
Environment and perform the following operations on the edge station.
2.6.2 Creating an Inference Container Image
Prerequisites
● In the container scenario, install Docker 18.03 or later.
● Obtain the
package by referring to Table 2-7. The user environment needs to connect to
the network to pull images. If the network is not connected, see 4.1
Conguring a System Network Proxy.
oine inference engine package and service inference program
Issue 01 (2021-03-02) Copyright © Huawei Technologies Co., Ltd. 12
Page 17

Atlas Intelligent Edge
CANN Software Installation Guide (A500-3000,
A500-3010) 2 Installing the Development Environment
Table 2-7 Required software
Software Package Description How to Obtain
A500-3000nnrt_
{version}
aarch64_gcc7.3.0.run
dockerle Required for creating an
Service inference program
package
_linux-
Oine inference engine
package
{version}
software package
version.
image
Collection of service
inference programs.
The .tar and .tgz
formats are supported.
The compressed
package format of the
service inference
program must be
supported by the
compression program in
the container. In
addition, the command
for decompressing the
service inference
program package in
install.sh must map the
actual format.
indicates the
Link
Prepared by
users
Prepared by
users
Procedure
Step 1 Upload the software package to the same directory (for example, /home/test) on
Step 2 Perform the following steps to create a Dockerle:
install.sh Installation script of the
service inference
program.
run.sh Script for running the
service inference
program.
the edge station.
● A500-3000-nnrt_
● Service inference program package
1. Log in to the edge station as the root user and run the id HwHiAiUser
command to query and record the UID and GID of the HwHiAiUser user on
the host.
2. Go to the software package upload directory in Step 1 and run the following
command to create a
{version}
_linux-aarch64_gcc7.3.0.run
Dockerle (for example, Dockerle):
Issue 01 (2021-03-02) Copyright © Huawei Technologies Co., Ltd. 13
Page 18

NO TE
Atlas Intelligent Edge
CANN Software Installation Guide (A500-3000,
A500-3010) 2 Installing the Development Environment
vi Dockerle
3. Write the following content and run the :wq command to save the content.
The Ubuntu Arm OS is used as an example.
#OS and version number. Change them based on the site requirements.
FROM ubuntu:18.04
# Set the parameters of the oine inference engine package.
ARG NNRT_PKG
# Set environment variables.
ARG ASCEND_BASE=/usr/local/Ascend
ENV LD_LIBRARY_PATH=\
$LD_LIBRARY_PATH:\
$ASCEND_BASE/nnrt/latest/acllib/lib64:\
/home/data/miniD/driver/lib64
# Set the directory of the started container.
WORKDIR /root
# Copy the
COPY $NNRT_PKG .
oine inference engine package.
# Install the
RUN umask 0022 && \
groupadd -g
&& usermod -u
chmod +x ${NNRT_PKG} &&\
./${NNRT_PKG} --quiet --install &&\
rm ${NNRT_PKG}
# Copy the service inference program package, installation script, and running script.
ARG DIST_PKG
COPY $DIST_PKG .
COPY install.sh .
COPY run.sh /usr/local/bin/
#Run the installation script.
RUN chmod +x /usr/local/bin/run.sh && \
sh install.sh && \
rm $DIST_PKG && \
rm install.sh
#Program that is run by default when the container is started.
CMD run.sh
Dockerle:
In
groupadd -g
usermod -u
oine inference engine package.
gid
HwHiAiUser && useradd -g HwHiAiUser -d /home/HwHiAiUser -m HwHiAiUser
uid
HwHiAiUser &&\
gid
HwHiAiUser && useradd -g HwHiAiUser -d /home/HwHiAiUser -m HwHiAiUser &&
uid
HwHiAiUser &&\
Create the HwHiAiUser user in the container. gid and uid in the le indicate
the UID and GID of the HwHiAiUser user on the host. You can replace them
as required according t Step 2.1. The UID and GID of the HwHiAiUser user in
the container must be the same as those on the host.
– In this document, the driver running user is HwHiAiUser. If you specify another
user as the driver running user, change the user name to the actual one.
– To obtain the image ubuntu:18.04, you can also run the docker pull ubuntu:18.04
command to obtain the image from Docker Hub.
4. After creating the Dockerle, run the following command to change the
permission on the Dockerle:
chmod 600 Dockerle
Issue 01 (2021-03-02) Copyright © Huawei Technologies Co., Ltd. 14
Page 19

Atlas Intelligent Edge
CANN Software Installation Guide (A500-3000,
A500-3010) 2 Installing the Development Environment
5. The procedure for preparing the install.sh and run.sh scripts is the same as
that for preparing the Dockerle. Compilation Sample shows the le
content.
Step 3 Go to the directory where the software package is stored and run the following
command to create a container image:
docker build -t
DIST_PKG=
image-name
distpackage-name
--build-arg NNRT_PKG=
.
nnrt-name
--build-arg
Do not omit . at the end of the command. Table 2-8 describes the parameters in
the command.
Table 2-8 Command parameter description
Parameter Description
image-name
You can set the image name and tag as required.
--build-arg Species parameters in the Dockerle.
NNRT_PKG
nnrt-name
: species the name of the oine inference
engine package. Do not omit the le name extension.
Replace it with the actual one.
DIST_PKG
distpackage-name
: species the name of the compressed
package of the service inference program. Do not omit
the le name extension. Replace it with the actual one.
If "Successfully built xxx" is displayed, the image is successfully created.
Step 4 After the image is created, run the following command to view the image
information:
docker images
Example:
REPOSITORY TAG IMAGE ID CREATED SIZE
workload-image v1.0 1372d2961ed2 About an hour ago 249MB
----End
Compilation Sample
Example of compiling install.sh
#!/bin/bash
# Go to the container working directory.
cd /root
#Decompress the service inference program package based on the package format.
tar xf dist.tar
# Create log-related
mkdir -p /usr/slog
mkdir -p /var/log/npu/slog/slogd
chown -Rf HwHiAiUser:HwHiAiUser /usr/slog
chown -Rf HwHiAiUser:HwHiAiUser /var/log/npu/slog
les.
Issue 01 (2021-03-02) Copyright © Huawei Technologies Co., Ltd. 15
Page 20

Atlas Intelligent Edge
CANN Software Installation Guide (A500-3000,
A500-3010) 2 Installing the Development Environment
Compilation example of run.sh
#!/bin/bash
# Start the slogd daemon process.
export LD_LIBRARY_PATH=/home/data/miniD/driver/add-ons:$LD_LIBRARY_PATH
/home/data/miniD/driver/tools/slogd &
ps -ef | grep -v grep | grep "tools/slogd"
# Access the directory where the executable
cd /root/dist
#Run the executable le.
./main
le of the service inference program is located.
If the OS in the container is Ubuntu ARM 18.04, add the following content to
install.sh:
# Create a soft link for the slogd daemon process.
mkdir /lib64
cd /lib64
ln -sf /lib/ld-linux-aarch64.so.1 ld-linux-aarch64.so.1
2.6.3 Starting and Verifying a Container Image
Prerequisites
A container image has been created.
Procedure
Step 1 Log in to the edge station as the root user.
Step 2 Run the following command to start the container image and verify the startup of
the slogd daemon process and the running of service programs:
docker run --device=/dev/davinci0 --device=/dev/davinci_manager --device=/dev/hisi_hdc --device /dev/
devmm_svm \
-v /usr/local/bin/npu-smi:/usr/local/bin/npu-smi \
-v /home/data/miniD/driver/lib64:/home/data/miniD/driver/lib64 \
-v /home/data/miniD/driver/add-ons:/home/data/miniD/driver/add-ons \
-v /var/log/npu/conf/slog/slog.conf:/var/log/npu/conf/slog/slog.conf \
-v /home/data/miniD/driver/tools:/home/data/miniD/driver/tools \
-it workload-image:v1.0
Table 2-9 Parameter description
Parameter
Description
--device Adds a host device to
the container. Replace
davinci0 with the
actual device name.
If multiple chips need
to be mapped,
multiple parameters
need to be
congured,
for example, -device=/dev/davinci0
--device=/dev/
davinci1.
Issue 01 (2021-03-02) Copyright © Huawei Technologies Co., Ltd. 16
Page 21

NO TE
Atlas Intelligent Edge
CANN Software Installation Guide (A500-3000,
A500-3010) 2 Installing the Development Environment
Parameter Description
-v /usr/local/bin/npu-smi:/usr/local/bin/npu-smi Mount the npu-smi
tool to the container.
Change the value
based on the site
requirements.
-v /home/data/miniD/driver/lib64:/home/data/miniD/
driver/lib64
-v /home/data/miniD/driver/add-ons:/home/data/
miniD/driver/add-ons
-v /var/log/npu/conf/slog/slog.conf:/var/log/npu/conf/
slog/slog.conf
Mount the operating
environment
directory /home/data/
miniD/driver/lib64 to
the container. Change
the directory based on
the path of the
driver.so
le.
Mount the operating
environment
directory /home/data/
miniD/driver/add-ons
to the container.
Change the directory
based on the path of
the third-party library.
Mounts the operating
environment log
conguration
le /var/log/npu/
conf/slog/slog.conf to
the container. Change
it based on actual
situation.
-v /home/data/miniD/driver/tools:/home/data/miniD/
driver/tools
Mount the operating
environment
directory /home/data/
miniD/driver/tools to
the container. Change
the directory based on
the path of slogd.
workload-image:v1.0 Generated image le.
● In the preceding command example, the service program is run by default. If you need
to directly access the container, add /bin/bash to the end of the command.
● --device=/dev/davinci0 indicates that chip 0 is mounted to the container.
● Multiple containers can be mounted to the same chip, but cannot use the same chip at
the same time. If multiple models need to use the same chip, you are advised to deploy
multiple models in the same container.
Issue 01 (2021-03-02) Copyright © Huawei Technologies Co., Ltd. 17
Page 22

Atlas Intelligent Edge
CANN Software Installation Guide (A500-3000,
A500-3010) 2 Installing the Development Environment
If the following information is displayed, the slogd daemon process is started:
root 18 1 0 19:34 ? 00:00:00 /home/data/miniD/driver/tools/slogd
For details about how to deploy container images in batches, see the
Atlas
Intelligent Edge Solution V100R020C00 Application Deployment and Model
Update Guide (A500-3000 and A500-3010)
.
----End
Issue 01 (2021-03-02) Copyright © Huawei Technologies Co., Ltd. 18
Page 23

Atlas Intelligent Edge
CANN Software Installation Guide (A500-3000,
A500-3010) 3 Installing the Operating Environment
3 Installing the Operating Environment
3.1 Data Planning
3.2 Obtaining Software Packages
3.3 Default Information
3.4 Scenarios
3.5 Scenario 1: Batch
3.6 Scenario 2: Single-Device
3.7 Deploying Applications
Conguration Using SmartKit (Recommended)
Conguration
3.1 Data Planning
3.1.1 AI Edge Station Network Ports
Figure 3-1 shows the network ports of the Atlas 500 AI edge station.
Figure 3-1 Atlas 500 AI edge station network ports
Issue 01 (2021-03-02) Copyright © Huawei Technologies Co., Ltd. 19
Page 24

Atlas Intelligent Edge
CANN Software Installation Guide (A500-3000,
A500-3010) 3 Installing the Operating Environment
Table 3-1 Atlas 500 AI edge station network ports
Physical Network Port Description
ETH0, ETH1 Both the two network ports can be used as
management and service network ports.
The management network port is used to:
● Log in to the Atlas IES WebUI.
● Check the Atlas 500 AI edge station.
● Change the initial user name and password
for the IES.
● Change the initial IP address of the IES.
● Set the system time.
● (Optional) Create a drive partition.
● Upgrade the
The service network port is used to:
● Install the CANN software.
rmware.
3.1.2 Typical Networking
Figure 3-2 shows the typical networking of the Atlas 500 AI edge station. IEF is
short for Intelligent EdgeFabric, and FD is short for FusionDirector.
Figure 3-2 HA networking
Issue 01 (2021-03-02) Copyright © Huawei Technologies Co., Ltd. 20
Page 25

Atlas Intelligent Edge
CANN Software Installation Guide (A500-3000,
A500-3010) 3 Installing the Operating Environment
Device Port IP Address Description
Atlas
500 AI
edge
station
(active)
ETH0 Floating IP
address
(active)
Arbitration
IP address
(active)
Managemen
t IP address
(active)
Used for the Atlas 500 AI edge station to
communicate with external devices, such as IP
cameras (IPCs). If the active node is faulty,
the oating IP address of the active node is
migrated to the standby node, and the
standby node uses this IP address to
communicate with external devices.
If the user service does not need to connect to
external devices, you do not need to set the
oating IP address.
Used to assist the dual backup function in
active/standby arbitration. This IP address is
optional. The system periodically checks
whether the arbitration IP address can be
pinged to determine the network connectivity.
Generally, this parameter is set to the IP
address of the gateway.
● Used to log in to the iBMC management
system of the Atlas 500 AI edge station.
● Used for interconnection with
FusionDirector.
Atlas
500 AI
edge
station
(standb
y)
ETH1 Heartbeat
IP address
(active)
ETH0 Floating IP
address
(standby)
Arbitration
IP address
(standby)
Managemen
t IP address
(standby)
Used for information exchange and le
synchronization between the active and
standby nodes.
To detect the oating IP address status of the
active node, you need to congure an IP
address that is in the same network segment
as the oating IP address of the active node
for the standby node to ensure that the
oating IP address of the active node can be
pinged from the standby node.
Used to assist the dual backup function in
active/standby arbitration. This IP address is
optional. The system periodically checks
whether the arbitration IP address can be
pinged to determine the network connectivity.
Generally, this parameter is set to the IP
address of the gateway.
● Used to log in to the iBMC management
system of the Atlas 500 AI edge station.
● Used for interconnection with
FusionDirector.
ETH1 Heartbeat
IP address
(standby)
Issue 01 (2021-03-02) Copyright © Huawei Technologies Co., Ltd. 21
Used for information exchange and le
synchronization between the active and
standby nodes.
Page 26

NO TE
Atlas Intelligent Edge
CANN Software Installation Guide (A500-3000,
A500-3010) 3 Installing the Operating Environment
The port and IP address planning in the preceding table is only for reference. You need to
congure the IP addresses of each network port according to the actual planning.
3.1.3 Drive Partition Planning
This section describes how to plan drive partitions, including the size and type of
each partition, based on the actual application requirements.
3.2 Obtaining Software Packages
Tool Software Packages
The following software packages are required only when SmartKit is used to
deploy the Atlas 500 AI edge station in batches.
Table 3-2 Tool software packages
Package Type
SmartKit
installation
package
(required when
SmartKit is used
for
conguration
and
deployment)
SmartKit plugin package
Package How to Obtain
SmartKit_
FusionServer ToolsSmartKit-ServerMainV161.zip
3.3 Default Information
Table 3-3 lists the default parameters provided by the Atlas 500 IES. For security
purposes, you are advised to change the initial parameter values during the rst
operation and periodically update the parameter values.
{version}
.zip Select a version at FusionServer
Tools.
For example, select FusionServer
Tools 2.1.5 and then select
SmartKit_V2R6C00RC10.zip.
Select the latest version at
FusionServer Tools.
Issue 01 (2021-03-02) Copyright © Huawei Technologies Co., Ltd. 22
Page 27

Atlas Intelligent Edge
CANN Software Installation Guide (A500-3000,
A500-3010) 3 Installing the Operating Environment
Table 3-3 Default information
Category Name Default Value
CLI login data of the
Atlas 500 IES
WebUI login data of the
Atlas 500 IES
Network port data of the
Atlas 500 IES
Initial user name and
password
Default password in
develop mode
Initial user name and
password
Initial IP address of the
management network
port
● Default user name:
admin
● Default password:
Huawei12#$
● Default password:
Huawei@SYS3
● Default user name:
admin
● Default password:
Huawei12#$
● Default IP address of
eth0: 192.168.2.111,
corresponding to
network port 1
( ) of the device
hardware
● Default IP address of
eth1: 192.168.3.111,
corresponding to
network port 2
3.4 Scenarios
Table 3-4 lists the conguration scenarios of the server.
Table 3-4 Scenarios and conguration methods
Scen
ario
Mult
iple
devic
es
Congur
ation
Method
Using
SmartKit
(
hardware
Description
If multiple devices are congured, you are advised to use
SmartKit to congure the devices in batches.
) of the device
Issue 01 (2021-03-02) Copyright © Huawei Technologies Co., Ltd. 23
Page 28

NO TE
Atlas Intelligent Edge
CANN Software Installation Guide (A500-3000,
A500-3010) 3 Installing the Operating Environment
Scen
ario
One
or a
few
devic
es
Congur
ation
Method
Singledevice
congur
ation/
Using
SmartKit
Description
If only one or a few devices are congured, you can use
SmartKit to congure and deploy the devices or log in to a
single server to congure the device. If you use SmartKit to
congure the device, see 3.4 Scenarios. Scenario 2 describes
how to congure the device by logging in to a single server.
3.5 Scenario 1: Batch Conguration Using SmartKit
(Recommended)
3.5.1 Installing and Running SmartKit
This section uses FusionServer Tools 2.1.5 as an example. If the version onsite is
dierent, perform operations by referring to the user guide of the matching
version.
Prerequisites
Procedure
Step 1 Connect cables and deploy the network environment.
Step 2 Copy the SmartKit installation package downloaded in 3.2 Obtaining Software
Before installing SmartKit, ensure that the system operating environment meets
the requirements by referring to "Installing SmartKit" in the SmartKit User Guide
of the matching version.
1. Use an Ethernet cable to directly or indirectly (through switches) connect the
maintenance terminal where SmartKit is installed to the management
network port of a server.
Congure the network port IP address and subnet mask of the maintenance
2.
terminal, so that the maintenance terminal can access the server.
You are advised to set the network port IP address of the maintenance terminal and the
management network port IP address of the server in the same network segment. If the IP
addresses are not in the same network segment, congure a router to ensure that the
maintenance terminal can correctly communicate with the storage system.
Packages to the maintenance terminal where SmartKit needs to be installed.
Step 3 Install SmartKit.
1. Decompress the SmartKit_
SmartKit_
Issue 01 (2021-03-02) Copyright © Huawei Technologies Co., Ltd. 24
{version}
.exe installation le from the SmartKit_
{version}
.zip package and obtain the
{version}
folder.
Page 29

NO TE
Atlas Intelligent Edge
CANN Software Installation Guide (A500-3000,
A500-3010) 3 Installing the Operating Environment
2. Double-click the installation software and install SmartKit as prompted.
Step 4 Run SmartKit.
1. Run SmartKit on the desktop of the maintenance terminal and follow the
instructions until the identity authentication page is displayed.
You must have administrator permissions to use some functions. You are advised to
run SmartKit as an OS administrator.
2. Perform the following steps to complete identity authentication:
Figure 3-3 Identity authentication
If you are an enterprise user and have not signed the user license agreement,
click User License Agreement to sign the agreement.
a. Read the Huawei privacy statement and select I have read and agree to
Huawei Privacy Statement.
b. Perform identity authentication.
Enter the user name and password for logging in to the Huawei
enterprise technical support website and click Authenticate Now.
Issue 01 (2021-03-02) Copyright © Huawei Technologies Co., Ltd. 25
Page 30

NO TE
NO TE
Atlas Intelligent Edge
CANN Software Installation Guide (A500-3000,
A500-3010) 3 Installing the Operating Environment
▪ If identity authentication is not required now, click Authenticate Later to log
in to SmartKit as a guest. Online installation and upgrade are unavailable.
▪ If identity authentication is required now, click Authenticate Now in the
upper right corner of the toolbox to perform identity authentication.
c. Select your business domain.
d. Click OK. The SmartKit home page is displayed.
Step 5 (Optional) Upgrade SmartKit to the latest version. If the version is FusionServer
Tools 2.1.6 or later, skip this step.
Only FusionServer Tools 2.1.6 (SmartKit V2R7C00RC2) and later versions support
the IES
1. Click in the upper right corner of the home page.
2. Click Upgrade.
3. Select Online upgrade and click Next.
4. Click Upgrade and upgrade SmartKit as prompted.
conguration function.
Step 6 Install functions.
1. On the SmartKit home page, click Function Management.
The function list page is displayed.
2. Select Server in the Product Field area in the left pane and then select Site
Deployment Delivery.
3. Click and select the local plug-in package FusionServer Tools-
SmartKit-ServerMain-V161.zip.
4. Click Install.
5. After the installation is successful, click OK. IES
function list.
----End
3.5.2 Batch Conguration Using a Template
You can use SmartKit to quickly
For versions earlier than Atlas 500 AI edge station 1.0.7.SPC100, SmartKit does not support
automatic device discovery. Devices can be discovered only by using the IP address and
serial number (SN) or the IP address and MAC address.
congure the Atlas 500 AI edge station in batches.
Conguration is added to the
Data Preparation
● The PC is properly connected to the network of the Atlas 500 AI edge station
to be operated.
● You have obtained the SNs or MAC addresses of all Atlas 500 AI edge station.
● You have planned the IP addresses, subnet masks, and partitions of the Atlas
500 AI edge station NICs
Issue 01 (2021-03-02) Copyright © Huawei Technologies Co., Ltd. 26
Page 31

NO TE
Atlas Intelligent Edge
CANN Software Installation Guide (A500-3000,
A500-3010) 3 Installing the Operating Environment
Procedure
Step 1 On the SmartKit home page, choose Server > Site Deployment Delivery > More.
Step 2 Choose IES Conguration. The wizard page is displayed.
Step 3 Click IES Conguration. The IES Cong page is displayed, as shown in Figure 3-4.
Figure 3-4 IES Conguration
Step 4 Click Download Template to download the Atlas 500 AI edge station
conguration template IES_Congxxx to the local PC.
Open the Excel conguration le and read the value description and conguration
methods of the conguration items on the Conguration instructions sheet and
other sheets.
Step 5 Click the Initial Conguration tab and change the initial IP address, user name,
and password of the Atlas 500 AI edge station. Table 3-5 lists the parameters.
This IP address can be used to log in to the Atlas IES WebUI.
If the IP address has been changed, you can use the IP address to discover devices and
congure a new IP address.
Table 3-5 Initial
Parameter
SN Set this parameter when the
Conguration parameters
Setting
initial IP address of the Atlas
500 AI edge station is
congured using the SN.
Enter at least one of SN,
MAC, and IP.
Default priority: IP > MAC >
SN.
Enter the SN or MAC
address for the
rst
conguration.
Issue 01 (2021-03-02) Copyright © Huawei Technologies Co., Ltd. 27
Page 32

Atlas Intelligent Edge
CANN Software Installation Guide (A500-3000,
A500-3010) 3 Installing the Operating Environment
Parameter Setting
MAC Set this parameter when the
initial IP address of the Atlas
500 AI edge station is
congured using the MAC
address.
IP Set this parameter when the
initial IP address of the Atlas
500 AI edge station is
congured using the IP
address.
Username User name for logging in to
the device.
During the initial
conguration of the IP
address, the user name and
Password Password for logging in to
password must be entered.
the device
ETH0 IP Address Planned IP address of ETH0. Set this parameter based on
the actual plan on the live
ETH0 IP Mask Subnet mask corresponding
network.
to the IP address of ETH0.
ETH0 IP Gateway ETH0 gateway address.
ETH0 VLAN ID VLAN ID corresponding to
the IP address of ETH0.
ETH1 IP Address For the setting method, see
ETH0.
ETH1 IP Mask
ETH1 IP Gateway
ETH1 VLAN ID
Step 6 Click the Dierentiated Conguration tab to congure the system information,
drive partition, NFS management, and NTP service. Table 3-6 lists the parameters.
Table 3-6
Parameter
Dierentiated Conguration parameters
Setting
Drive-Partition Creation
Drive Letter Location of the drive.
Partition Name Name of the partition to be created, for example,
mmcblk0p1.
Mount Path Mount directory of the partition. This parameter is
mandatory only when Operation is set to Mount.
Issue 01 (2021-03-02) Copyright © Huawei Technologies Co., Ltd. 28
Page 33

Atlas Intelligent Edge
CANN Software Installation Guide (A500-3000,
A500-3010) 3 Installing the Operating Environment
Parameter Setting
Number of Partitions Number of partitions. A maximum of 16 partitions
can be created.
Partition Capacity (GB) The maximum capacity cannot exceed the
remaining free capacity. The minimum capacity is
0.5 GB and supports only one decimal place.
File System Only ext4 is supported at present.
Operation The value can be Create, Mount, Delete, or
Unmount. Select Create or Mount when creating
a partition.
NFS Management
Server IP IP address of the NFS server.
Server Shared Directory Shared directory on the NFS server.
Local Mount Point Local mount path of the Atlas 500 AI edge station.
NOTE
The default mount directory is /opt/mount/ or a
subdirectory of /opt/mount/. If you want to mount the
le system to another path, run the mount_white_path
add
Absolute_Path
mount directory and then enter the mount directory. For
details, see "mount_white_path Commands" in the
500 Intelligent Edge System (V2.2.200.010 or Later)
User Guide (Models 3000, 3010)
command to add a user-dened
Atlas
.
NFS Protocol Version Version of the NFS protocol.
Currently, NFSv3 and NFSv4 are supported. NFSv3
is used by default.
Operation The value can be Mount or Unmount. Set this
parameter to Mount when the NFS is connected.
Setting NTP Service
Enable NTP Service Enable or disable the NTP function of the Atlas 500
AI edge station. If the NTP function is enabled, the
time can be synchronized with the NTP server.
Local NTP IP Address IP address of the NTP server.
Other conguration items Refer to the template description and ll in the
template as required.
Step 7 Click the NMS
Certicate and Time tab to congure the service certicate, time,
and gateway registration. Table 3-7 lists the parameters.
Issue 01 (2021-03-02) Copyright © Huawei Technologies Co., Ltd. 29
Page 34

Atlas Intelligent Edge
CANN Software Installation Guide (A500-3000,
A500-3010) 3 Installing the Operating Environment
Table 3-7 NMS Certicate and Time parameters
Parameter Setting
Service Certicate
Certicate Path (.p12 or .pfx) Set this parameter based on the template
description.
Password
Time Settings
Region The time zone information consists of Region
and Time Zone. Select a time zone based on
Time Zone
the geographical location of the live network.
Time Current time of the device.
NTP Enable or disable the NTP function of the Atlas
500 AI edge station. If the NTP function is
enabled, the time can be synchronized with the
NTP server.
Preferred NTP Server Address IP address of the NTP server that is
preferentially selected. The value can be an IP
address or a domain name.
Alternate NTP Server Address IP address of the NTP server that is
alternatively selected. The value can be an IP
address or a domain name.
NMS Registration
NMS Mode ● Point-to-point web: This mode is used by
default to manage one Atlas 500 AI edge
station. You can enter the management IP
address of the Atlas 500 AI edge station on
your browser to perform point-to-point
device management.
● FusionDirector: Connect the Atlas 500 AI
edge station to the central management
system FusionDirector for
unied
management.
● HUAWEI CLOUD IEF: The Atlas 500 AI edge
station is managed by HUAWEI CLOUD IEF
as an edge node.
When
NMS
Node ID Node ID generated when the local device
connects to FusionDirector.
Mode is
set to
FusionD
irector
IP Address IP address for accessing FusionDirector.
Account Account used to manage the Atlas 500 AI edge
station. The account is provided by
FusionDirector. The default account is
EdgeAccount.
Issue 01 (2021-03-02) Copyright © Huawei Technologies Co., Ltd. 30
Page 35

Atlas Intelligent Edge
CANN Software Installation Guide (A500-3000,
A500-3010) 3 Installing the Operating Environment
Parameter Setting
Password Password used to manage the Atlas 500 AI
edge station. The password is provided by
FusionDirector. The default password is
edgeAT5b#$FD.
FusionDirector root
Certicate File
When
NMS
Mode is
set to
HUAWE
I CLOUD
IEF
Device Information Enter the IP address, user name, password, and
Step 8 After the conguration is complete, save the template le.
Step 9 Click Import Conguration File and select the congured template le.
Step 10 Click Start and complete the conguration as prompted.
----End
Node Certicate/
Product Certicate
(Select the
absolute path of
the certicate on
the local host.)
Root certicate issued by Huawei.
When an edge Atlas 500 AI edge station node
is added to IEF, the corresponding certicate is
generated. Import the certicate when the
Atlas 500 AI edge station is interconnected
with the IEF.
root user password of the Atlas 500 AI edge
station.
3.6 Scenario 2: Single-Device Conguration
3.6.1 Initial Conguration
For details, see "Installation and Conguration" > "Initial Conguration" in the
Atlas 500 AI Edge Station User Guide (Models 3000, 3010)
3.6.2 Managing Atlas 500 AI Edge Stations on FusionDirector
Scenarios
The Atlas IES supports the following NMS modes:
● Point-to-point management
The Atlas IES manages one Atlas 500 AI edge station alone. This mode is used
by default. If you want to manage edge devices in batches, switch the NMS
mode to FusionDirector or HUAWEI CLOUD IEF so that the edge devices can
be managed by FusionDirector or IEF.
● FusionDirector
FusionDirector is used to centrally manage and maintain servers and Huawei
edge devices. It provides full-lifecycle management capabilities, such as edge
.
Issue 01 (2021-03-02) Copyright © Huawei Technologies Co., Ltd. 31
Page 36

Atlas Intelligent Edge
CANN Software Installation Guide (A500-3000,
A500-3010) 3 Installing the Operating Environment
device management, device conguration, and rmware update, helping
O&M personnel improve O&M eciency and reduce O&M costs. For details
about FusionDirector, see the FusionDirector Operation Guide.
You can switch the NMS mode to FusionDirector so that FusionDirector can
manage Atlas 500 AI edge stations in batches.
This mode can be used if FusionDirector is deployed.
● HUAWEI CLOUD IEF
The Intelligent EdgeFabric (IEF) extends cloud applications to the edge and
collaborates edge and cloud data through management of edge devices. It
provides
monitoring and log collection. For details about IEF, see Intelligent
EdgeFabric IEF.
You can switch the NMS mode to HUAWEI CLOUD IEF so that the IEF can
manage Atlas 500 AI edge stations in batches.
This mode can be used if HUAWEI CLOUD is deployed.
● FusionDirector and IEF dual NMS mode
In this mode, FusionDirector manages edge devices, and the IEF NMS mode is
enabled on FusionDirector to deploy services for the managed edge devices.
For details about how to enable the IEF NMS mode on FusionDirector, see
Enabling the IEF Management Mode.
Select this mode if you want to use FusionDirector to manage edge devices
and use IEF to deploy services for the managed edge devices.
unied on-cloud O&M capabilities, such as device/application
Procedure
Step 1 Choose Maintenance > NMS Registration.
Issue 01 (2021-03-02) Copyright © Huawei Technologies Co., Ltd. 32
Page 37

NO TICE
Atlas Intelligent Edge
CANN Software Installation Guide (A500-3000,
A500-3010) 3 Installing the Operating Environment
Figure 3-5 NMS Registration
Step 2 Select the NMS mode.
● When the NMS mode is switched between point-to-point management and
FusionDirector, for
instances are uninstalled and the service instance creation function is
unavailable. For rmware 20.0.0.016 or later, existing service instances will be
smoothly migrated and will not be uninstalled. You can manually uninstall the
service instances when required.
● When the NM mode is switched to HUAWEI CLOUD IEF or is switched from
HUAWEI CLOUD IEF to another mode, existing service instances will be
uninstalled.
● When changing the NMS mode from FusionDirector to HUAWEI CLOUD IEF,
ensure that the correct IEF
indicating switching failure is displayed on the web page. In this case, the web
page automatically refreshes the NMS mode to point-to-point management.
● Point-to-point Management: By default, the Atlas IES independently
manages an Atlas 500 AI edge station in this mode. You can enter the
management IP address of the Atlas 500 AI edge station on your browser to
perform point-to-point device management.
rmware versions earlier than 20.0.0.016, existing service
certicate is uploaded. Otherwise, a message
Issue 01 (2021-03-02) Copyright © Huawei Technologies Co., Ltd. 33
Page 38

NO TE
Atlas Intelligent Edge
CANN Software Installation Guide (A500-3000,
A500-3010) 3 Installing the Operating Environment
● FusionDirector: Connect the Atlas 500 AI edge station to the central
management system FusionDirector for unied management. Set the
following parameters based on the actual situation:
Figure 3-6 FusionDirector
The rmware versions earlier than 20.0.0.016 do not support the Node ID, Server
Name, FusionDirector Root Certicate File, and FusionDirector Interconnection
Test parameters.
Issue 01 (2021-03-02) Copyright © Huawei Technologies Co., Ltd. 34
Page 39

Atlas Intelligent Edge
CANN Software Installation Guide (A500-3000,
A500-3010) 3 Installing the Operating Environment
Parameter Description
Node ID ID of the device connected to
FusionDirector. Retain the default
value.
NOTE
If the Atlas 500 AI edge station is faulty
and replaced, the node ID of the Atlas 500
AI edge station must be the same as the
node ID of the original Atlas 500 AI edge
station. Choose Menu > Devices > Device
List > Edge Devices on the FusionDirector
WebUI to query the node ID information
of the faulty device.
Server Name If you import a user-dened service
certicate to FusionDirector, you need
to import the root certicate of the
corresponding CA to the edge device
to verify the user-dened service
certicate of FusionDirector. You can
import the root certicate clicking
FusionDirector Root Certicate File
on the WebUI. In addition, you need
to set the Server Name parameter to
verify the domain name of the
user-
dened service certicate of
FusionDirector. The value must be the
same as the CN
eld of the user-
dened service certicate of
FusionDirector. (CN refers to Common
Name.)
If the service
certicate precongured
by Huawei is used, you do not need to
set this parameter.
NOTICE
The CN eld of the user-dened service
certicate cannot contain "huawei".
Otherwise, the device fails to interconnect
with FusionDirector.
If the server name is a domain name
starting with "*.", after the
saved, "*." will be replaced with "fd.".
conguration is
IP Address
IP address for accessing
FusionDirector.
Account Account for accessing FusionDirector.
The default account is EdgeAccount.
Password Password for accessing FusionDirector.
The default password is edgeAT5b#
$FD.
Issue 01 (2021-03-02) Copyright © Huawei Technologies Co., Ltd. 35
Page 40

Atlas Intelligent Edge
CANN Software Installation Guide (A500-3000,
A500-3010) 3 Installing the Operating Environment
Parameter Description
FusionDirector Root Certicate File
Click to upload the root
certicate le. If there are multiple
levels of certicates, merge all the
certicates into one le and import it.
You are advised to place the upperlevel certicates after the lower-level
certicates in the le.
This parameter is optional. You do not
need to set this parameter if a
precongured certicate is used.
However, you are advised to use your
certicate and public-private key
own
pair and periodically update them for
security purposes. If the device fails to
connect to FusionDirector because the
certicate has expired or is revoked,
import the root certicate le again.
For security purposes, the root
certicate must meet the following
requirements:
– Use RSA with a key of 2048 bits or
more if an asymmetrical encryption
algorithm is used.
– Use SHA2 with a secret of 256 bits
or more if a hash algorithm is
used.
NOTICE
After the root
Docker Engine will restart, which takes
about 50s. After Docker Engine is
restarted, your services will also restart.
Exercise caution when performing this
operation.
certicate is replaced,
Issue 01 (2021-03-02) Copyright © Huawei Technologies Co., Ltd. 36
Page 41

Atlas Intelligent Edge
CANN Software Installation Guide (A500-3000,
A500-3010) 3 Installing the Operating Environment
Parameter Description
FusionDirector Interconnection
Test
– If you select Test, the node ID and
the connectivity between the
device and FusionDirector are
tested. If the test fails, the NMS
mode switchover fails. The
interconnection test is performed
by default.
– If you select Do not test, the node
ID and the connectivity between
the device and FusionDirector will
not be tested. The NMS mode
switchover is successful, but the
edge station may not be managed
by FusionDirector.
In the
oine centralized conguration
where FusionDirector cannot be
connected, you can skip the
interconnection test. However, the
FusionDirector parameters must be
valid. That is, the node ID of each
Atlas 500 AI edge station must be
unique on FusionDirector, and the IP
address, user name, and password are
valid. The interconnection test is
recommended in other scenarios to
prevent management failures caused
by incorrect input.
● HUAWEI CLOUD IEF: The Atlas 500 AI edge station is managed by HUAWEI
CLOUD IEF as an edge node.
Click on the right of Node Certicate/Product Certicate to upload a
certicate le.
Figure 3-7 HUAWEI CLOUD IEF
Step 3 Click Save.
----End
Issue 01 (2021-03-02) Copyright © Huawei Technologies Co., Ltd. 37
Page 42

Atlas Intelligent Edge
CANN Software Installation Guide (A500-3000,
A500-3010) 3 Installing the Operating Environment
3.7 Deploying Applications
Before deploying applications in batches, you are advised to complete the
verication on an edge station by referring to 2.6 Verifying Applications.
For details about batch deployment, see the Atlas Intelligent Edge Solution
V100R020C00 Application Deployment and Model Update Guide (A500-3000,
A500-3010).
Issue 01 (2021-03-02) Copyright © Huawei Technologies Co., Ltd. 38
Page 43

Atlas Intelligent Edge
CANN Software Installation Guide (A500-3000,
A500-3010) 4 Common Operations
4 Common Operations
4.1 Conguring a System Network Proxy
4.2 Uninstalling the CANN Software
4.3 Setting User Account Validity Period
4.1 Conguring a System Network Proxy
The following procedure is a general method for conguring a network proxy. It
may not be applicable to all network environments. The method of
the network proxy depends on the actual network environment.
Prerequisite
● Ensure that the network cable of the edge station is connected and the proxy
server can connect to the external network.
● The
Conguring a System Network Proxy
Step 1 Log in to the user environment as the root user.
Step 2 Run the following command to edit the
vi /etc/prole
conguration proxy is based on the condition that the edge station is
located on an intranet and cannot be directly connected to the external
network.
/etc/prole le:
conguring
Add the following content to the le, save the le, and exit:
export http_proxy="http://
export https_proxy="
In the preceding commands, user indicates the username on the intranet,
password indicates the user password, proxyserverip indicates the IP address of
the proxy server, and port indicates the port number.
Step 3 Run the following command to make the
source /etc/prole
Issue 01 (2021-03-02) Copyright © Huawei Technologies Co., Ltd. 39
user:password@proxyserverip:port
http://user:password@proxyserverip:port
conguration take eect.
"
"
Page 44

Atlas Intelligent Edge
CANN Software Installation Guide (A500-3000,
A500-3010) 4 Common Operations
Step 4 Run the following command to check whether the external network is connected:
wget www.baidu.com
If the HTML
network successfully.
----End
le can be downloaded, the edge station is connected to the external
4.2 Uninstalling the CANN Software
Method 1: Uninstalling a Software Package
To uninstall an installed software package, perform the following steps:
Step 1 Log in to the installation environment as the installation user of the software
package.
Step 2 Go to the directory where the software packages are stored.
Step 3 Uninstall the software package.
● If you specify a path when installing the software package, run the ./*.run -uninstall --install-path=
<path>
example, /home/work.
● If you do not specify a path when installing the software package, run the ./
*.run --uninstall command to uninstall the software package.
indicates the specied software package installation path, for
<path>
command to uninstall the software package.
If the following information is displayed, the software is successfully uninstalled:
[INFO]
xxx
[INFO] process end
xxx
----End
uninstall success
indicates the name of the software package to be uninstalled.
Method 2: Using a Script
You can also use the uninstallation script to uninstall the. The following describes
how to uninstall the development suite package.
Step 1 Go to the directory where the uninstallation script of the software is stored.
Generally, the script is stored in the script directory.
cd
{path}
{path}
in a specied directory, replace it with the specied directory. If this parameter is
not
20.0.0.
indicates the OS architecture and GCC version. Replace them as required.
Step 2 Run the ./uninstall.sh command to run the script.
/ascend-toolkit/20.0.0.
indicates the tool installation directory. If the software package is installed
specied, the default directory is used. Replace it by referring to Step 6.
xxx
indicates the software package version, and
xxx/xxx
-linux_gcc
x.x.x
/script
xxx
-linux_gcc
x.x.x
----End
Issue 01 (2021-03-02) Copyright © Huawei Technologies Co., Ltd. 40
Page 45

NO TE
Atlas Intelligent Edge
CANN Software Installation Guide (A500-3000,
A500-3010) 4 Common Operations
● If software packages of multiple versions are installed in the environment, you need to
use the --install-path parameter to specify the directory of the corresponding version
when upgrading or uninstalling a software package.
● Assume that software packages of multiple versions are installed in the environment
and one of them needs to be uninstalled. The software package installation directory /
home/work is used as an example.
In the directory where the software package is stored, run the following commands to
upgrade and uninstall the software.
./*.run --upgrade --install-path=/home/work/ascend-toolkit/
./*.run --uninstall --install-path=/home/work/ascend-toolkit/
{version}
indicates the software package version.
{version}
{version}
4.3 Setting User Account Validity Period
Run the chage command to set the validity period of a user account for security
purposes.
Command:
chage [-m mindays] [-M maxdays] [-d lastday] [-I inactive] [-E expiredate] [-W warndays] user
Table 4-1 describes the parameters.
Table 4-1 Parameters description
Parameter
Description
-m Minimum time (in days) for which the password must be used.
The password cannot be changed during this period. The value
0 indicates that the password can be changed at any time.
-M Maximum validity period (days) of a password. The value 1
indicates that the validity check of the password can be
disabled.
-d Last password change date.
-I Maximum idle period (in days) after which the user account
will be disabled. After the specied time period has expired, the
password will be invalid.
-E Date when the user account expires. The user account is
unavailable when the account validity period has expired.
-W Number of days in advance users are notied that their
passwords are about to expire.
-l Lists the current settings. It helps non-privileged users to
determine the time when their passwords or accounts expire.
Issue 01 (2021-03-02) Copyright © Huawei Technologies Co., Ltd. 41
Page 46

NO TE
Atlas Intelligent Edge
CANN Software Installation Guide (A500-3000,
A500-3010) 4 Common Operations
● Table 4-1 lists only common parameters. You can run the chage --help command to
display detailed parameter description.
● The date is in the format of
indicates that the user account test will expire on December 1, 2020.
● User must be
root.
specied. Replace it with the actual user name. The default user name is
YYYY-MM-DD
. For example, chage -E 2020-12-01 test
For example, to change the validity period of the test user to December 1, 2020,
run the following command:
chage -E 2020-12-01 test
Issue 01 (2021-03-02) Copyright © Huawei Technologies Co., Ltd. 42
Page 47

Atlas Intelligent Edge
CANN Software Installation Guide (A500-3000,
A500-3010) 5 FAQs
5 FAQs
5.1 What Do I Do If "Could not nd a version that satises the requirement xxx" Is
Displayed When pip3.7.5 install Is Run?
5.1 What Do I Do If "Could not
nd a version that
satises the requirement xxx" Is Displayed When
pip3.7.5 install Is Run?
Symptom
During dependency installation, when the pip3.7.5 install xxx command is used
to install related software, a message is displayed indicating that the network
cannot be connected and the message "Could not
requirement xxx" is displayed.
Figure 5-1 Message displayed upon pip3 install
Possible Causes
The pip source is not congured.
nd a version that satises the
Procedure
Congure the pip source as follows:
Step 1 Run the following command as the installation user of the software package:
cd ~/.pip
If a message indicating that the directory does not exist is displayed, run the
following commands to create and go to the directory:
Issue 01 (2021-03-02) Copyright © Huawei Technologies Co., Ltd. 43
Page 48

Atlas Intelligent Edge
CANN Software Installation Guide (A500-3000,
A500-3010) 5 FAQs
mkdir ~/.pip
cd ~/.pip
Create a pip.conf le in the .pip directory:
touch pip.conf
Step 2 Edit the pip.conf le.
Run the vi pip.conf command to open the pip.conf le and edit the le as
follows.
[global]
# Huawei source is used as an example. Replace it based on the actual situation.
index-url = https://mirrors.huaweicloud.com/repository/pypi/simple
trusted-host = mirrors.huaweicloud.com
timeout = 120
Step 3 Run the :wq! command to save the
----End
le and exit.
Issue 01 (2021-03-02) Copyright © Huawei Technologies Co., Ltd. 44
Page 49

NO TICE
Atlas Intelligent Edge
CANN Software Installation Guide (A500-3000,
A500-3010) 6 References
6 References
6.1 Parameters
6.2 About CCEC Compiler
6.3 HCC Overview
6.1 Parameters
One-click installation is supported in the command line. You can select parameters
as required to complete the installation. All parameters are optional.
Installation command format: ./*.run [options]
For details, see Table 6-1.
If the parameters queried by running the ./*.run --help command are not
described in the following table, this parameter is reserved or applies to other chip
versions. You do not need to pay attention to this parameter.
Table 6-1 Parameters supported by the installation package
Parameter
Description
--help | -h Queries help information.
--version Queries version information.
--info Queries software package construction information.
--list Queries the software package list.
--check Checks the consistency and integrity of software packages.
--quiet Silent installation, skipping interactive messages.
Issue 01 (2021-03-02) Copyright © Huawei Technologies Co., Ltd. 45
Page 50

Atlas Intelligent Edge
CANN Software Installation Guide (A500-3000,
A500-3010) 6 References
Parameter Description
--noexec Decompresses a software package to the current directory
without running the installation script. This parameter is
used together with --extract=<path>. The format is as
follows:
--noexec --extract=<path>
--extract=<path> Decompresses a software package to a specied directory.
--tar arg1
[arg2 ...]
Runs the tar command on the software package. Use the
arguments following tar as the command arguments. For
example, the --tar xvf command indicates that the .run
package will be decompressed to the current directory.
--install Installs a software package. You can specify the installation
path --install-path=<path> or use the default installation
path.
--install-for-all Allows all users to have the same installation group
permission.
If this option is included in installation or upgrade
command, all users have the same permission on the
directories and les created by the runle installer as the
installation group.
This parameter must be used together with one of the
parameters --install, --devel, and --upgrade, for example, ./
*.run --install --install-for-all.
NOTE
Make sure the security risks are considered before you include this
option.
--install-
username=<user
name>
Initial installation: You can specify the running user name.
Otherwise, HwHiAiUser is used by default.
Overwrite: The user name used in the last installation is
adopted.
This parameter must be used together with --install-
usergroup=<usergroup>.
--install-
usergroup=<user
group>
Initial installation: You can specify the running user group
name. Otherwise, HwHiAiUser is used by default.
Overwrite: The user group name used in the last installation
is adopted.
This parameter must be used together with --install-
username=<username>.
Issue 01 (2021-03-02) Copyright © Huawei Technologies Co., Ltd. 46
Page 51

Atlas Intelligent Edge
CANN Software Installation Guide (A500-3000,
A500-3010) 6 References
Parameter Description
--install-
path=<path>
--uninstall Uninstalls the software that has been installed.
--upgrade Upgrades the software that has been installed. The system
--devel Installs a software package in development mode, that is,
Species the installation path. If you do not specify the
installation path, the default installation path is used.
● For installation as user root, the default installation path
is /usr/local/Ascend.
● For installation as a non-root user, the default
installation path is ${HOME}/Ascend.
If this parameter is used to specify the installation directory,
the running user must have the read and write permissions
on the
automatically checks the version number. If the version
number is not in ascending order, the upgrade cannot be
performed.
install only the les required by the development
environment.
specied installation directory.
6.2 About CCEC Compiler
The built-in CCEC compiler in Ascend AI Software Stack implements the TBE
operator build, and compiles the Code Compute Engine (CCE) operator generated
by the CodeGen module into an executable that can run on the Ascend AI
ProcessorHiSilicon SoC. During graph build, the TBE automatically invokes the
CCEC compiler, free from manual calling.
The CCEC compiler is stored in the ccec_compiler directory in the ATC or
FwkACLlib installation path. The main binary tools are listed in the following table.
Table 6-2 CCEC compiler tools
Tool
Name
clang ccec_compiler/bi
Relative Path Description Risk Analysis
n/clang
CCE operator compiler.
Automatically invoked to
build the TBE operators. It
cannot be invoked
separately.
Attackers may use
the existing
debugger or
compiler to build
new programs,
causing secondary
attack on the
system.
Issue 01 (2021-03-02) Copyright © Huawei Technologies Co., Ltd. 47
Page 52

Atlas Intelligent Edge
CANN Software Installation Guide (A500-3000,
A500-3010) 6 References
Tool
Name
llvmobjdum
p
lld ccec_compiler/bi
Relative Path Description Risk Analysis
ccec_compiler/bi
n/llvm-objdump
n/lld
Debugger, providing the
function of printing the
operator function name
and oset address
information for fault
locating.
When the AI Core Error
Analyzer is used to parse AI
Core errors, this tool is
automatically invoked to
locate the function error
during TBE operator
development. It cannot be
called be invoked
separately.
Single-architecture CCE
operator linker.
During TBE operator build,
this tool is automatically
used to link operators to
form a complete executable
program. It cannot be
called be invoked
separately.
6.3 HCC Overview
The Toolkit runle provides the Huawei Compiler Collection (HCC) for compiling
drivers and applications on the device side. The HCC is stored in the toolchain/
hcc/ directory in the Toolkit installation path. The following table describes the
binary tools in the directory.
Table 6-3 HCC tools
Tool
gcc hcc/bin/aarch64-target-linux-gnu-gcc Compiles a source le into an
Relative Path Description
executable.
This tool is used to compile
user code on the device side.
Issue 01 (2021-03-02) Copyright © Huawei Technologies Co., Ltd. 48
Page 53

Atlas Intelligent Edge
CANN Software Installation Guide (A500-3000,
A500-3010) 6 References
Tool Relative Path Description
ld hcc/bin/aarch64-target-linux-gnu-
gnu-ld
readelf hcc/bin/aarch64-target-linux-gnu-
gnu-readelf
Adds all symbols to the
dynamic symbol table to
create a dynamically linked
executable.
This tool is used to link the
intermediate
les to a
complete executable le
during user code compilation
on the device side.
Displays the information
contained in the ELF header
at the start of the le.
This tool is used to display
the information contained in
the ELF header of the
operator library binary
le at
the start of the le, for
debugging purposes.
Issue 01 (2021-03-02) Copyright © Huawei Technologies Co., Ltd. 49
Page 54

Atlas Intelligent Edge
CANN Software Installation Guide (A500-3000,
A500-3010) A Change History
A Change History
Date Description
2020-07-21 This issue is the rst ocial release.
Issue 01 (2021-03-02) Copyright © Huawei Technologies Co., Ltd. 50
 Loading...