


20130206 For FCC Certification
20130206 For FCC Certification
User Guide

20130206 For FCC Certification
20130206 For FCC Certification
Important Information
This device was tested for typical body-worn operations per the FCC’s radio frequency (RF)
safety requirements. To comply with these RF exposure requirements, use a belt-clip, holster,
or similar accessory with this device to maintain a minimum separation distance of 1.0 cm
between the user’s body and the handset, with the device oriented with either the front or back
of the device facing towards the user’s body. Such accessories should not contain any metallic
components. Body-worn accessories that do not meet these requirements may not ensure
compliance with FCC RF exposure guidelines and their use should be avoided.

20130206 For FCC Certification
20130206 For FCC Certification
Get Started
This section gives you all the information you need to set up your phone and Sprint service the
first time.
Your Phone at a Glance
The following illustrations outline your phone’s primary external features, keys, and buttons.
Front panel
Back panel
Get Started 1
20130206 For FCC Certification
20130206 For FCC Certification
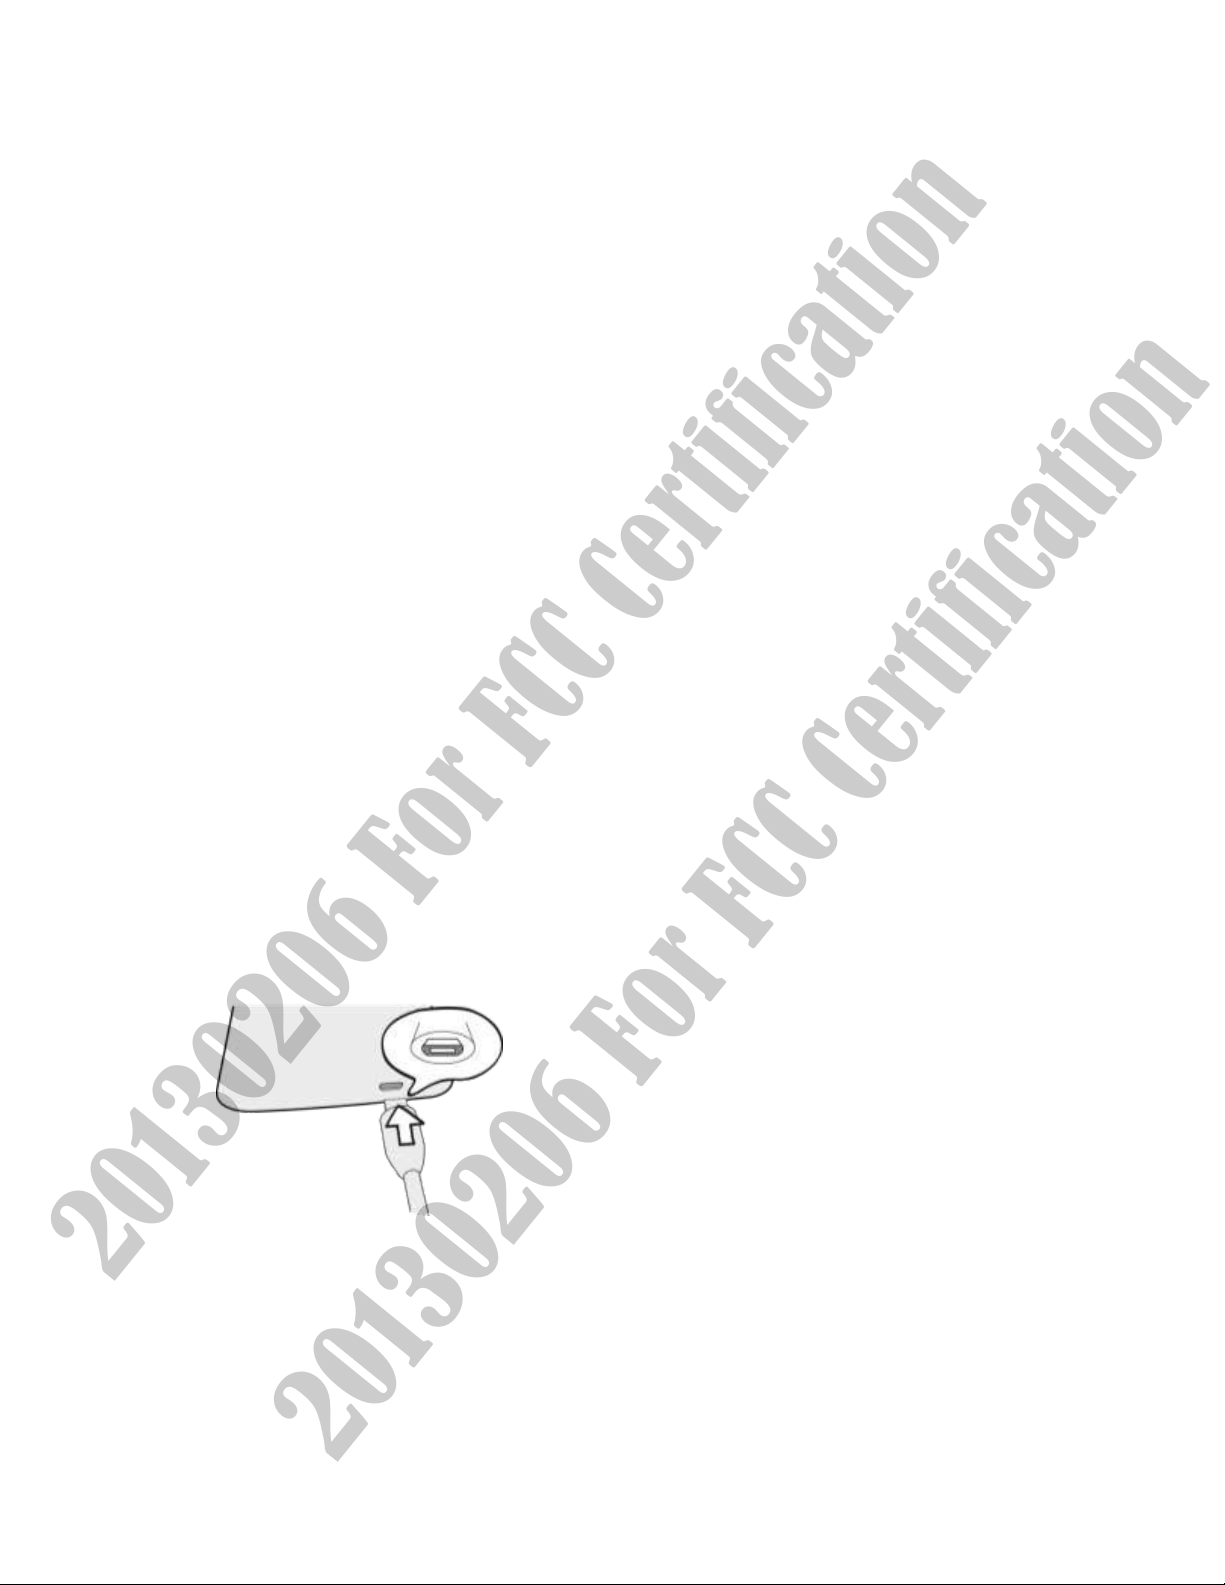
Charge Your Phone
You must first charge the battery to begin setting up your phone.
1. Plug one end of the USB cable to the AC adapter.
2. Plug the other end of the USB cable into the charger/accessory jack on the bottom panel
of your phone.
3. Plug the AC adapter into an electrical outlet. Fully charging a battery may take up to
three hours.
Note: Your phone’s battery should have enough charge for the device to turn on and find a
signal, run the setup application, set up voicemail, and make a call. You should fully
charge the battery as soon as possible.
Get Started 2

20130206 For FCC Certification
20130206 For FCC Certification
4. Press the Power button ( ) to turn the phone on.
Your device will search for Sprint service, and begin the setup application.\
Activate Your Phone
Follow the instructions below to activate your phone if it has not already been activated.
Depending on your account or how and where you purchased your phone, it may be ready to
use or you may need to activate it on your Sprint account.
● If you purchased your phone at a Sprint Store, it is probably activated and ready to use.
● If you received your phone in the mail and it is for a new Sprint account or a new line of
service, it is designed to activate automatically.
When you turn the phone on for the first time, you should see a Hands Free
Activation screen, which may be followed by a PRL Update screen and a Firmware
Update screen. Follow the onscreen instructions to continue.
● If you received your phone in the mail and you are activating a new phone for an existing
number on your account (you’re swapping phones), you can activate on your computer
online or directly on your phone.
Activate on your computer:
• Go to sprint.com/activate and complete the online instructions to activate your
phone
Activate on your phone:
• Turn on your new phone. (Make sure the old one is turned off.) Your phone will
automatically attempt Hands-Free Activation.
• Touch Activate to override auto-activation and start the manual activation
wizard.
• Follow the on-screen prompts to complete the activation process.
To confirm activation, make a phone call. If your phone is still not activated or you do not have
access to the Internet, contact Sprint Customer Service at 1-888-211-4727 for assistance.
Tip: Do not press the Power button while the phone is being activated. Pressing the Power
button cancels the activation process.
Note: If you are having any difficulty with activation, contact Sprint Customer Service by calling
1-888-211-4727 from any other phone.
Get Started 3

20130206 For FCC Certification
20130206 For FCC Certification
Complete the Setup Application
Walk through the on-device setup to choose your phone language, Internet connection, select
how you want to set up your new phone, and more. Touch Start to begin. Touch Next or Skip
to skip any of the screens.
● Connect to Wi-Fi. Connect to a Wi-Fi® network. For more information, see
● Set up phone. Select how you want to set up your new phone.
Set up from scratch. Use the HTC Get Started service to set up your accounts and
personalize your new phone from your computer. Your phone shows you the URL of
the HTC Get Started site and a pair code. On your computer’s web browser, just go
to the URL and enter the pair code to start your web setup. You need an HTC
Account to save your accounts and settings on the Web and download them to your
phone. To find out more about HTC Get Started and HTC Account, see the Help and
FAQ on the HTC Get Started site:
Restore, transfer, or import content. If you already finished the HTC Get Started
setup before turning on your new phone, just download your web setup by selecting
Apply HTC Get Started setup. Or if you have content from an old phone, you can
choose to do a direct phone-to-phone transfer. See
Phone
● Accounts & sync. Set up your email and social network accounts including Google,
Exchange ActiveSync® Mail, Dropbox, Facebook, Flickr®, Hotmail®, and HTC Watch™.
For more information, see
.
Accounts & Sync.
XXX.
Transfer Content To Your New
Wi-Fi.
Note: You do not need to sign up for a Google Account to use your phone. However, to
download applications from Google Play™ or chat in Google Talk™, you must link your
phone to a Google Account.
● Dropbox. Create a new or sign in to your Dropbox account and enjoy a free 25GB
Dropbox space. See Dropbox for more information. Additional terms and requirements
may apply (including a subscription fee) after your two year trial ends.
● Tell HTC. Choose whether to allow HTC to collect anonymous data in the background
about how you use your phone.
● Google location. Turn on Google® location services. For more information, see
Location.
● HTC Backup. To make it easier for you to back up and restore content from your phone
to another HTC phone in the future, select Back up phone daily.
● Personalize. Give your new phone a name, and then touch Finish.
Get Started 4
20130206 For FCC Certification
20130206 For FCC Certification
Note: Some features that need to connect to the Internet such as location-based services and
auto-sync of your online accounts may incur extra data fees. Don’t worry. You can
enable or disable them in Settings later on.
Set Up Voicemail
Your phone automatically transfers all unanswered calls to your voicemail, even if your phone is
in use or turned off. You should set up your Sprint Voicemail and personal greeting as soon as
your phone is activated. Always use a password to protect against unauthorized access.
1. Touch > . (If your screen is locked, press to turn on the display and then
drag up or flick an empty space up to unlock the screen.)
2. Touch and hold to dial your voicemail number.
3. Follow the system prompts to:
Create your password.
Record your name announcement.
Record your greeting.
Note: Voicemail Password – Sprint strongly recommends that you create a password when
setting up your voicemail to protect against unauthorized access. Without a password,
anyone who has access to your phone is able to access your voicemail messages.
Transfer Content To Your New Phone
You can easily transfer content — contacts, messages, calendar events, music, photos, videos,
and more — from other phones or your computer to your new phone using the HTC Transfer
Tool, Bluetooth, or direct USB connection.
Transfer Content from an Android Phone with Data Connection
On your old Android™ phone, download the HTC Transfer Tool and use it to transfer your
content to your new HTC phone.
Note: You need Android version 2.3 or later to use the HTC Transfer Tool on your old phone.
If your old phone has Android version 2.2 or an earlier version, you need to use
Bluetooth® transfer. See XXX.
1. Do one of the following:
If you’re setting up your new HTC phone for the first time, choose to transfer content,
and then select Transfer from old phone on the Set up phone screen.
Go to Settings, and then touch Transfer content.
Get Started 5
20130206 For FCC Certification
20130206 For FCC Certification
2. Choose whether to transfer from an old HTC phone or other Android phone.
3. Follow the suggestions shown on your new phone to download and install the HTC
Transfer Tool to your old phone.
4. Follow the instructions on the two phones to connect them. When you see a PIN on your
old phone, make sure the same PIN also appears on your new phone before you
continue.
5. On your old phone, choose the types of content you want to transfer, and then touch
Start.
6. Wait for the transfer to finish.
Transfer Content from an Android Phone without Data Connection
If your old Android phone has no data connection, turn on Wi‑Fi and connect to the hotspot that
you see on your new HTC phone. You’ll then need to download the HTC Transfer Tool from an
HTC webpage on your Web browser.
1. After turning on Wi‑Fi, connect your old phone to the hotspot that’s shown on your new
phone (for example, HTC Transfer Tool 1234).
2. Go to Settings > Security, and then select the Unknown sources option to allow the
download and installation of the tool through your web browser.
3. Access the HTC webpage on your Web browser. Depending on the type of Android
phone that you have:
Get Started 6

20130206 For FCC Certification
20130206 For FCC Certification
The Web browser automatically opens to the HTC webpage if you’re using an HTC
phone.
You need to slide the Notifications panel open, and then touch Sign in to Wi-Fi
network if you’re using another Android phone.
4. Touch the download button on the HTC webpage.
5. Slide the Notifications panel open again, and wait until you see a notification that shows
the Transfer_tool.apk has been downloaded.
6. Touch the Transfer_tool.apk notification to install the HTC Transfer Tool.
7. After installation is complete, open the HTC Transfer Tool.
8. Choose the types of content you want to transfer, and then touch Start.
9. Wait for the transfer to finish.
Transfer Content From Your Old Phone Using Bluetooth
Use Bluetooth to transfer contacts from an iPhone®, a phone that has Android version 2.2 (or
earlier version), or other types of phones.
Note: Depending on the capabilities of your old phone, you may be able to transfer not only
contacts but also other data such as calendar events and text messages to your new
HTC phone.
Use HTC Sync Manager to transfer more types of content from an iPhone.
1. Do one of the following:
If you’re setting up your new phone for the first time, choose to transfer content, and
then select Transfer from old phone on the Set up phone screen.
Go to Settings, and then touch Transfer content.
2. Touch iPhone or Other, and then choose your old phone’s name and model.
3. On your old phone, turn Bluetooth on and set it to discoverable mode.
4. Follow the onscreen instructions on your old and new phones to pair them.
5. Choose the types of data you want to transfer.
6. Wait for the transfer to finish.
Transfer Content Between Your Phone and Computer
There are two ways you can transfer content to or from your computer.
Get Started 7

20130206 For FCC Certification
20130206 For FCC Certification
● Connect your phone to your computer. Your computer will recognize it just like any
removable USB drive, and you can copy your media between them.
● Download and use the HTC Sync Manager software on your computer. You can set it up
to automatically get music, photos, and videos off your phone to your computer. You can
also sync playlists from your computer to the phone. If you have an iPhone, you can
even connect it and transfer the camera roll (photos and videos) to your computer. Then
reconnect your phone and copy them over.
Ways of Transferring Contacts and Other Content into Your Phone
Aside from the HTC Transfer Tool, there are other ways you can add contacts and other content
to your phone.
● Sync with your computer. Use HTC Sync Manager to sync contacts, documents,
playlists, and more between your phone and a Windows® or Mac® computer. You can
also use it to transfer contacts, messages, and other content from an iPhone to your
computer, and then to your HTC phone.
● Gmail™. Google® contacts are imported to your phone after you sign in to your Google
Account. You can also create more Google contacts right from your phone.
● Social network accounts. Log in to your favorite social networks to sync contact
information from them.
● Microsoft® Exchange ActiveSync®. Your phone syncs your work contacts from the
Microsoft Exchange ActiveSync Server in your workplace.
● Phone contacts. You can create contacts locally on your phone, if you don’t prefer to
store them on your online accounts.
Sprint Account Information and Help
Find out about account passwords and information about managing your account and finding
help.
Sprint Account Passwords
You will need to create passwords to protect access to your personal account information, your
voicemail account, and your data services account. As a Sprint customer, you enjoy unlimited
access to all your information.
Account User Name and Password
If you are the account owner, you will create an account user name and password when you
sign on to sprint.com. (Click Sign in/Register and then click Sign up now! to get started.) If
you are not the account owner (if someone else receives the bill for your Sprint service), you
can get a sub-account password at
sprint.com.
Get Started 8
20130206 For FCC Certification
20130206 For FCC Certification
Voicemail Password
You’ll create your voicemail password when you set up your voicemail. See Set Up Voicemail
for more information on your voicemail password.
Data Services Password
With your Sprint phone, you may elect to set up an optional data services password to control
access and authorize purchases.
For more information, or to change your passwords, sign on to
Customer Service at 1-888-211-4727.
sprint.com or call Sprint
Manage Your Account
Manage your Sprint account from your computer, your Sprint phone, or any other phone.
Online:
sprint.com
● Access your account information.
● Check your minutes used (depending on your Sprint service plan).
● View and pay your bill.
● Enroll in Sprint online billing and automatic payment.
● Purchase accessories.
● Shop for the latest Sprint phones.
● View available Sprint service plans and options.
● Learn more about data services and other products like games, ring tones, screen
savers, and more.
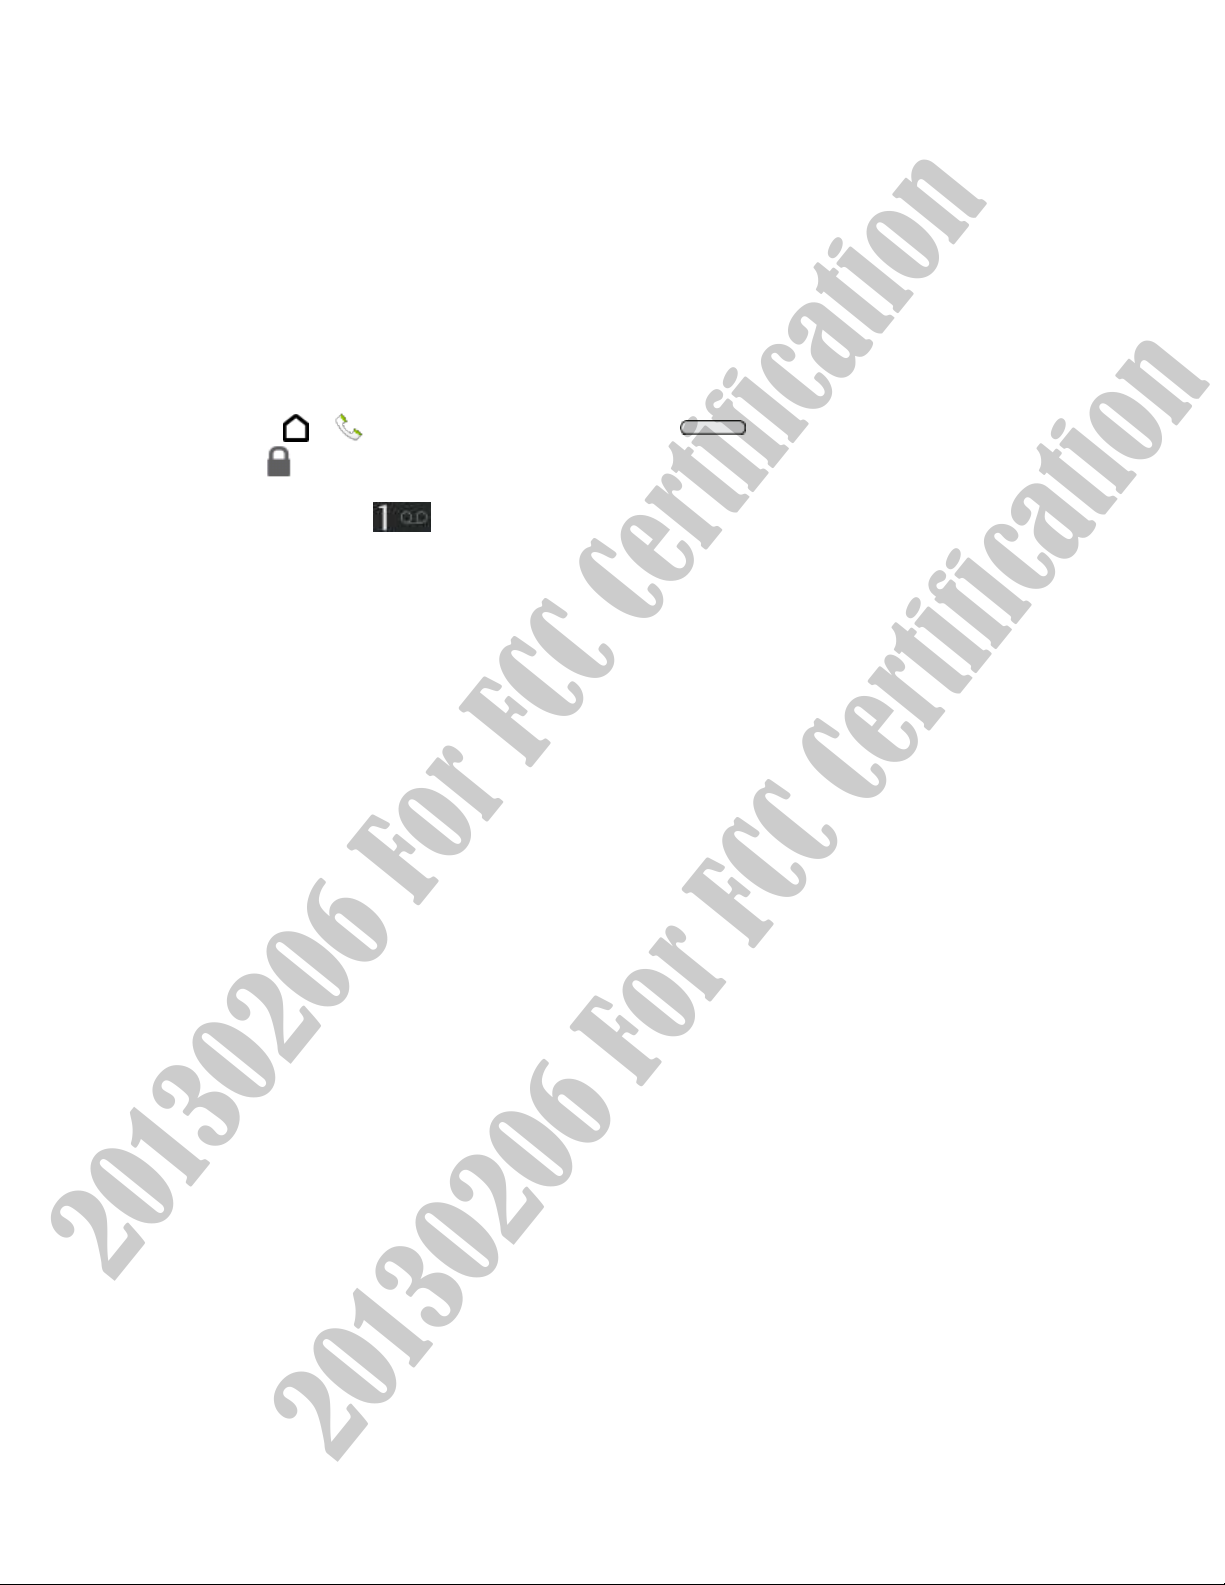
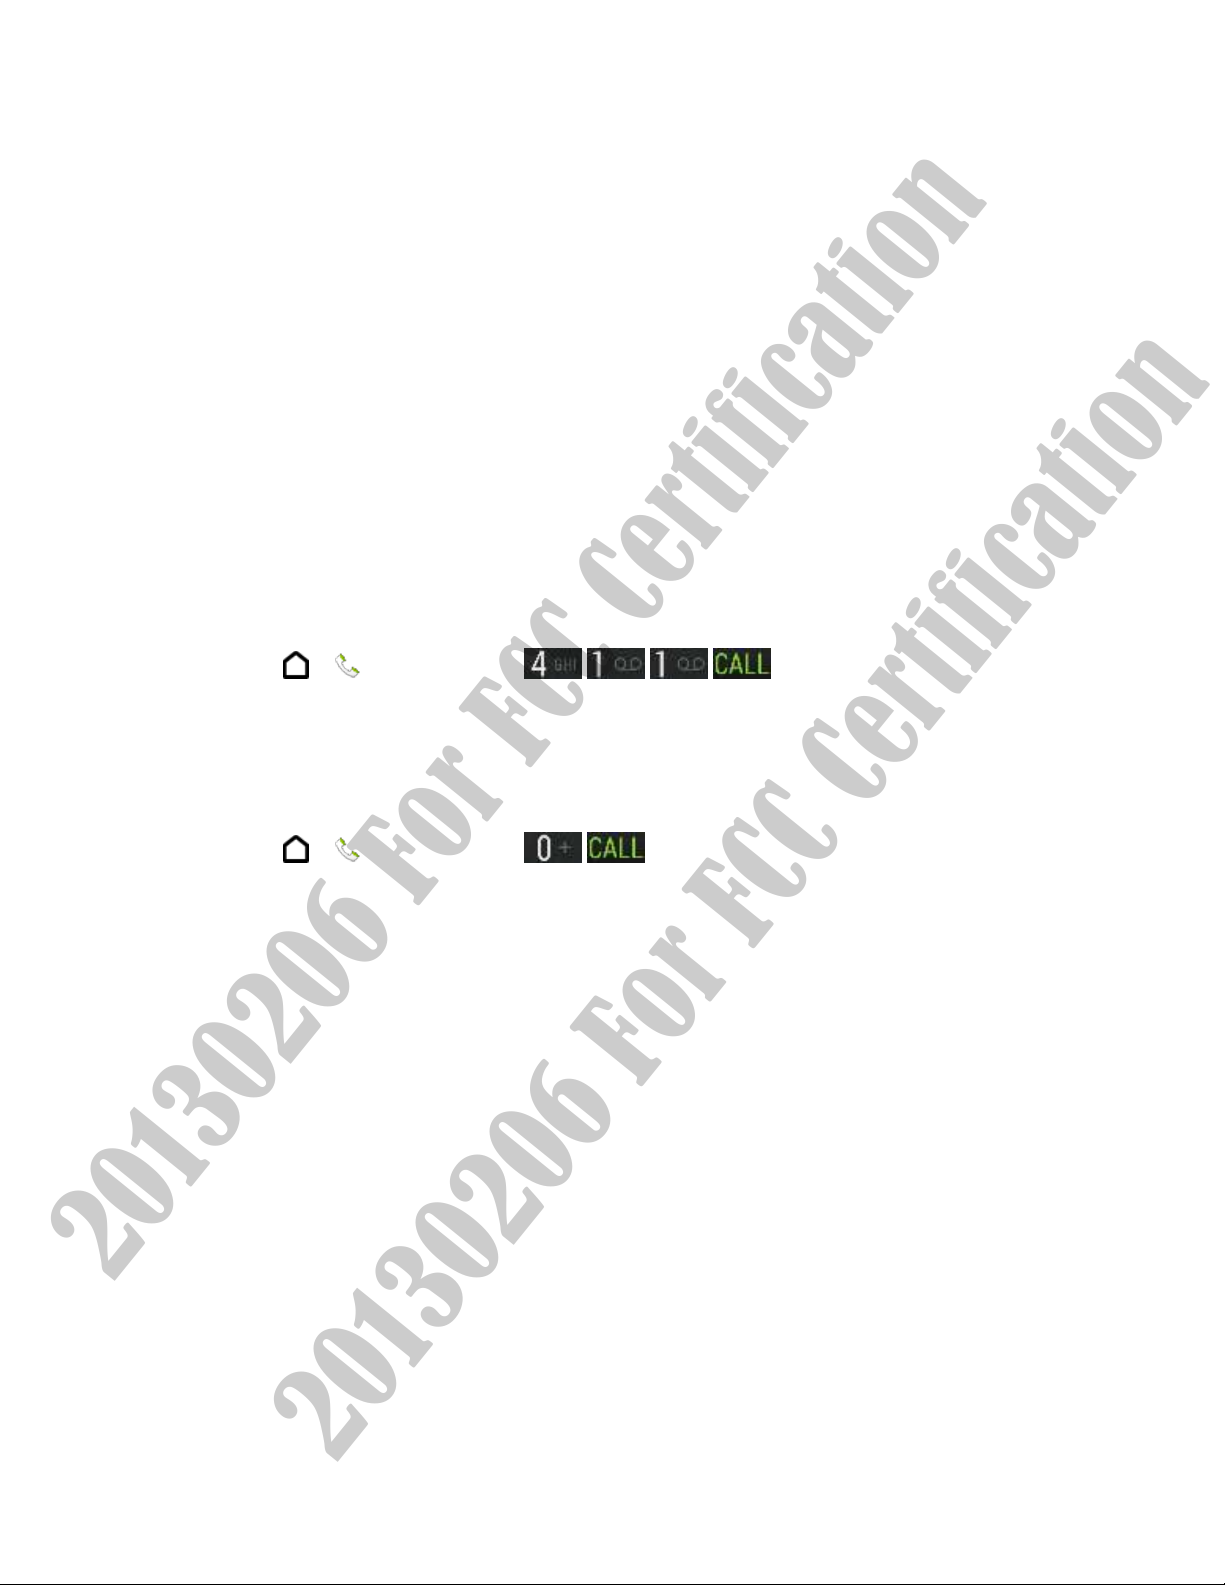
From Your Sprint Phone
1. Touch > . (If your screen is locked, press to turn on the display and then
drag up or flick an empty space up to unlock the screen.)
2. Do any of the following:
Touch to check minute usage and account balance.
Touch to make a payment.
Touch to access a summary of your Sprint service plan or get
answers to other questions.
Get Started 9
20130206 For FCC Certification
20130206 For FCC Certification
From Any Other Phone
● Sprint Customer Service: 1-888-211-4727.
● Business Customer Service: 1-888-788-4727.
Sprint Support Services
Sprint 411 and Sprint Operator Services let you easily access information and calling assistance
from your Sprint phone.
Sprint 411
Sprint 411 gives you access to a variety of services and information, including residential,
business, and government listings; movie listings or showtimes; driving directions, restaurant
reservations, and major local event information. You can get up to three pieces of information
per call, and the operator can automatically connect your call at no additional charge.
There is a per-call charge to use Sprint 411, and you will be billed for airtime.
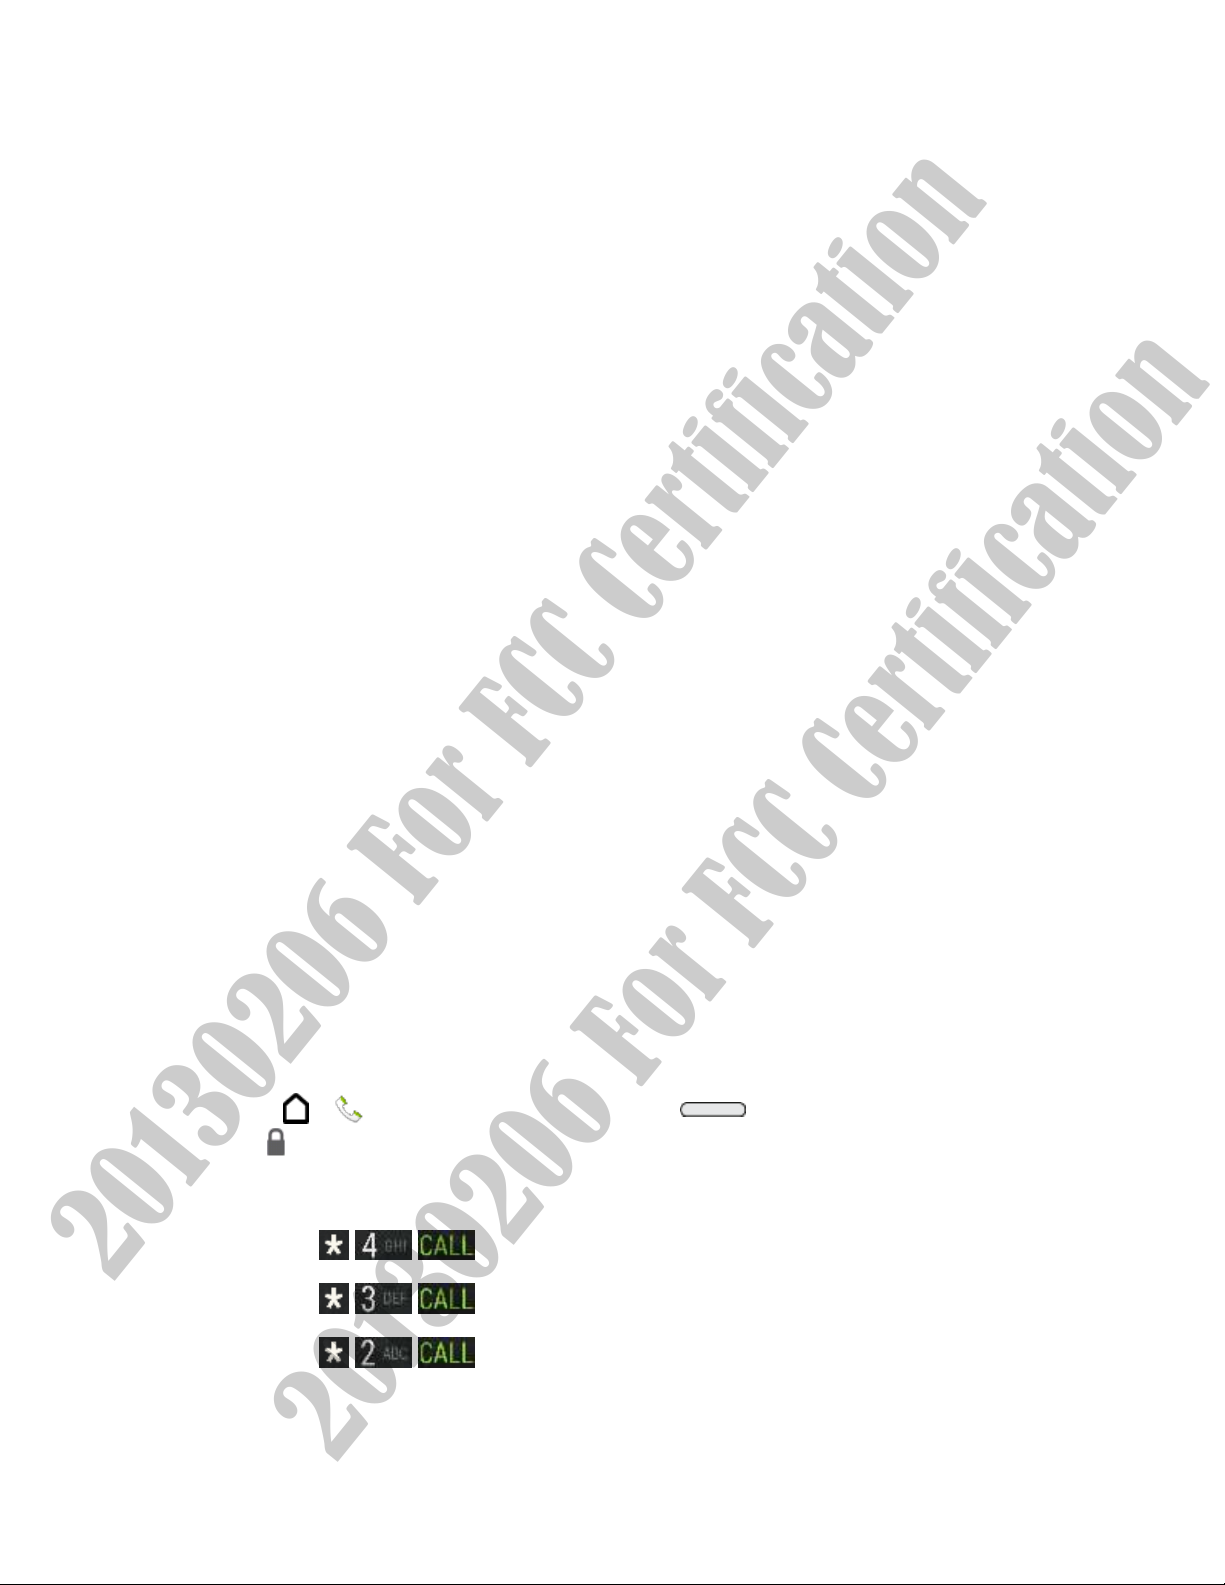
► Touch > , and then touch .
Sprint Operator Services
Sprint Operator Services provides assistance when you place collect calls or when you place
calls billed to a local telephone calling card or third party.
► Touch > , and then touch .
For more information or to see the latest in products and services, visit us online at sprint.com.
Get Started 10

20130206 For FCC Certification
20130206 For FCC Certification
Phone Basics
Your phone is packed with features that simplify your life and expand your ability to stay
connected to the people and information that are important to you. The topics in this section will
introduce the basic functions and features of your phone.
Your Phone’s Layout
The illustrations below outline your phone’s basic layout.
Front panel
1. Home lets you display the main Home screen. When the screen is active:
Double-tap to select a recently-opened app.
Touch and hold to open Google Search.
2. Microphone allows other callers to hear you clearly when you are speaking to them.
3. Back lets you return to the previous screen, or close a dialog box, options menu, the
Notifications panel, or onscreen keyboard. You can also configure this key to open the
Menu while you're in an app.
Phone Basics 11

20130206 For FCC Certification
20130206 For FCC Certification
4. Volume Button allows you to adjust the ringer or media volume or adjust the voice
volume during a call.
5. Front Camera allows you to take photos and videos or start a video call.
6. 3.5 mm Headset Jack allows you to plug in either a stereo headset or an optional
headset for convenient, hands-free conversations.
CAUTION! Inserting an accessory into the incorrect jack may damage the phone.
7. Power Button lets you turn the phone on or off, turn the screen on or off, restart the
phone, or switch your phone to airplane mode.
8. Proximity sensor turns off the screen automatically when you place the phone near
your face.
9. Front Indicator Light (LED) shows your phone’s status or pending notifications at a
glance.
10. Touchscreen lets you view and control all the features of your phone.
11. Charger/Accessory Jack allows you to connect the phone charger or the USB cable
(included).
CAUTION! Inserting an accessory into the incorrect jack may damage the phone.
12. Earpiece lets you hear the caller and automated prompts.
Phone Basics 12

20130206 For FCC Certification
20130206 For FCC Certification
Back panel
● Camera Lens lets you take pictures and videos.
● Speaker lets you hear the different ringers and sounds. The speaker also lets you hear
the caller’s voice in speakerphone mode.
● Flash helps illuminate subjects in low-light environments when the camera is focusing
and capturing a photo or video.
Turn Your Phone On and Off
The instructions below explain how to turn your phone on and off, or how to restart the phone.
Turn Your Phone On
► Press and hold .
Turn Your Phone Off
1. Press and hold to open the Power options menu.
Note: When the screen is locked and you press , it will only turn off the screen and not
the phone. You will need to unlock the screen first before you press and hold to
turn the phone off. See
Turn Your Screen On and Off for details.
Phone Basics 13

20130206 For FCC Certification
20130206 For FCC Certification
2. Touch Power off to turn the phone off.
Restart Your Phone
Restarting the phone will close all running apps and will clear all temporary files in the phone’s
memory. Make sure to save your work before restarting the phone.
1. Press and hold for about two seconds.
2. On the Power options menu, touch Restart.
3. In the Restart phone confirmation box, touch Restart.
Note: If the phone hangs and the touchscreen does not respond, press and hold for
about 12 seconds to restart the phone.
Turn Your Screen On and Off
Your phone allows you to quickly turn the screen off when not in use and to turn it back on and
unlock it when you need it.
Turn the Screen Off When Not in Use
► To quickly turn the screen off, press . Pressing again or receiving an
incoming call will turn on your phone screen and show the lock screen.
To save battery power, the phone automatically turns off the screen after a certain period of
time when you leave it idle. You will still be able to receive messages and calls while the
phone’s screen is off.
Note: For information on how to adjust the time before the screen turns off, see Screen
Timeout
Turn the Screen On and Unlock It
Below are steps for how to unlock your phone’s screen.
1. To turn the screen on, press .
2. Drag or the clock up or swipe up from an empty space on the lock screen.
.
Your Phone’s Lock Screen
Aside from protecting the phone’s screen from unwanted touches and presses, the lock screen
also displays important information, updates, and messages at a glance, and provides shortcut
icons to your favorite applications.
Unlock the Screen
Unlock the screen to receive an incoming call or to access your phone.
Phone Basics 14

20130206 For FCC Certification
20130206 For FCC Certification
1. When the screen is off, press to show the lock screen.
2. Flick any of the following items up the screen: the lock icon ( ), the clock, an empty
space on the lock screen, or a shortcut icon.
Note: If you have set up a screen lock, you'll be asked to provide your credentials before your
phone unlocks. See
Security-Screen Lock.
Customize the Lock Screen
You can customize the lock screen style and change the shortcuts that appear on the lock
screen.
1. Slide down the Notifications panel, and then touch > Personalize.
2. In Display, touch Lock screen style.
3. Slide your finger left or right to choose a lock screen style.
4. Touch the lock screen style to see a preview. If you want to further customize it, touch
Settings.
5. Touch Done.
Touchscreen Navigation
Your phone’s touchscreen lets you control actions through a variety of touch gestures.
Touch
Touch the screen with your finger when you want to select onscreen items such as application
and settings icons, or press onscreen buttons.
Phone Basics 15

20130206 For FCC Certification
20130206 For FCC Certification
After you've scrolled down a long list or screen (in apps such as Mail and People), touch the
status bar to jump straight to the top of your screen.
Touch and Hold
To open the available options for an item (for example, a contact or link in a Web page), touch
and hold the item.
Swipe or Slide
Quickly swipe your finger vertically or horizontally across the screen to go to other Home pages,
scroll through documents, and more.
Phone Basics 16

20130206 For FCC Certification
20130206 For FCC Certification
Drag
To drag, press and hold your finger with some pressure before you start to drag. While
dragging, do not release your finger until you have reached the target position.
Flick
Flicking the screen is similar to swiping, except that you need to swipe your finger in light, quick
strokes. This finger gesture is always in a vertical direction, such as when flicking the contacts
or message list.
Press and Flick
On the Home screen, you can easily move a widget or icon from one screen to another. Press
and hold the widget or icon with one finger, and flick the screen to the new location with another
Phone Basics 17

20130206 For FCC Certification
20130206 For FCC Certification
finger.
Pinch and Spread
―Pinch‖ the screen using your thumb and forefinger to zoom out, or ―spread‖ the screen to zoom
in when viewing a picture or a Web page. (Move fingers inward to zoom out and outward to
zoom in.)
Two-finger Scrolling
In some applications that have sorting, like Mail or People, you can use two fingers to scroll the
screen. The screen displays the sorting order, and you can easily scroll to the information you
Phone Basics 18

20130206 For FCC Certification
20130206 For FCC Certification
want.
Three-finger Scrolling
● Swipe up using three fingers to share content such as photos, videos, and music from
your phone to your TV or speakers.
● While using the HTC Car app, tap the screen with three fingers to activate the voice
command mode.
Note: HTC gestures is enabled by default, which makes the three-finger gesture work only
when sharing content or using HTC apps. If you want to use the multi-finger gesture in
other apps or games, clear the HTC gestures option in Settings > Display, gestures &
buttons.
Motion Gestures
Use motion gestures to rotate the screen, mute, lower the ringtone volume, and more.
Rotate
For most screens, you can automatically change the screen orientation from portrait to
landscape by turning the phone sideways. When entering text, you can turn the phone sideways
Phone Basics 19

20130206 For FCC Certification
20130206 For FCC Certification
to bring up a bigger keyboard. See HTC Sense Input Keyboard for more details.
Note: The Auto-rotate screen option in Settings > Display, gestures & buttons needs to be
selected for the screen orientation to automatically change.
Flip to Silence
When a call comes in, you can turn your over to mute it.
Pick Up to Lower Volume
In a business meeting or restaurant, pick HTC One up when a call comes in to lower the
ringtone volume.
Phone Basics 20

20130206 For FCC Certification
20130206 For FCC Certification
Set Volume to Automatically Increase while in Your Pocket or Bag
You can set HTC One to recognize when it's in your bag or pocket and raise the ringtone
volume so that you can hear it in noisy environments.
Working with Phone Apps and Settings
Quickly open your favorite apps even when the phone screen is locked and easily change your
phone settings to make it truly yours.
Open an App
Open apps from the Home screen by:
● Touching an app on the launch bar at the bottom of the Home screen.
● To see more apps, touch . Then touch the app you want to use.
Open an App or Folder from the Lock Screen
Tip: The shortcuts on the lock screen are the same ones on your Home screen’s launch bar.
To change the lock screen shortcuts, you’ll have to replace the apps or folders on the
launch bar.
● On the lock screen, drag an app or folder icon up to unlock the screen and directly go to
the app or folder.
● When there's a notification or info shown on the lock screen such as a missed call or
new message, you can drag it up to directly go to its app.
If you've set up a screen lock, you'll be asked to provide your credentials first before your phone
opens the app or folder.
Switch Between Recently Opened Apps
When you're multitasking and using different apps on your phone, you can easily switch
between the apps you've recently opened.
Phone Basics 21

20130206 For FCC Certification
20130206 For FCC Certification
► Double-tap to see recently-opened apps.
To switch back to an app, just touch it.
To remove an app from the list, drag it up.
Refresh Content
In some apps, you can easily refresh content that's synced or downloaded from the Web with a
simple finger gesture.
1. While viewing content such as weather, stocks, or Mail inbox, scroll to the top of the
screen.
Phone Basics 22

20130206 For FCC Certification
20130206 For FCC Certification
2. Pull down the screen with your finger, and then release to refresh.
Set the Back Key to Open the Menu
You can set the Back key ( ) to open the Menu while in an app.
1. Slide the Notifications panel open, and then touch .
2. Touch Display, gestures & buttons.
3. Touch Back button and select Press for back, press and hold for menu.
Capture the Phone Screen
Want to show off your high game score, write a blog post about your phone's features, or post a
status update about a song you're playing? It's easy to take a picture of the screen and share it
from Gallery.
► Briefly press and hold and then press . The screen is saved in the
Screenshots album in Gallery.
Get to Know Your Settings
Want to change the ringtone, set up a Wi‑Fi connection or make your phone more secure? Do
this and more in Settings.
► Slide the Notifications panel open, and then touch . For more information, see
Settings.
Your Home Screen
Your Home screen is where you make your phone your own.
Phone Basics 23

20130206 For FCC Certification
20130206 For FCC Certification
● After you've turned on and set up your phone, you'll see the Feeds view as the main
Home screen. Customize it to show posts from your social networks, headlines from
your favorite news media, and more. For details, see
● You can change the apps on the launch bar at the bottom of the Home screen. See
Customize the Home Screen.
● Swipe left and you’ll discover another Home screen panel for adding your favorite apps,
widgets, and more so they’re just a tap away. And if you need more Home screen
panels, you can add more. For details, see
Customize the Home Screen.
Home Screen Feeds.
Home Screen Feeds
Your phone allows you to rearrange the order of your home screens and even remove extended
screens at any time.
Check Feeds on Your Home Screen
Stay in touch with friends or get the latest about your interests right on your Home screen. Set
up which social networks, news sources, and more will appear. Your phone refreshes the
stream every time you return to the Home screen.
● Touch a tile to view more details or to comment on a post or status update.
● Scroll to the top and pull down on the screen to manually refresh the stream. This also
shows icons for posting on social networks, searching, and more.
Tip: If the Feeds view is set as the main screen, you can press or touch the status bar to
scroll to the top.
● Touch to choose the type of feeds to display. Select Highlights to see other contents
such as upcoming events, frequently-viewed photos in Gallery, and more.
Your Social Networks
When you sign in to your social network accounts and authorize HTC Sense to access them,
you can:
● Post status updates from the Home screen when using the Feeds view.
● See your contacts and their status updates in People.
● See photos in Gallery or on the Home screen.
● Check your friends’ status updates and posts on the Home screen when using the
Feeds view.
● View events and reminders in Calendar.
Phone Basics 24

20130206 For FCC Certification
20130206 For FCC Certification
To post an update on your social network on the Home screen Feeds view:
1. Touch , and then choose a social network.
Note: If the icon doesn't show, scroll to the top and pull down on the screen.
2. Compose your status update and post it on your social network.
Select Feeds
Get updated with the most relevant content and posts with just a swipe. Choose which feeds to
display on the Home screen. You can select popular news channels and websites or choose a
category like Entertainment. You can also show posts from friends in social networks or
information from apps such as Calendar.
1. From the Feeds view, touch > Topics and services.
Note: If the icon doesn't show, scroll to the top and pull down on the screen.
2. Select feeds from apps, types of content, and social networks that will display on the
Home screen. Swipe left or right for more choices.
Subscribe to a Different News Source or Channel
Feeds from news channels and Web sites displayed on the Home screen are set by a local
content guide. To see a different list of news sources, change the local content.
1. From the Feeds view, touch > Settings.
Note: If the icon doesn't show, scroll to the top and pull down on the screen.
2. Touch Local content.
3. Select a country, and touch Next.
4. Select news sources and categories that you want.
============================================= >>>
Choosing Your Default Home Screen
Do you like browsing feeds most of the time? Or do you prefer interacting with apps more?
Personalize to go straight to the Feeds and widgets view or the All apps view.
1. Slide the Notifications panel open, and then touch > Personalize.
2. Touch Home screen.
3. Choose the default behavior when you press .
Phone Basics 25

20130206 For FCC Certification
20130206 For FCC Certification
Tip: Quickly switch between the Feeds and widgets view or the All apps view by touching
or .
<<< =============================================
Customize the Home Screen
Your phone allows you to change the wallpaper, add or remove home screen panels, and add
shortcuts, folders, and widgets at any time.
Change the Wallpaper
Changing the phone’s display screen wallpaper with a preset wallpaper or your favorite photo is
a quick and easy way to change the feel of your phone and give it a fresh look. Browse the
collection of wallpapers included in your phone or choose from photos that you have taken with
the camera. You can also change to an animated wallpaper.
1. Slide the Notifications panel open, and then touch > Personalize > Wallpaper.
2. Select from the following:
HTC wallpapers. Choose a preset image, and then touch Preview.
Live wallpapers. Choose a preset animated wallpaper, and then touch Preview. If
the animated wallpaper you chose can be customized, touch Settings.
Gallery. Choose an existing photo and crop it.
3. Touch Done or Apply.
Rearrange the Home Screen
Reorder your Home screen panels in any way that fits how you use them. For example, move
the panels with frequently-used widgets, shortcuts, and folders closer to the main Home screen.
You can also add or remove panels
1. Slide the Notifications panel open, and then touch > Personalize > Customize
home screen.
2. Touch and hold the thumbnail of the screen you want to move.
3. Drag the thumbnail to its new position, and then lift your finger.
4. You can also do any of the following:
>>>>>>
To set a Home screen panel as the main Home screen, drag the panel to .
To remove a panel, drag it to .
Phone Basics 26

20130206 For FCC Certification
20130206 For FCC Certification
To add a panel, touch .
Customize the Launch Bar
The launch bar on your Home screen gives you one-touch access to commonly used apps. You
can replace the apps on the launch bar with other apps that you often use.
Tip: The apps or shortcuts you see on the lock screen are the same as the ones in the
launch bar.
1. Touch and hold the app you want to replace, and then drag it out of the launch bar.
2. Touch to go to the All apps screen.
3. Touch and hold an app, and then drag it to the empty slot on the launch bar.
You can also place shortcuts to settings or information on the launch bar. Add a shortcut first to
the Home screen, and then drag it to the launch bar.
Work with Widgets, Folders, and App Shortcuts
Add widgets and app shortcuts to the Home screen. You can also group your favorite apps into
folders so you can easily access them.
Add Widgets on Your Home Screen
Widgets make at-a-glance important information and media content easily available. Choose
from a selection of widgets and add the most useful ones to your Home screen.
1. Slide the Notifications panel open, and then touch > Personalize > Customize
home screen.
2. Touch > Widgets.
Swipe to browse through the widgets.
Touch to search for specific widgets.
Tip: Some widgets are available in different styles and sizes.
Phone Basics 27

20130206 For FCC Certification
20130206 For FCC Certification
3. Press and hold, and then drag a widget to a Home screen thumbnail where you want to
add it.
You can also add widgets that allow you to quickly switch on or off certain settings such as
Bluetooth® and GPS.
Change the Widget Settings
You can modify basic settings of some widgets (for example, you can change the city that is
displayed on the weather clock widget) from the Home screen. Some widgets can also be
resized after you've added them to your Home screen.
► Do any of the following:
To change the widget settings, press and hold the widget, and then drag it to .
You can then customize the widget settings.
To resize the widget, press and hold the widget. If a border appears around the
widget, drag the sides of the border to enlarge or shrink the widget size.
Add Apps and Other Shortcuts on Your Home Screen
Place apps you often use on your Home screen. You can also add shortcuts to frequently used
settings, bookmarked Web pages, and more.
1. Slide the Notifications panel open, and then touch > Personalize > Customize
home screen.
2. Touch > Apps or Shortcuts.
Swipe to browse through the apps or shortcuts.
Touch to search for specific apps or shortcuts.
3. Press and hold, and then drag an app or shortcut to a Home screen thumbnail where
you want to add it.
Note: To add an app from the All apps view, press and hold an app and drag it to . Drop the
app on an empty space in the Home screen.
Move or Remove Items on Your Home Screen
1. Touch and hold the widget or app shortcut you want to move or remove.
2. Do one of the following:
To move the item to another position on the same panel, just drag it to a new area
and then release it.
Phone Basics 28

20130206 For FCC Certification
20130206 For FCC Certification
To move the item to another Home screen panel, flick left or right to rotate the screen
to another Home screen panel, and then release it.
To remove the item, drag it to and then release it.
Group Apps in a Folder
Find your apps even easier by grouping them into folders.
1. Touch and hold an app, and then drag it over to another app to automatically create a
folder.
2. Touch the folder to open it.
3. Touch , and then select one or more apps that you want to add to the folder.
4. Touch Add.
<<<<<<<<<<<
Status and Notifications
The status bar and notification panel make it easy to see your phone’s connection, alert you of
new messages, and much more.
Phone Basics 29

Icon
Description
Signal strength (More bars = stronger signal)
No service
Connected to a Wi-Fi network
Sprint 4G LTE Network is available
Sprint 4G LTE Network available and active (with icon animation)
Sprint 3G Network is available
Sprint 3G Network available and active (with icon animation)
Sprint 3G Network is currently unavailable
Phone’s location feature is on and available for location-based services such as
GPS navigation
Phone’s location feature off and your location is available only for 911
Phone microphone muted
Phone speaker muted
Vibrate mode
Shows current battery charge level (icon shown is fully charged)
Bluetooth on
Connected to Bluetooth phone
Airplane mode
Alarm set
20130206 For FCC Certification
20130206 For FCC Certification
Status Bar
The status bar at the top of the Home screen provides phone and service status information on
the right side and notification alerts on the left. To view notification alerts, touch and hold the
status bar and drag it down.
Status Icons
Phone Basics 30

Icon
Description
New text or multimedia message
New voicemail
New Gmail message
New Microsoft Exchange ActiveSync or POP3/IMAP email message
Problem with text or multimedia message delivery
New instant message from Google Talk
Upcoming event
Music is playing
General notification (for example, sync error)
Wi-Fi is on and wireless networks are available
Data synchronizing – connected to HTC Sync
New location detected
More (undisplayed) notifications
Missed call
Call in progress
Matched contacts suggestion
Uploading data (animated)
Downloading data (animated)
Waiting to upload
Speakerphone on
Wired microphone headset connected
Wired headset connected
20130206 For FCC Certification
20130206 For FCC Certification
Notification Icons
Phone Basics 31

Content downloaded
Phone connected to computer via USB cable
Storage card is blank
Downloaded Google Play app installed successfully
20130206 For FCC Certification
20130206 For FCC Certification
Notifications Panel
When you see notification icons, open the Notifications panel to check out details of the
notifications that you've received. You can also quickly access settings from the Notifications
panel.
1. Slide down from the top of the screen to open the notifications panel.
If you have several notifications, scroll down the screen to see them all.
2. On the Notifications panel:
You can expand certain notifications to see more information, such as email
previews and calendar events. Spread with your two fingers to expand a notification,
or pinch to collapse it.
You'll see icons in some notifications that allow you to take immediate actions. For
example, when you have a missed call, touch the available icons to return the call or
reply with a text message.
Touch the notification icon on the left to open the corresponding app.
To dismiss just one notification in the list, drag it left or right.
Phone Basics 32

20130206 For FCC Certification
20130206 For FCC Certification
3. To close the Notifications panel, slide up from the bottom bar of the panel or touch .
You can also touch to dismiss all notifications and close the Notifications panel.
Notification LED
The Notification LED shows a:
● Solid green light when your phone is connected to the power adapter or a computer and
the battery is fully charged.
● Flashing green light when you have a pending notification (for example, a new message
or a missed call).
● Solid orange light when the battery is being charged.
● Flashing orange light when the battery level reaches very low. (Power is below 14%.)
Note: The indicators are listed in order of priority. For example, if your phone is connected to
the AC adapter and the battery is charging, the LED will be solid orange and will not
switch to a flashing green light even if there is a pending notification.
Enter Text
You can type on your phone using one of the available touchscreen keyboards.
HTC Sense Keyboard
Typing is fast and accurate with the HTC Sense® keyboard.
● Just swipe right to access the numeric and symbol keyboard. Or swipe left to switch
between languages.
● The keys have secondary numbers, punctuation symbols, or other characters that you
can quickly insert without having to switch to the numeric and symbol keyboard.
For example, just touch and hold a key on the first row to insert a number.
● Choose from a selection of smileys and insert one right from the keyboard.
● Show or hide navigational arrow keys on the keyboard. If you enable the arrow keys in
Settings, they'll only appear on the portrait keyboard.
● You can type words by just speaking.
● Word prediction also saves typing time. As you type, you'll see word suggestions that
you can choose from. You can even add words, phrases, and shortcuts to the word
prediction dictionary.
Phone Basics 33

20130206 For FCC Certification
20130206 For FCC Certification
● Turn on the Trace keyboard so you can type words by just sliding your finger from one
letter to another.
And since everyone has their own typing style, you can go to Settings to calibrate the keyboard
so it learns how you type.
Change the Keyboard Layout
You can choose from different keyboard layouts to suit your typing style. To change the
keyboard layout, do the following:
1. Slide the Notifications panel open, and then touch > Language & keyboard.
2. Touch HTC Sense Input > Keyboard selection.
3. Touch Keyboard types, and then select the keyboard layout you want to use.
Change the Keyboard Language
If multiple keyboard languages are available on your phone, you can choose which languages
to enable in the onscreen keyboard.
1. Slide the Notifications panel open, and then touch > Language & keyboard.
2. Touch HTC Sense Input > Keyboard selection, and then choose the languages you
want.
3. To change the keyboard language, do any of the following:
Swipe left on the onscreen keyboard (not available if you're using trace keyboard).
Touch the language key (for example, ) until you see the language you want to
use.
Touch and hold the language key, and then drag your finger to the keyboard
language you want to use
Enter Text by Typing
The onscreen keyboard becomes available when you tap a text field in an app. Enter letters and
numbers, change the keyboard layout or language, and more.
Phone Basics 34

20130206 For FCC Certification
20130206 For FCC Certification
● Touch the keys on the onscreen keyboard to enter letters and numbers, as well as
punctuation marks and symbols.
● Touch to enter an uppercase letter. Touch twice to turn on caps lock.
● Touch and hold keys with gray characters at the top to enter numbers, symbols, or
accented letters. Some keys have multiple characters or accents associated with them.
● Swipe right to show number and symbol keys. To return to the main keyboard, swipe
left.
● On supported apps, turn the phone sideways to show a larger Standard keyboard that
lets you type easily using two thumbs.
● Touch to close the onscreen keyboard.
To open the keyboard settings, touch and hold the comma key. Or, slide the Notifications panel
open, and then touch Choose input method > Set up input methods > HTC Sense Input.
Enter Text Using the Trace Keyboard
Instead of tapping the keys on the onscreen keyboard, you can "trace" to type words.
Note: You need to turn on Trace keyboard in Settings > Language & keyboard > HTC
Sense Input.
1. Touch an area where you want to enter text.
2. Slide your finger from one letter to the next to enter a word.
3. Lift your finger when the word is completed. The suggestion list will show possible
matches.
4. You can:
Touch the space bar to insert a highlighted word.
Touch a word from the suggestion list.
Touch the arrow next to the suggestion list to see more choices.
Enter Text by Speaking
Try speaking the words to enter them in most text fields that let you use the touch input
keyboard.
1. Touch an area where you want to enter text.
2. On the onscreen keyboard, touch and hold .
Phone Basics 35

20130206 For FCC Certification
20130206 For FCC Certification
3. When you see the microphone image, speak out the words you want to type.
4. To set the voice input language, touch the language bar above the microphone image.
You can choose one or more languages. Available languages depend on the voice input
languages supported by Google.
5. If a word doesn't match what you've spoken and it's underlined, touch the underlined
word to delete it or to see more choices.
6. Enter punctuation marks by saying the name (for example, say "comma").
Enter Text with Word Prediction
The onscreen keyboard has predictive text to help you type quickly and accurately. Predictive
text input is enabled by default, and word suggestions are displayed as you type.
To enter a word in predictive mode, do any of the following:
● Touch the space bar to insert the highlighted word in the suggestion list.
● Touch a word from the suggestion list.
● Touch the arrow next to the suggestion list to see more choices.
Tip: Touch to switch between Multitap and XT9 predictive modes when using the Phone
keyboard layout.
Manage Your Predictive Text Dictionary
Your phone comes with a list of words that it references for predictive text suggestions.
Sometimes you may need to add a word to the predictive text dictionary, for example a name or
a specialized technical word.
While entering text using the Standard keyboard layout, if you touch any word on the suggestion
list, it is automatically added to the predictive text dictionary if it was not in the dictionary
already.
1. Slide the Notifications panel open, and then touch > Language & keyboard.
2. Touch HTC Sense Input > Personal dictionary.
3. Do any of the following:
To add a word to the predictive text dictionary, touch , enter the word, and then
touch OK.
To edit a word, touch the word, enter your changes, and then touch OK.
Phone Basics 36

20130206 For FCC Certification
20130206 For FCC Certification
To delete a word, touch > Delete, select the words, and then touch Delete.
Swype Keyboard
Enter text by sliding on or touching the keys on the Swype® keyboard, or by speaking.
Switch to the Swype Keyboard
By default, your phone uses the touch input keyboard for text input. To change the input method
to Swype:
1. Touch an area where you want to enter text.
2. Slide the Notifications panel open, and then touch Choose input method > Swype.
Enter Text Using Swype
Slide your finger on the Swype keyboard to enter text.
1. Touch an area where you want to enter text.
2. Briefly press and hold the first letter of the word you want to enter, and then slide your
finger to the other letters of the word.
3. When you’ve reached the last letter, lift your finger.
For example, to enter the word ―the‖, touch and hold t, and then slide your finger to h
and e.
Note: If you’ve entered a word that Swype doesn’t recognize, word suggestions appear at the
top of the keyboard. Touch a word to enter it to your text.
There are many options to choose from with Swype keyboard settings. While using the Swype
keyboard, touch and hold to adjust the Swype settings.
Enter Text by Typing on the Swype Keyboard or by Speaking
Instead of using Swype, you can enter text by touching the keys on the Swype keyboard or by
speaking:
● Touch the keys on the onscreen keyboard to enter letters and numbers, as well as
punctuation marks and symbols.
Phone Basics 37

20130206 For FCC Certification
20130206 For FCC Certification
● Touch to enter an uppercase letter. Touch twice to turn on caps lock.
● Touch and hold keys with gray characters at the top to enter numbers, symbols, or
accented letters. Some keys have multiple characters or accents associated with them.
● Touch 123 to show number and symbol keys. To return to the main keyboard, touch
ABC.
● Touch to enter text by speaking.
● Touch and hold the space bar to change the keyboard language.
Edit Text
In apps such as the Web browser and Mail, you have many options to make entering text
easier, including copying, cutting, pasting, and sharing text.
Cut and Paste Text
1. Touch and hold on a word.
2. Drag the start and end anchors to highlight the surrounding text you want to select.
Tip: You can use the magnifier to zoom in while selecting your text. To turn on the magnifier,
slide the Notifications panel open, touch > Accessibility, and then select the Show
magnifier option. You'll see the magnifier when you touch one of the text selection
anchors.
3. After you have selected the text you want to copy, touch Copy.
The selected text is then copied to the clipboard.
4. In a text entry field (for example while composing an email), touch and hold at the point
where you want to paste the text.
Phone Basics 38

20130206 For FCC Certification
20130206 For FCC Certification
5. Touch Paste.
Tip: To copy the address of a linked webpage, touch and hold the link, and then touch Copy
link URL.
Share Text
1. After you have selected the text you want to share, touch Share.
2. Choose where to paste and share the selected text, such as in an email message or
social network status update.
Phone Basics 39
 Loading...