

Page 1

©2011 Sprint. SPRINT and the logo are trademarks of Sprint.
Other marks are the property of their respective owners.
11 / 18 / 1 0
User Guide
www.sprint.com
Page 2
Consejo: Para encontrar esta guía para usuarios en español,
por favor visita a
Support > Devices.
To find this user guide in Spanish, please visit
www.sprint.com and click Support > Devices.
Important Privacy Message – Sprint’s policies often do not
apply to third-party applications. Third-party applications may
access your personal information or require Sprint to disclose
your customer information to the third-party application
provider. To find out how a third-party application will collect,
access, use, or disclose your personal information, check the
application provider’s policies, which can usually be found on
their website. If you aren’t comfortable with the third-party
www.sprint.com y haz clic en
application’s policies, don’t use the application.
Page 3
Table of Contents
Tip: Looking for something? If you don’t see it in the headings
listed here, try the Index on page 276.
Introduction . . . . . . . . . . . . . . . . . . . . . . . . . . . . . . . i
Your Device’s Menu. . . . . . . . . . . . . . . . . . . . . . . . i
Section 1: Getting Started . . . . . . . . . . . . . . . . . 1
1A. Setting Up Service . . . . . . . . . . . . . . . . . . . 2
Setting Up Your Device . . . . . . . . . . . . . . . . . . . . . . 2
Activating Your Device . . . . . . . . . . . . . . . . . . . . . . 3
Setting Up Your Voicemail . . . . . . . . . . . . . . . . . . . 4
Sprint Account Passwords . . . . . . . . . . . . . . . . . . . 4
Getting Help . . . . . . . . . . . . . . . . . . . . . . . . . . . . . . . 5
Section 2: Your Device . . . . . . . . . . . . . . . . . . . . 7
2A. Device Basics . . . . . . . . . . . . . . . . . . . . . . . 8
Your Device . . . . . . . . . . . . . . . . . . . . . . . . . . . . . . . . 9
Turning Your Device On and Off . . . . . . . . . . . . . 11
Viewing the Display Screen . . . . . . . . . . . . . . . . . 13
Battery and Charger . . . . . . . . . . . . . . . . . . . . . . . 18
Getting Around Your Device . . . . . . . . . . . . . . . . 21
Displaying Your Phone Number . . . . . . . . . . . . . 22
Making and Answering Calls . . . . . . . . . . . . . . . 22
Speed Dialing . . . . . . . . . . . . . . . . . . . . . . . . . . . . 28
Dialing Sprint Services . . . . . . . . . . . . . . . . . . . . . 29
Entering Text . . . . . . . . . . . . . . . . . . . . . . . . . . . . . . 29
Home Screen . . . . . . . . . . . . . . . . . . . . . . . . . . . . . 35
2B. Settings . . . . . . . . . . . . . . . . . . . . . . . . . . . . 40
Personalization Settings . . . . . . . . . . . . . . . . . . . . 40
Sound Settings . . . . . . . . . . . . . . . . . . . . . . . . . . . 41
Display Settings . . . . . . . . . . . . . . . . . . . . . . . . . . . 44
Location Settings . . . . . . . . . . . . . . . . . . . . . . . . . . 46
Messaging Settings . . . . . . . . . . . . . . . . . . . . . . . 46
Airplane Mode . . . . . . . . . . . . . . . . . . . . . . . . . . . . 48
TTY Use With Sprint Service . . . . . . . . . . . . . . . . 48
Security Settings . . . . . . . . . . . . . . . . . . . . . . . . . . 50
Data Synchronization Settings . . . . . . . . . . . . . . 53
Social Network Settings . . . . . . . . . . . . . . . . . . . . 54
Application Settings . . . . . . . . . . . . . . . . . . . . . . . 55
Date & Time Settings . . . . . . . . . . . . . . . . . . . . . . 56
Power-Saving Tips . . . . . . . . . . . . . . . . . . . . . . . . 57
Page 4

2C. History . . . . . . . . . . . . . . . . . . . . . . . . . . . . . 59
Viewing History . . . . . . . . . . . . . . . . . . . . . . . . . . . 59
Making a Call From History . . . . . . . . . . . . . . . . 60
Saving a Number From History . . . . . . . . . . . . . 60
Prepending a Number From History . . . . . . . . . . 61
Erasing History . . . . . . . . . . . . . . . . . . . . . . . . . . . . 61
2D. Contacts . . . . . . . . . . . . . . . . . . . . . . . . . . . 62
About People . . . . . . . . . . . . . . . . . . . . . . . . . . . . . 62
Using the People Screen . . . . . . . . . . . . . . . . . . 63
Adding a New People Entry . . . . . . . . . . . . . . . . 65
Saving a Phone Number . . . . . . . . . . . . . . . . . . 66
Using the Contact Details Screen . . . . . . . . . . . 66
Merging Entries in People . . . . . . . . . . . . . . . . . . . 67
Editing an Entry in People . . . . . . . . . . . . . . . . . . 68
Finding Entries in People . . . . . . . . . . . . . . . . . . . 71
Backing Up and Importing Entries in People . . 72
Working with Groups . . . . . . . . . . . . . . . . . . . . . . . 73
Using the People Widget . . . . . . . . . . . . . . . . . . . 74
Connecting with Your Social Networks . . . . . . . 76
Using Friend Stream . . . . . . . . . . . . . . . . . . . . . . . 79
2E. Calendar & Tools . . . . . . . . . . . . . . . . . . . . 81
Calendar . . . . . . . . . . . . . . . . . . . . . . . . . . . . . . . . . 81
Calculator . . . . . . . . . . . . . . . . . . . . . . . . . . . . . . . . 89
Clock . . . . . . . . . . . . . . . . . . . . . . . . . . . . . . . . . . . . 90
Flashlight . . . . . . . . . . . . . . . . . . . . . . . . . . . . . . . . . 95
Sharing Games and Applications . . . . . . . . . . . 95
Car Panel . . . . . . . . . . . . . . . . . . . . . . . . . . . . . . . . 97
Quickoffice . . . . . . . . . . . . . . . . . . . . . . . . . . . . . . . 99
Adobe Reader . . . . . . . . . . . . . . . . . . . . . . . . . . . 100
HTC Sync . . . . . . . . . . . . . . . . . . . . . . . . . . . . . . . 101
Updating Your Device . . . . . . . . . . . . . . . . . . . . . 109
2F. Voice Services . . . . . . . . . . . . . . . . . . . . . 110
Automatic Speech Recognition (ASR) . . . . . . . 110
Managing Voice Memos . . . . . . . . . . . . . . . . . . 111
Voice Input . . . . . . . . . . . . . . . . . . . . . . . . . . . . . . 113
2G. microSD Card . . . . . . . . . . . . . . . . . . . . . . 114
Your Device’s microSD Card . . . . . . . . . . . . . . . 114
Using the Device’s microSD Card as a
USB Drive . . . . . . . . . . . . . . . . . . . . . . . . . . . . . . . 117
Page 5

2H. Camera & Multimedia . . . . . . . . . . . . . . . 119
Taking Pictures and Shooting Videos . . . . . . . 119
Viewing Pictures and Videos Using Gallery . . 127
Listening to Music . . . . . . . . . . . . . . . . . . . . . . . . 135
Listening to the Radio . . . . . . . . . . . . . . . . . . . . . 140
2I. Bluetooth . . . . . . . . . . . . . . . . . . . . . . . . . . 142
Using Bluetooth . . . . . . . . . . . . . . . . . . . . . . . . . . 142
Section 3: Sprint Service. . . . . . . . . . . . . . . . 149
3A. Sprint Service: The Basics . . . . . . . . . . 150
Voicemail . . . . . . . . . . . . . . . . . . . . . . . . . . . . . . . . 150
Text Messaging (SMS) and Multimedia
Messaging (MMS) . . . . . . . . . . . . . . . . . . . . . . . . 152
Caller ID . . . . . . . . . . . . . . . . . . . . . . . . . . . . . . . . . 162
Call Waiting . . . . . . . . . . . . . . . . . . . . . . . . . . . . . . 163
Making a 3-Way Call . . . . . . . . . . . . . . . . . . . . . . 163
Call Forwarding . . . . . . . . . . . . . . . . . . . . . . . . . . 164
Roaming . . . . . . . . . . . . . . . . . . . . . . . . . . . . . . . . 164
3B. Web and Data Services . . . . . . . . . . . . . 167
Ways of Connecting to the Internet . . . . . . . . . 167
Connecting Using Wi-Fi . . . . . . . . . . . . . . . . . . . 167
Connecting Using Sprint 4G . . . . . . . . . . . . . . . 170
Getting Started With Data Services . . . . . . . . . 171
Connecting to a Virtual Private
Network (VPN) . . . . . . . . . . . . . . . . . . . . . . . . . . . 173
Using the Device’s Web Browser . . . . . . . . . . . 175
Accessing Email Messages . . . . . . . . . . . . . . . 184
Gmail . . . . . . . . . . . . . . . . . . . . . . . . . . . . . . . . . . . 190
Google Talk . . . . . . . . . . . . . . . . . . . . . . . . . . . . . 198
Downloading Applications and Games
From Android Market . . . . . . . . . . . . . . . . . . . . . 200
Peep . . . . . . . . . . . . . . . . . . . . . . . . . . . . . . . . . . . 204
Stocks . . . . . . . . . . . . . . . . . . . . . . . . . . . . . . . . . . 207
Weather . . . . . . . . . . . . . . . . . . . . . . . . . . . . . . . . . 209
News Feeds . . . . . . . . . . . . . . . . . . . . . . . . . . . . . 211
Sprint Hotspot . . . . . . . . . . . . . . . . . . . . . . . . . . . 214
Using Your Device as a Modem . . . . . . . . . . . 217
Data Services FAQs . . . . . . . . . . . . . . . . . . . . . . 217
3C. Entertainment: TV and Music . . . . . . . . 219
TV . . . . . . . . . . . . . . . . . . . . . . . . . . . . . . . . . . . . . . 219
Music - MP3 Store . . . . . . . . . . . . . . . . . . . . . . . 222
Streaming Music . . . . . . . . . . . . . . . . . . . . . . . . . 223
YouTube . . . . . . . . . . . . . . . . . . . . . . . . . . . . . . . . 224
NASCAR Sprint Cup Mobile . . . . . . . . . . . . . . . 226
Page 6

3D. GPS Navigation . . . . . . . . . . . . . . . . . . . . 230
GPS Services . . . . . . . . . . . . . . . . . . . . . . . . . . . 230
TeleNav GPS Navigator . . . . . . . . . . . . . . . . . . 231
Google Maps . . . . . . . . . . . . . . . . . . . . . . . . . . . 232
Google Latitude . . . . . . . . . . . . . . . . . . . . . . . . . 238
Footprints . . . . . . . . . . . . . . . . . . . . . . . . . . . . . . . . 241
Section 4: Safety and Warranty
Information . . . . . . . . . . . . . . . . . . . . . . . . . . . . . 245
4A. Important Safety Information . . . . . . . . 246
Important Health Information and
Safety Precautions . . . . . . . . . . . . . . . . . . . . . . . 246
General Precautions . . . . . . . . . . . . . . . . . . . . . . 253
Additional Safety Information . . . . . . . . . . . . . . 256
Regulatory Agency Identifications . . . . . . . . . . 262
Federal Communication Commission
Interference Statement . . . . . . . . . . . . . . . . . . . . 263
SAR Information . . . . . . . . . . . . . . . . . . . . . . . . . 266
Telecommunications & Internet
Association (TIA) Safety Information . . . . . . . . 267
WEEE Notice . . . . . . . . . . . . . . . . . . . . . . . . . . . . 268
RoHS Compliance . . . . . . . . . . . . . . . . . . . . . . . 269
Owner’s Record . . . . . . . . . . . . . . . . . . . . . . . . . . 269
User Guide Proprietary Notices . . . . . . . . . . . . . 270
4B. Manufacturer’s Warranty . . . . . . . . . . . 271
Manufacturer’s Warranty . . . . . . . . . . . . . . . . . . . 272
Privacy Restrictions . . . . . . . . . . . . . . . . . . . . . . . 274
Weather Disclaimer . . . . . . . . . . . . . . . . . . . . . . . 274
Warranty Disclaimer . . . . . . . . . . . . . . . . . . . . . . 274
Limitation of Damages . . . . . . . . . . . . . . . . . . . . 275
Index. . . . . . . . . . . . . . . . . . . . . . . . . . . . . . . . . . 276
Page 7
Introduction
Your Device’s Menu
This User Guide introduces you to Sprint® service and
all the features of your new device. It’s divided into four
sections:
⽧ Section 1: Getting Started
⽧ Section 2: Your Device
⽧ Section 3: Sprint Service
⽧ Section 4: Safety and Warranty Information
Note: Because of updates in phone software, this printed
guide may not be the most current version for your
phone. Visit www.sprint.com
to access the most recent version of the user guide.
WARNING: Please refer to the Important Safety
Information section on page 246 to learn
about information that will help you safely use
your device. Failure to read and follow the
Important Safety Information in this device
guide may result in serious bodily injury, death,
or property damage.
and sign on to My Sprint
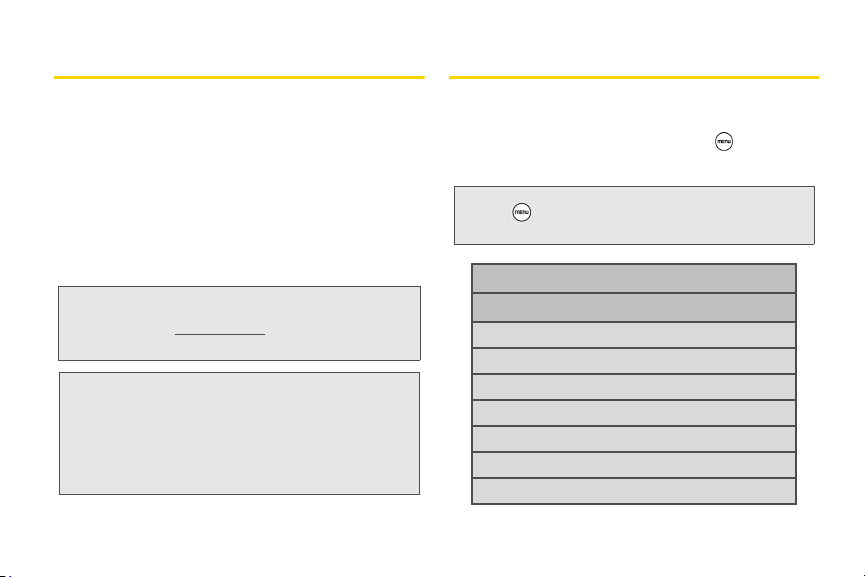
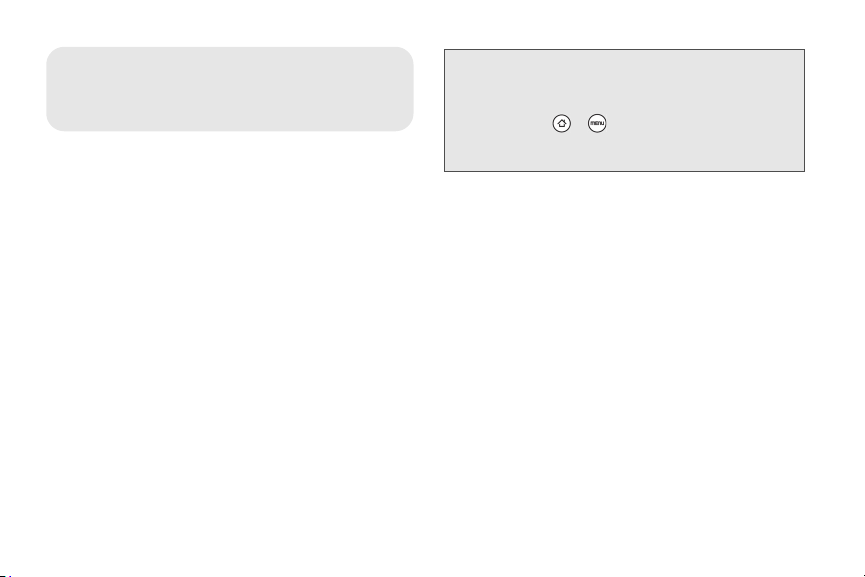
The following table outlines your device’s main menu
structure. From the Home screen, press to open the
menu.
Tip: For most programs or games on the device, pressing
brings up options available for the application or
game.
All apps
Scenes
1: Sprint Scene
2: HTC
3: Social
4: Work
5: Play
6: Travel
7: Cl ea n S la te
i
Page 8
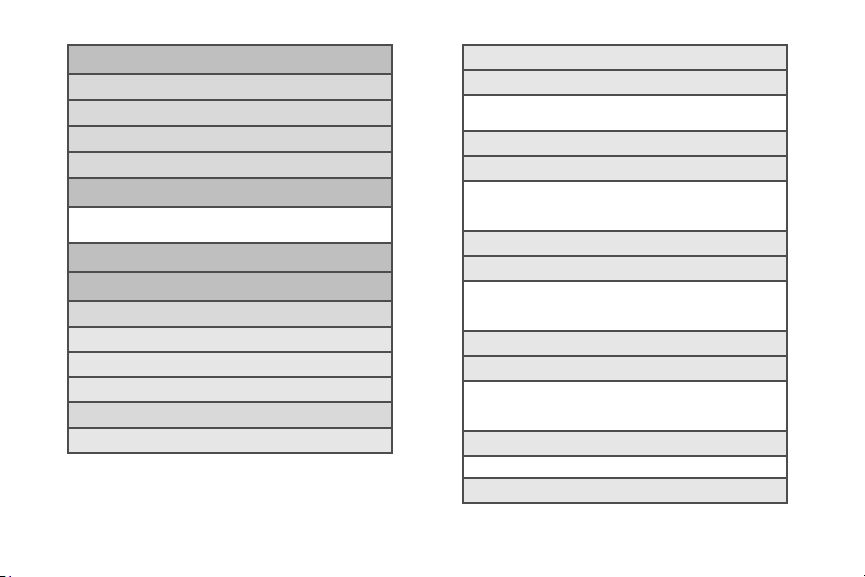
Add to Home
1: W idget
2: App
3: Shortcut
4: Folder
Wallpaper
1: Live wallpapers 2: HTC wallpapers
3: Gallery
Notifications
Settings
1: Personalize
1: Scenes
2: Home wallpaper
3: Default ringtone
2: Wireless & networks
1: Airplane mode
ii
2: Wi-Fi
3: Wi-Fi settings
1: Wi-Fi 2: Network notification
3: Add Wi-Fi network
4: Bluetooth
5: Bluetooth settings
1: Bluetooth 2: Device name
3: Discoverable 4: Advanced Settings
5: Scan for devices
6: Sprint Hotspot
7: Sprint Hotspot settings
1: Router name 2: Security
(SSID)
3: Password 4: Manage users
8: 4G
9: 4G settings
1: 4G 2: Network notification
3: Network provider 4: Signal strength
5: IP address
10: VPN settings
1: Add VPN
11: Mobile network
Page 9
12: Mobile networks
1: Data roaming 2: Data Roam Guard
3: Data roaming 4: Enable always-on
sound mobile data
5: Roaming 6: Call guard
13: USB tethering
3: Call
1: Voicemail service
2: Voicemail settings
3: Clear voicemail notification
4: TTY mode
1: TTY Off 2: TTY Full
3: TTY HCO 4: TTY VCO
5: Hearing aids
6: Phone settings
1: Edit default 2: Edit message
message
3: Save to contacts
7: DD TM mo de
8: Voice Privacy
9: Automatic prepend
10: Plus code dialing
1: North American dialing
2: International dialing
4: Sound
1: Sound profile 2: Volume
3: Vibrate 4: Phone ringtone
5: Quiet ring on 6: Notification sound
pickup
7: Audible touch 8: Audible selection
tones
9: Screen lock 10: Vibrate feedback
sounds
11: Emergency tone
5: Display
1: Auto-rotate screen 2: Animation
3: Brightness 4. Screen timeout
5: Notification flash 6: G-Sensor calibration
6: Accounts & sync
1: Background data
2: Auto-sync
3: Exchange ActiveSync (if available)
1: Account settings 2: Schedule
3: Mail 4: Contacts
5: Calendar
iii
Page 10
4: Facebook (if available)
1: Account settings 2: Sync Contacts
5: Facebook for HTC Sense (if available)
1: Account settings 2: Sync Contacts
6: Flickr (if available)
1: Account settings 2: Sync Contacts
7: Google (if available)
1: Sync Contacts 2: Sync Gmail
3: Sync Calendar
8: Twitter for HTC Sense (if available)
1: Account settings 2: Sync Peep
3: Sync Friend
9: News
1: Account settings 2: Sync news
10: Stocks
1: Account settings 2: Sync stock info
11: Weather
1: Account settings 2: Sync weather
7: Location
1: Use wireless networks 2: Location setting
3: Use GPS satellites
8: Search
1: Google search 2: Searchable items
3: Clear shortcuts
9: Connect to PC
1: Default connection 2: Ask me
type
10: Security
1: Set up screen lock 2: Visible passwords
3: Set password 4: Use secure credentials
5: Install from SD card 6: Clear all credentials
11: Applications
1: Unknown sources 2: Quick launch
3: Manage applications 4: Running services
5: Development
12: SD & phone storage
1: Total space 2: Available space
3: Unmount SD card 4: Format SD card
5: Available space 6: Factory data reset
iv
Page 11
13: Date & time
1: Automatic 2: Set date
3: Select time zone 4: Set time
5: Use 24-hour format 6: Select date format
14: Language & keyboard
1: Select language
1: English 2: Español
2: Touch Input
1: Keyboard types 2: International keyboard
3: Text input 4: Chinese Text input
5: Tutorial 6: Personal dictionary
15: Accessibility
16: Voice input & output
1: Voice recognizer settings
2: Text-to-speech settings
17: System updates
1: Firmware update 2: Update profile
3: Update PRL 4: HTC software update
18: About phone
1: Phone identity
1: Model number 2: MEID
3: Phone number 4: IMSI
5: Current username
2: Battery
1: Battery status 2: Battery level
3: Battery use 4: Up time
5: Awake time
3: Hardware information
1: Hardware version 2: Wi-Fi MAC address
3: Bluetooth address 4: 4G MAC address
4: Software information
1: Android version 2: Baseband version
3: Kernel version 4: Build number
5: Software number 6: Browser version
7: PRI Version 8: PRL Version
5: Legal information
1: HTC legal 2: Sprint legal
3: Google legal 4: Open source licenses
v
Page 12

Page 13

Section 1
Getting Started
Page 14
⽧ Setting Up Your Device (page 2)
1A. Setting Up Service
⽧ Activating Your Device (page 3)
⽧ Setting Up Your Voicemail (page 4)
⽧ Sprint Account Passwords (page 4)
⽧ Getting Help (page 5)
Setting Up Your Device
1. Install the battery.
䡲 Insert a coin or other flat object into the slot at the
bottom of the battery compartment cover and lift
the up gently to remove.
2 1A. Setting Up Service
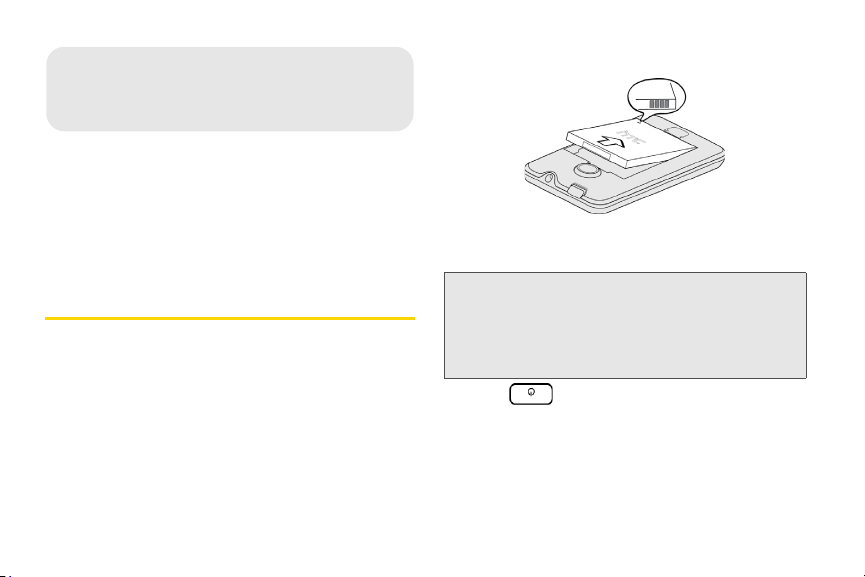
䡲 Insert the battery, contacts end first, and gently
press the battery into place.
䡲 Replace the battery compartment cover, making
sure all the locking tabs are seated and there are
no gaps around the cover.
Note: When you turn on your device for the first time, you will
be given options to let you quickly set up various
accounts, such as your Google account, Facebook,
Flickr, Twitter, Microsoft
other email accounts. We recommend that you skip
these.
®
Exchange ActiveSync®, and
2. Press to turn the device on.
䡲 If your device is activated, it will turn on, search for
Sprint service, and enter standby mode.
䡲 If your device is not yet activated, see “Activating
Your Device” on page 3 for more information.
Page 15
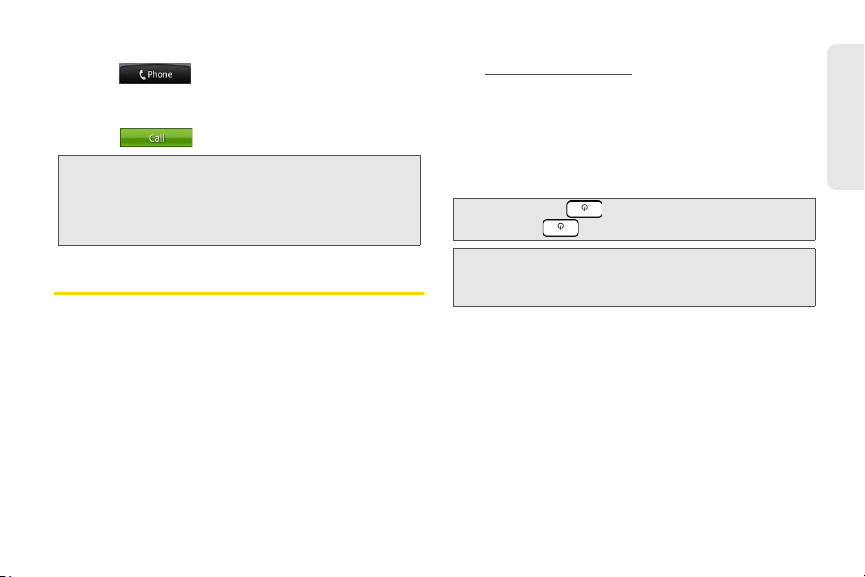
3. Make your first call.
䡲 Ta p .
䡲 Use the onscreen keypad to enter a phone
number.
䡲 Ta p .
Note: Your phone’s battery should have enough charge for
your phone to turn on and find a signal, set up your
voicemail, and make a call. You should fully charge
your battery as soon as possible. See “Charging the
Battery” on page 20 for details.
Activating Your Device
䢇 If you purchased your device at a Sprint Store, it is
probably activated and ready to use.
䢇 If you received your device in the mail and it is for a new
Sprint account or a new line of service, it is designed to
activate automatically. To confirm your activation,
make a phone call.
䢇 If you received your device in the mail and you are
activating a new device for an existing number on your
account, you will need to go online to activate your
new device.
䡲 From your computer’s Web browser, go to
www.sprint.com/activate and complete the
onscreen instructions to activate your device.
When you have finished, make a phone call to
confirm your activation. If your device is still not
activated or you do not have access to the Internet,
contact Sprint Customer Service at
1-88 8-211-4727
for assistance.
Tip: Do not press while the phone is being activated.
Pressing cancels the activation process.
Note: If you are having difficulty with activation, contact Sprint
Customer Service by dialing
other phone.
1-888- 211-4727 from any
1A. Setting Up Service 3
Setting Up Service
Page 16
Setting Up Your Voicemail
Your device automatically transfers all unanswered
calls to your voicemail, even if your device is in use or
turned off. You should set up your Sprint Voicemail and
personal greeting as soon as your device is activated.
Always use a password to protect against unauthorized
access.
1. Press and tap > Voicemail.
2. In the Personalize your Voicemail window, tap
Personalize now.
3. Your device will automatically connect with Sprint
voicemail service. Follow the system prompts to:
䡲 Create your password.
䡲 Record your name announcement.
䡲 Record your greeting.
Note: Voicemail Password
Sprint strongly recommends that you create a
password when setting up your voicemail to protect
against unauthorized access. Without a password,
anyone who has access to your device is able to
access your voicemail messages.
4 1A. Setting Up Service
For more information about using your voicemail, see
“Voicemail” on page 150.
Sprint Account Passwords
As a Sprint customer, you enjoy unlimited access to
your personal account information, your voicemail
account, and your data services account. To ensure
that no one else has access to your information, you
will need to create passwords to protect your privacy.
Account User Name and Password
If you are the account owner, you will create an account
user name and password when you sign on to
www.sprint.com. (Click Sign in and then click Sign up
now! to get started.) If you are not the account owner (if
someone else receives the bill for your Sprint service),
you can get a sub-account password at
Voicemail Password
You’ll create your voicemail password when you set up
your voicemail. See “Setting Up Your Voicemail” on
page 4 for more information on your voicemail
password.
www.sprint.com.
Page 17
Data Services Password
With your Sprint phone, you may elect to set up an
optional data services password to control access and
authorize Premium Service purchases.
For more information, or to change your passwords,
sign on to
Service at
www.sprint.com or call Sprint Customer
1-888 -211-4727.
Getting Help
Managing Your Account
Online: www.sprint.com
䢇 Access your account information.
䢇 Check your minutes used (depending on your Sprint
service plan).
䢇 View and pay your bill.
䢇 Enroll in Sprint online billing and automatic payment.
䢇 Purchase accessories.
䢇 Shop for the latest Sprint phones.
䢇 View available Sprint service plans and options.
䢇 Learn more about data services and other products
like games, ring tones, screen savers, and more.
From Your Sprint Phone
1. Press and tap .
2. Do any of the following:
䡲 Ta p to check mi nu te
usage and account balance.
䡲 Tap to make a payment.
䡲 Tap to access a summary
of your Sprint service plan or get answers to other
questions.
From Any Other Phone
䢇 Sprint Customer Service: 1-88 8-211-4727.
䢇 Business Customer Service: 1-800-927-2199.
1A. Setting Up Service 5
Setting Up Service
Page 18
Sprint 411
Sprint 411 gives you access to a variety of services and
information, including residential, business, and
government listings; movie listings or showtimes;
driving directions, restaurant reservations, and major
local event information. You can get up to three pieces
of information per call, and the operator can
automatically connect your call at no additional charge.
There is a per-call charge to use Sprint 411, and you
will be billed for airtime.
䊳 Tap .
Sprint Operator Services
Sprint Operator Services provides assistance when you
place collect calls or when you place calls billed to a
local telephone calling card or third party.
䊳 Tap .
For more information or to see the latest in products
and services, visit us online at
6 1A. Setting Up Service
www.sprint.com.
Page 19

Section 2
Your Device
Page 20
⽧ Your Device (page 9)
2A. Device Basics
⽧ Turning Your Device On and Off (page 11)
⽧ Viewing the Display Screen (page 13)
⽧ Battery and Charger (page 18)
⽧ Getting Around Your Device (page 21)
⽧ Displaying Your Phone Number (page 22)
⽧ Making and Answering Calls (page 22)
⽧ Speed Dialing (page 28)
⽧ Dialing Sprint Services (page 29)
⽧ Entering Text (page 29)
⽧ Home Screen (page 35)
8 2A. Device Basics
Tip: Device Software Upgrades – Updates to your device’s
software may become available from time to time.
Sprint will automatically send critical updates to your
device. You can also check for and download updates
by pressing
System updates > Firmware update
download available updates.
> , and then tapping Settings >
to search for and
Page 21

Your Device
1
2
3
4
5
6
Key Functions
1. Front Indicator Light (LED) shows your device’s
connection status at a glance.
2. Proximity Sensor automatically switches the display
screen off when you hold the device near your
face during a call. When activated, the proximity
sensor does not affect the device’s 3G, 4G, or
connection.
Wi-Fi
3. Earpiece lets you hear the caller and automated
prompts.
4. Display Screen displays all the information needed
to operate your device, such as the call status, the
People list, the date and time, and the signal and
battery strength.
9
8
7
5. Menu Key allows you to open a list of actions that
you can do on the current screen.
6. Home Key takes you back to the Home screen.
When in standby mode, press and hold to open
the recently used applications window.
7. Microphone allows other callers to hear you clearly
when you are speaking to them.
2A. Device Basics 9
Device Basics
Page 22
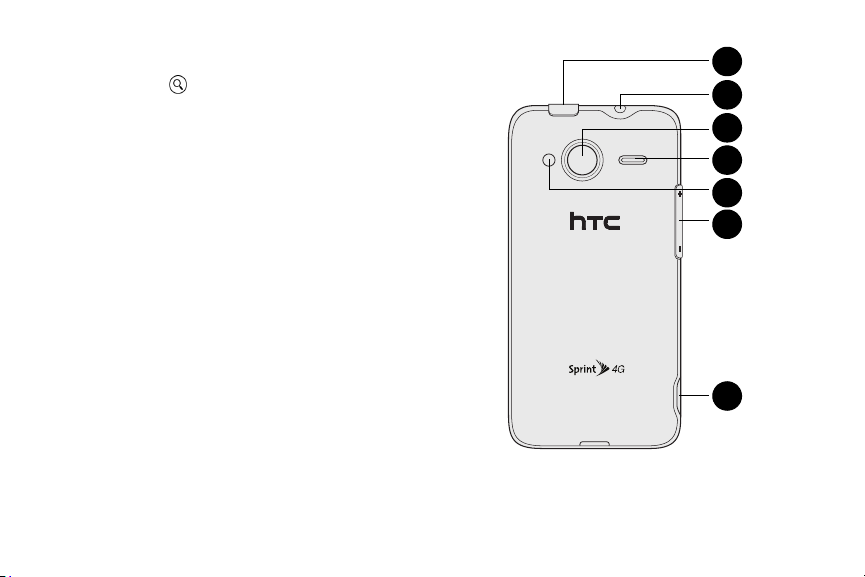
8.
10
11
12
13
14
15
16
Search Key allows you to search information on the
current screen or application. For example, while in
People, press to search for a contact.
9. Back Key allows you to go back to the previous
screen, or close a dialog box, options menu, the
Notifications panel, or onscreen keyboard.
10. Charger/Accessory Jack allows you to connect the
device charger or the USB cable (included).
CAUTION! Inserting an accessory into the incorrect
jack may damage the device.
11. Volume Button allows you to adjust the ringer or
media volume or adjust the voice volume during a
call.
12. Flash helps illuminate subjects in low-light
environments when the camera is focusing and
capturing a photo or video.
13. Speaker lets you hear the different ringers and
sounds. The speaker also lets you hear the caller’s
voice in speakerphone mode.
14 . Camera Lens lets you take pictures and videos.
10 2A. Device Basics
Page 23
15. 3.5 mm Headset Jack allows you to plug in either a
17
stereo headset or an optional headset for
convenient, hands-free conversations. CAUTION!
Inserting an accessory into the incorrect jack may
damage the device.
16. Power Button lets you turn the device on or off or
turn the screen on or off, or switch your device to
silent mode, vibration mode, or airplane mode.
17. QWERTY Keyboard slides out from the left side of
the device.
Turning Your Device On and Off
Turning Your Device On
䊳 Press at the top of the device.
Device Basics
2A. Device Basics 11
Page 24
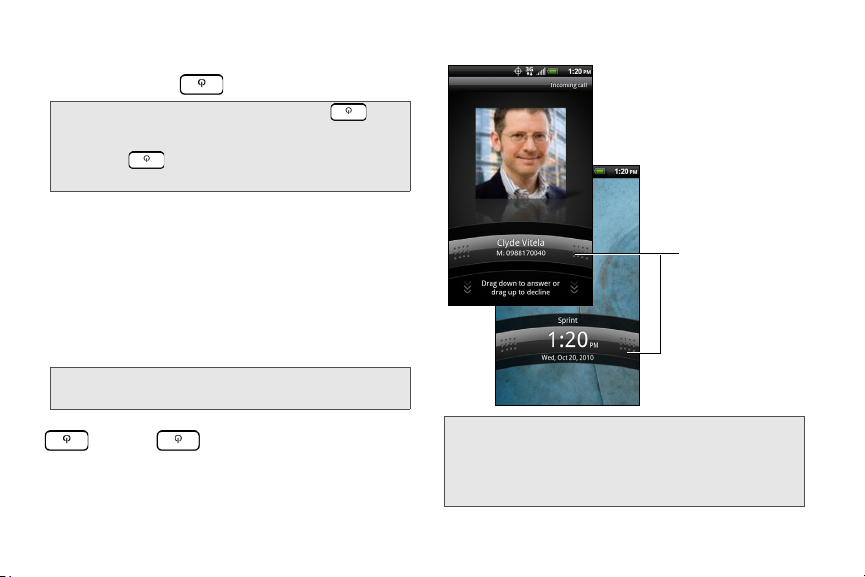
Turning Your Device Off
Press and hold the
lock screen bar and
then drag it down to
unlock the screen
or answer an
incoming call.
Lock screen bar
1. Press and hold for about two seconds.
Note: When the screen is locked and you press , it will
only turn off the screen and not the device. You will
need to unlock the screen first before you press and
hold to turn the device off. See “Turning the
Screen Off When Not in Use” for details.
2. On the Phone options menu, tap Power off.
3. In the Power off confirmation box, tap OK.
Turning the Screen Off When Not in Use
To save battery power, the device automatically turns
off the screen after a certain period of time when you
leave it idle. You will still be able to receive messages
and calls while the device’s screen is off.
Tip: For information on how to adjust the time before the
screen turns off, see “Display Settings” on page 44.
You can also turn off and lock the screen by pressing
. Pressing again or receiving an incoming
call will turn on your device screen and show the lock
screen.
12 2A. Device Basics
To unlock the screen:
Note: If you have set up a screen lock, you will be prompted
to draw the pattern, enter the PIN, or enter the
password. For more information on how to create and
enable a screen lock, see “Protecting Your Device with
a Screen Lock” on page 50.
Page 25
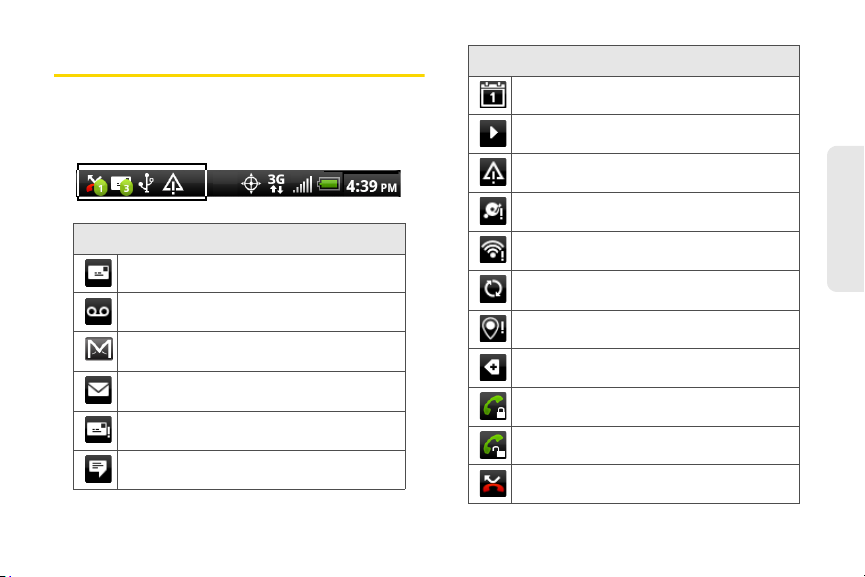
Viewing the Display Screen
Your device’s display screen provides information
about notifications and your device’s status. This list
identifies the symbols you’ll see on your device’s
display screen:
Status Bar – Notification Icons
Upcoming event
Music is playing
General notification (for example, sync error)
Storage card is low on free space
Status Bar – Notification Icons
New Text or Multimedia Message
New Voicemail
New Gmail message
New Microsoft Exchange ActiveSync or
POP3/IMAP email message
Problem with Text/Multimedia Message
delivery
New instant message from Google Talk
Wi-Fi is on and wireless networks are
available
Data synchronizing – connected to HTC
Sync
New location detected
More (undisplayed) notifications
Call in progress (Voice Privacy locked)
Call in progress (Voice Privacy unlocked)
Missed call
2A. Device Basics 13
Device Basics
Page 26
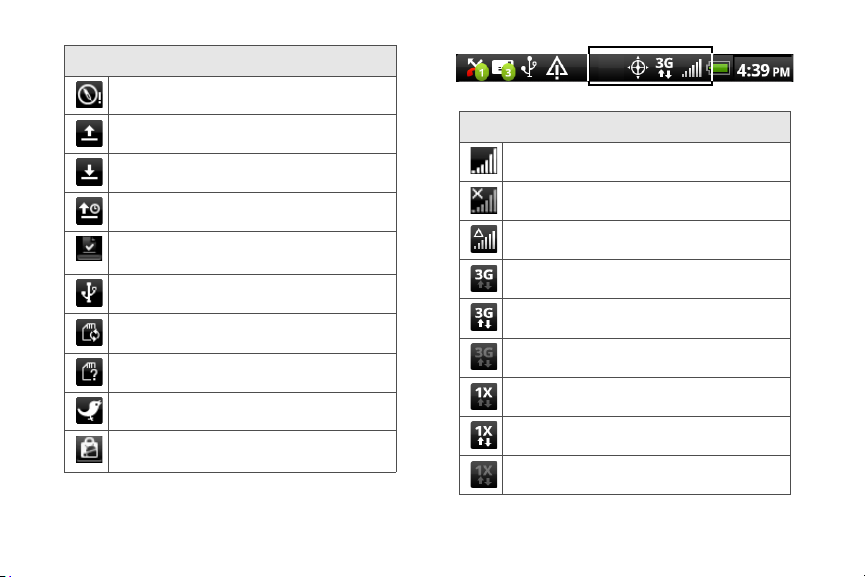
Status Bar – Notification Icons
Compass needs orientation
Uploading data (animated)
Downloading data (animated)
Waiting to upload
Content downloaded
Device connected to computer via USB
cable
Storage card is safe to remove or storage
card is being prepared
No storage card installed in the device
New tweet
Updates available for an application
downloaded from Android Market
14 2A. Device Basics
Status Bar – Device Status Icons
Signal Strength
(More bars = stronger signal)
No Service
Device is “roaming” off the Nationwide Sprint
Network
Sprint 3G data service (EVDO) available
Sprint 3G data service (EVDO) available and
active (with icon animation)
Sprint 3G data service is currently
unavailable
Sprint 1xRTT network available
Sprint 1xRTT network available and active
(with icon animation)
Sprint 1xRTT network is currently unavailable
Page 27
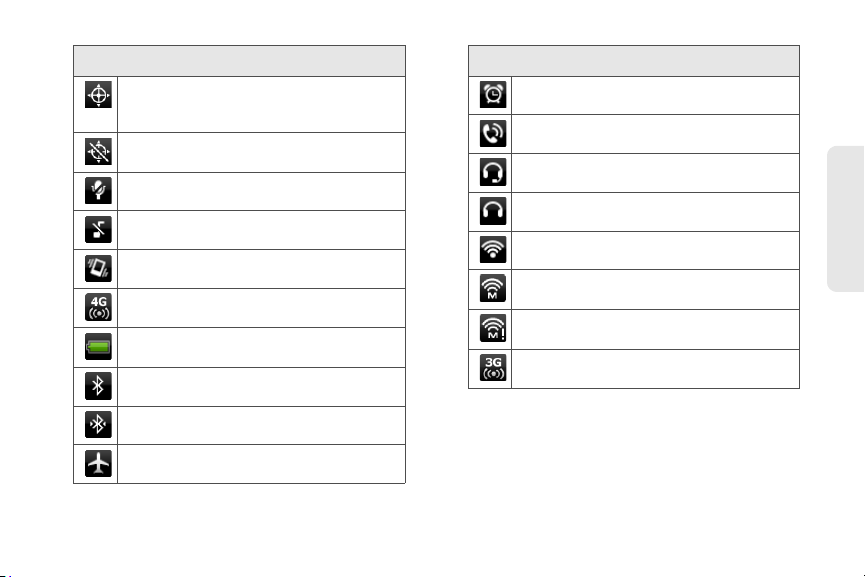
Status Bar – Device Status Icons
Device’s location feature is on and available
for location-based services such as GPS
Navigation
Device’s location feature off and your
location is available only for 911
Device microphone muted
Device speaker muted
Vibrate mode
Sprint Mobile Hotspot is on and is ready to
share its 4G connection
Shows current battery charge level
(Icon shown is fully charged)
Bluetooth on
Status Bar – Device Status Icons
Alarm set
Speakerphone on
Wired microphone headset connected
Wired headset connected
Connected to Wi-Fi network
Device Basics
Connected to a 4G network
4G is on and 4G networks are available
Sprint Hotspot is on and is ready to share its
3G connection
Connected to Bluetooth device
Airplane mode
Notifications Panel
Notification icons report the arrival of new messages,
calendar events, alarms being set and ongoing
settings such as call forwarding being on or the current
2A. Device Basics 15
Page 28
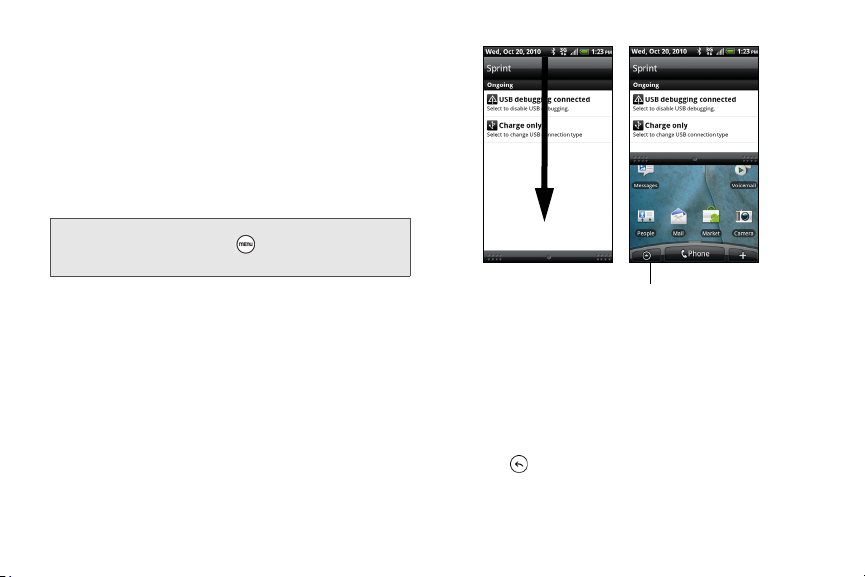
call status. You can open the Notifications panel to
Tap a notification
to open the related
application.
Press and hold,
and then drag up
to close the
Notifications panel.
access message, reminder, or event notification tabs.
To open the Notifications panel:
When a new notification icon appears in the status bar,
press and hold the status bar and then drag it
downward to open the Notifications panel.
If you have several notifications, you can scroll down
the screen to view more notifications.
Tip: You can also open the Notifications panel from the
Home screen by pressing and then tapping
Notifications.
16 2A. Device Basics
To close the Notifications panel:
䊳 Press and hold the bottom bar of the Notifications
panel, and then drag it up the screen.
– or –
Press .
Page 29
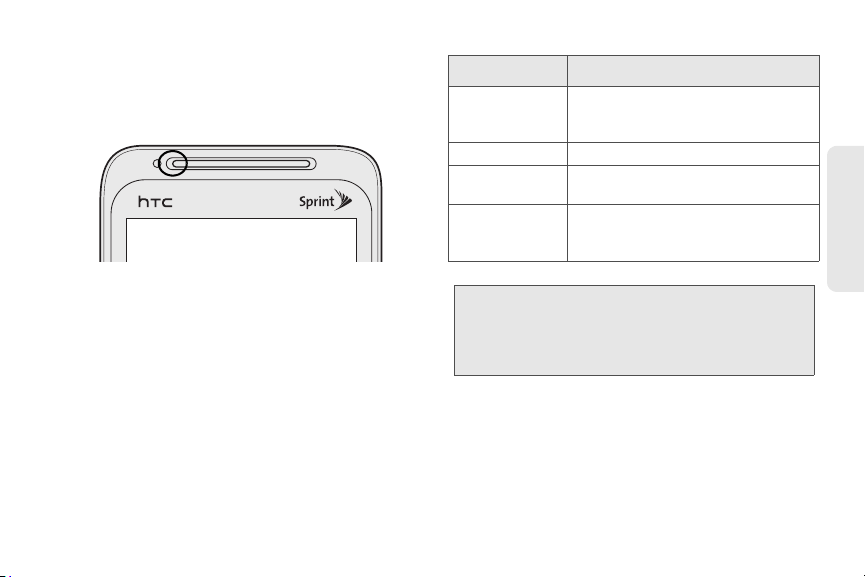
Notification LED
The Notification LED located at the left end of the
earpiece provides information on the device status or
pending notifications.
LED Status Indication
Solid green Battery is fully charged (when the
Solid amber Battery is charging.
Flashing amber Battery is low. (Battery power is below
Flashing green You have a pending notification (for
Note: The indicators are listed in order of priority. For
example, if your device is connected to a power
adapter and is charging the battery, the LED will be
solid amber and will not switch to a flashing green light
even if there is a pending notification.
device is connected to the AC adapter
or a computer).
14% .)
example, a new message or a missed
call).
2A. Device Basics 17
Device Basics
Page 30
Battery and Charger
WARNING: Use only Sprint-approved or HTC-approved
Sprint-approved or HTC-approved batteries and
accessories can be found at Sprint Stores or through
HTC; or call
available at
Battery Capacity
Your device is equipped with a rechargeable battery.
The battery provides up to 6 hours of continuous talk
time. For battery-saving tips, see “Power-Saving Tips”
on page 57.
Note: Long backlight settings, searching for service, vibrate
18 2A. Device Basics
batteries and chargers with your device. The
failure to use an Sprint-approved or
HTC-approved battery and charger may
increase the risk that your device will overheat,
catch fire, or explode, resulting in serious bodily
injury, death, or property damage.
1-866-866-7509 to order. They’re also
www.sprint.com.
mode, browser use, and other variables may reduce
the battery’s talk and standby times.
Tip: Watch your device’s battery level indicator and charge
the battery before it runs out of power.
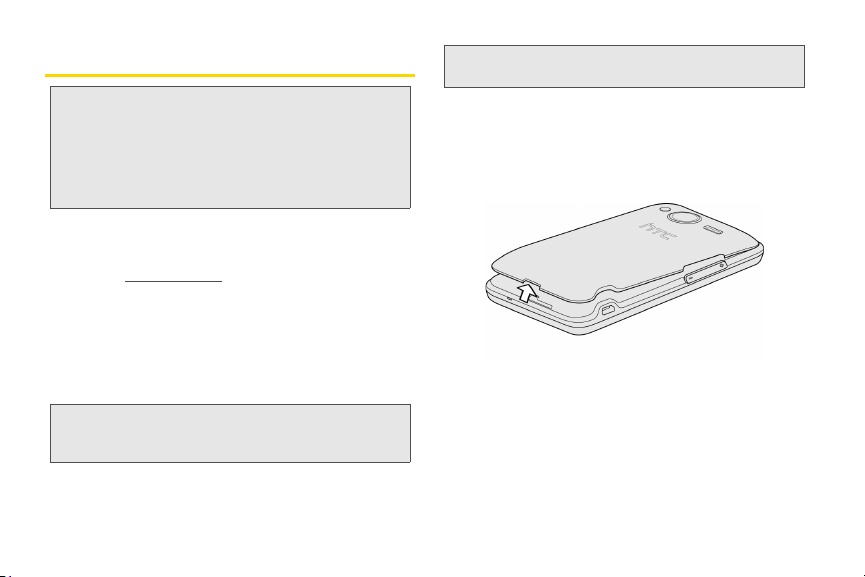
Installing the Battery
1. With the device turned off, insert a coin or other flat
object into the slot at the bottom of the battery
compartment cover and lift up gently to remove.
Page 31

2. Insert the contact end of the battery first, and then
gently push the battery into place.
3. Replace the battery compartment cover and press
until it snaps into place, making sure all the locking
tabs are seated and there are no gaps around the
cover.
Removing the Battery
1. Make sure the power is off so that you don’t lose
any stored numbers or messages.
2. Remove the battery compartment cover. (See
step 1 of “Installing the Battery.”)
3. Lift the battery out at the notch just below the
camera lens.
WARNING: Do not handle a damaged or leaking Li-Ion
battery as you can be burned.
2A. Device Basics 19
Device Basics
Page 32

Charging the Battery
Keeping track of your battery’s charge is important. If
your battery level becomes too low, your device
automatically turns off, and you will lose any
information you were just working on.
Always use a Sprint-approved or HTC-approved
desktop charger, travel charger, or vehicle power
adapter to charge your battery.
Tip: With the Sprint-approved Li-ion battery, you can recharge
the battery before it becomes completely run down.
1. Plug the USB connector of the AC adapter into the
charger/accessory jack on the lower left side of
your device.
20 2A. Device Basics
2. Plug the AC adapter in to an electrical outlet to
start charging the battery.
Charging is indicated by a solid amber light in the
Notification LED. As the battery is being charged while
the device is on, the charging battery icon ( ) is
displayed in the status bar of the Home screen. After
the battery has been fully charged, the Notification LED
shows a solid green light and a full battery icon ( )
displays in the status bar of the Home screen.
For more information about Notifications, see
“Notification LED” on page 17 for more details.
Page 33

Getting Around Your Device
There are different ways to navigate around the your
device’s Home screen, menus, and application
screens.
Ta p
When you want to type using the onscreen keyboard,
select items onscreen such as application and settings
icons, or press onscreen buttons, simply tap them with
your finger.
Press and hold
To open the available options for an item (for example,
contact or link in a Web page), simply press and hold
the item.
Swipe or slide
To swipe or slide means to quickly drag your finger
vertically or horizontally across the screen.
Drag
To drag, press and hold your finger with some pressure
before you start to move your finger. While dragging, do
not release your finger until you have reached the
target position.
Flick
Flicking the screen is similar to swiping, except that you
need to swipe your finger in light, quick strokes. This
finger gesture is always in a vertical direction, such as
when flicking the contacts or message list.
Rotate
For most screens, you can automatically change the
screen orientation from portrait to landscape by turning
the device sideways. When entering text, you can turn
the device sideways to bring up a bigger keyboard.
See “Using the Onscreen Keyboard” for more details.
Note: The Auto-rotate check box in > > Settings >
Display
needs to be selected for the screen orientation
to automatically change.
2A. Device Basics 21
Device Basics
Page 34

Pinch and Spread
Zooming out (pinch) Zooming in (spread)
“Pinch” the screen using your thumb and
forefinger to zoom out or “spread” the screen to
zoom in when viewing a picture or a Web page.
(Move fingers inward to zoom out and outward to
zoom in.)
Displaying Your Phone Number
䊳 Press > and tap Settings > About phone >
Phone identity. (Your phone number and other
information about your device and account will be
displayed.)
22 2A. Device Basics
Making and Answering Calls
Making Calls
There are several convenient methods to make a call
from your device.
Calling Using the Phone Dialer
You can dial a number directly in the Phone’s dialer. As
you enter the first digits of the phone number, Smart
Dial searchs for contacts that match. If you see the
number that you want, you can tap it to dial it
immediately without entering the rest of the phone
number.
Note: Smart Dial will also search your contacts if you enter the
letters in the name of a contact using the letters on the
number pad. As you enter more letters or numbers, the
list shows only the corresponding matches.
1. Press and tap .
2. Begin entering the first few digits or characters by
tapping the keys on the Phone keypad. If you enter
an incorrect digit, tap to erase it. To erase the
entire number, press and hold .
Page 35

3. Tap the phone number or contact from the list.
– or –
To call a different phone number associated with
the contact, tap the contact card icon at the right
side of the contact name. On the contact details
screen, tap the number you want to call.
Tip: Tap to close the Phone keypad and to see if there
are more matching numbers or contacts. To browse
through the filtered list, flick through the list or slide
your finger up or down the list slowly.
Calling a Phone Number in a Text Message
While viewing a text message, you can place a call to a
number that is in the body of the message.
1. Press and tap > Messages.
2. Tap the message with the phone number, and
then tap the phone number.
3. On the Select link screen, tap the number you want
to call.
4. The Phone screen then opens, with the phone
number automatically filled in and ready to be
dialed. To place the call, tap
Call.
For more information about text messages, see “Text
Messaging (SMS) and Multimedia Messaging (MMS)”
on page 152.
Calling a Phone Number in an Email Message
While viewing an email message, you can tap a phone
number within the body of the email message to open
the Phone screen and dial the selected number.
Calling a Speed Dial Number
To call a stored speed dial number, press and hold a
number key. For information on setting up speed dial
numbers, see “Speed Dialing” on page 28.
You can also place calls from your device using your
History listings (page 59) and Automatic Speech
Recognition (page 110).
2A. Device Basics 23
Device Basics
Page 36

Receiving Calls
When you receive a phone call from a contact, the
Incoming call screen appears and displays the caller
ID icon, name, and phone number of the calling party.
When you receive a phone call from someone who is
not stored in People, only the default caller ID icon and
phone number appear on the Incoming call screen.
Note: If your device is turned off, all calls automatically go to
voicemail.
Answering an Incoming Call
䊳 If the display is on, tap Answer.
䊳 If the display is off, the display will come on with the
Lock screen. Drag the bar down to answer the call.
Muting the Ringing Sound
To mute the ringer without rejecting the call, you can do
any of the following:
䊳 Press the volume button down.
䊳 Press and tap Mute. (You can do this even on
the Lock screen.)
䊳 Place the device face down on a level surface.
24 2A. Device Basics
Using the Quiet Ring on Pickup Feature
Your device automatically reduces the ringer volume
when you pick up the device to answer calls.
1. Press > , and then tap Settings > Sound.
2. Scroll down the screen, and then select the Quiet
ring on pickup check box.
3. Press .
Rejecting an Incoming Call
䊳 If the display is on, tap Decline.
䊳 If the display is off, the display will come on with
the Lock screen. Press and then tap
Decline to
reject and send the call to your voicemail.
Rejecting a Call and Sending a Text Message
You can automatically send a default text message to a
caller and reject the incoming voice call. Press and
Send message when you have an incoming call to
tap
send the text message.
You can change the default text message by pressing
and tapping
while on the Phone screen.
Phone settings > Edit default message
Page 37

Answering a Roam Call With Call Guard Enabled
Call Guard is an option that helps you manage your
roaming charges when making or receiving calls while
outside the Nationwide Sprint Network. See “Roaming”
on page 164 for more information.
䊳 Ta p Answer to answer the call. (See “Call Guard”
on page 165 for more information.)
Note: If your device is turned off, all calls automatically go to
voicemail.
Ending a Call
䊳 Ta p End call.
Missed Call Notification
When you do not answer an incoming call, you will see
the missed call icon in the status bar.
To see who the caller was, press and hold the status
bar, and then drag downward on the screen to open
the Notifications panel. The missed call number or
contact name is displayed.
Tap the missed call number or contact name to open
the Call history. Missed calls are indicated by the
missed call icon ( ).
Calling Emergency Numbers
You can place calls to 911 even if the device’s screen is
locked or your account is restricted.
To call the 911 emergency number when the device’s
screen is locked with a screen lock:
1. Unlock the screen. For more information, see
“Turning the Screen Off When Not in Use.”
2. Ta p Emergency call on the screen.
3. Ta p .
To call the 911 emergency number normally or when your
account is restricted:
1. Unlock the screen. For more information, see
“Turning the Screen Off When Not in Use.”
2. Tap on the Home screen.
3. Ta p .
2A. Device Basics 25
Device Basics
Page 38

Enhanced 911 (E911) Information
This device features an embedded Global Positioning
System (GPS) chip necessary for utilizing E911
emergency location services where available.
When you place an emergency 911 call, the GPS
feature of your device seeks information to calculate
your approximate location. Depending on several
variables, including availability and access to satellite
signals, it may take up to 30 seconds or more to
determine and report your approximate location.
Important: Always report your location to the 911 operator
when placing an emergency call.
designated emergency call takers, known as
Public Safety Answering Points (PSAPs), may not
be equipped to receive GPS location information
from your device.
Some
In-Call Options
Pressing during a call displays a list of available
in-call features. To select an option, tap the option.
26 2A. Device Basics
The following options may be available through the
Options menu:
Note: When the device is completing a call, only the People,
Flash, and Speaker on options are available.
䢇 Add call to initiate a three-way call.
䢇 People to display your contacts list.
䢇 Flash to accept another incoming call and put the
first caller on hold. Tap
Flash again to talk to the first
caller.
䢇 Mute to mute the microphone. Tap Unmute to unmute
the microphone.
䢇 Speaker on or Speaker off to route the device’s audio
through the speaker or through the earpiece.
䊳 Tap Speaker On to route the device’s audio through
the speaker. (You can adjust the speaker volume
by pressing the volume button up or down.)
䊳 Tap Speaker Off to use the device’s earpiece.
WARNING: Because of higher volume levels, do not place
the device near your ear during speakerphone
use.
Page 39

End-of-Call Options
After you receive a call from or make a call to a phone
number that is not in your People list, you can choose
to save the number to People. On the Phone screen,
tap at the right side of the number to add the new
number to People.
Tip: After receiving a call from a phone number that is not in
your People list, an options menu is briefly displayed to
allow you to save the number to People. On the options
Yes, create new contact.
menu, tap
Saving a Phone Number
You can store contacts entries in your device. Your
device automatically sorts People entries
alphabetically. (For more information, see “About
People” on page 62.)
To save a number from standby mode:
1. Press and tap .
2. Enter the phone number by tapping the keys on
the keypad.
3. Tap Save to People. (This button appears after
tapping six digits.)
4. Ta p Create new contact or Save to existing contact.
5. Use the keyboard to enter the new contact name
Save to save the new entry.
and tap
– or –
Tap an existing contact name and tap
the new number.
Save to save
Finding a Phone Number
You can search People for entries by name.
1. Press , tap > People, and then press .
2. Enter the first letter or letters of an entry. (The more
letters you enter, the more specific the search.)
3. Tap the contact to display the contact’s phone
number(s).
Dialing From the People List
1. Press and tap > People.
2. Tap the entry you want to call.
3. Ta p Call [Type of Number]. (For example, Call
mobile.)
2A. Device Basics 27
Device Basics
Page 40

Speed Dialing
Your device can store up to nine phone numbers in
speed dial locations.
To assign a speed dial number to a People entry:
1. Press , tap > People, and then tap an
entry in People.
2. Press and tap More > Set speed dial.
3. Tap the list menu under Number to select a
number from the contact to assign to speed dial.
4. Tap the list menu under Location to assign the
number to a speed dial location.
5. Tap Save.
Note: If you assign a number to an already in-use speed dial
location, the new phone number will automatically
replace the previous speed dial assignment.
To call using Speed Dial:
䊳 Press and hold the appropriate key on the Phone
keypad for approximately two seconds.
The display confirms that you have dialed the
28 2A. Device Basics
number when it shows “Dialing” on the upper right
side of the screen.
Finding Speed Dial Numbers
1. Press and tap .
2. Press and Speed dial.
3. Tap a speed dial entry to call the contact.
Tip: While on the Speed dial screen, press and tap Add
to add new speed dial entries from People.
Page 41

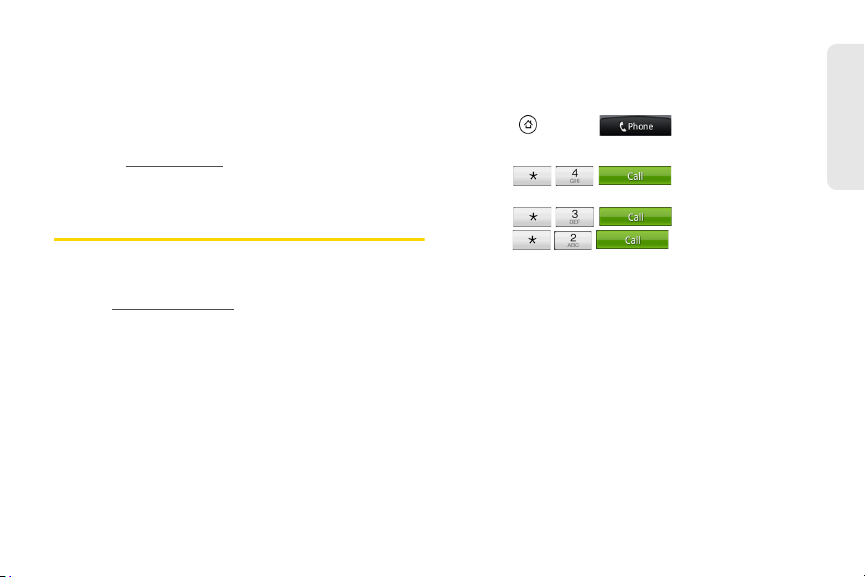
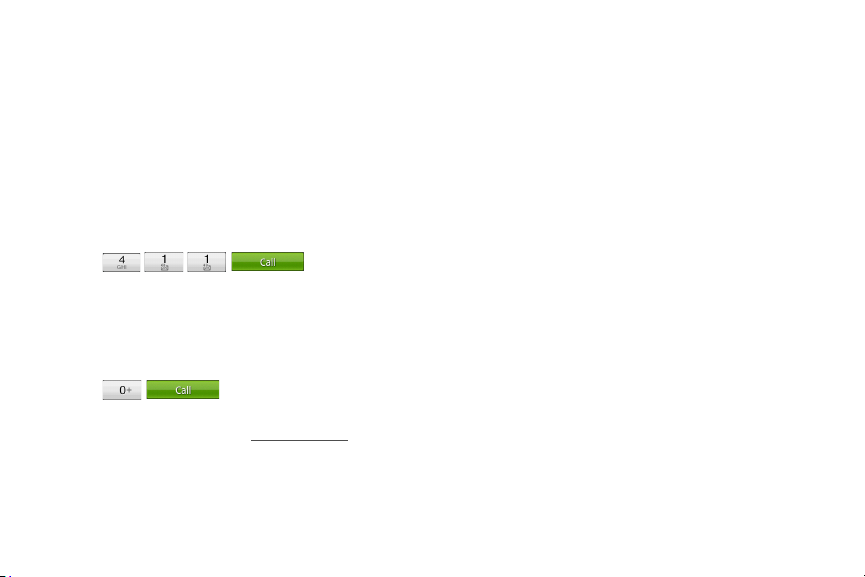
Dialing Sprint Services
䊳 Dial the appropriate service number:
䡲 Customer Service –
䡲 Sprint 411 –
䡲 Account Information –
䡲 Sprint Operator –
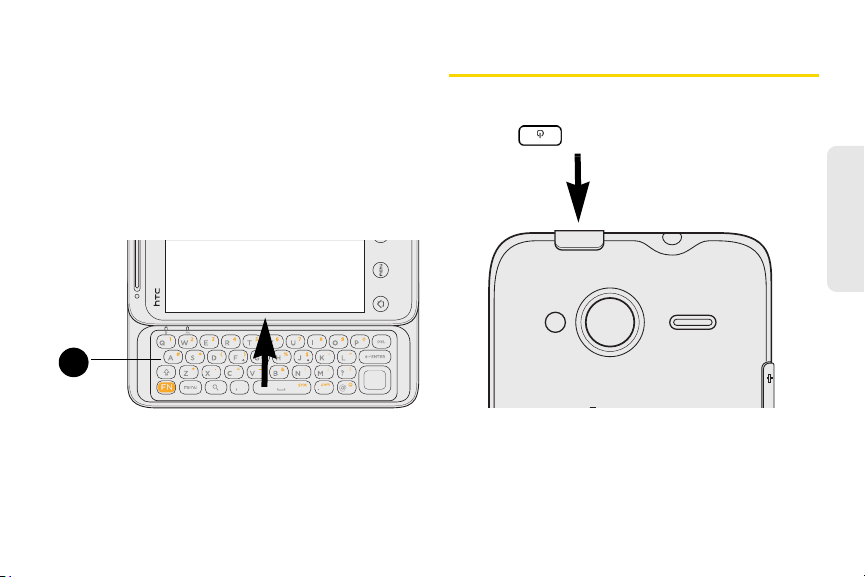
2. Push the screen panel up with your thumbs to
reveal the slideout keyboard.
Note: When the slideout keyboard is opened, the display
stays in landscape mode and you will not be able to
use the onscreen keyboard.
Entering Text
Using the Slideout Keyboard
Open the slideout keyboard to type faster and more
conveniently with your fingers. The slideout keyboard
also comes with special keys that let you quickly
access menus and search your phone.
1. Hold the phone sideways, with the front panel
buttons to your right
Device Basics
3. Start an app or select a field that requires entry of
text or numbers.
2A. Device Basics 29
Page 42

4.
Press the letter keys to enter text. Press the
following keys to enter uppercase letters, numbers,
special characters, or symbols:
Shift key ()
● Press once to capitalize the next letter you
select.
● Press twice to lock the key and type a series of
uppercase letters (this works just like the Caps
Lock key on your computer keyboard). The
cursor changes when you lock the shift key.
● To unlock, press the shift key once again.
Function key ()
● Press once to type the character shown
beside the letter or punctuation keys. For
example, if you need to type the dollar sign
($), press , and then press the D key
FN, D).
(
● Press twice to lock the key and type a series of
numbers and characters. The cursor changes
when you lock the function key.
● To unlock, press the function key once again.
30 2A. Device Basics
5. Press these keys to perform other actions:
Menu key ()
● Instead of pressing the MENU button, press
the menu key to open the available menu
options for the current screen.
Search key ()
● Instead of pressing the SEARCH button, press
the search key to open the search box and
then type what you want to search. Press the
Enter key to begin the search
6. Use the navigation key to the right of the slideout
keyboard to move the cursor.
Using the Onscreen Keyboard
When you start a program or select a box that requires
entry of text or numbers, the onscreen keyboard
becomes available. You can choose from three
keyboard layouts:
Phone Keypad.
Changing to Landscape Orientation
When entering text, you can choose to use the
landscape orientation of the onscreen keyboard by
QWERTY, Compact QWERTY, and
Page 43

turning the device sideways. This pops up a larger
keyboard that lets you type easily using two thumbs
Note: The landscape orientation keyboard is not supported in
all applications.
Changing the Onscreen Keyboard Layout
You can choose from three different keyboard layouts
to suit your typing style. To change the keyboard layout,
do the following:
1. Press > , and then tap Settings > Language &
keyboard > Touch Input.
2. Ta p Keyboard types, and then select from the
following keyboard types:
䡲 QWERT Y. This layout is similar to a desktop
computer keyboard. This is the default keyboard
layout.
䡲 Phone Keypad. This layout resembles a traditional
wireless phone keypad.
䡲 Compact QWERTY. This layout features two letters
on each key. The keys are slightly larger than on
the full QWERTY layout.
Entering Text
Use the following keys while entering text using the
onscreen keyboard:
Press and hold keys with gray characters at the
top to enter numbers, symbols, or accented
letters. The gray character displayed on the key is
the character that will be inserted when you press
and hold that key. Some keys have multiple
characters or accents associated with them.
Shift key. Tap to capitalize the next letter you
enter. Tap twice to turn on caps lock.
Numeric key. Tap to switch to the numeric and
symbol keyboard.
Alphabet key. Tap to switch to the alphabetic
keyboard.
Enter key. Tap to create a new line.
Backspace key. Tap to delete the previous
character. Press and hold to delete multiple
characters.
Voic e input key. Tap to speak the words you want
to type. See “Voice Input” on page 113.
2A. Device Basics 31
Device Basics
Page 44

Tap to hide the onscreen keyboard.
Tap to toggle between
predictive modes when using the Compact
QWERTY or Phone Keypad layout. (See
“Predictive Text” for details.)
Multitap and XT9
Predictive Text
The onscreen keyboard has predictive text to help you
type quickly and accurately. Predictive text input is
enabled by default, and word suggestions are
displayed as you type.
32 2A. Device Basics
To enter a word in predictive mode, do any of the
following:
䢇 If you see the word you want highlighted in green or
orange, you can simply tap the space bar to insert
the word into your text.
䢇 If you see the word you want shown in the
suggestions before you have finished typing the
entire word, tap the word to insert it into your text.
䢇 If an arrow is shown to the right of the suggestion list,
tap the arrow to see more suggestions.
Adding a Word to the Predictive Text Dictionary
Your device comes with a list of words that it references
for predictive text suggestions. Sometimes you may
need to add a word to the predictive text dictionary, for
example a name or a specialized technical word. While
entering text using the QWERTY keyboard layout, if you
tap any word on the suggestion list, it is automatically
added to the predictive text dictionary if it was not in the
dictionary already.
To manually add a word to the predictive text dictionary:
1. Press > , and then tap Settings > Language &
keyboard > Touch Input > Personal dictionary.
Page 45

2. Ta p Add new.
3. Enter the word to add, and then tap OK.
Editing or Deleting a Word in Your Personal
Dictionary
You can edit or remove words that you previously
added to the predictive text dictionary.
1. Press > , and then tap Settings > Language &
keyboard > Touch Input > Personal dictionary.
2. To edit a word, tap the word, enter your changes,
and then tap
– or –
To delete a word, tap the
word.
OK.
X icon to the right of the
Backing up Your Personal Dictionary to Your
Storage Card
You can use your microSD storage card to back up the
new words you’ve added to your personal dictionary.
1. Press > , and then tap Settings > Language &
keyboard > Touch Input.
2. Ta p Personal dictionary > Sync personal dictionary >
Copy to storage card.
3. When prompted, tap OK.
Restoring Your Personal Dictionary from Your
Storage Card
1. Press > , and then tap Settings > Language &
keyboard > Touch Input.
2. Ta p Personal dictionary > Sync personal dictionary >
Restore from storage card.
3. When prompted, tap OK.
2A. Device Basics 33
Device Basics
Page 46

Adjusting Touch Input Settings
䊳 Press > , and tap Settings > Language &
keyboard > Touch Input.
Touch Input Settings
䢇 Keyboard types lets you select the keyboard layout to
use. You can choose from
Compact QWERTY.
or
䢇 International keyboard lets you select the language
layout of the keyboard.
䢇 Text input lets you set text input options when
entering text, calibrate the keyboard, and set sound
or vibration feedback whenever you tap a key.
䡲 QWERTY
● Prediction: Enable the word prediction feature.
● Spell correction: Correct typographical errors
by selecting from a list of possible words
based on the keys you have tapped as well as
neighboring keys.
34 2A. Device Basics
QWERTY, Phone Keypad,
䡲 Hardware QWERTY
● Prediction: Enable the word prediction feature.
● Spell correction: Correct typographical errors
by selecting from a list of possible words that
reflect the characters of the keys you have
tapped as well as characters of nearby keys.
䡲 Phone keypad & compact QWERTY
● Spell correction: Correct typographical errors
by selecting from a list of possible words that
reflect the characters of the keys you have
tapped as well as characters of nearby keys.
● Word completion: Select from a list of possible
combinations based on the characters that
appear on the keys that you tapped.
䡲 Other settings
● Sound feedback: Cause keys to audibly click
when tapped.
● Vibrate when typing: Cause keys to vibrate
when tapped.
䡲 Finger touch precision
● Calibration tool: Lets you recalibrate the
keyboard if you feel that the keys are not
responding accurately to your taps.
Page 47

● Reset calibration: Reset the calibration back to
1
2
3
4
5
factory default.
䢇 Chinese Text input lets you set options when entering
text in Chinese.
䡲 Pinyin: Choose Traditional Chinese or Simplified
Chinese. In Simplified Chinese, you can enable
Fuzzy Pinyin pairs.
䡲 Stroke: Choose Traditional Chinese or Simplified
Chinese mode.
䢇 Tutorial lets you go through tutorials to learn how to
use the onscreen keyboard features.
䢇 Personal dictionary lets you add, edit, or remove
words in the predictive text dictionary. For more
information, see “Adding a Word to the Predictive
Text Dictionary” and “Editing or Deleting a Word in
Your Personal Dictionary.”
Home Screen
The Home screen is the starting point for many
applications and functions. The Home screen allows
you to add items like application icons, shortcuts,
folders, and widgets to give you instant access to
information and applications.
Device Basics
2A. Device Basics 35
Page 48

1.
Status Bar: Displays device status and notification
icons. See “Viewing the Display Screen” on page
13 for a list of icons you will see on the status bar.
2. Application icon: Tap to open the related
application.
3. All apps: Tap to open the All apps screen. The All
apps screen holds all applications on your device.
4. Add to Home: Tap to add shortcuts, widgets, and
folders to the Home screen or to an extended
screen.
5. Phone: Tap to open the Phone screen to make
calls.
Tip: While in any application, press to go back to the
Home screen.
Extended Screens
Besides the Home screen, you can access six
additional screens to provide more space for adding
icons, widgets, and more. Press , and then drag
across the screen to move from the Home screen to an
extended screen.
36 2A. Device Basics
There are six extended screens besides the main
Home screen.
Note: You cannot add more screens.
Tip: While on an extended screen, press to return to the
Home screen.
Page 49

To go directly to a particular screen:
1. From any screen, pinch the screen to display
thumbnail images of all screens.
Tip: On the Home screen, you can press to show the
thumbnail overview.
2. Tap the screen you want to open.
Customizing the Home Screen
To add a Home screen item:
1. Press and tap .
Note: You can also press and hold an empty area on the
Home screen.
2. On the Add to Home screen, tap the item you want
to add to the Home screen or an extended screen:
䡲 Widget: Add HTC or Android™ widgets to a
screen such as a clock, calendar, mail, people,
Footprints, and more.
䡲 App: Add shortcuts to applications on your phone.
To quickly add an application shortcut that is on
the All apps screen to a screen, press and hold
an application icon. When the device vibrates,
drag the icon to an empty area on the screen,
and then release it.
䡲 Shortcut: Add shortcuts to bookmarked Web
page, a favorite contact, a Gmail™ label, a music
playlist, and more.
䡲 Folder: Add a folder where you can organize
screen items. Add a shortcut to all your contacts,
contacts with phone numbers, or starred contacts.
Contact details are automatically updated when
there are changes in the source.
Customize any screen by adding application shortcuts
and widgets. You can also use preset widgets from a
Scene. To use a Scene, press
Scenes.
Tip: You can also create and save your custom scene. (See
“Creating and Saving a Custom Scene” for details.)
> and tap
To add a widget:
1. Press and tap .
2. In the Add to Home options menu, tap Widget.
3. Select a widget to add to a screen, and then select
a layout to use, when available.
2A. Device Basics 37
Device Basics
Page 50

Note: Most HTC widgets offer various layouts and sizes to fit
your needs.
Tap Select.
4.
Note: You may need to slide to another screen or remove a
widget on the screen first if there is no space to place
the new widget.
To reposition a screen item:
1. Press and hold the item on the Home screen you
want to reposition to activate Edit mode.
Note: Whe n Edit mode is acti vated, the item expands and the
device vibrates.
2. Without lifting your finger, drag the icon to the
position you want on the screen, and then release
it.
Note: To move an item from the Home screen to an
extended screen, press and hold the item and then
drag it to the left or right edge of the screen until the
display shifts to the extended screen. Position the item
on the screen, and then release it.
38 2A. Device Basics
To remove a screen item:
1. Press and hold the item on the screen you want to
remove to activate Edit mode.
Note: When Edit mode is activated, the item expands and the
device vibrates.
2. Drag the icon to ( changes
into ).
3. Release when the dragged icon and
both turn red.
To create a folder and add items to it:
You can create folders on a screen to hold application
icons or shortcuts.
1. Press > and tap Add to Home > Folder >
New folder. A new folder appears on the screen.
2. Press and hold an application icon or a shortcut
on the screen to activate Edit mode, and then drag
it on top of the folder.
To access the items inside a folder, tap the folder to
open it and then tap the icon of the application or
shortcut you want to open.
Page 51

Note: To delete a folder, follow the same procedure as you
would for removing a screen item.
To rename a folder:
1. Tap the folder to open it.
2. Press and hold the folder’s title bar to open the
Rename folder dialog box.
3. Enter the Folder name and then tap OK.
Creating and Saving a Custom Scene
Create your own custom scene and save it on your
device.
1. Customize the Home and extended screens by
adding or removing widgets or application
shortcuts, repositioning items, or changing the
wallpaper.
2. After customizing, press and tap Scenes.
3. On the Choose a scene options menu, select
Current (unsaved) and tap Save.
4. Enter the Scene name and tap Done.
Device Basics
2A. Device Basics 39
Page 52

⽧ Personalization Settings (page 40)
2B. Settings
⽧ Sound Settings (page 41)
⽧ Display Settings (page 44)
⽧ Location Settings (page 46)
⽧ Messaging Settings (page 46)
⽧ Airplane Mode (page 48)
⽧ TTY Use With Sprint Service (page 48)
⽧ Security Settings (page 50)
⽧ Data Synchronization Settings (page 53)
⽧ Social Network Settings (page 54)
⽧ Application Settings (page 55)
⽧ Date & Time Settings (page 56)
⽧ Power-Saving Tips (page 57)
40 2B. Settings
Personalization Settings
Scenes
Selecting a Scene
Customize your device’s Home and extended screens’
appearance by selecting a scene to reflect your
lifestyle. Scenes are preset screen layouts that you can
quickly apply.
䊳 Press > , tap Scenes, and then tap a scene
to apply it.
To save a custom scene:
䊳 Customize the Home and extended screens by
changing the wallpaper and adding widgets, press
, and then tap
Save. Enter the Scene name and then tap Done.
Tip: You can rename or delete a custom scene. On the
Settings screen, tap
press and hold a custom scene.
Scenes > Current (unsaved) >
Personalize > Scenes, and then
Page 53

Renaming or Deleting a Scene
You can rename or delete a custom scene. To learn
how to create a custom scene, see “Creating and
Saving a Custom Scene” on page 39.
1. Press > and tap Settings > Personalize >
Scenes.
2. Press and hold the custom scene (under My
scenes) and tap Rename or Delete.
3. Tap Rename, enter the new Scene name, and then
Done.
tap
– or –
Delete > OK.
Tap
Note: You cannot rename or delete a preset scene.
Home Screen Wallpaper
See “Changing the Display Screen” on page 44 for
details.
Default Ring Tone
See “Phone Ring Tone” on this page for details.
Sound Settings
Phone Ring Tone
Select a default ring tone for incoming calls.
Selecting the Default Ring Tone
Your device provides a variety of ring tones that you
can set as the default ring tone of your device.
1. Press > and tap Settings > Sound > Phone
ringtone.
2. Tap the ring tone you want to use, and then tap
OK. The ring tone briefly plays when selected.
Note: You can use *.wav, *.mid, *.mp3, *.wma, or other types
of sound files that you have downloaded from the
Internet or copied from your computer as ring tones.
Notification Sound
Select a default sound for notifications.
2B. Settings 41
Settings
Page 54

Selecting the Default Notification Sound
Your device provides a variety of sounds that you can
set as the default sound for notifications.
1. Press > and tap Settings > Sound >
Notification sound.
2. Tap the sound you want to use, and then tap OK.
The sound plays when selected.
Adjusting the Device’s Volume Settings
Adjust your device’s volume settings to suit your needs
and your environment.
1. Press > and tap Settings > Sound.
2. Ta p Volume.
3. Drag the volume sliders on the screen to adjust the
ringtone, media, alarm, or notification volume and
OK.
then tap
Note: You can adjust the ringer volume in standby mode (or
the earpiece volume during a call) by pressing the
volume button up or down.
42 2B. Settings
Vibrate
To set your device to vibrate instead of making any
sounds:
䊳 Press the volume button down in standby mode
until you see the image below on the screen.
The device vibrates and the vibrate mode icon ( )
appears on the status bar.
To set your device to always vibrate in addition to any
ringer settings:
1. Press > and tap Settings > Sound.
2. Select the Vibrate check box.
3. Press .
Page 55

Silence All
The Silence All option allows you to mute all sounds
without turning your device off.
To activate Silence All:
䊳 Press the volume button down in standby mode
until you see the image below on the screen.
The Silence All mode icon ( ) appears on the status
bar.
To deactivate Silence All:
䊳 Press the volume button up repeatedly to select a
volume level.
Alert Notification
Set your device to alert you with an audible tone when
you are not within the Sprint coverage area or when
you make an emergency call.
1. Press > and tap Settings > Sound.
2. Ta p Emergency tone, and then tap Alert.
3. Press .
Enabling Touch Tones
You can set the device to play a sound when you are
using the phone keypad or tapping the screen.
1. Press > and tap Settings > Sound.
2. Do any or all of the following:
䡲 Select the Audible selection check box to set the
device to play a sound every time you tap the
screen.
䡲 Ta p Audible touch tones, and then tap Long tones
Short tones to set the device to play a sound
or
when you are using the phone keypad.
3. Press .
2B. Settings 43
Settings
Page 56

Display Settings
Changing the Screen Timeout Period
After a period of inactivity, the device screen turns off to
conserve battery power. You can set the idle time
before the screen turns off.
1. Press > and tap Settings > Display > Screen
timeout.
2. Tap the time before the screen turns off.
Note: Extended screen timeout periods reduce the battery’s
talk and standby times.
Tip: To turn off and lock the screen quickly, press .
44 2B. Settings
Changing the Display Screen
Changing the device’s display screen wallpaper with a
preset wallpaper or your favorite photo is a quick and
easy way to change the feel of your device and give it a
fresh look. Browse the collection of wallpapers
included in your device or choose from photos that you
have taken with the camera. You can also change to an
animated wallpaper.
1. Press > and tap Wallpaper.
2. Do one of the following:
䡲 Ta p Live wallpapers to choose from preset
animated wallpapers.
䡲 Ta p HTC wallpapers to use a preset image.
䡲 Ta p Gallery to use a picture that you have
captured using the camera or copied to your
device as a wallpaper. You can crop the picture
before setting it as a wallpaper.
3. Tap Save or Set wallpaper.
After changing the wallpaper, remember to save it to
the scene that you created or save it as a new scene.
For more information, see “Creating and Saving a
Custom Scene” on page 39.
Page 57

Adjusting the Brightness
By default, the screen brightness automatically adjusts
depending on the surrounding lighting conditions.
To manually adjust screen brightness
1. Press > and tap Settings > Display.
2. Ta p Brightness and then clear the Automatic
brightness check box.
3. Drag the slider to adjust the brightness.
4. Tap OK.
Changing the Screen Orientation
By default, the screen orientation automatically
changes when the device is rotated. To disable
automatic screen orientation:
1. Press > and tap Settings > Display.
2. Clear the Auto-rotate screen check box and
press .
Note: Not all application screens support automatic rotation.
The screen orientation automatically changes to
landscape mode when you turn the device
counterclockwise 90 degrees. If you turn the device
clockwise 90 degrees, the screen orientation will not
change to landscape mode.
Recalibrating the Screen
Recalibrate the screen if you feel that the screen
orientation does not respond properly to the way you
hold the device.
1. Press > and tap Settings > Display >
G-Sensor calibration.
2. Place the device on a flat surface and then tap
Calibrate.
3. After the recalibration process, tap OK.
2B. Settings 45
Settings
Page 58

Location Settings
Your device is equipped with a Location feature for use
in connection with location-based services.
The Location feature allows the network to detect your
position. Turning Location off will hide your location
from everyone except 911.
Note: Tur ni ng Location on will allow the network to detect
your position using GPS technology, making some
Sprint applications and services easier to use. Turning
Location off will disable the GPS location function for
all purposes except 911, but will not hide your general
location based on the cell site serving your call. No
application or service may use your location without
your request or permission. GPS-enhanced 911 is not
available in all areas.
To enable your device’s Location setting feature:
1. Press > and tap Settings > Location >
Location setting.
2. Read the Location disclaimer and then tap ON.
3. Press .
46 2B. Settings
When you turn the Location setting feature on, the
device displays the icon on the status bar. When
you turn Location setting off, the device displays the
icon.
Messaging Settings
Your device’s advanced messaging capabilities let you
send and receive many different kinds of text
messages without placing a voice call. (For more
information, see “Accessing Email Messages” on
page 184.)
Messaging settings allow you to decide how you would
like to be notified of new messages and create your
own preset messages.
Setting Message Notification
When you receive a message, your device notifies you
by displaying an icon on your display screen. You can
also choose to vibrate the device and have the screen
flash when you receive a message.
Page 59

To display a notification and vibrate the device when you
receive a message:
1. Press and tap > Messages.
2. Press and then tap Settings.
3. Scroll down the screen and select the Play
notification sound and Vibrate check boxes.
Note: Ta p Notification sound to choose a notification sound.
4. Press .
To flash the screen when you receive a message:
1. Press > and tap Settings > Display >
Notification flash.
2. Select the SMS/MMS check box and then
press .
Managing Preset Messages
Your device is loaded with nine preset messages to
help make sending text messages easier. Customize or
delete these messages, such as “Where are you?,”
“Let’s catch up soon,” and “Just checking in” to suit
your needs, or add your own messages to the list.
To edit or delete a preset message:
1. Press and tap > Messages > New
message.
2. Tap the “Tap to compose” text box.
3. Press and tap Quick text. (You will see the list of
preset messages.)
4. Press and:
Edit, tap the message you want to edit, edit the
Tap
message, and then tap .
– or –
Delete, select the message you want to delete,
Tap
OK. (Tap Cancel to cancel the deletion.)
and tap
2B. Settings 47
Settings
Page 60

To add a new preset message:
1. Press and tap > Messages > New
message.
2. Tap the “Tap to compose” text box.
3. Press and tap Quick text. (You will see the list of
preset messages.)
4. To add a new message, press and tap Insert.
5. Enter your message and tap . (Your new
message will be added to the beginning of the list.)
Airplane Mode
Airplane Mode allows you to use many of your device’s
features, such as Gallery, Camera, and Music, when
you are on an airplane or in any other area where
making or receiving calls or data is prohibited. When
you set your device to Airplane Mode, it cannot send or
receive any calls or access online information.
48 2B. Settings
To quickly turn Airplane Mode on or off:
䊳 Press and hold , and then tap Airplane
To turn Airplane Mode on or off in Settings:
in Phone options. While in Airplane Mode,
mode
the status bar will display .
1. Press > and tap Settings > Wireless &
networks.
2. Select the Airplane mode check box and press .
While in Airplane Mode, the status bar will
display .
TTY Use With Sprint Service
A TTY (teletypewriter, also known as a TDD or Text
Telephone) is a telecommunications device that allows
people who are deaf, hard of hearing, or who have
speech or language disabilities, to communicate by
telephone.
Your device is compatible with select TTY devices.
Please check with the manufacturer of your TTY device
to ensure that it supports digital wireless transmission.
Your device and TTY device will connect using a
special cable that plugs into your device’s headset
Page 61

jack. If this cable was not provided with your TTY
device, contact your TTY device manufacturer to
purchase the connector cable.
When establishing your Sprint service, please call
Sprint Customer Service using the state
Telecommunications Relay Service (TRS) by first
dialing . Then provide the
state TRS with this number:
866-727-4889.
To turn TTY Mode on or off:
1. Press > and tap Settings > Call > TTY mode.
2. Ta p TTY Full, TTY HCO, or TTY VCO to turn TTY
mode on.
– or –
TTY Off to turn TTY mode off.
Tap
Note: When enabled, TTY mode may impair the audio
quality of non-TTY devices connected to the headset
jack.
WARNING: 911 Emergency Calling
Sprint recommends that TTY users make
emergency calls by other means, including
Telecommunications Relay Services (TRS),
analog cellular, and landline communications.
Wireless TTY calls to 911 may be corrupted
when received by public safety answering points
(PSAPs), rendering some communications
unintelligible. The problem encountered appears
related to TTY equipment or software used by
PSAPs. This matter has been brought to the
attention of the FCC, and the wireless industry
and the PSAP community are currently working
to resolve this.
Settings
2B. Settings 49
Page 62

Security Settings
Protecting Your Device with a Screen Lock
You can increase the security of your device by
creating a screen lock. When enabled, you have to
draw the correct unlock pattern on the screen, enter the
correct PIN, or enter the correct password to unlock the
device’s control keys, buttons, and touchscreen.
To create and enable the screen unlock pattern:
1. Press > and tap Settings > Security > Set up
screen lock.
2. Ta p Pattern.
3. Read the information on the screen and tap Next.
4. Study the example pattern on the screen, and then
Next.
tap
5. Draw the screen unlock pattern by connecting at
least four dots in a vertical, horizontal, or diagonal
direction. Lift your finger from the screen when
finished.
50 2B. Settings
Note: You must slide your finger on the screen to create the
pattern and not tap individual dots.
6. The device records the pattern. Tap Continue.
7. When prompted, draw the screen unlock pattern
again, and then tap
Tip: Clear the Use visible pattern check box if you do not
want the unlock pattern to display on the screen when
you unlock it.
Note: To change your unlock screen pattern, press >
If you fail to draw the correct unlock pattern on the
screen after five attempts, you will be prompted to wait
for 30 seconds before you can try again.
To create and enable a screen unlock PIN:
and then tap Settings > Security > Change
,
unlock pattern
Confirm.
.
1. Press > and tap Settings > Security > Set up
screen lock.
2. Ta p PIN.
3. Enter a PIN, tap OK, and then enter your PIN again
to confirm it.
Page 63

If you fail to enter the correct PIN after five attempts, you
will be prompted to wait for 30 seconds before you can
try again.
To create and enable a screen unlock password:
1. Press > and tap Settings > Security > Set up
screen lock.
2. Ta p Password.
3. Enter a password, tap Continue, and then enter
your password again to confirm it.
If you fail to enter the correct password after five
attempts, you will be prompted to wait for 30 seconds
before you can try again.
To disable the screen lock:
1. Press > and tap Settings > Security >
Change screen lock.
2. Ta p None.
3. Draw your unlock screen pattern, enter your PIN, or
enter your password, and then tap
If you fail to enter the correct password after five
attempts, you will be prompted to wait for 30 seconds
before you can try again.
Continue.
Updating Your Device’s System Software
From time to time, system software updates for your
device may be available. Your device can automatically
check and notify you if an update is available. You can
download and install the update to your device.
Depending on the type of update, the update may
erase all your personal data and customized settings,
and it could also remove any programs you have
installed. Make sure that you have backed up the
information and files you want to keep.
Note: Checking and downloading system software updates
may incur additional data transfer fees.
To check for phone system software updates manually
1. Press > and then tap Settings > System
updates > HTC software update.
2. On the System software updates screen, tap
Check now.
2B. Settings 51
Settings
Page 64

Resetting Your Device
Resetting the device deletes all data, including
downloaded applications, and resets the device back
to its initial state — the state before you turned on the
device for the first time.
Important: Make sure to back up important data you have
䊳 Press > and tap Settings > Privacy > Factory
To reset the device using the device keys:
1. With the device turned off, press and hold the
2. When the device’s display turns on, release the
3. Use the volume button to select CLEAR STORAGE,
52 2B. Settings
on the device before you reset it.
data reset > Reset phone.
volume button down, and then press .
volume button.
and then press . (All data will be deleted
from the device.)
Security Features for Data Services
Enabling and Disabling Data Services
You can disable data services without turning off your
device; however, you will not have access to all data
services, including Web and messaging. Disabling
data services will avoid any charges associated with
these services. While signed out, you can still place or
receive phone calls, check voicemail, and use other
voice services. You may enable data services again at
any time.
To enable or disable data services:
1. Press > and tap Settings > Wireless &
networks.
2. Select the Mobile network check box to enable
data services.
– or –
Clear the
services.
Mobile network check box to disable data
Page 65

Data Synchronization Settings
Synchronizing Google Apps
Your device’s Google Apps™, such as Gmail, Calendar,
and Contacts, give you access to the same personal
information (email messages, events, and contacts)
that you add, view, and edit on your computer using
Gmail or Google Calendar. Synchronize the Google
Apps you want to keep information up-to-date.
Note: You need to be signed in to your Google account to
synchronize Google Apps.
To select which Google Apps to synchronize:
1. Press > and then tap Settings > Accounts &
sync.
Tip: Select the Auto -sync check box to automatically
synchronize all applications. When the
box is cleared, you can synchronize individual
applications manually by selecting their respective check
boxes.
2. Ta p Google.
3. Select the Google Apps you want to synchronize.
Auto-sync check
To stop synchronization:
䊳 When the device is synchronizing, tap Cancel sync
to stop synchronization.
Synchronizing Exchange ActiveSync
You can synchronize your device with your company’s
Microsoft Exchange Server to access your device’s
Exchange Server account’s email, contacts, and
calendar events.
Note: You need to have an Exchange ActiveSync account
set up on your device. See “Email” on page 184.
To select which Exchange ActiveSync items to
synchronize:
1. Press > and tap Settings > Accounts &
sync > Exchange ActiveSync.
2. Select the Exchange ActiveSync items you want to
synchronize.
To change the synchronization schedule:
1. Press > and tap Settings > Accounts &
sync > Exchange ActiveSync > Schedule.
2B. Settings 53
Settings
Page 66

2.
Tap the time interval at which the device will check
for new data.
To manually start synchronization:
䊳 On the Microsoft Exchange ActiveSync screen, tap
Sync now.
To change account settings:
1. Press > and tap Settings > Accounts & sync
> Exchange ActiveSync > Account settings.
2. Change the general settings, mail, and calendar
settings according to your preference.
3. Press .
54 2B. Settings
Social Network Settings
Logging in to and Synchronizing Your Social Network Accounts
If you set up a Facebook for HTC Sense, Flickr, or
Twitter account when you first turned on your device,
you can quickly login and synchronize information
such as status messages and friends lists between
your device and your social network accounts on the
Web.
Note: You need to have an existing Facebook, Flickr, or
Twitter account.
To log in to your Facebook or Twitter account:
1. Press > and tap Settings > Accounts & sync.
2. Ta p Facebook for HTC Sense or Twitter.
3. Enter your user name and password and then tap
Sign in.
To log in to your Flickr account:
1. Press > and tap Settings > Accounts & sync.
2. Ta p Add account > Flickr.
Page 67

3. Enter your Yahoo! ID and password and tap Sign
in.
4. Follow the screen instructions to log in to your
Flickr account.
To synchronize your Facebook or Twitter account:
1. Press > and tap Settings > Accounts & sync.
2. Ta p Facebook for HTC Sense or Twi tt er.
3. Tap Sync now.
To remove a social network account:
1. Press > and tap Settings > Accounts & sync.
2. Tap the account you want to remove.
3. Tap Remove account.
Tip: On the Social Networks screen, press and tap Log
out all
to log out from all the social network accounts.
Application Settings
Allowing Installation of Third-Party Programs
By default, you can install only programs and games
downloaded from the Android Market.
To install third-party programs on the device:
䊳 Press > , tap Settings > Applications, and
then select the
To uninstall third-party programs on the device:
1. Press > and tap Settings > Applications >
Manage applications.
2. On the Manage applications screen, tap the
Downloaded, Running, All, or On SD card tab, and
then tap the application you want to uninstall.
3. On the Application info screen, tap Uninstall.
Note: You cannot uninstall programs that are preinstalled on
the device.
Unknown sources check box.
2B. Settings 55
Settings
Page 68

Clearing Application Cache and Data
Free up storage space and device memory by deleting
application cache and data.
1. Press > and tap Settings > Applications >
Manage applications.
2. In the Manage applications list, tap the
Downloaded, Running, All, or On SD card tab, and
then tap the application whose cache or data you
want to delete.
Tip: Press to bring up sort and filter options.
3. In the Application info screen, tap Clear data or
Clear cache.
56 2B. Settings
Date & Time Settings
Setting Local Date, Time Zone, and Time
By default, your device automatically uses the
network-provided date, time zone, and time. However,
you can set the date, time zone, and time manually if
you need to.
1. Press > and tap Settings > Date & time.
2. Clear the Automatic check box.
3. Tap Set date. In the Change date window, scroll the
date wheel to change the date. Tap
finished.
4. Tap Select time zone, and then select the time zone
in the list. Scroll down the list to view more time
zones.
5. Tap Set time. In the time window, scroll the time
wheel to adjust the time. Tap
6. Select the Use 24-hour format check box to toggle
between using a 12-hour or 24-hour time format.
7. Tap Select date format, and then select how you
want dates to display on your device. The selected
Done when
Done when finished.
Page 69

date format also applies to the date displayed in
the Alarm Clock.
Power-Saving Tips
Adjusting the Display Brightness and
Screen On-Time
䢇 Press > , tap Settings > Display > Brightness,
and then modify the backlight setting as desired. For
more information, see “Display Settings” on page 44.
– or –
Power Control widget to the home screen to
Add the
easily adjust the screen brightness. Press and tap
> Add to Home > Widget > Power Control.
䢇 Decrease the time before the screen turns off when
the device is idle. Press
Display > Screen timeout, and then select a timeout
value.
䢇 To turn off the screen, press . The device will
continue to function.
> , tap Settings >
Managing Your Device’s Wireless Functions
To save battery life, you can disable the 4G, Bluetooth,
GPS, Sprint Hotspot, and Wi-Fi functions of the device
when not in use.
To change wireless settings:
䊳 Press > and then tap Settings > Wireless &
networks. Disable any wireless functions (for
example,
To change GPS settings:
䊳 Press > and then tap Settings > Location.
Disable the GPS by unchecking
To add a wireless function widget to your Home screen:
䊳 Press and tap > Add to Home > Widget >
Settings. Tap the widget you would like to add (for
example,
Bluetooth or Wi-Fi) that are not in use.
Use GPS satellites.
4G, Bluetooth, GPS, Hotspot, or Wi-Fi).
2B. Settings 57
Settings
Page 70

Setting the Email Synchronization Schedule
If you use the device to send and receive email, you
can set your email account to download email more or
less frequently as desired.
1. Press and tap > Mail.
2. If you have set up multiple email accounts on your
device, switch to the email account that you want
to edit by tapping .
3. In the Inbox, press and tap More > Settings >
Send & Receive > Schedule.
4. In the Frequency section, tap Peak times or Off-
peak times, and then select an email download
frequency.
Note: The more frequently your device checks for new
messages, the more quickly the battery will run down.
Tip: You can also close applications that are not in use to
conserve battery power. To do so, press > , and
then tap Settings > Applications > Manage
Applications. Tap the Running tab, tap the application
you would like to close, and then tap Force stop.
58 2B. Settings
|
Page 71

⽧ Viewing History (page 59)
2C. History
⽧ Making a Call From History (page 60)
⽧ Saving a Number From History (page 60)
⽧ Prepending a Number From History (page 61)
⽧ Erasing History (page 61)
Viewing History
History is a list of phone numbers (or People entries)
for calls you placed, accepted, or missed. History
makes redialing a number fast and easy. It is
continually updated as your device automatically adds
new numbers to the beginning of the list.
Each entry contains the phone number (if it is
available) and People entry name (if the number is in
People). Duplicate calls (same number and type of
call) may only appear once on the list.
2C. History 59
History
Page 72

To v ie w Hi stor y:
1. Press and tap > People.
2. Tap the Call history tab .
3. Tap at the right side of a number of contact to
view the call history for that number or contact.
Note: History records only calls that occur while the device is
turned on. If a call is received while your device is
turned off, it will not be included in History.
Making a Call From History
1. Press and tap > People.
2. Tap the Call history tab .
3. Tap an entry on the Call history list to place a call
to that entry.
Note: You cannot make calls from History to entries identified
as
No ID or Restricted.
60 2C. History
Tip: Press and hold an entry in the Call history list to open the
options menu where you can select to view the contact
information (if number is stored in People), edit the
number before you redial, send a text message, or delete
the entry from the Call history list.
Saving a Number From History
If the phone number of a person who called is not in
People, you can choose to save the number after you
hang up.
1. Press and tap > People.
2. Tap the Call history tab .
3. Press and hold the received call and then tap Save
to contacts on the options menu.
4. The phone number is automatically added to the
Mobile box in the Number section. Enter the name
and other contact information.
Tip: To store the number as another type (for example, home
number), tap the
5. Scroll down the screen and tap Save.
Mobile button.
Page 73

After you have saved the number, your device displays
the new People entry. (See “Displaying an Entry in
People” on page 68.)
Note: You cannot save phone numbers already in People or
from calls identified as
No ID or Restricted.
Prepending a Number From History
If you need to make a call from History and you are
outside your local area code, you can add the
appropriate prefix by prepending the number.
1. Press and tap > People.
2. Tap the Call history tab .
3. Press and hold the entry you want to call and tap
Edit number before calling.
4. Enter the prefix and tap to call the
number.
Erasing History
To erase a History entry:
1. Press and tap > People.
2. Tap the Call history tab .
3. Press and hold the entry you want to delete and
Delete from call history.
tap
To erase all History entries:
1. Press and tap > People.
2. Tap the Call history tab .
3. Press and tap Delete all.
2C. History 61
History
Page 74

⽧ About People (page 62)
2D. Contacts
⽧ Using the People Screen (page 63)
⽧ Adding a New People Entry (page 65)
⽧ Saving a Phone Number (page 66)
⽧ Using the Contact Details Screen (page 66)
⽧ Merging Entries in People (page 67)
⽧ Editing an Entry in People (page 68)
⽧ Finding Entries in People (page 71)
⽧ Backing Up and Importing Entries in People (page 72)
⽧ Working with Groups (page 73)
⽧ Using the People Widget (page 74)
⽧ Connecting with Your Social Networks (page 76)
⽧ Using Friend Stream (page 79)
62 2D. Contacts
About People
In People, you can easily manage your
communications with contacts through phone,
messaging, and email. You can also view updates on
their Facebook, Flickr, and Twitter accounts.
If you are synchronizing contacts with your Google
account, with your PC, or with an Exchange Server, any
contacts stored in those accounts are displayed in
People. You can also synchronize contacts from your
Facebook account in People.
Ways of Getting Contacts Into Your Device
You can add contacts to your device from:
䡲 Gmail contacts that are imported to your device
after you set up a Google Account. For more
information, see “Gmail” on page 190.
䡲 Phone contacts For more information, see “Adding
a New People Entry” on page 65.
䡲 Exchange ActiveSync Server For more information,
see “Email” on page 184.
䡲 Contacts on your computer For more information,
see “HTC Sync” on page 101.
Page 75

䡲 Facebook For more information, see “Your
1 2 3 4
Contacts List” on page 64.
To open People:
䊳 Press and tap > People. (You may need
to scroll down the screen to see the icon.)
Using the People Screen
The People screen gives you easy access to all your
contacts, as well as even faster access to the people
and groups of people you contact most often.
The People screen has the following tabs:
1. All gives you access to all contacts on your device,
including Google contacts, Exchange ActiveSync
contacts, Phone contacts, and Facebook contacts.
You can also use this tab to open or update My
contact card. For more information, see “Setting Up
My Contact Card” on page 64.
2. Groups lets you assign contacts to groups so you
can easily send an SMS, MMS, or email message
to a whole group. For more information, see
“Working with Groups” on page 73.
3. Online directories lets you search for contacts on
your online directories such as your Exchange
ActiveSync or Facebook account to copy to your
device. For more information, see “Connecting with
Your Social Networks” on page 76.
4. Call history lists all your dialed numbers and
received and missed calls. For more information,
see “Viewing History” on page 59.
2D. Contacts 63
Contacts
Page 76

Setting Up My Contact Card
1
2
3
4
5
6
My contact card provides a convenient way to store your
personal contact information so that you can easily
send it using MMS, email, or Bluetooth.
My contact card:
To s et up
1. On the All tab of the People screen, tap Me.
Tip: If you are logged in to your Facebook account through
Facebook for HTC Sense, instead of
name you use in Facebook.
2. Enter your name and contact details.
3. Tap Save.
Me, you will see the
64 2D. Contacts
Your Contacts List
The All tab of the People screen shows all your
contacts, including Google contacts, Exchange
ActiveSync contacts, Phone contacts, and Facebook
contacts.
Note: If you signed in to your Google Account and Facebook
account when you first set up the device, your contacts
from those accounts will appear in the contacts list
when you open People.
Page 77

1. Add a contact.
2. Edit or update My Contact Card.
3. Tap a contact to open the contact details for that
contact.
4. The green icon ( ) appears when the contact:
䡲 Has sent you a new text or email message, or
tried to call you but you missed the call.
䡲 Has updated their Facebook profile or has added
photos on Flickr or Facebook.
䡲 Has upcoming Facebook events.
5. The Facebook status appears when you link the
contact to their Facebook account.
6. Tap the photo or icon to open a menu where you
can quickly choose how to communicate with the
contact. Depending on the contact information
stored, you can call, send a text or email message,
see the contact’s Facebook profile, and locate the
contact’s address in Google Maps.
Adding a New People Entry
1. On the All tab, tap Add contact at the top of the
screen.
Note: If you have set up a Google Account or an Exchange
ActiveSync email account, the Contact type option
appears to determine which account the contact will
sync with.
2. Ta p the Name box, enter the first and last name of
the contact, and choose the order in which to
display the names. Tap
3. Enter the contact information in the boxes
provided.
4. Scroll to the bottom of the screen and tap Save.
OK.
2D. Contacts 65
Contacts
Page 78

After saving the number, your device displays the new
1 2 3 4 5 6
entry in the contacts list.
Tip: ICE - In Case of Emergency
To make it easier for emergency personnel to identify
important contacts, you can list your local emergency
contacts under “ICE” in your phone’s Contacts list. For
example, if your mother is your primary emergency
contact, list her as “ICE-Mom” in your Contacts. To list
more than one emergency contact, use “ICE1-___,”
“ICE2-___,” etc.
Saving a Phone Number
To save a number from standby mode:
1. Press and tap .
2. Enter the phone number by tapping the keys on
the keypad.
3. Tap Save to People. (This button appears after
tapping six digits.)
4. Tap Add contact or Save to existing contact.
66 2D. Contacts
5. Use the keyboard to enter the new contact name
Save to save the new entry.
and tap
– or –
Tap an existing contact name and tap
the new number.
Save to save
Using the Contact Details Screen
When you tap a contact on the People screen, the
Contact Details screen opens, showing you the
information stored for that contact, exchanged
messages and phone calls with that contact, Facebook
notifications, and more.
The Contact Details screen has the following tabs:
1. Details shows the information you have stored for
the contact, and allows you to get in touch with the
contact directly by tapping any of the displayed
methods. For example, if the contact has a stored
work phone number, tap
Call Work to call that
Page 79

number. You can also add one of the contact’s
phone numbers as a speed dial number. For more
information, see “Speed Dialing” on page 28.
2. Messages shows your exchanged SMS messages
with the contact. Tap a message to view it. To send
a new message, tap
information about messages, see “Text Messaging
(SMS) and Multimedia Messaging (MMS)” on
page 152.
New message. For more
3. Mail shows email messages you have received
from the contact. Tap an email message to view it.
To send a new email message, tap
more information about email, see “Email” on
page 184.
New mail. For
4. Updates and events shows the contact’s Facebook
status, updates, and events, and shows when he or
she uploads new photos to Flickr. When there is a
notification of the contact’s birthday, you can tap
the notification to call the contact directly or send a
message greeting.
5. Gallery shows the contact’s Facebook and Flickr
photo albums. For more information, see “Viewing
Photos in Your Social Networks” on page 130.
6. Call history lists all your incoming, outgoing, and
missed calls to and from the contact. Tap a list item
to call the contact using the displayed number.
Merging Entries in People
Merge duplicated entries in People to avoid clutter and
confusion. If the same contact appears in your Phone,
Google, and Facebook accounts, you can merge the
contact information into one entry.
The device automatically merges entries that it finds to
have similar data. If you need to manually merge
entries or break the link between entries, follow the
procedures below.
Manually Merging Entries in People
1. Press and tap > People.
2. On the All tab, tap the entry (not the icon or photo)
you want to merge with another entry on your
device.
3. On the upper right corner of the screen, tap
or (if there are suggested links.)
2D. Contacts 67
Contacts
Page 80

4.
On the screen, you can:
䡲 If there are suggested links, tap to link the
entry to the selected account.
䡲 Tap one of the options available in the Add
contact section.
5. Tap Done.
Unlinking Entries
1. Press and tap > People.
2. On the All tab, tap the entry (not the icon or photo)
whose contact information link you want to break.
3. On the upper right corner of the screen, tap .
4. On the Linked contacts section, tap beside
the entry to break the link.
5. Tap Done.
68 2D. Contacts
Editing an Entry in People
Displaying an Entry in People
䊳 Press and tap > People, and then tap an
entry.
Adding a Number to an Entry in People
1. Display an entry in People. (See “Displaying an
Entry in People” for details.)
2. Scroll down the screen and tap Edit.
3. Scroll down the screen and tap Add > Phone.
4. Tap the type of phone number you want to add.
(For example,
5. Enter the phone number and tap Save. (Scroll
down the screen to see the
Editing an Entry in People
1. Display an entry in People. (See “Displaying an
Entry in People” for details.)
2. Scroll down the screen and tap Edit.
Home or Work.)
Save button.)
Page 81

3. Under the Phone section, tap the number you want
to edit.
4. Edit the number using the keypad.
Tip: Tap the Number type (for example, [ ], to change
the type of number).
Tap X at the right side of a number to delete it.
5. Tap Save. (Scroll down the screen to see the Save
button.)
Selecting a Ringer Type for an Entry
Assign a ringer type to an entry in People so you can
identify the caller by the ringer type. See “Sound
Settings” on page 41.
1. Display an entry in People. (See “Displaying an
Entry in People” on page 68 for details.)
2. Scroll down the screen, and then tap Ringtone.
3. Select a ring tone (the ring tone plays back) from
the menu and tap
OK.
Assigning a Picture to an Entry
Assign a picture to display when a specified contact
calls you.
1. Display an entry in People. (See “Displaying an
Entry in People” for details.)
2. Scroll down the screen and tap Edit.
3. Tap at the top-left corner of the screen.
4. Ta p Gallery or Camera.
䡲 If you selected Gallery, select an album to find the
picture, tap the picture you want to use, crop the
picture, and tap
䡲 If you selected Camera, the camera will launch
and you will use it to take a new picture.
(See “Taking Pictures and Shooting Videos” on
page 119.)
5. Ta p Save. (Scroll down the screen to see the Save
button.)
Save.
2D. Contacts 69
Contacts
Page 82

Adding an Email Address to an Entry
1. Display an entry in People. (See “Displaying an
Entry in People” for details.)
2. Scroll down the screen and tap Edit.
3. Under the Email section, tap the box after .
4. Enter the email address and tap Save. (Scroll down
the screen to see the
Save button.)
Adding Additional Information to an Entry
You can add additional information to an entry in
People.
1. Display an entry in People. (See “Displaying an
Entry in People” for details.)
2. Scroll down the screen and tap Edit.
3. Scroll down the screen and tap Add.
4. Tap the type of information you want to add such
Phone, Email, or Postal address.
as
70 2 D. Conta cts
Sending an Entry as a vCard
1. Press and tap > People.
2. On the All tab, press and hold the name of the
contact (not the icon or photo) whose contact
information you want to send, and then tap
contact as vCard.
Send
3. Select the type of information you want to send,
and then tap
Send.
4. Enter the recipient’s number or email address, and
Send.
then tap
You can also send the vCard using Bluetooth. To learn
how to send files through Bluetooth, see “Using
Bluetooth” on page 142.
Deleting an Entry
1. Press and tap > People.
2. Tap a contact you wish to delete.
3. Press and then tap Delete.
4. Tap OK to confirm the deletion.
Page 83

Deleting Multiple Entries
1. Press and tap > People.
2. On the All tab, press , and then tap Delete.
3. Select the entries you want to delete, and then tap
Delete.
4. Tap OK to confirm the deletions.
Finding Entries in People
Finding Contacts by Name
1. Press and tap > People.
2. Scroll through all the entries.
– or –
Press and enter the first letter or letters of a
name (such as “dav” for “Dave”). (The more letters
you enter, the more your search narrows.)
3. To display an entry, tap an entry.
4. To dial the entry’s default phone number (Primary),
tap the number under
Action.
Finding Group Entries
1. Press and tap > People.
2. Scroll to the Groups tab.
3. Scroll through the group titles. To display entries
belonging to a group, tap the group name.
4. To display an entry within the group, tap the entry.
5. To dial the entry’s default phone number (Primary),
tap the number under
See “Working with Groups” on page 73 for more
details.
Action.
2D. Contacts 71
Contacts
Page 84

Backing Up and Importing Entries in People
Backing Up People Entries to the Storage Card
1. Press and tap > People.
2. Press , and then tap Import/Export > Export to
SD card.
3. When asked to confirm, tap OK.
72 2D. C ontac ts
Importing Entries From the Storage Card
You can import only those contacts that were exported
to the storage card using the Export to SD card feature
on the device. See “Backing Up People Entries to the
Storage Card”.
1. Press and tap > People.
2. Press , and then tap Import/Export > Import from
SD card.
3. If you have Google or Exchange ActiveSync
accounts set up on your device, tap the type for
the imported contacts.
Tip: Press to stop the import process.
Page 85

Working with Groups
On the Groups tab, you can assign contacts to groups
so you can easily send text, multimedia, or email
messages to a whole group. You can also sync your
device’s groups with the groups in your Google
account, accessible using your computer’s Web
browser.
Creating a Group and Adding Entries
1. Press and tap > People > Groups tab >
Add group.
2. Enter a name for the group and tap Add contact to
group.
3. Select the entries you want in the group. You can
use the search bar to search for entries quickly.
4. Tap Save.
Adding or Removing Entries From a Group
1. Press and tap > People > Groups tab.
2. Press and hold a group and tap Edit group.
3. To add entries to the group, tap Add contact to
group, tap the entries you want to add, and tap
Done.
– or –
To remove entries from the group, tap at the
right side of the entry you want to remove.
4. Ta p Save. (Tap to close the keyboard if you do
not see the
Save button.)
Sending a Text or Multimedia Message to All Entries in a Group
1. Press and tap > People > Groups tab.
2. Tap the group you want to send a message to.
3. Go to the Group action tab, and then tap Send
group message to send a message to the group.
Note: Depending on your account, you may be charged per
group member for each message sent. For example, if
you send a message to a group of five people, you will
be charged for five messages.
2D. Contacts 73
Contacts
Page 86

For instructions on composing and sending your
message, see “Composing Text Messages” on page
153 .
Sending an Email Message to All
Entries in a Group
1. Press and tap > People > Groups tab.
2. Tap the group you want to send an email message
to.
3. Go to the Group action tab, and then tap Send
group mail to send an email message to the group.
4. Tap Compose to use Gmail to send the email
message. (You need to be signed in to your
Google account to use Gmail.)
– or –
Mail to use your Exchange ActiveSync or
Tap
POP3/IMAP email account to send the email
message. (You need to have an email account set
up on your device.)
For instructions on composing and sending your
message, see “Composing and Sending Email” on
page 185.
74 2 D. C on ta ct s
Deleting a Group
1. Press and tap > People > Groups tab.
2. Press and hold a group and tap Delete group.
Using the People Widget
Put the group of people you contact most right on the
screen of your device by adding them with the People
widget. Using the People widget, you can instantly
place a call, send a message, or view details of a
favorite contact with a single tap.
Adding the People Widget
1. Press and tap > Widget > People.
2. Choose the widget style, and then tap Select.
3. Select the group you want to add as a widget.
4. Drag the widget to a blank screen, and then
release.
Tip: The People widget requires a whole screen.
Page 87

Setting the Default Communication Method
1. Press , and then go to the People widget.
2. Tap a contact on the widget.
3. On the Select default action screen, tap the
communication method you want for the contact.
Changing the Default Communication Method
1. Press , and then go to the People widget.
2. Tap the name of a contact on the widget to open
the person’s contact card.
3. Press , and then tap More > Set Widget Action.
4. On the Select default action screen, tap the
communication method you want for the contact.
Getting In Touch With a Contact
1. Press , and then go to the People widget.
2. Do either of the following:
䡲 Tap a contact’s icon or photo on the widget. The
default communication method will be performed.
If you have not set a default communication
method, the Select default action screen will
open. (See “Setting the Default Communication
Method” on this page for details.)
䡲 Tap the name of the contact to open the contact
details screen. On the contact details screen,
choose how you want to communicate with the
contact by tapping an option under
Action.
2D. Contacts 75
Contacts
Page 88

Connecting with Your Social Networks
Facebook for HTC Sense
View your Facebook updates in supported applications
on the device. See “Logging in to and Synchronizing
Your Social Network Accounts” on page 54 to learn
how to sign in to Facebook for HTC Sense.
After signing in to Facebook for HTC Sense, you can:
䢇 Download your Facebook contacts and their contact
details to People on your device. Your Facebook
contacts’ status updates display on your contacts list.
䢇 Browse through Facebook photo albums in Gallery.
(See “Viewing Photos in Your Social Networks” on
page 130 for details.)
䢇 Read Facebook status updates in Friend Stream.
(See “Using Friend Stream” on page 79 for details.)
Updating Your Facebook Status
1. Press and tap > People > All tab.
2. Ta p Me or [Your Name] > Facebook.
3. Enter your status in the “What’s on your mind” text
box and tap
Share.
Synchronizing Facebook for HTC Sense
See “Social Network Settings” on page 54.
Facebook for
HTC Sense - People
76 2 D. Co nt ac ts
Facebook for
HTC Sense - Photos
Page 89

Changing Facebook for HTC Sense Update
Settings
1. Press > and tap Settings > Accounts & sync.
2. Ta p Facebook for HTC Sense.
3. Tap Account settings > Update schedule, and then
select the time interval.
Facebook for Android
The Facebook application on your phone lets you keep
up and stay close with your friends in Facebook.
It offers most of the features that you are familiar with
when using Facebook on your computer.
If you have more than one Facebook account, you can
sign in to the Facebook application using your other
Facebook account.
Opening Facebook
1. Press and tap > Facebook.
2. If this is your first time using Facebook, follow the
onscreen instructions to sign into your Facebook
account. Your Facebook profile is then displayed
on the screen.
3. Press to go to the Facebook home screen and
access other functions.
Note: While on the Facebook home screen, press and
then tap
Settings to set refresh and notification options.
On some Facebook screens, you can press and hold
an item to open an options menu.
With the Facebook application, you can:
䡲 Share your thoughts and check other people’s
status updates.
䡲 View your friends list and write on someone’s
wall.
䡲 Comment on and like a friend’s post.
䡲 View someone’s personal information, including
photo albums.
䡲 Check your Facebook notifications.
䡲 Take a photo and upload it directly to your
Facebook account.
2D. Contacts 77
Contacts
Page 90

Adding the Facebook Widget
Add the Facebook widget to the Home screen to let
you quickly share your thoughts and view your friends’
status updates.
1. Press and tap > Widget > Facebook.
2. Choose the widget style, and then tap Select.
3. Drag the widget to a blank space on the Home
screen, and then release.
78 2 D. Conta cts
Facebook FAQ
What are the differences between the Facebook for HTC
Sense and the Facebook for Android application?
䢇 Facebook for HTC Sense is not a standalone
application. It is integrated into People, Friend
Stream, and Gallery to give you up-to-date
information about your Facebook contacts (their
status updates and new photos) in these
applications.
䢇 The Facebook for Android application is a
standalone application. Use this application to do
most of the things that you would do when you’re
using your computer’s Web browser to access your
Facebook account, such as adding a friend and
adding captions to photos you upload.
䢇 The two do not share the same login credentials.
Signing in to Facebook for HTC Sense does not sign
you in to the Facebook application and vice versa. If
you want to use the same Facebook account for
both, you’ll have to sign in to both using the same
login credentials.
Page 91

Using Friend Stream
1
2
3
4
5
6
Streamline your social network accounts through
Friend Stream. Update your status simultaneously, view
status updates, and look through photo updates from
your Facebook, Twitter, and other social network
accounts using Friend Stream.
Opening Friend Stream
1. Press and tap > Friend Stream.
2. If you are not signed in to a social network
account, you will be asked to sign in to at least one
of the social network accounts.
3. Friend Stream opens in the All updates tab. Slide
your finger on the bottom row to go to the tab you
want.
The Friend Stream Screen
Only updates from accounts that you are signed in to
will be shown. You can filter the updates that show in
Friend Stream by pressing and then tapping
Settings > Show updates.
Contacts
1. Tap to enter and send a status update.
2. Depending on the type, tap to open Peep, post a
Facebook comment, look at the Flickr album, or
open the link in the Web browser.
2D. Contacts 79
Page 92

3.
Shows all the messages from the social network
accounts that you are signed in to.
4. Shows only links posted on Facebook.
5. Shows only photo updates from Facebook and
Flickr.
6. Shows only status updates from Facebook and
Twi tter.
Updating Your Status
1. Press and tap > Friend Stream.
2. On the All Updates tab, tap the “What’s on your
mind?” text field.
3. Tap , and then in the Update dialog box, select
to which accounts you want the status update to
be posted. Tap
Note: Only the accounts that you are signed in to will be
shown on the dialog box.
4. Enter your status update, and then tap Share.
80 2D. Contacts
Done.
Adding the Friend Stream Widget
Add the Friend Stream widget so you can update your
status simultaneously and view status updates from
your social network accounts right on your device’s
screen.
1. Press and tap > Widget > Friend Stream.
2. Choose the widget style, and then tap Select.
3. Drag the widget to a blank space on a screen, and
then release.
Page 93

⽧ Calendar (page 81)
2E. Calendar & Tools
⽧ Calculator (page 89)
⽧ Clock (page 90)
⽧ Flashlight (page 95)
⽧ Sharing Games and Applications (page 95)
⽧ Car Panel (page 97)
⽧ Quickoffice (page 99)
⽧ Adobe Reader (page 100)
⽧ HTC Sync (page 101)
⽧ Updating Your Device (page 109)
Calendar
Use Calendar to create and manage events, meetings,
and appointments. Your Calendar helps organize your
time and reminds you of important events. Depending
on your synchronization settings, your device’s
Calendar stays in sync with your Calendar on the Web,
Exchange ActiveSync calendar, and Outlook calendar.
Adding an Event to the Calendar
1. Press and tap > Calendar.
2. On any Calendar view, press and tap New
event to open the Event details screen.
Note: If you are in Agenda or Month view, you can also tap
3. If you have more than one calendar, select a
at the bottom-right of the screen.
If you are in Day view, tap Add event.
calendar in which to add the event:
䡲 Select My Calendar to create an event that will
appear only on your device.
䡲 Select your Google Account to create a Google
Calendar event. If you have several Google
2E. Calendar & Tools 81
Calendar & Tools
Page 94

Calendars on the Web, select one in which to add
your event.
Note: You can create multiple Google Calendars only in
Google Calendar on the Web. After creating them in
Google Calendar on the Web, you’ll be able to see
them in the Calendar application on your device. For
more information about creating and managing
multiple Google Calendars, visit the Google website:
http://calendar.google.com.
If you have synchronized your device with an
Exchange ActiveSync account or Outlook on your
computer, you can also select these calendars.
䡲 Select PC Sync to create an Outlook Calendar
event to sync with your computer.
䡲 Select Exchange to create an Exchange
ActiveSync calendar event.
4. Enter a name for the event.
5. To specify the date and time of the event, do one of
the following:
䡲 If there is a time frame for the event, tap the From
To dates and times to set them.
and
82 2E. Calendar & Tools
䡲 If the event is a special occasion such as a
birthday or an all-day event, set the
dates, and then select the
All Day check box.
From and To
6. Enter the event location and description.
7. Set the event reminder time.
Note: You can add another reminder time in a Google
Calendar event. Press
to add another reminder.
and then tap Add reminder
8. If the event occurs on a regular basis, tap the
Repetition box and then choose how often the
event occurs.
9. Scroll to the bottom of the screen and then tap
Save.
Page 95

Inviting Guests to Your Event (Google Account Only)
If you want to invite guests to your event, you need to
create and add the event in your Google Calendar.
An email invitation will be sent to your guests using
your Google Account.
1. Open Calendar and create a new event. Tap the
Calendar field and then select your Google
Account (or one of your other Google Calendars).
For the steps, see “Adding an Event to the
Calendar.”
2. Add details about the event, such as date and
time, location, and more.
3. In the Guests field, enter the email addresses of
everyone you want to invite to the event. Separate
multiple addresses with commas.
4. Tap Save to add the event to your Google
Calendar.
If the people to whom you send invitations use Google
Calendar, they’ll receive an invitation in Calendar and
by email.
Sending a Meeting Request (Exchange ActiveSync only)
If you have an Exchange ActiveSync account set up on
your device, you can use Calendar to create a meeting
appointment and send a meeting request email to the
people you want to invite to your meeting.
1. Open Calendar and create a new event. Tap the
Calendar field and then select Exchange. For the
steps, see “Adding an Event to the Calendar” on
page 81.
2. Add details about the meeting, such as date and
time, location, and more.
3. Press and then tap Meeting Invitation.
4. Tap and choose attendees from your contacts
or Company Directory.
5. Enter the email subject and your message, and
then tap
6. Ta p Save to add the meeting appointment to your
Exchange ActiveSync Calendar.
Send.
2E. Calendar & Tools 83
Calendar & Tools
Page 96

Event Alerts
When your device is turned on and you have an event
alarm scheduled, your device alerts you and displays
the event summary. There are several ways your device
alerts you to scheduled events:
䢇 By playing the assigned ringer type.
䢇 By showing the icon on the status bar.
䢇 By showing the Alert screen.
Event Reminders
If you have set at least one reminder for an event, the
upcoming event icon ( ) will appear in the
notifications area of the status bar to remind you of the
upcoming event.
To view, dismiss, or snooze the reminder:
1. Press the status bar, and then drag down the
screen to open the Notifications panel.
2. Tap the upcoming event name to display the event.
Note: If you have other pending event reminders, these
events will also appear on the screen.
84 2E. Calendar & Tools
3. Do one of the following:
䡲 Ta p Snooze all to snooze all event reminders for
five minutes.
– or –
䡲 Ta p Dismiss all to dismiss all event reminders.
– or –
䡲 Press to keep the reminders pending in the
notifications area of the status bar.
To set reminder settings:
䊳 On any Calendar view, press and tap More >
Settings > Reminder settings.
Viewing Events
You can display the Calendar in daily, weekly, monthly,
or agenda view. To change the Calendar view,
press and tap
Day and Agenda Views
Day view displays a list of the events of one day and
also shows weather information at the bottom of the
screen when you’re viewing events of the current day.
Day, Agenda, Week, or Month.
Page 97

Agenda view shows a list of all your events in
Day view
Agenda view
chronological order.
The color bars on the left side of the events indicate the
type of calendar that includes the event. To find out
what each color represents, press and then tap
More > Calendars.
When in Day view, slide left or right across the screen
to view earlier or later days.
Note: In Day view, the weather information appears only if the
event is within the five-day forecast of the Weather
application.
Weather information does not appear in Day view
when you change Day view to display as a time list. To
check, in any calendar view, press , and tap
Settings > Calendar view setting > Day views
More >
.
2E. Calendar & Tools 85
Calendar & Tools
Page 98

Week View
Week view displays a chart of
the events of one week.
Week view:
When in
䢇 You can press and hold on a
time slot to create a new
event at that time.
䢇 Tap an event to view its
details.
䢇 Slide left or right across the
screen to view earlier or later
weeks.
86 2E. Calendar & Tools
Month View
In Month view, you’ll see
markers on days that have
events.
When in
䢇 Tap on the bottom left of
䢇 Tap a day to view the events
䢇 Press and hold a day to
䢇 Slide up or down the screen to view earlier or later
Month view:
the screen to switch to
Agenda view. Tap on the
bottom right to create a new
event.
of that day.
open an options menu from
which you can also choose to create an event or
switch to either
Day or Agenda view.
months.
Page 99

Erasing Events
1. Press and tap > Calendar.
2. Open the calendar event details:
䡲 In Agenda, Day, and Week views, tap the calendar
event you want to delete.
䡲 In Month view, tap the date where the calendar
event occurs, and tap the calendar event.
3. Press and tap Delete event.
4. In the Delete event confirmation box, tap OK.
– or –
If the calendar event is recurring, select
event or All events, and tap OK.
Only this
Showing or Hiding Calendars
In any Calendar view, press , tap More > Calendars,
and then select or clear a calendar to show or hide it.
All calendars to display all calendars.
Tap
The calendars are kept synchronized on your device,
whether or not you hide them.
Choosing Google Calendars to Synchronize with Your Device
You can choose which Google Calendars to keep
synchronized on your phone or which ones to stop
synchronizing.
Stop Synchronizing a Google Calendar
1. In any Calendar view, press and tap More >
Calendars.
2. Press and tap Remove calendars.
3. Select a Google Calendar to remove from your
calendars list, and then tap
4. Press to update Calendar with the new
changes and return to the Calendar view you were
viewing.
The calendars that you remove from your calendars list
will no longer be synchronized on your device, but you
remain subscribed to them and can work with them in
Google Calendar on the Web.
OK.
2E. Calendar & Tools 87
Calendar & Tools
Page 100

Adding a Google Calendar to Synchronize
Only the calendars that you’ve created or subscribed to
on the Web, but previously removed from your
calendars list, are shown in the list of calendars that
you can add.
1. In any Calendar view, press and tap More >
Calendars.
2. Press and tap Add calendars.
3. Select a Google Calendar to add to your calendars
list, and then tap
OK.
4. Press to update Calendar with the changes
and return to the Calendar view you were using
before.
Synchronizing an Exchange ActiveSync Calendar
If you have set up a Microsoft Exchange ActiveSync
account on your device, you can also synchronize
Exchange ActiveSync calendar events on your device.
Calendar events on your Exchange ActiveSync will also
show in Calendar if you chose to synchronize with the
Exchange ActiveSync Server.
88 2E. Calendar & Tools
䊳 To check if Exchange ActiveSync items are set to
be synchronized, go to the Home screen, press
, and tap
ActiveSync.
Settings > Accounts & sync > Exchange
Synchronizing an Outlook Calendar
See “HTC Sync” on page 101 for details.
Sending a vCalendar
You can send a calendar event as a vCalendar to
someone’s phone or your computer using Bluetooth.
You can also send it as a file attachment with your
message.
1. Press and tap > Calendar.
2. Press and hold the calendar event you want to
send, and then tap
you need to tap the day when the event takes
place before you can press and hold the event.
3. Choose how to send the vCalendar (Bluetooth,
Mail, or Message).
䡲 For Bluetooth, you’ll be asked to turn on Bluetooth
on your device and connect to the receiving
Share vCalendar. In Month view,
 Loading...