

Page 1
Your HTC Desire Z
User guide
Page 2

2 Contents
Contents
Basics
Inside the box 6
Your phone 6
Back cover 8
SIM card 8
Storage card 9
Battery 11
Switching your phone on or off 12
Entering your PIN 13
Finger gestures 13
Using the trackpad to interact with the touch screen 14
Getting started
Setting up your phone for the first time 17
Home screen 18
Sleep mode 19
Status and notifications 20
Notifications panel 22
Connecting your phone to a computer 23
Copying files to or from the storage card 24
Adjusting the volume 24
Searching your phone and the web 25
Copying text, looking up information, and sharing 27
Personalizing
Making your phone truly yours 29
Personalizing your phone with scenes 29
Changing your wallpaper 30
Applying a new skin 30
Personalizing your Home screen with widgets 31
Adding icons and other shortcuts on your Home screen 32
Adding folders on your Home screen 32
Rearranging or removing widgets and icons on your Home screen 33
Rearranging the Home screen 34
Using sound sets 34
Changing your ringtones and alarms 35
Rearranging or hiding application tabs 36
Phone calls
Different ways of making calls 38
Page 3

3 Contents
Making a call on the Phone dialer screen 38
Using Speed dial 39
Calling a phone number in a text message 39
Calling a phone number in an email 40
Making an emergency call 40
Receiving calls 41
What can I do during a call? 42
Setting up a conference call 44
Using Call history 44
Blocking callers 45
Call services 46
Turning Airplane mode on or off 47
People
Ways of getting contacts into your phone 48
Transferring contacts from your old phone 48
About the People app 49
Setting up My contact card 50
Importing contacts from your SIM card 51
Adding a new contact 51
Importing a contact from an Exchange ActiveSync account 51
Merging contact information 52
Filtering your contacts list 53
Backing up your contacts to the storage card 54
Contact information and conversations 54
Sending contact information as a vCard 55
Contact groups 56
Adding People widgets 58
Keyboard
Using the slideout keyboard 60
Using the onscreen keyboard 62
Entering words with predictive text 64
Entering text by speaking 65
Editing text 66
Adjusting input settings 67
Messages
Opening Messages 68
Sending a text message (SMS) 68
Sending a multimedia message (MMS) 69
Resuming a draft message 71
Viewing and replying to a message 71
Viewing and saving an attachment from a multimedia message 72
Push messages 73
Managing message conversations 73
Accounts and sync
Synchronizing with online accounts 75
Synchronizing with your computer 76
Page 4

4 Contents
Social
Facebook for HTC Sense 85
Facebook app 86
Tweeting on your phone using Peep 88
Using Friend Stream 90
Chatting in Google Talk 92
Email
Using Mail 95
Internet connections
Data connection 103
Wi-Fi 104
About connection widgets 106
Connecting to a virtual private network (VPN) 106
Using your phone as a modem (USB tethering) 107
Connecting your phone to the Internet through a computer (Internet Pass-through) 108
Using your phone as a wireless router 108
Bluetooth
Bluetooth basics 109
Connecting a Bluetooth headset or car kit 110
Disconnecting or unpairing from a Bluetooth device 111
Sending information using Bluetooth 112
Receiving information using Bluetooth 113
Camera
Camera basics 115
Taking a photo 117
Recording video 118
Adding effects 119
Photos, videos, and music
Gallery 120
Music 127
Connected Media 131
Maps and location
Location settings 133
Locations 133
More apps
Using Flashlight 145
Security
Protecting your SIM card with a PIN 146
Page 5

5 Contents
Protecting your phone with a screen lock pattern, PIN or password 146
Settings
Changing display settings 148
Changing sound settings 149
Changing the phone language 151
Optimizing your phone’s battery life 151
Managing memory 152
Checking information about your phone 153
Update and reset
Phone software updates 154
Restarting your phone 155
Resetting your phone 155
Trademarks and copyrights
Page 6
Tab
FN
FN
XT9
6 Basics
Basics
Inside the box
You will find the following inside the box:
§ Phone
§ Battery (preinstalled)
§ microSD™ card (preinstalled)
§ USB cable
§ 3.5mm stereo headset
§ Power adapter
§ Quick start guide
§ Safety and regulatory guide
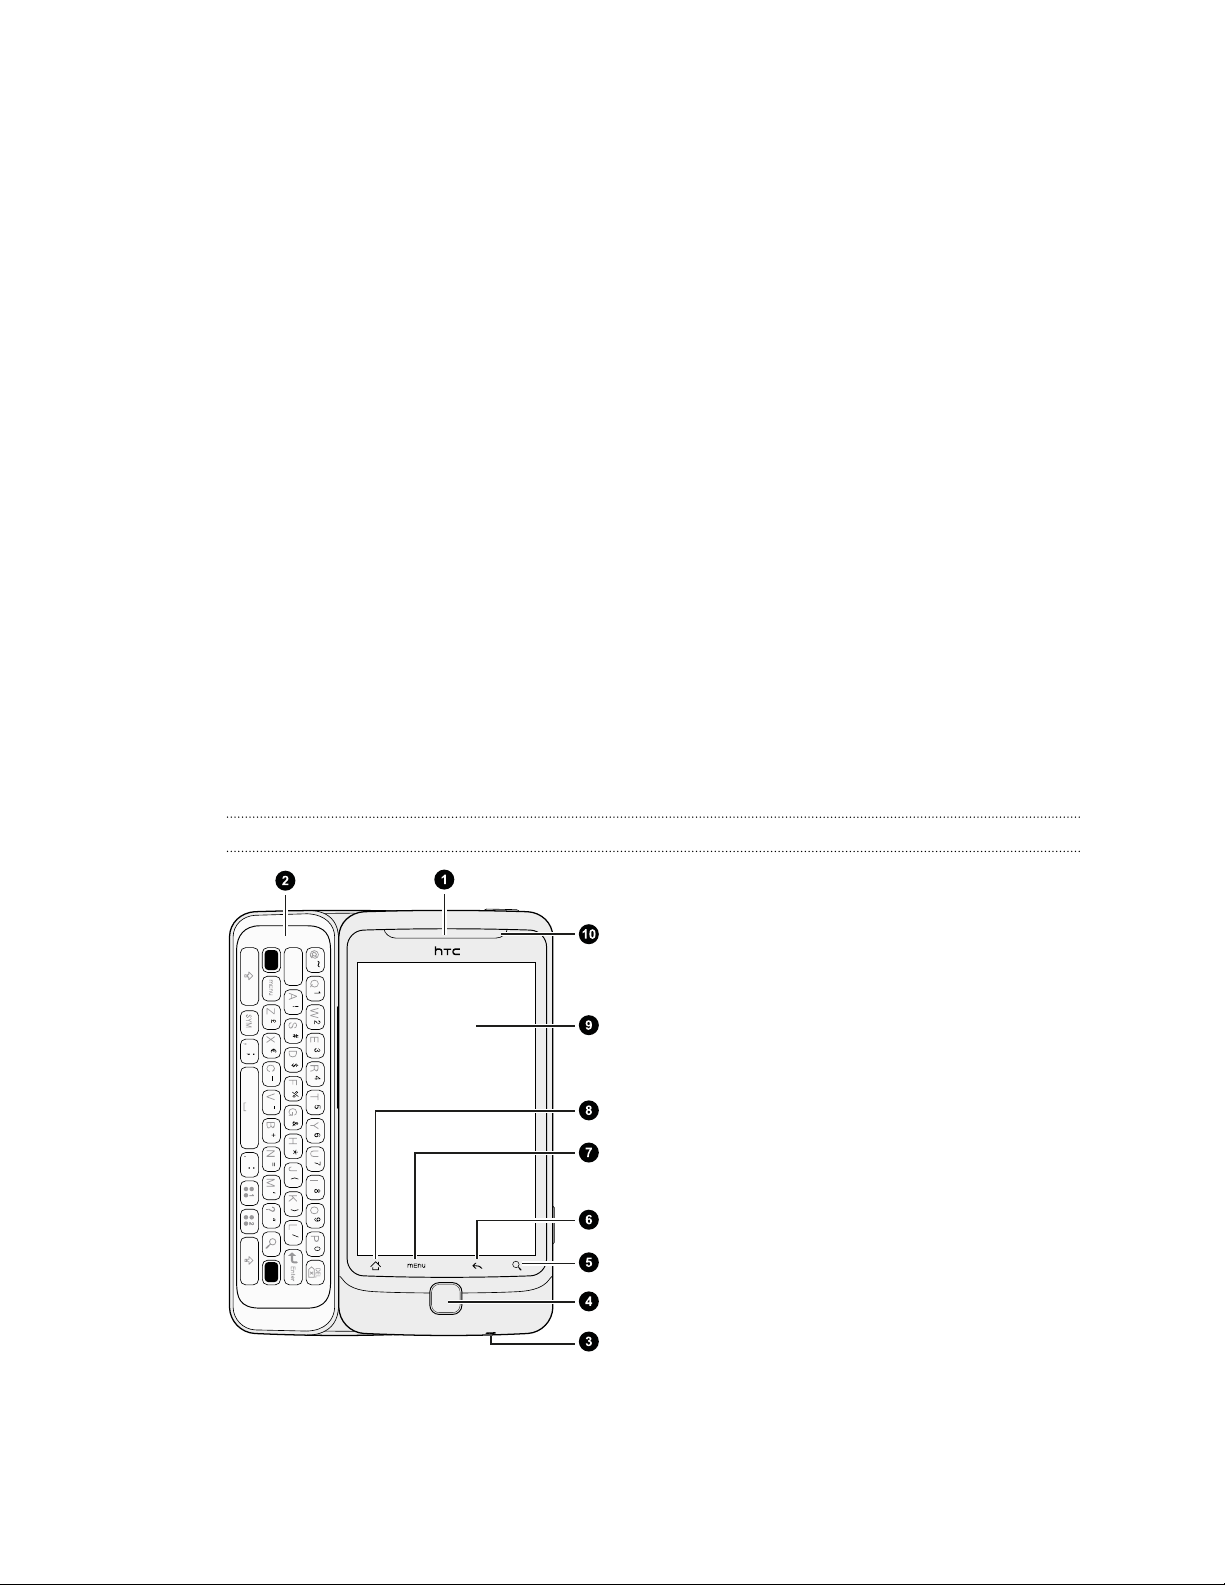
Your phone
Front panel (keyboard opened)
1. Earpiece
2. Slideout keyboard
3. Microphone
4. Trackpad
5. SEARCH
6. BACK
7. MENU
8. HOME
9. Touch screen
10. Notification LED
Page 7
7 Basics
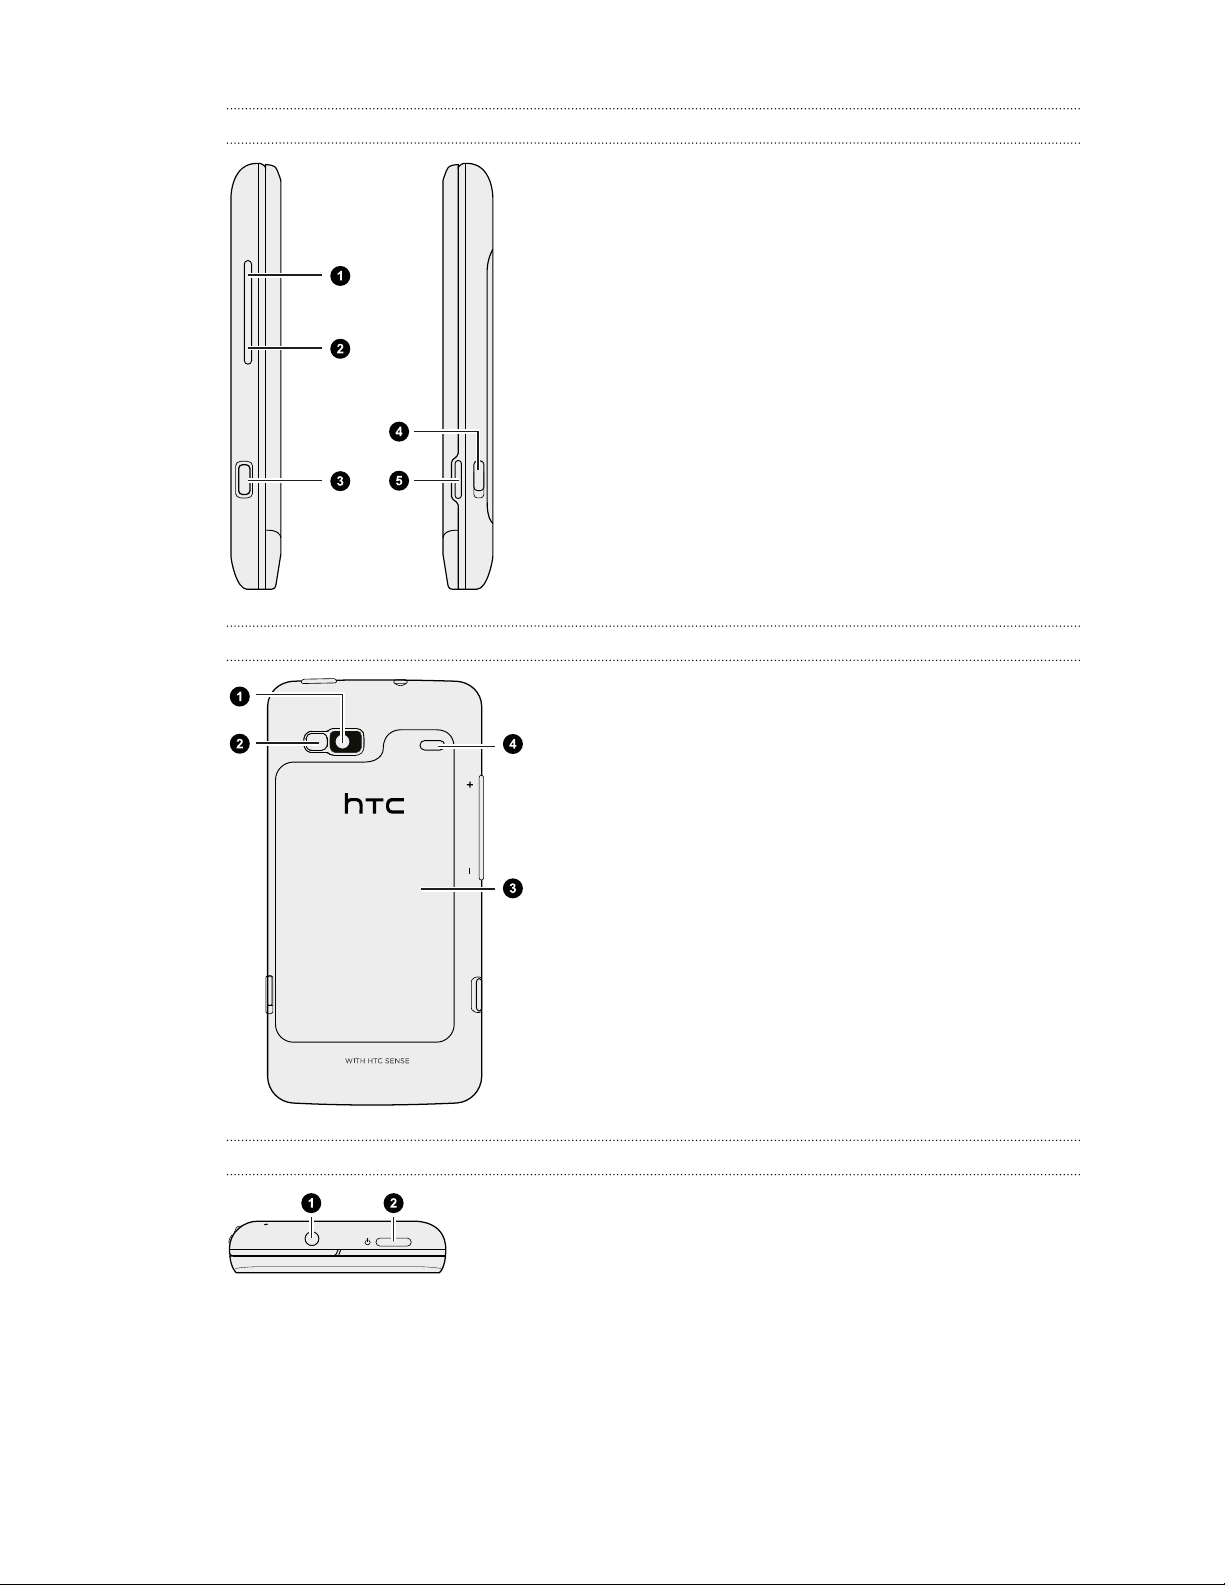
Left and right panels
Back panel
1. VOLUME UP
2. VOLUME DOWN
3. USB connector
4. Back cover lock
5. CAMERA
Top panel
1. 5 megapixel camera
2. LED flash
3. Back cover
4. Speaker
1. 3.5mm headset jack
2. POWER
Page 8
8 Basics
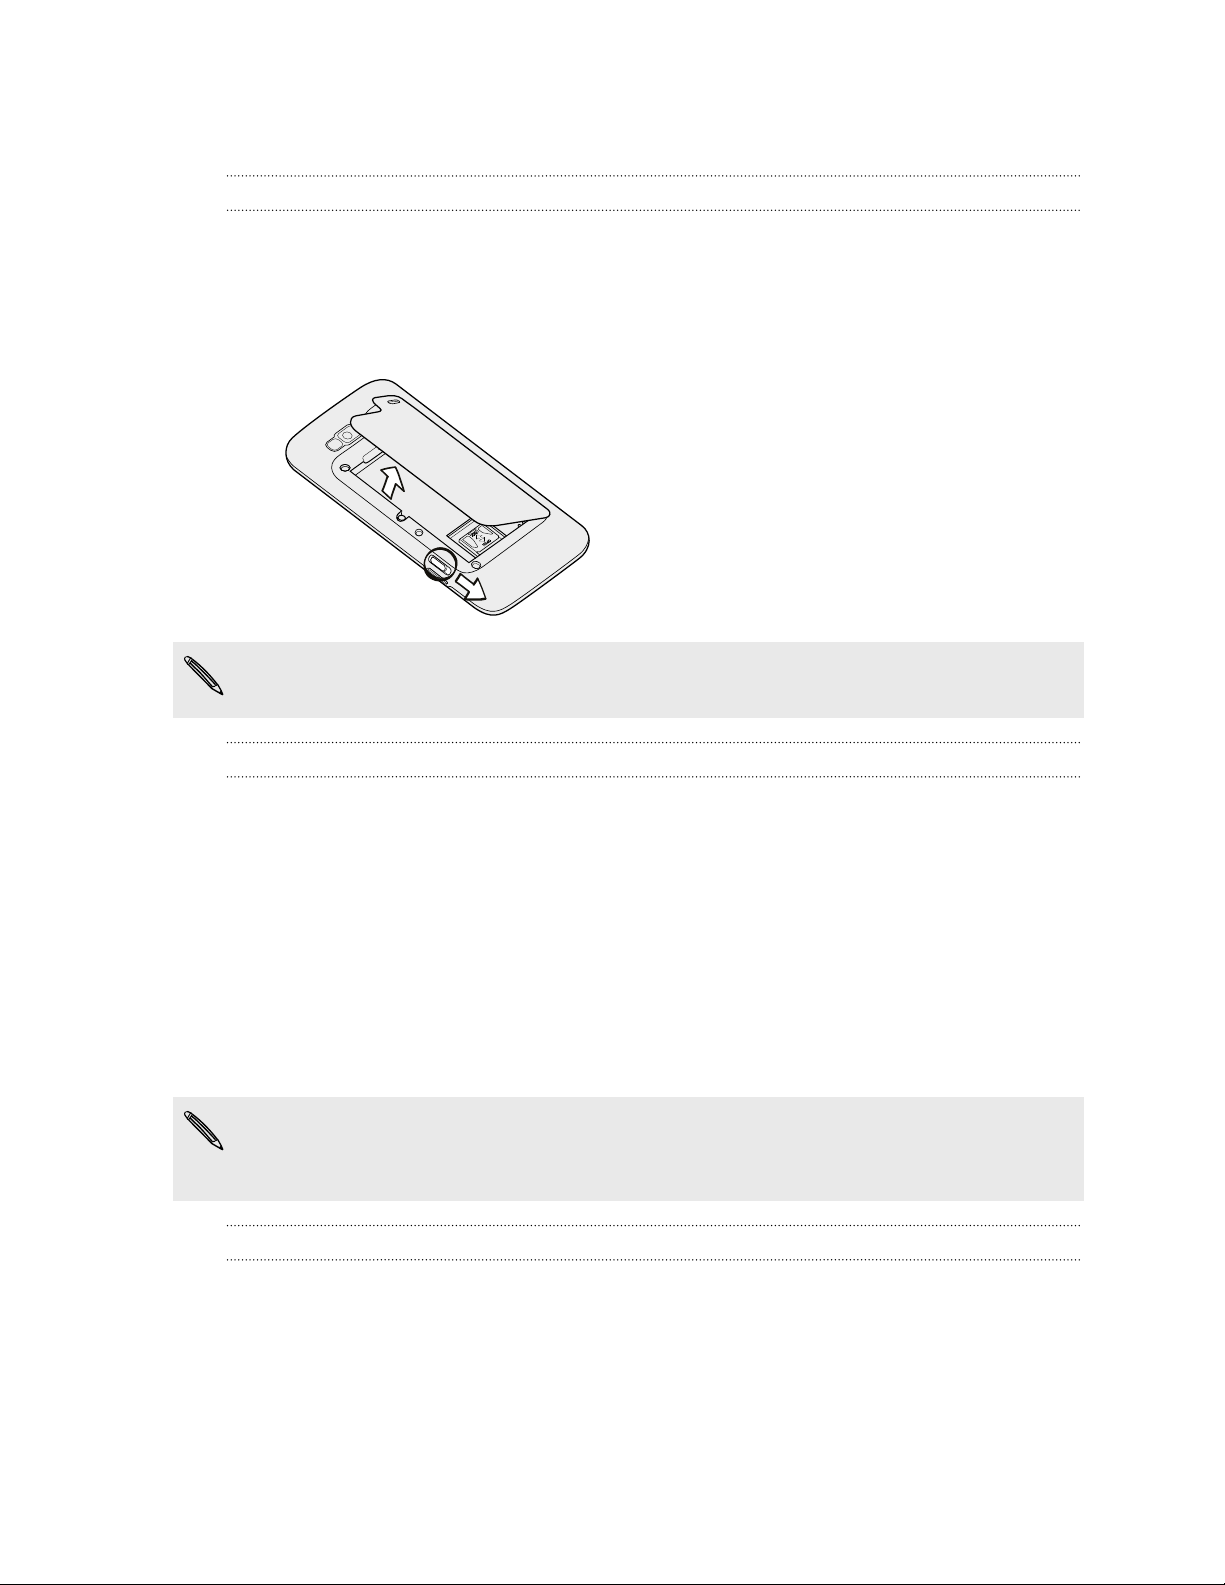
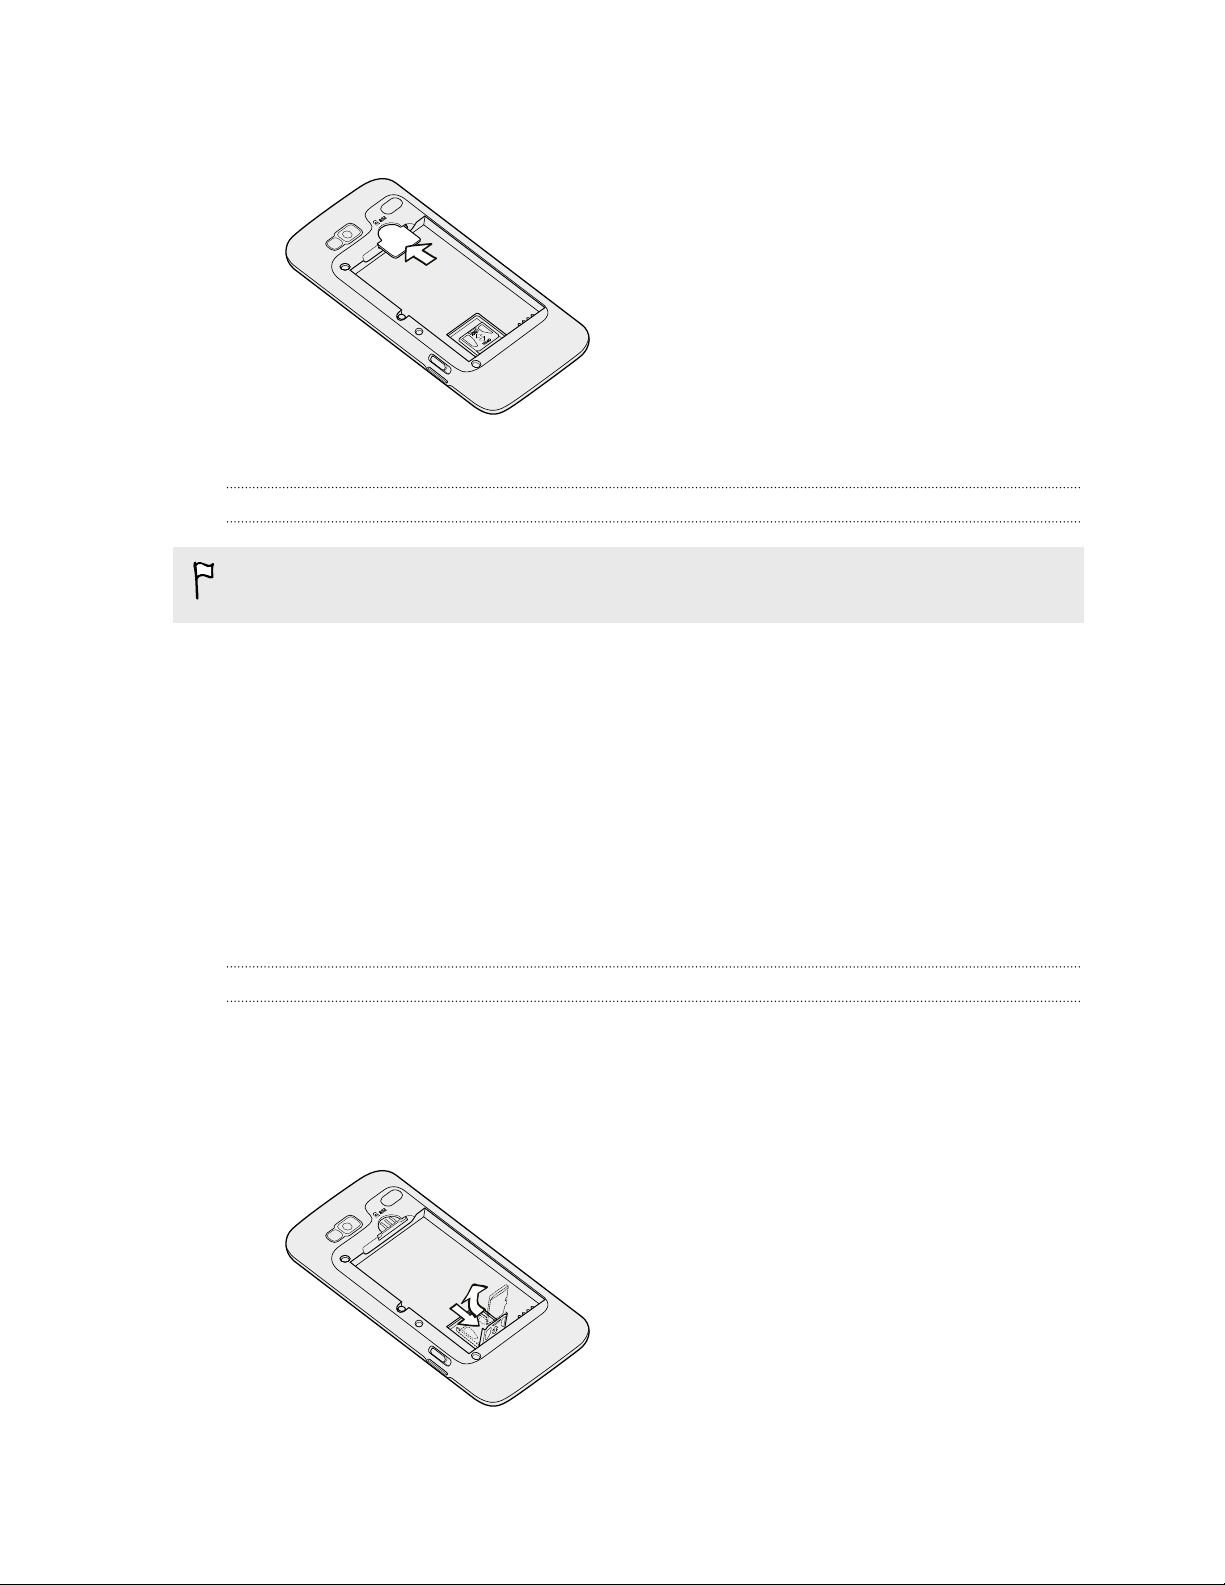
Back cover
Removing the back cover
Remove the back cover to access the battery compartment, SIM card slot, and
storage card slot.
1. With the phone turned off, hold your phone securely with the front facing down.
2. Slide the back cover lock down, and then lift the back cover to remove it.
When you take your phone out from the box and remove the back cover for the
first time, you’ll find that the battery is inside the phone.
Replacing the back cover
1. Insert the back cover tabs to the openings located at the right side of your
phone’s back panel.
2. Press the back cover against the phone until the back cover lock clicks in place.
SIM card
The SIM card contains your phone number, service details, and phonebook/message
memory. Your phone supports both 1.8 V and 3 V SIM cards.
Some legacy SIM cards may not function with your phone. You should consult with
your mobile operator for a replacement SIM card. There may be fees for this
service.
Inserting the SIM card
1. Take the back cover off.
2. Remove the battery.
Page 9
9 Basics
3. With the SIM card’s gold contacts facing down, insert the SIM card into the slot
with its cut-off corner first.
4. Push the SIM card completely into the slot.
Removing the SIM card
Make sure to switch off your phone before removing your SIM card. Otherwise, the
phone will automatically turn off when you remove the SIM card.
1. Take the back cover off.
2. Remove the battery.
3. Slide the SIM card out from the SIM card slot using your thumb.
Storage card
Use the microSD card to store your photos, videos, and music. You’ll find the microSD
card already inserted in your phone.
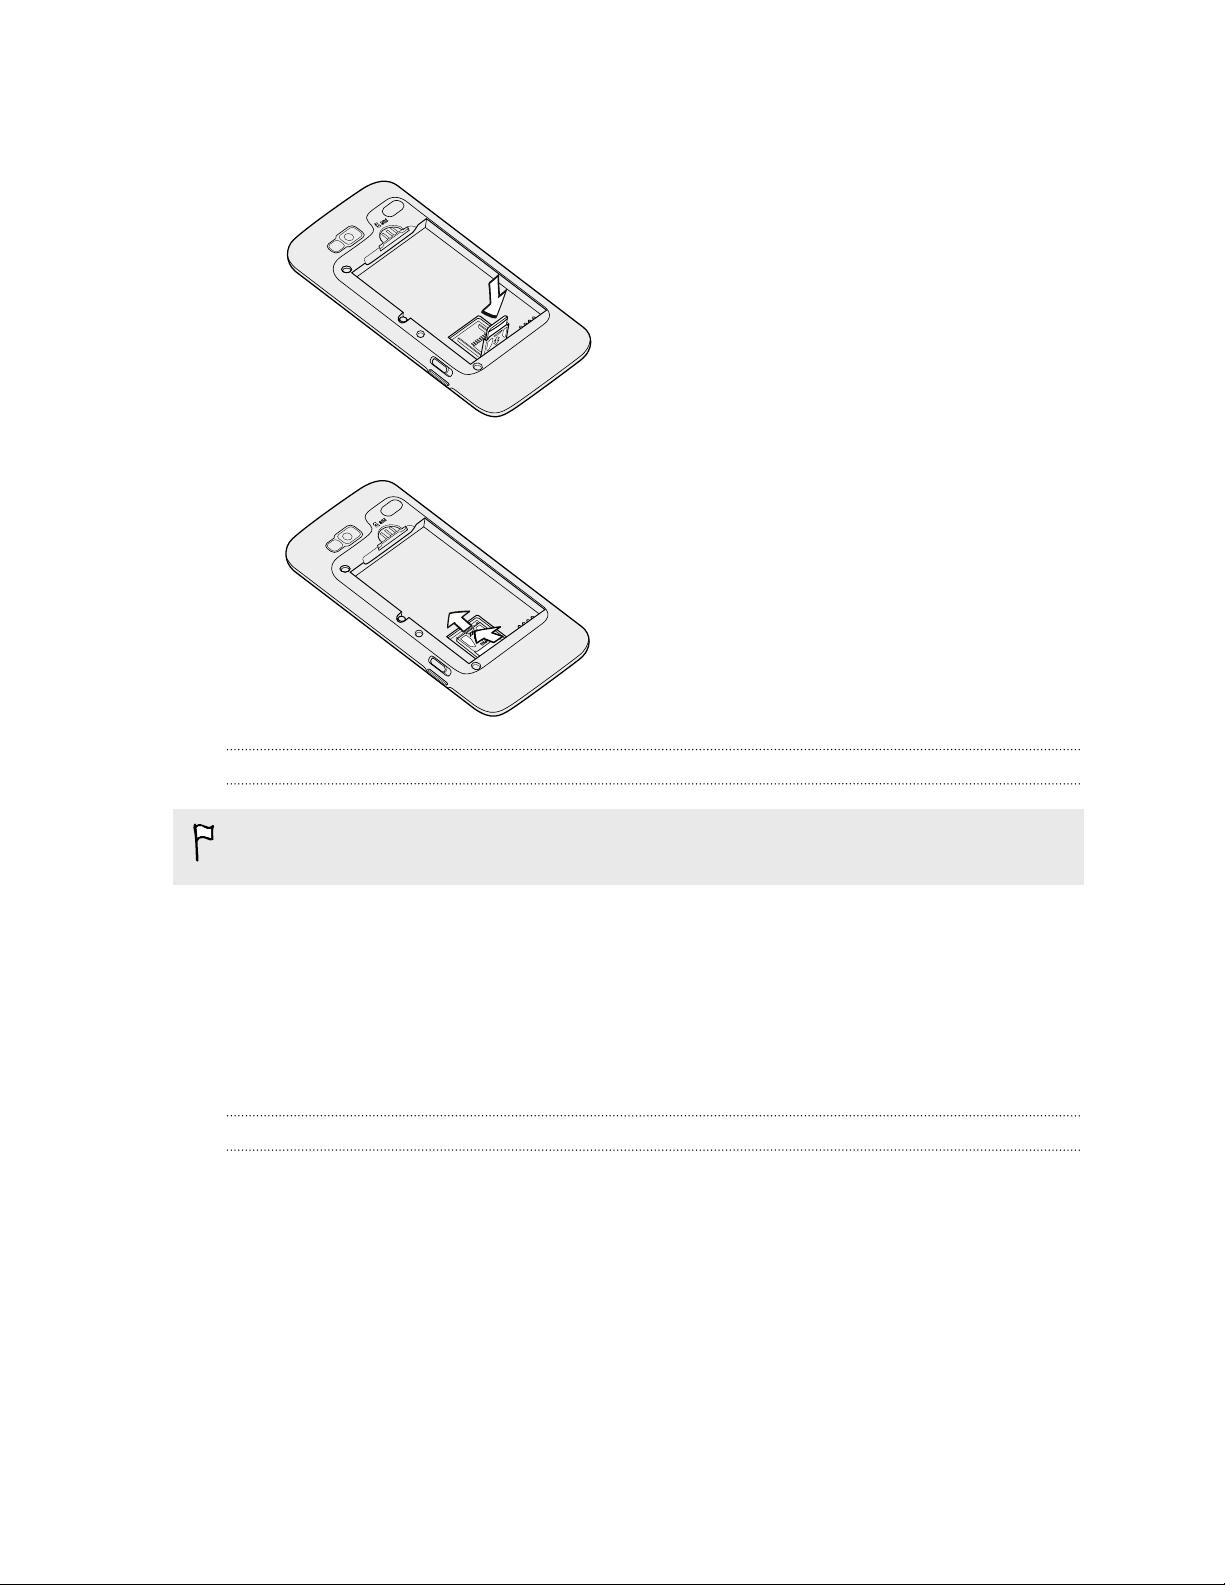
Inserting the storage card
1. Take the back cover off.
2. Remove the battery.
3. Slide the storage card holder down towards the edge of the battery
compartment, and then flip it up to open.
Page 10
10 Basics
4. Insert the storage card to the holder with its gold contacts facing the
connectors on the storage card slot.
5. Flip the storage card holder down, and then slide it up to lock.
Removing the storage card
If your phone is on you must first "unmount" the storage card before removing it to
prevent corrupting or damaging the files in the storage card.
1. Take the back cover off.
2. Remove the battery.
3. Slide the storage card holder down towards the edge of the battery
compartment, and then flip it up to open.
4. Pull the storage card out, and then close the storage card holder.
Unmounting the storage card
When you need to remove the storage card while the phone is on, unmount the
storage card first to prevent corrupting or damaging the files in the storage card.
1. From the Home screen, press MENU, and then tap Settings.
2. Scroll down the screen, and then tap SD & phone storage.
3. Tap Unmount SD card.
Page 11
11 Basics
Battery
Your phone uses a rechargeable battery. Please use only original batteries and
accessories that came with your phone or replacements that we recommend.
How long the battery can last before it needs recharging depends on how you use
your phone. Among these are the phone features and accessories you use (for
example, leaving your Bluetooth connection always on uses more power). Long phone
calls and frequent web browsing uses up a lot of battery power. Also, consider your
location: poor signal strength from your mobile network and extreme temperature
make the battery work harder.
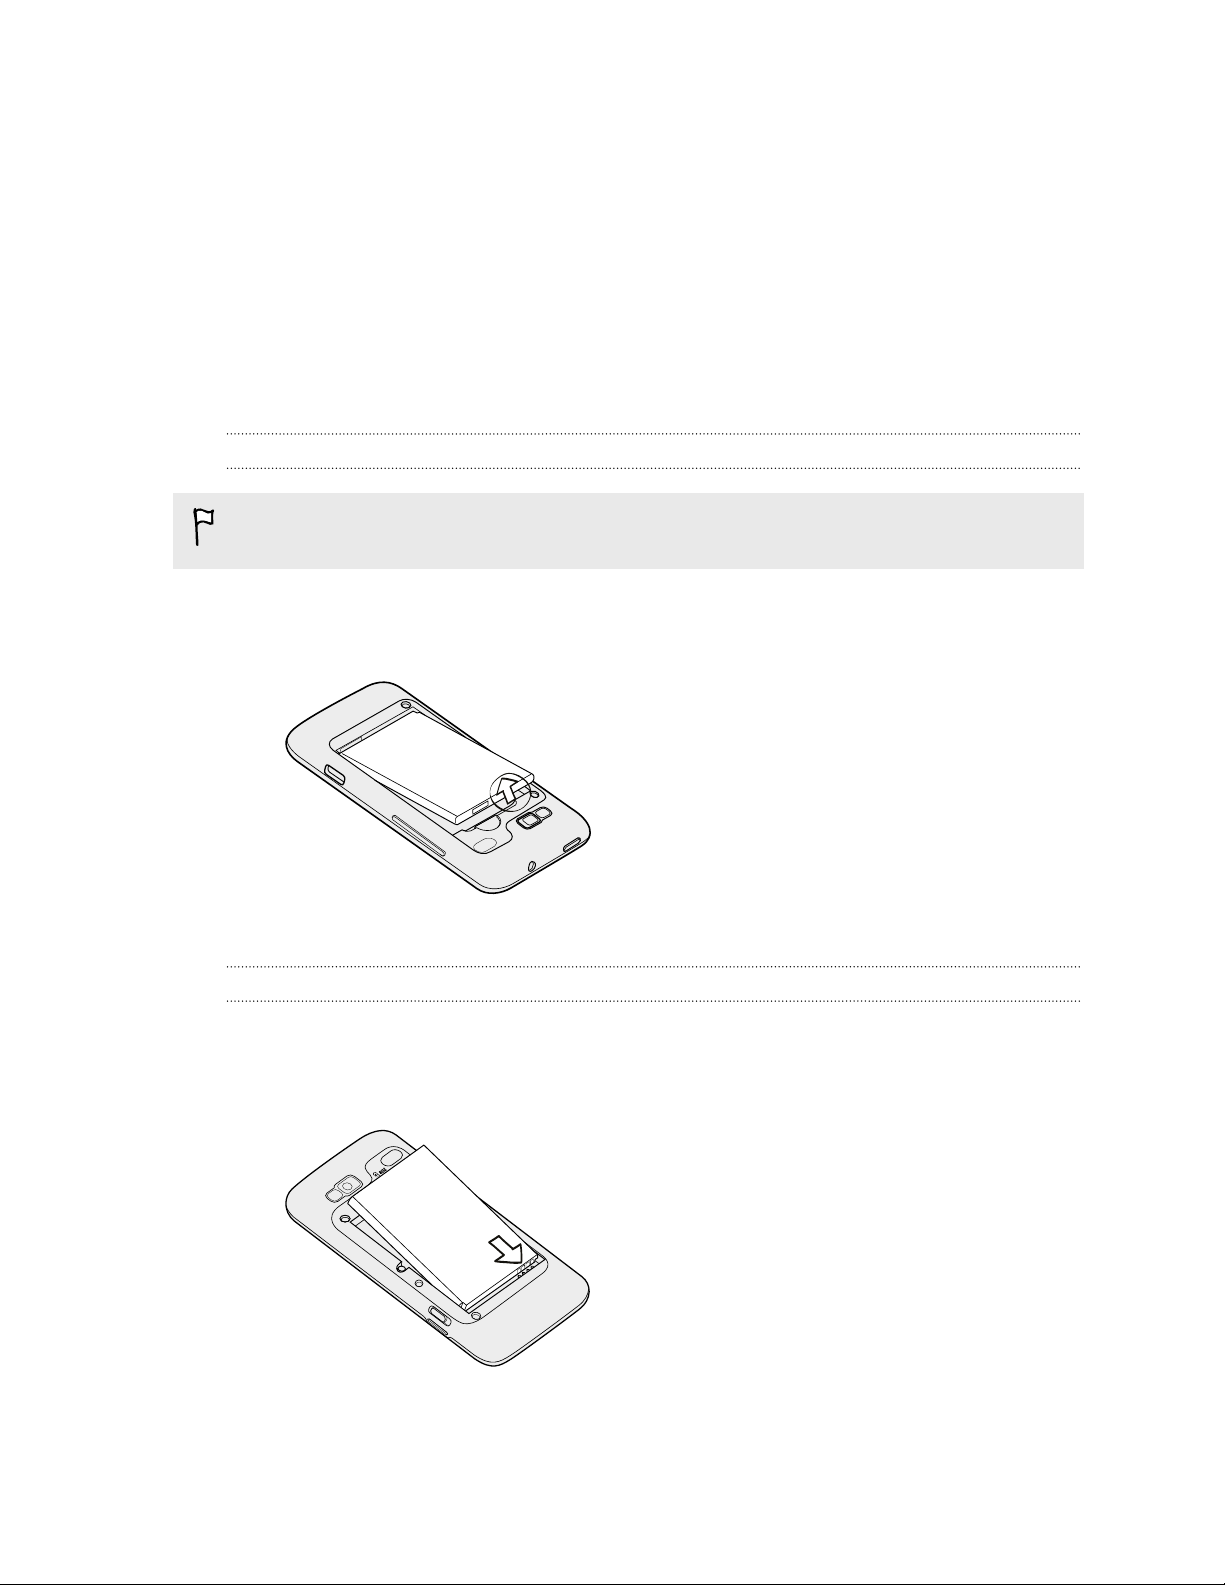
Removing the battery
Right after you take your phone out from the box for the first time, don’t forget to
remove the thin film wrapped around the battery that’s inside your phone.
1. Take the back cover off.
2. Lift the battery from the groove at the top of the battery compartment.
3. Pull the battery out of the battery compartment.
Inserting the battery
1. Take the back cover off.
2. Insert the battery (with its exposed copper contacts first) into the battery
compartment.
3. Replace the back cover.
Page 12
12 Basics
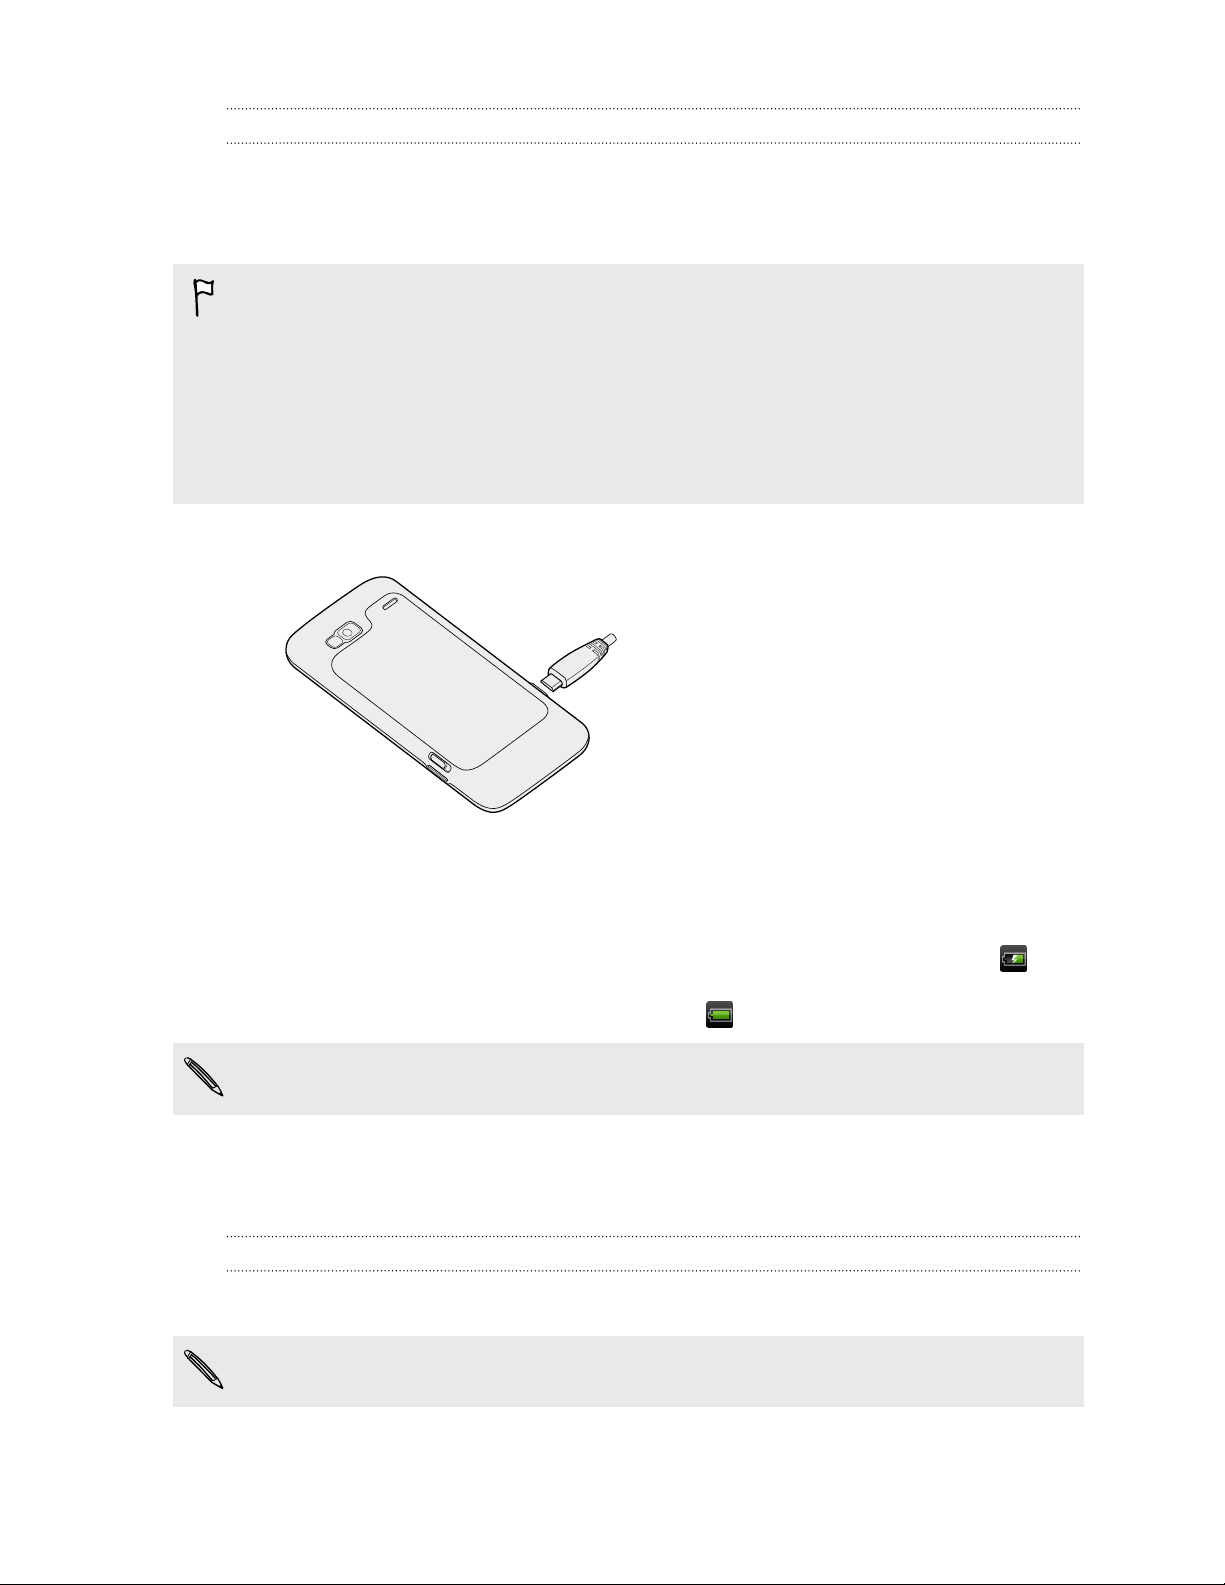
Charging the battery
The battery is partially charged when shipped. Before you turn on and start using your
phone, it is recommended that you charge the battery. Some batteries perform best
after several full charge/discharge cycles.
§ When the phone is shipped, the battery is already installed on your phone. A thin
film is inserted between the battery and the compartment. You need to remove
this film before you can charge the battery.
§ Only the power adapter and USB sync cable provided with your phone must be
used to charge the battery.
§ Do not remove the battery from the phone while you are charging it using the
power or car adapter.
1. Plug the power adapter into the USB connector of your phone.
2. Plug in the power adapter to an electrical outlet to start charging the battery.
As the battery is being charged, the notification LED shows a solid red light. The light
turns to solid green when the phone is fully charged.
When you charge the battery while the phone is on, the charging battery icon is
displayed in your phone’s status bar. After the battery has been fully charged, the
charging battery icon turns to a full battery icon .
As a safety precaution, the battery stops charging when it overheats.
Switching your phone on or off
Switching your phone on
Press the POWER button. Easy.
When you turn on the phone for the first time, you’ll need to set it up.
Page 13
13 Basics
Switching your phone off
1. If the display is off, press the POWER button to turn it back on, then unlock the
screen by sliding down the bar on the lock screen.
2. Press and hold the POWER button for a few seconds.
3. When the Power options menu appears, tap Power off.
Entering your PIN
Most SIM cards come with a PIN (personal identification number) set by your mobile
operator. If you’re asked for a PIN, enter it and then tap OK.
If you enter the wrong PIN three times, your SIM card is blocked. No problem. Just
contact your mobile operator and ask for the PUK (PIN Unblocking Key).
Finger gestures
Tap When you want to type using the keyboard, select items onscreen such
as application and settings icons, or press onscreen buttons, simply tap
them with your finger.
Press and
hold
Swipe or
slide
Drag Press and hold your finger with some pressure before you start to drag.
Flick Flicking the screen is similar to swiping, except that you need to swipe
Rotate For most screens, you can automatically change the screen orientation
To open the available options for an item (for example, a contact or link
in a web page), simply press and hold the item.
To swipe or slide means to quickly drag your finger vertically or
horizontally across the screen.
While dragging, do not release your finger until you have reached the
target position.
your finger in light, quicker strokes. This finger gesture is always in a
vertical direction, such as when flicking the contacts or message list.
from portrait to landscape by turning the phone sideways. When
entering text, you can turn the phone sideways to bring up a bigger
keyboard.
Pinch In some apps, like Gallery or the web browser, you can “pinch” the screen
using two fingers (for example, thumb and index finger) to zoom in or
zoom out when viewing a picture or a web page.
Page 14
14 Basics
Using the trackpad to interact with the touch screen
Besides using finger gestures, you can also use the trackpad to interact with your
phone’s touch screen. Be sure to place your finger over the trackpad first (covering it
completely), and then slide your finger across the trackpad.
Navigating the Home screen
§ To go to the extended Home screen on the right, slide your finger to the right
on the trackpad.
§ Slide your finger to the left to go to the extended Home screen on the left.
Selecting an item onscreen
For most screens, slide your finger to the left, right, up, or down, depending on the
direction you want to go. For example, if you want to select (highlight) an item above,
slide your finger upward. Press the trackpad to open the item.
Page 15
15 Basics
Selecting a tab
For screens that have tabs at the bottom, slide your finger to the left or right to go to
a tab.
Moving the cursor when entering text
§ To go back or forward one character in a word, slide your finger left or right.
§ Slide your finger up or down to go up or down between lines of text.
Page 16
16 Basics
Selecting a link on a webpage
1. Slide your finger down to go to the next link on a webpage.
2. When a link is selected, press the trackpad to open the link.
Page 17

17 Getting started
Getting started
Setting up your phone for the first time
When you switch on your phone for the first time, you’ll be asked to set up your
phone. You can choose your language, how you want to connect to the Internet, and
whether you want your current location to be automatically detected. If you still have
personal contacts and calendar events stored on your old phone, you can easily
transfer them to your new phone through Bluetooth as well.
Be sure to sign in to your Google™ Account so you can use Google apps like Gmail™.
You can also set up your other email accounts, favorite social networks like Facebook
and Twitter™, and more.
Just follow the onscreen instructions and you’ll be up and running with your phone in
no time.
®
Some features that need to connect to the Internet such as location-based services
and auto-sync of your online accounts may incur extra data fees from your mobile
operator. Don’t worry. You can enable or disable them in your phone’s settings as
you go along later on.
Page 18
18 Getting started
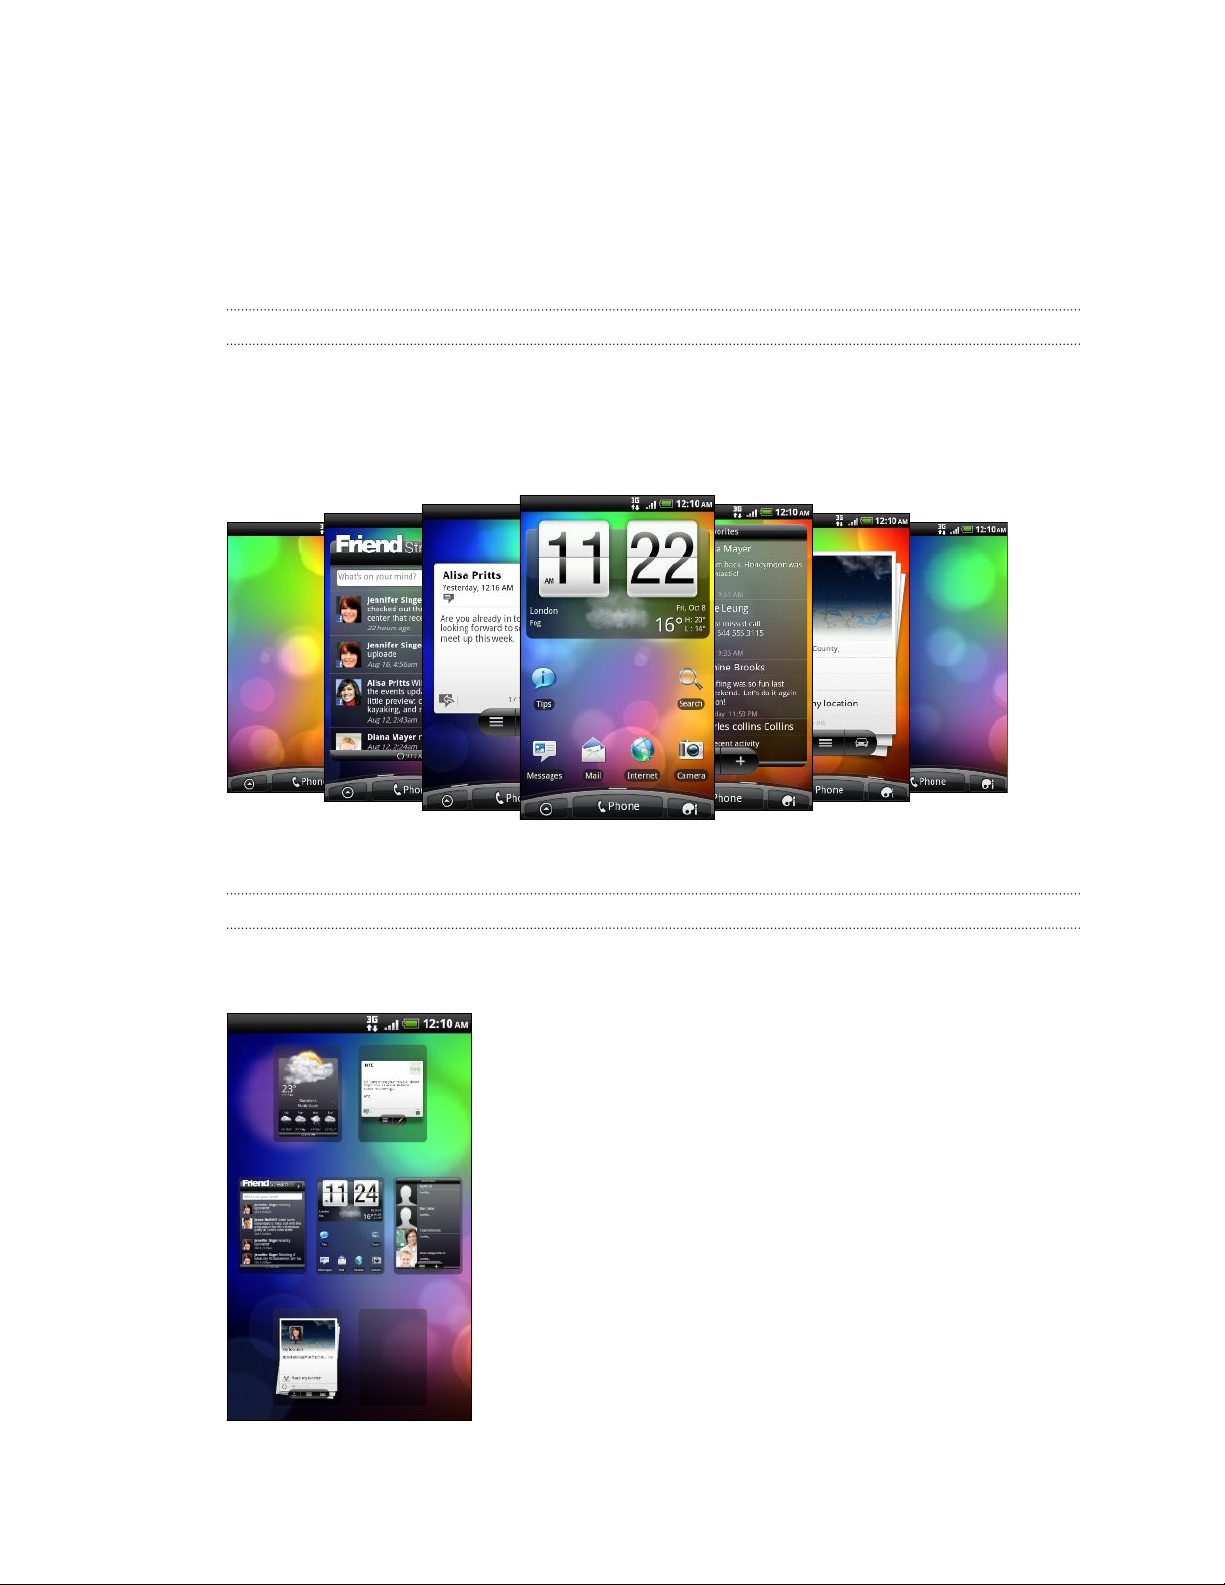
Home screen
Your Home screen is where you make your phone your own. It comes with a weather
clock widget that shows the time and weather in your current location. You can also
add your favorite applications, shortcuts, folders and widgets so they’re always just a
tap away. To find out how, see Personalizing on page 29.
Extended Home screen
As you start to do more things with your phone, you might find that one Home screen
is not enough. No problem. You can use up to six extra screens. It should be plenty.
Slide your finger horizontally to the left or right and you’ll discover more space for
adding icons, widgets, and more.
Press HOME to return to the main Home screen (that is, the center home screen).
Using Leap view
To jump straight to the screen that you want, press HOME or pinch the screen to
show the Leap view. It reveals all seven Home screens as thumbnails.
Just tap the one you want and you’ll leap right there.
Page 19
19 Getting started
Sleep mode
Sleep mode saves battery power by putting your phone into a low power state while
the display is off. It also stops accidental button presses when the phone’s in your bag
or pocket. You’ll still receive messages and calls though.
Switching to Sleep mode
Briefly press the POWER button to turn off the display and switch your phone to
Sleep mode. Your phone also automatically goes into Sleep mode when it’s idle for a
while.
Waking up from Sleep mode
Your phone automatically wakes up when you have an incoming call.
To wake your phone up manually, press the POWER button. You’ll need to unlock the
screen.
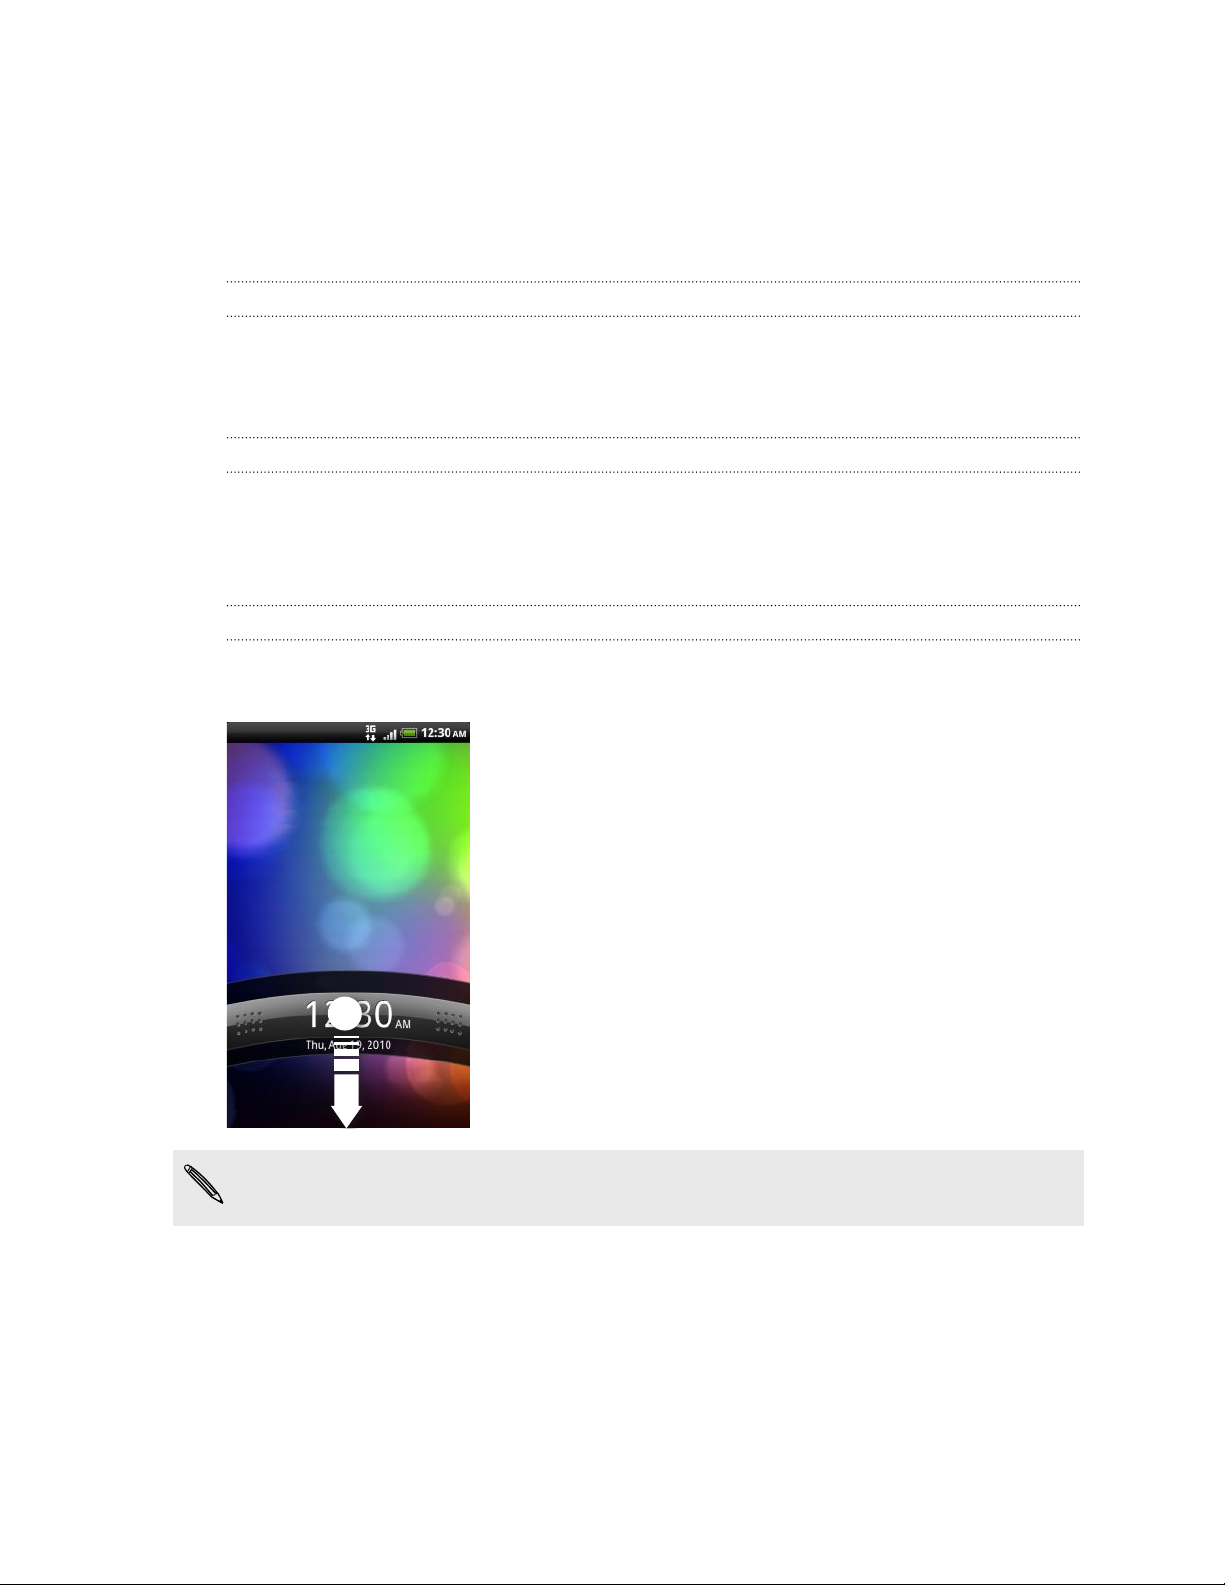
Unlocking the screen
Press the bar on the lock screen and then slide your finger down to unlock the screen
or answer an incoming call.
If you have set up a screen unlock pattern, pin, or password, you will be asked to
draw the pattern on the screen or enter the PIN or password before it unlocks.
Page 20
20 Getting started
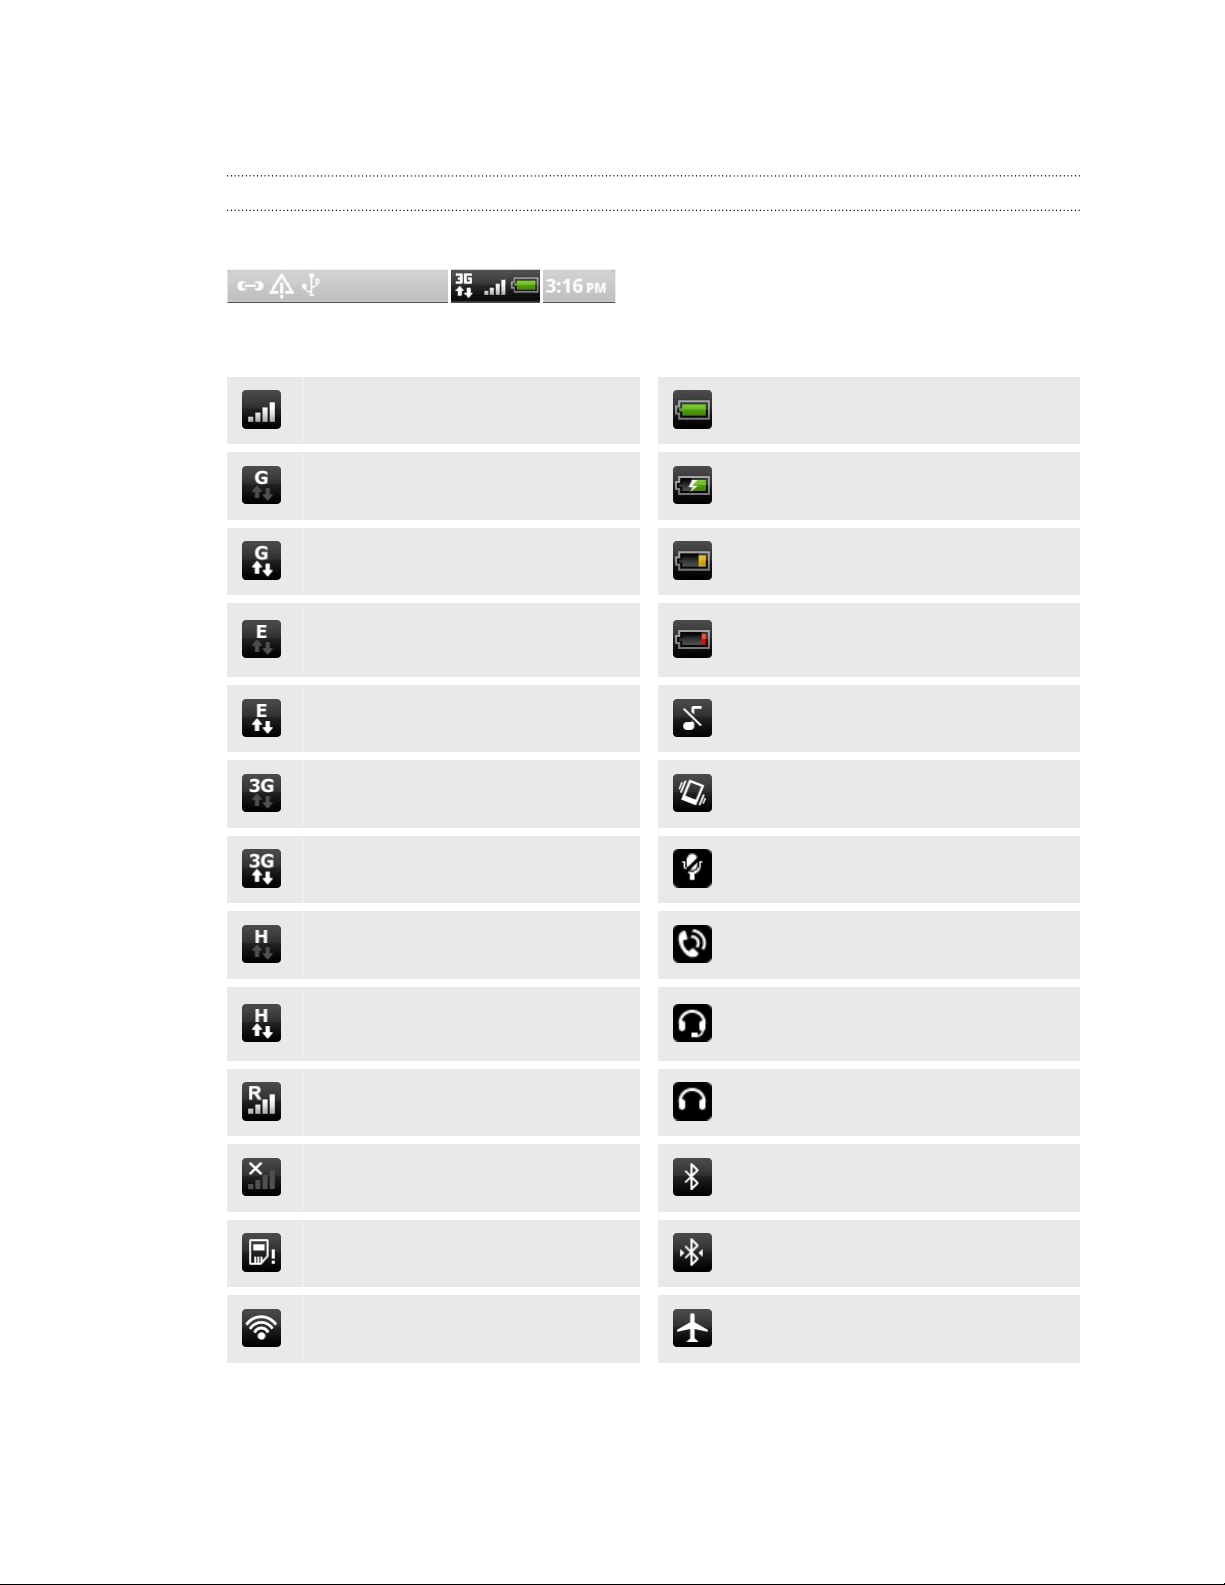
Status and notifications
Status icons
You can tell a lot about your phone by checking the icons in its status bar.
Here’s what each icon means:
Signal strength Battery is full
GPRS connected Battery is charging
GPRS in use Battery is low (20% remaining)
EDGE connected
EDGE in use Silent mode
3G connected Vibrate mode
3G in use Phone microphone is mute
HSDPA connected Speakerphone is on
HSDPA in use
Roaming Wired headset connected
No signal Bluetooth is on
Battery is very low (10%
remaining)
Wired microphone headset
connected
No SIM card installed Connected to a Bluetooth device
Connected to a Wi-Fi network Airplane mode
Page 21
21 Getting started
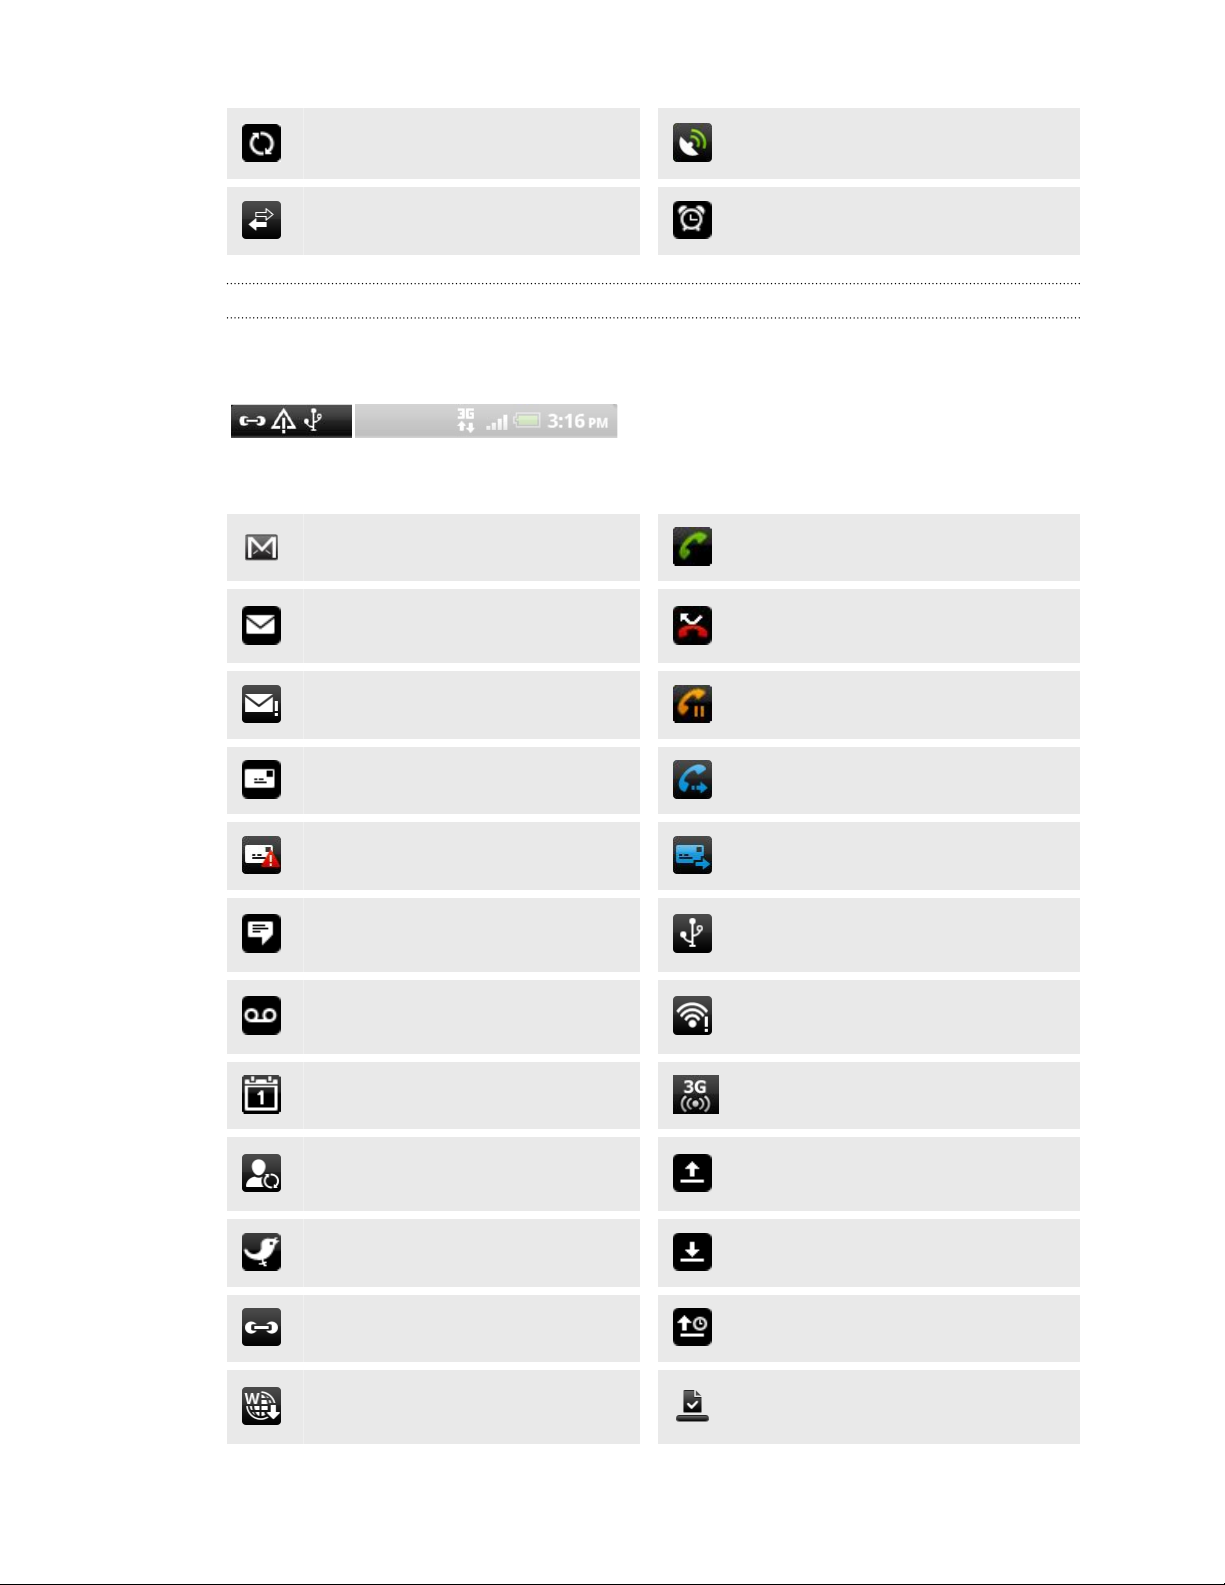
Data synchronizing GPS is on
Network sharing is on Alarm is set
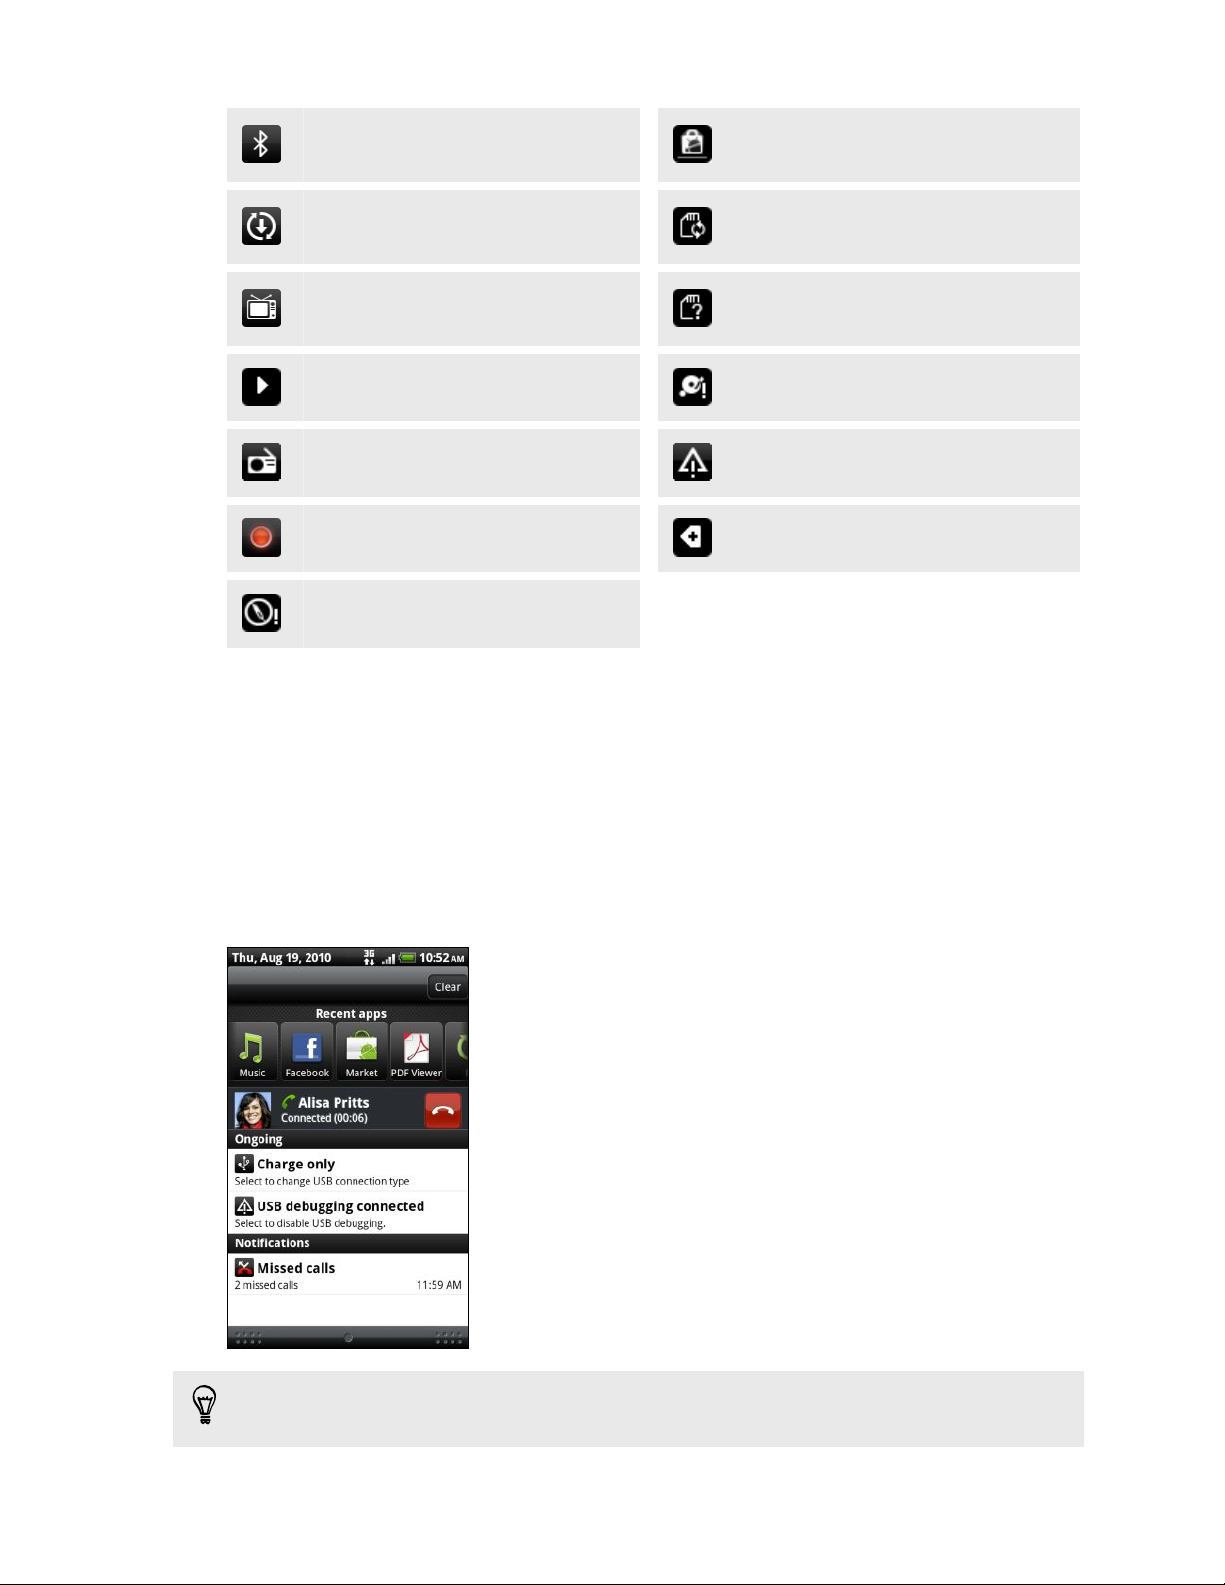
Notification icons
A busy life means a busy phone. Notification icons on the status bar make it easy for
you to keep on top of your messages, calendar events, and alarms.
Here’s what each one means:
New Gmail message Call in progress
New Microsoft Exchange
ActiveSync or POP3/IMAP email
Missed call
Problem with email delivery Call on hold
New SMS/MMS Call forwarding on
Problem with SMS/MMS delivery Message forwarding on
New Google Talk™ instant
message
New voicemail
The phone is connected to a
computer via USB cable
Wi-Fi is on and wireless networks
are available
Upcoming event Portable Wi-Fi Hotspot is on
New updates from your social
networks
Uploading data (animated)
New tweet Downloading data (animated)
Matched contacts suggestion Waiting to upload
New push message
Downloaded Android Market™ app
installed successfully
Page 22
22 Getting started
Bluetooth pairing request
Phone software update available
TV out
Song is playing Storage card is low on free space
FM Radio app in use General notification
Voice recording is on More (not displayed) notifications
Compass needs orientation
Update available for an app
downloaded from Android Market
Storage card is safe to remove or
storage card is being prepared
No storage card installed on the
phone
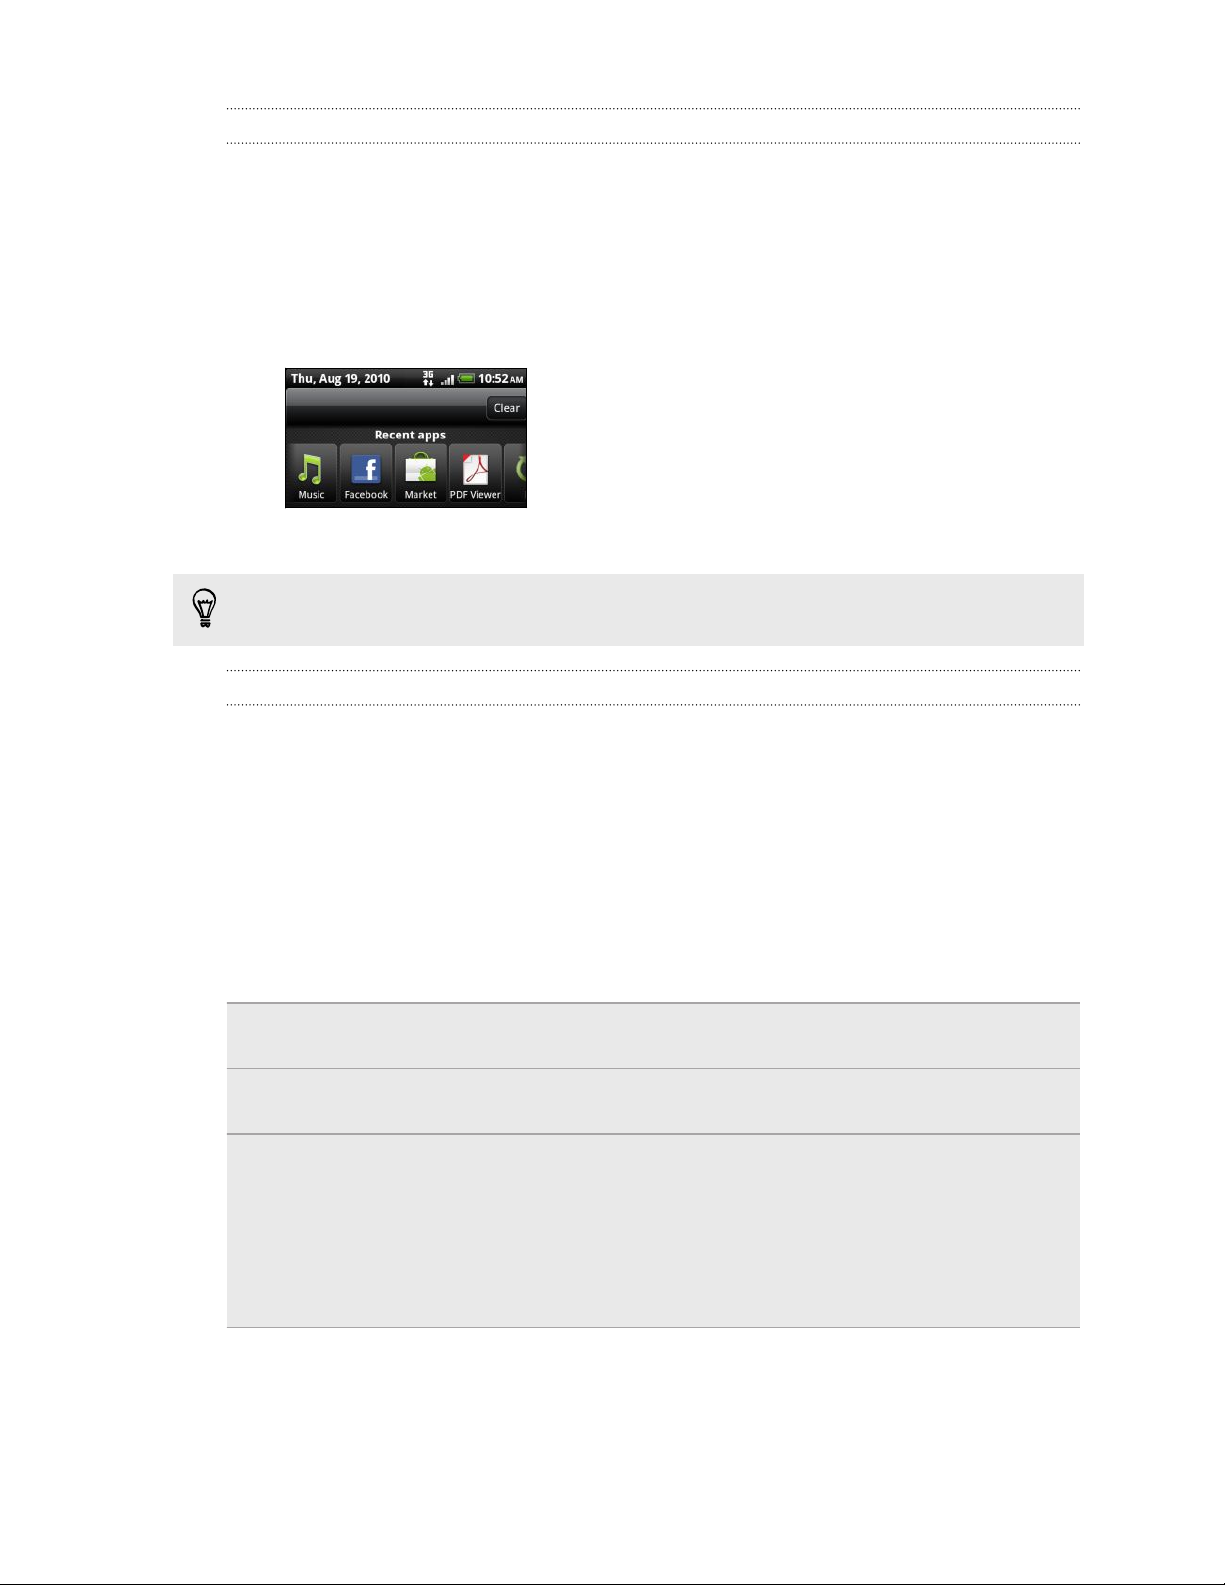
Notifications panel
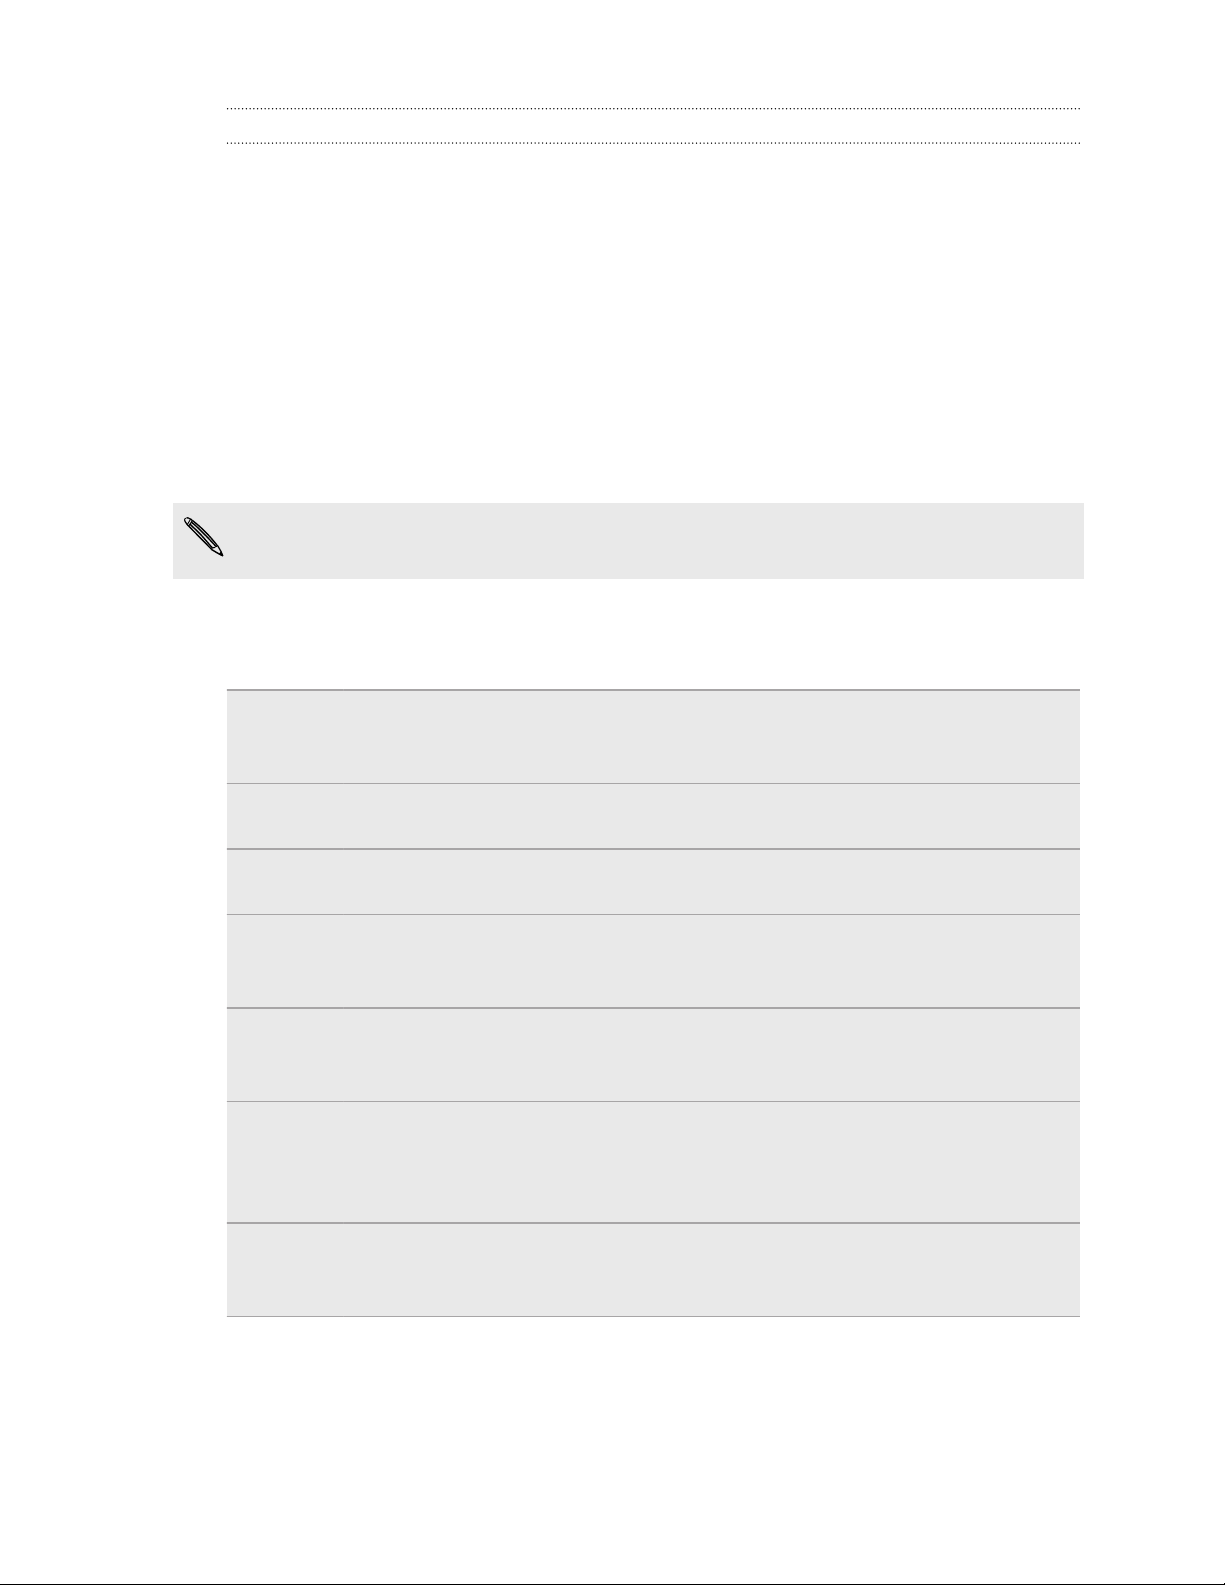
When you get a new notification, you can open the Notifications panel to see the
message, reminder or event notification. The Notifications panel also lets you switch
between recently-opened apps as quickly as possible.
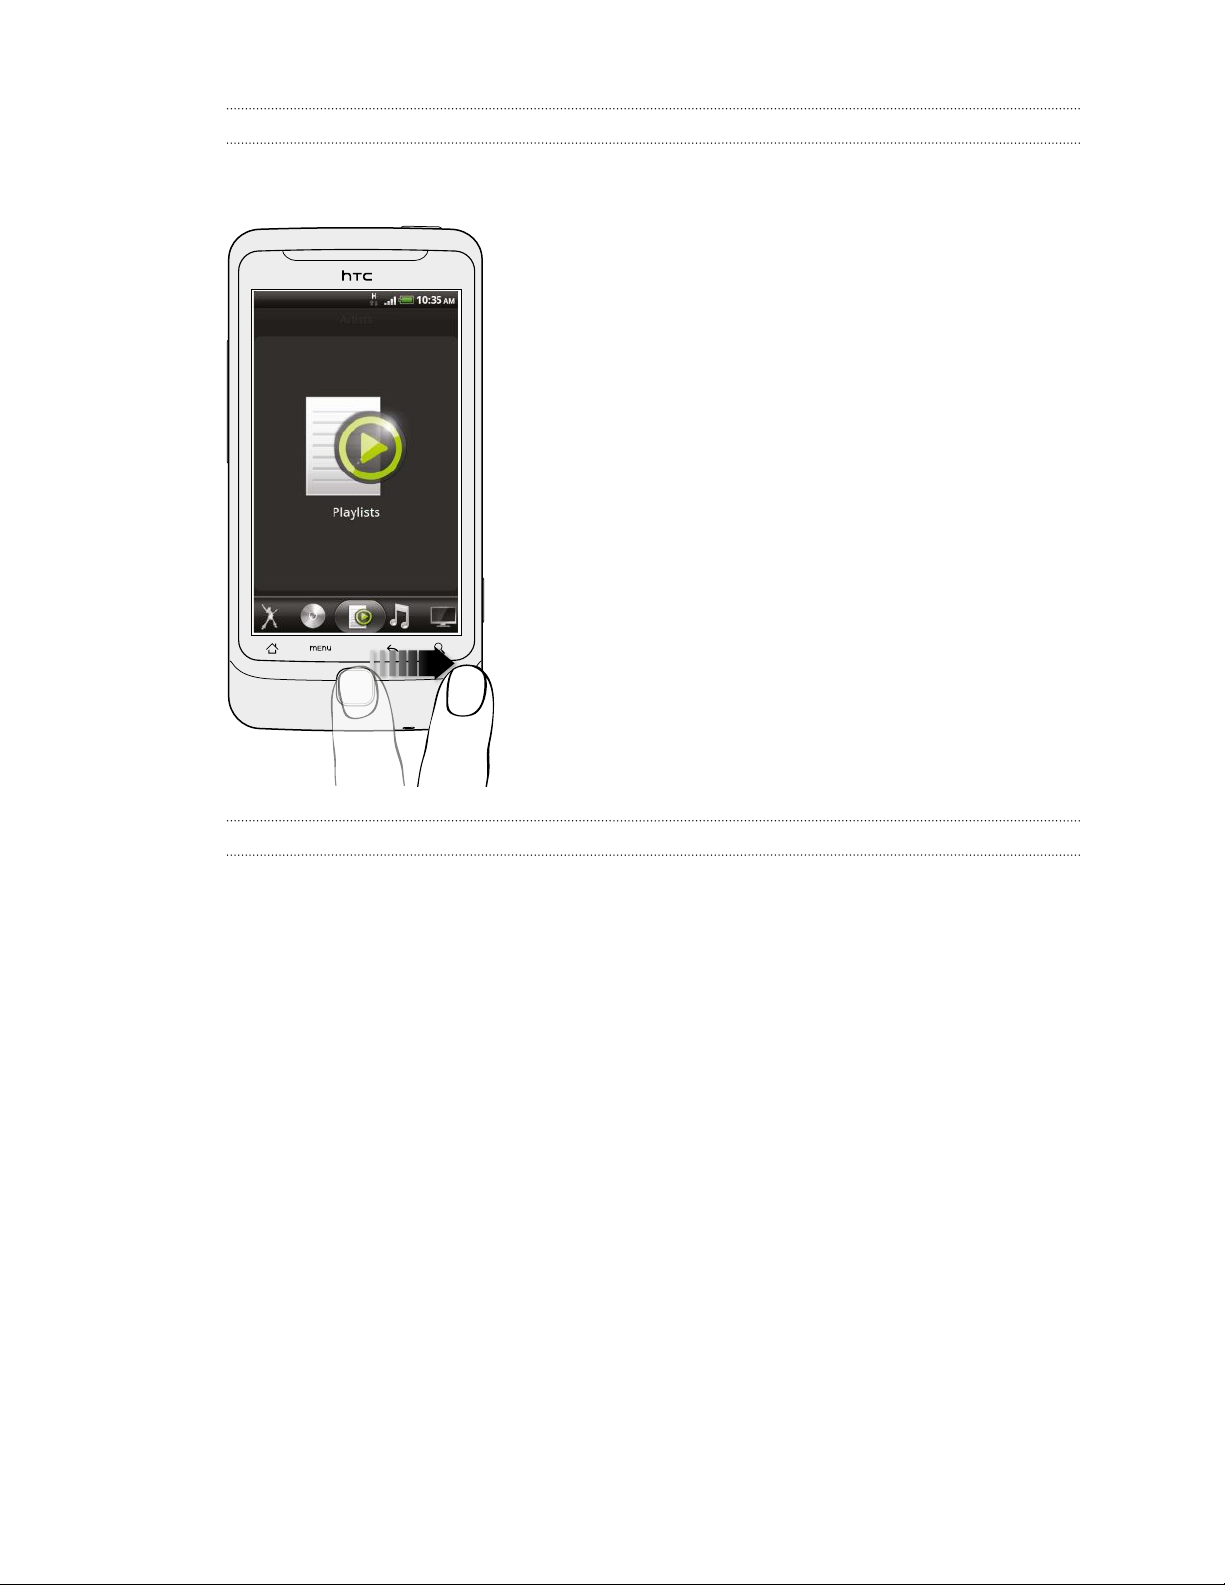
To open the Notifications panel, press and hold the status bar, then slide your finger
downward.
If you have several notifications, you can scroll down the
screen to see them all.
You can also open the Notifications panel on the Home screen by pressing MENU
and then tapping Notifications.
Page 23
23 Getting started
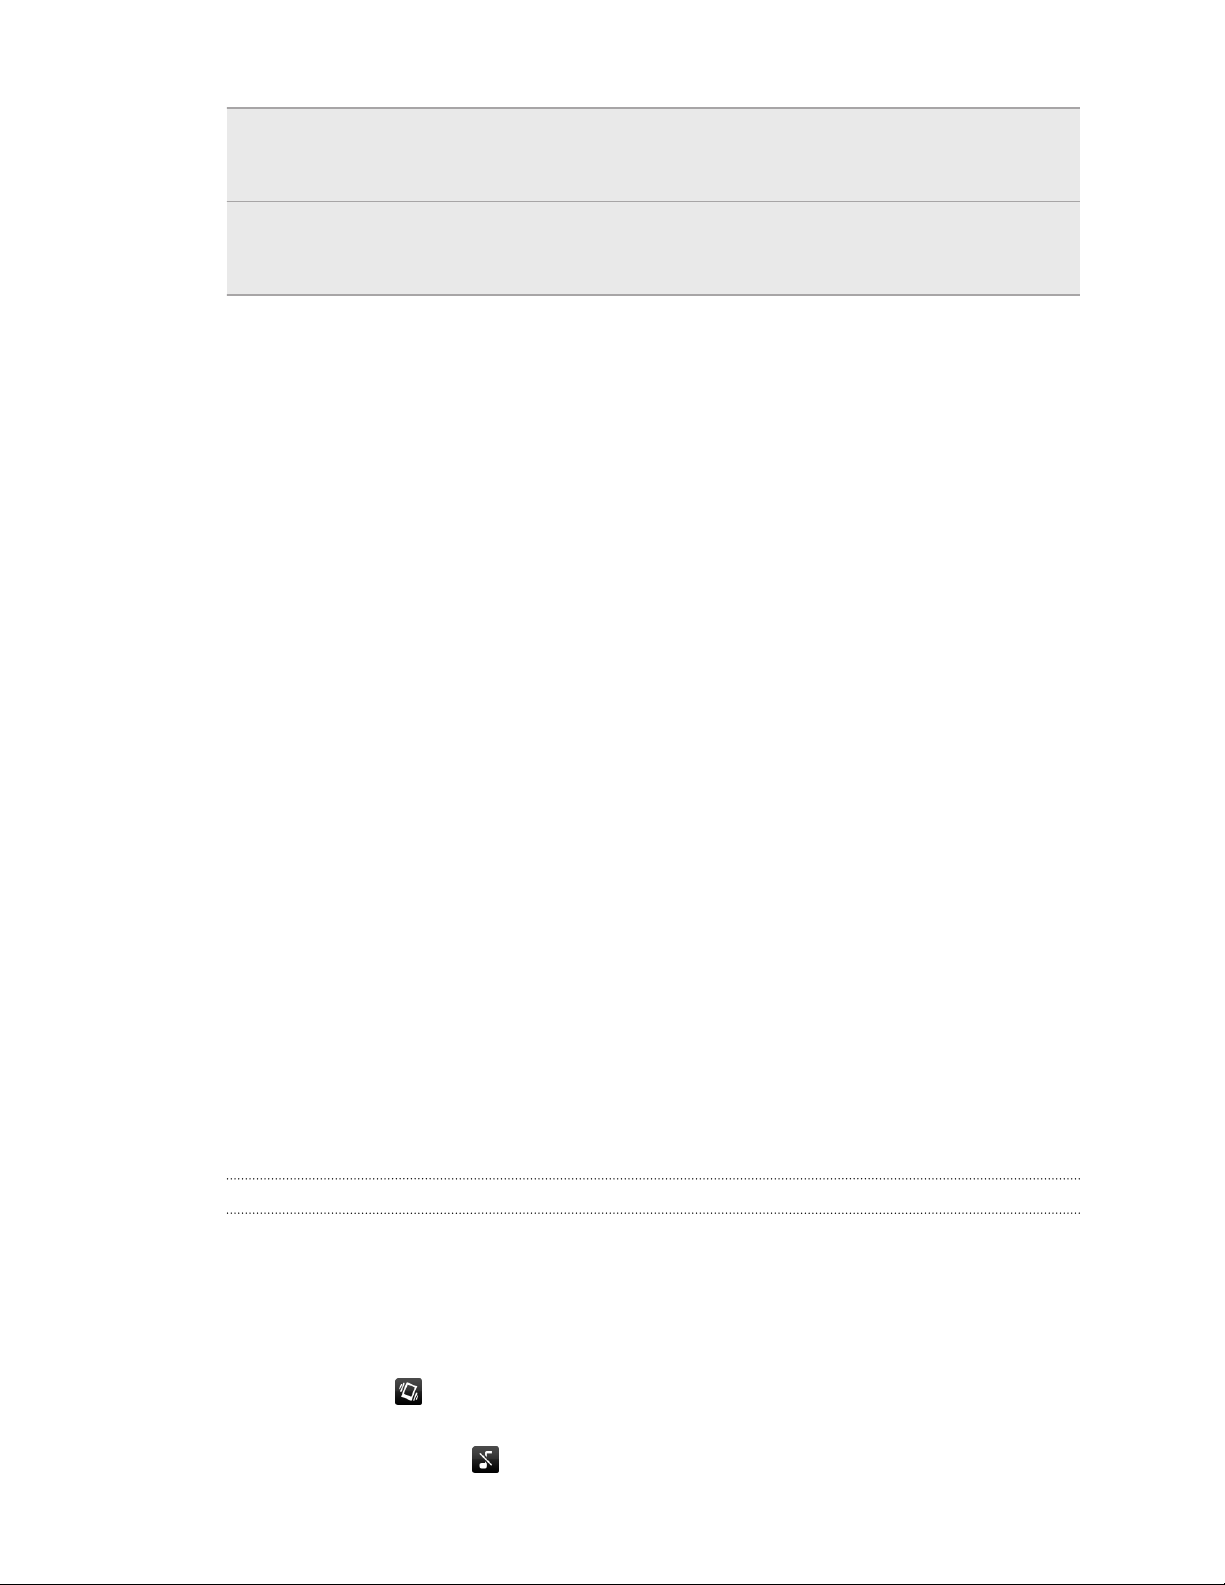
Switching between recently opened apps
On the Notifications panel, you can easily access up to eight apps you just recently
opened.
1. Press and hold the status bar, then slide your finger downward to open the
Notifications panel.
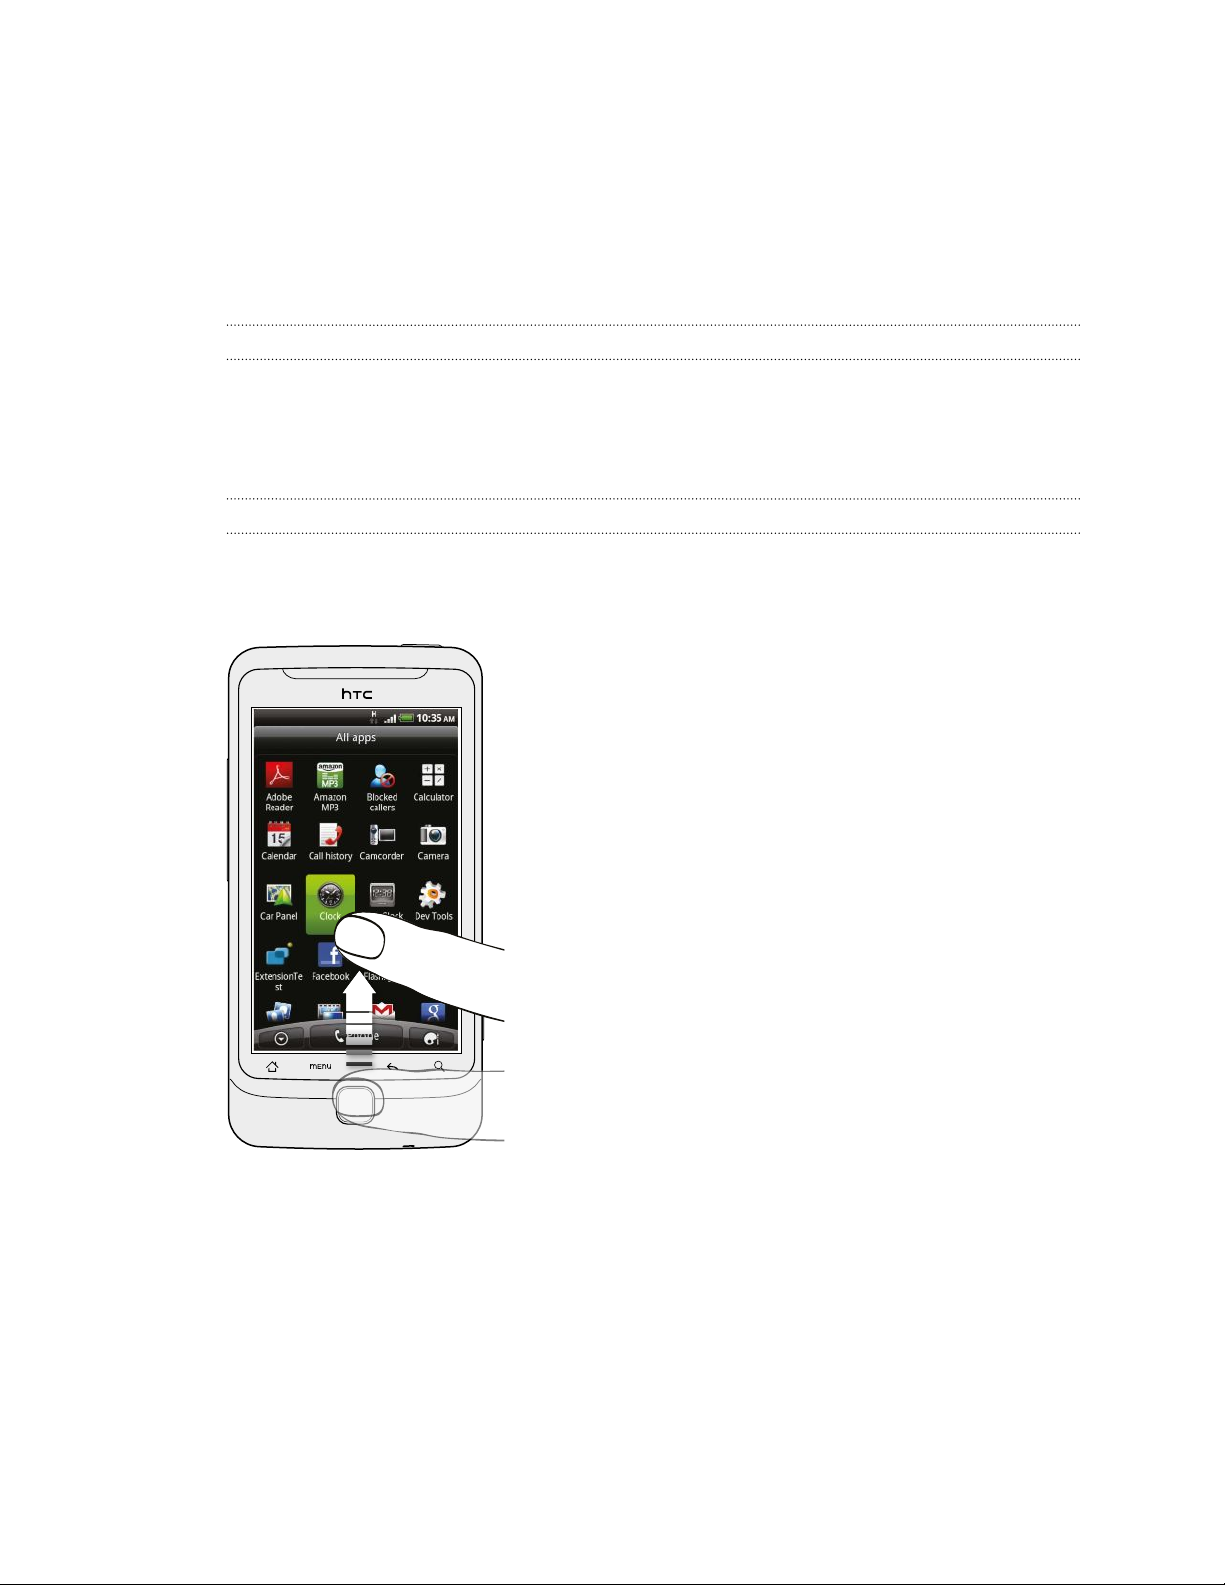
2. In the Recent apps section, slide your finger left or right to see recently-opened
apps.
3. Tap an app to open it.
Press and hold HOME to view recently used apps.
Closing the Notifications panel
Press and hold the bottom bar of the Notifications panel, then slide your finger up the
screen. Or just press BACK.
Connecting your phone to a computer
Whenever you connect your phone to a computer using the USB cable, the Connect
to PC screen opens and lets you choose the type of USB connection.
Select one of the following choices, and then tap Done:
Charge only Select this option if you only want to charge the battery while your
phone is connected to your computer.
HTC Sync Select this option to synchronize contacts, calendar, and other
information between your computer and your phone.
Disk drive This mode is available only when there’s a microSD card on your
phone. Select this mode when you want to copy files between your
phone’s storage card and your computer.
When Disk drive mode is enabled while your phone is connected to
the computer, you will not be able to use apps on your phone to
access the storage card.
Page 24
24 Getting started
USB
tethering
Internet
pass-through
When you do not have Internet connection on your computer, you
can select this mode to share your phone’s mobile data connection
with your computer.
If you don’t have a data plan for your phone or you don’t have access
to a Wi-Fi network, you can select this mode to share your
computer’s Internet connection with your phone.
Copying files to or from the storage card
You can copy your music, photos, and other files to your phone’s storage card.
1. Connect your phone to your computer using the supplied USB cable.
2. On your phone’s Connect to PC screen, tap Disk drive, and then tap Done. On
your computer, the connected phone is recognized as a removable disk.
3. Navigate to the removable disk and open it.
4. Do one of the following:
§ Copy the files from the computer to the phone’s storage card’s root folder.
§ Copy the files from the phone’s storage card to a folder in your computer.
5. After copying the files, unmount the removable disk (that is, the connected
phone) as required by your computer’s operating system to safely remove your
phone.
6. Do one of the following:
§ Disconnect the phone from the computer.
§ If you want to keep the phone connected to the computer but want the
phone to be able to access the storage card, open the Notifications panel,
tap Disk drive, select an option except Disk drive, and then tap Done.
Adjusting the volume
Adjusting the ringer volume changes the volume level of the phone ringtone, while
adjusting the media volume changes the volume level of sound notifications and
music or video playback.
Adjusting the ringer volume
§ Press the VOLUME UP or VOLUME DOWN button on the left panel of the phone
to adjust the ringer volume to your desired level. The Ringer volume window
appears on the screen to display the volume levels.
§ While in the lowest ringer volume level (Silent mode), press VOLUME DOWN
once to set your phone to Vibrate mode. The phone vibrates and the vibrate
mode icon appears in the status bar.
§ While in Vibrate mode, press VOLUME UP once to switch to silent mode. The
speaker mute icon displays in the status bar.
Page 25
25 Getting started
Adjusting the media volume
When playing music or watching video, press the VOLUME UP or VOLUME DOWN
button on the left panel of the phone to adjust the volume. The Media volume window
appears on the screen to display the volume level.
Adjusting the earpiece volume for phone calls
During a phone call, press the VOLUME UP or VOLUME DOWN button.
Adjusting the volume via settings
1. From the Home screen, press MENU, and then tap Settings > Sound > Volume.
2. Drag the volume sliders to the left or right to adjust the volume levels of your
phone’s ringtone, media playback, alarms, and notifications. Your phone briefly
plays a sample tone with the volume being adjusted as you drag a slider.
3. If you want the same volume for your ringtone and notifications, select Use
incoming call volume for notifications.
4. When you’re done, tap OK.
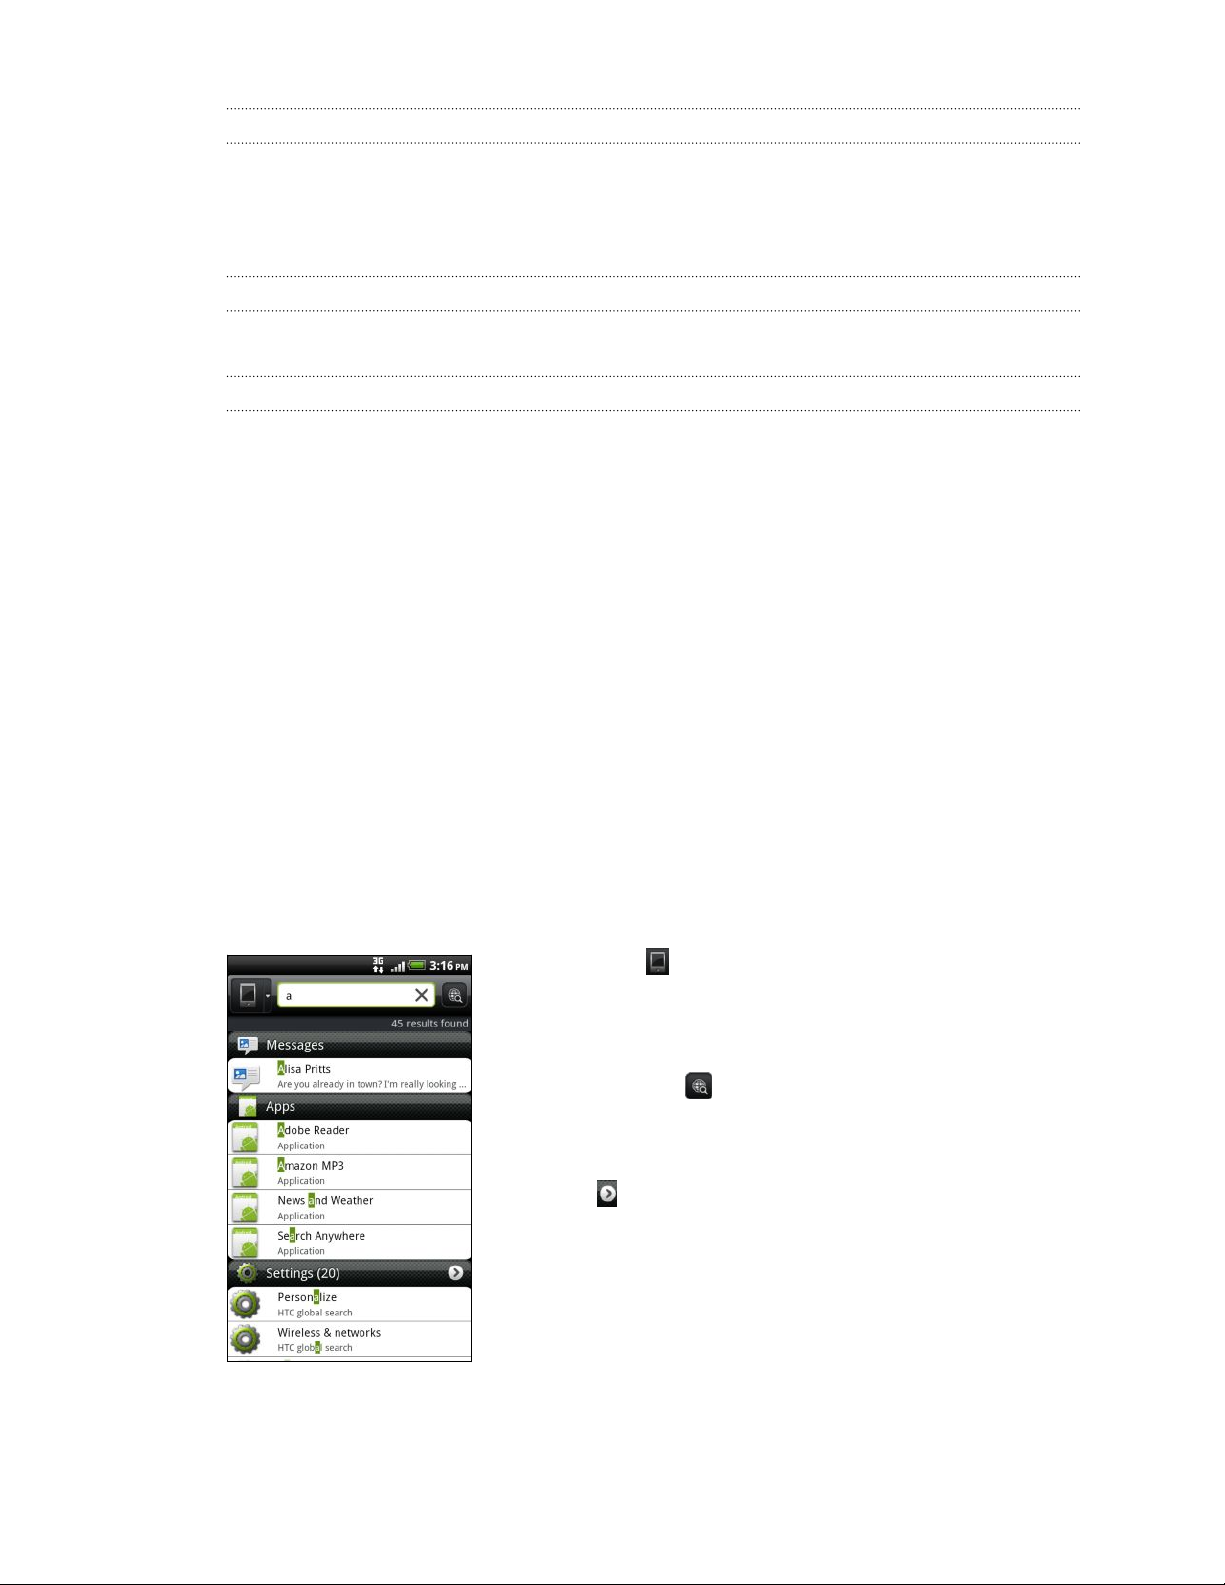
Searching your phone and the web
Find all types of information on your phone and the Web. Search Anywhere sifts
through different files, information, and apps on your phone. You can also choose to
search the Web using your favorite web search service.
Simply press SEARCH from the Home screen. Then enter the first few letters of what
you want to search for. Matching items are shown as you type.
§ This icon indicates that your phone will search for
all types of information. Tap it if you want to choose
and search only for one type of item, for example,
Mail.
§ Tap this icon to search the Web for the term you
entered.
§ Tap a result from the list to open the relevant app.
§ Tap to see more results for a category.
Page 26
26 Getting started
Setting your phone’s search options
You can choose the default Web search service to use, or change the type and order
of items searched on your phone.
1. From the Home screen, press SEARCH.
2. When the search box appears, press MENU, and then tap Settings.
3. Tap any of the following:
Web search
engine
Select areas to
search
Choose the web search service you want to use.
Choose the types of items or apps to include in the search.
You can also press and hold , and arrange items
according to search priority.
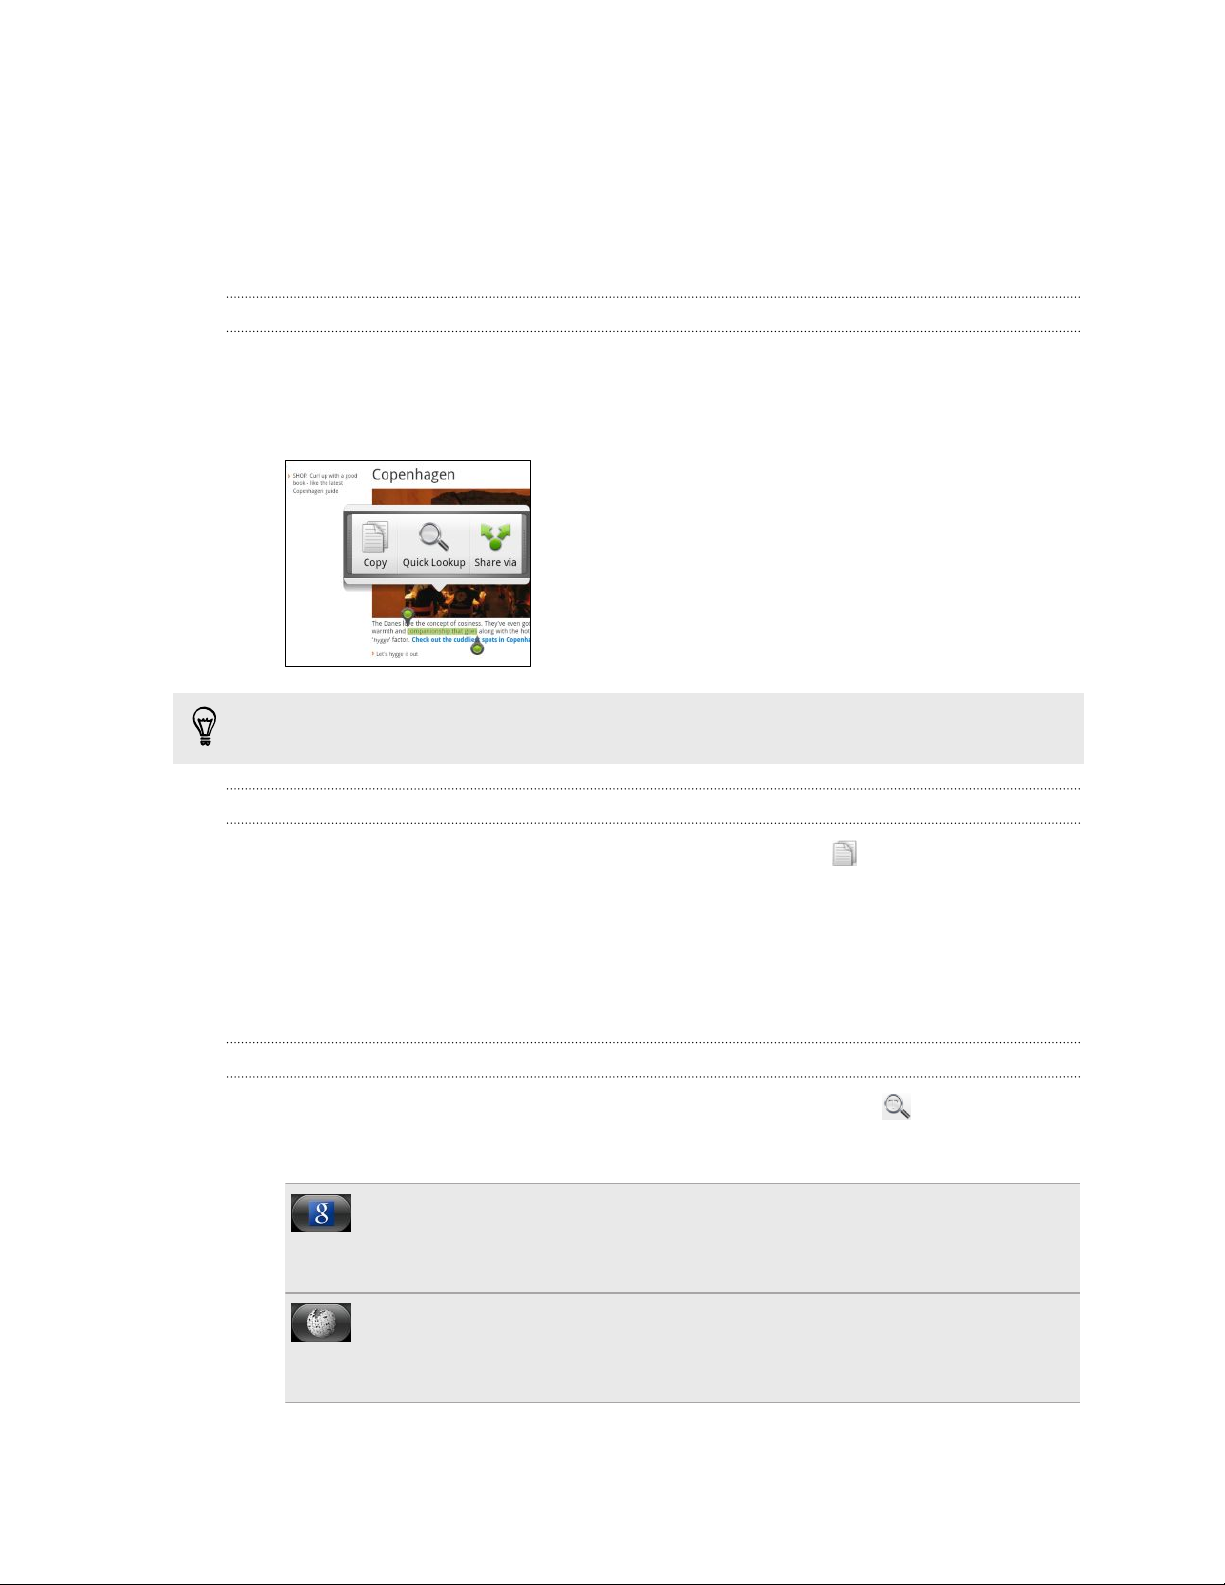
Quickly looking up information on the Web
Quick Lookup helps you learn about something right on the spot. When you enter a
new word or phrase, you can easily look it up in popular websites or search services
such as Google Search and Wikipedia®.
1. From the Home screen, tap > Quick Lookup.
2. If the onscreen keyboard is open, press BACK to close it first so you’ll see the
bottom tabs.
3. Slide across the tabs to pick where you want to look up information. Then in the
search box, enter what you want to search for.
4. Tap .
After looking up the item on one tab, you can slide to other tabs to automatically
look up the same term there.
Translating words to other languages
1. From the Home screen, tap > Quick Lookup.
2. If the onscreen keyboard is open, press BACK to close it first so you’ll see the
bottom tabs.
3. Slide to the Google Translate tab.
4. Under From language, choose the original language, then enter the word or
phrase you want to translate.
5. Under To language, choose from the languages available for translation.
6. Tap Translate.
Page 27
27 Getting started
Copying text, looking up information, and sharing
In apps such as the web browser and Mail, you can select text and choose what you
want to do with it.
Selecting text
1. Press and hold on a word.
2. Drag the start and end markers to highlight the surrounding text you want to
select.
To select text in a link, press and hold the link, and then tap Copy link URL.
Copying and pasting text
1. After you have selected the text you want to copy, tap .
The selected text is then copied to the clipboard.
2. In a text entry field (for example while composing a message), press and hold at
the point where you want to paste the text.
3. Tap Paste.
Searching text
1. After you have selected the text you want to search for, tap .
2. Tap one of the following tabs:
Google Search
Look for related information using Google Search, based on the text
that you selected.
Wikipedia
Look for related information on Wikipedia, based on the text that you
selected.
Page 28

28 Getting started
Pasting text in a new message or social network status update
1. After you have selected the text you want to share, tap .
2. Choose whether to paste the selected text in a new text, multimedia, or email
message or in your status update on a social network such as Twitter.
Page 29

29 Personalizing
Personalizing
Making your phone truly yours
Make your phone look and sound just the way you want it. Personalize your phone
with a different wallpaper, skin, ringtone, and notification sound for events such as
incoming text, email, and calendar reminders.
Tap the Personalize button
right on the Home screen to get started.
Personalizing your phone with scenes
Your phone becomes multiple phones in one when you use scenes. Scenes are
personalized Home screen layouts that you can quickly apply to your phone. By
switching between scenes, you instantly turn your phone into your perfect weekend
phone, travel phone, work phone, or pure play phone.
Everytime you add or modify something on the Home screen, your phone
automatically saves your changes to the current scene selected.
Using a preset scene
Your phone features preset scenes, each preconfigured with a different wallpaper and
collection of widgets that reflect different moments in your life. You can choose a
scene that is suitable for work, play, travel, or your social life.
1. From the Home screen, tap > Scene.
2. Slide your finger on the screen from right to left to select the scene you want.
3. Tap Apply.
Creating a new scene
You’ll start with an empty Home screen when you create a new scene.
1. From the Home screen, tap > Scene.
2. Press MENU, and then tap New.
3. Enter a new scene name, then tap Done.
4. Personalize the scene by adding widgets and other elements, arranging the
Home screen layout, and changing the skin or wallpaper. All of your changes will
be automatically saved to this scene.
Page 30
30 Personalizing
Renaming a scene
1. From the Home screen, tap > Scene.
2. Slide your finger on the screen from right to left to select the scene you want to
rename.
3. Press and hold a scene thumbnail, then tap Rename.
4. Enter a new scene name, then tap Done.
Deleting scenes
1. From the Home screen, tap > Scene.
2. Press MENU, and then tap Delete.
3. Slide your finger on the screen from right to left to browse through scenes, then
tap one or more scenes you want to delete.
4. Tap Delete.
Changing your wallpaper
Personalizing your wallpaper with your favorite photo is a quick and easy way to
change the feel of your phone and give it a fresh look. Browse the collection of
wallpapers included in your phone or choose from photos that you have taken with
the camera. You can also change your Home screen to use an animated wallpaper.
1. From the Home screen, tap
2. Tap one of the following:
HTC wallpapers Choose a preset wallpaper, then tap Preview > Apply.
Live wallpapers Choose from preset animated wallpapers. Tap Preview to
view the animation, and then tap Apply.
Gallery Choose a photo that you have taken using the camera or
copied to your storage card. Crop the photo and then tap
Save.
> Wallpaper.
Applying a new skin
Personalize beyond the Home screen by applying a new skin. Skins are set to give a
different look and feel to most onscreen buttons, application screens, option menus,
and other items.
1. From the Home screen, tap
2. Slide your finger on the screen from right to left to select the skin you want.
3. Tap Apply.
> Skin.
Page 31

31 Personalizing
Personalizing your Home screen with widgets
Widgets put at-a-glance important information and media content up front on your
Home screen. Some widgets are already added to your Home screen for your
convenience. You can add more from the available selections of widgets, or download
more widgets.
Adding a widget to your Home screen
1. Go to a part of the Home screen where there’s space to add a new widget.
2. Tap > Widget.
3. Select a widget that you want.
4. Most HTC widgets are available in a variety of designs and sizes to suit your
needs. Slide your finger on the screen from right to left to view the different
styles, and then tap Select to choose one.
You can also add widgets that allow you to quickly switch on or off certain settings of
your phone, such as Wi-Fi, Mobile Network, and Bluetooth. Scroll down the widgets
list, tap Settings, and then tap the widget that you want.
Changing the settings of a widget
You can modify basic settings of some widgets (for example, the People and Mail
widgets) from the Home screen.
1. Press and hold a widget on the Home screen. The phone vibrates and you’ll see
a colored box around the widget. Don’t lift your finger just yet.
2. Drag the widget to the Edit button (if it’s enabled).
The relevant screen where you can change some settings for this widget then
opens.
3. Customize the widget settings.
Page 32

32 Personalizing
Adding icons and other shortcuts on your Home screen
Place app icons on your Home screen to open apps quicker. You can also add
shortcuts to settings and specific information such as a bookmarked webpage,
someone’s phone number, a music playlist, route directions, and many other items, to
your Home screen.
The shortcuts available depend on the apps that are installed on your phone.
1.
Go to a part of the Home screen where there’s space to add a new icon or
shortcut.
2. Tap and then tap App to add an app icon, or Shortcut to add a shortcut to
a setting or information.
To add an app icon on the Home screen, you can also press HOME, tap , and
then press and hold an app icon. Without lifting your finger, drag the icon to an
empty area on the Home screen, and then release it.
Adding folders on your Home screen
Use folders to group related apps and other shortcuts to keep your Home screen tidy
and organized. You can also add information folders that show up-to-date information
such as Bluetooth received files, your Facebook phonebook, and more.
Creating a new folder and adding items to it
1. Go to a part of the Home screen where there’s space to add a new folder.
2. Tap > Folder.
3. Tap New Folder.
4. Press and hold an app icon or a shortcut that you want to move to the folder.
The phone then vibrates. Don’t lift your finger just yet.
5. Drag the app icon or shortcut and drop it on top of the folder.
Simply tap the folder to open it so you can access the
apps and shortcuts inside the folder.
Renaming a folder
1. Tap the folder to open it.
2. Press and hold the folder window’s title bar.
3. Enter a new folder name and then tap OK.
Page 33

33 Personalizing
Rearranging or removing widgets and icons on your Home screen
Rearrange the widgets and icons on your Home screen to make room for adding more
items. You can also remove widgets and icons that you don’t frequently use.
Moving a widget or icon
1. Press and hold the widget or icon you want to move. The phone vibrates and
you’ll see a colored box around the widget or icon. Don’t lift your finger just yet.
2. Drag the widget or icon to a new location on the screen. You can pause at the
left or right edge of the screen to drag the widget or icon onto another Home
screen panel.
3. When the widget or icon is where you want it, lift your finger.
Removing a widget or icon
1. Press and hold the widget or icon you want to remove. The phone vibrates and
you'll see a colored box around the widget or icon. Don’t lift your finger just yet.
2. Drag the widget or icon to the Remove button.
3. When the widget or icon also turns red, lift your finger.
Page 34

34 Personalizing
Rearranging the Home screen
Reorder your Home screen panels in any way that fits how you use them. For
example, move the panels with frequently-used widgets, shortcuts, and folders closer
to the main Home screen.
The center thumbnail in Leap view is always the main Home screen.
1. Pinch the Home screen to show the Leap view.
2. Press and hold the thumbnail of the home screen you want to move. The phone
then vibrates. Don’t lift your finger just yet.
3. Drag the thumbnail to its new position, and then lift your finger.
Using sound sets
Sound sets are different collections of ringtone, notification, and alarm sounds you
can use to personalize the way your phone alerts you. Using sound sets, you can
instantly change from subtle ringtone and notification sounds while you’re in the
office into something fun when you’re out with friends.
Choosing a preset sound set
1. From the Home screen, tap > Sound set.
2. On the Sound sets screen, tap a sound set name.
3. You can tap to listen to the different sounds for that sound set.
4. Tap Apply.
Page 35

35 Personalizing
Customizing a sound set
You can customize a sound set by applying your personal choice of ringtone,
notification sounds, and alarms that may be from your phone’s preset selection or
your storage card (except for notification sounds).
Be sure to choose the sound set you want before changing the ringtone,
notification sounds, and alarm since your phone automatically saves your changes
to the current sound set selected.
Creating a sound set
1. From the Home screen, tap > Sound set.
2. On the Sound sets screen, tap New sound set.
3. Enter a new sound set name, and then tap Done.
The newly created sound set is then added to your phone’s list of sound sets. You can
assign different tones to the sound set to your preference.
Deleting sound sets
1. From the Home screen, tap > Sound set.
2. Press MENU, and then tap Delete.
3. Tap one or more sound sets you want to delete.
4. Tap Delete.
Changing your ringtones and alarms
Change your ringtones, notification sounds, and alarms to suit your mood or lifestyle.
Your changes are saved in the sound set that is currently loaded, overwriting its
settings.
Changing the ringtone
1. From the Home screen, tap > Ringtone.
2. Scroll through the available ringtones and tap the ringtone you want to use. The
ringtone briefly plays when selected.
3. If the audio file is on your storage card, tap New ringtone, select the item you
want to import to the Ringtones list, then tap OK.
4. Tap Apply.
Changing notification sounds
1. From the Home screen, tap > Notification sound.
2. Choose the type of notification that you want to change.
Page 36

36 Personalizing
3. Tap the sound you want to use. A sample tone briefly plays when selected.
4. Tap Apply.
Changing the alarm sound
1. From the Home screen, tap > Alarm.
2. Scroll through the available tones and tap the item you want to use. A sample
tone briefly plays when selected.
3. If the audio file is on your storage card, tap New alarm, select the item you want
to import to the Alarms list, then tap OK.
4. Tap Apply.
Rearranging or hiding application tabs
You can rearrange the tabs at the bottom of some of your phone’s apps to prioritize
the types of information you frequently use or remove the tabs you don’t really need.
1. Open an app that has the usual tabs at the bottom of its screen (for example,
the contact details screen in People).
2. Press and hold a tab. When the screen changes and shows you an empty area,
lift your finger.
3. Do any of the following:
Move a tab Press and hold the tab you want to move, and then drag it to its
new position.
Remove a tab Press and hold a tab you want to hide, then drag it up. When
you see a colored box, lift your finger. Note that you can't hide
the tab if it’s grayed out.
4. When you’re done, press BACK.
Adding a tab back
1. Open the app from which you previously removed some tabs.
2. Press and hold a tab. When the screen changes and shows you some of your
hidden tabs, lift your finger.
Page 37

37 Personalizing
3. Press and hold the tab you want to show, then drag it down to where you want
to position it again.
4. When you’re done, press BACK.
Page 38

38 Phone calls
Phone calls
Different ways of making calls
Besides making calls from the phone dialer screen on your phone, you can tap a
number in a text message or email to call, or press a single number on the phone
dialer to quickly call a contact.
Most SIM cards come with a PIN (personal identification number) set by your
mobile operator. If you’re asked for a PIN, enter it and then tap OK.
If you enter the wrong PIN three times, your SIM card is blocked. No problem. Just
contact your mobile operator and ask for the PUK (PIN Unblocking Key).
Making a call on the Phone dialer screen
You can either dial a number directly, or use the Smart dial feature to search and call a
stored contact or a number from your call history.
1. On the Home screen, tap Phone.
2. Begin entering the first few digits of a phone number or characters of a contact
name on the phone keypad. The Phone dialer screen then displays a list of
matching numbers and names.
If you enter a wrong digit or letter, tap to delete it. To erase the entire entry,
press and hold .
3. Tap to close the phone keypad and to see if there are more matching
numbers or contacts.
4. To browse through the filtered list, flick through the list or slide your finger up or
down the list slowly.
5. To place a call, do one of the following:
§ Tap a phone number or contact from the list.
§ After entering a complete number, tap Call.
§ To call a different phone number associated with the contact, you can tap
at the right side of the contact name. On the contact details screen, tap
the number you want to call.
While dialing or when the call is in progress, the status bar displays the call in progress
icon .
Page 39

39 Phone calls
What is Smart dial?
The phone dialer’s Smart dial feature makes it quick and easy for you to place a call.
Simply enter the phone number or first few letters of the person’s name you want to
call. Smart dial automatically searches and filters your contacts list (stored on your
phone, SIM card, and online accounts such as Google Account and Exchange
ActiveSync®) and the phone numbers from the call history.
Using Speed dial
Use Speed dial to call a phone number with a single tap. For example, if you assign a
contact’s number to the number 2 key, you can just press and hold 2 to dial the
number.
The number 1 key is generally reserved for your voicemail. Press and hold this key
to call voicemail and retrieve your voicemail messages.
Assigning a speed dial key
1. On the Home screen, tap Phone.
2. Press MENU, and then tap Speed dial > Add new.
3. Enter the name of the contact you want to add. When the name comes up in
the list, tap the name.
4. On the Speed dial screen, choose the phone number of the contact to use, and a
speed dial key to assign.
5. Tap Save.
Calling a phone number in a text message
1. Tap the phone number within the message.
2. Edit the phone number if needed, and then tap Call.
To call the message sender, press and hold the sender or the received message,
and then tap Call on the options menu.
Page 40

40 Phone calls
Calling a phone number in an email
Want to call a number that's in an email? No problem. Your phone recognizes a
number as a phone number if the number has a minimum of 5 digits and at least one
of the following:
§ Numbers starting with a plus sign (+). For example, +1-987-654-32 1 or
+198765432 1.
§ Numbers starting with an area or country code enclosed in a parenthesis. For
example, (02)98765432 1 or (02)987-654-32 1.
§ Numbers separated by dashes. For example, (02)-987-654-32 1 or 0987-654-32
1.
1. In the email body, tap the phone number. A selection menu then pops up and
the phone number is highlighted.
2. Tap Call.
3. When the phone dialer screen opens with the phone number already entered,
tap Call.
Making an emergency call
You can make emergency calls from your phone even if you don’t have a SIM card
installed or your SIM card has been blocked.
1. On the Home screen, tap Phone.
2. Dial the international emergency number for your locale (for example, 000), and
then tap Call.
Additional emergency numbers may be included in your SIM card. Contact your
mobile operator for details.
If you’ve enabled but forgotten your lock screen password, lock pattern, and/or the
SIM lock, you can still make emergency calls by tapping Emergency call on the screen.
Page 41

41 Phone calls
Receiving calls
When you receive a phone call from a contact, the Incoming call screen appears.
You can use your phone’s polite ringer and pocket mode features for receiving
calls. To find out how, see Changing sound settings on page 149.
Answering a call
To answer a call:
§ Tap Answer.
§ If the display is off when you get a call, the Lock screen appears. Drag the bar
that shows the caller name or number downward.
Rejecting a call
Do one of the following:
§ Tap Decline.
§ If the display is off when you get a call, drag the bar upward on the Lock screen,
or press MENU and then tap Decline.
§ To reject the call and send a text message, press MENU, and then tap Send
message.
You can also Press the POWER button twice to reject a call.
Changing the text message to send out for rejected calls
1. On the Phone dialer screen, press MENU.
2. Tap Settings > Edit default message.
3. Enter the new message, and then tap OK.
Page 42

42 Phone calls
Muting the ringing sound without rejecting the call
Do one of the following:
§ Press the VOLUME DOWN or VOLUME UP button.
§ Press the POWER button.
§ Place the phone face down on a level surface.
If the phone is already facing down, the phone will still ring when there are
subsequent incoming calls.
HTC Caller ID
Everytime you make a call or your friend gives you a ring, you get to see your friend’s
latest status update from social networks like Facebook or Twitter right on the call
screen. You also won’t miss people’s birthdays. You’ll see a birthday reminder, if your
friend’s birthday will occur sometime within the next seven days.
What can I do during a call?
When a call is in progress, use the buttons onscreen to mute or unmute the
microphone or to turn the speakerphone on or off. You can also press MENU and
choose whether to add a call, place the call on hold, mute the microphone, and more.
Putting a call on hold
1. Press MENU and then tap Hold to put the call on hold. When you put a call on
hold, the status bar displays the hold call icon .
2. Press MENU, and then tap Unhold to resume the call.
Page 43

43 Phone calls
Switching between calls
If you’re already on a call and accept another call, you can choose to switch between
the two calls.
1. When you receive another call, tap Answer to accept the second call and put
the first call on hold.
2. To switch between the calls, tap the person you want to talk to on the screen.
3. To end the current call and return to the other call, tap End call.
Turning the speakerphone on during a call
To decrease potential damage to your hearing, do not hold your phone against
your ear when the speakerphone is on.
Do one of the following:
§ Flip your phone over during a call (be sure that Flip for speaker is selected in
HOME > MENU > Settings > Sound).
§ On the call screen, tap .
The speakerphone icon appears in the status bar when the speakerphone is on.
To turn the speakerphone off, just flip the phone over again, facing it up. Or tap
again.
Muting the microphone during a call
On the call screen, tap to toggle between turning the microphone on or off.
When the microphone is turned off, the mute icon appears in the status bar.
Ending a call
Do one of the following to end the call:
§ On the call screen, tap End call.
If the phone display is off, press POWER to turn on the screen so you can tap End
call.
§ Slide open the Notifications panel, then tap .
§ If you are using the provided wired headset, press the button to end the call.
If the phone number of the person who called is not in your contacts list, you can
choose to save the number to your contacts list after you hang up.
Page 44

44 Phone calls
Setting up a conference call
Conference calling with your friends, family, or co-workers is easy. Make the first call
(or accept a call), and then simply dial each subsequent call to add it to the
conference.
Make sure your SIM card is enabled with conference calling service. Contact your
mobile operator for details.
1. Make a call to the first conference call participant.
2. When connected, press MENU, tap Add call, and then dial the number of the
second participant. The first participant is put on hold when you dial the second
participant.
3. When connected to the second participant, tap merge .
4. To add another participant to the conference call, tap on the conference call
screen, and then dial the number of the contact you want to invite to the
conference call.
5. When connected, tap
6. To talk to a person in the conference call in private, tap and then select
Private call on the options menu.
7. When finished, tap End call.
to add the participant to the conference call.
Using Call history
Use Call History to check missed calls, your dialed numbers, and received calls.
Checking a missed call
You will see the missed call icon in the status bar when you miss a call.
1. Slide open the Notifications panel to check who the caller is.
2. To return the call, tap the missed call notification. Then tap the caller’s name or
number on the Call History screen.
Checking calls in the Call History
From the Home screen, tap > Call History.
You can also tap
On the Call History screen, you can:
§ Tap a name or number in the list to call.
§ Press and hold a name or number in the list to display the options menu.
on the phone dialer screen.
Page 45

45 Phone calls
§ Tap to check only the call history of a particular contact.
§ Press MENU, then tap View to display just a particular type of calls such as
missed calls or outgoing calls.
Adding a new phone number to your contacts from Call History
1. On the Call History screen, press and hold the phone number that you want to
save, and then tap Save to People.
2. Choose whether to create a new contact or save the number to an existing
contact on your phone.
3. Do any of the following:
§ When creating a new contact, enter the contact name, contact type, and
other information in the blank contact record that appears. The phone
number is automatically added to the mobile field in the phone section. To
store it as another type of number, for example a home number, tap the
Mobile button.
§ When saving the number to an existing contact, tap a contact stored on
your phone, and then select the number type.
4. Tap Save.
Clearing the Call History list
On the Call History screen, do one of the following:
Remove one name or
number
Clear the entire list Press MENU, and then tap Delete all.
Press and hold the name or number, and then tap
Delete from call history.
Blocking callers
When you block a phone number or a contact from calling you, the blocked calls go
directly to your voicemail.
Blocking one or more contacts from calling
1. From the Home screen, tap > Blocked Callers.
2. On the Blocked callers tab, tap Add caller.
3. Select the contacts you want to block, then tap Save.
Checking your blocked call history
1. From the Home screen, tap > Blocked Callers.
2. Slide to the Blocked call history tab.
3. Press and hold a name or number in the list to display the options menu where
you can select to check the call history details and more.
Page 46

46 Phone calls
Unblocking callers
1. From the Home screen, tap > Blocked Callers.
2. On the Blocked callers tab, press MENU, then tap Remove callers.
3. Select one or more contacts, then tap Delete.
4. When prompted, tap OK.
Call services
Your phone can directly link to the mobile phone network, and enable you to access
and change the settings of various phone services for your phone. Call services may
include call forwarding, call waiting, voicemail, and more. Contact your mobile
operator to find out about the availability of call services for your phone.
To open call services, press MENU from the Home screen, and then tap Settings >
Call.
Fixed Dialing
Numbers
Voicemail service Shows the current voicemail service being used.
Voicemail settings Specify another voicemail number aside from the voice mail
Clear voicemail
notification
Phone settings Edit the call reject message, choose whether to open the
Cell broadcast Enable or disable receipt of cell broadcast messages from your
Cell broadcast
settings
Call forwarding Select how you want your phone to handle busy, unanswered,
Call barring
settings
Restrict outgoing calls to a fixed set of numbers. To enable this
feature, you must know your SIM card’s PIN2 code.
number on your SIM card.
If you have a notification of a new voicemail, you can clear the
notification with this option.
message editor when you reject a call with a message, and
choose whether to allow automatic saving of an unknown
contact number when a call with that number ends.
service provider.
Configure channels and language for cell broadcast messages.
and unreachable calls. You can also set the call forwarding
option for all incoming calls.
Choose whether to block various categories of incoming and
outgoing call.
Additional call
settings
Enable or disable operator services such as caller ID and call
waiting.
Page 47

47 Phone calls
Turning Airplane mode on or off
In many countries, you are required by law to turn off the phone while on board an
aircraft. A way to turn off the phone function is to switch your phone to Airplane
mode.
When you enable Airplane mode, all wireless radios on your phone are turned off,
including the call function, data services, Bluetooth, and Wi-Fi. When you disable
Airplane mode, the call function is turned back on and the previous state of Bluetooth
and Wi-Fi is restored.
To turn Airplane mode on or off, press and hold POWER, and then tap Airplane mode.
When enabled, the Airplane mode icon is displayed in the status bar.
Page 48

48 People
People
Ways of getting contacts into your phone
There are several ways you can add contacts to your phone. You can sync your phone
with contacts from your Google Account, computer, Facebook, and more.
Gmail Google contacts are imported to your phone after you sign in to
your Google Account. You can also create more Google contacts
right from your phone.
Facebook Log in to your Facebook account through Facebook for HTC
Sense to import your Facebook friends' contact information.
Phone contacts You can choose to create and store contacts in your phone
memory or transfer existing ones from your old phone.
SIM card Copy all your SIM contacts to your phone.
Microsoft
Exchange
ActiveSync
Contacts on your
computer
®
Your phone syncs your work contacts from the Microsoft
Exchange ActiveSync Server in your workplace.
Use HTC Sync™ to sync your phone with your computer's
Microsoft Outlook®, Outlook Express or Windows® Contacts.
Transferring contacts from your old phone
Easily transfer contacts from your old phone to your new HTC phone through
Bluetooth. Depending on your old phone’s model, you may also transfer other types
of data such as calendar events and text messages to your new phone.
1. From the Home screen, tap > Transfer Data.
2. Tap Next to begin.
3. Choose your old phone's name and model.
4. On your old phone, turn Bluetooth on and set it to discoverable mode.
5. On your new HTC phone, tap Next to continue. Your new phone automatically
turns Bluetooth on and searches for Bluetooth devices.
6. From the device list, choose your old phone and then tap Next. Your new HTC
phone then tries to pair with your old phone. You’ll see a security passkey on
the screen.
7. On your old phone, enter this passkey or simply confirm it.
Page 49

49 People
8. Select the Contacts check box (and other supported types of data you want to
import), and then tap Next.
9. When your new HTC phone finishes importing data, tap Done.
About the People app
With the People app, easily manage your communications with your contacts via
phone, messaging, and email. You can also link your contacts to their social network
accounts like Facebook, Twitter, and Flickr™ to see their updates and events from
these accounts all in one place.
And that's not all. If you have the same contacts from different sources, People lets
you merge their contact information so you won't have duplicated entries in your
contacts list.
1. From the Home screen, tap
2. Tap one of the following tabs:
All
Gives you access to all contacts on your phone, online accounts, and
more.
Groups
Lets you assign contacts to groups so you can easily send an SMS,
MMS, or email message to a whole group.
Online directories
View your friends list in your social network accounts. You can also
search for contacts in your Exchange ActiveSync account to copy to
your phone.
Call History
Lists all your dialed numbers and received and missed calls.
> People.
Page 50

50 People
Your contacts list
The People app's All tab shows all contacts on your phone and from the online
accounts you're logged in to.
Your contacts list also display the contacts stored on your SIM card (usually marked
with the SIM card icon ).
From the All tab, you can:
§ Open or update your contact information.
§ Create, edit, or find contacts.
§ View instant status updates when you’ve linked
the contact to his or her social network account.
§ Tap the contact's name to open the contact
details screen for that contact.
§ See a notification icon when the contact has
sent you a new message, tried to call you,
updated his or her social network accounts, or
when it's the contact's birthday.
§ Check out who's online in Google Talk. Online
status icons are displayed if you’re signed in to
Google Talk on your phone. For example,
means the contact is available to chat.
Setting up My contact card
My contact card provides a convenient way to store your personal contact
information so that you can easily send it to other people.
1. From the Home screen, tap > People.
2. On the All tab, tap Me.
If you are logged in to your Facebook account through Facebook for HTC Sense,
instead of Me, you'll see the name you use in Facebook. Tap your name, press
MENU, then tap Edit.
3. Enter your name and contact details.
4. Tap Save.
Page 51

51 People
Importing contacts from your SIM card
You can copy all your SIM contacts to your phone. Import them as phone contacts,
Google contacts, or Exchange ActiveSync contacts, if you have set up the relevant
accounts.
1. From the Home screen, tap > People.
2. On the All tab, press MENU, and then tap Import/Export > Import from SIM
card.
3. If you have Google or Exchange ActiveSync accounts set up on your phone, tap
the type for the imported contacts.
4. Do one of the following:
§ Tap one or more SIM contacts you want to import.
§ To import all contacts, press MENU, and then tap Select all.
5. Tap Save.
Adding a new contact
1. From the Home screen, tap > People.
2. On the All tab, tap Add contact.
3. Select the Contact type, for example Google or Microsoft Exchange ActiveSync.
This determines which account the contact will sync with.
Some fields may not be supported when you’re adding contacts to your SIM card.
4. Tap the Name field, enter the first and last name of the contact, then tap OK.
5. Enter the contact information in the fields provided. Press BACK if you want to
close the onscreen keyboard first and easily scroll through the other fields.
6. Tap Save.
Importing a contact from an Exchange ActiveSync account
You can search for a work contact from your Exchange ActiveSync account, and then
copy it to your phone.
You need to have your Exchange ActiveSync account set up on your phone first.
1. From the Home screen, tap
2. On the Online directories tab, tap Company directory.
3. Enter the name, and then tap .
> People.
Page 52

52 People
4. In the list, tap the name of the contact you want to copy to your phone.
5. Tap Save to People.
Merging contact information
If you have the same contacts on your phone, Google Account, and social network
accounts such as Facebook and Twitter, your phone will try to combine them
automatically or let you decide which contacts to combine. Combining the same
contacts avoids duplicated entries in your contacts list.
Accepting matched contacts suggestions
When your phone finds contacts that can be merged, you’ll see a link icon in the
notifications area of the status bar.
1. Slide down the Notifications panel, and then tap Matched contacts suggestion.
Your phone displays all suggested contacts that you can merge.
2. To merge, tap .
3. Tap OK.
If you don’t want to merge any of your contacts, tap Dismiss all.
Viewing a list of all your linked contacts
1. From the Home screen, tap > People.
2. On the All tab, press MENU, and then tap More > Linked contacts. The All linked
contacts screen then opens where you can see the account types and
information merged.
3. You can choose to break the link of an account type or relink.
4. When you're done, tap OK.
Page 53

53 People
Manually merging contact information
1. From the Home screen, tap > People.
2. On the All tab, tap the name of the contact (not the icon or photo) you want to
link.
3. On the upper-right corner of the screen, tap or (if there are suggested
links).
4. On the screen, you can:
§ Under Suggest links, tap to link the contact to an account.
§ Under Add contact, tap one of the options to link to another contact.
5. Tap Done.
Breaking the link
1. From the Home screen, tap > People.
2. On the All tab, tap the name of the contact (not the icon or photo) whose link
you want to break.
3. On the upper-right corner of the screen, tap .
4. Under the Linked contacts section, tap beside an account type to break
the link.
5. Tap Done.
Filtering your contacts list
You can choose to only display contacts from particular account types (for example,
Google contacts or Facebook contacts).
1. From the Home screen, tap > People.
2. On the All tab, press MENU, then tap View.
3. Select the types of contacts you want to show in your contacts list.
You can also choose how you want to display and sort your contacts.
4. Tap Done.
Searching for a contact
1. From the Home screen, tap > People.
2. Press SEARCH, then enter the first few letters of a contact’s first or last name,
email, or company name. You can also type in the first few digits of your
contact’s phone number. Matching contacts are displayed.
3. Tap the contact to open his or her contact details screen.
Page 54

54 People
Backing up your contacts to the storage card
1. From the Home screen, tap > People.
2. Press MENU, and then tap Import/Export > Export to SD card.
3. Select an account or type of contacts to export, then tap OK.
Importing contacts from the storage card
You can only import contacts that were exported to the storage card using the
Export to SD card feature on the phone.
1. From the Home screen, tap > People.
2. Press MENU, and then tap Import/Export > Import from SD card.
3. If you have Google or Exchange ActiveSync accounts set up on your phone, tap
the type for the imported contacts.
Contact information and conversations
When you tap a contact on the People screen, the contact details screen opens,
showing you the information you've stored or linked for that contact.
The contact details screen has the following tabs:
Details
Shows the information you have stored for the contact. Get in touch with the
contact directly by tapping any of the displayed methods. For example, if the
contact has a stored work phone number, tap Call work.
Messages
Shows your exchanged SMS messages with the contact. You can reply to the
contact’s message directly from this tab.
Mail
Shows all the email you have received from the contact. Tap an email to view
it.
Updates and events
Shows the contact’s updates and events from social network accounts you've
linked like Facebook, Twitter, and Flickr.
Gallery
Shows the linked contact’s Facebook and Flickr albums and photos.
Call History
Lists all your incoming, outgoing, and missed calls to and from the contact.
Page 55

55 People
Editing a contact’s information
1. From the Home screen, tap > People.
2. On the All tab, press and hold the contact, and then tap Edit contact.
You cannot edit the contact information of a Facebook friend.
3. Enter the new information for the contact.
4. Tap Save.
Deleting contacts
1. From the Home screen, tap > People.
2. On the All tab, press MENU, and then tap Delete.
3. Select the contacts you want to remove, and then tap Delete.
4. When prompted, tap OK.
Sending contact information as a vCard
Easily share your own contact information or any contact on your phone.
1. From the Home screen, tap > People.
2. On the All tab, do the following:
To send Do this
Someone's contact
information
Your contact
information
3. Choose how you want to send it.
Press and hold the name of the contact (not the icon or
photo) whose contact information you want to send, and
then tap Send contact as vCard.
1. Tap [Your name] My contact card.
2. Press MENU, and then tap Send my contact info.
4. Select the type of information you want to send, and then tap Send.
Page 56

56 People
Contact groups
Assign contacts to groups so you can easily send a message or email to a whole
group. You can also sync groups on your phone with the groups in your Google
account, accessible via your computer’s web browser. We’ve also added the Frequent
group as a special group type that automatically stores the contacts you dial or get
calls from the most.
Creating a group
1. From the Home screen, tap > People.
2. On the Group tab, tap Add group.
3. Enter a name for the group, and then tap Add contact to group.
4. Select the contacts you want to add to the group, and then tap Save
If your contacts list is long, you can use the search bar to search for contacts
quickly, or press BACK to hide the onscreen keyboard and scroll through the list.
5. Tap to select a photo for the group.
6. Tap Save.
Editing a contact group
1. From the Home screen, tap > People.
2. On the Group tab, press and hold the group, and then tap Edit group.
3. You can:
§ Tap the group name to change the name. You can only change the name
for groups that you have created.
§ Tap the icon to the left of the group name to change or remove the group
photo.
§ To add contacts to the group, tap Add contact to group, select the
contacts you want to add, and then tap Save.
§ To remove a contact from the group, tap at the right side of the contact
name.
4. Tap Save.
Page 57

57 People
Sending a message or email to a group
You will be charged by your mobile provider for each message sent. For example, if
you send a message to a group of five people, you will be charged for five
messages.
1. From the Home screen, tap > People.
2. On the Group tab, tap the group you want to send a message or email to.
3. Go to the Group action tab, and then do one of the following:
§ Tap Send group message to send a message to the group.
§ Tap Send group mail to send an email to the group.
Rearranging your contact groups
1. From the Home screen, tap > People.
2. On the Groups tab, press MENU, and then tap Rearrange.
3. Press and hold
highlighted, drag it to its new position.
4. Tap Save.
at the end of the group you want to move. When the row is
Rearranging the members of a contact group
1. From the Home screen, tap > People.
2. On the Groups tab, tap the group to see its members.
3. Press MENU, and then tap Rearrange.
4. Press and hold at the end of the contact’s name you want to move. When
the row is highlighted, drag it to its new position.
5. Tap Save.
Deleting a group
You can only delete groups that you have created.
1. From the Home screen, tap > People.
2. On the Groups tab, press and hold the group you want to delete, and then tap
Delete group.
Page 58

58 People
Adding People widgets
Stay in touch with different circles of friends or colleagues in your life. Using the
People widget, you can instantly place a call, send a message, view details of a
favorite contact, and even check Facebook and Twitter updates. You can add several
People widgets on the Home screen, with a different group of contacts on each
widget.
1. From the Home screen, tap > Widget > People.
2. Choose the widget style, and then tap Select.
3. Select the group you want to add as a widget.
4. Drag the widget to a blank space on a Home screen. When the widget is where
you want it, lift your finger.
5. Repeat the above steps to add another People widget.
Setting the default communication method
1. On the Home screen, go to the People widget.
2. Tap a contact on the widget.
3. On the Select default action screen, tap the communication method you want
for the contact.
Changing the default communication method
1. On the Home screen, go to the People widget.
2. Tap the name of a contact on the widget to open the person’s contact card.
3. Press MENU, and then tap More > Set widget action.
4. On the Select default action screen, tap the communication method you want
for the contact.
Page 59

59 People
Getting in touch with a contact
1. On the Home screen, go to the People widget.
2. Tap a contact (photo not the name) on the widget. The default communication
method will be performed.
Tap the name of the contact to open the contact details screen for that contact.
Page 60

Tab
FN
FN
XT9
60 Keyboard
Keyboard
Using the slideout keyboard
Open the slideout keyboard and type faster and more convenient with your fingers.
The slideout keyboard also comes with special keys that let you quickly access menus,
search your phone, or launch an app.
1. Hold the phone sideways, with the front panel buttons to your right.
2. Push the screen panel up with your thumbs to reveal the slideout keyboard.
When the slideout keyboard is opened, the display stays in landscape and you will
not be able to use the onscreen keyboard.
3. Open an app or select a field that requires text or numbers.
4. Press the letter keys to enter text.
Page 61

61 Keyboard
Using the slideout keyboard keys
Press these keys to enter uppercase letters, numbers, special characters, symbols, and
more:
Shift key
§ Press once and then press a letter key to type that letter in
uppercase.
§ Press twice to lock the key and type a series of uppercase letters.
The cursor changes when you lock the Shift key: .
To unlock the Shift key, press it once again.
Function key
§ Press once to type the character shown beside the letter or
punctuation keys. For example, if you need to type the dollar sign
($), press the Function key, and then press the D key (FN, D).
§ Press twice to lock the key and type a series of numbers and
characters. The cursor changes when you lock the Function key:
.
To unlock the Function key, press it once again.
Symbol key
Press to open the symbols panel and insert a symbol or special
character to your text. If Symbol and Search share a single key press
and then press to open the symbols panel.
Menu key
Instead of pressing the MENU button, press this key to open the
available menu options for the current screen.
Search key
or
Instead of pressing the SEARCH button, press this key to open the
search box and type what you want to search. Press the Enter key to
begin the search.
Quick keys
These keys let you quickly open apps and other items such as
bookmarks.
Assigning an app or shortcut to a Quick key
The slideout keyboard comes with Quick keys which you can assign to quickly open
an app or an item when pressed.
1. Open the slideout keyboard.
2. Press and hold Shortcut key #1 to assign the first Quick key . Press and hold
Shortcut key #2 to assign the second Quick key .
Page 62

62 Keyboard
3. Tap OK
4. Tap Apps or Shortcuts, and then tap the app or shortcut that you want to
assign to the selected Quick key. If you are assigning a shortcut to an item on
your phone, follow the screen instructions to proceed.
5. Press the Quick key you’ve assigned. The app or item opens.
Assigning a keyboard shortcut
While on the Home screen, you can quickly open an app or an item by pressing a
keyboard shortcut.
1. While on the Home screen, open the slideout keyboard.
2. Press and hold any of the keyboard keys (A ~ Z).
3. Tap OK.
4. Tap Apps or Shortcuts, and then tap the app or shortcut that you want to
assign to the selected key. If you are assigning a shortcut to an item on your
phone, follow the screen instructions to proceed.
5. While on the Home screen, press and hold the key you’ve assigned a keyboard
shortcut to. The app or item opens.
Using the onscreen keyboard
When you start an app or select a field that requires text or numbers, the onscreen
keyboard becomes available.
The onscreen keyboard is only available when the slideout keyboard is closed.
After entering your text, you can tap or press BACK to close the onscreen
keyboard.
Selecting a keyboard layout
You can choose from three different keyboard layouts to suit your typing style.
1. From the Home screen, press MENU, and then tap Settings > Language &
keyboard > Touch Input.
2. Tap Keyboard types, and then select the keyboard layout that you want to use.
Choose one from the following:
QWERTY This layout is similar to a desktop computer keyboard. This is
the default keyboard layout.
Phone Keypad This layout resembles the traditional mobile phone keypad.
Compact
QWERTY
This layout features two letters on each key. The key size is
slightly bigger than on the full QWERTY layout.
Page 63

63 Keyboard
Entering text
Use the following keys while entering text using the onscreen keyboard:
Press and hold keys with gray characters at the top to enter numbers, symbols,
or accented letters. The gray character displayed on the key is the character that
will be inserted when you press and hold that key. Some keys have multiple
characters or accents associated with them.
Shift key. Tap to enter an uppercase letter. Tap twice to turn on caps lock.
Tap to switch to the numeric and symbol keyboard.
Enter key. Tap to create a new line.
Backspace key. Tap to delete the previous character.
Language key. The key you see depends on the keyboard language you are
currently using. Tap to switch to another keyboard language. You can also
access onscreen keyboard settings.
Tap to toggle between Multitap and XT9 predictive modes when using the
Compact QWERTY or Phone keypad layout.
Tap to hide the onscreen keyboard.
Enabling multiple keyboard languages
If there are multiple keyboard languages available on your phone, you can choose
which languages to enable in the onscreen keyboard so that you can switch to these
languages and use them to enter text.
1. From the Home screen, press MENU, and then tap Settings > Language &
keyboard > Touch Input.
2. Tap International keyboard.
3. Choose the languages you want.
Available languages depend on the region where you purchased the phone.
Changing to the landscape onscreen keyboard
When entering text, you can choose to use the landscape orientation of the onscreen
keyboard. Turn your phone sideways to use a larger keyboard for easy typing.
§ Select the Auto-rotate screen check box in HOME > MENU > Settings > Display to
allow the screen orientation to automatically change.
§ The landscape orientation keyboard is not supported in all apps.
Page 64

64 Keyboard
Entering words with predictive text
The onscreen keyboard has predictive text to help you type quickly and accurately.
Predictive text input is enabled by default, and word suggestions are displayed as you
type.
To enter a word in predictive mode, do any of the following:
§ If you see the word you want highlighted in green or orange, just tap the space
bar to insert the word into your text.
§ If you see the word you want shown in the suggestions before you have finished
typing the entire word, tap the word to insert it into your text.
§ If an arrow is shown to the right of the suggestion list, tap the arrow to see more
suggestions.
Setting a second language for the keyboard
Aside from the keyboard language you are currently using, you can set the predictive
text to be bilingual. As you type, you’ll get word suggestions in two languages that
you’ve selected.
1. From the Home screen, press MENU, and then tap Settings > Language &
keyboard > Touch Input.
2. Tap Bilingual prediction, and then choose the language you want.
Adding a word to the predictive text dictionary
Your phone comes with a list of words that it references for predictive text
suggestions. While entering text using the QWERTY keyboard layout, if you tap any
word on the suggestion list, it is automatically added to the predictive text dictionary
if it was not in the dictionary already.
You can also add a word to the list manually.
1. From the Home screen, press MENU, and then tap Settings > Language &
keyboard > Touch Input.
2. Tap Personal dictionary > Edit personal dictionary > Add new
3. Enter the word to add, and then tap OK.
Page 65

65 Keyboard
Editing or deleting a word in the predictive text dictionary
You can edit or remove words that you previously added to the predictive text
dictionary.
1. From the Home screen, press MENU, and then tap Settings > Language &
keyboard > Touch Input.
2. Tap Personal dictionary > Edit personal dictionary
§ To edit a word, tap the word itself.
§ To delete words from the dictionary, press MENU and tap Delete. Then
choose the words to remove and tap OK.
Backing up your personal dictionary to your storage card
You can use your storage card to back up the new words you’ve added to the
predictive text dictionary.
1. From the Home screen, press MENU, and then tap Settings > Language &
keyboard > Touch Input.
2. Tap Personal dictionary > Sync personal dictionary > Copy to storage card
3. When prompted, tap OK.
Importing your personal dictionary from your storage card
1. From the Home screen, press MENU, and then tap Settings > Language &
keyboard > Touch Input.
2. Tap Personal dictionary > Sync personal dictionary > Restore from storage card
3. When prompted, tap OK.
Entering text by speaking
No time to type? Try speaking the words to enter it in most text fields that let you use
the onscreen keyboard.
§ First make sure to select the language you’ll be using in the Voice input & output
settings.
§ Since your phone uses Google’s speech-recognition service, you need to be
connected to the Internet to enter text by speaking.
1. Press and hold the language key. Your phone cues you to speak.
2. Tell your phone what you want to be typed in.
Page 66

66 Keyboard
Setting the voice input language
1. From the Home screen, press MENU, then tap Settings > Voice input & output >
Voice recognizer settings.
2. Tap Language, then choose the language you want.
Available languages depend on the voice input languages supported by Google.
Editing text
It's easy to cut, copy, and paste text using the keyboard.
Some apps may offer their own way of selecting or copying text.
Selecting text
Highlight the text that you want to copy or cut.
1. Press and hold the text field that contains the text to select until the magnifier
appears.
2. Drag your finger to move the text cursor to a letter within the text that you
want to select.
3. After positioning the text cursor, lift your finger. The text selection menu then
pops up.
4. Do one of the following:
§ Tap Select text. When the word where you’ve placed the text cursor is
highlighted, drag the start and end markers to select the text you want.
§ Tap Select all to select everything in the text field.
Page 67

67 Keyboard
Copying and pasting text
1. After you have selected the text you want to copy, tap Copy or Cut. The
selected text is then copied to the clipboard.
2. Press and hold a text field in the same or other app until the magnifier appears.
3. Drag your finger to move the text cursor to where you want to paste the text.
4. After positioning the text cursor, lift your finger. The text selection menu then
pops up.
5. Tap Paste.
Adjusting input settings
Open the Touch Input settings by doing one of the following:
§ On the onscreen keyboard, tap the language key (for example, tap if you’re
currently using the English onscreen keyboard). Then on the International
keyboard options menu, tap Settings.
§ From the Home screen, press MENU, and then tap Settings > Language &
keyboard > Touch Input.
Hardware keyboard
settings
Keyboard types Select the keyboard layout to use. You can choose from
International
keyboard
Bilingual prediction Select a secondary keyboard language to use.
Text input § Turn on or off predictive text, spell correction, and word
Tutorial Learn how to use the onscreen keyboard with this interactive
Personal dictionary Add, edit or remove words in the predictive text dictionary.
§ Set the default language keyboard layout (if available).
§ Turn predictive text on or off.
QWERTY, Phone Keypad, or Compact QWERTY.
Add or remove languages from the onscreen keyboard
language list.
completion.
§ Enable audible or vibration feedback when typing.
§ Calibrate the touch keyboard accuracy.
tutorial.
Page 68

68 Messages
Messages
Opening Messages
Keep in touch with important people in your life. Use the Messages app to compose
and send text (SMS) and multimedia messages (MMS).
From the Home screen, tap
all your sent and received messages are neatly grouped into conversations, by
contact name or phone number.
You can also view your messages on the Home screen with the Messages widget.
> Messages. The All messages screen opens, where
§ Scroll up or down the list of conversations by
swiping your finger on the screen.
§ Tap a contact name or number to view the exchange
of messages.
Sending a text message (SMS)
1. From the Home screen, tap
2. Tap Compose message.
3. Fill in one or more recipients. You can:
§ Enter the first few letters of a contact name or starting digits of a mobile
number. As you type, matching names with phone numbers from your
stored contacts are displayed. Tap a name or one of the contact’s numbers.
§ Tap , and then select the phone numbers of the contacts to whom you
want to send the message. You can also select contact groups as
recipients. When you have selected all the message recipients, tap OK.
§ Enter the complete phone numbers directly in the To field.
> Messages.
Page 69

69 Messages
4. Tap the box that says Tap to add text, and then enter your message.
§ There is a limit on the number of characters for a single text message (displayed
above the Send button). If you exceed the limit, your text message will be
delivered as one but will be billed as more than one message.
§ Your text message automatically becomes a multimedia message if you enter an
email address as the recipient, add a message subject, attach an item, or compose
a very long message.
5. Tap Send, or press BACK to save the message as a draft.
Sending a multimedia message (MMS)
1. From the Home screen, tap > Messages.
2. Tap Compose message.
3. Fill in one or more recipients. You can:
§ Enter the first few letters of a contact name or starting digits of a mobile
number. As you type, matching names with phone numbers and email
addresses from your stored contacts are displayed. Tap a contact’s number
or email address. Email addresses will be displayed when Show email
address is selected in Recipient list settings.
§ Tap , and then select the phone numbers of the contacts to whom you
want to send the message. You can also select contact groups as
recipients. When you have selected all the message recipients, tap OK.
§ Enter the complete phone numbers or email address directly in the To field.
4. To add a subject line, press MENU and then tap More > Add subject.
5. Tap the box that says Tap to add text, and then enter your message.
Page 70

70 Messages
6. Tap and then choose the type of attachment.
Picture Select Camera to take a photo and attach it, or Gallery
to attach a photo from your storage card.
Video Select Camcorder to capture a video and attach it, or
Videos to attach a video from your storage card.
Audio Select Voice Recorder to make a voice recording and
attach it, or Music & sounds to attach a music file or
voice recording from your storage card.
App
recommendation
Choose an app you’ve installed from Android Market
that you want to share with others. The URL from which
the app can be downloaded will be inserted to your
message.
Location Add your current location (requires GPS to be turned
on), or a location you pick on a map to your message.
Contact (vCard) Select a contact, and then select the information to
attach.
Appointment
Select the calendar event you want to attach.
(vCalendar)
Slideshow Create a slideshow of pictures with text as your MMS
message.
7. To make changes to your attachment, tap or (depending on the type
of file you’ve attached). You can also press MENU, then tap Remove to start
over.
8. Tap Send, or press BACK to save the message as a draft.
Creating a slideshow
In a multimedia message, you can add slides, each containing a photo, video, or audio.
1. In the multimedia message you’re composing, tap > Slideshow.
2. On the Edit slideshow screen, tap Add slide.
3. Tap Slide 1.
4. To compose your slideshow, do any of the following:
Add a picture Tap Insert picture.
Add a video Press MENU, and then tap Add video (you
cannot add both a picture and a video on the
same slide).
Add music or a voice
Press MENU, and then tap Add audio.
recording
Add a caption Tap the box that says Tap to add text.
Add a new slide Tap Add slide.
Page 71

71 Messages
View the next or previous slide Tap or .
Preview your slideshow Press MENU, and then tap Preview.
View more options Press MENU, and then tap More.
5. When finished, tap Done to attach the slideshow to your message.
6. Tap Send, or press BACK to save the message as a draft.
Resuming a draft message
1. On the All messages screen, press MENU, and then tap Drafts.
2. Tap the message and then resume editing it.
3. Tap Send.
Viewing and replying to a message
Depending on your notification settings, the phone plays a ringtone, vibrates, or
displays the message briefly in the status bar when you receive a new message. A
new message icon is also displayed in the status bar.
1. To open and read the message, you can:
§ Press and hold the status bar, and then slide your finger down to open the
Notifications panel. Then tap the new message notification.
§ Open the Messages app to access and read the message.
2. While reading the message, you can:
Reply with a text
message
Reply with a multimedia
message
Tap the box that says Tap to add text, enter your
reply message, and then tap Send.
Tap the box that says Tap to add text, enter your
reply message, tap to choose an attachment
for your message, and then tap Send.
Call or save a phone
number contained in the
message
Tap the phone number. Then choose whether to
dial the number or add it to your contacts.
Page 72

72 Messages
Open a link in the
message
Send to or save an email
address contained in the
message
Forward a message Press and hold the message to open the options
Check message details Press and hold the message to open the options
Tap the link to open it in the web browser.
Tap the email address. Then choose whether to
send an email, send a multimedia message, or save
the email address to your contacts.
menu, and then tap Forward.
menu, and then tap View message details.
Replying to another phone number of the contact
When a contact has multiple phone numbers stored on your phone, you’ll see the
particular phone number used within the message. There’s also a bold letter before
the phone number to indicate the number type (for example, M stands for Mobile).
Keep in mind that your response will be sent to the phone number of the latest
message you’ve received from this contact.
1. On the All messages screen, tap a contact (or phone number) to display the
exchange of messages with that contact.
2. Tap the box that says Tap to add text, then enter your reply message
3. Press MENU and then tap More > Recipient phone number.
4. Select another phone number of this contact, and then tap OK.
Viewing and saving an attachment from a multimedia message
If you are concerned about the size of your data downloads, check the multimedia
message size first before you download it.
When Auto-retrieve in MMS settings is disabled, only the message header is
downloaded. To download the entire message, tap the Download button at the
right side of the message.
§ If there’s a media attachment such as a photo or video in a received message,
tap it to view the content.
§ If the attachment is a contact (vCard), tap it to view the contact information,
then tap Save to add to your contacts.
Page 73

73 Messages
§ If the attachment is an appointment or event (vCalendar), tap it to choose the
calendar where to save it, and then tap Import.
§ To save the attachment to your storage card, press and hold the multimedia
message, and then choose to save the type of attachment from the options
menu.
Push messages
Push messages contain a web link. Often, the link will be to download a file that you
have requested, for example a ringtone.
When you receive a push message, a notification icon
bar.
is displayed in the status
Opening and reading a new push message
1. Press and hold the status bar, and then slide the status bar down to open the
Notifications panel.
2. Tap the new message.
3. Tap Visit website.
Viewing all your push messages
1. From the Home screen, tap > Messages.
2. Press MENU, and then tap Push messages.
Managing message conversations
Protecting a message from deletion
You can lock a message so that it will not be deleted even if you delete the other
messages in the conversation.
1. On the All messages screen, tap a contact (or phone number) to display the
exchange of messages with that contact.
2. Press and hold the message that you want to lock.
3. Tap Lock message on the options menu. A lock icon is displayed at the right
hand side of the message.
Copying a message to your SIM card
1. On the All messages screen, tap a contact (or phone number) to display the
exchange of messages with that contact.
2. Press and hold the message, and then tap Copy to SIM. A SIM card icon is
displayed at the right hand side of the message.
Page 74

74 Messages
Deleting a single message
1. On the All messages screen, tap a contact (or phone number) to display the
exchange of messages with that contact.
2. Press and hold the message that you want to delete.
3. If the message is locked, tap Unlock message on the options menu, and then
press and hold the message to display the options menu again.
4. Tap Delete message on the options menu.
5. When prompted to confirm, tap OK.
Deleting several messages within a conversation
1. On the All messages screen, tap a contact (or phone number) to display the
exchange of messages with that contact.
2. Press MENU and then tap More > Delete.
3. Tap Delete by selection.
You can also tap Delete by phone number if the contact used multiple phone
numbers throughout the conversation and you want to delete the messages sent
from a particular number.
4. Select the messages you want to delete and then tap Delete.
Deleting a conversation
1. Do any of the following:
§ On the All messages screen, press and hold a contact (or phone number)
whose messages you want to delete, and then tap Delete
§ While looking at the exchange of messages in a conversation, press MENU
and then tap More > Delete > Delete thread.
Any locked messages in the conversation thread will not be deleted unless
you select the Delete locked messages check box.
2. When prompted to confirm, tap OK to delete the entire thread.
Deleting several conversations
1. On the All messages screen, press MENU and then tap Delete.
2. Select the conversation threads you want to delete.
3. Tap Delete. Any locked messages will not be deleted.
Page 75

75 Accounts and sync
Accounts and sync
Synchronizing with online accounts
About online accounts
Your phone can sync with various online social networking and email accounts.
These are some of the types of information your phone can sync with your online
accounts:
§ Gmail and Exchange ActiveSync email.
§ Google and Exchange ActiveSync contacts, as well as your friends’ contact
information in Facebook and their Twitter profiles.
§ Calendar events from your primary Google Account, from Exchange
ActiveSync, and from your Facebook account.
§ Status updates and links shared by your friends and yourself on social networks
such as Facebook and Twitter.
§ Flickr and Facebook photo uploads.
You can set up an Exchange ActiveSync account on your phone either in the Mail
app or the Accounts & sync settings.
Synchronizing with a Google Account
Signing in to your Google Account lets you sync Gmail and your Google contacts and
calendars between your phone and the Web. You also need to sign in to a Google
Account to use Google apps such as Google Talk and Android Market.
If you skipped signing in to a Google Account when you first set up your phone,
you may encounter problems when using some Google apps. If these problems
persist, you may need to factory reset your phone and enter your Google Account
details when you set up the phone again.
Adding more Google Accounts
You can add more than one Google Account on your phone. However, subsequent
Google Accounts can only sync contacts, emails, and calendar events. Other Google
services use the first Google Account you added.
1. From the Home screen, press MENU, and then tap Settings > Accounts & sync.
2. Tap Add account > Google.
3. Follow the onscreen instructions to sign in to an account or create a new
account.
Page 76

76 Accounts and sync
Forgot your Google Account password?
You need your Google Account password to sync Gmail, Calendar, and Google
contacts to your phone You also need this password to use Google Talk and
download apps from Android Market. If you have forgotten your Google
Account password, you can try to recover it by going to the Google website.
1. On your phone or computer, open your web browser and go to https://
www.google.com/accounts/ForgotPasswd.
2. Enter the email address or username that you use to sign in to your
Google Account and click Submit.
3. Follow the instructions on the screen to reset your password.
If you don’t have an alternate email address or cannot access the email
account you used to create your Google Account, you can reset your Google
Account after 24 hours by answering the security question for password
recovery.
Adding a social network account
If you skipped setting up your social network account (such as Facebook, Twitter, or
Flickr) when you first turned on and set up your phone, you can still sign in to these
accounts through your phone’s settings.
1. From the Home screen, press MENU, and then tap Settings > Accounts & sync.
2. Tap Add account, and then tap the account type you want to add.
3. Follow the onscreen instructions to enter the account information.
Your social network account is then added to the list on the Accounts & sync screen.
Depending on how you configured the account, the new information may start
synchronizing with your phone.
Synchronizing with your computer
About HTC Sync
You have your new vacation photos on your phone while your business calendar is on
your computer. Why not make these types of files and information available on both
devices?
With HTC Sync, you can:
§ Sync your contacts between your Microsoft Outlook, Outlook Express or
Windows Contacts on your computer and your phone.
§ Sync your calendar events between the Outlook or Windows Calendar on your
computer and your phone.
Page 77

77 Accounts and sync
§ Bring your photos, videos, documents, songs, and playlists to your phone and
enjoy them on the go.
§ Easily import your captured photos and videos from your phone to your
computer.
§ Store the same bookmarks on both your computer and phone's web browsers.
§ Use your computer's Internet connection to download maps and useful add-on
services for your phone's Locations app.
§ Install third-party mobile phone apps (not downloaded from Android Market)
from your computer.
§ You need a storage card inserted into your phone to be able to sync multimedia
files, maps, and documents.
§ The available categories and options depend on the phone you've connected to
your computer.
Installing HTC Sync that came with the microSD card
Copy the HTC Sync installer from the microSD card to your computer and use it to
install.
§ The HTC Sync version in the microSD card that came with your phone can be
installed on a computer running Windows 7, Windows Vista, or Windows XP.
§ HTC Sync requires USB 2.0 on your computer to connect and sync with your
phone.
§ For trouble-free installation, first quit all running programs and temporarily exit
from your anti-virus program before you start installing HTC Sync.
1. Connect your phone to your computer using the supplied USB cable.
2. On your phone’s Connect to PC screen, tap Disk drive, and then tap Done. On
your computer, the connected phone is recognized as a removable disk.
3. Navigate to the removable disk and open it.
4. Copy HTCSync.exe to your computer.
5. After copying, unmount the removable disk (that is, the connected phone) as
required by your computer’s operating system to safely remove your phone.
6. On your computer, double-click HTCSync.exe and follow the onscreen
instructions to install HTC Sync.
After installing HTC Sync, the HTC Sync icon is added to your computer’s system
tray (check the bottom-right side of your computer screen). You can double-click this
icon to open HTC Sync.
Page 78

78 Accounts and sync
Setting up HTC Sync to recognize your phone
1. Connect your phone to your computer using the USB cable that came with your
phone.
2. When your phone prompts you to choose a type of USB connection, tap HTC
Sync, and then tap Done. Wait for HTC Sync to recognize your phone.
3. On the Device setup screen, enter a name for your phone.
4. Click Save. The Device panel then opens.
To change the name of your phone later, click Overview > Device setup.
Getting to know the workspace
On the Device panel, you can set your sync options, see your phone's general
information, check the used and available space on your storage card, and begin
synchronization.
The available categories and options depend on the phone you've connected to
your computer. For example, Locations appears in the Device panel when you have
the Locations app on your phone.
§ Click a category of items to see its sync options on the right side of the Device
panel.
You can also click Overview to see your phone's basic software information and
storage card usage, change the phone name, or install third-party applications
to your phone.
§ Click Sync now to start synchronizing the categories and options you've
selected.
§ The estimated storage usage bar beside the Sync now button shows you the
estimated storage card space that will be used when there are new items to be
synchronized and added to your phone.
Music sync options
Bring the music tracks and songs you play on your computer to your phone. If you
have playlists created in iTunes® or Windows Media® Player, you can sync these too
and enjoy them on the go.
You can sync audio files in these formats: *.aac, *.amr, *.m4a, *.mid, *.midi, *.mp3,
*.wav, *.wma
1. On the Device panel, click Music, and then click the On button. Turning Music
sync on means you want this category included every time you sync your
computer and phone.
2. Select Sync music files from, and then click Add.
Page 79

79 Accounts and sync
3. Choose a folder that contains your audio files, and then click OK.
4. Select Sync music files from iTunes and Windows Media Player if you're using
iTunes or Windows Media Player on your computer, then choose the playlists
you want to sync on your phone.
Gallery sync options
You can automatically sync photos and videos between your phone and computer.
You can sync audio files in these formats:
§ Photos: *.bmp, *.gif, *.jpeg, *.jpg, *.png
§ Videos: *.3gp, *.3g2, *.mp4, *.wmv
1. On the Device panel, click Gallery, and then click the On button. Turning Gallery
sync on means you want this category included every time you sync your
computer and phone.
2. To automatically import your camera shots to your computer during
synchronization, select Copy device Camera Shots to PC. Photos and videos
from your storage card will be saved to the \My Photos\Device Camera Shots
folder on your computer.
3. Select Sync PC photos & videos from, and then click Add.
4. Choose a folder that contains your multimedia files, and then click OK. All
supported image and video files added to this folder will be copied to your
phone's storage card during synchronization.
Calendar sync options
Your phone can sync appointments and events with your calendar in Outlook
(Outlook XP, Outlook 2003 or Outlook 2007) or Windows Calendar.
1. On the Device panel, click Calendar, and then click the On button. Turning
Calendar sync on means you want this category included every time you sync
your computer and phone.
2. Select the application you want to sync calendar events with.
3. Choose from which point you want to start synchronizing your calendar events.
4. In cases when conflicting information is found on both the phone and computer,
choose which information you want to keep.
Only the calendar fields supported on your phone will be synchronized.
Page 80

80 Accounts and sync
People sync options
Sync your phone contacts with your Outlook (Outlook XP, Outlook 2003 or Outlook
2007), Outlook Express, or Windows Contacts.
If you have contacts to sync from your SIM card, you have to import these first to
your phone storage.
1. On the Device panel, click People, and then click the On button. Turning People
sync on means you want this category included every time you sync your
computer and phone.
2. Choose the application you want to sync your contacts with.
3. In cases when conflicting information is found on both the phone and computer,
choose which information you want to keep.
Only the contact fields supported on your phone will be synchronized.
Bookmarks sync options
Sync web browser bookmarks between your phone and computer.
If you are using Google Chrome™ or Firefox® Internet browser and have selected it
to sync with your phone, make sure to close all browser windows before you begin
synchronization.
1. Using your favorite web browser on your computer, create a favorites folder
named HTC bookmarks. Make sure to save your favorite bookmarks in this
folder to be able to sync them with your phone.
2. On HTC Sync's Device panel, click Bookmarks, and then click the On button.
Turning Bookmarks sync on means you want this category included every time
you sync your computer and phone.
3. Choose the web browser that stores the bookmarks to sync with your phone.
When conflicting information is found on both the phone and computer, HTC Sync
keeps the information from your computer.
Page 81

81 Accounts and sync
Documents sync options
You can sync files and documents from your computer to your phone. You can also
sync email attachments that you stored on your phone's storage card to your
computer.
§ To open a document on your phone, you'll need a compatible app. Usually, your
phone can open and view these file types: Microsoft Office 2003 and 2007 Word
(*.doc), Excel (*.xls), and PowerPoint (*.ppt), PDF files (*.pdf), text files (*.txt).
§ To sync email attachments stored on your phone's storage card to your computer,
you must set up an Exchange ActiveSync or POP3/IMAP email account from the
Mail app on your phone.
1. On the Device panel, click Documents, and then click the On button. Turning
Documents sync on means you want this category included every time you sync
your computer and phone.
2. To sync email attachments that you've stored on your phone's storage card,
select Copy all download Mail documents to PC.
3. Select Sync PC documents from, and then click Add.
4. Choose a folder that contains the documents you want to sync on your phone,
and then click OK.
Email attachments from your phone's storage card will be saved to the \My
Documents\Device documents\ folder on your computer. Documents from your
computer will be saved to the \My Documents\Device documents\ folder on your
storage card.
Page 82

82 Accounts and sync
Locations sync options
Before going on a trip to another city or country, you can download the maps you
need using HTC Sync on your computer, then sync them to your phone. You can also
purchase licenses for other useful data such as driving and walking navigation, safety
cameras alerts, and more.
1. On the Device panel, click Locations, and then click the On button. Turning
Locations sync on means you want this category included every time you sync
your computer and phone.
2. Select and download maps and additional map features.
3. After you're done downloading items on your computer, you'll see these items
in the Locations content list. You can then choose whether you want to sync all
maps and licenses or just the items you select.
Downloading maps or purchasing services
You can download maps for free or purchase premium services such as navigation,
safety cameras, and turn-by-turn voice instructions.
1. On the Device panel, click Locations, and then click the On button.
2. Click Get more Maps and Licenses.
3. On the left side of the Navigation store window, click the type of content you
want to download, and then select a country.
4. Under the Additional map features section, you can choose one or more
navigation products you want to download or purchase. When purchasing
navigation products, you also need to consider the license duration for using the
downloaded content.
5. Click Add to Shopping cart .
Checking out products or licenses
1. Click Add to Shopping cart beside Navigation store to view your shopping
cart.
2. Review the items you've selected and the total amount of purchase.
3. Click Check out.
4. Enter your email address and your billing information (if you selected a premium
navigation product).
Page 83

83 Accounts and sync
5. Please take time to review the agreement, and then click I agree to the terms
and agreement to continue.
6. Click Review purchase to see a list of items you've selected, your email address,
and the billing information you've provided.
7. When everything is correct, click Confirm and download. The download
progress of your selected maps will then display in the Device panel.
Synchronizing your phone
Check the estimated usage bar beside the Sync now button for the estimated file size
of new items to sync on your phone.
When there's not enough space left on your storage card, you'll see a warning icon
and you won't be able to sync.
1. After selecting and customizing the categories you want to sync, click Sync
now.
2. After synchronization is complete, click Disconnect.
3. Safely remove your phone as required by your computer's operating system.
The next time you connect your phone to your computer, synchronization
automatically begins based on your sync settings.
Installing an app from your computer to your phone
If you have application files (*.apk) on your computer, you can use HTC Sync to install
them to your phone. We strongly recommend you install only applications that you
trust.
Before you begin, make sure that your phone is set to allow applications from your
computer to be installed to your phone. To do this, press MENU while on the Home
screen, tap Settings > Applications, and then select the Unknown sources check
box.
1. On the Device panel, click Overview.
2. Click Application installer.
3. Browse for the application file on your computer, and then click Open. The
installation process starts on your phone.
4. Check your phone's screen to see if there are additional instructions to
complete the installation.
5. After installation is complete, you can click Disconnect.
6. Safely remove your phone as required by your computer's operating system.
Page 84

84 Accounts and sync
Synchronizing another phone with your computer
You can switch from one phone to another, if you have more than one device to sync.
1. Connect another phone to your computer, then set up HTC Sync to recognize
this phone.
2. Click the phone you want to set up or begin synchronization. The Device panel
then opens, where you can separately customize your sync settings for this
phone.
To switch to another phone to sync, click Devices, and then click the phone's name or
image.
Downloading the latest HTC Sync upgrade
Visit the HTC support website (www.htc.com/support/) from time to time to check
for the most recent HTC Sync upgrade so you can download and install it on your
computer.
After installing the latest upgrade, set up HTC Sync again to recognize and sync with
your phone.
Page 85

85 Social
Social
Facebook for HTC Sense
If you signed in to your Facebook account when you turned on and set up your phone
for the first time, that means your Facebook account is linked to Facebook for HTC
Sense on your phone.
With Facebook for HTC Sense, you can:
§ See all your Facebook contacts and their instant status updates in People.
When you tap a contact on the All tab, slide to
the Updates and events tab to see updates such
as posted status messages, uploads, and profile
changes.
When there is a notification of the contact’s
birthday, you can tap the notification to call the
contact directly or send a message greeting.
§ See Facebook photos right on the Gallery app.
You can also upload one or more photos from
your storage card to Facebook, then tag and add
captions that go with it.
When you’re viewing the albums of a Facebook
friend, you can also share a link to a particular
album, or comment on the album photos.
Page 86

86 Social
§ Check your friends’ Facebook status updates in Friend Stream.
§ Add your Facebook events and your friends’ birthdays to the Calendar app.
What’s the difference between Facebook app and Facebook for HTC Sense?
§ Facebook for HTC Sense is not a standalone app. It is integrated in People,
Friend Stream, Gallery, and Calendar to give you up-to-date information about
your Facebook contacts (their status updates, shared links, and photos) in these
apps.
§ The Facebook app is a standalone app. Use this app to do most of the things
that you would do when you’re using your computer’s web browser to access
your Facebook account, such as adding a friend and sending Facebook
messages.
§ The two do not share the same login credentials. Signing in to Facebook for
HTC Sense does not sign you in to the Facebook app and vice versa. If you want
to use the same Facebook account for both, you’ll have to sign in to both using
the same login credentials.
If you have more than one Facebook account, you may sign in to the Facebook app
using your second account, since the Facebook app does not share the same login
credentials as Facebook for HTC Sense.
Facebook app
The Facebook app on your phone lets you keep up and stay close with your friends in
Facebook. It offers most of the features that you are familiar with when using
Facebook on your computer.
With the Facebook app, you can:
§ Share your thoughts and check other people’s status updates.
§ View your friends list and write on someone’s wall.
§ Comment on and like a friend’s post.
§ View someone’s personal information, including photo albums.
§ Check your Facebook notifications.
§ Take a photo and upload it straight to your Facebook account.
Page 87

87 Social
Using the Facebook app
1. From the Home screen, tap > Facebook.
2. If this is your first time to use Facebook, follow the onscreen instructions to sign
in to your Facebook account.
3. On the News Feed screen, tap to access the other functions.
§ While on the Facebook home screen, press MENU, and then tap Settings to set
refresh and notification options.
§ On some Facebook screens, you can press and hold an item to open an options
menu.
Adding the Facebook widget
Add the Facebook widget to the Home screen so you can easily post updates and
check status updates of your friends.
The widget will only link to the Facebook account that you logged into on the
Facebook app.
Page 88

88 Social
Tweeting on your phone using Peep
You can post and read tweets, send and receive direct messages, search for new
Twitter users to follow using the Peep app. Peep is a Twitter client that lets you enjoy
“tweeting” on your phone. You can also link your contacts in People to their Twitter
profiles (if you’re following them).
If you did not sign in to your Twitter account when you first turned on the phone, you
can do one of the following:
§ Sign in to your Twitter account from Peep. From the Home screen, tap >
Peep, then follow the onscreen instructions.
§ Add the Twitter for HTC Sense account in Settings > Accounts & sync.
Twitter for HTC Sense and Peep share the same login credentials. This means that
when you use Peep on your phone for tweeting, you can also link your contacts to
their Twitter profiles via Twitter for HTC Sense.
From the Home screen, tap > Peep. Peep opens in the All tweets tab.
Tap to compose and send a tweet.
Tap a person’s name to check profile
details and all of his or her tweets.
If you have linked the contact in
People, tap the photo or icon to open a
menu where you can quickly choose
how to communicate with the contact.
Press and hold a tweet to open an
options menu to reply, send a direct
message, retweet, and more.
View all the tweets from people you
follow and tweets that you have
posted.
View all tweets that mention your
username using the “@[your
username]” convention.
View all private/direct messages that
you have received or sent.
View tweets that you have marked as
favorites.
Sending a tweet
1. On the All tweets tab, tap the text box that says What's happening?.
2. Type your tweet.
Page 89

89 Social
3. Add a picture or location to your tweet.
§ Tap to post a picture from Gallery or Camera to your default photo
hosting site and add the link to the picture in your tweet.
§ Tap to insert your location into the tweet. You can choose to add a map
link, insert your location name, or insert your position coordinates.
4. Tap Update.
Sending a direct message
You can only send a direct message to someone who is following you.
1. In any of the tabs in Peep, press MENU, and then tap New message.
2. Tap the text box at the top of the screen, and then enter the name. As you enter
characters, the names of the Twitter users that match the characters you enter
will appear. Tap the name when you see it.
3. Enter your message, and then tap Update.
You can also send a direct message when you press and hold a tweet of the person
you want to send the direct message to, and then tap Send direct message on the
options menu.
Setting Peep options
In any of the tabs in Peep, press MENU, and then tap More > Settings. You can set
these options:
Account settings Sign out of your Twitter account.
General settings Choose whether to show the screen name or the real name of
the people you follow.
Send & receive Set the frequency to check for new tweets and set the number
of tweets to download.
Services Set your photo hosting site, photo quality, location options, and
URL shortening host.
Notification settings Select when and how you want to be notified.
Searching for Twitter users to follow
1. In any of the tabs in Peep, press the SEARCH button.
2. Type a Twitter name in the search box. You can also narrow down the search
when you tap > Users.
3. Tap .
4. In the list of search results, tap the Twitter user you want to follow.
5. Press MENU, and then tap Follow.
Page 90

90 Social
Unfollowing a Twitter user
1. On the All tweets tab, tap the Twitter user you want to stop following.
2. Press MENU, and then tap Unfollow.
Using Friend Stream
Friend Stream connects you to your social networks. Share and get updates from
friends in popular networks like Facebook and Twitter in a single feed. With Friend
Stream, you can easily track your friends’ status messages, photo uploads,
notifications, and more — or comment and post your own.
§ You must be signed in to at least one social network account to use Friend
Stream.
§ To use your Facebook account on Friend Stream, you need to be signed in via
Facebook for HTC Sense.
From the Home screen, tap > Friend Stream. Friend Stream opens on the All
updates tab.
When you tap someone’s status update, you can:
§ Open Peep and view all tweets.
§ Write a comment. Like or unlike someone’s
Facebook posts.
§ Look at someone’s album photos.
When you tap someone’s photo or name, you can:
§ Check the person’s profile details.
§ Look at the person’s Facebook wall.
§ Check the person’s posted tweets.
Slide to the other tabs to view social network updates
grouped as status updates only, photo uploads, links,
updates from members of your Facebook list, or social
network notifications.
Updating your status
You can update your status simultaneously on all the social network accounts you are
signed in to.
1. From the Home screen, tap > Friend Stream.
2. On the All updates tab, tap the text box that says What's on your mind?.
3. Enter your status update.
Page 91

91 Social
4. If you do not want to send the status update to all your social network
accounts, tap and clear the check boxes of the social networks to exclude.
5. Tap and then choose what you want to attach to your tweet or status
update.
App
recommendation
Choose an app you’ve installed from Android Market that
you want to share with others. The URL from which the
app can be downloaded will be inserted to your status.
Picture Select From Camera to take a photo and attach it or
From Gallery to attach a photo from your storage card.
Location Add your current location or a location you pick on a
map.
6. Tap Share.
Commenting on and liking Facebook posts
Tap someone’s status update on the All updates tab, and do any of the following:
§ Tap a photo or the album name shown in the status
update to view and comment on the album photos
using the Gallery app.
§ Tap Like or Unlike to like or unlike the person’s status
update.
§ Tap the text box that says Write a comment..., and
then enter what you think about the person’s status
update.
Page 92

92 Social
Checking notifications from your social networks
Slide to the Notifications tab to easily see a single feed of your notifications from
different social networks. It can be a comment on your Facebook post, a mention or
direct message in Twitter, a tagged photo of you, and more.
About the Friend Stream widget
Use the Friend Stream widget so you can easily update your status and view other
people’s status updates right on the Home screen.
Chatting in Google Talk
Google Talk is Google’s instant messaging program. It lets you communicate with
other people that also use Google Talk. If you signed in to your Google Account when
you first set up the phone, you are already signed in to Google Talk.
Chatting with a friend
1. From the Home screen, tap > Talk.
2. Tap a friend in the Friends list.
3. Enter your message in the text box. You can also insert a smiley by pressing
MENU, and then tapping More > Insert smiley.
4. Tap Send.
5. While chatting, press MENU and then tap any of these options:
Chat off
record
Switch chats If you have more than one chat going, tap to switch chat with
Your Google Talk messages are stored in the Chats folder of
your Gmail account. Tap this option if you don’t want to store
your chat messages.
another friend.
Page 93

93 Social
Friends list Return to the Friends list.
Add to chat Add another friend to your chat. The friend you invited and
the friend you're currently chatting will receive an invitation to
a group chat. Each one who accepts the invitation joins the
group chat.
End chat End your current chat.
More Clear the chat history, insert a smiley or view your friend’s
contact details.
Accepting a chat invitation
When a friend sends you a Google Talk message, you receive a notification. Their
entry in the Friends list displays the message.
Do one of the following:
§ In the Friends list, tap the friend who sent you the invitation to chat.
§ Open the Notifications panel, and then tap the chat notification.
Changing your online status and picture
1. From the Home screen, tap > Talk.
2. In the Friends list, tap your name to open the Set Status screen.
3. Enter your new status message. Or press BACK to choose a custom status from
the list.
4. Tap the online status beside your picture, and then select the status you want
on the menu.
5. Tap your picture, and then do one of the following:
§ Tap Remove to remove your photo.
§ Tap Change to select another picture on the storage card.
6. Tap Done.
Your online status, message, and picture appear in your contacts' Friends list and in
other apps where your Google Talk status are displayed.
Adding and managing friends
The Friends list is where you add and manage your friends in Google Talk.
To open Google Talk, from the Home screen, tap > Talk.
Inviting a friend
1. In the Friends list, press MENU, and then tap Add friend.
2. Enter the Google Talk instant messaging ID or Gmail address of the friend you
want to add.
3. Tap Send invitation.
Page 94

94 Social
Viewing all friends
Initially, only those friends that you often chat with — the most popular — are shown
in the Friends list.
In the Friends list, do one of the following:
§ To view all your friends, press MENU, and then tap All friends.
§ To view only friends that you often chat with, press MENU, and then tap Most
popular.
Making a friend popular
1. In the Friends list, press MENU, and then tap All friends.
2. Press and hold a friend’s name, and then tap Always show friend.
Blocking a friend
You can block a friend from sending you messages. When blocked, your friend is
removed from the Friends list and is added to the Blocked friends list.
1. In the Friends list, press MENU, and then tap All friends.
2. Press and hold a friend’s name, and then tap Block friend.
Unblocking a friend
1. In the Friends list, press MENU and then tap More > Blocked.
2. Tap the name of the blocked friend, and then tap OK.
Viewing all invited friends
In the Friends list, press MENU, and then tap More > Invites.
Friends who have not yet accepted your invitation are listed in the screen.
Changing settings or signing out
1. From the Home screen, tap > Talk.
2. In the Friends list, press MENU and then tap:
§ Settings to change the app and notification settings.
§ Sign out to sign out.
Page 95

95 Email
Using Mail
About the Mail app
Use the Mail app to add your webmail and other POP3 or IMAP email accounts. You
can also set up and use your Exchange ActiveSync email on your phone.
You can add the Mail widget to view your POP3/IMAP or Exchange ActiveSync
emails on the Home screen.
Adding a POP3/IMAP email account
1. From the Home screen, tap > Mail.
2. Do one of the following:
§ If this is your first time to add an email account in Mail, tap Other (POP3/
IMAP) on the Choose a mail provider screen.
§ If you’ve already added an email account in Mail, press MENU, and then tap
More > New account. If the Choose a mail provider screen is displayed, tap
Other (POP3/IMAP).
3. Enter the email address and password for your email account and then tap
Next.
4. If the account type you want to set up is not in the phone database, you’ll be
asked to enter more details.
5. Enter the account name and your name and then tap Finish setup.
Adding a Microsoft Exchange ActiveSync account
You can add one or more Microsoft Exchange ActiveSync accounts on your phone.
You can sync with Microsoft Exchange Server 2003 Service Pack (SP2) or later.
You can add up to 15 Exchange ActiveSync accounts on your phone.
From the Home screen, tap > Mail.
1.
2. Do one of the following:
§ If this is your first time to add an email account in Mail, tap Microsoft
Exchange ActiveSync on the Choose a mail provider screen.
§ If you’ve already added an email account in Mail, press MENU, and then tap
More > New account. If the Choose a mail provider screen is displayed, tap
Microsoft Exchange ActiveSync.
Page 96

96 Email
3. Enter the Exchange ActiveSync account details, and then tap Next. Your
corporate Exchange Server must support auto-detect for the phone to
automatically set up the Exchange ActiveSync account. If your corporate
Exchange Server does not support auto-detect, you’ll need to enter your
Exchange Server settings after you tap Next. Ask your Exchange Server
administrator for details.
4. Choose the types of information you want to sync. Also choose how often you
want to update and sync email to your phone, then tap Next.
5. Enter the account name, then tap Finish setup.
Checking your Mail inbox
When you open the Mail app, it displays the inbox of one of your email accounts that
you’ve set up on your phone.
To switch between email accounts, tap the bar that shows the current email account,
and then tap another account.
Page 97

97 Email
Viewing the unified inbox of all your email accounts
You can view email messages from all your accounts just in one place without having
to switch to different accounts.
Just tap the bar that shows the current email account, and then tap All accounts.
Email messages are color coded so you can easily distinguish which email accounts
they belong to.
Up to 15 email accounts can be shown in the unified inbox.
Switching between different views of your inbox
If you have lots of email messages, it may take you some time to browse through the
long list and find a single email or related email messages. To skim through your email
messages easier, tap one of the following tabs to change the view of your inbox:
Received
Displays email messages as individual items.
Conversations
Displays email messages as conversations, grouped according to the subject
line. Tap a subject in the list to show the email conversation.
Group
Displays all email messages from a contact group. To choose which contact
group to display, press MENU, tap View, and then select a group.
Unread
Displays unread messages.
Marked (Exchange ActiveSync only)
Displays all flagged messages.
Page 98

98 Email
Meeting invitations (Exchange ActiveSync only)
Displays meeting invitations which you have not yet accepted or declined.
Attachments
Displays all messages that have attachments.
Refreshing an email account
Whatever your automatic synchronization settings are, you can also synchronize your
sent and received emails manually at any time.
§ While in the account you want to synchronize, press MENU, and then tap
Refresh.
§ If you have several email accounts, you can refresh them all at the same time.
Go to the unified inbox first. Then press MENU and tap Refresh.
Sorting email messages
You can sort email messages by date received, priority, subject, sender, or size.
On the inbox, press MENU, tap Sort, and select from the sorting options.
Managing email messages
Deleting an email message
1. On the inbox, press and hold the message you want to delete.
2. On the options menu, tap Delete.
Selecting several email messages
1. Tap the check boxes of email messages to select them.
2. Choose what you want to do with the selected messages: Mark unread, Delete,
or Move to another folder.
You cannot move email messages when you’re in the unified (All accounts) inbox.
Moving several email messages to another folder
1. Switch to the email account you want to use.
2. Go to the Received tab or any other tab (except for the Conversations tab).
3. Tap the check boxes of email messages you want to move.
4. Tap Move to, and then tap the folder where to move the email messages.
Moving an email message after reading
In the open message, press MENU, and then tap More > Move to. Tap the folder where
you want to move the email message.
Page 99

99 Email
Deleting all messages
1. First tap the check box of any email message.
2. Press MENU, and then tap Select all.
3. Tap Delete.
Switching to other mail folders
1. Press MENU, and then tap Folders.
2. Tap the mail folder whose messages you want to view.
Sending an email message
1. From the Home screen, tap > Mail.
2. Switch to the email account that you want to use for sending email.
3. On the email account inbox, tap Compose mail.
4. Fill in one or more recipients. You can:
§ Enter email addresses directly in the To field, separating them with a
comma. As you enter email addresses, any matching addresses from your
contacts list are displayed. Tap a match to enter that address directly.
§ Tap the icon, and then choose the contacts to whom you want to send
the message. You can also select contact groups as recipients, or search
and add contacts from the company directory if you have set up an
Exchange ActiveSync account on your phone. When you have selected all
the message recipients, tap OK.
If you want to send a carbon copy (Cc) or a blind carbon copy (Bcc) of the email to
other recipients, press MENU, and then tap Show Cc/Bcc.
5. Enter the subject, and then compose your message.
6. To add an attachment, press MENU, tap Attach, and choose from the following
options:
Picture Select Camera to take a photo and attach it, or Gallery
to attach a photo from your storage card.
Video Select Camcorder to capture a video and attach it, or
Videos to attach a video from your storage card.
Audio Select Voice Recorder to make a voice recording and
attach it, or Files to attach a music file or voice
recording from your storage card.
App
recommendation
Choose an app you’ve installed from Android Market
that you want to tell other people about. The URL from
which the app can be downloaded will be inserted in
your email.
Page 100

100 Email
Location You can attach location information. Send your current
Document Attach a PDF file or an Office document such as a text
Contact (vCard) Attach someone’s contact information.
location (requires GPS to be turned on) or a location
you pick on a map.
file or a spreadsheet.
Appointment
Attach a calendar event.
(vCalendar)
File Attach any file from your storage card.
7. Tap Send to send the message immediately, or tap Save as draft to send it later.
If there’s no Wi-Fi or data connection available or Airplane mode is on when you
send your email, the email will be saved to the Outbox folder. Once there’s Wi-Fi or
data connection available, the saved email will be sent automatically next time your
phone syncs.
Resuming a draft email message
1. In the email account inbox, press MENU, and then tap Folders > Drafts.
2. Tap the message.
3. When you finish editing the message, tap Send.
Reading and replying to an email message
1. From the Home screen, tap > Mail.
2. Switch to the email account you want to use.
3. On the email account inbox, tap the email you want to read.
4. Do any of the following:
Reply to the message Tap Reply or Reply all.
Forward the message Press MENU, and then tap More > Forward.
Delete the message Press MENU, and then tap Delete.
Mark the message as unread Press MENU, and then tap Mark unread.
 Loading...