

Page 1

HSM FA 500.2
OPERATING INSTRUCTIONS
PAPER SHREDDER
Keep this instruction for future use! 1.655.999.112 – 1002
english
http://www.monomachines.com/
http://www.monomachines.com/
Page 2

2 1002
FA 500.2
Contents
1 Proper use, warranty .................................................................................................................3
2 Safety instructions .....................................................................................................................3
3 Overview ...................................................................................................................................4
4 Dimensions ...............................................................................................................................5
5 Transportation, installation ........................................................................................................6
6 Operating and display elements on the keypad ........................................................................7
7 Start-up and inspecting the safety devices ...............................................................................8
8 Malfunctions ............................................................................................................................10
9 Maintenance and care ............................................................................................................10
10 Technical data .........................................................................................................................13
11 Electric wiring diagrams for Solo- and Combination-version ..................................................14
http://www.monomachines.com/
http://www.monomachines.com/
Page 3
1002 3
FA 500.2
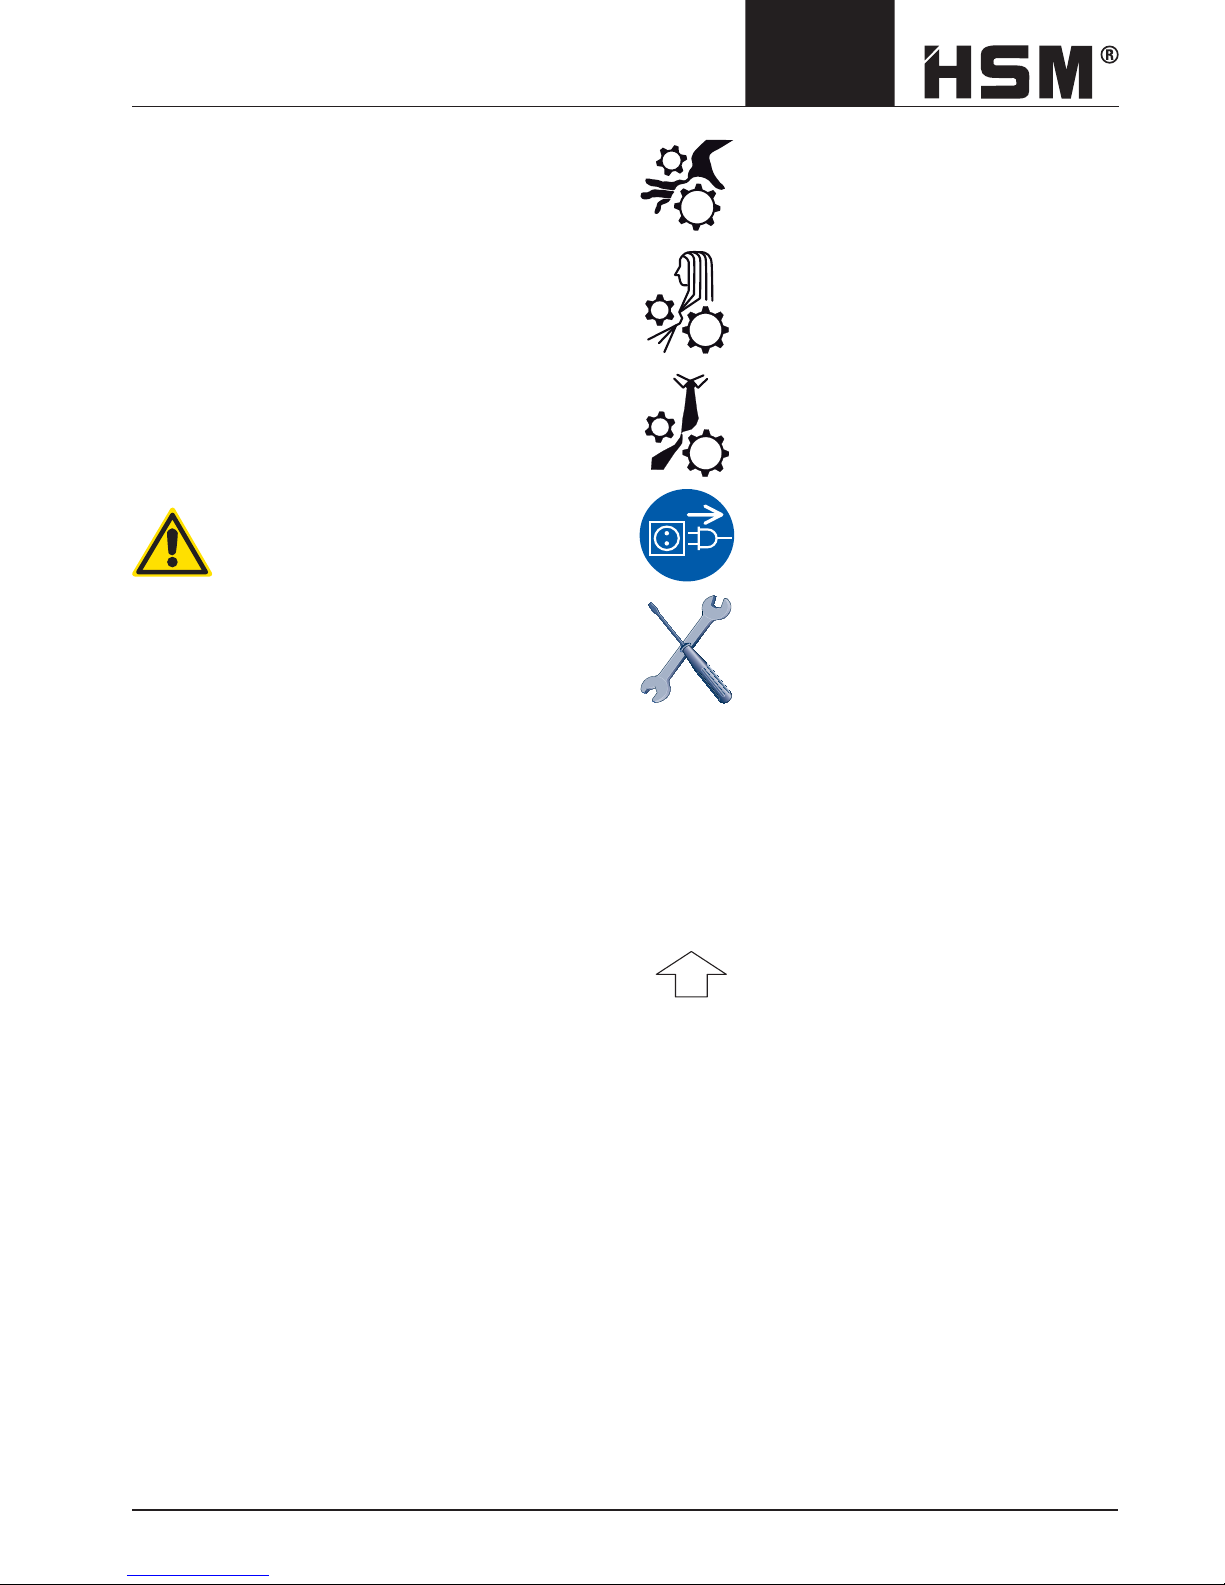
Danger of injury
Do not reach into the paper feed
opening.
Splinters can cause injury
Wear protective goggles when destroying diskettes, CDs and hard
credit cards.
Danger of injury during intake
Do not go near the paper feed opening with long hair, loose clothing, ties,
scarves, necklaces, bracelets etc.
Do not destroy any material which
might become tangled, such as tapes,
binder ties or foil.
Switch off the shredder and pull
out the power plug before moving
or cleaning the shredder, or any other
task outside its normal scope of use.
Maintenance and service tasks may
only be performed by HSM customer
service and service engineers of our
dealers.
1 Proper use, warranty
The document shredder is designed for destroying paper
and cardboard, as well as store cards, credit cards, CDROMs and fl oppy discs. Its sturdy drive mechanism is not
damaged by paper clips and staples and is even suitable
for shredding whole fi les and folders.
Our general business conditions are applicable. We provide a one year warranty for the document shredder. The
warranty period is 6 months when used in multiple shifts.
This warranty excludes wear, damage due to improper
handling, natural depreciation, and actions taken by third
parties.
2 Safety instructions
Caution:
It is prohibited to operate one only machine
of a combination-version machine.
• Before using the machine for the fi rst time, read the
operating manual, and keep it for later use and to
pass on to any subsequent users.
• Do not remove or modify safety devices which guarantee the safe operation of the machine.
• Observe all safety instructions attached to the machine.
• Carry out inspection and maintenance regularly.
• Switch off the shredder, disconnect the power plug
and call customer service in the following circumstances:
- power cables or plugs are damaged
- liquid has entered the shredder
- the shredder has been exposed to rain
- the machine does not work properly despite the
operating manual having been observed
- the shredder has been damaged
• No platforms or other raised surfaces may be placed
near the shredder if they encroach on the specifi ed
safety clearances.
Warning
• Ensure that no unauthorised persons can access
the document shredder. Do not leave the document shredder switched on when it is unattended.
The shredder may not be operated by anyone under
16 years of age.
When the machine is not in use, it must be shut down
and secured against unauthorised use.
To do so, you
can secure the mains switch with a padlock when it is
in the of
f position.
Operating controls for your safety
Emergency stop button
In the event of danger, press the
emergency stop button immediately.
This switches off the shredder, and
stops the cutting block and feed belt.
Main switch (only Solo-version)
In the event of danger, turn the main
switch to “0”.
You can secure the main switch in
this position with a padlock to prevent
restarting.
Translation of the original operating instructions
http://www.monomachines.com/
http://www.monomachines.com/
Page 4

4 1002
FA 500.2
Combination with
HSM KP 80
3 Overview
7
4
3
25
1 Main switch (only solo-version)
2 Keypad
3 Emergency stop button
4 Loading tray
5 Intake conveyor,
paper feed opening
6 Braking swivel castors
7 Nameplate
8 Oiler
8
6
1
http://www.monomachines.com/
http://www.monomachines.com/
Page 5
1002 5
FA 500.2
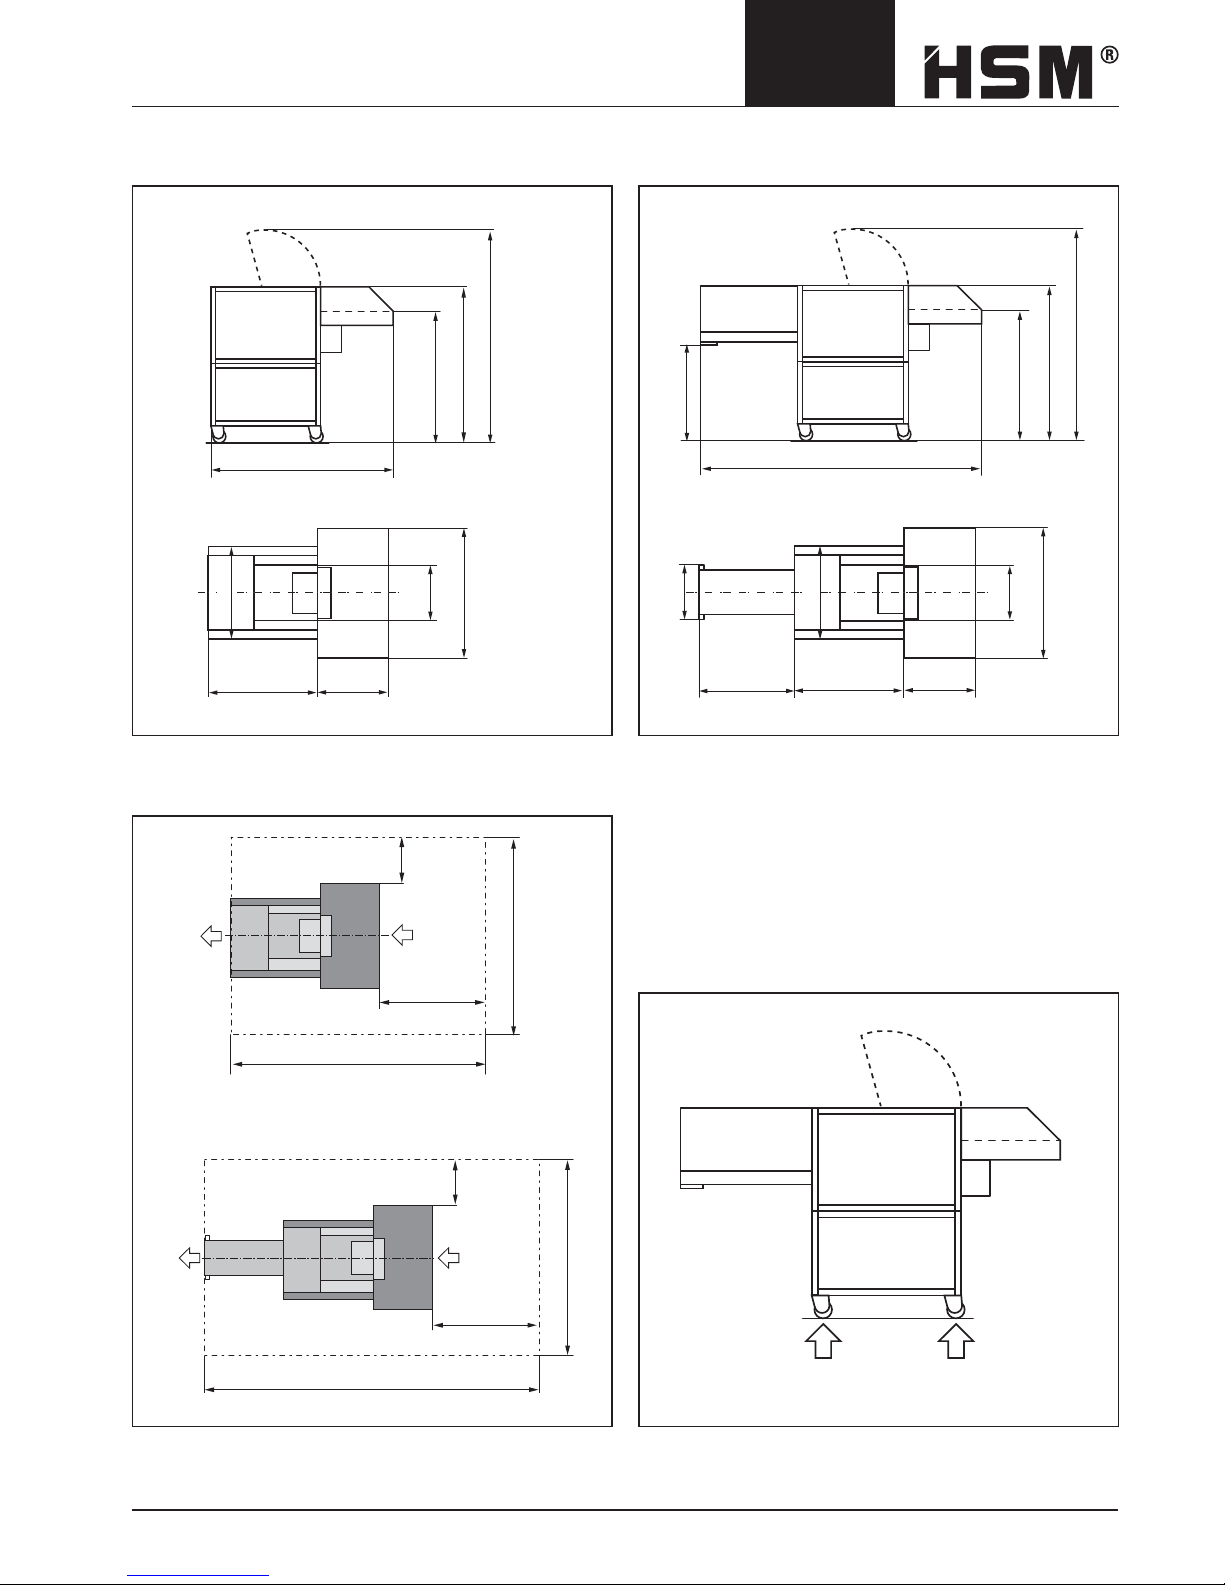
4 Dimensions
Space requirements for operation and maintenance Load on rollers
HSM FA 500.2 Combination-version HSM FA 500.2 Stand alone-version
Combination-version
Stand alone-version
2 x 180 kg 2 x 180 kg
1590
1925 max.
1410
1185
960
630
500
1155
880
500
880
1155
560
910 960 630
1000
500
1255
3500
1000
500
1255
2590
1410
1185
820
2500
1925 max.
http://www.monomachines.com/
http://www.monomachines.com/
Page 6
6 1002
FA 500.2
5 Transportation, installation
• During transport, observe the high centre of gravity of
the paper shredder!
• Place the pallet with the shredder in its packaging on
a smooth, level surface.
• Observe the instructions for unpacking.
• If you need to move the shredder through narrow
doors, you can wait until it is at its fi nal location before
fi tting the loading tray. Without the tray, the machine is
only 880 mm wide.
• The shredder may only be placed in dry rooms on a
hard, level fl oor – not on carpets. The fl oor load on
each roller is approximately 180 kg.
• The machine must be connected to a power source
which meets the specifi cations on the nameplate.
Make sure the power cable is unobstructed and that
nobody can tread on it
Mount the loading table onto the unit:
• Remove screws (1) and (2) from the frame.
• Fasten the supports to the frame with the screws (2).
• Place the table on the supports. Make sure the oil
hose is not bent. Fasten the table above (1) to the
frame.
• Screw the table on with the hexagon bolts (1) also at
the bottom of the frame and fasten to the supports
with the bolts (3) and nuts (4).
Mount the oil hose onto the unit:
• Guide the hose through the recesses in the table to
the oiler and shorten the hose.
2 2
2
1
1 1
1
3, 4
http://www.monomachines.com/
http://www.monomachines.com/
Page 7

1002 7
FA 500.2
• Insert the connecting screw (5) and the clamp (6) on
the end of the hose and secure the unit on the oiler.
• Pour the oil into the oiler container from the two bottles supplied.
Ready for operation
Green LED
Paper container full
Red LED
Start button
The shredder switches on. The feed
belt moves in the intake direction.
Stop button
The cutting block and feed belt stop.
The shredder is in standby mode.
Reverse button
The cutting block and feed belt run in
reverse.
Paper jam or overload
Red LED
Safety circuit interrupted
Red LED
• Solo machine:
Lock the front castors by pressing down the brake le-
ver.
• Combination version:
The assembly of the shredder with the baling press
is described in the operator‘s manual of the Shredder
press combination.
6 Operating and display elements on the keypad
5 6
http://www.monomachines.com/
http://www.monomachines.com/
Page 8

8 1002
FA 500.2
7 Start-up and inspecting the safety
devices
Check that the safety devices are working
properly:
• At the start of each shift
• After any maintenance or repair work
Do not start the machine until you have
checked the safety devices and found them
to be in perfect working order. If any defect
arises during operation stop the machine immediately and make sure it is corrected.
Switching on the paper shredder
• Unlock the emergency stop button by turning it anticlockwise.
• Solo-version: Turn the main switch to the I
position.
Combination-version: Turn the main switch
on the baling press to the I position.
` The green „Ready for operation“ LED
lights up.
• Press the green start button.
` The cutting block and feed belt start up.
Caution!
The feed belt can run in reverse if the phase
wires in the power plug are incorrectly connected.
Turn off the main switch immediately and
pull out the power plug! Have an electrician
change two of the three phase wires.
Checking the emergency stop button
Press the emergency stop button
while the machine is running.
The shredder must switch off immediately. The cutting block and the feed
belt must stop.
The machine will only start again once
you have pulled out the emergency
stop button again.
Safety fl ap on the feed belt
Open the safety fl ap.
The shredder must switch off immediately and the ”Safety
circuit interrupted” LED must light up.
The machine will only start again once you have closed
the safety fl ap.
Safety switch on the dust tray
Pull out the dust tray.
The shredder must switch off immediately and the ”Safety
circuit interrupted” LED must light up.
The machine will only start again once you have pushed
in the dust tray completely.
http://www.monomachines.com/
http://www.monomachines.com/
Page 9

1002 9
FA 500.2
Safety switch on the inspection door (only
stand alone-version)
Open the inspection door.
The shredder must switch off immediately and the ”Safety
circuit interrupted” LED must light up.
The machine will only start again once you have closed
the inspection door.
Safety switch on the protective fl ap (only
stand alone-version)
Open the protective fl ap.
The shredder must switch off immediately and the ”Safety
circuit interrupted” LED must light up.
The machine will only start again once the protective fl ap
is in its basic (vertical) position.
• Press the green start button.
` The cutting block and feed belt start up.
• Place the material to be shredded on the
loading tray and then place batches on the
feed belt.
If material that is not supposed to be shredded is mistakenly placed onto the belt, never
attempt to pull it out
• Press the stop button.
` The drive stops.
• Press the reverse button.
` The cutting block and feed belt run in
reverse.
• You can now remove the material from the
belt and start the shredder again by pressing the start button.
Stopping the shredder
• Press the stop button.
` The cutting block and feed belt stop.
` The shredder switches to standby mode.
Switching off the shredder
• Turn the main switch on the paper shredder or the baling press to 0.
You can secure the main switch in this
position using a padlock.
Shredding material
http://www.monomachines.com/
http://www.monomachines.com/
Page 10

10 1002
FA 500.2
8 Malfunctions
Check the following before calling customer service:
• Is the power plug connected?
• Is the shredder switched on?
• Is there a paper jam in the shredder?
• Has the motor been overloaded?
Paper jam
You have fed in too much paper.
` The red LED on the keypad blinks.
` The cutting block automatically runs in
reverse for several seconds.
Caution!
The blade rollers can still cause injuries
even while they are not running.
Do not reach into the cutting apparatus!
Wear safety gloves!
• Take out the pile of paper.
• Press the green start button and put less
paper on the feed belt.
Electric motor overheated
` The red LED on the keypad lights up.
` The shredder switches off automatically.
• Let the motor cool down for 20 - 30
minutes
• Press the green start button.
Safety circuit interrupted
` The red LED on the keypad lights up.
` The shredder switches off automatically.
• Check
- Safety fl ap on the feed belt is closed.
- The dust tray is pushed in completely.
- (only stand alone-version)
The inspection door is closed.
- (only stand alone-version)
The protective fl ap is in vertical position.
• Press the green start button.
9 Maintenance and care
Cleaning the cutting unit if the cutting quality
deteriorates or the machine becomes noisy
• Let the shredder run without feeding in any
paper.
• Push the lever of the oiler
down several times.
• Make sure the oil level in
the container is between the
MIN and MAX markings.
Order no. 1.235.997.501 for
5 litre container
MIN
MAX
Paper dust and particles accumulate in the paper shredder during operation. To facilitate cleaning, the ground
plate of the paper shredder was designed as a tray. This
tray must be emptied every week.
Note:
The paper shredder cannot be switched on unless the
dust tray is fully pushed in.
Emptying the dust tray
http://www.monomachines.com/
http://www.monomachines.com/
Page 11

1002 11
FA 500.2
Checking the chain tension (twice yearly)
• Switch off the shredder.
• Pull out the power plug.
• Remove the left side cover.
The sagging of the chain should be 9 to 14 mm.
If you need to tighten the chain:
• Loosen the clamping nuts (1).
• Lower the motor until the sagging is 9 to 14 mm.
• Tighten the clamping nuts again.
• Reinstall the cover.
Note:
Do not tighten the chain too much, as this will cause premature wear on the chain and bearings.
1
• Lift the safety fl ap. You can now see the stripping de-
vice.
Caution cutter rolls! Cutting injuries are possible even when the paper shredder is idle.
Always wear protective gloves!
Check whether the stripping device is fl ush with the con-
veyor belt. Otherwise it must be readjusted:
• Loosen the countersunk screws of the clamping strip
- this allows to move the stripping device.
• Align the stripping device and retighten the countersunk screws.
If the stripping bar is worn, it must be replaced. The area
below the stripping device should be cleaned at the same
time.
Greasing the drive chains and cogs (twice
yearly)
• Switch off the shredder.
• Pull out the power plug.
• Remove the left and right side covers.
• Grease the cogs and the drive chains from
the motor to the cutting apparatus, the cutting block to the feed belt and the cutting
block to the regulating roller.
Recommended lubricating grease: K2K in
accordance with DIN 51502/DIN 51825
• Reinstall the covers.
Maintenance work on the inlet conveyor belt
Checking the stripping device
http://www.monomachines.com/
http://www.monomachines.com/
Page 12

12 1002
FA 500.2
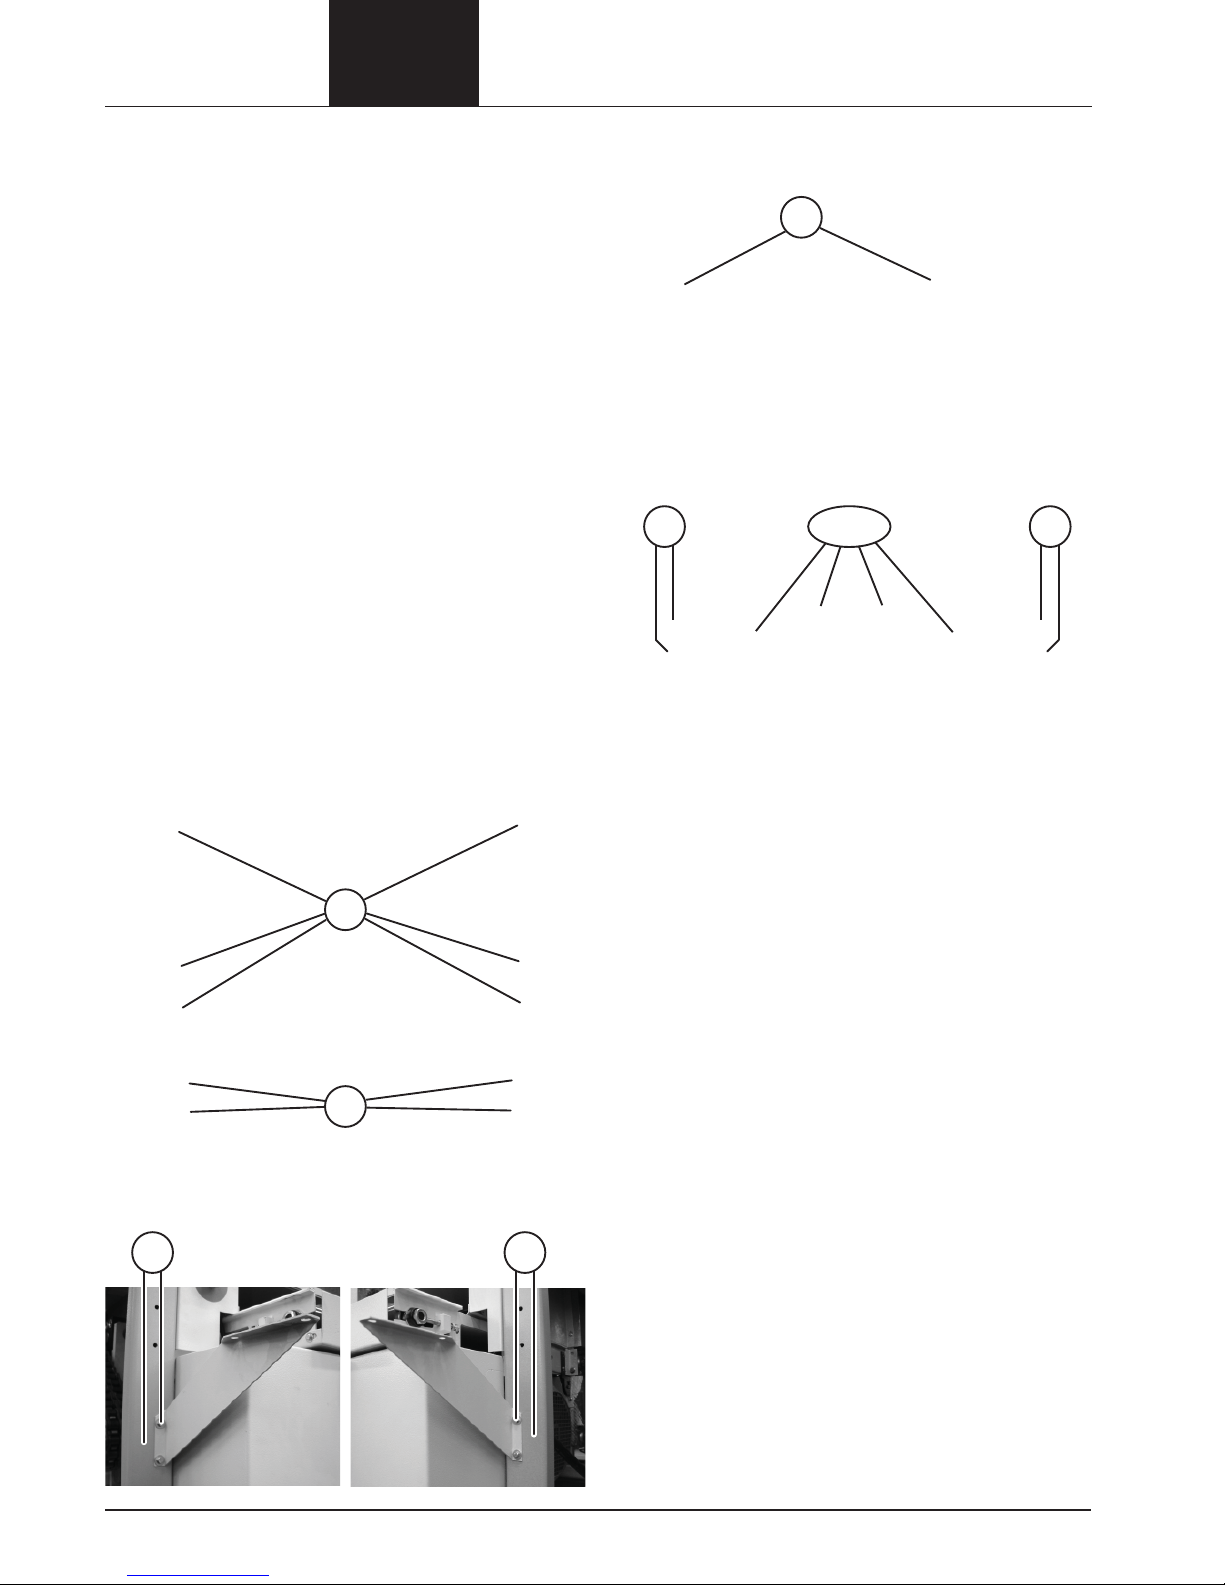
Tightening the feed belt
The feed belt should not slip when loaded with material.
• Switch off the shredder.
• Remove the feeding table and the left and
right side covers.
• Loosen the hexagon nuts (1) of the tension roll on the
left and right side.
• Loosen the lock nuts (2) of the tensioning bolts (3).
• Tighten the feed belt evenly using the tensioning
bolts.
Note:
Only tighten the feed belt until it stops slipping. The feed
belt bearing may be damaged if it is tightened too much.
• Tighten the hex nuts on the snub roller and
the lock nuts on the tensioning bolts again.
Reinstall the covers and the table.
You must check that the feed belt runs
straight:
Switch on the shredder and let it run for
10 minutes. During this time, the feed belt
must run in the middle of the snub roller. If it
slips to the left or right edge, you must alter
the setting of the snub roller.
Checking the feed belt for wear
The surface of the feed belt can become worn after long
periods of use. If you can see the fabric inlay in the belt, it
must be replaced. Please notify our customer service.
1
2
3
Cleaning the shredder:
• Switch off the shredder and disconnect the mains
plug.
• When cleaning, only use a soft cloth and a mild soapwater solution. Never use scouring agents, cleaning
fl uid, petroleum or thinners.
Cleaning the tensioning station (monthly)
• Remove the feeding table and the front panel of the
tensioning station.
• Remove particles and dirt.
Cleaning the conveyor-belt area (monthly)
• Remove the covers on both sides.
The cleaning openings in the conveyor-belt covers are
now accessible.
• Blow out the conveyor-belt area with compressed air
or use a vacuum cleaner to remove the dirt particles.
Checking the stripping brush (monthly)
• Remove the covers on both sides.
The stripping brush below the conveyor belt is now
accessible.
If the stripping brush is not fl ush with the conveyor
belt, you must re-adjust the stripping brush:
• Loosen the brush supports on the left and on the right.
• Re-adjust the brush support with the brush upwards.
• Screw the brush support back on.
http://www.monomachines.com/
http://www.monomachines.com/
Page 13

1002 13
FA 500.2
10 Technical Data
Cutting type Cross cut
Cut size (mm) 10.5 x 40 - 76 7.5 x 40 - 80 6 x 40 - 53
Safety level DIN 32757 – 1 2 2 3
Cutting capacity (sheets), DIN A4, 70 g/m
2
80 g/m
2
600 - 650
510 - 550
500 - 550
425 - 470
400 - 450
340 - 350
Cutting speed 210 mm/s
Effective width 500 mm
Weight approx. 725 kg
Voltage 3 x 400 V, 50 Hz
Rated power 9.2 kW
Rated current 18.1 A
Fuse rate 32 A
Plug CEE 32A
Ambient conditions in operation:
Temperature
Relative humidity
Height above sea-level (MSL)
-10 °C to +40 °C
max. 90 %, without condensation
max. 2,000 m
Sound level (idling / under load) 63 dB(A) / 80 dB(A)
EC Declaration of Conformity
The manufacturer HSM GmbH + Co. KG, Austrasse 1 - 9, D-88699 Frickingen hereby declares that the machine, referred to here
as
document shredder HSM FA 500.2
corresponds to the health and safety requirements of the following EC directives listed below due to its conception and design of
the version in which it was put into circulation by us:
Machinery directive 2006 / 42 / EC
EMC directive 2004 / 108 / EC
Applied standards and technical specifi cations:
• EN 349:1993 + A1:2008 • EN 62061:2005
• EN 12100-1:2003 + A1:2009 • EN 12100-2:2003 + A1:2009
• EN 55014-1:2006 • EN 55014-2:1997 + A1:2001
• EN 61000-3-2:2006 • EN 60950-1:2006
• EN 61000-3-3:1995 + A1:2001 + A2:2005
Authorised representative for the compilation of technical documentation:
Rolf Gasteier, HSM GmbH + Co. KG
Frickingen, 11.02.2010
Rolf Gasteier - Technical Director
The machine type was tested for compliance with the requirements of the EU Machinery Directive by:
TÜV Rheinland LGA Products GmbH, Tillystrasse 2, 90431 Nürnberg / Germany.
This test centre is responsible in accordance with Appendix XI of the EC Machinery Directive.
http://www.monomachines.com/
http://www.monomachines.com/
Page 14

14 1002
FA 500.2
Solo 400 V
11 Electric wiring diagrams
Solo
400 V / 50 Hz
Legend:
=AV: Shredder
+S: in switch cabinet
+MA: on machine
+BF: Keypad
http://www.monomachines.com/
http://www.monomachines.com/
Page 15

1002 15
FA 500.2
Solo 400 V
http://www.monomachines.com/
http://www.monomachines.com/
Page 16

16 1002
FA 500.2
Solo 400 V
http://www.monomachines.com/
http://www.monomachines.com/
Page 17

1002 17
FA 500.2
Kombi 400 V
Combination
400 V / 50 Hz
http://www.monomachines.com/
http://www.monomachines.com/
Page 18

18 1002
FA 500.2
Kombi 400 V
http://www.monomachines.com/
http://www.monomachines.com/
Page 19

1002 19
FA 500.2
Kombi 400 V
http://www.monomachines.com/
http://www.monomachines.com/
Page 20

20 1002
FA 500.2
Kombi 400 V
http://www.monomachines.com/
http://www.monomachines.com/
 Loading...