

Page 1
hp toptools 5.6 for Unicenter
User Guide
Page 2

HP Toptools for Unicenter User Guide
Notice Page
Hewlett-Packard makes no warranty of any kind with regard to this material, including, but not
limited to, the implied warranties of merchantability and fitness for a particular purpose.
Hewlett-Packard shall not be liable for errors contained herein or for incidental or consequential damages
in connection with the furnishing, performance, or use of this material.
This document contains proprietary information, which is protected by copyright. All rights are reserved.
No part of this document may be photocopied, reproduced, or translated to another language without the
prior written consent of Hewlett-Packard Company. The information contained in this document is subject
to change without notice.
Microsoft®, Windows®, and Windows NT® are registered trademarks of Microsoft Corporation.
Pentium® is a registered trademark of Intel Corporation.
CA and Unicenter are registered trademarks of Computer Associates Inc.
Netware® and Novell® are registered trademarks of Novell Corporation.
Computer Associates is not responsible and does not warrant the operation of this application.
Other brand and product names are registered trademarks or trademarks of their respective holders.
Hewlett-Packard Company 2002 All Rights Reserved.
Document Version 1.0
Hewlett-Packard Co.
10955 Tantau Ave.
Cupertino, CA 95014 U.S.A.
Page 2
Page 3

HP Toptools for Unicenter User Guide
Table of Contents
1 OVERVIEW ........................................................................................................................................................5
1.1 BEFORE YOU BEGIN .......................................................................................................................................6
1.2 REQUIREMENTS.............................................................................................................................................. 8
2 INSTALLING THE HP TOPTOOLS SERVER BRIDGE COMPONENT ................................................13
2.1 PREPARING THE TOPTOOLS SERVER ............................................................................................................. 13
2.2 STEP-BY-STEP INSTRUCTIONS ......................................................................................................................14
2.3 POST INSTALLATION RECOMMENDATIONS ...................................................................................................18
2.4 VERIFYING A SUCCESSFUL INSTALLATION ...................................................................................................18
3 INSTALLING THE CA UNICENTER PLATFORM BRIDGE COMPONENT .......................................21
3.1 PREPARING THE UNICENTER SYSTEM ...........................................................................................................21
3.2 STEP-BY-STEP INSTRUCTIONS ......................................................................................................................23
3.3 RECLASSIFY HP DEVICES.............................................................................................................................32
3.4 VERIFYING A SUCCESSFUL INSTALLATION ...................................................................................................32
4 INSTALLING HP WEB JETADMIN FOR UNICENTER...........................................................................37
4.1 STEP-BY-STEP INSTRUCTIONS ......................................................................................................................37
4.2 VERIFYING A SUCCESSFUL INSTALLATION ...................................................................................................39
4.3 USING HP WEB JETADMIN FOR UNICENTER ................................................................................................39
5 USING HP TOPTOOLS FOR UNICENTER.................................................................................................41
5.1 NEW MANAGEMENT FEATURES ...................................................................................................................41
5.2 TOPTOOLS AUTHENTICATION AND UNICENTER ............................................................................................43
5.3 RECLASSIFYING HP DEVICES ........................................................................................................................45
5.4 HP DEVICE ACTIONS.....................................................................................................................................45
5.5 MANAGING HP KAYAKS, VECTRAS, AND VISUALIZE WORKSTATIONS ...........................................................48
5.6 MANAGING HP OMNIBOOKS..........................................................................................................................53
5.7 MANAGING HP SERVERS...............................................................................................................................54
5.8 MANAGING HP TOPTOOLS REMOTE CONTROL CARDS ....................................................................................58
5.9 MANAGING HP LASERJET PRODUCTS ............................................................................................................60
5.10 MANAGING HP PROCURVE AND ADVANCESTACK NETWORKING DEVICES ....................................................64
5.11 UNICENTER SEVERITY BROWSER .................................................................................................................69
5.12 UNICENTER REPORT EXPLORER ...................................................................................................................70
6 ADVANCED CONFIGURATION...................................................................................................................72
6.1 USING HP TOPTOOLS IN STANDALONE MODE ...............................................................................................72
6.2 INTEGRATING UNICENTER AND HP TOPTOOLS 5.6 PCANYWHERE AND SYSTEM PERFORMANCE ADVISOR
FEATURES ................................................................................................................................................................72
6.3 USING HP TOPTOOLS FOR UNICENTER IN LARGE AND DISTRIBUTED ENVIRONMENTS.................................73
6.4 APPLICATION NOTES ....................................................................................................................................74
7 THEORY OF OPERATION ............................................................................................................................76
7.1 HP TOPTOOLS FOR UNICENTER PLATFORM BRIDGE COMPONENT PROCESSES .............................................76
7.2 HP TOPTOOLS FOR UNICENTER SERVER BRIDGE COMPONENT PROCESS .....................................................76
7.3 MODIFICATIONS DONE BY INSTALLATION ...................................................................................................76
7.4 DISCOVERY AND APPLICATIONS...................................................................................................................77
8 TROUBLESHOOTING PROBLEMS.............................................................................................................78
8.1 VERIFYING TOPTOOLS DEVICE MANAGER ....................................................................................................78
8.2 VERIFYING TOPTOOLS SERVER BRIDGE........................................................................................................78
8.3 VERIFYING THE PLATFORM BRIDGE ............................................................................................................ 78
8.4 USEFUL LOG FILES.......................................................................................................................................79
8.5 TROUBLESHOOTING TIPS ..............................................................................................................................81
9 UNINSTALLING THE SERVER BRIDGE COMPONENT........................................................................82
Page 3
Page 4

HP Toptools for Unicenter User Guide
9.1 STEP-BY-STEP INSTRUCTIONS ......................................................................................................................82
9.2 VERIFYING A SUCCESSFUL UNINSTALL ........................................................................................................82
10 UNINSTALLING THE PLATFORM BRIDGE COMPONENT ............................................................. 84
10.1 STEP-BY-STEP INSTRUCTIONS ......................................................................................................................84
10.2 VERIFYING A SUCCESSFUL UNINSTALL ........................................................................................................84
Page 4
Page 5

HP Toptools for Unicenter User Guide
r
1 Overview
HP Toptools for Unicenter is an HP Toptools Enterprise Product that enhances CA Unicenter’s ability to access the
manageability built into HP computing products. HP Toptools for Unicenter customizes the Unicenter environment
to discover and monitor HP products while integrating or ‘bridging’ Toptools applications into the Unicenter
console.
HP Toptools is a collection of applications and agents that enable fault, configuration, performance, security, and
asset management of HP Netserver, Visualize, Kayak, Omnibook, Vectra, NetPC, Advancestack, Procurve, palmtop,
Surestore and LaserJet products. At the center of Toptools solutions is the Toptools server, a web-based device
management application which generates web pages to display information obtained from managed devices,
permitting monitoring and administration of HP hardware from anywhere on the network through the use of a web
browser.
Console session is initiated
from anywhere on network
via a web browser.
Figure 1-1. The HP Toptools Device Manager consists of a Toptools Server
Toptools Server
Netservers LaserJets OmnibooksHP PCs
and a browser-based console.
Procurve
Devices
Web Browse
Console
The HP Toptools server includes integrated modules that may be obtained and deployed independently, such as HP
Toptools for Hubs and Switches, HP Toptools for Servers, and HP Web JetAdmin.
HP Toptools Enterprise Products is an accessory product. For more information on HP Toptools products, visit the
HP Toptools website at www.hp.com/toptools
For information on which Toptools products are supported by HP Toptools for Unicenter, check the "Requirements"
section of this document.
Page 5
.
Page 6

HP Toptools for Unicenter User Guide
HP Toptools for Unicenter increases your management control of HP products through:
• Automatic discovery and identification of HP products in Unicenter browsers and maps
• Automatic reception of events into Unicenter’s Event Console
• DSM management of HP Netserver, Toptools Remote Control card, and LaserJet products
• Access to Toptools actions on selected devices
• Launching Toptools property pages to ‘drill down’ on device configuration
1.1 Before You Begin
Which HP products do you need to manage?
The HP Toptools for Unicenter installation wizard offers two options:
• HP Toptools for Unicenter – Integrates management of HP Netserver, Kayak, Vectra, Omnibook, Visualize,
Procurve, Advancestack, and LaserJet products into Unicenter and links to an HP Toptools server.
• HP Web JetAdmin for Unicenter – Integrates management of HP LaserJet products into Unicenter and links
to a Web JetAdmin server.
You must first decide which product types you wish to manage. If you wish to manage only LaserJet products, you
may elect to install HP Web JetAdmin for Unicenter. Web JetAdmin provides management for an unlimited
number of printers and may be installed on a variety of operating systems such as Solaris or Windows NT. It may
also be used in combination with the HP JetDirect Trap Proxy Server available in the contributed library.
If you wish to manage other HP products (including LaserJets), you should install HP Toptools for Unicenter. HP
Toptools integrates with Web JetAdmin and enables LaserJet management as part of the overall solution. As you
install the HP Toptools server, you will be prompted to select which types of devices you wish to manage.
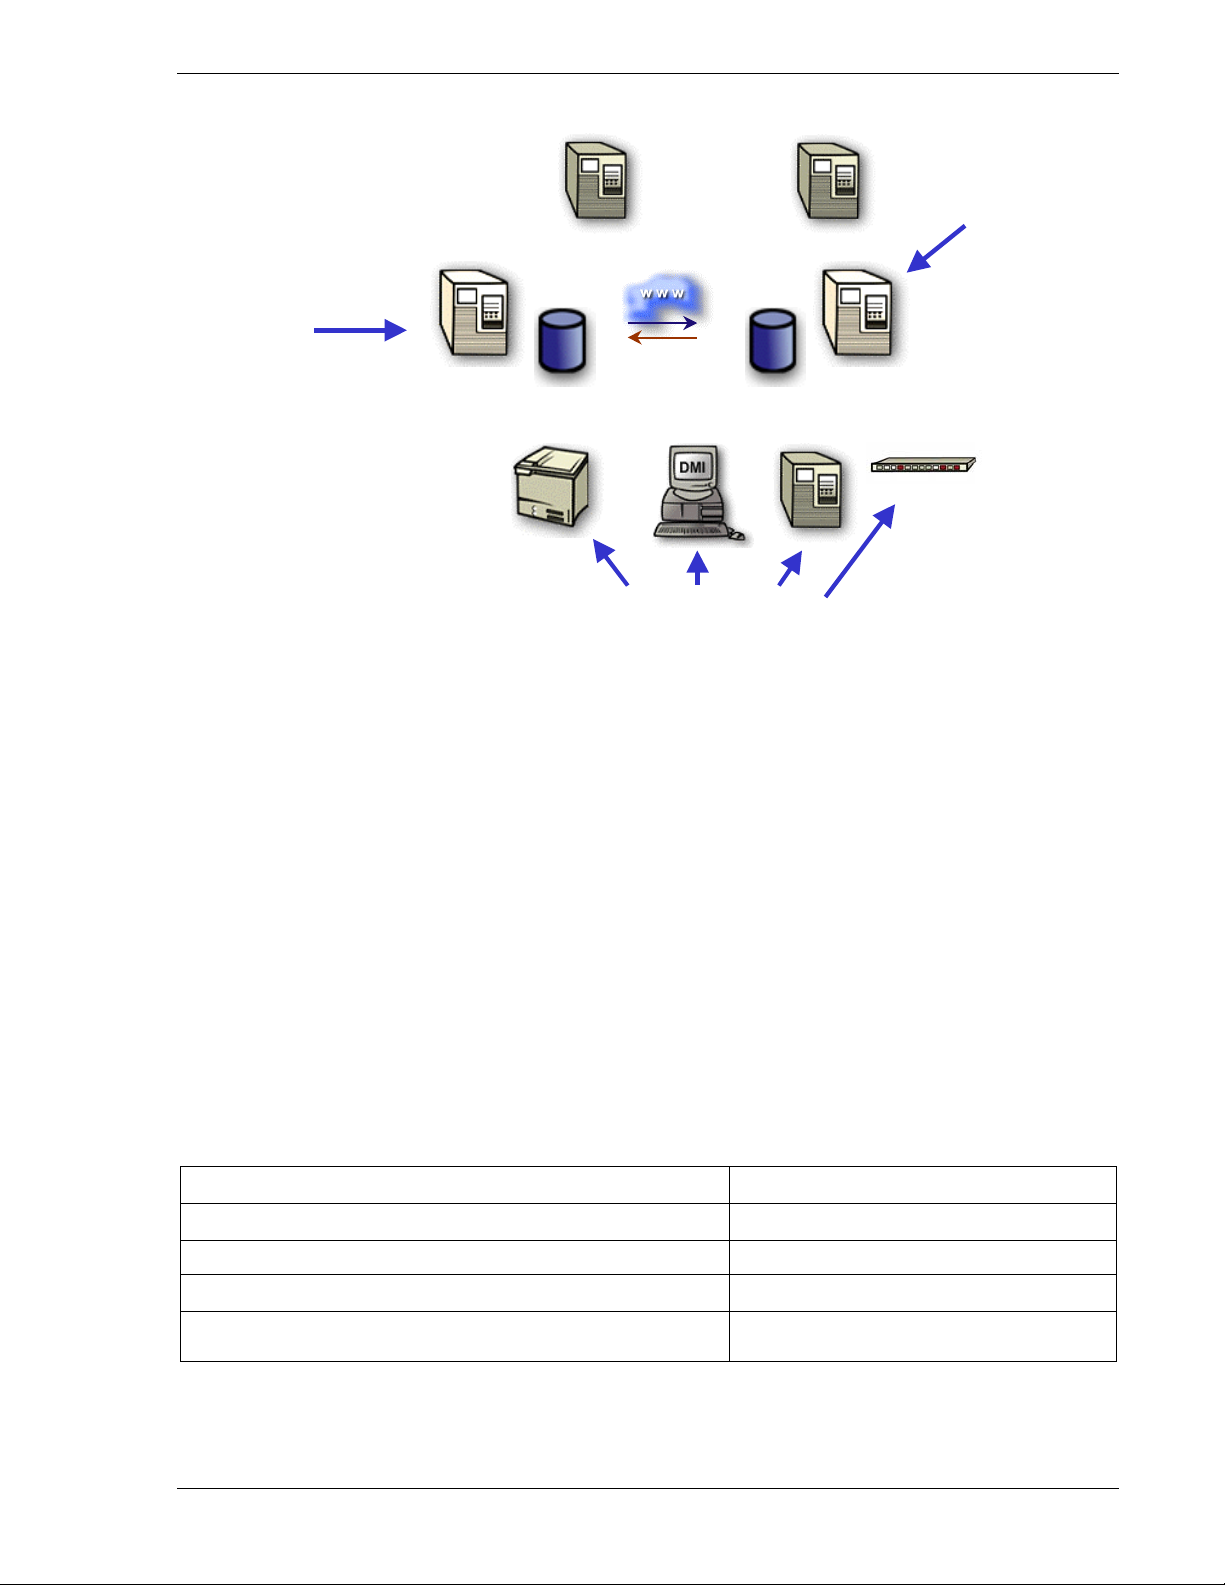
Which components will you need to install?
HP Toptools for Unicenter consists of 6 components (Figure 1-2):
• The HP Toptools server (or Web JetAdmin) application
• The CA Unicenter application
• Management agents on HP devices
• A web browser installed on Unicenter’s console
• Integration software, referred to as the 'platform bridge' installed on the Unicenter server
• Integration software, referred to as the 'server bridge' installed on the Toptools server
Page 6
Page 7
HP Toptools for Unicenter User Guide
Web JetAdmin Trap Proxy
Server Bridge
Platform Bridge
Toptool s
Server
Unicent er
TNG
Management Agents
Figure 1-2. Location of HP Toptools for Unicenter components
Where will you install Toptools ?
HP Toptools for Unicenter supports two options:
• Toptools installed on a separate system (preferred as shown in Figure 1-2)
• Toptools installed on the same system as Unicenter (also referred to as a single system installation)
Installing Toptools on a separate system will result in better system performance for both Toptools and Unicenter.
However, depending on the size of your network and available resources, you may wish to have a single, centralized
system. More information on using HP Toptools for Unicenter in distributed Unicenter environments is provided in
the “Advanced Configuration” section of this Guide.
Do you need to use pcAnywhere or the System Performance Advisor?
HP Toptools 5.6 for Unicenter provides access to pcAnywhere and System Performance Advisor from the Unicenter
console, please refer to the “Advanced Configuration” section for additional information.
For more information on installing these solutions:
HP Toptools for Unicenter on a Unicenter server and Toptools server
Installation sections in this User Guide
HP Toptools HP Toptools User Guide
HP Web JetAdmin HP Web JetAdmin User Guide
HP JetDirect Trap Proxy Server (Contributed Library) HP JetDirect Trap Proxy Server User Guide
HP Toptools for Unicenter with pcAnywhere or System Performance
Advisor
Page 7
Advanced Configuration section in this User Guide
Page 8

HP Toptools for Unicenter User Guide
1.2 Requirements
Prior to installing the server and platform bridge components, supported versions of HP Toptools, CA Unicenter,
and a web browser must be installed and verified operational.
1.2.1 Supported hp toptools Configuration
HP Toptools 5.6 for Unicenter supports the following version of the HP Toptools server:
• HP Toptools 5.6 (Build A.05.60) included on the HP Toptools 5.6 Enterprise Products CD.
Documentation describing HP Toptools 5.6 server software installation is included on the HP Toptools CD is
provided in the readme file located at the root of the CD-ROM, as well as in the HP Toptools User's Guide
(/Manuals/Users_Manual.pdf).
The installation of HP Toptools 5.6 permits the selection of which management components are installed. Any
combination of the four components (“desktops”, “servers”, “printers”, or “hubs and switches”) may be selected for
operation with this bridge. In addition, “Advanced Configuration” should be selected at the end of that installation
and all discovery categories (IPX, WMI, etc) enabled as appropriate*. Discovery should NOT be scheduled. Note
that you may be prompted to overwrite existing files during the TT 5.6 install. You MUST choose to overwrite
existing files or the installation will fail.
*Unless you intend to use HP Toptools for Hubs and Switches management features, do not enable 'Topology'
discovery.
1.2.2 Supported Unicenter Configuration
The following versions of Unicenter are supported by HP Toptools for Unicenter:
• CA Unicenter 2.4 and 3.0
1.2.3 Supported hp Computing Products
The following HP computing products are supported by HP Toptools for Unicenter:
• HP IA-32 Servers (previously known as Netservers) and Toptools Remote Control cards
• HP IPF Servers
• HP Visualize workstations
• HP Kayak workstations
• HP Vectra desktops
• HP Omnibook notebooks
• HP LaserJet printers and plotters
• HP Advancestack and Procurve networking products
Page 8
Page 9

HP Toptools for Unicenter User Guide
HP Toptools Remote Control card, Advancestack, and Procurve devices support firmware agent software. Firmware
may be updated using HP Toptools. HP Netserver, Visualize, Kayak, Vectra, and Omnibook products support HP
Toptools agents that are loaded into the Operating System.
All agents and firmware are provided with purchased products and may also be downloaded from the HP website.
Upgrading agents and firmware to current versions is highly recommended.
*Support for Windows-Based Terminals is limited to early models.
1.2.4 Supported Web Browsers and Configuration
The Toptools console is accessed using a web browser. A web browser must be installed on each Unicenter console
on which you intend to install the bridge. Microsoft Internet Explorer v.5.0 is included on the HP Toptools 5.6 CD.
To enable operation of the Toptools console you must:
• Use a supported web browser application and version.
• Be authenticated with HP Toptools (the web server application).
Make sure that the platform user is a member of the Toptools “admin” group on the Toptools server. Use the NT
User Manager add authorized users to the Toptools server. Only members of the Toptools groups can access
Toptools.
You can access Toptools from any system using browser versions in the table below:
Browser System Browsers
Windows 2000, NT, or XP IE 4.01 SP2 (JVM 2436)
Browser Settings
To configure the browser on your management platform:
1. Set your browser to exclude using a proxy to access your Toptools server. This can be done for your entire
domain or just for the server depending on your network requirements.
IE 401.SP2: Internet Options => Connections => Advanced => Exceptions
IE 5.0: Tools => Internet Options => Connections => LAN Settings => Advanced
Netscape: Edit => Preferences => Advanced => Proxies => Manual => View
2. On IE, check Bypass proxy server for local addresses as well as entering the domain in the Exceptions list on
the Advanced configuration page.
3. The URL to the management server should include your domain:
http://TTManagmentServerName.company.com/hptt
4. Always accept cookies and always refresh new page.
5. Enable Basic Authentication for the IIS service on the Toptools server
It is also helpful to set your browser to check for newer versions of stored pages on every visit to the page.
To verify correct operation of browser connection to the Toptools server, perform the following test:
1. Launch Toptools from your browser (the URL to the Toptools server should include your domain (e.g.,
http://machine.company.com/hptt).
2. The product will start up. If you set up NTFS on the management server, and set your IIS to BASIC security
(required for using Netscape), you will be challenged for your username and password (domain\username for
Netscape).
IE 5.0 (JVM 3167)
IE 5.5
IE 6.0
Netscape 4.61
Netscape 4.72
.
Page 9
Page 10

HP Toptools for Unicenter User Guide
Notes on Netscape:
Installation of the bridge sets the Directory Security on the following virtual directories to Basic Authentication
on the Toptools server:
Installed Components Virtual Directories to set “Basic Authentication”
Device Manager Hptt, Viewer
Device Manger + Desktops or Netservers or Windows
Based Terminals
Hubs & Switches HpttTopology, Scripts
Hptt, Viewer
To Configure Access on the Toptools Server:
1. Start the Internet Service Manager
2. Start->Programs->Windows NT 4.0 Option Pack->Microsoft II or PW Server->Internet Service
Manager
3. Select the Hptt virtual directory, right mouse to bring up the context menu and select Properties.
4. Select Directory Security, click Edit, select Basic Authentication, and OK. Do not change any other settings
in this dialog.
5. Repeat for the Viewer virtual directory.
6. Repeat for the hpttTopology virtual directory if you installed Toptools for Hubs & Switches.
7. Repeat for the Scripts virtual directory if you installed Toptools for Hubs & Switches.
8. Stop the Toptools Services.
9. Stop the Web Server Services.
10. Start the WW Web Service (last entry in the services menu).
11. Start the Toptools Services
In all cases of using Netscape, the “afc11.zip” file must be present in the java\classes directory. Toptools will sense
the presence or absence of this file the first time you connect to it via Netscape and walk you through installation of
this file. Do not unzip it.
Page 10
Page 11

HP Toptools for Unicenter User Guide
1.2.5 Disk Space Usage
Approximately 5 MB on the Unicenter system, 1 MB on the Toptools system. The 1 MB on the Toptools system is
in addition to the disk space required for the Toptools installation. Refer to the Toptools documentation for
additional information on Toptools requirements.
1.2.6 Memory Requirements
HP Toptools for Unicenter uses approximately 4 MB of memory in background processes on the Unicenter system,
and approximately 2 MB of memory on the Toptools server. If both Unicenter and Toptools are installed on the
same system along with the bridge, the system should have a minimum of 196 MB. (It is recommended that two
separate systems be used.)
1.2.7 Processor Requirements
The requirements for the bridge are the same as the requirements for Unicenter and Toptools. If Unicenter and
Toptools are installed on the same system, a minimum of a 300 MHz Pentium is suggested for adequate
performance.
1.2.8 Single System Installation
HP Toptools and CA Unicenter may be installed on the same system.
1. Make sure the system has enough memory for both programs. A minimum of 256 MB of memory is required,
with higher amounts recommended. Beyond the disk space requirements of Unicenter and Toptools, an
additional 10MB of disk space is required for HP Toptools for Unicenter bridge components.
2. Install Microsoft SQL Server and Unicenter first as the Toptools server installation will update the Data Access
Components.
3. Install the Toptools server.
The following are REQUIREMENTS for a supported single system installation on Windows NT (not required for
Windows 2000):
4. Remove the SNMP services.
5. Reboot the system.
6. Reinstall SNMP Services.
7. Reboot the system and reinstall Service Pack 5 and above.
8. Verify that traps are being received in Unicenter. If not repeat steps 4 and 7.
9. Install the server bridge component.
10. Reboot the system.
11. Install the platform bridge component.
12. Reboot the system.
For older model HP hubs the Toptools action items “Properties (Device View)”, “SNMP/Trap Configuration”, and
“Update firmware” are only available when the Toptools server is installed on the same system as Unicenter.
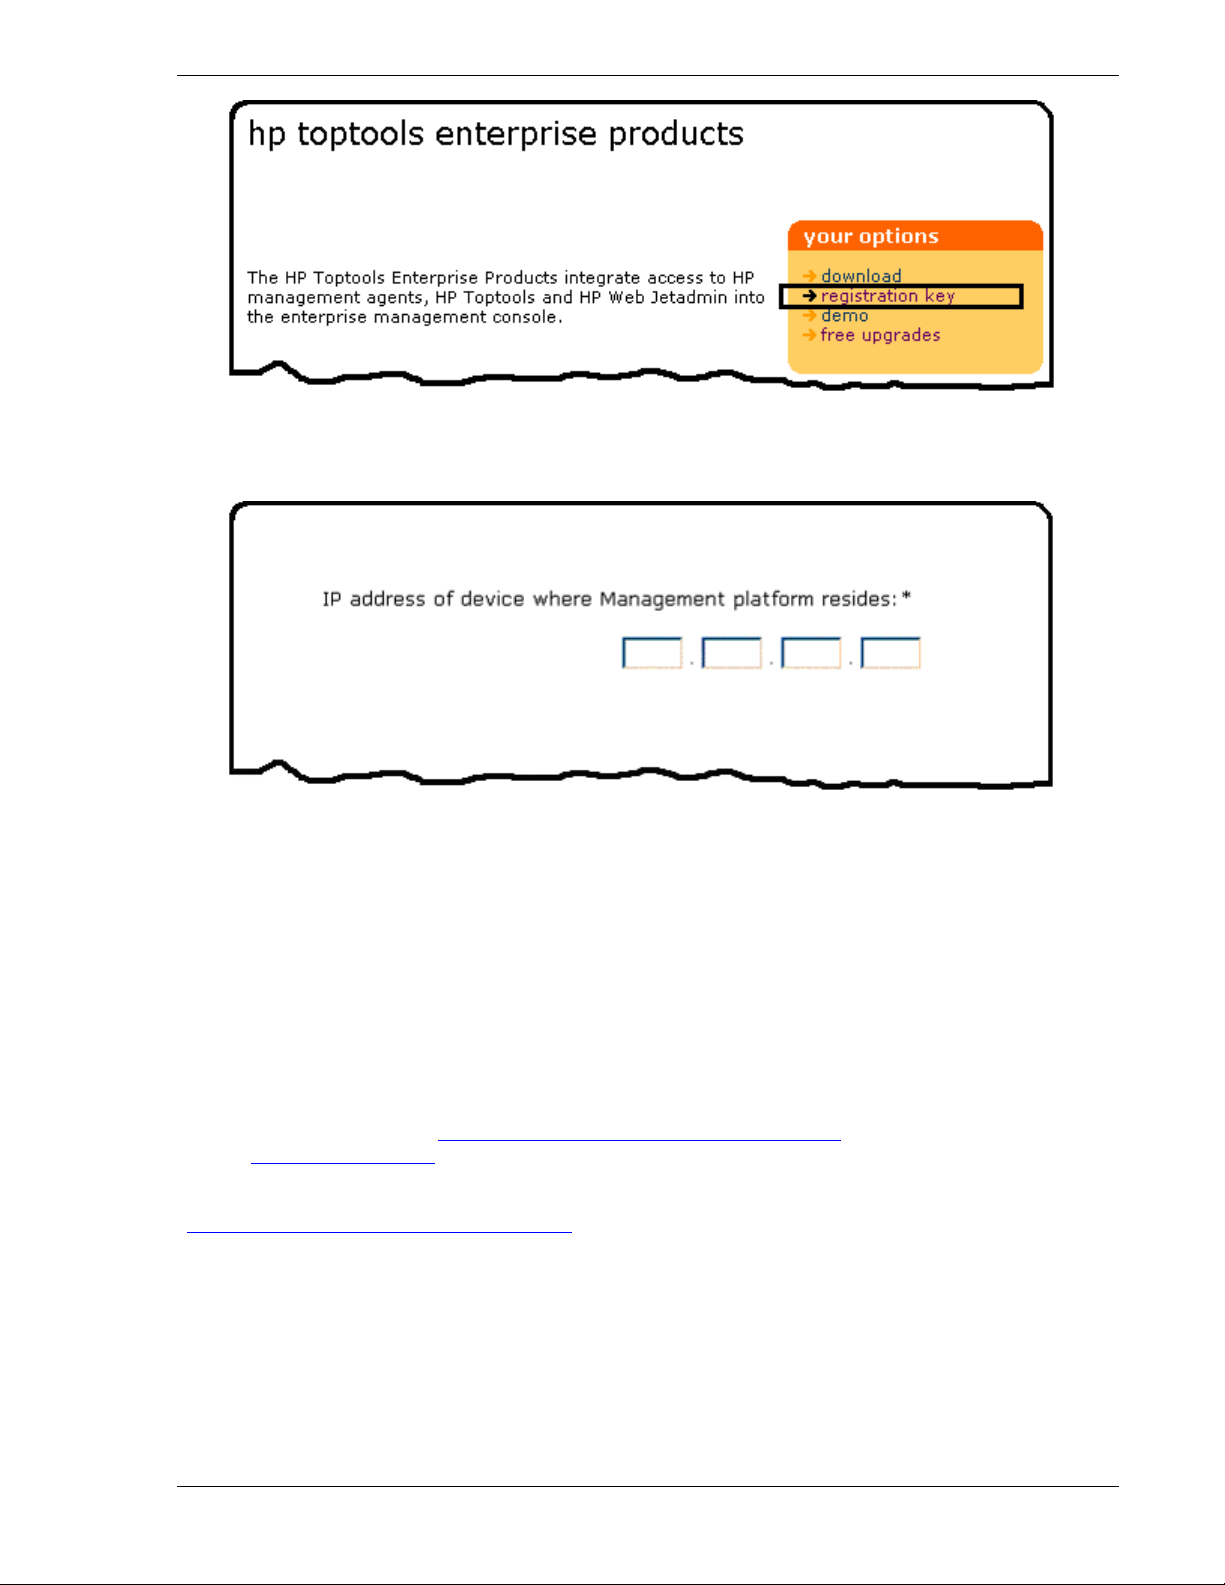
1.2.9 Evaluation and Registration
The HP Toptools Enterprise Products CD provides a 60-day, full featured evaluation of each HP Toptools Enterprise
Product that expires unless a free license key is obtained by registration. To enable evaluation, follow the installation
instructions as described below.
Registration: To obtain a free license key for HP Toptools for Unicenter, go to the HP Toptools website
(http://www.hp.com/toptools/solutions/entsols.html
Page 11
) and click on “registration key”.
Page 12
HP Toptools for Unicenter User Guide
Fill in the registration form. Be sure to enter a valid email address as this is where your license file will be sent.
You must provide the IP address of the Unicenter server. •
.
When you register to receive your license key, you will be emailed a new license.dat file.
License Installation:
• Copy the license file to <drive>:\<Unicenter-Home directory>\BIN\license.dat on the Unicenter system..
Activation:
Activate and verify the new license by stopping and then restarting Unicenter. You should be able to access
Toptools features for HP devices.
1.2.10 Support and Contact information
Both pre- and post-sales support for HP Toptools for Unicenter is provided free-of-charge and may be obtained from
the HP Customer Care Centers: http://www.hp.com/cposupport/mail_support.html
web site www.hp.com/toptools
Training modules describing Toptools are provided on the Toptools web site
(www.hp.com/toptools/techsupport/support.html).
Page 12
for updates and information on and future releases.
. Also refer to the HP Toptools
Page 13

HP Toptools for Unicenter User Guide
2 Installing the hp toptools Server Bridge Component
There are two bridge components that compose HP Toptools for Unicenter, a Toptools server bridge
and a platform bridge. The server bridge must be installed on the Toptools server as described below, while the
platform bridge must be installed on the Unicenter system as described later.
2.1 Preparing the toptools Server
The Toptools Device Manager must be installed and accessible to the system running Unicenter. Using the
browser, invoke the URL http://<Toptools_Server>/hptt where <Toptools_Server> is the fully-qualified DNS
hostname or IP address of the system running the Toptools Device Manager. If you are unable to access the
Toptools server, consult the Toptools Device Manager documentation to troubleshoot the problem. Refer to Section
1.
You may be prompted for a login. Only members of one of the three Toptools user groups “toptools”, “toptools
operator”, or “toptools admin” are authenticated to access the Toptools server.
To simplify logins from the Unicenter server, use the Windows NT User
Manager to add Unicenter users to the appropriate Toptools group(s) on the
Toptools server. Otherwise, each browser launch will be accompanied by an
authentication prompt.
WARNING:
Discovery is turned off by
this installation. Proper
operation of both Toptools
and the bridge require that it
NOT be turned on again.
Page 13
Page 14
HP Toptools for Unicenter User Guide
2.2 Step-by-Step Instructions
The Toptools server bridge component is installed on the Toptools system. It must be installed prior to installing the
platform bridge component.
The Toptools server bridge component installation process consists of the following:
1. Verify that the Toptools server is operational. (Refer to Section 1.)
2. Install the Toptools server bridge component on the Toptools server.
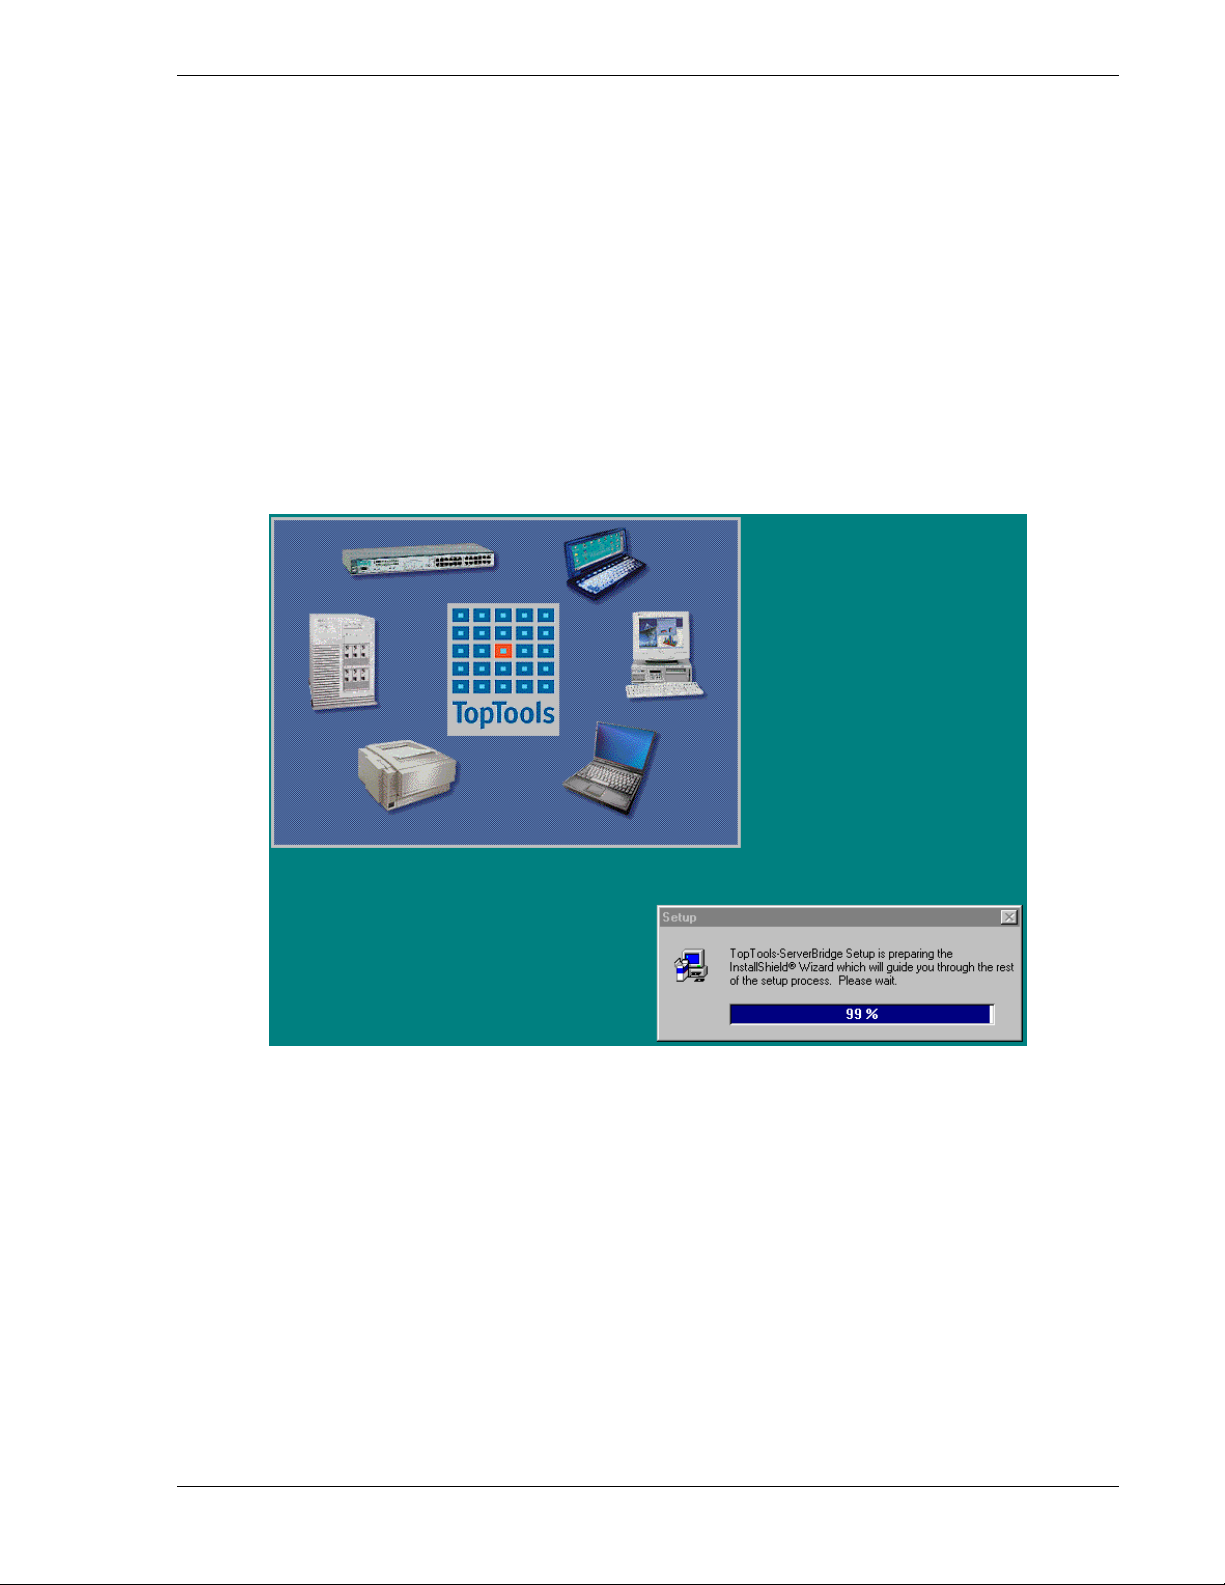
2.2.1 Installation
To install the server bridge component, go to the Enterprise\Tt4tng\SrvrBrdg directory and run Setup.exe. You will
see the following screen:
Figure 2-1. Opening screen of installation program for Toptools Server bridge component.
After a few moments, the license agreement screen is displayed as shown below. Notice that the version number for
the HP Toptools Server Bridge, the Toptools Server bridge component, is displayed.
Page 14
Page 15

HP Toptools for Unicenter User Guide
Figure 2-2. License Agreement for HP Toptools Server bridge
After accepting the software agreement, setup asks for a directory to install to and permits you to specify a different
directory as shown in Figure 2-3.
Figure 2-3. The Toptools Server Bridge uses a default install directory of c:\TTBridge.
The setup program stops and restarts the Toptools server services:
Page 15
Page 16
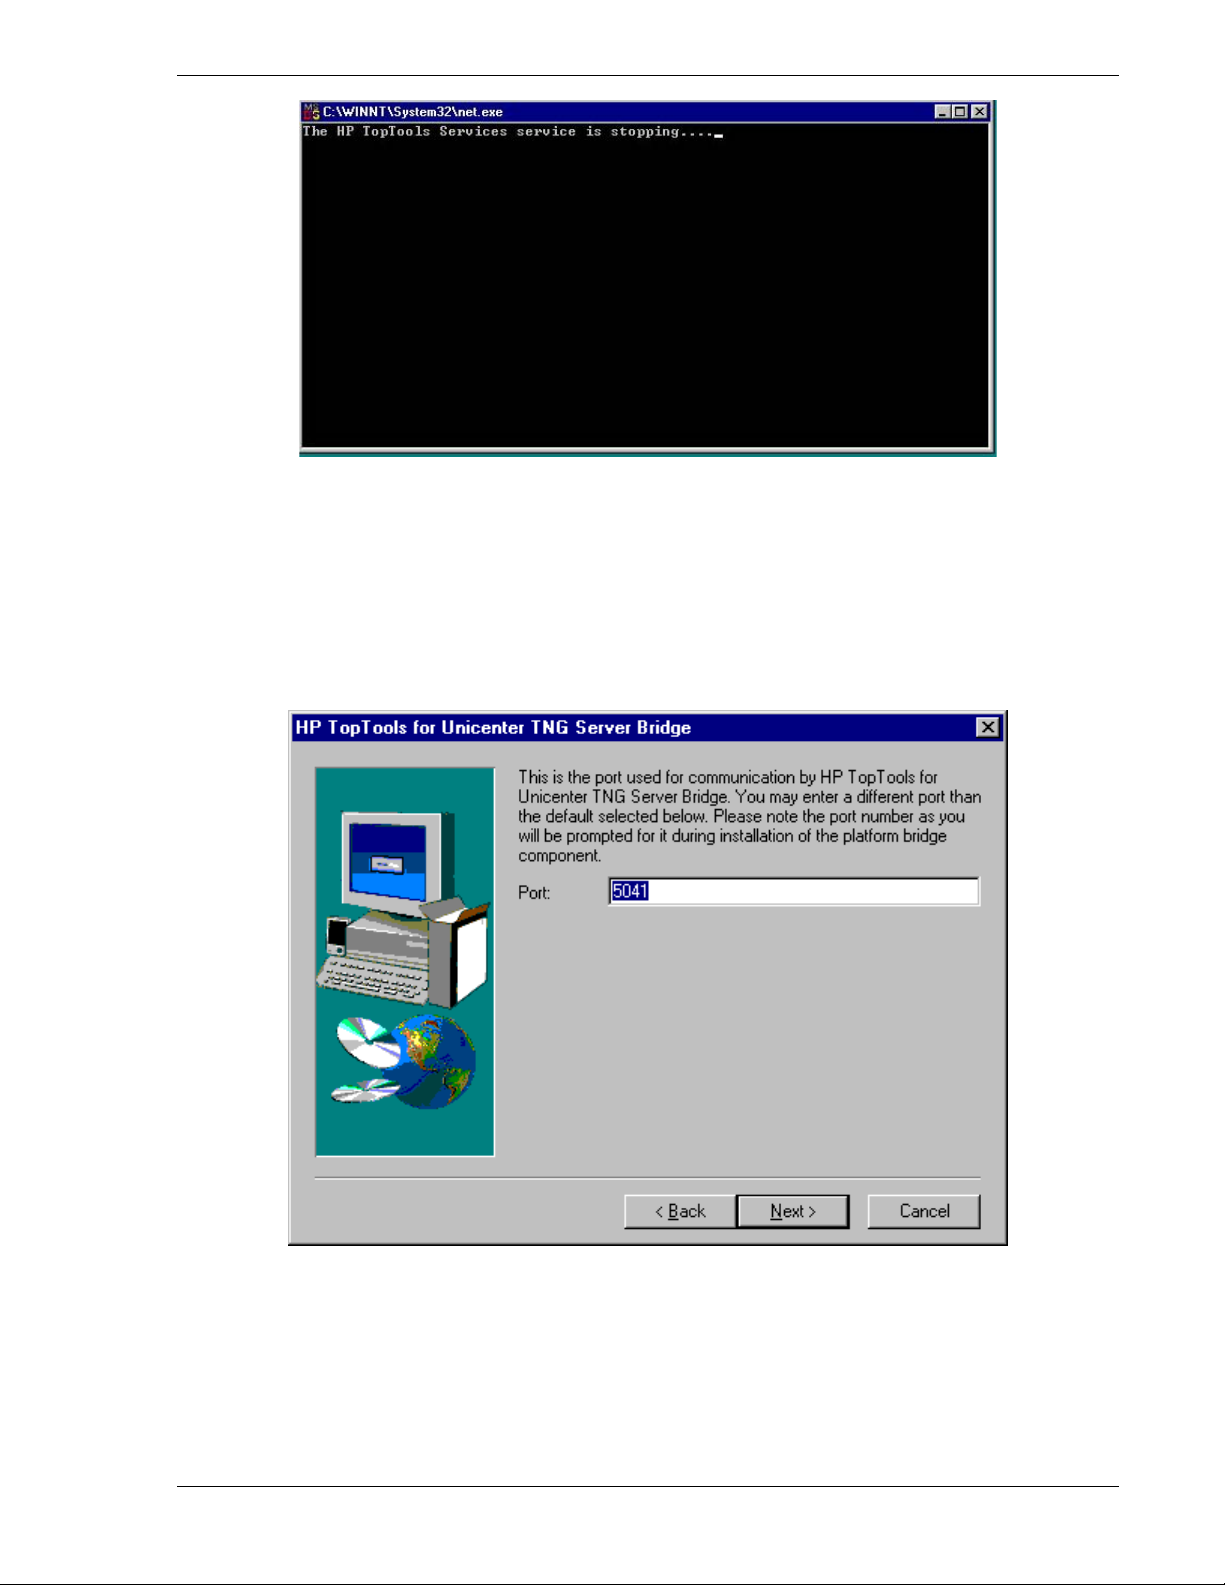
HP Toptools for Unicenter User Guide
Figure 2-4. Setup stops and restarts the Toptools services.
Setup displays the port number on which it intends to service requests. The default is 5041. If for some reason this
TCP port is not available on your system, select an available port, and specify it here. A list of reserved TCP ports
is available in the \winnt\system32\drivers\etc\services file. Listed ports may not be in use, but have already been
specified for use by other applications. You can see a list of actively used ports by using ‘netstat –p tcp’.
Regardless of which free TCP port you select, make a note of it as you will be prompted to enter the port during the
platform bridge component installation.
Figure 2-5. TCP port 5041 is the default used by Toptools for Unicenter.
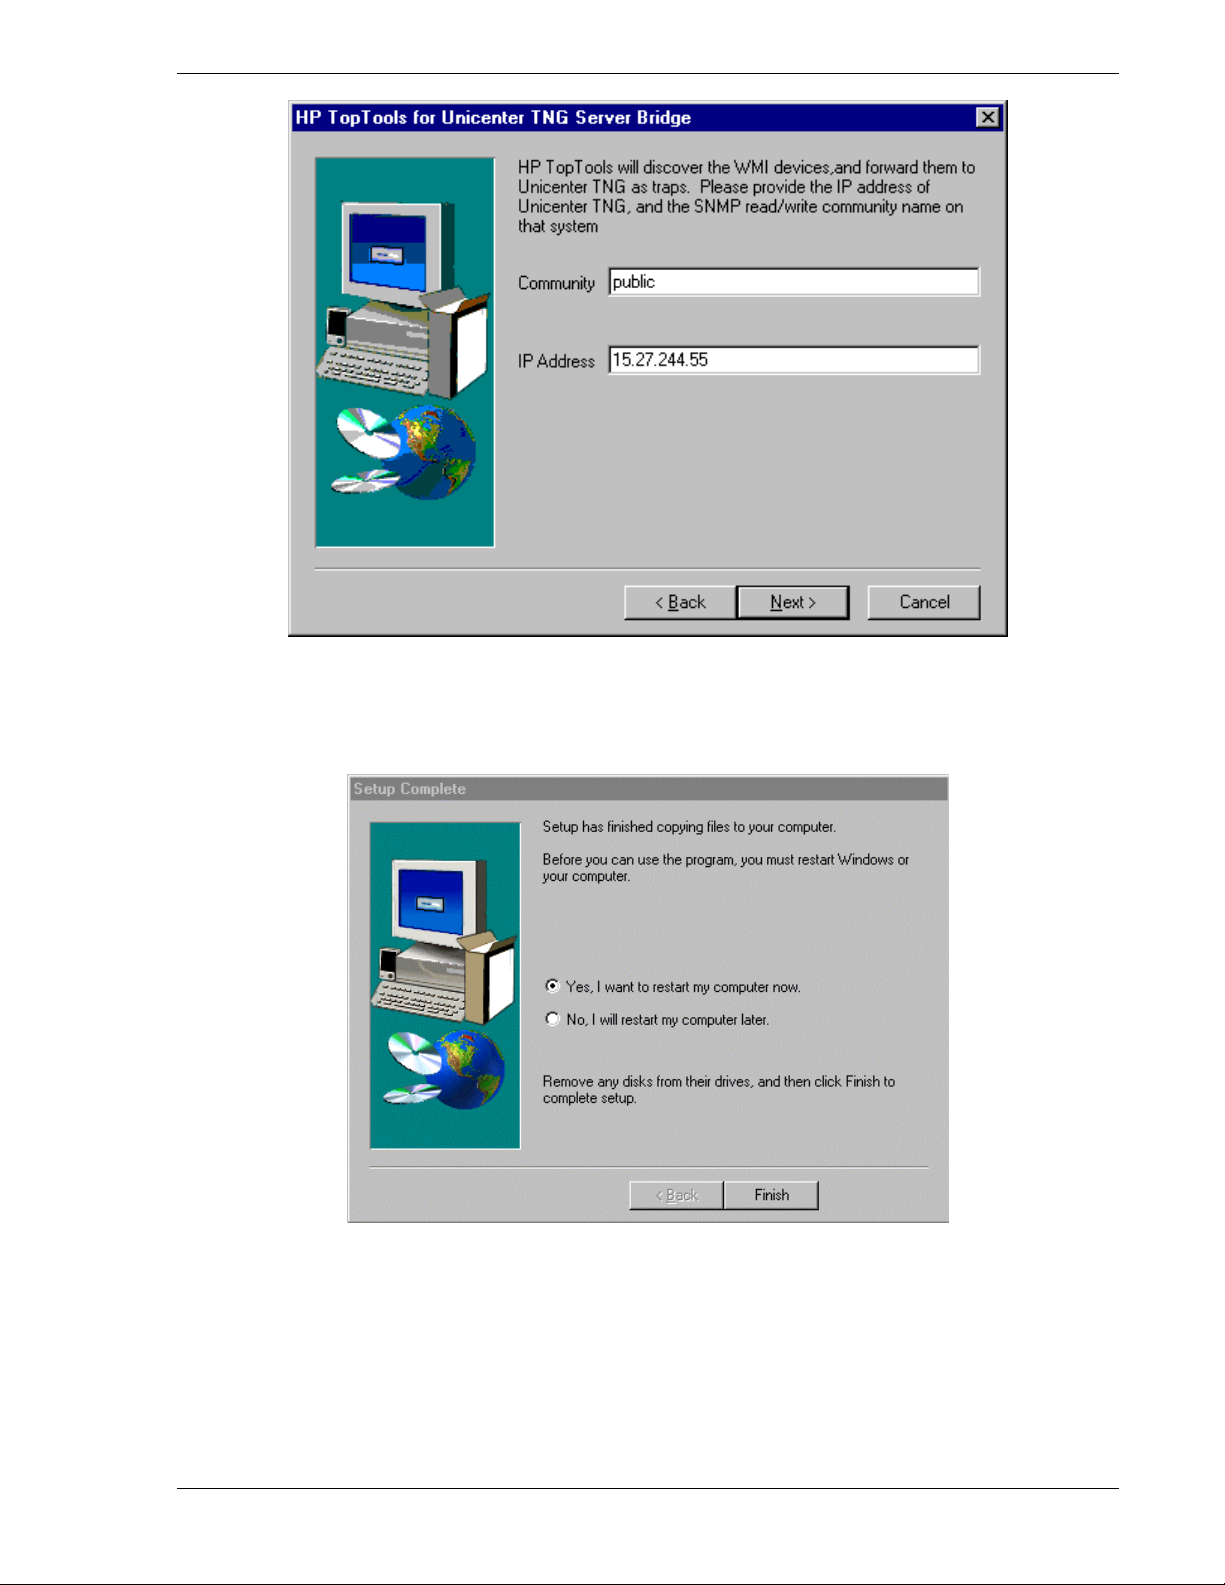
Next, setup requests the address of the Unicenter system. Enter the Community string and IP address into the fields.
Page 16
Page 17
HP Toptools for Unicenter User Guide
Figure 2-6. Enter the IP address of the system running Unicenter.
When installation is complete, you will see the following screen:
Figure 2-7. Final screen of server bridge installation.
Page 17
Page 18
HP Toptools for Unicenter User Guide
2.3 Post Installation Recommendations
The Toptools server must have its discovery database cleared AFTER the installation of the Toptools server bridge
component. This is because the devices discovered by Unicenter are sent to Toptools to populate MEDS (the
Toptools database).
To clear the Toptools database:
• On the Windows NT Service Control Panel, set: “HP Toptools Services” to manual startup.
• Reboot the system.
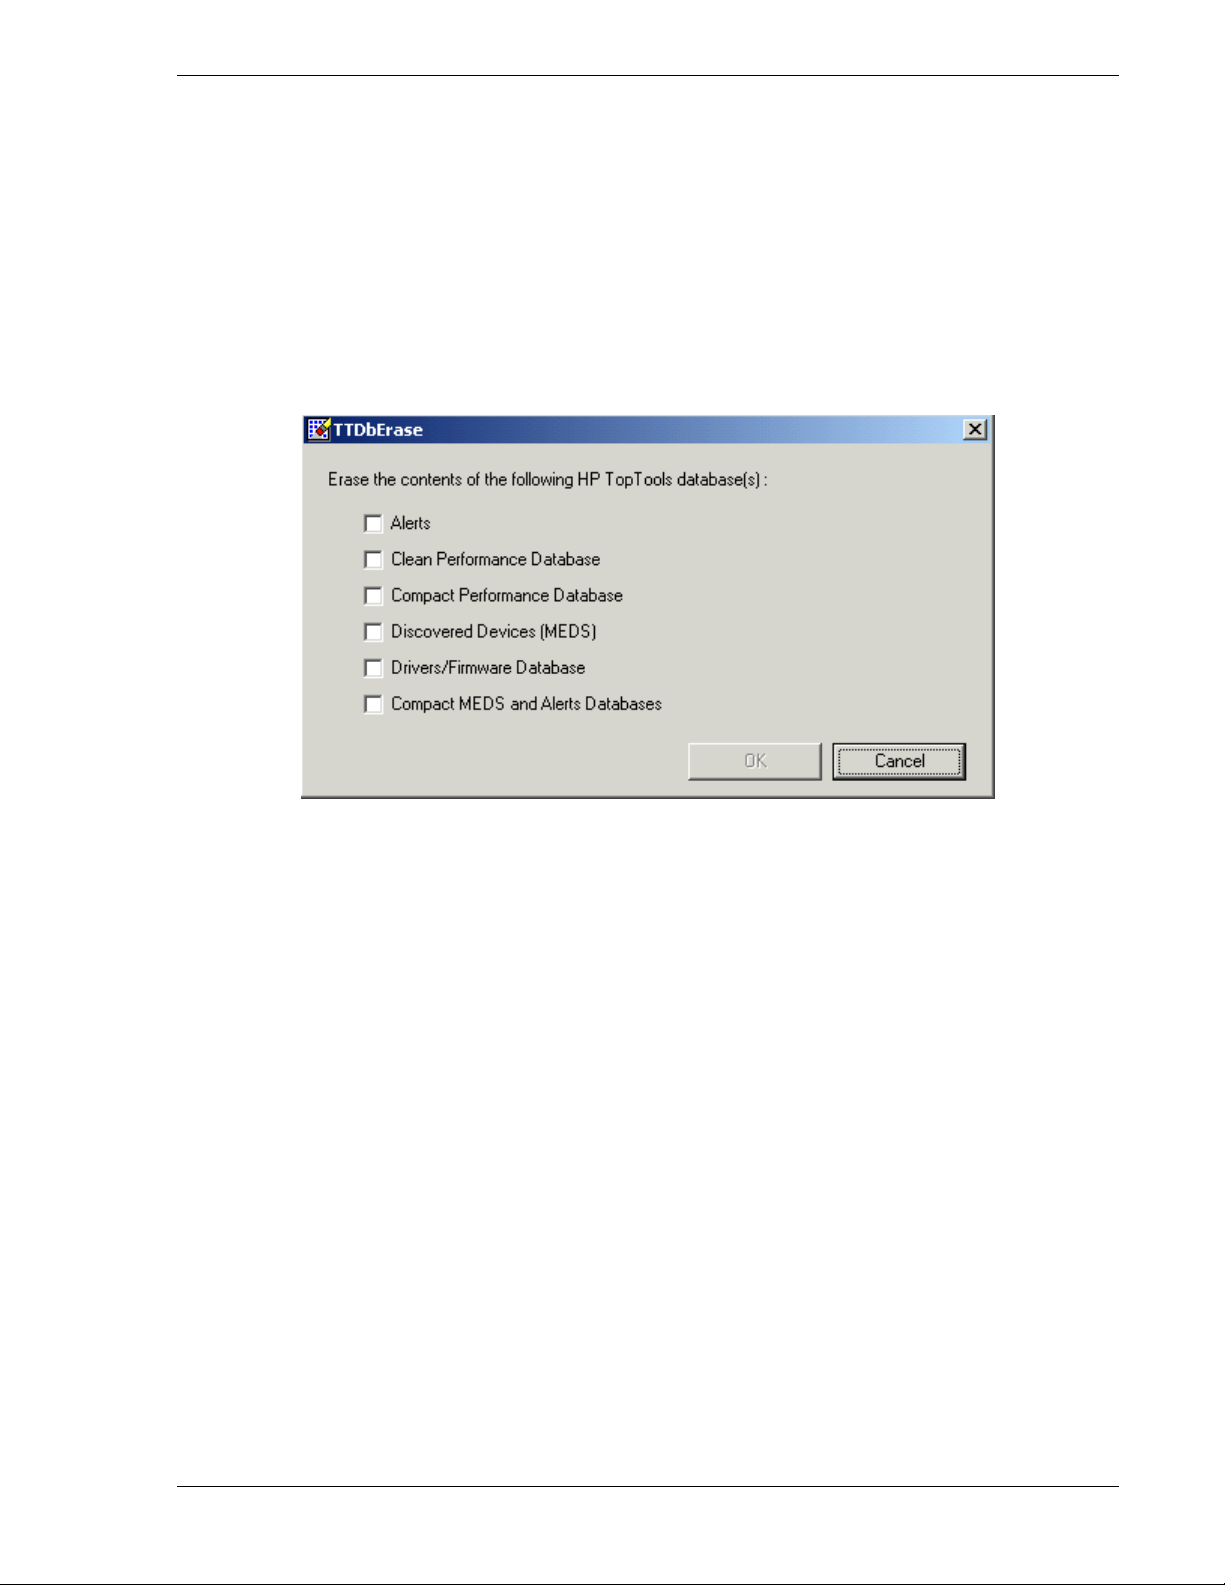
• Select
Start->Programs->HP Toptools->Clear Database to launch the following screen:
• Select “Discovered Devices (MEDS)” and press the OK button to completely clear the database.
• On the Windows NT Service Control Panel, change “HP Toptools Services” to automatic startup.
2.4 Verifying a Successful Installation
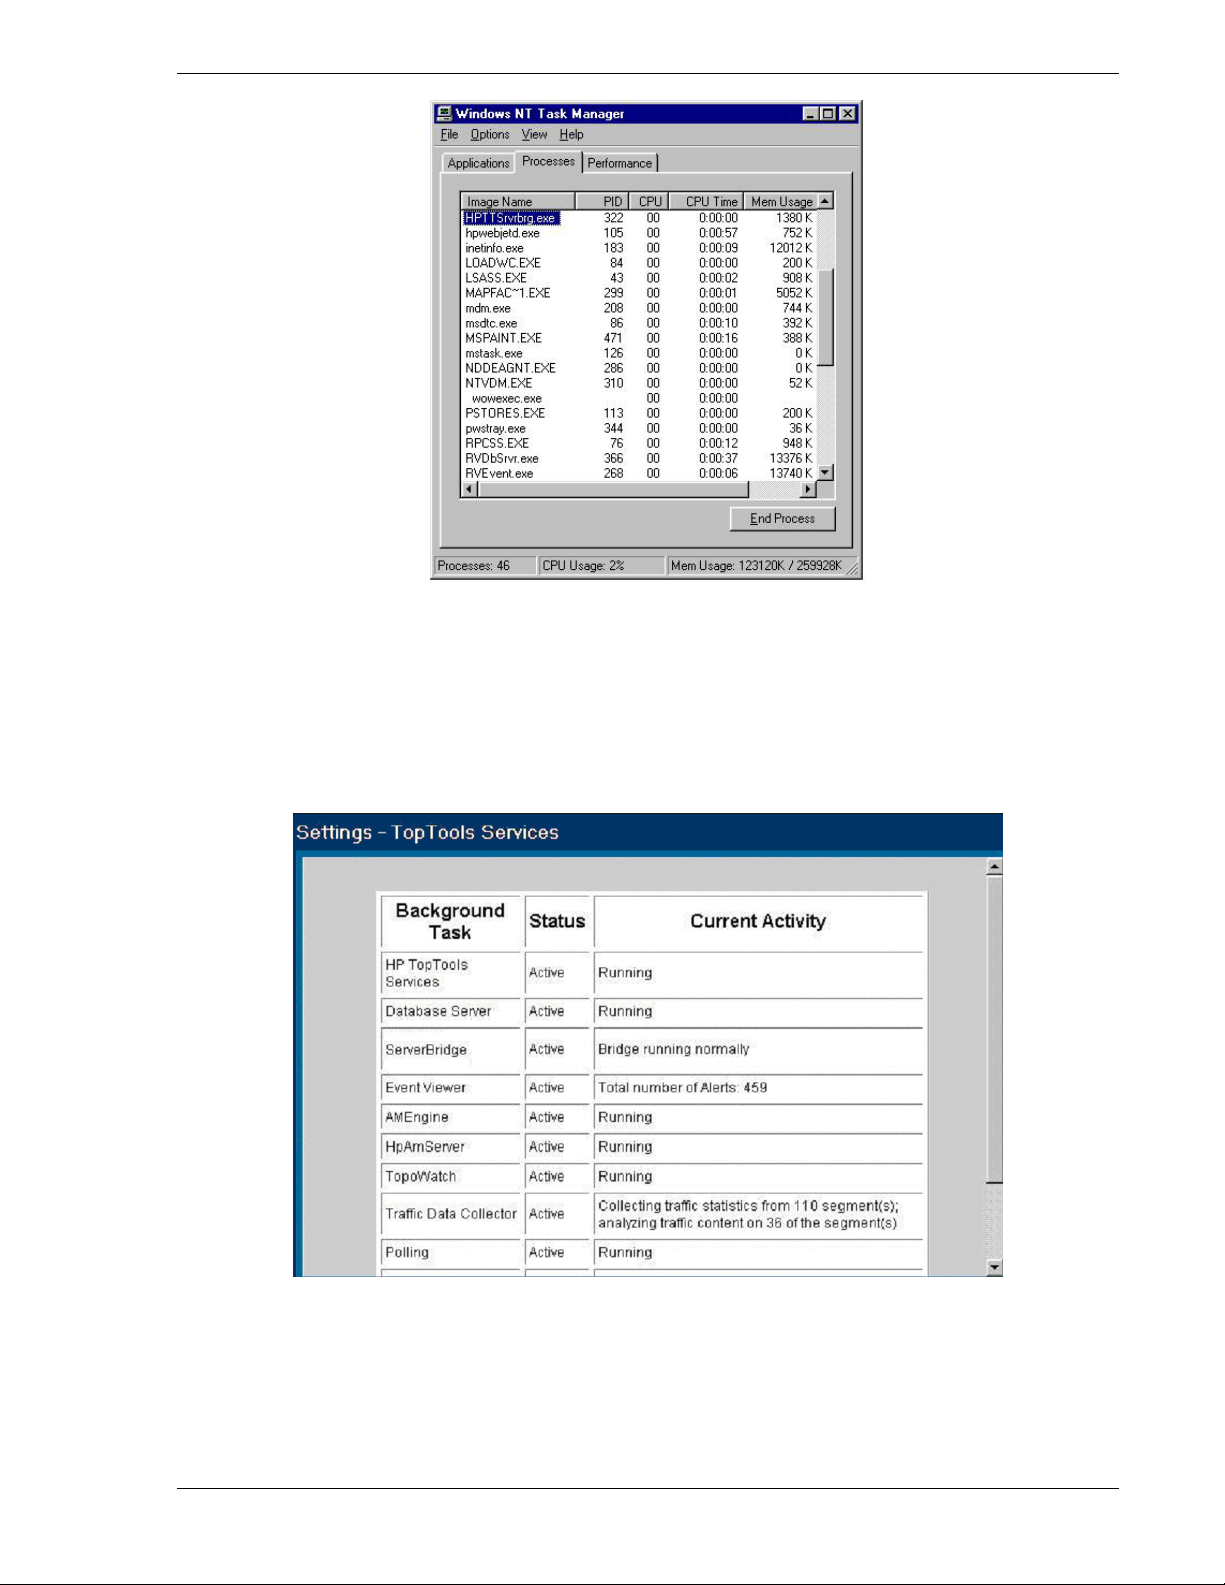
There are two simple ways of verifying that the installation of the server bridge was successful. First, after the
system has rebooted a new process should be listed in the task manager: HPTTsrvbrg.exe as shown below.
Page 18
Page 19
HP Toptools for Unicenter User Guide
Figure 2-8. The Toptools Server bridge component uses a background process called "HPTTSrvbrg.exe".
Second, this process should be listed as one of the Toptools services managed by the RViewSCM.exe manager, a
Toptools server process called the Service Control Manager. You can verify this by launching a console session
directly to Toptools. (As indicated by an icon on the workspace of the system running the Toptools server, or by
launching IE with the URL http://<Toptools_Server_IP address>/hptt.) From the main screen shown by the
browser, select Settings->Toptools Services and verify the status of the Toptools server bridge as shown in the
following figure.
Figure 2-9. The Toptools Services window displays the status of the Toptools Server Bridge.
The Toptools server bridge background task should be “Active” and the current activity should be “Bridge running
normally”. Reboot is not required, but recommended.
Page 19
Page 20

HP Toptools for Unicenter User Guide
Page 20
Page 21
HP Toptools for Unicenter User Guide
3 Installing the CA Unicenter Platform Bridge Component
The platform bridge component must be installed on the Unicenter system following the installation of the server
bridge component on the Toptools server.
The Unicenter platform bridge component installation process consists of the following:
1. Prepare the Unicenter console for installation by following the steps listed in this section.
2. Run the platform bridge installation wizard.
3. Perform post-installation wizard steps for Unicenter as specified in “Step-by-Step Instructions”.
3.1 Preparing the Unicenter System
In addition to having a properly installed and functioning CA Unicenter for Windows version 2.4 or 3.0 system, the
platform bridge component requires the installation of Microsoft Internet Explorer version 4.01 or greater. Refer to
the “Requirements” section of this Guide for more information on supported web browsers and their configuration.
3.1.1 Pre-installation Check and Configuration
Before installing the platform bridge component do the following:
• Verify that Unicenter is installed and functioning properly.
• Verify that Microsoft Internet Explorer 4.01 or greater is installed and configured properly and can connect to
the Toptools server. Configure the browser to “Bypass Proxy Server for local addresses” and specify the IP
address and host name of the Toptools server as a system to access by bypassing.
• Enter SNMP communities for managed HP devices.
• Use the browser to verify that the HP Toptools Server bridge component has been successfully installed, is
running, and is reachable over the network:
• Activate the SNMP trap server for Unicenter
1. On the Unicenter system Telnet to the Toptools IP address and port number.
At the DOS prompt enter "Telnet" <Toptools server address>
Example: Telnet 25.27.40.51 5041
2. A flashing cursor indicates a successful connection. If it fails to connect it will display the message,
"failure to connect". If you receive a failure, verify the IP address and port number that you entered
matches the address of the Toptools server and the port you entered during installation of the server
bridge.
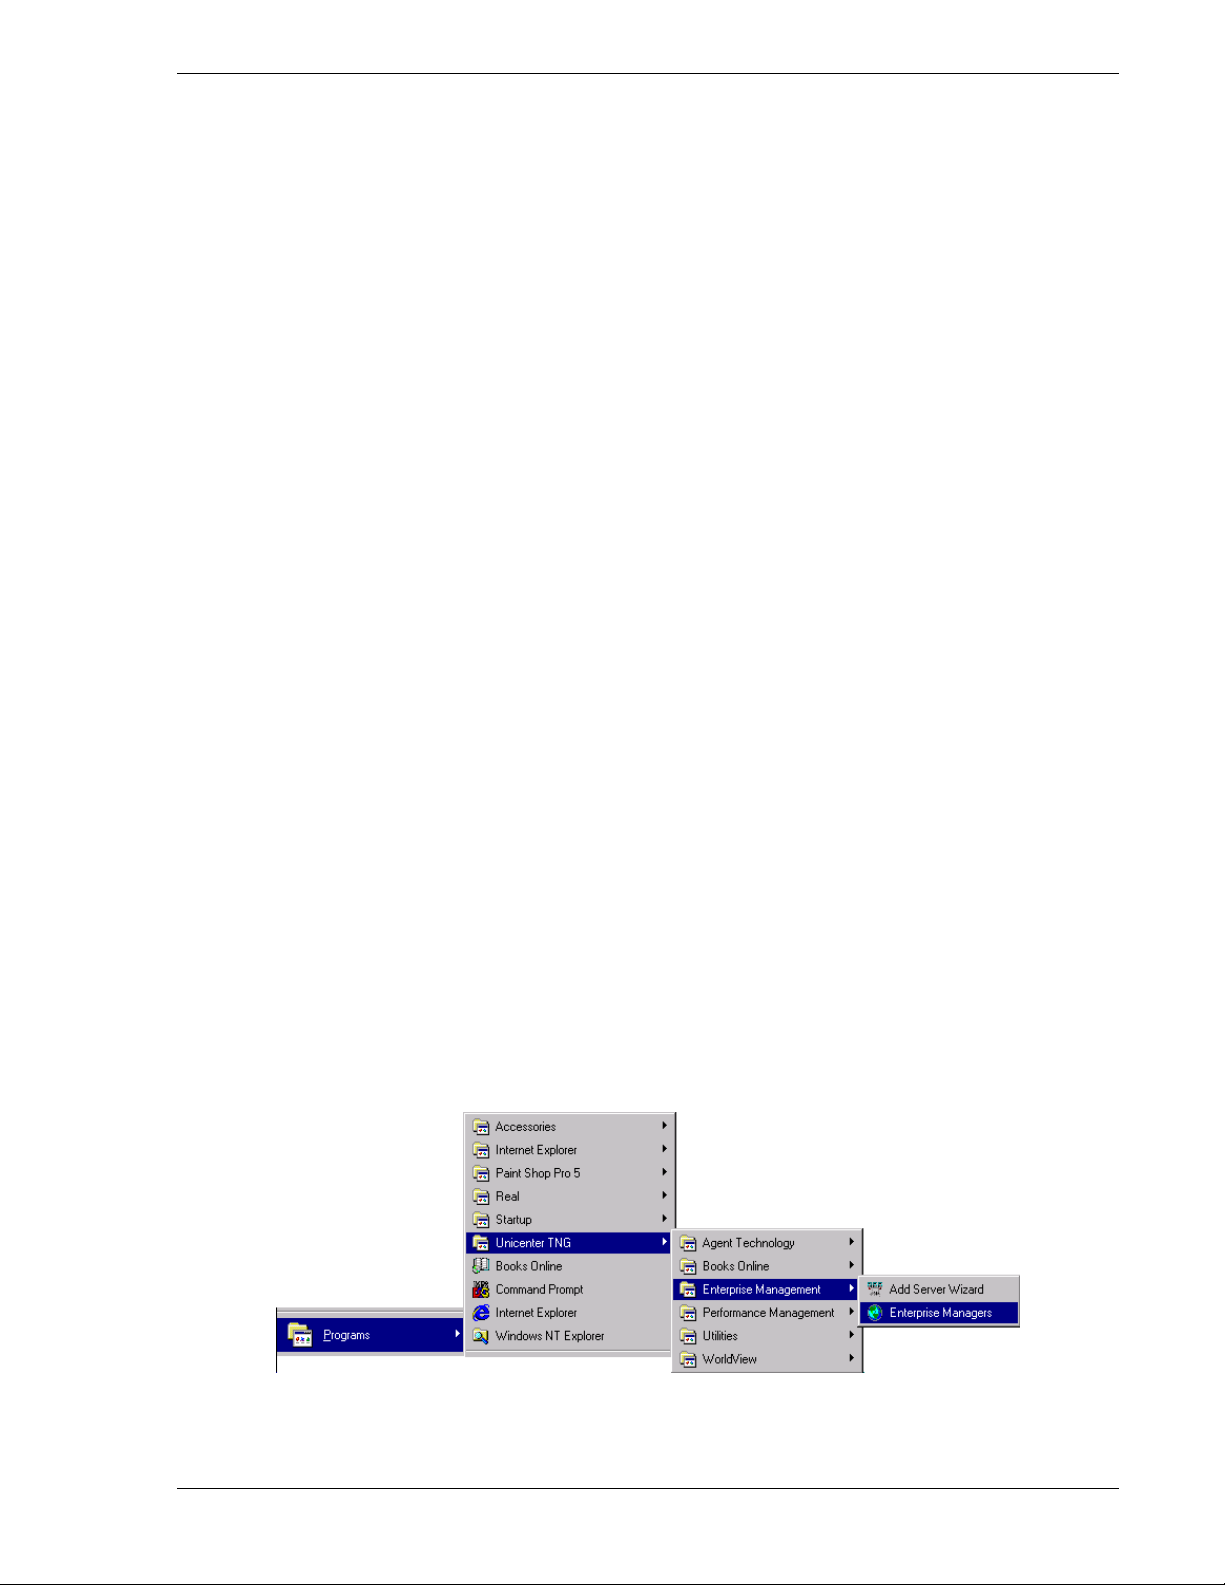
1. Select
Start->Programs->CA-Unicenter->Enterprise Management.
Page 21
Page 22
HP Toptools for Unicenter User Guide
2. Select Windows NT, Configuration, Settings.
Figure 3-1. Bringing up the Unicenter Settings screen.
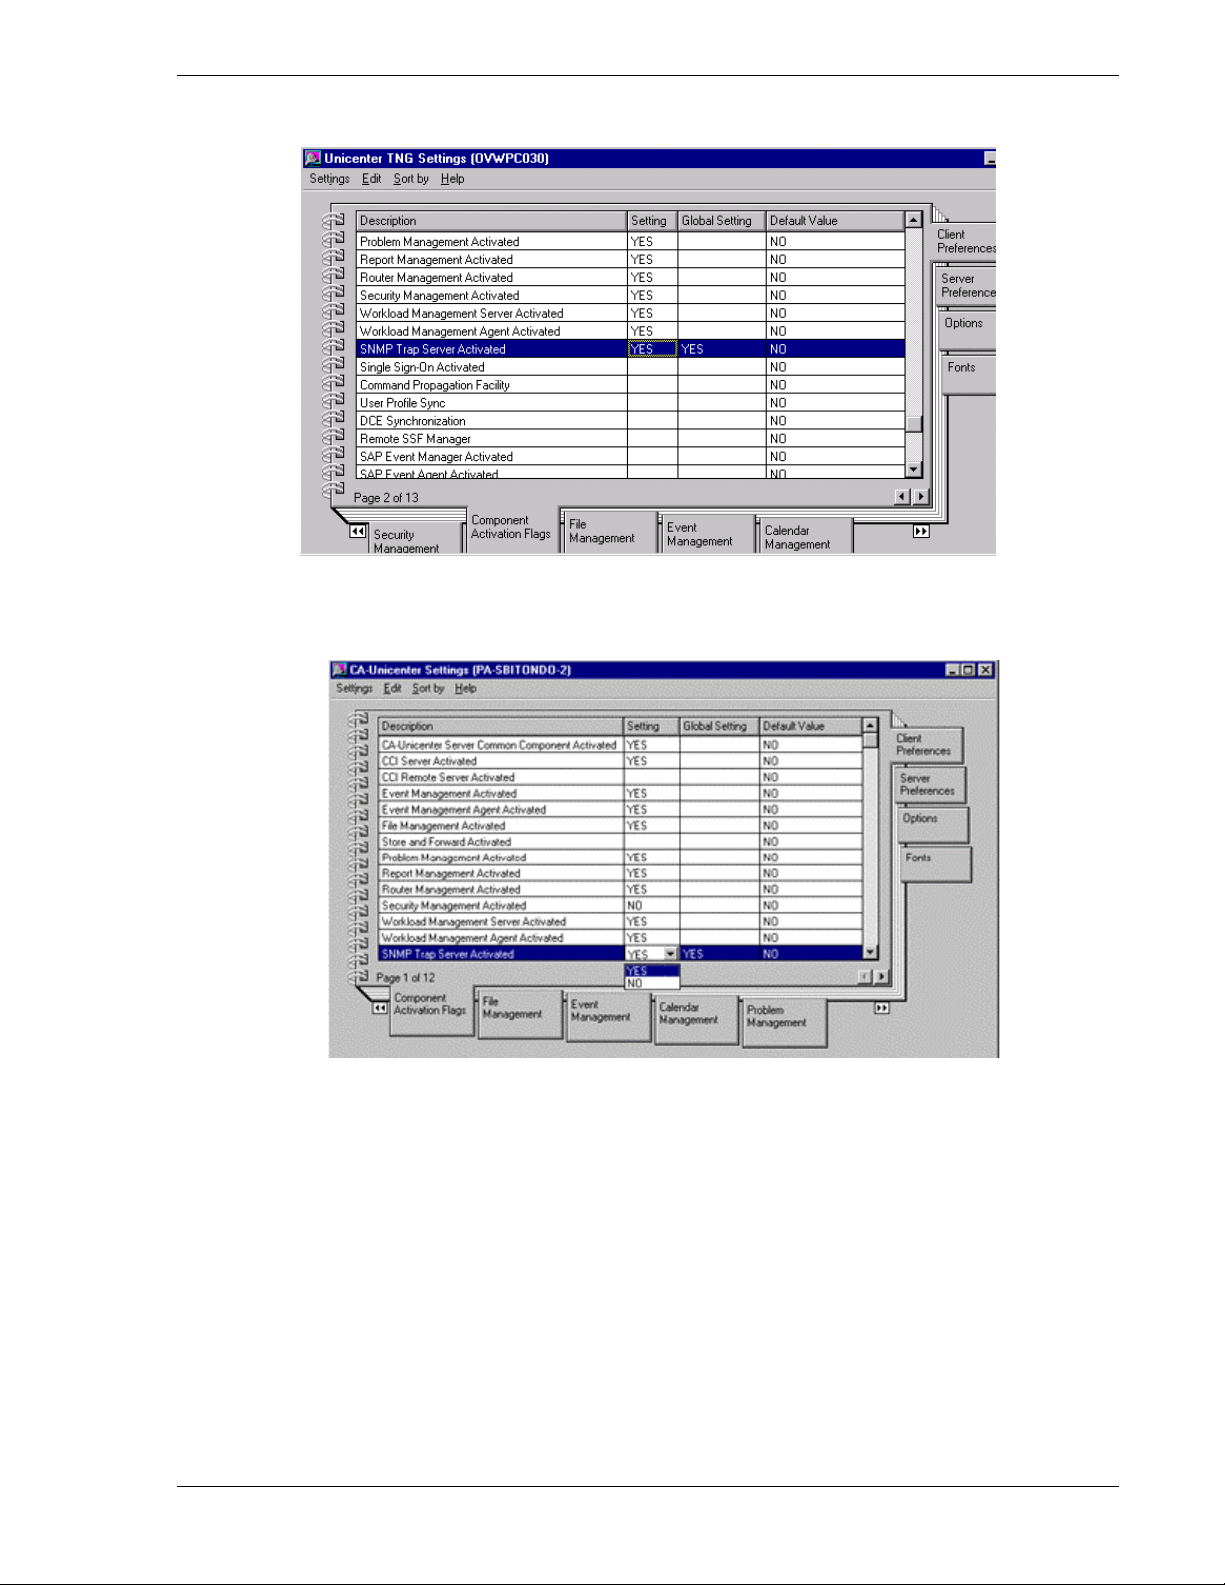
3. This brings up the CA-Unicenter Settings window as shown below:
Figure 3-2. Both Client and Server Preferences must have SNMP Trap Server activated.
4. Select both “Component Activation Flags” on the bottom tab, and “Client Preferences” on the right
tab.
5. Find the row “SNMP Trap Server Activated”. The value should be “Yes”. Double-click on the
settings column to set this value to “Yes”.
6. Select both “Component Activation Flags” on the bottom tab, and “Server Preferences” on the right
tab.
7. Find the row “SNMP Trap Server Activated”. The value should be “Yes”. Double-click on the
settings column to set this value to “Yes”.
• To allow reception of DMI and WMI alerts forwarded from the Toptools server as SNMP traps, go to the
Unicenter Settings screen (Figure 3-2) and click on the Event Management tab at the bottom of the dialog.
Scroll down and find the entry for Users authorized to issue commands. There should be an entry for the person
who installed Unicenter. There should be an entry for person who installed Unicenter as well as Unicenter’s
CAUNINT account. Additional users can be added if required. Refer to the Unicenter documentation.
• Set the Windows NT SNMP Trap service to manual.
Page 22
Page 23
HP Toptools for Unicenter User Guide
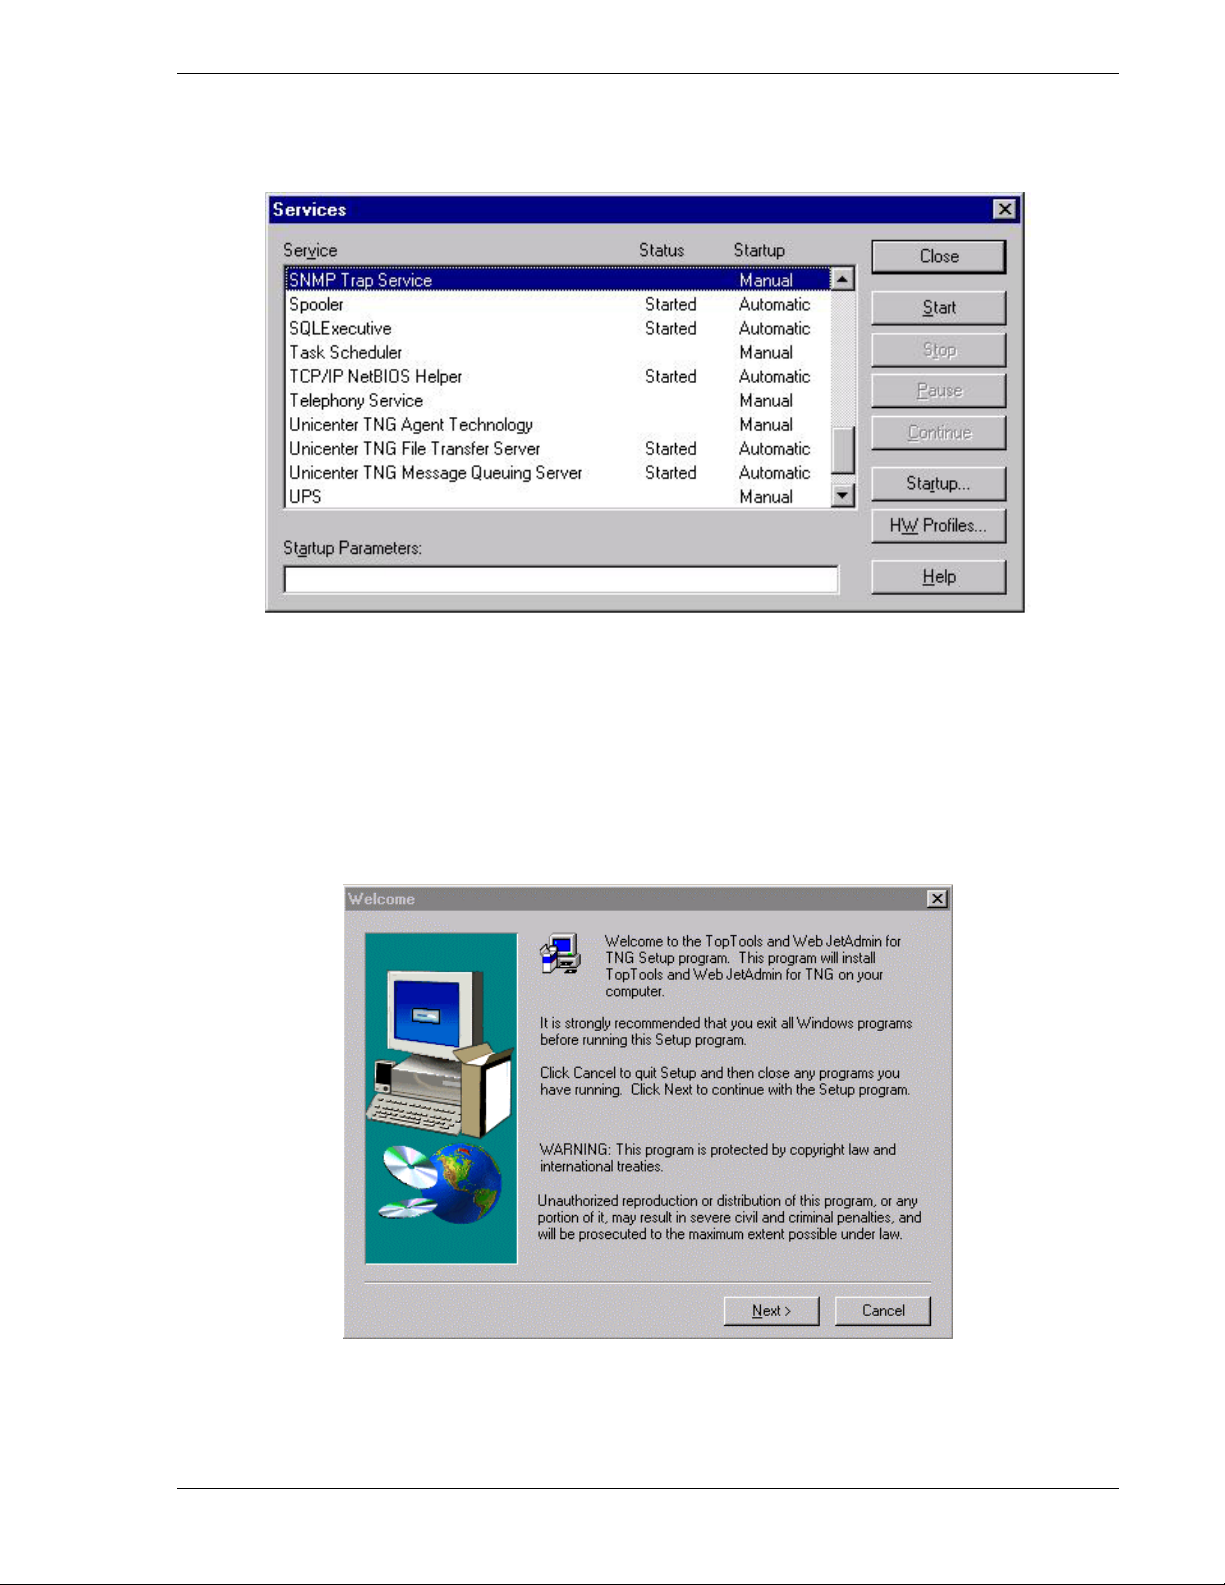
1. Select Start->Settings->Control Panel.
2. Select Services.
3. Select SNMP Trap service entry.
Figure 3-3. Set the "SNMP Trap Service" to "Manual" startup.
4. Set the Startup Type to Manual.
3.2 Step-by-Step Instructions
The platform bridge component is installed on the Unicenter system running the Repository and WorldView
console. To install the platform bridge component, go to the Enterprise\Tt4tng\PlatformBrdg directory on the CD
and run Setup.exe. After a few moments, the license agreement screen is displayed along with the headline “HP
Toptools for Unicenter
Figure 3-4. The first screen displayed is the Welcome Screen.
Page 23
Page 24
HP Toptools for Unicenter User Guide
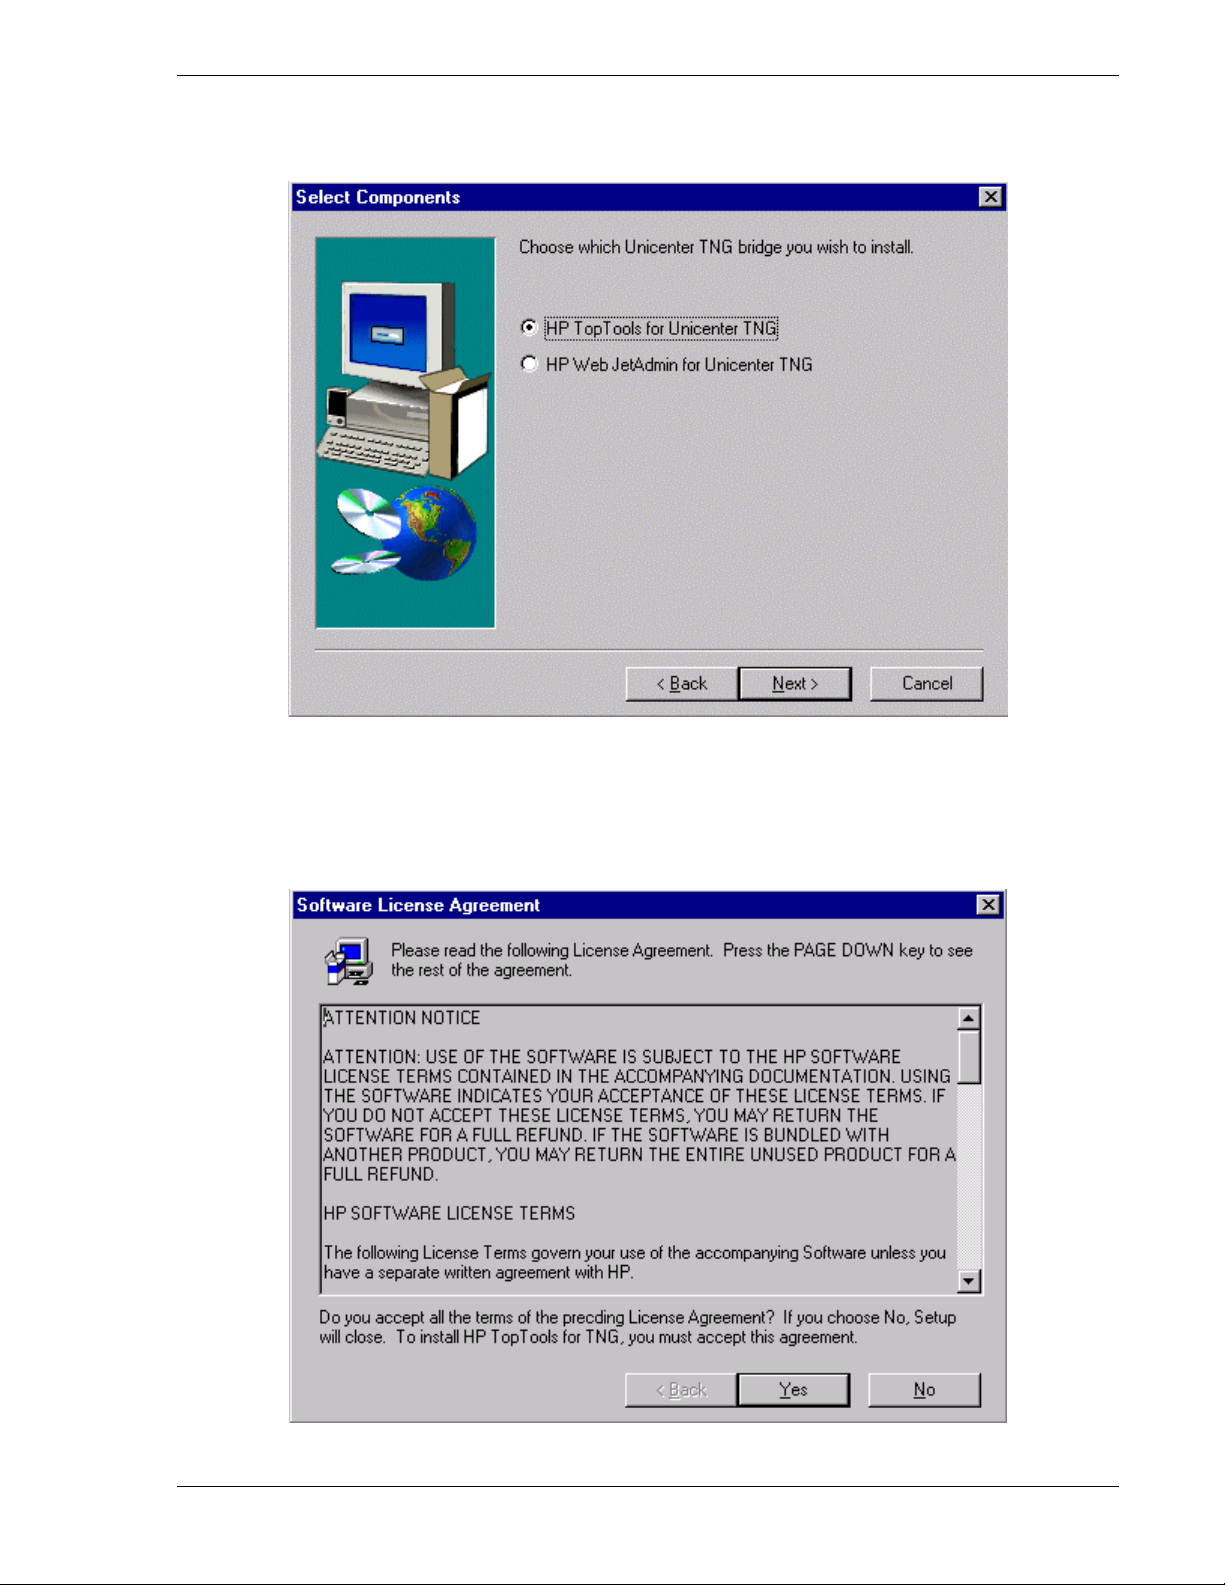
The next screen allows you to select HP Toptools for Unicenter or the HP Web JetAdmin for Unicenter platform
bridge components. For an explanation of the difference between these two products, refer to Before You Begin in
the “Requirements” section of this Guide.
Figure 3-5. Component Selection screen.
Select HP Toptools for Unicenter to install the HP Toptools for Unicenter platform bridge component. Refer to
section 4 “Installing HP Web JetAdmin for Unicenter” for instructions on installing and using HP Web JetAdmin
for Unicenter. Additional information on Web JetAdmin is provided by the online help in the Web JetAdmin
application.
Figure 3-6. The first screen displayed by the installation is the License Agreement.
Page 24
Page 25
HP Toptools for Unicenter User Guide
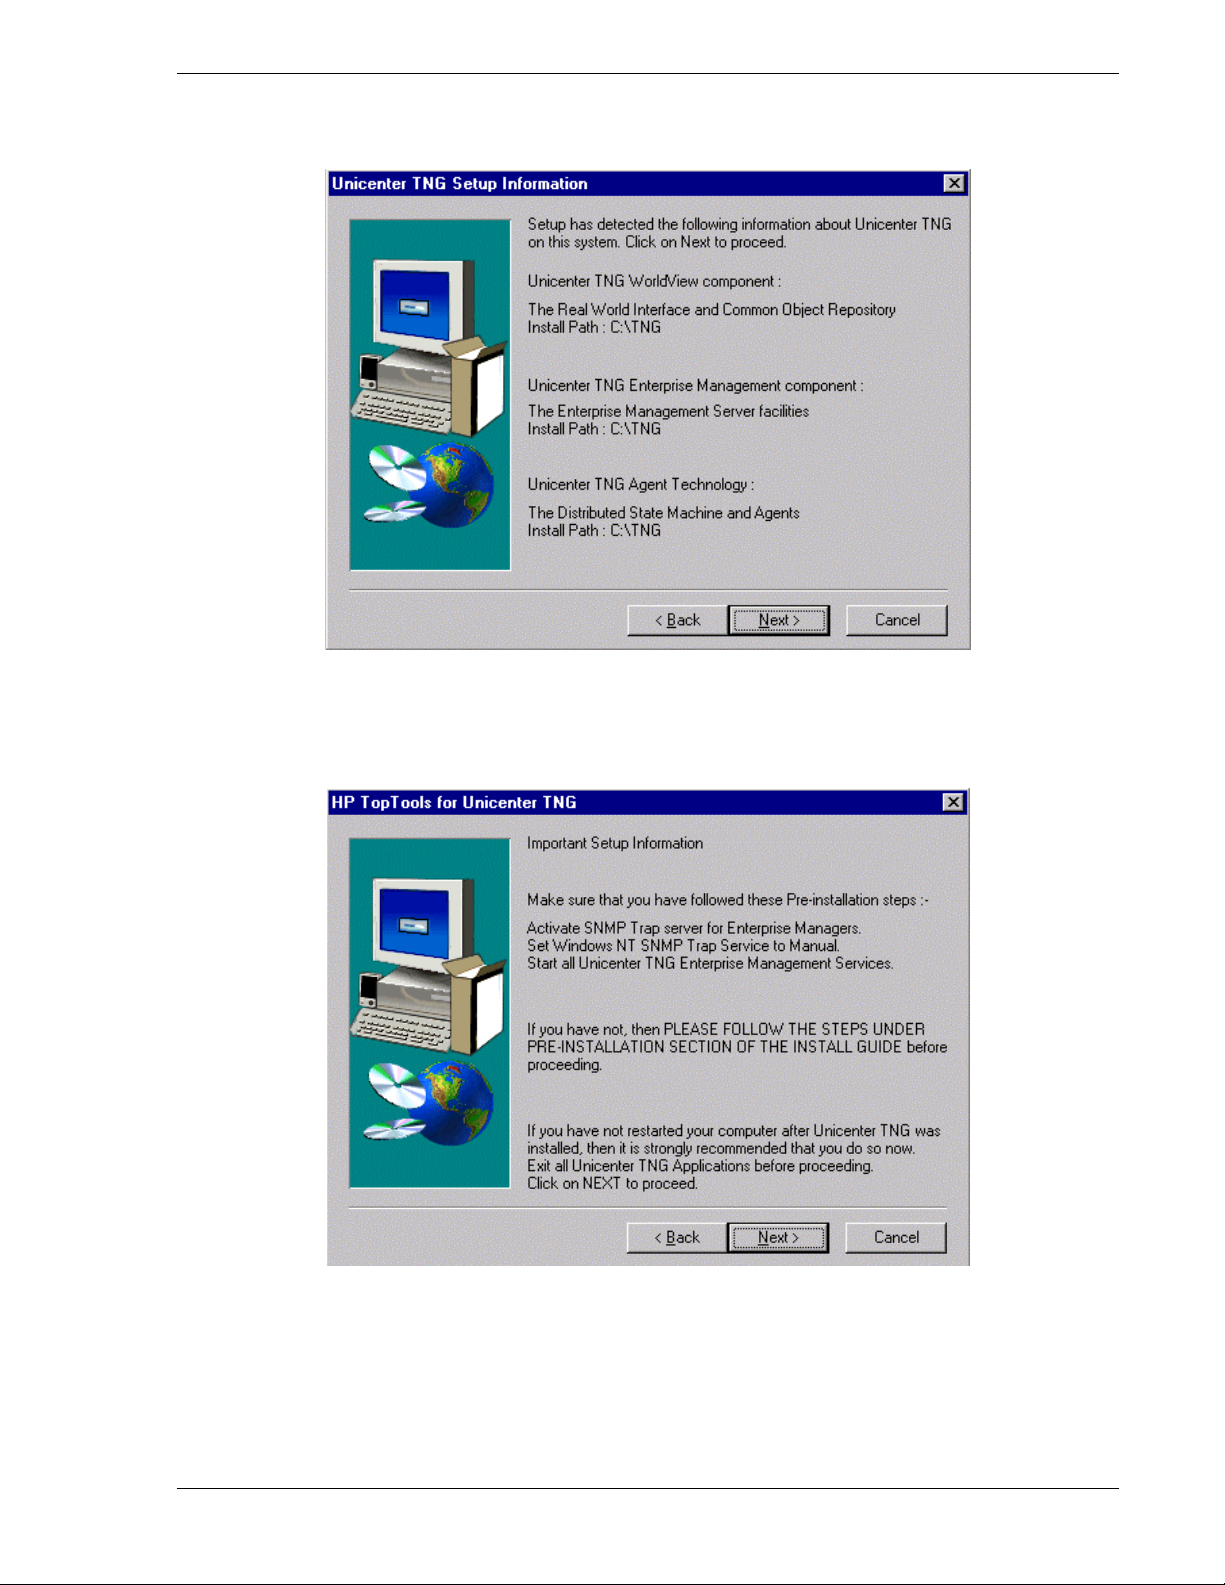
Setup determines where Unicenter is installed and displays this information:
Figure 3-7. Setup indicates the destination of installation files.
Next, the installation program displays a warning about prerequisites. These were detailed in the previous section.
Figure 3-8. Setup indicates prerequisites for this installation.
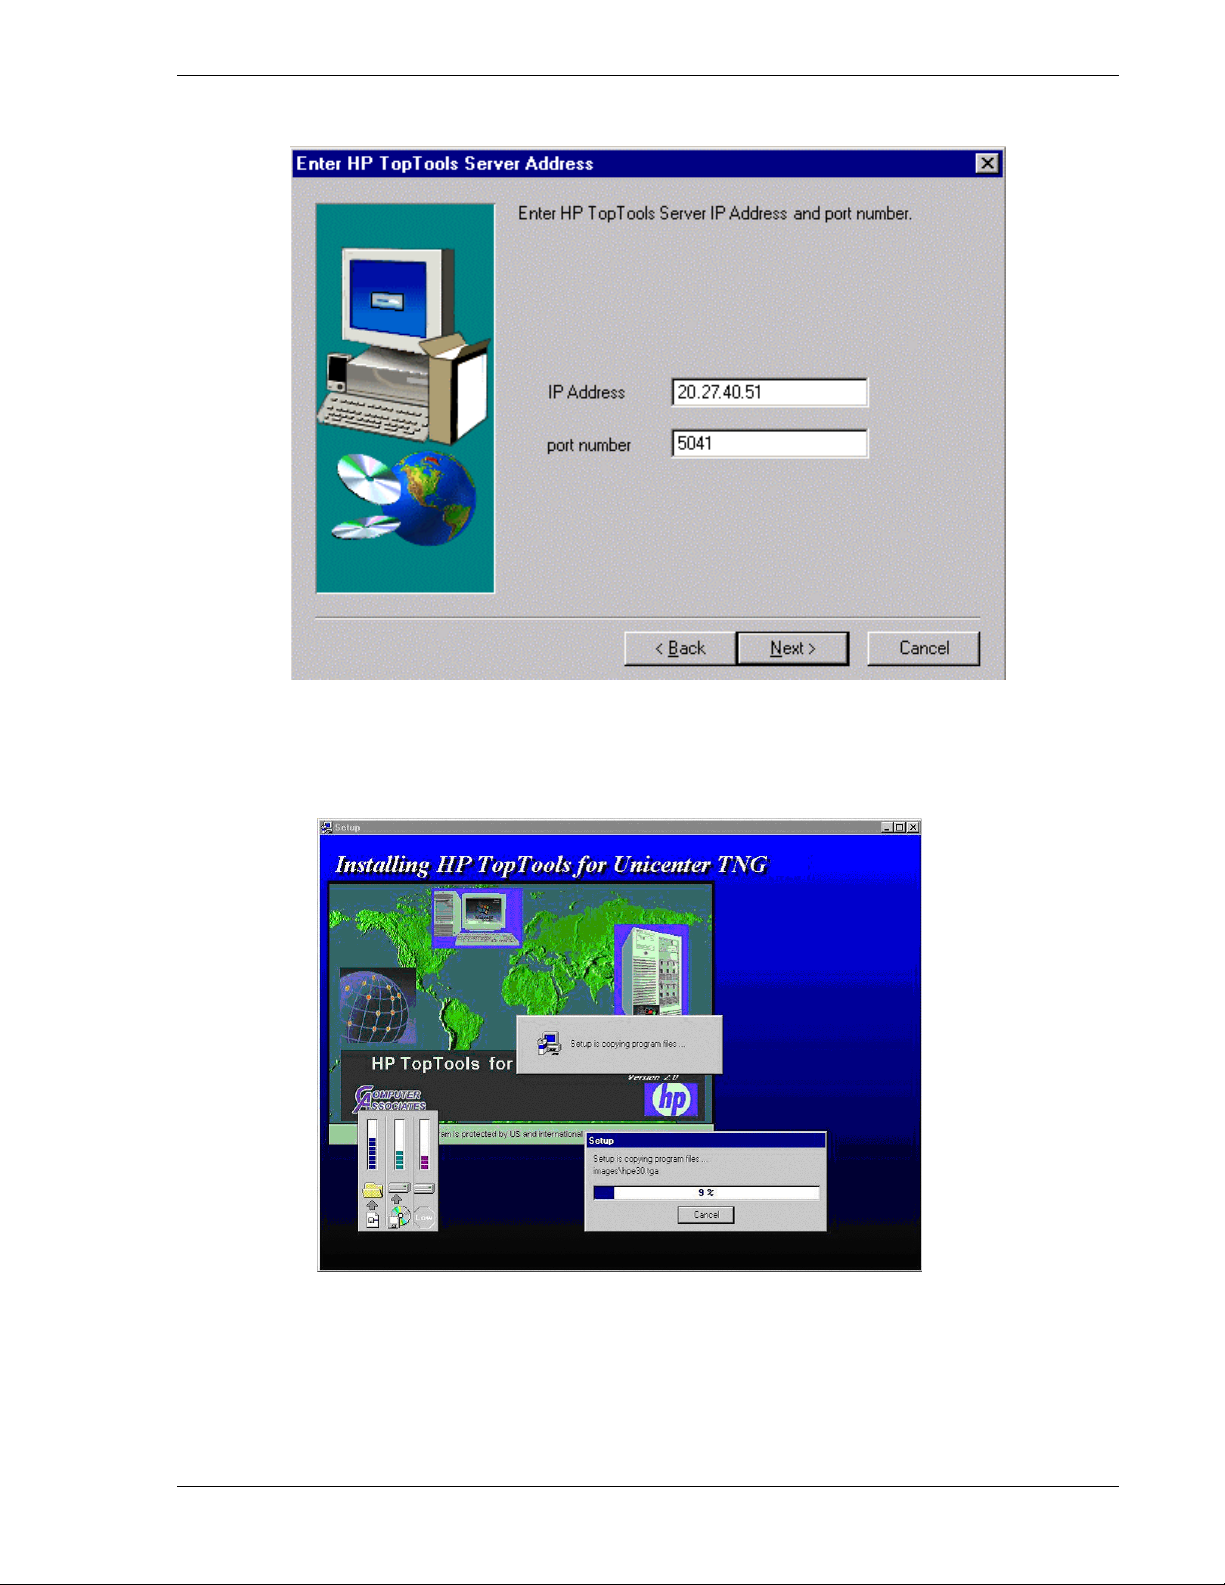
At this point, the installation program prompts you to enter the IP address of the system running the Toptools server
and server bridge, along with the TCP port number specified during server bridge installation. The default port is
5041; however, if you specified a different port number earlier, then you must enter the new number now.
Page 25
Page 26
HP Toptools for Unicenter User Guide
This screen is shown below:
Figure 3-9. The TCP port number must match the port number entered previously.
After entering the Toptools server information, the installation program continues installing as shown below.
Figure 3-10. Installation of the platform bridge component should complete in less than ten minutes.
Before completion, the installation program will attempt to gain access to the Unicenter database. You will be
prompted to login:
Page 26
Page 27

HP Toptools for Unicenter User Guide
Figure 3-11. You must select a repository and login.
Following successful login, a message will then be displayed stating that Setup is creating device classes and
objects.
The following HP MIBS will be installed into Unicenter. You can then use the Unicenter Object (MIB) Browser to
examine and modify SNMP variables for HP devices. A complete list of new MIBs is shown in the following table.
Table 3-1. MIBs added to Unicenter by the platform bridge.
MIB File Date MIB File Date MIB File Date MIB File Date
adaptec.mib 6/12/02 hpicfIpRoute.mib 6/19/02 hpSwitchStat.mib 6/19/02 rfc1850.mib 6/19/02
cageagt.mib 6/12/02 hpicfLinktest.mib 6/19/02 hpVlan.mib 6/19/02 rfc1850b.mib 6/19/02
cisco-cdp.mib 6/19/02 hpicfOid.mib 6/19/02 ianaiftype.mib 6/19/02 rfc1906.mib 6/19/02
cisco-smi.mib 6/19/02 hpicfOid.mib.def 6/13/02
cisco-tc.mib 6/19/02 hpicfOspf.mib 6/19/02 ieee8021pae.mib 6/19/02 rfc2011.mib 6/19/02
cisco-vtp.mib 6/19/02 hpicfRip.mib 6/19/02 ieee8023lag.mib 6/19/02 rfc2012.mib 6/19/02
hc-rmon.mib 6/19/02 hpicfSecurity.mib 6/19/02 ipx.mib 6/19/02 rfc2013.mib 6/19/02
hpeccmib.mib 6/12/02 hpicfSntp.mib 6/19/02 mlxraid.mib 6/12/02 rfc2020.mib 6/19/02
hpenv.mib 6/17/02 hpicfStack.mib 6/19/02 nsaasr.mib 5/31/02 rfc2021.mib 6/19/02
hpMemAgt.mib 8/16/02 hpicfTC.mib 6/19/02 nsadimm.mib 5/31/02 rfc2096.mib 6/19/02
hpn.mib 6/12/02 hpicfVg.mib 6/19/02 nsaevent.mib 5/31/02 rfc2108.mib 6/19/02
hpnetctz.mib 5/31/02 hpicfVgRptr.mib 6/19/02 nsafc.mib 6/17/02 rfc2266.mib 6/19/02
hpnr.mib 5/31/02 hpNetSwitch.mib 6/19/02 nsainfo.mib 6/17/02 rfc2571.mib 6/19/02
hpnrtrap.mib 6/12/02 hpr-sn-switch.mib 6/19/02 nsapci.mib 5/31/02 rfc2578.mib 6/19/02
hpprfmib.mib 5/31/02 hp-sn-agent.mib 6/19/02 nsarps.mib 6/12/02 rfc2579.mib 6/19/02
hpriagt.mib 6/17/02 hp-sn-appletalk.mib 6/19/02 nsascsi.mib 5/31/02 rfc2613.mib 6/19/02
hpswa.mib 5/31/02 hp-sn-bgp4.mib 6/19/02 nsatrap.mib 6/17/02 rfc2618.mib 6/19/02
hptat.mib 5/31/02 hp-sn-igmp.mib 6/19/02 nsatrcfg.mib 5/31/02 rfc2620.mib 6/19/02
hpEntMib.mib 6/19/02 hp-sn-ip.mib 6/19/02 nsatrmgr.mib 6/12/02 rfc2665.mib 6/19/02
hpHttpMg.mib 6/19/02 hp-sn-ipx.mib 6/19/02 nsavolcp.mib 5/31/02 rfc2668.mib 6/19/02
hpicf8023Rptr.mib 6/19/02 hp-sn-ospf.mib 6/19/02 nsnicmib.mib 5/31/02 rfc2674_p.mib 6/19/02
hpicfBasic.mib 6/19/02 hp-sn-pos.mib 6/19/02 parselog.mib 6/3/02 rfc2674_q.mib 6/19/02
hpicfBridge.mib 6/19/02 hp-sn-root.mib 6/19/02 rfc1213.mib 6/19/02 rfc2737.mib 6/19/02
hpicfChain.mib 6/19/02 hp-sn-sw-l4-switch.mib 6/19/02 rfc1493.mib 6/19/02 rfc2819.mib 6/19/02
hpicfChassis.mib 6/19/02 hp-sn-trap.mib 6/19/02 rfc1512.mib 6/19/02 rfc2863.mib 6/19/02
hpicfDownload.mib 6/19/02 hpSwitchConfig.mib 6/19/02 rfc1513.mib 6/19/02 symtrap.mib 6/17/02
hpicfEtwist.mib 6/19/02 hpSwitchDma.mib 6/19/02 rfc1724.mib 6/19/02
hpicfFf.mib 6/19/02 hpSwitchDrivers.mib 6/19/02 rfc1742.mib 6/19/02
hpicfGenRptr.mib 6/19/02 hpSwitchStack.mib 6/19/02 rfc1749.mib 6/19/02
ianaiprouteprotoco
l.mib
6/19/02 rfc1907.mib 6/19/02
Page 27
Page 28

HP Toptools for Unicenter User Guide
The installation wizard completes by displaying this final screen:
Figure 3-12. The platform bridge component will finish by requesting a reboot.
This screen indicates that the installation wizard has completed successful. A reboot is required for proper
operation. Installation is complete.
Note: If you integrate new components into your Toptools server, such as HP Web JetAdmin or Toptools for Hubs
and Switches, you must uninstall and then reinstall the platform bridge component in order for these new
capabilities to be recognized in the Unicenter console.
3.2.1 Configuring DSM
The following examples will demonstrate configuring DSM (Distributed State Machine) to manage Netservers.
However, it is necessary to perform the same steps for other HP device classes, in particular the DSM policies. The
following example illustrates selecting (ex. HP JetDirect Agents, HP RMC agents, or HP NSA agents) agents for
DSM to monitor.
Launch the DSM wizard by invoking
Continue to the screen shown in the following figure:
Start->Programs->Unicenter Agent Technology->DSM Wizard.
Page 28
Page 29

HP Toptools for Unicenter User Guide
Figure 3-13. Login to the Repository.
Enter the password for the Object Repository and select “Next” to get to the screen shown in Figure 3-14.
Figure 3-14. Select all the agents that may be loaded onto HP Netservers.
This screen permits you to select all agents (e.g. NSAAgent or Ping) that may applied to HP Netservers (or other HP
devices). The number of agents selected affects Unicenter’s performance. Consult Unicenter documentation for
more details.
When “Next” is selected, the following screen will be displayed:
Page 29
Page 30

HP Toptools for Unicenter User Guide
Figure 3-15. HP Netserver Node Classes (right panel).
Press Next..
The table in Figure 3-16 should list all the classes on the right hand side for the “NSAAgent”. Repeat this for
“Ping” and the Netservers classes.
When you are done adding the Netserver classes to agents of interest, press the “Next” button. This will bring up
the following screen:
Figure 3-16. Select subnets where these agents should be managed.
Select the subnets on which management of these agents should take place. Unlike auto-discovery, which takes
place interactively using the Unicenter auto-discovery window, DSM actively contacts agents to determine their
state. For example, the Ping Agent is using the ICMP layer of the IP stack on the end nodes. The Ping Agent is
polled, by default, every 5 minutes to determine if the system is up and running. By selecting a subnet in this
screen, you configure what networks are actively monitored using the DSM. Complete this screen and press “Next”.
Page 30
Page 31

HP Toptools for Unicenter User Guide
Figure 3-17. It may take some time for agent checks to update map status.
Even though you may indicate that the Ping Agent should be monitored on HP Netserver classes, it will take another
5 minutes before the next round of ping checks are executed and the status of the Ping agent in the submap updated.
3.2.2 Running ResetDSM
You must run “resetdsm” after DSM wizard is executed.
Run “resetdsm” and “awservices start” to make these changes take affect:
1. At the DOS prompt enter: resetdsm
2. Run HP Reclassification, World View-> HP Reclassification
3. Make sure the Setting entries on the Unicenter Event Management tab are "yes".
4. At the DOS prompt enter: unicntrl start all
Watch performance meter, this step may take 2-5 minutes. Wait. Do not do next step until the system stabilizes.
5. At the DOS prompt enter: awservices start
Watch performance meter, this step may take 10-15 minutes. Wait. Do not do next step until the system
stabilizes. Virtual memory consumption will grow.
Bring up 2-D or object view and look for Netserver Agents as depicted in the figure below. If agents are not present,
execute resetdsm and repeat steps 4 and 5.
Figure 3-18. The Netserver UniSpace has three Agents: WBEM Agent, Ping Agent, and NSAAgent.
The HPNetserver is a unispace now and is populated with agent icons for each SNMP agent loaded on the HP
Netserver. This can be seen in the Unicenter WorldView 2d map, 3d map, or NodeView. If an alert is received
from an agent, the agent color is changed and propagates up the hierarchy. The agent color is changed on the 2d
map, 3d map, and in the Node View. For more details on Unicenter’s DSM refer to Unicenter product
documentation.
Page 31
Page 32

HP Toptools for Unicenter User Guide
3.3 Reclassify HP Devices
HP Toptools for Unicenter adds processes to complement the native Unicenter discovery service.
The platform bridge discovery program attempts to classify all devices in the Unicenter repository by doing
extended SNMP, DMI, and WMI discovery on those devices. For each HP device discovered, the icon on the
Unicenter map is changed and additional functionality is enabled via the Toptools menu in Unicenter. The
discovery process is not instantaneous; extended DMI, WMI, and SNMP requests can take some time. A file,
Repository Data to Toptools.log, can be generated to monitor the status of the reclassification. For instructions on
enabling logging read the section “Useful Log Files”.
Each time the “HP Reclass Service” service is restarted using the Windows NT Service manager, all objects in the
Repository are transferred to the HP Toptools Server. Note that a new reclassification (HP discovery) is not started
as a result of this action. To start a new reclassification, the menu item
>Reclassify HP Devices must be selected. This is automatically launched following Unicenter’s Autodiscovery.
The following panel is displayed:
Start->Programs->Unicenter WorldView-
For more information on the discovery process, refer to the Theory of Operation section of this Guide.
3.4 Verifying a Successful Installation
There are a few ways to check that the platform bridge has installed successfully.
• Launch the Unicenter Class Browser. New classes should be placed in the hierarchy as appropriate.
Highlighted below is Workstation->HPDesktop->HPDesktop_DMI_2X:
Page 32
Page 33

HP Toptools for Unicenter User Guide
Figure 3-19. Unicenter Class tree now includes HP specific classes.
Check for new menu items placed into the Windows NT Start menu as shown in the following figure.
• Create HP Device Classes can be used to recreate the classes shown above. This may be useful if the class
repository is cleared.
• Reclassify HP Devices provides a manual mechanism for starting the complete reclassification of all nodes in
the Unicenter repository.
• Remove HP Device Classes cleans up the class repository, if this is ever required.
Page 33
Page 34

HP Toptools for Unicenter User Guide
Figure 3-20. The platform bridge creates three new menu items.
Check the status of new processes. Looking at the Windows NT Service Control Manager, the “HP Toptools for
Unicenter” service corresponds to “HP Reclassification Service.exe”:
Figure 3-21. HP Toptools for Unicenter service should be Automatically started.
Under Task Manager, an indication that the platform bridge is working is that the background process HP Reclass
Serv (full name is “HP Reclassification Service.exe”) which corresponds to the service “HP Toptools for
Unicenter”, is listed as shown below:
Page 34
Page 35

HP Toptools for Unicenter User Guide
Figure 3-22. The bridge adds a new process: HP Reclass Serv.
After the initial installation, node reclassification can take 15-30 minutes. During this time, the process HP
Reclassifica (full name is “HpttReclassification.exe”) will be running as shown in the previous diagram. Look for
changes in the Unicenter map. Unicenter maps will now have customized icons and images that represent devices
determined to be HP devices. During reclassification, each node in the Unicenter database is queried using SNMP or
DMI to determine which class it belongs to. While the maps are usable immediately, not all HP nodes will properly
reflect their final classification until this discovery process completes.
The following 2d map shows a number of HP desktops, one Omnibook notebook computer, and one HP printer:
Figure 3-23. The Unicenter Map displays custom HP icons.
Page 35
Page 36

HP Toptools for Unicenter User Guide
Page 36
Page 37

HP Toptools for Unicenter User Guide
4 Installing HP Web JetAdmin for Unicenter
HP Web JetAdmin is a web-based tool designed to manage HP printing products. HP Web JetAdmin for Unicenter
integrates management of HP printers into Unicenter. If you need to manage only HP printers from Unicenter, this
solution links directly to Web JetAdmin providing unlimited management of HP printing products.
If you need to manage HP printers and other HP products such as HP Vectras or HP Netservers, you should install
HP Toptools for Unicenter with Web JetAdmin integrated into the Toptools environment. Instructions on
installation of HP Toptools for Unicenter is provided in Section 3 of this Guide.
Refer to HP Web JetAdmin documentation for more information on using HP Web JetAdmin.
4.1 Step-by-Step Instructions
1. To install HP Web JetAdmin for Unicenter Bridge, run CD\Enterprise\Tt4tng\PlatformBrdg\Setup.exe.
Figure 4-1. Product Selection Dialog.
2. Select HP Web JetAdmin for Unicenter and click Next.
3. A license agreement will be displayed. Click on Yes to accept the agreement and continue. A Welcome page
will be displayed.
Page 37
Page 38

HP Toptools for Unicenter User Guide
Figure 4-2. Welcome Screen.
4. Click on Next to continue.
5. You will be asked to input the address and port for the address of your Web JetAdmin server. The default port is
8000. If the address and port are incorrect an error message will be displayed. Enter the address and click on
Next.
Figure 4-3. Web JetAdmin Server Information Dialog.
This will cause the HP printer MIB files to be installed. The printer MIBs installed are listed in the following table.
Page 38
Page 39

HP Toptools for Unicenter User Guide
Table 4-1. MIBs added by HP Web JetAdmin for Unicenter.
MIB File Date MIB File Date
ljS5000.mib 03/23/01 lj5.mib 03/23/01
ljS8000.mib 03/23/01 lj5Si.mib 03/23/01
ljSmbm.mib 03/23/01 lj5SiMop.mib 03/23/01
ljS8000stapler.mib 03/23/01 lj6P.mib 03/23/01
jd_master_mib.txt 03/23/01 ljS4000.mib 03/23/01
lj4V.mib 03/23/01
6. When the MIB files have been installed a Setup Complete dialog will be displayed. Click Finish.
You do not need to reboot your system. Note, some of these MIBs are also added as part of HP Toptools for
Unicenter.
4.1.1 Reinitialize Unicenter
After installing the HP Web JetAdmin for Unicenter bridge you should reinitialize Unicenter by running resetdsm.
Refer to “Step-by-Step Instructions” in Section 3.2.1 of this Guide for instructions on configuring and resetting
DSM for Unicenter environments.
4.2 Verifying a Successful Installation
Quick steps to verifying a successful installation:
• The Unicenter Worldview menu should now display an entry for Uninstall HP Web JetAdmin for Unicenter.
• Open a 2D map and look for new HP printer icons on systems known to be manufactured by HP.
• Select an HP printer on the map and raise the popup menu. The menu entry “HP Web JetAdmin Properties”
should appear.
• A new agent should appear within the printer Unispace.
4.3 Using HP Web JetAdmin for Unicenter
HP Web JetAdmin for Unicenter adds:
• Printer MIBs into Unicenter that can be accessed from the Object Browser.
• The ability to receive and monitor events through DSM.
• Customized icons that appear in browsers and maps.
• A launch to Web JetAdmin from Unicenter popup menus (as shown below).
Page 39
Page 40

HP Toptools for Unicenter User Guide
4.3.1 Accessing Printer Properties
HP Web JetAdmin Printer Properties opens Web JetAdmin for the selected printer in your default browser. To
access printer properties:
1. Right-click on a printer from a Unicenter map or browser to bring up the popup menu as shown in the figure
below.
2. Select HP WebJetAdmin Printer Properties.
More information on managing HP printers from within an integrated Unicenter environment is provided in the
Using HP Toptools for Unicenter section of this Guide.
Printer Trap Proxy
A proxy program for sending printer traps to the Unicenter console is provided in the contributed library directories
of the Unicenter bridge components on the Enterprise CD. It is also available from the HP Toptools web site. This
program is not supported and is made available for use only where needed for customer convenience. Refer to the
readme file in the contributed software directory for additional information.
Uninstalling HP Web JetAdmin for Unicenter
To uninstall, click Start, Programs, Unicenter, Worldview, Uninstall HP Web JetAdmin for Unicenter. After
performing the uninstall, run resetdsm to reinitialize Unicenter’s DSM following removal of printer agents.
4.3.2 Verifying a Successful Uninstall
To verify a successful uninstall:
• HP printers should no longer be identified with customized icons.
• HP printers should no longer have an HP JetDirect Agent in Unispace.
• The menu item “Uninstall HP Web JetAdmin for Unicenter” should be removed.
• The menu items for HP Web JetAdmin should no longer be listed in the Tools menu.
Page 40
Page 41

HP Toptools for Unicenter User Guide
5 Using HP Toptools for Unicenter
HP Toptools for Unicenter customizes Unicenter to be able to manage HP products while integrating HP Toptools
applications into the Unicenter console.
5.1 New Management Features
The following management features are added with HP Toptools:
• Discovery and identification of HP products
• Toptools applications are added to the Unicenter menus
• Enhanced event management
5.1.1 Discovery and Identification of hp Products
As a result of enhanced discovery services that identify and classify HP products, HP devices are displayed with a
custom HP icon. HP PCs running Windows 2000 are shown using the standard Unicenter icon.
Table 5-1. Customized HP Icons for Unicenter
HP Vectra
HP Vectra
Visualize Workstation
HP NetVectra
HP Kayak
HP Omnibook
HP PalmTop
HP Netserver NT
HP Netserver Windows
2000
HP Netserver NetWare
HP Toptools Remote
Control card
HP Blade GSP Card
HP Advancestack
Switching Hub
HP Advancestack 10/100
LAN Switch-16
HP Advancestack Hub
HP 12-Port Hub
HP Advancestack
100Base-T Hub
HP Remote Bridge
HP LAN Bridge
HP Procurve Switch
1600M
HP Printer (requires Web
Jetadmin bridge)
HP Fiber-Optic Hub
HP Advancestack Switch
800T
HP Advancestack 100VG
Hub
HP Advancestack Switch
2000 (B)
HP Advancestack Switch
100, 200
HP Advancestack Switch
2000
HP Advancestack Switch
208, 224
HP Netserver OS/2
HP Netserver Linux
HP IA-32 Windows 2000
HP IA-32 Linux
HP ThinLAN Hub
HP 24-Port Hub
HP Procurve Switch
4000M
HP Blade Switch
HP 48-Port Hub!
HP Procurve Routing
Switch
HP Procurve Routing
Switch 6308-SX
Page 41
Page 42

HP Toptools for Unicenter User Guide
5.1.2 toptools Applications added to Unicenter Menus
Once HP devices are classified, new Toptools menu items become enabled based on HP device classes. Rightclicking the mouse over an HP node will display the HP Toptools menus as an additional entry to the standard popup menu box. The following is an example of the menu items for an HP hub:
Notice that there are five new actions available for an HP hub: launching the “HP Toptools Properties” web page,
changing the SNMP password, or updating the firmware. (Properties (Device View) requires that the Toptools
server and Unicenter system are installed on the same system.) In addition, the action “Management Home Page”
will be present for web enabled devices.
Select a node to display the object and its agent. The Figure 5-1 shows information on an HP Netserver.
Figure 5-1. A Left-click on the device in the Unicenter Topology list displays node information.
5.1.3 Enhanced Event Management
Through HP Toptools for Unicenter you will automatically receive alerts from HP Netservers and HP PC products.
Alert forwarding is automated during the Unicenter and Toptools discovery processes.
HP ProCurve and AdvanceStack products may be configured to automatically forward traps to Unicenter through
Toptools. See Section 5.9 for further information.
Page 42
Page 43

HP Toptools for Unicenter User Guide
HP printers may be configured to send traps directly to Unicenter, or customers may implement the HP JetDirect
Trap Proxy Server to automate reception, filtering, and forwarding of printer alerts to Unicenter. The JetDirect Trap
Proxy Server software is included in the Contributed Library on the HP Toptools Enterprise Products CD.
HP Netservers, Toptools Remote Control cards, and printers are managed through DSM. HP PC and networking
product alerts may be viewed from the Event Console.
The following sections will provide specific information about using HP Toptools for Unicenter, and how to manage
specific HP devices. For more information on how HP Toptools for Unicenter works (such as the discovery or event
management process), refer to the Theory of Operation section of this Guide.
5.2 toptools Authentication and Unicenter
As Unicenter and Toptools are both applications that provide extensive management access to valuable network
resources, it is important to consider security when deploying HP Toptools for Unicenter.
5.2.1 toptools Considerations
Because Toptools is a web-based application, security is configured through file and web server application
permissions.
If you install the Toptools server on the same system as Unicenter, security settings for access to Toptools will not
be an issue. However, if the Toptools server is installed on a separate system, authentication for requests from the
system running Unicenter may occur.
By default, only users in one of the Toptools groups (“toptools”, “toptools operator”, “toptools admin”) on the
Toptools server are permitted access to Toptools pages. You must add Unicenter users to one of the Toptools
groups. If no additional users are added, then the first attempt to launch a browser on the Unicenter system will
result in an authentication prompt. Once you have added users to one or more of the Toptools groups on the
Toptools server subsequent Toptools page requests will be authenticated using Basic Authentication.
Basic Authentication prompts you for a password. Care must be exercised in this approach in order to avoid
permitting unauthorized access to Toptools. Users logging into the user account used to operate Unicenter can now
gain access to the Toptools actions (such as locking or rebooting all the HP devices in your organization).
More information on configuring Microsoft IIS and browser security is also located in the Requirements and
Installation sections of this Guide.
5.2.2 Device Security
In addition to securing the Toptools and Unicenter applications, security can be implemented at managed devices
through deploying passwords on managed device agents (SNMP, webagent, DMI). Passwords are typically stored
in the databases of the management consoles (e.g. Unicenter or Toptools server) which should also be secured
through login and file permission restrictions.
SNMP managed devices such as HP Netservers and ProCurve switches can be configured with SNMP communities
that must be entered into Unicenter. HP Toptools for Unicenter synchronizes SNMP communities between
Unicenter and Toptools.
If you enable login security to a webagent device, you will be prompted to enter the account and password to the
agent each time you try to access management information on the device (e.g. HP Toptools Remote Control card
pages).
Every desktop that runs DMI or WMI in an organization should be protected by the use of a DMI or WMI password.
An intruder could easily just invoke the DMI or WMI operations such as flashing the BIOS, locking out the
Page 43
Page 44

HP Toptools for Unicenter User Guide
keyboard, or rebooting a device. HP PC passwords (DMI or WMI passwords) may be configured through HP
Toptools property pages or through the Toptools actions added to the Unicenter menu.
Page 44
Page 45

HP Toptools for Unicenter User Guide
5.3 Reclassifying hp Devices
HP Toptools for Unicenter adds proceses to complement the native Unicenter discovery service.
The platform bridge discovery program attempts to classify all devices in the Unicenter repository by doing
extended SNMP, DMI, and WMI discovery on those devices. For each HP device discovered, the icon on the
Unicenter map is changed and additional functionality is enabled via the Toptools menu in Unicenter. The
discovery process is not instantaneous; extended DMI, WMI, and SNMP requests can take some time. A file,
Repository Data to Toptools.log, can be generated to monitor the status of the reclassification. For instructions on
enabling logging read the section “Useful Log Files”.
Each time HpttReclassification.exe is restarted using the Windows NT Service manager, all objects in the
Repository are transferred to the HP Toptools Server. Note that a new reclassification (HP discovery) is not started
as a result of this action. To start a new reclassification, the menu item
>Reclassify HP Devices must be selected. This is automatically done whenever Unicenter Autodiscovery is run.
The following panel is displayed:
Start->Programs->Unicenter WorldView-
Figure 5-2. HP Reclassification Display.
For more information on the discovery process, refer to the Theory of Operation section of this Guide.
5.4 hp Device Actions
Once you have located the desired HP device, you can right click on the device to perform a variety of actions.
The actions available will vary depending on the device type. The following actions are available for most HP PCs:
• Manage Drivers/Firmware consists of distributing BIOS, agent, or driver packages to one or more Vectras,
Kayaks, or Omnibooks, scheduling the software upgrade to occur on the next reboot, and then rebooting the
system. Updating the diagnostics consists of distributing a diagnostics package using a technique similar to the
system software upgrade.
• Power On/ Power Off allows you to turn systems on and off remotely.
• pcAnywhere launches the pcAnywhere application for remote access. If you click on the pcAnywhere command
in the menu and pcAnywhere has been enabled on the remote device, Toptools will launch pcAnywhere
Express and attempt to connect to the remote device. (You may need to enter a valid user and password.) If
connection to the remote device is successful, a window will be opened on your system displaying the screen
for the remote system. Refer to the Toptools online help for additional information.
• View System Performance allows you to monitor system resources. Clicking on View System Performance
opens the System Performance Analysis page for the selected device. On this page you can view the CPU,
Memory, Disk I/O, or Storage utilization and configuration for the selected device.
• Reboot allows you to restart a system remotely.
• Change Support Information allows you to update system support information.
• Set System Passwords allows you to set passwords to limit system access.
• Change Security Settings offers the administrator the option to prevent access to various hardware devices such
as removable and bootable drives, serial ports, or printer ports.
• Lock/Unlock System allows you to limit keyboard access to the system.
Page 45
Page 46

HP Toptools for Unicenter User Guide
• Protect/Unprotect System access to the system front panel and power controls (see Figure 5-5).
• Set Identification String, also referred to as the “tattoo” string, is useful for configuring your environment to
support asset management.
• Add Printer allows you to remotely configure a printer on the system.
• e-Diagtools lets you perform system diagnostics remotely.
The most important menu item for each HP device is Properties. For PCs such as HP
Kayaks, Vectras, or Omnibooks, Property pages are generated with information collected
through a connection to a Toptools agent running on the PC. Property pages are similar
for HP Kayaks, Vectras, and Omnibooks. See the section on Vectras for a more in-depth
overview of Property pages.
The remaining menu items invoke management operations such as “Reboot”, “Lock
system”, or “Manage Drivers/Firmware”. Figure 5-3 shows the screen that is displayed
after selecting the reboot menu entry.
HINT:
The Properties page is
generated on the
Toptools Server by DMI
or WMI requests to the
PC.
If the PC is down, the
Toptools Server uses
entries stored in its
database to generate a
minimal page, with only
two tabs of information.
Figure 5-3. One or more HP PCs can be rebooted.
Figure 5-4 shows the Lock system dialog, which has several useful applications such as restricting access to a
system during a remote control session, or when implementing organizational security policies. Example: An
unauthorized user is trying to log into a critical PC as the local Administrator to change configuration settings. The
HP PC generates and sends DMI alerts to indicate an unauthorized user is making several unsuccessful attempts to
log in as the local Administrator. The OpenView NNM event log provides notification of this event. In response,
the NNM console operator can invoke the Toptools action “Lock System”. This action dynamically locks the
keyboard and mouse of the selected system preventing further unauthorized access.
Toptools actions can be performed against single or multiple targets. For example, a group of PC’s can be
prevented from a power-off via the front panel prior to a network-wide backup routine.
Page 46
Page 47

HP Toptools for Unicenter User Guide
Figure 5-4. Locking the system prevents users from using the keyboard or powering off.
Some Toptools actions directly control the power-state of the PC. The ability to power-on a system can be very
useful. For example: An administrator wants to install a new system software package on all the Kayaks in a
company. This can be done very quickly from the NNM station by executing a Find By-> Attribute – isHPKayak,
to select all Kayaks, going to the Tools -> HP Toptools -> Power On to awaken the Kayaks, then selecting the
Manage Drivers/Firmware menu item to distribute the new package.
Figure 5-5. Prevent Shutdown permits the user to still use the keyboard, but not power off the system.
The power-on password is also referred to as the DMI or WMI password. As DMI and WMI offer administrators an
extensive range of remote manageability, it is important to use DMI/WMI passwords to protect access to remote
management actions. The Toptools menu item Set System Password gives the administrator access to change
DMI/WMI passwords for the protection of a single system, or for a collection of systems on a periodic security
maintenance schedule.
Refer to the HP Toptools User’s Guide and Toptools online help for more information on device actions.
Page 47
Page 48

HP Toptools for Unicenter User Guide
5.5 Managing hp kayaks, vectras, and visualize workstations
HP Toptools for Unicenter enables extensive DMI and WMI management capability of HP desktop and workstation
products within Unicenter environments:
• Automatic discovery and identification
• Toptools actions and property pages
• Event management
Managing HP Kayak, Vectra, and Visualize systems requires DMI or WMI software be installed and running. The
DMI or WMI software, called HP Toptools agent, can be downloaded from the HP web site at
http://www.hp.com/toptools
or installed from the HP Toptools Enterprise Products CD.
Figure 5-6. Actions added by HP Toptools for Unicenter for DMI 2.x systems.
Toptools menu items are displayed on the menu shown when right clicking the mouse on a selected HP desktop
icon.
Of the Toptools actions added to the menu, the most important menu item for each HP device is typically “HP
Toptools Properties”. For HP Kayaks, Vectras, or Omnibooks, Toptools property pages are generated by interfacing
with the service layer running on the PC. Property pages will be described in great detail later in this section. Most
of the Toptools actions enabled in the menu are also available within the property pages of the device.
• Power On, Power Off, Reboot - These options provide direct access to the power state of the managed PC.
Figure 5-7. This Screen powers off an HP desktop.
Page 48
Page 49

HP Toptools for Unicenter User Guide
• Lock/Unlock System, Protect/Unprotect System – Dynamically controls access to the PC. Protect/Unprotect
system prevents local user interaction with the mouse and keyboard while Lock/Unlock provides the protect
feature plus preventing or enabling power off of the system through the power button.
Figure 5-8. Locking the system prevents users from using the keyboard or powering off.
Locking a system can be useful if a security intrusion has been detected. For example, imagine that alerts are
received that indicate an unauthorized user is making several unsuccessful attempts to log in as Administrator. The
Unicenter event log would provide notification of this event. In response, the Unicenter user could invoke the
Toptools action “Lock System” as shown above. This would prevent the user from typing anything on the keyboard
of that system, and would also prevent that system from being powered down from the front panel, which might
result in a denial of service for some other users. In other situations, the administrator might want to prevent certain
critical systems from being powered off. As shown in the next figure, a system can be prevented from being turned
off (“protected”).
Figure 5-9. A Protected system cannot be powered down.
• Manage Drivers/Firmware - Consists of distributing BIOS, driver, or diagnostic packages to Vectras, Kayaks,
or Omnibooks, scheduling the update to occur on the next reboot, and then rebooting the system.
• Change Security Settings - Offers the ability to prevent access to various hardware devices such as floppy disk
drives, serial ports, or printer ports.
• Set Identification String – Also called the “tattoo” string and is used for asset management.
Page 49
Page 50

HP Toptools for Unicenter User Guide
• Set System Password – Also referred to as the power-on password or the DMI password. As DMI offers
administrators an extensive range of remote manageability, it is important to use DMI passwords to authorize
remote management actions. This Toptools menu item gives the administrator the ability to change the DMI
password in accordance with the general security policy of periodic changes in critical passwords.
• pcAnywhere – Launches the pcAnywhere application for remote access. If you click on the pcAnywhere
command in the menu and pcAnywhere has been enabled on the remote device, Toptools will launch
pcAnywhere Express and attempt to connect to the remote device. (You may need to enter a valid user and
password.) If connection to the remote device is successful, a window will be opened on your system displaying
the screen for the remote system. Refer to the Toptools online help for additional information.
• View System Performance – Allows you to monitor system resources. Clicking on View System Performance
opens the System Performance Analysis page for the selected device. On this page you can view the CPU,
Memory, Disk I/O, or Storage utilization and configuration for the selected device.
Toptools actions can be used in cooperation to perform complex tasks: Imagine a situation where an administrator
wants to install a new BIOS package on a Kayak. This can be done quickly from the Unicenter console by selecting
Kayaks one at a time, powering on the system (in case the owner has turned it off), and then selecting the Manage
Drivers/Firmware menu item.
5.5.1 Property Pages
Property pages for an HP Vectra are displayed in the following figures. Property pages contain up to seven subpages selectable via tabs with the labels: Identity, Status, Configuration, Security, Reports, e-Diagtools, and Support.
The main difference between pages for HP Vectras, Kayaks, and Omnibooks is the Identity page, where different
banners and photos are used depending on the remote system’s identity.
Figure 5-10. HP Vectra Property Pages are similar to Kayak and Omnibook pages.
The information displayed in property pages is obtained from two locations: a small amount of information pulled
from the discovery database on the Toptools server and information obtained from direct requests to the managed
system.
The Identity page provides a short summary of the system identity and configuration. The words “Connected” or
“Not Connected” displayed above the photograph of the system are used to indicate whether or not the Toptools
server can directly connect to the system. If the Toptools server cannot connect to the system, only the information
from the Toptools server discovery database is used to generate the property pages that will consist of the Identity,
Report, and Support pages.
Page 50
Page 51

HP Toptools for Unicenter User Guide
The Status page displays a range of status categories that are dependent on management agent technology installed
on the Vectra. In this case the Vectra supports SNMP, DMI, and WMI, so nine system status entries are available,
ranging from Power-On Self Test, Disk Reliability, and Network Interface statistics to what processes and services
are currently running on the Vectra.
Figure 5-11. The status page can be used to monitor an actively running desktop.
The Configuration page consists of three parts: Configuration, Explore PC, and User Settings. Figure 5-12 shows
the Configuration page, with the main Configuration part selected. This displays an organized view of the extensive
management information available from the DMI layers of the HP Vectra. In this case, details of the System
memory are being examined. Comparably in-depth information is available for various parts of the HP Vectra using
this section’s formatted report of the system.
Figure 5-12. The Configuration page has extensive information on the Vectra.
Page 51
Page 52

HP Toptools for Unicenter User Guide
The Explore PC part of the Configuration page provides a more unformatted view of the information available from
the DMI layer of the remote system. Figure 5-13 shows a sample of this information, with the window displaying
the DMI Service Layer (SP) Indication Subscription part of the HP Vectra PC MIF. ‘Subscribers’ are addresses to
which the DMI agent will send alerts to. With HP Toptools for Unicenter, the Toptools server subscribes the
Unicenter server to the PC so that the PC will send DMI alerts directly to Unicenter.
Figure 5-13. Every DMI variable can be examined via the Configuration page.
The Security tab contains three sub-sections: Passwords, Settings, and Actions. The Passwords page is shown in
Figure 5-14. This page permits modifications of the power-on password and power-on password control.
The DMI or WMI power-on passwords are stored in encrypted form on the Toptools server system. If you attempt
to invoke a DMI or WMI action, these passwords are used to request authorization. If you attempt an action with
the wrong password, the Toptools web page will prompt you to enter the correct one.
Figure 5-14. The power-on passwords can be changed using the Security page.
Page 52
Page 53

HP Toptools for Unicenter User Guide
The Settings portion of the Security page is the same page that can be directly invoked from the Toptools menu of
the Unicenter map. This screen is shown in Figure 5-15.
Figure 5-15. Extensive control over the Vectra can be exercised from the Security page.
The Reports tab displays a formatted summary of the information about this particular system. This can be printed
or saved.
The Support tab displays information on obtaining assistance for the HP device.
5.6 Managing hp omnibooks
HP Omnibooks are displayed on the Unicenter map with a customized icon as shown in Table 5-1. The enabled
Toptools menu actions are comparable to the HP Vectra, Kayak, and Visualize systems. For an overview of the
menu items, refer to the previous section.
Figure 5-16. Omnibook management is comparable to HP Vectra, Kayak and Visualize products.
When notebook computers are disconnected from the network, they may appear down in the Unicenter map and not
have extensive data displayed in Toptools property pages.
Page 53
Page 54

HP Toptools for Unicenter User Guide
5.7 Managing hp Servers
HP servers are supported by HP Toptools for Unicenter through:
• Automatic discovery and identification within Unicenter’s Repository
• Access to HP Toptools property pages from the Unicenter popup menu
• Association with HP Toptools Remote Control cards
• Compiling current MIBS into Unicenter
• Event and status monitoring through DSM
HP servers support both DMI and SNMP management technologies. To manage HP servers, the Toptools for
Servers agents must be installed on each server you wish to manage. These agents are included on the Navigator CD
shipped with servers, on the HP Toptools Enterprise Products CD or may be downloaded from the HP web site at
http://www.hp.com/toptools
If you wish to access SNMP management capability (such as viewing HP NetRAID configuration) for servers
through Toptools, you must also install the HP Toptools for Servers component during the installation of the
Toptools server.
Finally, if you have configured a SNMP community other than the default ‘public’ on the Toptools agent, you must
specify the community within Unicenter prior to running discovery.
.
5.7.1 Discovery and Classification
HP servers are sorted into classes, depending on the general form factor of the packaging.: small, medium, large, or
rack. These classes are sub-classed based on OS: Novell NetWare, SCO, Linux, Windows NT, or Windows 2000.
Different types of icons are used to represent servers on 2d maps, depending on the OS type.
5.7.2 hp toptools Property Pages and Actions
Figure 5-17 displays the menu items enabled for an HP server.
Figure 5-17. The HP Netserver menu.
• HP Toptools Properties launches property pages for HP Netservers. A quick overview of features will be
presented in the following figures.
• Set SNMP Passwords raises a dialog that allows the user to set the SNMP community that should stored in the
Toptools database and used by Toptools to communicate with the Netserver.
• Wake on LAN allows you to remotely power on the server.
Page 54
Page 55

HP Toptools for Unicenter User Guide
The Identity page shown in the figure below provides a brief summary of the configuration of the Netserver,
including model, operating system, hostname, and location.
Figure 5-18. The Identity page.
The Status page shows CPU utilization, memory utilization, storage capacity, and network statistics in a graphical
and tabular format.
Figure 5-19. The Status page summarizes Netserver agent information.
The exploded Storage Capacity pane of the Status page is shown in Figure 5-20. In addition to reporting the actual
volume capacity, this screen allows users to modify the storage capacity alert levels by clicking on indicators and
dragging them to new values.
Page 55
Page 56

HP Toptools for Unicenter User Guide
Figure 5-20. Users can modify the Storage Capacity alert levels by dragging the indicators.
The Tools page lists software resources available to administrators for managing HP Netservers.
The remainder of property pages (Configuration, Report, and Support) for Netservers is comparable to the Properties
pages shown for HP Vectras. See the Toptools for Servers documentation for full details.
5.7.3 Association with the hp toptools remote control card
HP servers with an HP Toptools Remote Control card installed have the associated card moved into the submap of
the server object that physically contains them. For more information on the management of servers using the HP
Toptools Remote Control card and management of the card, refer to the next section of this User Guide, “Managing
HP Toptools Remote Control Cards”.
5.7.4 Compiled MIBS
During installation of the platform bridge, current server MIBS are loaded into Unicenter. This means that you can
use the Unicenter Object Browser to GET and SET SNMP MIB variables for the servers. In addition, most SNMP
traps received from servers are now formatted within Unicenter’s Event Console.
5.7.5 Event and Status Monitoring through DSM
HP Toptools for Unicenter supports event management for HP servers through:
• Loading trap definitions for HP server traps as described in the section above.
• Automatically setting the trap destination on HP servers during the platform bridge discovery process
• Adding NSAAgent to DSM
A submap is automatically generated for each HP server. The NSAAgent icon is added to the submap. Status
conditions associated with the icon are propagated up to the server icon on the main map. The NSAAagent icon is
shown in the Figure 5-21.
Page 56
Page 57

HP Toptools for Unicenter User Guide
Figure 5-21. HP Server Submap.
The NSAAgent agent in the server Unispace is also shown in NodeView (Figure 5-22). This agent will change state
and reflect status upon reception of traps from an HP server. Because the hpnsaSystemInfo MIB is loaded into the
DSM mib browser directory during installation, you can perform MIB browsing from within NodeView.
Figure 5-22. HP Netserver NodeView.
5.7.6 Resetting Status on the NSAAgent
NSAAgent status reflects the severity of the last trap received by the server. To reset the status of the NSAAgent:
1. Open the submap of the managed server
2. Double click on the unispace icon to display the system's unispace window
3. Right click on the NSAAgent and select View Node.
4. Right click on the NSAAgent box and select Reset Status from the action menu.
For more information on event management with HP Toptools for Unicenter, consult the Theory of Operation
section.
Page 57
Page 58

HP Toptools for Unicenter User Guide
5.8 Managing hp toptools remote control cards
The HP Toptools Remote Control card is an HP server accessory product that provides in-band and out-of-band
management of HP servers, even when a server is down, offline, or ‘hung’. The card installs into a slot within the
server and provides both a serial and ethernet interface.
HP Toptools 5.6 for Unicenter provides the following for the HP Toptools Remote Control card:
• Automatic discovery and classification
• Placement within the server submap that physically contains it
• HP Toptools actions to manage both the card and the server
• Event management through DSM
During platform bridge discovery, cards and their host servers are identified. Once reclassification has completed,
the cards are moved into the submaps of the servers that contain them. Figure 5-23 depicts the card pc051 which is
installed into the server PC046.
Figure 5-23. HP RMC card Submap.
Menu items (as shown below) are enabled within the popup menu for the card object. The menu items Add User,
Delete User, Change Password, Update Software, View Users, Replicate Configuration, and HP Toptools Properties
are actions used to manage the card’s configuration and administrative user access.
The items Power On and Power Off are used to remotely boot or shutdown the server that the card is installed in.
Page 58
Page 59

HP Toptools for Unicenter User Guide
The HP Toptools Remote Control card uses both SNMP and webagent technology. When selecting the item HP
Toptools Properties, the browser request is sent to the Toptools server which then redirects the request directly to the
card’s webagent. If you have configured a user account and password, you will be prompted for this information
before being able to access configuration pages or, for example, power down the server.
Figure 5-24. HP RMC Card Property Page.
Card events are managed through DSM. Like the server, a new agent is added to Unispace that may also be
browsed through NodeView.
Figure 5-25. HP RMC Card Unispace.
To reset the status of the HP RMC Agent, follow the same instructions provided in section 5.5 on resetting agent
status.
Page 59
Page 60

HP Toptools for Unicenter User Guide
5.9 Managing hp laserjet Products
HP Web Jetadmin is available on the Enterprise Products CD or may be downloaded from the HP web site at
http://www.hp.com/go/webjetadmin . To manage HP printers, you must install and set up a link to HP Web
JetAdmin during the installation of the HP Toptools server.
HP Web Jetadmin supports the following HP printing products (HP Jetdirect Connect Peripherals):
• HP LaserJets • HP PaintJets • HP 2000C
• HP DeskJets • HP DesignJets • HP Digital Sender
The platform bridge discovers and reclassifies all HP printing products within Unicenter’s Repository. Each HP
printer is identified on the NNM map by a customized printer icon. To access HP management actions, select a
printer and invoke Toptools from the context menu (Figure 5-26).
Figure 5-26. The map shows customized icons and actions for HP printers.
.
Page 60
Page 61

HP Toptools for Unicenter User Guide
5.9.1 hp Printer Properties Page
A Property page for an HP printer is displayed in the figure below. HP printer Property pages are different from the
Property pages of other HP devices. They consist of a menu bar containing: Status, Configuration, Install,
Diagnostics, Alerts, Print Jobs, Refresh/Expand All and Context-sensitive Help. The Status button displays a
realistic representation of the HP printer, a stop light status indicator with accompanying status message, network
details, and a description of hardware capabilities for the particular model.
Figure 5-27. Printer Properties Display.
Once raised, specific pages are opened by clicking from the buttons at the top of the status page.
• Configuration. The Configuration button brings up a screen with extensive information and control
capabilities as shown in the figure below. The range of manageability is dependent on the printer model.
Figure 5-28. Extensive information and control is available on the Configuration page.
Page 61
Page 62

HP Toptools for Unicenter User Guide
• Install. The Install button can be used to configure new printers. The Diagnostics button displays a list of 7
categories of diagnostics: Device, JetDirect, TCP/IP, NetWare, IPX/SPX, EtherTalk, and DLC/LLC. Selecting a
category displays information and diagnostics.
• Diagnostics. This button takes displays diagnostic information to help troubleshoot printer problems.
Figure 5-29. The Diagnostics page features a wide range of diagnostics.
• Alerts – The Alerts button displays alerts configuration for the printer.
Page 62
Page 63

HP Toptools for Unicenter User Guide
• Print Jobs - The Print Jobs button displays a list of print jobs, the originator of the job, and their completion
status. Each print job can be cancelled as shown in the figure below.
Figure 5-30. Print jobs can be monitored and controlled.
• Refresh - This button updates the information being displayed.
• Context Help - The final button on the HP printer Properties page is Context Help. This button generates
context-sensitive help screens.
5.9.2 DSM Management of hp Printing Products
Version 5.6 provides DSM management of HP printing products. During platform bridge installation, a new agent
called the HP JetDirect Agent is added and placed within the Unispace of products classified as HP printers (As
shown in the figure below which is the Unispace of printer pc112).
As printer traps are received by Unicenter, DSM changes the state of the JetDirect agent to reflect the severity of the
most recent trap received.
Traps may be configured to be forwarded to Unicenter through two options:
• Individually configure each printer to send traps directly to Unicenter
• Use the HP JetDirect Trap Proxy Server to receive and forward events to Unicenter from printers (available in
the Contributed Library)
For more information on the trap proxy, consult the HP JetDirect Trap Proxy Server User Guide included in the
Contributed Library on the HP Toptools Enterprise Products CD.
Page 63
Page 64

HP Toptools for Unicenter User Guide
The HP JetDirect Agent can also be browsed through NodeView.
To reset the status of the agent within Unispace:
1. Open the submap of the managed system (LaserJet)
2. Double click on the unispace icon to display the printer’s Unispace window
3. Right click on the HP JetDirect Agent and select View Node.
4. Right click on the JetDirect Agent box and select Reset Status from the action menu.
5.10 Managing hp procurve and advancestack Networking Devices
HP Toptools for Unicenter provides management support for HP Procurve and Advancestack devices:
• Automatic discovery and identification
• HP Toptools property pages or device webagent pages
• HP Toptools actions
• Compilation of current MIBS and trap definitions
To manage HP Procurve and Advancestack devices, SNMP management must be enabled on the device. For full
functionality, the device webagent should also be enabled. Prior to running Unicenter discovery, be certain to
specify any SNMP communities that are not the default ‘public’ into the Unicenter console.
As the platform bridge performs its discovery and reclassification of HP networking products, their respective icons
are changed within Unicenter browsers and maps (Figure 5-31).
Page 64
Page 65

HP Toptools for Unicenter User Guide
Figure 5-31. Each HP hub has a custom icon and new menu items.
Following installation, new menu items are enabled. Right clicking on an HP hub icon displays the menu shown in
Figure 5-32.
Figure 5-32. The HP Toptools menu actions for AdvanceStack and ProCurve devices.
The degree of manageability depends on the capabilities of the particular HP device.
HP Toptools Properties opens a browser to the Toptools server and displays the Toptools property page for the
device as shown in Figure 5-33.
Properties(Device View) provides a visual representation of the configuration and status of networking devices that
do not support webagents. This feature is supported with single system installations only.
Node Port Table provides a list of the ports on the device, their type and the subnets or devices to which they are
connected. A sample Node port table that can be displayed using the HP Toptools Node Port Table Action is shown
in Figure 5-34.
SNMP/Trap Configuration allows the administrator to set the trap Thresholds, Trap Receivers, SNMP Community
Names and Authorized Managers for the device. This feature is supported with single system installations only.
Update Firmware allows you to select and install updated firmware for the device.
HP Toptools Home Page opens a browser window to the Toptools server.
Management Home Page launches the web page for web-enabled devices.
Page 65
Page 66

HP Toptools for Unicenter User Guide
Figure 5-33. Web-enabled Hubs and Switches generate Property pages directly.
Properties(Device View) and SNMP/Trap Configuration are only supported if the Toptools server is installed on
the same system as the Unicenter server running the platform bridge component, as shown in the message depicted
below:
If Toptools is not installed on the same system you can use the HP Toptools Home page feature to access Toptools
and perform actions on the device using Toptools. Refer to the Toptools documentation and online help for a
description of how to use Toptools.
Page 66
Page 67

HP Toptools for Unicenter User Guide
Figure 5-34. Typical Node Port Table.
Note that all HP hub and switch MIBS are now loaded into Unicenter. This means that hub and switch traps will be
formatted, and the Unicenter MIB browser can be used to GET and SET SNMP MIB variables.
Unrecognized HP hubs and switches are displayed under the class “HP_Device” and will attempt to display SNMP
Property pages or Management Home pages when such an action is selected. The following figure shows how such
a device will be displayed in the 3d map:
Figure 5-35. Unrecognized HP hubs and switches are classified as HP Device objects.
To receive traps from HP networking products, use the following options:
• Manually configure each device to send its traps to the Unicenter server.
• Use HP Toptools for Hubs and Switches SNMP/Trap Configuration to automatically configure multiple devices
to send traps to Unicenter.
• Use Properties(Device View) and click the Security button to configure trap destinations on devices not
supported by SNMP/Trap Configuration or Automatic Management. (Requires single system installation.)
• Use SNMP/Trap Configuration against a specific device to configure its trap destinations remotely. (Requires
single system installation.)
Page 67
Page 68

HP Toptools for Unicenter User Guide
The models listed in the table below can be configured using SNMP/Trap Configuration or Automatic Management.
Models supported by SNMP/Trap Configuration and Automatic Management
advancestack 10 Base-T Switching Hub
advancestack Switch 800T, 2000B
procurve 10 Base-T hub 12M, 24M
procurve 10/100 hub 12M, 24M
procurve Switch 2400, 2424, 4000, 1600, 8000
To automatically configure HP networking products to send traps to the NNM server, there are two options:
1. Use the SNMP/Trap Configuration menu item (Figure 5-36) to configure thresholds and trap destinations on the
selected device.
Figure 5-36. SNMP/Trap Configuration dialog
2. Access HP Toptools for Hubs and Switches SNMP/Trap Configuration using the following procedure.
Right click on a map icon and select HP Toptools ->Toptools Home to launch the Toptools Server home
page. In Toptools, display the available devices by selecting Devices, Devices by Type, Networking
Devices. Right click on the desired device(s) and select SNMP/Trap Configuration from the action
menu. This will display the Device Configuration dialog. To configure a new trap destination select the
Trap Receivers tab. Enter the address of the new device to receive traps. Click Add, Apply. You will be
asked to enter a password to log on to the device(s) to complete the configuration. By selecting multiple
devices in the list, you are able to specify trap destinations for all of them that support the SNMP/Trap
Configuration feature.
Note: To use Device View or SNMP/Trap Configuration to set trap destinations, the read community for the
selected device must be set to public. You will be prompted to enter the correct write community.
Page 68
Page 69

HP Toptools for Unicenter User Guide
5.11 Unicenter Severity Browser
The Unicenter Severity Browser can be used to give a quick status of the systems on your network, including the
status of HP hardware being managed. Figure 5-37 shows the Unicenter Severity Browser, indicating the status of
the Unicenter Agents (the SQL Server Agent and Performance Agent II) and an HP Management Agent
(NSAAgent). The Unicenter Severity Browser provides you with a quick overview of systems that are in a degraded
or failed state.
Figure 5-37. Unicenter Severity Browser displaying HP system status.
Page 69
Page 70

HP Toptools for Unicenter User Guide
5.12 Unicenter Report Explorer
HP Toptools for CA Unicenter allows you to create Unicenter reports containing HP-specific information. You can
use the Unicenter Report Explorer to create a variety of reports. The following are examples of how to generate HP
information reports.
5.12.1 Creating an hp Server Event Report
You can generate a report from the Enterprise Management Console Log showing only HP events.
1.
Start the Report Explorer. Click Start, Programs, Unicenter, Utilities, Report Explorer.
2.
Select Unicenter Reports, Enterprise Management, Event, Console Logs.
3.
Select the Console Log by Disposition Detail report.
4.
Right-click and select Setup Reports. This will display the Event Management Reports window.
5.
Click Add. This will display the Event Management Report Filter window.
6.
Enter *hpttsdtrpmsg* in the Process Info field.
7.
Enter “Netserver Messages” (or some other name) in the Name field.
8.
Click OK. This returns you to the Event Management Reports window.
9.
Ensure that the Data Filter Netserver Messages entry is highlighted. Click OK.
10.
Right-click on the Console Log by Disposition Detail report. Select Reload Report Database.
11.
Double-click on the Console Log by Disposition Detail report. This will display the report with the new
HP Netserver Messages filter.
NOTE: The HP server messages filter can be used with any of the Console Log reports shown.
Figure 5-38. Unicenter HP Server Events Report.
Page 70
Page 71

HP Toptools for Unicenter User Guide
5.12.2 Creating an hp Management Agents Report
This example provides a report of the HP Management Agents that have been discovered and placed in the
Unicenter repository. The report created should be similar to the one shown in Figure 5-39.
1.
Start the Report Explorer. Click Start, Programs, Unicenter, Utilities, Report Explorer.
2.
Select TNG Reports, Agent Technologies.
3.
Select TNG Agents by Domain, General State and Specific State report.
4.
Right-click and select Setup Reports.
5.
Select an appropriate Domain Manager.
6.
In the Agents window, select the Agents to include in the report (i.e. NSAAgent). Multiple agents can be
selected.
7.
Click OK.
8.
Right-click on the TNG Agents by Domain, General State and Specific State report. Select Reload
Report Database.
9.
Double-click TNG Agents by Domain, General State and Specific State report to display the report.
NOTE: You can use this agent selection with any Agent Technology report.
Figure 5-39. Unicenter HP Management Agents Report.
Page 71
Page 72

HP Toptools for Unicenter User Guide
6 Advanced Configuration
6.1 Using hp toptools in Standalone Mode
The HP Toptools Device Manager has a simple workgroup level enterprise management console that can frequently
meet the needs of quick enterprise management. Using the HP Toptools for Unicenter bridge does not prevent a
user from using this console. However, this may cause discrepancies between the view seen from Unicenter and HP
Toptools Device Manager consoles. For example, if a node is added to the HP Toptools Device Manager discovery
database from the Toptools console, Unicenter has no way of knowing about this node; so, the node will be
displayed in the Toptools console but NOT in the Unicenter map.
Installation of the HP Toptools Server bridge alters the setup of the HP Toptools server by turning off DMI and
WMI alerts and SNMP trap reception and scheduled discoveries.
Note: Do NOT schedule discovery on the Toptools server! The discovery completion signal is sent by the bridge
and will not be recognized if discovery is scheduled independently. The Toptools server database is dependent on
Unicenter discovery and the bridge components to populate MEDS.
6.2 Integrating Unicenter and hp toptools 5.6 pcAnywhere and System
Performance Advisor Features
HP Toptools 5.6 for Unicenter adds to Toptools functionality the following features:
• Enhanced discovery
• Improved alert reception and actions on events
• Customizable inventory reporting
• Remote control
• System performance monitoring
A collection of these features complement CA Unicenter or framework environments:
• Customizable inventory reporting. In a bridged environment, the Toptools database is populated with data
about the devices Unicenter sends to the Toptools server. Administrators may take advantage of reports
included with the Toptools to run quick, but comprehensive reports such as displaying the total list and location
of networking devices or a Windows 2000 migration report that checks configuration requirements for
supporting HP PCs.
• Performance monitoring with System Performance Advisor. As an alternative to Unicenter’s performance
monitoring agent, the System Performance Advisor provides a tool set of system performance monitoring to
framework’s basic network management capabilities. With a single click from Unicenter’s map, administrators
can view attributes such as CPU utilization and disk I/O on MS Windows systems. System Performance
Advisor agents are provided free-of-charge for HP systems such as Netservers and Vectras.
• Remote control with Symantec’s pcAnywhere. Unicenter console operators can access full remote control
sessions of Windows NT servers and Windows PC’s using Symantec’s web-based pcAnywhere.
6.2.1 Using pcAnywhere and the System Performance Advisor with NNM
To start using pcAnywhere or the System Performance Advisor from the Unicenter console, a few configuration
steps must be taken:
• Install and enable pcAnywhere host service on all systems you wish to remotely control.
• Configure custom groups and push System Performance Advisor agents (start collection) to monitored systems
(up to 500).
Page 72
Page 73

HP Toptools for Unicenter User Guide
Once these steps are taken, a full discovery cycle must run within the bridged environment before being able to
access pcAnywhere and System Performance Advisor features from Unicenter’s map. For Netservers, access the
system performance function through Toptools. For more information on configuring and using the System
Performance Advisor, refer to the Toptools User’s Guide.
6.3 Using HP Toptools for Unicenter in Large and Distributed Environments
HP Toptools for Unicenter
Important considerations when planning deployment of HP Toptools for Unicenter:
• The product is designed to integrate a single Unicenter server to a single Toptools server.
• HP Toptools 5.6 will support unlimited nodes in its database subject to system resources.
• HP Toptools for Unicenter does not support remote Worldview clients. The platform bridge must be installed
on the system with the Unicenter Repository.
As Unicenter discovers devices and populates its Repository, all devices that Unicenter discovers are sent to
Toptools to populate its database (MEDS). Devices will still be identified and events will be received from HP
SNMP-based devices, but the following two features will be limited to HP devices included within the MEDS
database:
• Automatic reception of DMI and WMI alerts for HP PC’s.
• All Toptools menu actions
When managing large networks, it is recommended for performance that you distribute Unicenter and Toptools
servers together to manage sites or networks of less than 5000 nodes, such as shown in the figure below:
HP Toptools for Unicenter
TNG TopTools
Toptools
WEB
CONSOLE
Network A
TNG TopTools
HP Toptools for Unicenter
TNG TopTools
HP Toptools for Unicenter
Network B
Network C
Page 73
Page 74

HP Toptools for Unicenter User Guide
By distributing Unicenter and Toptools together, full functionality of HP Toptools for Unicenter is available, while
keeping node counts down and thus improving the performance of the Unicenter server.
HP Web JetAdmin for Unicenter
HP Web JetAdmin does not specify a maximum node count. As a result, you may scale Web JetAdmin with your
Unicenter server or distribute as depicted in the figure above.
6.4 Application Notes
Integration between HP Toptools and Unicenter provides for many additional management application
opportunities. Administrators, third party consultants, operations staff, and even end-users with the appropriate
authority, can add considerable value to the HP Toptools for Unicenter integration by defining enterprise
management policies. For example, Unicenter could be directed to generate a helpdesk trouble ticket automatically
whenever a critical event takes place on an HP device. Another useful application policy might be to lock a user’s
keyboard whenever a security breach or virus is detected.
A variety of events or traps can be managed utilizing the same procedures outlined below. The following examples
provide a step-by-step procedure for developing integrated policies for HP devices and Unicenter using Event
Management.
The Event Management component of Unicenter is comprised of three parts: Event Console, Message Records, and
Message Actions. Event Management intercepts the system log as part of a regular installation. When a Message
Record is matched against a console message, a Message Action is then carried out. Wildcard characters, such as *
and ? can be used to further refine a Message Record match. For additional information on Event Management,
please refer to the CA Reference Guide in the Unicenter Books Online.
Unicenter policies can be defined to Event Management through CAUTIL (CA’s Command Line Interface), the
Enterprise Management GUI, or the Unicenter API. The following examples will employ CAUTIL record
definitions for easy deployment to external client sites running Unicenter. These definitions can be entered into a
file with a simple text editor and then executed at the client site. Note: %HOST% is a variable name for the Event
Management machine where these definitions are to be defined. For information on using Unicenter Event
Management, please refer to the CA Reference Guide in the Unicenter Books Online.
6.4.1 Helpdesk Application
This example detects a disk nearly full situation and then opens a helpdesk trouble ticket on the Unicenter Problem
component.
1. Determine the event to be managed and the policy you wish to administer. Make a note of the precise textual
syntax of the event or trap message. For example, SNMPTRAP – C:\ is 90% full
2. Define the Message Record to match the console message. For example,
CAUTIL -D=%HOST% DEFINE MSGRECORD MSGID='SNMPTRAP – ?:\ is 9?% full ' TYPE=MSG
This example will only confirm a match when any disk usage exceeds 89%. Note the use of the two question mark
wildcard characters in the MSGID text string relative to the example trap.
3. Define the Message Action to create the helpdesk trouble ticket. For example,
CAUTIL -D=%HOST% DEFINE MSGACTION NAME=(*,*) ACTION=COMMAND
TEXT=”’C:\path\dsktrap.bat &userid &datem &time8 &nodeid &5’”
We have used a Message Action to execute a batch file located in the directory called path, which, in this case,
will execute another CAUTIL command. This Message Action example passes five parameters that will be
used in the batch file to create the trouble ticket. The &5 is a variable, which corresponds to the fifth field of the
Unicenter Event Console text message, in this case is ‘90%’. For more information about creating Message
Actions, refer to MSGACTIONS in the CA Reference Guide.
Page 74
Page 75

HP Toptools for Unicenter User Guide
4. Create the batch file that will be executed by the Message Action. Using a text editor enter the CAUTIL
command to create the helpdesk trouble ticket. For example,
CAUTIL “DEFINE PROBLEM SYMTPON=’Disk is %5 full!’ occurred=(%1,%2,%3,%4) priority=01”
Now, whenever a message matching the one in step 1 comes across the event console, a trouble ticket will be
automatically generated contain important information including the node id, date and time.
6.4.2 Using CA Software Delivery or CA ShipIT
Two management tasks can be incorporated into software delivery using CA’s Software Delivery or ShipIT
programs. The first task is distributing BIOS updates to desktop computers such as HP Vectras, Kayaks, or
Omnibooks. The second task is distributing the Toptools agent software to desktop computers. Having the agent
running on desktop computers is required in order to manage these systems.
First, the distribution packages must be created using the CA SD Explorer. The source for the distribution packages
comes from the HP web site http://www.hp.com/toptools/download/download.html
download package is downloaded from the HP site, then used to create a sealed distribution package inside the SD
Explorer.
Updating the BIOS
For BIOS packages, these files come from http://www.hp.com/desktop/support
under each type of desktop. From the support page, select “Software and Drivers”. Then select the particular
model. This brings up a page that contains a list of drivers specific to the particular model. Download the package.
(For some models, there are two types of BIOS packages: a standalone version and a Toptools version. Download
the Toptools version.) Run the program to extract the files. (Note that the Toptools version may generate a warning
dialog indicating that Toptools is not installed on this system. This is ok.) Note where the files are extracted to: this
is usually some directory called c:\bios\<family>\disk1 but may be elsewhere. (The Toptools version typically puts
the files into c:\temp\<Toptools>\<family>) These files need to be distributed to the desktops that need their BIOS
flashed.
The directory contains several files, but there are two that do most of the work: phlash32.exe and <family>.ful. The
<family>.ful file, where <family> is replaced by ha0709us or something comparable, is the name of the BIOS
family. The phlash32.exe file is the Windows NT file that installs the *.ful file containing the BIOS update
software.
Manually, the BIOS update could take place using this procedure:
(click on drivers). Each
, specifically the BIOS package
• Go to the HP Desktop and copy the directory of files extracted above.
• Open an MS-DOS window (cmd.exe) and cd to the directory.
• Run “phlash32 –c –q *.ful” where *.ful is replaced by the name of the .ful file in the directory
• Reboot the system
To create the new BIOS package for use with CA ShipIT or Software Delivery, launch the SD Eplorer to define a
new Software Library item. Use the previous procedure to define a new sealed package. Be sure to define “Install
programs..” as appropriate as well as indicating that “Boot after job completed” is required. Only HP desktops
running Windows NT can be updated.
Installing toptools Agent
For the Toptools agent, the web site http://www.hp.com/toptools
contains both the DMI Service Layer as well as the Crash Monitor. By default the web distribution installs
interactively. After downloading the agent, extract the files and modify “dmisetup.ini” so that InteractiveInstall=0.
This will permit the package to be used for distribution, by allowing it to install in a non-interactive mode. Once
again, select “Install Program” and “Boot after job completed”.
Page 75
contains the distribution package. This agent
Page 76

HP Toptools for Unicenter User Guide
7 Theory of Operation
HP Toptools for Unicenter installs software, also referred to as bridge components, on both the Unicenter console
and Toptools server.
7.1 HP Toptools for Unicenter Platform Bridge Component Processes
The platform bridge installation adds the following processes to the Unicenter console:
Process Purpose
Prompts user for a Unicenter Repository name. After connecting, it traverses the
HpttReclassification.exe
HpttOneTimeReclass.exe Reclassifies HP SNMP-based devices based on SNMP system object ID. (OID).
HpttDMIAlert.exe Processes incoming DMI alerts from HP PC’s.
HPTTLaunchAction.exe Launches selected Toptools menu item actions
HpttHomePageLaunch.exe Launches Toptools home page when invoked from menu
HpttRMCMenuActionLaunch.exe
HPTTfor UNicenterTNG_Service.exe Service that runs HP Reclassification following Unicenter discovery.
HpttRepository Data to Toptools.exe Transfers Unicenter’s Repository discovery data to Toptools.
HpttmodifyDSM.exe Modifies DSM configuration.
HpttremoveHPJDAgt.exe Removes JetDirect Agent
HpttSdTrpMsg.exe Sends trap messages to Unicenter’s Event Console.
HpttUnclassify.exe Unclassifies HP devices.
Repository for probable HP PC’s and servers performing a second-level SNMP and/or
DMI discovery. When an HP system is identified, it is reclassified. User can stop this
process any time by clicking the Stop button, and by clicking the Cancel button, the user
can exit the process
Launches HP Toptools Remote Control card menu actions that are directed at a
Netserver.
7.2 HP Toptools for Unicenter Server Bridge Component Process
The HP Toptools for Unicenter server bridge component installs on the Toptools server. The installation wizard
adds the hpttSrvrBrg process to Toptools that is controlled by the Toptools services manager rviewscm.exe. The
hpttSrvrBrg process receives 1
st
level discovery information (e.g. node address) from the HpttRepository Data to
Toptools.exe process on the platform bridge. Discovery information from Unicenter populates the Toptools
database.
7.3 Modifications Done By Installation
On the Toptools Server, the HP Toptools for Unicenter component registers with the Toptools server as a process
controlled via the Toptools Service Control Manager (RViewSCM process), therefore providing the Toptools server
console control over stopping, starting, or monitoring status of this component process.
Installation of the server bridge also makes changes on the event management functions of the Toptools server.
Platform bridge installation performs the following modifications to Unicenter’s console:
• Copies files
• Creates HP classes within Unicenter’s Repository
• Loads trap definitions and MIBS
• Performs HP Reclassification
• Runs DSM wizard to create associations for new classes
• Resets DSM
Page 76
Page 77

HP Toptools for Unicenter User Guide
7.4 Discovery and Applications
HP Toptools for Unicenter enhances and extends Unicenter’s discovery in two ways:
• Configuring Unicenter’s discovery to recognize and classify HP SNMP managed devices such as switches and
printers.
• Adding a discovery service that identifies and reclassifies HP systems such as Netservers and PC’s.
As Unicenter is performing discovery, the platform bridge discovery process checks the Repository for likely HP
system candidates (e.g. Windows NT Workstations), and then performs extended discovery on those systems to
determine through DMI and WMI if they are HP PC’s, or through SNMP, if they are HP Netservers. This process
and its progress is visible through the utility HP Reclassification.
At the end of discovery, the platform bridge checks HP Toptools Remote Control cards and HP Netservers for an
association. If one exists, the HP Toptools Remote Control card is placed within the host Netserver’s submap.
Once HP devices are classified within the Repository, menu items and icons associated with their respective classes
become enabled, and the contents of the Repository are sent to the Toptools server.
The Toptools server performs second level discovery to populate MEDS with the data necessary to respond to
requests from the platform bridge on Unicenter’s console (e.g. responding to a request for Property pages).
7.4.1 Event Management
HP Toptools for Unicenter configures Unicenter to recognize and process HP alerts, and to automatically receive
alerts from HP products.
• During the platform bridge discovery process, HP Netservers have their trap destinations automatically set to
send traps to the Unicenter server.
• During discovery, the Toptools server subscribes for DMI and WMI alerts from HP PC’s. The server bridge
configures Toptools to then forward DMI and WMI alerts as SNMP traps to the Unicenter server.
• Customers may use Toptools SNMP/Trap Configuration to configure HP networking devices to send traps
directly to the Unicenter server.
• Customers may use the HP JetDirect Trap Proxy (available in the Contributed Library) to automatically receive,
filter, and forward printer traps to the Unicenter server.
CA Unicenter will natively receive and process SNMP traps through message records and DSM. HP Toptools for
Unicenter provides DSM agents for HP Netservers, HP LaserJets, and HP Toptools Remote Control cards. When
traps are received from these devices, DSM changes the status on the agent which is then propagated up the map.
To reset status on the agent, you must select the agent and the menu item “Reset Status”.
Page 77
Page 78

HP Toptools for Unicenter User Guide
8 Troubleshooting Problems
Note that troubleshooting should proceed in the sequence listed below, as each item is dependent on the proper
behavior of the items listed before it.
8.1 Verifying toptools Device Manager
Since all Unicenter menu item actions involve launching a web browser with a URL, it is important to verify that
this can be done outside of Unicenter. From the system running Unicenter, launch Internet Explorer (version 4.01 or
greater) with the following URL:
http://<Toptools_Server_DNS_name>/hptt
This should bring up opening screen of HP Toptools. If this fails, refer to the HP Toptools Device Manager
documentation to isolate and fix the problem.
8.2 Verifying toptools Server Bridge
First, from the opening screen of HP Toptools select Settings from the left-hand panel. Select the last item on the
pull-down menu, Services. This should bring up a status list of all the HP Toptools services in the right-hand panel
of the web browser. One of the services should be called HP Toptools Server Bridge. This service should be
running. If it is not listed, this means that this component has been uninstalled, and needs to be reinstalled. If it is
not running, the services should be started, which can be done from this screen. If it is running, try running “telnet
<toptools_server_dns_name> 5041” which should successfully connect you to the port which this component uses.
Note that the telnet should not provide you with any other indication of success other than an error-free connect; a
failure would be a message indicating that it was unable to connect to this port. If you encounter a failure, try
rebooting the system.
8.3 Verifying The Platform Bridge
From the Windows NT Services Control Manager window, make sure that the “HP Toptools for Unicenter” service
is set to “Automatic” and is started. This global process is used to manage all the bridge processes.
From the Unicenter Class Browser, verify that the HP classes have been entered. The following figure shows what
classes should be visible. If you do not see similar classes, use the menu option “Create HP Device Classes” to
recreate these classes.
Figure 8-1. The Bridge creates new Agent and Host classes
Page 78
Page 79

HP Toptools for Unicenter User Guide
Next, verify that nodes are being transmitted to the Toptools server. Launch the “Reclassify HP Devices” action
from the Windows Unicenter menu. Press “start”. All the nodes in the Unicenter database should get retransferred
to the HP Toptools Server. Launch a web browser after this completes and try the URL
“http://<toptools_server>/hptt”. From the HP Toptools Devices window, select the “All Devices” category and look
at the bottom left corner of the screen to see how many devices are in the Toptools database. Compare this to the
number in the Unicenter database. Furthermore, look at the number of Servers or Desktops and compare this from
system to system. This can indicate whether or not the transfer was successful. If this is failing, verify that the
Toptools server is working in stand-alone mode. Refer to the documentation that accompanies the Toptools server
for more details.
Try selecting an HP device and launching a Toptools menu action. The browser should be launched with the
appropriate URL. Select a second HP device and then launch another Toptools menu action. The existing instance
of IE should be reused for this new URL.
8.4 Useful Log Files
HP Toptools for Unicenter creates log files on both the Toptools server and the Unicenter console.
8.4.1 Log Files on toptools Server
The Toptools Server Bridge component can create a log file called ttbrg.log in c:\winnt\system32 if certain registry
settings are modified. By default, logging is turned off. To activate logging, edit the key.
Note that if an error occurs, the Toptools Server Bridge appends error messages into a file called ttbrgerr.log
regardless of the registry settings.
To enable Toptools server logging:
1. Run the program regedit.exe in the WINNT directory.
2. Use the explorer on the left-hand side of the program to open the folder
[My Computer\HKEY_LOCAL_MACHINE\SOFTWARE\Hewlett Packard\HP Toptools\Toptools Server].
3. When you open the “Top Tools Server” folder you will see a list of registry names with their corresponding
data values on the right hand side of the program. In the list of registry names you will see
“Log Node Transfer” registry name.
This registry variable can be set to either “yes” or “no.”
4. To enable logging of the node transfer process, right click the “Log Node Transfer” registry name. A popup
menu will appear on the screen.
5. Chose the “modify” menu item of the popup menu. This action will bring up a dialog box that has a “Value
name:” text field and a “Value data:” text field.
6. Type “yes” in the “Value data:” field and press the OK button to enable logging.
7. Exit from the regedit.exe program by clicking the close button.
To turn off logging, follow the same instructions as above but type “no” in the “Value Data” field.
HKEY_LOCAL_MACHINE\SOFTWARE\Hewlett-Packard\TTBridge\DEBUGLEVEL
Table 8-1. Toptools Server Bridge Logging Levels
DEBUGLEVEL Description of Logging
0 No logging
15 Full logging
8.4.2 Log Files on Unicenter Server
If you want to enable logging for a bridge component, set the "Data" value for the component to 15. To disable
logging for a component set its “Data” value to zero.
Page 79
Page 80

HP Toptools for Unicenter User Guide
Table 8-2. Platform Bridge Components
Log file Purpose
HpttRepository Data to Toptools.log Logs transfer of nodes from Unicenter to Toptools over bridge components
HpttReclassification.log Logs reclassification of HP systems
HpttDMIAlert.log Tracks incoming DMI alert sources
HPTTLaunchAction.log Logs URLs returned by Plug-In Manager
HpttHomePageLaunch.log Logs browser activity in launching Toptools home page or RMC pages
HpttRMCMenuActionLaunch.log Tracks success of attempts to power on or off server from RMC menu actions
HpttSdTrpMsg.log Logs trap messages
Figure 8-2. Platform Bridge Component Registry Entries.
8.4.3 How to Interpret the Log
If logging is enabled, a “HpttRepository Data to Toptools.log” file will be put in the TND\BIN directory whenever
“HpttRepository data to Toptools or “HP Reclassification” is executed. The file is of the form:
Total number of nodes: <number of nodes that were transferred>
------------------------------------------------------------Node#: 1
Class name: <name of the Unicenter class this node is in>
Node name: <the network name of this machine>
Node address: <the IP address of this machine>
Subnet mask: <the subnet mask this machine was found under>
Date: <the date of when the node was transferred to Toptools>
Time: <the time of when the node was transferred to Toptools>
Size of structure: <the size of the data structure that held the node information>
Size of variable: <the instance of the >
no indication of error <this line can be “indication of error” or “an error has occurred,” depending
on whether an error has occurred while attempting to send the node>
------------------------------------------------------------Node#: 2
.
.
.
Page 80
Page 81

HP Toptools for Unicenter User Guide
8.4.4 Verify Product Version Numbers
The Toptools server bridge component has a version number located in the C:\TTBridge\HPTTBrg.txt file. It
contains a build number similar to this:
hpttSrvrBrdgVersion X.XX, build Y, mm/dd/yy
hpttPlatformBrdgVersion X.XX, build Y, mm/dd/yy
The platform bridge component indicates its version number during installation.
8.5 Troubleshooting Tips
Problem: All the HP computers are highlighted in black on the Unicenter 2d WorldView map.
• DSM is not looking for the Ping Agent. Try ‘resetdsm’ and then restart the services via ‘awservices start’.
Then wait 5 minutes (the default polling interval for the Ping Agent is 300 seconds). If this does not solve the
problem, reinvoke the DSM Wizard and ensure that DSM looks for the Ping Agent on the new HP classes, as
documented in the Section 4.9.
Problem: When selecting a menu item from Unicenter, you get a windows socket error or a connection error.
• Verify that the Toptools server bridge is running by making a telnet connection to the same port number and
verifying that a connection is made. From the command line, run “telnet Ipaddress port number”, using the
IP address of the Toptools server system and the port number, typically 5041.
• Verify that the HPTTsrvbrg.exe process is running in the Task Manager on the Toptools server. If it is not,
then stop and start the HP Toptools services from the control panel’s NT service manager.
Problem: Connection is being made by telnet on the same port number and all the menu items are showing up
correctly, but the browser doesn’t get launched when you try to carry out some action
• Go to Internet Information Services on the Toptools server. Under “Default Web Site” find the “Hptt” directory
and verify that its directory security level is set to “Basic Authentication”. This will be set automatically by
installation of the server bridge. Please be aware that installation of some programs or patches will change this
setting back to the unsupported “Integrated Windows Authentication”.
• Check to see if memory is the problem. Start up the browser beforehand and then try an action from the menu.
If this time the browser shows up with the correct URL, memory is the likely problem.
Problem: You get a message stating that actions for an HP icon cannot execute because the node is not yet in the
Toptools database.
• It may take some time to reclassify all nodes. First, the platform bridge sends all the nodes (1
information) from the Unicenter server to the Toptools server. Then, simultaneously, the platform bridge is
doing a 2nd level discovery, using SNMP, DMI, or WMI, to classify these nodes, at the same time that the
Toptools server is performing discovery to populate its database. Until these complete, the bridge is unable to
launch an action from the Toptools server.
Problem: After discovery if you invoke a URL for an action it returns an error message “Unable to invoke URL”.
• If this message comes before launching the browser it indicates that HPTTLaunchAction has had a problem.
Check and see if HPTTLaunchAction is running in the task manager once you click on an action menu item.
• If the browser is invoked and it gives a message about invoke URL the plug in manager on the Toptools server
returned an incorrect URL. Refer to the Toptools documentation to verify operation of the Toptools server.
st
level discovery
Page 81
Page 82

HP Toptools for Unicenter User Guide
9 Uninstalling the Server Bridge Component
9.1 Step-by-Step Instructions
The Toptools Server Bridge component should be uninstalled using the menu option from the
Start -> Programs ->HP Toptools menu as shown below:
Figure 9-1. Uninstalling the HP Toptools Server bridge.
9.2 Verifying a Successful Uninstall
Launch Toptools and select Settings->Services. The list of Toptools services should no longer include an entry
called “Toptools Server Bridge”.
Page 82
Page 83

HP Toptools for Unicenter User Guide
Page 83
Page 84

HP Toptools for Unicenter User Guide
10 Uninstalling the Platform Bridge Component
10.1 Step-by-Step Instructions
The uninstall process has the side affect of deleting all the objects that have been reclassified as HP devices, which
means that they will be removed from your database. Therefore, it is recommended that the Unicenter
Autodiscovery be run after the uninstall process completes, so that HP devices are placed back into their original
class settings.
To uninstall, use the Windows Add/Remove Programs control window as shown in the following figure:
Figure 10-1. Uninstall the platform bridge component.
Remember to run reset DSM once the platform bridge has been uninstalled and HP classes removed.
10.2 Verifying a Successful Uninstall
Run the Class Browser and verify that HP classes have been removed. Run the 2d and 3d map applications to verify
that HP nodes no longer have unique icons or menus.
Page 84
Page 85

HP Toptools for Unicenter User Guide
actions for HP devices ......................................................44
change security settings, PCs............................................45
Customer Care Centers .....................................................12
device actions....................................................................44
Group, TopTools...............................................................43
Hostname, TopTools Server .............................................43
password, TopTools user ..................................................13
power on, PCs ..................................................................46
properties, PCs .................................................................45
Server Hostname, TopTools............................................. 43
set ID string, PCs.............................................................. 45
support.............................................................................. 12
TopTools Group ............................................................... 43
TopTools Server Hostname.............................................. 43
Page 85
 Loading...