

Page 1
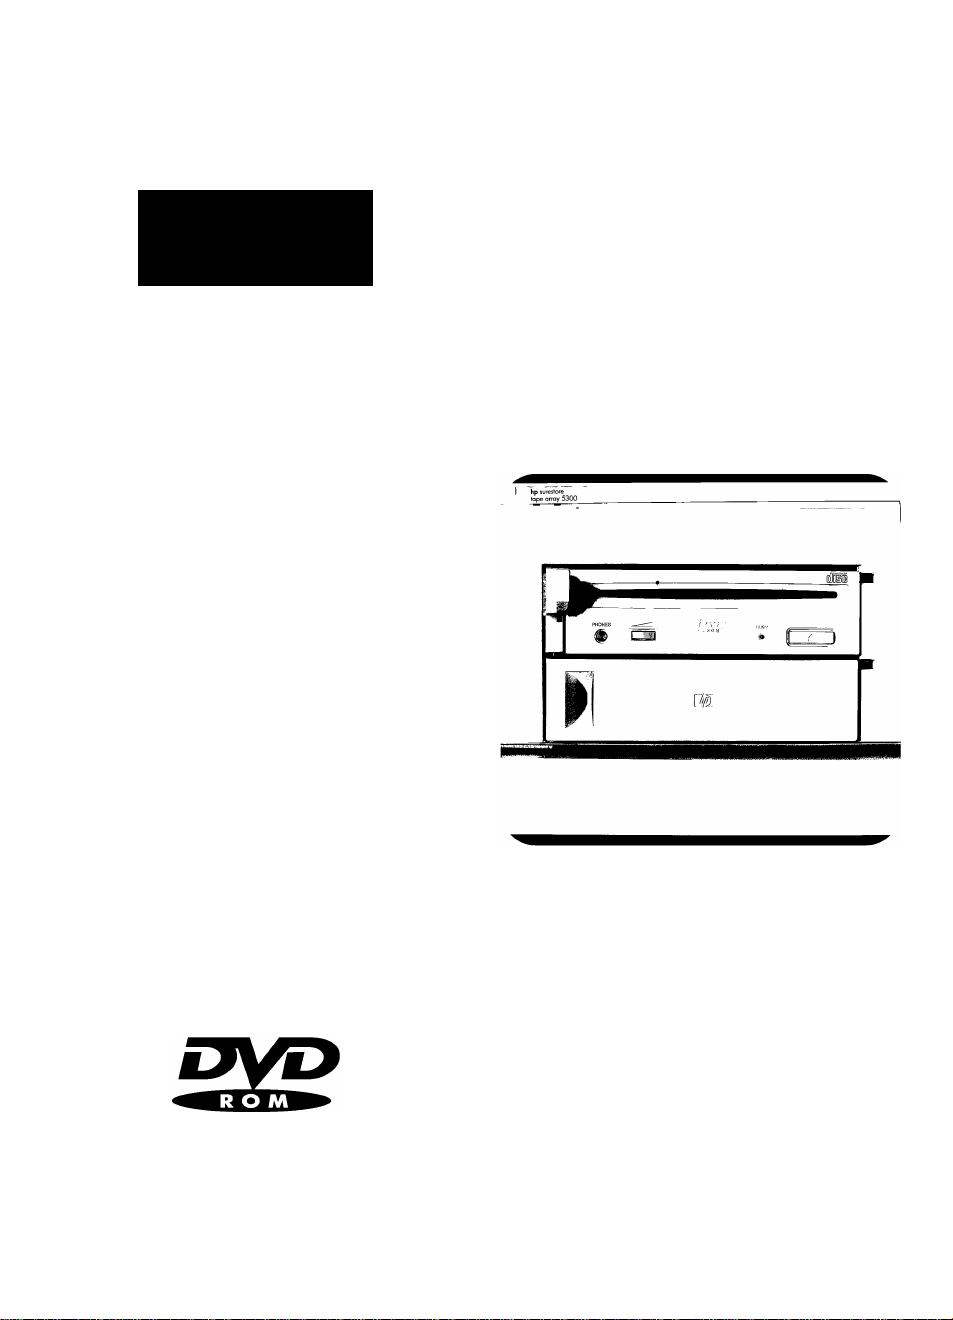
hp surestore
dvd-rom drive
removable model
getting started guide
m
invent
Page 2
Scsi,
Scsi,
ii
Û
n
Scsi,
1
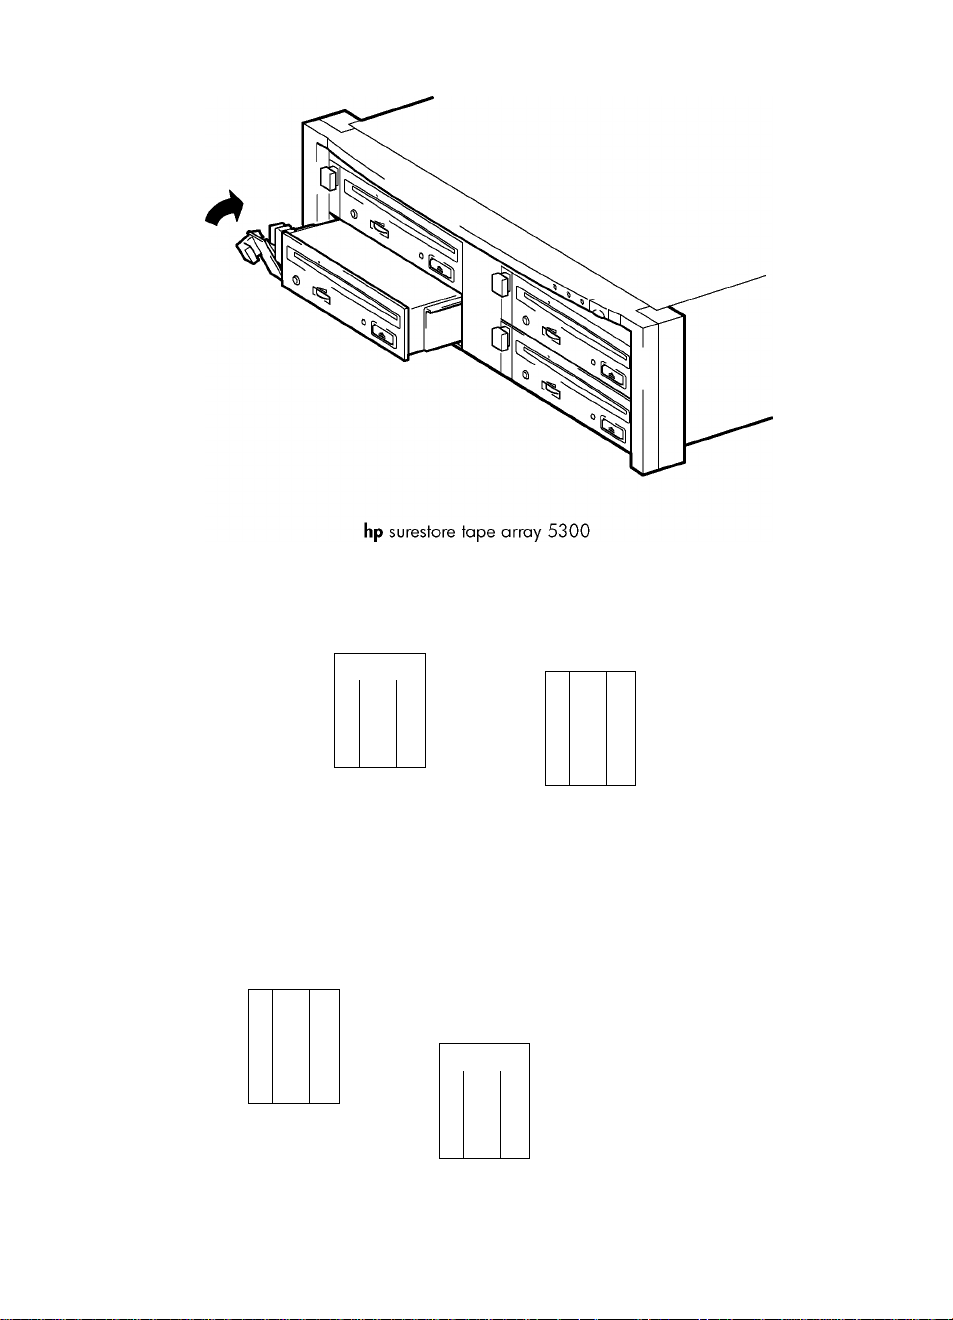
hp surestore tape array 5300
H
Scsi,
D
fl
D
Page 3

HP Surestore DVD-ROM rack-ready drives - overview
HP Surestore DVD-ROM rack-ready drives are designed to be installed in a rack-mounted
HP Surestore Tape Array 5300. Refer to the documentation supplied with your tape array for tape array
installation instructions.
Before you start
Step 1: Install the drive
Ensure the drive extractor lever is in the oy/'position. Slide the DVD-ROM
drive into an empty bay of the tape array. The DVD-ROM drive needs to
mate with the connectors at the back of the bay. Push the extractor lever
in until it locks the drive in position.
Step 2: Set the drive's SCSI ID
SCSI IDs for drives in the tape array are set on the back panel of the array.
We recommend that the drive is connected to a dedicated host bus
adapter. Make sure that the SCSI bus is terminated.
Your HP Surestore DVD-ROM rack-ready drive
Operating the DVD drive
Replacing the drive
Troubleshooting
Warranty
page 3
page 7
page 9
page 11
page 13
page 15
page 1%
page 19
Page 4

Copyright © 2001 by Hewlett-Packard Limited.
June 2001
Part Number: C7499-90900
The information contained in this document is subject to change without notice.
This document contains proprietary information which is protected by copyright. All rights are
reserved. No part of this document may be photocopied, reproduced or translated to another
language without the prior written consent of Hewlett-Packard Limited.
Hewlett-Packard shall not be liable for errors contained herein or for incidental or
consequential damages (including lost profits) in connection with the furnishing, performance,
or use of this material whether based on warranty, contract, or other legal theory.
Windows is a U.S. registered trademark of Microsoft Corp.
UNIX is a registered trademark of X/Open Company in the U.S. and other countries.
Product Details
Write your DVD-ROM drive details here so you can find them easily if you need them.
Model (type of drive):
Model (number):
Serial (number):
Date purchased/installed:
SCSI ID:
Page 5

Before you start
HP Surestore DVD-ROM rack-ready models
HP Surestore DVD-ROM rack-ready drives are installed in an HP Surestore Tape Array 5300.
They allow the user to install software from CD or DVD disks if the server itself does not have
a CD or DVD-ROM drive. HP Surestore DVD-ROM rack-ready drives may be used in
conjunction with other HP Surestore rack-ready devices. For example, the tape array may
contain:
• four DVD-ROM drives, each connected to a separate server (as shown in the illustrations in
this guide)
• ora mixture of DVD-ROM drives and HP Surestore tape drives, such as the DAT, DLT VS80
or Ultrium drives
If devices are daisy-chained, HP Surestore DVD-ROM rack-ready drives should only be
connected to the same SCSI bus as other LVD SCSI devices. See "HP Surestore DVDROM rack-ready drives and SCSI" on page 4 for further details.
This guide describes how to install and operate the following HP Surestore DVD-ROM rackready models:
• C7499A
Prerequisites
To install and use your new DVD-ROM drive, you will need the following:
• HP Surestore Tape Array 5300 and appropriate SCSI cables
• SCSI host bus adapter on host server
For the latest list of operating systems that support HP Surestore DVD-ROM rack-ready drives,
please consult our World Wide Web site (www. hp. com/go/connect).
HP Surestore tape arrays
You need a properly installed and configured HP Surestore Tape Array 5300, which is a rack
mounted system designed to hold removable drives. They can be installed in HP, Compaq,
IBM and other compatible 19" rackmount systems.
Airflow
The blanking panels provided with the tape array must be installed in empty slots. The
HP Surestore Tape Array 5300 is designed to provide adequate airflow for up to four half
height HP Surestore rack-ready drives (or up to two full-height tape drives). If the tape array is
not fully populated, use blanking plates in any unused bays. Ventilation must be adequate at
the front and rear of the tape array.
SCSI cables and terminators
HP Surestore DVD-ROM rack-ready drives require no SCSI cables to plug into an HP Surestore
Tape Array 5300. However, cabling and terminators are required to connect the tape array
with the SCSI host.
Refer to your HP Surestore Tape Array 5300 Getting StartedGuidefor details of how to install
SCSI cables and terminators to the SCSI connections on the rear panel of the tape array. The
Page 6

latest version of this document can be downloaded from //www.hp.com/support/
tapearray.
You will need to order the correct length and SCSI connector type cables and terminators to
suit your particular configuration. Cable and terminators options are listed at the HP tape
arraysupportwebsite: //
your local HP sales office.
SCSI host bus adapter
Up to four host servers can be attached to the HP Surestore Tape Array 5300. Each server
needs a properly installed and configured SCSI host adapter or a built-in SCSI controller on
the computer's motherboard (SCSI-2 or SCSI-3 compliant). Connectivity information can be
found on our World Wide Web site: //www. hp .com/go/connect. Check the server
documentation for the specification of any built-in SCSI channels. Do not connect to a RAID
controller channel; these are for disk drives only.
HP Surestore DVD-ROM rack-ready drives and SCSI
The HP Surestore DVD-ROM rack-ready drive is a fast, narrow, single ended SCSI peripheral,
therefore, its maximum throughput (burst rate) is 20 MB/sec. However, incorporated into the
HP Surestore DVD-ROM rack-ready module, the DVD device can be connected to an LVD SCSI
bus without affecting the performance of any native LVD devices on that bus, as long as there
are no other single ended devices on the bus. For example:
• If you connect an LVD SCSI peripheral with a transfer rate of 80 MB/sec to the same bus as
the DVD device, which has a transfer rate of 20 MB/sec and is a narrow single ended
device, the performance of both devices is unaffected.
• However, if you connect another single ended device, such as an HP Surestore DAT 24
tape drive, to the same bus as the DVD device the bus performance will be restricted.
All HP rack-ready devices connect to the rack enclosure through a blind-mate, easy-plug
connector. The connectors on the back of the rack enclosure are all 68-pin. To connect a
device in your rack enclosure with the host system, you need a 68-pin to 68-pin, LVDScompliant cable that is compatible with the type of bus used by the host system. For device-todevice connection in the rack use a (68-pin to 68-pin) 0.5 meter cable.
If your drive is the only SCSI device or if it is the last SCSI device in a daisy-chain of devices,
you must install a terminator.
Cable and terminator options are listed at the HP tape array support web site:
//www. hp .com/support/tapearray, and can be ordered from your local HP sales
office.
www.hp.com/support/tapearray, and can be ordered from
Page 7

Product specification
HP's rack-ready DVD-ROMs have the following features and benefits:
• Half-height array module for use with HP Surestore Tape Array 5300.
• DVD and CD read functionality in a racked environment.
• High data transfer rate (CAV 10x as DVD-ROM, CAV 40x as CD-ROM).
• Enables software loading in a racked environment.
• Supports offline swapping (drives may be swapped without powering down the tape array
as long as there is no other activity on the bus).
Physical dimensions
Weight
Data interface Ultra 2 SCSI, LVDS
Data transfer rate CAV 10x as DVD-ROM, CAV 40x as CD-ROM
Current and power consumption
Stand-by (average)
Read (average)
Maximum 1.2 A (+5 V); 1.8 A (+12 V); 27.6 W (power consumption)
Includes power save mode
Power supply (input
voltage) +5V (+/- 5%), +12V (+/- 10%)
Mechanism
Access time/seek time 95 ms average (DVD); 80 ms random average (CD-ROM)
Standards supported DVD formats: DVD-ROM (read only), DVD-5 (single side, single
Load mechanism Slot, long disk eject
Loading time
Unloading time
Warranty
42 mm (1.65 in.) H
165 mm (6.5 in.) W
320 mm (12.6 in.) D
3.1 kg (6.83 lbs)
0.10 A (+5 V); 0.05 A (+12 V); 1.1 W (power consumption)
0.8 A (+5 V); 1.3 A (+12 V); 19.6 W (power consumption)
Normal DC input voltage:
DVD-ROM, offline hot swappable
layer) 4.7GB; DVD-9 (single side, dual layer) 8.5GB; DVD-
Video (read only), DVD-R (write once), DVD-R/W (rewritable).
CD-ROM formats (650 MB): Photo CD (single and multisession),
CD Extra or CD Plus (both audio and data), Video CD, CD-R
(recordable once), cD-RW (rewritable), cD-ROM XA Modes 1
and 2 (concurrent audio and video), CD-DA (audio only).
Less than 4 seconds (the period the disk is started to load and
clamped in the drive)
Less than 3 seconds (from eject button press to disk unload)
3 years
Page 8
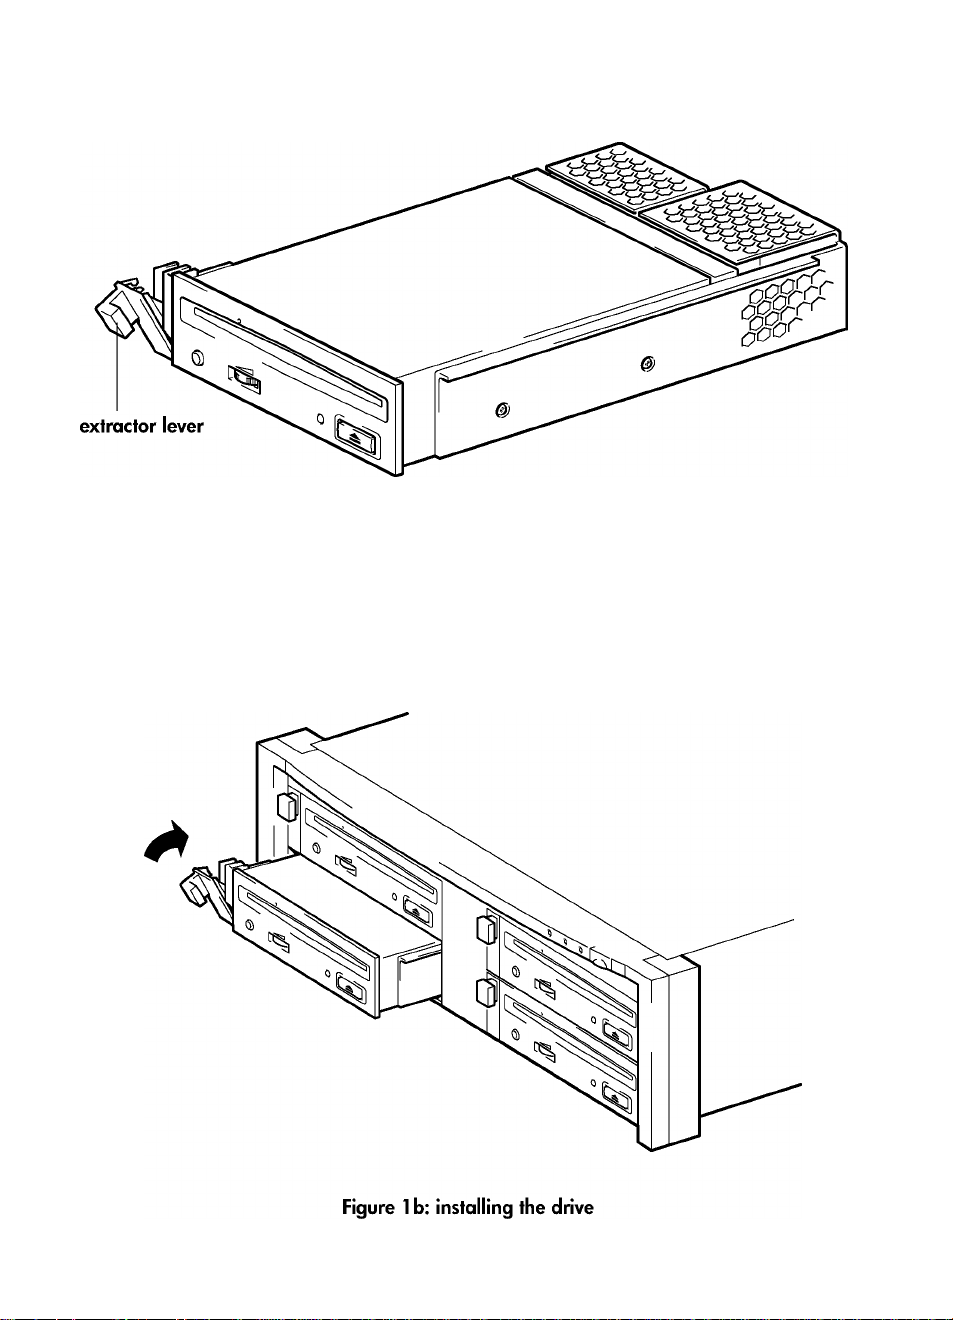
Figure 1 a: extractor lever in the out position
Page 9

Step 1 : Install the drive
HP Surestore DVD-ROM rack-ready drives are designed to be installed in a rack-mounted
HP Surestore Tape Array 5300, which may also contain other HP Surestore DVD-ROM drives
or tape backup devices. Refer to the documentation supplied with your tape array for tape
array installation instructions.
1 Before installing a DVD-ROM drive, make sure that the extractor lever is in the fully open
position (pulled out) as shown on figure la.
Caution When handling a DVD-ROM drive, hold the drive by the side carrier framework. To avoid
possible damage, do not hold the body of the drive and do not push or pull on the drive's
front panel.
2 Slide the drive into one of the open bays, as shown on figure l b, ensuring that the guide rails
on both sides of the drive locate into the slots on the partition wall. Carefully but firmly ensure
the drive is pushed fully in so that the rear connectors are securely seated. The extractor level
will close slightly.
Note
Caution
Correct alignment of SCSI drives in the tape array is essential to ensure a secured connection
is made between the interface of the drive and the interface of the array.
3
Push on the extractor lever to complete the insertion and to lock the drive in place.
It is very important to ensure blanking plates are fitted if less than the full compliment of drives
is installed. Failure to do so may affect drive performance. If there are less than four half
height drives installed, insert a blanking plate into the empty bays. This is essential to ensure
adequate airflow is maintained.
Page 10

Figure 2: setting the SCSI ID
Page 11

Step 2: Set the drive's SCSI ID
Note
SCSI IDs for drives in the tape array are set on the back panel of the array. HP Surestore DVDROM rack-ready drives can be assigned any unused\D between 1 and 6. Do not use SCSI
ID 7, which is reserved for the SCSI controller, or SCSI ID 0, which is typically assigned to the
boot disk.
1 Decide which SCSI ID to use.
Set the appropriate switch, as shown in figure 2. If you daisy-chain devices, make sure that
devices are of the same SCSI type and that each device on the same SCSI bus has a unique
SCSI ID. Do not daisy-chain more than two devices on the same SCSI bus.
Note
Note
The HP Surestore Tape Array 5300 has four SCSI ID switches to enable the installation of up
to four half-height drives.
Make sure that an appropriate SCSI terminator is attached to the spare SCSI connector on the
back of the tape array. If you daisy-chain devices, make sure that the end device is terminated.
Write the model name, product number, serial number, and SCSI ID of your drive at the front
of this guide for future reference. The product and serial numbers are on a label on the side of
the drive.
SCSI cables and terminators
HP Surestore DVD-ROM rack-ready devices require no SCSI cables to plug into an HP
Surestore Tape Array 5300. However, cabling and terminators are required to connect the
tape array with the SCSI host.
The HP Surestore DVD-ROM rack-ready drive is a fast, narrow, single ended SCSI peripheral,
therefore, its maximum throughput (burst rate) is 20 MB/sec. However, incorporated into the
HP Surestore DVD-ROM rack-ready module, the DVD device can be connected to an LVD SCSI
bus without affecting the performance of any native LVD devices on that bus, as long as there
are no other single ended devices on the bus. For example:
• If you connect an LVD SCSI peripheral with a transfer rate of 80 MB/sec to the same bus as
the DVD device, which has a transfer rate of 20 MB/sec and is a narrow single ended
device, the performance of both devices is unaffected.
• However, if you connect another single ended device, such as an HP Surestore DAT 24
tape drive, to the same bus as the DVD device the bus performance will be restricted.
Refer to your HP Surestore Tape Array 5300 Getting StartedGuide\or details of how to install
SCSI cables and terminators to the SCSI connections on the rear panel of the tape array. The
latest version of this document can be downloaded from //www.hp.com/support/
tapearray.
You will need to order the correct length and SCSI connector type cables and terminators to
suit your particular configuration. Cable and terminator options are listed at the HP tape array
support website: //www.hp.com/support/tapearray, and can be ordered from your
local HP sales office.
Page 12

emergency disk loading
Figure 3: DVD-ROM drive controls and indicators
10
Page 13

Your HP Surestore DVD-ROM rack-ready drive
There is one LED, an eject button and an emergency eject slot on the front panel of your DVDROM drive. See page 13 for more information about loading and unloading disks and
page 17 for information about forcing ejection.
Front panel LEDs
There is one LED as illustrated in the diagram. (See figure 3.)
Activity
• flashing means the drive is reading the disk
• off is the normal state when there is no disk activity
Buttons
Eject button
Push this button to unload a disk from the disk loading slot. This button does not work if the
power to the tape array is off or if a software application has disabled ejecting a disk.
Media
HP Surestore DVD-ROM rack-ready drives can read the following formats:
DVD formats CD-ROM formats
• DVD-ROM (read only) • Photo CD (single and multisession)
• DVD-5 (single side, single layer) 4.7GB • CD Extra or CD Plus (both audio and data)
• DVD-9 (single side, dual layer) 8.5GB • Video CD
• DVD-Video (read only) • CD-R (recordable once)
• DVD-R (write once) • CD-RW (rewritable)
• DVD-R/W (rewritable) • CD-ROM XA Modes 1 and 2 (concurrent
audio and video)
• CD-DA (audio only)
11
Page 14

Figure 4a: loading a disk
Figure 4b: unloading a disk
12
Page 15

Operating the DVD drive
To load a CD or DVD
1 Insert a CD or DVD into the disk loading slot with the printed side facing up, as shown in figure
4a.
2 The Activity LED lights while the drive reads the CD or DVD to initialize. When the LED turns
off, the CD or DVD is ready for use.
To unload a CD or DVD
1 Wait for the DVD-ROM drive activity to stop.
2 Press the eject button, as shown in figure 4b. The CD or DVD will slide out. (This may take a
few seconds).
3 Place the CD or DVD in its box or sleeve. Store it in a safe place.
Note Some application software can be configured to prevent unloading a CD or DVD until you
exit the program. If the CD or DVD will not eject, check your software.
Emergency ejection of a CD or DVD disk
If a CD or DVD disk does not eject after pressing the eject button, use the emergency eject
procedure described on page 17. UNIX operating systems will require the CD/DVD
filesystem to be unmounted before the disk can be ejected.
Looking after disks
To preserve the disk
• Always store the CD or DVD disk in its protective case or sleeve.
• Always store the CD or DVD disk at temperatures between +10° to +60° C (+14° F to
+140° F).
• Always allow the CD or DVD to stabilize after moving it from one temperature extreme to
another before using.
• Always wipe a dirty CD or DVD with a clean, soft cloth. Wipe in a straight line, starting from
the inside edge to the outside edge in a noncircular motion.
• Always replace damaged CDs or DVDs.
To avoid damage
• Never touch the surface of the CD or DVD with your fingers.
• Never scratch the reflective top or bottom surface of the CD or DVD.
• Never drop the CD or DVD.
• Never expose the CD or DVD to dirt, moisture or high humidity.
• Never use cleaning solutions to clean the CD or DVD.
13
Page 16

14
Figure 5b: removing the drive
Page 17

Replacing the drive
HP Surestore DVD-ROM rack-ready drives can be removed and replaced without powering
down the tape array. However you should be aware of the following:
• If all drives in the tape array are powered up when the system is turned on, the host will be
aware of those drives. You can remove any of those drives and replace it with another drive
as long as there is no activity on the bus.
• Do not remove or add drives to a bus that already has drives connected and running, for
example backing up or restoring data. Wait until there is no activity on the bus before
removing or adding drives.
• If a drive is not powered up or you place a drive in an empty slot afferthe system has been
powered up, most systems will have to be reset before the host will recognize the drive.
• The SCSI IDs are controlled by the tape array, not by the drives themselves, so if you remove
a drive and replace it with another the ID will not change.
1 Pull the extraction lever of the drive that you want to replace so that it is in the out position.
(See figure 5a.)
2 Using the extraction lever, pull the drive gently and firmly out of the tape array. (See figure 5b.)
3 To insert another drive, follow the instructions in "Step 1: Install the drive" on page 7.
15
Page 18

Troubleshooting
DVD-ROM drive not performing correctly
If the DVD-ROM drive is not performing correctly, confirm the following:
• Power switch on the HP Surestore Tape Array 5300 is ON
• Power LED on the HP Surestore Tape Array 5300 is ON
• DVD-ROM disk does not have smudges, scratches, abrasion or other damage
• SCSI cables on the rear of the tape array are connected properly
• SCSI ID is recognized by the system (the SCSI ID is unique)
• SCSI bus is correctly terminated
• Host and the drive have the same SCSI interface type (LVDS)
• If a CD or DVD problem occurs, check the DVD-ROM drive's Activity LED
Interpreting the activity LED
Activity LED
FLASHING
OFF Normal state, with CD or DVD in
If a problem persists after checking the above conditions, contact an HP service
representative.
Probable Cause
Normal read activity for CD or
DVDs
drive, but no CD or DVD activity
Normal state, with no CD or DVD
in drive
No power to the tape array Check the power to the tape array.
SCSI cable not connected to the
tape array or wrong SCSI cable
Indeterminate drive malfunction Call the HP service provider.
Action
None
None
None
If the tape array has power, the
DVD-ROM drive may be defective.
Call the HP service provider.
Check the SCSI cable and
terminator on the back of the tape
array. Call the HP service provider
to check the drive's SCSI cable.
Warning
There are no user-serviceable parts inside the drive. When disassembled, the DVD-ROM drive
becomes a Class 1 laser mechanism. Blindness can result from exposure to the visible red laser
beam and hazardous invisible laser radiation.
Service must be performed by trained support personnel. Attempting to disassemble the drive will
void the warranty and may damage the drive.
16
Page 19

Emergency ejection of a CD or DVD disk
If a CD or DVD disk does not eject after pressing the eject button, follow this procedure to
manually eject.
Caution The emergency eject procedure must be done with the drive disconnected from the power
supply. Failure to disconnect the drive from the power supply may pose a hazard to the media
and the drive.
UNIX operating systems will require the CD/DVD filesystem to be unmounted before the disk
can be ejected.
1 Remove the drive as described on page 15. This removes power from the DVD-ROM drive.
Alternatively, make sure that the tape array is not operating on any other device in the array,
and then power down the tape array, as described in the HP Surestore Tape Array 5300
Getting Started Guide.
2 Locate the small emergency eject hole above the disk loading slot. See figure 3 on page 10.
3 Use a straight, metal pin of appropriate diameter, such as a 1/16" (1.59 mm) hex key (Allen
wrench) and insert it in the emergency eject hole.
4 Push the pin firmly with one continuous motion into the hole until the disk is ejected. (Some
mechanical sound and resistance is normal.)
Note If the disk is not within your grasp, carry out step 5 so that the disk is reloaded and then
repeat steps 1 to 5.
5 Replace the drive, as described on page 7.
If you powered down the tape array at step 1 above, power it on again now, as described in
the HP Surestore Tape Array 5300 Getting Started Guide.
17
Page 20

Preparing for a service call
If you need help, your dealer has the latest information regarding HP products and services
and can provide support under HP's comprehensive menu of reseller services. If your dealer is
not able to help, you can obtain support from HP directly.
Before calling for service or support:
• Check that your HP Surestore DVD-ROM drive is installed correctly
• Check the instructions and the troubleshooting advice in this Getting Started Guide
When calling HP Customer Support, please be prepared to work with the HP support
specialists to resolve your problem.
Obtaining service
A full listing of HP's service and support centers worldwide can be found at
http://www.hp.com/cposupport/ mail_support.html.
During the warranty period
HP provides a free telephone support service during the warranty period. Contact your local
HP dealer or the appropriate HP technical support contact for your area. You will be
connected to a responsive team waiting to help you.
After the warranty period
If you require support after your warranty has expired, you can receive support for a fee
through the same telephone numbers. The fee is charged on a per incident basis.
Alternatively, you can contact your local HP dealer who will be able to advise you and
arrange for service.
Returning your drive for service
Your HP Surestore drive comes with a 24-hour Express Exchange warranty (not available in all
countries).
Before returning an HP Surestore drive, call the Customer Support Center for your area. When
you call, make sure that you have the following information available:
• The product name and serial number (see label on the side of the unit)
• Date of purchase
• A description of the product fault
• A contact name for details of the failure
• A contact telephone number
• Your shipping address
The telephone service agent will verify that the unit is faulty and will make sure that a
replacement unit is sent to you within 24 hours. When you receive the replacement unit,
remove it from the packaging and use the packaging material for returning the faulty unit. All
shipment costs are prepaid by HP.
When returning the drive to HP, any damage caused as a result of inadequate packaging is
your responsibility. Use the original packing materials whenever possible.
18
Page 21

Warranty
This warranty gives you specific legal rights. You may also hove other rights which vary
according to where you are located.
Hewlett-Packard warrants its Surestore drives against defects in materials and workmanship
for a period of three years, either from the date of delivery or, where the purchase price
includes installation by Hewlett-Packard, from the date of installation. If a new
HP Surestore DVD-ROM rack-ready drive is purchased as a component of an HP computer
system, the drive warranty is automatically upgraded to the system warranty.
You are entitled to:
• automatic three-year, next da/' unit exchange
• system matching warranty on HP system^ (internal, external and removable units), when
• free technical call center assistance during the product support life (does not include
' unit exchange next day is not available in some countries
^ The system matching period is applicable for the period of the host system standard
Further information is available via the web at: www.hp. com/support/tapewarranty.
During the first three years, the 24-hour Express Exchange program (not available in all
countries) allows you to receive a replacement unit by next-day delivery upon verification of a
faulty drive. Hewlett-Packard will, at its option, either repair or replace products that prove to
be defective. Should Hewlett-Packard be unable to repair or replace the product within a
reasonable period of time, a refund of the purchase price may be given upon return of the
product.
If you choose not to use Express Exchange, your HP Surestore drive must be serviced by one
of the authorized repair depots within the country in which it was originally purchased. You
must prepay shipping charges (together with all duty and taxes) for products returned for
service. Except for products returned to you from another country, Hewlett-Packard will pay for
return of products to you. If the drive is repaired by an authorized dealer, you will need to
negotiate the method and cost of returning the drive with the dealer.
purchased as a component of that system
telephone call cost)
warranty only. The drive warranty reverts to unit exchange for the remainder of its standard
warranty period, if applicable, after the host warranty expires.
Exclusions
The warranty on your HP Surestore DVD-ROM drive does not apply to defects resulting from:
• Improper or inadequate maintenance by the customer
• Customer-supplied software or interfaces
• Unauthorized modification or misuse
• Use of unsupported media
• Operation outside the environmental specifications for the product
• Improper site preparation and maintenance
Limitations
Any implied warranty of merchantability or fitness is limited to the three-year duration of this
written warranty. Some states or provinces do not allow limitations on how long an implied
warranty lasts, so limitations or exclusions may not apply to you.
19
Page 22

Limited warranty statement for USA, Canada, Australia and New Zealand
HP warrants to you, the end-user customer, that HP hardware, accessories and supplies will be
free from defects in materials and workmanship after the date of purchase, for the period
specified above. If HP receives notice of such defects during the warranty period, HP will, at
its option, either repair or replace products which prove to be defective. Replacement
products may be either new or like-new.
1 HP warrants to you that HP software will not fail to execute its programming instructions after
the date of purchase, for the period specified above, due to defects in material and
workmanship when properly installed and used. If HP receives notice of such defects during
the warranty period, HP will replace software media which does not execute its programming
instructions due to such defects.
2 HP does not warrant that the operation of HP products will be uninterrupted or error free. If HP
is unable, within a reasonable time, to repair or replace any product to a condition as
warranted, you will be entitled to a refund of the purchase price upon prompt return of the
product.
3 HP products may contain remanufactured parts equivalent to new in performance or may have
been subject to incidental use.
4 Warranty does not apply to defects resulting from (a) improper or inadequate maintenance or
calibration, (b) software, interfacing, parts or supplies not supplied by HP, (c) unauthorized
modification or misuse, (d) operation outside of the published environmental specifications for
the product, or (e) improper site preparation or maintenance.
5 HP MAKES NO OTHER EXPRESS WARRANTY OR CONDITION WHETHER WRITTEN OR
ORAL. TO THE EXTENT ALLOWED BY LOCAL LAW, ANY IMPLIED WARRANTY OR
CONDITION OF MERCHANTABILITY, SATISFACTORY QUALITY, OR FITNESS FOR A
PARTICULAR PURPOSE IS LIMITED TO THE DURATION OF THE EXPRESS WARRANTY SET
FORTH ABOVE. Some countries, states or provinces do not allow limitations on the duration of
an implied warranty, so the above limitation or exclusion might not apply to you. This warranty
gives you specific legal rights and you might also have other rights that vary from country to
country, state to state, or province to province.
6 TO THE EXTENT ALLOWED BY LOCAL LAW, THE REMEDIES IN THIS WARRANTY
STATEMENT ARE YOUR SOLE AND EXCLUSIVE REMEDIES. EXCEPT AS INDICATED ABOVE,
IN NO EVENT WILL HP OR ITS SUPPLIERS BE LIABLE FOR LOSS OF DATA OR FOR DIRECT,
SPECIAL, INCIDENTAL, CONSEQUENTIAL (INCLUDING LOST PROFIT OR DATA), OR OTHER
DAMAGE, WHETHER BASED IN CONTRACT, TORT, OR OTHERWISE. Some countries, states
or provinces do not allow the exclusion or limitation of incidental or consequential damages,
so the above limitation or exclusion may not apply to you.
FOR CONSUMER TRANSACTIONS IN AUSTRALIA AND NEW ZEALAND: THE WARRANTY
TERMS CONTAINED IN THIS STATEMENT, EXCEPT TO THE EXTENT LAWFULLY PERMITTED,
DO NOT EXCLUDE, RESTRICT OR MODIFY AND ARE IN ADDITION TO THE MANDATORY
STATUTORY RIGHTS APPLICABLE TO THE SALE OF THIS PRODUCT TO YOU.
Consumer Warranty Sept 16/97.
20
Page 23

Page 24

invent
http://www.hp.com/support/tapearray
C7499-90900
Printed in the UK
 Loading...