

HP ProLiant DL100 Rack Installation Instructions
Rack
Installation
Instructions
This document is for the person who installs, administers, and
troubleshoots servers and storage systems. HP assumes you are
qualified in the servicing computer equipment and trained in
recognizing hazards in products with hazardous energy levels.
Operating system
hp ProLiant
DL100 Storage Server
© Copyright 2004 Hewlett-Packard Development Company, L.P.
Hewlett-Packard Company makes no warranty of any kind with regard to
this material, including, but not limited to, the implied warranties of merchantability
and fitness for a particular purpose. Hewlett-Packard shall not be liable for errors
contained herein or for incidental or consequential damages in connection with
the furnishing, performance, or use of this material.
This document contains proprietary information, which is protected by copyright.
No part of this document may be photocopied, reproduced, or translated into
another language without the prior written consent of Hewlett-Packard. The
information contained in this document is subject to change without notice.
Hewlett-Packard Company shall not be liable for technical or editorial errors or
omissions contained herein. The information is provided “as is” without warranty of
any kind and is subject to change without notice. The warranties for HewlettPackard Company products are set forth in the express limited warranty statements
accompanying such products. Nothing herein should be construed as constituting
an additional warranty.
Printed in the U.S.A.
The HP ProLiant DL100 Storage Server is preloaded with the
Windows
®
Storage Server 2003 operating system. Prior to power
up, deployment instructions found in the “Installation Guide”
should be followed to enable the successful configuration of the
storage server in addition to the guidelines found below.
Required Items:
Installation Guide
Administration Guide
To begin the first-time startup procedure:
Be sure that the server is safely installed in an adequate
environment.
Be sure that the power cables and peripheral devices are
plugged in and AC power is supplied to the server.
Refer to the Installation Guide prior to powering up the server.
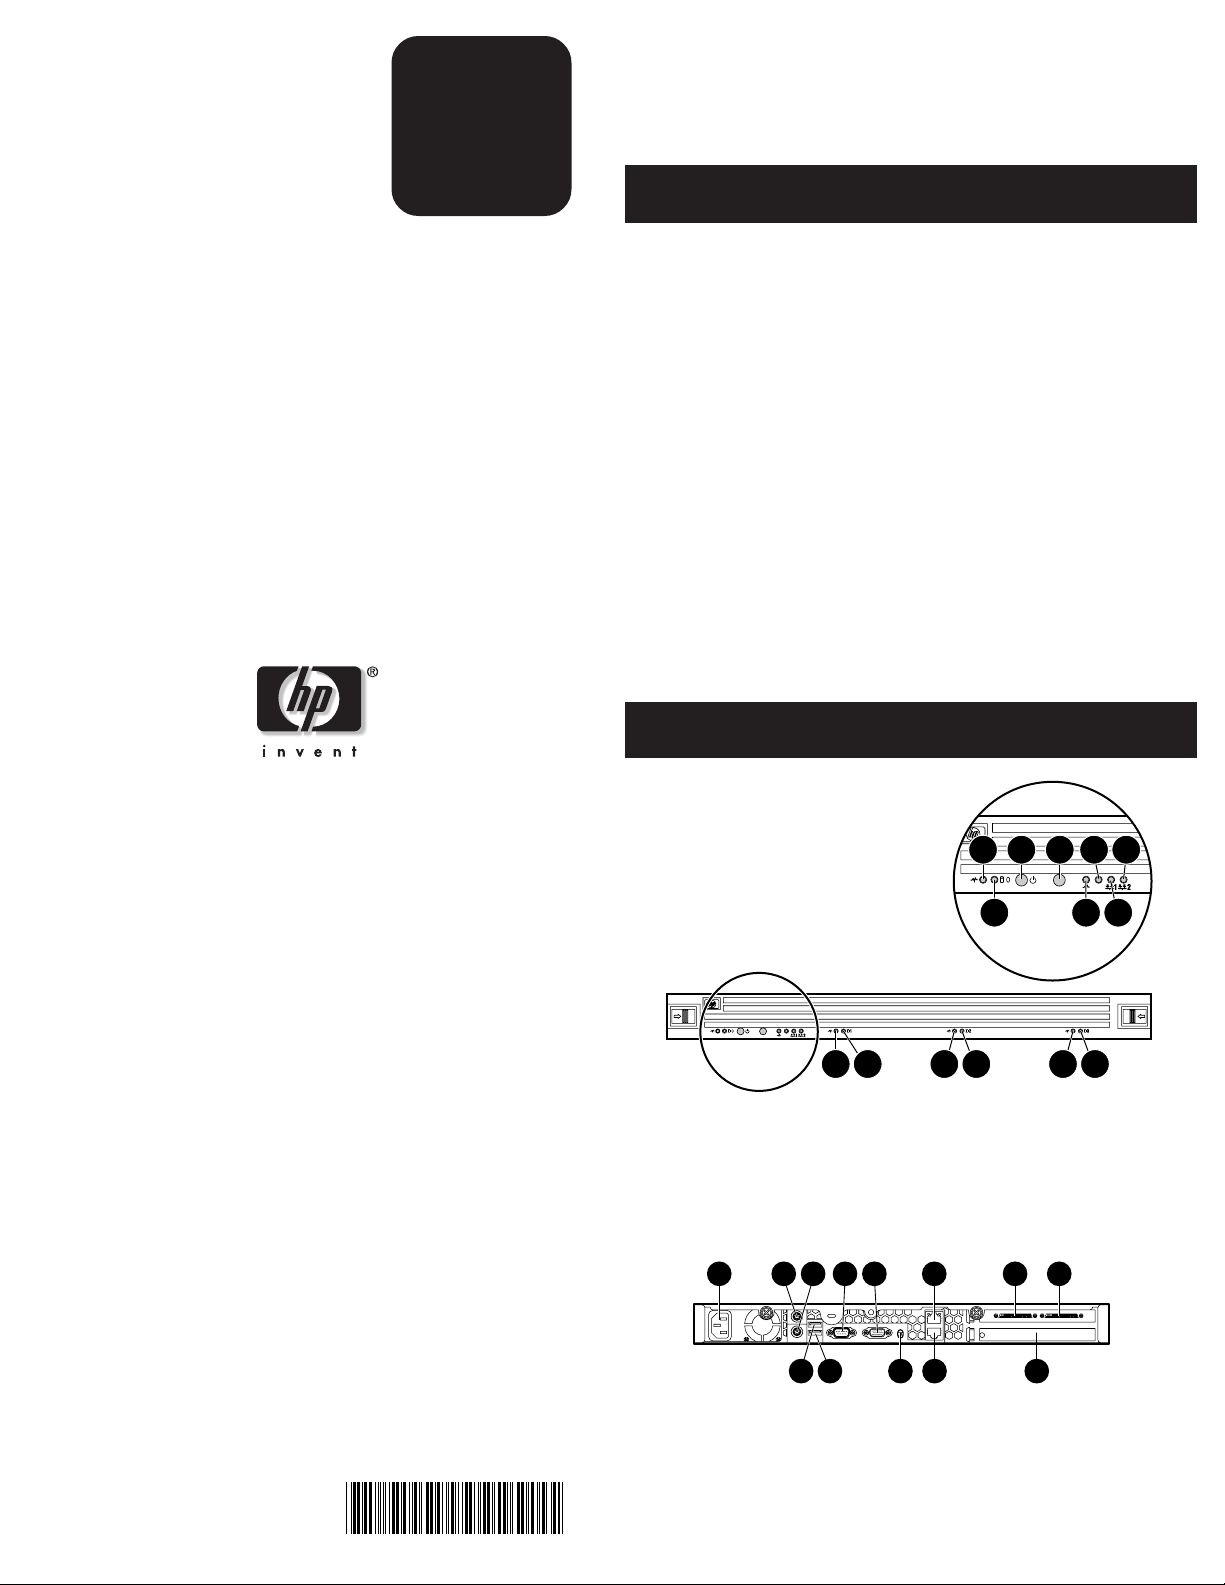
Front and rear views
1
3
4
6
8
UID
UID
UID
UID
1
1 Reserved
2 Hard drive status/activity
3 Power button
4 UID button
2
2
5 Power LED
6 UID LED
7 NIC 1 activity LED
8 NIC 2 acitivity LED
1
2
5
7
1
2
HP ProLiant DL100 Storage Server
Rack Installation Instructions
Second Edition (September 2004)
Part Number: 372017-002
372017- 002
1
1 Power connector
2 Mouse (green)
3 Keyboard (purple)
4 Serial (teal)
5 Video (blue)
6 NIC 1 (Eth0)
2
13
3
4
5
6
10
12
11
78 HP SCSI Ultra 160 Dual Port
9 Adaptec 2410SA HW RAID 4 Port
SATA controller (internal)
- NIC 2 (Eth1)
q UID light and button
we USB
7
8
9
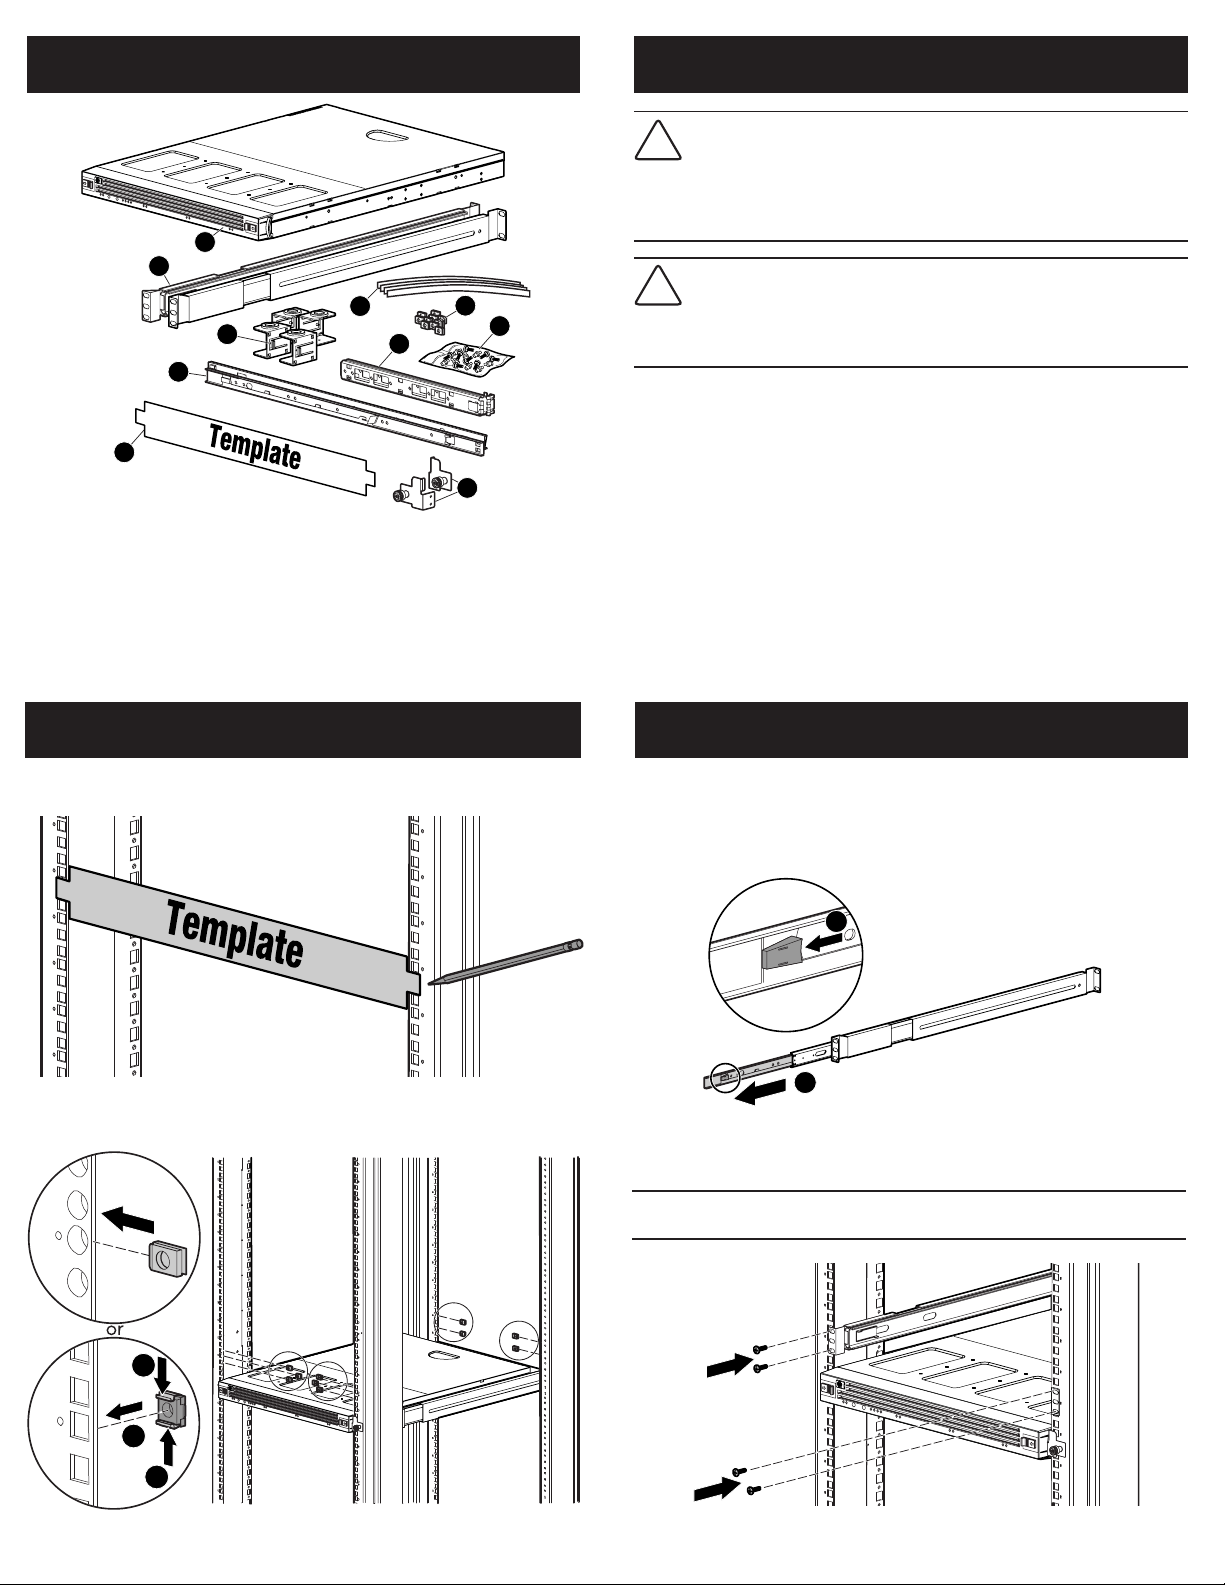
Contents
Warnings and Cautions
WARNING: Before you begin, make sure that the rack is
sufficiently stable. If provided, lower the rack leveler feet and
!
make sure any required stabilizers are installed. If provided,
extend the rack anti-tip device. Failure to extend the anti-tip
device could result in personal injury or damage if the rack tips
5
4
6
3
2
1
9
7
8
10
15136
over.
CAUTION: Make sure that the rack and all equipment
mounted in the rack have a reliable ground connection. Verify
that the total current of the rack components does not exceed
the current rating of the power distribution unit or outlet
receptacles.
1 Rack Template
2 Inner slide rails
(removed for clarity)
3 Stacking feet
4 Inner slide rails
5 Server
6 Velcro straps
7 Cage Nuts
8 Mounting screws
9 Cable management arm
- Thumbscrew brackets
1 Rack preparation
1. Mark the front and back rack holes for the cage nuts.
2. Install cage nuts.
2 Slide rail installation
1. Remove inner slides from slide rails:
a. Extend inner slides until they lock.
b. Press green tab to release; pull out inner slide.
1
2
2. Install slide rails in rack.
IMPORTANT: Leave back screws slightly loose until step 4, “Server
installation” is complete.
1
2
1
15135
 Loading...