


Processor Option
Kit contents
Installation Instructions
for HP ProLiant BL2x220c Generation 5 Server Blade
© Copyright 2008 Hewlett-Packard Development Company, L.P.
The information contained herein is subject to change without notice. The
only warranties for HP products and services are set forth in the express
warranty statements accompanying such products and services. Nothing
herein should be construed as constituting an additional warranty. HP shall
not be liable for technical or editorial errors or omissions contained herein.
Part Number 469335-002
March 2008 (Second Edition)
• Processor with installation tool
• Heatsink
• This document
Installing a processor
WARNING: To reduce the risk of personal injury from hot
surfaces, allow the drives and the internal system
components to cool before touching them.
CAUTION: To avoid damage to the system board:
• Do not touch the processor socket contacts.
• Always install the processor socket cover after
removing the processor from the socket.
• Do not tilt or slide the processor when lowering the
processor into the socket.
CAUTION: To avoid damage to the processor:
• Handle the processor only by the edges.
• Do not touch the bottom of the processor, especially
the contact area.
CAUTION: To prevent possible server malfunction and
damage to the equipment, multiprocessor configurations
must contain processors with the same part number.
CAUTION: To prevent possible server blade overheating,
always populate processor socket 2 with a processor and
a heatsink or a processor socket cover and a heatsink
blank.
CAUTION: The heatsink thermal interface media is not
reusable and must be replaced if the heatsink is removed
from the processor after it has been installed.
IMPORTANT: When installing the heatsink, align the
guide pins on the processor retention bracket with the
alignment holes in the heatsink.
IMPORTANT: Processor socket 1 must always be
populated. If processor socket 1 is empty, the server blade
does not power up.
NOTE: Do not discard the processor protective cover.
Always install the processor protective cover if the
processor is removed from the socket.
IMPORTANT: If upgrading processor speed or adding
additional processors, update the system ROM before
installing the processor.
1. Power down the server blade.
2. Remove the server blade.
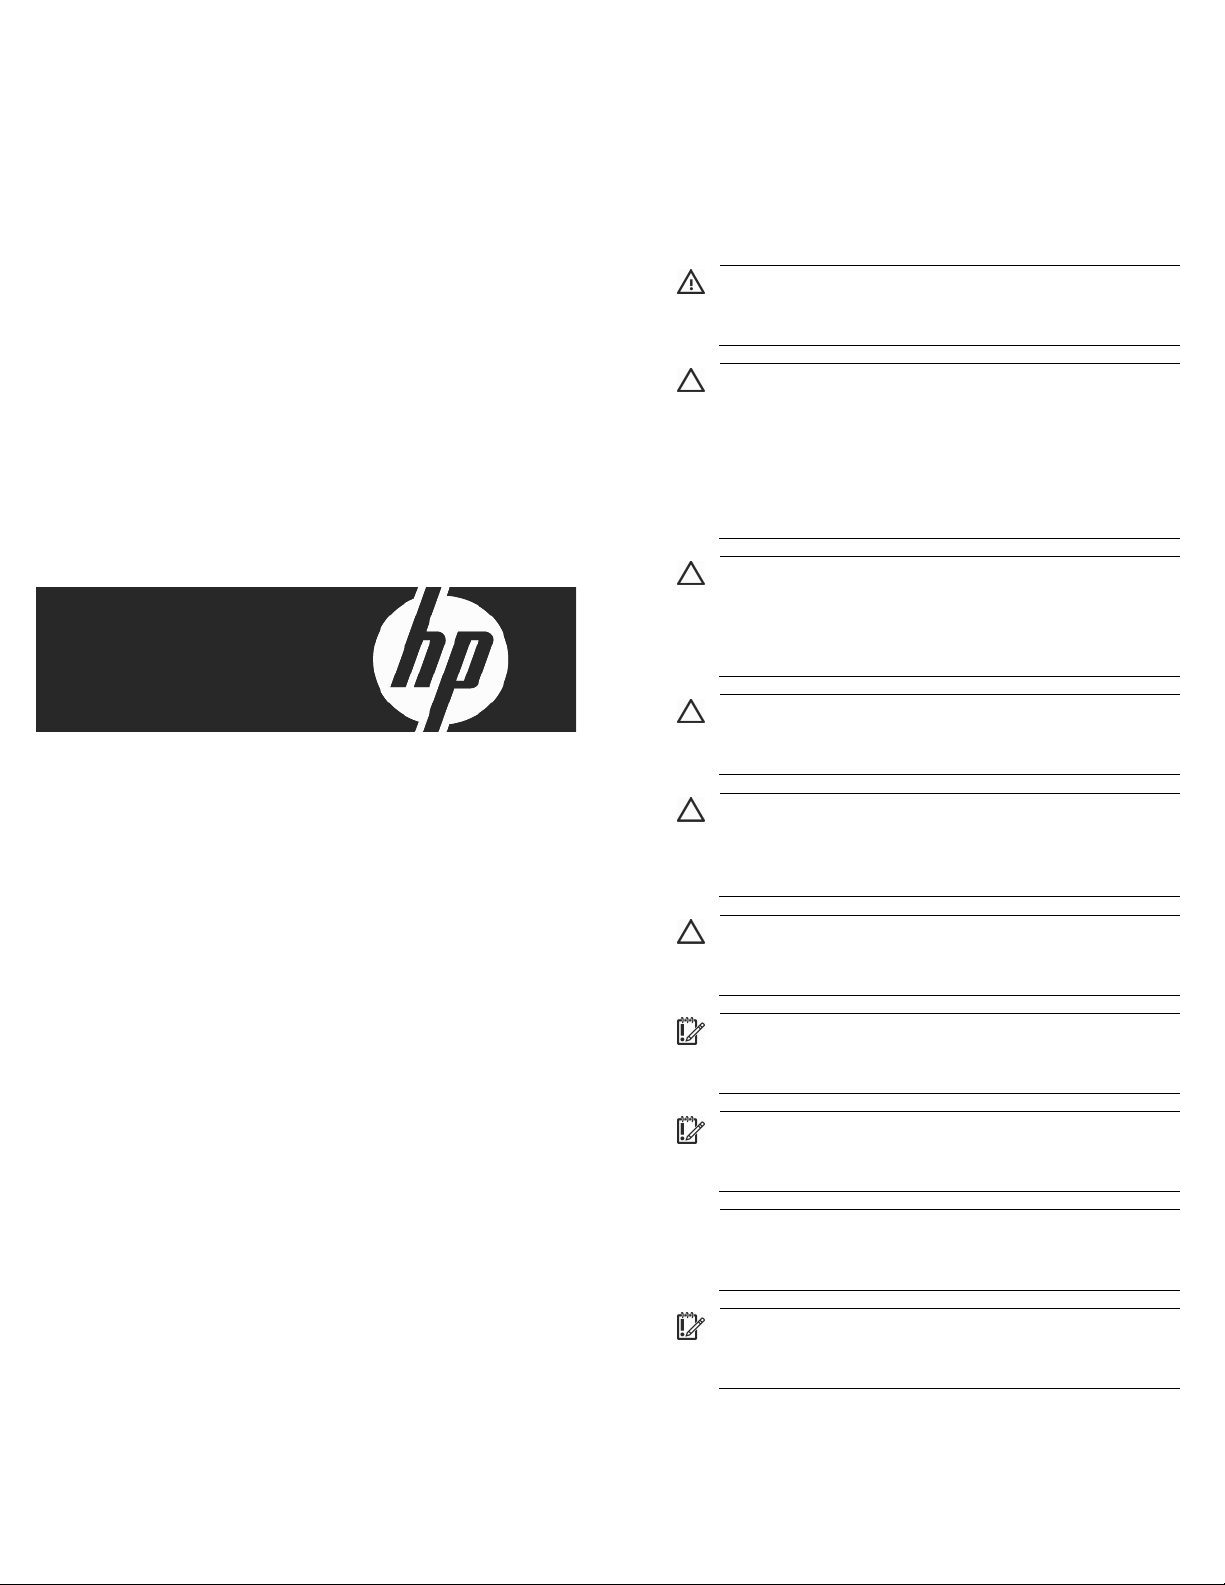
3. Remove the server B assembly:
a. Place the server blade on a flat, level work surface with the
bezel facing away from you.
b. Extend the server B serial label pull tab.
CAUTION: The jackscrews control the unseating and
seating of critical system connectors. Failure to use the
jackscrews to remove and install the server B assembly can
cause the system boards to fail.
c. Turn the jackscrew on the right approximately six turns
counterclockwise.
d. Turn the jackscrew on the left counterclockwise until the
threads are fully disengaged.
e. Turn jackscrew on the right counterclockwise until the
threads are fully disengaged.
CAUTION: To prevent damage to the server blade, do not
apply pressure to the enclosure connector.
f. Lift server B assembly from server A assembly, and then
place it on the work surface with the system board facing
up.
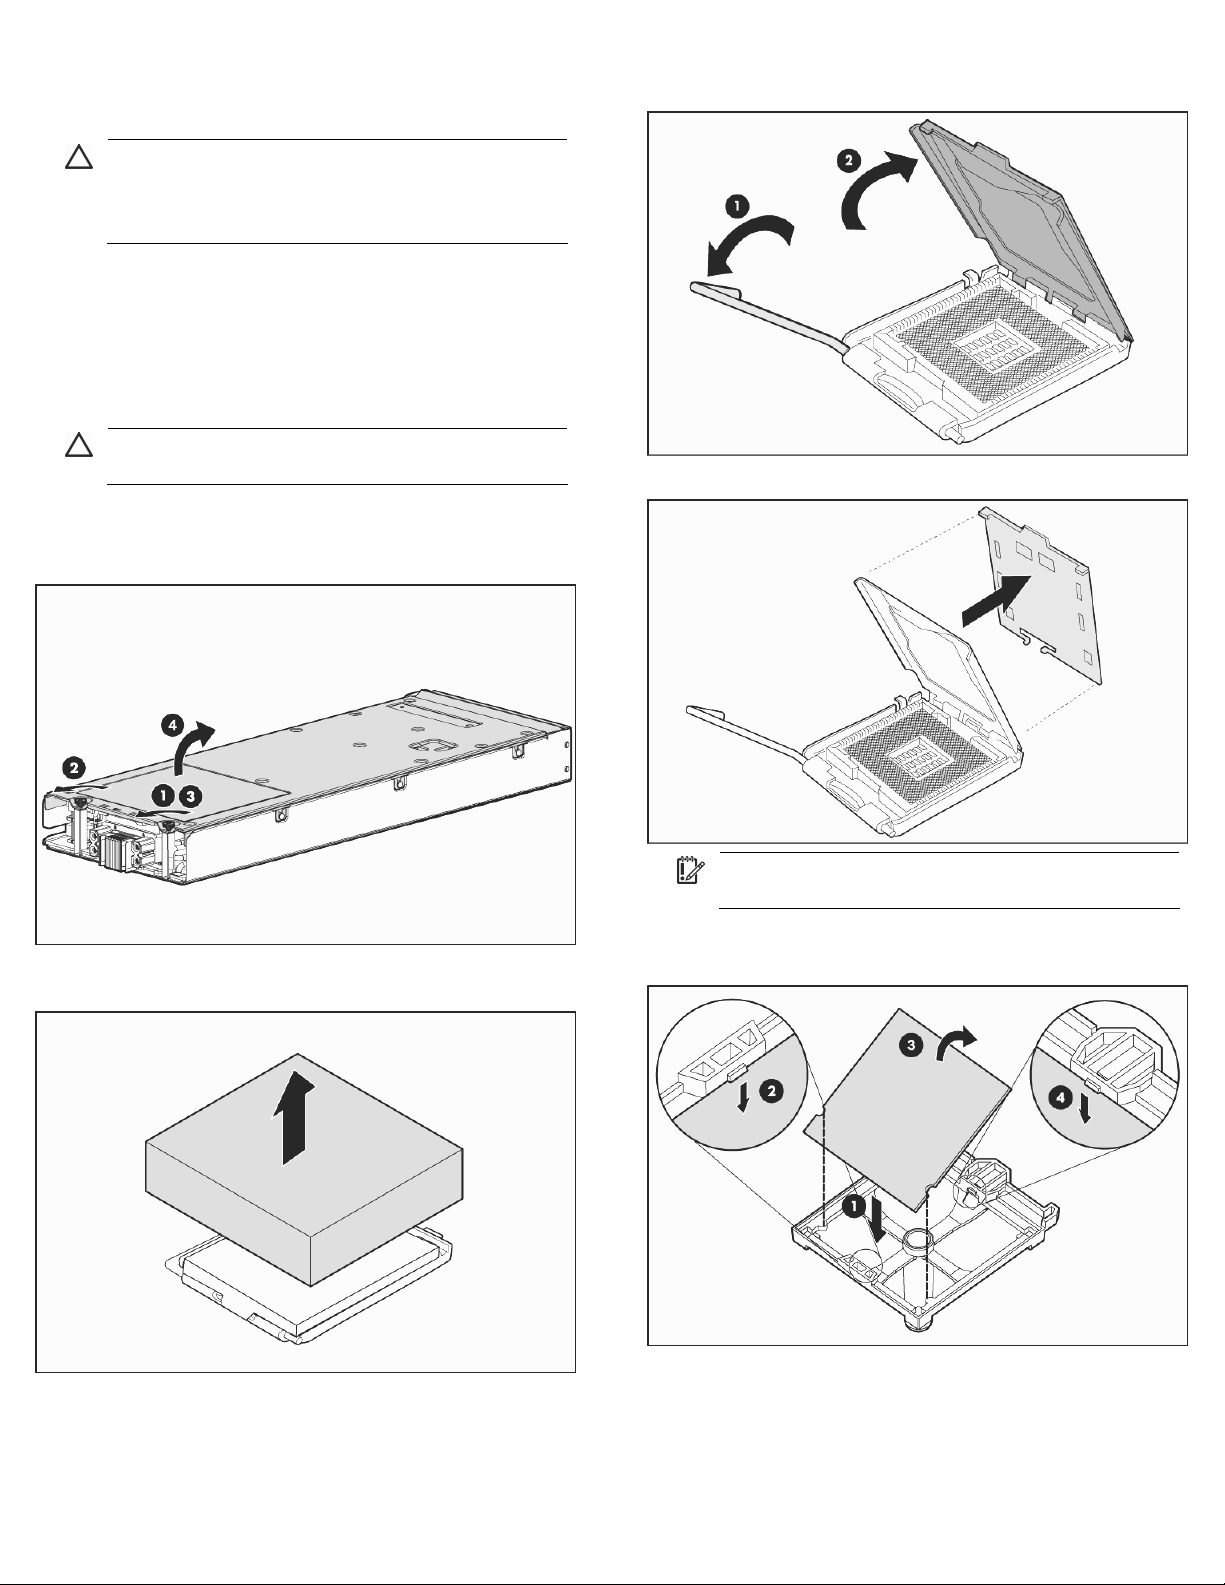
5. Open the processor retaining latch and the processor socket
retaining bracket.
6. Remove the processor socket protective cover.
4. Remove the heatsink blank. Retain the heatsink blank for future
use.
IMPORTANT: Be sure the processor remains inside the
processor installation tool.
7. If the processor has separated from the installation tool,
carefully re-insert the processor in the tool.