

Page 1

Processor Option
Installation Instructions
for HP ProLiant BL260c Generation 5 Server Blades
© Copyright 2008 Hewlett-Packard Development Company, L.P.
The information contained herein is subject to change without notice. The
only warranties for HP products and services are set forth in the express
warranty statements accompanying such products and services. Nothing
herein should be construed as constituting an additional warranty. HP shall
not be liable for technical or editorial errors or omissions contained herein.
Part Number 462809-001
February 2008 (First Edition)
Kit contents
• Processor with installation tool
• Heatsink
• This document
Installing a processor
WARNING: To reduce the risk of personal injury from hot
surfaces, allow the drives and the internal system
components to cool before touching them.
CAUTION: To avoid damage to the system board:
• Do not touch the processor socket contacts.
• Always install the processor socket cover after
removing the processor from the socket.
• Do not tilt or slide the processor when lowering the
1. Update the system ROM using any standard ROM flash
2. Power down the server blade.
3. Remove the server blade.
processor into the socket.
CAUTION: To avoid damage to the processor:
• Handle the processor only by the edges.
• Do not touch the bottom of the processor, especially
the contact area.
CAUTION: To prevent possible server malfunction and
damage to the equipment, multiprocessor configurations
must contain processors with the same part number.
CAUTION: To prevent possible server blade overheating,
always populate processor socket 2 with a processor and
a heatsink or a processor cover and a heatsink blank.
CAUTION: The heatsink thermal interface media is not
reusable and must be replaced if the heatsink is removed
from the processor after it has been installed.
IMPORTANT: When installing the heatsink, align the
guide pins on the processor retention bracket with the
alignment holes in the heatsink.
IMPORTANT: Processor socket 1 must always be
populated. If processor socket 1 is empty, the server blade
does not power up.
NOTE: Do not discard the processor protective cover.
Always install the processor protective cover if the
processor is removed from the socket.
IMPORTANT: If upgrading processor speed or adding
additional processors, update the system ROM before
installing the processor.
mechanism.
Page 2
4. Remove the access panel.
5. Disconnect all hard drive cables.
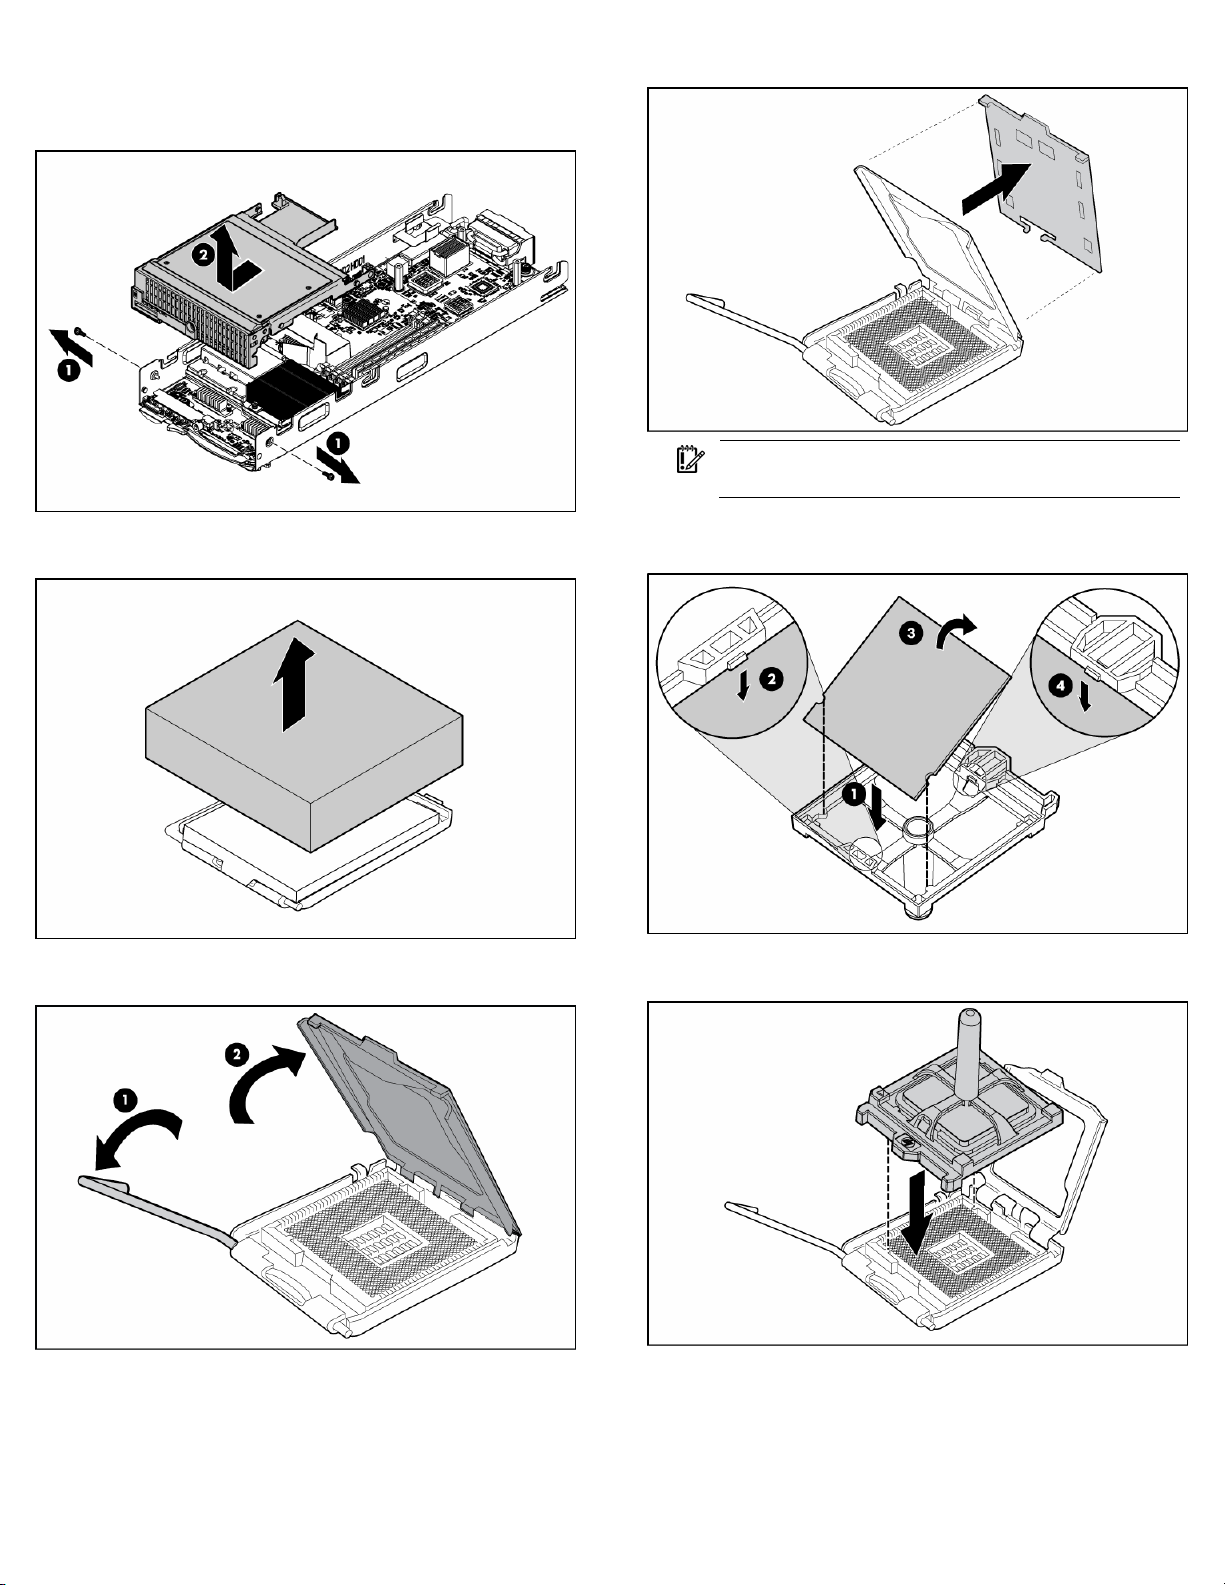
6. Remove the hard drive cage/bezel assembly.
9. Remove the processor socket protective cover.
7. Remove the heatsink blank. Retain the heatsink blank for
future use.
8. Open the processor retaining latch and the processor socket
retaining bracket.
IMPORTANT: Be sure the processor remains inside the
processor installation tool.
10. If the processor has separated from the installation tool,
carefully re-insert the processor in the tool.
11. Align the processor installation tool with the socket and install
the processor.
Page 3

12. Press down firmly until the processor installation tool clicks and
separates from the processor, and then remove the processor
installation tool.
13. Close the processor socket retaining bracket and the processor
retaining latch.
15. Install the heatsink.
16. Install the hard drive cage/bezel assembly.
14. Remove the thermal interface protective cover from
the heatsink.
CAUTION: Heatsink retaining screws should be tightened
in diagonally opposite pairs (in an "X" pattern).
17. Connect all hard drive cables.
18. Install the access panel.
The installation is complete.
 Loading...