

Page 1

HP Prime Graphing Calculator
Page 2

© Copyright 2015–2017 HP Development
Company, L.P.
The information contained herein is subject to
change without notice. The only warranties for
HP products and services are set forth in the
express warranty statements accompanying
such products and services. Nothing herein
should be construed as constituting an
additional warranty. HP shall not be liable for
technical or editorial errors or omissions
contained herein.
HP Company shall not be liable for any errors
or for incidental or consequential damages in
connection with the furnishing, performance,
or use of this manual or the examples
contained herein.
Condential computer software. Valid license
from HP required for possession, use or
copying. Consistent with FAR 12.211 and
12.212, Commercial Computer Software,
Computer Software Documentation, and
Technical Data for Commercial Items are
licensed to the U.S. Government under vendor's
standard commercial license.
Portions of this software are copyright 2013
The FreeType Project (www.freetype.org). All
rights reserved. HP is distributing FreeType
under the FreeType License. HP is distributing
google-droid-fonts under the Apache Software
License v2.0. HP is distributing HIDAPI under
the BSD license only. HP is distributing Qt
under the LGPLv2.1 license. HP is providing a
full copy of the Qt source. HP is distributing
QuaZIP under LGPLv2 and the zlib/libpng
licenses. HP is providing a full copy of the
QuaZIP source.
Product Regulatory and Environment
Information is provided on the CD shipped with
this product.
Third Edition: December 2017
First Edition: July 2015
Document Part Number: 813269-003
Page 3

Table of contents
1 Preface ......................................................................................................................................................... 1
Manual conventions ............................................................................................................................................... 1
2 Getting started ............................................................................................................................................. 2
Before starting ....................................................................................................................................................... 2
On/o, cancel operations ...................................................................................................................................... 3
To turn on ............................................................................................................................................. 3
To cancel .............................................................................................................................................. 3
To turn o ............................................................................................................................................ 3
The Home View .................................................................................................................................... 3
The CAS View ....................................................................................................................................... 3
Protective cover ................................................................................................................................... 3
The display ............................................................................................................................................................. 4
Adjusting the brightness ..................................................................................................................... 4
Clearing the display ............................................................................................................................. 4
Sections of the display ........................................................................................................................ 4
The Quick Settings menu .................................................................................................................... 5
Navigation .............................................................................................................................................................. 6
Touch gestures .................................................................................................................................... 7
The keyboard ....................................................................................................................................... 7
Context-sensitive menu ...................................................................................................................... 8
Entry and edit keys ................................................................................................................................................ 9
Shift keys ........................................................................................................................................... 10
Adding text ........................................................................................................................................ 11
Math keys .......................................................................................................................................... 11
Math template ................................................................................................................. 13
Math shortcuts ................................................................................................................ 14
Fractions ......................................................................................................................... 15
Hexagesimal numbers .................................................................................................... 15
EEX key (powers of 10) ................................................................................................... 16
Menus ................................................................................................................................................................... 17
Selecting from a menu ...................................................................................................................... 17
Shortcuts ........................................................................................................................................... 18
Closing a menu .................................................................................................................................. 18
Toolbox menus .................................................................................................................................. 18
Input forms .......................................................................................................................................................... 18
iii
Page 4

Resetting input form elds ............................................................................................................... 19
System-wide settings .......................................................................................................................................... 19
Home settings ................................................................................................................................... 20
Page 1 .............................................................................................................................. 20
Page 2 .............................................................................................................................. 21
Page 3 .............................................................................................................................. 21
Page 4 .............................................................................................................................. 22
Specifying a Home setting .............................................................................................. 22
Mathematical calculations .................................................................................................................................. 23
Where to start ................................................................................................................................... 24
Choosing an entry type ..................................................................................................................... 24
Entering expressions ......................................................................................................................... 24
Example .......................................................................................................................... 25
Parentheses .................................................................................................................... 25
Algebraic precedence ................................................................................... 26
Negative numbers ........................................................................................................... 26
Explicit and implied multiplication ................................................................................. 26
Large results ................................................................................................................... 27
Reusing previous expressions and results ....................................................................................... 27
Using the clipboard ......................................................................................................... 27
Reusing the last result .................................................................................................... 28
Reusing an expression or result from the CAS ............................................................... 29
Storing value in a variable ................................................................................................................. 29
Complex numbers ................................................................................................................................................ 30
Copy and paste ..................................................................................................................................................... 31
Sharing data ......................................................................................................................................................... 33
General procedure ............................................................................................................................. 33
Using Memory Manager ....................................................................................................................................... 34
Backups catalog ................................................................................................................................ 34
Online help ........................................................................................................................................................... 36
3 Reverse Polish Notation (RPN) ...................................................................................................................... 38
History in RPN mode ............................................................................................................................................ 39
Reusing results .................................................................................................................................. 40
Sample calculations ............................................................................................................................................. 41
Manipulating the stack ........................................................................................................................................ 42
PICK .................................................................................................................................................... 43
ROLL ................................................................................................................................................... 43
Swap .................................................................................................................................................. 43
Stack .................................................................................................................................................. 43
DROPN ............................................................................................................................. 43
iv
Page 5

DUPN ............................................................................................................................... 44
Echo ................................................................................................................................. 44
→LIST .............................................................................................................................. 45
Show an item ..................................................................................................................................... 45
Delete an item ................................................................................................................................... 45
Delete all items .................................................................................................................................. 46
4 Computer algebra system (CAS) .................................................................................................................... 47
CAS view ............................................................................................................................................................... 47
CAS calculations ................................................................................................................................................... 48
Example 1 .......................................................................................................................................... 49
Example 2 .......................................................................................................................................... 50
Settings ................................................................................................................................................................ 50
Page 1 ................................................................................................................................................ 51
Page 2 ................................................................................................................................................ 52
Setting the form of menu items ........................................................................................................ 52
Using an expression or result from Home view ................................................................................ 52
Using a Home variable in CAS ............................................................................................................ 53
5 Exam Mode .................................................................................................................................................. 54
Using Basic Mode ................................................................................................................................................. 54
Modifying the default conguration ................................................................................................................... 55
Creating a new conguration .............................................................................................................................. 57
Activating exam mode ......................................................................................................................................... 58
Cancelling exam mode ...................................................................................................................... 60
Modifying congurations .................................................................................................................................... 60
Changing a conguration .................................................................................................................. 60
Returning to the default conguration ............................................................................................. 60
Deleting congurations ..................................................................................................................... 61
6 Introduction to HP apps ............................................................................................................................... 62
Application library ............................................................................................................................................... 63
Opening an app .................................................................................................................................. 63
Resetting an app ............................................................................................................................... 63
Sorting apps ...................................................................................................................................... 64
Deleting an app ................................................................................................................................. 64
Other options ..................................................................................................................................... 64
App views ............................................................................................................................................................. 64
Symbolic view .................................................................................................................................... 65
Symbolic Setup view ......................................................................................................................... 66
v
Page 6

Plot view ............................................................................................................................................ 66
Plot Setup view .................................................................................................................................. 67
Numeric view ..................................................................................................................................... 67
Numeric Setup view ........................................................................................................................... 68
Quick example ................................................................................................................................... 68
Opening the app .............................................................................................................. 68
Symbolic view ................................................................................................................. 69
Symbolic Setup view ....................................................................................................... 70
Plot view .......................................................................................................................... 70
Plot Setup view ............................................................................................................... 71
Numeric view ................................................................................................................... 71
Numeric Setup view ........................................................................................................ 72
Common operations in Symbolic view ................................................................................................................ 72
Adding a denition ............................................................................................................................ 72
Modifying a denition ....................................................................................................................... 73
Denitional building blocks ............................................................................................................... 73
Evaluating a dependent denition .................................................................................................... 74
Selecting or deselecting a denition to explore ............................................................................... 75
Choosing a color for plots ................................................................................................................. 75
Deleting a denition .......................................................................................................................... 75
Symbolic view: Summary of menu buttons ...................................................................................... 76
Common operations in Symbolic Setup view ...................................................................................................... 77
Overriding system-wide settings ...................................................................................................... 77
Restoring default settings ................................................................................................................ 77
Common operations in Plot view ......................................................................................................................... 78
Zoom .................................................................................................................................................. 78
Zoom factors ................................................................................................................... 78
Zoom options .................................................................................................................. 79
Zoom gestures ................................................................................................................ 79
Zoom keys ....................................................................................................................... 79
Zoom menu ..................................................................................................................... 79
Box zoom ........................................................................................................................ 80
Views menu ..................................................................................................................... 81
Testing a zoom with split-screen viewing ...................................................................... 81
Zoom examples ............................................................................................................... 82
Zoom In ......................................................................................................... 83
Zoom Out ...................................................................................................... 83
X In ................................................................................................................ 84
X Out ............................................................................................................. 84
Y In ................................................................................................................ 85
Y Out ............................................................................................................. 86
vi
Page 7

Square ........................................................................................................... 86
Autoscale ...................................................................................................... 87
Decimal ......................................................................................................... 88
Integer .......................................................................................................... 88
Trig ................................................................................................................ 89
Trace .................................................................................................................................................. 89
Selecting a plot ............................................................................................................... 89
Evaluating a function ...................................................................................................... 90
Turning tracing on or o ................................................................................................. 90
Plot view: Summary of menu buttons .............................................................................................. 91
Copy-and-paste operations in Plot view ........................................................................................... 91
Common operations in Plot Setup view .............................................................................................................. 91
Conguring Plot view ........................................................................................................................ 91
Page 1 .............................................................................................................................. 92
Page 2 .............................................................................................................................. 93
Page 3 .............................................................................................................................. 93
Graphing methods ............................................................................................................................. 94
Restoring default settings ................................................................................................................ 96
Common operations in Numeric view ................................................................................................................. 97
Zoom .................................................................................................................................................. 97
Zoom options .................................................................................................................. 98
Zoom gestures ................................................................................................................ 98
Zoom keys ....................................................................................................................... 98
Zoom menu ..................................................................................................................... 98
Evaluating .......................................................................................................................................... 99
Custom tables ................................................................................................................................. 100
Deleting data ................................................................................................................ 101
Copy and paste in Numeric view ..................................................................................................... 101
Copying and pasting a cell ............................................................................................ 101
Copying and pasting a row ............................................................................................ 101
Copying and pasting an array of cells ........................................................................... 102
Numeric view: Summary of menu buttons ..................................................................................... 102
More menu .................................................................................................................... 103
Common operations in Numeric Setup view ..................................................................................................... 103
Restoring default settings .............................................................................................................. 104
Combining Plot and Numeric Views ................................................................................................................... 104
Adding a note to an app ..................................................................................................................................... 105
Creating an app .................................................................................................................................................. 105
Example ........................................................................................................................................... 105
App functions and variables .............................................................................................................................. 107
Functions ......................................................................................................................................... 107
vii
Page 8

Variables .......................................................................................................................................... 107
Qualifying variables ........................................................................................................................ 108
7 Function app ............................................................................................................................................. 109
Getting started with the Function app .............................................................................................................. 109
Opening the Function app ............................................................................................................... 109
Dening the expressions ................................................................................................................ 110
Setting up a plot .............................................................................................................................. 111
Plotting a function .......................................................................................................................... 111
Tracing a graph ................................................................................................................................ 112
Changing the scale .......................................................................................................................... 113
Displaying Numeric view ................................................................................................................. 113
Setting up Numeric view ................................................................................................................. 115
Exploring Numeric view .................................................................................................................. 116
Navigating a table ......................................................................................................... 116
Going directly to a value ............................................................................................... 117
Accessing the zoom options ......................................................................................... 117
Other options ................................................................................................................ 117
Analyzing functions ........................................................................................................................................... 117
Displaying the Plot view menu ........................................................................................................ 118
Sketching functions ...................................................................................................... 118
Modifying function graphs ........................................................................................... 119
Finding a root of a quadratic equation ......................................................................... 120
Finding an intersection of two functions ..................................................................... 122
Finding the slope of a quadratic equation .................................................................... 123
Finding the signed area between two functions .......................................................... 124
Finding the extremum of the quadratic equation ........................................................ 126
Adding a tangent to a function ..................................................................................... 126
Function variables ............................................................................................................................................. 127
Accessing function variables ........................................................................................................... 127
Summary of FCN operations ............................................................................................................................. 129
Dening functions in terms of derivatives or integrals .................................................................................... 129
Functions dened by derivatives .................................................................................................... 129
Functions dened by integrals ........................................................................................................ 132
8 Advanced Graphing app .............................................................................................................................. 134
Getting started with the Advanced Graphing app ............................................................................................. 136
Opening the Advanced Graphing app .............................................................................................. 136
Dening an open sentence .............................................................................................................. 137
Setting up the plot .......................................................................................................................... 137
Plotting the selected denitions ..................................................................................................... 139
viii
Page 9

Exploring the graph ......................................................................................................................... 139
Trace in Plot view .......................................................................................................... 142
Numeric view ................................................................................................................................... 143
Displaying Numeric view .............................................................................................. 143
Exploring Numeric view ................................................................................................ 144
Numeric Setup view ...................................................................................................... 144
Trace in Numeric view ................................................................................................... 145
Edge ............................................................................................................ 146
PoI ............................................................................................................... 147
Zoom in Numeric view .................................................................................................. 147
Plot Gallery ........................................................................................................................................................ 148
Exploring a plot from the Plot Gallery ............................................................................................ 148
9 Graph 3D app ............................................................................................................................................. 149
Getting started with the Graph 3D app ............................................................................................................. 149
Opening the Graph 3D app .............................................................................................................. 149
Dening an expression .................................................................................................................... 149
Setting up the plot .......................................................................................................................... 150
Plotting the expression ................................................................................................................... 153
Plot view: summary of menu buttons .......................................................................... 155
Zooming in Plot view .................................................................................................... 155
Displaying a table ............................................................................................................................ 156
Numeric view: summary of menu buttons ................................................................... 157
Zooming in Numeric view ............................................................................................. 157
Setting up a table ............................................................................................................................ 158
10 Geometry ................................................................................................................................................ 160
Getting started with the Geometry app ............................................................................................................ 160
Preparation ...................................................................................................................................... 160
Opening the app and plotting the graph ........................................................................................ 160
Adding a constrained point ............................................................................................................. 161
Adding a tangent ............................................................................................................................. 162
Creating a derivative point .............................................................................................................. 163
Adding some calculations ............................................................................................................... 165
Calculations in Plot view ................................................................................................................. 167
Trace the derivative ......................................................................................................................... 167
Plot view in detail .............................................................................................................................................. 168
Selecting objects ............................................................................................................................. 169
Hiding names ................................................................................................................................... 169
Moving objects ................................................................................................................................ 169
Coloring objects ............................................................................................................................... 170
ix
Page 10

Filling objects .................................................................................................................................. 170
Clearing an object ............................................................................................................................ 170
Clearing all objects .......................................................................................................................... 171
Gestures in Plot view ....................................................................................................................... 171
Zooming .......................................................................................................................................... 171
Plot view: buttons and keys ............................................................................................................ 172
The Options menu ........................................................................................................................... 173
Using the slopeeld command ....................................................................................................... 173
Plot Setup view ................................................................................................................................ 174
Symbolic view in detail ...................................................................................................................................... 175
Creating objects .............................................................................................................................. 176
Reordering entries .......................................................................................................................... 176
Hiding an object ............................................................................................................................... 176
Deleting an object ........................................................................................................................... 177
Symbolic Setup view ....................................................................................................................... 177
Numeric view in detail ....................................................................................................................................... 177
Listing all objects ............................................................................................................................ 180
Displaying calculations in Plot view ................................................................................................ 180
Editing a calculation ........................................................................................................................ 180
Deleting a calculation ...................................................................................................................... 181
Plot view: Cmds menu ....................................................................................................................................... 181
Point ................................................................................................................................................ 181
Point .............................................................................................................................. 181
Point On ......................................................................................................................... 181
Midpoint ........................................................................................................................ 182
Center ............................................................................................................................ 182
Intersection ................................................................................................................... 182
Intersections ................................................................................................................. 182
Random Points .............................................................................................................. 182
Line .................................................................................................................................................. 182
Segment ........................................................................................................................ 182
Ray ................................................................................................................................ 183
Line ................................................................................................................................ 183
Parallel .......................................................................................................................... 183
Perpendicular ................................................................................................................ 183
Tangent ......................................................................................................................... 183
Median ........................................................................................................................... 183
Altitude .......................................................................................................................... 183
Angle bisector ............................................................................................................... 184
Polygon ............................................................................................................................................ 184
Triangle ......................................................................................................................... 184
x
Page 11

Isosceles Triangle ......................................................................................................... 184
Right Triangle ................................................................................................................ 185
Quadrilateral ................................................................................................................. 185
Parallelogram ............................................................................................................... 185
Rhombus ....................................................................................................................... 185
Rectangle ...................................................................................................................... 185
Polygon ......................................................................................................................... 186
Regular Polygon ............................................................................................................ 186
Square ........................................................................................................................... 186
Curve ................................................................................................................................................ 186
Circle .............................................................................................................................. 186
Circumcircle ................................................................................................................... 187
Excircle .......................................................................................................................... 187
Incircle ........................................................................................................................... 187
Ellipse ............................................................................................................................ 188
Hyperbola ..................................................................................................................... 188
Parabola ........................................................................................................................ 188
Conic .............................................................................................................................. 188
Locus ............................................................................................................................. 189
Plot .................................................................................................................................................. 189
Function ........................................................................................................................ 190
Parametric .................................................................................................................... 190
Polar .............................................................................................................................. 190
Sequence ....................................................................................................................... 191
Implicit .......................................................................................................................... 191
Slopeeld ...................................................................................................................... 191
ODE ................................................................................................................................ 191
List ................................................................................................................................. 191
Slider ............................................................................................................................. 192
Transform ........................................................................................................................................ 192
Translation .................................................................................................................... 192
Reection ...................................................................................................................... 193
Rotation ........................................................................................................................ 194
Dilation .......................................................................................................................... 194
Similarity ....................................................................................................................... 195
Projection ...................................................................................................................... 195
Inversion ....................................................................................................................... 196
Reciprocation ................................................................................................................ 196
Cartesian ......................................................................................................................................... 197
Abscissa ........................................................................................................................ 197
Ordinate ........................................................................................................................ 197
xi
Page 12

Point→Complex ............................................................................................................ 197
Coordinates ................................................................................................................... 197
Equation of .................................................................................................................... 197
Parametric .................................................................................................................... 198
Polar coordinates .......................................................................................................... 198
Measure ........................................................................................................................................... 198
Distance ........................................................................................................................ 198
Radius ........................................................................................................................... 198
Perimeter ...................................................................................................................... 198
Slope ............................................................................................................................. 198
Area ............................................................................................................................... 198
Angle ............................................................................................................................. 198
Arc Length ..................................................................................................................... 198
Tests ................................................................................................................................................ 199
Collinear ........................................................................................................................ 199
On circle ......................................................................................................................... 199
On object ....................................................................................................................... 199
Parallel .......................................................................................................................... 199
Perpendicular ................................................................................................................ 199
Isosceles ........................................................................................................................ 199
Equilateral ..................................................................................................................... 199
Parallelogram ............................................................................................................... 200
Conjugate ...................................................................................................................... 200
Geometry functions and commands ................................................................................................................. 200
Symbolic view: Cmds menu ............................................................................................................ 200
Point .............................................................................................................................. 200
Point ........................................................................................................... 200
Point on ...................................................................................................... 201
Midpoint ...................................................................................................... 201
Center ......................................................................................................... 201
Intersection ................................................................................................ 201
Intersections ............................................................................................... 201
Line ................................................................................................................................ 202
Segment ..................................................................................................... 202
Ray .............................................................................................................. 202
Line ............................................................................................................. 202
Parallel ........................................................................................................ 202
Perpendicular ............................................................................................. 203
Tangent ....................................................................................................... 203
Median ........................................................................................................ 203
Altitude ....................................................................................................... 203
xii
Page 13

Bisector ....................................................................................................... 204
Polygon ......................................................................................................................... 204
Triangle ....................................................................................................... 204
Isosceles Triangle ....................................................................................... 204
Right Triangle ............................................................................................. 204
Quadrilateral .............................................................................................. 204
Parallelogram ............................................................................................. 205
Rhombus ..................................................................................................... 205
Rectangle .................................................................................................... 205
Polygon ....................................................................................................... 205
Regular Polygon ......................................................................................... 206
Square ......................................................................................................... 206
Curve ............................................................................................................................. 206
Circle ........................................................................................................... 206
Circumcircle ................................................................................................ 206
Excircle ........................................................................................................ 206
Incircle ........................................................................................................ 207
Ellipse ......................................................................................................... 207
Hyperbola ................................................................................................... 207
Parabola ..................................................................................................... 207
Conic ........................................................................................................... 208
Locus ........................................................................................................... 208
Plot ................................................................................................................................ 208
Function ...................................................................................................... 208
Parametric .................................................................................................. 208
Polar ........................................................................................................... 208
Sequence .................................................................................................... 209
Implicit ........................................................................................................ 209
Slopeeld .................................................................................................... 209
ODE ............................................................................................................. 209
List .............................................................................................................. 209
Slider ........................................................................................................... 210
Transform ..................................................................................................................... 210
Translation ................................................................................................. 210
Reection ................................................................................................... 210
Rotation ...................................................................................................... 210
Dilation ....................................................................................................... 210
Similarity .................................................................................................... 210
Projection ................................................................................................... 211
Inversion ..................................................................................................... 211
Reciprocation .............................................................................................. 211
xiii
Page 14

Numeric view: Cmds menu .............................................................................................................. 211
Cartesian ....................................................................................................................... 211
Abscissa ...................................................................................................... 211
Ordinate ...................................................................................................... 212
Coordinates ................................................................................................. 212
Equation of ................................................................................................. 212
Parametric .................................................................................................. 212
Polar Coordinates ....................................................................................... 212
Measure ......................................................................................................................... 212
Distance ...................................................................................................... 212
Radius ......................................................................................................... 213
Perimeter .................................................................................................... 213
Slope ........................................................................................................... 213
Area ............................................................................................................. 213
Angle ........................................................................................................... 213
Arc Length ................................................................................................... 214
Tests .............................................................................................................................. 214
Collinear ...................................................................................................... 214
On circle ...................................................................................................... 214
On object ..................................................................................................... 214
Parallel ........................................................................................................ 214
Perpendicular ............................................................................................. 215
Isosceles ..................................................................................................... 215
Equilateral .................................................................................................. 215
Parallelogram ............................................................................................. 215
Conjugate .................................................................................................... 215
Other Geometry functions .............................................................................................................. 215
aix ............................................................................................................................... 215
barycenter ..................................................................................................................... 216
convexhull ..................................................................................................................... 216
distance2 ....................................................................................................................... 216
division_point ............................................................................................................... 216
equilateral_triangle ...................................................................................................... 216
exbisector ..................................................................................................................... 217
extract_measure .......................................................................................................... 217
harmonic_conjugate ..................................................................................................... 217
harmonic_division ........................................................................................................ 217
isobarycenter ................................................................................................................ 218
is_harmonic .................................................................................................................. 218
is_harmonic_circle_bundle ........................................................................................... 218
is_harmonic_line_bundle ............................................................................................. 218
xiv
Page 15

is_orthogonal ................................................................................................................ 218
is_rectangle .................................................................................................................. 218
is_rhombus ................................................................................................................... 219
is_square ....................................................................................................................... 219
LineHorz ........................................................................................................................ 219
LineVert ......................................................................................................................... 219
open_polygon ............................................................................................................... 219
orthocenter ................................................................................................................... 219
perpendicular bisector .................................................................................................. 220
point2d .......................................................................................................................... 220
polar .............................................................................................................................. 220
pole ............................................................................................................................... 220
power_pc ....................................................................................................................... 220
radical_axis ................................................................................................................... 221
vector ............................................................................................................................ 221
vertices .......................................................................................................................... 221
vertices_abca ................................................................................................................ 221
11 Spreadsheet ............................................................................................................................................ 222
Getting started with the Spreadsheet app ........................................................................................................ 222
Basic operations ................................................................................................................................................ 227
Navigation, selection, and gestures ............................................................................................... 227
Cell references ................................................................................................................................. 227
Cell naming ...................................................................................................................................... 228
Method 1 ....................................................................................................................... 228
Method 2 ....................................................................................................................... 228
Using names in calculations ......................................................................................... 228
Entering content .............................................................................................................................. 228
Direct entry ................................................................................................................... 229
Importing data .............................................................................................................. 230
External functions ........................................................................................................ 230
Copy and paste ................................................................................................................................ 232
Using the CHOOSE command ............................................................................................................................ 232
External references ........................................................................................................................................... 232
Referencing variables ...................................................................................................................... 233
Using the CAS in spreadsheet calculations ....................................................................................................... 234
Buttons and keys ............................................................................................................................................... 234
Formatting options ............................................................................................................................................ 235
Format parameters ......................................................................................................................... 236
Spreadsheet functions ...................................................................................................................................... 237
xv
Page 16

12 Statistics 1Var app ................................................................................................................................... 238
Getting started with the Statistics 1Var app ..................................................................................................... 238
Symbolic view: menu items ............................................................................................................ 241
Entering and editing statistical data ................................................................................................................. 245
Numeric view: menu items .............................................................................................................. 245
More menu .................................................................................................................... 245
Editing a data set ............................................................................................................................ 246
Deleting data ................................................................................................................................... 246
Inserting data .................................................................................................................................. 246
Generating data ............................................................................................................................... 246
Sorting data values ......................................................................................................................... 247
Computed statistics ........................................................................................................................................... 247
Plotting .............................................................................................................................................................. 248
Plotting statistical data ................................................................................................................... 248
Plot types ........................................................................................................................................ 249
Histogram ..................................................................................................................... 249
Box-and-whisker plot ................................................................................................... 250
Normal probability plot ................................................................................................ 250
Line plot ........................................................................................................................ 251
Bar graph ...................................................................................................................... 251
Pareto chart .................................................................................................................. 252
Control chart ................................................................................................................. 252
Dot plot ......................................................................................................................... 253
Stem and leaf plot ......................................................................................................... 253
Pie chart ........................................................................................................................ 254
Setting up the plot .......................................................................................................................... 254
Exploring the graph ......................................................................................................................... 254
Plot view: menu items .................................................................................................. 255
13 Statistics 2Var app ................................................................................................................................... 256
Getting started with the Statistics 2Var app ..................................................................................................... 256
Opening the Statistics 2Var app ...................................................................................................... 256
Entering data ................................................................................................................................... 257
Choosing data columns and t ........................................................................................................ 258
Exploring statistics .......................................................................................................................... 259
Setting up the plot .......................................................................................................................... 260
Plotting the graph ........................................................................................................................... 261
Displaying the equation .................................................................................................................. 262
Predicting values ............................................................................................................................. 262
Entering and editing statistical data ................................................................................................................. 263
Numeric view: menu items .............................................................................................................. 264
xvi
Page 17

More menu .................................................................................................................... 264
Dening a regression model ............................................................................................................................. 264
Choosing a t ................................................................................................................................... 265
Fit types ........................................................................................................................................... 265
Dening your own t ....................................................................................................................... 265
Computed statistics ........................................................................................................................................... 266
Plotting statistical data ..................................................................................................................................... 267
Tracing a scatter plot ...................................................................................................................... 268
Tracing a curve ................................................................................................................................ 268
Tracing order ................................................................................................................................... 269
Plot view: menu items ..................................................................................................................... 269
Function menu .............................................................................................................. 269
Sketch ......................................................................................................... 269
Plot Setup view ................................................................................................................................ 270
Predicting values ............................................................................................................................. 270
Plot view ........................................................................................................................ 270
Home view .................................................................................................................... 271
Troubleshooting a plot .................................................................................................................... 271
14 Inference app .......................................................................................................................................... 272
Sample data ....................................................................................................................................................... 272
Getting started with the Inference app ............................................................................................................. 272
Opening the Inference app .............................................................................................................. 273
Symbolic view options .................................................................................................................... 273
Selecting the inference method ...................................................................................................... 275
Entering data ................................................................................................................................... 276
Displaying the test results .............................................................................................................. 277
Plotting the test results .................................................................................................................. 277
Importing statistics ........................................................................................................................................... 278
Opening the Statistics 1Var app ...................................................................................................... 278
Clearing unwanted data .................................................................................................................. 278
Entering data ................................................................................................................................... 279
Calculating the statistics ................................................................................................................. 280
Opening the Inference app .............................................................................................................. 280
Selecting the inference method and type ...................................................................................... 281
Importing the data .......................................................................................................................... 281
Displaying results numerically ........................................................................................................ 283
Displaying results graphically ......................................................................................................... 283
Hypothesis tests ................................................................................................................................................ 283
One-Sample Z-Test .......................................................................................................................... 284
Menu name ................................................................................................................... 284
xvii
Page 18

Inputs ............................................................................................................................ 284
Results .......................................................................................................................... 284
Two-Sample Z-Test .......................................................................................................................... 284
Menu name ................................................................................................................... 284
Inputs ............................................................................................................................ 285
Results .......................................................................................................................... 285
One-Proportion Z-Test .................................................................................................................... 285
Menu name ................................................................................................................... 285
Inputs ............................................................................................................................ 286
Results .......................................................................................................................... 286
Two-Proportion Z-Test .................................................................................................................... 286
Menu name ................................................................................................................... 286
Inputs ............................................................................................................................ 286
Results .......................................................................................................................... 288
One-Sample T-Test .......................................................................................................................... 288
Menu name ................................................................................................................... 288
Inputs ............................................................................................................................ 288
Results .......................................................................................................................... 289
Two-Sample T-Test .......................................................................................................................... 289
Menu name ................................................................................................................... 289
Inputs ............................................................................................................................ 289
Results .......................................................................................................................... 290
Condence intervals .......................................................................................................................................... 290
One-Sample Z-Interval .................................................................................................................... 290
Menu name ................................................................................................................... 290
Inputs ............................................................................................................................ 290
Results .......................................................................................................................... 290
Two-Sample Z-Interval ................................................................................................................... 291
Menu name ................................................................................................................... 291
Inputs ............................................................................................................................ 291
Results .......................................................................................................................... 291
One-Proportion Z-Interval .............................................................................................................. 292
Menu name ................................................................................................................... 292
Inputs ............................................................................................................................ 292
Results .......................................................................................................................... 292
Two-Proportion Z-Interval .............................................................................................................. 292
Menu name ................................................................................................................... 292
Inputs ............................................................................................................................ 292
Results .......................................................................................................................... 293
One-Sample T-Interval .................................................................................................................... 293
Menu name ................................................................................................................... 293
xviii
Page 19

Inputs ............................................................................................................................ 293
Results .......................................................................................................................... 293
Two-Sample T-Interval ................................................................................................................... 294
Menu name ................................................................................................................... 294
Inputs ............................................................................................................................ 294
Results .......................................................................................................................... 294
Chi-square tests ................................................................................................................................................ 295
Goodness of t test ......................................................................................................................... 295
Menu name ................................................................................................................... 295
Inputs ............................................................................................................................ 295
Results .......................................................................................................................... 295
Menu keys ..................................................................................................................... 295
Two-way table test ......................................................................................................................... 296
Menu name ................................................................................................................... 296
Inputs ............................................................................................................................ 296
Results .......................................................................................................................... 296
Menu keys ..................................................................................................................... 296
Inference for regression .................................................................................................................................... 297
Linear t-test ..................................................................................................................................... 297
Menu name ................................................................................................................... 297
Inputs ............................................................................................................................ 297
Results .......................................................................................................................... 297
Menu keys ..................................................................................................................... 297
Condence interval for slope .......................................................................................................... 298
Menu name ................................................................................................................... 298
Inputs ............................................................................................................................ 298
Results .......................................................................................................................... 298
Menu keys ..................................................................................................................... 298
Condence interval for intercept .................................................................................................... 299
Menu name ................................................................................................................... 299
Inputs ............................................................................................................................ 299
Results .......................................................................................................................... 299
Menu keys ..................................................................................................................... 299
Condence interval for a mean response ....................................................................................... 300
Menu name ................................................................................................................... 300
Inputs ............................................................................................................................ 300
Results .......................................................................................................................... 300
Menu keys ..................................................................................................................... 300
Prediction interval ........................................................................................................................... 301
Menu name ................................................................................................................... 301
Inputs ............................................................................................................................ 301
xix
Page 20

Results .......................................................................................................................... 301
Menu keys ..................................................................................................................... 301
ANOVA ................................................................................................................................................................ 302
Menu name ...................................................................................................................................... 302
Inputs ............................................................................................................................................... 302
Results ............................................................................................................................................. 302
Menu keys ........................................................................................................................................ 302
15 Solve app ................................................................................................................................................ 304
Getting started with the Solve app ................................................................................................................... 304
One equation ................................................................................................................................... 304
Opening the Solve app .................................................................................................. 305
Clearing the app and dening the equation ................................................................. 305
Entering known variables ............................................................................................. 306
Solving for the unknown variable ................................................................................ 307
Plotting the equation .................................................................................................... 307
Several equations ........................................................................................................................... 308
Opening the solve app .................................................................................................. 309
Dening the equations ................................................................................................. 309
Entering a seed value ................................................................................................... 309
Solving the unknown variables .................................................................................... 310
Limitations ...................................................................................................................................... 310
Solution information ......................................................................................................................................... 311
16 Linear Solver app ..................................................................................................................................... 312
Getting started with the Linear Solver app ....................................................................................................... 312
Opening the Linear Solver app ........................................................................................................ 312
Dening and solving the equations ................................................................................................ 313
Solving a two-by-two system ......................................................................................................... 314
Menu items ........................................................................................................................................................ 314
17 Parametric app ........................................................................................................................................ 315
Getting started with the Parametric app .......................................................................................................... 315
Opening the Parametric app ........................................................................................................... 315
Dening the functions ..................................................................................................................... 316
Setting the angle measure .............................................................................................................. 316
Setting up the plot .......................................................................................................................... 317
Plotting the functions ..................................................................................................................... 318
Exploring the graph ......................................................................................................................... 318
Displaying the Numeric view ........................................................................................................... 319
xx
Page 21

18 Polar app ................................................................................................................................................. 320
Getting started with the Polar app .................................................................................................................... 320
Opening the Polar app .................................................................................................................... 320
Dening the function ...................................................................................................................... 320
Setting the angle measure .............................................................................................................. 321
Setting up the plot .......................................................................................................................... 322
Plotting the expression ................................................................................................................... 322
Exploring the graph ......................................................................................................................... 323
Displaying the Numeric view ........................................................................................................... 324
19 Sequence app .......................................................................................................................................... 325
Getting started with the Sequence app ............................................................................................................ 326
Opening the Sequence app ............................................................................................................. 326
Dening the expression .................................................................................................................. 326
Setting up the plot .......................................................................................................................... 327
Plotting the sequence ..................................................................................................................... 328
Exploring the graph ......................................................................................................................... 329
Displaying Numeric view ................................................................................................................. 329
Exploring the table of values .......................................................................................................... 330
Setting up the table of values ......................................................................................................... 331
Another example: Explicitly dened sequences ............................................................................................... 331
Dening the expression .................................................................................................................. 331
Setting up the plot .......................................................................................................................... 332
Plotting the sequence ..................................................................................................................... 332
Exploring the table of values .......................................................................................................... 333
20 Finance app ............................................................................................................................................. 334
Getting started with the Finance app ................................................................................................................ 334
Opening the Finance app ................................................................................................................. 334
Symbolic view options .................................................................................................................... 335
Time value of money (TVM) ............................................................................................................................... 335
Using TVM ........................................................................................................................................ 335
Cash ow diagrams ......................................................................................................................... 337
TVM variables .................................................................................................................................. 339
Another example: balloon payment ............................................................................................... 340
Amortizations .................................................................................................................................. 341
Calculating amortizations ............................................................................................ 341
Amortization for a home mortgage example .............................................................. 341
Amortization graph ....................................................................................................... 343
Amortization variables ................................................................................................. 343
xxi
Page 22

Interest conversion ............................................................................................................................................ 343
Using interest conversion ............................................................................................................... 343
Interest conversion variables .......................................................................................................... 344
Date calculation ................................................................................................................................................. 344
Using date calculation ..................................................................................................................... 345
Date calculation variables ............................................................................................................... 346
Cash ow ............................................................................................................................................................ 347
Using cash ow ............................................................................................................................... 347
Cash ow variables ......................................................................................................................... 348
Another example: MIRR and FMRR .................................................................................................. 349
Exploring cash ow in Plot view ..................................................................................................... 350
Plot view: menu items ..................................................................................................................... 352
Sample cash ows ........................................................................................................................... 353
Depreciation ...................................................................................................................................................... 353
Using depreciation .......................................................................................................................... 354
Depreciation variables .................................................................................................................... 355
Depreciation types .......................................................................................................................... 356
Another example: declining balance .............................................................................................. 356
Break-even ......................................................................................................................................................... 357
Using break-even ............................................................................................................................ 357
Break-even variables ...................................................................................................................... 358
Percent change .................................................................................................................................................. 358
Using percent change ...................................................................................................................... 359
Percent change variables ................................................................................................................ 360
Percent change types ...................................................................................................................... 360
Another example: part/total calculation ........................................................................................ 360
Bond ................................................................................................................................................................... 361
Using bond ....................................................................................................................................... 361
Bond variables ................................................................................................................................. 362
Black-Scholes ..................................................................................................................................................... 363
Using Black-Scholes ........................................................................................................................ 363
Black-Scholes variables .................................................................................................................. 364
Another example: annual inputs ..................................................................................................... 364
21 Triangle Solver app .................................................................................................................................. 366
Getting started with the Triangle Solver app .................................................................................................... 366
Opening the Triangle Solver app ..................................................................................................... 366
Setting the angle measure .............................................................................................................. 367
Specify the known values ............................................................................................................... 367
Solving for the unknown values ..................................................................................................... 368
Choosing triangle types ..................................................................................................................................... 368
xxii
Page 23

Special cases ...................................................................................................................................................... 369
Indeterminate case ......................................................................................................................... 369
No solution with given data ............................................................................................................ 369
Not enough data .............................................................................................................................. 370
22 Explorer app ............................................................................................................................................ 371
Getting started with the Explorer app .............................................................................................................. 371
Opening the Explorer app ............................................................................................................... 371
Exploring linear functions ................................................................................................................................. 371
Exploring quadratic functions ........................................................................................................................... 372
Exploring cubic functions .................................................................................................................................. 374
Exploring exponential functions ....................................................................................................................... 375
Exploring logarithmic functions ........................................................................................................................ 376
Exploring trigonometric functions .................................................................................................................... 377
23 Functions and commands ......................................................................................................................... 379
Keyboard functions ........................................................................................................................................... 381
.................................................................................................. 381
........................................................................................................................................... 381
(ex) ...................................................................................................................... 381
........................................................................................................................................... 382
(10x) .................................................................................................................... 382
................................................................................................................ 382
(ASIN) ................................................................................................................... 382
(ACOS) .................................................................................................................. 382
(ATAN) ................................................................................................................... 383
........................................................................................................................................... 383
............................................................................................................................. 383
........................................................................................................................................... 383
............................................................................................................................. 383
xxiii
Page 24
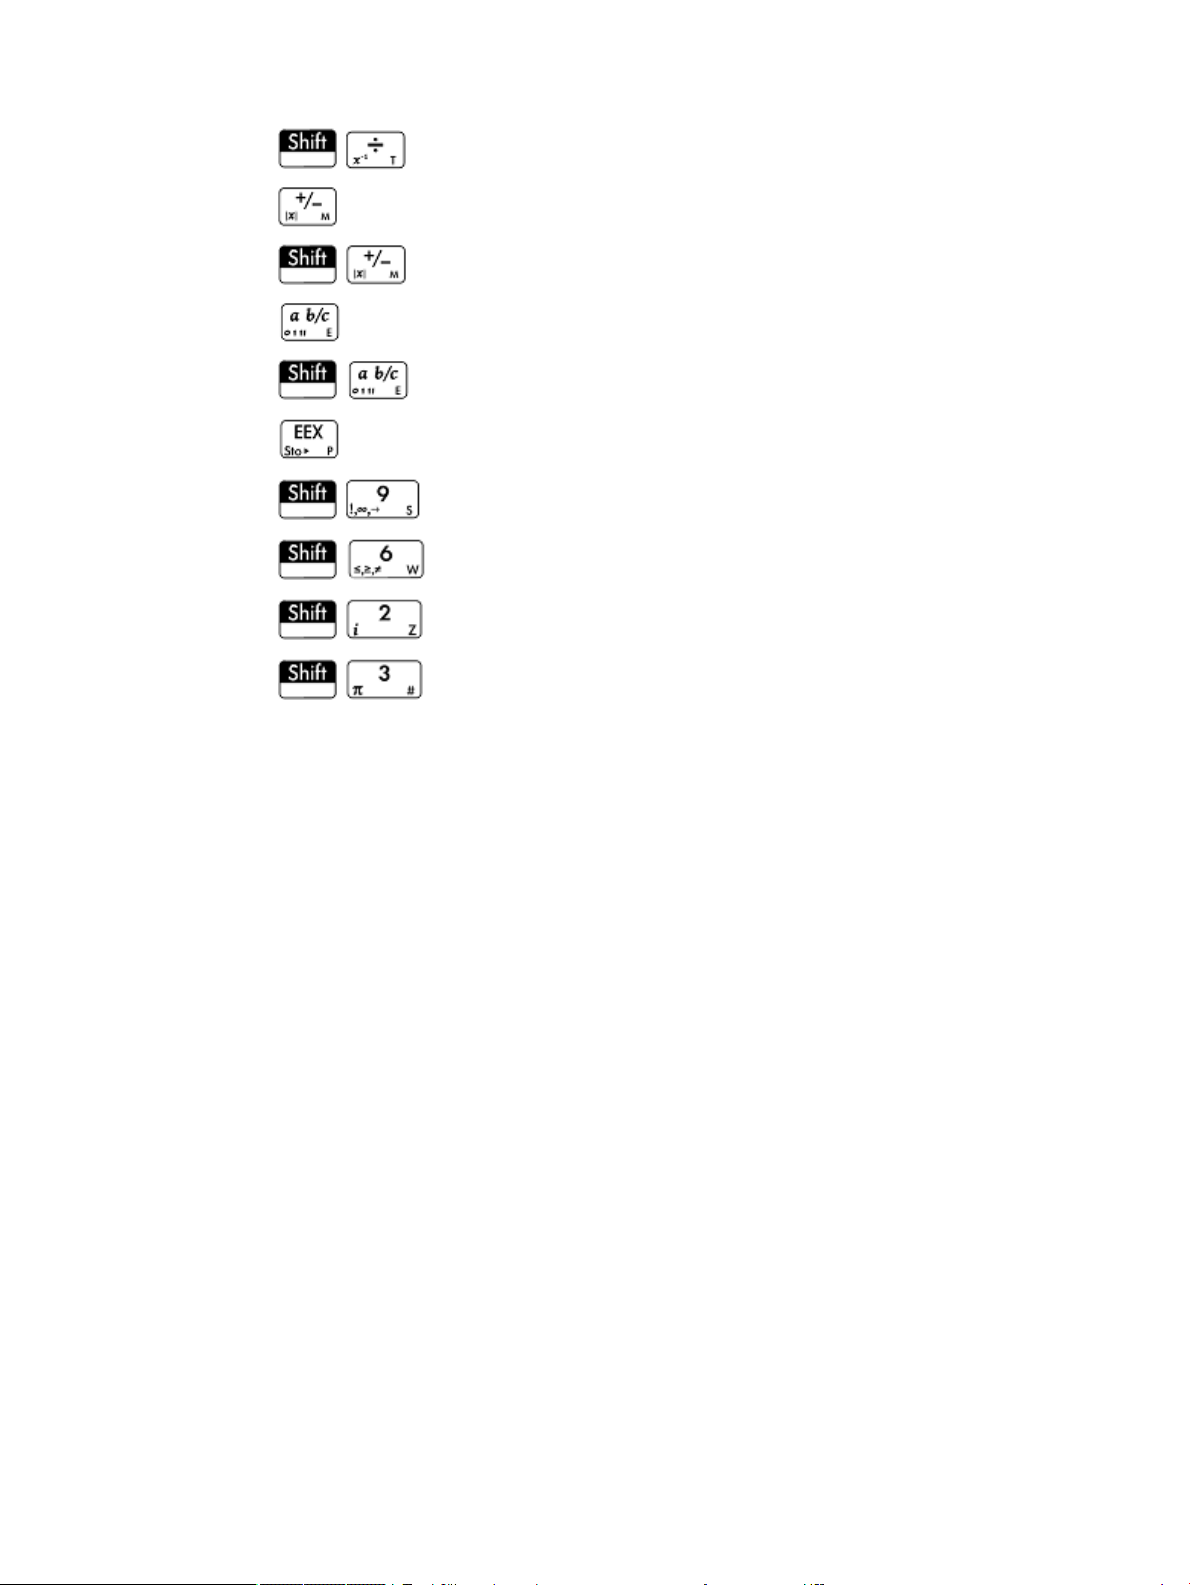
............................................................................................................................. 383
........................................................................................................................................... 384
(|x|) ....................................................................................................................... 384
........................................................................................................................................... 384
............................................................................................................................. 384
........................................................................................................................................... 385
........................................................................................................................... 385
.......................................................................................................................... 385
.......................................................................................................................... 385
.......................................................................................................................... 385
Math menu ......................................................................................................................................................... 386
Numbers .......................................................................................................................................... 386
Ceiling ............................................................................................................................ 386
Floor .............................................................................................................................. 386
IP ................................................................................................................................... 386
FP .................................................................................................................................. 386
Round ............................................................................................................................ 386
Truncate ........................................................................................................................ 387
Mantissa ........................................................................................................................ 387
Exponent ....................................................................................................................... 387
Arithmetic ........................................................................................................................................ 387
Maximum ...................................................................................................................... 387
Minimum ....................................................................................................................... 388
Modulus ......................................................................................................................... 388
Find Root ....................................................................................................................... 388
Percentage .................................................................................................................... 388
Arithmetic – Complex ...................................................................................................................... 388
Argument ...................................................................................................................... 388
Conjugate ...................................................................................................................... 388
Real Part ........................................................................................................................ 389
Imaginary Part .............................................................................................................. 389
Unit Vector .................................................................................................................... 389
xxiv
Page 25

Arithmetic – Exponential ................................................................................................................ 389
ALOG .............................................................................................................................. 389
EXPM1 ........................................................................................................................... 389
LNP1 .............................................................................................................................. 389
Trigonometry .................................................................................................................................. 389
CSC ................................................................................................................................ 390
ACSC .............................................................................................................................. 390
SEC ................................................................................................................................ 390
ASEC .............................................................................................................................. 390
COT ................................................................................................................................ 390
ACOT .............................................................................................................................. 390
Hyperbolic ....................................................................................................................................... 390
SINH ............................................................................................................................... 390
ASINH ............................................................................................................................ 390
COSH .............................................................................................................................. 390
ACOSH ............................................................................................................................ 390
TANH .............................................................................................................................. 391
ATANH ............................................................................................................................ 391
Probability ....................................................................................................................................... 392
Factorial ........................................................................................................................ 392
Combination .................................................................................................................. 392
Permutation .................................................................................................................. 392
Probability – Random ...................................................................................................................... 392
Number ......................................................................................................................... 392
Integer ........................................................................................................................... 392
Normal .......................................................................................................................... 393
Seed .............................................................................................................................. 393
Probability – Density ....................................................................................................................... 393
Normal .......................................................................................................................... 393
T .................................................................................................................................... 393
χ2 ................................................................................................................................... 393
F ..................................................................................................................................... 393
Binomial ........................................................................................................................ 394
Geometric ...................................................................................................................... 394
Poisson .......................................................................................................................... 394
Probability – Cumulative ................................................................................................................. 394
Normal .......................................................................................................................... 394
T .................................................................................................................................... 394
X2 .................................................................................................................................. 395
F ..................................................................................................................................... 395
Binomial ........................................................................................................................ 395
xxv
Page 26

Geometric ...................................................................................................................... 395
Poisson .......................................................................................................................... 395
Probability – Inverse ....................................................................................................................... 396
Normal .......................................................................................................................... 396
T .................................................................................................................................... 396
χ2 ................................................................................................................................... 396
F ..................................................................................................................................... 396
Binomial ........................................................................................................................ 396
Geometric ...................................................................................................................... 397
Poisson .......................................................................................................................... 397
List ................................................................................................................................................... 397
Matrix .............................................................................................................................................. 397
Special ............................................................................................................................................. 397
Beta ............................................................................................................................... 397
Gamma .......................................................................................................................... 397
Psi .................................................................................................................................. 397
Zeta ............................................................................................................................... 397
erf .................................................................................................................................. 398
erfc ................................................................................................................................ 398
Ei .................................................................................................................................... 398
Si .................................................................................................................................... 398
Ci .................................................................................................................................... 398
CAS menu ........................................................................................................................................................... 398
Algebra ............................................................................................................................................ 399
Simplify ......................................................................................................................... 399
Collect ........................................................................................................................... 399
Expand .......................................................................................................................... 399
Factor ............................................................................................................................ 399
Substitute ..................................................................................................................... 399
Partial Fraction ............................................................................................................. 399
Algebra – Extract ............................................................................................................................. 400
Numerator ..................................................................................................................... 400
Denominator ................................................................................................................. 400
Left Side ........................................................................................................................ 400
Right Side ...................................................................................................................... 400
Calculus ........................................................................................................................................... 400
Dierentiate .................................................................................................................. 400
Integrate ....................................................................................................................... 401
Limit .............................................................................................................................. 401
Series ............................................................................................................................ 401
Summation ................................................................................................................... 401
xxvi
Page 27

Calculus – Dierential ..................................................................................................................... 402
Curl ................................................................................................................................ 402
Divergence .................................................................................................................... 402
Gradient ........................................................................................................................ 402
Hessian .......................................................................................................................... 402
Calculus – Integral ........................................................................................................................... 402
By Parts u ...................................................................................................................... 402
By Parts v ...................................................................................................................... 403
F(b)–F(a) ........................................................................................................................ 403
Calculus – Limits .............................................................................................................................. 403
Riemann Sum ................................................................................................................ 403
Taylor ............................................................................................................................ 403
Taylor of Quotient ......................................................................................................... 403
Calculus – Transform ....................................................................................................................... 404
Laplace .......................................................................................................................... 404
Inverse Laplace ............................................................................................................. 404
FFT ................................................................................................................................. 404
Inverse FFT .................................................................................................................... 404
Solve ................................................................................................................................................ 404
Solve .............................................................................................................................. 404
Zeros ............................................................................................................................. 405
Complex Solve ............................................................................................................... 405
Complex Zeros .............................................................................................................. 405
Numerical Solve ............................................................................................................ 406
Dierential Equation .................................................................................................... 406
ODE Solve ...................................................................................................................... 406
Linear System ............................................................................................................... 406
Rewrite ............................................................................................................................................ 406
lncollect ......................................................................................................................... 406
powexpand ................................................................................................................... 407
texpand ......................................................................................................................... 407
Rewrite – Exp & Ln .......................................................................................................................... 407
ey*lnx→ xy ................................................................................................................... 407
xy→ey*lnx .................................................................................................................... 407
exp2trig ......................................................................................................................... 407
expexpand .................................................................................................................... 408
Rewrite – Sine .................................................................................................................................. 408
asinx→acosx ................................................................................................................ 408
asinx→atanx ................................................................................................................ 408
sinx→cosx*tanx ........................................................................................................... 408
Rewrite – Cosine .............................................................................................................................. 408
xxvii
Page 28

acosx→asinx ................................................................................................................ 408
acosx→atanx ................................................................................................................ 408
cosx→sinx/tanx ............................................................................................................ 409
Rewrite – Tangent ........................................................................................................................... 409
atanx→asinx ................................................................................................................ 409
atanx→acosx ................................................................................................................ 409
tanx→sinx/cosx ............................................................................................................ 409
halftan ........................................................................................................................... 409
Rewrite – Trig .................................................................................................................................. 410
trigx→sinx .................................................................................................................... 410
trigx→cosx ................................................................................................................... 410
trigx→tanx ................................................................................................................... 410
atrig2ln ......................................................................................................................... 410
tlin ................................................................................................................................. 410
tcollect .......................................................................................................................... 410
trigexpand ..................................................................................................................... 411
trig2exp ......................................................................................................................... 411
Integer ............................................................................................................................................. 411
Divisors ......................................................................................................................... 411
Factors .......................................................................................................................... 411
Factor List ..................................................................................................................... 411
GCD ................................................................................................................................ 412
LCM ................................................................................................................................ 412
Integer – Prime ................................................................................................................................ 412
Test if Prime .................................................................................................................. 412
Nth Prime ...................................................................................................................... 412
Next Prime .................................................................................................................... 412
Previous Prime .............................................................................................................. 412
Euler .............................................................................................................................. 413
Integer – Division ............................................................................................................................ 413
Quotient ........................................................................................................................ 413
Remainder ..................................................................................................................... 413
anMOD p ........................................................................................................................ 413
Chinese Remainder ....................................................................................................... 413
Polynomial ...................................................................................................................................... 414
Find Roots ..................................................................................................................... 414
Coeicients ................................................................................................................... 414
Divisors ......................................................................................................................... 414
Factor List ..................................................................................................................... 414
GCD ................................................................................................................................ 414
LCM ................................................................................................................................ 414
xxviii
Page 29

Polynomial – Create ........................................................................................................................ 415
Poly to Coef ................................................................................................................... 415
Coef to Poly ................................................................................................................... 415
Roots to Coef ................................................................................................................. 415
Roots to Poly ................................................................................................................. 415
Random ......................................................................................................................... 415
Minimum ....................................................................................................................... 416
Polynomial – Algebra ...................................................................................................................... 416
Quotient ........................................................................................................................ 416
Remainder ..................................................................................................................... 416
Degree ........................................................................................................................... 416
Factor by Degree ........................................................................................................... 416
Coef. GCD ....................................................................................................................... 417
Zero Count ..................................................................................................................... 417
Chinese Remainder ....................................................................................................... 417
Polynomial – Special ....................................................................................................................... 417
Cyclotomic ..................................................................................................................... 417
Groebner Basis .............................................................................................................. 417
Groebner Remainder ..................................................................................................... 418
Hermite ......................................................................................................................... 418
Lagrange ....................................................................................................................... 418
Laguerre ........................................................................................................................ 418
Legendre ....................................................................................................................... 418
Chebyshev Tn ................................................................................................................ 419
Chebyshev Un ............................................................................................................... 419
Plot .................................................................................................................................................. 419
Function ........................................................................................................................ 419
Contour ......................................................................................................................... 419
App menu ........................................................................................................................................................... 419
Finance app functions ..................................................................................................................... 420
TVM functions ............................................................................................................... 420
Main variables ............................................................................................. 420
Optional variables ...................................................................................... 420
TvmFV ......................................................................................................... 421
TvmIPYR ...................................................................................................... 421
TvmNbPmt .................................................................................................. 421
TvmPMT ...................................................................................................... 421
TvmPV ......................................................................................................... 421
Interest conversion functions ....................................................................................... 421
IntConvNom ................................................................................................ 422
IntConvE ................................................................................................... 422
xxix
Page 30

IntConvCPYR ............................................................................................... 422
Date calculation functions ............................................................................................ 422
DateDays .................................................................................................... 422
Cash ow functions ...................................................................................................... 422
CashFlowIRR ............................................................................................... 422
CashFlowMIRR ............................................................................................ 423
CashFlowFMRR ........................................................................................... 423
CashFlowTotal ............................................................................................ 423
CashFlowNPV .............................................................................................. 423
CashFlowNFV .............................................................................................. 423
CashFlowNUS .............................................................................................. 424
CashFlowPB ................................................................................................ 424
Depreciation functions ................................................................................................. 424
Depreciate .................................................................................................. 424
Break-even functions ................................................................................................... 425
BrkEvFixed .................................................................................................. 425
BrkEvQuant ................................................................................................. 425
BrkEvCost ................................................................................................... 425
BrkEvPrice .................................................................................................. 425
BrkEvProt ................................................................................................. 425
Percent change functions ............................................................................................. 426
ChangePrice ................................................................................................ 426
ChangeCost ................................................................................................. 426
PercentMargin ............................................................................................ 426
PercentMarkup ........................................................................................... 426
ChangeOld .................................................................................................. 426
ChangeNew ................................................................................................. 427
PercentTotal ............................................................................................... 427
PercentChange ........................................................................................... 427
Bond functions .............................................................................................................. 427
BondYield .................................................................................................... 427
BondPrice .................................................................................................... 428
Black Scholes functions ................................................................................................ 428
BlackScholes ............................................................................................... 428
Solve app functions ......................................................................................................................... 428
SOLVE ............................................................................................................................ 428
Spreadsheet app functions ............................................................................................................. 428
SUM ............................................................................................................................... 429
AVERAGE ....................................................................................................................... 430
AMORT ........................................................................................................................... 430
STAT1 ............................................................................................................................. 430
xxx
Page 31

STAT2 ............................................................................................................................. 431
REGRS ............................................................................................................................ 433
predY ............................................................................................................................. 434
PredX ............................................................................................................................. 435
HypZ1mean ................................................................................................................... 435
HYPZ2mean .................................................................................................................. 436
HypZ1prop .................................................................................................................... 436
HypZ2prop .................................................................................................................... 437
HypT1mean ................................................................................................................... 438
HypT2mean ................................................................................................................... 438
ConfZ1mean .................................................................................................................. 439
ConfZ2mean .................................................................................................................. 439
ConfZ1prop ................................................................................................................... 440
ConfZ2prop ................................................................................................................... 440
ConfT1mean .................................................................................................................. 440
ConfT2mean .................................................................................................................. 441
Statistics 1Var app functions .......................................................................................................... 441
Do1VStats ..................................................................................................................... 441
SetFreq .......................................................................................................................... 441
SetSample ..................................................................................................................... 442
Statistics 2Var app functions .......................................................................................................... 442
PredX ............................................................................................................................. 442
PredY ............................................................................................................................. 442
Resid .............................................................................................................................. 442
Do2VStats ..................................................................................................................... 442
SetDepend .................................................................................................................... 443
SetIndep ........................................................................................................................ 443
Inference app functions .................................................................................................................. 443
DoInference ................................................................................................................... 443
HypZ1mean ................................................................................................................... 443
HypZ2mean ................................................................................................................... 444
HypZ1prop .................................................................................................................... 444
HypZ2prop .................................................................................................................... 445
HypT1mean ................................................................................................................... 445
HypT2mean ................................................................................................................... 446
ConfZ1mean .................................................................................................................. 446
ConfZ2mean .................................................................................................................. 447
ConfZ1prop ................................................................................................................... 447
ConfZ2prop ................................................................................................................... 447
ConfT1mean .................................................................................................................. 447
ConfT2mean .................................................................................................................. 448
xxxi
Page 32

Chi2GOF ......................................................................................................................... 448
Chi2TwoWay .................................................................................................................. 448
LinRegrTConf- Slope ..................................................................................................... 448
LinRegrTConfInt ............................................................................................................ 449
LinRegrTMean-Resp ..................................................................................................... 449
LinRegrTPredInt ............................................................................................................ 450
LinRegrTTest ................................................................................................................. 450
Finance app functions ..................................................................................................................... 451
CalcFV ............................................................................................................................ 451
CalcIPYR ........................................................................................................................ 451
CalcNbPmt ..................................................................................................................... 452
CalcPMT ......................................................................................................................... 452
CalcPV ........................................................................................................................... 452
DoFinance ..................................................................................................................... 452
Linear Solver app functions ............................................................................................................ 452
Solve2x2 ....................................................................................................................... 452
Solve3x3 ....................................................................................................................... 453
LinSolve ......................................................................................................................... 453
Triangle Solver app functions ......................................................................................................... 453
AAS ................................................................................................................................ 453
ASA ................................................................................................................................ 453
SAS ................................................................................................................................ 454
SSA ................................................................................................................................ 454
SSS ................................................................................................................................ 454
DoSolve ......................................................................................................................... 454
Explorer functions ........................................................................................................................... 454
LinearSlope ................................................................................................................... 454
LinearYIntercept ........................................................................................................... 455
QuadSolve ..................................................................................................................... 455
QuadDelta ..................................................................................................................... 455
Common app functions ................................................................................................................... 455
CHECK ............................................................................................................................ 455
UNCHECK ....................................................................................................................... 456
ISCHECK ......................................................................................................................... 456
Ctlg menu ........................................................................................................................................................... 457
! ........................................................................................................................................................ 457
% ...................................................................................................................................................... 458
%TOTAL ............................................................................................................................................ 458
( ........................................................................................................................................................ 458
* ....................................................................................................................................................... 458
+ ....................................................................................................................................................... 458
xxxii
Page 33

– ....................................................................................................................................................... 458
.* ...................................................................................................................................................... 458
./ ...................................................................................................................................................... 458
.^ ...................................................................................................................................................... 459
/ ....................................................................................................................................................... 459
:= ...................................................................................................................................................... 459
< ....................................................................................................................................................... 459
<= ..................................................................................................................................................... 459
<> ..................................................................................................................................................... 459
= ....................................................................................................................................................... 459
== ..................................................................................................................................................... 459
EQ .................................................................................................................................................... 459
> ....................................................................................................................................................... 459
>= ..................................................................................................................................................... 460
^ ....................................................................................................................................................... 460
a2q ................................................................................................................................................... 460
abcuv ............................................................................................................................................... 460
additionally ...................................................................................................................................... 461
Airy Ai ............................................................................................................................................... 461
Airy Bi ............................................................................................................................................... 461
algvar ............................................................................................................................................... 461
AND .................................................................................................................................................. 461
append ............................................................................................................................................. 461
apply ................................................................................................................................................ 461
assume ............................................................................................................................................ 462
basis ................................................................................................................................................ 462
betad ............................................................................................................................................... 462
betad_cdf ........................................................................................................................................ 462
betad_icdf ....................................................................................................................................... 462
bounded_function ........................................................................................................................... 463
breakpoint ....................................................................................................................................... 463
canonical_form ............................................................................................................................... 463
cat .................................................................................................................................................... 463
Cauchy ............................................................................................................................................. 463
Cauchy_cdf ...................................................................................................................................... 463
Cauchy_icdf ..................................................................................................................................... 463
cFactor ............................................................................................................................................. 464
charpoly ........................................................................................................................................... 464
chrem ............................................................................................................................................... 464
col .................................................................................................................................................... 464
colDim .............................................................................................................................................. 464
xxxiii
Page 34

comDenom ...................................................................................................................................... 465
companion ....................................................................................................................................... 465
compare ........................................................................................................................................... 465
complexroot .................................................................................................................................... 465
contains ........................................................................................................................................... 466
CopyVar ........................................................................................................................................... 466
correlation ....................................................................................................................................... 466
count ................................................................................................................................................ 466
covariance ....................................................................................................................................... 466
covariance_correlation ................................................................................................................... 466
cpartfrac .......................................................................................................................................... 467
crationalroot ................................................................................................................................... 467
cumSum ........................................................................................................................................... 467
DateAdd ........................................................................................................................................... 467
Day of the week ............................................................................................................................... 467
DeltaDays ........................................................................................................................................ 468
delcols ............................................................................................................................................. 468
delrows ............................................................................................................................................ 468
deltalist ........................................................................................................................................... 468
deltalist ........................................................................................................................................... 468
Dirac ................................................................................................................................................. 468
e ....................................................................................................................................................... 469
egcd ................................................................................................................................................. 469
eigenvals ......................................................................................................................................... 469
eigenvects ....................................................................................................................................... 469
eigVl ................................................................................................................................................. 469
EVAL ................................................................................................................................................. 469
evalc ................................................................................................................................................ 470
evalf ................................................................................................................................................. 470
even ................................................................................................................................................. 470
exact ................................................................................................................................................ 470
EXP .................................................................................................................................................. 470
exponential ..................................................................................................................................... 470
exponential_cdf .............................................................................................................................. 471
exponential_icdf ............................................................................................................................. 471
exponential_regression .................................................................................................................. 471
EXPR ................................................................................................................................................ 471
ezgcd ............................................................................................................................................... 471
f2nd ................................................................................................................................................. 472
factorial ........................................................................................................................................... 472
oat ................................................................................................................................................. 472
xxxiv
Page 35

fMax ................................................................................................................................................. 472
fMin .................................................................................................................................................. 472
format .............................................................................................................................................. 472
Fourier an ........................................................................................................................................ 473
Fourier bn ........................................................................................................................................ 473
Fourier cn ......................................................................................................................................... 473
fracmod ........................................................................................................................................... 473
froot ................................................................................................................................................. 473
fsolve ............................................................................................................................................... 473
function_di .................................................................................................................................... 473
gammad .......................................................................................................................................... 474
gammad_cdf ................................................................................................................................... 474
gamma_icdf .................................................................................................................................... 474
gauss ............................................................................................................................................... 474
GF ..................................................................................................................................................... 474
gramschmidt ................................................................................................................................... 475
hadamard ........................................................................................................................................ 475
halftan2hypexp ............................................................................................................................... 475
halt ................................................................................................................................................... 475
hamdist ............................................................................................................................................ 475
has ................................................................................................................................................... 475
head ................................................................................................................................................. 476
Heaviside ......................................................................................................................................... 476
horner .............................................................................................................................................. 476
hyp2exp ........................................................................................................................................... 476
iabcuv .............................................................................................................................................. 476
ibasis ................................................................................................................................................ 476
icontent ........................................................................................................................................... 477
id ...................................................................................................................................................... 477
identity ............................................................................................................................................ 477
iegcd ................................................................................................................................................ 477
igcd .................................................................................................................................................. 477
image ............................................................................................................................................... 477
interval2center ................................................................................................................................ 478
inv .................................................................................................................................................... 478
iPart ................................................................................................................................................. 478
iquorem ........................................................................................................................................... 478
jacobi_symbol ................................................................................................................................. 478
ker .................................................................................................................................................... 478
laplacian .......................................................................................................................................... 479
latex ................................................................................................................................................. 479
xxxv
Page 36

lcoe ................................................................................................................................................ 479
legendre_symbol ............................................................................................................................ 479
length .............................................................................................................................................. 479
lgcd .................................................................................................................................................. 480
lin ..................................................................................................................................................... 480
linear_interpolate ........................................................................................................................... 480
linear_regression ............................................................................................................................ 480
LineHorz .......................................................................................................................................... 480
LineTan ............................................................................................................................................ 480
LineVert ........................................................................................................................................... 481
list2mat ........................................................................................................................................... 481
lname ............................................................................................................................................... 481
lnexpand .......................................................................................................................................... 481
logarithmic_regression ................................................................................................................... 481
logb .................................................................................................................................................. 482
logistic_regression .......................................................................................................................... 482
lu ...................................................................................................................................................... 482
lvar ................................................................................................................................................... 482
map .................................................................................................................................................. 482
mat2list ........................................................................................................................................... 483
matpow ........................................................................................................................................... 483
matrix .............................................................................................................................................. 483
MAXREAL ......................................................................................................................................... 483
mean ................................................................................................................................................ 483
median ............................................................................................................................................. 484
member ........................................................................................................................................... 484
MEMORY .......................................................................................................................................... 484
MINREAL .......................................................................................................................................... 484
modgcd ............................................................................................................................................ 485
mRow ............................................................................................................................................... 485
mult_c_conjugate ........................................................................................................................... 485
mult_conjugate ............................................................................................................................... 485
nDeriv .............................................................................................................................................. 485
NEG .................................................................................................................................................. 486
negbinomial .................................................................................................................................... 486
negbinomial_cdf ............................................................................................................................. 486
negbinomial_icdf ............................................................................................................................ 486
newton ............................................................................................................................................. 486
normal ............................................................................................................................................. 486
normalize ........................................................................................................................................ 487
NOT .................................................................................................................................................. 487
xxxvi
Page 37

odd ................................................................................................................................................... 487
OR .................................................................................................................................................... 487
order_size ........................................................................................................................................ 487
pa2b2 ............................................................................................................................................... 487
pade ................................................................................................................................................. 488
part .................................................................................................................................................. 488
peval ................................................................................................................................................ 488
PI ...................................................................................................................................................... 488
PIECEWISE ....................................................................................................................................... 488
plotinequation ................................................................................................................................. 489
polar_point ...................................................................................................................................... 489
pole .................................................................................................................................................. 489
POLYCOEF ........................................................................................................................................ 489
POLYEVAL ........................................................................................................................................ 489
polygon ............................................................................................................................................ 489
polygonplot ..................................................................................................................................... 490
polygonscatterplot .......................................................................................................................... 490
polynomial_regression ................................................................................................................... 490
POLYROOT ........................................................................................................................................ 490
potential .......................................................................................................................................... 490
power_regression ........................................................................................................................... 491
powerpc ........................................................................................................................................... 491
prepend ........................................................................................................................................... 491
primpart .......................................................................................................................................... 491
product ............................................................................................................................................ 491
propfrac ........................................................................................................................................... 491
ptayl ................................................................................................................................................. 492
purge ............................................................................................................................................... 492
Q2a .................................................................................................................................................. 492
quantile ........................................................................................................................................... 492
quartile1 .......................................................................................................................................... 492
quartile3 .......................................................................................................................................... 493
quartiles .......................................................................................................................................... 493
quorem ............................................................................................................................................ 493
QUOTE .............................................................................................................................................. 493
randbinomial ................................................................................................................................... 493
randchisquare ................................................................................................................................. 493
randexp ........................................................................................................................................... 494
randsher ........................................................................................................................................ 494
randgeometric ................................................................................................................................. 494
randperm ......................................................................................................................................... 494
xxxvii
Page 38

randpoisson ..................................................................................................................................... 494
randstudent ..................................................................................................................................... 494
randvector ....................................................................................................................................... 495
ranm ................................................................................................................................................ 495
ratnormal ........................................................................................................................................ 495
rectangular_coordinates ................................................................................................................. 495
reduced_conic ................................................................................................................................. 495
ref .................................................................................................................................................... 496
remove ............................................................................................................................................. 496
reorder ............................................................................................................................................. 496
residue ............................................................................................................................................. 496
restart .............................................................................................................................................. 496
resultant .......................................................................................................................................... 496
revlist ............................................................................................................................................... 497
romberg ........................................................................................................................................... 497
row ................................................................................................................................................... 497
rowAdd ............................................................................................................................................ 497
rowDim ............................................................................................................................................ 497
rowSwap .......................................................................................................................................... 498
rsolve ............................................................................................................................................... 498
select ............................................................................................................................................... 498
seq ................................................................................................................................................... 498
seqsolve .......................................................................................................................................... 498
shift ................................................................................................................................................. 499
shift_phase ..................................................................................................................................... 499
signature ......................................................................................................................................... 499
simult ............................................................................................................................................... 499
sincos ............................................................................................................................................... 499
spline ............................................................................................................................................... 500
sqrfree ............................................................................................................................................. 500
sqrt .................................................................................................................................................. 500
srand ................................................................................................................................................ 500
stddev .............................................................................................................................................. 500
stddevp ............................................................................................................................................ 500
sto .................................................................................................................................................... 501
sturmseq ......................................................................................................................................... 501
subMat ............................................................................................................................................. 501
suppress .......................................................................................................................................... 501
surd .................................................................................................................................................. 501
sylvester .......................................................................................................................................... 501
table ................................................................................................................................................. 502
xxxviii
Page 39

tail .................................................................................................................................................... 502
tan2cossin2 ..................................................................................................................................... 502
tan2sincos2 ..................................................................................................................................... 502
transpose ........................................................................................................................................ 502
trunc ................................................................................................................................................ 502
tsimplify .......................................................................................................................................... 503
type .................................................................................................................................................. 503
unapply ............................................................................................................................................ 503
uniform ............................................................................................................................................ 503
uniform_cdf ..................................................................................................................................... 503
uniform_icdf .................................................................................................................................... 504
UNION .............................................................................................................................................. 504
valuation .......................................................................................................................................... 504
variance ........................................................................................................................................... 504
vpotential ........................................................................................................................................ 504
VERSION ........................................................................................................................................... 504
weibull ............................................................................................................................................. 505
weibull_cdf ...................................................................................................................................... 505
weibull_icdf ..................................................................................................................................... 505
when ................................................................................................................................................ 505
XOR .................................................................................................................................................. 505
zip .................................................................................................................................................... 506
ztrans ............................................................................................................................................... 506
| ........................................................................................................................................................ 506
2 ....................................................................................................................................................... 506
π ....................................................................................................................................................... 506
∂ ....................................................................................................................................................... 506
Σ ....................................................................................................................................................... 506
− ....................................................................................................................................................... 507
√ ....................................................................................................................................................... 507
ʃ ........................................................................................................................................................ 507
≠ ....................................................................................................................................................... 507
≤ ....................................................................................................................................................... 507
≥ ....................................................................................................................................................... 507
► ..................................................................................................................................................... 507
i ........................................................................................................................................................ 507
–1 ..................................................................................................................................................... 507
Creating your own functions ............................................................................................................................. 508
24 Variables ................................................................................................................................................. 510
Working with variables ...................................................................................................................................... 510
xxxix
Page 40

Working with Home variables ......................................................................................................... 510
Working with user variables ........................................................................................................... 511
Working with app variables ............................................................................................................. 512
More about the Vars menu .............................................................................................................. 512
Qualifying variables ........................................................................................................................................... 513
Home variables .................................................................................................................................................. 514
App variables ..................................................................................................................................................... 515
Function app variables .................................................................................................................... 515
Results variables ........................................................................................................... 516
Extremum ................................................................................................... 516
Isect ............................................................................................................ 516
Root ............................................................................................................ 516
SignedArea ................................................................................................. 516
Slope ........................................................................................................... 516
Geometry app variables .................................................................................................................. 517
Spreadsheet app variables .............................................................................................................. 517
Solve app variables ......................................................................................................................... 517
Advanced Graphing app variables ................................................................................................... 519
Graph 3D app variables ................................................................................................................... 519
Statistics 1Var app variables ........................................................................................................... 520
Results .......................................................................................................................... 521
NbItem ........................................................................................................ 521
MinVal ......................................................................................................... 521
Q1 ................................................................................................................ 521
MedVal ........................................................................................................ 521
Q3 ................................................................................................................ 521
MaxVal ........................................................................................................ 521
ΣX ................................................................................................................ 521
ΣX2 .............................................................................................................. 521
MeanX ......................................................................................................... 522
sX ................................................................................................................ 522
σX ................................................................................................................ 522
serrX ........................................................................................................... 522
ssX .............................................................................................................. 522
Statistics 2Var app variables ........................................................................................................... 522
Results .......................................................................................................................... 523
NbItem ........................................................................................................ 523
Corr ............................................................................................................. 523
CoefDet ....................................................................................................... 523
sCov ............................................................................................................ 523
σCov ............................................................................................................ 523
xl
Page 41

ΣXY .............................................................................................................. 523
MeanX ......................................................................................................... 523
ΣX ................................................................................................................ 523
ΣX2 .............................................................................................................. 524
sX ................................................................................................................ 524
σX ................................................................................................................ 524
serrX ........................................................................................................... 524
ssX .............................................................................................................. 524
MeanY ......................................................................................................... 524
ΣY ................................................................................................................ 524
ΣY2 .............................................................................................................. 524
sY ................................................................................................................ 524
σY ................................................................................................................ 524
serrY ........................................................................................................... 524
ssY ............................................................................................................... 524
Inference app variables ................................................................................................................... 525
Results .......................................................................................................................... 525
CoefDet ....................................................................................................... 525
ContribList .................................................................................................. 526
ContribMat .................................................................................................. 526
Corr ............................................................................................................. 526
CritScore ..................................................................................................... 526
CritVal1 ....................................................................................................... 526
CritVal2 ....................................................................................................... 526
DF ................................................................................................................ 526
ExpList ........................................................................................................ 526
ExpMat ........................................................................................................ 526
Inter ............................................................................................................ 526
Prob ............................................................................................................ 526
Result .......................................................................................................... 526
serrInter ...................................................................................................... 526
serrLine ....................................................................................................... 526
serrSlope .................................................................................................... 527
serrY ........................................................................................................... 527
Slope ........................................................................................................... 527
TestScore .................................................................................................... 527
TestValue .................................................................................................... 527
Yval ............................................................................................................. 527
Parametric app variables ................................................................................................................ 527
Polar app variables .......................................................................................................................... 528
Finance app variables ...................................................................................................................... 529
xli
Page 42

Results variables ........................................................................................................... 530
Cash ow .................................................................................................... 530
Bond ............................................................................................................ 531
Black Scholes .............................................................................................. 531
Explorer app variables .................................................................................................................... 531
Triangle Solver app variables .......................................................................................................... 531
Linear Explorer app variables ......................................................................................................... 532
Sequence app variables .................................................................................................................. 533
25 Units and constants ................................................................................................................................. 534
Units ................................................................................................................................................................... 534
Unit categories ................................................................................................................................ 534
Prexes ............................................................................................................................................ 535
Unit calculations ................................................................................................................................................ 535
Unit tools ........................................................................................................................................................... 539
Convert ............................................................................................................................................ 539
MKSA ................................................................................................................................................ 540
UFACTOR .......................................................................................................................................... 540
USIMPLIFY ........................................................................................................................................ 540
Physical constants ............................................................................................................................................. 540
List of constants .............................................................................................................................. 543
26 Lists ........................................................................................................................................................ 545
Creating a list in the List Catalog ....................................................................................................................... 545
The List Editor ................................................................................................................................. 547
List Editor: Buttons and keys ........................................................................................ 547
List Editor: More menu ............................................................................... 547
Editing a list .................................................................................................................. 548
Inserting an element in a list ........................................................................................ 550
Deleting lists ...................................................................................................................................................... 550
To delete a list ................................................................................................................................. 550
To delete all lists ............................................................................................................................. 551
Lists in Home view ............................................................................................................................................. 551
To create a list ................................................................................................................................. 551
To store a list ................................................................................................................................... 551
To display a list ................................................................................................................................ 552
To display one element ................................................................................................................... 552
To store one element ...................................................................................................................... 552
List references ................................................................................................................................. 552
To send a list .................................................................................................................................... 552
List functions ..................................................................................................................................................... 553
xlii
Page 43

Menu format .................................................................................................................................... 553
Dierence ........................................................................................................................................ 553
Intersect .......................................................................................................................................... 554
Make List .......................................................................................................................................... 554
Sort .................................................................................................................................................. 554
Reverse ............................................................................................................................................ 555
Concatenate .................................................................................................................................... 555
Position ............................................................................................................................................ 555
Size .................................................................................................................................................. 555
ΔLIST ................................................................................................................................................ 556
ΣLIST ................................................................................................................................................ 556
πLIST ................................................................................................................................................ 556
Finding statistical values for lists ..................................................................................................................... 556
27 Matrices .................................................................................................................................................. 560
Creating and storing matrices ........................................................................................................................... 560
Matrix Catalog: buttons and keys ................................................................................................... 561
Working with matrices ....................................................................................................................................... 561
To open the Matrix Editor ................................................................................................................ 561
Matrix Editor: Buttons and keys ...................................................................................................... 561
Matrix Editor: More menu ............................................................................................. 562
Creating a matrix in the Matrix Editor ............................................................................................. 562
Matrices in Home view .................................................................................................................... 564
Storing a matrix ............................................................................................................................... 566
Displaying a matrix ......................................................................................................................... 567
Displaying one element .................................................................................................................. 567
Storing one element ........................................................................................................................ 567
Matrix references ............................................................................................................................ 568
Sending a matrix ............................................................................................................................. 568
Matrix arithmetic ............................................................................................................................................... 568
Multiplying and dividing by a scalar ................................................................................................ 569
Multiplying two matrices ................................................................................................................. 571
Raising a matrix to a power ............................................................................................................ 571
Dividing by a square matrix ............................................................................................................ 572
Inverting a matrix ............................................................................................................................ 572
Negating each element ................................................................................................................... 573
Solving systems of linear equations ................................................................................................................. 573
Matrix functions and commands ....................................................................................................................... 576
Argument conventions .................................................................................................................... 577
Matrix functions ................................................................................................................................................. 577
Matrix .............................................................................................................................................. 577
xliii
Page 44

Transpose ..................................................................................................................... 577
Determinant .................................................................................................................. 577
RREF .............................................................................................................................. 577
Create .............................................................................................................................................. 577
Make .............................................................................................................................. 577
Identity .......................................................................................................................... 578
Random ......................................................................................................................... 578
Jordan ........................................................................................................................... 578
Hilbert ........................................................................................................................... 578
Isometric ....................................................................................................................... 579
Vandermonde ............................................................................................................... 579
Basic ................................................................................................................................................ 579
Norm ............................................................................................................................. 579
Row Norm ..................................................................................................................... 579
Column Norm ................................................................................................................ 580
Spectral Norm ............................................................................................................... 580
Spectral Radius ............................................................................................................. 580
Condition ....................................................................................................................... 580
Rank .............................................................................................................................. 580
Pivot .............................................................................................................................. 581
Trace .............................................................................................................................. 581
Advanced ......................................................................................................................................... 581
Eigenvalues ................................................................................................................... 581
Eigenvectors ................................................................................................................. 581
Jordan ........................................................................................................................... 581
Diagonal ........................................................................................................................ 582
Cholesky ........................................................................................................................ 582
Hermite ......................................................................................................................... 582
Hessenberg ................................................................................................................... 582
Smith ............................................................................................................................. 583
Factorize .......................................................................................................................................... 583
LQ .................................................................................................................................. 583
LSQ ................................................................................................................................ 583
LU .................................................................................................................................. 583
QR .................................................................................................................................. 583
SCHUR ........................................................................................................................... 584
SVD ................................................................................................................................ 584
SVL ................................................................................................................................ 584
Vector .............................................................................................................................................. 584
Cross Product ................................................................................................................ 584
Dot Product ................................................................................................................... 584
xliv
Page 45

L2Norm ......................................................................................................................... 585
L1Norm ......................................................................................................................... 585
Max Norm ...................................................................................................................... 585
Examples ......................................................................................................................................... 585
Identity Matrix .............................................................................................................. 585
Transposing a Matrix .................................................................................................... 585
Reduced-Row Echelon Form ......................................................................................... 586
28 Notes and Info ......................................................................................................................................... 588
The Note Catalog ............................................................................................................................................... 588
Note Catalog: button and keys ........................................................................................................ 588
The Note Editor .................................................................................................................................................. 589
To create a note from the Notes catalog ........................................................................................ 589
Creating a note for an app ............................................................................................................... 590
Note Editor: buttons and keys ........................................................................................................ 590
Entering uppercase and lowercase characters ............................................................................... 591
Text formatting ............................................................................................................................... 592
Formatting options ......................................................................................................................... 592
Inserting mathematical expressions .............................................................................................. 593
To import a note .............................................................................................................................. 594
29 Programming in HP PPL ............................................................................................................................ 596
The Program Catalog ......................................................................................................................................... 597
Open the Program Catalog .............................................................................................................. 597
Program Catalog: buttons and keys ............................................................................................... 598
Creating a new program .................................................................................................................................... 598
The Program Editor ......................................................................................................................... 600
Program Editor: buttons and keys ................................................................................ 600
Run a Program .............................................................................................................. 605
Multi-function programs ............................................................................ 606
Debug a Program .......................................................................................................... 607
Edit a Program .............................................................................................................. 609
Copy a program or part of a program ........................................................................... 609
Delete a program .......................................................................................................... 610
Delete all programs ...................................................................................................... 610
Delete the contents of a program ................................................................................ 611
To share a program ....................................................................................................... 611
The HP Prime programming language .............................................................................................................. 611
Variables and visibility .................................................................................................................... 611
Qualifying the name of a variable ................................................................................................... 612
Functions, their arguments, and parameters ................................................................................. 613
xlv
Page 46

Program ROLLDIE .......................................................................................................... 613
Program ROLLMANY ..................................................................................................... 613
The User Keyboard: Customizing key presses .................................................................................................. 615
User mode ....................................................................................................................................... 615
Reassigning keys ............................................................................................................................. 616
Key names ....................................................................................................................................... 616
App programs .................................................................................................................................................... 620
Using dedicated program functions ............................................................................................... 620
Redening the View menu .............................................................................................................. 621
Customizing an app ......................................................................................................................... 621
Example ........................................................................................................................ 622
Program commands .......................................................................................................................................... 627
Commands under the Tmplt menu ................................................................................................. 627
Block .............................................................................................................................. 627
BEGIN END .................................................................................................. 627
RETURN ....................................................................................................... 628
KILL ............................................................................................................. 628
Branch ........................................................................................................................... 628
IF THEN ....................................................................................................... 628
IF THEN ELSE ............................................................................................... 628
CASE ............................................................................................................ 628
IFERR ........................................................................................................... 629
IFERR ELSE .................................................................................................. 629
Loop .............................................................................................................................. 629
FOR .............................................................................................................. 629
FOR STEP .................................................................................................... 630
FOR DOWN .................................................................................................. 631
FOR STEP DOWN ......................................................................................... 631
WHILE .......................................................................................................... 631
REPEAT ........................................................................................................ 632
BREAK ......................................................................................................... 632
CONTINUE ................................................................................................... 632
Variable ......................................................................................................................... 632
LOCAL .......................................................................................................... 632
EXPORT ....................................................................................................... 632
Function ........................................................................................................................ 633
EXPORT ....................................................................................................... 633
VIEW ............................................................................................................ 633
KEY .............................................................................................................. 633
Commands under the Cmds menu .................................................................................................. 634
Strings ........................................................................................................................... 634
xlvi
Page 47

ASC .............................................................................................................. 634
LOWER ........................................................................................................ 634
UPPER ......................................................................................................... 634
CHAR ........................................................................................................... 634
DIM .............................................................................................................. 634
STRING ........................................................................................................ 635
INSTRING ..................................................................................................... 635
LEFT ............................................................................................................ 636
RIGHT .......................................................................................................... 636
MID .............................................................................................................. 636
ROTATE ........................................................................................................ 636
STRINGFROMID ........................................................................................... 636
REPLACE ..................................................................................................... 637
Drawing ......................................................................................................................... 637
C→PX .......................................................................................................... 637
DRAWMENU ................................................................................................ 637
FREEZE ........................................................................................................ 637
PX→C .......................................................................................................... 637
RGB ............................................................................................................. 637
Pixels and Cartesian ..................................................................................................... 638
ARC_P, ARC .................................................................................................. 638
BLIT_P, BLIT ................................................................................................. 638
DIMGROB_P, DIMGROB ................................................................................ 639
FILLPOLY_P, FILLPOLY ................................................................................. 639
GETPIX_P, GETPIX ....................................................................................... 639
GROBH_P, GROBH ....................................................................................... 639
GROBW_P, GROB ......................................................................................... 639
INVERT_P, INVERT ....................................................................................... 640
LINE_P, LINE ................................................................................................ 640
PIXOFF_P, PIXOFF ........................................................................................ 641
PIXON_P, PIXON .......................................................................................... 641
RECT_P, RECT .............................................................................................. 641
SUBGROB_P, SUBGROB ............................................................................... 643
TEXTOUT_P, TEXTOUT ................................................................................. 643
TRIANGLE_P, TRIANGLE .............................................................................. 644
Matrix ............................................................................................................................ 646
ADDCOL ....................................................................................................... 646
ADDROW ..................................................................................................... 646
DELCOL ........................................................................................................ 646
DELROW ...................................................................................................... 646
EDITMAT ...................................................................................................... 646
xlvii
Page 48

REDIM .......................................................................................................... 646
REPLACE ..................................................................................................... 647
SCALE .......................................................................................................... 647
SCALEADD ................................................................................................... 647
SUB .............................................................................................................. 647
SWAPCOL .................................................................................................... 647
SWAPROW ................................................................................................... 647
App Functions ............................................................................................................... 647
STARTAPP ................................................................................................... 647
STARTVIEW ................................................................................................. 648
VIEW ............................................................................................................ 648
Integer ........................................................................................................................... 649
BITAND ........................................................................................................ 649
BITNOT ........................................................................................................ 649
BITOR .......................................................................................................... 649
BITSL ........................................................................................................... 649
BITSR ........................................................................................................... 649
BITXOR ........................................................................................................ 650
B→R ............................................................................................................ 650
GETBASE ..................................................................................................... 650
GETBITS ...................................................................................................... 650
R→B ............................................................................................................ 650
SETBITS ....................................................................................................... 650
SETBASE ..................................................................................................... 650
I/O .................................................................................................................................. 651
CHOOSE ....................................................................................................... 651
EDITLIST ...................................................................................................... 651
EDITMAT ...................................................................................................... 652
GETKEY ....................................................................................................... 652
INPUT .......................................................................................................... 652
ISKEYDOWN ................................................................................................ 653
MOUSE ........................................................................................................ 653
MSGBOX ...................................................................................................... 653
PRINT .......................................................................................................... 654
WAIT ............................................................................................................ 655
More .............................................................................................................................. 655
%CHANGE .................................................................................................... 655
%TOTAL ....................................................................................................... 655
CAS .............................................................................................................. 656
EVALLIST ..................................................................................................... 656
EXECON ....................................................................................................... 656
xlviii
Page 49

→HMS ......................................................................................................... 656
HMS→ ......................................................................................................... 656
ITERATE ....................................................................................................... 657
TICKS ........................................................................................................... 657
TEVAL .......................................................................................................... 657
TYPE ............................................................................................................ 657
Variables and programs ................................................................................................ 657
App variables .............................................................................................. 658
30 Basic integer arithmetic ........................................................................................................................... 696
The default base ................................................................................................................................................ 697
Changing the default base .............................................................................................................. 698
Examples of integer arithmetic ......................................................................................................................... 698
Mixed-base arithmetic .................................................................................................................... 698
Integer manipulation ...................................................................................................................... 699
Base functions ................................................................................................................................................... 700
31 Appendix A – Glossary .............................................................................................................................. 702
32 Appendix B – Troubleshooting ................................................................................................................... 704
Calculator not responding ................................................................................................................................. 704
To reset ............................................................................................................................................ 704
If the calculator does not turn on ................................................................................................... 704
Operating limits ................................................................................................................................................. 704
Status messages ............................................................................................................................................... 704
Index ........................................................................................................................................................... 706
xlix
Page 50

l
Page 51

1 Preface
Manual conventions
The following conventions are used in this manual to represent the keys that you press and the menu options
that you choose to perform operations.
● A key that initiates an unshifted function is represented by an image of that key:
, , , and so on.
● A key combination that initiates a shifted function (or inserts a character) is represented by the
appropriate shift key ( or ) followed by the key for that function or character:
initiates the natural exponential function and inserts the pound
character (#).
The name of the shifted function may also be given in parentheses after the key combination:
(Clear), (Setup)
● A key pressed to insert a digit is represented by that digit:
5, 7, 8, and so on.
● All xed on-screen text—such as screen and eld names—appear in bold:
CAS Settings, xstep, Decimal Mark, and so on.
● A menu item selected by touching the screen is represented by an image of that item:
, , , and so on.
NOTE: You must use your nger to select a menu item. Using a stylus or something similar will not
select whatever is touched.
● Characters on the entry line are set in a nonproportional font, as follows:
Function, Polar, Parametric, Ans, and so on.
● Cursor keys are represented by , , , and . You use these keys to move from eld
to eld on a screen or from one option to another in a list of options.
● Error messages are enclosed in quotation marks:
“Syntax Error”
Manual conventions 1
Page 52

2 Getting started
The HP Prime Graphing Calculator is an easy-to-use yet powerful graphing calculator designed for secondary
mathematics education and beyond. It oers hundreds of functions and commands, and includes a computer
algebra system (CAS) for symbolic calculations.
In addition to an extensive library of functions and commands, the calculator comes with a set of HP apps. An
HP app is a special application designed to help you explore a particular branch of mathematics or to solve a
problem of a particular type. For example, there is a HP app that will help you explore geometry and another
to help you explore parametric equations. There are also apps to help you solve systems of linear equations
and to solve time-value-of-money problems.
The HP Prime calculator also has its own programming language you can use to explore and solve
mathematical problems.
Functions, commands, apps, and programming are covered in detail later in this guide. In this chapter, the
general features of the calculator are explained, along with common interactions and basic mathematical
operations.
Before starting
Charge the battery fully before using the calculator for the rst time. To charge the battery, do one of the
following:
● Connect the calculator to a computer by using the USB cable that came in the package with your HP
Prime calculator. (The computer must be on for charging to occur.)
● Connect the calculator to a wall outlet using the HP-provided wall adapter.
When the calculator is on, a battery symbol appears in the title bar of the screen. Its appearance indicates the
charge level of the battery. A discharged battery takes approximately 4 hours to fully charge.
WARNING!
Battery warning
● To reduce the risk of re or burns, do not disassemble, crush, or puncture the battery; do not short the
external contacts; and do not dispose of the battery in re or water.
● To reduce potential safety risks, only use the battery provided with the calculator, a replacement battery
provided by HP, or a compatible battery recommended by HP.
● Keep the battery away from children.
● If you encounter problems when charging the calculator, stop charging and contact HP immediately.
Adapter warning
● To reduce the risk of electric shock or damage to equipment, only plug the AC adapter into an AC outlet
that is easily accessible at all times.
● To reduce potential safety risks, only use the AC adapter provided with the calculator, a replacement AC
adapter provided by HP, or an AC adapter purchased as an accessory from HP.
2 Chapter 2 Getting started
Page 53

On/o, cancel operations
To turn on
Press to turn on the calculator.
To cancel
When the calculator is on, pressing the key cancels the current operation. For example, it will clear
whatever you have entered on the entry line. It will also close a menu and a screen.
To turn o
Press (O) to turn the calculator o.
To save power, the calculator turns itself o after several minutes of inactivity. All stored and displayed
information is saved.
The Home View
Home view is the starting point for many calculations. Most mathematical functions are available in the Home
view. Some additional functions are available in the computer algebra system (CAS). A history of your
previous calculations is retained and you can reuse a previous calculation or its result.
To display Home view, press .
The CAS View
CAS view enables you to perform symbolic calculations. It is largely identical to Home view—it even has its
own history of past calculations—but the CAS view oers some additional functions.
To display CAS view, press .
Protective cover
The calculator is provided with a slide cover to protect the display and keyboard. Remove the cover by
grasping both sides of it and pulling down.
You can reverse the slide cover and slide it onto the back of the calculator. This will ensure that you do not
misplace the cover while you are using the calculator.
To prolong the life of the calculator, always place the cover over the display and keyboard when you are not
using the calculator.
On/o, cancel operations 3
Page 54

The display
π
S
S
Adjusting the brightness
To adjust the brightness of the display, press and hold , and then press the or key to
increase or decrease the brightness. The brightness will change with each press of the or
key.
Clearing the display
● Press or to clear the entry line
● Press (Clear) to clear the entry line and the history.
Sections of the display
Home view has four sections (shown above). The title bar shows either the screen name or the name of the
app you are currently using—Function in the example above. It also shows the time, a battery power
indicator, and a number of symbols that indicate various calculator settings. These are explained below. The
history displays a record of your past calculations. The entry line displays the object you are currently
entering or modifying. The menu buttons are options that are relevant to the current display. Select an option
by tapping the corresponding menu button. You close a menu, without making a selection from it, by pressing
.
Annunciators are symbols or characters that appear in the title bar. They indicate current settings, and also
provide time and battery power information.
Annunciator Meaning
The angle mode setting is currently degrees.
[Lime green]
The angle mode setting is currently radians.
[Lime green]
The Shift key is active. The function shown in blue on a key will be activated when a key is
[Cyan]
pressed. Press to cancel shift mode.
4 Chapter 2 Getting started
Page 55

Annunciator Meaning
A
...Z
a...z
U
U
1U
1U
CAS [White] You are working in CAS view, not Home view.
In Home View, this means the Alpha key is active. The character shown in orange on a key
will be entered in uppercase when a key is pressed. See Shift keys on page 10 for more
[Orange]
[Orange]
[Yellow]
[Yellow]
[Time] Displays the current time. The default is 24-hour format, but you can choose am–pm
information.
In CAS view, this means he Alpha–Shift key combination is active. The character shown in
orange on a key will be entered in uppercase when a key is pressed. See Shift keys
on page 10 for more information.
In Home view, this means the Alpha–Shift key combination is active. The character shown
in orange on a key will be entered in lowercase when a key is pressed. See Shift keys
on page 10 for more information.
In CAS view, this means the Alpha key is active. The character shown in orange on a key will
be entered in lowercase when a key is pressed. See Shift keys on page 10 for more
information.
The user keyboard is active. All the following key presses will enter the customized objects
associated with the key. You can customize the user keyboard presses.
The user keyboard is active. The next key press will enter the customized object associated
with the key. You can customize the user keyboard presses.
format. See Home settings on page 20 for more information.
[Green with gray border]
The Quick Settings menu
Indicates the battery charge.
Tap the right side of the title bar (where the time, battery, and angle measure mode are shown) to open the
Quick Settings menu. Actions you can take in this menu include the following:
The display 5
Page 56

● Tap one of the angle icons to change the angle measure mode (radians or degrees).
● Tap the date/time to open a monthly calendar. You can navigate between months to nd dates of
interest.
● Tap the wireless icon to connect to the nearest HP Classroom Network or to disconnect from the current
HP Classroom Network.
Navigation
The HP Prime oers two modes of navigation: touch and keys. In many cases, you can tap on an icon, eld,
menu, or object to select (or deselect) it. For example, you can open the Function app by tapping once on its
icon in the Application Library. However, to open the Application Library, you will need to press a key: .
Instead of tapping an icon in the Application Library, you can also press the cursor keys— , ,
, —until the app you want to open is highlighted, and then press . In the Application
Library, you can also type the
the app’s icon or press to open it.
Sometimes a touch or key–touch combination is available. For example, you can deselect a toggle option
either by tapping twice on it, or by using the arrow keys to move to the eld and then tapping a touch button
along the bottom of the screen (in this case ).
NOTE: You must use your nger or a capacitive stylus to select an item by touch.
rst one or two letters of an app’s name to highlight the app. Then either tap
6 Chapter 2 Getting started
Page 57

Touch gestures
The HP Prime calculator recognizes the following touch gestures:
● Tap—Point to an item on the screen, and then tap one nger to select the item.
● Tap and hold—Place your nger on the screen and hold it there for a moment.
● Scrolling—Place a nger on the screen and then drag it up, down, left, right, or diagonally to move up,
down, sideways, or diagonally on a page or image.
● One-nger slide—To scroll across the screen, lightly slide one nger across the screen in the direction
you want to move. To drag, in the Plot view of the Geometry app only, press and hold an object, and then
drag the object to move it. To select multiple cells in the Numeric view of the Spreadsheet, Statistics
1Var, and Statistics 2Var apps and in the List and Matrix Editors, tap and hold a cell, and then drag your
nger to select subsequent cells. This selection can be copied and pasted like a single value.
● 2-nger pinch zoom—Zoom out by placing two ngers apart on the screen and then moving your
ngers together. Zoom in by placing two ngers together on the screen and then moving your ngers
apart. In the Spreadsheet app, this gesture controls the width of columns and the height of rows.
Touch gestures may not be supported in all apps, editors, and input forms, and their function might vary.
Keep the following guidelines in mind:
● In Plot view, if a 2-nger pinch zoom gesture is performed horizontally, the zoom is performed on the x-
axis only. If a 2-nger pinch zoom is performed vertically, the zoom is performed on the y-axis only. If a
2-nger pinch zoom is performed diagonally, a square zoom is performed (that is, the zoom is
performed on both axes). In the Geometry app, only the diagonal zoom is supported.
● In Numeric view, if a 2-nger pinch zoom is performed vertically, the zoom is performed on the currently
selected row of the table. A zoom in decreases the common dierence in the x-values and a zoom out
increases the common dierence in the x-values. If a 2-nger pinch zoom is performed horizontally, the
column width changes.
The keyboard
The numbers in the legend below refer to the parts of the keyboard described in the illustration on the next
page.
Number Feature
1 LCD and touchscreen: 320 × 240 pixels
2 Context-sensitive touch-button menu
3 HP Apps keys
4 Home view and preference settings
5 Common math and science functions
6 Alpha and Shift keys
7 On, Cancel, and O key
8 List, matrix, program, and note catalogs
9 Last Answer key (Ans)
10 Enter key
11 Backspace and Delete key
Navigation 7
Page 58

Number Feature
1
2
3
4
5
6
7
8
9
11
13
14
12
15
16
10
17
12 Menu (and Paste) key
13 CAS (and CAS preferences) key
14 View (and Copy) key
15 Escape (and Clear) key
16 Help key
17 Rocker wheel (for cursor movement)
Context-sensitive menu
A context-sensitive menu occupies the bottom line of the screen.
8 Chapter 2 Getting started
Page 59

The options available depend on the context, that is, the view you are in. Note that the menu items are
activated by touch.
There are two types of buttons on the context-sensitive menu:
● Menu button—tap to display a pop-up menu. These buttons have square corners along their top (such
as in the illustration above).
● Command button—tap to initiate a command. These buttons have rounded corners (such as
in the illustration above).
Entry and edit keys
Keys Purpose
or
to
Enter numbers.
Cancels the current operation or clears the entry line.
Enters an input or executes an operation. In calculations, acts like “=”. When
or is present as a menu key, acts the same as pressing
or .
For entering a negative number. For example, to enter –25, press 25.
NOTE: This is not the same operation that is performed by the subtraction key ( ).
Displays a palette of preformatted templates representing common arithmetic expressions.
Enters the independent variable (that is, either X, T, θ, or N, depending on the app that is currently
active).
Entry and edit keys 9
Page 60

Keys Purpose
Displays a palette of comparison operators and Boolean operators.
Displays a palette of common math and Greek characters.
Automatically inserts the degree, minute, or second symbol according to the context.
Deletes the character to the left of the cursor. It returns the highlighted eld to its default value, if it
has one.
Deletes the character to the right of the cursor.
Clears all data on the screen (including the history). On a settings screen—for example Plot Setup—
returns all settings to their default values.
Move the cursor around the display. Press to move to the end of a menu or screen,
or to move to the start. These keys represent the directions of the rocker wheel.
Diagonal movements are also supported by the rocker wheel.
Shift keys
There are two shift keys that you use to access the operations and characters printed on the bottom of the
keys: and .
Key Purpose
Displays all the available characters. To enter a character, use the cursor keys to highlight it, and then
tap . To select multiple characters, select one, tap , and continue likewise
before pressing . There are many pages of characters. You can jump to a particular
Unicode block by tapping and selecting the block. You can also ick from page to page.
Press to access the operations printed in blue on a key. For instance, to access
the settings for Home view, press .
Press the key to access the characters printed in orange on a key. For
instance, to type Z in Home view, press and then press . For a
10 Chapter 2 Getting started
lowercase letter, press and then the letter. In CAS view,
Page 61

Key Purpose
Adding text
The text you can enter directly is shown by the orange characters on the keys. These characters can only be
entered in conjunction with the and keys. Both uppercase and lowercase characters can be
entered, and the method is exactly the opposite in CAS view than in Home view.
Keys Eect in Home view Eect in CAS view
and another key gives a lowercase letter, and and another letter
gives an uppercase letter.
Makes the next character uppercase. Makes the next character lowercase.
Lock mode: makes all characters
uppercase until the mode is reset.
With uppercase locked, makes the next
character lowercase.
Makes the next character lowercase. Makes the next character uppercase.
Lock mode: makes all characters lowercase
until the mode is reset.
With lowercase locked, makes the next
character uppercase.
With lowercase locked, makes all
characters uppercase until the mode is
reset.
Reset uppercase lock mode. Replace lowercase lock mode.
Replace lowercase lock mode. Reset uppercase lock mode.
Lock mode: makes all characters lowercase
until the mode is reset.
With lowercase locked, makes the next
character uppercase.
Lock mode: makes all characters lowercase
until the mode is reset.
With uppercase locked, makes the next
character lowercase.
With uppercase locked, makes all
characters lowercase until the mode is
reset.
You can also enter text (and other characters) by displaying the characters palette: .
Math keys
The most common math functions have their own keys on the keyboard (or a key in combination with the
key).
Entry and edit keys 11
Page 62

Example 1: To calculate SIN(10), press 10, and then press . The answer displayed is –
0.544… (if your angle measure setting is radians).
Example 2: To nd the square root of 256, press 256 and press . The answer
displayed is 16. Notice that the
(in this case √ on the key).
The mathematical functions not represented on the keyboard are on the Math, CAS, and Catlg menus.
NOTE: The order in which you enter operands and operators is determined by the entry mode. By default,
the entry mode is textbook, which means that you enter operands and operators just as you would if you were
writing the expression on paper. If your preferred entry mode is Reverse Polish Notation, the order of entry is
dierent.
key initiates the operator represented in blue on the next key pressed
12 Chapter 2 Getting started
Page 63

Math template
The math template key ( ) helps you insert the framework for common calculations (and for vectors,
matrices, and hexagesimal numbers). It displays a palette of preformatted outlines to which you add the
constants, variables, and so on. Just tap on the template you want (or use the arrow keys to highlight it and
press ). Then enter the components needed to complete the calculation.
Example: Suppose you want to nd the cube root of 945:
1. In Home view, press .
2. Select .
The skeleton or framework for your calculation now appears on the entry line: .
3. Each lled box on the template must be completed. Any hollow boxes are optional.
3 945
Press to display the result: 9.813…
4.
The template palette can save you a lot of time, especially with calculus calculations.
You can display the palette at any stage in dening an expression. In other words, you don’t need to start out
with a template. Rather, you can embed one or more templates at any point in the denition of an expression.
Entry and edit keys 13
Page 64

Math shortcuts
As well as the math template, there are other similar screens that oer a palette of special characters. For
example, pressing displays the special symbols palette, shown in the following gure.
Select a character by tapping it (or scrolling to it and pressing
A similar palette—the relations palette—is displayed if you press . The palette displays
operators useful in math and programming. Again, just tap the character you want.
).
Other math shortcut keys include . Pressing this key inserts an X, T, θ, or N depending on what app
you are using. (This is explained further in the chapters describing the apps.)
Similarly, pressing enters a degree, minute, or second character. It enters ° if no degree
symbol is part of your expression; enters ′ if the previous entry is a value in degrees; and enters ″ if the
previous entry is a value in minutes.
Thus, entering 36 40 20 yields 36°40′ 20 ″. See Hexagesimal
numbers on page 15 for more information.
14 Chapter 2 Getting started
Page 65

Fractions
The fraction key ( ) cycles through three varieties of fractional display. If the current answer is the
decimal fraction 5.25, pressing converts the answer to the common fraction 21/4. If you press
again, the answer is converted to a mixed number (5 + 1/4). If pressed again, the display returns to
the decimal fraction (5.25).
The HP Prime will approximate fraction and mixed number representations in cases where it cannot nd exact
ones. For example, enter √5 to see the decimal approximation: 2.236…. Press
again to see . Pressing a third time will cycle back to the original decimal representation.
Hexagesimal numbers
Any decimal result can be displayed in hexagesimal format; that is, in units subdivided into groups of 60. This
includes degrees, minutes, and seconds as well as hours, minutes, and seconds. For example, enter
the decimal result: 1.375. Now press to see 1°22′30. Press again to return
to the decimal representation.
The HP Prime calculator will produce the best approximation in cases where an exact result is not possible.
Enter √5 to see the decimal approximation: 2.236… Press to see 2°14′9.84472 .
once to see and
to see
Entry and edit keys 15
Page 66

NOTE: The degree and minute entries must be integers, and the minute and second entries must be
positive. Decimals are not allowed, except in the seconds.
Note too that the HP Prime calculator treats a value in hexgesimal format as a single entity. Hence, any
operation performed on a hexagesimal value is performed on the entire value. For example, if you enter
10°25′26″^2, the whole value is squared, not just the seconds component. The result in this case is
108°39′26.8544″.
EEX key (powers of 10)
Numbers like 5 × 10⁴ and 3.21 × 10⁻⁷ are expressed in scientic notation, that is, in terms of powers of ten.
This is simpler to work with than 50 000 or 0.000 000 321. To enter numbers like these, use the
functionality. This is easier than using 10 .
Example: Suppose you want to calculate
1. Open the Home Settings window.
2. Select Scientific from the Number Format menu.
3. Return home by pressing .
4. Enter 4 13 6 23 3 5.
16 Chapter 2 Getting started
Page 67

Menus
5. Press .
The result is 8.0000E15. This is equivalent to 8 × 10¹⁵.
A menu oers you a choice of items. As in the following example, some menus have sub-menus and sub-submenus.
Selecting from a menu
There are two techniques for selecting an item from a menu, as follows:
● Direct tapping
● Using the arrow keys to highlight the item you want and then either tapping or pressing
.
NOTE: The menu of buttons along the bottom of the screen can only be activated by tapping.
Menus 17
Page 68

Shortcuts
● Press when you are at the top of the menu to immediately display the last item in the menu.
● Press when you are at the bottom of the menu to immediately display the rst item in the menu.
● Press to jump straight to the bottom of the menu.
● Press to jump straight to the top of the menu.
● Enter the rst few characters of the item’s name to jump straight to that item.
● Enter the number of the item shown in the menu to jump straight to that item.
Closing a menu
A menu will close automatically when you select an item from it. If you want to close a menu without selecting
anything from it, press
Toolbox menus
The Toolbox menus ( ) are a collection of menus oering functions and commands useful in
mathematics and programming. The Math, CAS, and Catlg menus oer over 400 functions and commands.
Input forms
An input form is a screen that provides one or more elds for you to enter data or select an option. It is
another name for a dialog box.
● If a eld allows you to enter data of your choice, you can select it, add your data, and tap .
(There is no need to tap rst.)
● If a eld allows you to choose an item from a menu, you can tap on it (the eld or the label for the eld),
tap on it again to display the options, and tap on the item you want. (You can also choose an item from
an open list by pressing the cursor keys and pressing when the option you want is
highlighted.)
● If a eld is a toggle eld—one that is either selected or not selected—tap on it to select the eld and tap
on it again to select the alternate option. (Alternatively, select the eld and tap .)
or .
The following illustration shows an input form with all three types of eld.
18 Chapter 2 Getting started
Page 69

Calculator Name is a free-form data-entry eld, Font Size provides a menu of options, and Textbook Display
is a toggle eld.
Resetting input form elds
To reset a eld to its default value, highlight the eld and press . To reset all elds to their default
values, press (Clear).
System-wide settings
System-wide settings are values that determine the appearance of windows, the format of numbers, the
scale of plots, the units used by default in calculations, and much more.
There are two system-wide settings: Home settings and CAS settings. Home settings control Home view and
the apps. CAS settings control how calculations are done in the computer algebra system. CAS settings are
discussed in chapter 3.
Although Home settings control the apps, you can override certain Home settings once inside an app. For
example, you can set the angle measure to radians in the Home settings but choose degrees as the angle
measure once inside the Polar app. Degrees then remains the angle measure until you open another app that
has a dierent angle measure.
System-wide settings 19
Page 70

Home settings
You use the Home Settings input form to specify the settings for Home view (and the default settings for the
apps). Press (Settings) to open the Home Settings input form. There are four pages of
settings.
Page 1
Setting Options
Angle Measure Degrees—360 degrees in a circle.
Radians—2π radians in a circle.
The angle mode you set is the angle setting used in both Home view and the current
app. This is to ensure that trigonometric calculations done in the current app and
Home view give the same result.
Number Format The number format you set is the format used in all Home view calculations.
● Standard—Full-precision display.
● Fixed—Displays results rounded to a number of decimal places. If you choose
this option, a new eld appears for you to enter the number of decimal places.
For example, 123.456789 becomes 123.46 in Fixed 2 format.
● Scientic—Displays results with an one-digit exponent to the left of the decimal
point, and the specied number of decimal places. For example, 123.456789
becomes 1.23E2 in Scientic 2 format.
● Engineering—Displays results with an exponent that is a multiple of 3, and the
specied number of signicant digits beyond the rst one. Example: 123.456E7
becomes 1.23E9 in Engineering 2 format.
Entry ● Textbook—An expression is entered in much the same way as if you were
writing it on paper (with some arguments above or below others). In other words,
your entry could be two-dimensional.
● Algebraic—An expression is entered on a single line. Your entry is always one-
dimensional.
● RPN—Reverse Polish Notation. The arguments of the expression are entered
rst followed by the operator. The entry of an operator automatically evaluates
what has already been entered.
20 Chapter 2 Getting started
Page 71

Page 2
Setting Options
Integers Sets the default base for integer arithmetic: binary, octal, decimal, or hex. You can also
set the number of bits per integer and whether integers are to be signed.
Complex Choose one of two formats for displaying complex numbers: (a,b) or a+b*i.
To the right of this eld is an unnamed check box. Select it if you want to allow
complex output from real input.
Language Choose the language you want for menus, input forms, and the online help.
Decimal Mark Select Dot or Comma. Displays a number as 12456.98 (dot mode) or as 12456,98
(comma mode). Dot mode uses commas to separate elements in lists and matrices,
and to separate function arguments. Comma mode uses semicolons as separators in
these contexts.
Setting Options
Font Size Choose between small, medium, and large font for general display.
Calculator Name Enter a name for the calculator.
Textbook Display If selected, expressions and results are displayed in textbook format (that is, much as
you would see in textbooks). If not selected, expressions and results are displayed in
Page 3
algebraic format (that is, in one-dimensional format). For example, is displayed
as [[4,5],[6,2]] in algebraic format.
Menu Display This setting determines whether the commands on the Math and CAS menus are
presented descriptively or in common mathematical shorthand. The default is to
provide the descriptive names for the functions. If you prefer the functions to be
presented in mathematical shorthand, deselect this option.
Time Set the time and choose a format: 24-hour or am–pm format. The check box at the far
right lets you choose whether to show or hide the time on the title bar of screens.
Date Set the date and choose a format: YYYY/MM/DD, DD/MM/YYYY, or MM/DD/YYYY.
Color Theme Light—black text on a light background.
Dark—white text on a dark background
At the far right is an option for you to choose a color for the shading (such as the color
of the highlight).
Page 3 of the Home Settings input form is for setting Exam mode. This mode enables certain functions of the
calculator to be disabled for a set period, with the disabling controlled by a password. This feature will
primarily be of interest to those who supervise examinations and who need to ensure that the calculator is
used appropriately by students sitting an examination.
System-wide settings 21
Page 72

Page 4
If your HP Prime calculator supports wireless connectivity, you will see a fourth page of Home Settings. Page
4 of the Home Settings input form is for conguring your HP Prime calculator to work with the HP Prime
Wireless Kit to establish an HP Wireless Classroom Network. Visit http://www.hp.com/support for further
information.
Option Settings
Network Name ● No network available
Status ● No adapter found
RF Version ● No adapter found
Specifying a Home setting
This example demonstrates how to change the number format from the default setting—Standard—to
Scientic with two decimal places.
● Network 1
● Network 2 (and so on)
● Disconnected
● Connected
● Adapter rmware version
Press (Settings) to open the Home Settings input form.
1.
The Angle Measure eld is highlighted.
2. Tap Number Format (either the eld label or the eld). This selects the eld. (You can also press
to select it.)
22 Chapter 2 Getting started
Page 73

3. Tap Number Format again. A menu of number format options appears.
4. Tap Scientic. The option is chosen and the menu closes. (You can also choose an item by pressing the
cursor keys and pressing when the option you want is highlighted.)
5. Notice that a number appears to the right of the Number Format eld. This is the number of decimal
places currently set. To change the number to 2, tap the current number twice, and then tap 2 in the
menu that appears.
6. Press to return to Home view.
Mathematical calculations
The most commonly used math operations are available from the keyboard (see Math keys on page 11).
Access to the rest of the math functions is via various menus (see Menus on page 17).
Note that the HP Prime represents all numbers smaller than 1 × 10
is 9.99999999999 × 10
499
. A greater result is displayed as this number.
-499
as zero. The largest number displayed
Mathematical calculations 23
Page 74

Where to start
The home base for the calculator is the Home view ( ). You can do all your nonsymbolic calculations
here. You can also do calculations in CAS view, which uses the computer algebra system. In fact, you can use
functions from the CAS menu (one of the Toolbox menus) in an expression you are entering in Home view, and
use functions from the Math menu (another of the Toolbox menus) in an expression you are entering in CAS
view.
Choosing an entry type
The rst choice you need to make is the style of entry. The three types are as follows:
● Textbook
An expression is entered in much the same way as if you were writing it on paper (with some arguments
above or below others). In other words, your entry could be two-dimensional, as in the example above.
● Algebraic
An expression is entered on a single line. Your entry is always one-dimensional.
● Reverse Polish Notation (RPN) [Not available in CAS view.]
The arguments of the expression are entered rst followed by the operator. The entry of an operator
automatically evaluates what has already been entered. Thus you will need to enter a two-operator
expression (as in the example above) in two steps, one for each operator:
Step 1: 5 —the natural logarithm of 5 is calculated and displayed in history.
Step 2: – π is entered as a divisor and applied to the previous result.
NOTE: On page 2 of the Home Settings screen, you can specify whether you want to display your
calculations in Textbook format. This refers to the appearance of your calculations in the history section of
both Home view and CAS view. This is a dierent setting from the Entry setting discussed above.
Entering expressions
The examples that follow assume that the entry mode is Textbook.
● An expression can contain numbers, functions, and variables.
● To enter a function, press the appropriate key, or open a Toolbox menu and select the function. You can
also enter a function by using the alpha keys to spell out its name.
● When you have nished entering the expression, press to evaluate it.
If you make a mistake while entering an expression, you can do any of the following:
24 Chapter 2 Getting started
Page 75

Example
● Delete the character to the left of the cursor by pressing .
● Delete the character to the right of the cursor by pressing .
● Clear the entire entry line by pressing or .
To calculate :
▲ Enter 23 14 8 3 45
.
This example illustrates a number of important points to be aware of, as follows:
● The importance of delimiters (such as parentheses)
● How to enter negative numbers
● The use of implied versus explicit multiplication.
Parentheses
As the example above shows, parentheses are automatically added to enclose the arguments of functions, as
in LN(). However, you will need to manually add parentheses—by pressing —to enclose a group of
objects you want operated on as a single unit. Parentheses provide a way of avoiding arithmetic ambiguity. In
the example above we wanted the entire numerator divided by –3, thus the entire numerator was enclosed in
parentheses. Without the parentheses, only 14√8 would have been divided by –3.
The following examples show the use of parentheses, and the use of the cursor keys to move outside a group
of objects enclosed within parentheses.
Mathematical calculations 25
Page 76

Entering... Calculates...
Algebraic precedence
The HP Prime calculator calculates according to the following order of precedence. Functions at the same
level of precedence are evaluated in order from left to right.
1. Expressions within parentheses. Nested parentheses are evaluated from inner to outer.
2. !, √, reciprocal, square
3. nth root
4. Power, 10
45
45
85 9
85 9
n
5. Negation, multiplication, division, and modulo
6. Addition and subtraction
7. Relational operators (<, >, ≤, ≥, ==, ≠, =)
8. AND and NOT
9. OR and XOR
10. Left argument of | (where)
11. Assign to variable (:=)
Negative numbers
It is best to press to start a negative number or to insert a negative sign. Pressing instead
will, in some situations, be interpreted as an operation to subtract the next number you enter from the last
result. (This is explained in Reusing the last result on page 28.)
To raise a negative number to a power, enclose it in parentheses. For example, (–5)2 = 25, whereas –52 = –25.
Explicit and implied multiplication
Implied multiplication takes place when two operands appear with no operator between them. If you enter
AB, for example, the result is A*B. You can enter 14 8 without the multiplication operator
after 14. For the sake of clarity, the calculator adds the operator to the expression in history, but it is not
strictly necessary when you are entering the expression. You can, though, enter the operator if you wish. The
result will be the same.
26 Chapter 2 Getting started
Page 77

Large results
If the result is too long or too tall to be seen in its entirety—for example, a many-rowed matrix—highlight it
and then press . The result is displayed in full-screen view. You can now press and (as
well as and ) to bring hidden parts of the result into view. Tap to return to the previous
view.
Reusing previous expressions and results
Being able to retrieve and reuse an expression provides a quick way of repeating a calculation that requires
only a few minor changes to its parameters. You can retrieve and reuse any expression that is in history. You
can also retrieve and reuse any result that is in history.
To retrieve an expression and place it on the entry line for editing, do one of the following:
● Tap it twice.
● Use the cursor keys to highlight the expression and then either tap it or tap .
To retrieve a result and place it on the entry line, use the cursor keys to highlight it and then tap .
If the expression or result you want is not showing, press repeatedly to step through the entries and
reveal those that are not showing. You can also swipe the screen to quickly scroll through history.
TIP:
Pressing takes you straight to the very rst entry in history, and pressing
takes you straight to the most recent entry.
Using the clipboard
Your last four expressions are always copied to the clipboard and can easily be retrieved by pressing
. This opens the clipboard from where you can quickly choose the one you want.
NOTE: expressions and not results are available from the clipboard. Note too that the last four expressions
remain on the clipboard even if you have cleared history.
Mathematical calculations 27
Page 78

Reusing the last result
Press (Ans) to retrieve your last answer for use in another calculation. Ans appears on the
entry line. This is a shorthand for your last answer and it can be part of a new expression. You could now enter
other components of a calculation—such as operators, number, variables, etc.—and create a new calculation.
TIP: You don’t need to rst select Ans before it can be part of a new calculation. If you press a binary
operator key to begin a new calculation, Ans is automatically added to the entry line as the rst component of
the new calculation. For example, to multiply the last answer by 13, you could enter
13 . But the rst two keystrokes are unnecessary. All you need to enter is 13
.
The variable Ans is always stored with full precision whereas the results in history will only have the precision
determined by the current Number Format setting (see Page 1 on page 20). In other words, when you retrieve
the number assigned to Ans, you get the result to its full precision; but when you retrieve a number from
history, you get exactly what was displayed.
You can repeat the previous calculation simply by pressing . This can be useful if the previous
calculation involved Ans. For example, suppose you want to calculate the nth root of 2 when n is 2, 4, 8, 16,
32, and so on.
1. Calculate the square root of 2.
2
2. Enter √Ans.
This calculates the fourth root of 2.
28 Chapter 2 Getting started
Page 79

3. Press repeatedly. Each time you press, the root is twice the previous root. The last answer
shown in the following illustration is .
Reusing an expression or result from the CAS
When you are working in Home view, you can retrieve an expression or result from the CAS by tapping
and selecting Get from CAS. The CAS opens. Press or until the item you want to retrieve
is highlighted, and then press . The highlighted item is copied to the cursor point in Home view.
Storing value in a variable
You can store a value in a variable (that is, assign a value to a variable). Then when you want to use that value
in a calculation, you can refer to it by the variable’s name. You can create your own variables, or you can take
advantage of the built-in variables in Home view (named A to Z and θ) and in the CAS (named a to z, and a few
others). CAS variables can be used in calculations in Home view, and Home variables can be used in
calculations in the CAS. There are also built-in app variables and geometry variables. These can also be used
in calculations.
Example: To assign π2 to the variable A:
Your stored value appears as shown in the following gure. If you then wanted to multiply your stored value
by 5, you could enter: 5 .
Mathematical calculations 29
Page 80

You can also create your own variables in Home view. For example, suppose you wanted to create a variable
called ME and assign π2 to it. You would enter:
A message appears asking if you want to create a variable called ME. Tap or press to
conrm your intention. You can now use that variable in subsequent calculations: ME*3 will yield
29.6088132033, for example.
You can also create variables in CAS view in the same way. However, the built-in CAS variables must be
entered in lowercase. However, the variables you create yourself can be uppercase or lowercase.
As well as built-in Home and CAS variables, and the variables you create yourself, each app has variables that
you can access and use in calculations.
Complex numbers
You can perform arithmetic operations using complex numbers. Complex numbers can be entered in the
following forms in Textbook mode, where x is the real part, y is the imaginary part, and i is the imaginary
constant, √-1.
● (x, y)
● x + yi (except in RPN mode)
● x – yi (except in RPN mode)
● x + iy (except in RPN mode)
● x – iy (except in RPN mode)
In RPN mode, complex numbers must be entered enclosed in single quotes and require explicit multiplication.
For example, ‘3 – 2 * i’.
To enter i:
▲ Press .
– or –
30 Chapter 2 Getting started
Page 81

Press .
There are 10 built-in variables available for storing complex numbers. These are labeled Z0 to Z9. You can
also assign a complex number to a variable you create yourself.
To store a complex number in a variable, enter the complex number, press , enter the variable that
you want to assign the complex number to, and then press
variable
Z6:
2 3 6
Copy and paste
. For example, to store 2 + 3i in
copies the selected item to the HP Prime clipboard. opens the clipboard
and enables you to select a clipboard item and paste it to the current cursor location.
In the List Editor, you can select part of a list, an entire list, or a rectangular array of elements from multiple
lists. This selection can then be copied and pasted in either the Matrix Editor or the Numeric view of the
Spreadsheet, Statistics 1Var, or Statistics 2Var apps. Similarly, in the Matrix Editor, you can select one or more
rows, one or more columns, a sub-matrix, or the entire matrix. This selection can then be copied and pasted in
either the List Editor or the Numeric view of the three previously listed apps.
For example, in the following gure, a 2x2 array has been selected in the Matrix editor and copied to the
clipboard.
Copy and paste 31
Page 82

In the following gure, that array is being pasted as grid data into the Numeric view of the Statistics 1Var app.
In the following gure, that array is pasted into the Numeric view of the Statistics 1Var app.
Generally, the copy-and-paste function allows you to transfer numbers and expressions throughout the
calculator software.
32 Chapter 2 Getting started
Page 83

To continue the previous example, tap to calculate summary statistics for the two data points in
column D1. Tap the sample standard deviation, and then press to copy it to the clipboard.
Press to enter Home view and press to copy the sample standard deviation to the
command line. Press
Using this same copy-and-paste technique, you can perform other operations such as copying values and
pasting them into the Xmin and Xtick boxes in the Plot Setup view.
Sharing data
As well as giving you access to many types of mathematical calculations, the HP Prime calculator enables you
to create various objects that can be saved and used over and over again. For example, you can create apps,
lists, matrices, programs, and notes. You can also send these objects to other HP Prime calculators. Whenever
you encounter a screen with as a menu item, you can select an item on that screen to send it to
another HP Prime calculator.
You use one of the supplied USB cables to send objects from one HP Prime to another. This is the micro-A–
micro B USB cable. Note that the connectors on the ends of the USB cable are slightly dierent. The micro-A
connector has a rectangular end and the micro-B connector has a trapezoidal end. To share objects with
another HP Prime, the micro-A connector must be inserted into the USB port on the sending calculator, with
the micro-B connector inserted into the USB port on the receiving calculator.
to square it and press to see the result.
General procedure
The general procedure for sharing objects is as follows:
1. Navigate to the screen that lists the object you want to send.
This will be the Application Library for apps, the List Catalog for lists, the Matrix Catalog for matrices,
the Program Catalog for programs, and the Notes Catalog for notes.
2. Connect the USB cable between the two calculators.
The micro-A connector—with the rectangular end—must be inserted into the USB port on the sending
calculator.
Sharing data 33
Page 84

3. On the sending calculator, highlight the object you want to send and tap .
In the following illustration, a program named TriangleCalcs has been selected in the Program Catalog
and will be sent to the connected calculator when is tapped.
Using Memory Manager
Memory Manager contains a list of catalogs, the Home and CAS histories, the user variables, and backups.
▲ To open Memory Manager, press .
To use Memory Manager:
▲ Select one of the following menu buttons:
● —Displays the available memory and storage space.
● —Clones the HP Prime calculator to an attached HP Prime calculator.
● —Sends all data in a selected category (such as Lists or Matrices) to an attached HP
Prime calculator.
● —Opens the selected catalog. You can also open a catalog by pressing . In
the catalog, you can delete unnecessary objects.
Backups catalog
The Backups catalog can be used to back up or restore your HP Prime calculator without connecting it to a
computer.
To open the Backups catalog:
1. Open Memory Manager.
2. Tap Backups, and then tap .
The following options are available:
34 Chapter 2 Getting started
Page 85

● —Restores the HP Prime calculator using the selected backup le.
● —Deletes the selected backup le. You can also press to delete the selected backup
le.
● —Creates a new backup le using the current state of the HP Prime calculator. By default, the
name of the backup le includes the date.
Using Memory Manager 35
Page 86

Online help
The HP Prime calculator has an extensive online help system that is context sensitive. Generally, you can view
context-sensitive help for each app, each app view, each dedicated editor (List, Matrix, and so on), and each
function or command. Press to open the online help that relates to the current context. For example,
if you open the Symbolic view in the Function app and press , the following help page is displayed.
Many of the menu pages have the menu key available. Tap this key to paste an example into the
current cursor location. For example, tap and then tap the rst example in the list: SIN(6*X)*e^X.
The function is pasted into the command line in the Symbolic view of the Function app. Press to
paste this function into F1(X).
36 Chapter 2 Getting started
Page 87

Press to see the graph.
When a help page is displayed, you can tap to display a hierarchial tree display of the entire help
system. Tap an entry and then tap to view the page. Tap the + sign to expand any entry to view its
subentries. Tap and then press any key (or any shifted key combination) to display the help for that
key.
Extensive help is available for each command. The help provides the syntax of each command, a description
of the command, and an example. If you enter a command but need the syntax, press
syntax. For example, if you have entered
command.
Finally, if you have online help open, you can tap and enter a keyword to search help for that
keyword.
int( ) in CAS view, pressing displays help on the integral
to display its
Online help 37
Page 88

3 Reverse Polish Notation (RPN)
The HP Prime calculator provides you with three ways of entering objects in Home view, as follows:
● Textbook
An expression is entered in much the same way was if you were writing it on paper (with some
arguments above or below others). In other words, your entry could be two-dimensional, as in the
following example:
● Algebraic
An expression is entered on a single line. Your entry is always one-dimensional. The same calculation as
above would appear like this is algebraic entry mode:
● Reverse Polish Notation (RPN)
The arguments of the expression are entered rst followed by the operator. The entry of an operator
automatically evaluates what has already been entered. Thus you will need to enter a two-operator
expression (as in the example above) in two steps, one for each operator:
38 Chapter 3 Reverse Polish Notation (RPN)
Page 89

Step 1: 5 —the natural logarithm of 5 is calculated and displayed in history.
Step 2: – π is entered as a divisor and applied to the previous result.
You select your preferred entry method from page 1 of the Home Settings screen ( ). Select
settings as normal.
RPN is available in Home view, but not in CAS view.
The same entry-line editing tools are available in RPN mode as in algebraic and textbook mode. You can edit
an expression on the entry line using the following keys:
● Press to delete the character to the left of the cursor.
● Press to delete the character to the right of the cursor.
● Press to clear the entire entry line.
If there is no expression on the entry line, you can press to clear the entire history.
History in RPN mode
The results of your calculations are kept in history. This history is displayed above the entry line (and by
scrolling up to calculations that are no longer immediately visible). The calculator oers three histories: one
for the CAS view and two for Home view. The two histories in Home view are:
● non-RPN—visible if you have chosen algebraic or textbook as your preferred entry technique
● RPN—visible only if you have chosen RPN as your preferred entry technique. The RPN history is also
called the stack. As shown in the following illustration, each entry in the stack is given a number. This is
the stack level number.
As more calculations are added, an entry’s stack level number increases.
History in RPN mode 39
Page 90

If you switch from RPN to algebraic or textbook entry, your history is not lost. It is just not visible. If you switch
back to RPN, your RPN history is redisplayed. Likewise, if you switch to RPN, your non-RPN history is not lost.
When you are not in RPN mode, your history is ordered chronologically: oldest calculations at the top, most
recent at the bottom. In RPN mode, your history is ordered chronologically by default, but you can change the
order of the items in history. (This is explained in Manipulating the stack on page 42.)
Reusing results
There are two ways to reuse a result in history. Method 1 deselects the copied result after copying; Method 2
keeps the copied item selected.
Method 1
1. Select the result to be copied. You can do this by pressing or until the result is highlighted,
or by tapping on it.
2. Press . The result is copied to the entry line and is deselected.
Method 2
1. Select the result to be copied. You can do this by pressing the up arrow or the down arrow until the result
is highlighted, or by tapping on it.
2. Tap and select ECHO. The result is copied to the entry line and remains selected.
Note that while you can copy an item from the CAS history to use in a Home calculation (and copy an item
from the Home history to use in a CAS calculation), you cannot copy items from or to the RPN history. You can,
however, use CAS commands and functions when working in RPN mode.
40 Chapter 3 Reverse Polish Notation (RPN)
Page 91

Sample calculations
The general philosophy behind RPN is that arguments are placed before operators. The arguments can be on
the entry line (each separated by a space) or they can be in history. For example, to multiply π by 3, you could
enter the following on the entry line:
Then, enter the operator ( ). Thus, your entry line would look like this before entering the operator:
3
However, you could also have entered the arguments separately and then, with a blank entry line, entered the
operator ( ). Your history would look like the following gure before entering the operator:
To get the same result, you could also press to enter the value π on stack
level one, and then press .
If there are no entries in history and you enter an operator or function, an error message appears. An error
message will also appear if there is an entry on a stack level that an operator needs but it is not an
Sample calculations 41
Page 92

appropriate argument for that operator. For example, pressing when there is a string on level 1
displays an error message.
An operator or function will work only on the minimum number of arguments necessary to produce a result.
Thus if you enter on the entry line 2 4 6 8 and press , stack level 1 shows 48. Multiplication needs
only two arguments, so the two arguments last entered are the ones that get multiplied. The entries 2 and 4
are not ignored: 2 is placed on stack level 3 and 4 on stack level 2.
Where a function can accept a variable number of arguments, you need to specify how many arguments you
want it to include in its operation. You do this by specifying the number in parentheses straight after the
function name. You then press to evaluate the function. For example, suppose your stack looks
like following:
Suppose further that you want to determine the minimum of just the numbers on stack levels 1, 2, and 3. You
choose the MIN function from the MATH menu and complete the entry as MIN(3). When you press
, the minimum of just the last three items on the stack is displayed.
Manipulating the stack
A number of stack-manipulation options are available. Most appear as menu items across the bottom the
screen. To see these items, you must rst select an item in history:
42 Chapter 3 Reverse Polish Notation (RPN)
Page 93

PICK
ROLL
Swap
Stack
Copies the selected item to stack level 1. The item below the one that is copied is then highlighted. Thus if you
tapped four times, four consecutive items will be moved to the bottom four stack levels (levels 1–
4).
There are two roll commands:
● Tap to move the selected item to stack level 1. This is similar to pick, but pick duplicates the
item, with the duplicate being placed on stack level 1. However, roll does not duplicate an item. It simply
moves it.
● Tap to move the item on stack level 1 to the currently highlighted level.
You can swap the position of the objects on stack level 1 with those on stack level 2. Just press . The
level of other objects remains unchanged. Note that the entry line must not be active at the time, otherwise a
comma will be entered.
DROPN
Tapping displays further stack-manipulation tools.
Deletes all items in the stack from the highlighted item down to and including the item on stack level 1. Items
above the highlighted item drop down to ll the levels of the deleted items.
If you just want to delete a single item from the stack, see Delete an item on page 45.
Manipulating the stack 43
Page 94

DUPN
Echo
Duplicates all items between (and including) the highlighted item and the item on stack level 1. If, for
example, you have selected the item on stack level 3, selecting DUPN duplicates it and the two items below it,
places them on stack levels 1 to 3, and moves the items that were duplicated up to stack levels 4 to 6.
Places a copy of the selected result on the entry line and leaves the source result highlighted.
44 Chapter 3 Reverse Polish Notation (RPN)
Page 95

→LIST
Creates a list of results, with the highlighted result the rst element in the list and the item on stack level 1
the last.
Figure 3-1 Before
Figure 3-2 After
Show an item
To show a result in full-screen textbook format, tap .
Tap to return to the history.
Delete an item
To delete an item from the stack:
1. Select it. You can do this by pressing or until the item is highlighted, or by tapping on it.
2. Press .
Manipulating the stack 45
Page 96

Delete all items
To delete all items, thereby clearing the history, press .
46 Chapter 3 Reverse Polish Notation (RPN)
Page 97

4 Computer algebra system (CAS)
A computer algebra system (CAS) enables you to perform symbolic calculations. By default, CAS works in
exact mode, giving you innite precision. On the other hand, non-CAS calculations, such as those performed
in HOME view or by an app, are numerical calculations and are often approximations limited by the precision
of the calculator (to 12 signicant digits in the case of the HP Prime). For example, 1/3+2/7 yields the
approximate answer .619047619047 in Home view (with Standard numerical format), but yields the exact
answer 13/21 in the CAS.
The CAS oers many hundreds of functions, covering algebra, calculus, equation solving, polynomials, and
more. You select a function from the CAS menu, one of the Toolbox menus. For more information on the CAS
commands, see CAS menu in the Functions and commands chapter.
CAS view
CAS calculations are done in CAS view. CAS view is almost identical to Home view. A history of calculations is
built and you can select and copy previous calculations just as you can in Home view, as well as store objects
in variables.
To open CAS view, press . CAS appears in white at the left of the title bar to indicate that you are in
CAS view rather than Home view.
The menu buttons in CAS view are:
● —assigns an object to a variable.
● —applies common simplication rules to reduce an expression to its simplest form. For
example, yields b*EXP(a)*EXP(c).
● —copies a selected entry in history to the entry line.
● —displays the selected entry in full-screen mode, with horizontal and vertical scrolling
enabled. The entry is also presented in textbook format.
CAS view 47
Page 98

CAS calculations
With one exception, you perform calculations in CAS view just as you do in Home view. (The exception is that
there is no RPN entry mode in CAS view, just algebraic and textbook modes). All the operator and function
keys work in the same way in CAS view as Home view (although all the alpha characters are lowercase rather
than uppercase). But the primary dierence is that the default display of answers is symbolic rather than
numeric.
You can also use the template key ( ) to help you insert the framework for common calculations (and
for vectors and matrices).
The most commonly used CAS functions are available from the CAS menu. To display the menu, press the
button. (If the CAS menu is not open by default, tap .) Other CAS commands are available
from the Catlg menu (also a Toolbox menu).
To choose a function, select a category and then a command.
48 Chapter 4 Computer algebra system (CAS)
Page 99

Example 1
To nd the roots of 2x2 + 3x – 2:
1. With the CAS menu open, select Polynomial, and then select Find Roots.
2.
The function proot() appears on the entry line.
Between the parentheses, enter: 2 3 2.
Press .
3.
CAS calculations 49
Page 100

Example 2
To nd the area under the graph of 5x2 – 6 between x =1 and x = 3:
1. With the CAS menu open, select Calculus and then Integrate.
2.
The function int() appears on the entry line.
Between the parentheses, enter: 5 6
3.
Settings
Various settings allow you to congure how the CAS works. To display the settings, press .
The modes are spread across two pages.
1 3.
Press .
50 Chapter 4 Computer algebra system (CAS)
 Loading...