

Page 1
HP ProLiant DL320
Security Server
Quick setup poster
1 Introduction
The HP ProLiant DL320 Security Server is factory prepared to
protect your networks and allow secure Internet access.
Use this quick setup poster to help set up the ProLiant DL320
Security Server.
HP highly recommends following the instructions in this quick
setup poster to the end. This poster quickly guides you from
opening the box to setting your initial custom firewall policy.
2 Checking the package contents
The package contains the following items in addition to the
items listed in the server documentation:
• Recovery CDs
• HP ProLiant DL320 Security Server User Guide
• HP ProLiant DL320 Security Server Network
Information Card
• This quick setup poster
3 Verifying your network
information
Use the HP ProLiant DL320 Security Server Network Information
Card to record the network details needed during setup.
First Edition (February 2006)
Part Number 411246-001
Page 2

4 Connecting the server
6 Completing the server setup
Item Description
1 NIC port 1 (internal network)
2 NIC port 2 (external network)
3 NIC port 3 (perimeter network, optional)*
* NIC 3 will be installed in either PCI-X expansion slot 1 or 2,
depending on the type of NIC.
After powering on the ProLiant DL320 Security Server, the
Microsoft
might take a few minutes for the server to initialize.
1.
®
Windows Server™ 2003 dialog box displays. It
At the Welcome to the Windows Setup Wizard page,
click Next.
NOTE: The ProLiant DL320 Security Server is set to
maximum security by default, actively defending the
network from the instant network communications starts.
For more information about this feature, see the
ProLiant DL320 Security Server User Guide.
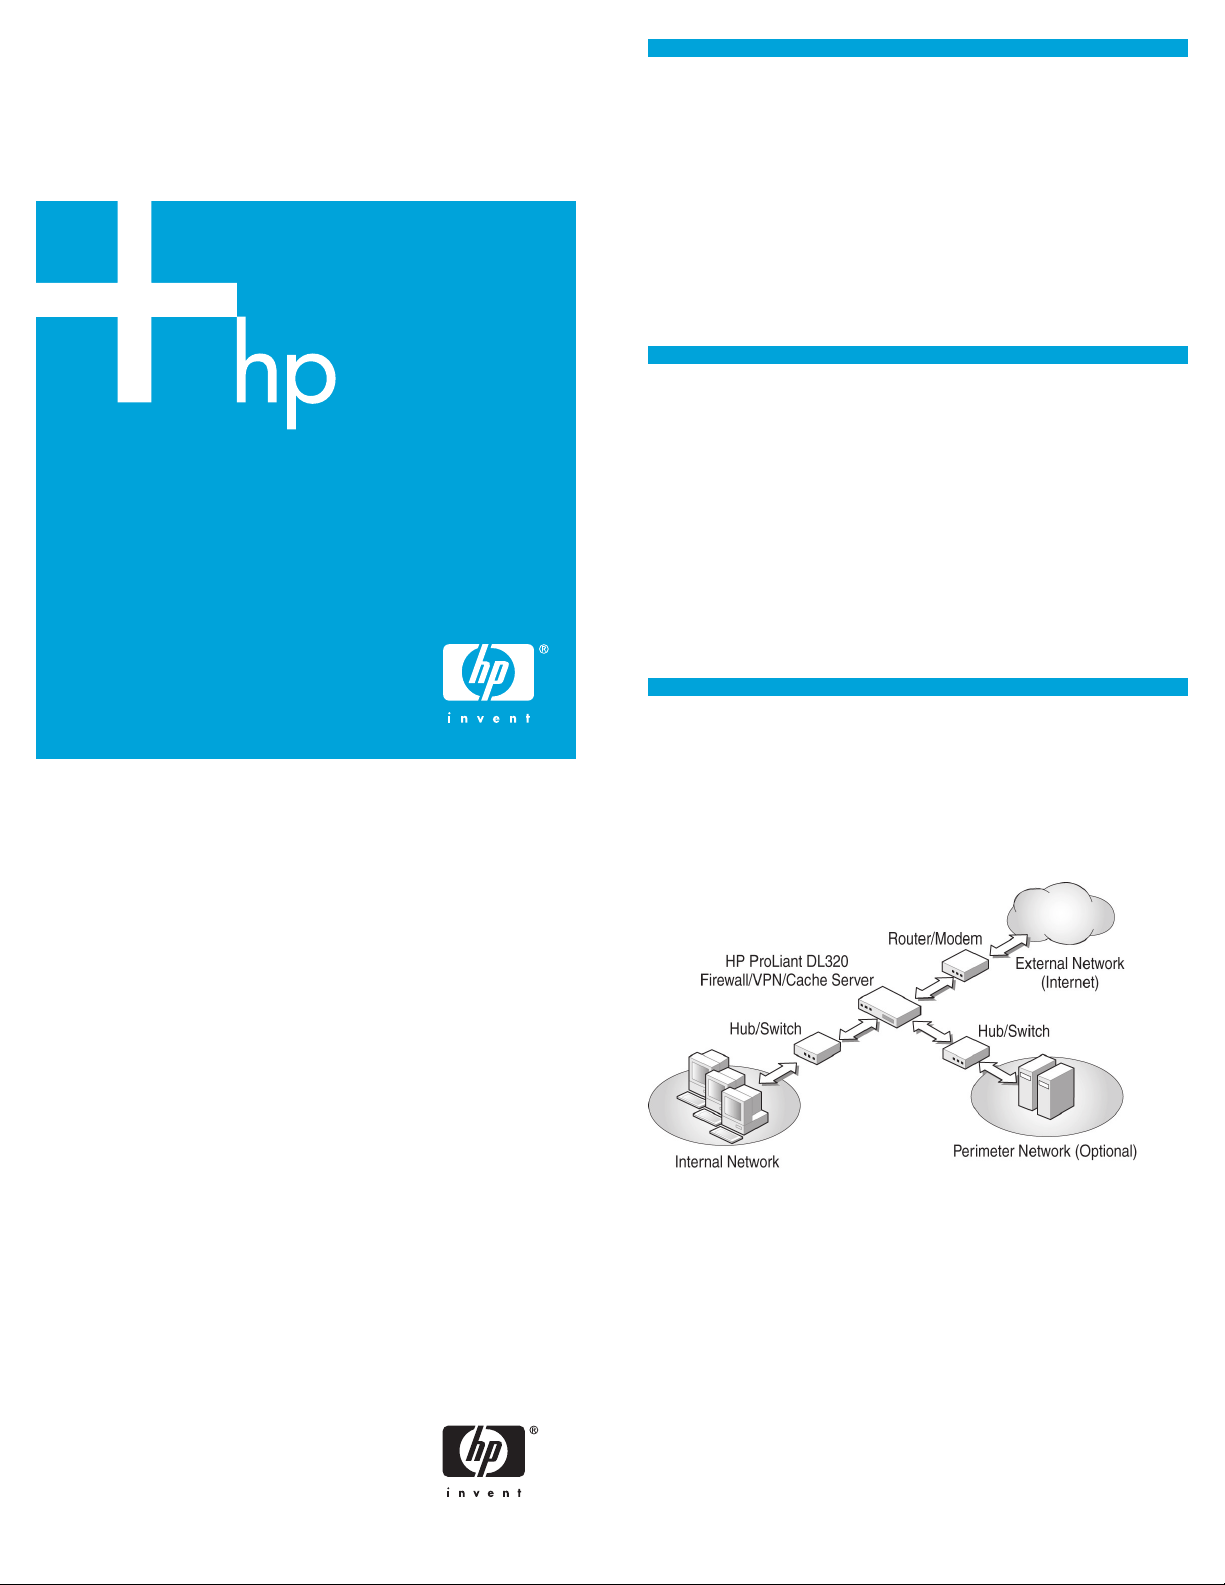
1. Plug one end of cable 1 into the internal port of the
ProLiant DL320 Security Server, and plug the other end into
the internal network hub or switch.
2. Plug one end of cable 2 into the external port of the
ProLiant DL320 Security Server, and plug the other end into
the Internet-connected router or modem.
3. To use a perimeter network, plug one end of cable 3 into
the perimeter port of the ProLiant DL320 Security Server,
and plug the other end into your perimeter network hub
or switch.
4. Connect a monitor to the VGA port of the ProLiant DL320
Security Server.
5. Connect a keyboard and a mouse to the keyboard and
mouse ports.
6. Plug the computer end of the power cord into the server
power inlet, and plug the other end into an appropriate
power source.
2. At the Regional and Language Options page,
follow the instructions to set the regional and language
options or to use the default language, which is English
(United States), and then click Next.
5 Powering up the server
Power up the ProLiant DL320 Security Server. See the server
hardware documentation for additional information.
Page 3

3. At the Computer Name and Administrator Password page:
a. In the Computer name text box, enter the computer
name recorded on the network information card.
b. In the Administrator password text box, enter the
administrator password created as part of completing
the network information card. The administrator
password is used to obtain administrator privileges to
manage the ProLiant DL320 Security Server.
c. In the Confirm password text box, enter the
administrator password again, and click Next.
5. At the Internal Connection TCP/IP Settings page:
a. Select Use the following IP address. If there is a DHCP
server in the internal network, and a fixed address
was reserved for the firewall, select Obtain an IP
address automatically.
b. In the IP address and Subnet mask text boxes, enter
the network IP addresses recorded on the network
information card for the internal network interface IP
address and the subnet mask IP address
c. Select Use the following DNS server addresses.
d. In the Preferred DNS server text box, enter the DNS
server IP address. If there is an alternate DNS server,
enter the IP address in the Alternate DNS server
text box.
e. Click Next. The External Connection TCP/IP Settings
page provides the details for the external network
adapter.
4. At the Date and Time Settings page:
a. Select the correct date and time.
b. Select the correct time zone. If your area uses daylight
savings time, select the Automatically adjust clock for
daylight saving changes checkbox.
c. Click Next. The Networking Settings page displays the
progress of network services invocation.
6. If using a static IP address supplied by an ISP, select Use
the following IP address, and enter the IP addresses to use.
Otherwise, select Obtain an IP address automatically. To
avoid configuring the external network interface, select the
Skip this step checkbox. HP recommends configuring this
interface at this time because the firewall is already
enforcing a strict security policy.
Page 4

7. Click Next.
8. At the Workgroup or Computer Domain page, either select
Domain and enter the appropriate domain name, or select
Workgroup and enter the name of the workgroup recorded
on the network information card. When adding the server
to a Windows® domain, the domain group policies are
applied to the server. If you are unsure of which option to
select, HP recommends selecting the Workgroup option. A
domain can be joined anytime after setup completes.
9. Click Next. The ProLiant DL320 Security Server performs
some final tasks, as displayed on the Performing Final Tasks
page, and automatically restarts.
10. Log on to the server using the administrator password
previously established.
HP Virus Throttle
HP Virus Throttle, a network packet-filtering feature that helps
slow the spread of viruses, is automatically installed and
enabled on your ProLiant DL320 Security Server. The installation
requires no user interaction and takes only a few moments.
When the Virus Throttle installation is complete, the server
automatically reboots. To access and configure Virus Throttle,
double-click the Virus Throttle icon in your system tray.
For information about configuring Virus Throttle, see the "HP
Virus Throttle" section of the HP ProLiant DL320 Security Server
User Guide included with the server. For information about
using Virus Throttle, see the HP ProLiant Essentials Intelligent
Networking Pack User Guide
http://h18004.www1.hp.com/products/servers/
proliantessentials/inp/index.html
7 Configuring the server
The installation is complete. The ProLiant DL320 Security Server
can be configured to enable internal network clients to access
the Internet, set up as a VPN server, and set up to allow
secure connections from Internet users to servers on the
internal network.
For additional setup and configuration options, see the HP
ProLiant DL320 Security Server User Guide.
When logging on to the ProLiant DL320 Security Server for the
first time, read the information displayed on the Getting Started
page. This information guides you through the basic
configuration steps. (This page can be accessed at anytime by
clicking the node with the server name on it.)
NOTE: At the Getting Started page, HP recommends
clicking Define your ISA Network Configuration. This
option starts the Network Template Wizard, which
quickly sets up an initial policy configuration based on
your preferences and network topology.
Additional information
The HP ProLiant Servers Troubleshooting Guide provides simple
procedures for resolving common problems as well as a
comprehensive course of action for fault isolation and
identification, error message interpretation, issue resolution,
and software maintenance.
To obtain the guide, refer to any of the following sources and
then select the HP ProLiant Servers Troubleshooting Guide:
• The server-specific Documentation CD
• The Business Support Center on the HP website
http://www.hp.com/support
Navigate to the server technical support page. Under selfhelp resources, select ProLiant Troubleshooting Guide.
• The Technical Documentation website
http://www.docs.hp.com
Select Enterprise Servers, Workstations and Systems
Hardware, and then the appropriate server.
For definitions of the acronyms used in this document, refer to
"Acronyms and abbreviations" on the Documentation CD.
Audience assumptions
This document is for the person who installs, administers, and
troubleshoots servers and storage systems. HP assumes you are
qualified in the servicing of computer equipment and trained in
recognizing hazards in products with hazardous energy levels.
Legal Notices
© Copyright 2006 Hewlett-Packard Development Company, L.P.The
information contained herein is subject to change without notice. The
only warranties for HP products and services are set forth in the
express warranty statements accompanying such products and
services. Nothing herein should be construed as constituting an
additional warranty. HP shall not be liable for technical or editorial
errors or omissions contained herein.
Confidential computer software. Valid license from HP required for
possession, use or copying. Consistent with FAR 12.211 and
12.212, Commercial Computer Software, Computer Software
Documentation, and Technical Data for Commercial Items are
licensed to the U.S. Government under vendor's standard
commercial license.
Microsoft and Windows are U.S. registered trademarks of Microsoft
Corporation. Windows Server 2003 is a U.S. trademark of
Microsoft Corporation.
 Loading...