

Page 1
LaserJet Pro
2
MFP M225 and M226
English ..................... 1
Bahasa Indonesia ...... 6
한국어 .................... 11
Getting Started Guide
www.hp.com/support/colorljMFPM225 www.register.hp.com
IMPORTANT:
Follow
the printer hardware setup
poster, then continue
with Step 4 to the right.
Steps 1 - 3 on
5. Select a connection method and prepare for software installation
www.hp.com/support/colorljMFPM226
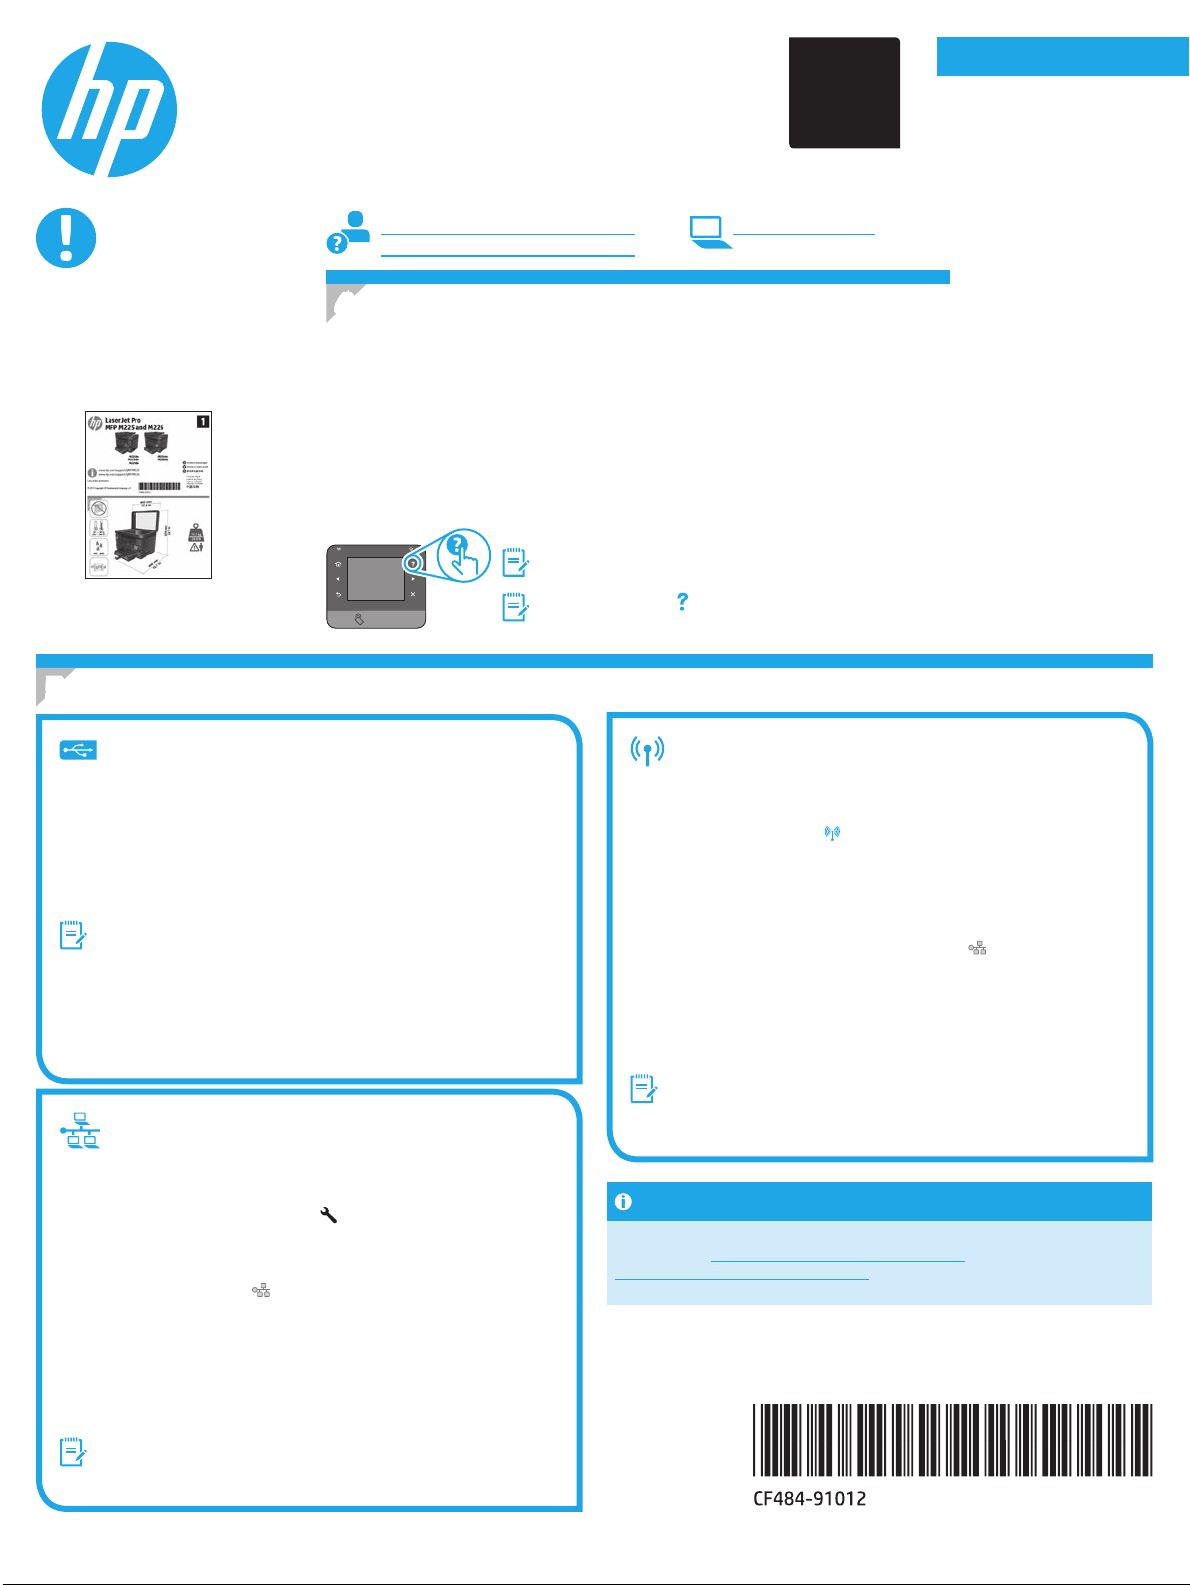
4. Initial setup on the control panel
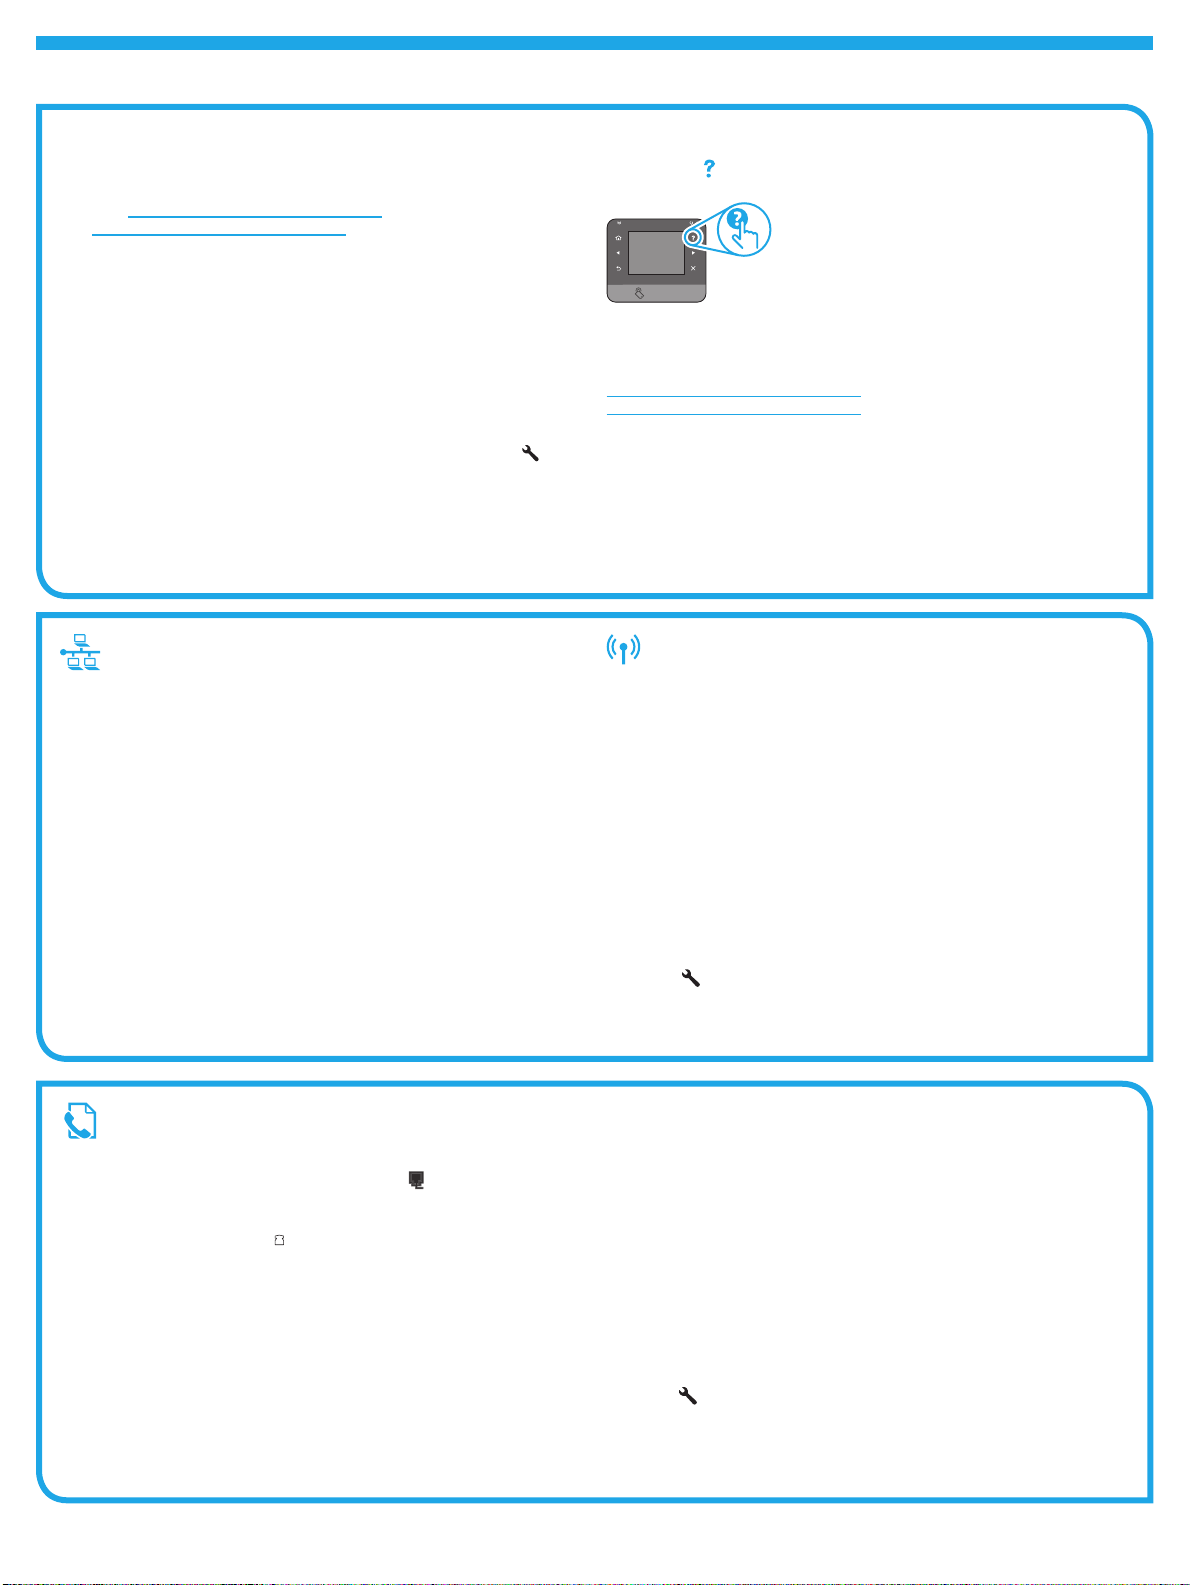
After turning on the printer, wait for it to initialize. To navigate the touchscreen control panel,
use touch, swipe, and scroll gestures. Follow the prompts on the control panel to congure these
settings:
• Language
• Location
• Default Settings
Under Default Settings select one of these options:
• Self-managed: Optimized default settings for a guided experience on setups,
congurations, and updates.
• IT-managed: Optimized default settings for eet manageability with enhanced security.
Settings are fully customizable after initial setup.
NOTE: Select Print Information Page to print a page that
instructs how to change the default settings.
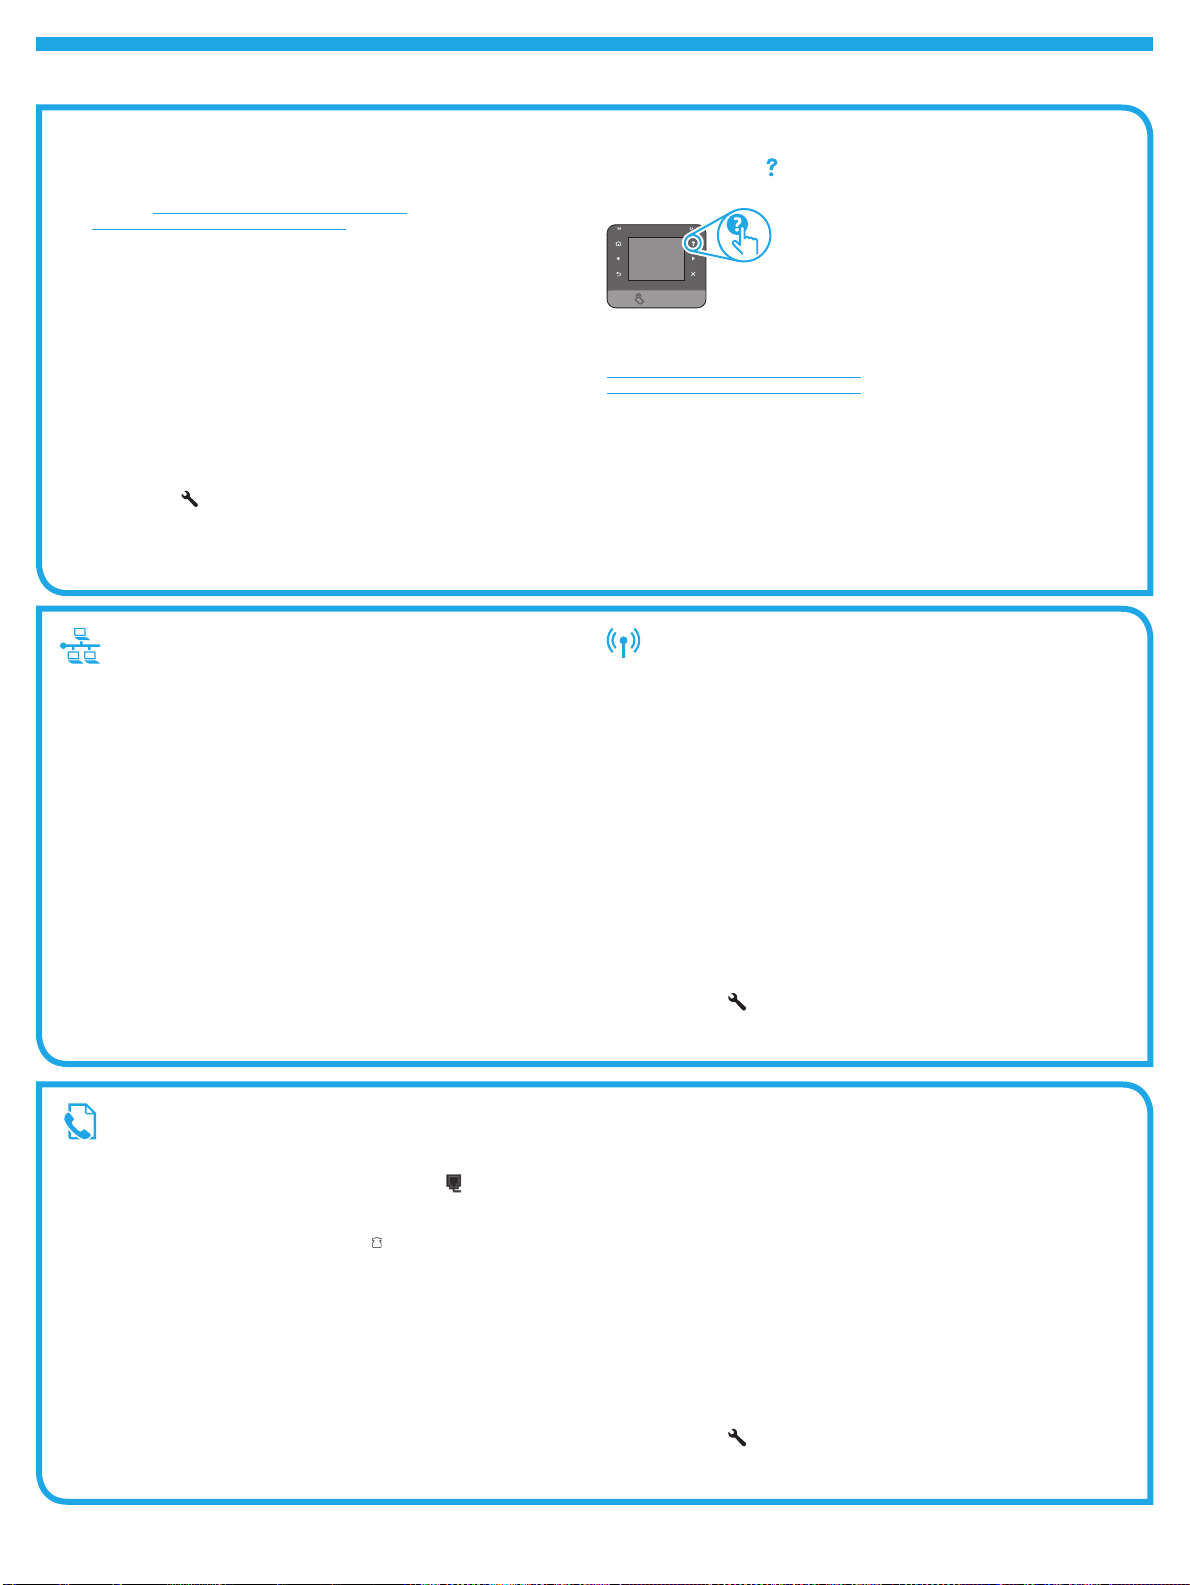
NOTE: Touch the Help button on the printer control panel to
access help topics.
ไทย ......................... 16
繁体中文 ................ 21
Tiếng Việt ............... 26
USB connection directly between the
printer and the computer
Use an A-to-B type USB cable.
Windows
1. Except Windows 8, 8.1, or RT, do not connect the USB cable before
installing the software. If already connected, remove before continuing.
Installation prompts to connect the cable when appropriate.
2. Continue with “6. Locate or download the software installation les.”
NOTE: During software installation, select the option to Directly connect
this computer using a USB cable.
Mac
1. Connect the USB cable between the computer and the printer before
installing the software.
2. Continue with “6. Locate or download the software installation les.”
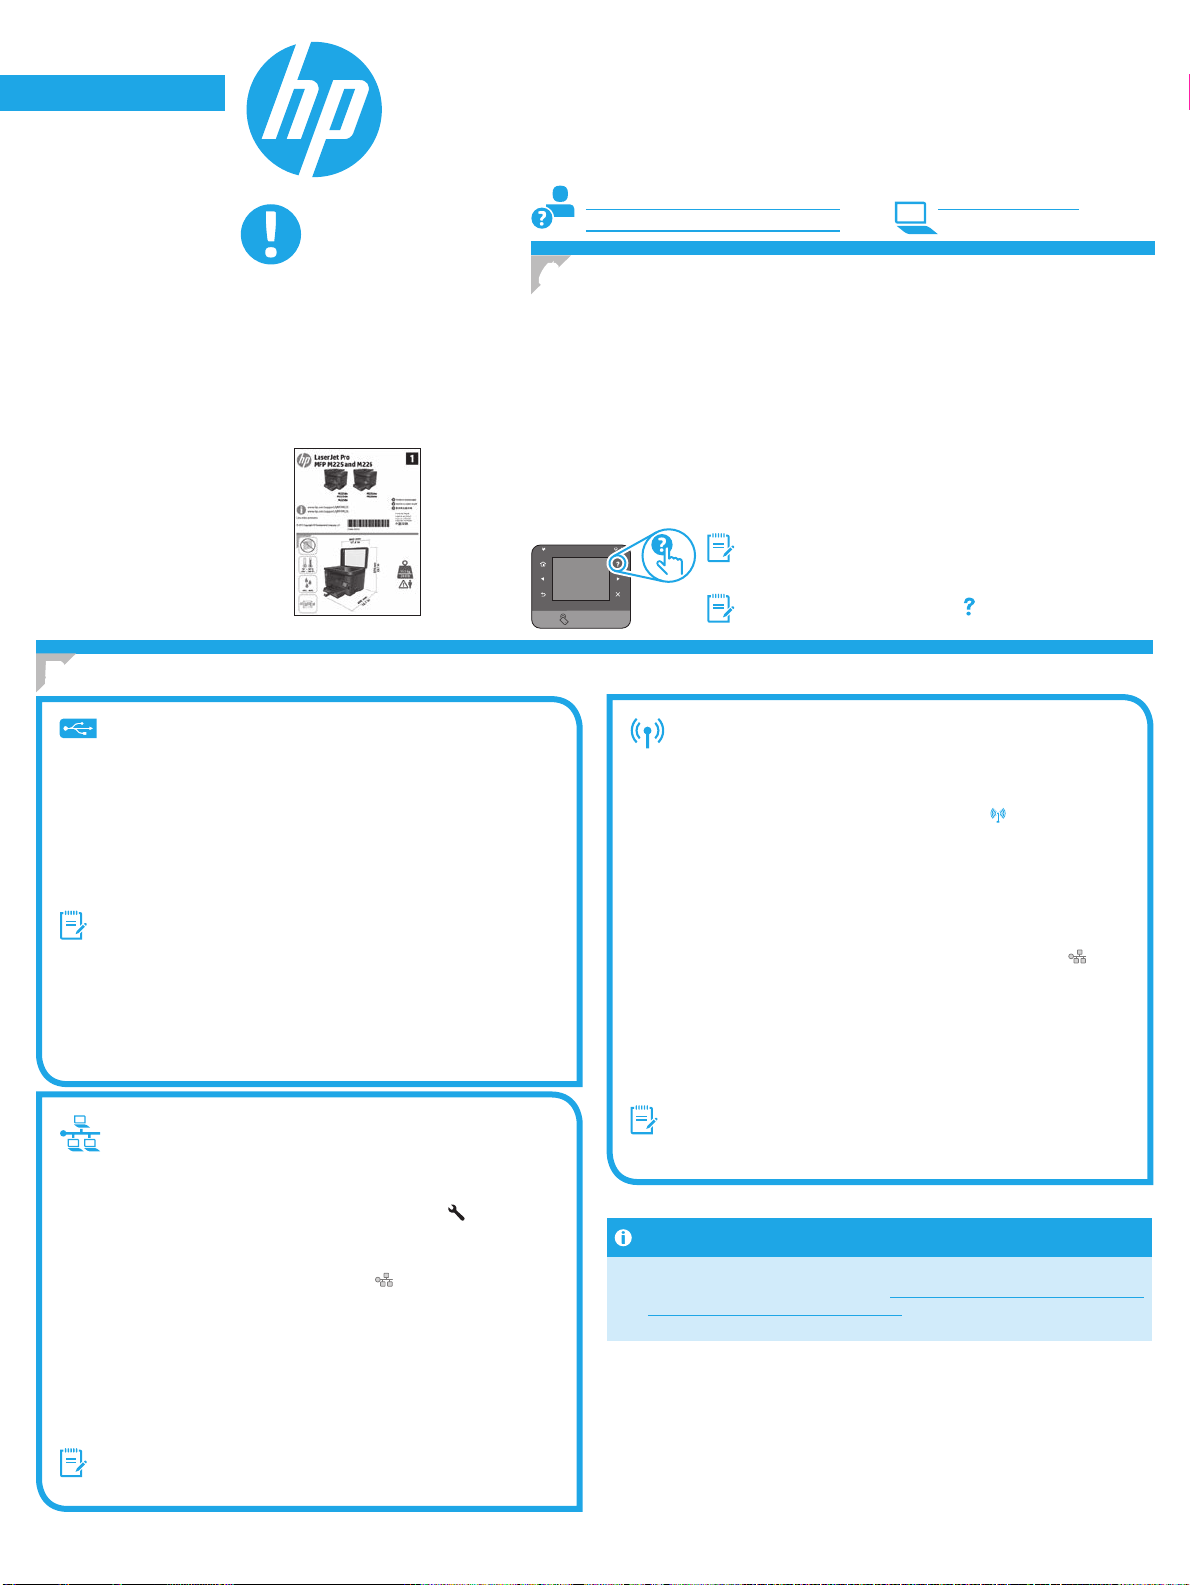
Wired (Ethernet) network connection
Use a standard network cable.
1. Connect the network cable to the printer and to the network. Wait a few
minutes for the printer to acquire a network address.
2. LCD control panels: Press the Setup button. Open the Network Setup
menu and then select Show IP Address to display the IP address or host
name.
Touchscreen control panels: From the Home screen on the product control
panel, touch the Network button to display the IP address or host name.
3. If an IP address is listed, the network connection has been established. If
not, wait a few more minutes and try again. Note the IP address for use
during software installation. Note the IP address for use during software
installation. Example IP address: 192.168.0.1
To manually congure the IP address, see “Manually congure the IP
address.”
4. Continue with “6. Locate or download the software installation les.”
NOTE: During software installation, select the option to Connect through
a network.
Built-in wireless network connection
(wireless models only)
1. To connect the printer to a wireless (Wi-Fi) network, on the printer control
panel, touch the Wireless button. Touch Wireless Menu, and then
touch Wireless Setup Wizard.
2. Select the network name from the SSID list, or enter the network name
if it is not listed.
3. Use the keyboard to enter the passphrase, and then touch the OK button.
4. Wait while the printer establishes a network connection.
5. On the printer control panel, touch the Network button. If an IP
address is listed, the network connection has been established. If not,
wait a few more minutes and try again. Note the IP address for use
during software installation. Example IP address: 192.168.0.1
6. To print from a computer, continue with “6. Locate or download the
software installation les.” To print from a phone or tablet only, continue
with “8. Mobile and wireless printing.”
NOTE: During software installation, select the option to Help me set up a
rst-time wireless connection.
Manually congure the IP address
See the printer User Guide for information on how to manually congure
the IP address www.hp.com/support/colorljMFPM225 or
www.hp.com/support/colorljMFPM226.
1
Page 2
6. Locate or download the software installation les
Method 1: Download from HP Easy Start (Windows
and OS X)
1. Go to 123.hp.com/laserjet, and click Download.
2. Follow the onscreen instructions and prompts to save the le to the computer.
3. Launch the software le from the folder where the le was saved, and continue
with “7. Install the software.”
Method 2: Download from printer support Web site
(Windows and OS X)
1. Go to www.hp.com/support/colorljMFPM225 or
www.hp.com/support/colorljMFPM226.
2. Select Software and drivers.
3. Download the software for your printer model and operating system.
4. Launch the installation le by clicking on the .exe or .zip le as necessary.
Method 3: Install from the printer CD
For Windows, the software installation les are provided on the CD that came with the
printer.
For OS X, the installer le on the CD includes a link to download the les from the Web.
1. Insert the printer CD into the computer.
2. Continue with “7. Install the software.”
7. Install the software
OS X full solution
Windows full solution
1. Insert the printer CD into the computer, or launch the software
installation le downloaded from the Web.
2. The software installer detects the language of the operating system, and
then it displays the main menu of the installation program in the same
language. When installing from the CD, if the installer program does not
start after 30 seconds, browse the CD drive on the computer and launch
the le named SETUP.EXE.
3. The Software Selection screen details the software to be installed.
• The recommended software installation includes the print driver and
software for all available printer features.
• To customize the software installed, click the Customize software
selections link. When nished, click the Next button.
4. Follow the on-screen instructions to install the software.
5. When prompted to select a connection type, select the appropriate option
for the type of connection:
• Directly connect this computer using a USB cable
• Connect through a network
• Help me set up a rst-time wireless connection
NOTE: When connecting through a network, the easiest way to detect the
printer is to select Automatically nd my printer on the network.
6. (Optional) For wireless models only, at the end of the software
installation process, set up fax and scan features by using the
Fax Setup Wizard, Scan to E-mail Wizard, and the Scan to Network
Folder Wizard. This is a convenient way to congure these features. See
“10. Set up scan features for printers on a network (wireless models
only - optional)” for more information.
1. Launch the software installation .dmg le that you downloaded from
theWeb.
2. The software installer detects the language of the operating system, and
then it displays the main menu of the installation program in the same
language.
3. The Installation Options screen details the software to be installed.
• For a standard installation, click the Install button now.
• For a custom installation, click the Customize button. On the screen
that opens, select the components to install, and then click the Install
button.
4. Follow the on-screen instructions to install the software.
5. At the end of the software installation process, use the HP Utility Setup
Assistant to congure printer options.
OS X basic installation
To install basic print and fax drivers without running the HP full solution
software from CD or hp.com download, follow these steps:
1. Connect the printer to the computer or network.
2. From System Preferences, click Printers and Scanners, then the plus
button on the bottom left, and select M225 or M226 using the driver
named either AirPrint or HP Printer.
Readiris Pro for HP
Download this free software to enable extra scanning features, including
Optical Character Recognition (OCR). During software installation, click the
More Options item in the left pane, and then select Web Support to download
this software.
To download the software from the Web, go to
www.hp.com/support/colorljMFPM225 or
www.hp.com/support/colorljMFPM226., select Drivers, and then click
Software & Firmware.
(Windows only)
8.
To print from a phone or tablet, connect the device to the same wireless network
as the printer.
Apple iOS devices (AirPrint): Open the item to print, and select the Action icon.
Select Print, select the printer, and then select Print.
Newer Android devices (4.4 or newer): Open the item to print, and select the Menu
button. Select Print, select the printer, and select Print.
Some devices require downloading the HP Print Service plugin app from the Google
Play store.
Older Android Devices (4.3 or older): Download the HP ePrint app from the Google
Play store.
Windows Phone: Download the HP AiO Remote app from the Windows Store.
Mobile and wireless printing (optional)
Learn more about mobile printing
To learn more about other mobile printing options,
including additional ePrint solutions, scan the QR code,
or see the “Mobile printing” section of the user guide.
HP Wireless Direct (wireless models only)
HP Wireless Direct enables close-proximity printing from a wireless mobile device
directly to an HP Wireless Direct-enabled printer without requiring a connection to a
network or the Internet.
Enable HP Wireless Direct
1. On the printer control panel, touch the Wireless button. Touch Wireless Menu,
and then touch Wireless Direct.
2. Touch On/O, and then touch On.
3. For secure printing, touch Security, and then touch On. Note the passphrase that
displays. Use this passphrase to allow access to the mobile devices.
To allow unsecured printing, touch Security, and then touch O.
For more information on wireless printing and wireless setup, go to
www.hp.com/go/wirelessprinting.
2
Page 3
9.
Use HP ePrint via email to print documents by sending them as an email attachment to the printer’s email address from any email enabled device, even from devices that are not
on the same network.
To use HP ePrint via email, the printer must meet these requirements:
• The printer must be connected to a wired or wireless network and have
Internet access.
• HP Web Services must be enabled on the printer, and the printer must be
registered with HP Connected.
10.
Set up HP ePrint via email (optional)
Set up scan features for printers on a network (wireless
Enable HP Web Services (wireless models only)
1. From the Home screen on the printer control panel, touch the Web Services
button.
2. Touch the Enable Web Services button. The printer enables Web Services, and
then prints an information page. The information page contains a printer code
necessary to register the HP printer at HP Connected.
3. Go to www.hpconnected.com to create an HP ePrint account and complete the
setup process.
models only - optional)
The printer includes Scan to E-mail and Scan to Network Folder features that scan les and send them as an email attachment or save them in a folder on the network.
The printer must be connected to a wired or wireless network. To congure these options, rst obtain the following information:
• For the Scan to Email feature, obtain the SMTP server name, SMTP port number, and authentication information. Contact the email/Internet service provider or system
administrator for this information. SMTP server names and port names are typically easy to nd by doing an Internet search. For example, search for terms like “gmail smtp
server name” or “yahoo smtp server name.”
• For the Scan to Network Folder feature, conrm that a shared network folder with proper permissions is set up, and know the path to that folder on the network.
NOTE: For more help on setting up Scan to Email and Scan to Network Folder, see the User Guide, or go to www.hp.com/support/colorljMFPM225 or
www.hp.com/support/colorljMFPM226, and search using keywords “scan to email” or “scan to network folder.”
Windows
Some HP products include driver installation from a software CD. At the end
of this installation is an option to Setup Scan to Folder and Email. The setup
wizards include the options for basic conguration.
Scan to Email Setup Wizard
1. Click Start, and then click Programs.
2. Click HP, click the name of the product, and then click
Scan to E-mail Wizard.
3. In the Outgoing Email Proles dialog, click the New button.
The Scan to Email Setup dialog opens.
4. On the 1. Start page, enter the Email Address and Display Name, and
then click Next. Creating a security PIN is optional.
5. On the 2. Authenticate page, enter the SMTP Server and Por t Number.
NOTE: In most cases, the default port number does not need to
be changed.
6. If you are using Google™ Gmail for email service, select the Always use
secure connection (SSL/TLS) check box.
7. If the SMTP server requires authentication to send an email, select the
Email Log-in Authentication check box, and then enter the user ID and
password. Click Next.
8. On the 4. Finish page, verify all the settings are correct, and click Finish.
Scan to Network Folder Setup Wizard
1. Click Start, and then click Programs.
2. Click HP, click the name of the product, and then click Scan to Network
Folder Wizard.
3. In the Network Folder Proles dialog, click the New button.
The Scan to Network Folder Setup dialog opens.
4. On the 1. Start page, enter the Display Name and Destination Folder,
and then click Next.
TIP: Click the Browse button to locate the folder.
5. To create a shortcut to the network folder on the computer desktop,
select the Create a Desktop shortcut to the network folder check box,
and click Next. Creating a security PIN is optional.
6. On the 2. Authenticate page, enter the Windows® User name and
Password, and click Next.
7. On the 3. Congure page, make sure that the default scan settings are
correct, and then enter a lename prex in the Filename Prex eld,
and click Next.
8. On the 4. Finish page, verify all the settings are correct, and click
Save and Test.
9. Click Finish to complete the conguration.
OS X
Open the HP Utility by clicking the HP Utility icon on the Dock, or click the
Go menu, and then double-click HP Utility.
Scan to Email
1. Click the System tab, then click the Administration link, and set the
Scan to Email option to On.
2. Click the Scan tab, then click the Outgoing E-mail Proles link, and click
the New button.
3. In the E-mail Address area, ll in the required elds.
4. In the SMTP Server Settings area, ll in the required elds.
NOTE: In most cases, the default port number does not need to be
changed.
5. If the SMTP server requires authentication to send an email, ll in the
required elds in the SMTP Authentication area. Creating a security PIN
is optional.
6. Congure email preferences in the E-mail Message Preferences area.
7. Review all the information, and then click Save and Test.
Scan to Network Folder
1. Click the System tab, then click the Administration link, and set the
Scan to Network Folder option to On.
2. Click the Scan tab, make sure the Network Folder Setup link is
highlighted.
3. On the Network Folder Conguration page, click the New button.
4. In the Network Folder Conguration area, ll in the required elds.
Creating a security PIN is optional.
5. In the Scan Settings area, ll in the required elds.
6. Review all the information, and then click Save and Test.
3
Page 4
11.
Set up fax (optional)
11.1 11.2
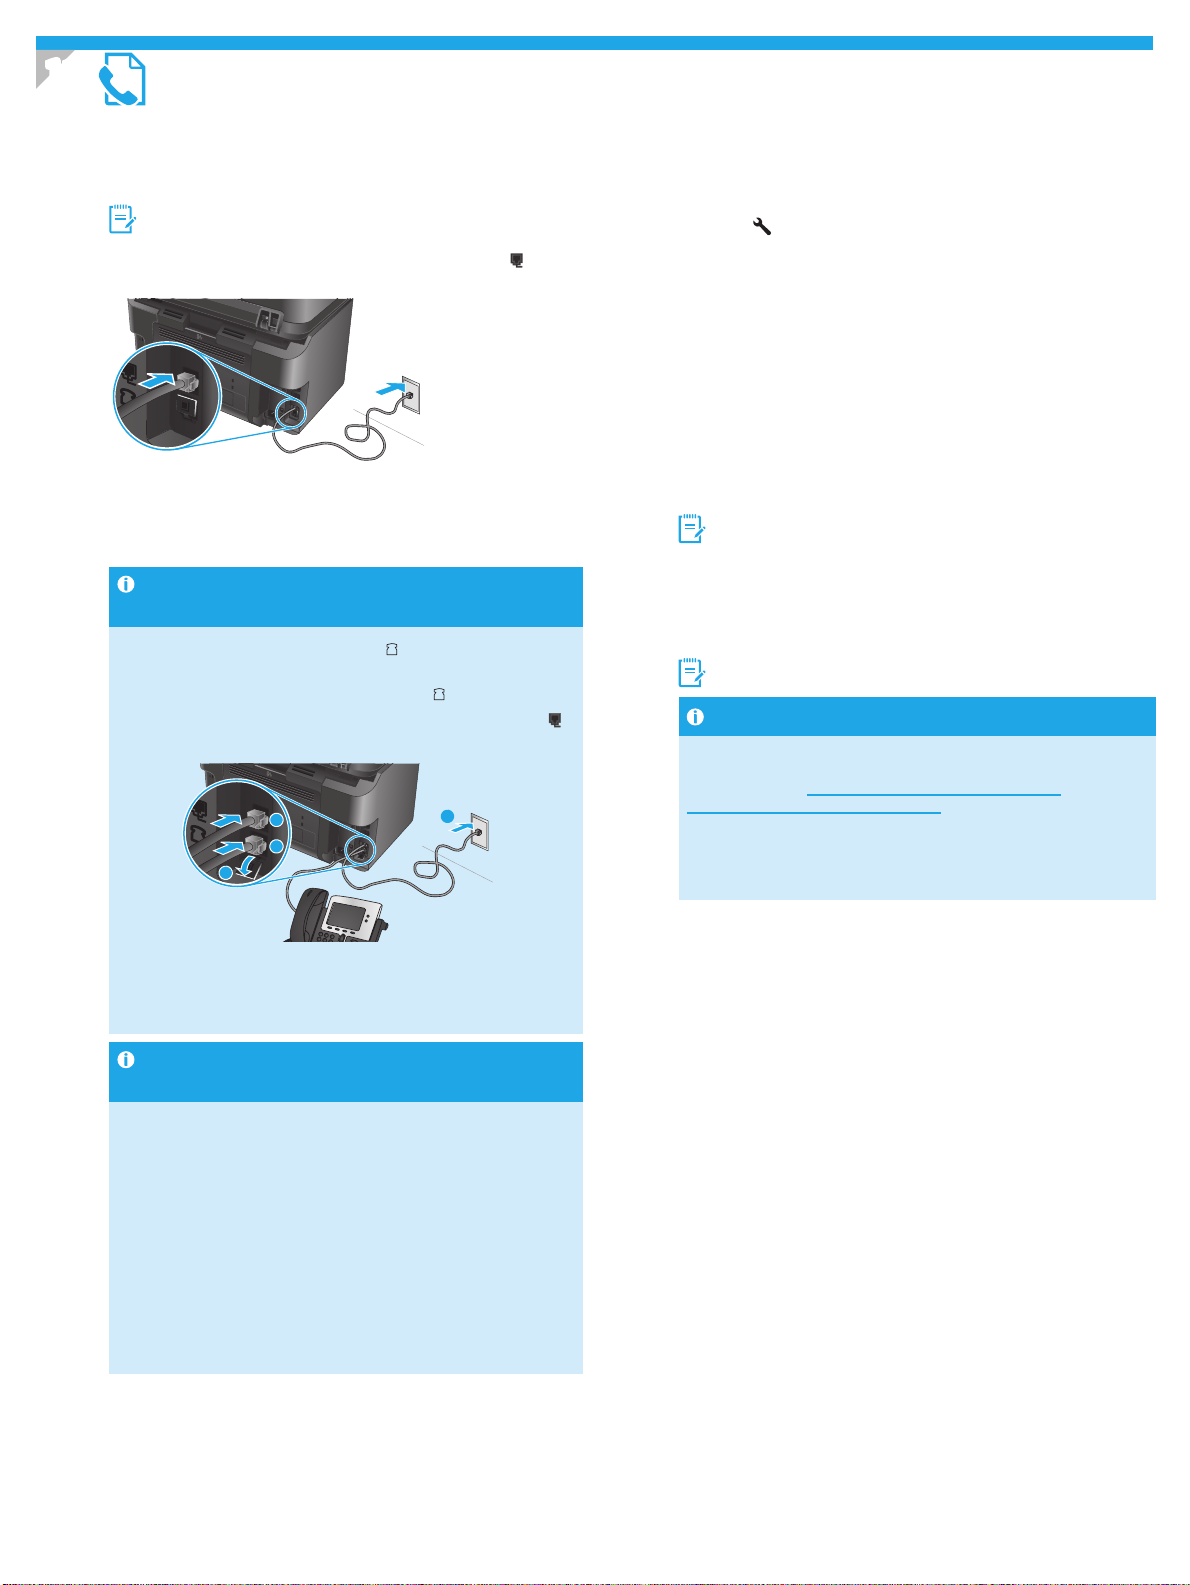
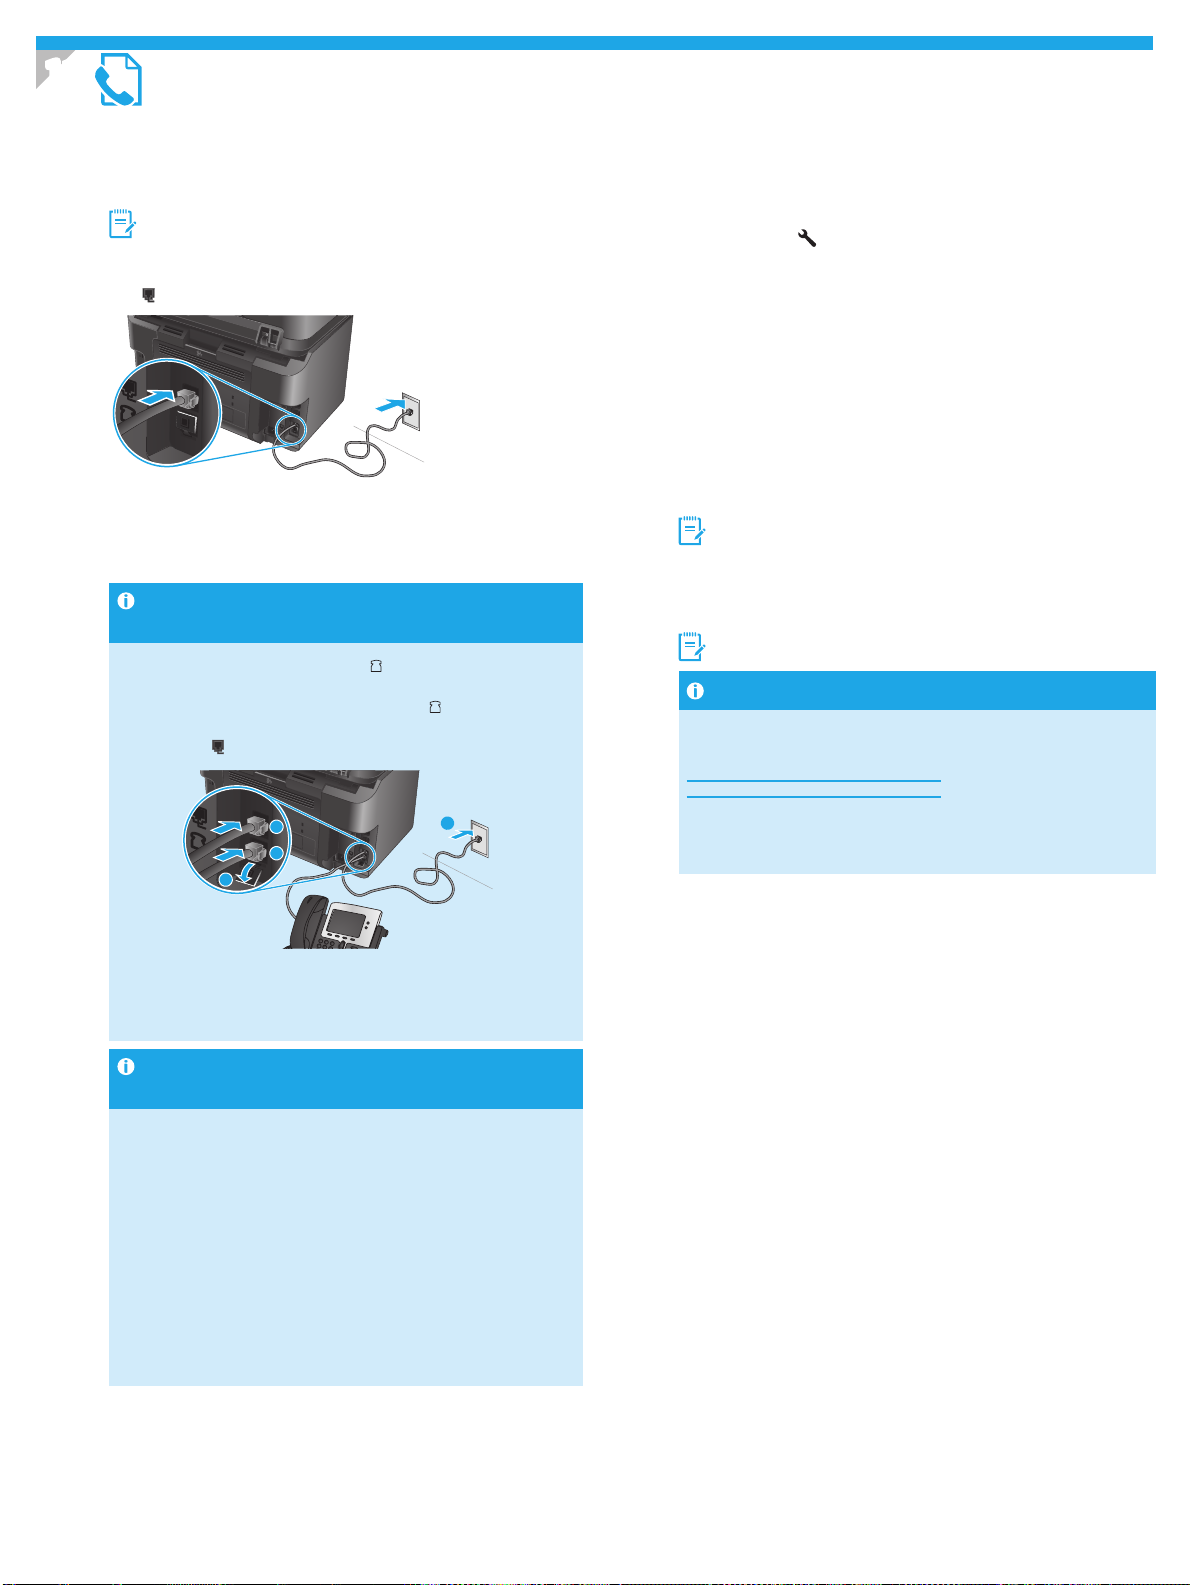
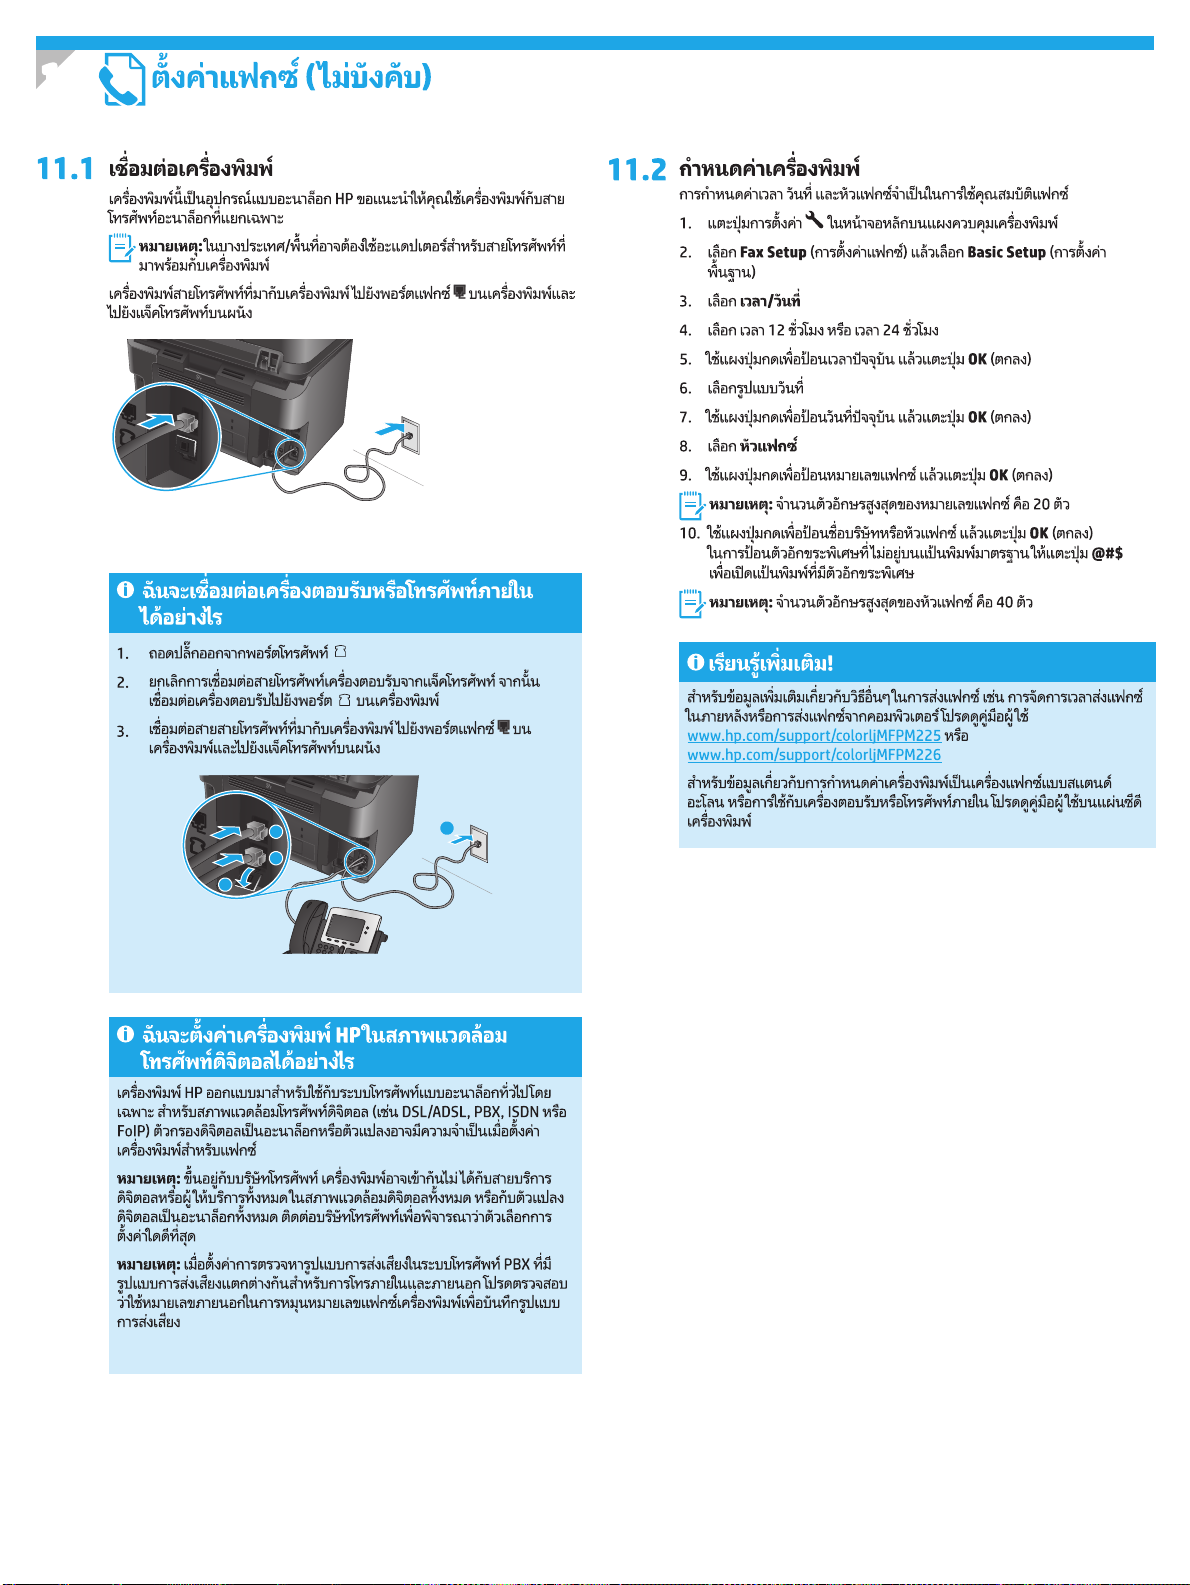
Connect the printer
The printer is an analog device. HP recommends using the printer on a
dedicated analog telephone line.
NOTE: Some countries/regions might require an adapter for the
phone cord that came with the printer.
Connect the phone cord that came with the printer to the Fax
the printer and to the telephone jack on the wall.
port on
How do I connect an answering machine or
extension phone?
1. Remove the plug from the phone port .
2. Disconnect the answering machine phone cord from the phone
jack, and then connect it to the phone port
3. Connect the phone cord that came with the printer to the fax port
on the printer and to the telephone jack on the wall.
3
2
1
on the printer.
3
Congure the printer
Conguring the fax time, date, and header settings is required to use the
fax feature.
1. From the Home screen on the printer control panel, touch the
Setup
2. Select Fax Setup, and then select Basic Setup.
3. Select Time/Date.
4. Select the 12-hour clock or 24-hour clock.
5. Use the keypad to enter the current time, and then touch the
OK button.
6. Select the date format.
7. Use the keypad to enter the current date, and then touch the
OK button.
8. Select Fax Header.
9. Use the keypad to enter the fax number, and then touch the
OK button.
NOTE: The maximum number of characters for the fax number
is 20.
10. Use the keypad to enter your company name or header, and then
touch the OK button.
To enter special characters that are not on the standard keypad,
touch the @#$ button to open a keypad that contains special
characters.
NOTE: The maximum number of characters for the fax header is 40.
button.
Learn more!
For more information about other ways to send faxes, such as
scheduling a fax to be sent later or sending faxes from a computer,
see the User Guide www.hp.com/support/colorljMFPM225 or
www.hp.com/support/colorljMFPM226.
For information about conguring the printer as a stand-alone fax
machine, or for use with an answering machine or extension phone,
see the User Guide on the printer CD.
How do I set up HP printers in digital phone
environments?
HP printers are designed specically for use with traditional analog phone
services. For a digital phone environment (such as DSL/ADSL, PBX, ISDN,
or FoIP), digital-to-analog lters or converters might be necessary when
setting up the printer for fax.
Note: Depending on the phone company, the printer might not be
compatible with all digital service lines or providers, in all digital
environments, or with all digital-to-analog converters. Contact the phone
company to determine which setup options are best.
Note: When setting up ring pattern detection in a PBX phone system
that has dierent ring patterns for internal and external calls, make sure
to dial the printer fax number using an external number for recording
the ring pattern.
4
Page 5
Troubleshooting
User Guide
The User Guide includes printer usage and troubleshooting information. It is
available on the printer CD and on the Web:
1. Go to www.hp.com/support/colorljMFPM225 or
www.hp.com/support/colorljMFPM226.
2. Click Manuals.
For Windows, the User Guide is copied to the computer during the
recommended software installation.
Windows® XP, Windows Vista®, and Windows® 7
Click Start, select Programs or All Programs, select HP, select the folder
for the HP printer, and then select Help.
Windows® 8
On the Start screen, right-click an empty area on the screen, click All Apps
on the app bar, click the icon with the printer’s name, and then select Help.
Check for rmware updates
1. From the Home screen on the printer control panel, touch the Setup
button.
2. Scroll to and open the Service menu.
3. Select LaserJet Update.
4. Select Check for Updates Now.
Wired (Ethernet) network connection
• Verify that the printer is attached to the correct network port using a cable of
the correct length.
• Verify the lights next to the network port are lit.
• Verify the print driver is installed on the computer.
• Test the network connection by pinging the network:
Windows
Click Start > Run. Type cmd, and press Enter. Type ping,
type a space, type the printer IP address, and then press Enter.
Example IP address: 192.168.0.1
OS X
Open the Network Utility, and type the IP address in the ping pane. Press
Enter. Example IP address: 192.168.0.1
• If the window displays round-trip times, the network is working.
• If the ping does not work, try restarting the printer and recheck all of the
connection steps.
Control panel help
Touch the Help button on the printer control panel to access help topics.
Additional support resources
For HP’s all-inclusive help for the printer, go to:
www.hp.com/support/colorljMFPM225 or
www.hp.com/support/colorljMFPM226
• Solve problems
• Find advanced conguration instructions
• Download software updates
• Join support forums
• Find warranty and regulatory information
• Mobile printing resources
Wireless network connection (wireless models only)
• Verify that the network cable is not connected. The printer cannot connect to
a wireless network when a network cable is connected.
• Verify that the printer and wireless router are turned on and have power. Also
make sure the wireless switch is turned on.
• Verify that the printer is within the range of the wireless network. For most
networks, the printer must be within 30 m (100 ft) of the wireless access
point (wireless router).
• Verify the print driver is installed on the computer.
• Verify that the computer and printer connect to the same wireless
network.
• For Mac, verify that the wireless router supports Bonjour.
• Restart the wireless router.
Perform the wireless diagnostic test
1. From the Home screen on the printer control panel, touch the
Setup
2. Select Self Diagnostics, and then select Run Wireless Test.
button.
Fax troubleshooting
Verify the physical connection
• Verify that the phone cord is connected to the fax
printer and to the wall jack.
• For an extension phone or other additional device, verify the phone cord is
connected to the telephone
device.
• If outgoing phone calls fail because no dial tone is detected or the line is busy,
connect to a dierent phone line.
• For Fax over IP service, reduce the fax speed and turn o Error Correction
Mode from the Fax Settings menu on the printer control panel.
port on the back of the printer and to the
port on the back of the
Verify the printer fax settings
• To use a voice-mail service from the phone company or service provider,
make sure that the printer Rings to Answer setting is set to be fewer rings
than the telephone answering machine.
• If multiple phone numbers are assigned to the same physical phone line and
the line is shared by multiple devices, make sure that the printer is set to the
correct distinctive ring setting. Use a setting in which the printer answers
faxes and ignores other ring types.
• Conguring the Fax Speed setting to Medium (V.17) or Slow (V.29) can also
improve your ability to send a fax.
Perform the fax diagnostic test
1. From the Home screen on the printer control panel, touch the
Setup
button.
2. Select Self Diagnostics, and then select Run Fax Test.
5
Page 6
English ................... 1
Bahasa Indonesia ......6
한국어 .................... 11
ไทย ......................... 16
繁体中文 ................ 21
Tiếng Việt ............... 26
Panduan Persiapan
LaserJet Pro MFP M225 dan M226
PENTING:
Ikuti Langkah 1-3
pada poster pengaturan
perangkat keras printer,
lalu lanjutkan dengan
Langkah 4 pada halaman
berikutnya.
www.hp.com/support/colorljMFPM225 www.register.hp.com
www.hp.com/support/colorljMFPM226
4. Pengaturan awal pada panel kontrol
Setelah menghidupkan printer, tunggu proses inisialisasi. Untuk menavigasikan panel kontrol
layar sentuh, gunakan gerakan sentuh, geser, dan gulir. Ikuti perintah pada panel kontrol untuk
mengkongurasi pengaturan berikut:
• Bahasa
• Lokasi
• Pengaturan Default
Dalam Default Settings (Pengaturan Default), pilih salah satu dari pilihan berikut:
• Dikelola sendiri: Pengaturan default yang dioptimalkan untuk pengalaman pengaturan,
kongurasi, danpembaruan terpandu.
• Dikelola TI: Pengaturan default yang dioptimalkan untuk kemampuan pengelolaan cepat
dengan meningkatkan keamanan.
Pengaturan dapat disesuaikan secara penuh setelah pengaturan awal.
CATATA N: Pilih Print Information Page (Halaman Informasi
Cetak) untuk mencetak halaman yang menunjukkan cara
mengubah pengaturan default.
CATATA N: Sentuh tombol Bantuan pada panel kontrol printer
untuk mengakses topik bantuan.
5. Memilih metode sambungan dan persiapan penginstalan perangkat lunak
Sambungan USB secara langsung antara
printer dan komputer
Gunakan kabel USB jenis A-ke-B.
Windows
1. Kecuali untuk Windows 8, 8.1, atau RT, jangan sambungkan kabel USB
sebelum menginstal perangkat lunak. Jika telah tersambung, lepas kabel
USB terlebih dulu sebelum melanjutkan. Penginstalan perangkat lunak
akan meminta kabel disambungkan pada saat yang tepat.
2. Lanjutkan dengan “6. Mencari atau men-download le instalan
perangkat lunak”.
CATATAN: Saat penginstalan perangkat lunak berlangsung, tetapkan
pilihan ke "Directly connect this computer using a USB cable."
(Sambungkan komputer ini secara langsung menggunakan kabel USB).
Mac
1. Sambungkan kabel USB antara komputer dan printer sebelum
menginstal perangkat lunak.
2. Lanjutkan dengan “6. Mencari atau men-download le instalan
perangkat lunak”.
Sambungan jaringan berkabel (Ethernet)
Gunakan kabel jaringan standar.
1. Sambungkan kabel jaringan ke printer dan jaringan. Tunggu beberapa
menit agar printer mendapatkan alamat jaringan.
2. Panel kontrol LCD: Tekan tombol Setup (Pengaturan) . Buka menu
Network Setup (Pengaturan Jaringan), lalu pilih Show IP Address
(Tampilkan Alamat IP) untuk menampilkan alamat IP atau nama host.
Panel kontrol layar sentuh: Dari layar Awal pada panel kontrol
produk, sentuh tombol Network (Jaringan)
alamat IP atau nama host.
3. Jika alamat IP tercantum dalam daftar, maka sambungan jaringan
telah ditetapkan. Jika tidak, tunggu beberapa menit, lalu coba lagi.
Catat alamat IP untuk digunakan selama penginstalan perangkat
lunak. Contoh alamat IP: 192.168.0.1
Untuk mengkongurasi alamat IP secara manual, lihat
“Kongurasikan alamat IP secara manual”.
4. Lanjutkan dengan "6. Mencari atau men-download le instalan
perangkat lunak".
CATATAN: Saat penginstalan perangkat lunak berlangsung, tetapkan
pilihan ke “Connect through a network” (Sambungkan melalui jaringan).
untuk menampilkan
Sambungan jaringan nirkabel internal
(hanya model nirkabel)
1. Untuk menyambungkan printer ke jaringan nirkabel (Wi-Fi), pada panel
kontrol printer, sentuh tombol Wireless (Nirkabel) . Sentuh Wireless
Menu (Menu Nirkabel), lalu sentuh Wireless Setup Wizard (Wizard
Pengaturan Nirkabel).
2. Pilih nama jaringan dari daftar SSID, atau masukkan nama jaringan jika
tidak tercantum dalam daftar.
3. Gunakan keyboard untuk memasukkan frasa akses, lalu sentuh
tombolOK.
4. Tunggu sementara printer menetapkan sambungan jaringan.
5. Pada panel kontrol printer, sentuh tombol Network (Jaringan) . Jika
alamat IP tercantum dalam daftar, maka sambungan jaringan telah
ditetapkan. Jika tidak, tunggu beberapa menit, lalu coba lagi. Catat
alamat IP untuk digunakan selama penginstalan perangkat lunak.
Contoh alamat IP: 192.168.0.1
6. Untuk mencetak dari komputer, lanjutkan dengan "6. Mencari atau
men-download le instalan perangkat lunak". Untuk mencetak dari
telepon atau hanya tablet, lanjutkan dengan "8. Pencetakan seluler
dan nirkabel".
CATATA N: Saat penginstalan perangkat lunak berlangsung, tetapkan
pilihan ke Help me set up a rst-time wireless connection (Bantu saya
mengatur sambungan nirkabel untuk pertama kalinya).
Kongurasikan alamat IP secara manual
Lihat Panduan Pengguna printer untuk mendapatkan informasi tentang cara
mengkongurasi alamat IP secara manual www.hp.com/support/colorljMFPM225
atau www.hp.com/support/colorljMFPM226.
6
Page 7

6. Mencari atau men-download le instalan perangkat lunak
Metode 1: Download dari HP Easy Start
(Windows dan OS X)
1. Kunjungi 123.hp.com/laserjet, lalu klik Download.
2. Ikuti perintah dan pesan cepat di layar untuk menyimpan le ke komputer.
3. Jalankan le perangkat lunak dari folder tempat menyimpan le, lalu
lanjutkan dengan "7. Menginstal perangkat lunak".
Metode 2: Download dari situs Web dukungan printer
(Windows dan OS X)
1. Kunjungi www.hp.com/support/colorljMFPM225 atau
www.hp.com/support/colorljMFPM226.
2. Pilih Software and drivers (Perangkat lunak dan driver).
3. Download perangkat lunak untuk model printer dan sistem operasi Anda.
4. Jalankan le penginstalan dengan mengklik le .exe atau .zip bila perlu.
Metode 3: Instal dari CD printer
Untuk Windows, le penginstalan perangkat lunak tersedia di CD yang disertakan
bersama printer.
Untuk OS X, le penginstal di CD berisi link untuk men-download le dari Web.
1. Masukkan CD printer ke komputer.
2. Lanjutkan dengan "7. Menginstal perangkat lunak".
(hanya Windows)
7. Menginstal perangkat lunak
Solusi lengkap Windows
1. Masukkan CD printer ke komputer, atau jalankan le instalan perangkat
lunak yang telah di-download dari Web.
2. Penginstal perangkat lunak menemukan bahasa sistem operasi, lalu
menampilkan menu utama program penginstalan dalam bahasa yang
sama. Saat melakukan penginstalan dari CD, jika program penginstal
tidak dimulai setelah 30 detik, buka drive CD pada komputer, lalu jalankan
le SETUP.EXE.
3. Layar Software Selection (Pilihan Perangkat Lunak) merinci perangkat
lunak yang akan diinstal.
• Penginstalan perangkat lunak yang direkomendasikan mencakup
driver cetak dan perangkat lunak untuk semua tur printer yang
tersedia.
• Untuk menyesuaikan perangkat lunak yang diinstal, klik link
Customize software selections (Sesuaikan pilihan perangkat lunak).
Setelah selesai, klik tombol Next (Berikutnya).
4. Ikuti petunjuk di layar untuk menginstal perangkat lunak.
5. Bila diminta untuk memilih jenis sambungan, tetapkan pilihan yang tepat
untuk jenis sambungan.
• Directly connect this computer using a USB cable (Sambungkan
komputer ini secara langsung menggunakan kabel USB)
• Connect through a network (Sambungkan melalui jaringan)
• Help me set up a rst-time wireless connection (Bantu saya
mengatur sambungan nirkabel untuk pertama kalinya)
CATATA N: Saat menyambung melalui jaringan, cara termudah untuk
menemukan printer adalah dengan memilih Automatically nd my
printer on the network (Temukan printer saya di jaringan secara
otomatis).
6. (Opsional) Hanya untuk model nirkabel, pada akhir proses
penginstalan perangkat lunak, kongurasikan tur faks dan pindai
dengan menggunakan Fax Setup Wizard (Wizard Pengaturan Faks),
Scan to E-mail Wizard (Wizard Pindai ke E-mail), dan Scan to Network
Folder Wizard (Wizard Pindai ke Folder Jaringan). Cara ini tepat untuk
mengkongurasikan tur tersebut. Untuk informasi lebih lanjut, lihat
"10. Mengatur tur pindai untuk printer di jaringan (hanya model
nirkabel - opsional)".
Solusi lengkap OS X
1. Jalankan le instalan perangkat lunak .dmg yang di-download dari web.
2. Penginstal perangkat lunak menemukan bahasa sistem operasi, lalu
menampilkan menu utama program penginstalan dalam bahasa
yangsama.
3. Layar Installation Options (Pilihan Penginstalan) merinci perangkat
lunak yang akan diinstal.
• Untuk penginstalan standar, klik tombol Install (Instal) sekarang.
• Untuk penginstalan kustom, klik tombol Customize (Sesuaikan).
Pada layar yang terbuka, pilih komponen yang akan diinstal, lalu klik
tombol Install (Instal).
4. Ikuti petunjuk di layar untuk menginstal perangkat lunak.
5. Pada akhir proses penginstalan perangkat lunak, gunakan
HPUtility Setup Assistant (Asisten Pengaturan HP Utility) untuk
mengkongurasi pilihan printer.
Penginstalan dasar OS X
Untuk menginstal driver cetak dan faks dasar tanpa menjalankan perangkat
lunak HP solusi lengkap dari CD atau melalui download hp.com, ikuti
langkah-langkah berikut:
1. Sambungkan printer ke komputer atau jaringan.
2. Dari System Preferences (Preferensi Sistem), klik Printers and Scanners
(Printer dan Pemindai), klik tombol plus pada bagian kiri bawah, lalu pilih
M225 atau M226 menggunakan driver AirPrint atau HP Printer.
Readiris Pro untuk HP
Download perangkat lunak gratis ini untuk mengaktifkan tur pindai ekstra,
termasuk OCR (Optical Character Recognition atau Pengenalan Karakter
Optik). Saat penginstalan perangkat lunak berlangsung, klik item More
Options (Pilihan Lainnya) di jendela kiri, lalu pilih Web Support (Dukungan
Web) untuk men-download perangkat lunak ini.
Untuk men-download perangkat lunak dari Web, kunjungi
www.hp.com/support/colorljMFPM225 atau
www.hp.com/support/colorljMFPM226, pilih Drivers (Driver), lalu klik
Software & Firmware (Perangkat Lunak & Firmware).
8.
Untuk mencetak dari ponsel atau tablet, sambungkan perangkat tersebut ke
jaringan nirkabel yang juga digunakan untuk menyambungkan printer.
Perangkat Apple iOS (AirPrint): Buka item yang akan dicetak, lalu pilih ikon
Action(Tindakan). Pilih Print (Cetak), pilih printer, lalu pilih Print (Cetak).
Perangkat Android versi lebih baru (4.4 atau versi yang lebih baru): Buka item
yang akan dicetak, lalu pilih tombol Menu. Pilih Print (Cetak), pilih printer, lalu pilih
Print (Cetak).
Perangkat tertentu mengharuskan Anda men-download aplikasi plugin HP Print
Service dari Google Play Store.
Perangkat Android versi lebih lama (4.3 atau versi yang lebih lama): Download
aplikasi HP ePrint dari Google Play Store.
Windows Phone: Download aplikasi HP AiO Remote dari Windows Store.
Pencetakan seluler dan nirkabel (opsional)
Selengkapnya tentang pencetakan seluler
“Untuk mengetahui selengkapnya tentang pilihan
pencetakan seluler lainnya, termasuk solusi tambahan
ePrint, pindai kode QR, atau lihat bagian “Pencetakan
Seluler” dalam panduan pengguna.”
HP Wireless Direct (hanya model nirkabel nw dan dw)
HP Wireless Direct dapat digunakan untuk pencetakan jarak dekat dari perangkat
bergerak nirkabel secara langsung ke printer yang mendukung HP Wireless Direct
tanpa memerlukan sambungan ke jaringan atau Internet.
Mengaktifkan HP Wireless Direct
1. Pada panel kontrol printer, sentuh tombol Wireless (Nirkabel)
Wireless Menu (Menu Nirkabel), lalu Wireless Direct (Langsung Nirkabel).
2. Sentuh On/O (Aktif/Nonaktif), lalu sentuh On (Aktif).
3. Untuk pencetakan yang aman, sentuh Security (Keamanan), lalu sentuh On
(Aktif). Catat frasa akses yang ditampilkan. Gunakan frasa akses tersebut
untuk mengizinkan akses ke perangkat bergerak. Untuk membolehkan
pencetakan yang tidak aman, sentuh Security (Keamanan), lalu sentuh O
(Nonaktif).
Untuk informasi selengkapnya tentang pencetakan nirkabel dan pengaturan
nirkabel, kunjungi www.hp.com/go/wirelessprinting.
7
. Sentuh
Page 8
9.
Gunakan HP ePrint via email untuk mencetak dokumen dengan mengirimnya sebagai lampiran ke alamat email printer dari perangkat apa pun yang mendukung email,
bahkan dari perangkat di jaringan yang berbeda.
Untuk menggunakan HP ePrint via email, printer harus memenuhi persyaratan ini:
• Printer harus disambungkan ke jaringan berkabel atau nirkabel dan memiliki
akses Internet.
• HP Web Services harus diaktifkan pada printer ini, lalu printer harus terdaftar
di HP Connected.
10.
Mengatur HP ePrint via email (opsional)
Mengkongurasi tur pindai untuk printer di jaringan
Mengaktifkan HP Web Services (hanya model nirkabel)
1. Dari layar Awal pada panel kontrol produk, sentuh tombol Web Services
(Layanan Web)
2. Sentuh tombol Enable Web Services (Aktifkan Layanan Web). Printer akan
mengaktifkan Layanan Web, lalu mencetak halaman informasi. Halaman
informasi berisi kode printer yang digunakan untuk mendaftarkan printer
HPdi HP Connected.
3. Kunjungi www.hpconnected.com untuk membuat akun HP ePrint dan
menyelesaikan proses pengaturan.
.
(hanya model nirkabel - opsional)
Printer mencakup tur Scan to E-mail (Pindai ke E-mail) dan Scan to Network Folder (Pindai ke Folder Jaringan) yang dapat memindai le dan mengirimnya sebagai
lampiran email atau menyimpan dalam folder di jaringan. Produk harus tersambung ke jaringan berkabel atau nirkabel. Untuk mengkongurasi pilihan berikut, dapatkan
dulu informasi berikut:
• Untuk tur Scan to Email (Pindai ke Email), dapatkan nama server SMTP, nomor port SMTP, dan informasi otentik. Hubungi penyedia layanan email/Internet atau
administrator sistem untuk informasi ini. Nama server SMTP dan nama port biasanya mudah ditemukan dengan melakukan pencarian di Internet. Misalnya, gunakan
istilah seperti "gmail smtp server name" atau "yahoo smtp server name".
• Untuk tur Scan to Network Folder (Pindai ke Folder Jaringan), konrmasikan bahwa folder jaringan bersama dengan izin yang tepat telah dikongurasi, lalu ketahui
jalur ke folder tersebut di jaringan.
CATATA N: Untuk bantuan selengkapnya tentang cara mengkongurasi Scan to Email (Pindai ke Email) dan Scan to Network Folder (Pindai ke Folder Jaringan),
lihatPanduan Pengguna atau kunjungi www.hp.com/support/colorljMFPM225 atau www.hp.com/support/colorljMFPM226, lalu cari menggunakan kata kunci
"scantoemail" atau "scan to network folder".
Windows
Beberapa produk HP menyertakan instalan driver dari CD perangkat lunak.
Pada akhir penginstalan tersedia pilihan untuk Setup Scan to Folder and
Email (Konfigurasikan Pindai ke Folder dan Email). Wizard pengaturan
menyertakan pilihan untuk kongurasi dasar.
Wizard Pengaturan Pindai ke Email
1. Klik Start (Mulai), lalu klik Programs (Program).
2. Klik HP, klik nama produk, lalu klik Scan to Email Wizard (Wizard
Pindai ke Email).
3. Pada dialog Outgoing E-mail Proles (Prol Email Keluar), klik tombol
New (Baru). Kotak dialog Scan to Email Setup (Pengaturan Pindai ke
Email) akan terbuka.
4. Pada halaman 1. Start (1. Mulai), masukkan Email Address (Alamat
Email) dan Display Name (Nama Tampilan), lalu klik Next (Berikutnya).
Pembuatan PIN keamanan adalah opsional.
5. Pada halaman 2. Authenticate (2. Otentikasikan), masukkan SMTP
Server (Server SMTP) dan Port Number (Nomor Port).
CATATA N: Pada sebagian besar kasus, nomor port default tidak
perludiganti.
6. Jika Anda menggunakan Google™ Gmail sebagai layanan email,
centang kotak Always use secure connection (SSL/TLS) (Selalu
gunakan sambungan aman (SSL/TLS)).
7. Jika SMTP memerlukan otentikasi untuk mengirim email, centang
kotak Email Log in Authentication (Otentikasi Log In Email), lalu
masukkan ID pengguna dan sandi. Klik Next (Berikutnya).
8. Pada halaman 4. Finish (4. Selesai), verikasikan semua pengaturan
sudah benar, lalu klik Finish (Selesai).
Wizard Pengaturan Pindai ke Folder Jaringan:
1. Klik Start (Mulai), lalu klik Programs (Program).
2. Klik HP, klik nama produk, lalu klik Scan to Network Folder Wizard
(Wizard Pindai ke Folder Jaringan).
3. Pada dialog Network Folder Proles (Prol Folder Jaringan),
kliktombol New (Baru). Dialog Scan to Network Folder Setup
(Pengaturan Pindai ke Folder Jaringan) akan terbuka.
4. Pada halaman 1. Start (1. Mulai), masukkan Display Name (Nama
Tampilan) dan Destination Folder (Folder Tujuan), lalu klik Next
(Berikutnya).
TIPS: Klik tombol Browse (Telusuri) untuk menemukan folder.
5. Untuk membuat pintasan ke folder jaringan pada desktop komputer,
centang kotak Create a Desktop shortcut to the network folder
(Buat pintasan Desktop ke folder jaringan), lalu klik Next (Berikutnya).
Pembuatan PIN keamanan adalah opsional.
6. Pada halaman 2. Authenticate (2. Otentikasikan), masukkan Nama
pengguna dan Sandi Windows®, lalu klik Next (Berikutnya).
7. Pada halaman 3. Congure (3. Kongurasikan), pastikan pengaturan
pindai default sudah benar, masukkan preks nama le pada kolom
Filename Prex (Preks Nama File), lalu klik Next (Berikutnya).
8. Pada halaman 4. Finish (4. Selesai), verikasikan semua pengaturan
sudah benar, lalu klik Save and Test (Simpan dan Uji).
9. Klik Finish (Selesai) untuk menyelesaikan kongurasi.
OS X
Buka HP Utility dengan mengklik ikon HP Utility pada Dock, atau klik menu
Go (Buka), lalu klik dua kali HP Utility.
Pindai ke Email
1. Klik tab System (Sistem), klik link Administration (Administrasi), lalu
atur pilihan Scan to Email (Pindai ke Email) ke On (Aktif).
2. Klik tab Scan (Pindai), klik link Outgoing Email Proles (Prol Email
Keluar), lalu klik tombol New (Baru).
3. Pada area E-mail Address (Alamat Email), isi kolom yang diperlukan.
4. Pada area SMTP Server Settings (Pengaturan Server SMTP), isi kolom
yang diperlukan.
CATATA N: Pada sebagian besar kasus, nomor port default tidak perlu
diganti.
5. Jika server SMTP memerlukan otentikasi untuk mengirim email, isi
kolom yang diperlukan di area SMTP Authentication (Otentikasi
SMTP). Pembuatan PIN keamanan adalah opsional.
6. Kongurasikan preferensi email di area E-mail Message Preferences
(Preferensi Pesan Email).
7. Periksa semua informasi, lalu klik Save and Test (Simpan dan Uji).
Pindai ke Folder Jaringan
1. Klik tab System (Sistem), klik link Administration (Administrasi), lalu
atur pilihan Scan to Network Folder (Pindai ke Folder Jaringan) ke
On(Aktif).
2. Klik tab Scan (Pindai), pastikan link Network Folder Setup (Pengaturan
Folder Jaringan) disorot.
3. Pada halaman Network Folder Conguration (Kongurasi Folder
Jaringan), klik tombol New (Baru).
4. Pada area Network Folder Conguration (Kongurasi Folder Jaringan),
isi kolom yang diperlukan. Pembuatan PIN keamanan adalah opsional.
5. Di area Scan Settings (Pengaturan Pindai), isi kolom yang diperlukan.
6. Periksa semua informasi, lalu klik Save and Test (Simpan dan Uji).
8
Page 9
11.
Mengatur faks (opsional)
11.1
Menyambungkan printer
Printer ini adalah perangkat analog. HP menganjurkan penggunaan
printer pada saluran telepon analog khusus.
CATATA N: Adapter mungkin diperlukan di beberapa negara/
kawasan tertentu untuk menggunakan kabel telepon yang
diberikan bersama printer.
Sambungkan kabel telepon yang diberikan bersama printer ke port
Faks
pada printer dan ke soket telepon di dinding.
Bagaimana menyambungkan mesin penjawab
atau telepon ekstensi?
1. Lepas konektor dari port telepon .
2. Lepas sambungan kabel telepon mesin penjawab dari soket
telepon, lalu sambungkan ke port telepon
3. Sambungkan kabel telepon yang diberikan bersama printer ke
port faks
pada printer dan ke soket telepon di dinding.
3
2
1
pada printer.
3
11.2
Mengkongurasi Printer
Mengkongurasi pengaturan waktu, tanggal, dan kepala faks diperlukan
agar dapat menggunakan tur faks.
1. Dari layar Awal pada panel kontrol printer, sentuh tombol Setup
(Pengaturan)
2. Pilih Fax Setup (Pengaturan Faks), lalu pilih Basic Setup
(Pengaturan Dasar).
3. Pilih Time/Date (Waktu/Tanggal).
4. Pilih format waktu 12 jam atau 24 jam.
5. Gunakan keypad untuk memasukkan waktu saat ini, lalu sentuh
tombol OK.
6. Pilih format tanggal.
7. Gunakan keypad untuk memasukkan tanggal sekarang, lalu sentuh
tombol OK.
8. Pilih Fax Header (Kepala Faks).
9. Gunakan keypad untuk memasukkan nomor faks, lalu sentuh
tombol OK.
CATATA N: Jumlah maksimal karakter untuk nomor faks adalah 20.
10. Gunakan keypad untuk memasukkan nama perusahaan atau kepala
faks, lalu sentuh tombol OK.
Untuk memasukkan karakter khusus yang tidak ada pada keypad
standar, sentuh tombol @#$ untuk membuka keypad yang berisi
karakter khusus.
CATATA N: Jumlah maksimal karakter untuk kepala faks adalah 40.
.
Selengkapnya!
Untuk informasi selengkapnya tentang cara lain untuk mengirim faks,
misalnya menjadwalkan faks untuk dikirim nanti atau mengirim faks
dari komputer, lihat Panduan Pengguna
www.hp.com/support/colorljMFPM225 atau
www.hp.com/support/colorljMFPM226.
Untuk informasi tentang cara mengkongurasi printer sebagai mesin
faks mandiri, atau untuk penggunaan dengan mesin penjawab atau
telepon ekstensi, lihat Panduan Pengguna pada CD printer.
Bagaimana cara mengkongurasi printer
HPdalam lingkungan telepon digital?
Printer HP dirancang khusus untuk digunakan bersama layanan
telepon analog biasa. Untuk lingkungan telepon digital (misalnya,
DSL/ADSL, PBX, ISDN, atau FoIP), lter atau konverter digital ke
analog mungkin diperlukan bila mengkongurasi printer untuk faks.
Catatan: Berdasarkan perusahaan telepon, printer mungkin tidak
kompatibel dengan semua saluran atau penyedia layanan digital,
di semua lingkungan digital, atau dengan semua konverter digital
ke analog. Hubungi perusahaan telepon untuk menentukan pilihan
pengaturan yang terbaik.
Catatan: Saat mengkongurasi deteksi pola dering dalam sistem
telepon PBX yang memiliki pola dering yang berbeda untuk panggilan
internal dan eksternal, pastikan menekan nomor faks printer
menggunakan nomor eksternal untuk merekam pola dering.
9
Page 10
Mengatasi Masalah
Panduan Pengguna
Panduan Pengguna mencakup informasi tentang penggunaan printer dan
mengatasi masalah. Tersedia pada CD printer dan web:
1. Kunjungi www.hp.com/support/colorljMFPM225 atau
www.hp.com/support/colorljMFPM226.
2. Klik Manuals (Panduan).
Untuk Windows, Panduan Pengguna disalin ke komputer saat penginstalan
perangkat lunak yang direkomendasikan berlangsung.
Windows® XP, Windows Vista®, dan Windows® 7
Klik Start (Mulai), pilih Programs (Program) atau All Programs (Semua
Program), pilih HP, pilih folder untuk printer HP Anda, lalu pilih Help
(Bantuan).
Windows® 8
Pada layar Start (Mulai), klik kanan area kosong pada layar, klik All Apps
(Semua Aplikasi) pada panel aplikasi, klik ikon dengan nama printer, lalu
pilih Help (Bantuan).
Memeriksa pembaruan rmware
1. Dari layar Awal pada panel kontrol printer, sentuh tombol Setup
(Pengaturan) .
2. Gulir dan buka menu Service (Layanan).
3. Pilih LaserJet Update (Pembaruan LaserJet).
4. Pilih Check for Updates Now (Periksa Pembaruan Sekarang).
Sambungan jaringan berkabel (Ethernet)
• Pastikan printer telah tersambung ke port jaringan yang benar
menggunakan kabel dengan panjang yang benar.
• Pastikan lampu di sebelah port jaringan telah menyala.
• Pastikan driver cetak telah terinstal di komputer.
• Uji sambungan jaringan dengan melakukan ping jaringan.
Windows
Klik Start (Mulai) > Run (Jalankan). Ketik cmd, lalu tekan Enter. Ketik ping,
ketik spasi, ketik alamat IP printer, lalu tekan Enter. Contoh alamat IP:
192.168.0.1
OS X
Buka Network Utility (Utilitas Jaringan), lalu ketik alamat IP di jendela
ping. Tekan Enter. Contoh alamat IP: 192.168.0.1
• Jika jendela menampilkan waktu respons (round-trip time), jaringan
bekerja.
• Jika ping tidak berjalan, coba hidupkan ulang printer, lalu periksa kembali
semua langkah sambungan.
Bantuan panel kontrol
Sentuh tombol Bantuan pada panel kontrol printer untuk mengakses topik
bantuan.
Sumber dukungan tambahan
Untuk bantuan secara menyeluruh dari HP terkait printer, kunjungi:
www.hp.com/support/colorljMFPM225 atau
www.hp.com/support/colorljMFPM226
• Mengatasi masalah
• Menemukan petunjuk kongurasi tingkat lanjut
• Men-download pembaruan perangkat lunak
• Mengikuti forum dukungan
• Mencari informasi jaminan dan peraturan
• Sumber pencetakan seluler
Sambungan jaringan nirkabel (hanya model
nirkabel)
• Pastikan kabel jaringan tidak tersambung. Printer tidak dapat
menyambung ke jaringan nirkabel jika kabel jaringan tersambung.
• Pastikan printer dan router nirkabel telah diaktifkan dan memiliki daya.
Pastikan juga sakelar nirkabel diaktifkan.
• Pastikan printer telah berada dalam jangkauan jaringan nirkabel. Untuk
sebagian besar jaringan, printer harus berada dalam jarak 30 m (100 kaki)
dari jalur akses nirkabel (router nirkabel).
• Pastikan driver cetak telah terinstal di komputer.
• Pastikan komputer dan printer telah tersambung ke jaringan nirkabel
yangsama.
• Untuk Mac, pastikan router nirkabel mendukung Bonjour.
• Hidupkan ulang router nirkabel.
Menjalankan pengujian diagnosis nirkabel
1. Dari layar Awal pada panel kontrol printer, sentuh tombol Setup
(Pengaturan) .
2. Pilih Self Diagnostics (Diagnosis Mandiri), lalu pilih Run Wireless Test
(Jalankan Pengujian Nirkabel).
Mengatasi masalah faks
Memastikan sambungan sik
• Pastikan kabel telepon telah tersambung ke port faks
belakang printer dan stopkontak.
• Untuk telepon ekstensi atau perangkat tambahan lain, pastikan kabel
telepon telah tersambung ke port telepon
dan perangkat.
• Jika panggilan telepon keluar gagal karena nada panggil tidak terdeteksi
atau sambungan sibuk, sambungkan ke saluran telepon lainnya.
• Untuk layanan Faks melalui IP, kurangi kecepatan faks, lalu nonaktifkan
Error Correction Mode (Mode Koreksi Kesalahan) dari menu Fax Settings
(Pengaturan Faks) pada panel kontrol printer.
di bagian belakang printer
di bagian
Memastikan pengaturan faks printer
• Untuk menggunakan layanan pesan suara dari perusahaan atau penyedia
layanan telepon, pastikan pengaturan Rings to Answer (Dering ke Jawab)
pada printer diatur ke lebih sedikit dering daripada mesin penjawab
telepon.
• Jika beberapa nomor telepon ditetapkan pada sambungan sik telepon
yang sama dan sambungan dibagi oleh beberapa perangkat, pastikan
printer telah diatur ke pengaturan dering khusus yang benar. Gunakan
pengaturan agar printer menjawab faks dan mengabaikan jenis dering
lainnya.
• Mengkongurasikan pengaturan Fax Speed (Kecepatan Faks) ke Medium
(Sedang) (V.17) atau Slow (Lambat) (V.29) juga dapat meningkatkan
kemampuan pengiriman faks.
Menjalankan pengujian diagnosis faks
1. Dari layar Awal pada panel kontrol printer, sentuh tombol Setup
(Pengaturan)
2. Pilih Self Diagnostics (Diagnosis Mandiri), lalu pilih Run Fax Test (Jalankan
Pengujian Faks).
.
10
Page 11

English .................... 1
LaserJet Pro MFP M225 및 M226
시작 설명서
중요:
프린터 하드웨어 설치
포스터의
수행한 후, 다음 페이지의
4단계를 진행하십시오.
1~3단계 를
www.hp.com/support/colorljMFPM225 www.register.hp.com
www.hp.com/support/colorljMFPM226
4. 제어판에서 초기 설정을 완료합니다
프린터를 켠 후 초기화될 때까지 기다립니다. 터치 스크린 제어판을 탐색하려면 터치,
스와이프, 스크롤 제스처를 사용합니다. 제어판에 표시되는 메시지에 따라 다음과 같은
설정을 구성합니다.
• 언어
• 위치
• 기본 설정
기본 설정 영역에서 다음 옵션 중 하나를 선택합니다.
• 자가 관리: 설정, 구성 및 업데이트에 대해 안내하기 위해 최적화된 기본 설정.
• IT 관리: 향상된 보안과 장비 관리를 위해 최적화된 기본 설정.
설정은 초기 설정 후 모두 사용자 정의할 수 있습니다.
참고: 기본 설정을 변경하는 방법을 지시하는 페이지를
인쇄하려면 인쇄 정보 페이지를 선택하십시오.
참고: 도움말을 보려면 프린트 제어판의 도움말 버튼을
누르십시오.
Bahasa Indonesia ...... 6
한국어 .................... 11
ไทย ......................... 16
繁体中文 ................ 21
Tiếng Việt ............... 26
5. 연결 방법을 선택하고 소프트웨어 설치를 준비합니다
프린터와 컴퓨터간 직접 USB 연결
A-B형 USB 케이블을 사용합니다.
Windows
1. Windows 8, 8.1 또는 RT를 제외하고, 소프트웨어를 설치하기 전에
USB 케이블을 연결하지 마십시오. 이미 연결된 경우, 계속 진행하기
전에 먼저 분리합니다. 설치 과정 중에 케이블을 연결하라는 메시지가
표시됩니다.
2. “6. 소프트웨어 설치 파일을 찾거나 다운로드”를 진행합니다.
참고: 소프트웨어를 설치하는 동안 “USB 케이블을 사용하여 이
컴퓨터에 직접 연결” 옵션을 선택합니다.
Mac
1. 소프트웨어를 설치하기 전에 USB 케이블을 컴퓨터와 프린터에
연결합니다.
2. “6. 소프트웨어 설치 파일을 찾거나 다운로드”를 진행합니다.
유선(이더넷) 네트워크 연결
표준 네트워크 케이블을 사용합니다.
1. 네트워크 케이블을 프린터와 네트워크에 연결합니다. 프린터에서
네트워크 주소를 받을 때까지 몇 분 대기합니다.
2. LCD 제어판: 설정
IP 주소 표시를 선택하여 IP 주소나 호스트 이름을 표시합니다.
터치스크린 제어판: 제품 제어판의 홈 화면에서 네트워크 버튼을
터치하여 IP 주소 또는 호스트 이름을 표시합니다.
3. IP 주소가 표시되면 네트워크 연결이 설정된 것입니다. 그렇지 않은
경우 몇 분 더 기다린 다음 다시 시도합니다. 소프트웨어 설치 중
사용할 IP 주소를 메모합니다. 소프트웨어 설치 중 사용할 IP 주소를
메모합니다. IP 주소 예: 192.168.0.1
IP 주소를 수동으로 구성하려면 “IP 주소 수동으로 구성”을
참조하십시오.
4. “6. 소프트웨어 설치 파일을 찾거나 다운로드”를 진행합니다.
참고: 소프트웨어를 설치하는 동안 “네트워크를 통해 연결” 옵션을
선택합니다.
버튼을 누릅니다. 네트워크 설정 메뉴를 연 다음,
내장 무선 네트워크 연결(무선 모델만 해당)
1. 프린터를 무선(Wi-Fi) 네트워크에 연결하려면 프린터 제어판에서
무선 버튼을 누릅니다. 무선 메뉴, 무선 설정 마법사를 차례로
누릅니다.
2. SSID 목록에서 네트워크 이름을 선택하거나 목록에 없는 경우
네트워크 이름을 입력합니다.
3. 키보드를 사용하여 암호를 입력한 후 확인 버튼을 누릅니다.
4. 프린터가 네트워크 연결을 설정하는 동안 기다립니다.
5. 프린터 제어판에서 네트워크 버튼을 누릅니다. IP 주소가 표시되면
네트워크 연결이 설정된 것입니다. 그렇지 않은 경우 몇 분 더
기다린 다음 다시 시도합니다. 소프트웨어 설치 중 사용할 IP 주소를
메모합니다. IP 주소 예: 192.168.0.1
6. 컴퓨터에서 인쇄하려면 “6. 소프트웨어 설치 파일을 찾거나 다운로드”
를 진행합니다. 휴대전화나 태블릿에서만 인쇄하려면 “8. 모바일 및
무선 인쇄”를 진행합니다.
참고: 소프트웨어 설치 중 “최초 무선 연결 설정 도움말 보기” 옵션을
선택합니다.
IP 주소 수동으로 구성
수동으로 IP 주소를 구성하는 방법에 대한 자세한 내용은 프린터
사용 설명서 www.hp.com/support/colorljMFPM225 또는
www.hp.com/support/colorljMFPM226을 참조하십시오.
11
Page 12

6. 소프트웨어 설치 파일을 찾거나 다운로드
방법 1: HP Easy Start에서 다운로드(Windows 및 OS X)
1. 123.hp.com/laserjet으로 이동하여 다운로드를 클릭합니다.
2. 화면에 표시되는 안내와 알림에 따라 컴퓨터에 파일을 저장합니다.
3. 파일이 저장된 폴더에서 소프트웨어 파일을 실행하고 “7. 소프트웨어 설치”
를 진행합니다.
방법 2: 프린터 지원 웹 사이트에서 다운로드
(Windows 및 OS X)
1. www.hp.com/support/colorljMFPM225 또는
www.hp.com/support/colorljMFPM226으로 이동합니다.
2. 소프트웨어 및 드라이버를 선택합니다.
3. 해당 프린터 모델 및 운영 체제용 소프트웨어를 다운로드합니다.
4. 필요에 따라 .exe 또는 .zip 파일을 클릭하여 설치 파일을 실행합니다.
방법 3: 프린터 CD에서 설치(Windows만 해당)
Windows의 경우, 소프트웨어 설치 파일은 프린터와 함께 제공된 CD에 있습니다.
OS X의 경우, CD의 설치 프로그램 파일에는 웹에서 파일을 다운로드할 수 있는
링크가 포함되어 있습니다.
1. 컴퓨터에 프린터 CD를 넣습니다.
2. “7. 소프트웨어 설치”를 진행합니다.
7. 소프트웨어 설치
Windows 전체 솔루션
1. 컴퓨터에 프린터 CD를 삽입하거나 웹에서 다운로드한 소프트웨어
설치 파일을 실행합니다.
2. 소프트웨어 설치 프로그램에서 운영 체제의 언어를 감지한 후 설치
프로그램의 기본 메뉴를 동일한 언어로 표시합니다. CD에서 설치하는
경우 30초 후에도 설치 프로그램이 시작되지 않으면 컴퓨터의 CD
드라이브를 검색하여 이름이 SETUP.EXE인 파일을 실행합니다.
3. 소프트웨어 선택 화면에 설치될 소프트웨어에 대한 세부 정보가
표시됩니다.
• 권장 소프트웨어 설치에는 제공되는 모든 프린터 기능을 위한 인쇄
드라이버 및 소프트웨어가 포함됩니다.
• 설치된 소프트웨어를 사용자 정의하려면 소프트웨어 선택 사용자
정의 링크를 클릭합니다. 작업이 끝나면 다음 버튼을 클릭합니다.
4. 화면의 지시에 따라 소프트웨어를 설치합니다.
5. 연결 유형을 선택하라는 메시지가 표시되면 연결 유형에 적합한
옵션을 선택합니다.
• USB 케이블을 사용하여 이 컴퓨터에 직접 연결
• 네트워크를 통해 연결
• 최초 무선 연결 설정 도움말 보기
참고: 네트워크를 통해 연결할 때 프린터를 검색하는 가장 쉬운 방법은
네트워크에서 내 프린터 자동으로 찾기를 선택하는 것입니다.
6. (선택 사항) 무선 모델의 경우에 한해, 소프트웨어 설치 과정 마지막에
팩스 설정 마법사, 스캔하여 이메일로 전송 마법사, 스캔 후 네트워크
폴더로 전송 마법사를 사용하여 팩스 및 스캔 기능을 설정합니다.
이러한 기능을 편리하게 구성할 수 있는 방법입니다. 자세한 내용은
“10. 네트워크 프린터에 대한 스캔 기능 설정(무선 모델만
해당 - 선택 사항)”을 참조하십시오.
OS X 전체 솔루션
1. 웹에서 다운로드한 소프트웨어 설치 .dmg 파일을 실행합니다.
2. 소프트웨어 설치 프로그램에서 운영 체제의 언어를 감지한 후 설치
프로그램의 기본 메뉴를 동일한 언어로 표시합니다.
3. 설치 옵션 화면에 설치될 소프트웨어에 대한 세부 정보가 표시됩니다.
• 표준 설치의 경우 설치 버튼을 바로 클릭합니다.
• 사용자 정의 설치의 경우 사용자 정의 버튼을 클릭합니다. 화면이
열리면 설치할 구성 요소를 선택한 후 설치 버튼을 클릭합니다.
4. 화면의 지시에 따라 소프트웨어를 설치합니다.
5. 소프트웨어 설치 과정 마지막에 HP 유틸리티 설정 지원을 사용하여
프린터 옵션을 구성합니다.
OS X 기본 설치
CD 또는 hp.com에서 다운로드한 HP 전체 솔루션 소프트웨어를 실행하지
않고 기본 인쇄 및 팩스 드라이버를 설치하려면 다음 단계를 수행합니다.
1. 컴퓨터나 네트워크에 프린터를 연결합니다.
2. 시스템 환경 설정에서 프린터 및 스캐너를 클릭한 다음 왼쪽 하단에
있는 더하기(+) 버튼을 클릭하고 이름이 AirPrint 또는 HP 프린터인
드라이버를 사용하여 M225 또는 M226을 선택합니다.
HP용 Readiris PRO 14
광학 문자 인식(OCR)을 포함하여 별도의 스캔 기능을 사용할 수 있는 이
무료 소프트웨어를 다운로드하십시오. 소프트웨어를 설치하는 동안 왼쪽
창에서 기타 옵션 항목을 클릭한 다음 웹 지원을 선택하여 이 소프트웨어를
다운로드합니다.
웹에서 소프트웨어를 다운로드하려면
www.hp.com/support/colorljMFPM225 또는
www.hp.com/support/colorljMFPM226에서 드라이버를 선택한
다음 소프트웨어 및 펌웨어를 클릭합니다.
8.
휴대폰이나 태블릿에서 인쇄하려면 장치를 프린터와 동일한 무선 네트워크에
연결합니다.
Apple iOS 장치(AirPrint): 인쇄할 항목을 열고 작업 아이콘을 선택합니다. 인쇄를
선택하고 프린터를 선택한 다음 인쇄를 선택합니다.
신규 Android 장치(4.4 이상 버전): 인쇄할 항목을 열고 메뉴 버튼을 선택합니다.
인쇄를 선택하고 프린터를 선택한 다음 인쇄를 선택합니다.
일부 장치의 경우 Google Play 스토어에서 HP 인쇄 서비스 플러그인 앱을
다운로드해야 합니다.
이전 Android 장치(4.3 이하 버전): Google Play 스토어에서 HP ePrint 앱을
다운로드합니다.
Windows 폰: Windows Store에서 HP AiO Remote 앱을 다운로드합니다.
모바일 및 무선 인쇄(선택 사항)
모바일 인쇄에 대해 자세히 알아보기
추가 ePrint에 솔루션을 포함한 기타 모바일 인쇄
옵션에 대한 자세한 내용은 QR 코드를 스캔하거나
사용 설명서의 “모바일 인쇄”섹션을 참조하십시오.
HP Wireless Direct (nw 및 dw 무선 모델만 해당)
HP Wireless Direct 인쇄 기능을 사용하면, 설정된 네트워크나 인터넷으로 연결할
필요 없이 무선 모바일 장치에서 HP Wireless Direct 기능이 활성화된 프린터로
직접 인쇄가 가능합니다.
HP Wireless Direct 활성화
1. 프린터 제어판에서 무선 버튼을 누릅니다. 무선 메뉴를 터치한 다음,
Wireless Direct를 터치합니다.
2. 켜짐/꺼짐을 누르고 켜짐을 누릅니다.
3. 보안 인쇄의 경우 보안을 누르고 켜짐을 누릅니다. 표시되는 암호를
메모합니다. 이 암호를 사용하여 모바일 장치에 대한 액세스를 허용합니다.
보안되지 않은 인쇄를 허용하려면 보안을 누르고 꺼짐을 누릅니다.
무선 인쇄 및 무선 설정에 대한 자세한 내용은
www.hp.com/go/wirelessprinting에서 확인하십시오.
12
Page 13

9.
이메일을 통한 HP ePrint를 사용하면 장치가 동일한 네트워크 상에 없어도 이메일을 사용할 수 있는 모든 장치에서 프린터의 이메일 주소로 문서를 첨부 파일로 전송하여
인쇄할 수 있습니다.
이메일을 통한 HP ePrint를 사용하려면 프린터가 다음 요구 사항을 충족해야
합니다.
• 프린터가 유선 또는 무선 네트워크에 연결되어 있고 인터넷에 접속되어야
합니다.
• 프린터에 HP 웹 서비스가 활성화되어 있어야 하며, HP Connected에 프린터가
등록되어 있어야 합니다.
10.
프린터에는 파일을 스캔한 후 이메일 첨부 파일로 보내거나 네트워크에 있는 폴더에 저장하는 스캔하여 이메일로 전송 및 스캔 후 네트워크 폴더로 전송 기능이 포함되어
있습니다. 프린터가 유선 또는 무선 네트워크에 연결되어 있어야 합니다. 이러한 옵션을 구성하려면 먼저 다음과 같은 정보를 얻으십시오.
• 스캔하여 이메일로 전송 기능의 경우 SMTP 서버 이름, SMTP 포트 번호, 인증 정보를 얻으십시오. 이 정보는 이메일/인터넷 서비스 공급자 또는 시스템 관리자에게
문의하십시오. SMTP 서버 이름과 포트 이름은 일반적으로 인터넷 검색으로 쉽게 찾을 수 있습니다. 예를 들어, “gmail smtp 서버 이름” 또는 “yahoo smtp 서버
이름” 등의 용어를 검색하십시오.
• 스캔 후 네트워크 폴더로 전송 기능의 경우 적절한 권한이 있는 공유 네트워크 폴더를 설정하고 네트워크에 있는 해당 폴더의 경로를 알고 있는지 확인합니다.
참고: 스캔하여 이메일로 전송 및 스캔 후 네트워크 폴더로 전송을 설정하는 방법에 대한 자세한 내용은 사용 설명서를 참조하거나
www.hp.com/support/colorljMFPM225 또는 www.hp.com/support/colorljMFPM226에서 “스캔하여 이메일로 전송” 또는 “스캔 후 네트워크
폴더로 전송” 키워드를 사용하여 검색하십시오.
이메일을 통한 HP ePrint 설정(선택 사항)
네트워크 프린트에 대한 스캔 기능 설정(무선 모델만 해당 - 선택 사항)
HP 웹 서비스 활성화(무선 모델만 해당)
1. 프린터 제어판의 홈 화면에서 웹 서비스 버튼을 누릅니다.
2. 웹 서비스 활성화 버튼을 누릅니다. 프린터에서 웹 서비스가 활성화되고
정보 페이지가 인쇄됩니다. 정보 페이지에는 HP 프린터를 HP Connected에
등록하는 데 사용되는 프린터 코드가 있습니다.
3. www.hpconnected.com으로 이동하여 HP ePrint 계정을 만들고 설정 과정을
완료합니다.
Windows
일부 HP 제품은 소프트웨어 CD를 사용한 드라이버 설치를 포함합니다.
이러한 설치 끝부분에 스캔하여 이메일로 전송 설정 옵션이 있습니다. 이
설정 마법사는 기본 구성에 대한 옵션을 포함하고 있습니다.
스캔하여 이메일로 전송 설정 마법사
1. 시작, 프로그램을 차례로 클릭합니다.
2. HP를 클릭하고 제품 이름을 누른 다음 스캔하여 이메일로 전송
마법사를 차례로 클릭합니다.
3. 발신 메일 프로필 대화 상자에서 새로 만들기 버튼을 클릭합니다.
스캔하여 이메일로 전송 설정 대화 상자가 열립니다.
4. 1. 시작 페이지에 이메일 주소 및 표시 이름을 입력하고 다음을
클릭합니다. 보안 PIN을 만드는 것은 선택 사항입니다.
5. 2. 인증 페이지에 SMTP 서버 및 포트 번호를 입력합니다.
참고: 대부분의 경우 기본 포트 번호를 변경할 필요가 없습니다.
6. Google™ Gmail 메일 서비스를 사용하는 경우에는 항상 보안 연결
(SSL/TLS) 사용 확인란을 클릭합니다.
7. SMTP 서버에서 이메일을 보내기 위한 인증을 요청하는 경우 이메일
로그인 인증 확인란을 선택한 후 사용자 ID 및 암호를 입력합니다.
다음을 클릭합니다.
8. 4. 마침 페이지에서 모든 설정이 올바른지 확인하고 마침을
클릭합니다.
스캔 후 네트워크 폴더로 전송 설정 마법사
1. 시작, 프로그램을 차례로 클릭합니다.
2. HP를 클릭하고 제품 이름을 누른 다음 스캔 후 네트워크 폴더로 전송
마법사를 차례로 클릭합니다.
3. 네트워크 폴더 프로필 대화 상자에서 새로 만들기 버튼을 클릭합니다.
스캔 후 네트워크 폴더로 전송 설정 대화 상자가 열립니다.
4. 1. 시작 페이지에 표시 이름 및 대상 폴더를 입력한 후 다음을
클릭합니다.
팁: 찾아보기 버튼을 클릭하여 폴더를 찾습니다.
5. 컴퓨터 바탕화면에 네트워크 폴더에 대한 바로 가기를 만들려면 바탕
화면에 네트워크 폴더의 바로 가기 만들기 확인란을 선택하고 다음을
클릭합니다. 보안 PIN을 만드는 것은 선택 사항입니다.
6. 2. 인증 페이지에 Windows® 사용자 이름 및 암호를 입력하고 다음을
클릭합니다.
7. 3. 구성 페이지에서 기본 스캔 설정이 올바른지 확인하고 파일 이름
접두사 필드에 파일 이름 접두사를 입력한 후 다음을 클릭합니다
8. 4. 마침 페이지에서 모든 설정이 올바른지 확인하고 저장 및 테스트를
클릭합니다.
9. 구성을 마치려면 마침을 클릭합니다.
OS X
Dock에서 HP Utility를 클릭하여 HP Utility를 열거나 이동 메뉴를 클릭한
다음 HP Utility를 두 번 클릭합니다.
스캔하여 이메일로 전송
1. 시스템 탭을 클릭한 다음 관리 링크를 클릭하고 스캔하여 이메일로
전송 옵션을 켜짐으로 설정합니다.
2. 스캔 탭을 클릭하고 발신 이메일 프로필 링크를 클릭한 다음 새로
만들기 버튼을 클릭합니다.
3. 이메일 주소 영역에서 필수 필드를 입력합니다.
4. SMTP 서버 설정 영역에서 필수 필드를 입력합니다.
참고: 대부분의 경우 기본 포트 번호를 변경할 필요가 없습니다.
5. SMTP 서버에서 이메일을 보내기 위한 인증을 요청하는 경우 SMTP
인증 영역에 필수 필드를 입력합니다. 보안 PIN을 만드는 것은 선택
사항입니다.
6. 이메일 메시지의 기본 설정 영역에 이메일 환경 설정을 구성합니다.
7. 모든 정보를 검토한 다음 저장 및 테스트를 클릭합니다.
스캔 후 네트워크 폴더로 전송
1. 시스템 탭을 클릭한 다음 관리 링크를 클릭하고 스캔 후 네트워크
폴더로 전송 옵션을 켜짐으로 설정합니다.
2. 스캔 탭을 클릭하고 네트워크 폴더 설정 링크가 강조 표시되었는지
확인합니다.
3. 네트워크 폴더 구성 페이지에서 새로 만들기 버튼을 클릭합니다.
4. 네트워크 폴더 구성 영역에서 필수 필드를 입력합니다. 보안 PIN을
만드는 것은 선택 사항입니다.
5. 스캔 설정 영역에서 필수 필드를 입력합니다.
6. 모든 정보를 검토한 다음 저장 및 테스트를 클릭합니다.
13
Page 14

11.
팩스 설정(선택 사항)
11.1 11.2
프린터 연결
이 프린터는 아날로그 장치입니다. HP는 전용 아날로그
전화선에서 이 프린터를 사용할 것을 권장합니다.
참고: 일부 국가/지역에서는 프린터와 함께 제공된 전화
코드에 대한 어댑터가 필요할 수 있습니다.
프린터와 함께 제공된 전화 코드를 프린터의 팩스
벽면의 전화 잭에 연결합니다.
포트와
자동 응답기나 내선 전화는 어떻게 연결하나요?
1. 전화 포트 에서 플러그를 제거합니다.
2. 전화 잭에서 자동 응답기 전화 코드를 분리한 다음 프린터의
전화 포트
3. 프린터와 함께 제공된 전화 코드를 프린터의 팩스 포트
벽면의 전화 잭에 연결합니다.
에 연결합니다.
3
2
1
와
3
프린터 구성
팩스 기능을 사용하려면 팩스 시간, 날짜 및 머리글 설정을 구성해야
합니다.
1. 프린터 제어판의 홈 화면에서 설정
2. 팩스 설정, 기본 설정을 차례로 선택합니다.
3. 시간/날짜를 선택합니다.
4. 12시간 시계 또는 24시간 시계를 선택합니다.
5. 키패드를 사용하여 현재 시간을 입력한 다음 확인 버튼을
누릅니다.
6. 날짜 형식을 선택합니다.
7. 키패드를 사용하여 현재 날짜를 입력한 다음 확인 버튼을
누릅니다.
8. 팩스 머리글을 선택합니다.
9. 키패드를 사용하여 팩스 번호를 입력한 다음 확인 버튼을
누릅니다.
참고: 팩스 번호로 최대 20자를 사용할 수 있습니다.
10. 키패드를 사용하여 회사 이름이나 머리글을 입력한 다음 확인
버튼을 누릅니다.
표준 키패드에 없는 특수 문자를 입력하려면 @#$ 버튼을 눌러
특수 문자가 들어 있는 키패드를 엽니다.
참고: 팩스 머리글로 최대 40자를 사용할 수 있습니다.
버튼을 누릅니다.
자세히 알아보기!
나중에 보내도록 팩스를 예약하거나 컴퓨터에서 팩스 보내기 등
팩스를 보내는 다양한 방법에 대한 자세한 내용은 사용 설명서
www.hp.com/support/colorljMFPM225 또는
www.hp.com/support/colorljMFPM226을 참조하십시오.
독립형 팩스로, 또는 자동 응답기나 내선 전화에서 사용하도록
프린터를 구성하는 방법에 대한 자세한 내용은 프린터 CD에 있는
사용 설명서를 참조하십시오.
디지털 전화기 환경에서는 HP 프린터를 어떻게
설정하나요?
HP 프린터는 기존 아날로그 전화기 서비스와 함께 사용할 수 있도록
개발되었습니다. 디지털 전화기 환경(예: DSL/ADSL, PBX, ISDN, 또는
FoIP 등)의 경우 팩스용 프린터를 설치할 때 디지털-아날로그 필터
또는 변환기가 필요할 수 있습니다.
참고: 전화 회사에 따라 프린터가 모든 디지털 서비스 회선이나 제공
업체와, 모든 디지털 환경에서 또는 모든 디지털-아날로그 변환기로
호환되지 않을 수 있습니다. 가장 적합한 설치 옵션을 확인하려면
전화 회사에 문의하십시오.
참고: 내선 및 외선 통화에 대해 다른 벨소리 종류를 가진 PBX 전화
시스템에 벨소리 종류 감지 기능을 설정할 때 외부 번호를 사용하여
프린터 팩스 번호로 전화를 걸어 벨소리 종류를 기록하십시오.
14
Page 15

문제 해결
사용 설명서
사용 설명서에는 프린터 사용법 및 문제 해결 정보가 포함되어 있습니다.
프린터 CD 및 웹에서 제공됩니다.
1. www.hp.com/support/colorljMFPM225 또는
www.hp.com/support/colorljMFPM226으로 이동합니다.
2. 설명서를 클릭합니다.
Windows의 경우, 권장 소프트웨어를 설치하는 동안 사용 설명서가
컴퓨터에 복사됩니다.
Windows
시작을 클릭하고, 프로그램 또는 모든 프로그램, HP를 차례로 선택하고,
HP 프린터 폴더를 선택한 후 도움말을 선택합니다.
Windows
시작 화면에서 화면의 빈 공간을 마우스 오른쪽 버튼으로 클릭하고, 응용
프로그램 표시줄에서 모든 앱을 클릭한 후, 프린터 이름이 있는 아이콘을
클릭하고 도움말을 클릭합니다.
®
XP, Windows Vista® 및 Windows® 7
®
8
펌웨어 업데이트 확인
1. 프린터 제어판의 홈 화면에서 설정 버튼을 누릅니다.
2. 서비스 메뉴로 스크롤하여 엽니다.
3. LaserJet 업데이트를 선택합니다.
4. 지금 업데이트 확인을 선택합니다.
유선(이더넷) 네트워크 연결
• 프린터가 올바른 길이의 케이블을 사용하여 올바른 네트워크 포트에
연결되어 있는지 확인합니다.
• 네트워크 포트 옆에 있는 표시등이 켜져 있는지 확인합니다.
• 프린터 드라이버가 컴퓨터에 설치되어 있는지 확인합니다.
• 네트워크에 ping을 수행하여 네트워크 통신을 테스트합니다.
Windows
시작 > 실행을 클릭합니다. cmd를 입력하고 Enter를 누릅니다. ping,
공백, 프린터 IP 주소를 차례로 입력한 다음 Enter를 누릅니다 IP 주소 예:
192.168.0.1
OS X
네트워크 유틸리티를 열고 ping 창에 IP 주소를 입력합니다. Enter를
누릅니다. IP 주소 예: 192.168.0.1
• 창에 왕복 시간이 표시되면 네트워크가 작동 중입니다.
• ping이 작동하지 않는 경우, 프린터를 재시작하고 모든 연결 단계를 다시
확인합니다.
제어판 도움말
도움말을 보려면 프린트 제어판의 도움말 버튼을 누르십시오.
추가 지원 리소스
프린터에 대한 HP 전체 도움말은 다음을 참조하십시오.
www.hp.com/support/colorljMFPM225 또는
www.hp.com/support/colorljMFPM226
• 문제 해결 방법
• 고급 구성 지침 찾기
• 소프트웨어 업데이트 다운로드
• 지원 포럼 가입
• 보증 및 규정 정보 찾기
• 모바일 인쇄 리소스
무선 네트워크 연결(무선 모델만 해당)
• 네트워크 케이블이 연결되어 있지 않은지 확인합니다. 네트워크 케이블이
연결되어 있는 경우 프린터가 무선 네트워크에 연결할 수 없습니다.
• 프린터 및 무선 라우터가 켜져 있고 전원에 이상이 없는지 확인합니다.
무선 스위치가 켜져 있는지도 확인합니다.
• 프린터가 무선 네트워크 범위 내에 있는지 확인합니다. 대부분의
네트워크에서는 프린터가 무선 액세스 지점(무선 라우터)의 30m(100ft)
이내에 있어야 합니다.
• 프린터 드라이버가 컴퓨터에 설치되어 있는지 확인합니다.
• 컴퓨터 및 프린터가 동일한 무선 네트워크에 연결되어 있는지
확인합니다.
• Mac의 경우 무선 라우터에서 Bonjour를 지원하는지 확인합니다.
• 무선 라우터를 재시작합니다.
무선 진단 테스트 수행
1. 프린터 제어판의 홈 화면에서 설정
2. 자가 진단, 무선 테스트 실행을 차례로 선택합니다.
버튼을 누릅니다.
팩스 문제 해결
물리적 연결 확인
• 전화 코드가 프린터 뒷면의 팩스 포트와 벽면 전화 잭에 연결되어
있는지 확인합니다.
• 내선 전화 또는 기타 추가 장치의 경우 전화 코드가 프린터 뒷면의 전화
포트와 장치에 연결되어 있는지 확인합니다.
• 발신음이 검출되지 않거나 통화 중이어서 전화 발신이 실패하는 경우
다른 전화선에 연결합니다.
• IP 서비스의 경우, 팩스 속도를 줄이고 프린터 제어판의 팩스 설정
메뉴에서 오류 수정 모드를 끕니다.
프린터 팩스 설정 확인
• 전화 회사 또는 서비스 공급자의 음성 메일 서비스를 사용하려면
프린터의 Rings to Answer(전화벨 횟수) 설정이 전화 자동 응답 장치보다
적게 설정되어 있는지 확인합니다.
• 여러 전화 번호가 동일한 물리적 전화 회선에 할당되고 회선을 여러
장치에서 공유하는 경우, 프린터가 올바른 벨소리 구별 설정으로
설정되어 있는지 확인합니다. 프린터가 팩스에 응답하고 다른 발신음
유형은 무시하는 설정을 사용합니다.
• 팩스 속도 설정을 중간(V.17) 또는 느림(V.29)으로 구성하면 팩스 전송
성능을 향상시킬 수 있습니다.
팩스 진단 테스트 수행
1. 프린터 제어판의 홈 화면에서 설정
2. 자가 진단, 팩스 테스트 실행을 차례로 선택합니다.
버튼을 터치합니다.
15
Page 16

English .................... 1
Bahasa Indonesia ...... 6
한국어 .................... 11
ไทย ......................... 16
繁体中文 ................ 21
Tiếng Việt ............... 26
5.
www.hp.com/support/colorljMFPM225 www.register.hp.com
www.hp.com/support/colorljMFPM226
4.
16
Page 17

6.
7.
8.
17
Page 18

9.
10.
18
Page 19
11.
3
2
1
3
19
Page 20

20
Page 21

English .................... 1
LaserJet Pro MFP M225 和 M226 入
門指南
重要事項:
依照印表機硬體設定海
報上的步驟 1 - 3 進行
後,再繼續執行下一頁的
步驟 4。
www.hp.com/support/colorljMFPM225 www.register.hp.com
www.hp.com/support/colorljMFPM226
4. 控制面板上的初始設定
開啟印表機電源後,等待印表機初始化。 若要瀏覽觸控螢幕控制面板,請使用點選、撥
動和捲動手勢。 依照控制面板上的提示設定下列設定:
• 語言
• 位置
• 預設設定
在「預設設定」下,選擇其中一個選項:
• 自我管理:引導式設定、組態及更新體驗的最佳化預設設定。
• IT 管理:安全性增強的機群管理功能最佳化預設設定。
設定值在初始設定之後完全可自訂。
註: 選擇「列印資訊頁」以列印指示如何變更預設設定的
頁面。
註: 點選印表機控制面板上的「說明」 按鈕以存取說明
主題。
Bahasa Indonesia ...... 6
한국어 .................... 11
ไทย ......................... 16
繁体中文 ................ 21
Tiếng Việt ............... 26
5. 選擇連線方法並準備進行軟體安裝
直接在印表機與電腦之間連接的 USB 連線
請使用 A 對 B 型的 USB 纜線。
Windows
1. 除了 Windows 8、8.1 和 RT 以外、請勿在安裝軟體之前連接 USB 纜
線。如果已連接,請先取下再繼續。安裝程序會在適當時間提示您
連接纜線。
2. 繼續執行「6. 找出或下載軟體安裝檔」。
註:進行軟體安裝時,選擇「使用 USB 纜線直接連接這部電腦」
的選項。
Mac
1. 先連接電腦與印表機之間的 USB 纜線、再進行軟體安裝。
2. 繼續執行「6. 找出或下載軟體安裝檔」。
有線(乙太網路)網路連線
使用標準網路線。
1. I將網路線連接至印表機與網路。 等待幾分鐘,讓印表機取得網路
位址。
2. LCD 控制面板:按下「設定」 按鈕。 開啟「網路設定」功能
表,然後選擇「顯示 IP 位址」以顯示 IP 位址或主機名稱。
觸控螢幕控制面板:在產品控制面板上的主畫面中,點選「網路」
按鈕以顯示 IP 位址或主機名稱。
3. 若列出 IP 位址,則已建立網路連線。若未列出,請等候幾分鐘後
再試一次。請記下 IP 位址以便在安裝軟體時使用。請記下 IP 位址
以便在安裝軟體時使用。IP 位址範例:192.168.0.1
若要手動設定 IP 位址,請參閱「手動設定 IP 位址」。
4. 繼續執行「6. 找出或下載軟體安裝檔」。
內建無線網路連線(僅限無線機型)
1. 若要將印表機連接至無線 (Wi-Fi) 網路,請點選印表機控制面板上
的「無線」 按鈕。 點選「無線功能表」,然後點選「無線設定
精靈」。
2. 從 SSID 清單選擇網路名稱,或輸入網路名稱(如果未列出)。
3. 使用鍵盤輸入複雜密碼,然後點選「確定」按鈕。
4. 等待印表機建立網路連線。
5. 在印表機控制面板上,點選「網路」 按鈕。 若列出 IP 位址,則
已建立網路連線。 若未列出,請等候幾分鐘後再試一次。 請記下
IP 位址以便在安裝軟體時使用。 IP 位址範例: 192.168.0.1
6. 若要從電腦列印,請繼續執行「6. 找出或下載軟體安裝檔」。 若要
單純從電話或平板電腦列印,請繼續執行「8. 行動和無線列印」。
註: 進行軟體安裝時,選擇「協助我設定第一次無線連線」的選
項。
手動設定 IP 位址
如需有關如何手動設定 IP 位址的詳細資訊,請參閱印表機使用指南
www.hp.com/support/colorljMFPM225 或
www.hp.com/support/colorljMFPM226。
註:進行軟體安裝時,選擇「透過網路連接」的選項。
21
Page 22

6. 找出或下載軟體安裝檔
方法 1:從 HP Easy Start 下載(Windows 及 OS X)
1. 請前往 123.hp.com/laserjet,然後按一下下載。
2. 請按照螢幕上的指示和提示,將檔案儲存至電腦。
3. 從儲存軟體檔案的資料夾啟動軟體檔案,然後繼續執行「7. 安裝軟體」。
方法 2:從印表機支援網站下載(Windows 及 OS X)
1. 前往 www.hp.com/support/colorljMFPM225 或
www.hp.com/support/colorljMFPM226。
7. 安裝軟體
Windows 完整解決方案
1. 將印表機光碟插入電腦中,或啟動從網路下載的軟體安裝檔。
2. 軟體安裝程式會偵測作業系統的語言,然後以相同的語言顯示安
裝程式的主功能表。 從光碟安裝時,如果安裝程式未在 30 秒鐘之
後啟動,請瀏覽電腦上的 CD 光碟機,並啟動名稱為 SETUP.EXE 的
檔案。
3. 「軟體選擇」畫面會詳細說明要安裝的軟體。
• 建議的軟體安裝包括所有可用印表機功能的列印驅動程式及軟
體。
• 要自訂已安裝的軟體,按一下自訂軟體選擇連結。完成時,按一
下「下一步」按鈕。
4. 依照螢幕上的指示安裝軟體。
5. 提示選擇連線類型時,選取連線類型的適當選項:
• 使用 USB 纜線直接連接這部電腦
• 透過網路連接
• 協助我設定第一次無線連線
註:透過網路連接時,偵測印表機的最輕鬆方式就是選擇
「Automatically nd my printer on the network」(自動在網路上
尋找我的印表機)。
6. (選用)僅限無線機型,請在軟體安裝程序結束時,使用「傳真設
定精靈」、「掃描到電子郵件精靈」和「掃描到網路資料夾精靈」
來設定傳真及掃描功能。這是設定這些功能的便利方法。請參閱
「10. 在網路上設定印表機的掃描功能(僅限無線機型 - 選用)」
以取得詳細資訊。
2. 選擇軟體和驅動程式。
3. 下載適用於您印表機型號和作業系統的軟體。
4. 視需要按一下 .exe 或 .zip 檔案以啟動安裝檔。
方法 3:從印表機光碟安裝(僅限 Windows)
對於 Windows,印表機隨附的光碟提供軟體安裝檔。
對於 OS X,光碟中的安裝程式檔案會包含可從網路下載檔案的連結。
1. 將印表機光碟插入電腦中。
2. 繼續執行「7. 安裝軟體」。
OS X 完整解決方案
1. 啟動您從網路下載的軟體安裝 .dmg 檔案。
2. 軟體安裝程式會偵測作業系統的語言,然後以相同的語言顯示安裝
程式的主功能表。
3. 「安裝選項」畫面會詳細說明要安裝的軟體。
• 進行標準安裝時,立即按一下「安裝」按鈕。
• 對於自訂安裝,請按一下「自訂」按鈕。 在開啟的畫面上,選擇
要安裝的元件,然後按一下「安裝」按鈕。
4. 依照螢幕上的指示安裝軟體。
5. 在軟體安裝程序結束時,使用 HP Utility 設定小幫手來設定印表機
選項。
OS X 基本安裝
若要不執行來自光碟或 hp.com 下載的 HP 完整解決方案軟體,
即安裝基本列印及傳真驅動程式,請依照下列步驟進行:
1. 將印表機連接至電腦或網路。
2. 在「系統偏好設定」中,依序按一下「印表機與掃描器」和左下方
的加號按鈕,並選擇「M225」或「M226」(使用名稱為 AirPrint
或 HP 印表機的驅動程式)。
Readiris Pro for HP
下載這個免費軟體以啟用其他掃描功能,包括光學字元辨識 (OCR)。 進
行軟體安裝時,按一下左窗格中的「More Options」(更多選項)項
目,然後選擇「Web Support」(網路支援)以下載這個軟體。
若要從網路下載軟體,請前往 www.hp.com/support/colorljMFPM225 或
www.hp.com/support/colorljMFPM226,選擇「Drivers」(驅動程式),
然後按一下「Software & Firmware」(軟體與韌體)。
8.
若要從行動電話或平板電腦列印,請將裝置連線到印表機所在的同一個無線
網路。
Apple iOS 裝置 (AirPrint):開啟要列印的項目,然後選擇動作圖示。選擇「列
印」,選擇印表機,然後選擇「列印」。
較新的 Android 裝置(4.4 或更新版本):開啟要列印的項目,然後選擇功能
表按鈕。 選擇「列印」,選擇印表機,然後選擇「列印」。
某些裝置必須從 Google Play 商店下載 HP Print Service 外掛程式應用程式。
較舊的 Android 裝置(4.3 或更舊版本):從 Google Play 商店下載 HP ePrint 應
用程式。
Windows Phone:從 Windows 市集下載 HP AiO Remote 應用程式。
行動和無線列印(選用)
進一步了解行動列印
若要進一步了解其他行動列印選項(包括其他
ePrint 解決方案),請掃描 QR 碼,或參閱使用指南
的「行動列印」一節。
HP 無線直接(僅限 nw 和 dw 無線機型)
HP 無線直接功能可讓您從無線行動裝置近距離列印到支援 HP 無線直接的印表
機,不需要連線到網路或網際網路。
啟用 HP 無線直接
1. 在印表機控制面板上,點選「無線」 按鈕。 點選「無線功能表」,然
後點選「Wireless Direct」(無線直接)。
2. 點選「On/O」(開/關),然後點選「On」(開啟)。
3. 如需進行安全列印,點選「Security」(安全性),然後點選「On」
(開啟)。記下顯示的複雜密碼。使用此複雜密碼以允許存取行動裝置。
若要允許無安全保護的列印,請點選「Security」(安全性),然後點選
「O」(關閉)。
如需無線列印及無線設定的詳細資訊,請前往
www.hp.com/go/wirelessprinting。
22
Page 23

9.
透過 HP ePrint via email,您只要在任何具備電子郵件功能的裝置上,將文件當做電子郵件附件傳送至印表機的電子郵件地址即可列印該文件,即使您使用的裝
置不在同一個網路上也沒問題。
若要使用 HP ePrint via email,印表機必須符合以下要求:
• 印表機必須連線到有線或無線網路,且必須能夠存取網際網路。
• HP Web 服務必須在印表機上啟用,而且印表機必須向 HP Connected 註
冊。
10.
印表機包含「掃描到電子郵件」和「掃描到網路資料夾」功能,可以掃描檔案,再將掃描結果當做電子郵件附件傳送,或儲存在網路上的資料夾中。 印表機必
須已連接至有線或無線網路。若要設定這些選項,請先取得下列資訊:
• 設定「掃描到電子郵件」功能時,要取得 SMTP 伺服器名稱、SMTP 連接埠號碼和驗證資訊。請聯絡電子郵件/網際網路服務供應商或系統管理員,以取得這
些資訊。透過網際網路搜尋通常可以找到 SMTP 伺服器名稱和連接埠名稱, 例如,搜尋「gmail smtp 伺服器名稱」或「yahoo smtp 伺服器名稱」等詞彙。
• 設定「掃描到網路資料夾」功能時,要確認已設定正確權限的共用網路資料夾,並且知道該資料夾在網路上的路徑。
註: 如需有關設定「掃描到電子郵件」和「掃描到網路資料夾」的說明,請參閱使用指南,或前往 www.hp.com/support/colorljMFPM225 或
www.hp.com/support/colorljMFPM226,使用關鍵字「掃描到電子郵件」或「掃描到網路資料夾」進行搜尋。
設定 HP ePrint via email(選用)
在網路上設定印表機的掃描功能(僅限無線機型 - 選用)
啟用 HP Web 服務(僅限無線機型)
1. 在印表機控制面板的主畫面中,點選「Web 服務」 按鈕。
2. 點選「啟用 Web 服務」按鈕。印表機隨即啟用 Web 服務,然後列印資訊
頁。資訊頁包含向 HP Connected 註冊 HP 印表機所需的印表機代碼。
3. 請前往 www.hpconnected.com 建立 HP ePrint 帳戶,並完成設定程序。
Windows
某些 HP 產品包含從軟體光碟安裝驅動程式的作業。在此安裝作業的最
後階段會提供設定掃描到資料夾和電子郵件的選項。這些設定精靈包含
基本組態的選項。
掃描到電子郵件設定精靈
1. 按一下「開始」,然後按一下「程式集」。
2. 按一下「HP」,按一下產品名稱,然後按一下「掃描到電子郵件
精靈」。
3. 在「外寄電子郵件設定檔」對話方塊中,按一下「新增」按鈕。
「掃描到電子郵件設定」對話方塊隨即開啟。
4. 在「1. Start」(1. 開始)頁面中,輸入「電子郵件地址」和「顯
示名稱」,然後按一下「下一步」。 建立安全性 PIN 碼是選用步
驟。
5. 在「 2. Authenticate」(2. 驗證)頁面中,輸入 SMTP 伺服器和連
接埠號碼。
註: 在大部分情況下,不需要變更預設連接埠號碼。
6. 如果您的電子郵件服務使用 Google™ Gmail,請選擇「Always use
secure connection (SSL/TLS)」(永遠使用安全連線 (SSL/TLS))核
取方塊。
7. 如果 SMTP 伺服器需要傳送電子郵件的驗證,請選擇「Email Log-in
Authentication」(電子郵件登入驗證)核取方塊,然後輸入使用
者 ID 和密碼。 按一下「下一步」。
8. 在「4. Finish」(4. 完成)頁面中,確認所有設定值皆正確,然後
按一下「完成」。
掃描到網路資料夾設定精靈
1. 按一下「開始」,然後按一下「程式集」。
2. 按一下「HP」,按一下產品名稱,然後按一下「掃描到網路資料
夾精靈」。
3. 在「網路資料夾設定檔」對話方塊中,按一下「新增」按鈕。
「掃描到網路資料夾設定」對話方塊隨即開啟。
4. 在「1. Start」(1. 開始)頁面中,輸入顯示名稱和目的地資料
夾,然後按一下「下一步」。
提示: 按一下「瀏覽」按鈕以尋找資料夾。
5. 若要在電腦桌面上建立網路資料夾的捷徑,請選擇「Create a
Desktop shortcut to the network folder」(建立網路資料夾的桌面
捷徑)核取方塊,然後按一下「下一步」。建立安全性 PIN 碼是選
用步驟。
6. 在「2. Authenticate」(2. 驗證)頁面中,輸入 Windows® 使用者
名稱和密碼,然後按一下「下一步」。
7. 在「3. Congure」(3. 設定)頁面中,確認預設掃描設定正確,然
後在「Filename Prex」(檔案名稱首碼)欄位中輸入檔案名稱首
碼,並按一下「下一步」。
8. 在「4. Finish」(4. 完成)頁面中,確認所有設定皆正確,然後按
一下「Save and Test 」(儲存並測試)。
9. 按一下「Finish」(完成)以完成組態設定。
OS X
按一下 Dock 上的 HP Utility 圖示開啟 HP Utility,或按一下「前往」選
單,然後按兩下「HP Utility」。
掃描到電子郵件
1. 按一下「系統」標籤,然後按一下「管理」連結,將「掃描到電子
郵件」選項設定為「開啟」。
2. 按一下「掃描」標籤,按一下「外寄電子郵件設定檔」連結,然後
按一下「新增」按鈕。
3. 在「電子郵件地址」區域中,填入必要的欄位。
4. 在「SMTP Server Settings」(SMTP 伺服器設定)區域中,填入必
要的欄位。
註: 在大部分情況下,不需要變更預設連接埠號碼。
5. 如果 SMTP 伺服器需要傳送電子郵件的驗證,請填入「SMTP
Authentication」(SMTP 驗證)區域中的必要欄位。 建立安全性
PIN 碼是選用步驟。
6. 設定「E-mail Message Preferences」(電子郵件訊息偏好設定)區
域中的電子郵件偏好設定。
7. 檢閱所有資訊,然後按一下「Save and Te st」(儲存並測試)。
掃描到網路資料夾
1. 按一下「系統」標籤,然後按一下「管理」連結,將「掃描到網路
資料夾」選項設定為「開啟」。
2. 按一下「掃描」標籤,確認「Network Folder Setup」(網路資料
夾設定)連結已反白顯示。
3. 在「Network Folder Conguration」(網路資料夾組態)頁面中,
按一下「新增」按鈕。
4. 在「Network Folder Conguration」(網路資料夾組態)區域中,
填入必要的欄位。 建立安全性 PIN 碼是選用步驟。
5. 在「Scan Settings」(掃描設定)區域中,填入必要的欄位。
6. 檢閱所有資訊,然後按一下「Save and Te st」(儲存並測試)。
23
Page 24

11.
設定傳真(選用)
11.1
連接印表機
印表機為類比裝置。 HP 建議在專用類比電話線路上使用印表機。
註:有些國家/地區可能需要為印表機隨附的電話線準備轉接
器。
將印表機隨附的電話線連接到印表機上的傳真
話插座。
連接埠和牆上的電
如何連接答錄機或電話分機?
1. 從電話連接埠 取下插頭。
2. 將答錄機電話線從電話插座拔除,然後連接到印表機上的電
話連接埠
3. 將印表機隨附的電話線連接到印表機上的傳真連接埠
上的電話插座。
。
和牆
11.2
設定印表機
若要使用傳真功能,必須設定傳真時間、日期及標題設定。
1. 在印表機控制面板的主畫面中,點選「設定」
2. 選擇「傳真設定」,然後選擇「基本設定」。
3. 選擇「時間/日期」。
4. 選擇 12 小時制或 24 小時制的時鐘。
5. 使用鍵盤輸入目前時間,然後選點「確定」按鈕。
6. 選擇日期格式。
7. 使用鍵盤輸入目前日期,然後點選「確定」按鈕。
8. 選擇「傳真標題」。
9. 使用鍵盤輸入傳真號碼,然後點選「確定」按鈕。
按鈕。
註:傳真號碼的字元數最多為 20 個。
10. 使用鍵盤輸入公司名稱或標題,然後點選「確定」按鈕。
若要輸入標準鍵盤上沒有的特殊字元,請點選 @#$ 按鈕以開啟
包含特殊字元的鍵盤。
註:傳真標題的字元數最多為 40 個。
告訴我更多資訊!
如需其他傳真傳送方式(例如排定在日後傳送傳
真或從電腦傳送傳真)的詳細資訊,請參閱使
用指南 www.hp.com/support/colorljMFPM225 或
www.hp.com/support/colorljMFPM226。
如需有關設定印表機做為獨立傳真機或搭配答錄機或電話分機使
用的詳細資訊,請參閱印表機光碟上的使用指南。
3
2
1
3
如何在數位電話環境中設定 HP 印表機?
HP 印表機是專為搭配傳統類比電話服務而設計。 進行印表機的傳
真設定時,數位電話環境(例如 DSL/ADSL、PBX、ISDN 或 FoIP)
可能需要數位轉類比過濾器或轉換器。
附註: 視電話公司而定,印表機並非與所有的數位服務線路或供
應商、所有的數位環境或所有的數位轉類比轉換器都能相容。 請
聯絡電話公司以判斷哪些設定選項最適合。
附註: 在內部和外部通話有不同鈴聲模式的 PBX 電話系統中設
定鈴聲模式偵測時,請務必使用外線電話號碼撥打印表機傳真號
碼,以便錄製鈴聲模式。
24
Page 25

疑難排解
使用指南
使用指南包含印表機使用方式及疑難排解資訊。 這可在印表機光碟或網路
上取得:
1. 前往 www.hp.com/support/colorljMFPM225 或
www.hp.com/support/colorljMFPM226。
2. 按一下「Manuals」(手冊)。
對於 Windows,使用指南會在進行建議的軟體安裝時複製到電腦。
Windows® XP、Windows Vista® 和 Windows® 7
按一下「開始」,依序選擇「程式集」或「所有程式」、「HP」
、HP 印表機的資料夾,然後選擇「說明」。
Windows® 8
在「開始」 畫面中,以滑鼠右鍵按一下畫面中的空白區域,按一下應
用程式列的「所有應用程式」,然後按一下顯示印表機名稱的圖示,
並選取「說明」。
檢查韌體更新
1. 在印表機控制面板的主畫面中,點選「設定」 按鈕。
2. 捲動至「服務」功能表並將其開啟。
3. 選擇「LaserJet 更新」。
4. 選擇「立即檢查更新」。
有線(乙太網路)網路連線
• 確認印表機以合適的纜線長度連接到正確的網路連接埠。
• 確認網路連接埠旁邊的指示燈已亮起。
• 確認電腦已安裝列印驅動程式。
• 使用 Ping 指令偵測網路以測試網路通訊:
Windows
按一下「開始」>「執行」。 輸入 cmd,並按下 Enter。
依序輸入 ping、空格、印表機 IP 位址,然後按下 Enter。
IP 位址範例:192.168.0.1
OS X
開啟「網路工具程式」,並在 Ping 窗格中輸入 IP 位址。按下 Enter。
IP 位址範例:192.168.0.1
• 如果視窗顯示往返時間,表示網路運作正常。
• 如果 Ping 沒有作用,請嘗試重新啟動印表機,再重新檢查所有的連線
步驟。
控制面板說明
點選印表機控制面板上的「說明」 按鈕以存取說明主題。
其他支援資源
如需印表機的 HP 全方位說明,請前往:
www.hp.com/support/colorljMFPM225 或
www.hp.com/support/colorljMFPM226
• 解決問題
• 尋找進階組態設定指示
• 下載軟體更新
• 加入支援論壇
• 尋找保固及法規資訊
• 行動列印資源
無線網路連線(僅限無線機型)
• 確認未連接網路線。 當網路線已連接時,印表機無法連接至無線網
路。
• 確認印表機和無線路由器已開啟且接通電源。 此外,確定無線開關已
開啟。
• 確認印表機位於無線網路範圍內。 對多數網路而言,印表機必須是在
距離無線存取點(無線路由器)30 公尺(100 英呎)以內的位置。
• 確認電腦已安裝列印驅動程式。
• 確認電腦和印表機連接至相同的無線網路。
• 若是使用 Mac,請確認無線路由器支援 Bonjour。
• 重新啟動無線路由器。
執行無線診斷測試
1. 在印表機控制面板的主畫面中,點選「設定」 按鈕。
2. 選擇「Self Diagnostics」(自我診斷),然後選擇「Run Wireless
Tes t」(執行無線測試)。
傳真疑難排解
檢查實體連線
• 確認電話線已連接到印表機背面傳真連接埠 和牆上插座。
• 對於電話分機或其他附加裝置,請確認電話線已連接到印表機背面電
話連接埠
• 如果因為偵測不到撥號音或在忙線中而無法對外撥打電話,請連接到
不同的電話線路。
• 若是使用網路傳真 (Fax over IP) 服務,請降低傳真速度,並關閉「錯誤
修正模式」(位於印表機控制面板上的「傳真設定」功能表中)。
和裝置。
檢查印表機傳真設定
• 若要使用電話公司或服務供應商提供的語音信箱服務,請確定印表機
「接聽鈴聲次數」設定所設定的鈴聲次數比電話答錄機的還要少。
• 如果已將多組電話號碼指定給同一條實體電話線路,而且有多台裝置
共用該線路時,請確定印表機設定了正確的區別鈴聲設定。 使用一個
會讓印表機接聽傳真而忽略其他鈴聲類型的設定。
• 將「傳真速度」設定設為「中等 (V.17)」或「慢速 (V.29)」,也可以改
善傳送傳真的功能。
執行傳真診斷測試
1. 在印表機控制面板的主畫面中,點選「設定」 按鈕。
2. 選擇「Self Diagnostics」(自我診斷),然後選擇「Run Fax Te st」
(執行傳真測試)。
25
Page 26

English .................... 1
BahasaIndonesia ...... 6
한국어 .................... 11
ไทย ......................... 16
繁体中文 ................ 21
TiếngViệt ............... 26
5.
www.hp.com/support/colorljMFPM225 www.register.hp.com
www.hp.com/support/colorljMFPM226
4.
26
Page 27

6.
7.
27
Page 28

8.
9.
28
Page 29
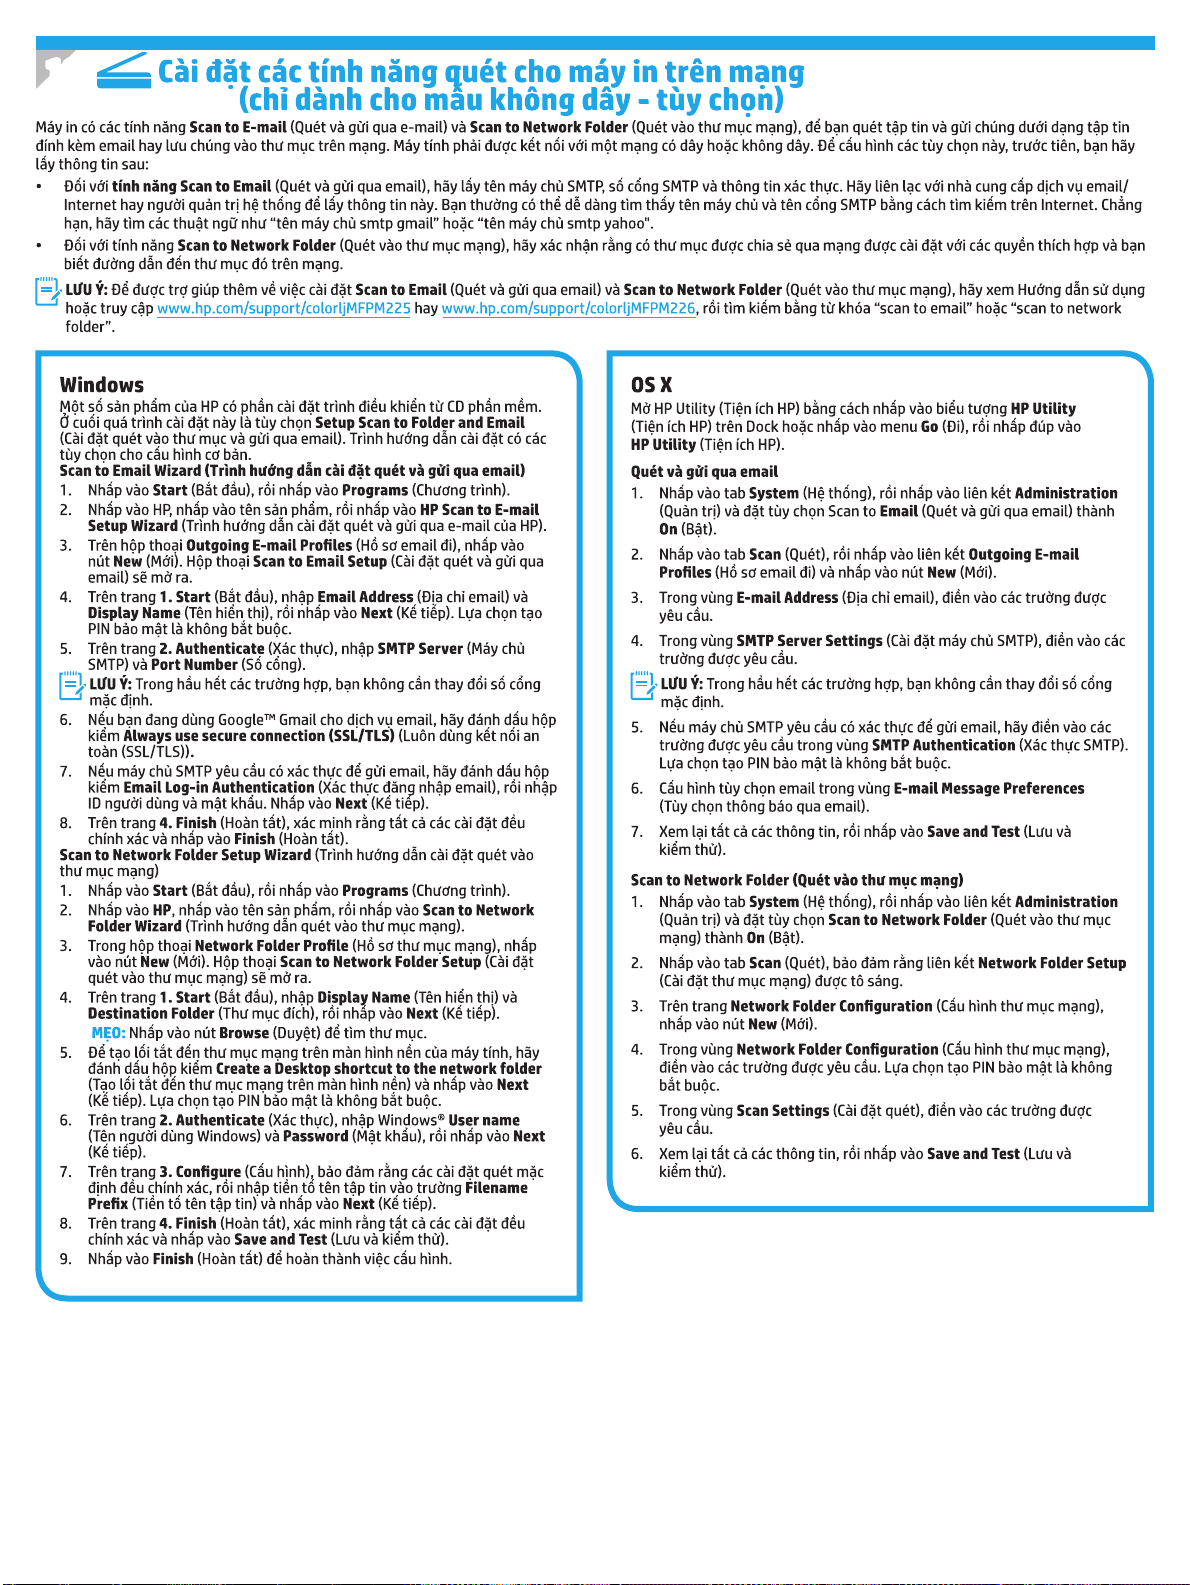
10.
29
Page 30

11.
3
2
1
3
30
Page 31

31
Page 32

© 2015 Copyright HP Development Company, L.P.
Reproduction, adaptation or translation without prior written permission is
prohibited, except as allowed under the copyright laws.
The information contained herein is subject to change without notice.
The only warranties for HP products and services are set forth in the express
warranty statements accompanying such products and services. Nothing herein
should be construed as constituting an additional warranty. HP shall not be liable
for technical or editorial errors or omissions contained herein.
Trademark Credits
Windows® is a U.S. registered trademark of Microsoft Corporation.
FCC Regulations
This equipment has been tested and found to comply with the limits for a Class
B digital device, pursuant to Part 15 of the FCC rules. These limits are designed
to provide reasonable protection against harmful interference in a residential
installation. This equipment generates, uses, and can radiate radio-frequency
energy. If this equipment is not installed and used in accordance with the
instructions, it may cause harmful interference to radio communications.
However, there is no guarantee that interference will not occur in a particular
installation. If this equipment does cause harmful interference to radio or
television reception, which can be determined by turning the equipment o and
on, correct the interference by one or more of the following measures:
• Reorient or relocate the receiving antenna.
• Increase separation between equipment and receiver.
• Connect equipment to an outlet on a circuit dierent from that to which the
receiver is located.
• Consult your dealer or an experienced radio/TV technician.
Any changes or modications to the product that are not expressly approved by
HP could void the user’s authority to operate this equipment. Use of a shielded
interface cable is required to comply with the Class B limits of Part 15 of FCC rules.
For more regulatory information, see the electronic user guide. HP shall not be
liable for any direct, indirect, incidental, consequential, or other damage alleged
in connection with the furnishing or use of this information.
© 2015 Copyright HP Development Company, L.P.
 Loading...