

Page 1

HP Kayak XM600 Minitower
Troubleshooting Guide
Page 2

HP Kayak XM600 Series 2
and HP Kayak XM600
This User’s Guide covers the
Series 2,
These PCs carry the model number P2190N and higher.
A separate User’s Manual is available for the
XM600
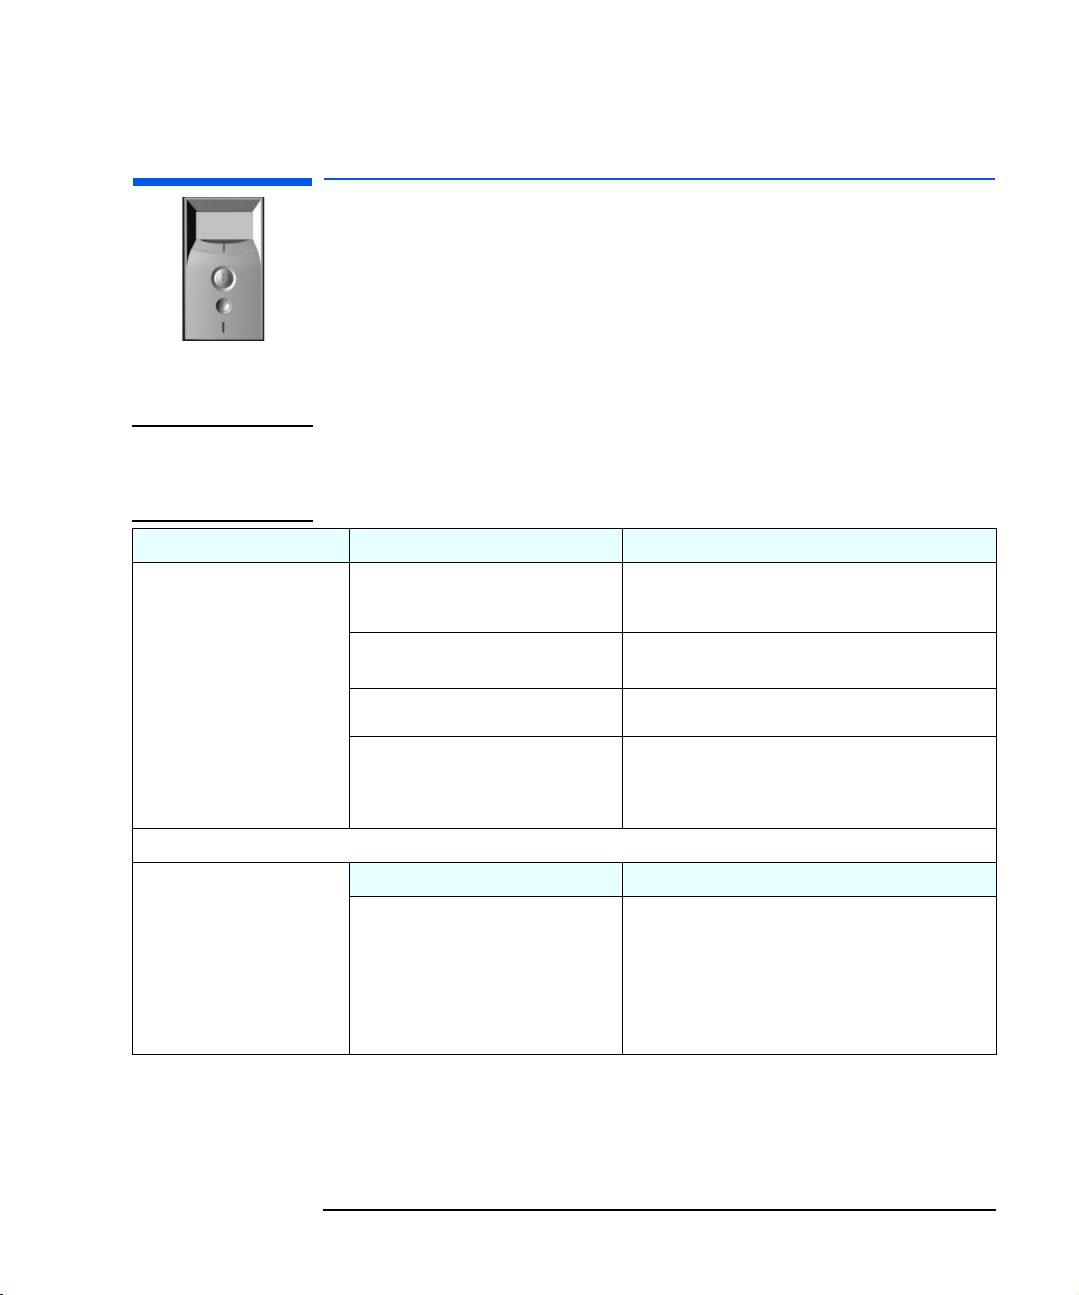
Each PC has a Support Label on its outer case clearly
identifying the series to which it belongs. When looking
at the PC from the front, the label is located on the righthand side-panel, close to the bottom of the panel.
The Support Label states the Model, the Model Number
and the Serial Number. The label includes the following
information:
HP Kayak XM600
These PCs carry the model numbers Dxxxx (all) and
Pxxxx up to P2189N.
or
HP Kayak XM600 Series 2
These PC carry the model numbers P2190N and higher.
equipped with socket-mounted processors.
, equipped with slot-mounted processors.
HP Kayak XM600
HP Kayak
Page 3

Contents
Your PC Workstation does not start correctly,
or does not start at all. Refer to page 7.
For example, the monitor is blank, error messages during boot,
beep codes emitted.
Your PC Workstation starts normally, but you are
having problems configuring. Refer to page 19.
For example, hardware not detected, mouse doesn’t work properly,
no sound from speakers.
Troubleshooting your PC Workstation
using HP DiagTools. Refer to page 39.
You can diagnose hardware-related problems, test
individual hardware components and check hardware configuration.
Recovering hard disk drive contents with the
recovery CD-ROM. Refer to page 47.
You can restore the preloaded operating system,
drivers, utilities and software.
Other useful sources of information. Refer to page 49.
How to obtain the latest drivers, software utilities and BIOS updates.
Also details on how to download documentation
corresponding to your PC Workstation.
Contacting HP Support Services. Refer to page 50.
Details the type of information you should prepare before
contacting HP Support for assistance.
iii
Page 4

Notice
The information contained in this document is subject to change
without notice.
Hewlett-Packard makes no warranty of any kind with regard to this
material, including, but not limited to, the implied warranties of
merchantability and fitness for a particular purpose. Hewlett-Packard
shall not be liable for errors contained herein or for incidental or
consequential damages in connection with the furnishing, performance,
or use of this material.
This document contains proprietary information that is protected by
copyright. All rights are reserved. No part of this document may be
photocopied, reproduced, or translated to another language without the
prior written consent of Hewlett-Packard Company.
TM
Adobe
McAfee VirusScan
Inc.
Microsoft
registered trademarks of Microsoft Corporation.
Pentium
and AcrobatTM are trademarks of Adobe Systems Incorporated.
®
is a registered trademark of Network Associates,
®
, MS®, MS-DOS®, Windows®, and Windows NT® are U.S.
®
is a registered trademark of Intel Corporation.
Hewlett-Packard France
Business Desktop Division (BDD)
Outbound Marketing Communications
38053 Grenoble Cedex 9
France
2000 Hewlett-Packard Company
iv Francais
Page 5

Introduction
Introduction
This manual is for anyone who wants to:
Troubleshoot problems on the PC Workstation
•
Find out where to get more information and support.
•
For information about setting up and using your PC Workstation, refer
to the User’s Guide that came with your PC Workstation. It is also
available on HP’s web site at:
www.hp.com/go/kayaksupport.
Important Warnings
Removing and Replacing the Cover
WARNING
WARNING
For your safety, never remove the PC Workstation’s cover without first
removing the power cord from the power outlet and any connection to a
telecommunications network. Always replace the cover before switching the
PC Workstation on again
.
Safety Information
There is a danger of explosion if the battery is incorrectly installed. For your
safety, never attempt to recharge, disassemble, or burn an old battery. Only
replace the battery with the same or equivalent type, as recommended by the
manufacturer. The battery in this PC is a lithium battery which does not
contain any heavy metals. Nevertheless, in order to protect the environment,
do not dispose of batteries in household waste. Please return used batteries
either to the shop from which you bought them, to the dealer from whom you
purchased your PC, or to HP so that they can either be recycled or disposed
of in the correct way . Returned batteries will be accepted free of charge.
If you have a modem:
Do not attempt to connect this product to the phone line during a lightning
storm. Never install telephone jacks in wet locations unless the telephone line
has been disconnected at the network interface. Never touch uninsulated
telephone wires or terminals unless the telephone line has been disconnected
at the network interface. Use caution when installing or modifying telephone
5
Page 6

Introduction
lines. Avoid using a telephone (other than a cordless type) during a lightning
storm. There may be a risk from lightning.
Do not use the telephone to report a gas leak in the vicinity of the leak.
Never touch or remove the communications board without first removing the
connection to the telephone network.
6
Page 7

Your PC Workstation Does Not Start Correctly
Symptom Type of Problem
When the power button is pressed, the PC
Workstation shows no sign of activity at all:
• Monitor is blank.
Case 1
• No hard disk drive or fan noise.
• MaxiLife status panel does not light up.
When the power button is pressed, the PC
Workstation appears to boot, but monitor remains
blank:
• Hard disk drive and fan can be heard.
Case 2
• Status LED is GREEN
• MaxiLife status panel displays a smiling face .
When the power button is pressed, the PC
Workstation does not boot:
• Monitor remains blank.
• Status LED is RED
Case 3
• Beep code emitted.
• MaxiLife status panel displays an error message
with a sad face .
When the power button is pressed, the PC
Workstation starts to boot and there is activity on
the monitor:
• Boot process fails with an error message.
Case 4
• Status LED is R
• MaxiLife status panel displays a sad face and
a POST error message.
When the power button is pressed, the PC
Workstation starts to boot and there is initially
some activity on the monitor, but then:
• Screen becomes blank.
Case 5
or
• Image is corrupt.
.
.
ED.
PC Workstation may not be correctly connected to
•
the power supply.
•
Monitor may be badly connected or not switched
on.
•
HP MaxiLife has detected a hardware
configuration error. A component may be badly
connected inside the PC Workstation.
•
Configuration error has been detected by the
POST (Power-On Self Test).
•
Video card may be improperly installed or
incorrectly configured.
•
Hard disk drive failure or not accessible.
Refer to page 9.
Refer to page 11.
Refer to page 13.
Refer to page 15.
Refer to page 17.
Page 8

Your PC Workstation Does Not Start Correctly
Helpful Information
Troubleshooting Pre-Boot Checks With HP MaxiLife Hardware Refer to page 13.
EMU (Error Message Utility) Description Refer to page 15.
Beep Code Table Refer to page 13.
Troubleshooting BIOS Problems:
• Updating the BIOS. Refer to page 30.
• Restoring BIOS Default Settings. Refer to page 30.
• Clearing the CMOS. Refer to page 31.
• Recovering the BIOS (Crisis Mode). Refer to page 32.
System Board Switches. Refer to page 33.
Using the HP Setup Program. Refer to page 34.
Troubleshooting Hardware With HP e-DiagTools. Refer to page 39.
8
Page 9
Your PC Workstation Does Not Start Correctly
Case 1 — If There Is No Activity At All
Case 1 — If There Is No Activity At All
When the power button is pressed, the PC Workstation appears to boot
(sound from the hard disk drive and fan, and status LED is red), but
the monitor is blank.
Monitor is blank.
•
No hard disk drive or fan noise.
•
MaxiLife status panel does not light up or display any messages.
•
NOTE
Symptom... Check that... How...
PC Workstation does not start –
the status LED indicator is not
illuminated.
If the PC Workstation still does not start
Before removing the cover, always switch off the display and PC Workstation.
Disconnect the power cord and any accessory cables. When checks have been
completed, close the PC Workstation and reconnect the power cord and accessory
cables. Verify that the PC Workstation boots correctly.
You can access the MaxiLife status panel. Press one of the LCD control buttons to activate MaxiLife. If it
comes to life, the power cord is connected.
If it doesn’t, follow the troubleshooting steps below.
The power cord is correctly connected. Connect the power cord to a grounded power outlet and the
PC Workstation.
The power outlet is working. Plug a light into the grounded power outlet and check that it
comes on.
The voltage switch is correctly set (located
on the rear of the PC Workstation).
Check that... How...
None of the internal devices are causing the
problem.
Case 1 — If There Is No Activity At All is continued on the next page
1
2
3
4
1
2
3
4
Disconnect the power cord.
Select the correct setting.
Reconnect the power cord.
Start the PC Workstation.
Remove internal power connectors from all internal
devices (except for the system board).
Reconnect the power cord.
Reconnect the power connectors one by one to the internal
devices to see if a device is defective.
If a device is found to be defective, contact HP Support or
your authorized dealer.
➩
9
Page 10

Your PC Workstation Does Not Start Correctly
Case 1 — If There Is No Activity At All
Symptom... Check that... How...
If the PC Workstation still does not start
There is not a problem with the power
supply unit.
If the problem persists, contact HP Support or your authorized dealer
Replace the power supply unit by a known working power
1
supply from the same model of PC.
If the PC Workstation starts, contact HP Support or your
2
authorized dealer. The power supply unit might need
replacing.
10
Page 11
Your PC Workstation Does Not Start Correctly
Case 2 — Monitor Is Blank
HP KAYAK XM600
SERVICE
INFO
Case 2 — Monitor Is Blank
S
When the power button is pressed, the PC Workstation appears to
boot (sound from the hard disk drive and fan, and status LED is
green), but the monitor is blank.
Hard disk drive and fan can be heard.
•
Status LED is GREEN.
•
MaxiLife status panel displays a smiling face .
•
NOTE
Symptom... Check that... How...
Power indicator light and hard
disk activity light work but the
screen remains blank.
If the monitor is still blank
You may need to update the Basic Input Output System (BIOS). The BIOS may be corrupt. Refer to page 32 for instructions on
Before removing the cover, always switch off the display and PC Workstation.
Disconnect the power cord and any accessory cables. When checks have been
completed, close the PC Workstation and reconnect the power cord and accessory
cables. Verify that the PC Workstation boots correctly.
The display is switched ON (LED is on). Refer to the monitor manual for an explanation of the LEDs.
The monitor’s power cord is correctly
connected.
The monitor’s power outlet is working. Plug a light into the grounded power outlet and check that it
Check that... How...
The monitor’s brightness and contrast
settings are correct.
The monitor itself is not faulty.
The video cable pins are not damaged.
Ensure the power cord is plugged into a grounded power outlet
and into the monitor.
comes on.
Refer to the monitor manual if necessary.
Replace the monitor by a known working monitor from the
1
same model of PC Workstation.
If the monitor starts, contact HP Support or your authorized
2
dealer. The monitor may need to be replaced.
Switch off and unplug the monitor.
1
Disconnect the video cable and straighten any bent pins.
2
Reconnect the video cable.
3
Switch on the monitor and see if it works.
4
how to recover the BIOS.
Case 2 — Monitor Is Blank is continued on the next page
➩
11
Page 12

Your PC Workstation Does Not Start Correctly
Case 2 — Monitor Is Blank
Symptom... Check that... How...
Dual monitor or multi-monitor configuration problem
If you have a dual monitor video card
installed, but only one monitor, check that
it is connected to
If you have two or more video cards
installed, but only one monitor, check that
the monitor is connected to the correct
output.
Only one monitor is being
displayed by Windows.
One monitor is blank. Multi-monitor configuration and resolution
The driver is correctly configured for
multi-monitor operations.
have been correctly defined.
Output 1
.
The outputs are labelled on the video card.
•
Plug the monitor in the video output on the second video
•
card.
Connect the top connector on the video card, labelled 1, to
1
the first monitor.
Connect second connector, labelled 2, to the second monitor.
2
Turn on both monitors before booting the PC Workstation.
3
Access
1
Control Panel
Select the multi-monitor option and configure for the required
2
number of monitors and resolution.
NOTE
For the Matrox G400 dual monitor graphics card, the
multi-monitor setting is only available if both monitors are
connected to the PC and switched on before the PC is
switched on.
Display Properties
.
through
Start, Settings,
NOTE If the monitor goes blank or becomes corrupt during a Windows boot, refer to “Case 5
— Screen Goes Blank or Corrupt Image” on page 17.
12
Page 13
NOTE
Your PC Workstation Does Not Start Correctly
Case 3 — Boot Process Fails and Monitor is Blank
Case 3 — Boot Process Fails and Monitor is Blank
When the power button is pressed, the hard disk drive or fan can be
heard, but the PC Workstation does not boot. The monitor remains
blank and the status LED is red.
Monitor remains blank.
•
Status LED is RED
•
Beep code is emitted.
•
MaxiLife status panel displays an error message with a sad face .
•
Before removing the cover, always switch off the display and PC Workstation.
Disconnect the power cord and any accessory cables. When checks have been
completed, close the PC Workstation and reconnect the power cord and accessory
cables. Verify that the PC Workstation boots correctly.
When your PC starts up, its BIOS performs a Power-on Self Test
(POST) to test your hardware configuration for any problems. If a
problem is detected during the POST, an error is displayed on your
PC’s monitor.
.
If, however, your PC is unable to display an error message (for
example, when you graphics controller has failed), it will emit a
buzzing sound. Immediately after the buzzing sound, a series of beeps
is emitted. An error message is also displayed on the MaxiLife LCD.
If you hear a series of beeps, you should count them as this will help
you detect the cause of the problem.
Beep Code &
MaxiLife LCD
1 beep Processor absent, not correctly connected or
ERROR !
CPU Socket
2 beeps Power supply is in protected mode
Cause... Check that...
ZIP socket not closed
Check processor correctly connected and ZIP
•
socket closed.
Processor socket 2 contains a terminator if it is
•
unused.
Power cables inside the PC are correctly
•
connected.
13
Page 14
Your PC Workstation Does Not Start Correctly
Case 3 — Boot Process Fails and Monitor is Blank
Beep Code &
MaxiLife LCD
3 beeps No memory, bad memory modules,
ERROR !
ERROR !
CPU Socket
Memory Error
4 beeps Graphics card problem
ERROR !
ERROR !
CPU Socket
No Video
5 beeps PnP/PCI initialization problem
Cause... Check that...
Memory module is correctly seated in socket 1
•
incompatible memory module
(nearest processor).
If unused, memory socket 2 contains an
•
RDRAM continuity module.
Video card installed.
•
Video card seated correctly in the AGP
•
connector.
PCI cards are correctly inserted in their slots.
•
You can try removing a PCI card to see if it is
•
causing the problem.
6 beeps Corrupted BIOS. You need to activate crisis recovery procedure
(refer to page 32).
7 beeps Defective system board
If You Miss the Beep Code
If you miss the beep code, turn off the PC by pressing the on/off power
button for five seconds or more, then listen for the signal again.
14
Page 15
Your PC Workstation Does Not Start Correctly
Case 4 — Boot Process Fails and Error Message Displayed on Screen
Case 4 — Boot Process Fails and Error Message
Displayed on Screen
When the power button is pressed, the PC Workstation starts to boot
and there is activity on the monitor, but the boot process then fails with
an error message. Status LED is red. A configuration error has been
detected.
Boot process fails with an error message.
•
Status LED is RED.
•
MaxiLife status panel displays and a POST error message.
•
NOTE
NOTE
Before removing the cover, switch off the display and PC Workstation. Disconnect the
power cord and any accessory cables. When checks have been completed, close the PC
Workstation and reconnect the power cord and accessory cables. Verify that the PC
Workstation boots correctly.
Error Message Utility (EMU)
In the event of an error generated in POST (Power-On-Self-Test)
during the boot process, there are two beeps, then the Error Setup
Manager gives access to one or more detected errors. Each EMU error
is displayed as a 4-digit code with an associated text message on the
monitor screen and the MaxiLife LCD panel.
If the monitor is not available, a short error message is also displayed on the MaxiLife
LCD panel.
Further details can be accessed by pressing ENTER. A detailed
description of the reason for the failure and how to solve the problem is
displayed.
15
Page 16

Your PC Workstation Does Not Start Correctly
Case 4 — Boot Process Fails and Error Message Displayed on Screen
The following examples give the different types of error categories.
Category #1:
ERROR
0070
Category #2:
WARNING
00100
If an error can be bypassed with <F1> or solved through Setup, the POST should prompt:
CPU Terminator Card Error
Press <Enter> to view more information about error
<F1= Continue>, <F2= Setup>
If the error is only a warning (i.e. key stuck), the POST should prompt:
1
Keyboard Error
1. After a timeout period of five seconds without any intervention, the system resumes to boot
Category #3:
00xx
If the error is serious, the POST should prompt:
The BIOS has detected a serious problem that prevents your PC from booting
Press <Enter> to view more information about error
16
Page 17

Your PC Workstation Does Not Start Correctly
Case 5 — Screen Goes Blank or Corrupt Image
Case 5 — Screen Goes Blank or Corrupt Image
When the power button is pressed, the PC Workstation starts to boot
and there is initially some activity on the monitor, but then the screen
goes blank or the image is corrupt.
Screen becomes blank.
•
or
Image is corrupt.
•
NOTE
Symptom.... Check that... How...
PC Workstation boots correctly,
but when the operating system
starts loading, the screen goes
blank or image is corrupt.
If the screen is still blank or corrupt
If the screen is still blank or corrupt
Before removing the cover, always switch off the display and PC Workstation.
Disconnect the power cord and any accessory cables. When checks have been
completed, close the PC Workstation and reconnect the power cord and accessory
cables. Verify that the PC Workstation boots correctly.
The monitor supports the resolution and
selected refresh rate. This type of problem
can occur if the PC Workstation is
configured using one monitor, then
swapped with another one.
Check that... How...
The video card is correctly inserted in the
socket on the system board.
Hard disk drive is correctly configured and
cables are connected.
Hard disk drive is accessible. Refer to page 39 for instructions about troubleshooting using HP
Check that... How...
The video driver is not corrupted or
incorrectly installed.
1
2
1
2
3
Refer to page 24 for further help, if required.
e-DiagTools.
Install the latest driver for the video card.
This can be downloaded from the Kayak Support web site:
www.hp.com/go/kayaksupport
XM600 PC Workstation.
Reboot the PC Workstation in VGA mode. Then, access
Display Properties
.
Panel
Change the display resolution and refresh values to settings
that can be handled by your monitor.
Follow the instructions indicated in the above
removing the cover and switching off the PC Workstation.
Remove the AGP card, then carefully re-insert it into the
socket.
Replace the cover and reconnect the power cord and
accessory cables. Verify that the PC Workstation boots
correctly.
through
Start, Settings, Control
about
Note
, then HP Kayak
17
Page 18

Your PC Workstation Does Not Start Correctly
Case 5 — Screen Goes Blank or Corrupt Image
18
Page 19

Configuration Problems
If your PC Workstation boots normally, but you are having problems
configuring different parts of your PC Workstation.
Symptom Type of Problem
CMOS test error.
PC Workstation starts to boot, but a POST (PowerOn Self-Test) error message is displayed on the
screen.
•
Keyboard or mouse are not working correctly.
•
Floppy disk drive LED does not appear.
•
Hard disk drive, DVD, CD-RW or CD-ROM drive are
•
not accessible.
Serial or Parallel ports are incorrectly configured.
•
Devices are not cabled correctly.
•
Device drivers missing or incorrectly installed.
•
You cannot turn off the PC Workstation. Refer to page 26.
You have forgotten your password.
Your PC Workstation has a software problem.
Can’t start the PC
Software application will not run.
•
Date and time are wrong.
•
Your PC Workstation repeatedly loses its configuration settings. Refer to page 28.
You have problems using the Euro Symbol Refer to page 29.
Refer to page 21.
Refer to page 22.
Refer to page 23.
Refer to page 24.
Refer to page 25.
Refer to page 26.
Refer to page 27.
Page 20

Configuration Problems
Helpful Information
Troubleshooting BIOS Problems:
• Updating the BIOS. Refer to page 30.
• Restoring the BIOS Default Settings. Refer to page 30.
• Clearing the CMOS. Refer to page 31.
• Recovering the BIOS (Crisis Mode). Refer to page 32.
System Board Switches. Refer to page 33.
Using the HP Setup Program. Refer to page 34.
Troubleshooting Drives With a Problem:
• Hard Disk Drive. Refer to page 35.
• CD-ROM, DVD or CD-RW Drives. Refer to page 36.
Troubleshooting Hardware With HP e-DiagTools. Refer to page 39.
Recovering Hard Disk Drive Contents. Refer to page 47.
20
Page 21

If There Is a CMOS Test Error
Configuration Problems
If There Is a CMOS Test Error
NOTE
Symptom... Check that... How...
POST displays CMOS test error.
CMOS is a chip that keeps a
record of installed components
when the PC Workstation is
turned off.
If the problem persists, contact HP Support or your authorized dealer
Before removing the cover, always switch off the display and PC Workstation.
Disconnect the power cord and any accessory cables. When checks have been
completed, close the PC Workstation and reconnect the power cord and accessory
cables. Verify that the PC Workstation boots correctly.
The internal battery is working.
You have the latest BIOS version
The system board is working. Replace the system board by a known working board from the
.
Set the PC Workstation to the correct time (refer to the
1
operating system manual).
Switch off and
2
Restart the PC Workstation and check the time is correct.
3
If the time is incorrect, replace the battery by a new one.
4
Refer to Chapter 2 of your PC Workstation
If you need to update, download the latest BIOS version from
the Kayak Support website:
www.hp.com/go/kayaksupport
XM600 PC Workstation.
same model of PC Workstation.
the PC Workstation for an hour.
unplug
User’s Guide
, then HP Kayak
.
21
Page 22

Configuration Problems
If There Is a Keyboard Test Error
If There Is a Keyboard Test Error
NOTE
Symptom... Check that... How...
POST displays a keyboard
test error.
If the PC Workstation boots but you still have a problem...
You may need to update the Basic Input Output System (BIOS). Create a bootable floppy to update the BIOS. Refer to page 30.
If the keyboard/mouse still does not work
If the problem persists, contact HP Support or your authorized dealer
Before removing the cover, always switch off the display and PC Workstation.
Disconnect the power cord and any accessory cables. When checks have been
completed, close the PC Workstation and reconnect the power cord and accessory
cables. Verify that the PC Workstation boots correctly.
The keyboard and mouse cables are
correctly connected.
The keyboard is clean and no keys are
stuck down.
The mouse is clean.
The keyboard/mouse are working Replace the keyboard/mouse by known working units.
Check that... If not...
The system board is working. There is a possible problem with the system board. Contact HP Support
Plug the cables into the correct connectors on the back of the PC
Workstation. These connectors are easily identified by their color coded
icon.
Check all keys are at the same height, and none are stuck
•
(keyboard).
Clean the mouse ball and sensors.
•
or your authorized dealer.
22
Page 23

If There Is a Floppy Disk Drive Test Error
If There Is a Floppy Disk Drive Test Error
Configuration Problems
NOTE
Symptom... Check that... How...
Power-On-Self-Test displays
floppy disk drive test error.
If the drive still does not work...
If the problem persists, contact HP Support or your authorized dealer
Before removing the cover, always switch off the display and PC Workstation.
Disconnect the power cord and any accessory cables. When checks have been
completed, close the PC Workstation and reconnect the power cord and accessory
cables. Verify that the PC Workstation boots correctly.
The drive is correctly configured in the
program.
Setup
The drive cables are correctly connected. Floppy disk drive power and data cables are correctly connected
The drive cable is working. Replace the floppy disk drive cable by a known working cable
The floppy disk is working.
Check that... If not...
The system board is working. There is a possible problem with the system board. Contact HP
When the message
1
press the F2 key.
Check the
2
Advance d
(refer to chapter 2 of the PC Workstation’s
from the same model of PC Workstation.
Ensure you are using a formatted diskette and it is inserted
1
correctly.
Clean the floppy disk drive using a diskette cleaning kit.
2
Insert a known working floppy disk and see if it works.
3
Support or your authorized dealer.
Press F2 to Enter Setup
Floppy Disk Controller
menu is enabled.
option in the
User’s Guide
appears,
Setup
).
23
Page 24

Configuration Problems
If There Is a Hard Disk, DVD, CD-RW or CD-ROM Test Error
If There Is a Hard Disk, DVD, CD-RW or CD-ROM
Test Error
NOTE
Symptom... Check that... How...
Power-On-Self-Test displays hard
disk, DVD or
CD-ROM drive test error
If the drive still does not work...
If the drive still does not work...
You may need to update the Basic Input Output System (BIOS). Create a bootable floppy to update the BIOS. Refer to page 30
You receive a S.M.A.R.T. alert during the Power-On-Self-Test. Recommended action: Carry out an immediate data backup, then
If there is a hard disk drive crash...
If the problem persists, contact HP Support or your authorized dealer
Before removing the cover, always switch off the display and PC Workstation.
Disconnect the power cord and any accessory cables. When checks have been
completed, close the PC Workstation, reconnect the power cord and accessory cables.
Verify that the PC Workstation boots correctly.
The drive is correctly configured in the
program. Refer to page 35 or page
Setup
36.
The drive cables are correctly connected.
The drive cable is working.
Run e-DiagTools to perform one of the hardware diagnostics tests. Refer to page 39.
Check that... How...
The drive is working with HP e-DiagTools.
Check that... How...
The system board is working.
Switch the PC OFF then ON.
1
When the message
2
press the F2 key.
Check the drive is enabled and the correct type is selected.
3
Check the drive cables are correctly connected (refer to
1
chapter 2 of the PC Workstation’s
Close the PC Workstation, switch it on, check if it works.
2
Replace the drive cable by a known working cable from the
1
same model of PC Workstation.
Close the PC Workstation, switch it on, check if it works.
2
Replace the drive by a known working drive from the same
1
model of PC Workstation.
Close the PC Workstation, switch it on,
2
Replace the system board by a known working board from
1
the same model of PC Workstation.
Close the PC Workstation, reconnect the power cord and
2
check that the PC Workstation and drive work.
If the drive works, contact HP Support or your authorized
3
dealer for further troubleshooting information.
contact HP Support:
for a replacement hard drive. Refer to page 35.
Refer to “Recovering Hard Disk Drive Contents” on page 47.
Press F2 to Enter Setup
User’s Guide
www.hp.com/go/kayaksupport
appears,
).
check if it works.
24
Page 25

Configuration Problems
If There Is a Serial or Parallel Port Test Error
If There Is a Serial or Parallel Port Test Error
NOTE
Symptom... Check that... How...
POST displays a port test error. The port is correctly configured in the
If the PC still has a problem...
You may need to update the Basic Input Output System (BIOS). Create a bootable floppy to update the BIOS. Refer to page 30.
If the problem persists, contact HP Support or your authorized dealer
Before removing the cover, always switch off the display and PC Workstation.
Disconnect the power cord and any accessory cables. When checks have been
completed, close the PC Workstation and reconnect the power cord and accessory
cables. Verify that the PC Workstation boots correctly.
Switch the PC Workstation OFF then ON.
1
program.
Setup
All connected devices are correctly
connected and switched on.
The correct device drivers are installed. Refer to the device documentation.
Check that... How...
The system board is working.
When the message
2
press the F2 key.
Check the port is enabled and the correct setting is selected
3
under
Integrated I/O Ports
Plug the cables into the correct connectors on the PC
1
Workstation rear panel.
Switch on the PC Workstation and the external devices.
2
Replace the system board by a known working board from
1
the same model of PC Workstation.
Close the PC Workstation, reconnect the power cord and
2
check that the PC Workstation works.
If the port works, contact HP Support or your authorized
3
dealer for further troubleshooting information.
Press F2 to Enter Setup
in the
Advanced
appears,
menu.
25
Page 26

Configuration Problems
If You Cannot Turn Off Your PC Workstation
If You Cannot Turn Off Your PC Workstation
Symptom... Check that... How...
PC Workstation does
buzzing or beeping sound when
you press the power button, but
you are still unable to turn it off.
not
make a
If You Have Forgotten Your Password
NOTE
Symptom... Solution...
You have forgotten the User password.
You have forgotten the Administrator
password.
Use these instructions if the passwords were set with the
You have saved all data and exited all
programs.
Switch off the PC Workstation.
1
Restart the PC Workstation. If you are prompted for a password, enter the Supervisor password.
2
When
3
4
5
6
7
1
2
3
4
5
6
7
8
9
10
11
Press F2 to Enter Setup
Enter the Administrator Password to access the
Go to the
Go to the
password which you had forgotten.
Press
Esc,
Switch off the PC Workstation and remove the power cord.
Remove the PC Workstation’s cover.
Set switch 9 on the system board switch block to the ON position.
Replace the power cord and restart the PC Workstation.
When the message
Workstation.
Remove the power cord and reset switch 9 back to the OFF position.
Replace the PC Workstation’s cover.
Switch on the PC Workstation and allow it to complete its startup routine.
After the Power-On-Self-Test has completed, press F2 when prompted to use the
program.
Set the Administrator and new User Passwords.
Press
Esc,
menu.
Security
Set User Password
or F3, or select
Passwords have been cleared
or F3, or select
Save all data and exit all programs (if you can).
1
Press the power button and keep it pressed for 5 seconds.
2
The PC Workstation will turn off.
Remove the power cord.
3
Setup
program.
appears, press the F2 key.
program.
Setup
field and set a new User Password. This will replace the old
Exit Menu,
Exit Menu,
to save the new Password and exit
appears on screen, switch off the PC
Setup
to save the new Password and exit
Setup
Setup
.
.
26
Page 27

If Your PC Workstation Has a Software Problem
Symptom... Solution...
Configuration Problems
If Your PC Workstation Has a Software Problem
power indicator light
Green
is illuminated, but some
software won’t run.
Date and time are wrong. The date and time can be incorrect for the following reason:
If there still is a software problem...
Refer to the application software documentation and/or the operating system documentation for guidance.
•
If the software is running but not functioning properly, try to save any unsaved data, then close down the
•
application and relaunch it. If it still does not work, restart the PC Workstation and then try launching the
software again.
Reinstall the software.
•
If the problem continues, contact the software manufacturer’s support services.
•
The time has changed to or from Summer Time.
•
To change the date and time, use your operating system utilities or the
battery (refer to Chapter 2 of your
Run HP e-DiagTools to check the hardware configuration. Refer to page 39.
User’s Guide
).
program. If necessary, install a new
Setup
27
Page 28

Configuration Problems
If the PC Workstation Clock Is Not Keeping Time Correctly
If the PC Workstation Clock Is Not
Keeping Time Correctly
WARNING
There is a danger of explosion if the battery is incorrectly installed. For
your safety, never attempt to recharge, disassemble, or burn the old
battery. Replace the battery only with the same or equivalent type
recommended by the manufacturer. The battery is a lithium battery
which does not contain heavy metals. Nevertheless, in order to protect
the environment, do not dispose of batteries in household waste.
Please return used batteries to the shop from which you bought them,
to the dealer from whom you purchased your PC Workstation, or to
HP, so that they can be either recycled or disposed of in an
environmentally sound way. Returned batteries will be accepted free
of charge.
If your PC Workstation repeatedly loses its configuration settings you
should consider changing the battery. Replace it with a CR2032 coin
type manganese/lithium battery, available from most PC Workstation
stores.
To change the battery:
Disconnect the PC Workstation’s power supply cord and any
1
connection to a telecommunications network.
Remove the PC Workstation’s cover.
2
Remove the old battery by sliding it from under the retaining clip.
3
Place the new battery in the battery holder and ensure that it is
4
properly seated. Ensure that the clip holds the battery firmly in
place.
Replace the cover. Reconnect all cables and power cords.
5
Run the Setup program, accessed by pressing
6
reconfigure the PC Workstation.
28
F2 at startup, to
Page 29

Configuration Problems
If You Have Problems Using the Euro Symbol
If You Have Problems Using the Euro Symbol
If your keyboard has a Euro symbol key, it can only be used with
operating systems and applications that support this feature.
Only the latest operating systems, such as Windows 98, provide
•
integrated support for the Euro symbol (in certain
languages only).
Not all applications support the Euro symbol.
•
Not all fonts contain the Euro character.
•
For Windows 95 and Windows NT Users
Windows NT 4.0 and Windows 95 do not provide integrated support.
For more information on how to enable support of the Euro symbol,
refer to Microsoft’s web site at:
www.microsoft.com/windows/euro.asp
Configuring Your Keyboard
To configure your keyboard, go to
menu. Double-click on
in the
Keyboard Properties window. Click on Add and select the country that
Keyboard and select the Language or Input Locales tab
corresponds to your keyboard, and click
.
Panel
Settings
Control Panel
OK. Click OK to exit the Control
in the
Start
29
Page 30

Configuration Problems
Troubleshooting BIOS Problems
Troubleshooting BIOS Problems
The BIOS is a set of program routines that gives the PC Workstation its
fundamental operational characteristics. Many problems with your PC
Workstation can be solved by updating (flashing) the BIOS (Basic
Input Output System).
NOTE
It is recommended that before you make any modifications to the BIOS you take note
of the system setup.
Updating the BIOS
The latest system BIOS (standard flash operation) for your PC
Workstation can be downloaded from HP’s Support Web site at:
www.hp.com/go/kayaksupport. Instructions on updating the BIOS
are supplied with the downloaded BIOS files and a BIOS flash utility.
Restoring BIOS Default Settings
Suspected hardware errors may be caused by BIOS and configuration
issues. If the BIOS settings are suspected to be wrong, do the following
steps to restore the BIOS to its default setting:
Press
1
2
3
F2 while the initial “Kayak” logo is displayed immediately after
restarting the PC Workstation to access the Setup program.
Press
F9 to load the default settings from the Setup program.
Set the “Reset Configuration Data” to Yes in the Main menu.
It is recommended that before you make any modifications to the
BIOS you take note of the system setup.
30
Page 31

Configuration Problems
Troubleshooting BIOS Problems
Clearing the CMOS
Turn off the PC Workstation, disconnect the power cord and data
1
cables, then remove the cover.
Set the system board switch 8 to the ON position to clear the CMOS
2
memory.
Replace the cover, and only reconnect the power cord.
3
Reboot the PC Workstation. A message similar to the following will
4
be displayed:
“Configuration has been cleared, set switch Clear to
the ON position before rebooting.”
Turn off the PC Workstation, disconnect the power cord, and remove
5
the cover.
Set the system board switch 8 to the OFF position to retain the
6
configuration.
Replace the cover, and reconnect the power cord and data cables.
7
Switch on the PC Workstation. Run the Setup program by pressing
8
F2
. Then press F9, the CMOS default values will be automatically
downloaded and saved.
Esc
Press
9
program.
to save the configuration and exit from the Setup
31
Page 32

Configuration Problems
Troubleshooting BIOS Problems
Recovering the BIOS (Crisis Mode)
If for some reason the BIOS is corrupted and the standard flash cannot
be used, use the BIOS Recovery Mode (exceptional BIOS recovery
operation) to restore the BIOS. To do this:
Obtain a bootable DOS floppy disk.
1
Copy the BIOS files on to the floppy disk.
2
Create (or edit) the file, AUTOEXEC.BAT
3
This should contain a single line of text:
“
phlash /c /mode=3 /s IC1105US.FUL
Rename the BIOS filename with the one on the floppy disk.
4
Shut down the PC Workstation.
5
Power off the PC Workstation and remove the power cord.
6
Remove the cover.
7
Set switch 7 to the ON position.
8
Insert the floppy disk into the floppy disk drive.
9
Reconnect the power cord and switch on the PC Workstation.
10
The PC Workstation boots from the floppy disk, then flashes the
11
BIOS. However, it should be noted, that during the flash process, the
screen remains blank.
The recovery process is finished when there are four beeps.
12
Power off the PC Workstation. Remove the floppy disk from the
13
drive. Remove the power cord.
Set switch 7 back to the OFF position.
14
Replace the cover, reconnect the power cord, then reboot the PC
15
Workstation.
”
32
Page 33

Configuration Problems
System Board Switches
System Board Switches
There are ten system board switches used for configuration, numbered
from 1 to 10. A certain number of these are reserved (switches 1, 2, 3,
4, 5) and should not be modified, otherwise it could lead to a system
failure.
Switch
1-5
6
7
8
9
10
Default
Position
OFF
ON
OFF
OFF
OFF
ON
Function:
Reserved.
Default Settings
Enables keyboard power-on using the space
bar.
OFF disables this option.
Enables normal modes.
ON enables the BIOS recovery mode at next
boot.
Retains CMOS memory.
ON clears CMOS memory at next boot.
Enables User and System Administrator
passwords.
ON clears the passwords at next boot.
Selects the chassis type.
ON = minitower
Do Not Change
33
Page 34

Configuration Problems
Using the HP Setup Program
Using the HP Setup Program
The Setup program allows you to view and change the configuration of
your PC Workstation, such as the passwords and boot device order.
Follow these instructions to check the configuration.
First, Turn On or Restart
Your PC Workstation
To Go to the Setup
Program
If your PC Workstation is off, turn on the display and then the PC
Workstat i o n.
If the PC Workstation is already turned on, save your data, exit all
programs and restart your PC Workstation. For Windows NT 4.0,
Windows 95 or Windows 98, use the
command in the
Start
menu. This command will automatically exit the
Shut Down
Restart your computer
operating system and restart the PC Workstation.
To go into the Setup program, press F2 while the “Kayak” logo appears
on your display.
.
34
Page 35

Configuration Problems
More Troubleshooting for Drives
More Troubleshooting for Drives
This section provides more information on how to solve problems with
your drives or accessory boards.
WARNING
Be sure to disconnect the power cord and any telecommunication
cables from your computer before you remove the cover to check the
cable connections or jumper settings.
To avoid electric shock and harm to your eyes by laser light, do not
open the CD-ROM drive enclosure. The CD-ROM drive should be
serviced by service personnel only. Refer to the label on the CD-ROM
for power requirements and wavelength. This PC Workstation is a class
1 laser product. Do not attempt to make any adjustment to the laser
unit.
If the Hard Disk Has a Problem
If you receive a S.M.A.R.T. alert either from TopTools or during
1
Power-On-Self-Test, there could be a potential problem with the
hard disk drive. Carry out an immediate data backup, then contact
HP Support.
Check that the disk power and data cables are correctly connected
2
(refer to Chapter 2 in your User’s Guide for information about cables
and connectors).
Check that booting from the hard drive has not been disabled in the
3
Boot menu of the Setup program, accessed by pressing F2 at startup.
Check that the hard disk drive has been detected (refer to the
4
Disk Drives
by pressing
Run ScanDisk and Disk Defragmenter to see if they detect a problem
5
submenu in the Boot menu in the Setup program, accessed
F2 at startup).
with the hard disk drive. To access these utilities, select
Accessories
Run IDE or SCSI tests from the
6
System Tools from the Start menu.
Advanced System Test
option from HP e-
DiagTools (described on page 39).
Programs
Hard
35
Page 36

Configuration Problems
More Troubleshooting for Drives
If the Hard Disk Activity
Light Does Not Work
If the hard disk activity light does not flicker when the PC Workstation
is accessing the hard disk drive:
1 Check that the control panel connector is firmly attached to the
system board.
2 Check that the disk power and data cables are correctly connected.
If the CD-ROM, DVD or CD-RW Drive Has a Problem
CD-ROM, DVD or CD-RW Drive Does Not Work
1 Check that a media is inserted in the drive.
2 Check that all cables (data, power and audio) have been properly
connected both to the drive and to the system board.
3 Verify that the drive has been detected in the Setup program,
accessed by pressing
IDE Secondary Master or IDE Secondary Slave field.
in the
4 If you intend to boot on CD-ROM, place
(refer to the
Boot Device Priority
F2 at startup). You should see a drive declared
CD-ROM before HDD in Setup
submenu in the
Boot
menu group of the
HP Setup program).
DVD Drive Doesn’t Play DVD Video
1 Check that the DVD disk you are trying to play and your DVD drive
have the same regional code setting.
NOTE
Your DVD drive’s regional code setting is set by the first DVD disk you insert in the
drive.
2 Ensure you have a software MPEG decoder installed on your system.
CD-ROM, DVD or CD-RW Drive Is Idle
If the drive does not appear to be working, try accessing the disk by
clicking on the drive icon or drive letter assigned to the drive by your
operating system.
36
Page 37

Configuration Problems
More Troubleshooting for Drives
CD-ROM, DVD or CD-RW Door Does Not Open
If you have difficulty removing a disk from the drive (during a power
failure for example), you can use the manual eject button.
For example, to eject a CD-ROM using the manual eject button:
1 With a thin, solid rod, such as the end of a paper clip, push the
CD-ROM drive’s manual eject button.The below diagram shows the
two possible positions of the manual eject button.
2 The CD-ROM drive door will be released, opening slightly. Carefully
pull it open fully and retrieve the CD.
3 To close the CD-ROM drive door, push it gently closed without
forcing it. The CD-ROM drive door may not close completely until it
is fully functional (for example, when the power comes back on).
37
Page 38

Configuration Problems
More Troubleshooting for Drives
38
Page 39

Troubleshooting with HP e-DiagTools
The first step in solving a problem with a PC is diagnosis.
HP’s e-DiagTools helps you diagnose hardware-related problems on a
HP computer. It is a series of tools designed to help you to:
Distinguish between software and hardware problems
•
Verify the correct functioning of a HP computer
•
Diagnose hardware-related problems
•
Provide precise information to support providers so that they can
•
solve any problem quickly and effectively.
e-DiagTools is not a repair tool.
Page 40

Troubleshooting with HP e-DiagTools
Overview of e-DiagTools
Overview of e-DiagTools
e-DiagTools has three main components:
❒ The buzzer, which provides pre-boot diagnostics. It emits an audible
set of beeps that helps diagnose a problem when the computer
cannot boot.
❒ The e-DiagTools core tests, which provide hardware detection, basic
and advanced system tests, and the possibility to generate a Support
Ticket with a complete record of the test results and the PC’s
configuration.
❒ A set of functions to forward the Support Ticket to your authorized
support provider via e-mail, and to retrieve and flash the latest BIOS
version for your computer.
HP e-DiagTools is supplied on the following media:
❒ The Utility Partition pre-installed on your hard disk
(recommended).
❒ The HP recovery CD-ROM that was supplied with your PC
Workstation.
❒ The HP DiagTools CD-ROM.
NOTE Only the Utility Partition version of e-DiagTools supports the full range
of e-features. When you run e-DiagTools from a CD-ROM you will not be
able to send the Support Ticket via e-mail or to update the BIOS.
If you are running e-DiagTools from a CD-ROM, the option to start from
the CD-ROM is enabled and the CD-ROM is configured to be the first
device to boot from.
After running e-DiagTools, restore the original Setup values.
Alternatively, you can set the boot device priority by pressing the F8 key
when the logo screen is displayed after restarting your computer.
40
Page 41

Troubleshooting with HP e-DiagTools
Running e-DiagTools from the Utility Partition on your Hard Disk
Running e-DiagTools from the Utility Partition on your
Hard Disk
To run e-DiagTools from the Utility Partition on your computer’s hard
disk drive, follow this procedure:
Quit all applications, shut down the operating system, and restart
1
your computer.
After the initial splash screen with the logo, a message is displayed:
2
Press <F10> to enter HP Utility Partition ...
or any other key to proceed
Press the F10 key. A menu appears.
3
NOTE If this does not work, it probably means that the Utility Partition has
been disabled. Try running e-DiagTools from a CD-ROM instead.
Alternatively, you can recreate the Utility Partition and restore your
operating system. For more information, refer to the following Web
address:
www.hp.com/desktops/diagtools
Select the option to run e-DiagTools. Depending on your BIOS
4
configuration, you may have to reboot the PC. Changes are made
automatically and are restored to the original values when you exit
e-DiagTools.
NOTE You cannot move from one option to another. Once you have selected
an option, you have to exit, reboot your system and run e-DiagTools.
41
Page 42

Troubleshooting with HP e-DiagTools
Running e-DiagTools from a CD-ROM
Running e-DiagTools from a CD-ROM
NOTE Only the Utility Partition version of e-DiagTools supports the full range
of e-features. When you run e-DiagTools from a CD-ROM you will not be
able to send the Support Ticket via e-mail or to update the BIOS.
Prerequisites
Before you run e-DiagTools from a CD-ROM, ensure that the following
are correctly configured in the computer’s BIOS Setup program:
❒ No operating system is specified, which means that:
Main
if the
•
set it to
if the Main or Advanced me nu ha s an item to select the operating
•
system, set it to
❒ All
Hardware Protection items in the Security menu are set to
Enabled or Unlocked.
No
Advanced
or
Other.
menu has an item
Plug and Play OS
❒ If you are running e-DiagTools from a CD-ROM, the option to start
from the CD-ROM is enabled and the CD-ROM is configured to be the
first device to boot from.
Alternatively, you can set the boot device priority by pressing the F8
key when the logo screen is displayed after restarting your
computer.
After running e-DiagTools, restore the original Setup values.
,
42
Page 43

Troubleshooting with HP e-DiagTools
Running e-DiagTools from a CD-ROM
Running e-DiagTools from the HP “Recovery” CD-ROM
To run e-DiagTools from the recovery CD-ROM:
Insert the HP CD-ROM in your CD-ROM drive. Shut down the
1
operating system and restart your computer.
Ensure that the option to start from the CD-ROM drive is enabled,
2
and that the CD-ROM is configured to be the first device to boot
from.
e-DiagTools will start automatically, or, depending on the HP
3
CD-ROM used, a menu appears. In this last case, select the option to
run the hardware diagnostics.
e-DiagTools will start, displaying a welcome screen.
Running e-DiagTools from the HP DiagTools CD-ROM
To run e-DiagTools from the HP DiagTools CD-ROM, follow this
procedure:
Insert the HP DiagTools CD-ROM in your CD-ROM drive. Shut down
1
the operating system and restart your computer.
Ensure that the option to start from the CD-ROM drive is enabled
2
and that the CD-ROM is configured to be the first device to boot
from.
The programs on the CD-ROM will automatically determine the
3
appropriate version of e-DiagTools to run.
e-DiagTools will start, displaying a welcome screen.
43
Page 44

Troubleshooting with HP e-DiagTools
HP e-DiagTools Hardware Tests
HP e-DiagTools Hardware Tests
The following hardware tests can be performed from HP e-DiagTools:
❒ Hardware Detection. Automatically detects the complete
hardware configuration of the system (including PC Workstation
model and version, processor type, cache memory, BIOS version,
total main memory, IDE or SCSI device list, video adapter, audio
card, keyboard, and USB controller) and determines the
appropriate tests to be performed.
❒ Basic System Tests. Automatically (no user input required)
verifies the correct operation of different hardware components
of the PC Workstation. If a warning message is displayed, you
should use the Advanced System Tests to investigate the error.
You can also produce a Support Ticket containing a record of the
system’s configuration and test results.
❒ Advanced System Tests. Independently tests a selected
hardware component of the PC Workstation. Because of this, the
tests are more thorough than what is performed in the Basic
System Tests. It should also be noted, the Advanced System
Tests can only be performed after the Basic System Tests have
been completed. Each test is selected through the on-line screen
menu and can be repeated any number of times.
For example, if there is doubt with a hard disk drive, select the
hard disk drive test, then one of the proposed options. If a test
fails, you can produce support ticket.
44
Page 45

Troubleshooting with HP e-DiagTools
For More Information
For More Information
For more information about using HP e-DiagTools, consult the eDiagTools User’s Guide, available in PDF format on HP’s web site
www.hp.com/desktops/diagtools
On this web site you can also:
Download e-DiagTools
•
Order the HP DiagTools CD-ROM
•
Get information about e-DiagTools, such as Frequently Asked
•
Questions.
45
Page 46

Troubleshooting with HP e-DiagTools
For More Information
46
Page 47

Recovering Hard Disk Drive Contents
In the unlikely event of a hard disk crash, you can recover your PC
Workstation’s preloaded operating system and software using the PC
Image Engineer — Image Creation and Recovery CD-ROM
supplied with your PC Workstation. Some of the available functions on
the Image Creation and Recovery CD-ROM are described below:
Full Recovery: Restores the operating system, drivers, utilities and
•
Special Disk Partition as supplied by default. A full recovery also
automatically erases any viruses that might be present on the Master
Boot Record. It should be noted, however, that this function
reformats your hard disk drive. It is highly recommended, if possible,
that you save all data files and software installations.
Minimal Recovery: Restores only the operating system and SCSI
•
driver for access to a SCSI hard disk drive.
Partial Recovery: Restores individual drivers which are supplied in a
•
“browseable area” of the CD-ROM.
Copy OS Master Files: For use when Windows prompts you to insert
•
the operating system media when installing additional drivers.
HP e-DiagTools: Checks the system configuration and operation.
•
Also described on page 39.
1
NOTE Any software that has been installed on the PC Workstation after it has been
purchased, and any personal data that has been generated by applications installed on
the PC Workstation, are not covered by the recovery process.
When using the Full Recovery option, any hardware that has been installed in the PC
Workstation after it has been purchased will require that the necessary drivers be reinstalled. In the case where hardware has been removed you may have to remove the
unneccessary drivers.
Refer to your Kayak User’s Guide delivered with the PC Workstation for
instructions on how to perform a recovery, upgrade or downgrade.
1. Some models are not provided with an
CD-ROM
reinstall the operating system from the CD-ROM provided for this purpose
with your PC Workstation.
Any drivers you need to reinstall can be downloaded from HP’s Support
Web s i te a t :
. If you do not have an
www.hp.com/go/kayaksupport
Image Creation and Recovery CD-ROM
Image Creation & Recovery
.
,
Page 48

Recovering Hard Disk Drive Contents
Recovering Preloaded Drivers
You can use the Image Creation and Recovery CD-ROM to reinstall
individual drivers that were delivered with the PC Workstation. To do
this, insert the CD-ROM into the CD-ROM drive. Automatically an
HTML file is displayed. Using your web browser, navigate through the
CD-ROM to find the appropriate driver(s). Then install them by
executing the corresponding installation program directly from the CDROM.
Reinstalling Windows NT Service Pack
If you use either the Full Recovery or Minimal Recovery options, the
Service Pack delivered with the PC Workstation is automatically
reinstalled.
Changing the Hard Disk
If the hard disk is corrupted and you can no longer use it, you should
replace it with a new hard disk drive. Refer to Chapter 2 of your PC
Workstation User’s Guide for information about installing hard disk
drives.
If the replacement hard disk drive is brand new, you will need to
partition and format the drive. This can be done using the Image
Creation and Recovery CD-ROM.
48
Page 49

Other Sources of Information
Getting Online Support for Troubleshooting
HP’s support web site provides extensive support material that can
help you troubleshoot problems on your PC Workstation:
Documentation for your PC Workstation (described below)
•
BIOS updates (including the upgrade utility and instructions)
•
The latest drivers and software utilities
•
For HP’s support web site, connect to:
www.hp.com/go/kayaksupport.
Documentation Set Overview
HP’s web site allows you to download documentation for your PC
Workstation free of charge. The documents provided are in Adobe
Acrobat (PDF) format and are available from HP’s web site at:
www.hp.com/go/kayaksupport.
The available documents include:
User’s Guide—describes how to set up your PC Workstation for the
•
first time and contains information on how to install and replace
hardware components.
Service Handbook Chapters—provides information on
•
replacement parts, including HP part numbers.
Technical Reference Manual—technical information on system
•
components, such as system board, chipset and BIOS.
Troubleshooting Guide—this online guide.
•
You will also find complete information on available service and support
at the HP World Wide Web site. To see the full set of services available,
go to:
www.hp.com/go/kayak
.
Page 50

Hewlett-Packard Support and Information Services
You can learn more about HP service and support from the support
Web s i t e :
www.hp.com/go/kayaksupport
.
Collecting Information Before Contacting HP Support
It is recommended that before contacting HP Support you note down
some of the information mentioned below. This will help HP support
deal with your problem quickly and efficiently.
PC Description
Model number See label on the right side of your PC.
Serial number See label on the right side of your PC.
Memory
Number of megabytes installed
•
Is it HP supplied memory or memory
•
from another source?
Write down a brief description of the problem
Frequency How often has the problem occurred?
Run OK? How long has the PC been running normally?
Recent changes to the PC Have there been any recent changes made to the PC?
Which BIOS version is used? The BIOS version is displayed in the Setup program main menu, accessed by pressing F2 during
Any BIOS parameter changes? Did the problem occur after changes were made to the BIOS using the Setup program?
Make a list of slots and interrupts used by
additional cards (for example, LAN, sound
and SCSI)
Are you using the original operating system
software that came preloaded on your PC?
If not, what is the operating system
version?
Any operating system-generated error
messages?
Any errors during boot (Power-On Self
Test)?
This test checks all installed components.
The total amount of memory installed is displayed in the Setup program main menu, accessed
•
by pressing F2 during start-up. You can also use the System Info feature of HP MaxiLife to
get this information.
There may be some compatibility problems with non-HP memory modules. HP supports and
•
recommends only HP supplied memory modules.
Question or Problem
Hardware Configuration
start-up. You can also use the System Info feature of HP MaxiLife to get this information.
This is to check for interrupt conflicts. You can find IRQs by running e-DiagTools
Operating System
Select Settings ➪ Control Panel from the Start menu, then click on the System icon. The
operating system version is displayed under System.
Please note down exact text of error message.
Any POST errors will be displayed on your monitor screen or signalled by beep codes.
(refer page 39).
 Loading...