

Page 1

HP StorageWorks
HA-Fabric Manager transition guide
HAFM SW 08.08.00
Part number: AA–RV1MD–TE/958–000384–003
Fourth edition: January 2006
Page 2

Legal and notice information
© Copyright 2001–2006 Hewlett-Packard Development Company, L.P.
© Copyright 2006 McDATA Corp.
Hewlett-Packard Company makes no warranty of any kind with regard to this material, including, but not limited to, the implied
warranties of merchantability and fitness for a particular purpose. Hewlett-Packard shall not be liable for errors contained herein or
for incidental or consequential damages in connection with the furnishing, performance, or use of this material.
This document contains proprietary information, which is protected by copyright. No part of this document may be photocopied,
reproduced, or translated into another language without the prior written consent of Hewlett-Packard. The information is provided
“as is” without warranty of any kind and is subject to change without notice. The only warranties for HP products and services are
set forth in the express warranty statements accompanying such products and services. Nothing herein should be construed as
constituting an additional warranty. HP shall not be liable for technical or editorial errors or omissions contained herein.
Intel and Pentium are trademarks or registered trademarks of Intel Corporation or its subsidiaries in the United States and other
countries.
Linux® is a U.S. registered trademark of Linus Torvalds.
Windows® is a U.S. registered trademarks of Microsoft Corporation.
UNIX® is a registered trademark of The Open Group.
Printed in the US.
HA-Fabric Manager transition guide
Page 3

Contents
About this guide . . . . . . . . . . . . . . . . . . . . . . . . . . . . . . . . . . . . . . . . . . . . . . . . . 5
Intended audience . . . . . . . . . . . . . . . . . . . . . . . . . . . . . . . . . . . . . . . . . . . . . . . . . . . . . . . . . 5
Related documentation . . . . . . . . . . . . . . . . . . . . . . . . . . . . . . . . . . . . . . . . . . . . . . . . . . . . . . 5
Document conventions and symbols . . . . . . . . . . . . . . . . . . . . . . . . . . . . . . . . . . . . . . . . . . . . . 6
Rack stability . . . . . . . . . . . . . . . . . . . . . . . . . . . . . . . . . . . . . . . . . . . . . . . . . . . . . . . . . . . . . 7
HP technical support . . . . . . . . . . . . . . . . . . . . . . . . . . . . . . . . . . . . . . . . . . . . . . . . . . . . . . . . 7
HP-authorized reseller . . . . . . . . . . . . . . . . . . . . . . . . . . . . . . . . . . . . . . . . . . . . . . . . . . . . 7
Helpful web sites . . . . . . . . . . . . . . . . . . . . . . . . . . . . . . . . . . . . . . . . . . . . . . . . . . . . . . . . 8
Contents
1 Upgrading to HAFM 8.8 . . . . . . . . . . . . . . . . . . . . . . . . . . . . . . . . . . . . . . . . . 9
HAFM platform . . . . . . . . . . . . . . . . . . . . . . . . . . . . . . . . . . . . . . . . . . . . . . . . . . . . . . . . . . . 9
Remote client system requirements . . . . . . . . . . . . . . . . . . . . . . . . . . . . . . . . . . . . . . . . . . . . . 10
Upgrade considerations . . . . . . . . . . . . . . . . . . . . . . . . . . . . . . . . . . . . . . . . . . . . . . . . . . . . 11
Upgrade and migration procedures . . . . . . . . . . . . . . . . . . . . . . . . . . . . . . . . . . . . . . . . . . . . 12
Upgrading an existing HAFM appliance from HAFM 7.x to 8.8 . . . . . . . . . . . . . . . . . . . . . . 12
Before upgrading . . . . . . . . . . . . . . . . . . . . . . . . . . . . . . . . . . . . . . . . . . . . . . . . . . . . 13
Upgrading to HAFM 8.8 . . . . . . . . . . . . . . . . . . . . . . . . . . . . . . . . . . . . . . . . . . . . . . . 13
Migrating data to HAFM 8.8 . . . . . . . . . . . . . . . . . . . . . . . . . . . . . . . . . . . . . . . . . . . . 14
Upgrading an existing HAFM appliance from HAFM 8.x to 8.8 . . . . . . . . . . . . . . . . . . . . . . 16
Before upgrading . . . . . . . . . . . . . . . . . . . . . . . . . . . . . . . . . . . . . . . . . . . . . . . . . . . . 16
Upgrading to HAFM 8.8 . . . . . . . . . . . . . . . . . . . . . . . . . . . . . . . . . . . . . . . . . . . . . . . 16
Migrating data to HAFM 8.8 . . . . . . . . . . . . . . . . . . . . . . . . . . . . . . . . . . . . . . . . . . . . 17
Data migration from HAFM 7.x to 8.x. . . . . . . . . . . . . . . . . . . . . . . . . . . . . . . . . . . . . . . . . . . 18
Data migrated. . . . . . . . . . . . . . . . . . . . . . . . . . . . . . . . . . . . . . . . . . . . . . . . . . . . . . . . . 18
User information . . . . . . . . . . . . . . . . . . . . . . . . . . . . . . . . . . . . . . . . . . . . . . . . . . . . . 18
E-mail event configuration . . . . . . . . . . . . . . . . . . . . . . . . . . . . . . . . . . . . . . . . . . . . . . 18
FAF libraries . . . . . . . . . . . . . . . . . . . . . . . . . . . . . . . . . . . . . . . . . . . . . . . . . . . . . . . 18
Firmware library . . . . . . . . . . . . . . . . . . . . . . . . . . . . . . . . . . . . . . . . . . . . . . . . . . . . . 18
Logs . . . . . . . . . . . . . . . . . . . . . . . . . . . . . . . . . . . . . . . . . . . . . . . . . . . . . . . . . . . . . 19
Nicknames . . . . . . . . . . . . . . . . . . . . . . . . . . . . . . . . . . . . . . . . . . . . . . . . . . . . . . . . 19
Sessions configuration . . . . . . . . . . . . . . . . . . . . . . . . . . . . . . . . . . . . . . . . . . . . . . . . . 19
SNMP configuration . . . . . . . . . . . . . . . . . . . . . . . . . . . . . . . . . . . . . . . . . . . . . . . . . . 19
Switch identification . . . . . . . . . . . . . . . . . . . . . . . . . . . . . . . . . . . . . . . . . . . . . . . . . . 19
Threshold alert configurations. . . . . . . . . . . . . . . . . . . . . . . . . . . . . . . . . . . . . . . . . . . . 19
Zoning configurations . . . . . . . . . . . . . . . . . . . . . . . . . . . . . . . . . . . . . . . . . . . . . . . . . 19
Data not migrated . . . . . . . . . . . . . . . . . . . . . . . . . . . . . . . . . . . . . . . . . . . . . . . . . . . . . . 19
Post-upgrade configuration tasks. . . . . . . . . . . . . . . . . . . . . . . . . . . . . . . . . . . . . . . . . . . . . . . 20
General HAFM configuration . . . . . . . . . . . . . . . . . . . . . . . . . . . . . . . . . . . . . . . . . . . . . . 20
Upgrading remote clients . . . . . . . . . . . . . . . . . . . . . . . . . . . . . . . . . . . . . . . . . . . . . . . . . 20
Reverting to HAFM 8.x . . . . . . . . . . . . . . . . . . . . . . . . . . . . . . . . . . . . . . . . . . . . . . . . . . . . . 21
Removing the HAFM application . . . . . . . . . . . . . . . . . . . . . . . . . . . . . . . . . . . . . . . . . . . . . . 21
HA-Fabric Manager transition guide 3
Page 4

Removing HAFM services . . . . . . . . . . . . . . . . . . . . . . . . . . . . . . . . . . . . . . . . . . . . . . . . . . . 21
Product license and feature keys. . . . . . . . . . . . . . . . . . . . . . . . . . . . . . . . . . . . . . . . . . . . . . . 21
License keys . . . . . . . . . . . . . . . . . . . . . . . . . . . . . . . . . . . . . . . . . . . . . . . . . . . . . . . . . . 22
Obtaining a license key. . . . . . . . . . . . . . . . . . . . . . . . . . . . . . . . . . . . . . . . . . . . . . . . 22
Activating optional software modules . . . . . . . . . . . . . . . . . . . . . . . . . . . . . . . . . . . . . . 22
Feature keys . . . . . . . . . . . . . . . . . . . . . . . . . . . . . . . . . . . . . . . . . . . . . . . . . . . . . . . . . . 22
Enabling a feature key . . . . . . . . . . . . . . . . . . . . . . . . . . . . . . . . . . . . . . . . . . . . . . . . 23
2 Comparing HAFM 7.x and 8.x features . . . . . . . . . . . . . . . . . . . . . . . . . . . . . . 25
Finding HAFM 7.x functions in HAFM 8.x . . . . . . . . . . . . . . . . . . . . . . . . . . . . . . . . . . . . . . . . 25
A Configuring HAFM through a firewall . . . . . . . . . . . . . . . . . . . . . . . . . . . . . . . 31
Polling client function . . . . . . . . . . . . . . . . . . . . . . . . . . . . . . . . . . . . . . . . . . . . . . . . . . . . . . 31
Faster logins . . . . . . . . . . . . . . . . . . . . . . . . . . . . . . . . . . . . . . . . . . . . . . . . . . . . . . . . . . 31
Forcing a client to be a polling client. . . . . . . . . . . . . . . . . . . . . . . . . . . . . . . . . . . . . . . 31
Forcing all clients to be polling clients . . . . . . . . . . . . . . . . . . . . . . . . . . . . . . . . . . . . . . 32
Configuring TCP port numbers to allow firewall access . . . . . . . . . . . . . . . . . . . . . . . . . . . . . . . 33
HAFM function with RMI at TCP port level. . . . . . . . . . . . . . . . . . . . . . . . . . . . . . . . . . . . . . 33
Forcing the RMI registry to use a TCP port. . . . . . . . . . . . . . . . . . . . . . . . . . . . . . . . . . . . . . 34
HAFM_sc.bat file . . . . . . . . . . . . . . . . . . . . . . . . . . . . . . . . . . . . . . . . . . . . . . . . . . . . 34
HAFM_c.bat file . . . . . . . . . . . . . . . . . . . . . . . . . . . . . . . . . . . . . . . . . . . . . . . . . . . . . 35
Forcing the server and client to export a port number . . . . . . . . . . . . . . . . . . . . . . . . . . . . . . 35
HAFM_sc.bat file . . . . . . . . . . . . . . . . . . . . . . . . . . . . . . . . . . . . . . . . . . . . . . . . . . . . 36
HAFM_c.bat file . . . . . . . . . . . . . . . . . . . . . . . . . . . . . . . . . . . . . . . . . . . . . . . . . . . . . 37
Index . . . . . . . . . . . . . . . . . . . . . . . . . . . . . . . . . . . . . . . . . . . . . . . . . . . . . . . . 39
Figures
1 1U-high rack-mount HAFM appliance. . . . . . . . . . . . . . . . . . . . . . . . . . . . . . . . . . . . . . . . . . 9
2 HAFM 8.8 Login dialog box . . . . . . . . . . . . . . . . . . . . . . . . . . . . . . . . . . . . . . . . . . . . . . . 15
3 HAFM appliance and client communications. . . . . . . . . . . . . . . . . . . . . . . . . . . . . . . . . . . . 33
Tables
1 Document conventions . . . . . . . . . . . . . . . . . . . . . . . . . . . . . . . . . . . . . . . . . . . . . . . . . 6
2 Windows
3 Solaris system requirements for remote clients . . . . . . . . . . . . . . . . . . . . . . . . . . . . . . . . 10
4 Linux
6 AIX system requirements for remote clients . . . . . . . . . . . . . . . . . . . . . . . . . . . . . . . . . . 11
5 HP-UX system requirements for remote clients . . . . . . . . . . . . . . . . . . . . . . . . . . . . . . . . 11
7 HAFM 7.x and 8.x function locations. . . . . . . . . . . . . . . . . . . . . . . . . . . . . . . . . . . . . . 25
4
® system requirements for remote clients . . . . . . . . . . . . . . . . . . . . . . . . . . . . . 10
® system requirements for remote clients . . . . . . . . . . . . . . . . . . . . . . . . . . . . . . . . 10
Page 5

About this guide
This guide provides information to help you transition from earlier versions of HP StorageWorks
High Availability Fabric Manager (HAFM) to HAFM 8.8.
Intended audience
This book is intended for use by system administrators and service technicians who are experienced
with the following:
• Fibre Channel technology
• StorageWorks Fibre Channel switches
Related documentation
For a list of corresponding documentation included with this product, see the “Related documents”
section of the HP StorageWorks HA-Fabric Manager release notes.
For the latest information, documentation, and firmware releases, please visit the HP StorageWorks
web site:
http://h18006.www1.hp.com/storage/saninfrastructure.html
For information about Fibre Channel standards, visit the Fibre Channel Industry Association web
site: h
ttp://www.fibrechannel.org.
These and other HP documents can be found on the HP document web site:
http://www.docs.hp.com
.
HA-Fabric Manager transition guide 5
Page 6
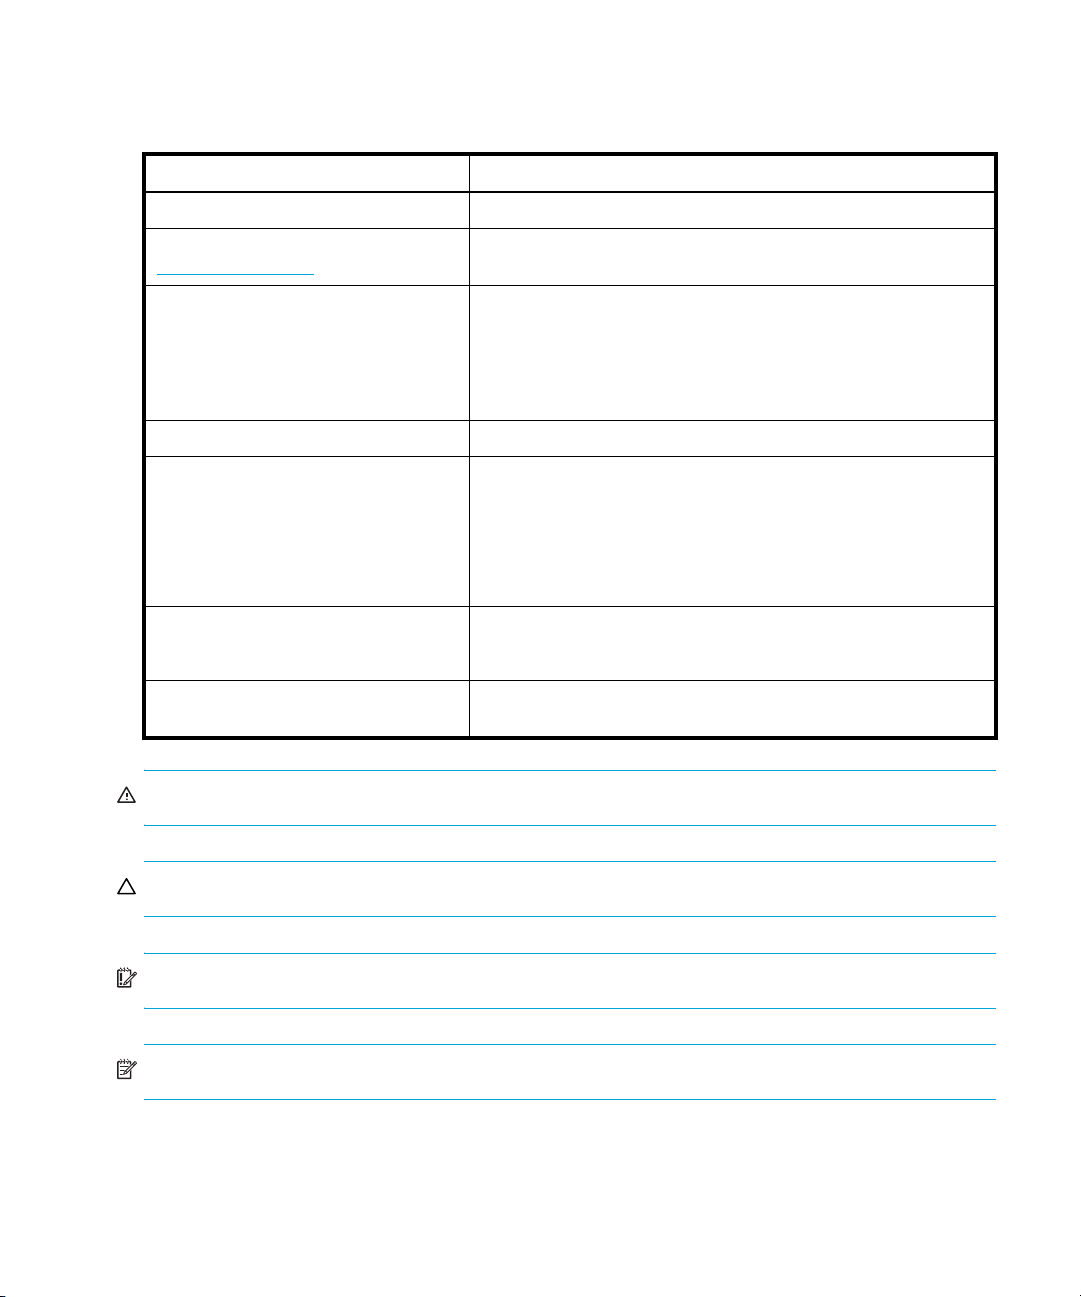
Document conventions and symbols
Table 1 Document conventions
Convention Element
Medium blue text: Figure 1 Cross-reference links and e-mail addresses
Medium blue, underlined text
(http://www.hp.com
Bold font • Key names
Italics font Text emphasis
Monospace font • File and directory names
Monospace, italic font • Code variables
Monospace, bold font Emphasis of file and directory names, system output, code, and
)
Web site addresses
• Text typed into a GUI element, such as into a box
• GUI elements that are clicked or selected, such as menu and
list items, buttons, and check boxes
• System output
• Code
• Text typed at the command line
• Command-line variables
text typed at the command line
WARNING! Indicates that failure to follow directions could result in bodily harm or death.
CAUTION: Indicates that failure to follow directions could result in damage to equipment or data.
IMPORTANT: Provides clarifying information or specific instructions.
NOTE: Provides additional information.
6
Page 7

TIP: Provides helpful hints and shortcuts.
Rack stability
WARNING! To reduce the risk of personal injury or damage to equipment:
• Extend leveling jacks to the floor.
• Ensure that the full weight of the rack rests on the leveling jacks.
• Install stabilizing feet on the rack.
• In multiple-rack installations, secure racks together.
• Extend only one rack component at a time. Racks may become unstable if more than one
component is extended.
HP technical support
Telephone numbers for worldwide technical support are listed on the HP support web site:
http://www.hp.com/support/
Collect the following information before calling:
• Technical support registration number (if applicable)
• Product serial numbers
• Product model names and numbers
• Applicable error messages
• Operating system type and revision level
• Detailed, specific questions
.
For continuous quality improvement, calls may be recorded or monitored.
HP strongly recommends that customers sign up online using the Subscriber's choice web site:
h
ttp://www.hp.com/go/e-updates.
• Subscribing to this service provides you with e-mail updates on the latest product
enhancements, newest versions of drivers, and firmware documentation updates as well as
instant access to numerous other product resources.
• After signing up, you can quickly locate your products by selecting Business support and then
Storage under Product Category.
HP-authorized reseller
For the name of your nearest HP-authorized reseller:
• In the United States, call 1-800-345-1518.
• Elsewhere, visit the HP web site: http://www.hp.com
and telephone numbers.
. Then click Contact HP to find locations
HA-Fabric Manager transition guide 7
Page 8

Helpful web sites
For other product information, see the following HP web sites:
• http://www.hp.com
• http://www.hp.com/go/storage
• http://www.hp.com/support/
• http://www.docs.hp.com
8
Page 9
1 Upgrading to HAFM 8.8
This chapter provides instructions and considerations for upgrading software and migrating data
from HAFM 7.x or 8.x to HAFM 8.8. Information is also included on configuration tasks that you
should perform after upgrading.
This chapter includes:
• HAFM platform, page 9
• Remote client system requirements, page 10
• Upgrade considerations, page 11
• Upgrade and migration procedures, page 12
• Data migration from HAFM 7.x to 8.x, page 18
• Post-upgrade configuration tasks, page 20
• Reverting to HAFM 8.x, page 21
• Removing the HAFM application, page 21
• Removing HAFM services, page 21
• Product license and feature keys, page 21
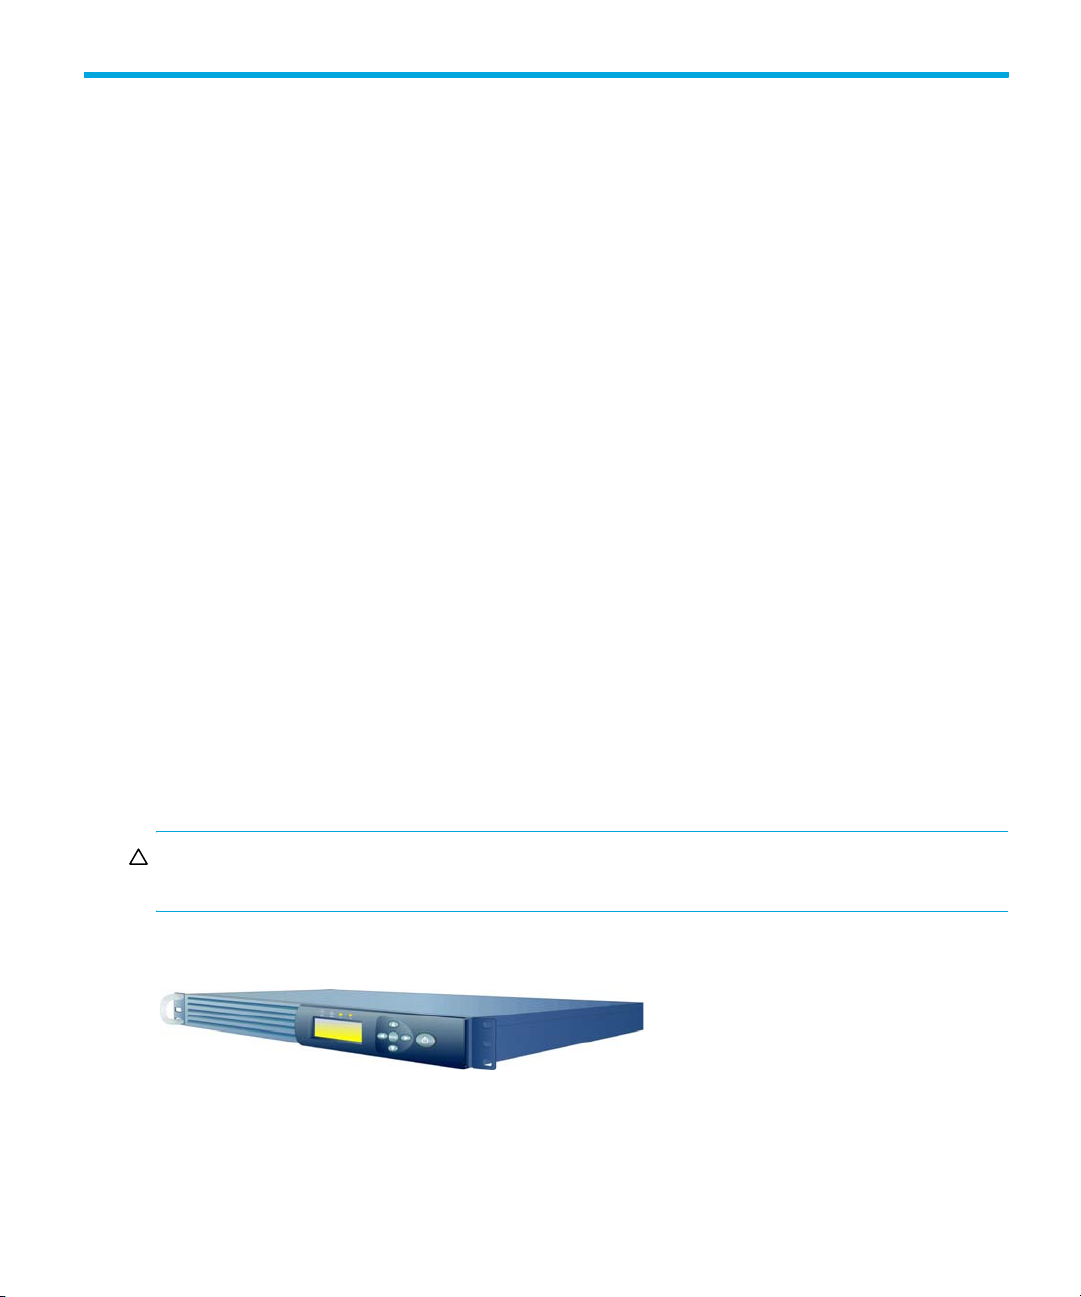
HAFM platform
HAFM 8.x is supported only on the 1unit-high (1 U-high) rack-mount HAFM appliance. Due to
memory and other limitations of previous notebook server platforms, you cannot install HAFM 8.x
on a notebook sever. The HAFM appliance is required for release 8.x and all future HAFM releases.
The HAFM appliance and related applications provide a GUI to monitor and manage HP products.
The HAFM appliance is a dedicated hardware and software solution that should not be used for
other tasks. HP tests the HAFM application installed on the HAFM appliance, but HP does not test
for compatibility with third-party software.
CAUTION: Modifications to the HAFM appliance hardware or installation of additional software
(including patches or service packs) may interfere with normal operation.
Figure 1 shows the 1U-high rack-mount HAFM appliance.
Figure 1 1U-high rack-mount HAFM appliance
HA-Fabric Manager transition guide 9
Page 10

Remote client system requirements
You can install HAFM client software on remote computers and log in to the HAFM appliance to
control and monitor SAN components. Verify that remote systems where you install the client
software meet the following minimum requirements, according to their operating systems.
Table 2 Windows
® system requirements for remote clients
Item Requirement
Processor 1 GHz Intel® Pentium® III and up
Hardware CD-ROM
Operating system • Windows 2000 Professional with service
pack 3 or later
• Windows 2003
Memory 1 GB RAM (minimum)
Disk space 350 MB disk space
Video requirements 8 MB video RAM
Resolution 256 colors
Table 3 Solaris system requirements for remote clients
Item Requirement
Models Ultra 10 and up
Processor UltraSparc IIi and up
Hardware CD-ROM
Operating system Solaris 8 or 9
Memory 512 MB RAM (minimum)
Disk space 350 MB disk space
Video requirements 8 MB video RAM
Resolution 256 colors
Table 4 Linux® system requirements for remote clients
Item Requirement
Processor 1 GHz Intel Pentium III and up
Hardware CD-ROM
Operating system • Red Hat Enterprise Linux ES 3.0
• Red Hat 8.0 kernel v.2.4.20-8
• Red Hat 9.0 kernel v.2.4.18-14
Memory 512 MB RAM (minimum)
Upgrading to HAFM 8.810
Page 11

Table 4 Linux® system requirements for remote clients (continued)
Item Requirement
Disk space 350 MB disk space
Video requirements 8 MB video RAM
Resolution 256 colors
Table 5 HP-UX system requirements for remote clients
Item Requirement
Models 9000/785/B2000 models
Processor 400 MHz PA-RISC
Hardware CD-ROM
Operating system HP-UX version 11.x or later
Memory 512 MB RAM (minimum)
Disk space 350 MB disk space
Video requirements HP VISUALIZE-FXE color, 1280x1024 48
planes
Resolution 256 colors
Table 6 AIX system requirements for remote clients
Item Requirement
Models RS/6000 44P Model 170
Processor 333 MHz Power3-II
Hardware CD-ROM
Operating system AIX 4.3.3 or later
Memory 512 MB RAM (minimum)
Disk space 350 MB disk space
Video requirements 16 MB video RAM
Resolution 256 colors
Upgrade considerations
The following considerations apply when upgrading to this HAFM 8.8 release:
• You cannot install a HAFM 8.x package on an existing notebook server due to memory and
other limitations.
• You can upgrade only an HAFM appliance running HAFM 07.02.00 or later to HAFM 8.x.
• After installing HAFM 8.x on an HAFM appliance, you must re-install the client application on
all remote clients running earlier versions of the HAFM.
• Once the HAFM appliance is upgraded to HAFM 8.x, any downgrade of HAFM to an earlier
release results in the loss of saved firmware files.
HA-Fabric Manager transition guide 11
Page 12

• When migrating data from a notebook server to an HAFM appliance that is running HAFM 8.x,
you can migrate data from the notebook server as a mapped (shared) drive. Both the notebook
server and HAFM appliance must be on the same physical network. This restriction may require
additional hardware, such as a hub or switch, if an unused Ethernet port is not available.
• Exit all HAFM software running on the HAFM appliance and remote systems before upgrading.
HAFM services must be stopped on the appliance.
• The earlier HAFM 7.2 version is not removed from an existing HAFM appliance during the
HAFM 8.x upgrade process. After installing HAFM 8.x, you must uninstall the previous HAFM
7.x version before rebooting, because HAFM services for both versions start after reboot. Current
HAFM data is not removed, however, and is available for migration to the new HAFM version.
• Upon failure of communication between the HAFM Appliance and any resource (switch) data,
the migration continues. Data and settings for such a switch may not be completely migrated.
There is no recovery from a switch being unavailable before the start of migration other than
running the installation again.
• When upgrading a notebook server to an HAFM appliance running HAFM 8.x or upgrading an
HAFM appliance to HAFM 8.x from an earlier version, make sure that you obtain the serial
number (on the software CD jewel case) and your license key for your installation. See ”Product
license and feature keys” on page 21 for general information on license and feature keys.
• You must have system administrator user rights for the earlier versions of HAFM from which you
are migrating. Obtain a login ID and password with those rights.
• The notebook server must be at HAFM 6.0 or later before you can migrate data to an HAFM
appliance running HAFM 8.x. If the notebook server is not at 6.0 or later, upgrade to
HAFM 7.1. See the upgrade instructions for the HAFM to which you are upgrading.
• The firmware on switches and directors managed by HAFM 8.x must be 4.0 or later. However, if
you want HAFM management and administrative support for features in later versions of
firmware, you should upgrade switches to that version.
Upgrade and migration procedures
This section describes upgrade and migration procedures for the following situations:
• Upgrading an existing HAFM appliance from HAFM 7.x to 8.8, page 12
• Upgrading an existing HAFM appliance from HAFM 8.x to 8.8, page 16
Upgrading an existing HAFM appliance from HAFM 7.x to 8.8
This section includes procedures to upgrade HAFM 7.x to HAFM 8.8 on the 1U-high rack mount
HAFM appliance.
NOTE: Be sure to keep the current version of your software. If you need to restore a previous
version in the future, you need to reinstall your previous version before installing your new version in
order to ensure that the backup functionality functions correctly. For more information, see the HP
StorageWorks HA-Fabric Manager user guide.
Upgrading to HAFM 8.812
Page 13

Before upgrading
Before beginning the upgrade procedure, complete the following tasks:
• Read ”Upgrade considerations” on page 11.
• Make sure that you obtain the serial number (on the software CD jewel case) and your license
key for your installation. See ”Product license and feature keys” on page 21 for more
information.
• If you use Call Home through dial-out, double-click the Call Home Setup icon on the Windows
desktop of the HAFM appliance, and copy phone numbers and other pertinent details from the
Properties tab on the Network and Dial-up Connections - CallHome dialog box so that you can
use them to configure the Call Home feature in the new release. For details, see the
HP StorageWorks HA-Fabric Manager user guide.
• Fully back up HAFM data on your HAFM appliance. To do this, copy the c:\HafmData
directory to the HAFM appliance CD-RW drive where backups occur. Overwrite the existing
files.
• Determine whether you are migrating data from another server, such as, from a notebook server
to a 1U server. If so, see ”Data migration from HAFM 7.x to 8.x” on page 18 and write down
the IP address of the remote server.
• Determine whether you are migrating HAFM 7.x data from a different machine. If so, you need
to share the drive from the HAFM 7.x machine and map it to the HAFM 8.x machine. See ”Data
migration from HAFM 7.x to 8.x” on page 18.
• Leave the HAFM 7.x software running. Do not launch the HAFM 7.x client.
• On the HAFM 7.x machine, define a user with the user name of Administrator, with a
password of password, and with system administrator privileges.
Upgrading to HAFM 8.8
1. Insert the software installation CD provided with your HAFM upgrade kit into the CD-ROM drive.
If autorun is enabled, the installer begins automatically. If it is not enabled open the
CD_drive\HAFM88_win\setup.exe file.
The InstallShield wizard takes you through the installation process.
2. Select the usual location for your system’s application files (for example, c:\Program
Files\HAFM 8.8) in the Choose Destination Location dialog box, and then click Next.
The Start Menu Location dialog box is displayed.
3. Select a folder for HAFM icons and click Next to install the HAFM 8.8 files on your system.
4. Select Launch Configuration Wizard, and then click Done.
The Configuration Wizard is displayed the first time you open the application.
5. Click Next on the Welcome page.
The License Agreement screen is displayed.
6. Read the agreement and click Yes.
7. Click Next.
The Copy Data and Settings dialog box is displayed.
HA-Fabric Manager transition guide 13
Page 14

8. Complete the following:
a. Click Yes.
b. Select 7.x from the Version list.
c. Browse to the shared drive (for example, c:\Program Files\HAFM).
NOTE: IP Addresses of unavailable switches and directors are not fully migrated.
d. Click Next.
9. Complete the following on the 7.x Migration window:
a. Browse to the HAFM 7.x Data Directory shared drive (for example, c:\HAFData).
b. Enter the IP Address of the remote server in the IP Address box.
The IP Address defaults to the local machine.
c. Enter the user ID and password in the appropriate boxes.
A System Administrator login is required.
d. Click Next.
The HAFM 8.8 Server License dialog box is displayed.
10.Enter your product’s serial number and your license key.
You are required only to enter a serial number and license key if you are upgrading to HAFM
8.x from HAFM 7.x on the HAFM appliance. See ”Product license and feature keys” on page 21
for more information.
11.Click Next.
A confirmation screen is displayed.
12.Click Finish.
13.Click OK on the start the server message.
A progress message displays. When the migration is complete, the HAFM 8.8 Log In dialog box
is displayed.
14.Click Cancel when the HAFM 8.8 Log In dialog box is displayed.
15.Stop HAFM services for HAFM 8.8 using the following steps:
a. Click Start > Programs > HP StorageWorks ha-fabric manager 8.8 > Stop Services.
A DOS window is displayed with messages of services being shut down.
b. Press any key to close the window.
Migrating data to HAFM 8.8
1. On the HAFM 8.8 machine, go to directory c:\Program Files\HAFM 8.8\bin and run
program LegacyExportImport.bat. Enter the following information:
• IP address of the HAFM 7.x machine. If both software applications reside on the same
machine, enter 127.0.0.1.
• Installation directory of the HAFM 7.x software. Default path is c:\Program Files\HAFM.
• Data directory of the HAFM 7.x software. Default path is c:\hafmdata.
Upgrading to HAFM 8.814
Page 15

• HAFM 7.x user name and password. Enter Administrator and password.
The migration starts and two logs are created in the data directory of the HAFM 8.8 installation
directory: SevenX_Export.log and SevenX_Import.log. A confirmation message is
displayed when the migration is finished.
2. Stop HAFM services for HAFM 7.x using the following steps:
a. Click Start > Programs > HP StorageWorks ha-fabric manager > Stop Services.
A DOS window is displayed with messages of services being shut down.
b. Press any key to close the window.
3. Start HAFM services for HAFM 8.8 using the following steps:
a. Click Start > Programs > HP StorageWorks ha-fabric manager 8.8 > Start Services.
A DOS window is displayed with messages of services being started.
b. Press any key to close the window.
4. Enter Administrator as the default user name and password as the password when the
HAFM 8.8 Log In dialog box is displayed.
Figure 2 HAFM 8.8 Login dialog box
NOTE: Once you log in, you can change the user ID and password for future logins.
5. Click Login.
6. See Chapter 2, “Getting a license key for new software” in the HP StorageWorks HA-Fabric
Manager user guide for information about license keys.
7. See Chapter 2, “Setting up the application” in your HP StorageWorks HA-Fabric Manager user
guide for further instructions about using the application.
8. Uninstall the previous HAFM 7.x version before rebooting if it has not been uninstalled after
installing HAFM 8.8. Otherwise HAFM services for both versions start after reboot.
HA-Fabric Manager transition guide 15
Page 16

Upgrading an existing HAFM appliance from HAFM 8.x to 8.8
This section includes procedures to upgrade HAFM 8.x to HAFM 8.8 on the 1U-high rack mount
HAFM appliance.
Before upgrading
Before beginning the upgrade procedure, complete the following tasks:
• Read the ”Upgrade considerations” on page 11.
• Fully back up HAFM data on your HAFM appliance. Copy the following directories to your
configured backup drive, where Install_Home is the directory where the application is installed:
• Install_Home\Client
• Install_Home\Server
• Install_Home\Backup
• Install_Home\Call Home
• Make sure that you obtain the serial number (on the software CD jewel case) and your license
key for your installation. See ”Product license and feature keys” on page 21 for more
information.
• If you use Call Home through dial-out, double-click the Call Home Setup icon on the Windows
desktop of the HAFM appliance, and copy phone numbers and other pertinent details from the
Network and Dial-up Connections - CallHome dialog box Properties tab so that you can use
them to configure the Call Home feature in the new release. For details, see the
HP StorageWorks HA-Fabric Manager user guide.
• To avoid errors, close all instances of the application before upgrading. Shut down HAFM on the
appliance and HAFM clients on all remote workstations.
• Stop HAFM services using the following steps:
a. Click Start > Programs > HP StorageWorks ha-fabric manager 8.x > Stop Services.
A DOS window is displayed with messages of services being shut down.
b. Press any key to close the window.
Upgrading to HAFM 8.8
To upgrade HAFM:
1. Insert the software installation CD provided with your HAFM upgrade kit into the CD-ROM drive.
If autorun is enabled, the installer begins automatically. If it is not enabled open the
CD_drive\HAFM88_win\setup.exe file.
The InstallShield wizard takes you through the installation process.
2. Select the usual location for your system’s application files (for example, c:\Program
Files\HAFM 8.8) when the Choose Destination Location dialog box is displayed, and then
click Next.
The Start Menu Location dialog box is displayed.
3. Select a folder for HAFM icons and click Next to install HAFM 8.8 files on your system.
4. Select Launch Configuration Wizard check box on the HAFM 8.8 Installation Complete dialog
box.
Upgrading to HAFM 8.816
Page 17

5. Click Finish.
Migrating data to HAFM 8.8
1. Stop HAFM services for HAFM 8.x using the following steps:
a. Click Start > Programs > HP StorageWorks ha-fabric manager 8.x > Stop Services.
A DOS window is displayed with messages of services being shut down.
b. Press any key to close the window.
2. Open the application by double-clicking the HAFM desktop icon or by clicking
Start > Programs > HP StorageWorks ha-fabric manager 8.8 > HAFM 8.8.
The Configuration Wizard appears the first time you open the application.
3. Click Next on the Welcome page.
The License Agreement screen is displayed.
4. Read the agreement and click Yes.
5. Click Next.
The Copy Data and Settings dialog box is displayed.
6. Complete the following:
a. Click Yes.
b. Select 8.x from the Version list.
c. Browse to the shared drive (for example, c:\Program Files\HAFM).
NOTE: IP Addresses of unavailable switches and directors are not fully migrated.
d. Click Next.
7. Complete the following on the 8.x Migration window:
a. Browse to the HAFM 8.x Data Directory shared drive (for example, c:\HAFData).
b. Enter the IP Address of the remote server in the IP Address box.
The IP Address defaults to the local machine.
c. Enter the user ID and password in the appropriate boxes.
A System Administrator login is required.
d. Click Next.
The HAFM 8.x Server License dialog box is displayed.
8. Enter your product’s serial number and your license key.
You are required only to enter a serial number and license key if you are upgrading to HAFM
8.x from HAFM 7.x on the HAFM appliance. See ”Product license and feature keys” on page 21
for more information.
9. Click Next.
A confirmation screen is displayed.
10.Click Finish.
HA-Fabric Manager transition guide 17
Page 18

11.Click OK on the start the server message.
A progress message displays. When the migration is complete, the HAFM 8.8 Log In dialog box
is displayed.
12.Enter Administrator as the default user name and password as the password when the
HAFM 8.8 Log In dialog box is displayed.
NOTE: Once you log in, you can change the user ID and password for future logins.
13.Click Login.
Data migration from HAFM 7.x to 8.x
Specific data is migrated when you select Yes from the Copy Data and Settings dialog box during
the HAFM software upgrade. The following sections explain the data that is and is not migrated.
Data migrated
Data stored in the c:\HafmData directory od HAFM 7.x is migrated to the comparable data
directories on the new appliance running HAFM 8.x. This data includes user information, e-mail
event configuration information, threshold alert configurations, and zoning configurations.
User information
• User ID
• Password (encrypted in MD5 format)
• User name
• User rights
• System Administrator—Transfers to HAFM 8.x as the System Administrator user group.
• Product Administrator—Transfers to HAFM 8.x as the Product Administrator user group.
• Operator—Transfers to HAFM 8.x as the Operator user group.
• Maintenance—Transfers to HAFM 8.x as the Maintenance user group.
E-mail event configuration
All e-mail addresses entered in the HAFM 7.x Configure E-Mail dialog box migrate to the E-mail
Event Notification Setup user list under one user. You have to modify the user list in HAFM 8.x to
assign addresses to individual users.
FAF libraries
File access facility (FAF) library data is migrated. This includes all information from the Configure
Address—Active dialog box (FICON management style only) in HAFM 7.x Product Manager.
Firmware library
The firmware library is migrated in the upgrade process, but release rules are not. Since release
rules are required, an error results when you attempt to send a firmware version in the library to a
switch. To avoid this problem, add the latest firmware file to the firmware library, which also adds
the new release rules and resolves the problem.
Upgrading to HAFM 8.818
Page 19

Logs
HAFM audit, event, session, product status, and fabric log files are migrated to the same logs in
HAFM 8.x. As a safeguard, you should export and archive these logs before migrating to
HAFM 8.x.
Product Manager audit, event, hardware, link incident, and threshold alerts are migrated.
Nicknames
Nicknames configured through the Configure Nicknames dialog box in HAFM are migrated.
Sessions configuration
Information from the Configure Sessions dialog box is migrated. This includes:
• Network addresses of computers allowed or prohibited from remote sessions
• Maximum number of remote sessions allowed
SNMP configuration
All data from the SNMP configuration is migrated. This includes the enable/disable flag and 12
rows of trap information that are configured in the HAFM Configure SNMP dialog box.
Switch identification
All switches and directors identified in the HAFM 6.x or 7.x Products View are migrated into HAFM
discovery and are placed in the Selected Individual Addresses table of the Discover Setup dialog
box. These switches are managed by HAFM 8.x. Note that if an address did not completely
migrate, you can enter the IP address of the switch or director in that dialog box.
Threshold alert configurations
Data input through the Configure Threshold Alert wizard in the Product Manager is migrated.
Zoning configurations
Zones and zone sets are migrated to the default zoning library.
Data not migrated
The following types of information are not migrated from HAFM 7.x to 8.x:
• Configurations for optional HAFM features, such as Open Trunking, SANtegrity Binding,
Enterprise Management Mode, Persistent Fabrics, and FlexPort. You must obtain feature keys for
these optional features to enable them.
• Except for the firmware library, FAF files, and logs, other Product Manager data is not migrated
since it is stored in switch memory for access by the Element Manager.
• Files created using the Backup and Restore Configuration option in the Product Manager
(NVRAM backup).
• Performance data from the Performance view in the Product Manager.
• Configuration information for switches that are not being managed locally is not included in the
migration.
HA-Fabric Manager transition guide 19
Page 20

• If the Administrator user's password was changed in the previous version of HAFM, the
password is not migrated. Instead, it reverts to the default password of password.
Post-upgrade configuration tasks
After upgrading to HAFM 8.x, you should perform the tasks in the following sections:
General HAFM configuration
• User configuration—Perform the tasks in “Configuring an HAFM Appliance” and “Managing
Users” in the HP StorageWorks HA-Fabric Manager user guide. Although user data from earlier
HAFM versions is migrated, there are additional tasks that you must perform, such as
configuring e-mail addresses and filtering event notifications.
• Call-Home—To set up the call home feature, specify the support center information through the
call home configuration (Call Home icon in the HAFM desktop). If you are upgrading from a
previous release of the application, all of your call home settings are preserved. You must also
enable call home notification through the Event Notification option under the Monitor menu. For
details see the HP StorageWorks HA-Fabric Manager user guide.
• Event notification—This feature includes configuring e-mail and call home event notification. See
”Finding HAFM 7.x functions in HAFM 8.x” on page 25.
Note that all e-mail addresses entered in the HAFM 6.x or 7.x Configure E-Mail dialog box
migrates to the HAFM 8.x E-mail Notification Setup user list under one user. You have to modify
the user list in HAFM 8.x to assign addresses to individual users. See the HP StorageWorks
HA-Fabric Manager user guide for instructions.
• Configuring SAN devices—Perform applicable procedures described in the HP StorageWorks
HA-Fabric Manager user guide. These procedures include steps for configuring Enterprise Fabric
Mode (if installed), configuring fabric binding (if installed), and configuring trap forwarding.
Upgrading remote clients
To log into the HAFM appliance as a remote client and use HAFM 8.x, you must download the
client application to your system. Supported operating systems include Windows, Solaris, HP-UX,
AIX, and Linux.
To upgrade an HAFM client on a remote system, use the following procedure.
1. Make sure that HAFM is not running on the remote machine.
2. Open an Internet browser.
3. Type the IP address of the HAFM appliance in the Location (or Address) box on the browser, and
then press Enter.
4. When the remote client installation screen appears, select the appropriate download for your
operating system.
5. Follow instructions in the configuration wizard to install the client to your system.
6. To start the application:
• On Windows systems, click Start > Programs > HP StorageWorks ha-fabric manager 8.8 >
HAFM 8.8.
•On UNIX systems, enter./HAFM_Client.
Upgrading to HAFM 8.820
Page 21

Reverting to HAFM 8.x
Following are instructions for reverting back from HAFM 8.8 to HAFM 8.x on the HAFM appliance.
1. Remove HAFM 8.8 using the following steps:
a. Click Start > Programs > HP StorageWorks ha-fabric manager 8.8 > Uninstall HAFM 8.8.
b. Follow the uninstall directions.
2. Start processes from HAFM 8.x Install home by running Install_Callhome_Service.bat,
Install_Backup_Service.bat, install_service.bat, and BackupService.exe
files from the \install home\bin directory.
3. Start the HAFM services (make sure that HAFM 8.x is running).
4. Launch the HAFM client and log on to the HAFM appliance.
Removing the HAFM application
Follow these instructions to remove the application from your system.
1. Click Start > Programs > HP StorageWorks ha-fabric manager 8.8 > Uninstall HAFM 8.8.
2. The InstallShield wizard takes you through the removal process.
Removing HAFM services
1. Start all of the processes:
a. Select Start > Programs > HP StorageWorks ha-fabric manager 8.8 > HAFM 8.8.
b. Open Windows Explorer and browse to Install_Home\bin.
c. Double-click the Install_Backup_Service.bat file.
d. Double-click the Install_CallHome_Service.bat file.
2. Double-click the Remove_Service.bat file from the Install_Home\bin directory.
3. Double-click the Remove_Backup_Service.bat file from the Install_Home\bin
directory.
4. Double-click the Remove_CallHome_Service.bat file from the Install_Home\bin
directory.
5. Repeat step 1.
6. Double-click the CleanupService.bat file from the Install_Home\bin directory.
Product license and feature keys
License keys are unique strings of alphanumeric characters that verify the right to use HAFM
software and additional software modules that you can purchase.
Feature keys are unique strings of alphanumeric characters that verify the right to use an Element
Manager application for a specific switch and the additional features that you purchase for that
Element Manager.
HA-Fabric Manager transition guide 21
Page 22

License keys
The use of license keys is new for HAFM 8.x. You must enter a license key provided with your
software and a software serial number the first time that you initialize HAFM 8.x if you are:
• Upgrading an HAFM appliance from HAFM 7.2 to HAFM 8.x.
• Replacing a notebook server running HAFM 7.x or 6.x with an HAFM appliance running
HAFM 8.x.
An updated license key is supplied for optional software modules that you purchase for the HAFM
8.x application on an HAFM appliance. To enable the new software module, you must enter this
key into the License dialog box, which is available from the Help menu, License option in the HAFM
application.
Obtaining a license key
You need to obtain a license key when upgrading software on an existing HAFM appliance to
HAFM 8.x or when replacing a notebook server with an HAFM appliance running HAFM 8.x.
The kit provides a software serial number on the CD jewel case and a software entitlement request
certificate for HAFM. The certificate contains instructions to retrieve the license key from the web
site.
For complete instructions, see the HP StorageWorks HA-Fabric Manager user guide.
Activating optional software modules
If you order additional port support or software modules after your initial purchase of HAFM 8.x,
you must perform the following procedure:
1. When the HAFM application is running, click Help > License.
The License dialog box is displayed.
2. Enter the permanent key in the License Key box and click Update.
3. Click OK.
The software license key allows you to access HAFM and all optional software modules that you
have purchased. Your kit documents provide a new feature enablement certificate, based on the
number of ports that you want to support.
4. To obtain a license key, follow instructions on the enablement certificate to obtain a license key.
Feature keys
Feature keys are unique strings of alphanumeric characters that enable the Element Manager for a
specific switch and the additional features that you purchase for that switch. The feature key, which
is encoded with a switch or director’s serial number, can be configured only on the switch or
director to which it is assigned.
Here are some important notes about the Element Manager feature key for this release:
• In the following situations in which the director or switch was upgraded to firmware 6.0, you
must contact customer support to receive an updated Element Manager feature key for an
existing HP fabric. Note that you still can manage the product, but you receive warnings that you
do not have a valid license.
Upgrading to HAFM 8.822
Page 23

• You reset the default settings through the Element Manager’s Reset Configuration option.
• You re-enter a feature key created before firmware 6.0 release and the Element Manager key
is deleted.
• Enabling the Reset Configuration option through the Element Manager Maintenance menu
clears all features that were enabled through the Configure Feature Key dialog box. When you
attempt to re-install features using a feature key assigned for version firmware 5.x, a warning
instructs you that the Element Manager feature key is not installed. You must contact customer
support to get a feature key reassigned.
• As a new addition for HAFM 8.x, access to the Element Manager is provided through a feature
key. If you do not have a feature key for an Element Manager, messages may display indicating
this. Also, if you try to access a feature without Element Manager support, a message may
display explaining that Element Manager support has not been installed. In these cases, you
must contact your sales representative to obtain a feature key.
NOTE: Switches and directors on existing HP fabrics, whether running a firmware version earlier
than 6.0 or upgraded to firmware 6.0, do not require Element Manager feature keys.
• For directors and switches shipped with firmware 6.0 or later installed:
• Directors—The Element Manager enablement certificate is included with the unit as shipped.
• Switches—The Element Manager is optional. When you want to manage a switch through
an Element Manager, you can receive an enablement certificate with which you can obtain a
feature key. You must activate this key through the Configure Feature Key dialog box.
• As you purchase additional Element Manager features, you receive a an enablement certificate
with which you can obtain a feature key.
Enabling a feature key
To enable a feature key in the switch or director Element Manager:
1. Click Configure > Features.
The Configure Feature Key dialog box is displayed.
2. Click New to add a new feature key.
The New Feature Key dialog box is displayed.
3. Enter the switch or director feature key and click OK.
HA-Fabric Manager transition guide 23
Page 24

Upgrading to HAFM 8.824
Page 25

2 Comparing HAFM 7.x and 8.x features
This chapter provides a basic description of the features in HAFM 8.x that are comparable with
features in HAFM 7.x.
For detailed procedures for using all HAFM 8.x features, see the HP StorageWorks HAFM user
guide.
Finding HAFM 7.x functions in HAFM 8.x
Table 7 provides a quick reference for locating comparable HAFM 7.x function in HAFM 8.x. For
specific information about using HAFM, see the HP StorageWorks HA-Fabric Manager user guide.
Table 7 HAFM 7.x and 8.x function locations
Function HAFM 7.x
Menu > Submenu: Options
Identifying
products to
HAFM
Displaying
product
properties
Logging out of
HAFM
Renaming fabric Fabrics > Rename Cannot rename. (Can create new
Persisting fabric • Fabrics > Persist Fabric Topology,
Exporting fabric
topology
Show route Fabrics > Show Route/Hide Route Configure > Show Route and Hide
Show zone
members
Show magnified
fabric view
• Product > New, Delete, Modify
• Toolbar: New Product
• Product > Properties
• Product right-click menu >
Properties
Product > Logout SAN > Log Out
Unpersist Fabric Topology
• Toolbar: Persist Fabric Topology
• Fabrics: Export Fabric Topology
• Toolbar: Export Fabric Topology
Fabrics > Show Zone Members Configure > List Zone Members
Fabrics > Show View Port View > Show All Panels (displays
HAFM 8.x
Menu > Submenu: Options
• Discover > Setup
• Toolbar: Discover Setup
• Product right-click menu >
Properties
• Toolbar: Properties
nickname in Properties dialog box.)
• Configure > Persist Fabric,
Unpersist Fabric
• Right-click menu on fabric in
Physical Map or Product List >
Persist Fabric, Unpersist Fabric
• SAN > Export
• Toolbar: Export
(Select Product List and
Physical Map from Export
Discovered SAN dialog box.)
Route
Minimap)
HA-Fabric Manager transition guide 25
Page 26

Table 7 HAFM 7.x and 8.x function locations (continued)
Function HAFM 7.x
Menu > Submenu: Options
Show tree
Fabrics > Show Fabric Tree View > All Panels or Fabric List
containing fabric,
product, device
branches
Enterprise Fabric
Fabrics > Enterprise Fabric Mode • Configure > Enterprise Fabric
Mode (if
enabled)
Fabric Binding (if
Fabrics > Fabric Binding • Configure > Fabric Binding
enabled)
View user HAFM
View > User Sessions SAN > Active Sessions
sessions
Zoom out of and
View > Zoom • View > Zoom
into topology
diagram
Arrange and
layout icons in
View > Layout Icons, Center in
Topology, Refresh Topology
topology, center
in topology,
refresh topology
Clear ISL alerts • View > Clear ISL Alert, Clear All
ISL Alerts
• Right-click menu on ISL in Fabrics
view
• Right-click menu on fabric in
Fabrics view
Enable fly-over
View > Enable Fly Over Display View > Enable Flyover Display
display
Configure user
Configure > Users • SAN > Users
administration
Configure user
Configure > Sessions SAN > Remote Access
sessions
HAFM 8.x
Menu > Submenu: Options
Mode
• Right-click menu on fabric in
Physical Map or Product List >
Enterprise Fabric Mode
• Right-click menu on fabric in
Physical Map or Product List >
Fabric Binding
• Physical Map Toolbar: + and -
icons
• Right-click menu on empty areas
of Physical Map
Not available
Right-click connection in persisted
fabric that displays an ISL alert and
select Clear ISL Alert(s). ISL alert
is a yellow triangle containing an
exclamation mark.
• Toolbar: HAFM Users
Comparing HAFM 7.x and 8.x features26
Page 27

Table 7 HAFM 7.x and 8.x function locations (continued)
Function HAFM 7.x
Menu > Submenu: Options
Configure
nicknames for
products and
fabrics
• Configure > Nicknames
• Right-click menu on product in
Fabric Tree and Fabrics view
• Right-click menu on fabric in
Fabrics view
HAFM 8.x
Menu > Submenu: Options
• View > Properties (when product
selected in Physical Map or
Product List). Enter nickname in
Nickname box.
• Toolbar > Properties (when
product selected in Physical
Map or Product List). Enter
nickname in Nickname box.
• Right-click menus on fabric and
product in Physical Map and
Product List > Properties. Enter
nickname in Nickname box.
Configure SNMP
agent
Configure > SNMP Agent • Monitor > SNMP Agent (On,
Off, Setup)
• Monitor > Trap Forwarding
Activate zone set Configure > Activate Zone Set • Configure > Zoning (click
Activate in the Zoning dialog
box.)
Zoning library Configure > Zoning Library
Toolbar: Show Zoning Library
• Configure > Zoning
• Right-click menu on fabric or
product in Physical Map
• Right-click menu on fabric or
product in Product List
• Toolbar: Zoning
Deactivate zone
set
Configure > Advanced Zoning >
Deactivate Zone Set
Configure > Zoning (click
Deactivate on Zoning dialog
box.)
Configure default
zone
Audit, Event,
Session, Product
Configure > Advanced Zoning >
Configure Default Zone
Logs > Audit, Event, Session, Product
Status, Fabric
Configure > Zoning (click Default
Zone on Zoning dialog box.)
Monitor > Logs > Audit, Event,
Session, Product Status, Fabric
Status, Fabric
logs
Configure e-mail Maintenance > Configure Email Monitor > Event Notification >
Email
Test e-mail
notification
Maintenance > Test Remote
Notification
Monitor > Event Notification >
Email (Click Test Email on
Configure Email dialog box.)
HA-Fabric Manager transition guide 27
Page 28

Table 7 HAFM 7.x and 8.x function locations (continued)
Function HAFM 7.x
Menu > Submenu: Options
Configure
Ethernet events
Configure call
home event
Maintenance > Configure Ethernet
Events
Maintenance > Configure Call Home
Event Notification
notification
Help • Help > Contents
• Help > About
Open Product
Manager
• Right-click menu on product icon
(Products view) > Open
• Toolbar: Open Product
Delete product
from HAFM
Display product
properties
Right-click menu on product icon
(Products view) > Delete
Right-click menu on product icon
(Products view) > Properties
HAFM 8.x
Menu > Submenu: Options
Monitor > Ethernet Event
Monitor > Event Notification > Call
Home
• Help > Contents
• Help > About HAFM 8
• Right-click menu on product icon
(Physical Map) > Element
Manager
• Toolbar: Launch Element
Manager
Right-click menu on product icon
(Physical Map) > Delete
Right-click menu on product icon
(Physical Map) > Properties
Toolbar: Properties
Comparing HAFM 7.x and 8.x features28
Page 29

Table 7 HAFM 7.x and 8.x function locations (continued)
Function HAFM 7.x
Menu > Submenu: Options
Modify product
network address
Display fabric
properties
Change product
label display
Right-click menu on product icon
(Products view) > Modify
Right-click menu on fabric in Fabric
Tree and Fabrics view > Properties
Toolbar > pulldown list
• Product Name
• Network Address
• World Wide Name
• Domain ID
• Nickname
HAFM 8.x
Menu > Submenu: Options
• Discover > Setup (Click
Change on Discover Setup
dialog box.)
• View > Properties (when product
selected in Physical Map or
Product List). Enter nickname in
Nickname box.
• Toolbar: Properties (when
product selected in Physical
Map or Product List). Enter
address in IP Address box.
• Right-click menus on fabric and
product in Physical Map and
Product List > Properties. Enter
address in IP Address box.
Right-click menu on fabric in Product
List and Physical Map > Properties
Toolbar > pulldown list
• Name
• Nickname
• Node Name
• IP Address
• Domain ID
(Changes label on Fabrics view)
(Changes label on Physical Map
and Product List)
HA-Fabric Manager transition guide 29
Page 30

Comparing HAFM 7.x and 8.x features30
Page 31

A Configuring HAFM through a firewall
This appendix provides optional procedures for configuring HAFM client and server applications to
function across remote networks through a firewall.
This chapter includes:
• Polling client function, page 31
• Configuring TCP port numbers to allow firewall access, page 33
Polling client function
In some cases, a network may use virtual private network (VPN) or firewall technology, which can
prohibit communication between servers and clients. In other words, a client can find a server and
appear to log in, but it is immediately logged out because the server cannot reach the client. To
resolve this issue, the HAFM application automatically detects the network configuration and runs
the client in “polling mode” when necessary.
When the client is not running in polling mode, the server calls the client whenever it has new data.
When the client is running in polling mode, the server queues up the data and the client
periodically (approximately every 5 or 10 seconds) checks in and gets the data. Thus, the original
two-way communication is transformed into one-way communication, allowing passage through
firewalls.
Faster logins
When a client attempts to log in to a server, the server normally calls back to verify communication.
In a firewall situation, this call fails and the server automatically treats the client as a “polling” client.
It may take up to 45 seconds for this call-back to fail (worst case). You can configure a polling
parameter in client and server batch files to let the server know ahead of time that the client is a
“polling” client. This skips the call-back from the server and decreases the login time.
Forcing a client to be a polling client
To force a specific client to be a polling client, edit the HAFM_c.bat file and the client portion of
the HAFM_sc.bat file, if both files are installed on your computer. These files on the client are in
the HAFM 8.x\bin directory (typically in c:\Program Files\HAFM 8.x\bin).
The HAFM_sc.bat file starts both the client and server and is installed on computers with the
HAFM appliance software. The HAFM_c.bat file starts the client only and is installed with the client
software.
Add the -Dsmp.callback.passive parameter, as in the following example. This parameter
affects only this client; all other clients can be regular clients.
HA-Fabric Manager transition guide 31
Page 32

NOTE: The following example illustrates the HAFM_c.bat file. The portion of this file starting with
rem HAFM Client is also included in the HAFM_sc.bat file. Both files must be modified if they
are installed on your computer.
setlocal
pushd %~dp0\..
call bin\set_cp.bat
rem HAFM Client
start %JAVA_HOME%\bin\HAFMClient.exe -Xmx256m -Xminf.15 -Xmaxf.35 -classpath
%CLASSPATH%-Dsun.java2d.noddraw=true -Dsmp.fabricPersistenceEnabled=true
-Dsmp.Mp.max=256 -Dsmp.deployment.prefix=Client/ -Dsmp.callback.passive
-Dsmp.flavor=%APP_FLAVOR% Client
rem HAFM Client Debug Mode
rem start%JAVA_HOME%\bin\HAFMClientD.exe -Xmx256m -Xminf.15 -Xmaxf.35
-classpath%CLASSPATH% -Dsun.java2d.noddraw=true
-Dsmp.fabricPersistenceEnabled=true -Dsmp.Mp.max=256
-Dsun.java2d.noddraw=true -Dsmp.fabricPersistenceEnabled=true
-Dsmp.deployment.prefix=Client/ -Dsmp.debug
-Dsmp.callback.passive?Dsmp.flavor=%APP_FLAVOR% Client
popd
endlocal
Forcing all clients to be polling clients
To force all clients communicating with a server to be treated as polling clients (regardless of the
parameters the clients launch with), edit the HAFM_sc.bat file located in the HAFM 8.x\bin
directory (typically in c:\Program Files\HAFM 8.x\bin) on the client. Add the
-Dsmp.callback.passive parameter to the HAFM server section of the file, as in the following
example.
setlocal
pushd %~dp0\..
call bin\set_cp.bat
...............
rem HAFM Server
start %JAVA_HOME%\bin\HAFMServer.exe -server -Xm512m
-Xminf.15 -Xmaxf.35 -classpath %CLASSPATH%
-Dsmp.Mp.max=512 -Dsmp.autodiscovery=false
-Dsmp.mpi.test -Dsmp.deployment.prefix=Server/
-Dsmp.zoning=legacy
-Dsmp.zoning.wait.timeout=180000 -Dsmp.webServer -Dsmp.callback.passive
-Dsmp.flavor=%APP_FLAVOR% Server
rem HAFM Server Debug Mode
rem start %JAVA_HOME%\bin\HAFMServerD.exe -server
-Xmx512m -Xminf.15 -Xmaxf.35 -classpath
%CLASSPATH% -Dsun.java2d.noddraw=true -Dsmp.Mp.max=512
-Dsmp.autodiscovery=false
-Dsmp.mpi.test -Dsmp.deployment.prefix=Server/
-Dsmp.zoning=legacy
-Dsmp.zoning.wait.timeout=180000 -Dsmp.debug
Configuring HAFM through a firewall32
Page 33

-Dsmp.webServer -Dsmp.callback.passive
-Dsmp.flavor=%APP_FLAVOR% Server
...............
:end
popd
endlocal
Configuring TCP port numbers to allow firewall access
This section provides details about configuring TCP port numbers for Remote Method Invocation
(RMI) servers and registries to allow HAFM client and server applications to function across
firewalls.
HAFM function with RMI at TCP port level
The RMI protocol lies between the HAFM application and the TCP/IP layer.
As shown in Figure 3, the HAFM appliance and clients communicate with each other through the
RMI server. This communication is a full-duplex function. However, before the RMI server on the
HAFM client can communicate with the RMI server on the HAFM appliance, it must know the TCP
port number of the RMI server. The function of the RMI registry is to communicate this TCP port
number to the HAFM client. Once this is done successfully, communication can take place between
the RMI server on the HAFM appliance and the HAFM client. (The HAFM appliance obtains the TCP
port number of the RMI server on the client during initial communications.)
HAFM appliance
RMI server RMI registry
RMI servers TCP/IP port #
RMI servers TCP/IP port #
Full-duplex communication
Figure 3 HAFM appliance and client communications
The TCP port numbers of the RMI server are randomly and automatically selected on both the HAFM
appliance and client as a full-duplex function. This situation poses a major problem for firewalls
because they need to know which TCP port numbers to pass through and which numbers to block.
Firewalls are configured to block all unknown incoming connections with no mapping of outgoing
connections based on a socket port of TCP and IP.
RMI server RMI registry
HAFM client
HA-Fabric Manager transition guide 33
Page 34

To work around this problem, administrators can “predict” which ports are used by the client and
server and use the following procedures to configure these port numbers into the appropriate batch
files. If the firewall prevents the client from connecting to arbitrary ports on the server, then perform
both of these procedures:
•”Forcing the RMI registry to use a TCP port” on page 34
•”Forcing the server and client to export a port number” on page 35
NOTE: You must configure both the server and client export port numbers.
• If the firewall prevents the server from connecting to arbitrary ports on the client, configure the
export port of the client as described in ”Forcing the server and client to export a port number”
on page 35.
NOTE: If the firewall prevents the server from connecting to arbitrary ports on the client, configure
only the export port of the client (-Dsmp.client.export.port=XXXX).
After you configure TCP port numbers using the following procedures, the firewall must be
configured to unblock the configured port numbers.
Forcing the RMI registry to use a TCP port
To force the RMI registry to use a particular TCP port for an RMI server, configure the
Dsmp.registry.port=XXXX parameter in the HAFM_sc.bat file. This file starts both the client
and server and is installed on a computers with the HAFM appliance software. The file is typically
located in c:\Program Files\HAFM 8.x\bin. Both the client and server areas of the
HAFM_sc.bat file must have matching parameters. Add a matching parameter to the
HAFM_c.bat file if the file is installed on your computer. This file starts the client only and is
installed with the client software.
HAFM_sc.bat file
Edit the HAFM_sc.bat file in the HAFM server and HAFM client area to include the parameter
-Dsmp.registry.port=XXXX. The XXXX is any TCP port number not being used by another
application. You must place this parameter after the %CLASSPATH% parameter, as in the following
example.
setlocal
pushd %~dp0\..
call bin\set_cp.bat
...............
rem HAFM Server
start %JAVA_HOME%\bin\HAFMServer.exe -server -Xmx512m -Xminf.15 -Xmaxf.35
-classpath %CLASSPATH% -Dsmp.Mp.max=512 -Dsmp.autodiscovery=false
-Dsmp.mpi.test -Dsmp.deployment.prefix=Server/ -Dsmp.zoning=legacy
Configuring HAFM through a firewall34
Page 35

-Dsmp.zoning.wait.timeout=180000 -Dsmp.webServer -Dsmp.registry.port=XXXX
-Dsmp.flavor=%APP_FLAVOR% Server
rem HAFM Server Debug Mode
rem start %JAVA_HOME%\bin\HAFMServerD.exe -server -Xmx512m -Xminf.15
-Xmaxf.35 -classpath %CLASSPATH%
-Dsmp.Mp.max=512 -Dsmp.autodiscovery=false -Dsmp.mpi.test
-Dsmp.deployment.prefix=Server/ -Dsmp.zoning=legacy
-Dsmp.zoning.wait.timeout=180000 -Dsmp.debug -Dsmp.webServer
-Dsmp.registry.port=XXXX -Dsmp.flavor=%APP_FLAVOR% Server
:client
rem HAFM Client
start %JAVA_HOME%\bin\HAFMClient.exe -Xmx256m -Xminf.15 -Xmaxf.35 -classpath
%CLASSPATH% -Dsun.java2d.noddraw=true -Dsmp.fabricPersistenceEnabled=true
-Dsmp.Mp.max=256 -Dsmp.deployment.prefix=Client/ -Dsmp.registry.port=XXXX
?Dsmp.flavor=%APP_FLAVOR% Client
rem HAFM Client Debug Mode
rem start %JAVA_HOME%\bin\HAFMClientD.exe -Xmx256m -Xminf.15 -Xmaxf.35
-classpath %CLASSPATH% -Dsun.java2d.noddraw=true
-Dsmp.fabricPersistenceEnabled=true -Dsmp.Mp.max=256
-Dsmp.deployment.prefix=Client/ -Dsmp.debug -Dsmp.registry.port=XXXX
?Dsmp.flavor=%APP_FLAVOR% Client
:end
popd
endlocal
HAFM_c.bat file
The following example shows an HAFM_c.bat file.
setlocal
pushd %~dp0\..
call bin\set_cp.bat
...............
rem HAFM Client
start %JAVA_HOME%\bin\HAFMClient.exe -Xmx256m -Xminf.15 -Xmaxf.35 -classpath
%CLASSPATH% -Dsun.java2d.noddraw=true -Dsmp.fabricPersistenceEnabled=true
-Dsmp.Mp.max=256 -Dsmp.deployment.prefix=Client/ -Dsmp.flavor=%APP_FLAVOR%
Client
rem HAFM Client Debug Mode
rem start %JAVA_HOME%\bin\HAFMClientD.exe -Xmx256m -Xminf.15 -Xmaxf.35
-classpath %CLASSPATH% -Dsun.java2d.noddraw=true
-Dsmp.fabricPersistenceEnabled=true -Dsmp.Mp.max=256
-Dsmp.deployment.prefix=Client/ -Dsmp.debug -Dsmp.registry.port=XXXX
-Dsmp.flavor=%APP_FLAVOR% Client
Forcing the server and client to export a port number
To force the server and client to export a specific TCP port number for an RMI server, configure the
-Dsmp.server.export.port=XXXX and -Dsmp.client.export.port=XXXX
parameters in HAFM_c.bat file and the -Dsmp.client.export.port=XXXX in the
HAFM_c.bat file. These files are typically located in c:\Program Files\HAFM 8.x\bin.
HA-Fabric Manager transition guide 35
Page 36

NOTE: If the firewall prevents the server from connecting to arbitrary ports on the client, force only
the export port of the client (-Dsmp.client.export.port=XXXX).
The HAFM_c.bat file starts both the client and server and is installed on computers with the HAFM
appliance software. The file is typically located in c:\Program Files\HAFM 8.x\bin. Both
the client and server areas of the HAFM_sc.bat file must have matching parameters. Add a
matching parameter to the HAFM_c.bat file if, this file is installed on your computer. This file starts
the Client only and is installed with the Client software.
HAFM_sc.bat file
Edit the HAFM_c.bat file in the HAFM server area to include the parameter
-Dsmp.server.export.port=XXXX and the HAFM Client area to include the parameter
-Dsmp.client.export.port=YYYY, where XXXX and YYYY are any TCP port numbers not
being used by another application. Although the server port number XXXX could match the client
port number YYYY, this is not necessary. If the HAFM_c.bat file is installed on your computer, add
the -Dsmp.client.export.port=YYYY parameter to that file. Add these parameters after the
%CLASSPATH% parameter, as in the following example.
setlocal
pushd %~dp0\..
call bin\set_cp.bat
...............
rem HAFM Server
start %JAVA_HOME%\bin\HAFMServer.exe -server -Xmx512m -Xminf.15 -Xmaxf.35
-classpath %CLASSPATH% -Dsmp.Mp.max=512 -Dsmp.autodiscovery=false
-Dsmp.mpi.test -Dsmp.deployment.prefix=Server/ -Dsmp.zoning=legacy
-Dsmp.zoning.wait.timeout=180000 -Dsmp.webServer
-Dsmp.server.export.port=XXXX -Dsmp.flavor=%APP_FLAVOR% Server
rem HAFM Server Debug Mode
rem start %JAVA_HOME%\bin\HAFMServerD.exe -server -Xmx512m -Xminf.15
-Xmaxf.35 -classpath %CLASSPATH% -Dsmp.Mp.max=512 -Dsmp.autodiscovery=false
-Dsmp.mpi.test -Dsmp.deployment.prefix=Server/ -Dsmp.zoning=legacy
-Dsmp.zoning.wait.timeout=180000 -Dsmp.debug -Dsmp.webServer
-Dsmp.server.export.port=XXXX -Dsmp.flavor=%APP_FLAVOR% Server
:client
rem HAFM Client
start %JAVA_HOME%\bin\HAFMClient.exe -Xmx256m -Xminf.15 -Xmaxf.35 -classpath
%CLASSPATH% -Dsun.java2d.noddraw=true -Dsmp.fabricPersistenceEnabled=true
-Dsmp.Mp.max=256 -Dsmp.deployment.prefix=Client/
-Dsmp.client.export.port=YYYY ?Dsmp.flavor=%APP_FLAVOR% Client
rem HAFM Client Debug Mode
rem start %JAVA_HOME%\bin\HAFMClientD.exe -Xmx256m -Xminf.15 -Xmaxf.35
-classpath %CLASSPATH% -Dsun.java2d.noddraw=true
-Dsmp.fabricPersistenceEnabled=true -Dsmp.Mp.max=256
-Dsmp.deployment.prefix=Client/ -Dsmp.debug -Dsmp.client.export.port=YYYY
?Dsmp.flavor=%APP_FLAVOR% Client
:end
popd
endlocal
Configuring HAFM through a firewall36
Page 37

HAFM_c.bat file
The following example shows an HAFM_c.bat file.
setlocal
pushd %~dp0\..
call bin\set_cp.bat
...............
rem HAFM Client
start %JAVA_HOME%\bin\HAFMClient.exe -Xmx256m -Xminf.15 -Xmaxf.35 -classpath
%CLASSPATH% -Dsun.java2d.noddraw=true -Dsmp.fabricPersistenceEnabled=true
-Dsmp.Mp.max=256 -Dsmp.deployment.prefix=Client/-Dsmp.flavor=%APP_FLAVOR%
Client
rem HAFM Client Debug Mode
rem start %JAVA_HOME%\bin\HAFMClientD.exe -Xmx256m -Xminf.15 -Xmaxf.35
-classpath %CLASSPATH% -Dsun.java2d.noddraw=true
-Dsmp.fabricPersistenceEnabled=true -Dsmp.Mp.max=256
-Dsmp.deployment.prefix=Client/ -Dsmp.debug -Dsmp.client.export.port=YYYY
-Dsmp.flavor=%APP_FLAVOR% Client
popd
endlocal
HA-Fabric Manager transition guide 37
Page 38

Configuring HAFM through a firewall38
Page 39

Index
A
audience 5
authorized reseller, HP 7
C
comparing HAFM 7.x and 8.x features 25
conventions
document 6
text symbols 6
D
data
migrated during upgrade 18
not migrated during upgrade 19
document
conventions 6
related documentation 5
documentation, HP web site 5
F
features keys, defined 21
firewall configuration
forcing port in RMI registry 34
TCP port numbers for RMI 33
H
HAFM
comparison of 7.x and 8.x 25
login dialog box 15
HAFM appliance, software upgrade 12, 16
help, obtaining 7, 8
HP
authorized reseller 7
storage web site 8
Subscriber’s choice web site 7
technical support 7
L
license keys
defined 21
obtaining 22
N
notebook server
upgrading HAFM 12, 16
O
optional software modules (8.x) 22
P
polling client 31
forcing all clients to be polling 32
forcing client to be 31
post-upgrade configuration tasks 20
R
rack stability, warning 7
related documentation 5
reverting to prior HAFM version 21
S
Subscriber’s choice, HP 7
symbols in text 6
T
technical support, HP 7
text symbols 6
U
upgrade procedure
data migrated 18
data not migrated 19
HAFM appliance 12, 16
post-upgrade tasks 20
reverting to prior HAFM version 21
W
warning
rack stability 7
web sites
HA-Fabric Manager transition guide 39
Page 40

HP documentation 5
HP storage 8
HP Subscriber’s choice 7
40
 Loading...