

Page 1

HP Pavilion PC
User’s Guide
Page 2

The information in this document is subject to change without notice.
Hewlett-Packard® Company makes no warranty of any kind with regard to this material, including, but
not limited to, the implied warranties of merchantability and fitness for a particular purpose.
HP shall not be liable for errors contained herein or for incidental or consequential damages in
connection with the furnishing, performance, or use of this material.
HP assumes no responsibility for the use or reliability of its software on equipment that is not furnished
by HP.
This document contains proprietary information that is protected by copyright. All rights are reserved.
No part of this document may be photocopied, reproduced, or translated to another language without
the prior written consent of HP.
Hewlett-Packard Company
Home Products Division
P.O. Box 4010
Cupertino, CA 95015-4010
Printed in the USA.
© Copyright Hewlett-Packard Company, 1997. All rights reserved.
Hewlett-Packard is a registered trademark of Hewlett-Packard Company in the United States of America
and other countries.
Other brand or product names are trademarks of their respective holders.
Page 3

Contents
Chapter 1 Setting Up Your
System ............................................. 1
Finding a Place for Your Computer............................................. 1
Putting Your Computer Together................................................ 2
Getting Comfortable....................................................................... 2
Your System is Working................................................................. 3
Chapter 2 Starting Out
with HP ............................................ 5
My Software Folder......................................................................... 6
Personal Guide................................................................................. 7
HP Support Center .......................................................................11
Chapter 3 Operating Your
Computer ...................................... 13
Learning Computer Basics.......................................................... 14
Turning Off Your Computer........................................................ 15
Suspending Your Computer ....................................................... 16
Using the One-Touch Multimedia Keyboard .........................17
Using the Fax Machine ................................................................ 23
Contents
iii
Page 4

Chapter 4 Running Programs
and Creating Files .........................25
Running Software Programs .......................................................26
Using Documents and Folders ...................................................27
Adding New Software Programs to Your Computer.............29
Removing Programs from Your Computer..............................29
Removing Icons from the Windows 95 Desktop...................30
Running MS-DOS..........................................................................31
Chapter 5 Troubleshooting.......33
Chapter 6 Upgrading and
Servicing Your Computer.............51
Connecting Components to Your PC .......................................53
Using Headphones........................................................................54
Using Your Computer with Your Stereo System....................55
Replacing the Battery ...................................................................56
Adding More Memory..................................................................61
Installing Add-in Cards ................................................................64
Using the BIOS Setup Program ................................................. 66
FCC Regulatory and Safety Information..................................69
Declaration of Conformity........................................................... 72
Safety Information.........................................................................73
Products Provided with External Television Antenna
Connectors......................................................................................74
Index ..............................................77
Reconfiguring Keyboard Buttons and the Display.................59
iv
HP Pavilion PC User’s Guide
Page 5

1 Setting Up Your System
◆
Thank you for choosing a Hewlett-Packard
Pavilion PC. To maximize your comfort and
productivity, it is important that you set up and
use your system properly.
Finding a Place for
Provide access to the back of the computer
and the display during setup.
◆
Use grounded, three-prong electrical outlets
for the computer and display. HP recommends
that you also use a power strip with surge
protection.
Your Computer
Keep these recommendations in mind when you
choose a place for your computer:
◆
Choose a room that is dry, clean, and well
ventilated.
◆
Place the computer on a strong, flat surface
with enough space to move the mouse around.
◆
Place the computer near a phone jack so that
you can connect the modem. The modem is
needed to send and receive faxes and e-mail,
and to log on to the Internet.
◆
Consider the location of the windows in the
room—if the display reflects direct sunlight,
viewing the display may be uncomfortable.
Chapter 1 • Setting Up Your System
1
Page 6
Putting Your
Computer Together
For step-by-step instructions on putting your
computer together, refer to the Welcome Poster
that came in your computer box. You’ll notice that
the colors of the cable plugs match the colors
of the connector labels on the back of your
computer. When in doubt, match the colors.
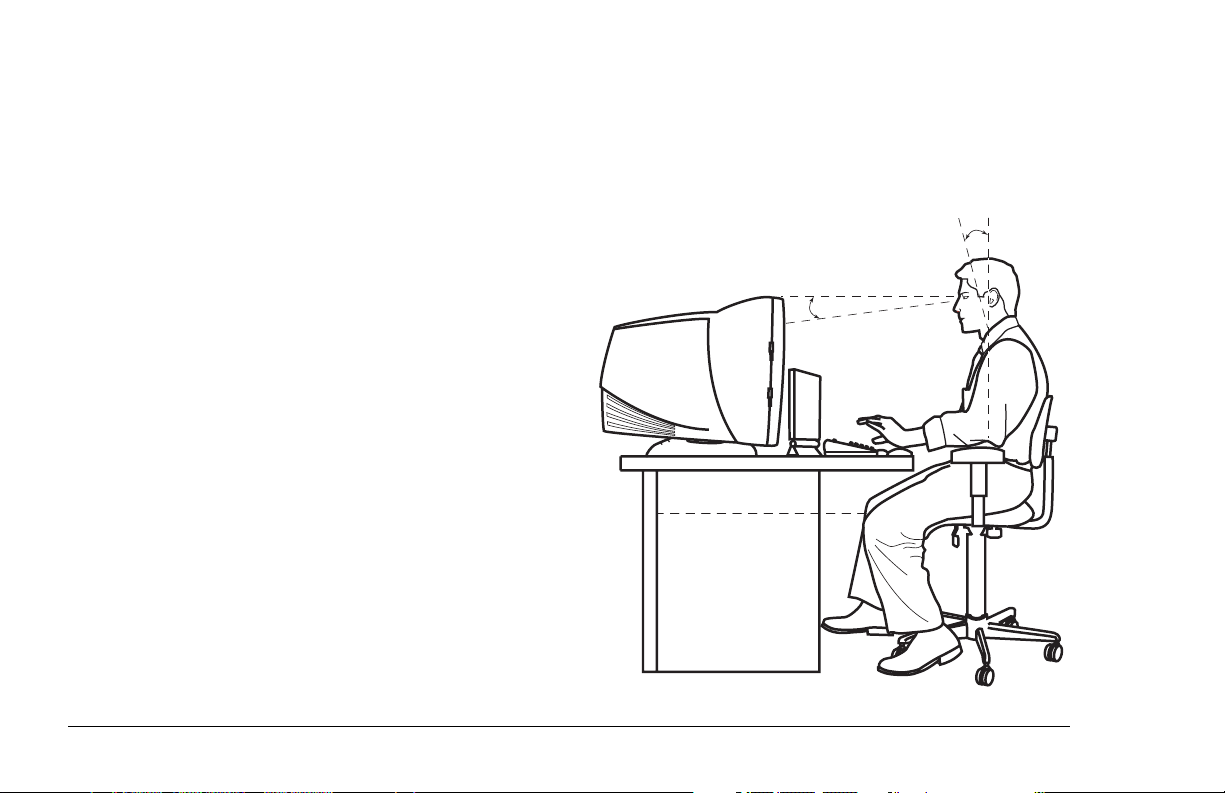
Getting Comfortable
Refer to the manual Working in Comfort With
Your HP Computer Equipment, which was
provided with your HP Pavilion PC, for important
ergonomic information.
Note:
You should take frequent, short breaks while
using the computer; we suggest you take a break after
15 to 20 minutes on the computer. Stretch each time
you take a break. If you experience physical discomfort,
it may be alleviated by ergonomically designed
accessories such as adjustable chairs, footrests,
keyboard trays, wrist rests, and glare screens.
0-15•
50-70 cm
-(20-28 inches)0-15•
2
HP Pavilion PC User’s Guide
Page 7
Your System is Working
When you first turn on your computer, a series
of startup screens, including a mouse tutorial,
appears, and then you see the Microsoft®
Windows® 95 desktop. Your computer is now
set up.
Double-click the Free Game icon on the desktop.
In addition to giving you a free game, this
procedure will guide you through the steps
necessary to register. It is important to register
with HP, so that you can be notified of changes
and updates for your HP Pavilion PC.
If Your System is Not Working
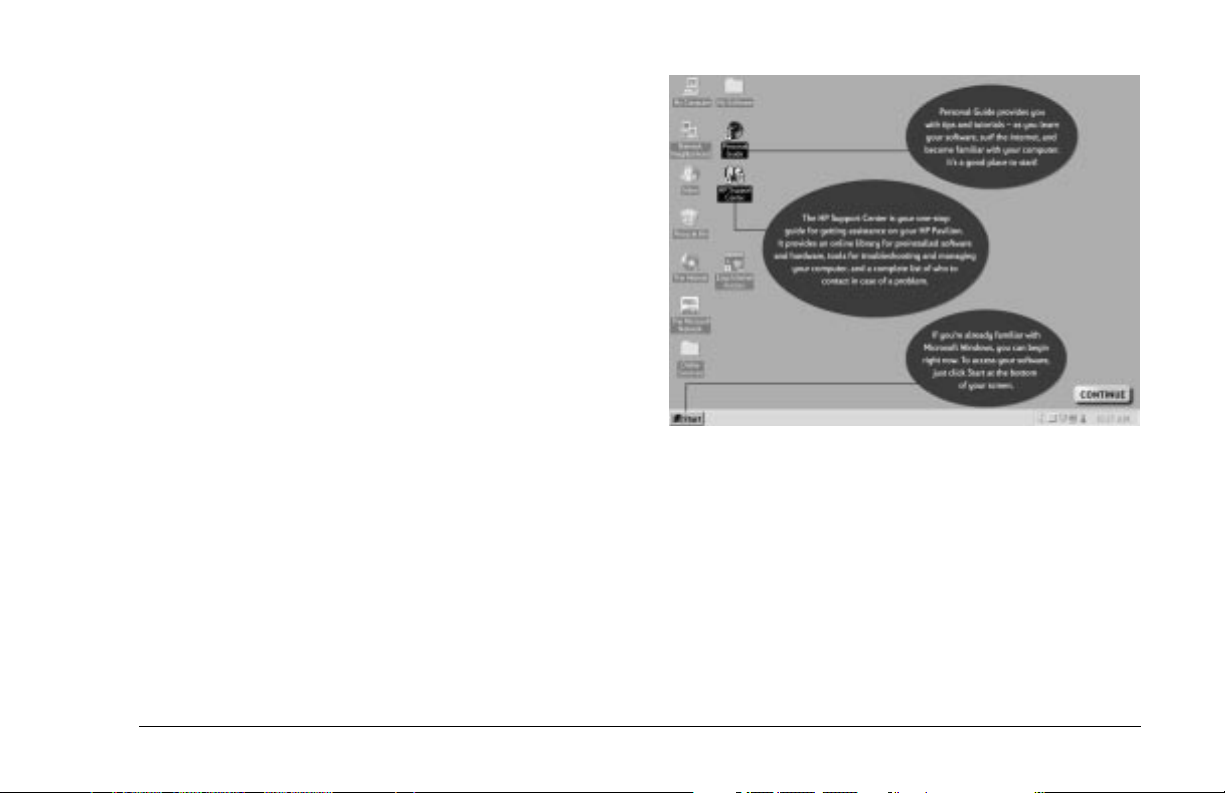
After you register online, a roadmap points out
and describes several important icons on your
desktop. For further information on Personal
Guide and HP Support Center, see the next
chapter.
If one or more of your system components
are not working properly, see Chapter 5,
“Troubleshooting,” beginning on page 33.
Chapter 1 • Setting Up Your System
3
Page 8

4
HP Pavilion PC User’s Guide
Page 9

2 Starting Out with HP
To help you get started, HP provides simple solutions for discovering
your software, learning Windows 95, getting support, and using the
Internet. The following table describes these solutions.
Topic HP Solution What It Does
Discovering
your software
Learning
Windows 95
Getting HP
support
Using the
Internet
The following sections describe the solutions in more detail.
My Software
folder
Personal
Guide
HP Support
Center
Internet
Access
This folder contains descriptions of various preinstalled applications HP provides on your PC. Look
here to learn a little about the applications before using them.
Personal Guide teaches you about Windows 95—folders, documents, shortcuts, and Windows
Explorer. It gives you answers to frequently asked Windows 95 questions, and also gives you quick
access to the Internet and the HP Support Center.
The HP Support Center provides you with online documentation, tutorials, diagnostics, system tools,
and answers to frequently asked questions. Check your disk for viruses, make more room on your
hard drive, recover lost or damaged HP programs, and contact technical support personnel from the
HP Support Center. An online diagnostic tool (SystemWizard) will take you through a sequence of
questions for problem identification and offer possible solutions. If you don’t solve the problem this
way, whatever you have tried so far is recorded for your support person to look at when you call.
An Internet service provider has been provided. Upon registration, you will receive 50 free hours to
use the Internet with HP’s customized browser. Be sure to explore the HP At Home Web site,
designed for HP Pavilion PC owners. To access the Internet, double-click the
on your Windows 95 desktop.
Note:
Your computer is shipped
with Windows 95. Hewlett-Packard
does not support Windows NT on
the Pavilion.
Internet Access
icon
Chapter 2 • Starting Out with HP
5
Page 10
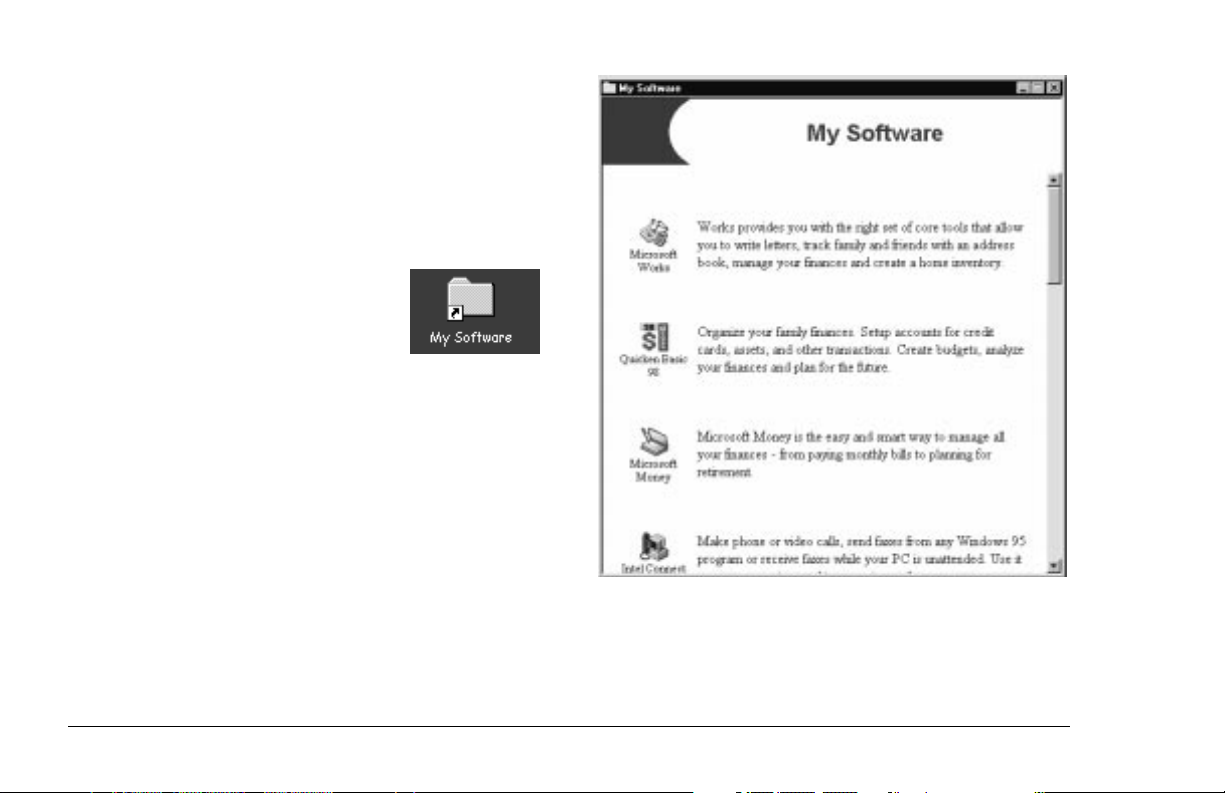
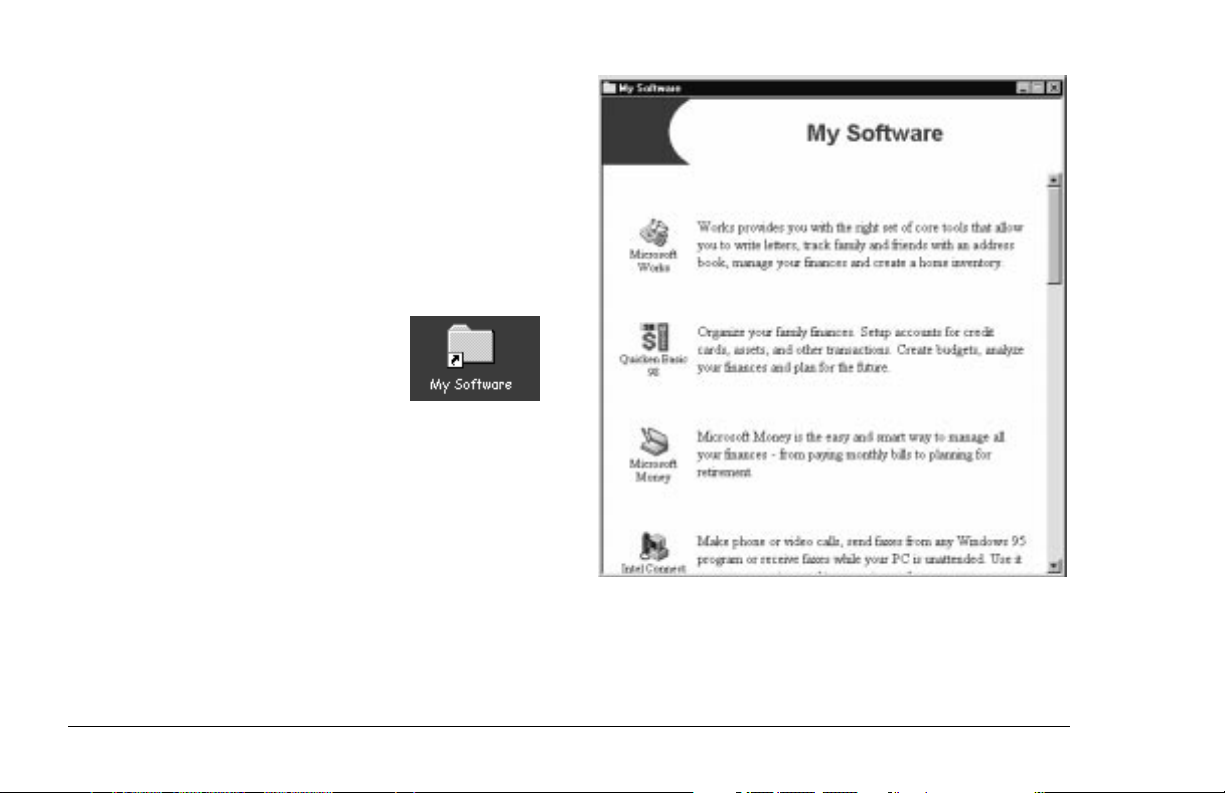
My Software Folder
Your HP Pavilion PC comes with a number of
preinstalled software programs. The programs
vary, depending on which system you purchased.
To see what programs you have and run them:
1
Double-click the My Software
folder on your Windows 95
desktop.
2
To run a program, double-click the program’s
icon in the My Software window.
Note:
You can also run all of these preinstalled
programs (plus any new ones you install) from the
Windows 95 Programs list. To see this list, click
Start on the Windows 95 taskbar and then choose
Programs.
Note:
Your window may show different software icons.
6
HP Pavilion PC User’s Guide
Page 11
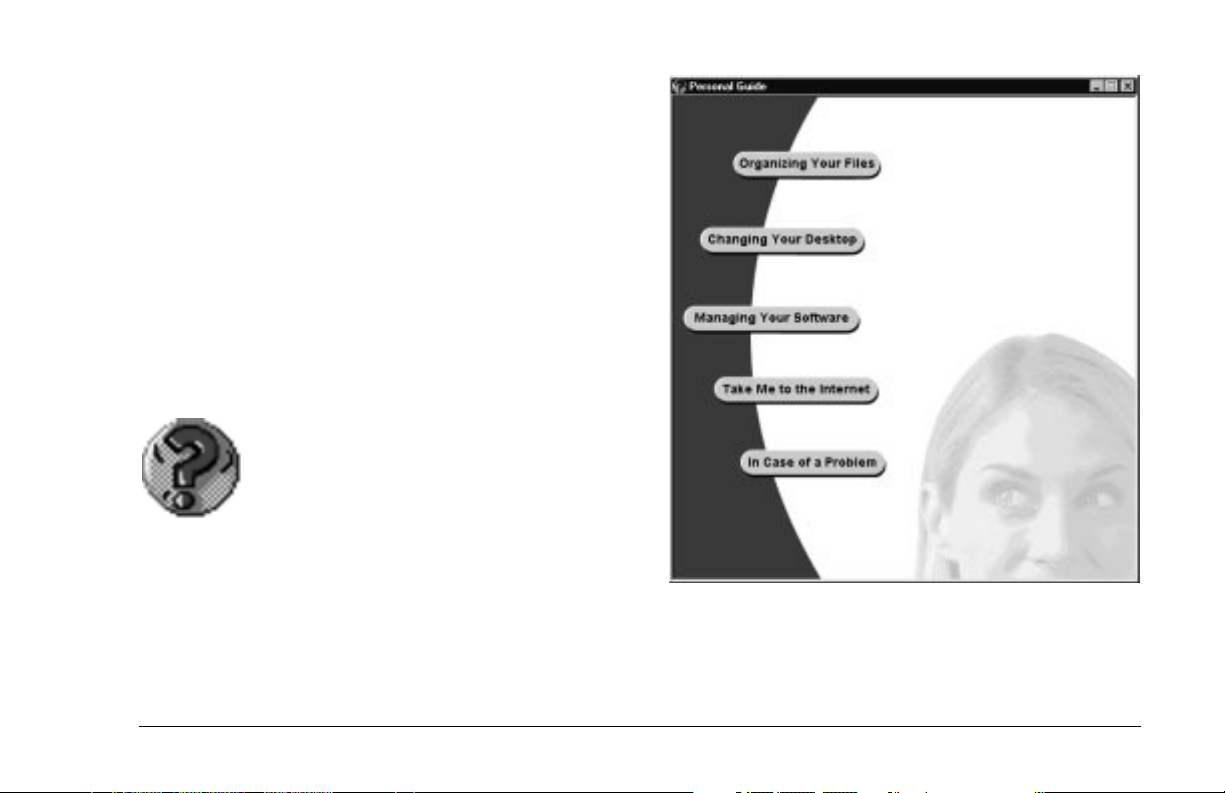
Personal Guide
For those who are new to Windows 95, Personal
Guide provides an easy way to start using your HP
Pavilion PC. It offers easy access to a variety of
on-screen tutorials and multimedia demos that
will help you get up and running quickly with your
new computer.
Start Personal Guide by double-clicking its icon on
the Windows 95 desktop.
To explore a Personal Guide category, click its
button in the Personal Guide window.
Descriptions of the Personal Guide categories are
listed on the following page.
Chapter 2 • Starting Out with HP
7
Page 12
Personal Guide Categories
Organizing Your Files
Managing Your Software
Changing Your Desktop
In Case of a Problem
Take Me to the Internet
Helps you get acquainted with the Windows 95 desktop, creating folders, saving files, moving and
removing documents, finding files, creating shortcuts, and using Windows Explorer.
Explains how to install and remove software, add software to the Start menu, prevent software from
starting automatically, and start a DOS session.
Explains how to increase the size of the desktop, change Windows 95 colors, choose a screen
saver, remove icons from the desktop, format the taskbar, and use Suspend mode.
Takes you directly to the HP Support Center so that you can get any additional questions answered.
Launches a demo summarizing the benefits of the Internet. If you sign up for a free Internet access
trial, you can access your browser directly from here.
Several of the categories (Organizing Your Files,
Managing Your Software, and Changing Your
Desktop) contain a number of topics for which
you can run tutorials. Just click a topic, read the
helpful information presented on the screen, and
then click
Show Me a Step-by-Step Demo
to
see and hear the multimedia tutorial.
8
HP Pavilion PC User’s Guide
Page 13
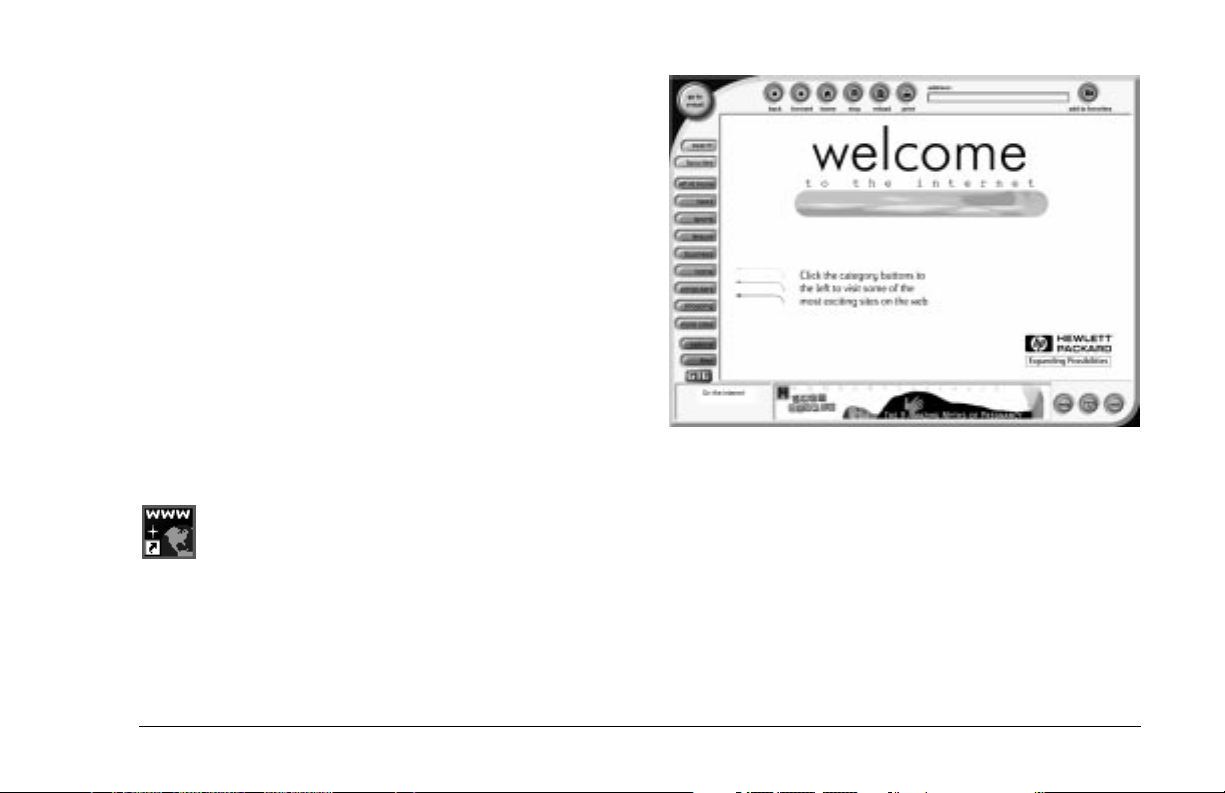
Easy Internet Access
HP has made it easy for you to explore the world
of the Internet by providing:
◆
A customized Internet browser that points
you to some of the most interesting sites on
the Web.
◆
Free Internet access for up to 50 hours. E-mail
is included and no credit card is needed!
To launch the custom browser, press the Internet
button on the keyboard or double-click the
Internet Access icon on your desktop.
You can then watch an interactive demo that will
acquaint you with the Web and show you how to
use e-mail. When you’re ready, click Sign Up to
register for your free Internet access trial.
Chapter 2 • Starting Out with HP
9
Page 14

After you sign up, you will see the HP At Home
Web site, which was created especially for HP
Pavilion PC owners. It’s filled with questions and
answers, tips, tricks, and activities for fun with
your HP Pavilion PC. The custom browser
provides direct links to popular sites on the Web,
helps you search the Web for specific topics, lets
you send and receive e-mail, and more. Even if
you already have an Internet service provider and
an e-mail address, you can still use the browser
provided. Simply select this option during the
sign-up process.
The HP At Home owners’ Web site is located at
http://www.hp-at-home.com/
10
HP Pavilion PC User’s Guide
Page 15
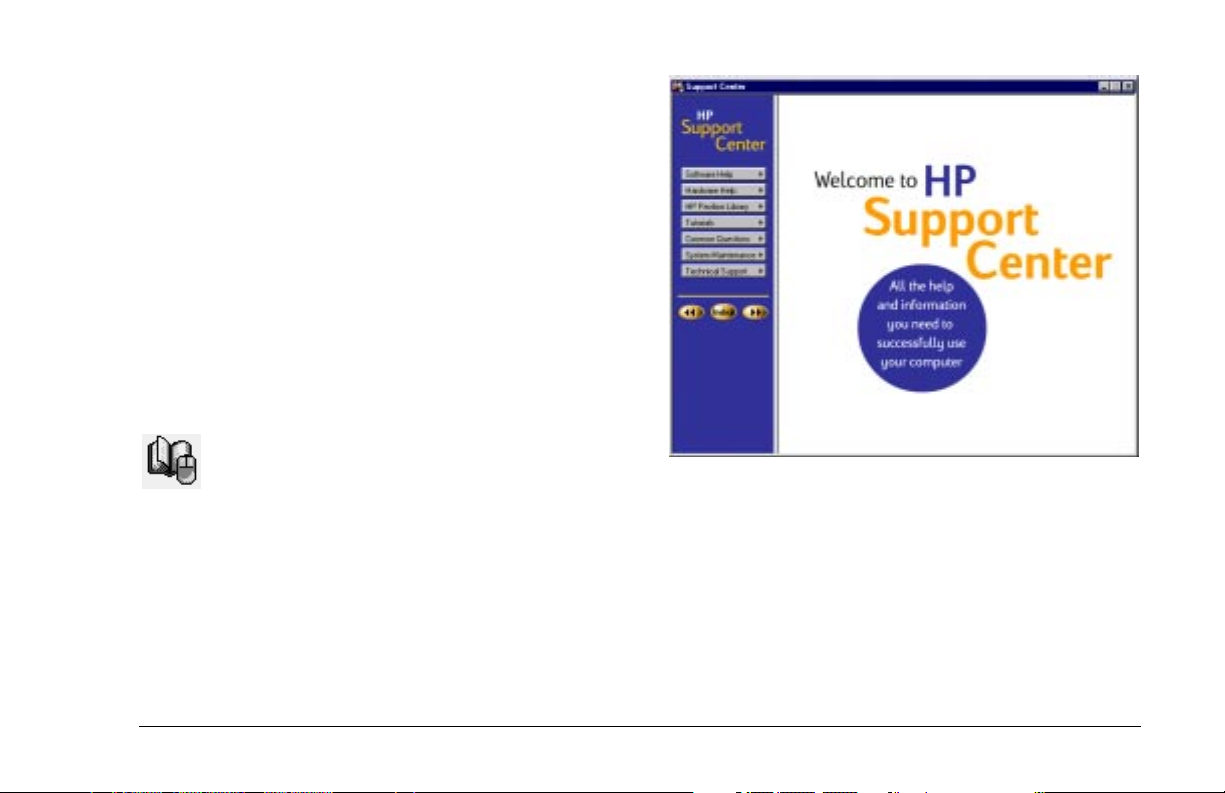
HP Support Center
If you are having trouble learning a new software
program or diagnosing a hardware problem,
the HP Support Center is the place to go. Your
support options, online documentation, tutorials,
and system maintenance tools have been grouped
in this one convenient location. To go to the
Support Center, choose HP Support Center in
the Start menu or double-click the icon on the
desktop.
Descriptions of HP Support Center options are
listed on the following page.
Chapter 2 • Starting Out with HP
11
Page 16

HP Support Center Options
Software Help
Hardware Help
Pavilion Library
Tutorials
Common Questions
System Maintenance
Technical Support
Each software package shipped with your computer is listed here, along with its manual (if there is
one), online Help, and a support phone number.
Exactly what hardware makes up your system? What do you do when something isn’t working? How
do you diagnose a problem? What is SystemWizard? Who do you call? This selection answers these
questions and more.
Online manuals are found here. Software manuals (also found under Software Help) and your modem
guide are found here.
Learn skills that range from creating software shortcuts to changing the color of your screen
background by taking the short lessons found here.
Common questions that HP Support Center personnel are frequently asked are listed and answered
here. Subjects range from modems to the Internet to MS-DOS and more. Check here if you have a
question about your computer.
Here you find system tools to clean up your hard disk, get rid of viruses, and run the SystemWizard
online diagnostic tool.
When you need help, who do you call? Where do you call?
12
HP Pavilion PC User’s Guide
Page 17

3 Operating Your Computer
The basics of operating your HP Pavilion PC are
covered in this chapter:
◆
Learning computer basics
◆
Turning off your computer
◆
Suspending your computer
◆
Using the one-touch multimedia keyboard
◆
Using the Intel Connect™ phone and
answering machine
◆
Using the fax machine
Chapter 3 • Operating Your Computer
13
Page 18

Learning Computer Basics
General computer skills are not covered in this book. To learn computer basics, try the suggestions listed.
What You May Want
to Learn Where You Can Find It
What your computer
can do
How to get more
practice using a mouse
How Windows 95 works
Common computer
terms
14
HP Pavilion PC User’s Guide
To see a demo, press the keyboard key with the Demo sticker on it. The key is Shortcut 3.
Solitaire or any of the games that came with your computer are a great way to practice pointing and
clicking.
An online manual called
ABCs of Windows 95
To see
1
Double-click the
2
3
4
An online manual called
manuals provided in the library for additional information.
HP Pavilion Library
Click
Online Books
Click
ABCs of Windows 95
Click
ABCs of Windows 95
:
HP Support Center
.
.
.
Pocket PC User’s Guide
covers the basics of this operating system.
icon on the desktop.
can also be found in the Pavilion library. Read other
Page 19

Tips
◆
When you aren’t using them, return diskettes,
CDs, and DVDs to their protective cases.
◆
Be careful not to spill liquids on the keyboard.
◆
Keep magnetic material away from your
computer and disks.
◆
Remove diskettes only after the indicator light
on the diskette drive goes off.
Turning Off Your
Computer
There is only one way to turn off your computer
correctly. To turn off the computer:
1
Exit all software programs. (To close
programs, click X in the upper-right corner
of each window.)
2
Click Start on the Windows 95 taskbar.
3
Click Shut Down (last item on the menu).
4
Click Yes.
5
Turn off your display.
Caution:
software is running could corrupt your files.
Note:
the mouse or keyboard, you can’t use Shut Down. In this
case, reset the computer by pressing the power button.
Turning off your computer this way does not protect your
programs and files as well as Shut Down does. The next
time you turn on the computer, the hard disk may be
scanned for errors. (When you turn off the computer this
way, wait a few seconds before you turn it back on.)
Pressing the computer’s power button when
If your system is “frozen” and won’t respond to
Chapter 3 • Operating Your Computer
15
Page 20

Suspending Your
(if you have programmed your computer to do so).
Computer
As an alternative to shutting down your computer,
you can put your PC in Suspend mode. When you
suspend your computer, it goes into a low-power
state and your display is blank as if it’s turned
off. The next time you use your computer, any
applications, folders, and documents that were
open before you suspended the computer will be
ready and waiting for you. With Suspend, you can
save electricity without having to wait for your PC
to go through the normal startup routine when you
turn on the computer.
Suspend also allows faxes to come through
to your computer, and enables your PC to
automatically retrieve your e-mail messages and
download information from the World Wide Web
To suspend the computer:
1
Press the Suspend button on the front of the
computer. The screen goes dark, and the
computer goes into Suspend mode.
2
When you want to use your computer again,
just start to use the keyboard or mouse, or
press the Suspend button. The screen display
will reappear just as you left it.
Another way to suspend your computer is to
choose Suspend on the Windows 95 Start menu.
Note:
If you use an application that wakes your
computer when it is suspended (such as when a fax
program receives an incoming fax), the computer will not
go back into Suspend mode automatically, unless you
configure your PC to use the Auto Suspend feature. For
information on enabling Auto Suspend, see “Setting Auto
Suspend in the BIOS” on page 68.
16
HP Pavilion PC User’s Guide
Page 21

Using the One-Touch
Multimedia Keyboard
You have a special multimedia keyboard that can:
◆
Adjust the volume on your speakers.
◆
Start and stop your CD or DVD player, skip to
different tracks, and eject the disk.
◆
Start a demo about your computer.
◆
Attach headphones.
◆
Mute all sound on the computer.
◆
Play back your phone messages.
◆
Answer the phone.
◆
Connect you directly to the Internet (if your
telephone line is connected to the computer).
◆
Set shortcuts to your favorite programs.
◆
Suspend your computer to save power while
you aren’t using it.
◆
Get support information.
Keyboard Buttons,
Knobs, and Controls
Volume
the volume for your entire computer system. (Note
that the knob can be turned indefinitely, even after
maximum sound has been reached.)
Messages
blinking, you have received a fax or a phone
message. Press the Messages button to hear
or read your new messages.
This knob increases and decreases
When the light next to this key is
Chapter 3 • Operating Your Computer
17
Page 22

Phone
This key works like a speakerphone
button on a regular phone. Press Phone to start
your phone software, and then dial a phone
number. If someone is calling you, answer by
pressing Phone. (For more information, see
page 21.)
Shortcut 1, Shortcut 2, Shortcut 3
Each of the three
shortcut keys is pre-set to start a particular
software program (Shortcut 3 is the Pavilion
demo), but you can change these settings. For
directions on changing the program connected
to a shortcut key, see page 59.
Internet
Press this key to launch your Internet
browser. This button is pre-set to use the
customized Internet browser already installed on
your computer. You can reconfigure the button
to launch a service provider or browser of your
choice. See the directions on page 53.
Note:
These three keys will work only if you have
connected a telephone line to the computer. See
page 55 for connection instructions.
18
HP Pavilion PC User’s Guide
Suspend
Press this key when your computer
won’t be used for a while, but you don’t want to
turn it off. Pressing this key will save electricity.
The screen will go dark, and your computer will go
into Suspend mode. When you want to use your
system again, press Suspend again, or move the
mouse, or press any key. The screen display will
reappear just as you left it.
Information
Press Information to see HP support
options. You can choose to launch either Personal
Guide or the HP Support Center. For information
on configuring this key, see page 59.
Page 23

Media Player
controls on an audio CD player. Use these buttons
to open and close the carrier, to skip tracks, to
pause, and to stop the CD player or DVD player.
Mute
Press Mute to turn off all sound on the
computer. A Mute On indicator appears on your
screen. To turn on the sound, again press the
Mute button. If you want to affect only one
specific sound (and not the whole system),
double-click the Volume icon on the screen. Here,
you can change individual sound levels.
These buttons work like the
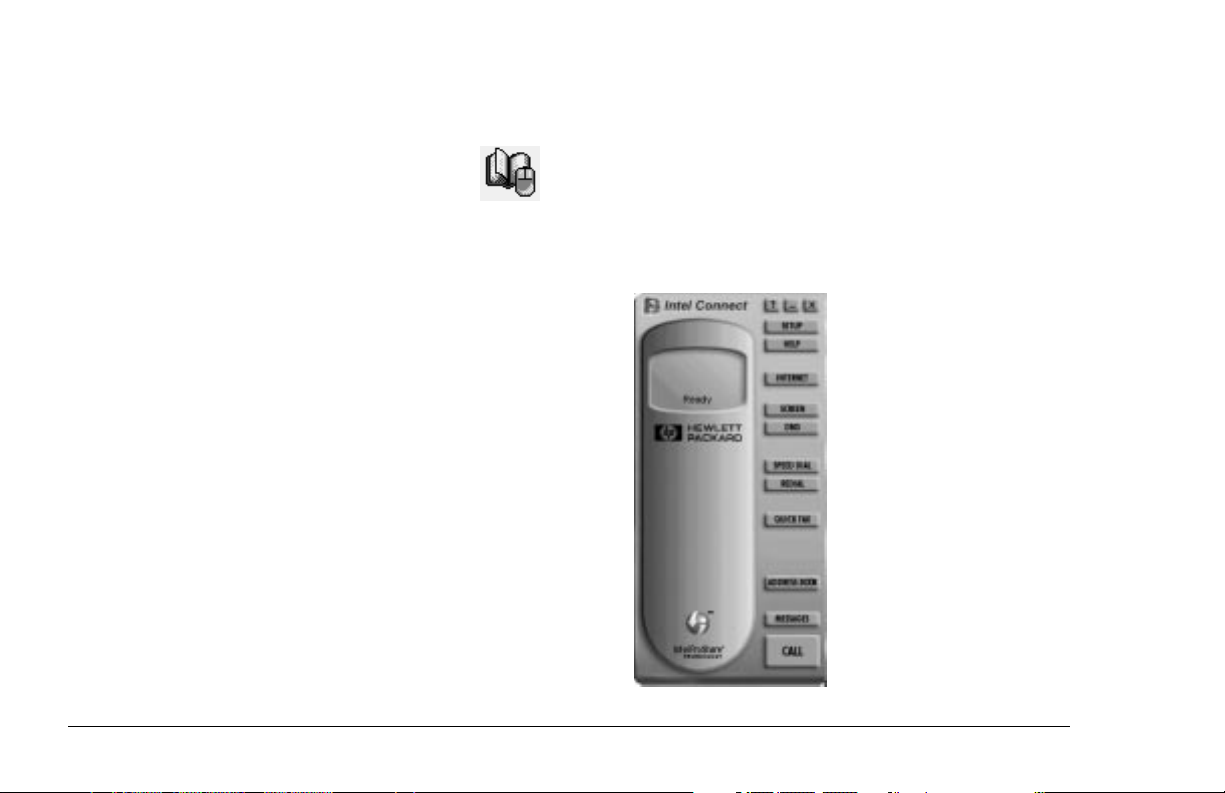
Using the Intel Connect™ Phone
and Answering Machine
Your computer can function as both a telephone
and an answering machine. You can:
◆
Make calls by clicking Address Book entries.
◆
Put callers on hold and let them listen to
on-hold music.
◆
Use speed dial.
◆
Use Caller ID (if your phone company
supports it).
◆
Access your messages remotely.
◆
Have your pager notify you.
◆
Screen your calls.
Chapter 3 • Operating Your Computer
19
Page 24
For a full explanation of your phone operation,
consult the online Intel Connect™ manual:
1
Double-click the HP Support Center
icon on the desktop.
2
Click HP Pavilion Library.
3
Click Online Books.
4
Click Intel Connect™.
To start the Intel Connect™ tutorial:
1
Start Intel Connect™.
2
Click the Intel Connect™ icon (located in the
upper-left corner directly above the phone).
3
Select View Tutorial.
Making a Phone Call
1
Press the Phone key on your multimedia
keyboard. The phone receiver opens. (The first
time you run Intel Connect™, you answer
setup questions and make your answering
machine’s recording.)
20
HP Pavilion PC User’s Guide
Page 25

2
Dial one of two ways: Either click the numbers
on the phone handset or enter the numbers
from the keyboard keypad.
3
When a person answers the phone, speak
directly into the microphone. The microphone
is located on the top of your display (HP
Pavilion Multimedia Display) or is connected
to your computer.
4
Press Phone again to hang up.
Receiving a Phone Call
Intel Connect™ must be running for you to
receive a call. (That is, the program must be
running in an open or minimized window.)
When a call comes in, you hear the ring from
the speakers and the status message on your
screen says Ringing. The CALL button changes
to a flashing ANSWER, indicating an incoming
call. Press the Phone button on the keyboard to
answer the call, and speak into the microphone.
The microphone is located on the top of your
display (HP Pavilion Multimedia Display) or is
connected to your computer.
Chapter 3 • Operating Your Computer
21
Page 26

Letting the Answering Machine
Take Calls
Keep Intel Connect™ running to answer calls
(remember that more than one program can run
simultaneously):
1
Press the Phone key on your multimedia
keyboard.
2
Click Setup.
3
Click Ringing.
4
In the Auto-answer ring count box, enter
the number of rings before the answering
machine plays the greeting.
5
Click the Answering tab.
6
Click Answer as an answering machine.
If you have set up multiple mailboxes, click
Answer as a voice mail system.
7
Click OK to return to the Intel Connect™
main window. Leave this program running and
go ahead with your other computer activities.
Note:
If you want the answering machine to pick up
calls without any ringing, click DND (Do Not Disturb)
on the Intel Connect™ main window.
Playing Messages
If you have messages on your answering machine,
the Messages light blinks on the keyboard.
To hear your messages, press the Messages
button next to the blinking light. If you have a
message, you will hear it. If you have a fax, you
will hear a notification.
Note:
You can access your messages remotely, set up
pager notification, or screen your calls. Refer to the
online
Intel Connect™
The manual is in the online HP Pavilion Library under HP
Support Center.
manual for these instructions.
22
HP Pavilion PC User’s Guide
Page 27

Note:
Your version of Intel Connect™ may have Video
Phone with Intel ProShare™ Technology (special video
receive capability). If it does, a video button appears on
the Main Menu. For more information, see the Intel
Connect™ manual.
To access the Intel Connect™ manual:
1
Double-click the
icon on the desktop.
2
HP Pavilion Library
Click
HP Support Center
.
Using the Fax Machine
This section explains how to send a fax. Refer to
the Intel Connect™ manual for instructions on:
◆
Entering names in the Address Book
◆
Sending a fax to a listing in the Address Book
◆
Selecting a fax cover page
◆
Printing a fax
◆
Forwarding a fax
3
4
Online Books
Click
Intel Connect
Click
Chapter 3 • Operating Your Computer
.
™.
23
Page 28

Sending a Fax
There are two ways to compose a fax. You can
type a message on the Quick Fax notepad, or you
can fax a file from any program that can print.
Sending a fax composed
on the Quick Fax notepad
1
Start Intel Connect™ by pressing Phone on
the keyboard.
2
Click Quick Fax on the Intel Connect™ main
window. The Message Manager appears.
3
In the subject box, type the subject of the fax.
4
Click To:
5
Click Unlisted, and then fill in the name and
fax number in the unlisted dialog box.
7
To include your default cover page, click
Include Cover Page.
8
Click OK to return to the Message Manager
window.
9
Click Message.
10
Click Send.
Faxing a file using software programs
Software programs that can print can also send
faxes. To send a fax, change the default printer
(in the software program) to Intel Fax, and then
print as you normally do.
6
In the Description field, choose Fax.
24
HP Pavilion PC User’s Guide
Page 29

4 Running Programs and
Creating Files
This chapter helps you start using your software
programs (also called applications). You’ll learn
about:
◆
Running software programs
◆
Using documents and folders
◆
Adding new software programs to your
computer
◆
Removing programs from your computer
◆
Removing icons from the Windows 95
desktop
◆
Running MS-DOS
Chapter 4 • Running Programs and Creating Files
25
Page 30
Running Software
Programs
Your HP Pavilion PC comes with a number of
preinstalled software programs. The programs
vary, depending on which system you purchased.
To see what programs you have and run them:
1
Double-click the My Software
folder on your Windows 95
desktop.
2
Click an icon to see its description.
3
To run a program, double-click the program’s
icon in the My Software window.
Note:
You can also run all of these preinstalled
programs (plus any new ones you install) from the
Windows 95 Programs list. To see this list, click
Start on the Windows 95 taskbar and then choose
Programs. Using Documents and Folders.
Note:
Your window may show different software icons.
26
HP Pavilion PC User’s Guide
Page 31

Using Documents and
Folders
If you want to make a separate copy of the
document, click Save As (instead of Save) in
step 2 and type a new name.
Saving Documents
To initially save documents created by
Windows 95 programs:
1
Click File (upper-left portion of window).
2
Click Save.
3
Select a folder in which to store the document.
4
Type a name for the document.
5
Click Save.
If you alter this document and save it again,
you don’t have to go through the steps again.
The document is updated when you click Save.
For more instructions, complete the tutorial
Managing Your Computer in Personal Guide.
Creating Folders
To create folders:
1
Go to the place in which you want the folder
to appear (on the desktop or inside another
folder).
2
Click the right mouse button.
3
Select New.
4
Click Folder.
5
Type the name of the new folder.
Chapter 4 • Running Programs and Creating Files
27
Page 32

6
Click elsewhere to end the procedure.
7
You can drag documents or other folders
into the new folder.
For more instructions, complete the online tutorial
Managing Your Computer in Personal Guide.
6
Double-click the document (or folder) to
open it.
7
For more instructions, complete the online
tutorial Managing Your Computer in Personal
Guide.
Finding Documents and Folders
To find documents or folders on your computer:
1
Click Start on the Windows 95 taskbar.
2
Select Find.
3
Click Files or Folders.
4
Type all or part of the name of the document
(or folder).
5
Click Find Now. The magnifying-glass
animation means the search is in progress. If
there are any matches, a list of files appears.
28
HP Pavilion PC User’s Guide
Moving Documents and Folders
To move files, just drag them from one location
to another. To drag a file, click it with your left
mouse button. Hold down the mouse button while
moving your mouse across your mouse pad or
table surface. When the file is in the location you
want, release the mouse button.
Page 33

Adding New Software
Programs to Your
Computer
6
Click Install.
7
Follow the on-screen directions.
Once a new program is installed, it appears in the
Programs section of the Start menu.
There are two ways to install a new program:
using the install utility that comes with the new
program, or using the Add/Remove Programs
utility in Windows 95.
To install new programs by running Add/Remove
Programs:
1
Put the CD in the media drive, or put the
diskette in the diskette drive.
2
Click Start on the Windows 95 taskbar.
3
Select Settings.
4
Click Control Panel.
5
Double-click Add/Remove Programs.
Note:
If you do not install programs with an install
utility (or the Add/Remove Programs utility), you won’t
be able to remove the programs properly later. Merely
deleting a program icon will not remove all of the
program files.
Removing Programs
from Your Computer
There are a number of ways to remove programs
from your hard disk. Some programs come with
their own uninstall utility, which you use to
remove the program. You can buy uninstall
utilities that remove any program from your hard
disk. Or you can use the Add/Remove Programs
utility in Windows 95.
Chapter 4 • Running Programs and Creating Files
29
Page 34

To use the Windows 95 Add/Remove Programs
utility:
1
Click Start on the Windows 95 taskbar.
2
Select Settings.
3
Click Control Panel.
4
Double-click Add/Remove Programs.
5
Click the program you want to remove.
6
Click Add/Remove.
Removing Icons from the
Windows 95 Desktop
There are two types of icons, and they are
removed differently:
◆ Shortcut icons
arrow in the lower-left corner of the icon.
You can drag them to the Recycle Bin.
(Icons created by installing new programs
are shortcuts.)
These are identified by an
7
Click OK.
30
HP Pavilion PC User’s Guide
◆ Program icons
Microsoft Recycle Bin and My Computer
icons, are not removable. Some icons, such
as the Inbox icon, however, can be removed
by following the directions that follow.
Some icons, such as the
Page 35

To remove program icons:
1
Make sure that all documents are saved and
all programs are closed.
2
Click Start on the Windows 95 taskbar.
3
Select Settings.
4
Click Control Panel.
5
Double-click Add/Remove Programs.
6
Click Windows Setup.
Running MS-DOS
Some software requires MS-DOS. To use
MS-DOS:
1
Click Start on the Windows 95 taskbar.
2
Click Shut Down. You are offered several
options.
3
Choose Restart computer in MS-DOS mode.
4
Click Yes.
7
Find the software whose icon you want to
delete.
8
Click the box to deselect it (the check mark
should disappear).
9
Click OK.
10
Click Yes to restart the computer.
You are now in MS-DOS at the Windows directory
level. Type CD C:\ and then press Enter to get to
the root level of the file system directory.
When you want to go back to Windows 95, type
EXIT at the MS-DOS prompt, and then press
Enter.
Chapter 4 • Running Programs and Creating Files
31
Page 36

32
HP Pavilion PC User’s Guide
Page 37

5 Troubleshooting
This chapter discusses your options for resolving
problems you may have with your HP Pavilion PC:
◆
Fixing common problems
◆
Solving software issues
◆
Using system tools
◆
Using SystemWizard
◆
Calling HP support
◆
Using the HP Pavilion Recovery CD(s)
Fixing Common Problems
This section lists problems you might experience
when using your computer. The problem is
listed first, followed by the solution. Check to
see whether your problem is listed. The list is
in alphabetical order. For example, if your
Windows 95 taskbar has disappeared, check
under W for Windows and then find the problem
My taskbar disappeared. General problems are
listed at the end of this section.
Chapter 5 • Troubleshooting
33
Page 38

Answering machine
The answering machine
never answers the phone.
Answering machine
The answering machine
grabs calls before I can answer the phone.
Make sure that the software is running. (The
screen with the phone should be in an open
window.) If the software is running, make the
following adjustments from the Intel Connect™
main window:
1
Click Setup.
2
Click Answering.
3
Choose either Answer as a voice mail system
or Answer as an answering machine.
◆
Increase the number of rings before Intel
Connect™ automatically answers:
1
From the Intel Connect™ main window,
click Setup.
2
Click Ringing.
3
Enter a higher number in the Auto-answer
ring count box.
◆
Make sure that the DND (Do Not Disturb)
button is not lit on the Intel Connect™
window. Click the DND button to disable the
Do Not Disturb feature.
main
34
HP Pavilion PC User’s Guide
Page 39

Answering machine
as they are left.
I can’t hear messages
Answering machine
as they are played back.
I can’t hear messages
Check the following:
◆
Make sure that the Screen button is lit on the
Intel Connect™ main window.
◆
Make sure that the mute feature is not on.
Press the keyboard Mute button repeatedly
until Mute Off flashes on your screen.
◆
Adjust the Volume knob on the keyboard or
use the Multimedia Sound Mixer to increase
just the answering machine sound level:
1
Double-click the Volume icon
(located in the lower-right corner
of your screen).
2
Adjust the slide control. Make sure that
the Volume Controls are set at least
halfway.
Make the following adjustments:
◆
Make sure that the mute feature is not on.
Press the keyboard Mute button until Mute
Off appears on the screen.
◆
Turn up the Volume knob on the keyboard.
◆
Adjust the Sound Mixer volume:
1
Double-click the Volume icon
(located in the lower-right corner
of your screen).
2
Make sure that the Volume Controls are
not muted and are set at least halfway.
Chapter 5 • Troubleshooting
35
Page 40

Answering machine
I can’t record an
outgoing message.
Use the phone you connected to your computer,
rather than the microphone in the display, to
record the message. If you haven’t set up a phone
on the computer, directions are on your Welcome
Poster.
CD
The message “System Error: Unable to
read drive” appears when running a CD
program.
◆
Make sure that the CD is placed into the drive
with the label side up.
◆
Wait 5 to 10 seconds after closing the CD
drawer to give the computer time to recognize
the CD.
◆
Are you trying to play a DVD in a CD player?
A DVD will not play in a CD player. To play a
DVD, you must have a special DVD player.
Display
My display doesn’t work, even
though the computer appears to work.
◆
Make sure that the power cord is securely
plugged into the display.
◆
Make sure that the display is turned on—it has
its own power switch.
◆
Make sure that your power cord is plugged
into a grounded three-prong outlet. Check to
see whether the outlet works by plugging
another item (such as a lamp) into the outlet.
(If the light on the front of the display is lit, it is
getting power. Try the next item on this list.)
◆
Check the cable connection between the
display and the computer. The cable
connectors must be pushed in all the way.
◆
Adjust the brightness and contrast controls on
the display. (The information may be there,
but you just can’t see it.)
36
HP Pavilion PC User’s Guide
Page 41

Fax and phone
Check to make sure that a phone cable connects
from the back of the computer to the wall. The
cable must be plugged into the rightmost socket
on the computer. The left socket is there to plug in
a phone if you want to.
Fax and phone
I can’t dial out.
I can’t correct typing
mistakes when dialing a phone number.
No, you can’t. The Backspace key doesn’t do
anything here. If you misdial a number, you must
hang up and start over.
Fax and phone
The message “Invalid phone
number” appears when using the Address Book.
Fax and phone
The message “Check error
log” appears in the status window.
Make the following adjustments, starting at the
Intel Connect™ main window:
1
Click Setup.
2
Click Error Log.
3
Read the error message.
4
Click Delete.
Fax and phone
Incoming faxes are not
picked up automatically.
1
Click Setup on the Intel Connect™ main
window.
You need to include the area code in the
Properties Description in the Address Book
Manager window.
2
Click Answering.
3
Choose either Answer as a voice mail system
or Answer as an answering machine.
Chapter 5 • Troubleshooting
37
Page 42

Fax and phone
I can’t enter a name or a
phone number in the To: box when composing
a fax.
In the Message Manager window:
1
Click To:
2
Choose a name from the Address Book; or
click Unlisted, and then enter a name and
phone number.
Keyboard
My keyboard doesn’t work, even
though the computer and display seem to work.
◆
Make sure that the keyboard is connected to
the keyboard port, not the mouse port. The
colors of the cable plugs and the colors of the
connector labels should match.
◆
Press the Caps Lock key on the keyboard.
Does a light appear on the key?
Fax and phone
The Address Book dials the
person’s business phone instead of the home
phone (and vice versa).
In the Address Book window:
1
Click Other Number.
2
Choose Home Phone or Business Phone.
38
HP Pavilion PC User’s Guide
Mouse
My mouse doesn’t work, even though
everything else does.
◆
Make sure that the mouse is connected to the
mouse port, not the keyboard port. The colors
of the cable plugs and the colors of the
connector labels should match. If you need to
reconnect these two cables, you
computer off, reconnect the cables, and then
turn the computer back on.
must
turn the
Page 43

◆
Make sure that you are in Windows 95, not
MS-DOS. (The MS-DOS interface is a plain
screen with a prompt that looks like this: C>)
If you are in MS-DOS, type EXIT and press
the Enter key.
◆
Does the pointer move on the screen when
you move your mouse? If not, try this:
1
Remove the mouse ball by unscrewing the
bottom of the mouse.
2
Clean the mouse ball with a damp cloth
(not paper).
3
Use your finger to move the rollers in the
mouse ball housing.
4
Replace the mouse ball and screw on the
cover.
Sound
◆
◆
◆
My computer doesn’t make any sound.
Check the headphone and microphone cables
at the back of the computer to be sure they
are not switched. The colors should match.
Be sure the blue sound plug is pressed firmly
into the jack.
Locate the Volume knob on the keyboard.
The knob is at the top of the keyboard, near
the center. Turn up the volume by turning the
knob clockwise. As you do this, you’ll see the
volume indicator increase on your screen.
Make sure that you have the speakers
connected properly.
Chapter 5 • Troubleshooting
39
Page 44

The Volume knob affects all sound on your
computer, but each input can be turned up or
down individually by adjusting the sound/mixer
settings. To adjust the setting, double-click this
icon and increase the sound for a single input.
◆
Your audio system may be muted. Press the
Mute button on the keyboard. If the message
Mute Off appears, you just turned off the mute
feature; your system should now produce
sound. If the message Mute On appears, you
just muted your system; press the Mute button
again to turn it off.
◆
The subwoofer (optional third speaker) has its
own volume control on the back; turn it
clockwise to increase the volume.
◆
Make sure that headphones are not plugged
into the keyboard. If they are, sound goes to
the headphones.
Speakerphone
I’m getting squealing noise
from the speakers or the microphone.
◆
During a phone call, turn the Volume knob
on the keyboard counterclockwise to decrease
the volume.
◆
Click the Volume icon and drag the
volume bar downward.
◆
If your display is against a wall or
other object, pull it out a few inches.
◆
If your display is underneath a shelf or large
object, pull the display out.
40
HP Pavilion PC User’s Guide
Page 45

Speakerphone
The volume is either
too loud or too soft.
Windows 95
I’m having trouble
understanding Windows 95.
◆
Turn the Volume knob on the keyboard.
◆
To set the sound on the phone only,
double-click the Volume icon
(located in the lower-right corner of
your screen), choose the phone, and drag the
volume bar upward or downward.
Speakerphone
I can’t hear the other person
clearly or at all.
◆
Turn the Volume knob on the keyboard
clockwise.
◆
Adjust the Sound Mixer volume:
1
Double-click the Volume icon
(located in lower-right corner of
your screen).
2
Make sure that Mute is not checked.
◆
You have Windows 95 tutorials on your
computer.
To access them:
1
Double-click the HP Support
Center icon on the desktop.
2
Click Tutorials.
◆
You also have an online book called ABCs of
Windows 95. To read it:
1
Double-click the HP Support
Center icon on the desktop.
2
Click HP Pavilion Library.
3
Click Online Books.
4
Click ABCs of Windows 95.
Chapter 5 • Troubleshooting
41
Page 46

◆
The printed Microsoft book Introducing
Microsoft Windows 95 is included with your
computer.
Windows 95
My program window
disappeared.
Sometimes, when operating a program, you
accidentally click outside the program’s work
surface and switch to another program. Your
program isn’t gone; it’s just underneath something
else. Hold down the Alt key and press the Tab key
to see all open programs, one at a time. When you
see the one you want, release the two keys and
your program will reappear. (You can also see the
program button for your open program on the
Windows 95 taskbar—click on the button.)
Windows 95
You may have accidentally removed your taskbar.
To get it back:
1
Point the cursor at the bottom of the screen.
2
When the cursor changes to a double arrow,
click and hold down the left mouse button.
3
Drag the double arrows up and release the
mouse button.
My taskbar disappeared.
42
HP Pavilion PC User’s Guide
Page 47

General problem
I can’t turn on my
computer at all.
◆
Make sure that the power cord and all cables
are securely plugged into the computer.
◆
Make sure that the power cord is plugged into
a grounded, three-prong outlet. Check to see
whether the outlet works by plugging another
item (such as a lamp) into the outlet.
◆
Check cables for damage and replace any
bad ones.
◆
If there is no response, press the computer’s
power button again.
◆
Check to see whether the keyboard lights flash
when you turn on the computer. The light next
to the 3.5" disk drive should flash.
◆
You should hear the hard disk spin or the
diskette drive make a noise.
◆
You should hear one beep; one beep indicates
that your computer is operating properly.
◆
Make sure your display is plugged in,
connected to your computer, and turned on.
◆
Follow any instructions that appear on the
screen.
General problem
My computer (or part
of it) doesn’t seem to be working.
If the system is “frozen” (no response to mouse or
keyboard actions), you may have had too many
application windows open at one time. Avoid this
overload in the future by closing applications
when you don’t need them. For now, reset the
system (see below).
Also, a voltage spike, power outage, or brownout
may have occurred. Symptoms of voltage spikes
include a flickering video display, unexpected
Chapter 5 • Troubleshooting
43
Page 48

system startups, and the system not responding to
your commands. Try resetting the system first (see
below). If the problem persists, reload the
software. (For HP software, use the Recovery
CD(s) discussed on page 49.) A voltage spike can
occasionally corrupt or destroy files, so it is a good
idea to consistently make backup copies of your
data files. Prevent voltage spikes by installing a
surge suppressor between the power outlet and
the system power cord.
If you can use your mouse and Start menu, reset
your system by clicking Start and then Shut
Down (see note). Your computer will do a disk
check to make sure that no files were damaged by
the reset.
Note:
The power button can be used in two ways to
reset and recover the system. First, press the button and
release; this procedure should reset the system. Using
the power button to reset the system is not a
recommended practice and should be used only
as a last resort.
General problem
A “General Protection
Fault” error occurred.
This error usually occurs when a program has
corrupted your random access memory (RAM)
resources. To recover:
1
Click Close on the message box announcing
the error.
2
Close the software program.
3
Click Start on the Windows 95 taskbar.
4
Click Shut Down.
5
Wait a few seconds, and then restart your
computer.
44
HP Pavilion PC User’s Guide
Page 49

General problem
error occurred.
A “Non-System Disk”
General problem
My computer is taking
longer to start up than it did before.
If you have a diskette in the disk drive, remove the
diskette, and then press any key to continue.
General problem
I need more space on
my disk.
◆
Run a hard disk space check (DriveSpace) to
find out exactly how much space you have. For
more information, see page 48.
◆
You can defragment your disk. That is, you can
rearrange your current files so that they are
packed in together and any little storage
spaces between them are removed to make
empty space on the disk. Results will vary. For
more information, see page 48.
◆
Before you turn on the computer, remove any
CD from the drive, so that the computer won’t
have to spend time checking it.
◆
You don’t have to wait for the virus scan each
time. Press the spacebar to skip the scan.
(Don’t skip it all of the time; you should run
a virus scan occasionally.)
◆
Your disk may need to be defragmented. See
page 48.
General problem
I think my computer has
a virus.
A virus check is run automatically when you start
the computer. However, you can run a more
thorough check by using your System Tools.
Directions are on page 47.
Chapter 5 • Troubleshooting
45
Page 50

General problem
I installed a new printer or
other device, and it won’t work.
You can also read the online manuals provided by
HP. To find these manuals:
Be sure that you installed the device drivers that
came with the new device.
Solving Software Issues
If you have a question about a specific application,
first check the program’s online Help on the top
menu bar of the program; Support Center also
includes the Help for each application. To see
this in Support Center:
1
Double-click the HP Support Center
icon on the desktop.
2
Click Software Help.
3
Select an application. A list of all software
Help will be displayed.
1
Double-click the HP Support Center
icon on the desktop.
2
Click HP Pavilion Library.
Using Online Support Documents
The HP Pavilion library on your system may
contain these and other online manuals.
Fax/Modem User’s
Guide
PC User’s Essential
Accessible Pocket
Dictionary
The ABCs of
Windows 95
The manufacturer’s manual for your
modem.
A quick reference for looking up
details about your PC.
Some chapters of this manual, such
as “Making Your Own Network” or
“A Bushel of Applets,” contain
technical information.
46
HP Pavilion PC User’s Guide
Page 51

Note:
The HP Pavilion Technical Guide is located on the
HP At Home Web site (http://www.hp-at-home.com/).
To read or print these documents:
1
Double-click the HP
icon on the desktop.
2
HP Pavilion Library
Click
Support Center
.
Using System Tools
Microsoft provides several utilities with Windows
95. HP took some of the commonly used utilities,
grouped them, and added some additional
utilities. The HP Support Center has links to these
utilities and other diagnostic tools. To use the HP
Support Center:
3
4
Online Books
Click
Click the book you would like to read or print.
.
1
Double-click the HP
icon on the desktop.
2
System Maintenance
Click
listed on the next page appear.
Chapter 5 • Troubleshooting
Support Center
. The options
47
Page 52

Utilities Available in the HP Support Center
SystemWizard
Virus Protection
Hard Drive
HP Pavilion
Recovery CD(s)
Device Manager
Detect, diagnose, and resolve problems with your computer hardware and software. Additional diagnostic
databases can be downloaded toll-free by SystemWizard, if needed, to diagnose your problem. If it cannot
identify the problem, SystemWizard calls HP (toll-free) and lets the HP support person know what you have
tried to do so far. (The phone calls are for HP-supported products only.)
If it is infected with a virus, your system can display any of a number of symptoms. When in doubt, run this
utility, especially if you download software from the Internet or use shareware. McAfee® VirusScan™ 95 is
run from here.
Three utilities are found here—DriveSpace, ScanDisk, and Disk Defragmenter.
DriveSpace
guessing how much more you can store on the hard disk, run this utility.
ScanDisk
surface of the disk.
Disk Defragmenter
pieces of files can be scattered, instead of being stored in one place. The files are complete when you open
them, but the computer takes longer to gather the fragments. Defragment your disk when your system seems
to slow down or when you get memory errors.
Before you got your computer, HP did a backup of your entire system. The backup CD is included with your
system in case you need to restore any software that was originally on your computer.
Find out what kind of system processor you have, how much RAM you have, and your support ID number.
Learn what kind of drives, controllers, ports, keyboard, modem, and display you have. Find out what
resources these devices use.
When your hard disk fills up, it will refuse to take more files of a certain size or more. Instead of
As periodic maintenance, it’s good to scan your hard disk for data errors and to check the physical
When you store and erase files extensively, your hard disk becomes fragmented. Bits and
48
HP Pavilion PC User’s Guide
Page 53

Using SystemWizard
Calling HP Support
If you have a system component that isn’t
working, and you tried the suggestions in this
chapter, refer to SystemWizard. To locate
SystemWizard:
1
Double-click the HP Support Center
icon on the desktop.
2
Click System Maintenance.
3
Click SystemWizard.
4
Follow the directions given.
If you need further support, call the HP Customer
Care Center (24 hours a day, 365 days a year).
If you can, have your support ID number ready.
To find your support ID number, either press
Alt+Ctrl+S or:
1
Double-click the HP Support Center
icon on the desktop.
2
Click Technical Support.
3
Click My HP Pavilion’s Support Number.
If your computer is completely nonfunctional,
call the HP Customer Care Center at
1-208-323-HOME (1-208-323-4663).
Chapter 5 • Troubleshooting
49
Page 54

Using the HP Pavilion
Recovery CD(s)
The HP Pavilion Recovery CD(s) are provided in
case you accidentally lose system files or software
that came with your computer. The CD(s) contain
a copy of the software originally installed on your
system and can be used only on an HP Pavilion
PC. There are two ways to use the CD(s):
◆
You can restore the software that came with
your system without reformatting the hard
disk.
◆
You can reformat the hard disk and then
restore all original software. Only reformat as a
last resort because reformatting destroys
system files and all your data. In addition, all
programs you bought and installed will have
to be reinstalled.
Warning:
information on the hard disk. If you reformat, you lose all
installed software and files created since you bought
your computer. You must reinstall software not originally
on the computer.
Reformatting the hard disk removes all
Running the HP Pavilion Recovery
program
To run the HP Pavilion Recovery program:
1
Insert the HP Pavilion Recovery CD in the
CD-ROM drive.
2
Shut down your computer.
3
Wait 30 seconds and turn on your computer
again.
4
When the Recovery program screen appears,
follow the instructions on the screen.
50
HP Pavilion PC User’s Guide
Page 55

6 Upgrading and Servicing
Your Computer
These topics are covered in this chapter:
◆
Connecting Components to Your PC
◆
Using headphones
◆
Using your computer with your stereo system
◆
Replacing the battery
◆
Reconfiguring keyboard buttons and the
display
◆
Adding more memory
◆
Installing an add-in board
◆
Using the BIOS Setup program
Your HP Pavilion PC comes with everything you
need to get started right away. However, you may
want to add a scanner or more memory at some
point.
To install a new component in your computer
(a process called upgrading), take your computer
to the store where you purchased the new
component. For a service fee, most stores will
install the new memory or card in your system.
If you wish, you can install the component
yourself, following the instructions in this chapter.
Chapter 6 • Upgrading and Servicing Your Computer
51
Page 56

For more details on the topics in this chapter,
check the section “HP Pavilion Library” in the
HP Support Center on your computer. The
following manuals, and other online manuals,
can be found there:
K56flex™ Fax/Modem User’s Guide
◆
The manufacturer’s manual for the K56flex™
modem.
The ABCs of Windows 95
◆
Some sections of
this manual, such as “Making Your Own
Network” or “A Bushel of Applets,” contain
technical information.
Warnings:
serviceable. To prevent damage to the power supply,
have a qualified person repair or replace it. All other
components are user-serviceable.
You must disconnect all power cords,
telecommunications links, networks, and modems
before working on the computer.
Do not operate the computer with the cover removed.
Electrostatic discharge (ESD) can damage disk drives,
add-in cards, and other components. If an ESD station is
not available, wear a wrist strap attached to a metal part
of the computer. Place cards on a conductive foam pad,
if possible, but never
For your safety, always unplug the system from its power
source and from any telecommunications systems (such
as phone lines), networks, or modems before performing
any of the procedures described in this chapter. Failure
to do so may result in personal injury or equipment
damage. Hazardous voltage levels are inside the power
supply and modem of this product.
The power supply is not user-
on the card wrapper.
52
HP Pavilion PC User’s Guide
Page 57

Connecting Components
to Your PC
AC Power Connector
This illustration points out all the connections on
the back of your computer. You may need to refer
to this drawing in case you ever move your
computer and need to reconnect the components,
or if you purchase new accessories.
Mouse
Universal Serial Bus
Keyboard
(USB)
Serial
Printer
Display
Joystick /MIDI
SERIAL
IN OUT
LINE
PHONE
LINE
Chapter 6 • Upgrading and Servicing Your Computer
Microphone
Line Out
Line In
Phone
Line
53
Page 58

Using Headphones
F3F1 F2
F4 F5
Media Player
F6 F7 F8 F9 F10 F11 F12
[ ] \
; '
, . /
HEWLETT
PACKARD
Esc
~ ! @ # $ % ^ & * ( ) _ +
` 1 2 3 4 5 6 7 8 9 0 - =
Q W E R T Y U I O P { } |
Tab
A S D F G H J K L : "
Caps Lock Enter
Z X C V B N M < > ?
Shift
Ctrl Alt Alt Ctrl
The HP Pavilion one-touch multimedia keyboard
is equipped with a standard mini (3.5mm)
headphone jack. This jack supports most portable
headphones. If you would like to use headphones
equipped with the larger .25-inch phone jack,
inexpensive adapters are available at most
consumer electronics stores.
To use the headphones, plug them into the outlet
Volume
Mute
Messages Phone Internet Suspend
Information
Shortcut 1 Shortcut 2
Print
Pause
Scrooll
Screen
Lock
BreakSysRq
Backspace
Insert
Home
End
Delete
Shift
_
/
Page
Num
*
Up
Lock
89
7
Page
Down
Home
PgUp
+
56
4
3
2
1
PgDn
End
Enter
0
'
Ins
Del
located on the side of the keyboard.
Note that when the headphones are plugged in,
the speakers will be muted. (The system’s line
output, however, will continue to work.) When you
unplug the headphones, the speakers will go back
to normal operation.
54
HP Pavilion PC User’s Guide
Page 59

Using Your Computer
with Your Stereo System
Sending Output to a Stereo
When your computer and your stereo system are
connected, the volume levels can be adjusted with
either the computer keyboard Volume knob or the
stereo volume control.
System
Your computer can be connected to your stereo
system for games or multimedia applications.
Connect the line output from the audio card to
any unused line-level input connector on the
stereo system. Use a cable that has a 3.5mm
stereo plug on one end and two RCA plugs on
the other end. (You can buy such a cable at most
consumer electronics stores.)
Making Audio Recordings
to a File
You can make recordings on your computer using
either the Microsoft Sound Recorder Applet or the
Media Rack wave recorder. In either case:
1
Select the sound source. For computergenerated sounds, select Line Out as the
source. For stereo-generated sounds, connect
the Line Out of the stereo system to the Line
In of the computer and select Line In as
the source.
Chapter 6 • Upgrading and Servicing Your Computer
55
Page 60

2
Set recording properties for the desired
recording quality. Be aware that the higher
the recording quality, the larger the resulting
file will be. A CD-quality recording requires
approximately 11 MB per minute of recorded
material.
Replacing the Battery
A lithium battery on the motherboard provides
backup power for the computer’s timekeeping
capability. The battery has an estimated life
expectancy of seven years.
3
Start the recorder by clicking the red button
on the recorder.
4
Start the material to be recorded. The audio is
now being saved on the hard drive as a .WAV
file.
5
After the material has been recorded, stop the
recorder and save the file.
56
HP Pavilion PC User’s Guide
When the battery starts to weaken, the date and
time may be incorrect. If the battery fails, replace
it with a CR2032 lithium battery (3 volt, 220mAh
rating) or an equivalent battery.
Warning:
battery is incorrectly replaced. Replace only with the
same or equivalent type of battery. Discard used
batteries according to the manufacturer’s instructions.
Attention :
remplacement incorrect batterie. Remplacer
uniquement avec une batterie du meme type ou d’un
type equivalent recommandé par le constructeur. Mettre
au rebut les batteries usagees conformement aux
instructions du fabricant.
There is danger of explosion if the
Il y a danger d’explosion s’il y a
Page 61

Replacing the battery
To replace the battery:
1
Turn off the computer and all peripherals.
2
Disconnect the power cord and modem cable.
3
Remove the computer cover according to the
directions in the booklet Removing the
Computer Covers.
4
If necessary, remove any full-length add-in
cards to gain access to the socket. (See the
next page for battery location.)
5
Remove any components that are blocking
access to the battery.
6
Gently pry the battery free from its socket,
taking care to note the positive (+) and
negative (-) orientation of the battery.
7
Install the new battery in the socket, observing
the correct polarity.
8
Replace any components that were removed.
9
Replace any add-in cards that were removed
and then replace the computer cover.
10
Run the BIOS (Basic Input Output System)
Setup program to reset the date and time.
(For instructions, see “Starting the BIOS
Setup Program” on page 66.)
Note:
Your motherboard will be similar to the one
shown on the next page.
Chapter 6 • Upgrading and Servicing Your Computer
57
Page 62

ISA SLOT 2
PCI SLOT 4
ISA SLOT 1
Card
Slots
Chip
PCI SLOT 3
I/O
Super
PCI SLOT 2
PCI SLOT 1
S -Video Out
Parallel Port
(Top)
VGA Serial
Composite
Video
Out
(Bottom) (Bottom)
Single Edge Contact Slot (Pentium II)
USB
Bottom:
USB 2
Top: USB 1
PS/2
Top: Mouse
Bottom: Keyboard
ATX Power Connector
(Programable BIOS)
Pin 1
Infrared
(IrDA)
58
HP Pavilion PC User’s Guide
Flash ROM
PANEL CONNECTORS
Intel PIIX4
PCIset
Buzzer
Freq. Ratio
IDE LED
Connector
PS Fan
Connector
System
Fan
Memory
Chip
(TV OUTPUT)
ATI VGA
Chipset
ImpactTV/2
Onboard
AGPset
440LX
Intel
Row 01 23 4
DIMM Socket 1 (64-bit, 168-pin module)
5
DIMM Socket 2 (64-bit, 168-pin module)
DIMM Socket 3 (64-bit, 168-pin module)
AMC Port
1MB SGRAM
BF1
BF0
BF2
BF3
1MB SGRAM
Floppy Drive Connector
Secondary IDE Connector
Primary IDE Connector
1MB SGRAM
1MB SGRAM
CMOS Power
Lithium Cell)
(CR2032V
Bus Freq.
FS2
FS1
FS0
Battery
Page 63

Reconfiguring Keyboard
Buttons and the Display
Reconfiguring Keyboard Buttons
Five buttons on the keyboard are programmable.
Four of these buttons can be completely
reconfigured; the fifth button (Information) has
two different options.
The following four buttons on your keyboard can
be reconfigured to start different applications.
Button Preset to
Internet
Shortcut 1
Internet browser
Microsoft Works
To reconfigure the Internet, Shortcut 1,
Shortcut 2, or Shortcut 3 button:
1
2
3
4
5
Click the small keyboard icon in the
lower-right corner of your screen.
In the window that appears, click the button
you want to configure.
Select an application from the list, or click
Browse
Change the label to reflect the new
application. The label will be displayed at the
bottom of the screen when the keyboard key
is pressed.
Click OK.
to find an application yourself.
Shortcut 2
Shortcut 3
Quicken
Pavilion PC demo
6
Close the window by clicking the X in the
upper-right corner of the window.
Chapter 6 • Upgrading and Servicing Your Computer
59
Page 64

7
When you turn off your computer (by clicking
Start and then Shut Down), answer Yes to
the question Would you like to save the new
configuration?
8
You can attach one of the application stickers
to the keyboard so you remember which
application the key launches. The stickers are
little icons of a globe, cards, a camera, an
artist’s palette, and so on. Shortcut 3 button
originally had a Demo sticker on it. You can
remove it.
3
Select the application you want to launch.
4
Click OK.
5
Close the window by clicking the X in the
upper-right corner of the window.
When you turn off your computer (by clicking
Start and then Shut Down), answer Yes to the
question Would you like to save the new
configuration?
Changing the On-screen Display
You can choose to have the Information button
launch either Personal Guide or HP Support
Center:
1
2
60
Click the small keyboard icon in the
lower-right corner of your screen.
In the window that appears, click the
Information button.
HP Pavilion PC User’s Guide
To change the size, the font, and the color of the
on-screen display:
1
2
3
4
Right-click the small keyboard icon in the
lower-right corner of your screen.
Select onscreen Display from the menu.
Make your changes.
Click Done.
Page 65

Adding More Memory
Your motherboard contains two or three 168-pin
DIMM sockets, depending on which model you
have. A DIMM is a dual inline memory module.
You can install these types of DIMMs in your
system:
◆
16 MB
HP Pavilion PCs with two DIMM sockets can
support up to 256 MB of SDRAM and HP Pavilion
PCs with three DIMM sockets can support up to
384 MB of SDRAM.
Your HP Pavilion PC is shipped with one or more
memory banks filled, but you can replace the
existing DIMM(s) with higher capacity ones.
◆
32 MB
◆
64 MB
◆
128 MB
All installed DIMMs must be 168-pin, four-clock,
66MHz, unbuffered SDRAM (synchronous
dynamic random access memory) DIMMs, Intel
specification v1.0 compliant.
Installing a DIMM
To install a DIMM:
1
Turn off the computer and all peripherals.
2
Disconnect the power cord and modem cable.
3
Remove the computer cover. (See the booklet
Removing the Computer Cover.)
Chapter 6 • Upgrading and Servicing Your Computer
61
Page 66

4
Holding the DIMM by its edges only, remove
it from its antistatic packaging. A DIMM has
two small notches on the lower edge that fit
into raised bumps in the DIMM socket.
5
Hold the DIMM perpendicular to the socket,
aligning the notches with the bumps.
6
Push straight down on top of the DIMM until
it is fully seated in the socket. The retaining
clips on the ends of the socket will
automatically lock into position when the
DIMM is fully inserted.
7
Replace the computer cover and reconnect
your cables.
62
HP Pavilion PC User’s Guide
Page 67

Removing a DIMM
To remove a DIMM:
1
Turn off the computer and all peripherals.
Disconnect the power cord and modem cable.
2
Remove the computer cover. (See the booklet
Removing the Computer Cover.)
3
Push down on the two retaining clips on the
ends of the DIMM socket until the DIMM
pops out of the socket.
4
Holding the DIMM by its edges only, lift it
away from the socket. Store it in its antistatic
packaging.
5
Replace the computer cover and reconnect
your cables.
6
Run the BIOS Setup program to adjust your
memory setting. (See “Starting the BIOS
Setup Program” on page 66.)
Warning:
Use the retaining clips to eject the DIMM.
Do not pull the DIMM out of the socket.
Chapter 6 • Upgrading and Servicing Your Computer
63
Page 68

Installing Add-in Cards
Installing a Card
At some point, you may add an ISA or PCI card to
your computer to accommodate a new component
such as a scanner. Depending on which HP
Pavilion PC model you purchased, the computer
may have as many as five slots and connectors for
installing new cards.
You will need a #2 Phillips screwdriver and a
medium flat-bladed screwdriver. You also need
any software (for example, drivers) supplied with
the card.
Warning:
add-in cards that draw excessive current. The system is
designed to provide 2 amps (average) of +5V power for
each board/card in the computer. The total +5V current
draw in a fully loaded system (one with all add-in card
slots filled) must not exceed the total number of slots
multiplied by 2 amps.
Do not overload the system by installing
To install a card:
1
Install any drivers supplied by the card
manufacturer.
2
Turn off the computer and all peripherals.
3
Disconnect the power cord and phone lines.
4
Remove the computer cover as described in
the booklet Removing the Computer Cover.
5
Remove the card from its wrapper. Place it on
a grounded, static-free surface, component
side up.
6
Remove the retaining plate covering the right
side of the slots.
64
HP Pavilion PC User’s Guide
Page 69

7
Remove the slot cover by inserting a
screwdriver into the opening and rocking
gently. Insert the screwdriver under the top
edge of the slot cover and press down.
8
Hold the card by the top edge or upper
corners, and position the board. Align the card
with the card guides and firmly press the card
into the expansion slot connector. (See the
motherboard drawing on page 57 for location
of expansion slots.)
What Is Plug and Play?
“Plug and Play” describes the ability to add and
remove add-in cards, memory, and peripherals
without any special procedures (like resetting
jumpers and testing for system conflicts). Your
system BIOS finds these components and adds
them to the system. You do not have to run the
BIOS Setup program.
If the New Card or Device Isn’t
9
IDE hard disks and memory are configured
automatically, as are Plug and Play cards; (see
the next section, “What is Plug and Play?”).
10
Replace the metal retaining plate.
11
Replace the back of the computer and restart
the computer.
Working
Recheck all connections, including those to the
board, power supply, keyboard, and display. If the
problem still exists, run the BIOS Setup program
and load the default settings; and then save and
exit. (Refer to ”Using the BIOS Setup Program” on
the next page.)
Chapter 6 • Upgrading and Servicing Your Computer
65
Page 70

Troubleshooting hints specifically for ISA add-in
cards can be found in the HP Pavilion Technical
Manual located on the HP At Home Web site
(http://www.hp-at-home.com/).
Using the BIOS Setup
Starting the BIOS Setup Program
Start the BIOS Setup program by pressing the F1
key after you see the blue HP logo screen during
startup but before Windows 95 starts. You have
only a few seconds to press the F1 key before the
startup process continues.
Program
The system BIOS (Basic Input Output System) on
your computer has a built-in setup program that
lets you control the special features of your
computer. Configuration information stored in the
BIOS includes the type of peripherals installed,
the startup sequence of the computer, and control
for power management. The battery maintains this
information when the system is turned off.
66
HP Pavilion PC User’s Guide
We recommend that you keep a written copy of
your settings and keep it up to date. If you never
change the BIOS, you don’t need to keep a record.
You can always return to the original factory
defaults by pressing the F5 key, clicking Exit
Menu, and then clicking Load Setup Defaults.
Page 71

BIOS Settings
The BIOS Setup program initially displays the Main Menu screen. In each screen, there are options for
modifying the system configuration.
Main
Advanced
Power
Boot
Exit
Set up and modify basic options such as time, date, disk drives, and hard drives. Check the amount of system
memory and extended memory here.
Modify advanced features such as Plug and Play and memory settings. Configure your peripherals and check your
CPU type and speed here.
Enable power-saving mode and specify auto suspend settings.
Specify the sequence in which the system boots: disk drive, hard drive, CD-ROM drive.
Save or discard changes.
Use the left arrow and right arrow keys to make a selection, and then press the Enter key.
For a more detailed explanation, see the online HP Pavilion Technical Manual available on the HP At Home
Web site (http://www.hp-at-home.com/).
Note:
We recommend that you keep a written copy of your settings and keep it up to date.
Chapter 6 • Upgrading and Servicing Your Computer
67
Page 72

Setting Auto Suspend in the BIOS
If you would like your computer to automatically
go into Suspend mode after a long period of
inactivity, you can enable the Auto Suspend
feature. With Auto Suspend enabled, the
computer will automatically re-suspend itself after
it is awakened by an application.
To enable the Auto Suspend feature:
1
Reboot your computer by shutting down and
restarting it.
2
When you see a blue screen with an HP logo,
press the F1 key on the keyboard; this starts
the BIOS Setup program.
3
Press → to go to the Power menu.
4
Press ↓ to go to the Power Savings category.
5
Press ↓ to choose the Auto Suspend
Timeout option, then press Enter.
6
Press the F10 key on the keyboard to save the
setting, then press Enter.
Note:
Some third party software and hardware may
experience problems with Suspend.
68
HP Pavilion PC User’s Guide
Page 73

FCC Regulatory and
Safety Information
Regulatory Information Federal Communications
Commission (FCC) (USA only)
Federal Communications Commission Radio
Frequency Interference Statement
Warning:
comply with the limits for a Class B digital device, pursuant
to Part 15 of the FCC Rules. These limits are designed to
provide reasonable protection against harmful interference
in a residential installation. This equipment generates, uses,
and can radiate radio frequency energy and, if not installed
and used in accordance with the instructions, may cause
harmful interference to radio communications. However,
there is no guarantee that interference will not occur in a
particular installation. If this equipment does cause harmful
interference to radio or television reception, which can be
determined by turning the equipment off and on, the user is
encouraged to correct the interference by one or more of the
following measures:
This equipment has been tested and found to
◆ reorient or relocate the receiving antenna.
◆ increase the separation between the equipment and the
receiver.
◆ connect the equipment into an outlet that is on a circuit
different from the receiver.
◆ consult the dealer or an experienced radio/TV technician
for help.
Hewlett-Packard’s system RFI and Radiated Immunity tests
were conducted with HP-supported peripheral devices and
HP-shielded cables, such as those you receive with your
system. Changes or modifications not expressly approved by
Hewlett-Packard could void the user’s authority to operate
the equipment. To comply with the limits for an FCC Class
B computing device, always use shielded signal cables and
the shielded power cord supplied with this unit.
Consumer Information and FCC Requirements
Telephone Connection
◆
This equipment complies with Part 68 of the Federal
Communications Commission rules. These rules permit
this device to be directly connected to the telephone
network. Standardized jacks are used for these
connections. This equipment should not be used on
party lines or coin lines.
Chapter 6 • Upgrading and Servicing Your Computer
69
Page 74

◆ If this device is malfunctioning, it may also cause harm to
the telephone network; this device should be
disconnected until the source of the problem can be
determined and until it has been repaired. If this is not
done, the telephone company may temporarily
disconnect your service.
◆ The telephone company may make changes in its
technical operations and procedures. If such changes
affect the compatibility or use of this device, the
telephone company is required to give adequate notice
of the changes.
◆ If the telephone company requests information on what
equipment is connected to their lines, inform them of:
a. The telephone number this unit is connected to
b. The ringer equivalence number
c. The USOC jack required: RJ-11C
d. The FCC Registration Number
Items (b) and (c) are indicated on the label. The ringer
equivalence number (REN) is used to determine how
many devices can be connected to your telephone line. In
most areas, the sum of the RENs on any one line should
not exceed five (5.0). If too many devices are attached,
they may not ring properly.
◆ In the event of equipment malfunction, all repairs should
be performed by Hewlett-Packard or an authorized HP
Personal Computer Dealer Repair center. It is the
responsibility of users requiring service to report the
problem to HP’s Home Products Division, or to one of
our authorized agents. Service can be obtained by calling
HP’s Customer Care Center at 1-208-323-HOME (1208-323-4663).
Statement of Fax Branding
The Consumer Protection Act of 1991 makes it unlawful for
any person to use a computer or other electronic device to
send any message via telephone fax machine, unless it
clearly contains—a margin at the top or bottom of each
transmitted page or on the first page of the transmission, the
date and time it is sent, identification of the business or
other entity, or individual sending the message, the
telephone number of the sending machine or such business,
entity or individual.
Canada Department of Communication (DOC)
Notice
Telephone Connection
The Canadian Department of Communications label
identifies certified equipment. This certification means that
the equipment meets certain telecommunications network
70
HP Pavilion PC User’s Guide
Page 75

protective, operational and safety requirements. The
department does not guarantee the equipment will operate
to the user’s satisfaction.
Before installing this equipment, the user should ensure it is
permissible to connect it to the facilities of the local
communications company. The equipment must be installed
using an acceptable method of connection. In some cases,
the company’s inside wiring associated with a single line
individual service may be extended by means of a certified
connector assembly (telephone extension cord). The
customer should be aware that compliance with the above
conditions may not prevent degradation of service in some
situations.
Repairs to certified equipment should be made by an
authorized Canadian maintenance facility designated by the
supplier. Any repairs or alterations made by the user to this
equipment, or equipment malfunctions may give the
telecommunications company cause to request that the
user disconnect the equipment.
The user should ensure, for their own protection, that the
electrical ground connections of the power utility, telephone
lines and internal metallic water pipe systems, if present, are
connected together. This precaution may be particularly
important in rural areas.
Warning:
connections themselves, but should contact the appropriate
electric inspection authority or electrician, as appropriate.
Warning:
terminal device denotes the percentage of the total load to
be connected to a telephone loop; this is used by the device
to prevent overloading. The termination on a loop may
consist of any combination of devices, subject only to the
requirement that the sum of the Load Numbers does
no exceed 100.
DOC Statement (Canada only)
This Class B digital apparatus meets all requirements of the
Canadian Interference-Causing Equipment Regulations.
Cet appareil numerique de la classe B respecte toutes les
exigences du Reglement sur le materiel brouilleur du
Canada.
Users should not attempt to make such
The Load Number .9 assigned to each
Chapter 6 • Upgrading and Servicing Your Computer
71
Page 76

Declaration of
Conformity
according to ISO/IEC Guide 22 and EN 45014
Manufacturer’s Name: Hewlett-Packard Company
Manufacturer’s Address: 10500 Ridgeview Ct.
declares, that the product
Product Name: HP Pavilion Multimedia Computer System
Model Number(s): 8XXXY (X is any number 0-9, Y is any
Product Options: All
conforms to the following Product Specifications:
Safety: IEC 950:1991 + A1, A2, A3/EN 60950:1992 + A1, A2, A3
EN 41003:1993
EMC: CISPR 22:1993 / EN 55022:1994 - Class B
EN 50082-1:1992 - Generic Immunity
IEC 801-2:1991/prEN 55024-2:1992 - 4 kV CD, 8 kV AD
IEC 801-3:1984/prEN 55024-3:1991 - 3V/m
IEC 801-4:1988/prEN 55024-4:1992 - 0.5 kV Signal Lines,
FCC Title 47 CFR, Part 15 Class B
AS/NZS 3548:1992/CISPR 22:1993 Class B
Cupertino, CA 95015-4010
USA
alphanumeric character or blank)
1)
1 kV Power Lines
2)
/ICES-003, Issue 2
1)
Supplementary Information:
The product herewith complies with the requirements of the following
Directives and carries the CE marking accordingly.
-the EMC Directive 89/336/EEC (including 93/68/EEC)
-the Low Voltage Directive 73/23/EEC (including 93/68/EEC)
1) The Product was tested in a typical configuration with Hewlett-Packard
Personal Computer peripherals.
2) This Device complies with Part 15 of the FCC Rules. Operation is
subject to the following two conditions: (1) this device may not cause
harmful interference, and (2) this device must accept any interference
received, including interference that may cause undesired operation.
Quality Manager
Cupertino, CA November, 1997
For Regulatory Compliance Information ONLY, contact:
Australian Contact: Product Regulations Manager, Hewlett-Packard
Australia Ltd., 31-41 Joseph Street, Blackburn,
Victoria 3130, Australia
European Contact: Your local Hewlett-Packard Sales and Service Office
or Hewlett-Packard GmbH, Department HQ-TRE
Standards Europe, Herrenberger StraBe 130,
D-71034 Boblingen (FAX: + 49-7031-14-3143)
USA Contact: Product Regulations Manager, Hewlett-Packard,
HPD, 10500 Ridgeview Ct.,
Cupertino, CA 95015-4010
(Phone: 408-343-5000)
72
HP Pavilion PC User’s Guide
Page 77

Safety Information
This product has not been evaluated for connection to an
“IT” power system (an AC distribution system with no direct
earth, according to IEC 950).
AC Power Safety Warning
Locate the computer near an AC outlet. The AC power cord
is your HP Pavilion PCs main AC disconnecting device and
must be easily accessible at all times. For your safety, the
power cord provided with your system has a grounded plug.
Always use the power cord with a properly grounded wall
outlet, to avoid the risk of electrical shock.
Lithium Battery Caution
Warning:
incorrectly replaced. Replace only with the same, or
equivalent, type recommended by the manufacturer.
Dispose of used batteries according to the manufacturer’s
instructions.
Attention :
remplacement incorrect de la batterie. Remplacer
uniquement avec une batterie du meme type ou d’un type
equivalent recommandé par le constructeur. Mettre au rebut
les batteries usagees conformement aux instructions du
fabricant.
There is danger of an explosion if the battery is
Il y a danger d’explosion s’il y a
To reduce the possibility of an electric shock from the
telephone network, plug your computer into the AC outlet
before connecting it to the telephone line. Also, disconnect
the telephone line before unplugging your computer from
the AC power outlet.
Warning:
from the telephone system when installing or removing your
computer cover.
Attention :
telephonique lors de l’installation les couvercles de
l’appareil hote sont enleves.
Warning: Always disconnect the modem cord
Debrancher la carte modem du reseau
Laser Safety Statement
Class 1 LED Product.
The CD-ROM and DVD drives contain a laser system and
are classified as a “Class 1 Laser Product” under a U.S.
Department of Health and Human Services (DHHS)
Radiation Performance standard according to the Radiation
Control for Health and Safety Act of 1968.
Should the unit ever require maintenance, contact an
authorized service location.
Chapter 6 • Upgrading and Servicing Your Computer
73
Page 78

Warning:
procedures other than those specified in the HP Pavilion PC
User’s Guide may result in hazardous radiation exposure.
To prevent direct exposure to laser beam, do not try to
open the enclosure of the CD-ROM or DVD.
Use of controls, adjustments or performance
7
Products Provided with
External Television
Antenna Connectors
External Television Antenna Grounding
If an outside antenna or cable system is connected to the
product, be sure the antenna or cable system is electrically
grounded so as to provide some protection against voltage
surges and built-up static charges. Article 810 of the
National Electrical Code, ANSI/NFPA 70, provides
information with regard to proper electrical grounding of the
mast and supporting structure, grounding of the lead-in wire
to an antenna-discharge unit, size of grounding conductors,
location of antenna-discharge unit, connection to grounding
electrodes, and requirements for the grounding electrode.
74
HP Pavilion PC User’s Guide
Antenna Grounding
Reference
1
2
3
4
5
6
7
6
5
4
1
Antenna Grounding
Grounding Component
Electric Service Equipment
Power Service Grounding Electrode System
(NEC Art 250, Part H)
Ground Clamps
Grounding Conductors (NEC Section 810-21)
Antenna Discharge Unit (NEC Section 810-20)
Ground Clamp
Antenna Lead in Wire
3
2
Page 79

Lightning Protection
For added protection of any Hewlett-Packard product during
a lightning storm, or when it is left unattended and unused
for long periods of time, unplug the product from the wall
outlet and disconnect the antenna or cable system. This will
prevent damage to the product due to lightning and power
line surges.
Power Lines
An outside antenna system should not be located in the
vicinity of overhead power lines or other electric light or
power circuits, or where it can fall into such power lines or
circuits.
Warning:
extreme care should be taken to keep from touching such
power lines or circuits as contact with them could be fatal.
When installing an outside antenna system,
Chapter 6 • Upgrading and Servicing Your Computer
75
Page 80

76
HP Pavilion PC User’s Guide
Page 81

Index
A
ABCs of Windows 95 • 14, 46, 52
AC Power Safety Warning • 73
Add/Remove Programs
utility • 29-31
Add-in cards installing • 64-65
adding more memory • 61
answering machine • 19-23
problems • 34-36
Applet • 55
applications. See software
and programs.
audio recordings • 55-56
auto suspend, turning on and off • 68
auto suspend feature • 16
auto suspend settings • 68
B
backup CD • 50
battery
caution • 73
location • 58
replacing • 56-57
BIOS Setup Program • 66-67
C
CALL button on keyboard • 21
calling HP support • 49
can’t turn on my computer at all • 43
card, installing • 64-65
CD
control keys • 17, 19
problems • 36
changing your desktop • 8
check hard disk • 48
common questions • 12
computer
assembling • 2
placing in a room • 1
computer cover, removing • 61-63
computer not working • 43-44
configure peripherals • 67
connect a stereo • 55-56
connecting components
to your PC • 53
connectors • 53
corrupting files • 15
CPU speed • 67
CPU type • 67
custom browser • 9
Index
77
Page 82

D
date, modifying • 67
demo
Internet • 9
keyboard key • 14
demo sticker on keyboard • 14, 60
demos • 7-8, 9, 14
Personal Guide demo • 7-8
Device Manager • 48
diagnostics • 5
DIMM sockets • 61-63
DIMMs • 61-63
Installing • 61-62
removing • 63
Disk Defragmenter • 48
disk drives, modifying • 67
Display, problems • 16, 36
documents
finding • 28
moving • 28
saving • 27
drives, type • 48
DriveSpace • 48
E
electrostatic discharge (ESD) • 52
e-mail • 1, 10, 16
ergonomic information • 2
Explorer. See Windows Explorer
F
fax
composing • 24
indicator for a fax received • 17
problems • 37-38
send from software • 24
sending • 24
using • 23-24
Fax/Modem User’s Guide.
See K56flex™ Fax/Modem User’s
Guide
faxes received while suspended • 16
fixing common problems • 33-46
folders
creating • 27-28
finding • 28
moving • 28
free game • 3
G
“General Protection Fault” • 44
H
hard disk fills up • 48
hard disk scanned for errors • 15
hard drive, modifying • 67
hardware Help from
HP Support Center • 12, 47-48
headphone jack • 54
Help
application • 46
hardware • 12, 47-48
software • 12, 46, 47-48
HP At Home Web site • 10
HP Customer Care Center • 49
HP Pavilion Technical Manual • 66
HP Support Center • 5, 11-12, 49
starting from keyboard • 18
I
Information button on keyboard • 59
Information key, programming • 59
Information key on keyboard • 18
78
HP Pavilion PC User’s Guide
Page 83

install a new program • 29
installing Add-in cards • 64-65
Intel Connect™ manual • 23
Intel Connect™ tutorial • 20
Internet
access • 5, 8, 9
key on keyboard • 18
Internet browser • 9
accessing • 9
free trial • 5, 9
launching • 18
Internet button • 9
Internet service provider • 5
“Invalid phone number” • 37
ISA card, installing • 64-65
K
K56flex™ Fax/Modem User’s
Guide • 52
keyboard • 17-19
problems • 38
L
laser safety statement • 73
library. See Pavilion Library
lightning protection • 74
lithium battery caution • 73
M
Making a phone call • 20-21
managing your software • 8
Media Rack wave recorder • 55
messages
accessing remotely • 22
playing • 22
Messages button • 18
microphone, using for phone
calls • 21
Microsoft Sound
Recorder Applet • 55
motherboard • 58
mouse, problems • 38
MS-DOS • 31, 39
Mute button on keyboard • 19
Mute On indicator on screen • 19
N
“Non-System Disk” • 45
O
organizing your files • 8
output to a stereo system • 55
P
Pavilion Library • 12, 23
PC User’s Essential Accessible
Pocket Dictionary • 46
PCI card, installing • 64-65
Personal Guide • 7-8
starting from keyboard • 18
phone
key on keyboard • 18
problems • 37-38
phone call, receiving • 21
phone message, indicator for a
message received • 18
phone software, starting • 18
physical discomfort • 2
playing messages • 22-23
Index
79
Page 84

Plug and Play • 65
modifying • 67
Plug and Play cards • 65
Pocket PC User’s Guide • 14
power lines • 75
power-saving mode • 67
printer, new, not working • 46
Program icons, removing • 30-31
program keyboard keys • 59-60
program window disappeared • 42
programs
installing • 29
removing • 29-30
R
RAM • 48
receive a phone call • 21
reconfiguring keyboard buttons and
the display • 59-60
Recovery CD(s)
running • 50
using • 50
reformat the hard disk • 50
register • 3
remove programs from
hard disk • 29-30
removing computer cover • 61-63
removing icons • 30-31
restore operating system • 50
restore Windows • 50
restoring the operating
system • 48-50
roadmap • 3
S
ScanDisk • 48
screen color, changing • 60
screen font, changing • 60
SDRAM • 61
Servicing Your Computer • 51-75
Shortcut icons, removing • 30
shortcut keys • 18
programming • 59
software
included by HP • 26
installing • 29
My Software folder • 5-6
software Help, from HP Support
Center • 12
sound, problems • 39-40
space on hard disk • 45
speakerphone • 18
problems • 40-41
speakers muted • 54
startup screens • 3
stereo use • 55-56
stickers for applications • 59-60
support ID number • 48, 49
Suspend, turning auto feature
on and off • 68
Suspend button • 16
Suspend mode • 16, 18, 68
starting from the keyboard • 19
suspending your computer • 16
system is “frozen” • 15
system maintenance • 12
system tools • 5
SystemWizard • 5, 49
80
HP Pavilion PC User’s Guide
Page 85

T
taskbar disappeared • 42
technical support • 12
telephone answering machine • 19,
22-23
troubleshooting • 33-50
turn off computer • 15
tutorials • 5, 7-8, 12
U
uninstall • 29-30
upgrading • 51-75
V
video phone • 23
video receive • 23
virus • 45
protection • 48
volume
control knob • 18, 35, 39-40
icon • 35, 40
W
.WAV files • 55-56
Windows Explorer • 5
Windows 95
learning. See ABCs of
Windows 95
problems • 41-42
Windows NT • 5
Index
81
Page 86

82
HP Pavilion PC User’s Guide
 Loading...