

Page 1
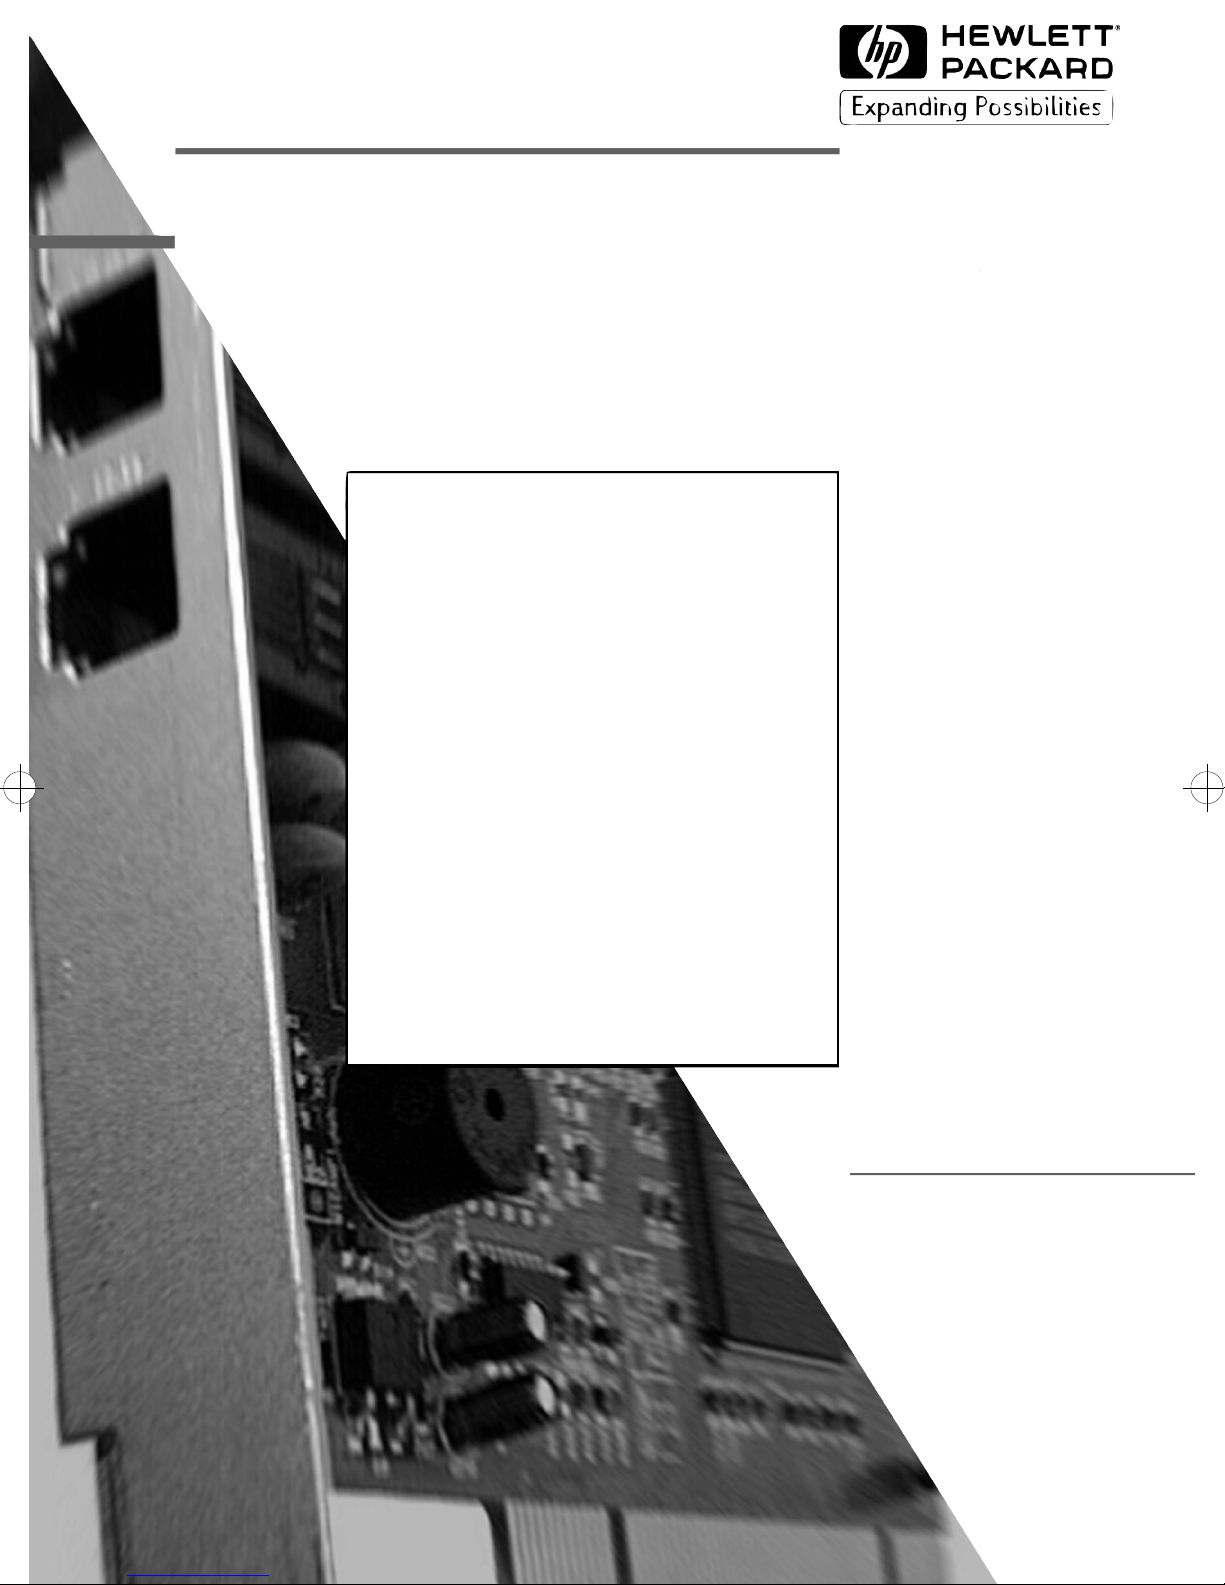
HP D7808A
HP D7808T
HP 56K V90 PCI
Fax Modem
User’s Guide
Page 2

Notice
The information contained in this document is subject to
change without notice.
Hewlett-Packard makes no warranty of any kind with regard to
this material, including, but not limited to, the implied
warranties of merchantability and fitness for a particular
purpose. Hewlett-Packard shall not be liable for errors
contained herein or for incidental or consequential damages in
connection with the furnishing, performance, or use of this
material.
This document contains proprietary information that is
protected by copyright. All rights are reserved. No part of this
document may be photocopied, reproduced, or translated to
another language without the prior written consent of
Hewlett-Packard Company.
Microsoft
®, Windows®, and Windows NT®
are U.S.
registered trademarks of Microsoft Corporation.
Hewlett-Packard France
Commercial Computing Division
38053 Grenoble Cedex 9
France
1998 Hewlett-Packard Company
Page 3
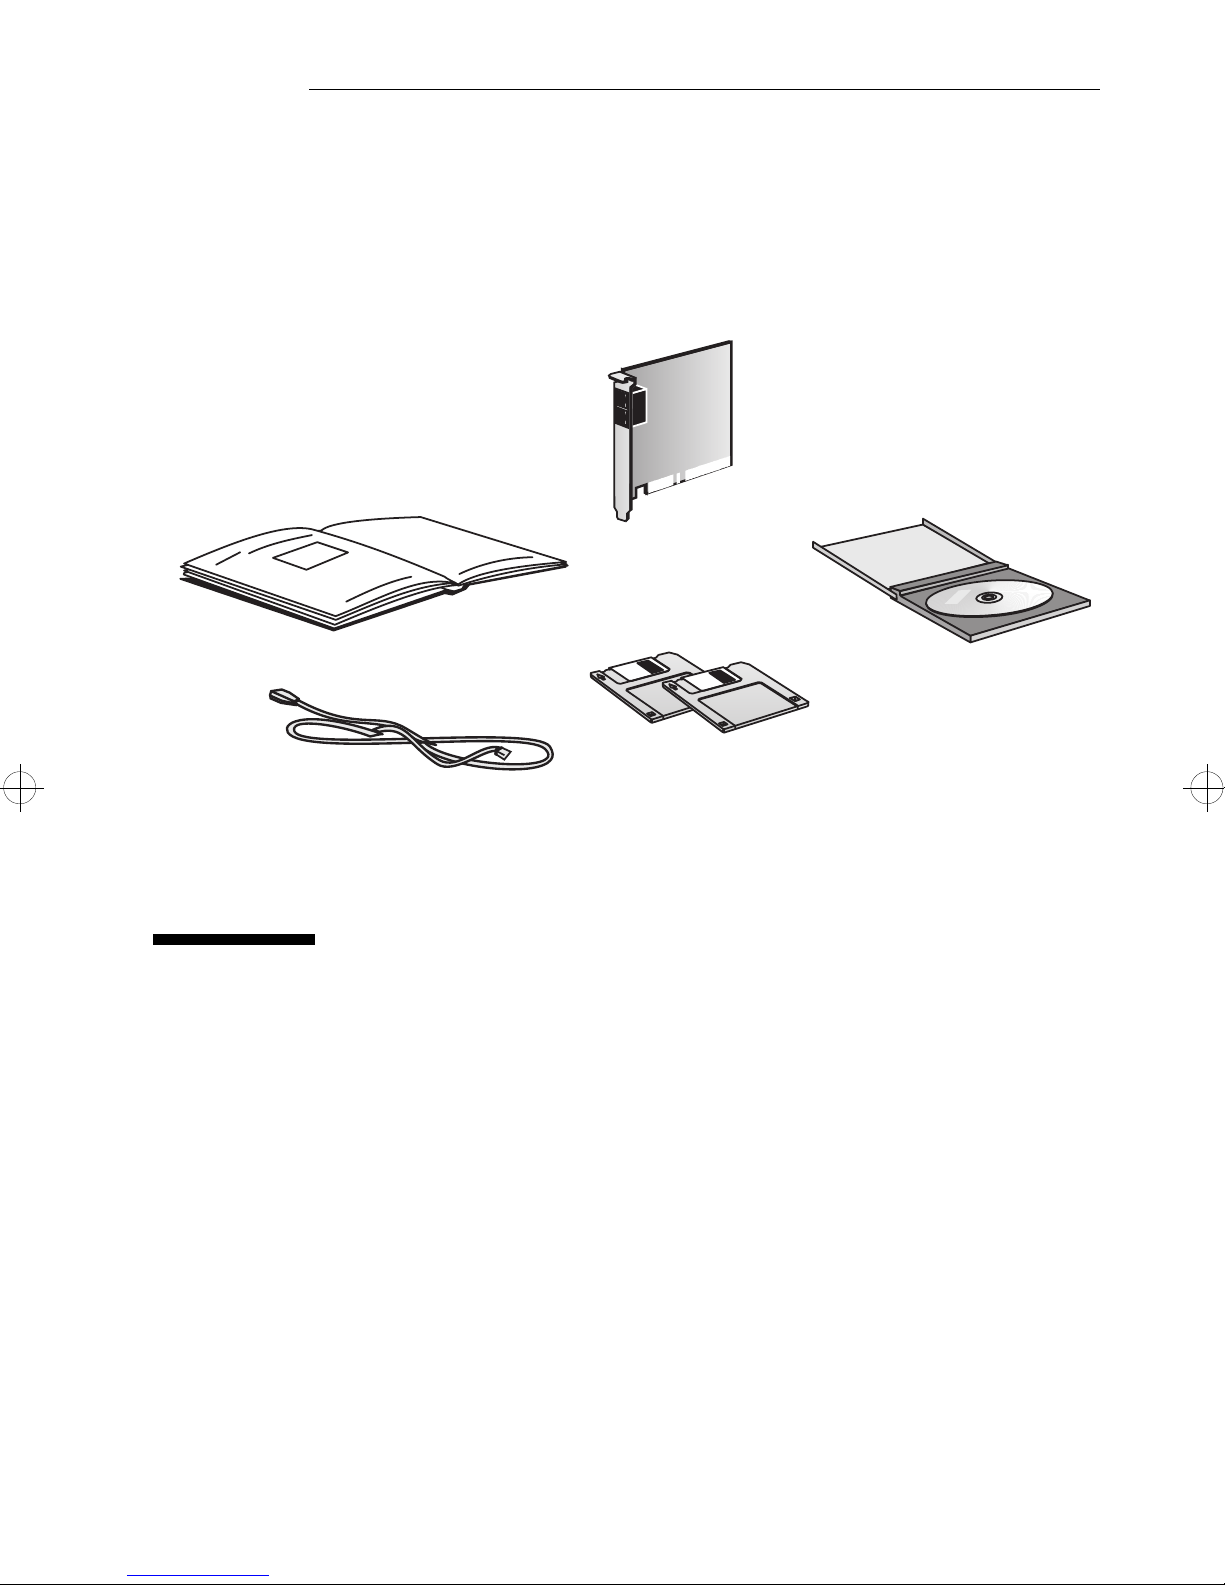
User’s Guide (this manual)
RJ-11 Telephone Cable
Fax Modem Card
CD-ROM
2 Floppy Disks
HP Fax Modem
User’s Guide
Page 4

Important Information
Safety Information
WARNING Do not attempt to connect this product to the telephone line
during a lightning storm. Never install telephone jacks in wet
locations unless the telephone line has been disconnected at
the network interface. Never touch uninsulated telephone
wires or terminals unless the telephone line has been
disconnected at the network interface.
Use caution when installing or modifying telephone lines.
Avoid using a telephone (other than a cordless type) during a
lightning storm. There may be a risk from lightning.
Do not use the telephone to report a gas leak in the vicinity of
the leak. All inputs and outputs are extra-safety low-voltage
circuits, except the telephone and line connectors, which are
telecommunications network voltage circuits.
Always disconnect the host computer from any analog
telephone circuits before removing any covers.
Never touch or remove the communications card without
first removing the connection to the telephone network.
Telephone Line Compatibility
Use an Analog Telephone Line
To use the HP Modem, you must have an analog telephone
line. If you are not sure if you have an analog telephone line or
a digital line, have it verified by the person in charge of your
telephone system before you install your modem.
CAUTION The modem will be damaged if you use a digital telephone line.
Company Telephone Systems
HP does not guarantee that the HP Fax Modem will function
correctly when connected to a company telephone system
(PABX, Key systems, etc.). Use a direct telephone line coming
from a telephone operator.
iv English
Page 5

Contents
1 Introduction
This Manual . . . . . . . . . . . . . . . . . . . . . . . . . . . . . . . . . . . . . . . 8
HP Fax Modem Features . . . . . . . . . . . . . . . . . . . . . . . . . . . . 8
System Requirements . . . . . . . . . . . . . . . . . . . . . . . . . . . . . . . 9
Before You Start. . . . . . . . . . . . . . . . . . . . . . . . . . . . . . . . . . . 10
Software Provided. . . . . . . . . . . . . . . . . . . . . . . . . . . . . . . . . 12
How Your HP Fax Modem Works . . . . . . . . . . . . . . . . . . . . 12
2 Installing Your HP Fax Modem
Installation Overview . . . . . . . . . . . . . . . . . . . . . . . . . . . . . . 14
Online Help. . . . . . . . . . . . . . . . . . . . . . . . . . . . . . . . . . . . . . . 14
Step 1: Installing the Modem Card in Your PC. . . . . . . . . . 15
Step 2: Connecting the Modem to the Telephone Line . . . 17
Step 3: Installing the Drivers . . . . . . . . . . . . . . . . . . . . . . . . 18
In Windows 95 . . . . . . . . . . . . . . . . . . . . . . . . . . . . . . . . . . . . 18
In Windows 98 . . . . . . . . . . . . . . . . . . . . . . . . . . . . . . . . . . . . 20
In Windows NT 4.0. . . . . . . . . . . . . . . . . . . . . . . . . . . . . . . . . 21
To Verify the Modem Installation . . . . . . . . . . . . . . . . . . . . . 22
Step 4: Setting up your Computer’s Internet Connection 23
In Windows 95 . . . . . . . . . . . . . . . . . . . . . . . . . . . . . . . . . . . . 23
In Windows 98 . . . . . . . . . . . . . . . . . . . . . . . . . . . . . . . . . . . . 24
English v
Page 6

In Windows NT 4.0 . . . . . . . . . . . . . . . . . . . . . . . . . . . . . . . . 25
Step 5: Installing and Setting up the Fax Software . . . . . . 27
Registering the Fax Software . . . . . . . . . . . . . . . . . . . . . . . 30
Getting Information About Using the Fax Software. . . . . . 31
3 Troubleshooting
If You Have a Problem . . . . . . . . . . . . . . . . . . . . . . . . . . . . . 34
Step 1: Check the Modem Hardware. . . . . . . . . . . . . . . . . . 35
Step 2: Check the Driver Installation . . . . . . . . . . . . . . . . . 36
In Windows 95 and Windows 98 . . . . . . . . . . . . . . . . . . . . . 36
In Windows NT 4.0 . . . . . . . . . . . . . . . . . . . . . . . . . . . . . . . . 37
If the Driver is Incorrectly Installed . . . . . . . . . . . . . . . . . . 37
Step 3: Use the Troubleshooting Tree . . . . . . . . . . . . . . . . . 38
Step 4: Consult the Windows Online Help . . . . . . . . . . . . . 40
HP Customer Care Service and Support . . . . . . . . . . . . . . 40
Regulatory Information and Warranty
Regulatory Information . . . . . . . . . . . . . . . . . . . . . . . . . . . . 42
HP Hardware Accessory Warranty . . . . . . . . . . . . . . . . . . . 45
HP Software Warranty . . . . . . . . . . . . . . . . . . . . . . . . . . . . . 46
HP Software License Agreement. . . . . . . . . . . . . . . . . . . . . 47
vi English
Page 7

1
Introduction
Congratulations on your purchase of the HP Fax Modem.
Whether you want to access the Internet (surf the Web,
exchange email, access newsgroups), do fax mailings, or
simply receive faxes on your PC, your HP Fax Modem
provides the high-speed transmission capabilities you
need.The HP Fax Modem is ideal for accessing graphicsintensive web sites, as well as for downloading highbandwidth audio and video files from the web.
Page 8

Introduction
This Manual
This Manual
This manual shows you how to get your HP Fax Modem up
and running. It includes information about installing the
modem card, software drivers, and fax software provided with
the modem.
HP Fax Modem Features
The HP Fax Modem provides your PC with the following
features:
• High speed Internet downloading at up to 56 Kbps.
• High speed data transfer (send and receive) at up to
33.6 Kbps.
• High speed fax send and receive rates of up to 14.4 Kbps.
NOTE The HP Fax Modem is for the US only.
8 English
Page 9

Introduction
System Requirements
System Requirements
The HP Fax Modem can be installed on selected HP Vectra
PCs, HP Brio PCs, and HP Kayak PC Workstations. To learn if
the HP Fax Modem is qualified for use with your HP
computer, consult HP’s web site at:
For HP Vectra PCs
For HP Kayak PC
Workstations
For HP Brio PCs
http://www.hp.com/go/vectraaccessories
http://www.hp.com/go/kayakaccessories
http://www.hp.com/go/brioaccessories
To use the HP Fax Modem, the minimum PC system
requirements are:
•
A microprocessor running at 100 MHz or higher.
• 8 MB of system memory (RAM) or higher.
• 4 MB of free hard disk space.
• One free PCI accessory card slot.
• A CD-ROM drive.
• A 3.5” floppy disk drive.
• Windows 95, Windows 98, or Windows NT 4.0 operating
system.
NOTE For Windows NT 4.0 users, it is recommended that you update
your computer with the Microsoft Service Pack 3 (or later) for
Windows NT 4.0, if you have not already done so.
Recent HP computers preloaded with Windows NT 4.0 will
already be updated with Microsoft Service Pack 3 or later.
If your Windows NT 4.0 computer has been updated with
Microsoft SP3, the following message is displayed at the top of
your screen when Windows starts:
TM Version 4.0 (Build xxxx: Service Pack 3).
Microsoft (R) Windows NT
English 9
Page 10

Introduction
Before You Start
Before You Start
1 Check that the following items were provided with the HP
Fax Modem installation kit:
❒ The internal modem card.
Write down its serial number here:
❒ The RJ-11 telephone cable. This is a standard telephone
cable that you use to connect the modem card to the
wall jack for an analog telephone line.
❒ The Windows 95 / Windows 98 Drivers and
Diagnostics floppy disk. This disk contains the modem
drivers for Windows 95 and Windows 98, as well as the
modem diagnostics utility.
❒ The Windows NT 4.0 Drivers floppy disk. This disk
contain the modem drivers for Windows NT 4.0.
❒ The HP Modem Fax Software CD-ROM. This CD-ROM
contains the fax application for your modem.
❒ This manual.
10 English
Page 11

Introduction
Before You Start
2 You will also need the following items:
❒ The User’s Guide that came with your computer.
Although not essential, this manual can be useful as it
contains information about installing accessory cards in
your PC.
❒ A medium-sized flat-head screwdriver. This is not
required for all HP computers, since some have thumb
screws.
❒ An analog telephone line. This is the standard wall jack
that most homes have. Use of a telephone line
connected to a company telephone system (PBX, Key
systems, etc.) is not supported by the HP Fax Modem.
❒ If you have Windows 95, the Windows 95 CD-ROM or HP
Recovery CD-ROM that came with your PC.
English 11
Page 12

Introduction
Software Provided
Software Provided
The HP Fax Modem kit includes the following software:
• Drivers for Windows 95, Windows 98, and Windows NT 4.0.
• The Modem Diagnostics utility.
• Fax software.
How Your HP Fax Modem Works
In data mode, the HP Fax Modem takes advantage of the
typical network configuration found when an analog
subscriber connects to a digitally connected server. Because
it bypasses the analog-to-digital conversion in the
downstream path, the modem can use nearly all of the
available network bandwidth.
The HP Fax Modem can send or upload data at up to
36.6 Kbps. Also, it is capable of downloading at 56 Kbps.
However, current regulations limit download speeds to
53 Kbps.
12 English
Page 13

2
Installing Your HP Fax Modem
This chapter will guide you through the installation of the
hardware and software for your modem. You should read this
chapter before starting the installation process.
Page 14

Installing Your HP Fax Modem
Installation Overview
Installation Overview
The following steps must be carried out in the correct order
to ensure the proper installation of your HP Fax Modem:
1 Install the modem card in your computer.
2 Connect the modem to an analog telephone line.
3 Install the software drivers and set up the dialing
properties for the modem.
4 Set up your computer’s Internet connection.
5 Install the fax software and set up your computer to use
fax.
Online Help
Apart from this manual, Windows 95, Windows 98 and
Windows NT 4.0 have extensive online help information about
installing, setting up and using modems. It also has
information about troubleshooting modem problems.
To access this valuable online information any time, click the
Start
“
modems”. Windows provides several topics about modems. To
view a topic, double-click it.
button, click Help, click the Index tab, and type in
14 English
Page 15

Installing Your HP Fax Modem
Step 1: Installing the Modem Card in Your PC
Step 1: Installing the Modem Card in Your PC
This section explains how to install the modem card in your
computer. You must install the modem card before installing
any drivers or software.
CAUTION Static electricity can damage electronic components. Turn off
all equipment. Don’t let your clothes touch the accessory. To
equalize the static electricity, rest the accessory bag on top of
the power supply unit (desktop models) or the top of the
computer (minitower models) while you are removing the
accessory from the bag. Handle the accessory as little as
possible and with care.
1 Turn off the computer. Disconnect all power cords and any
telecommunication cables.
2 Remove the computer’s cover.
3 Find a free PCI accessory card slot.
4 Unscrew and remove the slot cover. Store it in a safe place.
If the slot cover is tight, loosen the screws on the adjacent
slots.
5 Slide the modem card, gold-edge first, into the PCI slot. Do
not bend the card.
English 15
Page 16

Installing Your HP Fax Modem
Step 1: Installing the Modem Card in Your PC
NOTE Your modem may look different from the examples shown, but
the procedure for installing the card is the same. The PC’s
accessory card slots may also be different from the examples
shown.
Minitower models
Desktop models
6 Align the card’s connector with the slot. Firmly press the
card into the slot. Make sure that the card’s connector
engages completely with the slot and does not touch
components on other adjacent cards.
7 Secure the card by replacing the slot cover screw. If you
loosened the screws on adjacent slots, remember to tighten
them.
8
Replace the cover. Reconnect all power cords and cables.
16 English
Page 17

Installing Your HP Fax Modem
Step 2: Connecting the Modem to the Telephone Line
Step 2: Connecting the Modem to the Telephone
Line
1 Plug one end of the cable that came with the HP Fax
Modem into the LINE jack on the modem. Plug the other
end of the cable into a wall jack for an analog telephone
line.
PHONE connection (optional)
2 If you want to use a telephone on the same line as the
modem (when the modem is not in use), connect the
telephone cable into the modem’s PHONE jack.
3
Switch on your computer. You are now ready to install
the drivers and software that came with your HP Fax
Modem.
LINE connection
English 17
Page 18

Installing Your HP Fax Modem
Step 3: Installing the Drivers
Step 3: Installing the Drivers
This section shows you how to install the drivers for your HP
Fax Modem.
In Windows 95
NOTE Ensure that Plug and Play is enabled in your PC’s BIOS Setup
program. This will ensure that the newly installed modem is
detected.
To do this, enter the PC’s BIOS Setup program by pressing
F2
during startup and set PnP Operating System to Yes.
(Your PC’s BIOS Setup program may differ from this).
1 After you have restarted your computer, Windows
automatically detects the new modem as a
Controller
, and displays a message. Insert the Windows
95/98 Drivers disk in the floppy drive and click
PCI Serial
Next.
2 After a few moments, Windows displays the message:
Windows found the following driver:
HP Fax Modem PCI Enumerator
Click
Finish.
3 After a few moments, Windows displays a message similar
to:
Please insert the disk labeled HP Recovery
CDROM
(The exact message may differ from this.) This is normal.
It means that Windows needs the Windows 95 installation
or recovery CD-ROM (or disks) that came with your
computer. Put this CD-ROM in the CD-ROM drive and
click
18 English
OK.
Page 19

Installing Your HP Fax Modem
Step 3: Installing the Drivers
4 The next message says that a certain file could not be found
on the CD-ROM. In the
select
A: (the floppy disk drive) and click OK. The drivers
Copy files from
selection box,
will then be correctly installed on your computer.
5 Once your computer has started, you must set the dialing
properties for your modem. This will allow your modem to
dial correctly.
Click the
Panel
6 In the Control Panel, double-click the
7 Click the
Start button then click Settings Control
.
Modems icon.
Dialing Properties button.
8 Enter your area dialing code and country. Also, complete
the necessary information under
location
, for example, enter “0” in the appropriate field if
How I dial from this
you need to dial zero to get an outside line.
9 Once completed, click
OK.
To verify the modem installation, refer to the instructions
on page 22.
English 19
Page 20

Installing Your HP Fax Modem
Step 3: Installing the Drivers
In Windows 98
NOTE Ensure that Plug and Play is enabled in your PC’s BIOS Setup
program. This will ensure that the newly installed modem is
detected.
To do this, enter the PC’s BIOS Setup program by pressing
during startup and set
PnP Operating System to Yes.
F2
(Your PC’s BIOS Setup program may differ from this).
1 After you have restarted your computer, Windows 98
automatically detects the new modem. It displays a
message indicating that a wizard will search for drivers for
the
PCI Serial Controller. Click Next.
2 Windows displays the message
Windows to do?
best driver...
. Select the option Search for the
and click Next.
3 In the next window, click the check box
drives
floppy drive, and click
, insert the Windows 95/98 Drivers disk in the
Next.
What do you want
Floppy disk
4 Windows then tells you that it found a driver on the floppy
disk drive for your modem. Click
Next. The necessary files
will be copied onto your computer.
5 Finally, Windows informs you that it has finished installing
the software for your new hardware device. Click
Finish.
6 Once your computer has restarted, you must set the dialing
properties for your modem. This will allow your modem to
dial correctly.
Click the
Panel
7 In the
8 Click the
20 English
Start button then click Settings Control
.
Control Panel
Dialing Properties button.
, double-click the
Modems
icon.
Page 21

Installing Your HP Fax Modem
Step 3: Installing the Drivers
9 Enter your area dialing code and country. Also, complete
the necessary information under
location
, for example, enter “0” in the appropriate field if
How I dial from this
you need to dial zero to get an outside line.
10 Once completed, click
OK
then
Close
.
To verify the modem installation, refer to the instructions
on page 22.
In Windows NT 4.0
NOTE For Windows NT 4.0, ensure that Plug and Play is disabled in
your PC’s BIOS Setup program.
To do this, enter the PC’s BIOS Setup program by pressing
during startup and set
PnP Operating System to No. (Your
PC’s BIOS Setup program may differ from this).
1 Once your computer has started, insert the Windows NT
F2
4.0 Drivers disk into the floppy disk drive.
2 Click the
3 Enter “
A:\setup.exe” (where A: is the letter of your
Start
button, then click
floppy disk drive) and click
OK.
Run
.
4 The Modem Board Installation Wizard is launched. This will
guide you through the installation of the HP Fax Modem
drivers.
5 Once completed, click the
Settings Control Panel
6 In the
7 Click the
Control Panel, double-click the Modems icon.
Dialing Properties button.
Start button then click
.
8 Enter your area dialing code and country. Also, complete
the necessary information under
How I dial from this
location
you need to dial zero to get an outside line.
, for example, enter “0” in the appropriate field if
English 21
Page 22

Installing Your HP Fax Modem
Step 3: Installing the Drivers
9 Once completed, click OK.
To Verify the Modem Installation
To verify that the modem has been successfully installed in
Windows 95, Windows 98, and Windows NT 4.0:
1 Click the
Panel
2 Double-click the
3 In the
Start button then click Settings Control
.
Modems icon.
Modem Properties dialog box, select the General
tab. The modem installed on your computer should be
displayed.
22 English
Page 23

Installing Your HP Fax Modem
Step 4: Setting up your Computer’s Internet Connection
Step 4: Setting up your Computer’s Internet
Connection
This section shows you how to set up your computer so you
can connect to the Internet using your HP Fax Modem. Skip
this section if you do not want to use your modem to connect
to the Internet.
If you have already installed and set up a modem on your PC,
the exact setup procedure may differ from the one shown.
In Windows 95
Before you start, you must have your Internet Service
Provider’s phone number handy. If you do not have an
Internet Service Provider, you will need to get one before
proceeding.
1 Click the
Panel
2 Double-click the
3 Select the
4 Click the check box
needed
5 Click the
Start button then click Settings Control
.
Internet icon.
Connection tab.
Connect to the Internet as
.
Add button.
6 You are then asked to enter a connection name. You can
leave the name suggested or you can enter your own.
7 Under
with V90
select it from the drop-down list.
8 Click
Select a modem, you should see HP Fast Modem
, your newly installed modem. If you do not,
Next.
English 23
Page 24

Installing Your HP Fax Modem
Step 4: Setting up your Computer’s Internet Connection
9 In the next window, enter the area code, phone number
and country of your Internet Service Provider.
10 Click
11 In the
Next.
Internet Properties Dialogue box, click OK.
In Windows 98
1 Click the
Panel
2 Double-click the
3 Select the
4 Click the
The connection wizard will allow you to:
a Sign up and configure your computer for a new Internet
account. In this case, the connection wizard will present
you with a list of Internet Service Providers in your area
Start button, then click Settings Control
.
Internet icon.
Connection tab.
Connect
button to run the connection wizard.
so that you can choose one.
b Connect to an existing Internet account, if you have
one.
In both cases, detailed instructions are provided as the
connection guides you through the setup process.
24 English
Page 25

Installing Your HP Fax Modem
Step 4: Setting up your Computer’s Internet Connection
In Windows NT 4.0
Before you start, you must have your Internet Service
Provider’s phone number handy. If you do not have an
Internet Service Provider, you will need to get one before
proceeding.
1 Click the
Accessories Dial-Up Networking.
2 Click the
Start button, then click Programs
Install button. Windows installs dial-up
networking.
3 In the
should be listed. Select it and click
4 Click the
RAS Capable Device window, your HP Fax Modem
OK.
Configure
button.
5 Select the option as follows:
Select option to: Receive Faxes Send Faxes Internet
Dial out only
Receive calls
Dial out and
receive calls
Then click
6 Click the
7 Select the
8 Click the
9 Windows then informs you that dial-up networking was
successfully installed. Click
OK.
Network button.
TCP/IP
Continue button.
check box and click OK.
Restart.
English 25
Page 26

Installing Your HP Fax Modem
Step 4: Setting up your Computer’s Internet Connection
10 Once your computer has restarted, you must configure
your Internet Service Provider’s phone number and other
details before being able to access the internet.
Click the
Accessories Dial-Up Networking
Start button then click Programs
.
11 Windows tells you the phonebook is empty and asks you if
you want to add an entry. Click
OK. This launches the
Phonebook Entry Wizard.
If this message is not displayed, click
New to launch the
Phonebook Entry Wizard.
12 Enter the name of the phonebook entry (in this case, your
Service Provider) and click
13 In the next window, select the
Internet
check box. The two other options depend on the
Next.
I am calling the
Service Provider chosen. Consult your Service Provider for
this information. Click
Next.
14 Enter the phone number of your Service Provider and click
Next
15 Click
16 In
Dial-Up Networking, click Close.
.
Finish.
26 English
Page 27

Installing Your HP Fax Modem
Step 5: Installing and Setting up the Fax Software
Step 5: Installing and Setting up the Fax
Software
The CD-ROM that came with your HP Fax Modem contains
the fax software.
1 Insert the CD-ROM in the CD-ROM drive.
2 Run the Setup Wizard by clicking
D:\setup.exe, where D: is the letter of your CD-ROM
Start Run, then typing
drive.
If you are unsure about the letter of your CD-ROM drive,
you can click the
setup.exe file on the CD-ROM.
Browse
button and then look for the
The Setup Wizard will guide you through the installation of
RingCentral Fax.
English 27
Page 28

Installing Your HP Fax Modem
Step 5: Installing and Setting up the Fax Software
3 Once the installation is complete and the PC has restarted,
run RingCentral Fax by double-clicking the
RingCentral Fax
icon on your desktop. This takes you
into the RingCentral Fax Setup Wizard.
The RingCentral Fax Setup Wizard will guide you through
the process of setting up the fax software.
4 Click
Next. The Setup Wizard automatically detects your
modem and collects information about your modem.
5 The wizard then displays your HP Fax Modem. Ensure that
it is selected and click
6 Click
Next.
OK.
7 Enter the information requested, name, company, address
and so on.
Ensure that you enter all information accurately. It will be
used later to register your copy of RingCentral Fax, as well
as for creating a fax cover sheet.
Once completed, click
Next.
28 English
Page 29

Installing Your HP Fax Modem
Step 5: Installing and Setting up the Fax Software
8 Select your country, enter your area dialing code and dial
number for an outside line (if needed). Complete the
Waiting
information if this applies to you. Click Next.
Call
9 Enter your country code, home, business and fax number.
Click
Next
10 Enter your email address if your have one. Click
.
Next.
11 Verify your personal information displayed on the screen.
This information will be used to create your fax cover page.
If it is correct, click
If the information is not correct, click
Next.
Previous until you
get to the appropriate screen to modify the information.
To get back to this screen, click
Next until you get to it.
12 In the next screen, you can specify how many times the
computer will let an incoming call ring before answering. If
you have any doubt, leave the default settings. Once
completed, click
Next.
This setting is significant only if you are going to get
incoming calls.
13 Select
time you start your PC. Otherwise, select
Yes if you want the RingCentral Fax to start every
No. If you are
going to use your computer to receive faxes, you should
select
14 To complete the setup, click
Yes. Once completed, click Next.
Finish.
15 Once you have set up RingCentral Fax, you must then
register it. Go on to the next section to learn how to do this.
English 29
Page 30

Installing Your HP Fax Modem
Step 5: Installing and Setting up the Fax Software
Registering the Fax Software
Once you have installed and set up RingCentral Fax, you can
register it. Although you can register it at any time, it is best
to register it now. If you register, your copy of RingCentral
Fax will be updated to include an enhanced fax editor.
To register your software:
1 Run the Registration Wizard.
If you have just set up the fax software, the Registration
Wizard will start automatically (a few moments after
completing the setup). If this is the case, go on to step 2.
Otherwise, you can launch the Registration Wizard at any
time by clicking the
clicking
Fax
RingCentral Fax Register RingCentral
.
Menu
button on the fax machine, then
2 Once you have launched the Registration Wizard, click
Next.
3 Verify your personal data, then click
4 Click
Next.
Next.
RingCentral Fax will then automatically dial and register
your software. If the line is busy, you will be given the
opportunity to retry.
30 English
Page 31

Installing Your HP Fax Modem
Step 5: Installing and Setting up the Fax Software
Getting Information About Using the Fax Software
For information about using RingCentral Fax, consult the
RingCentral Fax online help. There are two ways to access the
online help:
• If RingCentral Fax is running, click the
?
help button on
the top right hand side of the fax machine.
• If RingCentral Fax is not running, click the Start button,
click
Programs RingCentral Fax RingCentral Fax
Help
. (If you chose a different Programs menu location
during the RingCentral Fax installation, you can access the
help in the location you chose.)
This online document has, among many other topics,
information about:
• Sending faxes
• Receiving faxes
• Scheduling faxes
• Viewing faxes
• Using fax cover pages.
NOTE If you want to receive faxes automatically, you must keep
RingCentral Fax running, either minimized or opened.
English 31
Page 32

Installing Your HP Fax Modem
Step 5: Installing and Setting up the Fax Software
32 English
Page 33

3
Troubleshooting
This chapter provides information for troubleshooting
problems you may have with your modem.
Page 34

Troubleshooting
If You Have a Problem
If You Have a Problem
If you have a problem with your HP Fax Modem, please
complete these steps in full before contacting your HP
Support provider:
1 Check the modem hardware.
2 Check the driver installation.
3 Use the troubleshooting tree.
4 Consult the online troubleshooting information provided
with Windows. If you have a problem with a particular
application, consult the documentation provided with the
application.
The following pages provide detailed information about each
of these steps.
34 English
Page 35

Troubleshooting
Step 1: Check the Modem Hardware
Step 1: Check the Modem Hardware
Your HP Fax Modem includes a diagnostics utility. You can
use this utility to ensure that your modem hardware is
functioning correctly. The diagnostics utility also checks the
phone line connection, including dial tone detection.
To run the diagnostics utility:
1 Insert floppy Disk 1 containing the Modem Diagnostics into
the disk drive.
2 Restart your computer. To do this, click
down
, then select Restart the computer and click OK.
Start Shut
3 Your computer will start (boot) on the floppy disk. Run the
diagnostics utility by typing “
the
Enter key. The diagnostics utility checks the modem
DIAG_HW.BAT” and pressing
hardware and then displays the result.
If your computer does not start on the floppy disk, check
that your computer is configured to boot on the floppy
disk. To do this, enter the PC’s Setup program by pressing
during startup and check the boot parameters.
F2
English 35
Page 36

Troubleshooting
Step 2: Check the Driver Installation
Step 2: Check the Driver Installation
In this step, check that the modem driver is correctly
installed. To do this, verify the resources allocated to the
modem. There are two different areas to check.
In Windows 95 and Windows 98
1 Click the
Panel
2 Double-click the
3 Click the
4 Double-click
5 Select
Properties button.
Under
device is working properly
Start button then click Settings Control
.
System
Device Manager tab.
Modem in the list.
HP Fast Modem with V90 then click the
Device Status
icon.
, there should be written
. If this is not the case,
then the driver is incorrectly installed (refer to “If the
Driver is Incorrectly Installed” on page 37).
Click
6 In the
Cancel.
Control Panel, double-click the Modems icon.
This
7 In the
Diagnostics tab. Your HP Fax Modem should be allocated
Modem Properties dialog box, select the
to one of the COM ports.
If this is not the case, the driver is incorrectly installed
(refer to “If the Driver is Incorrectly Installed” on page
37).
36 English
Page 37

Troubleshooting
Step 2: Check the Driver Installation
You can also verify that Windows can communicate with
the modem. To do this, select the COM port that is
attached to the modem, then click the
More Info button.
Windows communicates with the modem and then displays
some technical information about the modem. If this does
not work, the driver is incorrectly installed.
In Windows NT 4.0
There are two areas to check in Windows NT.
1 Click the
Panel
2 Double-click the
Fax Modem should be listed. If the HP Fax Modem is not
listed, the driver was incorrectly installed.
Click
3 Then, in the
Start button then click Settings Control
.
Cancel.
Add/Remove Programs
Control Panel
, double-click the
icon. Your HP
Modems
icon.
4 In the
should be listed under the
Modem Properties dialog box, your HP Fax Modem
Modem
heading. Also, a
communications port (for example COM3) should be listed
as attached to the modem.
If this is not the case, the driver is incorrectly installed.
If the Driver is Incorrectly Installed
If the driver is incorrectly installed:
1 Remove the incorrectly installed driver. To do this, click
the
Start button, click Settings Control Panel,
double click
Remove.
2 Re-install the modem driver. Refer to “Step 3: Installing the
Modems, then select the modem and click
Drivers” on page 18 for instructions.
English 37
Page 38

Troubleshooting
Step 3: Use the Troubleshooting Tree
Step 3: Use the Troubleshooting Tree
Symptom Recommended ActionQuestion to Ask Possible Cause
Unable to dial
or no dial tone
Does not detect
incoming call
Connect a telephone onto
the modem’s phone
connector. Do you hear a
dial tone on the telephone?
No
Connect a telephone onto
the modem’s phone
connector. Does the
telephone ring during an
incoming call?
No
Incompatibility between
PABX (company telephone
Yes
system) and modem
Faulty cable connection
Incompatibility between
PABX (company telephone
Yes
system) and modem
Faulty cable connection
Install on direct line coming
from telephone operator.
Alternatively, contact your
PABX provider for information
about compatibility with the
external telephone system.
Ensure the modem cable is
correctly connected into the
wall socket and the modem
card. Ensure the telephone
socket is working.
Install on direct line coming
from telephone operator.
Alternatively, contact your
PABX provider for information
about compatibility with the
external telephone system.
Ensure the modem cable is
correctly connected to the
wall socket and the modem
card. Ensure the telephone
socket is working.
Busy
Are you using the
correct number?
Are your Dialing
Properties correct?
38 English
Yes
No
No
Yes
Incorrect number Use correct number.
Line is busy Try again later.
Dialing Properties
incorrect
Check Dialing Properties:
Click Start
Control Panel, double-click
Modems, click Dialing
Settings
Properties.
Page 39

Symptom Recommended ActionQuestion to Ask Possible Cause
Troubleshooting
Step 3: Use the Troubleshooting Tree
Disconnection
Low speed
connection
Unable to find
modem
Windows 95 and
Windows 98: Follow the
instructions on page 36
to check the driver
installation.
Windows NT 4.0: Follow
the instructions on
page 37 to check the
driver installation.
No data was exchanged for
a period of time, therefore
there was a timeout and
the modem disconnected.
Bad line quality or
bad connection.
Bad line quality or
bad connection.
Remote modem does
not support high speed
connection.
Modem driver incorrectly
installed
No action to take.
A timeout is normal if no data
is being exchanged for a
period of time.
Try again later.
Try again later.
No action to take.
Re-install the modem driver:
1. Remove the current modem
driver (if there is one). To
do this, click Start
SettingsControl Panel,
double-click Modems, select
modem and click Remove.
2. Install modem driver
(refer to Step 3 on page 18).
An application is
unable to find or
to use the modem.
(The exact
message depends
on the application
used.)
Check if you have more
than one modem installed.
To do this, click Start
SettingsControl Panel,
double-click Modems. Do
you have more than one
modem listed?
No
You have more than one
modem driver installed.
(Driver installed twice,
Yes
modem replaced, modem
moved to a different PCI
slot, or more than one
modem card installed
Application is not set up
to use modem.
in PC.)
1. Determine which modem
driver to use. Choose the HP
Fax Modem that is working
correctly. (If there are several
HP Fax Modems, select
the one with the highest #
number.) To check if the
chosen driver is working,
follow Step 2 on page 36.
2. Set up the application to
use the modem. Refer to the
application’s documentation
to learn how to do this.
In RingCentral Fax:
Click the Menu button, click
Configure
the Modem tab, then click
the Select button.
Options, click
English 39
Page 40

Troubleshooting
Step 4: Consult the Windows Online Help
Step 4: Consult the Windows Online Help
Windows
Online Help
RingCentral
Fax Online
Help
Windows 95, Windows 98 and Windows NT 4.0 have
troubleshooting information for modem problems. To access
this information, click the
Index tab, type in “modems”, and double-click the
the
troubleshooting entry.
Start button, click Help, select
To access the help information for the fax application, click the
help button on the top right hand side of the fax machine. If
?
the fax application is not running, click the
Programs RingCentral Fax RingCentral Fax
click
Help
. (If you chose a different Start menu location during the
Start
button,
RingCentral Fax installation, you can access the help in the
location you chose.)
HP Customer Care Service and Support
The latest drivers and utilities are available on HP’s web site
at:
http://www.hp.com/go/vectrasupport.
For the latest information on HP accessories, refer to HP’s
web site at:
For HP Vectra PCs
For HP Kayak PC
Workstations
For HP Brio PCs
40 English
http://www.hp.com/go/vectraaccessories
http://www.hp.com/go/kayakaccessories
http://www.hp.com/go/brioaccessories
Page 41

Regulatory Information and
Warranty
Page 42

Regulatory Information and Warranty
Regulatory Information
Regulatory Information
DECLARATION OF CONFORMITY
According to ISO/IEC Guide 22 and EN 45014
Manufacturer’s Name:
Manufacturer’s Address:
Declares that the product:
Conforms to the following Product Specifications:
Supplementary information:
The product herewith complies with the requirements of the following Directives and carries the
CE-marking accordingly:
The EMC directive 89/336/EEC amended by the directive 93/68/EEC.
The Low Voltage Directive 73/23/EEC.
1)
The product was tested in a typical configuration with Hewlett-Packard Personal Computer Systems.
2)
This Device complies with Part 15 of the FCC Rules. Operation is subject to the following two conditions: (1) this device may
not cause harmful interference, and (2) this device must accept any interference received, including interference that may cause
undesired operation.
HEWLETT-PACKARD
5 Avenue Raymond Chanas
38053 Grenoble Cedex 09
FRANCE
Product Name:
Model Number:
SAFETY
EMC
IEC 801-3:1984 / prEN 55024-3:1991 - 3V/m
IEC 801-4:1988 / prEN 55024-4:1992 - 0.5 kV Signal Lines,
HP 56K V90 PCI Fax Modem
HP D7808A / HP D7808T
International: IEC 950:1991 +A1 +A2 +A3+A4
Europe: EN 60950:1992 +A1 +A2 +A3
CISPR 22:1993 / EN 55022:1994 Class B
EN 50082-1:1992
IEC 801-2:1992 / prEN 55024-2:1992 - 4kV CD, 8kV AD
FCC Title 47 CFR, Part 15 Class B
1)
1 kV Power Lines
2)
/ ICES-003, Issue 2
Grenoble
November 1998 Quality Manager
For Compliance Information ONLY, contact:
USA Contact:
Hewlett-Packard Company, Corporate Product Regulations Manager,
3000 Hanover Street, Palo Alto, CA 94304. (Phone: (415) 857-1501)
42 English
Jean-Marc JULIA
Page 43

Regulatory Information and Warranty
Regulatory Information
For US Only
FCC
Federal Communications Commission Radio Frequency Interference Statement
Warning:
This equipment has been tested and found to comply with the limits for a Class B digital device,
pursuant to Part 15 of the FCC Rules. These limits are designed to provide reasonable protection
against harmful interference in a residential installation. This equipment generates, and uses, and
can radiate radio frequency energy and, if not installed and used in accordance with the
instructions, may cause harmful interference to radio communications. However, there is no
guarantee that interference will not occur in a particular installation. If this equipment does
cause harmful interference to radio or television reception, which can be determined by turning
the equipment off and on, the user is encouraged to correct the interference by one or more of
the following measures:
• reorient or relocate the receiving antenna,
• increase the separation between the equipment and the receiver,
• connect the equipment into an outlet on a circuit different from that to which the receiver is
connected,
• consult the dealer or an experienced radio/TV technician for help.
Hewlett-Packard’s FCC compliance tests were conducted with HP-supported peripheral devices
and HP shielded cables, such as those you receive with your system. Changes or modifications
not expressly approved by Hewlett-Packard could void the user’s authority to operate the
equipment.
Notice Regarding the Connection of Telephone Equipment to Telephone
Lines
This equipment complies with Part 68 of the FCC Rules. Provided with this equipment is a label
that contains, among other information, the FCC Registration Number and Ringer Equivalence
Number (REN) for this equipment. You must, upon request, provide this information to your
telephone company.
The REN is used to determine the quantity of devices you may connect to your telephone line
and still have all of those devices ring when your telephone is called. In most, but not all areas,
the sum of the RENs connected to one line should not exceed five (5). To be certain of the
number of devices you may connect to your line, as determined by the REN, you should contact
your local telephone company to determine the maximum REN for your calling area.
If your telephone equipment causes harm to the telephone network, the telephone company may
discontinue your service temporarily. If possible, they will notify you in advance. But if advance
notice is not practical, you will be notified as soon as possible. You will be informed of your right
to file a complaint with the FCC.
Your telephone company may make changes in its facilities, equipment, operations or procedures
that could affect the proper functioning of your equipment. If they do, you will be notified in
advance to give you an opportunity to maintain uninterrupted telephone service. This product
contains no user serviceable parts or assemblies.
If you experience trouble with this product, please contact the HP Support Department. The
telephone company may ask that you disconnect this equipment from the network until the
problem has been corrected or until you are sure that the equipment is not malfunctioning.
This equipment may not be used on coin service provided by the telephone company. Connection
to party lines is subject to state tariffs.
Check the bottom of your modem card or modem for the FCC ID code and the FCC 68 number.
RINGER EQUIVALENCE: 0.8
This equipment use the following USOC jack: RJ11C.
English 43
Page 44

Regulatory Information and Warranty
Regulatory Information
For Canada Only
The standard connecting arrangement code for this equipment as specified in CP-01, section 1.8
is CA11A.
The Industry Canada Label identifies certified equipment. This certification means that the
equipment meets certain telecommunications network protective, operational and safety
requirements. The Department does not guarantee the equipment will operate to the user’s
satisfaction.
Before installing this equipment, users should ensure that it is permissible to be connected to the
facilities of the local telecommunications company. The equipment must also be installed using
an acceptable method of connection. In some cases, the company’s inside wiring associated with a
single line individual service may be extended by means of a certified connector assembly
(telephone extension cord). The customer should be aware that compliance with the above
conditions may not prevent degradation of service in some situations.
Repairs to certified equipment should be made by an authorized Canadian maintenance facility
designated by the supplier. Any repairs or alterations made by the user to this equipment, or
equipment malfunctions, may give the telecommunications company cause to request the user to
disconnect the equipment.
Users should ensure for their own protection that the electrical ground connections of the power
utility, telephone lines and internal metallic water pipe system, if present, are connected together.
This precaution may be particularly important in rural areas.
CAUTION: Users should not attempt to make such connections themselves, but should contact
the appropriate electric inspection authority, or electrician, as appropriate.
The Ringer Equivalence Number (REN) assigned to each terminal device provides an indication
of the maximum number of terminals allowed to be connected to a telephone interface. The
termination on an interface may consist of any combination of devices subject only to the
requirement that the sum of the Ringer Equivalence Numbers of all the devices does not exceed
5.
L’étiquette d’Industrie Canada identifie le matériel homologué. Cette étiquette certifie que le
matériel est conforme à certaines normes de protection, d’exploitation et de sécurité des réseaux
de télécommunications, comme le prescrivent les documents concernant les exigences
techniques relatives au matériel terminal. Le Ministère n’assure toutefois pas que le matériel
fonctionnera à la satisfaction de l’utilisateur.
Avant d’installer ce matériel, l’utilisateur doit assurer qu’il soit permis de raccorder aux
installations de l’entreprise locale de télécommunication. Le matériel doit également être installé
en suivant une méthode acceptée de raccordement. Dans certains cas, les fils intérieurs de
l’entreprise utilisés pour un service individuel à ligne unique peuvent être prolongés au moyen
d’un dispositif de raccordement homologué (cordon rallonge téléphonique interne). L’abonné ne
doit pas oublier qu’il est possible que la conformité aux conditions énoncées ci-dessus,
n’empêchent pas la dégradation du service dans certaines situations.
Les réparations de matériel homologué doivent être coordonnées par un représentant désigné
par le fournisseur. L’entreprise de télécommunications peut demander à l’utilisateur de
débrancher un appareil à la suite de réparations ou de modifications effectuées par l’utilisateur
ou à cause de mauvais fonctionnement.
Pour sa propre protection, l’utilisateur doit s’assurer que tous les fils de mise à la terre de la
source d’énergie électrique, des lignes téléphoniques et des canalisations d’eau métalliques, s’il y
en a, sont raccordés ensemble. Cette précaution est particulièrement importante dans les régions
rurales.
AVERTISSEMENT: L’utilisateur ne doit pas tenter de faire ces raccordements lui-même; il doit
avoir recours à un service d’inspection électrique, ou à un électricien, selon le cas.
44 English
Page 45

Regulatory Information and Warranty
HP Hardware Accessory Warranty
AVIS: L’indice d’équivalence de la sonnerie (LES) assigné à chaque dispositif terminal indique le
nombre maximal de terminaux qui peuvent être raccordés à une interface. La terminaison d’une
interface téléphonique peut consister en une combinaison de quelques dispositifs, à la seule
condition que la somme d’indice d’équivalence de la sonnerie de tous les dispositifs n’excède pas
5.
HP Hardware Accessory Warranty
This HP accessory is covered by a limited hardware warranty for a period of one year from the
date of purchase by the original end-user. The type of service provided is return to an HP or
repair-authorized reseller service-center.
At Hewlett-Packard's discretion, a defective accessory will be repaired or replaced by a new unit,
either of the same type or of an equivalent model.
If this accessory is purchased and used together with an HP Vectra personal computer, an HP
Brio personal computer, or an HP Kayak PC Workstation, it will be covered by the warranty of this
computer or workstation, under the same conditions of service and duration.
Please, refer to the warranty statement provided with your HP personal computer or PC
workstation for warranty limitations, customer responsibilities and other terms and conditions.
FOR CONSUMER TRANSACTIONS IN AUSTRALIA AND NEW ZEALAND: THE WARRANTY
TERMS CONTAINED IN THIS STATEMENT, EXCEPT TO THE EXTENT LAWFULLY
PERMITTED, DO NOT EXCLUDE, RESTRICT OR MODIFY AND ARE IN ADDITION TO THE
MANDATORY STATUTORY RIGHTS APPLICABLE TO THE SALE OF THIS PRODUCT TO YOU.
(source: template.txt 10 Oct 1998)
English 45
Page 46

Regulatory Information and Warranty
HP Software Warranty
HP Software Warranty
THIS WARRANTY STATEMENT TAKES PRECEDENCE OVER ANY OTHER SOFTWARE
WARRANTY STATEMENT INCLUDED WITH THIS PRODUCT.
Ninety-Day Limited Software Warranty
HP warrants for a period of NINETY (90) DAYS from the date of the purchase that the software
product will execute its programming instructions when all files are properly installed. HP does
not warrant that the software will be uninterrupted or error free. HP does not warrant to the
performance of usefulness of any software provided with your computer product. Unless
otherwise expressly provided by HP, it is your own responsibility to obtain the latest version of
any software and support directly from the software owner or authorized distributor. In the event
that this software product fails to execute its programming instructions during the warranty
period, Customer’s remedy shall be a refund or repair. Should HP be unable to replace the media
within a reasonable amount of time, Customer’s alternate remedy shall be a refund of the
purchase price upon return of the product and all copies.
Removable Media (If supplied)
HP warrants the removable media, if supplied, upon which this product is recorded to be free
from defects in materials and workmanship under normal use for a period of NINETY (90) DAYS
from the date of purchase. In the event the media proves to be defective during the warranty
period, Customer’s remedy shall be to return the media to HP for replacement. Should HP be
unable to replace the media within a reasonable amount of time, Customer’s alternate remedy
shall be a refund of the purchase price upon return of the product and destruction of all other
nonremovable media copies of the software product.
Notice of Warranty Claims
Customer must notify HP in writing of any warranty claim not later than thirty (30) days after the
expiration of the warranty period.
The above warranty shall not apply to defects resulting from: misuse; unauthorized modification;
operation or storage outside the environmental specifications for the product; in-transit damage;
improper maintenance; or defects resulting from use of non-HP software, accessories, media,
supplies, consumables, or such items not designed for use with the product.
HP MAKES NO OTHER EXPRESS WARRANTY, WHETHER WRITTEN OR ORAL WITH
RESPECT TO THIS PRODUCT. ANY IMPLIED WARRANTY OF MERCHANTABILITY OR
FITNESS FOR A PARTICULAR PURPOSE IS LIMITED TO THE DURATION OF THE EXPRESS
WARRANTY SET FORTH ABOVE. SOME STATES OR PROVINCES DO NOT ALLOW
LIMITATIONS ON HOW LONG AN IMPLIED WARRANTY LASTS, SO THE ABOVE
LIMITATIONS OR EXCLUSION MAY NOT APPLY TO YOU.
This warranty gives specific legal rights, and you may also have other rights which vary from state
to state, or province to province.
Limitation of Liability and Remedies
THE REMEDIES PROVIDED ABOVE ARE CUSTOMER’S SOLE AND EXCLUSIVE REMEDIES.
IN NO EVENT SHALL HP BE LIABLE FOR ANY DIRECT, INDIRECT, SPECIAL, INCIDENTAL
OR CONSEQUENTIAL DAMAGES (INCLUDING LOST PROFIT) WHETHER BASED ON
WARRANTY, CONTRACT, TORT OR ANY OTHER LEGAL THEORY. Some states or provinces do
not allow the exclusion or limitation of incidental or consequential damages, so the above
limitation or exclusion may not apply to you.
46 English
Page 47

Regulatory Information and Warranty
HP Software License Agreement
HP Software License Agreement
CAREFULLY READ THIS LICENSE AGREEMENT BEFORE PROCEEDING TO OPERATE THE
HP ACCESSORY. RIGHTS IN THE SOFTWARE ARE OFFERED ONLY ON THE CONDITION
THAT THE CUSTOMER AGREES TO ALL TERMS AND CONDITIONS OF THIS LICENSE
AGREEMENT. PROCEEDING TO INSTALLING AND USING THE ACCESSORY INDICATES
YOUR ACCEPTANCE OF THESE TERMS AND CONDITIONS. IF YOU DO NOT AGREE TO THE
LICENSE AGREEMENT, YOU MUST NOW DESTROY ANY MASTER DISKETTES OR CD-ROMS,
OR RETURN THE COMPLETE ACCESSORY AND SOFTWARE FOR A FULL REFUND.
UNLESS OTHERWISE STATED BELOW, THIS HP SOFTWARE PRODUCT LICENSE
AGREEMENT SHALL GOVERN THE USE OF ALL SOFTWARE THAT IS PROVIDED TO YOU,
THE CUSTOMER, AS PART OF THE HP ACCESSORY. IT SHALL SUPERSEDE ANY NON-HP
SOFTWARE LICENSE TERMS THAT MAY BE FOUND ON-LINE, OR IN ANY DOCUMENTATION
OR OTHER MATERIALS CONTAINED IN THE ACCESSORY PRODUCT PACKAGING.
Note: Operating System Software by Microsoft is licensed to you under the Microsoft End User
License Agreement (EULA) contained in the Microsoft documentation.
The following License Terms govern the use of the software:
USE. Customer may use the software on any one computer. Customer may not network the
software or otherwise use it on more than one computer. Customer may not reverse assemble or
decompile the software unless authorized by law.
COPIES AND ADAPTATIONS. Customer may make copies or adaptations of the software (a) for
archival purposes or (b) when copying or adaptation is an essential step in the use of the
software with a computer so long as the copies and adaptations are used in no other manner.
OWNERSHIP. Customer agrees that he/she does not have any title or ownership of the software,
other than ownership of the physical media. Customer acknowledges and agrees that the
software is copyrighted and protected under the copyright laws. Customer acknowledges and
agrees that the software may have been developed by a third party software supplier named in
the copyright notices included with the software, who shall be authorized to hold the Customer
responsible for any copyright infringement or violation of this Agreement.
TRANSFER OF RIGHTS IN SOFTWARE. Customer may transfer rights in the software to a third
party only as part of the transfer of all rights and only if Customer obtains the prior agreement of
the third party to be bound by the terms of this License Agreement. Upon such a transfer,
Customer agrees that his/her rights in the software are terminated and that he/she will either
destroy his/her copies and adaptations or deliver them to the third party.
SUBLICENSING AND DISTRIBUTION. Customer may not lease, sublicense the software or
distribute copies or adaptations of the software to anyone in physical media or by
telecommunication without the prior written consent of Hewlett-Packard.
TERMINATION. Hewlett-Packard may terminate this software license for failure to comply with
any of these terms provided Hewlett-Packard has requested Customer to cure the failure and
Customer has failed to do so within thirty (30) days of such notice.
UPDATES AND UPGRADES. Customer agrees that the software does not include updates and
upgrades which may be available from Hewlett-Packard under a separate support agreement.
EXPORT CLAUSE. Customer agrees not to export or re-export the software or any copy or
adaptation in violation of the U.S. Export Administration regulations or other applicable
regulation.
U.S. GOVERNMENT RESTRICTED RIGHTS. Use, duplication, or disclosure by the U.S.
Government is subject to restrictions as set forth in subparagraph (c)(1)(ii) of the Rights in
Technical Data and Computer Software clause in DFARS 252.227-7013. Hewlett-Packard
Company. 3000 Hanover Street, Palo Alto, CA 94304 U.S.A. Rights for non-DOD U.S. Government
Departments and Agencies are as set forth in FAR 52.227-19(c)(1,2).
(9 Nov 1998)
English 47
Page 48

Regulatory Information and Warranty
HP Software License Agreement
48 English
Page 49

Page 50

Paper not bleached with chlorine
50%
25%
Part Number
Printed
11/98 in Taiwan
D7808-90001
 Loading...