

Page 1

Quick Reference Guide
Microsoft Windows XPe-based Thin Clients t5710 & t5720
Document Part Number: 253378-008
July 2006
This guide supplements the standard Microsoft Windows XPe
documents supplied by Microsoft Corporation. This document
highlights the differences, enhancements, and additional features
provided with this terminal.
Page 2

Microsoft, MS-DOS, Windows, and Windows NT are trademarks of Microsoft
Corporation in the U.S. and other countries.
© 2006 Hewlett-Packard Development Company, L.P.
The information in this document is subject to change without notice.
The only warranties for HP products and services are set forth in the express
warranty statements accompanying such products and services. Nothing herein
should be construed as constituting an additional warranty. HP shall not be liable
for technical or editorial errors or omissions contained herein.
WARNING: Text set off in this manner indicates that failure to follow
Å
directions could result in bodily harm or loss of life.
CAUTION: Text set off in this manner indicates that failure to follow
Ä
directions could result in damage to equipment or loss of information.
Quick Reference Guide
Microsoft Windows XPe-based Thin Clients - t5710 & t5720
Eighth Edition (July 2006)
Document Part Number: 253378-008
Page 3

Contents
Contents
Introduction
Updates . . . . . . . . . . . . . . . . . . . . . . . . . . . . . . . . . . . . . . . . . . . . . . . . . . . . . . . . . . . . . 1–2
The XPe desktop . . . . . . . . . . . . . . . . . . . . . . . . . . . . . . . . . . . . . . . . . . . . . . . . . . . . . . 1–2
User desktop . . . . . . . . . . . . . . . . . . . . . . . . . . . . . . . . . . . . . . . . . . . . . . . . . . . . . . 1–2
Administrator desktop. . . . . . . . . . . . . . . . . . . . . . . . . . . . . . . . . . . . . . . . . . . . . . . 1–4
Server environment requirements . . . . . . . . . . . . . . . . . . . . . . . . . . . . . . . . . . . . . . . . . 1–5
Session services . . . . . . . . . . . . . . . . . . . . . . . . . . . . . . . . . . . . . . . . . . . . . . . . . . . 1–5
Citrix ICA. . . . . . . . . . . . . . . . . . . . . . . . . . . . . . . . . . . . . . . . . . . . . . . . . . . . . 1–5
Microsoft RDP . . . . . . . . . . . . . . . . . . . . . . . . . . . . . . . . . . . . . . . . . . . . . . . . . 1–5
Terminal emulation support . . . . . . . . . . . . . . . . . . . . . . . . . . . . . . . . . . . . . . . 1–6
Support service - Altiris Deployment Solution. . . . . . . . . . . . . . . . . . . . . . . . . . . . 1–6
Contents
Configuration
Logging on . . . . . . . . . . . . . . . . . . . . . . . . . . . . . . . . . . . . . . . . . . . . . . . . . . . . . . . . . . 2–1
Automatic logon . . . . . . . . . . . . . . . . . . . . . . . . . . . . . . . . . . . . . . . . . . . . . . . . . . . 2–1
Manual logon . . . . . . . . . . . . . . . . . . . . . . . . . . . . . . . . . . . . . . . . . . . . . . . . . . . . . 2–2
Administrator logon access. . . . . . . . . . . . . . . . . . . . . . . . . . . . . . . . . . . . . . . . . . . 2–3
Logging off, restarting, and shutting down the thin client . . . . . . . . . . . . . . . . . . . . . . 2–3
Enhanced Write Filter. . . . . . . . . . . . . . . . . . . . . . . . . . . . . . . . . . . . . . . . . . . . . . . 2–4
Power management. . . . . . . . . . . . . . . . . . . . . . . . . . . . . . . . . . . . . . . . . . . . . . . . . 2–4
System time. . . . . . . . . . . . . . . . . . . . . . . . . . . . . . . . . . . . . . . . . . . . . . . . . . . . . . . 2–5
Local drives . . . . . . . . . . . . . . . . . . . . . . . . . . . . . . . . . . . . . . . . . . . . . . . . . . . . . . . . . . 2–6
Drive Z . . . . . . . . . . . . . . . . . . . . . . . . . . . . . . . . . . . . . . . . . . . . . . . . . . . . . . . . . . 2–6
Drive C and flash . . . . . . . . . . . . . . . . . . . . . . . . . . . . . . . . . . . . . . . . . . . . . . . . . . 2–7
Saving files . . . . . . . . . . . . . . . . . . . . . . . . . . . . . . . . . . . . . . . . . . . . . . . . . . . . . . . 2–7
Mapping network drives . . . . . . . . . . . . . . . . . . . . . . . . . . . . . . . . . . . . . . . . . . . . . 2–7
Roaming profiles . . . . . . . . . . . . . . . . . . . . . . . . . . . . . . . . . . . . . . . . . . . . . . . 2–8
Quick Reference Guide www.hp.com iii
Page 4

User accounts . . . . . . . . . . . . . . . . . . . . . . . . . . . . . . . . . . . . . . . . . . . . . . . . . . . . . . . . 2–8
Creating a new user account . . . . . . . . . . . . . . . . . . . . . . . . . . . . . . . . . . . . . . . . . . 2–8
User Manager . . . . . . . . . . . . . . . . . . . . . . . . . . . . . . . . . . . . . . . . . . . . . . . . . . . . . 2–9
User profiles . . . . . . . . . . . . . . . . . . . . . . . . . . . . . . . . . . . . . . . . . . . . . . . . . . . . . . 2–9
Regional and Language Options . . . . . . . . . . . . . . . . . . . . . . . . . . . . . . . . . . . . . . . . . 2–11
Administrative Tools. . . . . . . . . . . . . . . . . . . . . . . . . . . . . . . . . . . . . . . . . . . . . . . . . . 2–12
Applications
Sygate firewall. . . . . . . . . . . . . . . . . . . . . . . . . . . . . . . . . . . . . . . . . . . . . . . . . . . . . . . . 3–2
Microsoft Windows Firewall. . . . . . . . . . . . . . . . . . . . . . . . . . . . . . . . . . . . . . . . . . . . . 3–3
On-by-default . . . . . . . . . . . . . . . . . . . . . . . . . . . . . . . . . . . . . . . . . . . . . . . . . . . . . 3–3
Configuring Microsoft Windows Firewall . . . . . . . . . . . . . . . . . . . . . . . . . . . . . . . 3–3
Gathering configuration information . . . . . . . . . . . . . . . . . . . . . . . . . . . . . . . . . . . 3–7
Troubleshooting applications . . . . . . . . . . . . . . . . . . . . . . . . . . . . . . . . . . . . . . . . . 3–7
Failure symptoms . . . . . . . . . . . . . . . . . . . . . . . . . . . . . . . . . . . . . . . . . . . . . . . . . . 3–8
Resolution . . . . . . . . . . . . . . . . . . . . . . . . . . . . . . . . . . . . . . . . . . . . . . . . . . . . . . . . 3–8
Adding a program. . . . . . . . . . . . . . . . . . . . . . . . . . . . . . . . . . . . . . . . . . . . . . . 3–9
Adding a port . . . . . . . . . . . . . . . . . . . . . . . . . . . . . . . . . . . . . . . . . . . . . . . . . . 3–9
Additional resources . . . . . . . . . . . . . . . . . . . . . . . . . . . . . . . . . . . . . . . . . . . . . . . 3–10
Citrix Program Neighborhood. . . . . . . . . . . . . . . . . . . . . . . . . . . . . . . . . . . . . . . . . . . 3–11
Remote Desktop Connection. . . . . . . . . . . . . . . . . . . . . . . . . . . . . . . . . . . . . . . . . . . . 3–12
HP PC Session Allocation Manager (SAM) Client. . . . . . . . . . . . . . . . . . . . . . . . . . . 3–13
TeemNT Terminal Emulation . . . . . . . . . . . . . . . . . . . . . . . . . . . . . . . . . . . . . . . . . . . 3–14
Altiris Client Agent . . . . . . . . . . . . . . . . . . . . . . . . . . . . . . . . . . . . . . . . . . . . . . . . . . . 3–15
Microsoft Internet Explorer. . . . . . . . . . . . . . . . . . . . . . . . . . . . . . . . . . . . . . . . . . . . . 3–16
Windows Media Player 9 . . . . . . . . . . . . . . . . . . . . . . . . . . . . . . . . . . . . . . . . . . . . . . 3–17
Macromedia Flash Player . . . . . . . . . . . . . . . . . . . . . . . . . . . . . . . . . . . . . . . . . . . . . . 3–17
Contents
Control Panel extended selections
Enhanced Write Filter Manager . . . . . . . . . . . . . . . . . . . . . . . . . . . . . . . . . . . . . . . . . . 4–1
Enhanced Write Filter Manager command line control . . . . . . . . . . . . . . . . . . . . . 4–3
Enhanced Write Filter user interface . . . . . . . . . . . . . . . . . . . . . . . . . . . . . . . . . . . 4–4
Enhanced Write Filter status tool . . . . . . . . . . . . . . . . . . . . . . . . . . . . . . . . . . . . . . 4–6
HP RAMDisk . . . . . . . . . . . . . . . . . . . . . . . . . . . . . . . . . . . . . . . . . . . . . . . . . . . . . . . . 4–7
HP DHCP Settings Update Client . . . . . . . . . . . . . . . . . . . . . . . . . . . . . . . . . . . . . . . . . 4–8
ThinState Capture . . . . . . . . . . . . . . . . . . . . . . . . . . . . . . . . . . . . . . . . . . . . . . . . . . . . . 4–9
ThinState Deploy . . . . . . . . . . . . . . . . . . . . . . . . . . . . . . . . . . . . . . . . . . . . . . . . . 4–14
Quick Reference Guide www.hp.com iv
Page 5

Administration and image upgrades
Altiris Deployment Solution software. . . . . . . . . . . . . . . . . . . . . . . . . . . . . . . . . . . . . . 5–1
Add-on upgrades. . . . . . . . . . . . . . . . . . . . . . . . . . . . . . . . . . . . . . . . . . . . . . . . . . . 5–1
Image upgrades . . . . . . . . . . . . . . . . . . . . . . . . . . . . . . . . . . . . . . . . . . . . . . . . . . . . 5–2
ThinState Capture and Deploy . . . . . . . . . . . . . . . . . . . . . . . . . . . . . . . . . . . . . . . . 5–2
HP Compaq Thin Client Imaging Tool . . . . . . . . . . . . . . . . . . . . . . . . . . . . . . . . . . . . . 5–3
Peripherals
USB to serial converter cable . . . . . . . . . . . . . . . . . . . . . . . . . . . . . . . . . . . . . . . . . . . . 6–1
Printers. . . . . . . . . . . . . . . . . . . . . . . . . . . . . . . . . . . . . . . . . . . . . . . . . . . . . . . . . . . . . . 6–2
Adding printers-using generic text-only print driver . . . . . . . . . . . . . . . . . . . . . . . 6–3
Using manufacturer print drivers . . . . . . . . . . . . . . . . . . . . . . . . . . . . . . . . . . . . . . 6–3
Audio . . . . . . . . . . . . . . . . . . . . . . . . . . . . . . . . . . . . . . . . . . . . . . . . . . . . . . . . . . . . . . . 6–4
Index
Contents
Quick Reference Guide www.hp.com v
Page 6

Contents
vi www.hp.com Quick Reference Guide
Page 7

1
Introduction
HP Compaq t57x0 thin client models use the Microsoft Windows XP
Embedded (XPe) operating system. These thin clients provide the
flexibility, connectivity, security, multimedia, and peripheral
capabilities that make them ideal for most mainstream business use:
■ Flexible
❏ Win32 based application support
❏ Extensive peripheral device support
■ Connectivity
❏ Latest versions of Citrix Program Neighborhood, Microsoft
RDP, and TeemNT
■ Familiar Windows XP Professional user interface
■ Improved security
❏ Sygate/Symantec Firewall and antivirus
❏ Microsoft Firewall
❏ Locked down protected Flash drive
■ Multimedia
❏ Windows Media Player
❏ Midi (Add-on)
❏ Windows Messenger
❏ Macromedia Flash
■ Internet browsing
❏ Internet Explorer
❏ Adobe Acrobat (Add-on)
❏ Sun JVM (Add-on)
Quick Reference Guide www.hp.com 1-1
Page 8

Introduction
■ Extensive MUI support: English, French, German, Spanish,
Traditional Chinese, Simplified Chinese, Korean, and Japanese
HP provides this client “ready to go” out of the box to meet most
common customer requirements. You may want to add/remove
features, and customize it to your specific needs.
This guide will introduce you to the features of this client that are not
found in the standard Microsoft Windows XP operating system.
Typically, a terminal is configured locally then used as a template for
other terminals, which are then configured using local or remote
administration tools.
Updates
HP provides add-ons, QFEs, and periodic updates for thin client
images. Check the HP support site for these updates or for important
documentation that provides specific information for your image
version at
The XPe desktop
http://welcome.hp.com/country/us/en/support.html.
This section provides a general overview of Windows XPe user and
administrator desktop features and functions.
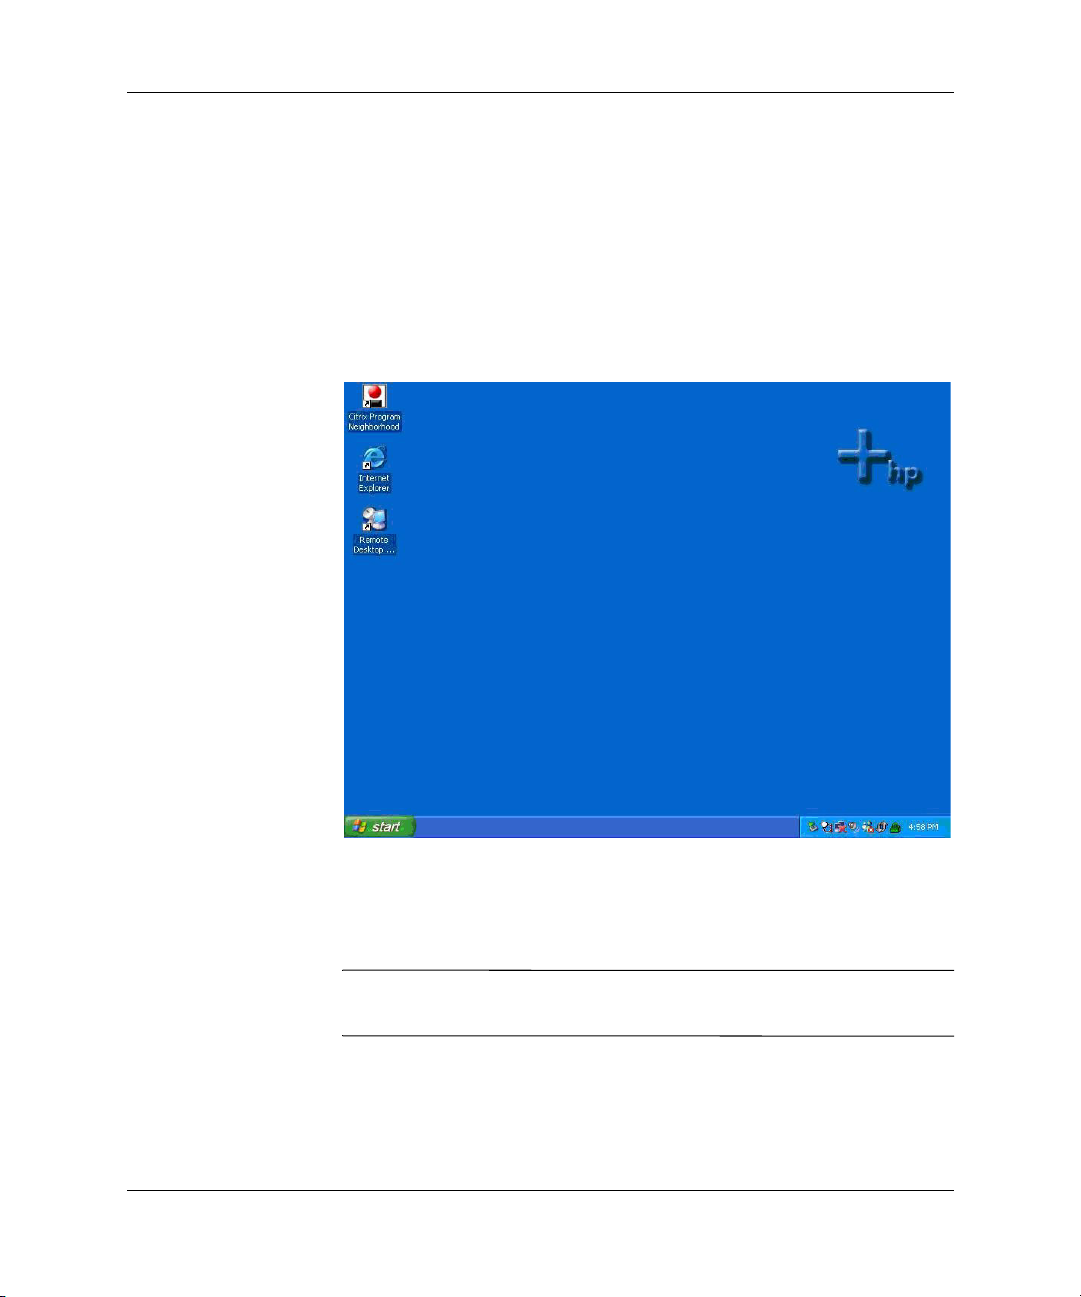
User desktop
The desktop that displays when you are logged on as a user is a
standard Windows XP desktop, with the exception that the only icons
displayed are for the Citrix Program Neighborhood, Microsoft RDP,
and Internet Explorer. These selections are also available from the
Start menu. You can open the terminal emulator application from
Start > Programs.
Links to remote ICA NFuse-published applications may also be listed
✎
on the Start menu and/or displayed as icons on the desktop. Refer to
the Citrix documentation for information and instructions.
1-2 www.hp.com Quick Reference Guide
Page 9

For information about the functionality of the standard Windows XPe
desktop and Start menu items, refer to the applicable Microsoft
documentation at:
http://msdn.microsoft.com/embedded/windowsxpembedded/default
.aspx
For the Web addresses of the Citrix Program Neighborhood and
Microsoft RDP help documents, see Chapter 3, in section “Citrix
Program Neighborhood.”
The Control Panel, available by clicking Start > Control Panel,
✎
provides access to a limited set of resources for changing Windows
XPe user preferences. You must log on as Administrator to access the
extended set of system resources.
Right-clicking the mouse when the pointer is on a user’s desktop
✎
background does not open a pop-up menu.
You may copy and paste text between a remote session and local
✎
computer using standard copy and paste methods.
Introduction
Quick Reference Guide www.hp.com 1-3
Page 10
Introduction
Administrator desktop
The desktop that displays when you are logged on as an administrator
is a standard Windows XP desktop. Icons present on the default
administrator desktop Start menu include:
■ Citrix Program Neighborhood
■ Microsoft RDP
■ Internet Explorer
For information about the functionality of the standard Windows XPe
desktop and Start menu items, refer to the Microsoft Web site at:
http://msdn.microsoft.com/embedded/windowsxpembedded/default
.aspx
Right-clicking the mouse when the pointer is on the administrator’s
✎
desktop background opens a pop-up menu.
1-4 www.hp.com Quick Reference Guide
Page 11

Server environment requirements
HP thin clients use a variety of services accessed through a network.
These services include session and product support services as well as
standard network services such as DHCP and DNS. Thin clients
require the following:
■ Session services
■ Support services
Session services
The network to which your thin client is connected requires any of the
following session services:
■ Citrix ICA
■ Microsoft RDP
■ Terminal Emulation Support
Citrix ICA
Introduction
You can make Citrix Independent Computing Architecture (ICA)
available on the network using Citrix MetaFrame or Presentation
Server for Microsoft Windows 2000 Server family, and Windows
2003 Server family.
Microsoft RDP
The Terminal Services Client application on the thin client accesses
Microsoft Terminal Services. You can make Microsoft RDP available
on the network using any of the following services:
■ Microsoft Windows 2000/2003 Server with Terminal Services
installed
■ Microsoft Windows Server 2000/2003
Quick Reference Guide www.hp.com 1-5
Page 12

Introduction
If a Windows 2000/2003 server is used for both of these session
✎
services (ICA and RDP), a Terminal Services Client Access Licenses
TSCAL) server must also reside somewhere on the network. Client
Access licenses permit clients to use the terminal, file, print, and other
network services provided by Windows 2000/2003 Server. The server
grants temporary licenses (on an individual device basis) that are
good for 90 days. Beyond that, you must purchase TSCALs and
install them in the TSCAL server. You cannot make a connection
without a temporary or permanent license.
For additional information about Microsoft Terminal Services, see
the Microsoft Web site:
http://www.microsoft.com/windows2000/technologies/terminal/def
ault.asp
Terminal emulation support
All t57x0 thin-client models include third-party terminal emulation
software to support computing on legacy platforms. The terminal
emulation software uses the Telnet protocol to communicate with the
computing platform.
Support service - Altiris Deployment Solution
The Altiris Deployment Solution™ support service is available for
your thin client network. This service provides an easy-to-use,
integrated tool that allows remote management of thin clients
throughout their life cycle, including initial deployment, ongoing
management, and software deployment.
You must install the Altiris Deployment Solution on a Windows
2000/2003 Server, or a workstation capable of logging on as
administrator to a domain that provides specified network services
which can access a software repository for your thin client. The
Altiris Deployment Solutions software uses a Preboot Execution
Environment (PXE) session and protocol to reimage or recover your
thin client. PXE upgrade services are built into the Altiris
Deployment Solution.
For additional information about the Altiris Deployment Solution,
refer to the Altiris Web site at:
review the Altiris Deployment Solution User Guide.
1-6 www.hp.com Quick Reference Guide
www.altiris.com/documentation and
Page 13
Logging on
You can log on to your thin client either automatically or manually.
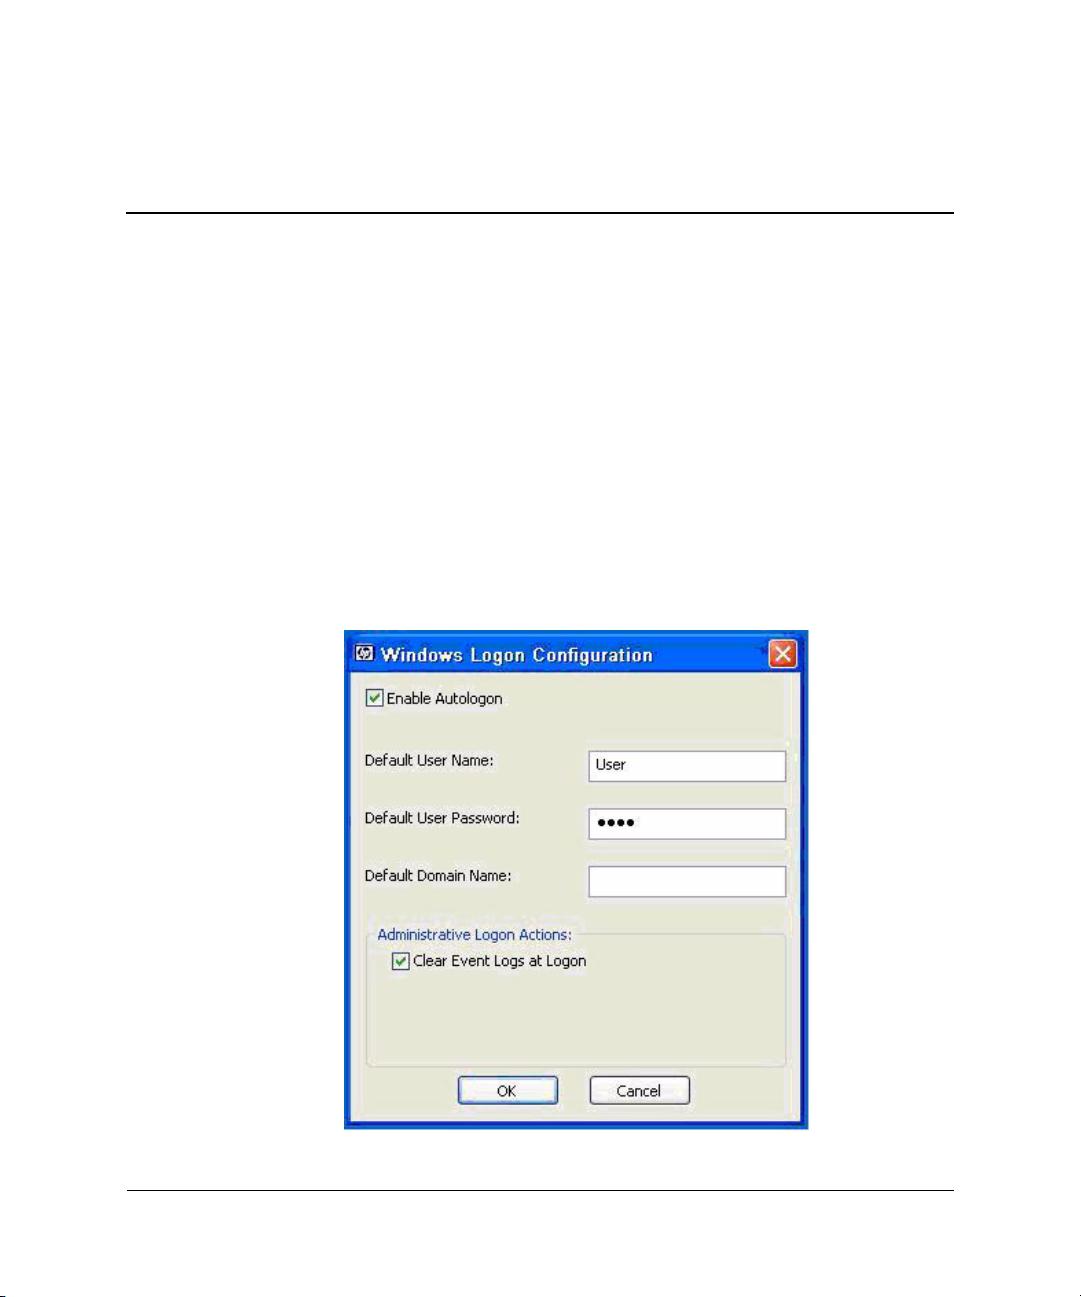
Automatic logon
The default for the XPe-based thin client is automatic logon. The
administrator can use the HP Windows Logon Configuration
Manager in the Control Panel to enable/disable auto logon and
change the auto logon user name, password, and domain. Only the
administrator account can change auto logon properties.
2
Configuration
Quick Reference Guide www.hp.com 2-1
Page 14

Configuration
✎
Manual logon
To save changes, be sure to disable the write filter cache or issue the
-commit command anytime during the current boot session. See
Chapter 4, in section “Enhanced Write Filter Manager” for
information about and instructions for disabling the write filter.
Enable the write filter when you no longer want permanent changes.
Enabling automatic logon bypasses the Log On to Windows dialog
box. To log on as a different user while auto logon is enabled, press
and hold
displays the Log On to Windows dialog box and allows you to
manually enter the logon information.
When automatic logon is disabled, thin client startup displays the Log
On to Windows dialog box. Type the logon information in the User
Name and Password text boxes. Note the following:
■ For a user account, the factory-default user name and password
■ For an administrator account, the factory-default user name and
Shift while clicking Start > Shut Down > Log Off. This
are both User.
password are both Administrator.
■ For security purposes, HP recommends that you change the
passwords from their default values. An administrator can change
passwords by pressing
Security dialog box, and then selecting Change Password. You
cannot change the password when logged on as a user.
■ Passwords are case sensitive but user names are not.
■ The administrator may create additional user accounts using the
User Accounts utility available in the Administrative Tools
option in Control Panel. However, due to local memory
constraints, you should keep the number of additional users to a
minimum. For more information, see Chapter 2, in section “User
accounts.”
2-2 www.hp.com Quick Reference Guide
Ctrl+Alt+Del to open the Windows
Page 15
Configuration
Administrator logon access
To access Administrator logon regardless of the state of the thin client
user mode:
» While holding down Shift, use the mouse to initiate logoff of the
User (invoked from the Start menu).
The screen for Administrator logon displays.
The default username and password for the Administrator account is
✎
Administrator. The default user name and password for the User
account is User.
You can use the HP Windows Logon Configuration Manager to
permanently modify the default login user. Located in the Control
Panel, only the Administrator can access this application.
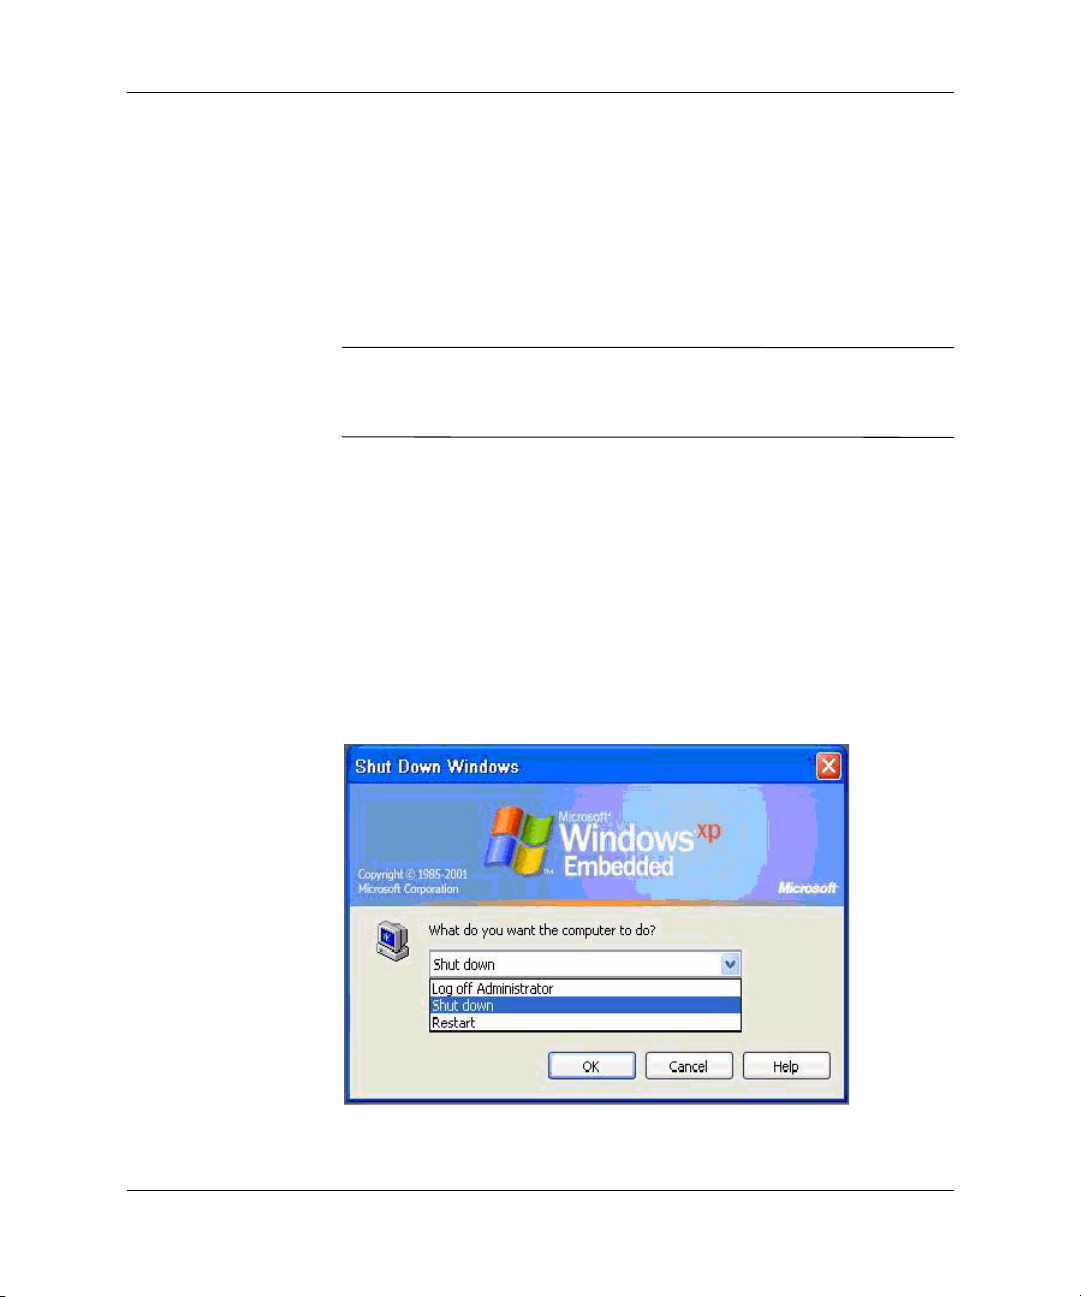
Logging off, restarting, and shutting down the thin client
To restart, shut down, or log off from the thin client, click Start >
Shut Down. From the Shut Down dialog box, select the desired
action, and then click OK.
Quick Reference Guide www.hp.com 2-3
Page 16

Configuration
You may also log off or shut down using the Windows Security
✎
dialog box. Press Ctrl+Alt+Del to open the dialog.
If automatic logon is enabled, when you log off (without shutting
✎
down) the thin client immediately logs on the default user. For
instructions for logging on as a different user, see Chapter 2, in
section “Logging on.”
The following utilities are affected by logging off, restarting, or
shutting down the thin client:
■ Enhanced Writer Filter
■ Power Management
■ System Time
Enhanced Write Filter
For detailed information about the Enhanced Write Filter, see Chapter
4, in section “Enhanced Write Filter Manager.” If you want to save
changes to system configuration settings, you must disable the write
filter cache or issue the
session. Otherwise, the new settings will be lost when the thin client
is shut down or restarted. Enable the write filter when you no longer
want to make permanent changes.
-commit command during the current boot
The write filter cache contents are not lost when you log off and on
again (as the same or different user). You may disable the write filter
cache after the new logon and still retain the changes.
A user logon account does not have write filter disabling privileges;
this is a local or remote administrator function.
A softpaq is available that allows you to synchronize client passwords
✎
without disabling EWF. See
this softpaq.
2-4 www.hp.com Quick Reference Guide
www.hp.com for more information about
Page 17
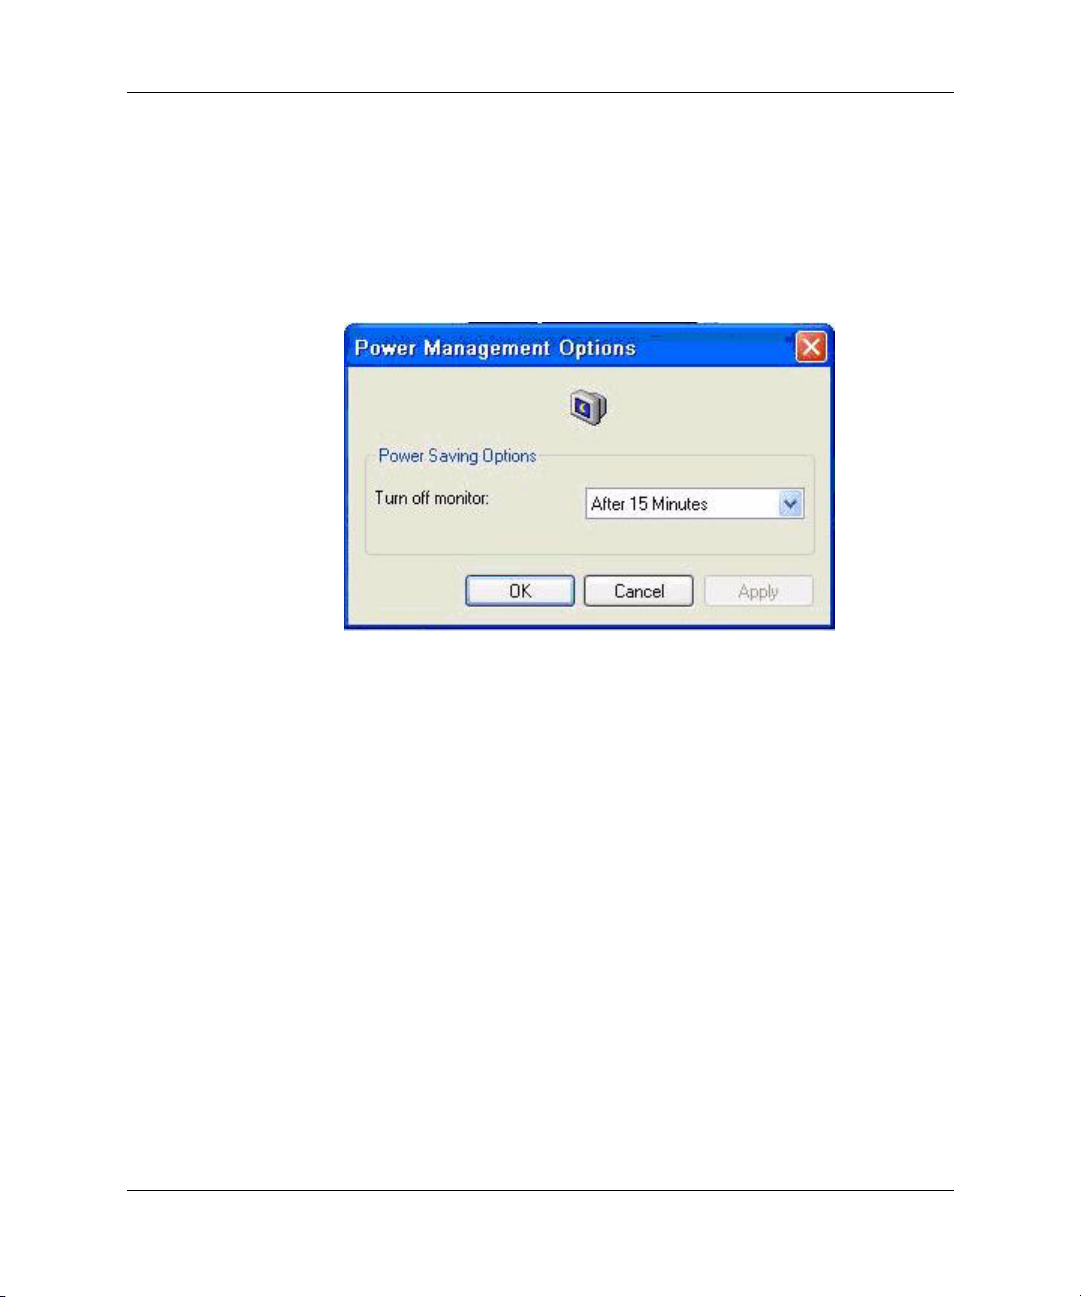
Power management
A “Monitor Saver” turns off the video signal to the monitor after a
designated idle time, allowing the monitor to enter a power-saving
mode. Parameters for this mode are available by right-clicking on the
desktop background and selecting Properties > Screen Saver >
Power.
Configuration
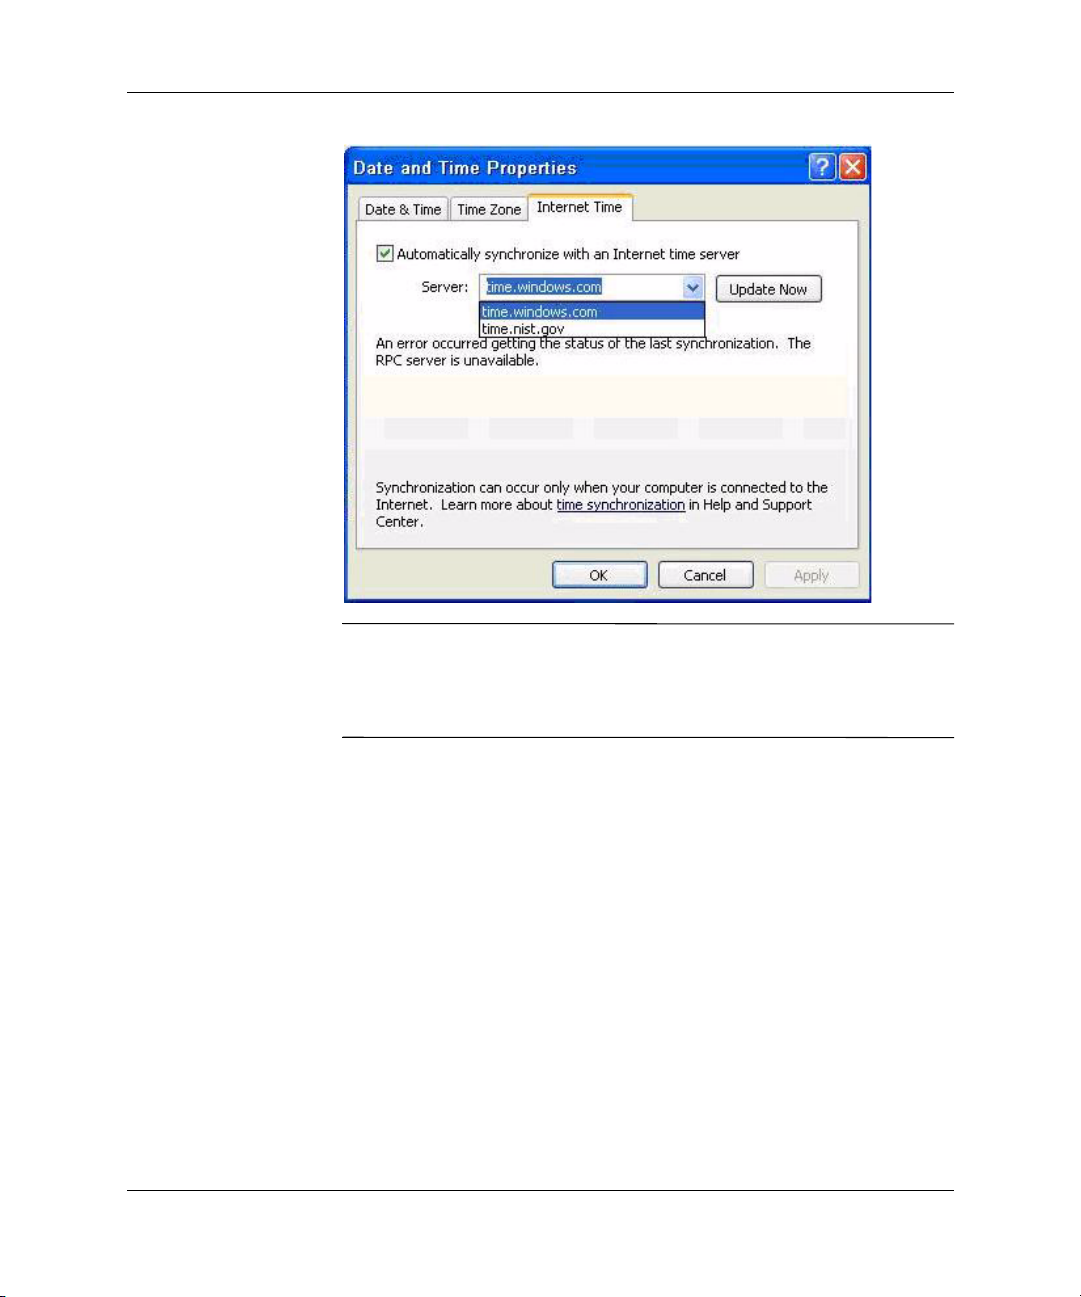
System time
After power off, clock time is not lost as long as the power source
remains plugged in. You can manually set the local time, or you can
automatically set the local time utility to synchronize the thin client
clock to a time server at a designated time.
Quick Reference Guide www.hp.com 2-5
Page 18
Configuration
You should maintain correct time because some applications may
✎
require access to the local thin client time. To open the Date and Time
Properties dialog, click on the time area in the task bar or double-click
the Date and Time icon in the Control Panel.
Local drives
The following sections describe the local drives located on the thin
client.
2-6 www.hp.com Quick Reference Guide
Page 19
Drive Z
Configuration
Drive Z is the onboard volatile memory (Ms-ramdrive) on the logic
board of the thin client. Because drive Z is volatile memory, HP
recommends that you do not use this drive to save data that you want
to retain. For Ramdisk configuration instructions, see Chapter 4, in
section “HP RAMDisk.” For information about using the Z drive for
roaming profiles, see Chapter 2, in section “Roaming profiles.”
Drive C and flash
Drive C is in the onboard flash drive. HP recommends that you do not
write to drive C, as writing to drive C reduces the free space on the
flash.
CAUTION: If the available free space on the flash drive is reduced to
Ä
below 3 MB, the thin client becomes unstable.
A write filter is used by the thin client for security and to prevent
excessive flash write activity. Changes to the thin client configuration
are lost when the thin client is restarted unless the write filter cache is
disabled or a
Quick Reference Guide www.hp.com 2-7
-commit command is issued during the current boot
Page 20

Configuration
session. See the write filter topics in Chapter 4, in section “Enhanced
Write Filter Manager.” for instructions to disable the cache. Enable
the write filter when you no longer want permanent changes.
Saving files
CAUTION: The thin client uses an embedded operating system with a
Ä
fixed amount of flash memory. HP recommends that you save files that you
want to retain on a server rather than on your thin client. Be careful of
application settings that write to the C drive, which resides in flash
memory (in particular, many applications by default write cache files to
the C drive on the local system). If you must write to a local drive, change
the application settings to use the Z drive. To minimize writing to the C
drive, update configuration settings as described in Chapter 2, in section
“User accounts.”
Mapping network drives
You can map network drives if you log on as either Administrator or
User.
To keep the mappings after the thin client is rebooted:
1. Disable the write filter cache during the current boot session or
issue the
-commit command.
2. Select Reconnect at Logon.
Because a user logon cannot disable the write filter cache, you can
retain the mappings by logging off the user (do not shut down or
restart) and logging back on as Administrator, and then disabling the
write filter.
You can also assign the remote home directory by using a user
manager utility or by other means known to administrators.
Roaming profiles
Write roaming profiles to the C drive. The profiles need to be limited
in size and will not be retained when the thin client is rebooted.
2-8 www.hp.com Quick Reference Guide
Page 21

For roaming profiles to work and be downloaded, there must be
✎
sufficient flash space available. In some cases it may be necessary to
remove software components to free up space for roaming profiles.
User accounts
This section describes how to create a new user account and user
profile.
Creating a new user account
CAUTION: Make sure to disable the write filter cache during the boot
Ä
session in which a new account is created. Remember to enable the write
filter after saving all of your permanent changes to flash.
You must log on as Administrator to create user accounts locally or
remotely. Due to local flash/disk space constraints, you should keep
the number of additional users to a minimum.
Use the User Manager utility to create new user accounts. To access
this utility, click Control Panel > Performance and Maintenance >
Administrative Tools.
Configuration
Quick Reference Guide www.hp.com 2-9
Page 22
Configuration
User Manager
User Manager is a utility that allows the administrator to create,
delete, and maintain user accounts.
User profiles
A new user profile is automatically configured from a template based
on the default user or administrator access settings in the registry,
browser profiles, and ICA and Microsoft RDP initial settings. If the
default user or administrator profile settings are changed from those
set at the factory, the changed settings are automatically applied to the
new user profile.
For the new user to match the characteristics of the default user, the
administrator must create the user in the User group and add the new
user to the Administrator group. The default user is in both groups;
otherwise the new user will not be able to add a local printer. The
user's actions are still limited while the user is in the Administrator
group.
2-10 www.hp.com Quick Reference Guide
Page 23

To create the user:
CAUTION: Because of the limited size of flash memory, HP strongly
Ä
recommends that you configure other applications available to the new
and existing users to prevent writing to the local file system. For the same
reason, HP also recommends that you exercise extreme care when
changing configuration settings of the factory-installed applications.
1. Log in as Administrator.
2. Open the Administrative Tools window by clicking Start >
Control Panel > Performance and Maintenance >
Administrative Tools.
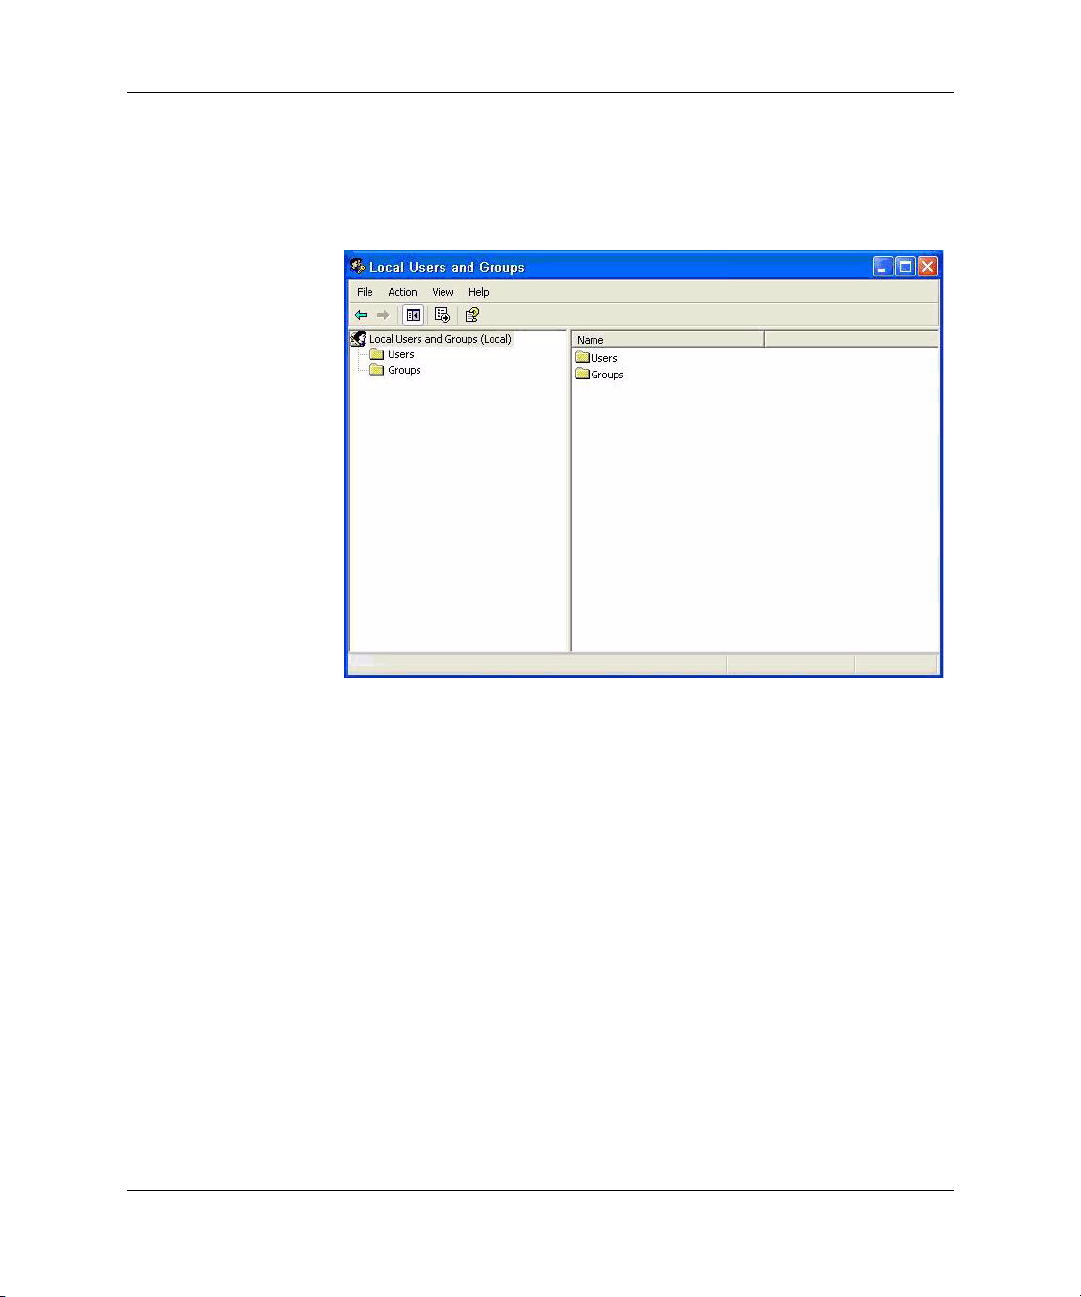
3. Double-click User Manager to open the Local Users and Groups
window.
4. Double-click the Users folder to view the contents in the right
pane.
5. Click Action in the menu bar, and then select New User. This
opens the New User dialog box.
6. Type in the user name and password, then and select the attributes
you want.
Configuration
7. Click Create, and then click the Close command button.
8. In the Local Users and Groups window, select (highlight) the
Users folder in the left pane.
9. In the right pane, double-click the name of the user just created.
This opens the [user name] Properties tabbed dialog box.
10. Open the Member Of tab dialog.
11. Click Add. This opens the Select Groups dialog box.
12. Type
Administrators in the Enter the Object Names to Select
field. This enables the Check Names command button.
13. Click Check Names, and then click OK.
The newly created user is now a member of both the administrators
and users groups and should match the privileges of the default user
account.
Quick Reference Guide www.hp.com 2-11
Page 24

Configuration
Regional and Language Options
The keyboard language options are preset at the factory. Should you
need to make a change, the keyboard language selection is made
through the Regional and Language Options selection in the
Control Panel. From this program you can select the type of keyboard
you are using as well as the layout/IME settings.
2-12 www.hp.com Quick Reference Guide
Page 25

Administrative Tools
Click the Administrative Tools icon in the Control Panel gain access
to the available administrative tools:
Configuration
Quick Reference Guide www.hp.com 2-13
Page 26

Configuration
2-14 www.hp.com Quick Reference Guide
Page 27

Applications
The XP Embedded image that ships with your thin client has the
following preinstalled applications:
■ Sygate Firewall
■ Citrix Program Neighborhood
■ Microsoft RDP
■ HP PC Session Allocation Manager (SAM) Client
■ TeemNT Te rminal Emul ation
■ Altiris Client Agent
■ Internet Explorer
■ Windows Messenger
■ Media Player
■ Macromedia Flash Player
3
Access to the following applications is limited to the Administrator
logon account:
■ Sygate Firewall
■ Altiris Client Agent
■ Macromedia Flash Player
Additional applications in the form of add-ons are provided and can
be downloaded from the HP Web site.
Check the HP support site for these applications or for other
important updates or documentation.
http://welcome.hp.com/country/us/en/support.html
Quick Reference Guide www.hp.com 3-1
Page 28

Applications
Sygate firewall
HP’s XPe SP2 image includes a Sygate firewall.
HP Sygate Security Agent provides a customizable firewall that helps
protect your computer from intrusion and misuse, whether malicious
or unintentional. The firewall detects and identifies known Trojans,
port scans, and other common attacks, and in response, selectively
allows or blocks the use of various networking services, applications,
ports, and components.
HP Sygate Standalone Agent has the ability to allow or block any port
or protocol, inbound or outbound, by either application or traffic
signature. The Agent not only blocks according to these parameters,
but can also link them with logical and/or conditional statements,
increasing the scope and flexibility of polices that you can apply. The
Agent can also block and apply policy to custom protocol adapters,
enabling enterprises to use custom network-enabled applications and
to block applications that circumvent the TCP/IP stack with custom
protocol adapters.
3-2 www.hp.com Quick Reference Guide
Page 29

Additional information about the Sygate Firewall is available in the
“HP Sygate Security Agent and Symantec Embedded Security:
Frequently Asked Questions” white paper at:
http://h20000.www2.hp.com/bc/docs/support/SupportManual/c0
0632596/c00632596.pdf
Microsoft Windows Firewall
An improved Microsoft Windows Firewall (previously known as
Internet Connection Firewall, or ICF) is available from HP as an
add-on. The firewall is enabled by default after you install the add-on.
The Microsoft Windows Firewall is provided only as an add-on and is
✎
not included in the image. Before installing the Microsoft Windows
Firewall, you must remove the Sygate Firewall. A Sygate Firewall
removal add-on is available at:
http://h18007.www1.hp.com/support/files/ThinClients/us/downloa
d/22630.html
On-by-default
Applications
After you install the add-on, Windows Firewall is turned on by
default for all network interfaces. On-by-default also protects new
network connections as they are added to the system. This could
break application compatibility if the application by default does not
work with stateful filtering.
Configuring Microsoft Windows Firewall
To provide the best security and usability, Windows Firewall
provides the ability to add exceptions for applications and services so
that they can receive inbound traffic.
To configure Windows Firewall, open the firewall from Control
Panel. You can also access the firewall configuration from the
Advanced tab in Network Connection properties.
Security Center is not in the image. Once you apply the Windows
Firewall, the FIREWALL.CPL control panel applet is only available
for the Administrator account.
Quick Reference Guide www.hp.com 3-3
Page 30

Applications
After you launch the Windows Firewall add-on, the Control Panel
✎
applet is only available to the Administrator account.
■ General Tab: The General tab provides access to the main three
configuration options as shown below.
❏ On (Recommended)
❏ Don’t allow exceptions
❏ Off (Not Recommended)
When you select Don't allow exceptions, Windows Firewall
blocks all requests to connect to your computer, including those
from programs or services on the Exceptions tab. The firewall
also blocks file and printer sharing and discovery of network
devices.
3-4 www.hp.com Quick Reference Guide
Page 31

Applications
Using Windows Firewall with no exceptions is useful when
connecting to a public network. This setting can help to protect
your computer by blocking all attempts to connect to your
computer. When you use Windows Firewall with no exceptions,
you can still view Web pages, send and receive e-mail, or use an
instant messaging program.
■ Exceptions Tab: Provides the ability to add program and port
exceptions to permit certain types of inbound traffic. The
exception settings specify the set of computers for which this
port/program is open.
You can specify three different modes of access:
❏ Any computer (including those on the Internet)
❏ My network (subnet) only
❏ Custom list
Quick Reference Guide www.hp.com 3-5
Page 32

Applications
Display a notification when the Windows Firewall blocks a
program is selected by default.
You can set a scope for each exception. For home and small
office networks, it is recommended that you set the scope to the
local network only where possible. This will enable computers on
the same subnet to connect to the program on the machine, but
drops traffic originating from a remote network.
■ Advanced Tab: Enables you to configure the following
functions.
❏ Network Connection Settings: Select connection-specific
rules which apply per network interface.
❏ Security Logging: Create a log file for troubleshooting.
❏ ICMP: With Global Internet Control Message Protocol
(ICMP) the computers on a network can share error and
status information.
❏ Default Settings: Restore Windows Firewall to a default
configuration.
3-6 www.hp.com Quick Reference Guide
Page 33

Applications
Gathering configuration information
To examine the current policy configuration for Windows Firewall,
you can use the following command:
configuration.
netsh firewall show
Troubleshooting applications
Modifying an application to work with a stateful filtering firewall is
the ideal way to resolve issues. This is not always possible, so the
firewall provides an interface for configuring exceptions for ports and
applications.
Quick Reference Guide www.hp.com 3-7
Page 34

Applications
Failure symptoms
Failures related to the default configuration will manifest in two
ways:
■ Client applications may fail to receive data from a server.
■ Server applications running on the Windows XPe computer may
Examples include an FTP client, multimedia streaming software,
and new mail notifications in some email applications.
not respond to client requests. Examples include a Web server
such as Internet Information Services (IIS), Remote Desktop, and
File Sharing.
Failures in network applications are not limited to firewall issues.
✎
RPC or DCOM security changes can cause failures. It is important to
note whether the failure is accompanied by a Windows Firewall
Security Alert indicating that an application is being blocked.
Resolution
With either of the failures mentioned above, you can add exceptions
to the configuration for Windows Firewall. Exceptions configure the
firewall to permit specific inbound connections to the computer.
3-8 www.hp.com Quick Reference Guide
Page 35

HP recommends adding a program instead of adding a port. Adding a
✎
program is easier and safer than adding a port because you do not
have to know which port numbers to use, and the port is only open
when the program is waiting to receive a connection. Only the
specified application can use the port, whereas opening a port allows
any application to use it.
Adding a program
The recommended configuration involves adding a program to the
exception list. This solution provides the easiest configuration, as
well as enables the firewall to open ranges of ports that can change
each time the program runs.
To add a program exception:
Applications
1. Open Windows Firewall and select the Exceptions tab.
2. If the program is in the list, click to enable the setting. If the
program is not in the list, click Add Program to display the Add
a Program dialog box.
3. Click Browse to choose the program you wish to add as an
exception, and then click OK.
4. Click Change Scope to view or set the scope for the program,
and then click OK.
5. Click OK to close the Add a Program dialog box.
6. Click the check box to enable the program. By default, the
program is not enabled in the list.
Adding a port
If adding the program to the exception list does not resolve the
application issue, you can add ports manually. You must first identify
the ports used by the application. The most reliable method for
determining port usage is consulting with the application vendor.
If the port number(s) for the process are less than 1024, it is likely that
the port numbers will not change. If the port numbers used greater
than 1024, the application may be using a range of ports, so opening
individual ports may not resolve the issue reliably.
Quick Reference Guide www.hp.com 3-9
Page 36

Applications
Once you have the port number and protocol, add an exception for
that port.
To add a port exception:
1. Open Windows Firewall and click the Exceptions tab.
2. Click Add Port to display the Add a Port dialog box.
a. Type the Port Number.
b. Choose TCP or UDP protocol.
c. Give the port exception a descriptive name in the Name field.
3. Click Change Scope to view or set the scope for the port
exception, and then click OK.
4. Click OK to close the Add a Port dialog box.
5. Click to enable the port.
Additional resources
Refer to the following resources for additional Microsoft Windows
Service Pack 2 and Microsoft Windows Firewall information:
TechNet Windows XP Professional Web site:
http://www.microsoft.com/technet/prodtechnol/winxppro/default
.mspx
Manually Configuring Windows Firewall in Windows XP
Service Pack 2:
http://www.microsoft.com/technet/community/columns/cableguy
/cg0204.mspx
Using the Windows Firewall INF File in Microsoft Windows XP
Service Pack 2:
http://www.microsoft.com/downloads/details.aspx?FamilyID=cb
307a1d-2f97-4e63-a581-bf25685b4c43&displaylang=en
Deploying Windows Firewall Settings for Microsoft Windows XP
with Service Pack 2:
http://www.microsoft.com/downloads/details.aspx?familyid=445
4e0e1-61fa-447a-bdcd-499f73a637d1&displaylang=en
3-10 www.hp.com Quick Reference Guide
Page 37

Citrix Program Neighborhood
Citrix Program Neighborhood is a feature of ICA introduced with
MetaFrame 1.8 that enables users to connect to MetaFrame and
WinFrame servers and published applications. Program
Neighborhood allows complete administrative control over
application access and delivers an even greater level of seamless
desktop integration.
Applications
Documentation for the ICA client application is available from the
Citrix Corporation Web site at:
www.citrix.com/support
Search under Product Documentation.
Quick Reference Guide www.hp.com 3-11
Page 38

Applications
Remote Desktop Connection
Use the Remote Desktop Connection dialog box to establish
connections to a Windows Terminal Server or to access remote
applications using Microsoft RDP.
Refer to the Microsoft Web site for documentation that offers a
detailed explanation and instructions on how to use the Microsoft
RDP dialog box.
3-12 www.hp.com Quick Reference Guide
Page 39

Applications
HP PC Session Allocation Manager (SAM) Client
The Consolidated Client Infrastructure (CCI) solution from HP
centralizes desktop computing and storage resources into easily
managed, highly secure data centers, while providing end users the
convenience and familiarity of a traditional desktop environment.
Additionally, companies have long used server-based computing
(SBC) to create virtual instances of desktop applications on a server
that multiple remote users can access. HP’s CCI offers a new
alternative for virtualizing the desktop.
Part of the CCI solution is the HP PC Session Allocation Manager
(HP SAM) and is an extension the HP SAM client. HP SAM client is
included in the latest HP Thin Client XP Embedded image, and can
be accessed from Start > Programs.
Quick Reference Guide www.hp.com 3-13
Page 40

Applications
HP SAM becomes the control point in managing a CCI deployment.
Specifically, it manages the assignment of Microsoft Remote Desktop
connections from a user’s access device (thin client) to Remote
Desktop sessions (blade PCs). Whether the session resides on a
dedicated physical blade or resides together with other sessions on a
virtual hardware platform, the HP SAM system can make these
desktop sessions available to users as they are needed.
For more information about PC SAM, see:
http://h71028.www7.hp.com/enterprise/cache/323204-0-0-225-1
21.html?jumpid=reg_R1002_USEN
TeemNT Terminal Emulation
All t57x0 thin-client models include third-party terminal emulation
software to support computing on legacy platforms. The software
uses the Telnet protocol to communicate with the computing
platform. Refer to the terminal emulation documentation (supplied
separately) for instructions. By default, you can access the TeemNT
Connection Wizard and the TeemNT Emulator from Start > All
Programs.
3-14 www.hp.com Quick Reference Guide
Page 41

Applications
Altiris Client Agent
The Altiris Client Agent allows the Altiris server to discover valid
clients that are added to the network. The agent carries out
assignments and reports the status of individual thin clients to the
Altiris server.
Quick Reference Guide www.hp.com 3-15
Page 42

Applications
Microsoft Internet Explorer
Version 6.0 of the Microsoft Internet Explorer browser is installed
locally on the thin client. The Internet options settings for the browser
have been preselected at the factory to limit writing to the flash
memory. These settings prevent exhaustion of the limited amount of
flash memory available and should not be modified. You may access
another browser through an ICA or RDP account if you need more
browser resources.
3-16 www.hp.com Quick Reference Guide
Page 43

Service Pack 2 makes Microsoft Internet Explorer 6.0 much more
secure. Internet Explorer has more control over the execution of all
content, including a built-in facility to manage pop-up windows.
Furthermore, Internet Explorer now prevents scripts from moving or
resizing windows and status bars to hide them from view or obscure
other windows.
Windows XPe Service Pack 2 added a block unsafe file transfers
feature to Windows Messenger. For a list of files generally
considered unsafe, see “Information About the Unsafe File List in
Internet Explorer 6” on the Microsoft Web site at:
http://go.microsoft.com/fwlink/?LinkId=25999
Windows Media Player 9
Version 9 of the Windows Media Player contains security,
performance, and functionality improvements. For more information
about improvements to Windows Media Player, refer to the Windows
Media Player home page at:
http://www.microsoft.com/windows/windowsmedia/player/9series
/ default.aspx
Applications
Macromedia Flash Player
Macromedia Flash Player is the agent for rich Web experiences
across multiple platforms. With Macromedia Flash Player, Web users
worldwide can view and interact with content developed in
Macromedia Flash.
Some Web sites require newer versions of the player. To install newer
players, administrator must temporarily increase the RamDisk to
64MB using the HP Ramdisk control panel applet.
Quick Reference Guide www.hp.com 3-17
Page 44

Applications
3-18 www.hp.com Quick Reference Guide
Page 45

4
Control Panel extended selections
The Control Panel is accessed by selecting Start > Control Panel.
Some of the extended selections available on the Control Panel are
discussed in the following sections.
Enhanced Write Filter Manager
The Enhanced Write Filter Manager provides a secure environment
for thin client computing by protecting the thin client from undesired
flash memory writes (the operating system and functional software
components reside in flash memory). The write filter also extends the
life of the thin client by preventing excessive flash write activity. It
Quick Reference Guide www.hp.com 4-1
Page 46

Control Panel extended selections
gives the appearance of read-write access to the flash by employing a
cache to intercept all flash writes and returning success to the process
that requested the I/O.
The intercepted flash writes that are stored in cache are available as
long as the thin client remains active, but are lost when you reboot or
shut down the unit. To preserve the results of writes to the registry,
favorites, cookies, and so forth, transfer the contents of the cache to
the flash on demand using the Altiris Deployment Solution software
or manually using the Enhanced Write Filter Manager.
After you disable the write filter, all future writes during the current
boot session are written to the flash with no further caching until
reboot. You can also enable/disable the write filter using the
command line. Always enable the writer filter after you have made all
of your permanent changes.
The administrator should periodically check the status of the cache
and reboot the thin client if the cache is more than 80 percent full.
CAUTION: Never disable the write filter cache if it is more
Ä
than 80 percent full.
Access to the Enhanced Write Filter is limited to the Administrator
account.
To avoid flash corruption when administering the thin client for
✎
permanent changes, HP strongly recommends that you disable the
write filter cache before making permanent modifications to the
system. Remember to enable the writer filter after making all of your
changes.
The following section describes how you can manipulate the write
filter through the command line.
4-2 www.hp.com Quick Reference Guide
Page 47

Control Panel extended selections
Enhanced Write Filter Manager command line control
CAUTION: Terminal Administrators should use Microsoft Windows NT
Ä
file security to prevent undesired usage of these commands.
CAUTION: When using the -commit command, all the temporary
Ä
contents are permanently written to the flash memory.
Because the Enhanced Write Filter Manager commands are executed
✎
on the next boot, you must reboot the system for the command to take
effect.
Windows XPe includes the Enhanced Write Filter (EWF) console
application command line tool, Ewfmgr.exe, which you can use to
issue a set of commands to the EWF driver, report the status of each
protected volume overlay, and report the format of the overall EWF
configurations.
By including the EWF Manager console application component in
your configuration and building it into your image, you enable use of
Ewfmgr.exe and the corresponding commands.
To use the Enhanced Write Filter Manager using the command line:
1. Select Start > Run > Open.
2. Type
3. Click OK.
4. Type
5. Press Enter.
Using the
the following commands in the boot command variable of the
command line:
-all
Displays information about all protected volumes and performs a
command, such as disable, enable, and commit, on each volume, if
specified.
Quick Reference Guide www.hp.com 4-3
CMD in the Open field to access the system DOS prompt.
ewfmgr c:
ewfmgr <drive-letter> -[boot command] syntax, use
Page 48

Control Panel extended selections
-commit
Commits all current level data in the overlay to the protected volume,
and resets the current overlay value to 1. You can combine -commit
with the -disable command to commit and then disable.
-disable
Disables the overlay on the specified protected volume.
-enable
Enables the Enhanced Write Filter so that data written to the
protected media is cached in the overlays. The current overlay level
becomes 1 as soon as EWF is started, and a new overlay is created at
level 1.
-commitanddisable
Combination of the commit and disable commands. This command
commits data in the overlay upon shutdown and disables EWF after
the system reboots.
Enhanced Write Filter user interface
In addition to the DOS command-line tool, the Windows XP
Embedded image includes an Enhanced Write Filter (EWF) user
interface. You can access the EWF interface through the Control
Panel or the Administrative Tools option for the administrator.
4-4 www.hp.com Quick Reference Guide
Page 49

To access the EWF user interface:
1. Log in as an Administrator.
Control Panel extended selections
2. Select Start > Control Panel > Other Control Panel Options
or Start > Control Panel > Performance and Maintenance >
Administrative Tools.
3. Click the EWF Manager icon.
4. Use the EWF user interface to Select Write Filter options.
The EWF user interface includes the following buttons:
Enable EWF
This button is the same as executing
ewfmgr.exe c: -Enable from
the DOS prompt.
Disable EWF
This button is the same as executing
ewfmgr.exe c: -Disable from
the DOS prompt.
Quick Reference Guide www.hp.com 4-5
Page 50

Control Panel extended selections
Overlay configuration
This button displays the Overlay information and is a combination of
the information supplied when executing
-Description and ewfmgr.exe c: -Gauge from the DOS prompt.
Clear boot command
ewfmgr.exe c:
This button is the same as executing
the DOS prompt.
Commit data to volume
This button is the same as executing
the DOS prompt.
Enhanced Write Filter status tool
The HP XPe Images include an EWF status service, which creates an
icon in the System Tray that shows the status of the EWF. In addition,
you can right-click on the icon to display and execute the available
options.
The EWF Status icon appears as a:
■ red lock when disabled.
■ green lock when enabled.
■ yellow lock when the state is set to change on next boot.
ewfmgr.exe c: -NoCmd from
ewfmgr.exe c: -Commit from
In the event of a corrupted EWF state, you must re-flash the thin
✎
client with the standard shipping image provided on the Web. For
additional information, see the “HP Compaq Thin Client Imaging
Tool” white paper located at:
http://h20000.www2.hp.com/bc/docs/support/SupportManual/c0
0485307/c00485307.pdf
If you are logged on as Administrator, you can change the status of
EWF by right-clicking the icon and selecting the desired EWF state.
4-6 www.hp.com Quick Reference Guide
Page 51

✎
HP RAMDisk
Control Panel extended selections
Since EWF Manager console utility (ewfmgr.exe) and the EWF status
service execute separate code, status changes by ewfmgr.exe are not
automatically reflected by the EWF status icon.
If you modify the EWF using the command line, you must right-click
the icon (you can then click anywhere on the screen to close the
context menu) to refresh the status icon display. The status icon
display is refreshed automatically when you make modifications
through the EWF Control Panel applet. The EWF applet always
reflects the current status.
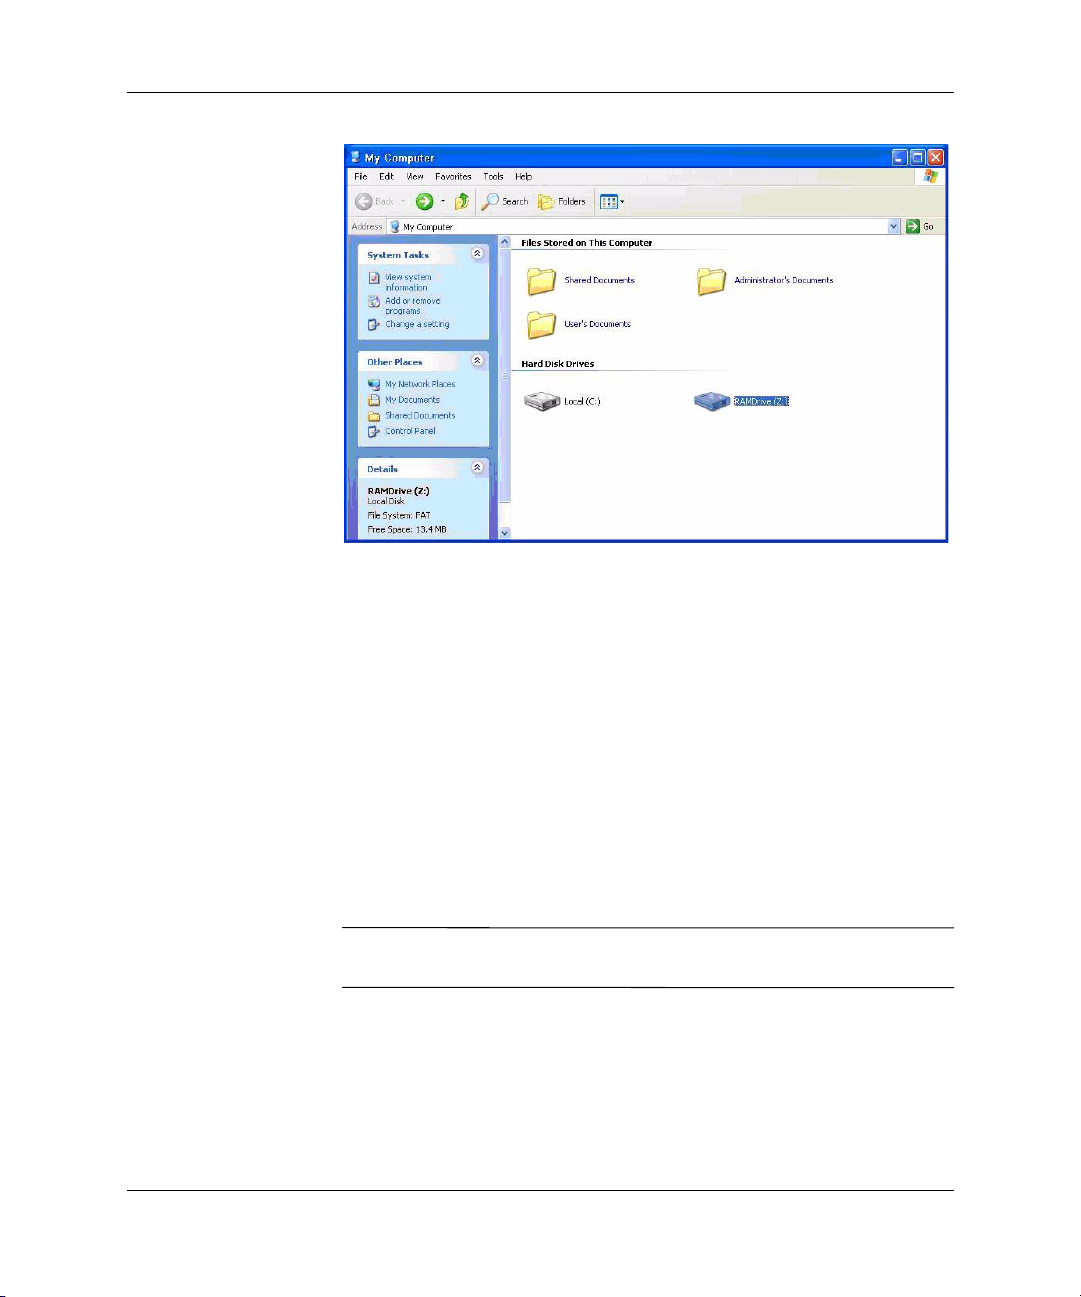
The RAMDisk is volatile memory space set aside for temporary data
storage. It is the Z drive shown in the My Computer window.
The following items are stored on the RAMDisk:
■ Browser Web page cache
■ Browser history
■ Browser cookies
■ Browser cache
■ Temporary Internet files
Quick Reference Guide www.hp.com 4-7
Page 52

Control Panel extended selections
■ Print spooling
■ User/system temporary files
You can also use the RAMDisk for temporary storage of other data
(such as roaming profiles) at the administrator’s discretion (see
Chapter 2, in section “Local drives”).
Use the RAMDisk Configuration dialog box to configure the
RAMDisk size. If you change the size of the RAMDisk, you will be
prompted to restart for changes to take effect. To permanently save
the change, make sure to disable the write filter cache or to issue the
-commit command during the current boot session before restarting.
The default optimal RAMDisk size is set to 16 MB. The maximum
✎
RAMDisk size that you can is 64 MB. The minimum is 2 MB.
HP DHCP Settings Update Client
The HP DHCP Settings Update Client is a utility found in the Control
Panel that allows an IT Administrator to apply settings to an HP XP
Embedded operating system.
The settings are applied through an .INI file that uses a subset of
parameters from Microsoft’s sysprep.inf as well as several
XPe/HP-specific keys. XPePrep can run by specifying a local .INI
file to be processed, or it can be used in conjunction with DHCP and
FTP servers to automatically apply settings across multiple clients on
a network.
4-8 www.hp.com Quick Reference Guide
Page 53

For detailed information, please review the “Using the HP DHCP
Settings Update Client” document on the HP support site at:
http://welcome.hp.com/country/us/en/support.html.
ThinState Capture
The HP ThinState Capture tool is a very simple wizard-based tool
that you can use to capture an HP thin client XP Embedded image,
which you can then deploy to another HP thin client of identical
model and hardware.
What do you need to have?
■ An HP thin client XP embedded unit that contains the latest HP
provided image.
■ An HP approved USB drive key. Consult the
t5720 quick specs for the latest approved USB flash drives.
WARNING: By default, the First Boot Device in the F10 System Bios is
Å
first set to USB, then ATA Flash, and finally to Network boot. If the default
Boot order settings have been changed, it is critical before using the
ThinState Capture tool that you first set the First Boot Device in the
Advanced Bios Features section of the F10 System Bios to USB.
Control Panel extended selections
The HP ThinState Capture tool is not a standalone tool and can only
✎
be accessed by the administrator from within the thin client image.
Save all data on the USB flash drive prior to performing this
✎
procedure.
Quick Reference Guide www.hp.com 4-9
Page 54

Control Panel extended selections
1. Once you launch the ThinState Capture tool from within the
Control Panel, you are presented with the following screen.
4-10 www.hp.com Quick Reference Guide
Page 55

2. Click Next.
Control Panel extended selections
3. At this point, attach to the unit a DOK. The DOK drive letter and
size are displayed.
The DOK must be greater in size than the onboard flash disk. As
a result, if your thin client has 512 MB Flash, then the USB flash
drive must be 1 GB.
Quick Reference Guide www.hp.com 4-11
Page 56

Control Panel extended selections
Once the right DOK size is attached, the following screen
displays.
4. Click Capture. The following warning displays.
5. Click Ye s. The ThinState Capture tool formats and makes the
USB flash drive bootable. ThinState Capture will now reboot the
system.
4-12 www.hp.com Quick Reference Guide
Page 57

Control Panel extended selections
After you performi these actions, the ThinState Capture tool displays
the following screen. Please follow the on-screen instructions.
You can now use the USB flash drive to deploy the captured image to
another HP thin client of the exact same model and hardware.
Quick Reference Guide www.hp.com 4-13
Page 58

Control Panel extended selections
The following table lists the supported capture and deploy scenarios:
ThinState Deploy
To perform a ThinState deployment:
1. Set the boot order in the F10 System Bios to USB boot.
2. Attach the USB flash drive to the thin client unit you wish to
3. Follow the on-screen instructions.
deploy the captured image to, and then power on the unit.
4-14 www.hp.com Quick Reference Guide
Page 59

Control Panel extended selections
After you remove the USB flash drive and cycle power to the system,
the image will unbundle. This process can take between 10-12
minutes. Do not interrupt or cycle power to the unit during this
process.
You may use the captured image (flash.ibr) found in the USB flash
drive in combination with Altiris Deployment Solution to remotely
image multiple thin client units.
You must use flash.ibr in conjunction with HP’s ThinState Deploy
✎
utility (e.g. ibr.exe). Flash.ibr is not compatible with Altiris’
rdeploy.exe or rdeployt.exe utilities. Please consult the HP Compaq
Thin Client Imaging Tool at:
http://h20000.www2.hp.com/bc/docs/support/SupportManual/c0
0485307/c00485307.pdf
For more information about Altiris, see http://www.altiris.com/.
Quick Reference Guide www.hp.com 4-15
Page 60

Control Panel extended selections
4-16 www.hp.com Quick Reference Guide
Page 61

Administration and image upgrades
This section highlights and discusses the Remote Administration
capabilities and firmware upgrade methods applicable to your thin
client.
Altiris Deployment Solution software
The Altiris Deployment Solution software is a full-featured remote
administration tool set. It accesses the thin client through the Altiris
remote Agent and PXE server utilities installed on the thin client.
Altiris allows you to perform the thin client administration functions
(including firmware upgrades) without requiring an administrator to
visit the individual thin client sites.
5
For more information about Altiris, see
http://www.altiris.com.
Add-on upgrades
If you want to install an add-on module, you can use the Altiris
Deployment Solution to administer the thin client. Disable/enable the
write filter as needed to save the changes.
CAUTION: If the available free space on the flash memory is reduced to
Ä
less than 3 MB, the thin client becomes unstable.
For add-on modules to work and be downloaded, there must be
✎
sufficient flash space available. In some cases it may be necessary to
remove software components to free up space for add-on modules.
Quick Reference Guide www.hp.com 5-1
Page 62

Administration and image upgrades
Image upgrades
The Intel Preboot Execution Environment (PXE) is a protocol that
defines interaction between TCP/IP, DHCP and TFTP to enable a
client to download a preboot environment from a server. PXE allows
a client to boot from a server on a network prior to booting the
embedded operating system or the operating system from the local
flash module. PXE allows a network administrator to remotely wake
up a thin client and perform various management tasks, including
loading the operating system and other software onto the thin client
from a server over the network. The PXE client is installed on the thin
client and the PXE server component is part of the Altiris
Deployment Solution suite.
Citrix ICA auto update does not function for the ICA client installed
✎
on the thin client; updates are implemented through the standard
firmware upgrade process.
ThinState Capture and Deploy
The HP ThinState Capture tool is a very simple wizard based tool that
can be used to capture an HP thin client XP Embedded image, which
can then be deployed to another HP thin client of identical model and
hardware. For more information about the ThinState Capture tool, see
Chapter 4, in section “ThinState Capture.”
5-2 www.hp.com Quick Reference Guide
Page 63

Administration and image upgrades
HP Compaq Thin Client Imaging Tool
The HP Compaq Thin Client Imaging Tool is part of the Softpaq
deliverable that contains the original factory image for the HP
Compaq t5000 thin client. You can use this utility to restore the
original factory image to your thin client.
This utility allows you to perform the following options:
■ Generate an ISO image to use with CD creation software to create
a bootable CD for deployment using a USB CD ROM drive.
■ Create a bootable flash image on a USB drive key.
.
■ Unbundle the image to a directory for use in a custom
deployment scenario or PXE image.
For additional information about this utility and its uses, visit the HP
Web site at:
http://h20000.www2.hp.com/bc/docs/support/SupportManual/c0
0485307/c00485307.pdf
Quick Reference Guide www.hp.com 5-3
Page 64

Administration and image upgrades
5-4 www.hp.com Quick Reference Guide
Page 65

Depending on the ports available, the thin client can provide services
for USB, serial, parallel, and PCI devices, as long as the appropriate
software is installed. Factory-installed software is described in the
following section. As they become available, you can install add-ons
for other services using the Altiris Deployment Solution software. For
more information, see Chapter 3, in section “Altiris Client Agent.”
For more information about available peripherals, see the model
QuickSpecs at:
http://h10010.www1.hp.com/wwpc/us/en/sm/WF04a/12454-32
1959-89307-338927-89307.html?jumpid=re_R295_prodexp/buspro
duct/computing/thinclients
Select the model, and then click the quickspec link.
.
USB to serial converter cable
Use this procedure to determine the port assigned to a device
connecting to the thin client through a USB to serial converter cable.
6
Peripherals
1. Connect a printer or other device to the serial port of the
converter cable. Do not connect the USB end of the converter
cable to the thin client at this time.
2. Open the Device Manager window (Control Panel > System >
Hardware Tab > Device Manager).
3. A Ports (COM & LPT) listing may or may not display, depending
on thin client model and whether a device driver was previously
installed to a port. If the listing does display, expand it to display
ports currently used.
4. Plug in the USB end of the converter cable to the thin client.
Quick Reference Guide www.hp.com 6-1
Page 66

Peripherals
Printers
5. The Ports (COM & LPT) listing will display if not already
shown. Under the Ports (COM & LPT) listing, a new COM port
will display for the new connection. Note which COM port
number is assigned to the new connection.
6. Continue the installation procedure for the connected device
using the discovered port number when prompted. Use the
manufacturer's procedures for other devices, such as a serial
touch screen.
You cannot use more than two USB to serial converters at one time.
✎
A generic universal print driver is installed on the thin client to
support text-only printing to a locally connected printer. To print full
text and graphics to a locally connected printer, install the driver
provided by the manufacturer and follow the manufacturer’s
instructions. Be sure to disable the write filter cache or run the
-commit command to save the installation. You can print to network
printers from ICA and RDP applications through print drivers on the
servers.
For additional information, please review the Printing and Imaging
Support on HP Thin Clients white paper on the HP support site at:
http://welcome.hp.com/country/us/en/support.html.
CAUTION: If the available free space on the flash memory is reduced to
Ä
less than 3 MB, the thin client becomes unstable.
Downloading and using printers requires sufficient flash space. In
✎
some cases, you may have to remove software components to free up
space for printers.
Printing to a locally-connected printer from an ICA or RDP session
✎
using the print drivers of the server produces full text and graphics
functionality from the printer. To do this, you must install the print
driver on the server and the text-only driver on the thin client (see the
following section).
6-2 www.hp.com Quick Reference Guide
Page 67

Adding printers-using generic text-only print driver
Follow these steps to add a printer using the text-only print driver:
Connect the printer to the parallel port.
1. Choose Printers and Faxes from the Start > Settings menu.
2. Select Add a Printer to open the Add Printer Wizard.
3. Click Next in the first panel of the wizard.
4. Select Local printer configured to this computer.
5. Verify that the Automatically Detect and Install my Plug and
Play Printer check box is not selected.
6. Click Next.
7. Select Use the Following Port.
8. Select the appropriate port from the list, and then click Next.
9. Choose the manufacturer and model of the printer, and then click
Next.
10. Use the assigned default name or other name for the printer, and
then click Next.
Peripherals
11. Select Do Not Share this Printer, and then click Next.
12. Choose whether to print a test page, and then click Next.
13. Click Finish.
Using manufacturer print drivers
Install the driver provided by the manufacturer and follow the
manufacturer's instructions. Be sure to disable the write filter or issue
the -commit command to save the installation.
Quick Reference Guide www.hp.com 6-3
Page 68

Peripherals
Audio
You can redirect audio from applications to the audio jacks on the
thin client. You control the level externally (such as by a 600-ohm
potentiometer control) and driving speakers requires a power booster.
You can adjust the volume using the sound icon in the task bar system
tray. You can single-click on this icon to open the master volume
control or double-click to open the volume control application dialog
box.
6-4 www.hp.com Quick Reference Guide
Page 69

Index
A
accounts, user 2–8
adding
ports to Windows Firewall 3–9
printers 6–3
programs 3–9
Administrative Tools 2–12
Administrator
desktop 1–4
logon 2–3
Agent 3–2
Altiris Client Agent
Altiris Deployment Solution
applications
audio
automatic logon
3–1
6–4
3–15
1–6, 5–1
2–1
C
cable 6–1
changing the password
3–11
Citrix
Citrix ICA
command line tool
configuring Microsoft Windows Firewall
3–3
Control Panel
converter cable
creating user account
1–5
4–1
6–1
2–2
4–3
2–8
D
default passwords 2–2
desktop
1–2
administrator 1–4
user 1–2
DHCP Settings Update Client 4–8
4–11
DOK
Drive C
Drive Z
drives
2–7
2–6, 4–7
2–6
Drive C and flash 2–7
Drive Z 2–6
E
Enhanced Write Filter 2–4
command line tool 4–3
status tool 4–6
user interface 4–4
Enhanced Writer Filter Manager 4–1
2–4
EWF
F
failure symptoms 3–8
features
firewall
flash
H
HP Compaq Thin Client Imaging Tool 5–3
HP DHCP Settings Update Client
HP RAMDisk
HP support Web site
HP Sygate Standalone Agent
1–1
3–2, 3–3
2–7
4–8
4–7
3–1
3–2
I
ICA 1–5
Quick Reference Guide www.hp.com Index-1
Page 70

Index
image capture 4–9
image deployment
image upgrades
imaging
Internet
Internet Explorer
5–3
1–1
4–14
5–2
3–16
L
language options 2–11
local drives
log on as Administrator
logging off
logon
automatic 2–1
manual 2–2
Logon Configuration Manager 2–1
2–6
2–3
2–3
M
Macromedia Flash Player 3–17
manual logon
manufacturer print drivers
mapping network drives
Media Player
memory
Microsoft Internet Explorer
Microsoft RDP
Microsoft Windows
Microsoft Windows Firewall
3–9
configuring 3–3
gathering configuration information 3–7
monitor saver 2–4
multimedia
2–2
6–3
2–7
3–17
2–6
3–16
1–5, 3–12
3–2, 3–3
3–3, 3–7, 3–8,
1–1
O
on-by-default 3–3
P
password 2–2
password, changing
PC SAM
3–13
2–2
peripherals
ports, Windows Firewall
power management
Preboot Execution Environment
preinstalled applications
print drives
printers
profiles
PXE
6–1
3–9
2–4
5–2
3–1
6–3
6–2
2–9
5–1, 5–2
R
RAMDisk 4–7
1–5
RDP
regional options
Remote Desktop Connection
requirements, server
restarting
roaming profiles
2–11
3–12
1–5
2–3
2–8
S
saving files 2–7
security
Security Center
server requirements
services, session
Session Allocation Manager
session services
shutting down
status tool
Sygate firewall
Sygate Standalone Agent
system time
1–1
3–3
1–5
1–5
3–13
1–5
2–3
4–6
3–2
3–2
2–5
T
TeemNT Terminal Emulation 3–14
terminal emulation
text-only print driver
thin client features
ThinState Capture
ThinState Deploy
1–6
6–3
1–1
4–9, 5–2
4–14, 5–2
Index-2 www.hp.com Quick Reference Guide
Page 71

Index
time 2–5
troubleshooting applications
troubleshooting Microsoft Windows Firewall
3–7
3–7
U
updates 1–2
upgrading images
USB to serial converter cable
user accounts
user desktop
User Manager
user profiles
using manufacturer print drivers
5–2
6–1
2–8
1–2
2–9
2–9
6–3
V
volatile memory 2–6
W
Web site
Altiris 1–6, 4–15
Citrix 3–11
Deploying Windows Firewall Settings
3–10
HP Compaq Thin Client Imaging Tool
white paper
HP support 3–1
HP Sygate Security Agent and Symantec
Embedded Security
FAQs 3–3
Manually Configuring Windows Firewall
3–10
PC SAM 3–14
QuickSpecs 6–1
TechNet Windows HP Professional 3–10
unsafe file list for Internet Explorer 3–17
Using the Windows Firewall INF File
3–10
Windows Media Player 3–17
Windows XPe 1–3
4–6
Windows Firewall 3–3
Windows Media Player
Windows XPe Web site
write filter
writer filter
2–7
4–1
Z
Z Drive 4–7
3–17
1–3
Quick Reference Guide www.hp.com Index-3
Page 72

Index
Index-4 www.hp.com Quick Reference Guide
 Loading...