

Page 1
HP Officejet J3500/J3600
User Guide
Page 2

Page 3

HP Officejet J3500/J3600
All-in-One series
User Guide
Page 4

Copyright information
© 2007 Copyright Hewlett-Packard
Development Company, L.P.
Hewlett-Packard Company
notices
The information contained in this
document is subject to change without
notice.
All rights reserved. Reproduction,
adaptation, or translation of this
material is prohibited without prior
written permission of Hewlett-Packard,
except as allowed under copyright laws.
The only warranties for HP products
and services are set forth in the express
warranty statements accompanying
such products and services. Nothing
herein should be construed as
constituting an additional warranty. HP
shall not be liable for technical or
editorial errors or omissions contained
herein.
Acknowledgements
Windows and Windows XP are U.S.
registered trademarks of Microsoft
Corporation. Windows Vista is either a
registered trademark or trademark of
Microsoft Corporation in the United
States and/or other countries.
Adobe® and Acrobat® are trademarks
of Adobe Systems Incorporated.
Safety information
Always follow basic safety precautions
when using this product to reduce risk
of injury from fire or electric shock.
1. Read and understand all instructions
in the documentation that comes with
the device.
2. Use only a grounded electrical outlet
when connecting this product to a
power source. If you do not know
whether the outlet is grounded, check
with a qualified electrician.
3. Observe all warnings and
instructions marked on the product.
4. Unplug this product from wall outlets
before cleaning.
5. Do not install or use this product near
water, or when you are wet.
6. Install the product securely on a
stable surface.
7. Install the product in a protected
location where no one can step on or
trip over the line cord, and the line cord
cannot be damaged.
8. If the product does not operate
normally, see
troubleshoot.
9. There are no user-serviceable parts
inside. Refer servicing to qualified
service personnel.
Maintain and
Accessibility
The device provides a number of
features that make it accessible for
people with disabilities.
Visual
The device software is accessible for
users with visual impairments or low
vision through the use of your operating
system's accessibility options and
features. It also supports most assistive
technology such as screen readers,
Braille readers, and voice-to-text
applications. For users who are color
blind, colored buttons and tabs used in
the software and on the control panel
have simple text or icon labels that
convey the appropriate action.
Mobility
For users with mobility impairments, the
device software functions can be
executed through keyboard
commands. The software also supports
Windows accessibility options such as
StickyKeys, ToggleKeys, FilterKeys,
and MouseKeys. The device doors,
buttons, paper trays, and paper guides
can be operated by users with limited
strength and reach.
Support
For more details about the accessibility
of this product and HP's commitment to
product accessibility, visit HP's Web
www.hp.com/accessibility.
site at
For accessibility information for the Mac
OS, visit the Apple Web site at
www.apple.com/accessibility.
Page 5

Contents
1 Get started
Find other resources for the product .........................................................................................9
Understand the device parts.....................................................................................................10
Front view...........................................................................................................................10
Printing supplies area.........................................................................................................11
Back view............................................................................................................................11
Control panel buttons and lights.........................................................................................12
Connection information.......................................................................................................13
2 Use the device
Use control panel menus..........................................................................................................15
Control-panel message types...................................................................................................15
Status messages................................................................................................................16
Warning messages.............................................................................................................16
Error messages..................................................................................................................16
Critical error messages.......................................................................................................16
Change device settings............................................................................................................16
Use the HP Solution Center (Windows)...................................................................................17
Use the HP photo and imaging software..................................................................................17
Text and symbols......................................................................................................................18
Type numbers and text on the control-panel keypad.........................................................19
To enter text..................................................................................................................19
To enter a space, pause, or symbol.............................................................................19
To erase a letter, number, or symbol............................................................................19
Available symbols for dialing fax numbers.........................................................................20
Load originals...........................................................................................................................20
Load an original in the automatic document feeder (ADF).................................................20
Select print media.....................................................................................................................21
Tips for selecting and using print media.............................................................................21
Understand specifications for supported media.................................................................22
Understand supported sizes.........................................................................................22
Understand supported media types and weights.........................................................23
Set minimum margins.........................................................................................................24
Load media...............................................................................................................................24
Load full-size paper............................................................................................................24
Load 10 x 15 cm (4 x 6 inch) photo paper..........................................................................26
Load index cards................................................................................................................27
Load envelopes..................................................................................................................28
Load other types of paper...................................................................................................28
1
Page 6

Print on special and custom-sized media.................................................................................29
Print on special or custom-sized media (Windows)............................................................30
Print on special or custom-sized media (Mac OS).............................................................30
Set up speed-dial entries..........................................................................................................31
Set up fax numbers as speed-dial entries or groups..........................................................31
Set up speed-dial entries..............................................................................................31
Set up a speed-dial group............................................................................................31
Print and view a list of speed-dial entries...........................................................................32
View a list of speed-dial entries....................................................................................32
3Print
Change print settings................................................................................................................33
Change settings from an application for current jobs (Windows).......................................33
Change default settings for all future jobs (Windows)........................................................33
Change settings (Mac OS).................................................................................................34
Print on both sides (duplexing).................................................................................................34
Guidelines for printing on both sides of a page..................................................................34
Perform duplexing..............................................................................................................34
Cancel a print job......................................................................................................................35
4Copy
Make copies from the control panel..........................................................................................37
Change the copy settings.........................................................................................................37
Set the number of copies..........................................................................................................38
Set the copy paper size............................................................................................................38
Set the copy paper type............................................................................................................38
Change copy speed or quality..................................................................................................39
Resize an original to fit onto letter or A4 paper........................................................................40
Copy a legal-size document onto letter paper..........................................................................40
Adjust the lightness and darkness of your copy.......................................................................41
Enhance blurred areas of your copy.........................................................................................41
Enhance light areas of your copy.............................................................................................42
Cancel a copy job.....................................................................................................................42
5Scan
Scan an original........................................................................................................................43
Scan an original to a program on a computer....................................................................43
Scan from a TWAIN-compliant or a WIA-compliant program...................................................44
Scan from a TWAIN-compliant program.............................................................................44
Scan from a WIA-compliant program..................................................................................44
Edit a scanned original.............................................................................................................44
Edit a scanned photo or graphic.........................................................................................45
Edit a scanned document using optical character recognition (OCR) software.................45
Change scan settings...............................................................................................................45
Cancel a scan job.....................................................................................................................45
2
Page 7

Contents
6Fax
Send a fax................................................................................................................................47
Send a basic fax.................................................................................................................47
Send a fax manually from a phone.....................................................................................48
Send a fax using monitor dialing........................................................................................49
Send a fax from memory....................................................................................................50
Schedule a fax to send later...............................................................................................50
Send a fax to multiple recipients.........................................................................................51
Send a fax to multiple recipients from the control panel ..............................................51
Send a fax to multiple recipients from the HP Photosmart Studio Software (Mac
OS)...............................................................................................................................52
Send a color original or photo fax.......................................................................................53
Change the fax resolution and Lighter / Darker settings...................................................53
Change the fax resolution.............................................................................................53
Change the Lighter / Darker setting............................................................................54
Set new default settings...............................................................................................55
Send a fax in Error Correction Mode..................................................................................55
Receive a fax............................................................................................................................55
Receive a fax manually......................................................................................................56
Set up backup fax reception...............................................................................................56
Reprint received faxes from memory..................................................................................57
Poll to receive a fax............................................................................................................58
Forward faxes to another number......................................................................................58
Set the paper size for received faxes.................................................................................59
Set automatic reduction for incoming faxes........................................................................59
Block junk fax numbers......................................................................................................60
Set the junk fax mode...................................................................................................60
Add numbers to the junk fax list...................................................................................60
Remove numbers from the junk fax list........................................................................61
Change fax settings..................................................................................................................61
Configure the fax header....................................................................................................62
Set the answer mode (Auto answer)..................................................................................62
Set the number of rings before answering..........................................................................62
Change the answer ring pattern for distinctive ring............................................................63
Set the fax error correction mode.......................................................................................63
Set the dial type..................................................................................................................64
Set the redial options..........................................................................................................64
Set the fax speed................................................................................................................64
Fax over the Internet................................................................................................................65
Test fax setup...........................................................................................................................65
Use reports...............................................................................................................................66
Print fax confirmation reports..............................................................................................66
Print fax error reports..........................................................................................................67
Print and view the fax log...................................................................................................67
Cancel a fax..............................................................................................................................68
7 Configure and manage
Manage the device...................................................................................................................69
Monitor the device..............................................................................................................69
Administer the device.........................................................................................................70
3
Page 8

Use device management tools.................................................................................................70
Toolbox (Windows).............................................................................................................70
Open the Toolbox.........................................................................................................71
Toolbox tabs ................................................................................................................71
HP Printer Utility (Mac OS).................................................................................................71
Open the HP Printer Utility............................................................................................71
HP Printer Utility panels................................................................................................72
Set up faxing for the device .....................................................................................................72
Set up faxing (parallel phone systems)..............................................................................73
Choose the correct fax setup for your home or office...................................................73
Select your fax setup case...........................................................................................75
Case A: Separate fax line (no voice calls received).....................................................76
Case B: Set up the device with DSL.............................................................................77
Case C: Set up the device with a PBX phone system or an ISDN line........................78
Case D: Fax with a distinctive ring service on the same line........................................79
Case E: Shared voice/fax line......................................................................................80
Case F: Shared voice/fax line with voice mail..............................................................81
Case G: Fax line shared with computer modem (no voice calls received)...................82
Case H: Shared voice/fax line with computer modem..................................................84
Case I: Shared voice/fax line with answering machine................................................88
Case J: Shared voice/fax line with computer modem and answering machine............89
Case K: Shared voice/fax line with computer dial-up modem and voice mail..............93
Serial-type fax setup...........................................................................................................95
Configure the device (Windows)...............................................................................................96
Direct connection................................................................................................................96
Install the software before connecting the device (recommended)..............................96
Connect the device before installing the software........................................................97
Share the device on a locally shared network..............................................................97
Configure the device (Mac OS)................................................................................................98
Install the software for a direct connection.........................................................................98
Share the device on a locally shared network....................................................................98
Uninstall and reinstall the software...........................................................................................99
8 Maintain and troubleshoot
Work with print cartridges.......................................................................................................103
Supported print cartridges................................................................................................103
Handle the print cartridges...............................................................................................104
Replace the print cartridges..............................................................................................104
Align the print cartridges...................................................................................................108
Clean the print cartridges.................................................................................................109
Clean the print cartridge contacts.....................................................................................110
Clean the area around the ink nozzles.............................................................................112
Store print cartridges........................................................................................................113
Clean the device.....................................................................................................................114
Clean the glass strip.........................................................................................................114
Clean the white strip.........................................................................................................115
Clean the exterior.............................................................................................................116
Troubleshooting tips and resources.......................................................................................116
4
Page 9

Contents
Solve printing problems..........................................................................................................116
The device shuts down unexpectedly...............................................................................117
Error message appears on control-panel display.............................................................117
The device is not responding (nothing prints)...................................................................117
Device takes a long time to print......................................................................................118
Blank or partial page printed.............................................................................................118
Something on the page is missing or incorrect.................................................................118
Placement of the text or graphics is wrong.......................................................................119
Poor print quality and unexpected printouts...........................................................................119
Poor quality printouts........................................................................................................120
Meaningless characters print............................................................................................120
Ink is smearing..................................................................................................................121
Ink is not filling the text or graphics completely................................................................121
Output is faded or dull colored..........................................................................................121
Colors are printing as black and white..............................................................................122
Wrong colors are printing.................................................................................................122
Printout shows bleeding colors.........................................................................................122
Colors do not line up properly...........................................................................................122
Lines or dots are missing from text or graphics................................................................122
Solve paper-feed problems....................................................................................................123
Media is not supported for the printer or tray....................................................................123
Media is not picked up from the tray.................................................................................123
Media is not coming out correctly.....................................................................................123
Pages are skewing...........................................................................................................123
Multiple pages are being picked up..................................................................................123
Solve copy problems..............................................................................................................124
No copy came out.............................................................................................................124
Copies are blank...............................................................................................................124
Documents are missing or faded......................................................................................124
Size is reduced.................................................................................................................125
Copy quality is poor..........................................................................................................125
Copy defects are apparent...............................................................................................125
Error messages appear....................................................................................................126
Solve scan problems..............................................................................................................126
Scanner did nothing..........................................................................................................126
Scan takes too long..........................................................................................................126
Part of the document did not scan or text is missing........................................................127
Text cannot be edited.......................................................................................................127
Error messages appear....................................................................................................128
Scanned image quality is poor.........................................................................................128
Scan defects are apparent...............................................................................................129
Solve fax problems.................................................................................................................129
The fax test failed.............................................................................................................130
Troubleshoot installation issues.............................................................................................141
Hardware installation suggestions....................................................................................141
Software installation suggestions.....................................................................................142
Clear paper jams....................................................................................................................142
Avoid paper jams....................................................................................................................144
5
Page 10

A HP supplies
Order printing supplies online.................................................................................................145
Supplies..................................................................................................................................145
Print cartridges..................................................................................................................145
HP media..........................................................................................................................145
B Support and warranty
Hewlett-Packard limited warranty statement..........................................................................148
Obtain electronic support........................................................................................................149
Obtain HP telephone support.................................................................................................149
Before you call..................................................................................................................149
Support process...............................................................................................................149
HP support by phone........................................................................................................150
Phone support period.................................................................................................150
Telephone support numbers.......................................................................................150
Placing a call...............................................................................................................151
After the phone support period...................................................................................152
Additional warranty options..............................................................................................152
HP Quick Exchange Service (Japan)...............................................................................152
Call HP Korea customer support......................................................................................153
Prepare the device for shipment.............................................................................................153
Remove the print cartridges before shipment...................................................................153
Remove the control-panel faceplate.................................................................................154
Pack the device......................................................................................................................155
C Device specifications
Physical specifications............................................................................................................157
Product features and capacities.............................................................................................157
Memory specifications............................................................................................................158
System requirements..............................................................................................................158
Print specifications..................................................................................................................159
Copy specifications.................................................................................................................159
Fax specifications...................................................................................................................159
Scan specifications.................................................................................................................160
Environmental specifications..................................................................................................160
Electrical specifications..........................................................................................................160
Acoustic emission specifications (noise levels per ISO 7779)................................................160
D Regulatory information
FCC statement........................................................................................................................164
Notice to users in Korea.........................................................................................................164
VCCI (Class B) compliance statement for users in Japan......................................................164
Notice to users in Japan about the power cord......................................................................165
RoHS notices (China only).....................................................................................................165
Noise emission statement for Germany.................................................................................165
Notice to users of the U.S. telephone network: FCC requirements........................................166
Notice to users of the Canadian telephone network...............................................................166
Notice to users in the European Economic Area....................................................................168
Australia wired fax statement.................................................................................................168
Warning for Australia and New Zealand with phone handset.................................................168
Regulatory model number......................................................................................................168
6
Page 11

Contents
Declaration of conformity........................................................................................................169
Environmental product stewardship program.........................................................................170
Paper use.........................................................................................................................170
Plastics.............................................................................................................................170
Material safety data sheets...............................................................................................170
Recycling program............................................................................................................170
HP inkjet supplies recycling program...............................................................................170
Disposal of waste equipment by users in private households in the European
Union................................................................................................................................171
Energy consumption.........................................................................................................171
Index............................................................................................................................................173
7
Page 12

8
Page 13

1 Get started
This guide provides details about how to use the device and to resolve problems.
Find other resources for the product
•
Understand the device parts
•
Find other resources for the product
You can obtain product information and further troubleshooting resources that are not
included in this guide from the following resources:
Resource Description Location
Setup poster Provides illustrated setup
Fax Getting Started Guide Provides instructions for
Readme file and release
notes
Toolbox (Microsoft
Windows®)
HP Printer Utility (Mac OS)
(Mac OS supported by
HP Officejet J3600 only)
Control panel Provides status, error, and
Logs and reports Provides information about
HP Web sites Provide the latest printer
®
information.
setting up the device and
information about the warranty
and safety issues.
Provide late-breaking
information and
troubleshooting tips.
Provides tools to align the
device, clean print cartridges,
print a test page, view ink level
of print cartridges, and order
supplies online.
For more information, see
Toolbox (Windows).
Contains tools to configure
print settings, align the device,
clean the print cartridges, view
ink level of print cartridges,
order supplies online, and find
support information from the
Web site.
For more information, see
Printer Utility (Mac OS).
warning information about
operations.
events that have occurred.
software, and product and
support information.
A printed version of the
document is provided with the
device.
A printed version of the
document is provided with the
device.
Included on the Starter CD.
The Toolbox is typically
installed with the device
software as an available
installation option.
The HP Printer Utility is
typically installed with the
device software.
HP
For more information, see
Control panel buttons and
lights.
For more information, see
Monitor the device.
www.hp.com/support
www.hp.com
Get started 9
Page 14
Chapter 1
(continued)
Resource Description Location
HP telephone support Lists information to contact
HP photo and imaging
software help
HP. During the warranty
period, this support is often
free of charge.
Provides information about
using the software.
Understand the device parts
• Front view
Printing supplies area
•
Back view
•
Control panel buttons and lights
•
Connection information
•
Front view
For more information, see
Obtain HP telephone support.
For more information, see Use
the HP photo and imaging
software.
1 Document feeder tray
2 Control panel display
3 Paper guides
4 Control panel
5 Print cartridge door
6 Input tray
7 Tray extender
8 Paper-width guide
9 Document catcher
10 Get started
Page 15
(continued)
10 Document catcher extender
11 Handset
Printing supplies area
1 Print cartridge door
2 Print cartridges
NOTE: The HP Officejet J3500 supports a black print cartridge only.
Back view
1 Power connection
2 Rear universal serial bus (USB) port
3 Fax ports (1-LINE and 2-EXT)
4 Rear door
5 Rear door access tab
Understand the device parts 11
Page 16
Chapter 1
Control panel buttons and lights
The following diagram and related table provide a quick reference to the control panel
features.
Label Name and Description
1 Speed Dial: Selects a speed dial number.
2 Redial/Pause: Redials the most recently dialed number or inserts a 3-second pause in a fax
3 Lighter / Darker: Lightens or darkens black-and-white faxes being sent.
4 Fax Resolution: Adjusts the resolution for black-and-white faxes being sent.
5 On light: Indicates, when lighted, that the device is on. The light blinks when the device is
6 Attention light: When blinking, the attention light indicates an error has occurred that requires
7 Display: View menus and messages.
8 Auto Answer: Switches among the Answer Mode settings. Depending on the setting, the device
9 Flash: Cancels a fax and brings up a dial tone. Also used to answer a call waiting.
10 Setup: Presents the Setup Menu for generating reports, changing fax and other maintenance
11 Fax Menu: Places the device in fax mode and presents the Fax Menu. Press Fax Menu
12 Scan To: Places the device in scan mode and presents the Scan To menu for selecting a scan
13 Copy Menu: Places the device in copy mode and presents the Copy Menu. Press Copy
number.
performing a task.
your attention.
automatically answers incoming phone calls, requires you to receive the fax manually, or
"listens" for fax tones.
settings, and accessing the Help menu. Press to scroll through the Help topics available, and
then press OK to select a topic. The Help topic you select opens on your computer screen.
repeatedly to scroll through the options in the Fax Menu.
destination.
Menu repeatedly to scroll through the options in the Copy Menu.
12 Get started
Page 17

(continued)
Label Name and Description
14 Start Black: Starts a black-and-white copy, scan, or fax job.
Start Color: Starts a color copy, scan, or fax job (HP Officejet J3600 only.)
15 Cancel: Stops a job, exits a menu, or exits settings.
16 Right arrow: Increases values on the display.
17 OK: Selects a menu or a setting on the display.
18 Left arrow: Decrease values on the display.
19 Power: Turns the device on or off. The On light next to the Power button is lit when the device
20 Keypad: Enter fax numbers, values, or text.
21 One-touch speed dial buttons: Accesses the first ten speed dial numbers. Press a speed dial
is on. The light blinks while performing a job.
When the device is off, a minimal amount of power is still supplied to the device. To completely
disconnect the power supply to the HP All-in-One, turn the device off, and then unplug the power
cord.
button once to select the speed dial number presented in the left column. Press the same speed
dial button a second time to select the speed dial number in the right column.
Connection information
Description Recommended number
of connected
computers for best
performance
USB connection One computer connected
with a USB cable to the
rear USB 2.0 high-speed
port on the device.
Printer sharing Up to five computers.
The host computer must
be turned on at all times,
or the other computers
cannot print to the device.
Supported software
features
All features are
supported.
All features resident on
the host computer are
supported. Only print is
supported from the other
computers.
Setup instructions
Follow the setup poster
guide for detailed
instructions.
For Windows, follow the
instructions in Share the
device on a locally shared
network. For Mac OS,
follow the instructions in
Share the device on a
locally shared network.
Understand the device parts 13
Page 18

Chapter 1
14 Get started
Page 19

2 Use the device
This section contains the following topics:
Use control panel menus
•
Control-panel message types
•
Change device settings
•
Use the HP Solution Center (Windows)
•
Use the HP photo and imaging software
•
Text and symbols
•
Load originals
•
Select print media
•
Load media
•
Print on special and custom-sized media
•
Set up speed-dial entries
•
Use control panel menus
The following sections provide a quick reference to top-level menus that appear on the
control-panel display. To display a menu, press the menu button for the function you want
to use.
• Scan menu: Presents a list of destinations; for example, HP photo and imaging
software.
• Fax menu: Allows you to enter a fax or speed-dial number, or display the Fax menu.
Menu options include:
• Modifying resolution
• Lightening/darkening
• Sending delayed faxes
• Setting up new defaults
• Copy menu: Menu options include:
• Selecting copy quantities
• Reducing/enlarging
• Selecting media type and size
Control-panel message types
This section contains the following topics:
•
Status messages
Warning messages
•
Error messages
•
Critical error messages
•
Use the device 15
Page 20

Chapter 2
Status messages
Status messages reflect the current state of the device. They inform you of normal
operation and require no action to clear them. They change as the state of the device
changes. Whenever the device is ready, not busy, and has no pending warning
messages, the status message READY appears if the device is turned on.
Warning messages
Warning messages inform you of events that require your attention, but they do not
prevent the device from operating. An example of a warning message is a low ink warning.
These messages appear until you resolve the condition.
Error messages
Error messages communicate that some action must be performed, such as adding
media or clearing a media jam. These messages are usually accompanied by a blinking
red Attention light. Take the appropriate action to continue printing.
If the error message shows an error code, press the Power button to turn off the device,
and then turn it on again. In most situations, this action solves the problem. If the message
persists, your device might need service. For more information, see
warranty.
Critical error messages
Critical error messages inform you of a device failure. Some of these messages can be
cleared by pressing the Power button to turn off the device, and then turning it on again.
If a critical error persists, service is required. For more information, see
warranty.
Support and
Support and
Change device settings
You can change the device settings from these places:
• From the control panel.
• From the HP Solution Center (Windows) or HP Device Manager (Mac OS). For more
information, see
NOTE: When you are configuring settings in HP Solution Center or in HP Device
Manager, you cannot see the settings that have been configured from the control
panel (such as the scan settings).
To change settings from the control panel
1. At the control panel, press the menu button for the function you are using (for example,
Copy Menu).
2. To reach the option that you want to change, use one of the following methods:
• Press a control-panel button, and then use the left or right arrow keys to adjust
the value.
• Select the option from the menu on the control-panel display.
3. Select the value that you want, and then press OK.
16 Use the device
Use the HP photo and imaging software.
Page 21

To change settings from the HP Solution Center (Windows)
▲ See
To change settings from the HP photo and imaging software (Mac OS)
1. Click the HP Device Manager icon in the Dock.
2. Select the device in the Devices drop-down menu.
3. On the Information and Settings menu, click an item that you want to change.
Use the HP photo and imaging software.
NOTE: Mac OS is supported by HP Officejet J3600 only.
Use the HP Solution Center (Windows)
On a Windows computer, the HP Solution Center is the entry point for the HP Photosmart
Software. Use the HP Solution Center to change print settings, start the Fax Setup
Wizard, order supplies, and access the onscreen Help.
The features available in the HP Solution Center vary depending on the devices you have
installed. The HP Solution Center is customized to show icons that are associated with
the selected device. If the selected device is not equipped with a particular feature, then
the icon for that feature does not appear in the HP Solution Center.
If the HP Solution Center on your computer does not contain any icons, an error might
have occurred during the software installation. To correct this, use the Control Panel in
Windows to completely uninstall the HP Photosmart Software, and then reinstall the
software. For more information, see the onscreen Help that came with the device.
For information about opening the HP Solution Center, see
software.
Use the HP photo and imaging
Use the HP photo and imaging software
You can use the HP photo and imaging software to access many features that are not
available from the control panel.
The software is installed on your computer during setup. For further information, see the
setup documentation that came with your device.
Access to the HP photo and imaging software differs by operating system (OS). For
example, if you have a Windows computer, the HP photo and imaging software entry
point is the HP Photosmart Software window. If you have a Macintosh computer, the HP
photo and imaging software entry point is the HP Photosmart Studio window. Regardless,
Use the HP Solution Center (Windows) 17
Page 22

Chapter 2
the entry point serves as the launching pad for the HP photo and imaging software and
services.
To open the HP Photosmart Software on a Windows computer
1. Do one of the following:
• On the Windows desktop, double-click the HP Photosmart Software icon.
• In the system tray at the far right of the Windows taskbar, double-click the HP
Digital Imaging Monitor icon.
• On the taskbar, click Start, point to Programs or All Programs, select HP, and
then click the HP Photosmart Software.
2. If you have more than one HP device installed, select the tab with your product's
name.
NOTE: On a Windows computer, the features available in the HP Photosmart
Software vary depending on the devices you have installed. The software is
customized to show icons that are associated with the selected device. If the
selected device is not equipped with a particular feature, then the icon for that
feature does not appear in the software.
TIP: If the HP Photosmart Software on your computer does not contain any
icons, an error might have occurred during the software installation. To correct
this, use the Control Panel in Windows to completely uninstall the HP Photosmart
Software; then reinstall the software.
To open the HP Photosmart Studio software on a Macintosh computer
1. Click the HP Photosmart Studio icon in the Dock.
The HP Photosmart Studio window appears.
NOTE: Mac OS is supported by HP Officejet J3600 only.
2. In the HP Photosmart Studio task bar, click Devices.
The HP Device Manager window appears.
3. Select your device from the Device drop-down menu.
From here, you can scan, send faxes, import documents, and perform maintenance
procedures such as checking the ink levels for the ink cartridges.
NOTE: On a Macintosh computer, the features available in the HP Photosmart
Studio software vary depending on the selected device.
TIP: When the HP Photosmart Studio software is opened, you can gain access
to the Dock menu shortcuts by selecting and holding the mouse button over the
HP Photosmart Studio icon in the Dock.
Text and symbols
You can use the keypad on the control panel to enter text and symbols.
You can also enter symbols from the keypad when you dial a fax or phone number. When
the device dials the number, it interprets the symbol and responds accordingly. For
example, if you enter a dash in the fax number, the device will pause before dialing the
18 Use the device
Page 23
remainder of the number. A pause is useful if you need to gain access to an outside line
before dialing the fax number.
NOTE: If you want to enter a symbol in your fax number, such as a dash, you need
to enter the symbol by using the keypad.
Type numbers and text on the control-panel keypad
You can enter text or symbols by using the keypad on the control panel.
After you are done entering text, press OK to store your entry.
To enter text
1. Press the keypad numbers that correspond to the letters of a name. For example, the
letters a, b, and c correspond to the number 2, as shown on the button below.
TIP: Press a button multiple times to see the available characters. Depending
on your language and country/region setting, other characters might be available
in addition to the ones shown on the keypad.
2. After the correct letter appears, wait for the cursor to advance automatically to the
right, or press the right arrow button. Press the number that corresponds to the next
letter in the name. Press the button multiple times until the correct letter appears. The
first letter of a word is automatically set to uppercase.
To enter a space, pause, or symbol
• To insert a space, press Space.
• To enter a pause, press Redial/Pause. A dash appears in the number sequence.
• To enter a symbol, such as @, press the Symbols button repeatedly to scroll through
the list of available symbols: asterisk (*), dash (-), ampersand (&), period (.), slash
(/), parentheses ( ), apostrophe ('), equals (=), number sign (#), at (@), underscore
(_), plus (+), exclamation (!), semicolon (;), question (?), comma (,), colon (:), percent
(%), and approximation (~).
To erase a letter, number, or symbol
▲ If you make a mistake, press the left arrow button to clear it, and then make the correct
entry.
Text and symbols 19
Page 24
Chapter 2
Available symbols for dialing fax numbers
To enter a symbol, such as *, press Symbols repeatedly to scroll through the list of
symbols. The following table provides the symbols that you can use in a fax or phone
number sequence, fax header information, and speed-dial entries.
Available
symbols
* Displays an asterisk symbol when
- When auto-dialing, the device enters a
( ) Displays a left or right parenthesis to
W When auto-dialing, W causes the device
R During auto-dialing, the R functions the
+ Displays a plus symbol. This symbol does
Load originals
Description Available when entering
required for dialing.
pause in the number sequence.
separate numbers, such as area codes,
for easier reading. These symbols do not
affect dialing.
to wait for a dial tone before continuing to
dial.
same as a Flash button on your telephone.
not affect dialing.
Fax header name, speed-dial
names, speed-dial numbers, fax or
phone numbers, and monitor dial
entries
Fax header name, fax header
number, speed-dial names, speeddial numbers, and fax or phone
numbers
Fax header name, fax header
number, speed-dial names, speeddial numbers, and fax or phone
numbers
Speed-dial numbers and fax or
phone numbers
Speed-dial numbers and fax or
phone numbers
Fax header name, fax header
number, speed-dial names, speeddial numbers, and fax or phone
numbers
You can load an original for a copy, fax, or scan job in the automatic document feeder.
Originals that are loaded in the automatic document feeder are automatically fed into the
device.
CAUTION: In areas of high humidity and temperature; avoid putting photo originals
through the automatic document feeder. They could become jammed and damage
your photos.
TIP: To avoid scratches or other damage to your original photos, place your photo
in a transparent photo sleeve before loading.
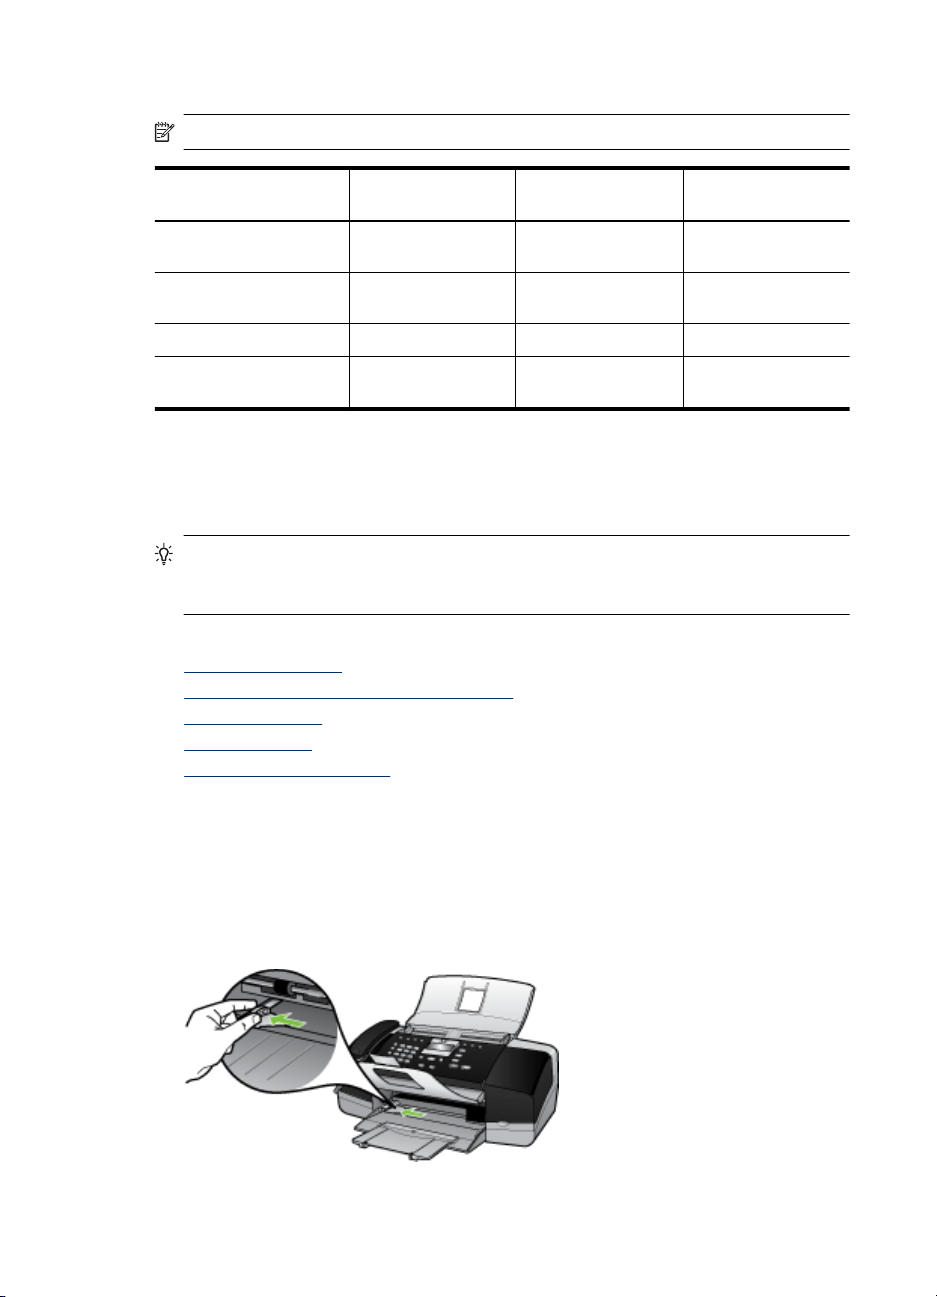
Load an original in the automatic document feeder (ADF)
You can copy, scan, or fax a single or multiple-page A4, letter, or legal-size document by
placing it in the document feeder tray.
The document feeder tray holds a maximum of 20 sheets of letter or A4-size paper or 15
sheets of legal-size paper.
20 Use the device
Page 25
To load an original in the document feeder tray
1. Load your original, with the print side down, into the document feeder tray. Place the
pages so that the top edge of the document goes in first. Slide the media into the
automatic document feeder until you hear a beep or see a message on the display
indicating that the loaded pages were detected.
TIP: For more help on loading originals in the automatic document feeder, refer
to the diagram engraved in the document feeder tray.
2. Slide the width guides inward until they stop at the left and right edges of the media.
Select print media
The device is designed to work well with most types of office media. It is best to test a
variety of print media types before buying large quantities. Use HP media for optimum
print quality. Visit the HP Web site at
www.hp.com for more information about HP media.
Tips for selecting and using print media
For the best results, observe the following guidelines.
• Always use media that conforms to the device specifications. For more information,
see
Understand specifications for supported media.
• Load only one type of media at a time into a tray.
• Load media print-side down and aligned against the right and back edges of the tray.
For more information, see
• Do not overload the tray. For more information, see
supported media.
• To prevent jams, poor print quality, and other printing problems, avoid the following
media:
• Multipart forms
• Media that is damaged, curled, or wrinkled
• Media with cutouts or perforations
• Media that is heavily textured, embossed, or does not accept ink well
• Media that is too lightweight or stretches easily
Load media.
Understand specifications for
Select print media 21
Page 26

Chapter 2
Cards and envelopes
• Avoid envelopes that have a very slick finish, self-stick adhesives, clasps, or windows.
Also avoid cards and envelopes with thick, irregular, or curled edges, or areas that
are wrinkled, torn, or otherwise damaged.
• Use tightly constructed envelopes, and make sure the folds are sharply creased.
• Load envelopes with the flaps facing up.
Photo media
•Use the Best mode to print photographs. Note that in this mode, printing takes longer
and more memory is required from your computer.
• Remove each sheet as it prints and set it aside to dry. Allowing wet media to stack
up may cause smearing.
Transparencies
• Insert transparencies with the rough side down and the adhesive strip pointing
towards the back of the device.
• Use the Normal mode to print transparencies. This mode provides longer drying time
and ensures that the ink dries completely before the next page is delivered to the
output tray.
• Remove each sheet as it prints and set it aside to dry. Allowing wet media to stack
up may cause smearing.
Custom-sized media
• Use only custom-sized media that is supported by the device.
• If your application supports custom-sized media, set the media size in the application
before printing the document. If not, set the size in the print driver. You might need
to reformat existing documents to print them correctly on custom-sized media.
Understand specifications for supported media
Use the following tables to determine the correct media to use with your device, and
determine what features will work with your media.
•
Understand supported sizes
Understand supported media types and weights
•
Understand supported sizes
NOTE: The HP Officejet J3600 supports all media listed in the table below. The
HP Officejet J3500 supports paper only.
Type Size
Paper A4: 210 x 297 mm (8.3 x 11.7 inches)
Legal: 216 x 356 mm (8.5 x 14 inches)
B5–JIS: 182 x 257 mm (7.2 x 10.1 inches)
Envelopes U.S. #10: 105 x 241 mm (4.13 x 9.5 inches)
22 Use the device
Page 27
(continued)
Type Size
A2: 111 x 146 mm (4.4 x 5.8 inches)
DL: 110 x 220 mm (4.3 x 8.7 inches)
C6: 114 x 162 mm (4.5 x 6.4 inches)
Transparency film Letter: 216 x 279 mm (8.5 x 11 inches)
A4: 210 x 297 mm
Premium photo paper 10 x 15 cm (4 x 6 inches)
Letter: 216 x 280 mm (8.5 x 11 inches)
A4: 210 x 297 mm
Cards Index card: 127 x 203 mm (5 x 8 inches)
A4: 210 x 297 mm
Labels Letter: 216 x 279 mm (8.5 x 11 inches)
A4: 105 x 149 mm
Custom 102 x 152 mm up to 216 x 356 mm (4 x 6 inches up to 8.5 x 14
inches)
Understand supported media types and weights
NOTE: The HP Officejet J3600 supports all media listed in the table below. The
HP Officejet J3500 supports plain paper and legal paper only.
Type Paper weight Input tray* Output tray** Document
Plain paper 16 to 24 lb. (60 to
Legal paper 20 to 24 lb. (75 to
Cards up to 110 lb.
Envelopes 20 to 24 lb. (75 to
Transparency film N/A 25 up to 10 N/A
Labels N/A up to 20 up to 10 N/A
4 x 6 inch photo
paper
8.5 x 11 inch photo
paper
90 gsm)
90 gsm)
index (200 gsm)
90 gsm)
up to 75 lb. (280
gsm)
N/A 40 20 N/A
up to 100
(16 lb. paper)
up to 100
(16 lb. paper)
20 10 N/A
10 10 N/A
30 20 N/A
up to 20
(16 lb. paper)
up to 20
(16 lb. paper)
feeder tray
up to 20
up to 15
* Maximum capacity. The input tray has a maximum input stack height capacity of 10 mm.
** Output tray capacity is affected by the type of paper and the amount of ink you are
using. HP recommends emptying the output tray frequently.
Select print media 23
Page 28
Chapter 2
Set minimum margins
NOTE: The HP Officejet J3500 does not support envelopes and cards.
Top (leading edge) Bottom (trailing
U.S. (Letter, Legal,
Executive)
ISO (A4, A5) and JIS (B5) 1.8 mm (0.07 inches) 12.7 mm (0.50
Envelopes 3.2 mm (0.13 inches) 3.2 mm (0.13 inches) 1.0 mm (0.04 inches)
Cards 1.0 mm (0.04 inches) 12.7 mm (0.50
Load media
This section describes the procedure for loading different types and sizes of paper into
the device for your copies, printouts, or faxes.
TIP: To help prevent rips, wrinkles, and curled or bent edges, store all paper flat in
a resealable bag. If the paper is not stored properly, extreme changes in temperature
and humidity might result in curled paper that does not work well in the device.
This section contains the following topics:
•
Load full-size paper
Load 10 x 15 cm (4 x 6 inch) photo paper
•
Load index cards
•
Load envelopes
•
Load other types of paper
•
edge)
1.5 mm (0.06 inches) 12.7 mm (0.50
inches)
inches)
inches)
Left and Right
margins
6.4 mm (0.25 inches)
3.2 mm (0.13 inches)
3.2 mm (0.13 inches)
Load full-size paper
You can load many types of letter, A4, or legal paper into the input tray of the device.
To load full-size paper
1. Slide the paper-width guide to its outermost position.
24 Use the device
Page 29
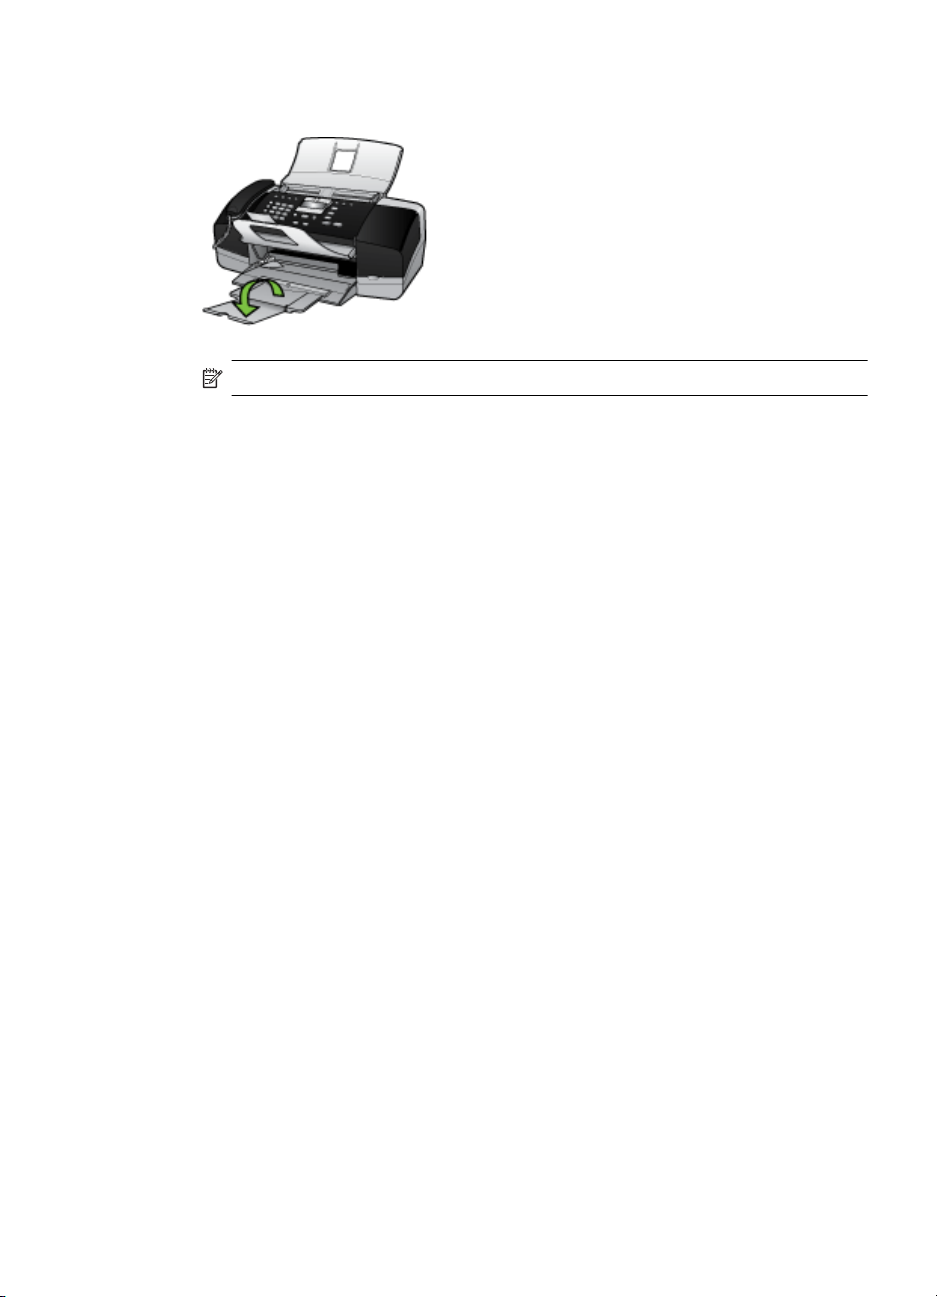
2. Flip the tray extender up toward you.
NOTE: When you use legal-size paper, leave the tray extender closed.
3. Tap a stack of paper on a flat surface to align the edges, and then check the paper
for the following:
• Make sure it is free of rips, dust, wrinkles, and curled or bent edges.
• Make sure all the paper in the stack is the same size and type.
Load media 25
Page 30
Chapter 2
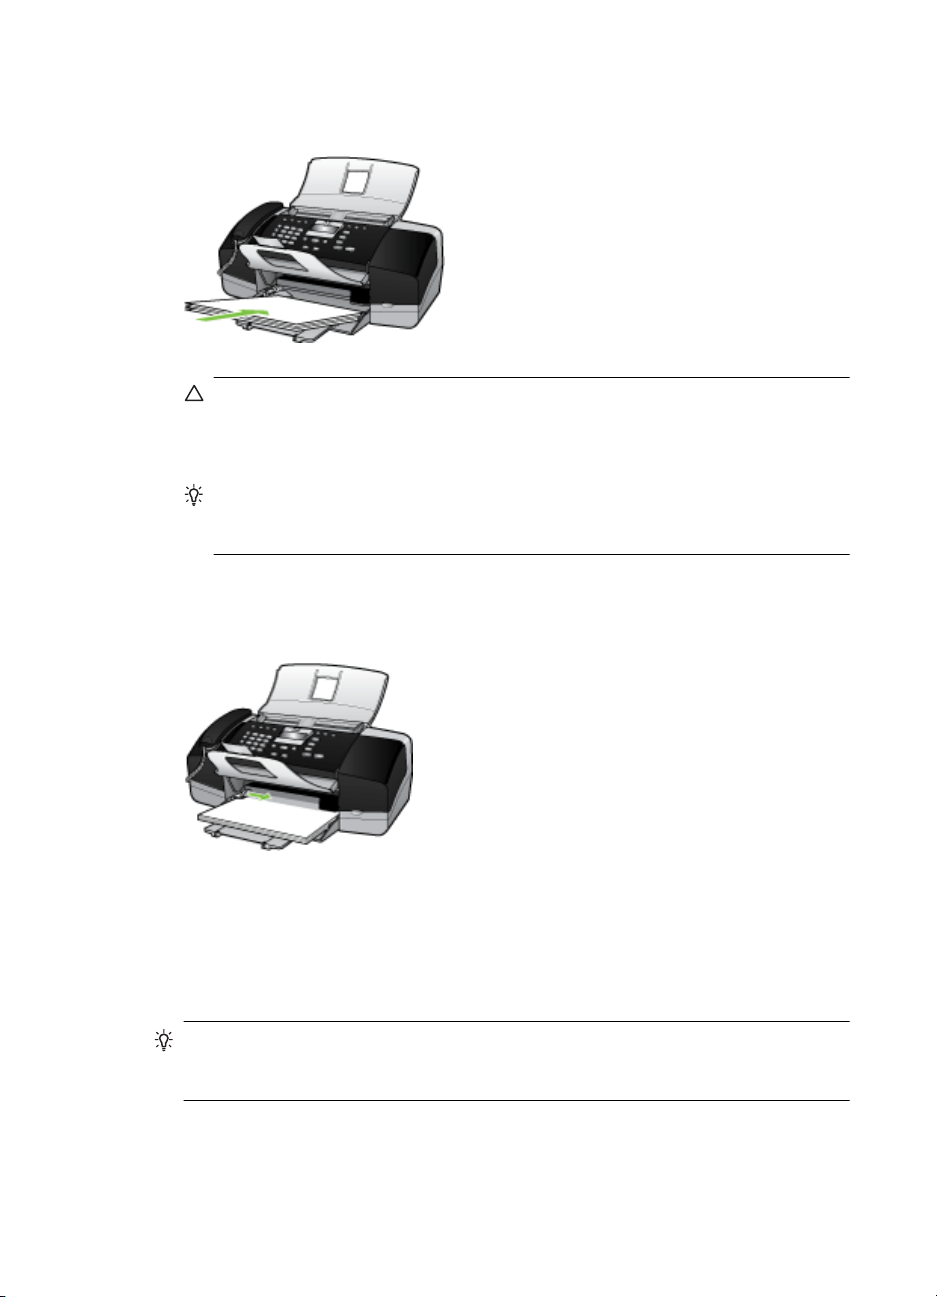
4. Insert the stack of paper into the input tray with the short edge forward and the print
side down. Slide the stack of paper forward until it stops.
CAUTION: Make sure that the device is idle and silent when you load paper into
the input tray. If it is servicing the print cartridges or otherwise engaged in a task,
the paper stop inside the device might not be in place. You could push the paper
too far forward, causing the device to eject blank pages.
TIP: If you are using letterhead, insert the top of the page first with the print side
down. For more help on loading full-size paper and letterhead, refer to the diagram
engraved in the base of the input tray.
5. Slide the paper-width guide inward until it stops at the edge of the paper.
Do not overload the input tray; make sure the stack of paper fits within the input tray
and is no higher than the top of the paper-width guide.
Load 10 x 15 cm (4 x 6 inch) photo paper
(HP Officejet J3600 only)
You can load 10 x 15 cm (4 x 6 inch) photo paper into the input tray of the device. For
the best results, use 10 x 15 cm (4 x 6 inch) HP Premium Plus Photo Paper or HP Premium
Photo Paper.
TIP: To help prevent rips, wrinkles, and curled or bent edges, store all paper flat in
a resealable bag. If the paper is not stored properly, extreme changes in temperature
and humidity might result in curled paper that does not work well in the device.
For best results, set the paper type and paper size before copying or printing.
26 Use the device
Page 31

To load 10 x 15 cm ( 4 x 6 inch) photo paper with tab in the input tray
1. Remove all paper from the input tray.
2. Insert the stack of photo paper into the far-right side of the input tray with the short
edge forward and the print side down. Slide the stack of photo paper forward until it
stops.
Load the photo paper so that the tabs are closest to you.
TIP: For more help on loading small-size photo paper, refer to the guides
engraved in the base of the input tray for loading photo paper.
3. Slide the paper-width guide inward against the photo paper until it stops.
Do not overload the input tray; make sure the stack of paper fits within the input tray
and is no higher than the top of the paper-width guide.
Load index cards
(HP Officejet J3600 only)
You can load index cards into the input tray of the device to print notes, recipes, and other
text.
For best results, set the paper type and paper size before copying or printing.
To load index cards in the input tray
1. Remove all paper from the input tray.
2. Insert the stack of cards, print side down, into the far-right side of the input tray. Slide
the stack of cards forward until it stops.
3. Slide the paper-width guide inward against the stack of cards until it stops.
Do not overload the input tray; make sure the stack of cards fits within the input tray
and is no higher than the top of the paper-width guide.
Load media 27
Page 32

Chapter 2
Load envelopes
(HP Officejet J3600 only)
You can load one or more envelopes into the input tray of the device. Do not use shiny
or embossed envelopes or envelopes that have clasps or windows.
NOTE: For specific details on how to format text for printing on envelopes, consult
the help files in your word processing software. For best results, consider using a label
for the return address on envelopes.
To load envelopes
1. Remove all paper from the input tray.
2. Insert one or more envelopes into the far-right side of the input tray with the envelope
flaps up and on the left. Slide the stack of envelopes forward until it stops.
3. Slide the paper-width guide inward against the stack of envelopes until it stops.
Do not overload the input tray; make sure the stack of envelopes fits within the input
tray and is not higher than the top of the paper-width guide.
TIP: For more help on loading envelopes, refer to the diagram engraved in the
base of the input tray.
Load other types of paper
(HP Officejet J3600 only)
The following papers require extra attention to load them properly.
NOTE: Not all paper sizes and paper types are available with all the functions on
the device. Some paper sizes and paper types can only be used if you are starting a
print job from the Print dialog box in a software application. They are not available
for copying or faxing. Papers that are only available for printing from a software
application are indicated as such.
28 Use the device
Page 33

HP Premium Inkjet Transparency Film and HP Premium Plus Inkjet Transparency
Film
▲ Insert the film so that the white transparency strip (with arrows and the HP logo) is on
top and is going into the input tray first.
NOTE: The device cannot automatically detect the paper size or paper type. For
best results, set the paper type to transparency film before printing or copying
onto transparency film.
HP Iron-On Transfers (for printing only)
1. Flatten the transfer sheet completely before using it; do not load curled sheets.
TIP: To prevent curling, keep transfer sheets sealed in the original package until
you are ready to use them.
2. Locate the blue stripe on the nonprinting side of the transfer paper and then manually
feed one sheet at a time into the input tray with the blue stripe facing up.
HP Greeting Cards, HP Photo Greeting Cards, or HP Textured Greeting Cards (for
printing only)
▲ Insert a small stack of HP greeting card paper into the input tray with the print side
down; slide the stack of cards forward until it stops.
TIP: Make sure the area on which you want to print is inserted first, facing down
in the input tray.
HP Inkjet labels (for printing only)
1. Always use letter or A4 label sheets designed for use with HP inkjet devices (such as
HP inkjet labels), and make sure that the labels are no more than two years old. Labels
on older sheets might peel off when the paper is pulled through the device, causing
subsequent paper jams.
2. Fan the stack of labels to make sure none of the pages are sticking together.
3. Place a stack of label sheets on top of full-size plain paper in the input tray, label side
down. Do not insert labels one sheet at a time.
For best results, set the paper type and paper size before copying or printing.
Related topics
Tips for selecting and using print media
Print on special and custom-sized media
(HP Officejet J3600 only)
Print on special or custom-sized media (Windows)
•
Print on special or custom-sized media (Mac OS)
•
Print on special and custom-sized media 29
Page 34

Chapter 2
Print on special or custom-sized media (Windows)
To print on special or custom-sized media
1. Load the appropriate media. For more information, see
2. With a document open, click Print on the File menu, and then click Setup,
Properties, or Preferences.
3. Click the Paper/Features tab.
4. Select the media size from the Size is drop-down list.
To set a custom media size:
a. Click the Custom button.
b. Type a name for the new custom size.
c.In the Width and Height boxes, type the dimensions, and then click Save.
d. Click OK twice to close the properties or preferences dialog box. Open the dialog
box again.
e. Select the new custom size.
5. To select the media type:
a. Click More in the Type is drop-down list.
b. Click the desired media type, and then click OK.
6. Change any other settings, and then click OK.
7. Print your document.
Load media.
Print on special or custom-sized media (Mac OS)
To print on special or custom-sized media
1. Load the appropriate media. For more information, see
2. On the File menu, click Page Setup.
3. Select the media size.
4. To set a custom media size:
a. Click Manage Custom Sizes in the Paper Size pull-down menu.
b. Click New and type a name for the size in the Paper Size Name box.
c.In the Width and Height boxes, type the dimensions and set the margins, if
desired.
d. Click Done or OK, and then click Save.
5. On the File menu, click Page Setup, and then select the new custom size.
6. Click OK.
7. On the File menu, click Print.
8. Open the Paper Handling panel.
9. Under Destination Paper Size, click the Scale to fit paper size tab, and then select
the customized paper size.
10. Change any other desired settings, and then click OK or Print.
Load media.
30 Use the device
Page 35

Set up speed-dial entries
You can set up frequently used fax numbers as speed-dial entries. This lets you dial those
numbers quickly by using the control panel. The first five entries for each of these
destinations are associated with the five speed-dial buttons on the control panel.
Set up fax numbers as speed-dial entries or groups
You can store fax numbers or groups of fax numbers as speed-dial entries. Speed-dial
entries 1 through 5 are associated with the corresponding five speed-dial buttons on the
control panel.
For information about printing a list of the speed-dial entries that are set up, see
view a list of speed-dial entries.
Set up speed-dial entries
• HP Photosmart Software (Windows): Open the HP Photosmart Software and follow
the instructions in the onscreen Help.
• HP Device Manager (Mac OS): Launch HP Device Manager, click Information and
Settings, and then select Fax Speed Dial Settings from the drop-down list.
• Control panel: Press Setup, and then select the Speed Dial Setup option.
• To add or change an entry: Select Individual Speed Dial or Group Speed Dial
and press the arrow keys to move to an unused entry number, or type a number
on the keypad. Type the fax number, and then press OK. Include any pauses or
other required numbers, such as an area code, an access code for numbers
outside a PBX system (usually a 9 or 0), or a long-distance prefix. Type the name,
and then press OK.
• To delete one entry or all entries: Select Delete Speed Dial, press the arrow keys
to highlight the speed-dial entry that you want to delete, and then press OK.
Print and
Set up a speed-dial group
If you send information to the same group of fax numbers on a regular basis, you can set
up a speed-dial entry for a group in order to simplify the task. The speed-dial entry for a
group can be associated with a speed-dial button on the control panel.
Set up speed-dial entries 31
Page 36

Chapter 2
A group member must be a member of the speed-dial list before you can add the member
to a speed-dial group. You can add up to 20 fax numbers to each group (with up to 50
characters for each fax number).
• HP Photosmart Software (Windows): Open the HP Photosmart Software and follow
the instructions in the onscreen Help.
• HP Device Manager (Mac OS): Launch HP Device Manager, click Information and
Settings, and then select Fax Speed Dial Settings from the drop-down list.
• Control panel: Press the Setup button, and then select the Speed Dial Setup option.
• To add a group: Select Group Speed Dial, select an unassigned speed-dial entry,
and then press OK. Use the arrow keys to highlight a speed-dial entry, and then
press OK to select it (a check mark appears next to the speed-dial entry). Repeat
this step to add additional speed-dial entries to this group. When finished, select
the Done Selecting option, and then press OK. Use the onscreen keyboard to
enter a group speed-dial name, and then select Done.
• To add entries to a group: Select Group Speed Dial, select the group speed-dial
entry that you want to change, and then press OK. Use the arrow keys to highlight
a speed-dial entry, and then press OK to select it (a check mark appears next to
the speed-dial entry). Repeat this step to add additional speed-dial entries to this
group. When finished, select the Done Selecting option, and then press OK.
Select Done at the Group Name screen.
• To delete an entry from a group: Select Group Speed Dial, select the group
speed-dial entry that you want to change, and then press OK. Use the arrow keys
to highlight a speed-dial entry, and then press OK to select it (the check mark is
removed from the speed-dial entry). Repeat this step to remove additional speeddial entries from this group. When finished, select the Done Selecting option, and
then press OK. Select Done at the Group Name screen.
• To delete a group: Select Delete Speed Dial, press the arrow keys to highlight
the speed-dial entry that you want to delete, and then press OK.
Print and view a list of speed-dial entries
You can print or view a list of all of the speed-dial entries that have been set up. Each
entry in the list contains the following information:
• Speed-dial number (the first five entries correspond to the five speed-dial buttons on
the control panel)
• Name associated with the fax number or group of fax numbers
• For the fax speed-dial list, the fax number (or all of the fax numbers for a group)
View a list of speed-dial entries
• HP Device Manager (Mac OS): Launch HP Device Manager, click Information and
Settings, and then select Fax Speed Dial Settings from the drop-down list.
• HP Photosmart Software (Windows): Open the HP Photosmart Software and follow
the instructions in the onscreen Help.
32 Use the device
Page 37

3Print
This section contains the following topics:
Change print settings
•
Print on both sides (duplexing)
•
Cancel a print job
•
Change print settings
You can change print settings (such as paper size or type) from an application or the
printer driver. Changes made from an application take precedence over changes made
from the printer driver. However, after the application is closed, the settings return to the
defaults configured in the driver.
NOTE: To set print settings for all print jobs, make the changes in the printer driver.
For more information about the features of the Windows printer driver, see the online
help for the driver. For more information about printing from a specific application, see
the documentation that came with the application.
Change settings from an application for current jobs (Windows)
To change the settings
1. Open the document that you want to print.
2. On the File menu, click Print, and then click Setup, Properties, or Preferences.
(Specific options may vary depending on the application that you are using.)
3. Change the settings that you want, and then click OK, Print, or a similar command.
NOTE: The settings that are available depend on the device model.
Change default settings for all future jobs (Windows)
To change the settings
1. Click Start, point to Settings, and then click Printers or Printers and Faxes.
- Or Click Start, click Control Panel, and then double-click Printers.
2. Right-click the printer icon, and then click Properties, Document Defaults, or
Printing Preferences.
3. Change the settings that you want, and then click OK.
NOTE: The settings that are available depend on the device model.
Print 33
Page 38

Chapter 3
Change settings (Mac OS)
To change the settings
1. On the File menu, click Page Setup.
2. Change the settings that you want (such as paper size), and then click OK.
3. On the File menu, click Print to open the printer driver.
4. Change the settings that you want (such as media type), and then click OK or
Print.
NOTE: The settings that are available depend on the device model.
Print on both sides (duplexing)
Using the Windows print driver, you can print on both sides of a sheet of media by
manually turning the media over and feeding it into the device again.
In Mac OS, you can print on both sides of a sheet by first printing the odd-numbered
pages, turning the pages over, and then printing the even-numbered pages. Mac OS is
only supported by the HP Officejet J3600.
•
Guidelines for printing on both sides of a page
Perform duplexing
•
Guidelines for printing on both sides of a page
• Always use media that conforms to the device specifications. For more information,
see
Understand specifications for supported media.
• Do not print on both sides of transparencies, envelopes, photo paper, glossy media,
or paper lighter than 16 lb bond (60 g/m
might occur with these media types.
• Several kinds of media require a specific orientation when you print on both sides of
a page, such as letterhead, preprinted paper, and paper with watermarks and
prepunched holes.
2
) or heavier than 28 lb bond (105 g/m2). Jams
Perform duplexing
To print on both sides of a page (Windows)
1. Load the appropriate media. For more information, see
sides of a page and Load media.
2. With a document open, click Print on the File menu, and then click Setup,
Properties, or Preferences.
3. Click the Features tab.
4. Select the Two-sided printing drop-down list.
5. To automatically resize each page to match the document's onscreen layout, ensure
Preserve Layout is selected. Clearing this option might result in unwanted page
breaks.
6. Select or clear the Flip Pages Up check box depending on which way you want the
binding. See the graphics in the print driver for examples.
34 Print
Guidelines for printing on both
Page 39

7. Choose a booklet layout from the Booklet Layout drop-down list, if you want.
8. Change any other settings, and then click OK.
9. Print your document.
To print on both sides of a page (Mac OS)
1. Load the appropriate media. For more information, see
sides of a page and Load media.
2. With the document open, click Print on the File menu.
3. From the drop-down list, select Paper Handling, click Print: Odd numbered
pages, and then press Print.
4. Flip the paper over, and then print the even-numbered pages.
Cancel a print job
You can cancel a print job using one of the following methods.
• Control panel: Press
currently processing. It does not affect jobs waiting to be processed.
• Windows: Double-click the printer icon that appears in the lower-right corner of the
computer screen. Select the print job, and then press the Delete key on the keyboard.
• Mac OS: Double-click the printer in the Printer Setup Utility. Select the print job,
click Hold, and then click Delete.
Guidelines for printing on both
(Cancel button). This clears the job that the device is
Cancel a print job 35
Page 40

Chapter 3
36 Print
Page 41

4Copy
This section contains the following topics:
Make copies from the control panel
•
Change the copy settings
•
Set the number of copies
•
Set the copy paper size
•
Set the copy paper type
•
Change copy speed or quality
•
Resize an original to fit onto letter or A4 paper
•
Copy a legal-size document onto letter paper
•
Adjust the lightness and darkness of your copy
•
Enhance blurred areas of your copy
•
Enhance light areas of your copy
•
Cancel a copy job
•
NOTE: Many copy functions can be performed from the software. See the software
help for more information.
Make copies from the control panel
NOTE: The HP Officejet J3500 supports black and white copies on plain paper only.
You can make quality copies from the control panel.
To make a copy from the control panel
1. Make sure you have paper loaded in the input tray.
2. Load your original using the ADF. For more information, see
3. Do one of the following:
• Press START COPY Black to start a black-and-white copy job.
• Press START COPY Color to start a color copy job.
NOTE: If you have a color original, pressing START COPY Black produces a
black-and-white copy of the color original, while pressing START COPY Color
produces a full-color copy of the color original.
Change the copy settings
NOTE: The HP Officejet J3500 supports black and white copies on plain paper only.
You can customize the copy settings to handle nearly any task.
Load originals.
Copy 37
Page 42

Chapter 4
When you change copy settings, the changes are for the current copy job only. You must
set the changes as defaults for the settings to apply to all future copy jobs.
To save the current settings as defaults for future jobs
1. Make any necessary changes to the settings in the Copy Menu.
2. Press Copy Menu, and then press the arrow keys until Set New Defaults appears.
3. Press the arrow keys to select Yes, and then press OK.
Set the number of copies
You can set the number of copies that you want to print by using the Number of
Copies option.
NOTE: The HP Officejet J3500 supports black and white copies on plain paper only.
To set the number of copies from the control panel
1. Make sure you have paper loaded in the input tray.
2. Load your original print side down in the document feeder tray.
Place the pages so that the top edge of the document goes in first.
3. In the Copy area, press Copy Menu repeatedly until Number of Copies appears.
4. Press
(The maximum number of copies varies by model.)
or use the keypad to enter the number of copies, up to the maximum.
TIP: If you hold down either of the arrow buttons, the number of copies changes
by increments of 5 to make it easier to set a large number of copies.
5. Press START COPY Black or START COPY Color.
Set the copy paper size
You can set the paper size on the device. The paper size you select should match what
is loaded in your input tray.
NOTE: The HP Officejet J3500 supports black and white copies on plain paper only.
To set the paper size from the control panel
1. In the Copy area, press Copy Menu repeatedly until Copy Paper Size appears.
2. Press
3. Press START COPY Black or START COPY Color.
until the appropriate paper size appears.
Set the copy paper type
You can set the paper type on the device.
NOTE: The HP Officejet J3500 supports black and white copies on plain paper only.
38 Copy
Page 43

To set the paper type for copies from the control panel
1. In the Copy area, press Copy Menu repeatedly until Paper Type appears.
2. Press
until the appropriate paper type appears.
3. Press START COPY Black or START COPY Color.
Refer to the following table to determine which paper type setting to choose based on the
paper loaded in the input tray.
Paper type Control panel setting
Copier paper or letterhead Plain Paper
HP Bright White Paper Plain Paper
HP Premium Plus Photo Paper, Glossy Premium Photo
HP Premium Plus Photo Paper, Matte Premium Photo
HP Premium Plus 10 x 15 cm (4 x 6 inch) Photo Paper Premium Photo
HP Premium or Premium Plus Inkjet Transparency Film Transparency
Other transparency film Transparency
Plain Hagaki Plain Paper
Glossy Hagaki Premium photo
L (Japan only) Premium Photo
Change copy speed or quality
The device provides three options that affect copy speed and quality:
• Best produces the highest quality for all paper and eliminates the banding (striping)
effect that sometimes occurs in solid areas. Best copies slower than the other quality
settings.
• Normal delivers high-quality output and is the recommended setting for most of your
copying. Normal copies faster than Best and is the default setting.
• Fast copies faster than the Normal setting. The text is comparable to the quality of
the Normal setting, but the graphics might be lower quality. The Fast setting uses
less ink and extends the life of your print cartridges.
NOTE: The HP Officejet J3500 supports black and white copies on plain paper only.
To change the copy quality from the control panel
1. Make sure you have paper loaded in the input tray.
2. Load your original print side down in the document feeder tray.
Place the pages so that the top edge of the document goes in first.
3. In the Copy area, press Quality until the appropriate quality setting is lit.
4. Press START COPY Black or START COPY Color.
Change copy speed or quality 39
Page 44

Chapter 4
Resize an original to fit onto letter or A4 paper
If the image or text on your original fills the entire sheet with no margins, use Fit to
Page or Full Page 91% to reduce your original and prevent unwanted cropping of the
text or images at the edges of the sheet.
TIP: You can also use Fit to Page to enlarge a small photo to fit within the printable
area of a full-size page. In order to do this without changing the proportions of the
original or cropping the edges, the device might leave an uneven amount of white
space around the edges of the paper.
NOTE: The HP Officejet J3500 supports black and white copies on plain paper only.
To resize a document from the control panel
1. Make sure you have paper loaded in the input tray.
2. Load your original print side down in the document feeder tray.
Place the pages so that the top edge of the document goes in first.
3. In the Copy area, press the Reduce/Enlarge button.
4. Press
5. Press START COPY Black or START COPY Color.
until Full Page 91% appears.
Copy a legal-size document onto letter paper
You can use the Legal > Ltr 72% setting to reduce a copy of a legal-size document to a
size that fits onto letter paper.
NOTE: The percentage in the example, Legal > Ltr 72%, might not match the
percentage that appears in the display.
40 Copy
Page 45

NOTE: The HP Officejet J3500 supports black and white copies on plain paper only.
To copy a legal-size document onto letter paper from the control panel
1. Make sure you have paper loaded in the input tray.
2. Load your legal-size document print side down in the document feeder tray.
Place the page in the document feeder tray so that the top edge of the document goes
in first.
3. In the Copy area, press the Reduce / Enlarge button.
4. Press
5. Press START COPY Black or START COPY Color.
until Legal > Ltr 72% appears.
Adjust the lightness and darkness of your copy
You can use the Lighter / Darker option to adjust the contrast of the copies you make.
NOTE: The HP Officejet J3500 supports black and white copies on plain paper only.
To adjust the copy contrast from the control panel
1. Make sure you have paper loaded in the input tray.
2. Load your original print side down in the document feeder tray.
Place the pages so that the top edge of the document goes in first.
3. In the Copy area, press Copy Menu repeatedly until Lighter / Darker appears.
4. Do one of the following:
• Press
• Press
5. Press START COPY Black or START COPY Color.
to darken the copy.
to lighten the copy.
Enhance blurred areas of your copy
You can use the Enhancements feature to adjust the quality of text documents by
sharpening edges of black text or adjust photographs by enhancing light colors that might
otherwise appear white.
Adjust the lightness and darkness of your copy 41
Page 46

Chapter 4
The Mixed enhancement is the default option. Use the Mixed enhancement to sharpen
edges of most originals.
NOTE: The HP Officejet J3500 supports black and white copies on plain paper only.
To copy a blurred document from the control panel
1. Make sure you have paper loaded in the input tray.
2. Load your original print side down in the document feeder tray.
TIP: To avoid scratches or other damage to your original photos, place your
photo in a transparent photo sleeve before loading.
3. In the Copy area, press Copy Menu repeatedly until Enhancements appears.
4. Press
5. Press START COPY Black or START COPY Color.
If any of the following occur, turn off Text enhancement by selecting Photo or None:
• Stray dots of color surround some text on your copies
• Large, black typefaces look splotchy (not smooth)
• Thin, colored objects or lines contain black sections
• Horizontal grainy or white bands appear in light- to medium-gray areas
until the Text setting appears.
Enhance light areas of your copy
You can use Photo enhancements to enhance light colors that might otherwise appear
white. You can also use Photo enhancements to eliminate or reduce any of the following
that might occur when copying with Text enhancements:
• Stray dots of color surround some text on your copies
• Large, black typefaces look splotchy (not smooth)
• Thin, colored objects or lines contain black sections
• Horizontal grainy or white bands appear in light- to medium-gray areas
NOTE: The HP Officejet J3500 supports black and white copies on plain paper only.
To copy an overexposed photo from the control panel
1. Make sure you have paper loaded in the input tray.
2. Load your original print side down in the document feeder tray.
TIP: To avoid scratches or other damage to your original photos, place your
photo in a transparent photo sleeve before loading.
3. In the Copy area, press Copy Menu repeatedly until Enhancements appears.
4. Press
5. Press START COPY Color.
until the Photo enhancement setting appears.
Cancel a copy job
▲ To stop copying, press Cancel on the control panel.
42 Copy
Page 47

5 Scan
You can scan originals and send them to a variety of destinations, such as a folder on
the network or a program on a computer. You can use the control panel, the HP photo
and imaging software, and TWAIN-compliant or WIA-compliant programs on a computer.
This section contains the following topics:
•
Scan an original
Scan from a TWAIN-compliant or a WIA-compliant program
•
Edit a scanned original
•
Change scan settings
•
Cancel a scan job
•
Scan an original
You can start a scan from a computer or from the control panel.
NOTE: You can also use the HP Photosmart Software to scan an image. Using this
software, you can edit a scanned image and create special projects using a scanned
image. For information about how to scan from the computer, and how to adjust,
resize, rotate, crop, and sharpen your scans, see the onscreen HP Photosmart
Software Help that came with your software.
To use the scan features, your device and computer must be connected and turned on.
The printer software must also be installed and running on your computer prior to
scanning. To verify that the printer software is running on a computer running Windows,
look for the device icon in the system tray at the lower-right side of the screen, near the
clock. To verify this on a computer using the Mac OS, open the HP Device Manager, and
click Scan Picture. If a scanner is available, it will launch the HP ScanPro application. If
it is not available, a message appears to let you know that a scanner was not found.
NOTE: Closing the HP Digital Imaging Monitor icon in your Windows system tray
can cause your device to lose some of its scan functionality and result in the No
Connection error message. If this happens, you can restore full functionality by
restarting your computer or by starting the HP Photosmart Software.
Scan an original to a program on a computer
Use the following steps if your device is directly connected to a computer via a USB cable.
When the scan is complete, the program that you have selected opens and displays the
document that you have scanned.
To send a scan to a program on a computer from the HP photo and imaging
software
1. At the computer, open the HP photo and imaging software. For more information, see
Use the HP photo and imaging software.
2. See the onscreen Help for further instructions.
Scan 43
Page 48

Chapter 5
To send a scan to a program on a computer from the control panel
1. Load the original in the ADF. For more information, see
2. Press the Scan Menu or Scan To button.
3. Press the arrow keys to select the program that you want to use (such as the HP
photo and imaging software), and then press OK.
4. Press START SCAN.
Load originals.
Scan from a TWAIN-compliant or a WIA-compliant program
The device is TWAIN-complaint and WIA-compliant and works with programs that support
TWAIN-compliant and WIA-compliant scanning devices. While you are in a TWAINcompliant or WIA-compliant program, you can gain access to the scanning feature and
scan an image directly into the program.
TWAIN is supported for all Windows and Mac OS operating systems.
For Windows operating systems, WIA is supported only for Windows XP and Windows
Vista direct connections. WIA is not supported for the Mac OS.
Scan from a TWAIN-compliant program
Generally, a software program is TWAIN-compliant if it has a command such as
Acquire, File Acquire, Scan, Import New Object, Insert from, or Scanner. If you are
unsure whether the program is compliant or you do not know what the command is called,
see the software program Help or documentation.
Start the scan from within the TWAIN-compliant program. See the software program Help
or documentation for information about the commands and steps to use.
NOTE: If you start a TWAIN scan while a fax is being received, an error message
will be displayed and the scan is not performed. Wait until the fax has been received
and then restart the scan.
Scan from a WIA-compliant program
Generally, a software program is WIA-compliant if it has a command such as Picture/
From Scanner or Camera in the Insert or File menu. If you are unsure whether the
program is compliant or you do not know what the command is called, see the software
program Help or documentation.
Start the scan from within the WIA-compliant program. See the software program Help
or documentation for information about the commands and steps to use.
Edit a scanned original
You can edit a scanned image using the HP Photosmart Software. You can also edit a
scanned document by using your Optical Character Recognition (OCR) software.
44 Scan
Page 49

Edit a scanned photo or graphic
You can edit a scanned photo or graphic using the HP Photosmart Software. Use this
software to adjust the brightness, contrast, color saturation, and more. You can also rotate
the image using the HP Photosmart Software.
For more information, see the onscreen HP Photosmart Software Help.
Edit a scanned document using optical character recognition (OCR) software
You can use OCR software to import scanned text into your preferred word-processing
program for editing. This allows you to edit faxes, letters, newspaper clippings, and many
other documents.
You can specify the word-processing program that you want to use for editing. If the wordprocessing icon is not present or active, either you do not have word-processing software
installed on your computer, or the scanner software did not recognize the program during
the installation. See the onscreen Help for the HP photo and imaging software for
information about how to create a link to the word-processing program.
The OCR software does not support scanning colored text. Colored text is always
converted to black-and-white text before being sent to OCR. Thus, all text in the final
document is in black and white, regardless of the original color.
Because of the complexity of some word-processing programs and their interaction with
the device, it is sometimes preferable to scan to Wordpad (a Windows accessory), and
then cut and paste the text into the preferred word-processing program.
Change scan settings
To change scan settings
• HP Device Manager (Mac OS): Launch HP Device Manager, click Information and
Settings, and then select Scan Preferences from the drop-down list.
• Windows: Open the device software, select Settings, select Scan Settings and
Preferences, then select from the available options and make your selections.
Cancel a scan job
▲ Press Cancel on the control panel.
Change scan settings 45
Page 50

Chapter 5
46 Scan
Page 51

6Fax
You can use the device to send and receive faxes, including color faxes. You can
schedule faxes to be sent at a later time and set up speed-dials to send faxes quickly and
easily to frequently used numbers. From the control panel, you can also set a number of
fax options, such as resolution and the contrast between lightness and darkness on the
faxes you send.
If the device is directly connected to a computer, you can use the HP photo and imaging
software to perform fax procedures that are not available from the control panel. For more
information, see
NOTE: Before you begin faxing, make sure you have set up the device properly for
faxing. You might have already done this as part of the initial setup, by using either
the control panel or the software that came with the device. You can verify the fax is
set up correctly by running the fax setup test from the control panel. To run the fax
test, press Setup, select Tools, select Run fax test, and then press OK.
This section contains the following topics:
•
Send a fax
Receive a fax
•
Change fax settings
•
Fax over the Internet
•
Test fax setup
•
Use reports
•
Cancel a fax
•
Use the HP photo and imaging software.
Send a fax
You can send a fax in a variety of ways. Using the control panel, you can send a blackand-white or color fax. You can also send a fax manually from an attached phone. This
allows you to speak with the recipient before sending the fax.
•
Send a basic fax
Send a fax manually from a phone
•
Send a fax using monitor dialing
•
Send a fax from memory
•
Schedule a fax to send later
•
Send a fax to multiple recipients
•
Send a color original or photo fax
•
Change the fax resolution and Lighter / Darker settings
•
Send a fax in Error Correction Mode
•
Send a basic fax
You can easily send a single- or multiple-page black-and-white fax by using the control
panel.
Fax 47
Page 52

Chapter 6
NOTE: If you need printed confirmation that your faxes were successfully sent,
enable fax confirmation before sending any faxes.
TIP: You can also send a fax manually from a phone or by using monitor dialing.
These features allow you to control the pace of your dialing. They are also useful
when you want to use a calling card to charge the call and you have to respond to
tone prompts while dialing.
To send a basic fax from the control panel
1. Load your originals. For additional information, see
Load originals.
2. Enter the fax number by using the keypad, press Speed Dial or a one-touch speed
dial button to select a speed dial, or press Redial/Pause to redial the last number
dialed.
TIP: To add a pause in the fax number you are entering, press Redial/Pause,
or press the Symbols (*) button repeatedly, until a dash (-) appears on the display.
3. Press START FAX Black.
If the device detects an original loaded in the automatic document feeder, it
sends the document to the number you entered.
TIP: If the recipient reports issues with the quality of the fax you sent, you can
try changing the resolution or contrast of your fax.
Send a fax manually from a phone
Sending a fax manually allows you to make a phone call and talk with the recipient before
you send the fax. This is useful if you want to inform the recipient that you are going to
send them a fax before sending it. When you send a fax manually, you can hear the dial
tones, telephone prompts, or other sounds through the handset on your telephone. This
makes it easy for you to use a calling card to send your fax.
Depending on how the recipient has their fax machine set up, the recipient might answer
the phone, or the fax machine might take the call. If a person answers the phone, you
can speak with the recipient before sending the fax. If a fax machine answers the call,
you can send the fax directly to the fax machine when you hear the fax tones from the
receiving fax machine.
NOTE: The HP Officejet J3500 supports black-and-white faxes only.
To send a fax manually from a phone
1. Load your originals. For additional information, see
document feeder (ADF).
2. Dial the number by using the keypad on the phone that is connected to the device.
NOTE: Do not use the keypad on the control panel of the device when manually
sending a fax. You must use the keypad on your phone to dial the recipient's
number.
Load an original in the automatic
48 Fax
Page 53

3. If the recipient answers the telephone, you can engage in a conversation before
sending your fax.
NOTE: If a fax machine answers the call, you will hear fax tones from the
receiving fax machine. Proceed to the next step to transmit the fax.
4. When you are ready to send the fax, press START FAX Black or START FAX
Color.
NOTE: If prompted, select Send Fax, and then press START FAX Black or
START FAX Color again.
If you were speaking with the recipient before sending the fax, inform the recipient
that they should press Start on their fax machine after they hear fax tones.
The telephone line is silent while the fax is transmitting. At this point, you can hang
up the telephone. If you want to continue speaking with the recipient, remain on the
line until the fax transmission is complete.
To send a fax manually from a phone using the attached handset
1. Load your originals print side down and top first in the center of the document feeder
tray.
2. Pick up the handset that is attached to the HP All-in-One and dial the number by using
the keypad on the control panel.
3. If the recipient answers the telephone, you can engage in a conversation before
sending your fax.
NOTE: If a fax machine answers the call, you will hear fax tones from the
receiving fax machine. Proceed to the next step to transmit the fax.
4. Once you are ready to send the fax, press START FAX Black or START FAX
Color.
NOTE: If prompted, press 1 to select Send Fax, and then press START FAX
Black or START FAX Color again.
If you were speaking with the recipient before sending the fax, inform the recipient
that they should press Start on their fax machine after they hear fax tones.
The telephone line is silent while the fax is transmitting. At this point, you can hang
up the telephone. If you want to continue speaking with the recipient, remain on the
line until the fax transmission is complete.
Send a fax using monitor dialing
Monitor dialing allows you to dial a number from the control panel as you would dial a
regular telephone. When you send a fax using monitor dialing, you can hear the dial tones,
telephone prompts, or other sounds through the speakers on the device. This enables
you to respond to prompts while dialing, as well as control the pace of your dialing.
TIP: If you do not enter your calling card PIN fast enough, the device might start
sending fax tones too soon and cause your PIN not to be recognized by the calling
card service. If this is the case, you can create a speed dial entry to store the PIN for
your calling card.
Send a fax 49
Page 54

Chapter 6
NOTE: Make sure the volume is turned on, or you will not hear a dial tone.
NOTE: The HP Officejet J3500 supports black-and-white faxes only.
To send a fax using monitor dialing from the control panel
1. Load your originals. For additional information, see
document feeder (ADF).
2. Press START FAX Black or START FAX Color.
If the device detects an original loaded in the automatic document feeder, you will
hear a dial tone.
3. When you hear the dial tone, enter the number by using the keypad on the control
panel.
4. Follow any prompts that might occur.
TIP: If you are using a calling card to send a fax and you have your calling card
PIN stored as a speed dial, when prompted to enter your PIN, press Speed
Dial or a one-touch speed dial button to select the speed dial entry where you
have your PIN stored.
Your fax is sent when the receiving fax machine answers.
Send a fax from memory
You can scan a black-and-white fax into memory and then send the fax from memory.
This feature is useful if the fax number you are trying to reach is busy or temporarily
unavailable. The device scans the originals into memory and sends them once it is able
to connect to the receiving fax machine. After the device scans the pages into memory,
you can immediately remove the originals from the document feeder tray.
Load an original in the automatic
NOTE: You can only send a black-and-white fax from memory.
To send a fax from memory
1. Load your originals print side down into the document feeder tray.
2. In the Fax area, press Fax Menu.
The Enter Number prompt appears.
3. Enter the fax number by using the keypad, press Speed Dial or a one-touch speed
dial button to select a speed dial, or press Redial/Pause to redial the last number
dialed.
4. In the Fax area, press Fax Menu repeatedly until How to Fax appears.
5. Press
6. Press START FAX Black.
The device scans the originals into memory and sends the fax when the receiving fax
machine is available.
until Scan & Fax appears, and then press OK.
Schedule a fax to send later
You can schedule a black-and-white fax to be sent within the next 24 hours. This enables
you to send a black-and-white fax late in the evening, when phone lines are not as busy
or phone rates are lower, for example. The device automatically sends your fax at the
specified time.
50 Fax
Page 55

You can only schedule one fax to be sent at a time. You can continue to send faxes
normally, however, while a fax is scheduled.
NOTE: You can only send faxes in black and white due to memory limitations.
To schedule a fax from the control panel
1. Load your originals print side down into the document feeder tray.
2. In the Fax area, press Fax Menu repeatedly until How to Fax appears.
3. Press
4. Enter the send time by using the numeric keypad, and then press OK. If prompted,
press 1 for AM, or 2 for PM.
5. Enter the fax number by using the keypad, press Speed Dial or a one-touch speed
dial button to select a speed dial, or press Redial/Pause to redial the last number
dialed.
6. Press START FAX Black.
The device scans all pages and the scheduled time appears on the display. The fax
is sent at the scheduled time.
To cancel a scheduled fax
1. In the Fax area, press Fax Menu repeatedly until How to Fax appears.
2. Press
If there is a fax already scheduled, the Cancel prompt appears on the display.
3. Press 1 to select Yes.
until Send Fax Later appears, and then press OK.
until Send Fax Later appears, and then press OK.
NOTE: You can also cancel the scheduled fax by pressing Cancel on the control
panel when the scheduled time is visible on the display.
Send a fax to multiple recipients
This section contains the following topics:
•
Send a fax to multiple recipients from the control panel
Send a fax to multiple recipients from the HP Photosmart Studio Software (Mac OS)
•
Send a fax to multiple recipients from the control panel
You can send a fax to multiple recipients without first setting up a group speed dial.
NOTE: The list of recipients you specify for this fax is not saved and only works for
sending faxes in black. If you intend to send other faxes to the same recipient list, you
should create a group speed dial list. For more information, see
as speed-dial entries or groups
To send a fax to multiple recipients without using group speed dial
1. Press Fax Menu and select Broadcast Fax.
2. Enter a fax number by using the keypad, or use the arrow keys to access speed dials.
NOTE: You can add up to 20 individual fax numbers.
Set up fax numbers
Send a fax 51
Page 56

Chapter 6
3. Press START FAX Black.
4. When prompted, load your originals print side up and top first in the center of the
document feeder tray. For additional information, see
Load an original in the
automatic document feeder (ADF).
5. Press START FAX Black again.
You can send a fax to multiple recipients at once by grouping individual speed dial entries
into group speed dial entries.
To send a fax to multiple recipients using group speed dial
1. Load your originals print side down into the document feeder tray.
2. Press Speed Dial repeatedly, until the appropriate group speed dial entry appears.
TIP: You can also scroll through the speed dial entries by pressing or , or
you can select a speed dial entry by entering its speed dial code using the keypad
on the control panel.
3. Press START FAX Black.
If the device detects an original loaded in the automatic document feeder, it sends
the document to each number in the group speed dial entry.
NOTE: You can only use group speed dial entries to send faxes in black and
white, because of memory limitations. The device scans the fax into memory then
dials the first number. When a connection is made, it sends the fax and dials the
next number. If a number is busy or not answering, the device follows the settings
for Busy Redial and No Answer Redial. If a connection cannot be made, the
next number is dialed and an error report is generated.
52 Fax
Send a fax to multiple recipients from the HP Photosmart Studio Software (Mac OS)
To send a fax to multiple recipients from the software
1. Load your originals print side down into the document feeder tray.
2. Select the HP Device Manager from the Dock.
The HP Device Manager window appears.
3. In the Devices pop-up menu, choose the HP All-in-One, and then double-click Send
Fax.
The Print dialog box opens.
4. From the Printer pop-up menu, choose the HP All-in-One (Fax).
5. From the pop-up menu, choose Fax Recipients.
6. Enter the recipient information, and then click Add to Recipients.
NOTE: You can also add recipients from the Phone Book or from the Address
Book. To select a recipient from the Address Book, click Open Address
Book, and then drag and drop the recipient to the Fax Recipients area.
7. Continue to enter recipients, clicking Add to Recipients after each one, until all the
appropriate recipients are in the Recipient List.
8. Click Send Fax Now.
Page 57

Send a color original or photo fax
(HP Officejet J3600 only)
You can fax a color original or photo from the device. If it determines that the recipient's
fax machine only supports black-and-white faxes, the fax is sent in black and white.
HP recommends that you use only color originals for color faxing.
To send a color original or photo fax from the control panel
1. Load your originals print side down into the document feeder tray.
2. In the Fax area, press Fax Menu.
The Enter Number prompt appears.
3. Enter the fax number by using the keypad, press Speed Dial or a one-touch speed
dial button to select a speed dial, or press Redial/Pause to redial the last number
dialed.
4. Press START FAX Color.
If the device detects an original loaded in the automatic document feeder, it sends
the document to the number you entered.
NOTE: If the recipient's fax machine only supports black-and-white faxes, the
HP All-in-One automatically sends the fax in black and white. A message appears
after the fax has been sent indicating that the fax was sent in black and white.
Press OK to clear the message.
Change the fax resolution and Lighter / Darker settings
You can change the Resolution and Lighter / Darker settings for documents that you
are faxing.
NOTE: These settings do not affect copy settings. Copy resolution and lightness/
darkness are set independently from fax resolution and lightness/darkness. Also, the
settings that you change from the control panel do not affect faxes you send from your
computer.
This section contains the following topics:
•
Change the fax resolution
Change the Lighter / Darker setting
•
Set new default settings
•
Change the fax resolution
The Resolution setting affects the transmission speed and quality of faxed black-andwhite documents. If the receiving fax machine does not support the resolution you have
chosen, the HP All-in-One sends faxes at the highest resolution supported by the
receiving fax machine.
NOTE: You can only change the resolution for faxes that you are sending in black
and white. The device sends all color faxes using Fine resolution.
Send a fax 53
Page 58

Chapter 6
The following resolution settings are available for sending faxes: Fine, Very Fine,
Photo, and Standard.
• Fine: provides high-quality text suitable for faxing most documents. This is the default
setting. When sending faxes in color, the device always uses the Fine setting.
• Very Fine: provides the best quality fax when you are faxing documents with very
fine detail. If you choose Very Fine, be aware that the faxing process takes longer to
complete and you can only send black-and-white faxes using this resolution. If you
send a color fax, it will be sent using Fine resolution instead.
• Photo: provides the best quality fax when sending photographs in black and white.
If you choose Photo, be aware that the faxing process takes longer to complete.
When faxing photographs in black and white, HP recommends that you choose
Photo.
• Standard: provides the fastest possible fax transmission with the lowest quality.
When you exit the Fax menu, this option returns to the default setting unless you set your
changes as the default.
To change the resolution from the control panel
1. Load your originals print side up into the document feeder tray.
2. In the Fax area, press Fax Menu.
The Enter Number prompt appears.
3. Enter the fax number by using the keypad, press Speed Dial or a one-touch speed
dial button to select a speed dial, or press Redial/Pause to redial the last number
dialed.
4. In the Fax area, press Fax Menu repeatedly until Resolution appears.
5. Press
to select a resolution setting, and then press OK.
6. Press START FAX Black.
If the device detects an original loaded in the automatic document feeder, it sends
the document to the number you entered.
54 Fax
Change the Lighter / Darker setting
You can change the contrast of a fax to be darker or lighter than the original. This feature
is useful if you are faxing a document that is faded, washed out, or handwritten. You can
darken the original by adjusting the contrast.
NOTE: The Lighter / Darker setting applies to black-and-white faxes only, not color
faxes.
When you exit the Fax menu, this option returns to the default setting unless you set your
changes as the default.
To change the Lighter / Darker setting from the control panel
1. Load your originals print side up into the document feeder tray.
2. In the Fax area, press Fax Menu.
The Enter Number prompt appears.
3. Enter the fax number by using the keypad, press Speed Dial or a one-touch speed
dial button to select a speed dial, or press Redial/Pause to redial the last number
dialed.
Page 59

4. In the Fax area, press Fax Menu repeatedly until Lighter / Darker appears.
5. Press
The indicator moves to the left or right as you press an arrow button.
6. Press START FAX Black.
If the device detects an original loaded in the automatic document feeder, it sends
the document to the number you entered.
Set new default settings
You can change the default value for the Resolution and Lighter / Darker settings
through the control panel.
To set new default settings from the control panel
1. Make changes to the Resolution and Lighter / Darker settings.
2. In the Fax area, press Fax Menu repeatedly until Set New Defaults appears.
3. Press
to lighten the fax or press to darken it, and then press OK.
until Yes appears, and then press OK.
Send a fax in Error Correction Mode
Error Correction Mode (ECM) prevents loss of data due to poor phone lines by detecting
errors that occur during transmission and automatically requesting retransmission of the
erroneous portion. Phone charges are unaffected, or might even be reduced, on good
phone lines. On poor phone lines, ECM increases sending time and phone charges, but
sends the data much more reliably. The default setting is On. Turn ECM off only if it
increases phone charges substantially, and you can accept poorer quality in exchange
for reduced charges.
Before turning the ECM setting off, consider the following. If you turn ECM off
• The quality and transmission speed of faxes you send and receive are affected.
•The Fax Speed is automatically set to Medium.
• You will no longer be able to send or receive faxes in color.
To change the ECM setting from the control panel
1. Press Setup.
2. Press 5, and then press 6.
This selects Advanced Fax Setup and then selects Error Correction Mode.
3. Press
4. Press OK.
Receive a fax
You can receive faxes automatically or manually. If you turn off the Auto Answer option,
you must receive faxes manually. If you turn on the Auto Answer option (the default
setting), the device automatically answers incoming calls and receives faxes after the
number of rings that are specified by the Rings to Answer setting. (The default Rings
to Answer setting is five rings.)
If you receive a legal-size fax and the device is not currently set to use legal-size paper,
the device reduces the fax so that it fits on the paper that is loaded. If you have disabled
the Automatic Reduction feature, the device prints the fax on two pages.
to select On or Off.
Receive a fax 55
Page 60

Chapter 6
NOTE: The HP Officejet J3500 can receive black-and-white faxes only.
• Receive a fax manually
Set up backup fax reception
•
Reprint received faxes from memory
•
Poll to receive a fax
•
Forward faxes to another number
•
Set the paper size for received faxes
•
Set automatic reduction for incoming faxes
•
Block junk fax numbers
•
Receive a fax manually
When you are on the phone, the person you are speaking with can send you a fax while
you are still connected. This is referred to as manual faxing. Use the instructions in this
section to receive a manual fax.
NOTE: You can pick up the handset to talk or listen for fax tones.
You can receive faxes manually from a phone that is:
• Directly connected to the device (on the 2-EXT port)
• On the same phone line, but not directly connected to the device
NOTE: The HP Officejet J3500 can receive black-and-white faxes only.
To receive a fax manually
1. Make sure the device is turned on and you have paper loaded in the input tray.
2. Remove any originals from the document feeder tray.
3. Set the Rings to Answer setting to a high number to allow you to answer the incoming
call before the device answers. Or, turn off the Auto Answer setting so that the device
does not automatically answer incoming calls.
4. If you are currently on the phone with the sender, instruct the sender to press Start
on their fax machine.
5. When you hear fax tones from a sending fax machine, do the following:
a.Press START FAX Black or START FAX Color on the control panel.
b. When prompted, select Fax Receive.
c. After the device begins to receive the fax, you can hang up the phone or remain
on the line. The phone line is silent during fax transmission.
Set up backup fax reception
Depending on your preference and security requirements, you can set up the device to
store all the faxes it receives, only the faxes it receives while the device is in an error
condition, or none of the faxes it receives.
56 Fax
Page 61

The following Backup Fax Reception modes are available:
On The default setting. When Backup Fax Reception is On, the device stores
On Error Only Causes the device to store faxes in memory only if an error condition exists
Off Faxes are never stored in memory. For example, you might want to turn off
all received faxes in memory. This enables you to reprint up to eight of the
most recently printed faxes if they are still saved in memory.
NOTE: When device memory is low, it overwrites the oldest, printed faxes
as it receives new faxes. If the memory becomes full of unprinted faxes, the
device stops answering incoming fax calls.
NOTE: If you receive a fax that is too large, such as a very detailed color
photo, it might not be stored in memory due to memory limitations.
that prevents the device from printing the faxes (for example, if the device
runs out of paper). The device continues to store incoming faxes as long
as there is memory available. (If the memory becomes full, the device stops
answering incoming fax calls.) When the error condition is resolved, the
faxes stored in memory print automatically, and then they are deleted from
memory.
Backup Fax Reception for security purposes. If an error condition occurs
that prevents the device from printing (for example, the device runs out of
paper), the device stops answering incoming fax calls.
NOTE: If Backup Fax Reception is enabled and you turn off the device, all faxes
stored in memory are deleted, including any unprinted faxes that you might have
received while the device was in an error condition. You must contact the senders to
ask them to resend any unprinted faxes. For a list of the faxes you have received,
print the Fax Log. The Fax Log is not deleted when the device is turned off.
To set backup fax reception from the control panel
1. Press Setup.
2. Select Advance Fax Setup, and then select Backup Fax Reception.
3. Press the right arrow button to select On, On Error Only, or Off.
4. Press OK.
Reprint received faxes from memory
If you set the Backup Fax Reception mode to On, the received faxes are stored in
memory, whether the device has an error condition or not.
NOTE: After the memory becomes full, the oldest, printed faxes are overwritten as
new faxes are received. If all the stored faxes are unprinted, the device does not
receive any fax calls until you print or delete the faxes from memory. You might also
want to delete the faxes in memory for security or privacy purposes.
Receive a fax 57
Page 62

Chapter 6
Depending on the sizes of the faxes in memory, you can reprint up to eight of the most
recently printed faxes, if they are still in memory. For example, you might need to reprint
your faxes if you lost the copy of your last printout.
To reprint faxes in memory from the control panel
1. Make sure you have paper loaded in the input tray.
2. Press Setup.
3. Select Tools, and then select Reprint Faxes in Memory.
The faxes are printed in the reverse order from which they were received with the
most recently received fax printed first, and so on.
4. If you want to stop reprinting the faxes in memory, press Cancel.
To delete all the faxes in memory from the control panel
▲ Turn off the device by pressing the Power button.
All faxes stored in memory are deleted from memory when you turn off the power.
Poll to receive a fax
Polling allows the HP All-in-One to ask another fax machine to send a fax that it has in
its queue. When you use the Poll to Receive feature, the HP All-in-One calls the
designated fax machine and requests the fax from it. The designated fax machine must
be set for polling and have a fax ready to send.
NOTE: The HP All-in-One does not support polling pass codes. Polling pass codes
are a security feature that require the receiving fax machine to provide a pass code
to the device it is polling in order to receive the fax. Make sure the device you are
polling does not have a pass code set up (or has not changed the default pass code)
or the HP All-in-One will not be able to receive the fax.
NOTE: The HP Officejet J3500 can receive black-and-white faxes only.
To set up poll to receive a fax from the control panel
1. In the Fax area, press Fax Menu repeatedly until How to Fax appears.
2. Press
3. Enter the fax number of the other fax machine.
4. Press START FAX Black or START FAX Color.
until Poll to Receive appears, and then press OK.
NOTE: If you press START FAX Color but the sender sent the fax in black and
white, the device prints the fax in black and white.
Forward faxes to another number
You can set up the device to forward your faxes to another fax number. A received color
fax is forwarded in black and white.
58 Fax
Page 63

HP recommends that you verify the number you are forwarding to is a working fax line.
Send a test fax to make sure the fax machine is able to receive your forwarded faxes.
To forward faxes from the control panel
1. Press Setup.
2. Select Advance Fax Setup, and then select Fax Forwarding Black Only.
3. Press the right arrow button until On-Forward or On-Print & Forward appears, and
then press OK.
• Choose On-Forward if you want to forward the fax to another number without
printing a backup copy on the device.
NOTE: If the device is not able to forward the fax to the designated fax
machine (for example, if it is not turned on), the device prints the fax. If you
set up the device to print error reports for received faxes, it will also print an
error report.
• Choose On-Print & Forward to print a backup copy of your received fax while
forwarding the fax to another number.
4. At the prompt, enter the number of the fax machine that will receive the forwarded
faxes.
5. At the prompt, enter a start time and date and a stop time and date.
6. Press OK.
Fax Forwarding appears on the control-panel display.
If the device loses power when Fax Forwarding is set up, it saves the Fax
Forwarding setting and phone number. When power is restored to the device, the
Fax Forwarding setting is still On.
NOTE: You can cancel fax forwarding by pressing Cancel on the control panel
when the Fax Forwarding message is visible on the display, or you can select
Off from the Fax Forwarding Black Only menu.
Set the paper size for received faxes
You can select the paper size for received faxes. The paper size you select should match
what is loaded in your input tray. Faxes can be printed on letter, A4, or legal paper only.
NOTE: If an incorrect paper size is loaded in the input tray when you receive a fax,
the fax does not print and an error message appears on the display. Load letter, A4,
or legal paper, and then press OK to print the fax.
To set the paper size for received faxes from the control panel
1. Press Setup.
2. Press 4, and then press 4.
This selects Basic Fax Setup and then selects Fax Paper Size.
3. Press
to select an option, and then press OK.
Set automatic reduction for incoming faxes
The Automatic Reduction setting determines what the HP All-in-One does if it receives
a fax that is too large for the default paper size. This setting is turned on by default, so
Receive a fax 59
Page 64

Chapter 6
the image of the incoming fax is reduced to fit on one page, if possible. If this feature is
turned off, information that does not fit on the first page is printed on a second page.
Automatic Reduction is useful when you receive a legal-size fax and letter-size paper
is loaded in the input tray.
To set automatic reduction from the control panel
1. Press Setup.
2. Press 5, and then press 4.
This selects Advanced Fax Setup and then selects Automatic Reduction.
3. Press
to select Off or On.
4. Press OK.
Block junk fax numbers
If you subscribe to a caller ID service through your phone provider, you can block specific
fax numbers so the device does not print faxes received from those numbers. When an
incoming fax call is received, the device compares the number to the list of junk fax
numbers to determine if the call should be blocked. If the number matches a number in
the blocked fax numbers list, the fax is not printed. (The maximum number of fax numbers
you can block varies by model.)
NOTE: This feature is not supported in all countries/regions. If it is not supported in
your country/region, Junk Fax Blocker Set Up does not appear in the Basic Fax
Setup menu.
NOTE: If no phone numbers are added in the Caller ID list, it is assumed that the
user has not signed up for the Caller ID service with the phone company.
60 Fax
Set the junk fax mode
By default, Block Junk Fax mode is turned On. If you do not subscribe to a caller ID
service through your phone provider, or do not want to use this feature, you can turn off
this setting.
To set the junk fax mode
▲ Press the Junk Fax Blocker button, select the Block Junk Fax option, and then
select On or Off.
Add numbers to the junk fax list
There are two ways to add a number to your junk list. You can select numbers from your
caller ID history, or you can enter new numbers. The numbers in your junk list are blocked
if Block Junk Fax mode is set to On.
To select a number from the caller ID list
1. Press Setup.
2. Press Basic Fax Setup, and then press Junk Fax Blocker Setup.
3. Press Add number to Junk List, and then press Select Number.
Page 65

4. Press the right arrow button to scroll through the numbers from which you have
received faxes. When the number you want to block appears, press OK to select it.
5. When the Select Another? prompt appears, do one of the following:
• If you want to add another number to the list of junk fax numbers, press
Yes, and then repeat step 4 for each number you want to block.
• If you are done, press No.
To manually enter a number to block
1. Press Setup.
2. Press Basic Fax Setup, and then press Junk Fax Blocker Setup.
3. Press Add number to Junk List, and then press Enter Number.
4. Use the keypad to enter a fax number to block, and then press OK.
Make sure you enter the fax number as it appears on the control-panel display, and
not the fax number that appears on the fax header of the received fax, as these
numbers can be different.
5. When the Enter Another? prompt appears, do one of the following:
• If you want to add another number to the list of junk fax numbers, press
Yes, and then repeat step 4 for each number you want to block.
• If you are done, press No.
Remove numbers from the junk fax list
If you no longer want to block a fax number, you can remove a number from your junk
fax list.
To remove numbers from the list of junk fax numbers
1. Press Setup.
2. Press Basic Fax Setup, and then press Junk Fax Blocker Setup.
3. Press Remove Number from Junk List.
4. Press the right arrow button to scroll through the numbers you have blocked. When
the number you want to remove appears, press OK to select it.
5. When the Delete Another? prompt appears, do one of the following:
• If you want to remove another number from the list of junk fax numbers,
press Yes, and then repeat step 4 for each number you want to block.
• If you are done, press No.
Change fax settings
After completing the steps in the getting started guide that came with the device, use the
following steps to change the initial settings or to configure other options for faxing.
•
Configure the fax header
Set the answer mode (Auto answer)
•
Set the number of rings before answering
•
Change the answer ring pattern for distinctive ring
•
Set the fax error correction mode
•
Change fax settings 61
Page 66

Chapter 6
• Set the dial type
Set the redial options
•
Set the fax speed
•
Configure the fax header
The fax header prints your name and fax number on the top of every fax you send. HP
recommends that you set up the fax header by using the software that you installed with
the device. You can also set up the fax header from the control panel, as described here.
NOTE: In some countries/regions, the fax header information is a legal requirement.
To set or change the fax header
1. Press Setup.
2. Press Basic Fax Setup, and then press Fax Header.
3. Enter your personal or company name using the numeric keypad, and then press
OK.
4. Enter your fax number by using the numeric keypad, and then press OK.
Set the answer mode (Auto answer)
The answer mode determines whether the device answers incoming calls.
• Turn on the Auto Answer setting if you want the device to answer faxes
automatically. The device answers all incoming calls and faxes.
• Turn off the Auto Answer setting if you want to receive faxes manually. You must
be available to respond in person to the incoming fax call or the device does not
receive faxes.
To set the answer mode to manual or automatic via the control panel
▲ Press Auto Answer to turn the light on or off, as appropriate for your setup.
When the Auto Answer light is on, the device answers calls automatically. When the
light is off, the it does not answer calls.
Set the number of rings before answering
If you turn on the Auto Answer setting, you can specify how many rings occur before
incoming calls are automatically answered.
The Rings to Answer setting is important if you have an answering machine on the same
phone line as the device, because you want the answering machine to answer the phone
before the device does. The number of rings to answer for the device should be greater
than the number of rings to answer for the answering machine.
For example, set your answering machine to a low number of rings and the device to
answer in the maximum number of rings. (The maximum number of rings varies by
country/region.) In this setup, the answering machine answers the call and the device
62 Fax
Page 67

monitors the line. If the device detects fax tones, it receives the fax. If the call is a voice
call, the answering machine records the incoming message.
To set the number of rings before answering via the control panel
1. Press Setup.
2. Press Basic Fax Setup, and then press Rings to Answer.
3. Enter the appropriate number of rings by using the keypad, or press the left or right
arrow button to change the number of rings.
4. Press OK to accept the setting.
Change the answer ring pattern for distinctive ring
Many phone companies offer a distinctive ring feature that allows you to have several
phone numbers on one phone line. When you subscribe to this service, each number is
assigned a different ring pattern. You can set up the device to answer incoming calls that
have a specific ring pattern.
If you connect the device to a line with distinctive ring, have your telephone company
assign one ring pattern to voice calls and another ring pattern to fax calls. HP
recommends that you request double or triple rings for a fax number. When the device
detects the specified ring pattern, it answers the call and receives the fax.
If you do not have a distinctive ring service, use the default ring pattern, which is All
Rings.
NOTE: The HP fax cannot receive faxes when teh main phone number is off the
hook.
To change the answer ring pattern for distinctive ring via the control panel
1. Verify that the device is set to answer fax calls automatically.
2. Press Setup.
3. Press Advance Fax Setup, and then press Distinctive Ring.
4. Press the right arrow button to select an option, and then press OK.
When the phone rings with the ring pattern assigned to your fax line, the device
answers the call and receives the fax.
Set the fax error correction mode
Typically, the device monitors the signals on the phone line while it is sending or receiving
a fax. If it detects an error signal during the transmission and the error-correction setting
is on, the device can request that a portion of the fax be resent.
Turn off error correction only if you are having trouble sending or receiving a fax, and you
want to accept the errors in the transmission. Turning off the setting might be useful when
you are trying to send a fax to another country/region or receive a fax from another
country/region, or if you are using a satellite phone connection.
To set the fax error-correction mode
▲ Control panel: Press Fax Menu, open the Advance Fax Setup menu, and then use
the Error correction mode option.
Change fax settings 63
Page 68

Chapter 6
Set the dial type
Use this procedure to set tone-dialing or pulse-dialing mode. The factory-set default is
Tone. Do not change the setting unless you know that your phone line cannot use tone
dialing.
NOTE: The pulse-dialing option is not available in all countries/regions.
To set the dial type
▲ Control panel: Press Setup, press Basic Fax Setup, and then use the Tone or
Pulse Dialing option.
Set the redial options
If the device was unable to send a fax because the receiving fax machine did not answer
or was busy, the device attempts to redial based on the settings for the busy-redial and
no-answer-redial options. Use the following procedure to turn the options on or off.
• Busy redial: If this option is turned on, the device redials automatically if it receives
a busy signal. The factory-set default for this option is ON.
• No answer redial: If this option is turned on, the device redials automatically if the
receiving fax machine does not answer. The factory-set default for this option is
OFF.
To set the redial options
▲ Control panel: Press Setup, press Advance Fax Setup, and then use the Busy
Redial or No Answer Redial options.
Set the fax speed
You can set the fax speed used to communicate between your device and other fax
machines when sending and receiving faxes. The default fax speed is Fast.
If you use one of the following, setting the fax speed to a slower speed might be required:
• An Internet phone service
• A PBX system
• Fax over Internet Protocol (FoIP)
• An integrated services digital network (ISDN) service
If you experience problems sending and receiving faxes, you might want to try setting the
Fax Speed setting to Medium or Slow. The following table provides the available fax
speed settings.
Fax speed setting Fax speed
Fast v.34 (33600 baud)
Medium v.17 (14400 baud)
Slow v.29 (9600 baud)
64 Fax
Page 69

To set the fax speed from the control panel
1. Press Setup.
2. Select Advanced Fax Setup, and then press Fax Speed.
3. Select an option using the arrow keys, and then press OK.
Fax over the Internet
You may subscribe to a low cost phone service that allows you to send and receive faxes
with your device by using the Internet. This method is called Fax over Internet Protocol
(FoIP). You probably use a FoIP service (provided by your telephone company) if you:
• Dial a special access code along with the fax number, or
• Have an IP converter box that connects to the Internet and provides analog phone
ports for the fax connection.
NOTE: You can only send and receive faxes by connecting a phone cord to the port
labeled "1-LINE" on the device. This means that your connection to the Internet must
be done either through a converter box (which supplies regular analog phone jacks
for fax connections) or your telephone company.
Some Internet faxing services do not work properly when the device is sending and
receiving faxes at high speed (33600bps). If you experience problems sending and
receiving faxes while using an Internet fax service, use a slower fax speed. You can do
this by changing the Fax Speed setting from High (the default) to Medium. For
information on changing this setting, see
If you have questions about internet faxing, contact your internet faxing services support
department.
Set the fax speed.
Test fax setup
You can test your fax setup to check the status of the device and to make sure it is set
up properly for faxing. Perform this test after you have completed setting up the device
for faxing. The test does the following:
• Tests the fax hardware
• Verifies the correct type of phone cord is connected to the device
• Checks that the phone cord is plugged into the correct port
• Checks for a dial tone
• Checks for an active phone line
• Tests the status of your phone line connection
The device prints a report with the results of the test. If the test fails, review the report for
information on how to fix the problem and rerun the test.
To test fax setup
1. Set up the device for faxing according to your particular home or office setup
instructions.
2. Make sure the print cartridges are installed, and that full-size paper is loaded in the
input tray before starting the test.
Fax over the Internet 65
Page 70

Chapter 6
3. From the control panel, press Setup.
4. Select Tools, and then select Run Fax Test.
The device displays the status of the test on the display and prints a report.
5. Review the report.
• If the test passes and you are still having problems faxing, check the fax settings
• If the test fails, review the report for more information on how to fix any problems
Use reports
You can set up the device to print error reports and confirmation reports automatically for
each fax you send and receive. You can also manually print system reports as required;
these reports provide useful system information about the device.
By default, the device is set to print a report only if there is a problem sending or receiving
a fax. A confirmation message that indicates whether a fax was successfully sent appears
briefly on the control-panel display after each transaction.
•
Print fax confirmation reports
Print fax error reports
•
Print and view the fax log
•
listed in the report to verify the settings are correct. A blank or incorrect fax setting
can cause problems faxing.
found.
Print fax confirmation reports
If you require printed confirmation that your faxes were successfully sent, follow these
instructions to enable fax confirmation before sending any faxes. Select either On Fax
Send or Send & Receive.
The default fax confirmation setting is Off. This means that a confirmation report is not
printed for each fax sent or received. A confirmation message indicating whether a fax
was successfully sent appears briefly on the control-panel display after each transaction.
To enable fax confirmation
1. Press Setup.
2. Press Print Report, and then Fax Confirmation.
3. Press the right arrow button to select one of the following, and then press OK.
Off Does not print a fax confirmation report when you send and receive
On Fax Send Prints a fax confirmation report for every fax you send.
On Fax Receive Prints a fax confirmation report for every fax you receive.
faxes successfully. This is the default setting.
66 Fax
Page 71

Send & Receive Prints a fax confirmation report for every fax you send and receive.
TIP: If you choose On Fax Send or Send & Receive, and scan your fax to send
from memory, you can include an image of the first page of the fax on the Fax
Sent Confirmation report. Press Setup, press Fax Confirmation, and then
press On Fax Send again. Select On from the Image on Fax Send Report menu.
Print fax error reports
You can configure the device so that it automatically prints a report when there is an error
during transmission or reception.
To set the device to print fax error reports automatically
1. Press Setup.
2. Press Print Report, and then press Fax Error Report.
3. Press the right arrow button to select one of the following, and then press OK.
Send & Receive Prints whenever a fax error occurs. This is the default setting.
Off Does not print any fax error reports.
On Fax Send Prints whenever a transmission error occurs.
On Fax Receive Prints whenever a receiving error occurs.
Print and view the fax log
The logs list faxes that have been sent from the control panel and all faxes that have been
received.
You can print a log of faxes that have been received and sent by the device. Each entry
in the log contains the following information:
• Transmission date and time
• Type (whether received or sent)
• Fax number
•Duration
• Number of pages
• Result (status) of transmission
To view the fax log from the HP photo and imaging software
1. At the computer, open the HP photo and imaging software. For more information, see
Use the HP photo and imaging software.
2. See the onscreen Help for the HP photo and imaging software for further instructions.
The log lists faxes that have been sent from the control panel and the HP photo and
imaging software and all faxes that have been received.
Use reports 67
Page 72

Chapter 6
To print the fax log from the control panel
1. On the control panel, press Setup.
2. Press the arrow key to move down to Print Report, and then press OK.
3. Press the arrow key to move down to Fax Log, and then press OK.
4. Press OK again to print the log.
Cancel a fax
You can cancel a fax you are sending or receiving at any time.
To cancel a fax
▲ Press Cancel on the control panel to stop a fax you are sending or receiving. If the
device does not stop faxing, press Cancel again.
The device prints any pages it has already started printing and then cancels the
remainder of the fax. This can take a few moments.
To cancel a number you are dialing
▲ Press Cancel to cancel a number you are currently dialing.
68 Fax
Page 73

7 Configure and manage
This section is intended for the administrator or individual who is responsible for managing
the device. This section contains information about the following topics.
•
Manage the device
Use device management tools
•
Set up faxing for the device
•
Configure the device (Windows)
•
Configure the device (Mac OS)
•
Uninstall and reinstall the software
•
Manage the device
The following, common tools can be used to manage the device. For information about
accessing and using the tools, see
NOTE: Specific procedures might include other methods.
Windows
• Device control panel
• Printer driver
• Toolbox
Mac OS
• Device control panel
• HP Printer Utility
Use device management tools.
NOTE: Mac OS is supported by HP Officejet J3600 only.
• Monitor the device
Administer the device
•
Monitor the device
This section provides instructions for monitoring the device.
NOTE: The ink levels shown are an estimate only. Actual ink volumes may vary.
Use this tool... to obtain the following information....
Control panel Obtain information about the status of jobs that
Toolbox (Windows) Print cartridge information: Click the
are being processed, the operating status of the
device, and the status of the print cartridges.
Estimated Ink Levels tab to view the ink-level
information, and then scroll to display the
Configure and manage 69
Page 74

Chapter 7
(continued)
Use this tool... to obtain the following information....
HP Printer Utility (Mac OS) (supported by
HP Officejet J3600 only)
Administer the device
This section provides information about administering the device and modifying settings.
Use this tool... to do the following...
Cartridge Details button. Click the Cartridge
Details button to view information about
replacement print cartridges and expiration
dates.
Print cartridge information: Open the
Information and Support panel and click
Supplies Status.
Control panel
Toolbox (Windows) Perform device maintenance tasks: Click the
HP Printer Utility (Mac OS) (supported
by HP Officejet J3600 only)
Use device management tools
• Toolbox (Windows)
HP Printer Utility (Mac OS)
•
Language and country/region: Press Setup,
•
and then open the Preferences menu. If you do
not see your country/region, press 99, and then
find your country/region in the list.
Control panel volume: Press Setup, and then
•
open the Preferences menu.
Fax sound volume: Press Setup, and then
•
select Fax Sound Volume.
Automatic report printing: Press Setup, and
•
then open the Advance Fax Setup menu.
Set the dial type: Press Setup, and then open
•
the Basic Fax Setup menu.
Set up redial options: Press Setup, and then
•
open the Advance Fax Setup menu.
Set the date and time: Press Setup, press
•
Tools, and then press Date and Time.
Device Services tab.
Perform device maintenance tasks: Open the
Information and Support panel, and then click the
option for the task that you want to perform.
Toolbox (Windows)
The Toolbox provides maintenance information about the device.
NOTE: The Toolbox can be installed from the Starter CD by selecting the full
installation option if the computer meets the system requirements.
70 Configure and manage
Page 75

Open the Toolbox
• From the HP Solution Center, click the Settings menu, point to Print Settings, and
then click Printer Toolbox.
• Right-click the HP Digital Imaging Monitor in the tray, point to Printer Model Name
and then click Display Printer Toolbox.
Toolbox tabs
The Toolbox contains the following tabs.
Tabs Contents
Estimated Ink Level
Device Services
HP Printer Utility (Mac OS)
The HP Printer Utility contains tools to configure print settings, calibrate the device, order
supplies online, and find Web site support information.
NOTE: Mac OS is supported by HP Officejet J3600 only.
Ink Level Information: Shows estimated ink
•
level for a print cartridge.
NOTE: The ink levels shown are an estimate
only. Actual ink volumes may vary.
Shop Online: Provides access to a Web site
•
from which you can order printing supplies for the
device online.
Order by Phone: Shows telephone numbers
•
that you can call to order supplies for the device.
Telephone numbers are not available for all
countries/regions.
Cartridge Details: Shows order numbers and
•
expiration dates of the installed print cartridges.
Align the Print Cartridges: Guides you through
•
aligning the print cartridges. For more
information, see
Clean the Print Cartridges: Guides you through
•
cleaning the print cartridges. For more
information, see
Print a Test Page: Guides you through printing
•
a test page.
Align the print cartridges.
Clean the print cartridges.
Open the HP Printer Utility
To open the HP Printer Utility from the Desktop
1. From the Finder, select Computer from the Go menu.
2. Select Library, and then select Printers.
3. Select HP, select Utilities, and then select HP Printer Selector.
4. Select the device and click Launch Utility.
Use device management tools 71
Page 76

Chapter 7
To open the HP Printer Utility from the Printer Setup Utility
1. From the Finder, select Computer from the Go menu.
2. Select the device from the list, and then press Utility.
3. Select the device from the menu, and then press Launch Utility.
HP Printer Utility panels
Information and Support panel
• Supplies Status: Shows the information about currently installed print cartridges.
• Supply Info: Shows the print cartridge replacement options.
• Device Information: Displays information about the model and serial number. This
page contains information about the device and the supplies.
• Clean: Guides you through cleaning the print cartridges.
• Align: Guides you through aligning the print cartridges.
• HP Support: Gain access to HP Web site where you can find support for the device,
register the device, and find information about returning and recycling used printing
supplies.
Set up faxing for the device
After completing all the steps in the getting started guide, use the instructions in this
section to complete your fax setup. Keep your getting started guide for later use.
In this section, you will learn how to set up the device so that faxing works successfully
with equipment and services you might already have on the same phone line.
TIP: You can also use the Fax Setup Wizard (Windows) or HP Fax Setup Utility (Mac
OS) to help you quickly set up some important fax settings such as the answer mode
and fax header information. You can access the Fax Setup Wizard (Windows) or HP
Fax Setup Utility (Mac OS) through the software you installed with the device. After
you run the Fax Setup Wizard (Windows) or HP Fax Setup Utility (Mac OS), follow
the procedures in this section to complete your fax setup.
72 Configure and manage
Page 77

Set up faxing (parallel phone systems)
Before you begin setting up the device for faxing, determine which kind of phone system
your country/region uses. The instructions for fax setup differ depending on whether you
have a serial- or parallel-type phone system.
• If you do not see your country/region listed in the table below, you probably have a
serial-type phone system. In a serial-type phone system, the connector type on your
shared telephone equipment (modems, phones, and answering machines) does not
allow a physical connection to the "2-EXT" port on the device. Instead, all equipment
must be connected at the telephone wall jack.
NOTE: In some countries/regions that use serial-type phone systems, the phone
cord that came with the device might have an additional wall plug attached to it.
This enables you to connect other telecom devices to the wall jack where you plug
in the device.
• If your country/region is listed in the table below, you probably have a parallel-type
telephone system. In a parallel-type phone system, you are able to connect shared
telephone equipment to the phone line by using the "2-EXT" port on the back of the
device.
NOTE: If you have a parallel-type phone system, HP recommends you use the
2-wire phone cord supplied with the device to connect it to the telephone wall jack.
Table 7-1 Countries/regions with a parallel-type phone system
Argentina Australia Brazil
Canada Chile China
Colombia Greece India
Indonesia Ireland Japan
Korea Latin America Malaysia
Mexico Philippines Poland
Portugal Russia Saudi Arabia
Singapore Spain Taiwan
Thailand USA Venezuela
Vietnam
If you are unsure which kind of telephone system you have (serial or parallel), check with
your telephone company.
Choose the correct fax setup for your home or office
To fax successfully, you need to know what types of equipment and services (if any) share
the same phone line with the device. This is important because you might need to connect
some of your existing office equipment directly to the device, and you might also need to
change some fax settings before you can fax successfully.
Set up faxing for the device 73
Page 78

Chapter 7
To determine the best way to set up the device in your home or office, first read through
the questions in this section and record your answers. Next, refer to the table in the
following section and choose the recommended setup case based on your answers.
Make sure to read and answer the following questions in the order they are presented.
1. Do you have a digital subscriber line (DSL) service through your telephone company?
(DSL might be called ADSL in your country/region.)
If you answered Yes, proceed directly to
Case B: Set up the device with DSL. You
do not need to continue answering questions.
If you answered No, continue answering questions.
2. Do you have a private branch exchange (PBX) phone system or an integrated
services digital network (ISDN) system?
If you answered Yes, proceed directly to
Case C: Set up the device with a PBX phone
system or an ISDN line. You do not need to continue answering questions.
If you answered No, continue answering questions.
3. Do you subscribe to a distinctive ring service through your telephone company that
provides multiple phone numbers with different ring patterns?
If you answered Yes, proceed directly to
Case D: Fax with a distinctive ring service
on the same line. You do not need to continue answering questions.
If you answered No, continue answering questions.
Are you unsure if you have distinctive ring? Many phone companies offer a distinctive
ring feature that allows you to have several phone numbers on one phone line.
When you subscribe to this service, each phone number will have a different ring
pattern. For example, you can have single, double, and triple rings for the different
numbers. You might assign one phone number with a single ring to your voice calls,
and another phone number with double rings to your fax calls. This allows you to tell
the difference between voice and fax calls when the phone rings.
4. Do you receive voice calls at the same phone number you will use for fax calls on the
device?
Continue answering questions.
5. Do you have a computer dial-up modem on the same phone line as the device?
Are you unsure if you use a computer dial-up modem? If you answer Yes to any of
the following questions, you are using a computer dial-up modem:
• Do you send and receive faxes directly to and from your computer software
applications through a dial-up connection?
• Do you send and receive e-mail messages on your computer through a dial-up
connection?
• Do you access the Internet from your computer through a dial-up connection?
Continue answering questions.
6. Do you have an answering machine that answers voice calls at the same phone
number you will use for fax calls on the device?
Continue answering questions.
7. Do you subscribe to a voice mail service through your telephone company at the same
phone number you will use for fax calls on the device?
After you have completed answering the questions, proceed to the next section to
select your fax setup case.
74 Configure and manage
Page 79

Select your fax setup case
Now that you have answered all the questions about the equipment and services that
share the phone line with the device, you are ready to choose the best setup case for
your home or office.
From the first column in the following table, choose the combination of equipment and
services applicable to your home or office setting. Then look up the appropriate setup
case in the second or third column based on your phone system. Step-by-step
instructions are included for each case in the sections that follow.
If you have answered all the questions in the previous section and have none of the
described equipment or services, choose "None" from the first column in the table.
NOTE: If your home or office setup is not described in this section, set up the device
as you would a regular analog phone. Make sure you use the phone cord supplied in
the box to connect one end to your telephone wall jack and the other end to the port
labeled 1-LINE on the back of the device. If you use another phone cord, you might
experience problems sending and receiving faxes.
Other equipment/services
sharing your fax line
None
(You answered No to all
questions.)
DSL service
(You answered Yes to question
1 only.)
PBX or ISDN system
(You answered Yes to question
2 only.)
Distinctive ring service
(You answered Yes to question
3 only.)
Voice calls
(You answered Yes to question
4 only.)
Voice calls and voice mail
service
(You answered Yes to
questions 4 and 7 only.)
Computer dial-up modem
(You answered Yes to question
5 only.)
Voice calls and computer dialup modem
(You answered Yes to
questions 4 and 5 only.)
Recommended fax setup for
parallel-type phone systems
Case A: Separate fax line (no
voice calls received)
Case B: Set up the device with
DSL
Case C: Set up the device with
a PBX phone system or an
ISDN line
Case D: Fax with a distinctive
ring service on the same line
Case E: Shared voice/fax line Refer to your country in Serial-
Case F: Shared voice/fax line
with voice mail
Case G: Fax line shared with
computer modem (no voice
calls received)
Case H: Shared voice/fax line
with computer modem
Recommended fax setup for
serial-type phone systems
Refer to your country in Serial-
type fax setup
Refer to your country in Serial-
type fax setup
Refer to your country in Serial-
type fax setup
Refer to your country in Serial-
type fax setup
type fax setup
Refer to your country in Serial-
type fax setup
Not applicable.
Not applicable.
Set up faxing for the device 75
Page 80

Chapter 7
(continued)
Other equipment/services
sharing your fax line
Recommended fax setup for
parallel-type phone systems
Recommended fax setup for
serial-type phone systems
Voice calls and answering
machine
(You answered Yes to
questions 4 and 6 only.)
Voice calls, computer dial-up
modem, and answering
machine
(You answered Yes to
questions 4, 5, and 6 only.)
Voice calls, computer dial-up
modem, and voice mail service
(You answered Yes to
questions 4, 5, and 7 only.)
Case I: Shared voice/fax line
with answering machine
Case J: Shared voice/fax line
with computer modem and
answering machine
Case K: Shared voice/fax line
with computer dial-up modem
and voice mail
Not applicable.
Not applicable.
Not applicable.
Case A: Separate fax line (no voice calls received)
If you have a separate phone line on which you receive no voice calls, and you have no
other equipment connected on this phone line, set up the device as described in this
section.
Figure 7-1 Back view of the device
1 Telephone wall jack
2 Use the phone cord supplied in the box with the device to connect to the
76 Configure and manage
1-LINE port
Page 81

To set up the device with a separate fax line
1. Using the phone cord supplied in the box with the device, connect one end to your
telephone wall jack, then connect the other end to the port labeled 1-LINE on the back
of the device.
NOTE: If you do not use the supplied cord to connect from the telephone wall
jack to the device, you might not be able to fax successfully. This special phone
cord is different from the phone cords you might already have in your home or
office.
2. Turn on the Auto Answer setting.
3. (Optional) Change the Rings to Answer setting to the lowest setting (two rings).
4. Run a fax test.
When the phone rings, the device answers automatically after the number of rings you
set in the Rings to Answer setting. The device begins emitting fax reception tones to the
sending fax machine and receives the fax.
Case B: Set up the device with DSL
If you have a DSL service through your telephone company, and do not connect any
equipment to the device, use the instructions in this section to connect a DSL filter
between the telephone wall jack and the device. The DSL filter removes the digital signal
that can interfere with the device, so the device can communicate properly with the phone
line. (DSL might be called ADSL in your country/region.)
NOTE: If you have a DSL line and you do not connect the DSL filter, you will not be
able to send and receive faxes with the device.
Figure 7-2 Back view of the device
1 Telephone wall jack
2 DSL (or ADSL) filter and cord supplied by your DSL provider
3 Use the phone cord supplied in the box with the device to connect to the
1-LINE port
Set up faxing for the device 77
Page 82

Chapter 7
To set up the device with DSL
1. Obtain a DSL filter from your DSL provider.
2. Using the phone cord supplied in the box with the device, connect one end to the
open port on the DSL filter, and then connect the other end to the port labeled 1-LINE
on the back of the device.
NOTE: If you do not use the supplied cord to connect from the DSL filter to the
device, you might not be able to fax successfully. This special phone cord is
different from the phone cords you might already have in your home or office.
As only one phone cord is supplied, you may will need to obtain additional phone
cords for this setup.
3. Connect an additional phone cord from the DSL filter to the telephone wall jack.
4. Run a fax test.
Case C: Set up the device with a PBX phone system or an ISDN line
If you are using either a PBX phone system or an ISDN converter/terminal adapter, make
sure you do the following:
• If you are using either a PBX or an ISDN converter/terminal adaptor, connect the
device to the port that is designated for fax and phone use. Also, make sure that the
terminal adapter is set to the correct switch type for your country/region, if possible.
NOTE: Some ISDN systems allow you to configure the ports for specific phone
equipment. For example, you might have assigned one port for telephone and
Group 3 fax and another port for multiple purposes. If you have problems when
connected to the fax/phone port of your ISDN converter, try using the port
designated for multiple purposes; it might be labeled "multi-combi" or something
similar.
• If you are using a PBX phone system, set the call waiting tone to "off."
NOTE: Many digital PBX systems include a call-waiting tone that is set to "on"
by default. The call waiting tone will interfere with any fax transmission, and you
will not be able to send or receive faxes with the device. Refer to the
documentation that came with your PBX phone system for instructions on how to
turn off the call-waiting tone.
• If you are using a PBX phone system, dial the number for an outside line before dialing
the fax number.
• Make sure you use the supplied cord to connect from the telephone wall jack to the
device. If you do not, you might not be able to fax successfully. This special phone
cord is different from the phone cords you might already have in your home or office.
If the supplied phone cord is too short, you can purchase a coupler from your local
electronics store and extend it.
78 Configure and manage
Page 83

Case D: Fax with a distinctive ring service on the same line
If you subscribe to a distinctive ring service (through your telephone company) that allows
you to have multiple phone numbers on one phone line, each with a different ring pattern,
set up the device as described in this section.
Figure 7-3 Back view of the device
1 Telephone wall jack
2 Use the phone cord supplied in the box with the device to connect to the
1-LINE port
To set up the device with a distinctive ring service
1. Using the phone cord supplied in the box with the device, connect one end to your
telephone wall jack, then connect the other end to the port labeled 1-LINE on the back
of the device.
NOTE: If you do not use the supplied cord to connect from the telephone wall
jack to the device, you might not be able to fax successfully. This special phone
cord is different from the phone cords you might already have in your home or
office.
2. Turn on the Auto Answer setting.
3. Change the Distinctive Ring setting to match the pattern that the telephone company
assigned to your fax number.
NOTE: By default, the device is set to answer all ring patterns. If you do not set
the Distinctive Ring to match the ring pattern assigned to your fax number, the
device might answer both voice calls and fax calls or it might not answer at all.
4. (Optional) Change the Rings to Answer setting to the lowest setting (two rings).
5. Run a fax test.
The device automatically answers incoming calls that have the ring pattern you selected
(Distinctive Ring setting) after the number of rings you selected (Rings to Answer
setting). The device begins emitting fax reception tones to the sending fax machine and
receives the fax.
Set up faxing for the device 79
Page 84

Chapter 7
Case E: Shared voice/fax line
If you receive both voice calls and fax calls at the same phone number, and you have no
other office equipment (or voice mail) on this phone line, set up the device as described
in this section.
Figure 7-4 Back view of the device
1 Telephone wall jack
2 Use the phone cord supplied in the box with the device to connect to the
1-LINE port
3 Telephone (optional)
To set up the device with a shared voice/fax line
1. Using the phone cord supplied in the box with the device, connect one end to your
telephone wall jack, then connect the other end to the port labeled 1-LINE on the back
of the device.
NOTE: If you do not use the supplied cord to connect from the telephone wall
jack to the device, you might not be able to fax successfully. This special phone
cord is different from the phone cords you might already have in your home or
office.
2. Do one of the following:
• If you have a parallel-type phone system, remove the white plug from the port
labeled 2-EXT on the back of the device, and then connect a phone to this port.
• If you have a serial-type phone system, you might plug your phone directly on top
of the device cable which has a wall plug attached to it.
80 Configure and manage
Page 85

3. Now you need to decide how you want the device to answer calls, automatically or
manually:
• If you set up the device to answer calls automatically, it answers all incoming
calls and receives faxes. The device will not be able to distinguish between fax
and voice calls in this case; if you suspect the call is a voice call, you will need to
answer it before the device answers the call. To set up the device to answer calls
automatically, turn on the Auto Answer setting.
• If you set up the device to answer faxes manually, you must be available to
respond in person to incoming fax calls or the device cannot receive faxes. To
set up the device to answer calls manually, turn off the Auto Answer setting.
4. Run a fax test.
If you pick up the phone before the device answers the call and hear fax tones from a
sending fax machine, you will need to answer the fax call manually.
Case F: Shared voice/fax line with voice mail
If you receive both voice calls and fax calls at the same phone number, and you also
subscribe to a voice mail service through your telephone company, set up the device as
described in this section.
NOTE: You cannot receive faxes automatically if you have a voice mail service at
the same phone number you use for fax calls. You must receive faxes manually; this
means you must be available to respond in person to incoming fax calls. If you want
to receive faxes automatically instead, contact your telephone company to subscribe
to a distinctive ring service, or to obtain a separate phone line for faxing.
Figure 7-5 Back view of the device
1 Telephone wall jack
2 Use the phone cord supplied in the box with the device to connect to the
"1-LINE" port
Set up faxing for the device 81
Page 86

Chapter 7
To set up the device with voice mail
1. Using the phone cord supplied in the box with the device, connect one end to your
telephone wall jack, then connect the other end to the port labeled 1-LINE on the back
of the device.
NOTE: If you do not use the supplied cord to connect from the telephone wall
jack to the device, you might not be able to fax successfully. This special phone
cord is different from the phone cords you might already have in your home or
office.
2. Turn off the Auto Answer setting.
3. Run a fax test.
You must be available to respond in person to incoming fax calls, or the device cannot
receive faxes. You must initiate the manual fax before voicemail picks up the line.
Case G: Fax line shared with computer modem (no voice calls received)
If you have a fax line on which you receive no voice calls, and you also have a computer
modem connected on this line, set up the device as described in this section.
NOTE: If you have a computer dial-up modem, your computer dial-up modem shares
the phone line with the device. You will not be able to use both your modem and the
device simultaneously. For example, you cannot use the device for faxing while you
are using your computer dial-up modem to send an e-mail or access the Internet.
• Set up the device with a computer dial-up modem
Set up the device with a computer DSL/ADSL modem
•
Set up the device with a computer dial-up modem
If you are using the same phone line for sending faxes and for a computer dial-up modem,
follow these directions for setting up the device.
Figure 7-6 Back view of the device
1 Telephone wall jack
2 Use the phone cord supplied in the box with the device to connect to the
82 Configure and manage
"1-LINE" port
Page 87

(continued)
3 Computer with modem
To set up the device with a computer dial-up modem
1. Remove the white plug from the port labeled 2-EXT on the back of the device.
2. Find the phone cord that connects from the back of your computer (your computer
dial-up modem) to a telephone wall jack. Disconnect the cord from the telephone wall
jack and plug it into the port labeled 2-EXT on the back of the device.
3. Using the phone cord supplied in the box with the device, connect one end to your
telephone wall jack, then connect the other end to the port labeled 1-LINE on the back
of the device.
NOTE: If you do not use the supplied cord to connect from the telephone wall
jack to the device, you might not be able to fax successfully. This special phone
cord is different from the phone cords you might already have in your home or
office.
4. If your modem software is set to receive faxes to your computer automatically, turn
off that setting.
NOTE: If you do not turn off the automatic fax reception setting in your modem
software, the device will not be able to receive faxes.
5. Turn on the Auto Answer setting.
6. (Optional) Change the Rings to Answer setting to the lowest setting (two rings).
7. Run a fax test.
When the phone rings, the device automatically answers after the number of rings you
set in the Rings to Answer setting. The device begins emitting fax reception tones to the
sending fax machine and receives the fax.
Set up the device with a computer DSL/ADSL modem
If you have a DSL line and use that phone line to send faxes, follow these instructions to
set up your fax.
Set up faxing for the device 83
Page 88

Chapter 7
1 Telephone wall jack
2 Parallel splitter
3 DSL/ADSL filter
Connect one end of the phone jack that was supplied with the device to
connect to the 1-LINE port on the back of the device. Connect the other
end of the cord to the DSL/ADSL filter.
4 Computer
5 Computer DSL/ADSL modem
NOTE: You will need to purchase a parallel splitter. A parallel splitter has one RJ-11
port on the front and two RJ-11 ports on the back. Do not use a 2–line phone splitter,
a serial splitter, or a parallel splitter which has two RJ-11 ports on the front and a plug
on the back.
To set up the device with a computer DSL/ADSL modem
1. Obtain a DSL filter from your DSL provider.
2. Using the phone cord provided in the box with the device, connect one end to the
DSL filter, and then connect the other end to the port labeled 1-LINE on the back of
the device.
NOTE: If you do not use the supplied cord to connect from the DSL filter to the
back of the device, you might not be able to fax successfully. This special phone
cord is different from the phone cords you might already have in your home or
office.
3. Connect the DSL filter to the parallel splitter.
4. Connect the DSL modem to the parallel splitter.
5. Connect the parallel splitter to the wall jack.
6. Run a fax test.
When the phone rings, the device automatically answers after the number of rings you
set in the Rings to Answer setting. The device begins emitting fax reception tones to the
sending fax machine and receives the fax.
Case H: Shared voice/fax line with computer modem
If you receive both voice calls and fax calls at the same phone number, and you also have
a computer modem connected on this phone line, set up the device as described in this
section.
84 Configure and manage
Page 89

NOTE: Since your computer modem shares the phone line with the device, you
cannot use both your modem and the device simultaneously. For example, you cannot
use the device for faxing while you are using your computer modem to send an e-mail
or access the Internet.
• Shared voice/fax with computer dial-up modem
Shared voice/fax with computer DSL/ADSL modem
•
Shared voice/fax with computer dial-up modem
If you use your phone line for both fax and telephone calls, use these instructions to set
up your fax.
There are two different ways to set up the device with your computer based on the number
of phone ports on your computer. Before you begin, check your computer to see if it has
one or two phone ports.
• If your computer has only one phone port, you will need to purchase a parallel splitter
(also called a coupler), as shown below. (A parallel splitter has one RJ-11 port on the
front and two RJ-11 ports on the back. Do not use a two-line phone splitter, a serial
splitter, or a parallel splitter which has two RJ-11 ports on the front and a plug on the
back.)
Figure 7-7 Example of a parallel splitter
• If your computer has one phone port, set up the device as described below.
Figure 7-8 Back view of the device
1 Telephone wall jack
2 Phone cord provided with the device plugged into the 1-LINE port on the
back of the device
Set up faxing for the device 85
Page 90

Chapter 7
3 Parallel splitter
4 Computer
5 Telephone
To set up the device on the same phone line as a computer with one phone port
1. Remove the white plug from the port labeled 2-EXT on the back of the device.
2. Find the phone cord that connects from the back of your computer (your computer
dial-up modem) to a telephone wall jack. Disconnect the cord from the telephone wall
jack and plug it into the parallel splitter.
3. Connect a phone cord from the parallel splitter to the port labeled 2-EXT on the back
of the device.
4. Connect a phone to the parallel splitter.
5. Using the phone cord supplied in the box with the device, connect one end to your
telephone wall jack, then connect the other end to the port labeled 1-LINE on the back
of the device.
NOTE: If you do not use the supplied cord to connect from the telephone wall
jack to the device, you might not be able to fax successfully. This special phone
cord is different from the phone cords you might already have in your home or
office.
6. If your modem software is set to receive faxes to your computer automatically, turn
off that setting.
NOTE: If you do not turn off the automatic fax reception setting in your modem
software, the HP device will not be able to receive faxes.
7. Now you need to decide how you want the device to answer calls, automatically or
manually:
• If you set up the device to answer calls automatically, it answers all incoming
calls and receives faxes. The device will not be able to distinguish between fax
and voice calls in this case; if you suspect the call is a voice call, you will need to
answer it before the device answers the call. To set up the device to answer calls
automatically, turn on the Auto Answer setting.
• If you set up the device to answer faxes manually, you must be available to
respond in person to incoming fax calls or the device cannot receive faxes. To
set up the device to answer calls manually, turn off the Auto Answer setting.
8. Run a fax test.
NOTE: If your computer has two telephone ports on the back, you do not need to
use a parallel splitter. You can plug the telephone into the “OUT” port on the computer
dial-up modem.
If you pick up the phone before the device answers the call and hear fax tones from a
sending fax machine, you will need to answer the fax call manually.
If you use your phone line for voice, fax, and your computer dial-up modem, follow these
directions to set up your fax.
86 Configure and manage
Page 91

Shared voice/fax with computer DSL/ADSL modem
Use these instructions if your computer has a DSL/ADSL modem
1 Telephone wall jack
2 Parallel splitter
3 DSL/ADSL filter
4 Phone cord supplied with the device
5 DSL/ADSL modem
6 Computer
7 Telephone
NOTE: You will need to purchase a parallel splitter. A parallel splitter has one RJ-11
port on the front and two RJ-11 ports on the back. Do not use a 2–line phone splitter,
a serial splitter, or a parallel splitter which has two RJ-11 ports on the front and a plug
on the back.
Set up faxing for the device 87
Page 92

Chapter 7
To set up the device with a computer DSL/ADSL modem
1. Obtain a DSL filter from your DSL provider.
NOTE: Phones in other parts of the home/office sharing the same phone number
with DSL service will need to be connected to additional DSL filters, otherwise
you will experience noise when making voice calls.
2. Using the phone cord supplied in the box with the devices, connect one end to the
DSL filter, then connect the other end to the port labeled 1-LINE on the back of the
device.
NOTE: If you do not use the supplied cord to connect from the DSL filter to the
device, you might not be able to fax successfully. This special phone cord is
different from phone cords you might already have in your home or office.
3. If you have a parallel-type phone system, remove the white plug from the port labeled
2-EXT on the back of the device, and then connect a phone to this port.
4. Connect the DSL filter to the parallel splitter.
5. Connect the DSL modem to the parallel splitter.
6. Connect the parallel splitter to the wall jack.
7. Run a fax test.
When the phone rings, the device automatically answers after the number of rings you
set in the Rings to Answer setting. The device begins emitting fax reception tones to the
sending fax machine and receives the fax.
Case I: Shared voice/fax line with answering machine
If you receive both voice calls and fax calls at the same phone number, and you also have
an answering machine that answers voice calls at this phone number, set up the device
as described in this section.
Figure 7-9 Back view of the device
1 Telephone wall jack
2 Use the phone cord provided to connect to the 1-LINE port on the back of
3 Answering machine
the device
88 Configure and manage
Page 93

(continued)
4 Telephone (optional)
To set up the device with a shared voice/fax line with answering machine
1. Remove the white plug from the port labeled 2-EXT on the back of the device.
2. Unplug your answering machine from the telephone wall jack, and connect it to the
port labeled 2-EXT on the back of the device.
NOTE: If you do not connect your answering machine directly to the device, fax
tones from a sending fax machine might be recorded on your answering machine,
and you probably will not be able to receive faxes with the device.
3. Using the phone cord supplied in the box with the device, connect one end to your
telephone wall jack, then connect the other end to the port labeled 1-LINE on the back
of the device.
NOTE: If you do not use the supplied cord to connect from the telephone wall
jack to the device, you might not be able to fax successfully. This special phone
cord is different from the phone cords you might already have in your home or
office.
4. (Optional) If your answering machine does not have a built-in phone, for convenience
you might want to connect a phone to the back of your answering machine at the
"OUT" port.
NOTE: If your answering machine does not let you connect an external phone,
you can purchase and use a parallel splitter (also known as a coupler) to connect
both the answering machine and telephone to the device. You can use standard
phone cords for these connections.
5. Turn on the Auto Answer setting.
6. Set your answering machine to answer after a low number of rings.
7. Change the Rings to Answer setting on the device to the maximum number of rings
supported by your device. (The maximum number of rings varies by country/region.)
8. Run a fax test.
When the phone rings, your answering machine answers after the number of rings you
have set, and then plays your recorded greeting. The device monitors the call during this
time, "listening" for fax tones. If incoming fax tones are detected, the device emits fax
reception tones and receives the fax; if there are no fax tones, the device stops monitoring
the line and your answering machine can record a voice message.
Case J: Shared voice/fax line with computer modem and answering machine
If you receive both voice calls and fax calls at the same phone number, and you also have
a computer modem and answering machine connected on this phone line, set up the HP
device as described in this section.
Set up faxing for the device 89
Page 94

Chapter 7
NOTE: Since your computer dial-up modem shares the phone line with the HP
device, you cannot use both your modem and the device simultaneously. For
example, you cannot use the HP device for faxing while you are using your computer
dial-up modem to send an e-mail or access the Internet.
• Shared voice/fax line with computer dial-up modem and answering machine
Shared voice/fax line with computer DSL/ADSL modem and answering machine
•
Shared voice/fax line with computer dial-up modem and answering machine
There are two different ways to set the HP device with your computer based on the
number of phone ports on your computer. Before you begin, check your computer to see
if it has one or two phone ports.
• If your computer has only one phone port, you will need to purchase a parallel splitter,
as shown below. (A parallel splitter has one RJ-11 port on the front and two RJ-11
ports on the back. Do not use a two-line phone splitter, a serial splitter, or a parallel
splitter which has two RJ-11 ports on the front and a plug on the back.)
Figure 7-10 Example of a parallel splitter
• If your computer has one phone port, set up the HP device as described below.
Figure 7-11 Back view of the device
1 Telephone wall jack
2 Telephone cord connected to the parallel splitter
3 Parallel splitter
4 Telephone (optional)
5 Answering machine
90 Configure and manage
Page 95

6 Computer with modem
7 Use the phone cord supplied in the box with the device to connect to the
"1-LINE" port
To set up the device on the same phone line as a computer with one phone port
1. Remove the white plug from the port labeled 2-EXT on the back of the HP device.
2. Find the phone cord that connects from the back of your computer (your computer
dial-up modem) to a telephone wall jack. Disconnect the cord from the telephone wall
jack and plug it into the port labeled 2-EXT on the back of the device.
3. Unplug your answering machine from the telephone wall jack, and connect it to the
port labeled 2-EXT on the back of the device.
NOTE: If you do not connect your answering machine directly to the device, fax
tones from a sending fax machine might be recorded on your answering machine,
and you might not be able to receive faxes with the device.
4. Using the phone cord supplied in the box with the HP device, connect one end to your
telephone wall jack, then connect the other end to the port labeled 1-LINE on the back
of the HP device.
NOTE: If you do not use the supplied cord to connect from the telephone wall
jack to the device, you might not be able to fax successfully. This special phone
cord is different from the phone cords you might already have in your home or
office.
5. (Optional) If your answering machine does not have a built-in phone, for convenience
you might want to connect a phone to the back of your answering machine at the
"OUT" port.
NOTE: If your answering machine does not let you connect an external phone,
you can purchase and use a parallel splitter (also known as a coupler) to connect
both the answering machine and telephone to the device. You can use standard
phone cords for these connections.
6. If your modem software is set to receive faxes to your computer automatically, turn
off that setting.
NOTE: If you do not turn off the automatic fax reception setting in your modem
software, the device will not be able to receive faxes.
7. Turn on the Auto Answer setting.
8. Set your answering machine to answer after a low number of rings.
9. Change the Rings to Answer setting on the HP device to the maximum number of
rings supported by your HP device. (The maximum number of rings varies by country/
region.)
10. Run a fax test.
NOTE: If you are using a computer with two telephone ports, you do not need a
parallel splitter. You can plug the answering machine into the “OUT” port on the
back of the computer.
Set up faxing for the device 91
Page 96

Chapter 7
When the phone rings, your answering machine answers after the number of rings you
have set, and then plays your recorded greeting. The device monitors the call during this
time, "listening" for fax tones. If incoming fax tones are detected, the device emits fax
reception tones and receives the fax; if there are no fax tones, the device stops monitoring
the line and your answering machine can record a voice message.
Shared voice/fax line with computer DSL/ADSL modem and answering machine
1 Telephone wall jack
2 Parallel splitter
3 DSL/ADSL filter
4 Phone cord provided with the device connected to the 1-LINE port on the
5 DSL/ADSL modem
6 Computer
7 Answering machine
8 Telephone (optional)
back of the device
NOTE: You will need to purchase a parallel splitter. A parallel splitter has one RJ-11
port on the front and two RJ-11 ports on the back. Do not use a 2–line phone splitter,
a serial splitter, or a parallel splitter which has two RJ-11 ports on the front and a plug
on the back.
92 Configure and manage
Page 97

To set up the device with a computer DSL/ADSL modem
1. Obtain a DSL/ADSL filter from your DSL/ADSL provider.
NOTE: Phones in other parts of the home/office sharing the same phone number
with DSL/ADSL service will need to be connected to additional DSL/ADSL filters,
otherwise you will experience noise when making voice calls.
2. Using the phone cord supplied in the box with the device, connect one end to the
DSL/ADSL filter, then connect the other end to the port labeled 1-LINE on the back
of the device.
NOTE: If you do not use the supplied cord to connect from the DSL/ADSL filter
to the device, you might not be able to fax successfully. This special phone cord
is different from the phone cords you might already have in your home or office.
3. Connect the DSL/ADSL filter to the splitter.
4. Unplug the answering machine from the telephone wall jack, and connect it to the
port labeled 2-EXT on the back of the device.
NOTE: If you do not connect your answering machine directly to the device, fax
tones from a sending fax machine might be recorded on your answering machine,
and you probably will not be able to receive faxes with the device.
5. Connect the DSL modem to the parallel splitter.
6. Connect the parallel splitter to the wall jack.
7. Set your answering machine to answer after a low number of rings.
8. Change your Rings to Answer setting on the device to the maximum number of rings
supported by the device.
NOTE: The maximum number of rings varies by country/region
9. Run a fax test.
When the phone rings, your answering machine will answer after the number of rings you
have set, and then play your recorded greeting. The device monitors the call during this
time, “listening” for fax tones. If incoming fax tones are detected, the device will emit fax
reception tones and receive the fax; if there are no fax tones, the device stops monitoring
the line and your answering machine can record a voice message.
If you use the same phone line for telephone, fax, and have a computer DSL modem,
follow these instructions to set up your fax.
Case K: Shared voice/fax line with computer dial-up modem and voice mail
If you receive both voice calls and fax calls at the same phone number, use a computer
dial-up modem on the same phone line, and subscribe to a voice mail service through
your telephone company, set up the device as described in this section.
NOTE: You cannot receive faxes automatically if you have a voice mail service at
the same phone number you use for fax calls. You must receive faxes manually; this
means you must be available to respond in person to incoming fax calls. If you want
to receive faxes automatically instead, contact your telephone company to subscribe
to a distinctive ring service, or to obtain a separate phone line for faxing.
Set up faxing for the device 93
Page 98

Chapter 7
Since your computer dial-up modem shares the phone line with the device, you cannot
use both your modem and the device simultaneously. For example, you cannot use the
device for faxing if you are using your computer dial-up modem to send an e-mail or
access the Internet.
There are two different ways to set up the device with your computer based on the number
of phone ports on your computer. Before you begin, check your computer to see if it has
one or two phone ports.
• If your computer has only one phone port, you will need to purchase a parallel splitter
(also called a coupler), as shown below. (A parallel splitter has one RJ-11 port on the
front and two RJ-11 ports on the back. Do not use a two-line phone splitter, a serial
splitter, or a parallel splitter which has two RJ-11 ports on the front and a plug on the
back.)
Figure 7-12 Example of a parallel splitter
• If your computer has two phone ports, set up the device as described below.
Figure 7-13 Back view of the device
1 Telephone wall jack
2 Use the phone cord supplied in the box with the device to connect to the
3 Computer with modem
4 Telephone
94 Configure and manage
1-LINE port
Page 99

To set up the device on the same phone line as a computer with two phone ports
1. Remove the white plug from the port labeled 2-EXT on the back of the device.
2. Find the phone cord that connects from the back of your computer (your computer
dial-up modem) to a telephone wall jack. Disconnect the cord from the telephone wall
jack and plug it into the port labeled 2-EXT on the back of the device.
3. Connect a phone to the "OUT" port on the back of your computer dial-up modem.
4. Using the phone cord supplied in the box with the device, connect one end to your
telephone wall jack, then connect the other end to the port labeled 1-LINE on the back
of the device.
NOTE: If you do not use the supplied cord to connect from the telephone wall
jack to the device, you might not be able to fax successfully. This special phone
cord is different from the phone cords you might already have in your home or
office.
5. If your modem software is set to receive faxes to your computer automatically, turn
off that setting.
NOTE: If you do not turn off the automatic fax reception setting in your modem
software, the device will not be able to receive faxes.
6. Turn off the Auto Answer setting.
7. Run a fax test.
You must be available to respond in person to incoming fax calls, or the device cannot
receive faxes.
Serial-type fax setup
For information on setting up the device for faxing using a serial-type phone system, see
the Fax Configuration Web site for your country/region.
Austria www.hp.com/at/faxconfig
Germany www.hp.com/de/faxconfig
Switzerland (French) www.hp.com/ch/fr/faxconfig
Switzerland (German) www.hp.com/ch/de/faxconfig
United Kingdom www.hp.com/uk/faxconfig
Finland www.hp.fi/faxconfig
Denmark www.hp.dk/faxconfig
Sweden www.hp.se/faxconfig
Norway www.hp.no/faxconfig
Netherlands www.hp.nl/faxconfig
Belgium (Dutch) www.hp.be/nl/faxconfig
Belguim (French) www.hp.be/fr/faxconfig
Portugal www.hp.pt/faxconfig
Set up faxing for the device 95
Page 100

Chapter 7
(continued)
Spain www.hp.es/faxconfig
France www.hp.com/fr/faxconfig
Ireland www.hp.com/ie/faxconfig
Italy www.hp.com/it/faxconfig
Configure the device (Windows)
You can connect the device directly to a computer, or you can share the device among
other users on a network.
NOTE: Microsoft Internet Explorer 6.0 or later must be installed on the computer
system to run the installation program.
You must have administrator privileges to install a printer driver on Windows 2000,
Windows XP, or Windows Vista.
Only the printer and scanner drivers are supported by devices running Windows 2000.
When setting up the device, HP recommends that you connect it after you install the
software because the installation program is designed to provide you with the easiest
setup experience. However, if you have connected the cable first, see
before installing the software.
Direct connection
You can connect the device directly to your computer using a USB cable.
Connect the device
NOTE: If you install the device software and connect the device to a computer
running Windows, you can connect additional devices to the same computer with USB
cables without reinstalling the device software.
When setting up the device, HP recommends that you connect the device after you install
the software because the installation program is designed to provide you with the easiest
setup experience. However, if you have connected the cable first, see
before installing the software.
Install the software before connecting the device (recommended)
To install the software
1. Close any applications that are running.
2. Insert the Starter CD into the CD drive. The CD menu runs automatically. If the CD
menu does not start automatically, double-click the setup icon on the Starter CD.
3. On the CD menu, click Install and follow the onscreen instructions.
4. When prompted, turn on the device and connect it to the computer using a USB cable.
The Found New Hardware wizard appears on the computer screen, and the device
icon is created in the Printers folder.
96 Configure and manage
Connect the device
 Loading...