

Page 1

HP Notebook
Reference Guide
Page 2

© Copyright 2011 Hewlett-Packard
Development Company, L.P.
Bluetooth is a trademark owned by its
proprietor and used by Hewlett-Packard
Company under license. Intel is a
trademark of Intel Corporation in the U.S.
and other countries. Java is a U.S.
trademark of Sun Microsystems, Inc.
Microsoft and Windows are U.S. registered
trademarks of Microsoft Corporation.
The information contained herein is subject
to change without notice. The only
warranties for HP products and services are
set forth in the express warranty statements
accompanying such products and services.
Nothing herein should be construed as
constituting an additional warranty. HP shall
not be liable for technical or editorial errors
or omissions contained herein.
Second Edition: March 2011
First Edition: June 2010
Product notice
This reference guide describes features
that are common to most models. Some
features may not be available on your
computer.
Document Part Number: 607195-002
Page 3

Safety warning notic e
WARNING! To reduce the possibility of heat-related injuries or of overheating the computer, do not
place the computer directly on your lap or obstruct the computer air vents. Use the computer only on
a hard, flat surface. Do not allow another hard surface, such as an adjoining optional printer, or a soft
surface, such as pillows or rugs or clothing, to block airflow. Also, do not allow the AC adapter to
contact the skin or a soft surface, such as pillows or rugs or clothing, during operation. The computer
and the AC adapter comply with the user-accessible surface temperature limits defined by the
International Standa rd for Safety of Information Technology E qui pme nt (IE C 6095 0) .
iii
Page 4

Safety warning notice iv
Page 5

Table of contents
1 Introduction ..................................................................................................................................................... 1
Finding more information about your new computer ..................... ... ..................... ... ..................... ... .... 1
2 Networking (select models only) ......................... ..... ..... ..... ..... .............................. ..... ..... ..... ......................... 2
Creating a wireless connection ............................................................................................................ 2
Using a WLAN ...................................................................................................................................... 5
Using HP Mobile Broadband (select models only) ............................................................................... 7
Using GPS (select models only) ................ ....... ....... ..... ........................................................................ 8
Using Bluetooth wireless devices ......................................................................................................... 8
Connecting to a wired network ............................................................................................................. 9
Identifying wireless and network status icons ...................................................................... 2
Turning wireless devices on or off ....................................................................................... 4
Using HP Connection Manager (select models only) .......................................................... 4
Using operating system controls .......................................................................................... 4
Connecting to an existing WLAN ......................................................................................... 5
Setting up a new WLAN ................................... ..... ....... ..... .................................. ...... ..... ...... 6
Protecting your WLAN ......................................................................................................... 6
Roaming to another network ................................................................................................ 6
Inserting a SIM ..................................................................................................................... 7
Removing a SIM .................................................................................................................. 8
Bluetooth and Internet Connection Sharing (ICS) ............................................................... 8
Using a modem (select models only) ................................................................................... 9
Connecting to a local area network (LAN) (select models only) ........................................ 13
Connecting a modem cable ................................................................................ 9
Connecting a country- or region-specific modem cable adapter ....................... 11
Selecting a location setting ............ ..... ...... ..... ..... .............................. ..... ...... ..... 11
Viewing the current location selection .............................................. 11
Adding new locations when traveling .............................. .... ............. 12
3 Multimedia ..................................................................................................................................................... 15
Using the media activity controls ............ .... .... ..... .......................................................... ..... .... ............ 15
v
Page 6

Audio .................... .............................................. ..... .... ... .... ................................................................ 15
Adjusting the volume .......... ... ... .. .... ................................. ... ... ... ... .................................. .. .. 16
Checking audio functions on the computer ........................................................................ 16
Webcam (select models only) ........... ........................................ .... ... .... ... ........................................... 18
Video .................... .... ...................................................................... ... ..... .... ... ..................................... 19
4 Power management ...................................................................................................................................... 22
VGA ................................................................................................................................... 19
HDMI .................................................................................................................................. 20
Configuring audio for HDMI ............................................................................... 20
Intel Wireless Display (select models only) ....................................................... 21
Shutting down the computer ......................................................................................... ..... ................. 22
Setting power options ......................................................................................................................... 23
Using Power Assistant (select models only) ...................................................................................... 27
Using battery power ............. ... .... ... ... ................... ... .... ... ... ...................................... .... .. ... .................. 27
Using external AC power .................................................................................................................... 30
Using power-saving states ................................................................................................. 23
Initiating and exiting Sleep ................................................................................ 23
Initiating and exiting Hibernation ....................................................................... 23
Using the power meter ....................................................................................................... 24
Using power plans ............................................................................................................. 24
Viewing the current power plan ......................................................................... 24
Selecting a different power plan ........................................................................ 24
Customizing power plans ........ ... ... .................... ... .... ... ... ................................... 25
Setting password protection on wakeup ............................................................................ 25
Finding additional battery information ................................................................................ 27
Using Battery Check .......................................................................................................... 28
Displaying the remaining battery charge ........................................................................... 28
Maximizing battery discharge time ...... .............................. .. ... .. .. ....................................... 28
Managing low battery levels .............................................................................................. 28
Identifying low battery levels ............................................................................. 28
Resolving a low battery level ....................... ..... ................................................. 29
Resolving a low battery level when external power is available ....... 29
Resolving a low battery level when a charged battery is available ... 29
Resolving a low battery level when no power source is available .... 29
Resolving a low battery level when the computer cannot exit
Hibernation .......................................... ... .. ... ... .................................. 2 9
Conserving battery power .................................................................................................. 29
Storing a battery ................................................................................................................ 30
Disposing of a used battery ............................................................................................... 30
Replacing the battery ..................... .... ................................................................................ 30
vi
Page 7

Testing an AC adapter ....................................................................................................... 32
Switching between graphics modes (select models only) .................................................................. 32
5 External cards and devices .......................................................................................................................... 33
Using Media Card Reader cards (select models only) ....................................................................... 33
Inserting a digital card ........................................................................................................ 33
Removing a digital card ..................................................................................................... 34
Using PC Cards (select models only) ................................................................................................. 34
Using ExpressCards (select models only) .......................................................................................... 37
Using smart cards (select models only) ............................................................................................. 39
Using a USB device ........................................................................................................................... 40
Using 1394 devices (select models only) ...... .... .... .... ............................................ .... .... .... ... .............. 41
Using an eSATA device (select models only) ..... ... .. ... ... ............................... .. ... .. ... ........................... 42
Using a serial device (select models only) ......................................................................................... 44
Using optional external devices ........... ...... ..... ....... ...... .................................... ....... ...... ..... ................. 44
Configuring a PC Card ............................... ...... .................................. ..... ....... ..... ..... .......... 35
Inserting a PC Card ........................................................................................................... 36
Removing a PC Card ......................................................................................................... 37
Configuring an ExpressCard .................. ..... ..... ....... ........................................................... 37
Inserting an ExpressCard ............... ... ................... ... ... ... .... ..................................... ... ... ... .. 3 8
Removing an ExpressCard ............................................. ..... .... .... ..... .... ........................... .. 39
Inserting a smart card ........................................................................................................ 40
Removing a smart card ...................................................................................................... 40
Connecting a USB device .................................................................................................. 41
Removing a USB device .................................................................................................... 41
Connecting a 1394 device ................................................................................................. 42
Removing a 1394 device ................................................................................................... 42
Connecting an eSATA device ............... .... .... ............................ ... ..... .... ..... ........................ 43
Removing an eSATA device .............................................................................................. 43
Using optional external drives ............................................................................................ 44
Using the expansion port (select models only) .................................................................. 45
Using the docking connector (select models only) ............................................................ 45
6 Drives ............................. .... .... ............................. .... ..... ..... .... ................................. ........................................ 47
Handling drives ................... ..... ...... ....... ..................................... ..... ....... ...... ..... .................................. 47
Using hard drives ............... ... ........................................ ... .. ... .... ......................................................... 48
Improving hard drive performance .............. .... ..... .... .... ................................................... ... 48
Using Disk Defragmenter .................................................................................. 48
Using Disk Cleanup ........................................................................................... 48
Using HP 3D DriveGuard (select models only) .................................................................. 49
Identifying HP 3D DriveGuard status ........... .............. .. ... .. .. ............................. . 49
vii
Page 8

Managing power with a parked hard drive ........................................................ 49
Using HP 3D DriveGuard software ................................................................... 50
Using optical drives (select models only) ..... .... ... ..................................... ... ... .... .. .............................. 50
Identifying the installed optical drive .................................................................................. 50
Inserting an optical disc ................ ................... .... ... ... ... ....................................... ... ... ... ... .. 50
Tray load ................ .... ... ... ... ...................................... ... ... .... ... ........................... 50
Slot load ............................................................................................................ 51
Removing an optical disc ................................................................................................... 51
Tray load ................ .... ... ... ... ...................................... ... ... .... ... ........................... 51
Slot load ............................................................................................................ 53
Sharing optical drives ........................................................................................................ 54
Using RAID (select models only) ........................................................................................................ 54
7 Security ........................... ....... ..... ..... ..... ..... ................................. ...... ..... ..... ..... ...... ........................................ 55
Protecting the computer ............. .... ... ..................... .... ... .... .... .......................................... ... ................ 55
Using passwords ................... .................................................... ... ..... .... .... ......................................... 56
Setting passwords in Windows .......................................................................................... 56
Setting passwords in Computer Setup .............................................................................. 57
Managing a BIOS administrator password .. .. ... ................ ... ............... ... ................ ... ......... 57
Managing a Computer Setup DriveLock pas s word ............ .. ............ .. ............ .. ............ .. .. . 58
Using Computer Setup Auto DriveLock ............................................................................. 61
Using antivirus software ......... .... ... .... ... ..................... .... ... .... .... .......................................... ................ 63
Using firewall software ....................................................................................................................... 64
Installing critical security updates ......... ..... ..... ............................. .... ..... ..... ..... .................................... 65
Using HP ProtectTools Security Manager (select models only) ......................................................... 66
Installing an optional security cable .................................................................................................... 67
Using the fingerprint reader (select models only) .......... .......................... ..... .... ..... .... ......................... 68
Locating the fingerprint reader .............. ..... ... ..................................................... ..... .... ..... .. 68
Entering a BIOS administrator password .......................................................... 58
Setting a DriveLock password ................................................ ..... ..... ..... ..... ....... 59
Entering a DriveLock password ........................................................................ 60
Changing a DriveLock password ...................................................................... 60
Removing DriveLock protection ........................................................................ 60
Enteri ng an Automatic DriveLock password ..................................................... 61
Removing Automatic DriveLock protection ....................................................... 61
When the disc tray opens normally .................................................. 52
When the disc tray fails to open normally ......................................... 52
8 Maintenance ..................... .... .... ................................................ ... ..... .... ... ...................................................... 69
Cleaning your computer ............. .... ... .... ... ........................................... ... .... ... .... ................................. 70
Cleaning products ........................................... ..... .... ..... ..... ................................................ 70
viii
Page 9

Cleaning procedures ...................... ...................................................................... ..... ....... .. 70
Cleaning the display .................. ........................ ..... ... ..... .... ............................... 70
Cleaning the sides and cover ............... .... .... .... ............................................... .. 70
Cleaning the TouchPad and keyboard .............................................................. 71
Cleaning a tablet PC pen and pen holder ......................................................... 71
Updating programs and drivers .......................................................................................................... 71
Using SoftPaq Download Manager .................................................................................................... 72
9 Computer Setup (BIOS) and System Diagnostics ..................................................................................... 73
10 MultiBoot ..................................................................................................................................................... 77
Using Computer Setup ............. .... .... ..... ... .................................................. .... ..... ... .... ........................ 73
Starting Computer Setup ................................................................................................... 73
Navigating and selecting in Computer Setup .......... ...... ..................................................... 73
Restoring factory settings in Computer Setup ................................................................... 74
Updating the BIOS ................................................... ..... ..... .... ..... ....................................... 75
Using System Diagnostics .................... .......................................................................... ..... ............... 76
About the boot device order ............................................................................................................... 77
Enabling boot devices in Computer Setup ...... ...................................... ... ... ... ... ................................. 78
Considering boot order changes ......... ... ............................................................ .... ... .... ... .................. 79
Choosing MultiBoot preferen ces ..... ... .... ... ........................................ ... .... ... .... ................................... 80
Setting a new boot order in Computer Setup ..................................................................... 80
Dynamically choosing a boot device using the F9 prompt ................................................. 80
Setting a MultiBoot Express prompt .................................................................................. 81
Entering MultiBoot Express preferences ........................................................................... 81
Determining the BIOS version ........................................................................... 75
Downloading a BIOS update ............................................................................. 75
11 Management ................................................................................................................................................ 82
Using Client Management Solutions ......................................... ... ... .... ... ............................................ 82
Using Intel Active Management Technology (select models only) ..................................................... 86
Appendix A Traveling with the computer ......................................................... ... .... ..... .... ............................. 89
Configuring and deploying a software image ..................................................................... 82
Managing and updating software ....................................................................................... 83
HP Client Manager for Altiris (select models only) ............................................ 83
HP CCM (Client Configuration Manager) (select models only) ......................... 85
HP SSM (System Software Manager) ............................................................... 85
Enabling the iAMT solution ................................................................................................ 87
Using the MEBx setup utility menus .................................................................................. 87
ix
Page 10

Appendix B Troubleshooting resources ................ ... ... .................................... .. ... ... ... .................................. 91
Appendix C Electrostatic Discharge ............................. .......................... ... ..... .... .... ....................................... 92
Index ................................................................................................................................................................... 93
x
Page 11

1 Introduction
This guide contains general information about HP notebook computers.
NOTE: Some of the features described in this guide may not be av ail abl e on you r co mpu t er .
Finding more information about your new computer
The following user guides and reference material are provided with your computer, either in print, on
the computer hard drive, or on an optical disc or SD Card:
Setup Instructions poster—Guides you through setting up your computer and turning it on. The
●
poster is included in the box with the computer.
NOTE: Refer to the p
Getting Started—Contains information about your computer, including product-specific features,
●
backup and recovery, mainte nanc e, and s pec ifi cat io ns.
Help and Support—Contains information about the operating system, drivers, troubleshooting
●
tools, and technical support. To access Help and Support, select Start > Help and Support. For
country- or region-sp eci fi c sup por t, go to http://www.hp.com/support, select your country or
region, and follow the on-screen instructions.
Safety & Comfort Guide—Descri bes p roper wo rk st ati on setup and proper posture, health, an d
●
work habits for computer users. It als o pr ovides important electrical and mec ha nic al safety
information. To access thi s gui de, se lec t Start > Help and Support > User Guides. This guide
is also available on the Web at http://www.hp.com/ergo.
oster for the location of your user guides and reference material.
Regulatory, Safety and Environmental Notices—Contains safety and regulatory information, and
●
battery disposal information. To access the notices, select Start > Help and Support > User
Guides.
Finding more information about your new computer 1
Page 12

2 Networking (select models only)
Your computer supports two types of Internet access:
Wireless—Refer to Creating a wireless connection on page 2.
●
Wired—Refer to Connecting to a wired network on page 9.
●
NOTE: You must set up Internet service before you can connect to the Internet.
Creating a wireless connection
Your computer may be equipp ed with on e or more of the fol lowi ng wi re les s dev ices :
Wireless l ocal area network (WLAN) dev ice
●
HP Mobile Broadband Module (wireless wide area network (WWAN) device)
●
Bluetooth® device
●
For more information on wirel es s technol ogy , re fer to the in for ma tion an d Web s ite li nks provided in
Help and Support.
Identifying wireless and network status icons
Windows® 7
Icon Name Description
Wireless (connected) Indicates that one or more wireless devices are on.
Wireless (disconnected) Indicates that all wireless devices are off.
HP Connection Manager
(select models only)
Wired network (connected) Indicates that one or more network devices are connected to the network.
Chapter 2 Networking (select models only) 2
Opens HP Connection Manager, which enables you to create and manage
WWAN connections (select models only), and monitor the status of WLAN
and Bluetooth connections.
Page 13
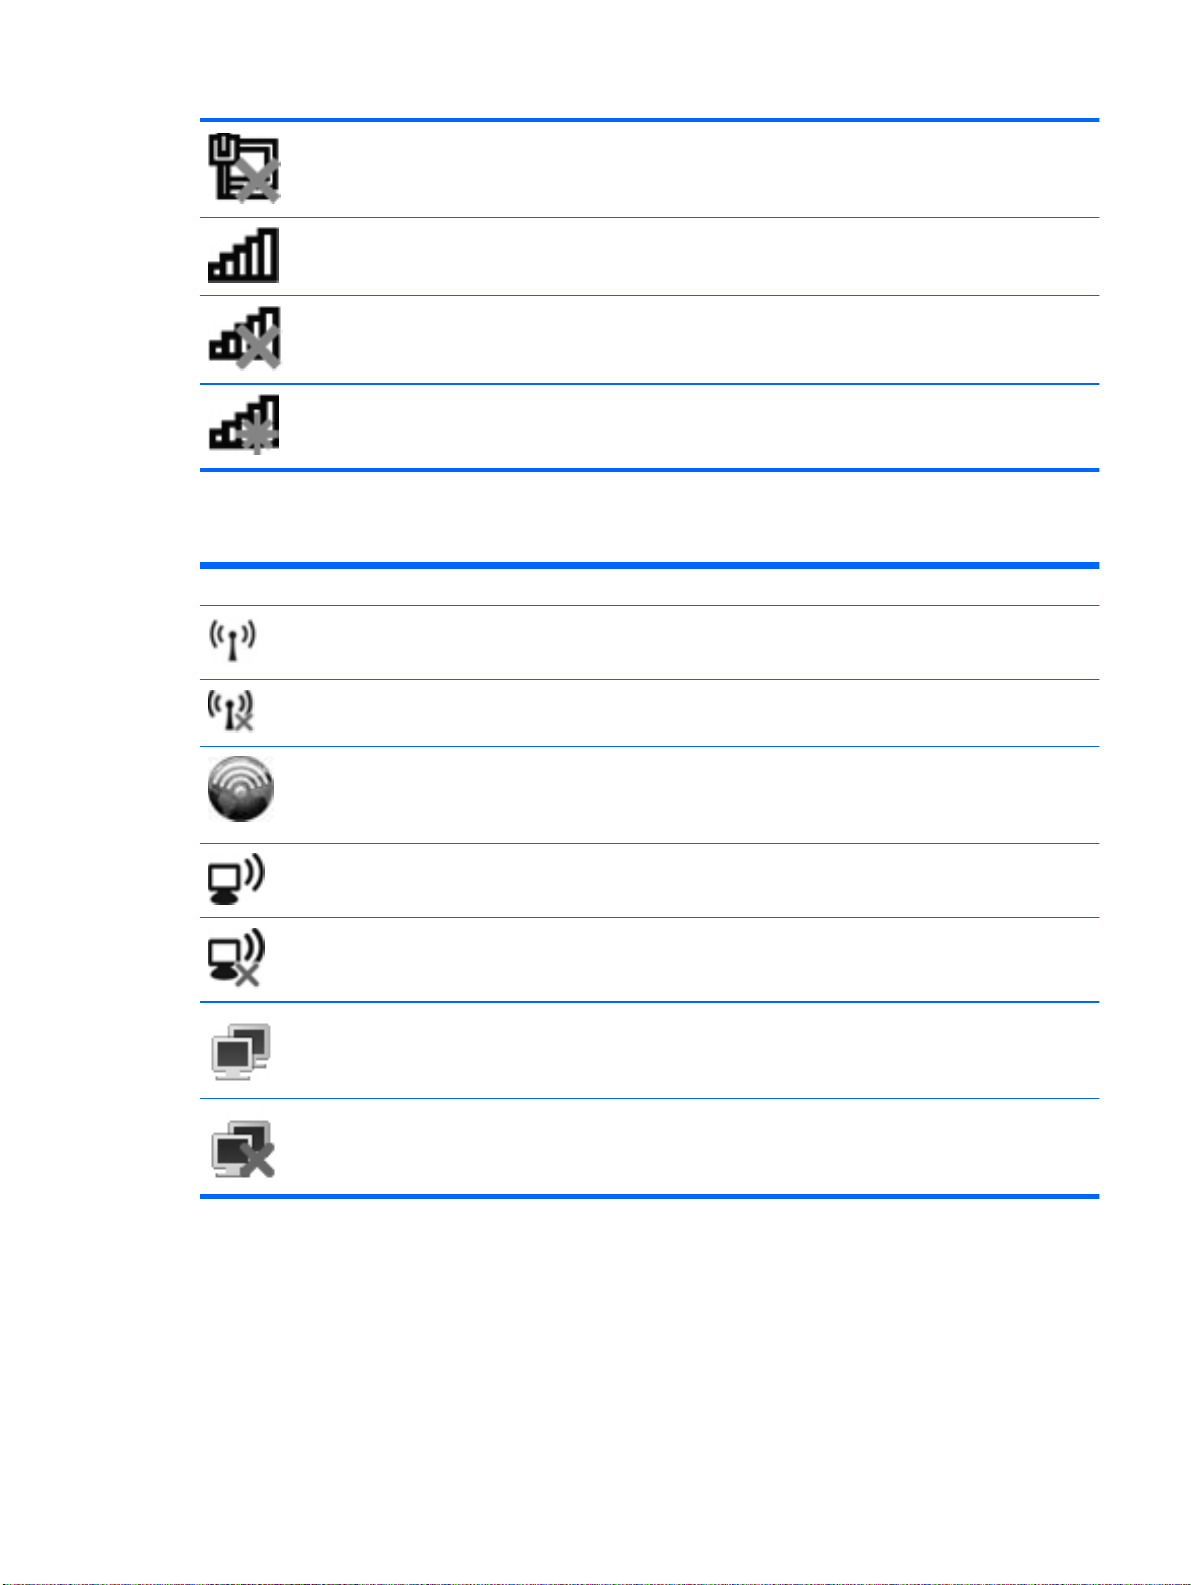
Network (disabled/
disconnected)
Network (connected) Indicates that one or more network devices are connected to a network.
Network (disconnected) Indicates that network devices are not connected to a network.
Indicates that all network devices are disabled in Windows Control Panel.
Network (disabled/
disconnected)
Indicates that no wireless connections are available.
Windows Vista®
Icon Name Description
Wireless (connected) Indicates that one or more wireless devices are on.
Wireless (disconnected) Indicates that all wireless devices are off.
HP Connection Manager (select models only) Opens HP Connection Manager, which enables you to
Wireless network connection (connected) Indicates that one or more WLAN devices are connected to
Wireless network connection (disconnected) Indicates that one or more WLAN devices are not
create and manage WWAN connections (select models
only), and monitor the status of WLAN and Bluetooth
connections.
a network.
connected to a network.
Network status (connected) Connected to the wired network.
Network status (disconnected) Not connected to the wired network.
Creating a wireless connection 3
Page 14

Turning wireless devices on or off
You can use the wireless button or HP Connection Manager (select models only) to turn on and turn
off wireless devices.
NOTE: A computer may have a wireless button, a wireless switch, or a wireless key on the
keyboard. The term wireless button is used throughout this guide to refer to all types of wireless
controls. Refer to the Getting S tar ted gui de for i nfo rm atio n on iden tif yi ng the loc ati on of the wir el es s
button on your computer.
To turn off wireless devices using HP C onne cti on Ma nag er:
▲ Right-click the HP Connection Manager icon in the notification area, at the far right of the
taskbar, and then click the power bu tton ne xt to the des ir ed dev ice.
– or –
Select Start > All Programs > HP > HP Connection Manager, and then click the power button
next to the desired device.
Using HP Connection Manager (select models only)
HP Connection Manager provides a central location for managing your wireless devices, an interface
for connecting to the Internet using HP Mobile Broadband, and an interface for sending and receiving
SMS (text) messages. HP Connection Manager allows you to manage the following devices:
Wireless local area network (WLAN)/WiFi
●
Wireless wide area network (WWAN)/HP Mobile Broadband
●
Bluetooth®
●
HP Connection Manager provides information and notifications on connection status, power status,
SIM details, and SMS messages. Status information and notifications are provided in the notification
area, at the far right of the task bar.
To open HP Connection Manager:
Click the HP Connection Manager icon in the task bar.
▲
– or –
Click Start > All Programs > HP > HP Connection Manager.
For more information, refer to the HP Connection Manager software Help.
Using operating system controls
The Network and Sharing Center all ows you to set up a con nec ti on or net wor k, connect to a network,
manage wireless networks, and diagnose and repair network problems.
To use operating system co ntrols :
▲ Select Start > Control Panel > Network and Internet > Network and Sharing Center.
For more information, se lec t Start > Help and Support.
Chapter 2 Networking (select models only) 4
Page 15

Using a WLAN
A wireless connection connects the computer to Wi-Fi networks, or WLANs. A WLAN is composed of
other computers and accessories that are linked by a wireless router or a wireless access point.
Connecting to an existing WLAN
Windows 7
1. Be sure that the WLAN device is on . (Ref er to Tur nin g wir ele ss de vices on or off on page 4).
2. Click the network icon in the notification area, at the far right of the taskbar.
3. Select your WLAN from the list.
4. Click Connect.
Windows Vista
1. Be sure that the WLAN device is on . (Ref er to Tur nin g wir ele ss de vices on or off on page 4.)
2. Select Start > Connect to.
3. Select your WLAN from the list.
If the network is a security-enabled WLAN, you are prompted to enter a network security code.
Type the code, and then click OK to complete the connection.
NOTE: If no WLANs are listed, you may be out of range of a wireless router or access point.
NOTE: If you do not see the WLAN you want to connect to, click Open Network and Sharing
Center, and then click Set up a new connection or network. A list of options is displayed. You
can choose to manually search for and connect to a network or to create a new network
connection.
If the network is unsecured, a warni ng is disp lay ed . Cl ick Con nect An yway to accept the
●
warning and complete the connection.
If the network is a security-en abl ed WL AN, yo u are prom pted to en ter a netw or k secur it y
●
code. Type the code, and then click Connect to complete the conne ct ion.
NOTE: If no WLANs are listed, you may be out of range of a wireless router or access point.
NOTE: If
of available networks is disp layed. You can choose to connect to an exist ing network or you can
create a new network connection.
After the connection is made, yo u can plac e the mous e poi nter ove r the net wor k icon in the
notification area, at the far right of the taskbar, to verify the name and status of the connection.
NOTE: The functional range (how far your wireless signals travel) depends on WLAN
lementation, router manufacturer, and interference from other electronic devices or structural
imp
barriers such as walls and flo ors .
you do not see the WLAN you want to connect to, click Show all connections. A list
Using a WLAN 5
Page 16
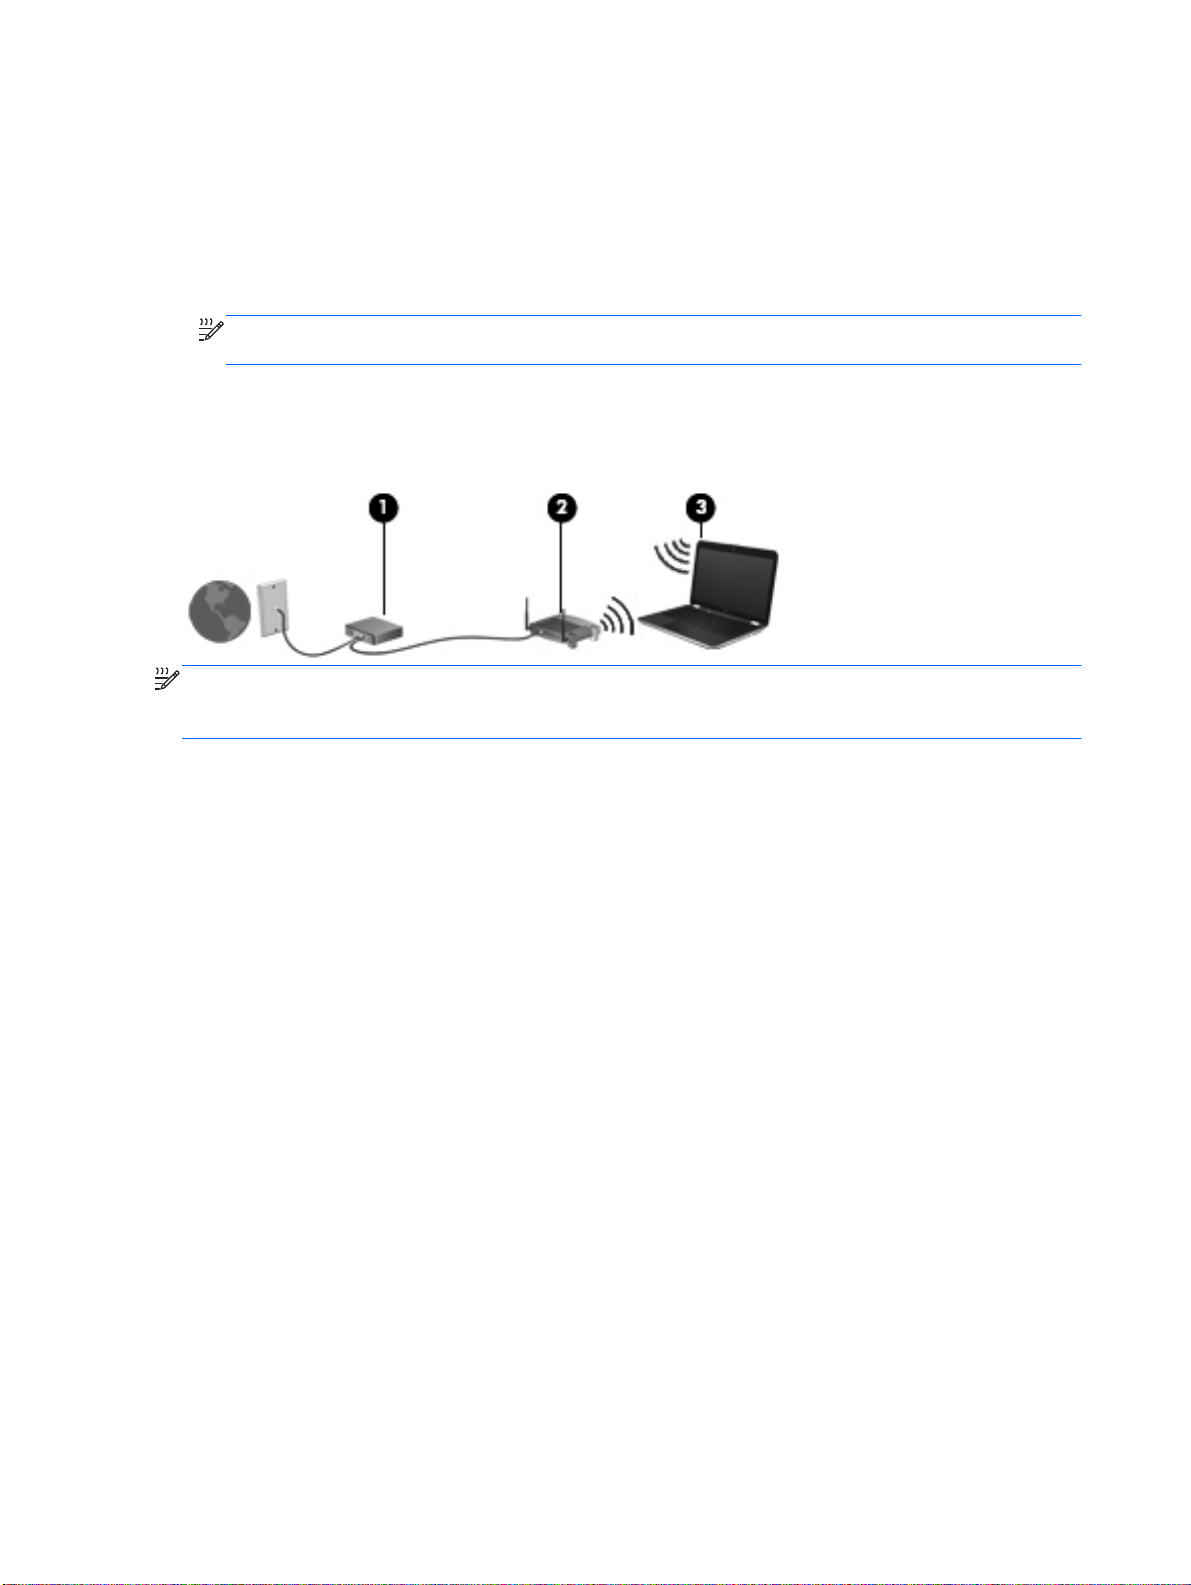
Setting up a new WLAN
Required equipment:
● A broadband modem (either DSL or cable) (purchased separately) (1) and high-speed Internet
service purchased fro m an Inter ne t se rvi ce pr ov id er ( ISP )
● A wireless router (purchased separ at ely ) (2)
NOTE: Some cable modems include a built-in router. Check with your ISP to see if you need a
separate router.
● The wireless computer (3)
The illustration below shows an example of a wireless network installation that is connected to the
Internet.
NOTE: When setting up a wireless connection, be sure that your computer and wireless router are
synchronized. To synchronize your computer and wireless router, turn your computer and wireless
router off and then back on.
As your network grows, additional wireless and wired computers can be connected to the network to
access the Internet.
For help in setting up your WLAN, refer to the inf or mati on pr ovided by your router manufacturer or
your ISP.
Protecting your WLAN
When you set up a WLAN or access an existing WLAN, always enable security features to protect
your network from unauthorized access. WLANs in public areas (hotspots) like coffee shops and
airports may not provide any security. If you are concerned about the security of your computer in a
hotspot, limit your network activities to e-mail that is not confidential and basic Internet surfing.
Wireless radio signals travel outside the network, so other WLAN devices can pick up unprotected
signals. You can take the following precautions to protect your WLAN:
●
●
Firewall—A firewall checks both data and requests for data that are sent to your network, and
discards any suspicious items. Firewalls are available in both software and hardware. Some
networks use a combination of both types.
Wireless encryption—W i- Fi Pro t ec ted Ac ce ss ( WPA ) us es security settings to enc r ypt an d
decrypt data transmitted over the network. WPA uses Temporal Key Integrity Protocol (TKIP) to
dynamically generate a new key for ev ery pac ke t. I t also ge ner ate s dif fer ent se ts of key s for
each computer on the network.
Roaming to another network
When you move your computer within range of another WLAN, Windows attempts to connect to that
network. If the attempt is successful, your computer is automatically connected to the new network. If
Chapter 2 Networking (select models only) 6
Page 17

Windows does not recognize the new network, follow the same procedure you used initially to
connect to your WLAN.
Using HP Mobile Broadband (select models only)
HP Mobile Broadband enables your computer to use wireless wide area networks (WWANs) to
access the Internet from more places a nd ove r la rge r areas th an it ca n by usi ng WL ANs. Using HP
Mobile Broadband requires a network service provider, which in most cases is a mobile phone
network provider.
When used with mobile network provider service, HP Mobile Broadband gives you the freedom to
stay connected to the Internet, sen d e-mai l, or co nnect to your corporate network whet her y ou are on
the road or outside the range of Wi-Fi ho tspots.
NOTE: You may need the HP Mobile Broadband Module serial number to activate mobile
broadband service. Refer to the Getting Started guide for the location of the serial number.
Some mobile network service providers require the use of a subscriber identity module (SIM). A SIM
contains basic information about you or your computer, such as a personal identification number
(PIN), as well as network information. Some computers include a preinstalled SIM. If the SIM is not
preinstalled, it may be included with the HP Mobile Broadband information provided with your
computer, or it may be provided separately by the mobile network service provider.
For information on inserting and removing the SIM, refer to Inserting a SIM on page 7 and
Removing a SIM on page 8.
For information on HP Mobile Broadband and how to activate service with a preferred mobile network
service provider, refer to the HP Mobile Broadband information included with your computer. For
additional information, see the HP Web site at http://www.hp.com/go/mobilebroadband (U.S. only).
Inserting a SIM
NOTE: To identify the SIM slot location, refer to the Getting Started guide.
1. Shut down the computer. If you are not sure whether the computer is off or in Hibernation, turn
the computer on by pressing the power button. Then shut down the computer through the
operating system.
2. Close the display.
3. Disconnect all exte rn al dev ic es conn ected to the computer.
4. Unplug the power cord from the AC outlet.
5. Remove the battery.
6. Insert the SIM into the SIM slot, and gently press the SIM into the slot until it is firmly seated.
CAUTION: When
the computer. If a SIM is inserted incorrectly, it could damage the SIM and the SIM connector.
To reduce the risk of damage to the connector, use minimal force when inserting a SIM.
7. Replace the battery.
NOTE: HP Mobile
inserting a SIM, position the card to match the icon next to the SIM slot on
Broadband is disabled if the battery is not replaced.
Using HP Mobile Broadband (select models only) 7
Page 18

8. Reconnect external power and external devices.
9. Turn on the computer.
Removing a SIM
NOTE: To identify the SIM slot location, refer to the Getting Started guide.
1. Shut down the computer. If you are not sure whether the computer is off or in Hibernation, turn
the computer on by pressing the power button. Then shut down the computer through the
operating system.
2. Close the display.
3. Disconnect all exte rn al dev ic es conn ected to the computer.
4. Unplug the power cord from the AC outlet.
5. Remove the battery.
6. Press in on the SIM, and then remove it from the slot.
7. Replace the battery.
8. Reconnect external power and external devices.
9. Turn on the computer.
Using GPS (select models only)
Your computer may be equipp ed w ith a Globa l Pos itioning System (GPS). GPS sat ellites deliver
location, speed, and direction information to GPS-equipped systems.
For more information, refer to the HP GPS and Location software Help.
Using Bluetooth wireless devices
A Bluetooth device provides short-range wireless communications that replace the physical cable
connections that traditionally link electronic devices such as the following:
Computers
●
Phones
●
Imaging devices (cameras and printers)
●
Audio devices
●
Bluetooth devices provide peer-to-peer capability that allows you to set up a personal area network
(PAN) of Bluetooth devices. For information on configuring and using Bluetooth devices, refer to the
Bluetooth software Help.
Bluetooth and Internet Connection Sharing (ICS)
HP does not recommend setting up one computer with Bluetooth as a host and using it as a gateway
through which other computers may connect to the Internet. When two or more computers are
Chapter 2 Networking (select models only) 8
Page 19
connected using Bluetooth, and Internet Connection Sharing (ICS) is enabled on one of the
computers, the other computers may not be able to connect to the Internet using the Bluetooth
network.
The strength of Bluetooth is in synchronizing information transfers between your computer and
wireless devices including cellular phones, printers, cameras, and PDAs. The inability to consistently
connect two or more computers to share the Internet through Bluetooth is a limitation of Bluetooth
and the Windows operatin g syste m.
Connecting to a wired network
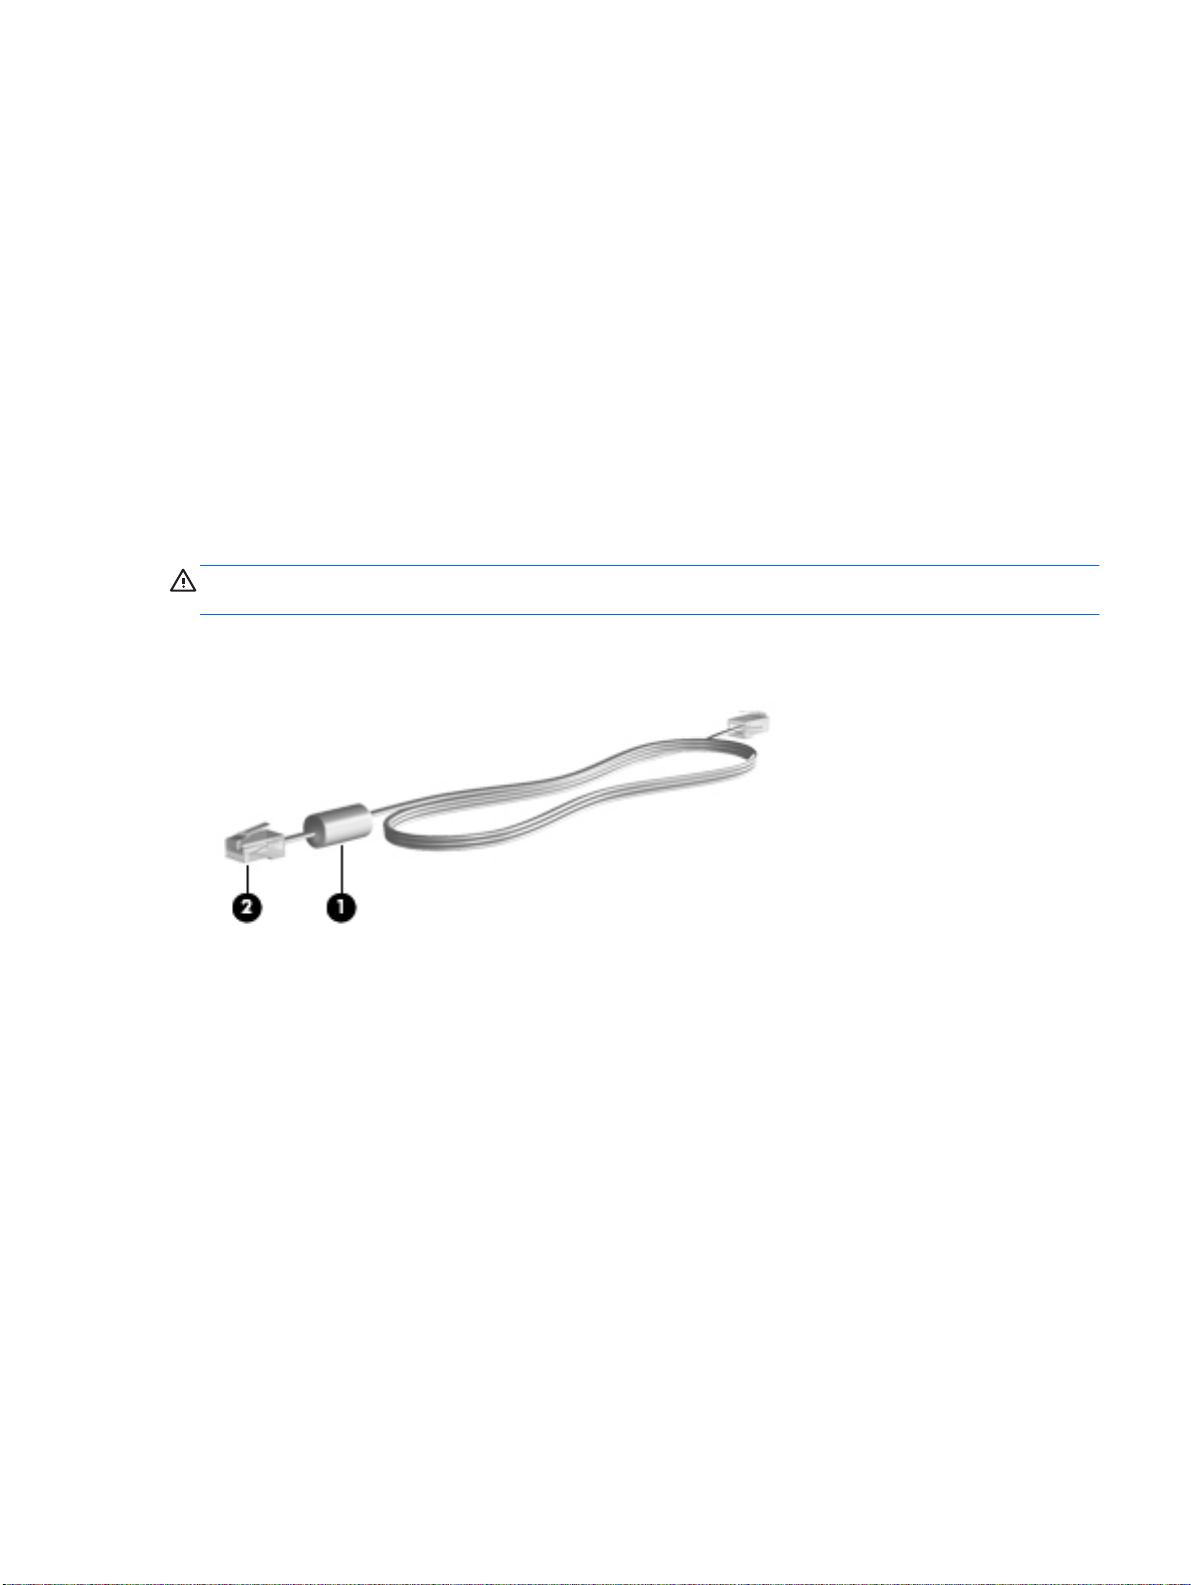
Using a modem (select models only)
A modem must be connected to an analog telephone line using a 6-pin, RJ-11 modem cable
(purchased separately). In some countries or regions, a specific modem cable adapter is also
required. Jacks for digital PBX systems may resemble analog telephone jacks, but they are not
compatible with the modem.
WARNING! To reduce the risk of electric shock, fire, or damage to the equipment, do not plug a
modem or telephone cable into the RJ-45 (network) jack.
If the modem cable contains noise suppression circuitry (1), which prevents interference from TV and
radio reception, orient the circuitry end of the cable (2) toward the computer.
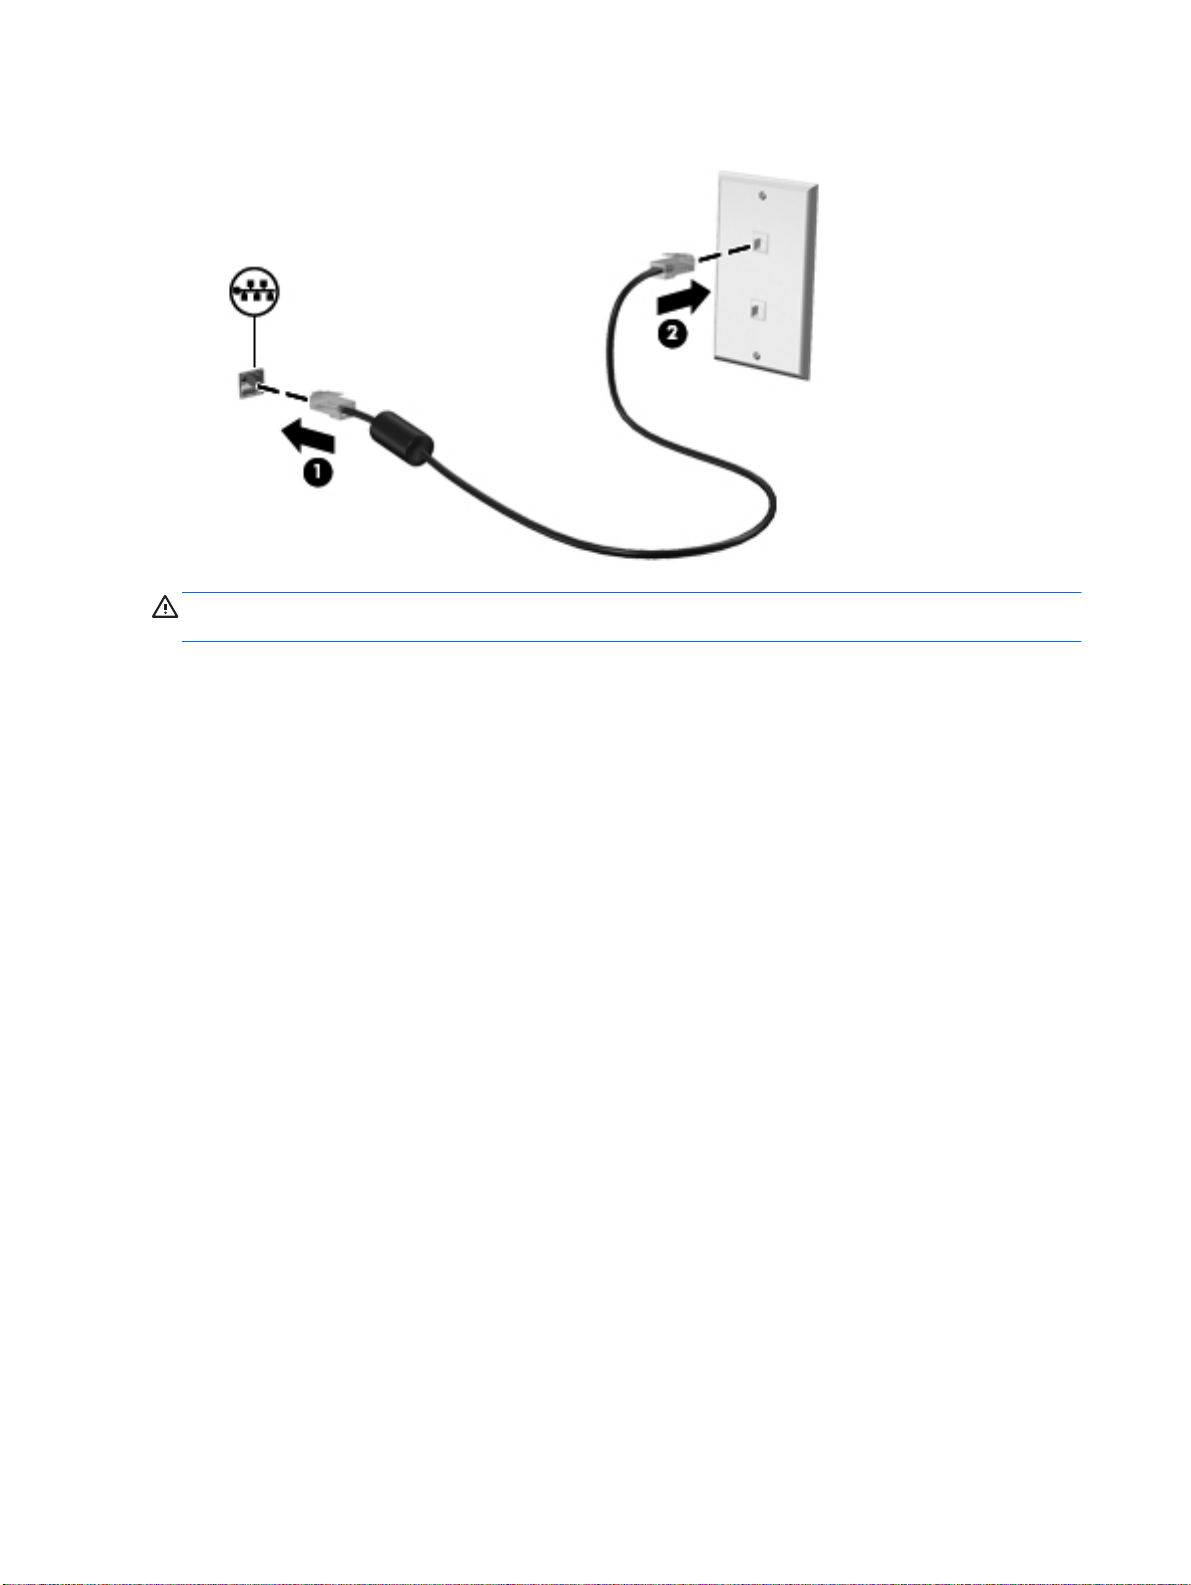
Connecting a modem cable
1. Plug the modem cable into the modem jack (1) on the computer.
Connecting to a wired network 9
Page 20

2. Plug the modem cable into the RJ-11 telephone wall jack (2).
10 Chapter 2 Networking (select models only)
Page 21
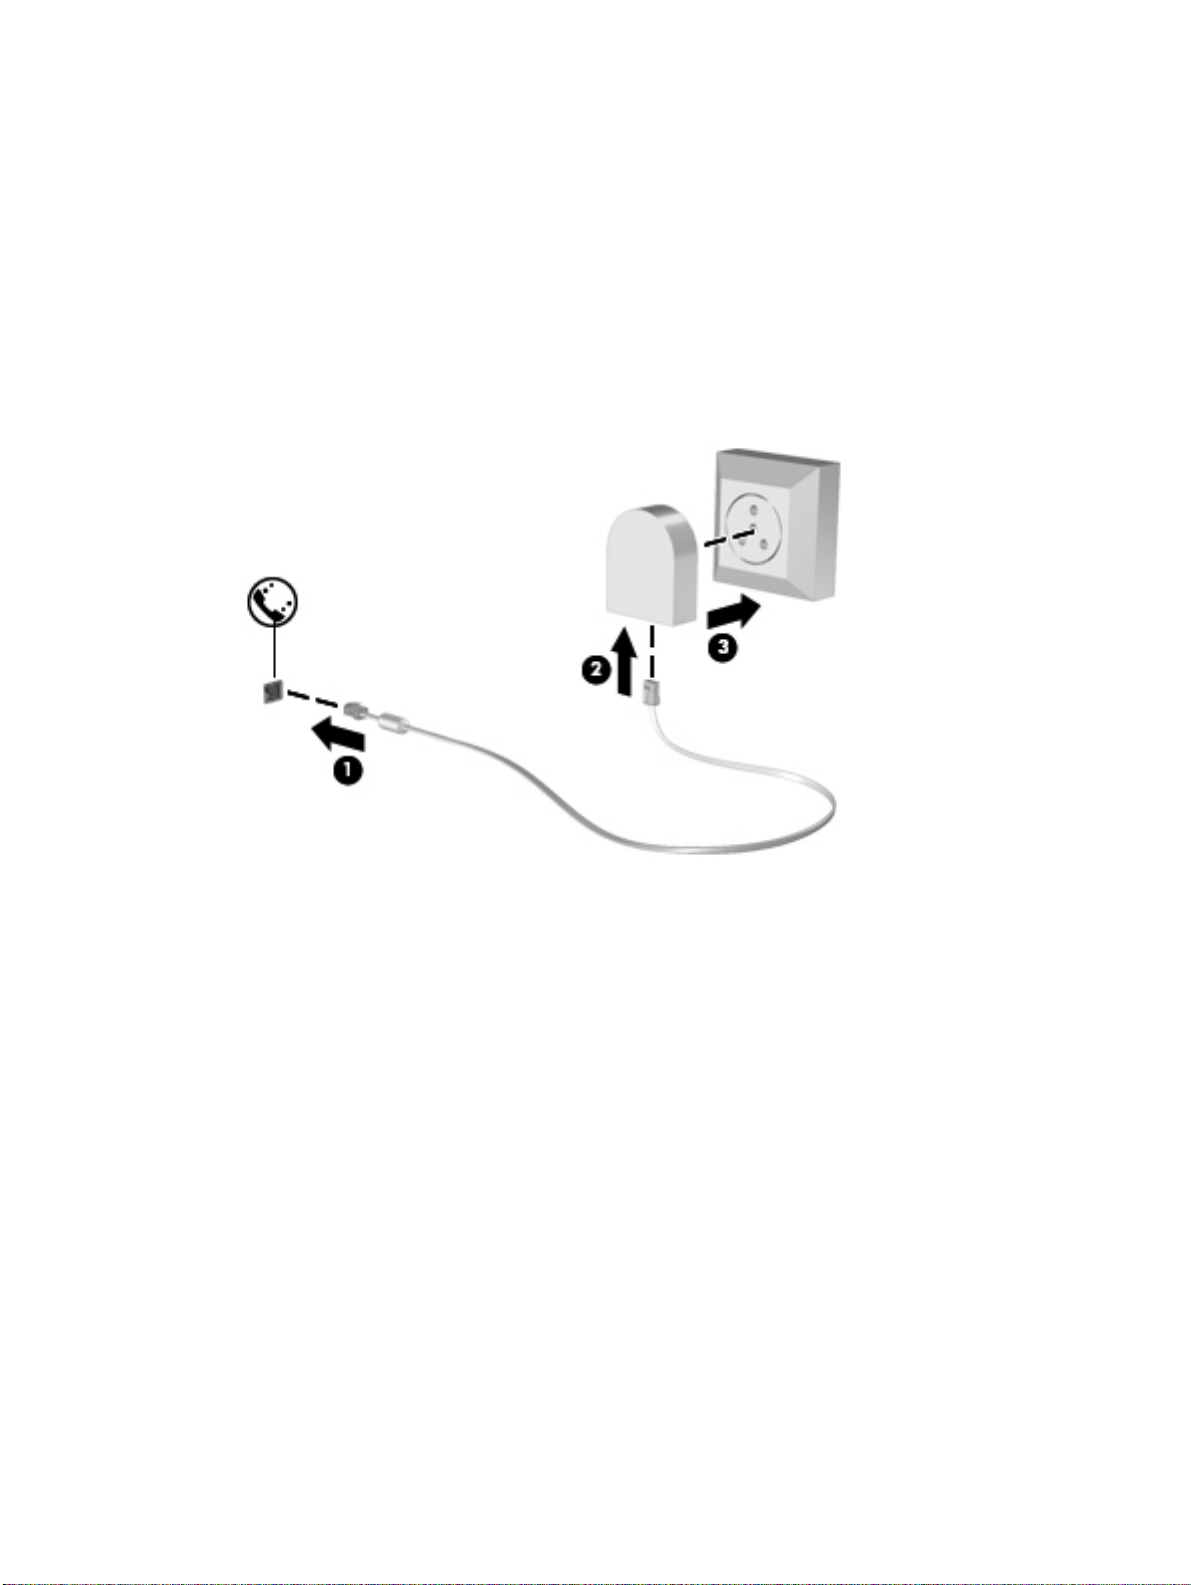
Connecting a country- or region-specific modem cable adapter
Telephone jacks vary by country or region. To use the modem and the modem cable outside the
country or region in which yo u pur ch ase d the computer, you must obtain a countr y- or region-specific
modem cable adapter.
To connect the modem to an analog telephone line that does not have an RJ-11 telephone jack,
follow these steps:
1. Plug the modem cable into the modem jack (1) on the computer.
2. Plug the modem cable into the modem cable adapter (2).
3. Plug the modem cabl e adapter (3) into the telephone wall jack.
Selecting a location setting
Viewing the current location selection
Windows 7
1. Select Start > Control Panel.
2. Click Clock, Language, and Region.
3. Click Region and Language.
4. Click the Location tab to display your location.
Windows Vista
1. Select Start > Control Panel.
2. Click Clock, Language, and Region.
3. Click Regional and Language Options.
Your location is displa ye d unde r Loc ati on.
Connecting to a wired network 11
Page 22

Adding new locations when traveling
On a new computer, the only location setting available to the modem is a location setting for the
country or region in which you purch ase d t he com put er . As you trav el to dif fer ent co untr i es or
regions, set the internal modem to a location setting that meets the operating standards of the country
or region in which you are using the modem.
As you add new location settings, they are saved by the computer so that you can switch among
settings at any time. You can add multiple location settings for any country or region.
CAUTION: To reduce the risk of losing your home country or region settings, do not delete your
current modem country or region settings. To enable modem use in other countries or regions while
preserving your home country or region configuration, add a new configuration for each location in
which you will use the modem.
CAUTION: To reduce the risk of configuring the modem in a way that violates the
telecommunications regulations and laws of the country or region you are visiting, select the country
or region in which the computer is located. The modem may not function properly if the correct
country or region selectio n is not ma de.
Windows 7
1. Select Start > Device and Prin ters.
2. Right-click the dev ic e that r epres ents y ou r computer, and click Modem settings.
NOTE: You must set up an initial (cur r ent) l ocati on area code before you can view the Dialing
Rules tab.
when you click Modem settings.
3. Click the Dialing Rules tab.
4. Click New. The New Location window opens.
5. In the Location name box, type a name (such as home or work) for the new location setting.
6. Select a country or region from the Country/region list. (If you select a country or region that is
not supported by the modem, the country / regi on se lec t i on for USA or UK is dis pl aye d.)
If you do not have a location already set up, you are prompted to enter the location
7. Enter the area code, a carrier code (if necessary), and the number for an outside line (if
necessary).
8. Next to Dial using, click Tone or Pulse.
9. Click OK to save your new locatio n setting.
10. Do one of the following:
12 Chapter 2 Networking (select models only)
To set your new location setting as the current location, click OK.
●
● To select another location setting as the current location setting, select your preference
from the settings in the Location list, and then click OK.
NOTE: You can us
your own country or region as well as in other countries or regions. For example, you could
add a setting named Work that includes dialing rules for accessing an outside line.
e the preceding procedure to add location settings for places within
Page 23

Windows Vista
1. Select Start > Control Panel.
2. Click Hardware and Sound.
3. Click Phone and Modem Options.
4. Click the Dialing Rules tab.
5. Click New. The New Location window opens.
6. In the Location name box, type a name (such as home or work) for the new location setting.
7. Select a country or region from the Country/region list. (If you select a country or region that is
8. Enter the area code, a carrier code (if necessary), and the number for an outside line (if
9. Next to Dial using, click Tone or Pulse.
10. Click OK to save your new location setting.
11. Do one of the following:
not supported by the modem, the country / regi on se lec t i on for USA or UK is dis pl aye d.)
necessary).
To set your new location setting as the current location, click OK.
●
To select another location setting as the current location setting, select your preference
●
from the settings in the Location list, and then click OK.
NOTE: You can use the preceding procedure to add location settings for places within
your own country or region as well as in other countries or regions. For example, you could
add a setting named Work that includes dialing rules for accessing an outside line.
Connecting to a local area network (LAN) (select models only)
Connecting to a LAN require s an 8-pin, RJ-45 network cable (purch ase d sep ar atel y). I f the network
cable contains noise suppression circui try (1), which prevents interference from TV and radio
reception, orient the circ ui tr y end of the ca ble (2) toward the computer.
To connect the network cable:
1. Plug the network cable in to the network jack (1) on the compu t er.
Connecting to a wired network 13
Page 24
2. Plug the other end of the network cable into a network wall jack (2).
WARNING! To reduce the risk of electric shock, fire, or damage to the equipment, do not plug a
modem cable or telephone cabl e into an RJ -45 (network) jack.
14 Chapter 2 Networking (select models only)
Page 25

3 Multimedia
Your computer may inclu de the fol low ing:
Integrated speaker (s)
●
Integrated microp hone(s)
●
Integrated webcam
●
Preinstalled multime dia s oftware
●
Multimedia buttons or keys
●
Using the media activity controls
Depending on your computer model, you may have the following media activity controls that allow
you to play, pause, fast forward, or rewi nd a medi a file :
Media buttons
●
Media hotkeys (specific keys pressed in combination with the fn key)
●
Media keys
●
Refer to the Getting S
tarted guide for information about your computer's media activity controls.
Audio
Your computer provide s a varie ty of audi o- re lat ed func ti ons :
Play music.
●
Record sound.
●
Download music from the Internet.
●
Create multimedia presentations.
●
Transmit sound and images wi th ins tant me ss agi ng pr ogr am s.
●
Stream radio programs.
●
Create (burn) audio CDs using the installed optical drive (select models only) or on an optional
●
external optical drive (purchased separately).
Using the media activity controls 15
Page 26

Adjusting the volume
Depending on your computer model, you can adjust the volume using the following:
● Volume buttons
● Volume hotkeys (specific keys pressed in combination with the fn key)
● Volume keys
WARNING! To reduce the risk of personal injury, adjust the volume before putting on headphones,
earbuds, or a headset. For additional safety information, refer to th e Regula tory, Safety and
Environmental Noti ces .
NOTE: Volume can also be controlled through the operating system and some programs.
NOTE: Refer to the Getting Started guide for information on what type of volume controls your
computer has.
Checking audio functions on the computer
NOTE: For best results when recording, speak directly into the microphone and record sound in a
setting free of background noi se.
Windows 7
To check the audio functions on your com pute r, fol low th ese s teps :
1. Select Start > Control Panel > Hardware and Sound > Sound.
2. When the Sound window ope ns , cli ck the Sounds tab. Under Program Events, select any sound
To check the recording functions on your computer, follow these steps:
1. Select Start > All Programs > Accessories > Sound Recorder.
2. Click Start Recording and speak into the microphone. Save the file to your desktop.
3. Open a multimedi a program and play back the sound.
To confirm or change the audio settings on your computer, select Start > Control Panel > Hardware
and Sound > Sound.
Windows Vista
To check the audio functions on your com pute r, fol low th ese s teps :
1. Select Start > Control Panel > Hardware and Sound > Sound.
2. When the Sound window ope ns , cli ck the Sounds tab. Under Pr ogr am , sel ect an y so und ev ent,
event, such as a beep or alarm, and click t he Test button.
You should hear sound throu gh the sp eak er s or through connected headphone s.
such as a beep or alarm, and click the Test button.
You should hear sound throu gh the sp eak er s or through connected headphone s.
16 Chapter 3 Multimedia
Page 27

To check the recording functions on your computer, follow these steps:
1. Select Start > All Programs > Accessories > Sound Recorder.
2. Click Start Recording and speak into the microphone. Save the file to your desktop.
3. Open a mul tim edi a pro gra m and pl ay bac k the s oun d.
To confirm or change the audio settings on your computer, select St
art > Control Panel > Audio.
Audio 1
7
Page 28

Webcam (select mod els only)
Some computers include an integrated webcam. With the preinstalled software, you can use the
webcam to take a photo or record a video. You can preview and save the photo or video recording.
The webcam software enable s you to exper i men t with the fol low ing fea tur es :
Capturing and sharing video
●
Streaming video with instant message software
●
● Taking still photos
For information on how to access the webcam, refer to the Ge ttin g St art ed gui de. For in for mation on
using the webcam, select Start > Help and Support.
18 Chapter 3 Multimedia
Page 29
Video
Your computer may have one or more of the following external video ports:
●
● HDMI (High Definition Multimedia Interface)
VGA
VGA
NOTE: Refer to the Getting Started guide for information about your computer's video ports.
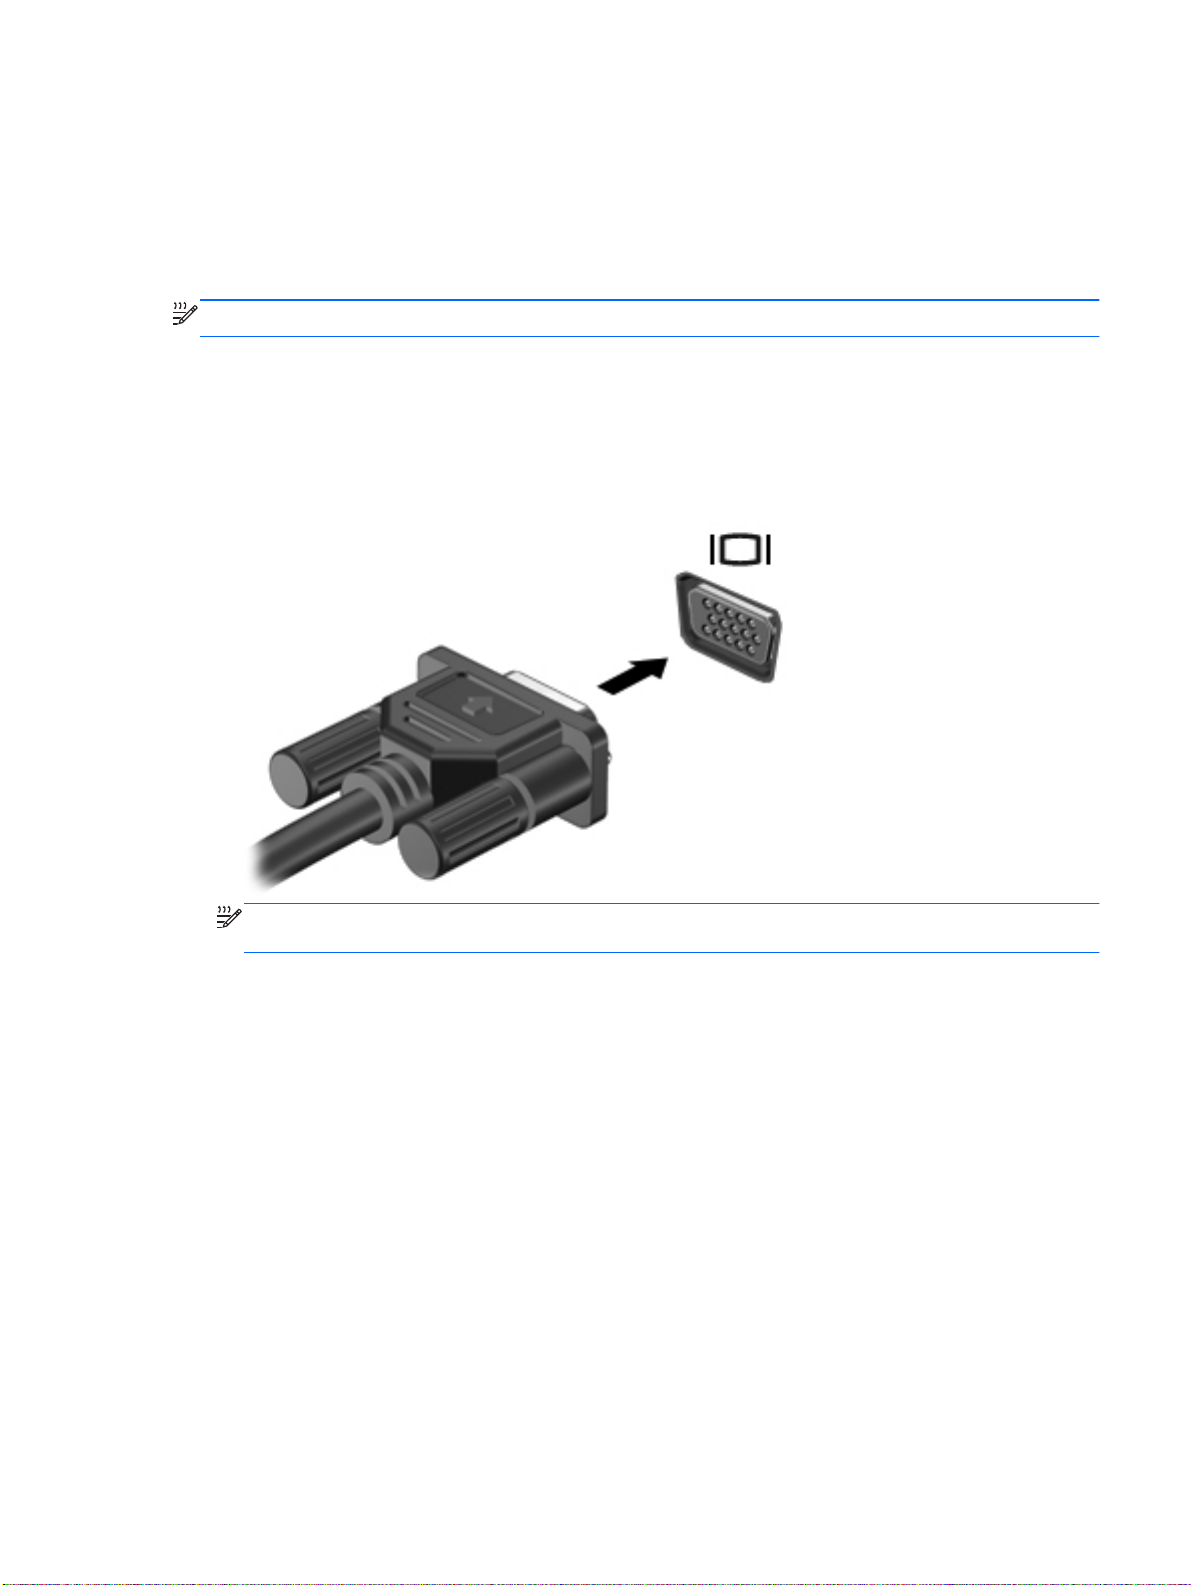
The external monitor port, or VGA port, is an analog display interface that connects an external VGA
display device such as an external VGA monitor or a VGA projector to the computer.
To connect a VGA display device, connect the device cable to the external monitor port.
▲
NOTE: For product-specific instructions on switching the screen image, refer to your Getting
Started guide.
Video 19
Page 30

HDMI
The HDMI port connects the computer to an optional video or audio device, such as a high-definition
television, or to any compatible digital or audio component.
NOTE: To transmit video signals through the HDMI port, you need an HDMI cable (purchased
separately).
One HDMI device can be connected to the HDMI port on the computer. The information displayed on
the computer screen can be simultaneously displayed on the HDMI device.
To connect a video or audio device to the HDMI port:
1. Connect one end of the HDMI cable to the HDMI port on the computer.
2. Connect the other end of the cable to the video device, and then refer to the device
manufacturer’s instr uc tio ns fo r ad diti onal information.
NOTE: For product-specific instructions on switching the screen image, refer to your Getti
guide.
Configuring audio for HDMI
To configure HDMI audio, first connect an audio or video device, such as a high-definition TV, to the
HDMI port on your computer. Then configure the default audio playback device as follows:
1. Right-cl ic k the Speakers icon in the notificat ion ar ea , at the far ri ght of the tas kb ar , and then
click Playback de vice s.
2. On the Playback tab, click either Digital Output or Digital Output Device (HDMI).
3. Click Set Default, and then click OK.
To return audi
1. Rig
2. On the Playback tab, click Speakers.
3. Click Set Default, and then click OK.
ht-click the Speakers icon in the notification ar ea , at the far ri ght of the tas kb ar, and t hen
click Playback de vice s.
o to the computer speakers, follow these steps:
ng Started
20 Chapter 3 Multimedia
Page 31

Intel Wireless Display (select models only)
Intel® Wireless Display allows you to share your computer content wirelessly on your TV. To
experience wireles s displ ay , a wirel es s TV adapter (purchased separatel y) is re qui red. Content that
asserts output protection, such as DVD and Blu-ray discs, will not pla y on Intel W irel es s Displ ay. For
details about using the wireless TV adapter, refer to the manufacturer's instructions.
NOTE: Be sure that wireless is enabled on your computer before using the wireless display.
Video 21
Page 32

4 Power management
NOTE: A computer may have a power button or a power switch. The term powe r but ton is used
throughout this guide to ref er to bot h type s of power c on trols.
Shutting down the computer
CAUTION: Unsaved information is lost when the computer shuts down.
The shut down command closes all open programs, including the operating system, and then turns
off the display and computer.
Shut down the computer under any of the fol low ing c ond iti ons :
● When you need to replace the battery or access components inside the computer
● When you are connecting an external hardware device that does not connect to a Univ ersal
Serial Bus (USB ) port
● When the computer will be unused and disconnected from external power for an extended
period
Although you can shut down the computer with the power button, the recommended procedure is to
use the Windows shut down command:
NOTE: If the computer
Hibernation before shutdown is possible.
is in the Sleep state or in Hibernation, you must first exit Sleep or
1. Save your work and close all open programs.
2. Windows 7—Select Start > Shut down.
If the computer is unresponsive and you are unable to use the preceding shutdown procedures, try
the following emergenc y pr oc edu re s in the se quence provided:
●
●
●
22 Chapter 4 Power management
Windows Vista—Select Start, click the arrow next to the Lock button, and then click Shut
Down.
NOTE: If you have been registered to a network domain, the button you click is called Shut
Down instead
Press ctrl+alt+delete, and then click the Power button.
Press and hold the power button for at least 5 seconds.
Disconnect the computer from external power and remove the battery.
of Turn Off Computer.
Page 33

Setting power options
Using power-saving states
The computer has two power-saving states that are enabled at the factory: Sleep and Hibernation.
When Sleep is initiated, the power lights blink and the screen clears. Your work is saved to memory,
letting you exit Sleep faster than exiting Hibernation. If the computer is in the Sleep state for an
extended period or if the battery reaches a critical battery level while in the Sleep state, the computer
initiates Hibe rn ati on.
When Hibernation is initiated, your work is saved to a hibernati on fil e on the hard dr iv e and the
computer turns off.
CAUTION: To reduce the risk of possible audio and video degradation, loss of audio or video
playback functionality, or loss of information, do not initiate Sleep or Hibernation while reading from or
writing to a disc or an external media card.
NOTE: You cannot initiate any type of networking connecti on or per fo rm an y com put er fun cti ons
while the computer is in the Sleep state or in Hibernation.
Initiating and exiting Sleep
The system is set at the factory to initiate Sleep after a period of inactivity when running on battery
power or on external power.
Power settings and timeo uts can be ch anged using Power Options in Window s Control Panel.
With the computer on, you can initiate Sl eep in any of the following ways:
Briefly press the power button.
●
Close the display.
●
Windows 7—Select Start, click the arrow next to the Shut down button, and then click Sleep.
●
Windows Vista—Select Start, click the arrow next to the Lock button, and then click Sleep.
To exit Sleep:
Briefly press the power button.
●
If the display is closed, open the display.
●
Press a key on the keyboard.
●
Tap or swipe the Touch Pad.
●
When the computer exits Sleep, the power lights turn on and your work returns to the screen as it
was before you stopped w orki ng.
NOTE: If you have se
password before your work will return to the screen.
t a password to be required on wakeup, you must enter your Windows
Initiating and exiting Hibernation
The system is set at the factory to initiate Hib er nati on afte r a per iod of in act iv ity when running on
battery power or on external power, or when the battery reaches a critical battery level.
Setting power options 23
Page 34

Power settings and timeo u ts can be ch anged in Windows Control Pan el.
To initiate Hibernation:
▲
To exit Hibernation:
▲
The power lights turn on and your work returns to the screen where you stopped working.
NOTE: If you have set a password to be required on wakeup, you must enter your Windows
password before your work will return to the screen.
ndows 7—Select Start, click the arrow next to the Shut down button, and then click
Wi
Hibernate.
Windows Vista—Select Start, click the arrow next to the Lock button, and then click Hibernate.
Briefly press the power button.
Using the power meter
The power meter is located in the notificati on ar ea, at the far rig ht of t he taskba r. T he pow er meter
allows you to quickly access power settings and view the remaining battery charge.
To display the percentage of remaining battery charge and the current power plan, move the
●
pointer over the power meter icon.
To access Power Options, or to change the power plan, click the power meter icon and select an
●
item from the list.
Different power meter icons indicate whether the computer is running on battery or external power.
The icon also displays a message if the battery has reached a low or critical battery level.
Using power plans
A power plan is a collection of system settings that manages how the computer uses power. Power
plans can help you conserve power or maximize performance.
Viewing the current power plan
Use any of the following methods:
● Click the power meter icon in the notification ar ea , at the far ri ght of the taskb ar .
● Windows 7—Select Start > Control Panel > System and Security > Power Options.
Windows Vista—Select Start > Control Panel > System and Maintenance > Power Options.
●
Selecting a different power plan
Use any of the following methods:
Click the power meter icon in the notification area, and then select a power plan from the list.
●
Windows 7—Select Start > Control Panel > System and Security > Power Options, and
●
then select an item from the list.
Windows Vista—Select Start > Control Panel > System and Maintenance > Power Options,
and then select an item from the list.
24 Chapter 4 Power management
Page 35

Customizing power plans
Windows 7
1. Click the power meter icon in the notification area, and then click More power options.
– or –
Select Start > Control Panel > System and Security > Power Opt ions .
2. Select a power plan, and then click Change plan settings.
3. Change the settings as needed.
4. To change additional settings, click Change advanced power settings and make your
changes.
Windows Vista
1. Click the power meter icon in the notification area, and then click More power options.
– or –
Select Start > Control Panel > System and Maintenance > Power Options.
2. Select a power plan, and then click Change plan settings.
3. Change the settings as needed.
4. To change additional settings, click Change advanced power settings and make your
changes.
Setting password protection on wakeup
To set the computer to prompt for a password when the computer exits Sleep or Hibernation, follow
these steps:
Windows 7
1. Select Start > Control Panel > System and Security > Pow er Opt ions .
2. In the left pane, click Require a password on wakeup.
3. Click Change Settings that are currently unavailable.
4. Click Require a p asswo rd (re comme nded).
5. Click Save changes.
Windows Vista
1. Select Start > Control Panel > System and Maintenance > Power Options.
2. In the left pane, click Require a password on wakeup.
NOTE: If you need to create a user account password or change your current user account
password, click Cr eat e or cha nge your us er acc ount pass word , and then follow the on-
screen instructions. If you do not need to create or change a user account password, go to step
5.
3. Click Change Settings that are currently unavailable.
Setting power options 25
Page 36

4. Click Require a password (recommended).
5. Click Save changes.
26 Chapter 4 Power management
Page 37

Using Power Assistant (select models only)
Power Assistant all ows you to co nfigure system settings to optimiz e yo ur co mp uter 's power
consumption and battery charge. Power Assistant provides tools and information to help you make
informed decisions on pow er ma nag eme nt:
● Power consumption predictions in hypothetical system configu rat ion s
● Predefined power profiles
●
To start Power Assistant when Windows is running:
▲
For more information about usi ng, co nfi gur in g, and man agi ng Po wer A ssis tan t, refe r to the Pow er
Assistant software Help.
Using battery power
WARNING! To reduce potential safety issues, use only the battery provided with the computer, a
replacement battery provided by HP, or a compatible battery purchased from HP.
Usage details and graphs sh owi ng powe r co nsu mpt ion tr end s ov er tim e
ct Start > All Programs > HP > HP Power Assistant.
Sele
– or –
Press fn+f6 (select models only).
The computer runs on battery power whenever it is not plugged into external AC power. Computer
battery life varies, depending on power management settings, running programs, display brightness,
external devices connec ted to the com puter, and other factors. Keepi ng the batt er y in the co mpu ter
whenever the computer is plugged into AC power charges the battery and also protects your work in
case of a power outage. If the computer contains a charged battery and is running on external AC
power, the computer autom ati cal ly switches to battery power if the AC ada pter i s disc onn ec ted fro m
the computer or an AC power loss occurs.
NOTE: When you d
battery life. For information on increasing or decreasing display brightness, refer to the Getting
Started guide. Select computer models can switch between graphic modes to increase battery life.
For more information, refer to Switching between graphics modes (select models only) on page 32.
isconnect AC power, the display brightness is automatically decreased to save
Finding additional battery information
Help and Support provides the following tools and information about the battery:
● Battery Check tool to test battery performance
● Information on calibration, power management, and proper care and storage to maximize battery
life
● Information on battery types, specifications, life cycles, and capacity
To access battery information:
▲ Select Start > Help and Support > Learn > Power Plans: Frequently Asked Questions.
Using Power Assist ant (s el ec t model s onl y) 2 7
Page 38

Using Battery Check
Battery Check in Help and Suppor t provi des information on the status of the battery in sta ll ed in the
computer.
To run Battery Check:
1. Connect the AC adapter to the computer.
2. Select Start > Help and Support > Troubleshoot > Power, Thermal and Mechanical.
3. Click the Power tab, and then click Battery Check.
Battery Check examines the battery and its cells to see if they are functioning properly, and then
reports the results of the examination.
NOTE: The computer must be connected to external power for Battery Check to work properly.
Displaying the remaining battery charge
▲ Move the pointer over the power meter icon in the notification area, at the far right of the taskbar.
Maximizing battery discharge time
Battery discharge time varies depending on the features you use while on battery power. Maximum
discharge time gradually decreases as the battery storage capacity naturally degrades.
Tips for maximizing battery dis c harge tim e:
Lower the brightness on the display.
●
Remove the battery from the computer when it is not being used or charged.
●
Store the battery in a cool, dry location.
●
Select the Power saver setting in Pow er Options.
●
Managing low battery levels
The information in this section describes the alerts and system responses set at the factory. Some
low-battery alerts and syst em re sp ons es can be changed using Power Options in Window s Contr ol
Panel. Preferences set using Power Options do not affect lights.
Identifying low battery levels
When a battery that is the sole power source for the computer reaches a low or critical battery level,
the following behavior occurs:
e battery light (select models only) indicates a low or critical battery level.
Th
●
NOTE: For additional information about the battery light, refer to the Getting St arted guide.
– or –
The power meter icon in the notification area shows a low or critical battery notification.
●
28 Chapter 4 Power management
Page 39

NOTE: For additional information about the power me ter, refe r to Using the power meter
on page 24.
The computer takes the following actions for a critical battery level:
If Hibernation is enabled and the computer is on or in the Sleep state, the computer initiates
●
Hibernation.
If Hibernation is disabled and the computer is on or in the Sleep state, the computer remains
●
briefly in the Sleep state, and then shuts down and loses any unsaved information.
Resolving a low battery level
Resolving a low battery level when external power is available
▲ Connect one of the following devices:
● AC adapter
● Optional docking or expansion de vi ce
● Optional power adapter purchased as an accessory from HP
Resolving a low battery level when a charged battery is available
1. Turn off the computer or initiate Hibernation.
2. Replace the discharged battery with a charged battery.
3. Turn on the computer.
Resolving a low battery level when no power source is available
● Initiate Hibernation.
● Save your work and shut down the computer.
Resolving a low battery level when the computer cannot exit Hibernation
When the computer lacks sufficient power to exit Hibernation, follow these steps:
1. Replace the discharged battery with a charged battery, or connect the AC adapter to the
2. Exit Hibernation by pres si ng the po wer bu tton .
computer and to external power.
Conserving battery power
Select low power-use settings through Power Options in Windows Control Panel.
●
Turn off wireless and LAN connections and exit modem applications when you are not using
●
them.
Disconnect unused external devices that are not plugged into an external power source.
●
Stop, disable, or remove any external media cards that you are not using.
●
Using battery power 29
Page 40

● Decrease screen brightness.
● Before you leave your work, initiate Sleep or Hibernation, or shut down the computer.
Storing a battery
CAUTION: To reduce the risk of damage to a battery, do not expose it to high temperatures for
extended periods of time.
If a computer will be unused and unpl ugg ed from ex ter nal po wer fo r more than 2 weeks, remove the
battery and store it separately.
To prolong the charge of a stored batter y, pl ace i t in a cool, dr y plac e.
NOTE: A stored batte
recharge the battery before returning it to storage.
Calibrate a battery before using it if it has been stored for one month or more.
ry should be checked every 6 months. If the capacity is less than 50 percent,
Disposing of a used battery
WARNING! To reduce the risk of fire or burns, do not disassemble, crush, or puncture; do not short
external contacts; do not dispose of in fire or water.
Refer to the Regulatory, S afet y and En vi ro nmental Notices for proper battery disposal.
Replacing the battery
In Windows 7, Battery Check in Help and Support notifies you to replace the battery when an internal
cell is not charging properly or when the battery storage capacity has reached a weak condition. If the
battery is possibly covered by an HP warranty, instructions include a warranty ID. A message refers
you to the HP Web site for more information about ordering a replacement battery.
Using external AC power
NOTE: For information on connecting to AC power, refer to the Setup Instructions poster provided
in the computer box.
External AC power is supplied through an approved AC adapter or an optional docking or expansion
device.
WARNING! To reduce po
a replacement AC adapter provided by HP, or a compatible AC adapter purchased from HP.
Connect the computer to external AC power under any of the following conditions:
WARNING! Do not charge the computer battery while you are onboard aircraft.
When charging or calibrating a battery
●
When installing or modif yi ng sy ste m sof t war e
●
When writing information to a CD, a DVD, or a BD (select models only)
●
tential safety issues, use only the AC adapter provided with the computer,
When running Disk Defragmen ter
●
When performing a backup or recov er y
●
30 Chapter 4 Power management
Page 41

When you connect the computer to external AC power, the following events occur:
● The battery begins to charge.
If the computer is turned on, the power meter icon in the notification area changes appearance.
●
When you disconnect external AC power
e computer switches to battery power.
Th
●
● The display brightness is automatically decreased to save battery life.
, the following events occur:
Using external AC power 31
Page 42

Testing an AC adapter
Test the AC adapter if the computer exhibits any of the following symptoms when it is connected to
AC power:
● The computer does not turn on.
● The display does not turn on.
● The power lights are off.
To test the AC adapter:
1. Shut down the computer.
2. Remove the battery from the computer.
3. Connect the AC adapter to the computer, and then plug it into an AC outlet.
4. Turn on the computer.
● If the power lights turn on, the AC adapter is working properly.
● If the power lights remain off, the AC adapter is not functioning and shoul d be rep lac ed .
Contact HP Customer Support for information on obta ini ng a re pla cem ent
AC power adapter.
Switching between graphics modes (select models only)
Select computers are equipped with switchable graphics and have two modes for processing
graphics. When you switch from AC power to battery power, the computer can switch from using the
high-performance mo de to usi ng the po wer -sav in g mode to co ns erv e batt er y lif e. Sim ilar ly , when yo u
switch from battery power to AC power, the computer can switch back to the high-performance mode.
NOTE: In some instances, in order to optimize performance of the computer, the system does not
allow you to switch modes, or it may prompt you to switch. It may also be necessary to close all
programs before switching.
NOTE: HDMI (select models only) only works in the high-performance mode. If you use the power-
saving mode, you can not use HDMI.
When you switch between AC and battery power, you are notified that the computer is about to switch
graphics modes. If you prefer, you can ch oos e to con tinu e usi ng the sa me gr aph ic s mod e. Wh ile th e
computer switches mode s, the scr een go es bl ank fo r a few seconds. When the switch is complete , a
notification appears in the notification area, and the scre en im age reappears.
NOTE: When select
switch between graphics modes.
computer models are in slate mod e, t he sc re en or ien tati on is r es et when yo u
32 Chapter 4 Power management
Page 43

5 External cards and devices
Using Media Card Reader cards (select models only)
Optional digital cards provide secure data storage and convenient data sharing. These cards are
often used with digital media–equipped cameras and PDAs as well as with other computers.
To determine the digital card formats that are supported on your computer, refer to the Getting
Started guide .
Inserting a digital card
CAUTION: To reduce the risk of damage to the digital card connectors, use minimal force to insert
a digital card.
1. Hold the card label-side up, with the connectors facing the computer.
2. Insert the card into the Media Card Reader, and then press in on the card until it is firmly seated.
You will hear a sound when the device has been detected, and a menu of options may be
displayed.
Using Media Card Reader cards (select models only) 33
Page 44

Removing a digital card
CAUTION: To reduce the risk of loss of data or an unresponsive system, use the following
procedure to safely remove the digital card.
1. Save your information and close all programs associated with the digital card.
2. Click the remove hardware icon in the notification area, at the far right of the taskbar. Then
follow the on-screen instruct io ns .
3. Either press in on the card (1), and then remove it from the slot (2).
– or –
Pull the card out of the slot.
Using PC Cards (select models only)
34 Chapter
A PC Card is a credit card-sized accessory designed to conform to the standard specifications of the
Personal Computer Memory Card International Association (PCMCIA). The PC Card slot supports the
following types of PC Cards:
32-bit (CardBus) and 16-bit PC Cards
●
Type I and Type II PC Cards
●
NOTE: Zoomed video PC Cards and 12-V PC Cards are not supported.
5 External ca rds a nd dev ic es
Page 45

Configuring a PC Card
To reduce the risk of loss of support for other PC Cards during configuration, install only the software
required for the device. If you are ins tr uct ed by the PC Ca rd ma nufa ctu re r to ins tall device drivers:
● Install only the device drivers for your o perating system.
● Do not install other software, such as card services, socket services, or enablers, supplied by
the PC Card manufacturer.
Using PC Card s (select models only) 35
Page 46

Inserting a PC Card
CAUTION: To prevent damage to the computer and external media cards, do not insert an
ExpressCard into a PC Card slot.
CAUTION: To reduce the risk of damage to the connectors:
Use minimal force when inserting a PC Card.
Do not move or transport the computer when a PC Card is in use.
The PC Card slot may contain a protective insert. The insert must be
PC Card:
1. Pres
This action extends the button into position for releasing the insert.
2. Press the PC Card eject bu tton aga in to release the insert.
3. Pull the insert out of the slot (2).
removed before you can insert a
s the PC Card eject button (1).
To insert a PC Card:
1. Hold the card label-side up, with the connectors facing the computer.
2. Insert the card into the PC Card slot, and then press in on the card until it is firmly seated.
You will hear a sound when the card has been detected, and a menu of available options may
be displayed.
NOTE: The first time y
that the device is recognized by the computer.
ou connect a PC Card, a message in the notification area lets you know
36 Chapter 5 External cards and devic es
Page 47

NOTE: To conserve power, stop or remove a PC Card when it is not in use.
Removing a PC Card
CAUTION: To reduce the risk of loss of data or an unresponsive system, stop a PC Card before
removing it.
1. Save your information and close all programs associated with the PC Card.
2. Click the remove hardware icon in the notification area, at the far right of the taskbar, and then
follow the on-screen instruct io ns .
3. Release and remove the PC Car d:
a. Press the PC Card eject button (1).
b. Press the PC Card eject button again to release the PC Card.
c. Pull the PC Card (2) out of the slot.
This action extends the button into position for releasing the PC Card.
Using ExpressCards (select models only)
An ExpressCard is a high-performance PC Card that is inserted into th e Expre ssC ard sl ot.
Like standard PC Cards, ExpressCards are designed to conform to the standard specifications of the
PCMCIA.
Configuring an ExpressCard
Install only the software required for the card. If you are instructed by the ExpressCard manufacturer
to install device drivers:
● Install only the device drivers for your o perating system.
● Do not install additional software, such as card services, socket services, or enablers, that are
supplied by the ExpressC ard m anu fac tur er .
Using ExpressCard s ( sel ec t mode ls on ly ) 37
Page 48

Inserting an ExpressCard
CAUTION: To prevent damage to t he com put er an d exte rna l med ia ca rd s, do not in ser t a PC Car d
into an ExpressCard slot.
CAUTION: To reduce the risk of damage to the connectors:
Use minimal force when inserting an ExpressCard.
Do not move or transport the computer when an ExpressCard is in use.
The ExpressCard slot may contain a protective inser
1. Pres s in on the in
2. Pull the insert out of the slot (2).
To insert an ExpressCard:
t. To remove the insert:
sert (1) to unlock it.
1. Hold the card label-side up, with the connectors facing the computer.
2. Insert the card into the ExpressCard slot, and then press in on the card until it is firmly seated.
You will hear a sound when the card has been detected, and a menu of options may be
displayed.
NOTE: The first time you connect an ExpressCard, a message in the notification area lets you
know that the
NOTE: To conserve power, stop or remove an ExpressCard when it is not in use.
card is recognized by the computer.
38 Chapter
5 External ca rds a nd dev ic es
Page 49

Removing an ExpressCard
CAUTION: To reduce the risk of loss of data or an unresponsive system, use the following
procedure to safely remove the ExpressCard.
1. Save your information and close all programs associated with the ExpressCard.
2. Click the remove hardware icon in the notification area, at the far right of the taskbar, and then
follow the on-screen instruct io ns .
3. Release and remov e the Ex pres sCard:
a. G entl y pres s in on the Ex pr es sC ard (1) to unlock it.
b. Pull the ExpressCard out of the slot (2).
Using smart cards (select models only)
NOTE: The term smart card is used throughout this chapter to refer to both smart cards and Java™
Cards.
A smart card is a credit card-sized accessor y that ca rr ies a microchip containi ng memory and a
microprocessor. Like personal computers, smart cards have an operating system to manage input
and output, and they include secur it y feat ure s to pro tec t agai ns t tampe ri ng. Ind ust ry -s tan dar d sm ar t
cards are used with the smart card reader (select models only).
A PIN is needed to gain access to the contents of the microchip. For more information about smart
card security features, refer to Help and Support.
Using smart cards (select models only) 39
Page 50

Inserting a smart card
1. Hold the card label-side up, and gently slide the card into the smart card reader until the card is
seated.
2. Follow the on-screen instructions for logging on to the computer using the smart card PIN.
Removing a smart card
▲ Grasp the edge of the smart card, and then pull it out of the smart card reader.
Using a USB device
Universal Serial Bus (USB) is a hardware interface that can be used to connect an optional external
device, such as a USB keyboard, mouse, drive, printer, scanner, or hub.
Some USB devices may require additional support software, which is usually included with the
device. For more information about device-specific software, refer to the manufacturer's instructions.
These instructions may be provided with the software, on disc, or on the manufacturer’s Web site.
The computer has at least 1 USB port that supports USB 1.0, 1.1, 2.0, or 3.0 devices. Your computer
may also have a powered USB port that provides p owe r to an exte rn al dev ic e if it is used with a
powered USB cable. An optional docking device or USB hub provides additional USB ports that can
be used with the computer.
40 Chapter 5 Extern al ca rds a nd dev ices
Page 51

Connecting a USB device
CAUTION: To reduce the risk of damage to a USB connector, use minimal force to connect the
device.
▲ Connect the USB cable for the device to the USB port.
NOTE: The following illustration may look slightly different on your computer.
You will hear a sound when the device has been detected.
NOTE: The first time you connect a USB device, a message in the notificati on area lets you know
that the device is
recognized by the computer.
Removing a USB device
CAUTION: To reduce the risk o f dama ge to a USB co nnec tor , do not pul l on the ca ble to r emo ve
the USB device.
CAUTION: To reduce the risk of loss of information or an unresponsive system, use the following
procedure to safely remove the USB device.
1. To remove a USB device, save your information and close all programs associated with the
2. Click the remove hardware icon in the notification area, at the far right of the taskbar, and then
3. Remove the device.
device.
follow the on-screen instruct io ns .
Using 1394 devices (select models only)
IEEE 1394 is a hardware interface that connects a high-speed multimedia or data storage device to
the computer. Scanners, digital cameras, and digital camcorders often require a 1394 connection.
Some 1394 devices may require additional support software, which is usually included with the
device. For more information about device-specific software, refer to the manufacturer's instructions.
The 1394 port also supports IEEE 1394a devices.
Using 1394 devices (select models only) 41
Page 52

Connecting a 1394 device
CAUTION: To reduce the risk of damage to a 1394 port connector, use minimal force to connect the
device.
▲ To connect a 1394 device to the computer, connect the 1394 cable for the device to the 1394
port.
You will hear a sound when the device has been detected.
Removing a 1394 device
CAUTION: To reduce the risk of loss of information or an unresponsive system, stop the 1394
device before removing it.
CAUTION: To reduce the risk of damage to a 1394 connector, do not pull on the cable to remove
the 1394 device.
1. To remove a 1394 device, save your information and close all programs associated with the
2. Click the remove hardware icon in the notification area, at the far right of the taskbar, and then
3. Remove the device.
Using an eSATA device (select models only)
An eSATA port connects an option al hig h- per formance eSATA component, such as an eSA TA
external hard drive.
Some eSATA devices may require additional support software, which is usually included with the
device. For more information about device-specific software, refer to the manufacturer's instructions.
NOTE: The eSATA port also supports an optional USB device.
device.
follow the on-screen instruct io ns .
42 Chapter
5 External ca rds a nd dev ic es
Page 53

Connecting an eSATA device
CAUTION: To reduce the risk of damage to an eSATA port connector, use minimal force to connect
the device.
▲ To connect an eSATA device to the computer, connect the eSATA cable for the device to the
eSATA port.
You will hear a sound when the device has been detected.
Removing an eSATA device
CAUTION: To reduce the risk of damage to an eSA T A con nec tor , do not pul l on the ca ble to
remove the eSATA device.
CAUTION: To reduce the risk of loss of information or an unresponsive system, use the following
procedure to safely remove the device.
1. To remove an eSATA device, save your information and close all programs associated with the
device.
2. Click the remove hardware icon in the notification area, at the far right of the taskbar, and then
follow the on-screen instruct io ns .
3. Remove the device.
Using an eSATA device (select models only) 43
Page 54

Using a serial device (select models only)
Select computer models include a serial port that connects optional devices such as a serial modem,
mouse, or printer.
Some serial devices may require additional support software, which is usually included with the
device. For more information about device-specific software, refer to the manufacturer's instructions.
▲ To connect a serial device, connect the dev ic e ca ble to the serial port on the computer.
Using optional external devices
NOTE: For more information about required software and drivers, or to learn which computer port to
use, refer to the manufacturer 's ins tr uc tio ns.
To connect an external devi ce to the co mp uter :
CAUTION: To reduce the risk of damage to the equipment when connecting a powered device, be
sure that the device is turned off and the AC power cord is unplugged.
1. Connect the device to the computer.
2. If you are connecting a powered device, plug the device power cord into a grounded AC outlet.
3. Turn on the device.
To disconnect an unpowere d external device, turn off the device, and then disco nnec t it fro m the
computer. To disconnect a powered external device, turn off the device, disconnect it from the
computer, and then unplug the AC power cord.
Using optional external drives
Removable external drives expand your options for storing and accessing information. A USB drive
can be added by connecting the drive to a USB port on the computer.
NOTE: HP extern
computer.
al USB optical drives should be connected to the powered USB port on the
44 Chapter 5 Extern al ca rds a nd dev ices
Page 55

USB drives include the following types:
● 1.44-megabyte diskette drive
Hard drive module
●
External optical drive (CD, DVD, and Blu-ray)
●
MultiBay device
●
Using the expansion port (select models only)
The expansion port connects th e com pute r to an optiona l doc ki ng or ex pan si on dev ice, so that
additional ports and connectors can be used with the computer.
NOTE: The computer has only one expansion port.
Using the docking connector (select models only)
The docking connector connects the computer to an optional docking device. An optional docking
device provides additional ports and connectors that can be used with the computer.
NOTE: The following image may look slightly different than your computer or docking device.
Using op
tional external devices 45
Page 56

46 Chapter 5 Extern al ca rds a nd dev ices
Page 57

6 Drives
Handling drives
Drives are fragile computer components that must be handled with care. Refer to the following
cautions before handling drives. Additional cautions are included with the procedures to which they
apply.
Observe these precautions :
●
●
●
●
●
●
●
●
Before you move a computer that is connected to an external hard drive, initiate Sleep and allow
the screen to clear, or properly dis connect the external hard drive.
Before handling a drive, disc har ge st atic e lec tr icity b y touc hi ng the unp ain t ed me tal su rface of
the drive.
Do not touch the connector pins on a removabl e drive or o n the computer.
Handle a drive carefully; do not drop a drive or place items on it.
Before removing or inserting a drive, shut down the computer. If you are unsure whether the
computer is off, in the Sleep state, or in Hibernation, turn the computer on, and then shut it down
through the operating system.
Do not use excessive force when inserting a dri ve in to a drive bay .
Do not type on the keyboard or move the computer while an optical drive is writing to a disc. The
write process is sensitive to vi br atio n.
When the battery is the only source of power, be sure that the battery is sufficiently charged
before writing to media.
Avoid exposing a drive to temperature or humidity extremes.
●
Avoid exposing a drive to liquids. Do not spray the drive with cleaning products.
●
Remove media from a drive before removing the drive from the drive bay, or traveling with,
●
shipping, or storing a drive.
If a drive must be mailed, place the drive in a bubble-pack mailer or other suitable protective
●
packaging and label the package “FRAGILE.”
Avoid exposing a drive to magnetic fields. Security devices with magnetic fields include airport
●
walk-through devices and security wands. Airport conveyer belts and similar security devices
that check carry-on baggage use X-rays instead of magnetism and do not damage drives.
Handling drives 47
Page 58

Using hard drives
Improving hard drive performance
Using Disk Defragmenter
As you use the computer, files on the hard drive become fragmented. Disk Defragmenter
consolidates the fragme nted fi les and folders on the hard drive so that the system can run mor e
efficiently.
NOTE: It is not necessary to run Disk Defragmenter on solid-state drives.
After you start Disk Defragmenter, it works without supervision. Depending on the size of your hard
drive and the number of fragmented files, Disk Defragmenter may take more than an hour to
complete. You may want to set it to run during the night or at another time when you do not need
access to your computer.
HP recommends defragmenting your hard drive at least once a month. You may set Disk
Defragmenter to run on a monthly schedule, but you can defragment your computer manually at any
time.
To run Disk Defragmenter:
1. Connect the computer to AC power.
2. Select Start > All Programs > Accessories > System Tools > Disk Defragmenter.
3. Windows 7—Click Defragment disk.
NOTE: Windows i
computer. You may be prompted for your permission or password for tasks such as installing
software, running utilities, or changing Windows settings. Refer to Help and Support for more
information.
Windows Vista—Click Defragment now.
ncludes the User Account Control feature to improve the security of your
NOTE: Windows i
computer. You may be prompted for your permission or password for tasks such as installing
software, running utilities, or changing Windows settings. Refer to Help and Support for more
information.
For additional information, access the Disk Defragmenter software Help.
Using Disk Cleanup
48 Chapter 6 Drives
Disk Cleanup searches the hard drive for unnecessary files that you can safely delete to free up disk
space and help the computer to run more efficiently.
To run Disk Cleanup:
1. Select Start > All Programs > Accessories > System Tools > Disk Cleanup.
2. Follow the on-screen instructions.
ncludes the User Account Control feature to improve the security of your
Page 59

Using HP 3D DriveGuard (select models only)
HP 3D DriveGuard protect s the hard dr iv e by parki ng the dr iv e and hal tin g data re que sts u nde r either
of the following conditions:
● You drop the computer.
● You move the computer with the display closed while the computer is running on battery power.
A short time after the end of one of these events, HP 3D DriveGuard returns the hard drive to normal
operation.
NOTE: Because solid-state drives (SSD) lack moving parts, HP 3D DriveGuard is unnecessary.
NOTE: Hard drives in the primary hard drive bay or in the secondary hard drive bay are protected
by HP 3D DriveGuard. Hard drives inst a lle d in opti ona l doc ki ng devic es or conn ec ted to USB p ort s
are not protected by HP 3D DriveGuard.
For more information, refer to the HP 3D DriveGuard software Help.
Identifying HP 3D DriveGuard status
The drive light on the computer changes color to show that a drive in the primary hard drive bay or a
drive in the secondary hard drive bay (select models only) is parked. To determine whether drives are
currently protected or whether a drive is parked, use the icon in the notification area, at the far right of
the taskbar:
If the software is enabled, a green check mark is superimposed over the hard drive icon.
●
If the software is disabled, a red X is superimposed over the hard drive icon.
●
If the drives are parked, a yellow moon is superimposed over the hard drive icon.
●
If the icon in the notification area is not ena
1. Selec
2. On the Icon
3. Click OK.
t Start > Control Panel > Hardware and Sound > HP 3D DriveGuard.
NOTE: If prompted by User Account Control, click Yes.
in system tray row, click Show.
Managing power with a parked hard drive
If HP 3D DriveGuard has parked the drive, the computer will behave in the following ways:
● The computer will not shut down.
● The computer will not initiate Sleep or Hibernation, except as described in the following note.
NOTE: If the computer is running on battery power and reaches a critical battery level, HP 3D
DriveGuar
● The computer will not activate battery alarms set on the Alarms tab in Power Options.
Before you move the computer, HP recommends that you either shut it down or initiate Sleep or
Hibernation.
d allows the computer to initiate Hibe rn ati on.
bled, follow these steps to enable it:
Using hard drives 49
Page 60

Using HP 3D DriveGuard software
The HP 3D DriveGuard software enables you to perform the following tasks:
Enable and disable HP 3D DriveGuard.
●
NOTE: Depending on your user priv il eges , you m ay be una ble to enable or disable HP 3D
DriveGuard. Privileges for non-administrator users can be changed by members of an
administrator group .
Determine whether a drive in the system is supported.
●
To open the software and change sett ings, follow these steps:
1. Double-click the icon in the notification area, at the far right of the taskbar.
– or –
Right-click the icon in the notification area, and then select Settings.
2. Click the appropriate button to change settings.
3. Click OK.
Using optical drives (select model s onl y)
Optical drives include the following:
CD
●
DVD
●
Blu-ray (BD)
●
Identifying the installed optical drive
Select Start > Computer.
▲
A list of all the devices installed in your computer, including your optical drive, is displayed.
Inserting an optical disc
Tray load
1. Turn on the computer.
2. Press the relea se bu tton (1) on the drive bezel to release the disc tray.
3. Pull out the tray (2).
4. Hold the disc by the edges to avoid touching the flat surfaces and position the disc label-side up
over the tray spindle.
NOTE: If the tray is not fully accessible, tilt the disc carefull y to positi on it ov er the spindle .
50 Chapter 6
Drives
Page 61

5. Gently press the disc (3) down onto the tray spindle until the disc snaps into place.
6. Close the disc tray.
Slot load
NOTE: After you insert a disc, a short pause is normal. If you have not selected a media player, an
AutoPlay dialog box opens. It prompts you to select how you want to use the media content.
CAUTION: Do not insert 8-cm optical discs into a slot load optical drive. It may cause damage to
the optical drive.
1. Turn on the computer.
2. Hold the disc by the edges to avoid touching the flat surfaces and position the disc label-side up.
3. Gently slide the disc into the slot load optical drive.
Removing an optical disc
Tray load
There are 2 ways to remove a disc, depending on whether the disc tray opens normally or not.
Using optical drives (select models only) 51
Page 62

When the disc tray opens normally
1. Press the relea se bu tton (1) on the drive bezel to release the disc tray, and then gently pull out
the tray (2) until it stops.
2. Remove the disc (3) from the tra y by gently p re ssin g down on the sp indle while lifting the outer
edges of the disc. Hold the disc by the edges and avoi d t ouching the flat surfaces.
NOTE: If the tray is not fully accessible, tilt the disc carefully as you remove it.
3. Close the disc tray and place the disc in a protective case.
When the disc tray fails to open normally
1. Insert the end of a paper clip (1) into the r ele ase ac c ess in t he fro nt bez el of the driv e.
2. Press in gently on the paper clip until the tray is released, and then pull out the tray (2) until it
stops.
52 Chapter 6 Drives
Page 63

3. Remove the disc (3) from the tray by gently pressing down on the sp ind le whi le li fti ng the oute r
edges of the disc. Hold the disc by the edges and avoi d t ouching the flat surfaces.
NOTE: If the tray is not fully accessible, tilt the disc carefully as you remove it.
Slot load
4. Close the disc tray and place the disc in a protective case.
1. Pres s the re lea se button (1) next to the drive.
2. Remove the disc (2) by holding it by the edges and avoid touchi ng the fla t surf aces .
3. Place the disc in a protective case.
Using optical drives (select models only) 53
Page 64

Sharing optical drives
Although your computer may not have an integrated optical drive, you can access software and data,
and install applications, by sharing an optical drive connected to another computer in your network.
Sharing drives is a feature of the Windows operating system that allows a drive on one computer to
be accessible to other computers on the same network.
NOTE: You must have a network set up in order to share an optical drive; refer to Networking
(select models only) on page 2 for additional informati on on se ttin g up a networ k .
NOTE: Some discs, such as DVD movies and game discs, may be copy-protected and therefore
unusable through DVD or CD drive shari ng.
To share an optical drive:
1. From the computer with the optical drive you are sharing, select Start > Computer.
2. Right-click the optical drive you want to share, and click Properties.
3. Click the Sharing tab, and then click Advanced Shari ng.
4. Select the Share this folder check box.
5. Type a name for the optical drive in the Share name text box.
6. Click Apply, and then click OK.
7. To view the shared optical drive, select Start > Control Panel > Network and Internet >
Network and Sharing Center.
Using RAID (select models only)
Redundant Arrays of Independent Disks (RAID) technolog y allows a co mp uter to use two or m ore
hard disks at the same time. RAID treats multiple drives as one contiguous drive, either through
hardware or software settings. If multiple disks are set up to work together in this fashion, they are
referred to as a RAID array.
For additional information about RAID, refer to the RAID User Guide located in Help and Support or
refer to the HP Web site at http://www.hp.com/support.
54 Chapter 6 Drives
Page 65

7 Security
Protecting the computer
Standard security features provided by the Windows operating system and the non-Windows
Computer Setup can protect your personal settings and data from a variety of risks.
NOTE: Security solutions are desi gne d to act as det er ren t s. T hese deterrents may not prevent a
product from being mishandled or stolen.
NOTE: Before you send your computer for service, back up and delete confidential files, and
remove all password se ttings.
NOTE: Some features listed in this chapter may not be available on your computer.
NOTE: Your computer supports CompuTrace, which is an online security-based tracking and
recovery service available in select regions. If the computer is stolen, CompuTrace can track the
computer if the unauthorized user accesses the Internet. You must purchase the software and
subscribe to the service in order to us e Com puTr ace . For info rm ati on abou t ord eri ng the Co mpu Trac e
software, go to the HP Web site at http://www.hpshopping.com.
Computer risk Security feature
Unauthorized use of the computer HP ProtectTools Security Manager, in combination with a
Unauthorized access to Computer Setup (f10) BIOS administrator password in Computer Setup*
Unauthorized access to the contents of a hard drive DriveLock password in Computer Setup*
Unauthorized startup from an optical drive, diskette drive, or
internal network adapter
password, smart card, and/or fingerprint reader.
Boot options feature in Computer Setup*
Unauthorized access to a Windows user account HP ProtectTools Security Manager
Unauthorized access to data ● Firewall software
Unauthorized access to Computer Setup settings and other
syst
em identification information
Unauthorized removal of the com
*Computer Setup is a preinstalled, ROM-based utility that can be used even when the operating system is not working or will
not load. You can use either a pointing device (TouchPad, pointing stick, or USB mouse) or the keyboard to navigate and
make selections in Computer Setup.
● Windows updates
Drive Encryption for HP ProtectTools
●
BIOS administrator password in Computer Setup*
puter Security cable slot (used with an optional security cable)
Protecting the computer 55
Page 66

Using passwords
A password is a group of characters that you choose to secure your computer information. Several
types of passwords can be set, depending on how you want to control access to your information.
Passwords can be set in Windows or in non-Windows Computer Setup that is preinstalled on the
computer.
Setup and DriveLock passwords are set in Computer Setup and are managed by the system
●
BIOS.
The embedded security password, which is an HP ProtectTools Security Manager password,
●
can be enabled in Computer Setup to provide BIOS password protection in addition to their
normal HP ProtectTools functions. The embedded security password is used with the optional
embedded securi ty c hip .
Windows passwords are set only in the Windows operating system.
●
● If you forget the BIOS administrator password set in Computer Setup, you can use HP SpareKey
to access the utility.
If you forget both the DriveLock user password and the DriveLock master password set in
●
Computer Setup, the hard drive that is protected by the passwords is perma nently locked and
can no longer be used.
You can use the same password for a Computer Setup feature and for a Windows security feature.
You can also use the same password f or more than one Computer Setup feature.
Use the following tips for creating and saving passwords:
● When creating passwords, follow requirements set by the program.
Write down your passwords and store them in a secure place away from the computer.
●
Do not store passwords in a file on the computer.
●
The following tables li st co mmonly used Windows and BI OS ad mi nis tr ator p as swo rd s and de sc ri be
their functions.
Setting passwords in Windows
Password Function
Administrator password* Protects access to a Windows administrator-level account.
User password* Protects access to a Windows user account.
*For information about setting a Windows administrator password or a Windows user password, select Star
Support.
NOTE: T
Setup contents.
his password cannot be used to access Computer
t > Help and
56 Chapter 7 Security
Page 67

Setting passwords in Computer Setup
Password Function
BIOS administrator password* P rotects access to Computer Setup.
DriveLock master password* Protects access to the internal hard drive that is protected by
DriveLock user password* Protects access to the internal hard drive that is protected by
TPM embedded security password When enabled as a BIOS administrator password, protects
*For details about each of these passwords, refer to the following topics.
Managing a BIOS administrator password
To set, change, or delete this password, follow these steps:
Setting a new BIOS administrator p asswo rd
1. Turn on or restart the computer, and then press esc while the “Press the ESC key for Startup
Menu” message is displayed at the bottom of the screen.
DriveLock. It is also used to remove DriveLock protection.
This password is set under DriveLock Passwords during the
enable process.
DriveLock, and is set under DriveLock Passwords during the
enable process.
access to the computer contents when the computer turns
on, restarts, or exits Hibernation.
This password requires the optional embedded security chip
to support this security feature.
2. Press f10 to enter Computer Setup.
3. Use a pointing device or the arr ow key s to selec t Security > Setup BIOS Administrator
Password, and then press enter.
4. When prompted, ty pe a pass wo rd.
5. When prompted, ty pe the new pa ss word agai n to con f irm.
6. To save your changes and ex it Com pute r Se tup, cl ick the Save icon in the lower-left corner of
the screen, and then follow the on-screen instructions.
– or –
Use the arrow keys to select File > Save Changes and Exit, and then press enter.
Your changes go into ef fec
nging a BIOS administrator password
Cha
1. Turn on or restart the computer, and then press esc while the “Press the ESC key for Startup
Menu” message is displayed at the bottom of the screen.
2. Press f10 to enter Computer Setup.
3. Use a pointing device or the arr ow key s to selec t Security > Change Password, and then press
t when the computer restarts.
enter.
Using passwords 57
Page 68

4. When prompted, ty pe you r cu rr en t pass wor d.
5. When prompted, ty pe you r new pa ss word again to confirm.
6. To save your changes and ex it Com pute r Se tup, cl ick the Save icon in the lower-left corner of
Your changes go into ef fect when the computer restarts.
Deleting a BIOS administrator password
1. Turn on or restart the computer, and then press esc while the “Press the ESC key for Startup
2. Press f10 to enter Computer Setup.
3. Use a pointing device or the arr ow key s to selec t Security > Change Password, and then press
4. When prompted, ty pe you r cu rr en t pass wor d.
5. When prompted for the new password, leave the field empty, and then press enter.
6. Read the warning. To continue, select YES.
7. When prompted to type your new password again, leave the field empty, and then press enter.
the screen, and then follow the on-screen instructions.
– or –
Use the arrow keys to select File > Save Changes and Exit, and then press enter.
Menu” message is displayed at the bottom of the screen.
enter.
8. To save your changes and ex it Com pute r Se tup, cl ick the Save icon in the lower-left corner of
Your changes go into ef fec
the screen, and then follow the on-screen instructions.
– or –
Use the arrow keys to select File > Save Changes and Exit, and then press enter.
t when the computer restarts.
Entering a BIOS administrator password
At the BIOS administra to r p as sw ord prompt, type your password (using the same kind of keys you
used to set the password), and then pres s enter. After 3 unsuccessful attempts to enter the BIOS
administrator password, you must restart the comp ute r and try again.
Managing a Computer Setup DriveLock password
CAUTION: To prevent the DriveLock-protected hard drive from becoming permanently unusable,
record the DriveLock user password and the DriveLock master password in a safe place away from
your computer. If you forget both Dr iv eL ock p asswo rd s, the har d dr iv e will b e per man entl y lock ed and
can no longer be used.
DriveLock protection prevents unauthorized access to the contents of a hard drive. DriveLock can be
applied only to the internal hard drive(s) of the computer. After DriveLock protection is applied to a
drive, a password must be entered to access the drive. The drive must be inserted into the computer
or an advanced port replicator in order for it to be accessed by the DriveLock passwords.
58 Chapter 7 Security
Page 69

To apply DriveLock protection to an internal hard drive, a user password and a master password
must be set in Computer Setup. Note the foll owi ng co nsi der at ions about using DriveLock protecti on:
● After DriveLock protection is applied to a hard drive, the hard drive can be accessed only by
entering either the user passwor d or the master p as swo rd .
The owner of the user password should be the day-to-day user of the protected hard drive. The
●
owner of the master password may be either a system administrator or the day-to-day user.
The user password and the master passwo rd c an be ide nti cal .
●
You can delete a user password or master password only by removing DriveLock protection
●
from the drive. DriveLock protection can be removed from the drive only with the master
password.
Setting a DriveLock password
To set a DriveLock password in Computer Setup, follow these steps:
1. Turn on the computer, and then press esc while the “Press the ESC key for Startup Menu”
message is displayed at the bottom of the screen.
2. Press f10 to enter Computer Setup.
3. Use a pointing device or the arr ow key s to selec t Security > DriveLock P ass words, and the n
press enter.
4. Use a pointing device to click the hard drive you want to protect.
– or –
Use the arrow keys to select the hard drive you want to protect, and then press enter.
5. Read the warning. To continue, select YES.
6. When prompted, type a mas ter pa ss wor d, and th en press enter.
7. When prompted, ty pe the mast e r password again to confirm, and then press enter.
8. When prompted, type a user p as sword, and then press enter.
9. When prompted, type the us er pa ss word agai n to con fir m, and th en pre ss enter.
10. To confirm DriveLock protection on the drive you have selected, type DriveLock in the
confirmation field, and then press enter.
NOTE: The DriveLoc k con f ir ma tion is case sensitive.
11. To save your changes and exit Compute r Setup, cl ic k the Save icon in the lower-left corner of
Your changes go into effect when the co mpu ter r est arts.
the screen, and then follow the on-screen instructions.
– or –
Use the arrow keys to select File > Save Changes and Exit, and then press enter.
Using passwords 59
Page 70

Entering a DriveLock passwo rd
Be sure that the hard drive is inserted into the computer (not into an optional docking device or
external Mul tiB ay ).
At the DriveLock Password prompt, type your user or master password (using the same kind of keys
you used to set the password), and then press enter.
After 2 incorrect attempts to enter the password, you must shut down the computer and try again.
Changing a DriveLock password
To change a DriveLock password in Computer Setup, follow these steps:
1. Turn on the computer, and then press esc while the “Press the ESC key for Startup Menu”
message is displayed at the bottom of the screen.
2. Press f10 to enter Computer Setup.
3. Use a pointing device or the arr ow key s to selec t Security > DriveLock Pa ssw o rd, and then
press enter.
4. Use a pointing device to select an internal hard drive.
– or –
Use the arrow keys to select an internal hard drive, and then press enter.
5. Use a pointing device or the arrow keys to select the password you want to change.
6. When prompted, ty pe you r cu rrent password, and then press enter.
7. When prompted, type a new password, and then press enter.
8. When prompted, type the new password again to confirm, and then press enter.
9. To save your changes and ex it Com pute r Se tup, cl ick the Save icon in the lower-left corner of
Your changes go into ef fect when the computer restarts.
the screen, and then follow the on-screen instructions.
– or –
Use the arrow keys to select File > Save Changes and Exit, and then press enter.
Removing DriveLock protection
To remove DriveLock protection in Computer Setup, follow these steps:
1. Turn on the computer, and then press esc while the “Press the ESC key for Startup Menu”
message is displayed at the bottom of the screen.
2. Press f10 to enter Computer Setup.
3. Use a pointing device or the arr ow key s to selec t Security > DriveLock Pa ssw o rd, and then
press enter.
4. Use a pointing device or the arr ow key s to selec t an inte rn al har d driv e, and then pr es s enter.
5. Use a pointing device or the arr ow key s to selec t D isable protection.
60 Chapter 7 Security
Page 71

6. Type your master password, and then press enter.
7. To save your changes and ex it Com pute r Se tup, cl ick the Save icon in the lower-left corner of
Your changes go into ef fec
the screen, and then follow the on-screen instructions.
– or –
Use the arrow keys to select File > Save Changes and Exit, and then press enter.
t wh en the co mpu ter restarts.
Using Computer Setup Auto DriveLock
In a multiple-user environment, you can set an Automatic DriveLock password. When the Automatic
DriveLock passwor d is ena ble d, a rand om us er pa ss wor d and a Dri ve Loc k ma ste r pas sw or d will be
created for you. When any user passes the password credential, the same random user and
DriveLock master passwo rd wi ll be used to unl oc k the dr iv e.
NOTE: You must have a BIOS administrator password before you can access the Automatic
DriveLock featu re s.
Entering an Automatic DriveLo ck password
To enable an Automatic DriveLoc k pa sswor d in Com pute r Se tup, fol low th ese s teps :
1. Turn on or restart the computer, and then press esc while the “Press the ESC key for Startup
Menu” message is displayed at the bottom of the screen.
2. Press f10 to enter Computer Setup.
3. Use a pointing device or the arr ow key s to selec t Security > Automatic DriveLock, and then
press enter.
4. Use a pointing device or the arr ow key s to selec t an inte rn al har d driv e, and then pr es s enter.
5. Read the warning. To continue, select YES.
6. To save your changes and ex it Com pute r Se tup, cl ick the Save icon in the lower-left corner of
Removing Automatic DriveLock protection
To remove DriveLock protection in Computer Setup, follow these steps:
1. Turn on or restart the computer, and then press esc while the “Press the ESC key for Startup
2. Press f10 to enter Computer Setup.
3. Use a pointing device or the arr ow key s to selec t Security > Automatic DriveLock, and then
the screen, and then follow the on-screen instructions.
– or –
Use the arrow keys to select File > Save Changes and Exit, and then press enter.
Menu” message is displayed at the bottom of the screen.
press enter.
4. Use a pointing device or the arr ow key s to selec t an inte rn al har d driv e, and then pr es s enter.
Using passwords 61
Page 72

5. Use a pointing device or the arr ow key s to selec t D isable protection.
6. To save your changes and ex it Com pute r Se tup, cl ick the Save icon in the lower-left corner of
the screen, and then follow the on-screen instructions.
– or –
Use the arrow keys to select File > Save Changes and Exit, and then press enter.
62 Chapter 7 Security
Page 73

Using antivirus software
When you use the computer to access e-mail, a network, or the Internet, you potentially expose it to
computer viruse s. Com pute r vi ru se s can di sa ble th e oper ati ng sy stem, programs, or utilitie s, or caus e
them to function abnormally.
Antivirus software can detect most viruses, destroy them, and, in most cases, repair any damage they
have caused. To provide ongoing protection against newly discovered viruses, antivirus software
must be kept up to date.
An antivirus program may be preinstalled on your computer and may include a trial offer. It is strongly
recommended that you upgrade the trial offer or purchase the antivirus program of your choice in
order to fully protect your computer.
For more information abo ut com puter viruses, type viruses in the Search box in Help and Support.
Using antivirus software 63
Page 74

Using firewall software
Firewalls are designed to prevent unauthorized access to a system or network. A firewall can be a
software program you install on your computer and/or network, or it can be a solution made up of
both hardware and software.
There are two types of firewalls to con sider :
● Host-based firewalls—Sof tware that pr ote cts o nly th e compute r it is i nst all ed on.
Network-based firewalls—Installed between your DSL or cable modem and your home network
●
to protect all the computers on the network.
When a firewall is installed on a system, all data sent to and from the system is monitored and
compared with a set of user-defined security criteria. Any data that does not meet those criteria is
blocked.
Your computer or networking equipment may already have a firewall installed. If not, firewall software
solutions are available.
NOTE: Under some circumstance s a firewall can block access to Internet games, interfere with
printer or file sharing on a netwo rk, o r block a utho ri ze d e-mail a ttac hm ents . To tem por aril y resolve the
problem, disable the firew all , perf or m the tas k that yo u want to per for m, an d then re enab le the
firewall. To permanently resolve the problem, reconfigure the firewall.
64 Chapter 7 Security
Page 75

Installing critical security updates
CAUTION: Microsoft sends out alerts regarding critical updates. To protect the computer from
security breaches and com pute r vi ru se s, ins tall all critical updates from Mic r os oft as so on as y ou
receive an alert.
Updates to the operating system a nd other software may have become avail abl e afte r the co mputer
left the factory. To be sure that all available updates are installed on the computer, observe these
guidelines:
●
●
●
Run Windows Update as soon as possible after you set up your computer.
Run Windows Update monthly thereafter.
Obtain updates to Windows and other Microsoft programs, as they are released, from the
Microsoft Web site and through the updates link in Help and Support.
Installing critical security updates 65
Page 76

Using HP ProtectTools Security Manager (select models only)
HP ProtectTools Security Manager software is preinstalled on select computer models. This software
can be accessed through Windows Control Panel. It provides security features that help protect
against unauthorized access to the computer, networks, and critical data. For more information, refer
to the HP ProtectTools online Help.
66 Chapter 7 Security
Page 77

Installing an optional security cable
NOTE: A security cable is designed to act as a deterrent, but it may not prevent the computer from
being mishandled or stolen.
NOTE: The security cable slot on your computer may lo ok s lig htl y diff er ent fro m the il lus tr ati on in
this section. Refer to the Getting Started guide for the location of the security cable slot on your
computer.
1. Loop the security cable around a secured object.
2. Insert the key (1) into the cable lock (2).
3. Insert the cable lock into t he secur it y cab le sl ot on the co mpu ter (3), and then loc k the cable l ock
with the key.
Installing an optional security cable 67
Page 78

Using the fingerprint reader (select models only)
Integrated fingerprint r eade rs a re avai lab le on se lec t com puter models. In order to use the fingerpr int
reader, you must set up a user account wit h a pass wor d on the co mpu t er. Thi s accou nt all ows y ou to
log on to your computer with a swipe of a desi gna ted fin ger . You ma y als o use th e finge rp ri nt re ader
to fill in password fields on Web sites and other programs that require a logon. Refer to the fingerprint
software Help for instructions.
After you create your fingerprint identity, you can set up a Single Sign On service that allows you to
use your fingerprint scanner to create credentials for any application that requires a user name and
password.
Locating the fingerprint reader
The fingerprint reader is a small metallic sensor that is located in one of the following areas of your
computer:
Near the bottom of the TouchPad
●
On the right side of the keyboard
●
On the upper-right side of the display
●
On the left side of the display
●
Depending on your computer model, the fingerprint reader may be oriented horizontally or vertically.
Both orientations requi re tha t you swi pe yo ur finge r per pen dic ul ar to the m etal li c senso r. Refe r to the
Getting Started guide for the location of the fingerprint reader on your computer.
68 Chapter 7 Security
Page 79

8 Maintenance
69
Page 80

Cleaning your computer
Cleaning products
Use the following products to saf ely c le an and di si nfect you r note boo k or tab let PC :
●
●
●
●
●
CAUTION: Avoid the followi ng cleaning products:
Strong solvents, such as alcohol, acetone, ammonium chloride, methylene chloride, and
hydrocarbons, which can permanently damage the surface of the notebook or the tablet PC.
Fibrous materials, such as paper towels, which can scratch the notebook or tablet PC. Over time, dirt
particles and cleaning agents can get trapped in the scratches.
Dimethyl benzyl ammonium chloride 0.3 percent maximum concentration (For example:
germicidal disposabl e wipe s. T hes e wipe s com e in a var ie ty of br and nam es .)
Alcohol-free glass cleaning fluid
Water with mild soap solution
Dry microfiber cleaning cloth or a chamois (static-free cloth without oil)
Static-free cloth wipes
Cleaning procedures
Follow the procedures in this section to safely clean your notebook or tablet PC.
WARNING! To prevent electric shock or damage to components, do not attempt to clean your
notebook or tablet PC while it is turned on:
Turn off the notebook or tablet PC.
Disconnect external powe r.
Disconnect all powered ex
CAUTION: Do no
Liquids dripped on the surface can permanently damage internal components.
Cleaning the display
Cleaning the sides and cover
Gently wipe the display using a soft, lint-free cloth moistened with an alcohol-free gl ass cle aner. Be
sure that the display is dry before closing the display.
To clean and disinfect the sides and cover, use a soft microfiber cloth or chamois moistened with one
of the cleaning solutions listed previously or use an acceptable germicidal disposable wipe.
NOTE: When cleaning
debris.
t spray cleaning agents or liquids directly on any notebook or tablet PC surface.
the cover of the notebook, use a circular motion to aid in removing dirt and
ternal devices.
70 Chapter 8 Maintenance
Page 81

Cleaning the TouchPad and keyboard
CAUTION: When cleaning the TouchPad and keyboard, do not let liquids drip between the keys.
This can permanently damage internal components.
To clean and disinfect the TouchPad and keyboard, use a soft microfiber cloth or chamois
●
moistened with one of the cleaning solutions listed previously or use an acceptable germicidal
disposable wipe.
To prevent keys from sticking and to remove dust, lint, and particles from the keyboard, use a
●
can of compressed air with a straw extension.
WARNING! To reduce t
a vacuum cleaner attachment to clean the keyboard. A vacuum cleaner can deposit household
debris on the keyboard surf ac e.
Cleaning a tablet PC pen and pen holder
Updating programs and drivers
Using one of the cleaning solutions listed previously, moisten a soft microfiber cloth or chamois or use
an acceptable germicidal disposable wipe:
● To clean the pen, rub the pen in an up and down motion to aid in removing dirt and debris.
To clean the pen holder, use a rotating motion around the opening of the pen holder.
●
CAUTION: Do not put any fl
not sealed off from some of the internal elec tro nic s of the tab let PC .
he risk of electric shock or damage to internal components, do not use
uid or material other than the pen in the pen holder. The pen holder is
HP recommends that you update your programs and drivers on a regular basis with the latest
versions. Go to http://www.hp.com/support to download the latest versions. You can also register to
receive automatic update notifications when they become available.
Updating programs and driver s 71
Page 82

Using SoftPaq Download Manager
HP SoftPaq Download Manager (SDM) is a tool that provides quick access to SoftPaq information for
HP business computers without requiring the SoftPaq number. Using this tool, you can easily search
for SoftPaqs, and then downlo ad and unpack them.
SoftPaq Download Manage r works b y re adi ng and do wnlo adi ng, fr om the HP FT P site, a publ is hed
database file containing computer model and SoftPaq information. SoftPaq Download Manager
allows you to specify one or more computer models to determine which SoftPaqs are available for
download.
SoftPaq Download Manage r ch eck s the HP FTP si te for updates to the database and software. If
updates are found, they are downloaded and applied automatically.
SoftPaq Download Manager is avail abl e on the HP W eb si te. To use Sof t Paq Do wnl oad Ma nag er to
download SoftPaqs, you must first download and install the program. Go to the HP Web site at
http://www.hp.com/go/sdm, and follow the instructions to download and install SoftPaq Download
Manager.
To download SoftPaqs:
1. Select Start > All Programs > HP Software Setup > HP SoftPaq Download Manager.
2. When SoftPaq Download Manager opens for the first time, a window is displayed asking if you
want to show only software for the computer you are using or to show the software for all
supported models. Select Show software for all supported models. If you have used HP
SoftPaq Download Manager previously, go to Step 3.
a. Select your operating system and language filters in the Configuration Options window. The
filters limit the number of options that are listed in the Product Catalog pane. For example, if
only Windows 7 Professional is selected in the operating system filter, the only operating
system that is displayed in the Prod uct Cat alog is Windows 7 Professional.
b. To add other operating systems, change the filter settings in the Configuration Options
window. Refer to the HP SoftPaq Download Manager software Help for more information.
3. In the left pane, click the plus sign (+) to expand the model list, and then select the model or
models of the products you want to update.
4. Click Find Available SoftPaqs to download a list of available SoftPaqs for the selected
5. Select from the list of available SoftPaqs, and then click Download Only if you have many
6. Right-click Install So ftP aq in the SoftPaq Download Manager software to install the selected
computer.
SoftPaqs to download, because the SoftPaq selection and Internet connection speed determine
how long the download process will ta ke.
If you want to download only one or two SoftPaqs and have a high-speed Internet connection,
click Download & Unpack.
SoftPaqs on the computer.
72 Chapter 8 Maintenance
Page 83

9 Computer Setup (BIOS) and System
Diagnostics
Using Computer Setup
Computer Setup, or Basic Inpu t/O utpu t Syst em (BI OS ), contr ol s communication between all the input
and output devices on the system (such as disk drives, display, keyboard, mouse, and printer).
Computer Setup includes settings for the types of devices installed, the startup sequence of the
computer, and the amount of system and extended memory.
NOTE: Use extreme care when making changes in Computer Setup. Errors can prevent the
computer from operating proper l y.
Starting Computer Setup
NOTE: An external keyboard or mouse connected to a USB port can be used with Computer Setup
only if USB legacy support is enabled.
To start Computer Setup, follow these steps:
1. Turn on or restart the computer, and then press esc while the “Press the ESC key for Startup
Menu” message is displayed at the bottom of the screen.
2. Press f10 to enter Computer Setup.
Navigating and selecting in Computer Setup
To navigate and select in Computer Setup, follow these steps:
1. Turn on or restart the computer, and then press esc while the “Press the ESC key for Startup
Menu” message is displayed at the bottom of the screen.
To select a menu or a menu item, use the tab key and the keyboard arrow keys and then
●
press enter, or use a pointing device to click the item.
To scroll up and down, click the up arrow or the down arr ow in the upp er -rig ht cor ne r of the
●
●
NOTE: You can use either a pointing device (TouchPad, pointing stick, or USB mouse) or the
keyboard t
2. Press f10 to enter Computer Setup.
screen, or use the up arrow key or the down arrow key.
To close open dialog boxes and return to the main Computer Setup screen, press esc, and
then follow the on-scree n ins tru cti ons .
o navigate and make selections in Computer Setup.
Using Computer Setup 73
Page 84

To exit Computer Setup menus, choo se one of the following methods:
● To exit
Click the Exit icon in the lower-left corner of the screen, and then follow the on-screen
instructions.
– or –
Use the tab key and the arrow keys to select File > Ignore Changes and Exit, and then press
enter.
● To save your changes and exit Computer Setup men us :
Cclick the Save icon in the lower-left corner of the screen, and then follow the on-screen
instructions.
– or –
Use the tab key and the arrow keys to select File > Save Changes an d Exit , and then press
enter.
Your changes go into ef fec
Computer Setup menus without saving your changes:
t when the computer restarts.
Restoring factory settings in Computer Setup
NOTE: Restoring defaults will not change the hard drive mode.
To return all settings in Computer Setup to the values that were set at the factory, follow these steps:
1. Turn on or restart the computer, and then press esc while the “Press the ESC key for Startup
Menu” message is displayed at the bottom of the screen.
2. Press f10 to enter Computer Setup.
3. Use a pointing device or the arr ow key s to selec t File > Restore Defaults.
4. Follow the on-screen instructions.
5. To save your changes and ex it, cl ick the Save icon in the lower-left corner of the screen, and
Your changes go into ef fec
NOTE
settings.
then follow the on-screen instruc ti ons .
– or –
Use the arrow keys to select File > Save Changes and Exit, and then press enter.
: Your passwor
t when the computer restarts.
d settings and security settings are not changed when you restore the factory
74 Chapter 9 Computer Setup (BIOS) and System Diagnostics
Page 85

Updating the BIOS
Updated versions of the BIOS may be available on the HP Web site.
Most BIOS updates on the HP Web site are packaged in compressed files called SoftPaqs.
Some download packages contain a file named Readme.txt, which contains information regarding
installing and troubles hoo tin g the file.
Determining the BIOS version
To determine whether available BIOS updates contain later BIOS versions than those currently
installed on the computer, you need to know the version of the system BIOS currently installed.
BIOS version information (also known as RO M date and System BIOS) can be dis played by pressing
fn+esc (if you are already in Windows) or by using Computer Setup.
1. Start Computer Se tup.
2. Use a pointing device or the arr ow key s to selec t File > System Information.
3. To exit Computer Setup without saving your changes, click the Exit icon in the lower-left corner
of the screen, and then follow the on-s cr ee n ins tructions.
– or –
Use the tab key and the arrow keys to select File > Ignore Changes and Exit, and then press
enter.
Downloading a BIOS update
CAUTION: To reduce the risk of damage to the computer or an unsuccessful installation, download
and install a BIOS update only when the computer is connected to reliable external power using the
AC adapter. Do not download or instal l a BIO S upda te whi le the co mpu ter is ru nni ng on batte ry
power, docked in an optional docking device, or connected to an optional power source. During the
download and installa tio n, f oll ow these ins tr uc tion s:
Do not disconnect power from the computer by unplugging the power cord from the AC outlet.
Do not shut down the computer or initiate Sleep or Hibernation.
Do not insert, remove, connect, or disconnect any device, cable, or cord.
1. Select Start > Help and Support > Maintain.
2. Follow the on-screen instructions to identify your computer and access the BIOS update you
3. At the download area, fol low the se steps :
want to download.
a. Identify the BIOS update that is later than the BIOS version currently installed on your
computer. Make a note of the date, name, or other identifier. You may need this information
to locate the update later, after it has been downloaded to your hard drive.
b. Follow the on-screen instructions to download your selection to the hard drive.
Make a note of the path to the location on your hard drive where the BIOS update is
downloaded. You will need to access this path when you are ready to install the update.
Using Computer Setup 75
Page 86

NOTE: If you connect your comput er to a netwo rk, con su lt the netw or k adm ini strat or bef or e
installing any software updates, especially system BIOS updates.
BIOS installation proc ed ure s va ry . Fol lo w any ins tr uc tio ns tha t are di splayed on the screen after the
download is complete. If no instr uc tion s are dis pla ye d, f oll ow thes e ste ps:
1. Open Windows Explorer by selecting Start > Computer.
2. Double-click your hard drive designation. The hard drive designation is typically Local Disk (C:).
3. Using the hard drive path you recorded earlier, open the folder on your hard drive that contains
4. Double-click the file that has an .exe extension (for example, filename.exe).
5. Complete the instal la tion by f oll owi ng the on- s creen in structions.
NOTE: After a mess
downloaded file from your har d driv e.
the update.
The BIOS installation begins.
age on the screen reports a successful installation, you can delete the
Using System Diagnostics
System Diagnostics allows you to run diagnostic tests to determine if the computer hardware is
functioning properly. The following diagnostic tests are available in System Diagnostics:
Start-up test—This test analyzes the main computer components that are required to start the
●
computer.
Run-in test—This test repeats the start-up test and checks for intermittent problems that the
●
start-up test does not detect.
Hard disk test—This test analyzes the physical condition of the hard drive, and then checks all
●
data in every sector of the hard drive. If the test detects a damaged sector, it attempts to move
the data to a good sector.
Memory test—This test analyz es th e physic al c ond iti on of the mem or y mod ule s. If it rep ort s an
●
error, replace the memory modules immediately.
Battery test—This test analyzes the condition of the battery. If the battery fails the test, contact
●
HP Customer Support to report the issue and purchase a replacement battery.
You can also view system info rm atio n and er ro r log s in the Sy s tem Dia gno sti cs w ind ow.
To start System Diagnostics:
1. Turn on or restart the computer. While the “Press the ESC key for Startup Menu” message is
displayed in the lower-left co rn er of the sc r een , press esc. When the Startup Menu is displ ay ed,
press f2.
2. Click the diagnostic test you want to run, and then follow the on-screen instructions.
NOTE: If you need to stop a diagnostics test while it is running, press esc.
76 Chapter 9 Computer Setup (BIOS) and System Diagnostics
Page 87

10 MultiBoot
About the boot device order
As the computer starts, the system attempts to boot from enabled boot devices. The MultiBoot utility,
which is enabled at the factory, controls the order in which the system selects a boot device. Boot
devices can include optical d ri ves, dis ke tte driv es , a networ k int erface card (NIC), hard drives, and
USB devices. Boot devices contain bootable media or files that the computer needs to start and
operate properly.
NOTE: Some boot devices must be enabled in Computer Setup before they can be included in the
boot order.
The factory setting is for the computer to select the boot device by searching enabled boot devices
and drive bay location s in the fol lowing order:
NOTE: Some of the
computer.
● Notebook upgrade bay
● Optical drive
● Notebook hard drive
● USB diskette drive
● USB CD-ROM
● USB hard drive
● Notebook Ethernet
● Secure Digital (SD) Memory Card
● Docking station upgrade bay
● External SATA drive
boot devices and drive bay locations listed may not be supported on your
You can change the order in which the computer searches for a boot device by changing the boot
order in Computer Setup. You can also press esc while t he “Press the ESC key for Startup Menu”
message is displayed at the bottom of the sc re en, and th en press f9. Pressing f9 displays a menu
that shows the current boot devices and allows you to select a boot device. Or, you can use MultiBoot
Express to set the computer to prompt you for a boot location each time the computer turns on or
restarts.
About the boot device order 77
Page 88

Enabling boot devices in Computer Setup
The computer will boot to a USB device or a NIC device only if the device has first been enabled in
Computer Setup.
To start Computer Setup and enable a USB device or a NIC device as a boot device, follow these
steps:
1. Turn on or restart the computer, and then press esc while the “Press the ESC key for Startup
Menu” message is displayed at the bottom of the screen.
2. Press f10 to enter Computer Setup.
3. To enable bootable media in USB drives or in drives inserted into an optional docking device
(select models only), use a poi nti ng dev ic e or the arr ow key s to se lec t Sy stem Configuration >
Device Configurations. Confirm U SB legacy support is selected.
NOTE: The USB Port option must be enabled in order to use USB legacy support. It is enabled
at the factory. If the port becomes disabled , reen abl e it by se lect in g System Configuration >
Port Options, and then selecting USB Port.
– or –
To enable a NIC device, select System Configuration > Boot Options, and then select PXE
Internal NIC boot.
4. To save your changes and ex it Com pute r Se tup, cl ick the Save icon in the lower-left corner of
the screen, and then follow the on-screen instructions.
– or –
Use the arrow keys to select File > Save Changes and Exit, and then press enter.
Your changes go into ef fec
NOTE
: To connect a NIC to a Preboot eXecution Environment (PXE) or Remote Program Load
(RPL
) server without using MultiBoot, press esc while the “Press the ESC key for Startup Menu”
message is displayed at the bot tom of the scr een , and t hen qui ckly p re ss f12.
t when the computer restarts.
78 Chapter 10 MultiBoot
Page 89

Considering boot order changes
Before changing the boot order, note the following considerations:
When the computer restarts after the boot order has been changed, the computer attempts to
●
start using the new boot order.
If there is more than one type of boot device, the computer attempts to boot using the first of
●
each type of boot device (except for optical devices). For example, if the computer is connected
to an optional docking device (select models only) that contains a hard drive, this hard drive will
be shown in the boot order as a USB hard drive. If the system attempts to boot from this USB
hard drive and fails, it will not attempt to boot to the hard drive in the hard drive bay. Instead, it
will try to boot to the next type of device in the boot order. However, if there are two optical
devices, and the first optical device does not boot (either because it does not contain media or
the media is not a boot disc), the system will try to boot to the second optical device.
Changing the boot order also change s the lo gic al dr ive des ign ati ons . For exa mpl e, if you s tar t up
●
from a CD-ROM drive with a disc formatted as drive C, that CD-ROM drive becomes drive C and
the hard drive in the hard drive bay becom es driv e D.
● The computer will boot from a NIC device only if the device has been enabled in the Built-In
Device Options menu of Computer Setup and if booting from the device has been enabled in the
Boot Options menu of Computer Setup. Booting from a NIC does not affect logical drive
designations because no drive letter is associated with the NIC.
● Drives in an optional docking device (select models only) are treated like external USB devices
in the boot order.
Considering boot order changes 79
Page 90

Choosing MultiBoot preferences
You can use MultiBoot in the following ways:
To set a new boot order that the computer uses each time it is turned on, by changing the boot
●
order in Computer Setup.
To dynamically choose the boot device, by pressing esc while the “Press the ESC key for
●
Startup Menu” message is displayed at the bottom of the screen, and then pressing f9 to enter
the Boot Device Options menu.
● To use MultiBoot Express to set variable boot orders. This feature prompts you for a boot device
each time the computer is turned on or re st arted.
Setting a new boot order in Computer Setup
To start Computer Setup and set a boot devic e orde r tha t the com pute r uses eac h tim e it is turned on
or restarted, follow these st eps :
1. Turn on or restart the computer, and then press esc while the “Press the ESC key for Startup
Menu” message is displayed at the bottom of the screen.
2. Press f10 to enter Computer Setup.
3. Use a pointing device or the arro w key s to selec t the Legacy Boot Order list, and then press
enter.
4. To move the device up in the boot order, use a pointing device to click the up arrow, or press the
+ key.
– or –
To move the device down in the boot order, use a pointing device to click the down arrow, or
press the - key.
5. To save your changes and ex it Com pute r Se tup, cl ick the Save icon in the lower-left corner of
Your changes go into ef fect wh
Dynamically choosing a boot device using the F9 prompt
To dynamically choose a boot device for the current startup sequence, follow these steps:
1. Open the Select Boot Device menu by turning on or restarting the computer, and then pressing
2. Press f9.
3. Use a pointing device or the arrow keys to select a boot device, and then press enter.
Your changes go into effect immediately.
the screen, and then follow the on-screen instructions.
– or –
Use the arrow keys to select File > Save Changes and Exit, and then press enter.
en the computer restarts.
esc while the “Press the ESC key for Startup Menu” message is displayed at the bottom of the
screen.
80 Chapter 10 MultiBoot
Page 91

Setting a MultiBoot Express prompt
To start Computer Setup and set the computer to display the MultiBoot startup location menu each
time the computer is started or restarted, follow these steps:
1. Turn on or restart the computer, and then press esc while the “Press the ESC key for Startup
Menu” message is displayed at the bottom of the screen.
2. Press f10 to enter Computer Setup.
3. Use a pointing device or the arr ow key s to selec t System Configuration > Boot Options, and
then press enter.
4. In the Multiboot Express Popup Delay (Sec) field, enter the length of time in seconds that you
want the computer to display the startup location menu before it defaul ts to the cu rr ent Mu lti Bo ot
setting. (When 0 is selected, the Express Boot startup location menu is not displayed).
5. To save your changes and ex it Com pute r Se tup, cl ick the Save icon in the lower-left corner of
Your changes go into ef fec
the screen, and then follow the on-screen instructions.
– or –
Use the arrow keys to select File > Save Changes and Exit, and then press enter.
t when the computer restarts.
Entering MultiBoot Express preferences
When the Express Boot menu displays during startup, you have the following choices:
To specify a boot device from the Express Boot menu, select your preference within the allotted
●
time, and then press enter.
To prevent the computer from defaulti ng to the cu rrent MultiBoot setting, press an y key b efo re
●
● To allow the computer to start according to the curr en t Multi Bo ot set t ing s, wait f or the al lot ted
the allotted time expires. The computer will not start until you select a boot device and press
enter.
time to expire.
Choosing MultiBoot pr efer en ces 81
Page 92

11 Management
Using Client Management So lu tions
Client Management Solutions software provides standards-based solutions for managing client (user)
desktop, workstation, notebook, and tablet computers in a networked environment.
Client management incl udes the following key capabil iti es and fe atur es :
Initial software image deployment
●
Remote system software installation
●
Software management and updates
●
ROM updates
●
Tracking and security of computer assets (the hardware and software installed on the computer)
●
Fault notification and recov ery of cer ta in sy st em software and hardware components
●
NOTE: Support for specific features described in this section may vary, depending on computer
model and/or version of management software installed on the computer.
Configuring and deploying a software image
The computer is shipped wit h a prei ns tall ed sy st em so ftwa re im age . The in iti al so ftwar e im age is
configured during the first-time setup of the computer. After a brief software "unbundling" occurs, the
computer is ready to be used.
A customized software image can be deployed (distributed) in one of the following ways:
● Installing additional softwar e appl ications after unbundling the preinsta ll ed software image
● Using software deployment tools, such as Altiris Deployment Solutions, to replace the
preinstalled software with a customized software image
● Using a disk-cloning process to copy the co nten ts from one ha rd dr iv e to anot her
The deployment method you use depends on your organization's technology environment and
processes.
NOTE: Computer Se
management and troubleshooting, power management, and the recovery of system software.
82 Chapter 11 Management
tup and other system features provide further assistance with configuration
Page 93

Managing and updating software
HP provides several tools for managing and updating software on client computers:
● HP Client Manager for Altiris (select models only)
NOTE: To download HP Client Manager for Altiris or to obtain more information about HP
Client Manager for Altiris, see the HP Web site at http://www.hp.com.
● HP CCM (Client Configuration Manager) (select models only)
● HP SSM (System Software Manager )
HP Client Manager for Altiris (select models only)
HP Client Manager for Altiris integrates Intelligent Manageability technology into Altiris software. HP
Client Manager for Alti ri s pro vi des s up eri or h ard war e management capabiliti es fo r HP devic es :
Detailed views of hardware inventory for asset management
●
● System Checkup monitoring and diagnostics
● Web-accessible reporting of business-critical details such as thermal warnings and memory
alerts
● Remote updating of system software such as devic e driv er s and the s ystem BIOS
NOTE: Additional func
optional Altiris Solutions software (purchased separately).
tionality can be added when HP Client Manager for Altiris is used with
When HP Client Manager for Altiris (installed on a client computer) is used with Altiris Solutions
software (installed on an administrator computer), HP Client Manager for Altiris provides increased
management functionality and centralized hardware management of client devices for the following IT
life-cycle ar ea s:
● Inventory and asset management
◦ Software license compliance
◦ Computer tracking and reporting
◦ Computer lease contract information and fixed asset tracking
● System software deployment and mi gr atio n
◦ Windows migration
◦ System deployment
◦ Personality (personal user settings) migration
Using Client Management Solutions 83
Page 94

● Help desk and problem resolution
◦ Management of help desk tickets
Remote troubleshootin g
◦
Remote problem resolution
◦
Client disaster recovery
◦
● Software and operations management
◦ Ongoing client management
◦ HP system software deployment
Application self-healing (the ability to identify and repair certain application problems)
◦
Altiris Solutions s oftwa re pr ov id es eas y -to -u se so ftwa re di str ib uti on ca pabi li tie s. HP Cli ent Ma nag er
for Altiris enables communication with the Altiris Solutions software, which can be used to complete
new hardware deployment or personality migration to a new operating system using easy-to-follow
wizards. HP Client Manager for Altiris is available for download from the HP Web site.
When Altiris Solutions software is used in conjunc tio n with HP Sy s tem So ftwar e Ma nage r or HP
Client Manager for Altiris, administrators can also update the system BIOS and device driver software
from a central console.
84 Chapter 11 Management
Page 95

HP CCM (Client Configuration Manager) (select models only)
HP CCM automates the management of software such as operating systems, programs, software
updates, and content and configuration settings to ensure that each computer is maintained in the
correct configuration. With these automated management solutions, you can manage software
throughout the life cycle of the computer.
CCM enables you to perform the following tasks:
Collect hardware and software inventory across multiple platforms
●
Prepare a software package and conduct impact analysis prior to distribution
●
● Target individual computers, wor k gr oups, or entire populations of compute rs for dep loy me nt and
maintenance of software and content according to policies
Provision and manage opera ting s ys tem s, app li cations, and content on distribu ted co mpu t er s
●
from any location
Integrate CCM with help desks and other system management tools for seamless operations
●
Leverage a common infrastructure for management of software and content on standard
●
computing devices across any network for all enterprise users
Scale to meet enterprise needs
●
HP SSM (System Software Manager)
HP SSM lets you remotely update system-level software on multiple systems simultaneously. When
executed on a client computer, SSM detects versions of both hardware and software, and then
updates designated software from a central repository, known as a file store. Driver versions that are
supported by SSM are denoted with a special icon on the HP driver download Web site and on the
Support Software CD. To download the SSM utility or to obtain more information on SSM, see the HP
Web site at http://www.hp.com/go/ssm (English on ly ).
Using Client Management Solutions 85
Page 96

Using Intel Active Management Technology (select models only)
Intel® Active Management Technology (iAMT) allows discovery, repair, and protection of networked
computing assets. With iAMT, computers can be managed whether they are on or off. The iAMT
solution is available on compu t ers with Intel Centrino® with vPro mobi le tec hno log y.
Features of iAMT include:
● Hardware inventory information
Event notification
●
Power management
●
Remote diagnosis and repair
●
● Hardware-based isolation and recovery—limit or cut off computer network access if virus-like
activity is detected
86 Chapter 11 Management
Page 97

Enabling the iAMT solution
To configure iAMT settings:
NOTE: The ctrl+p prompt is visible only if the AMT Setup Prompt option is enabled in Computer
Setup.
1. Turn on or restart the computer.
2. Before Windows starts up, press ctrl+p.
NOTE: If you do not press ctrl+p at the appro
access the MEBx setup utility.
3. Enter the ME password. The factory setting for the password is admin.
The MEBx setup utility opens. Use the ar ro w keys to nav iga te.
4. Choose to configure Intel ME, configure iAMT, or change the Intel ME password.
5. When you have made your selections, select Exit to close the MEBx setup utility.
Using the MEBx setup utility menus
NOTE: For more information on iAMT, go to the Intel Web site at http://www.intel.com, and then
search for iAMT.
Intel ME Configuration
priate time, you must repeat steps 1 and 2 to
Select To do this
Intel ME State Control
ME Firmware Local Update
Intel
LAN Controller
Intel ME Features Control
Intel ME Power Control
Disable/enable the management engine.
Disable/enable local management of firmware updates.
Disable/enable the integrated network controller.
Disable/enable AMT or none.
Configure the management engine power policies.
iAMT Configuration
Select To do this
Host Name Assign a host name to the computer.
TCP/IP Disable/enable network interface or DHCP (assigns an IP
Provision Model Assign enterprise or small business iAMT model.
Setup and Configuration Set options to control remote configuration of AMT.
Un-Provision Reset the AMT configuration to factory defaults.
address if DHCP has been disabled) or change the domain
name.
SOL/IDE-R Dis able/enab le remote boot control to IDE diskette or CD-
ROM and assign a user name and password.
Using Intel Active Management Technology (select models only) 87
Page 98

Select To do this
Password Policy Set options to control requirements for the network password
Secure Firmware Update Disable/enable or disable updating firmware remotely.
Set PRTC Set the real-time clock.
Idle Timeout Set a time-out value.
and the MEBx password.
Change Intel ME Password
Select To do this
Change ME Password Change the password.
NOTE: The default password is admin.
88 Chapter 11 Management
Page 99

A Traveling with the computer
For best results, follow these traveling and shipping tips:
Prepare the computer for traveling or shipping:
●
Back up your information.
◦
Remove all discs and all external media cards, such as digital cards.
◦
CAUTION: To reduce the risk of damage to the computer, damage to a drive, or loss of
information, remove the media from a drive before removing the drive from a drive bay and
before shipping, storing, or traveling with a drive.
◦ Turn off and then disconnect all external devices.
◦ Shut down the computer.
● Take along a backup of your information. Ke ep the bac ku p sep ar ate fro m the co mpu t er.
● When traveling by air, carry the computer as hand luggage; do not check it in with the rest of
● In-flight computer use is at the discretion of the airline. If you plan to use the computer during a
your bags.
CAUTION: Avoi
include airport walk-through devices and security wands. Airport conveyer belts and similar
security devices that check carry-on baggage use X-rays instead of magnetism and do not
damage drives.
flight, check with the airline in advance.
d exposing a drive to magnetic fields. Security devices with magnetic fields
● If the computer will be unused and disconnected from external power for more than 2 weeks,
remove the battery and store i t sepa rately.
● If you are shipping the computer or a drive, use suitable protective packaging and label the
package “FRAGILE.”
● If the computer has a wireless device or an HP Mobile Broadband Module installed, such as an
802.11b/g device, a Global System for Mobile Communications (GSM) device, or a General
Packet Radio Service (GPRS) device, the use of these devices may be restricted in some
environments. Such restrictions may apply onbo ard aircraft, in hospi tal s, nea r explo sive s, and in
89
Page 100

hazardous locations. If you are uncertain of the policy that applies to the use of a particular
device, ask for authorization to use it befor e you tu rn it on.
● If you are traveling internationally, follow these suggestions:
◦ Check the computer-related customs regulations for each country or region on your
itinerary.
◦ Check the power cord and adapter requirements for each location in which you plan to use
the computer. Voltage, frequency, and plug configurations vary.
WARNING! To reduce the risk of electric shock, fire, or damage to the equipment, do not
attempt to power the computer with a voltage converter kit sold for appliances.
90 Appendix A Traveling with the computer
 Loading...