

HP 2920-24G, 2920-48G, 2920-24G, 2920-48G, 2920-24G PoE+, 2920-48G PoE+ Quick Setup Manual
HP 2920-24G, 2920-48G, 2920-24G PoE+, and 2920-48G PoE+ Switches
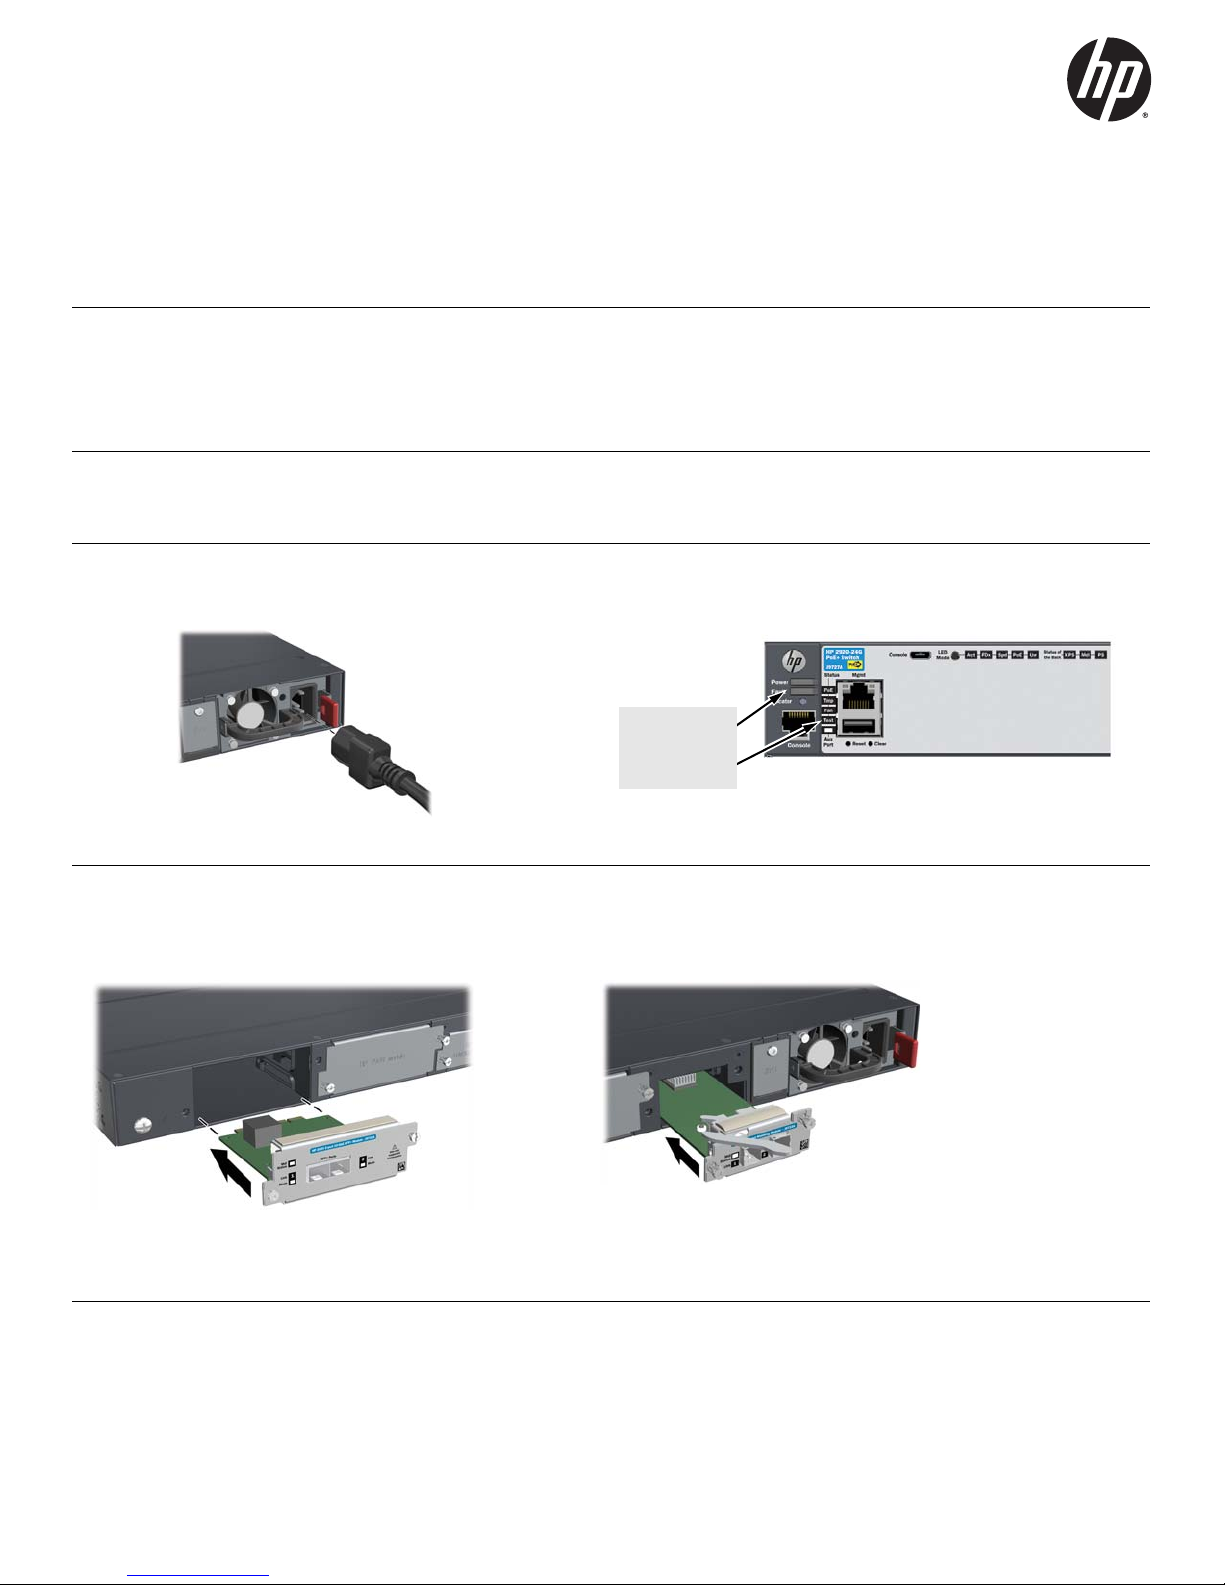
After Self-Test:
Power LED = On
Fault LED = Off
Test LED = Off
Quick Setup Guide
For more detailed instructions and information to set up your switch, view or download the Installation and Getting Started
Guide for your switch at www.hp.com/networking/support.
1. Unpack and check included parts. ■ Documentation kit
■ Switch
■ Console port serial cable (DB-9 to RJ-45)
■ Accessory kit (installation hardware)
■ AC power cord
2. Prepare for installation. To avoid personal injury or product damage, review the “Safety Precautions” on
page 4.
3. Power on the switch and verify that Self-Test completes normally. The switch does not contain a power switch. It
is powered on by connecting power through the AC power cord. After verification, unplug the switch.
4. (Optional) Install Modules. On the back of the switch are slots for 10 Gbps network connectivity and for high-speed
stacking. See the switch Installation and Getting Started Guide for more information on the use of these modules and
supported stacking topologies.
HP 2920 10GbE Module HP 2920 Stacking Module
1
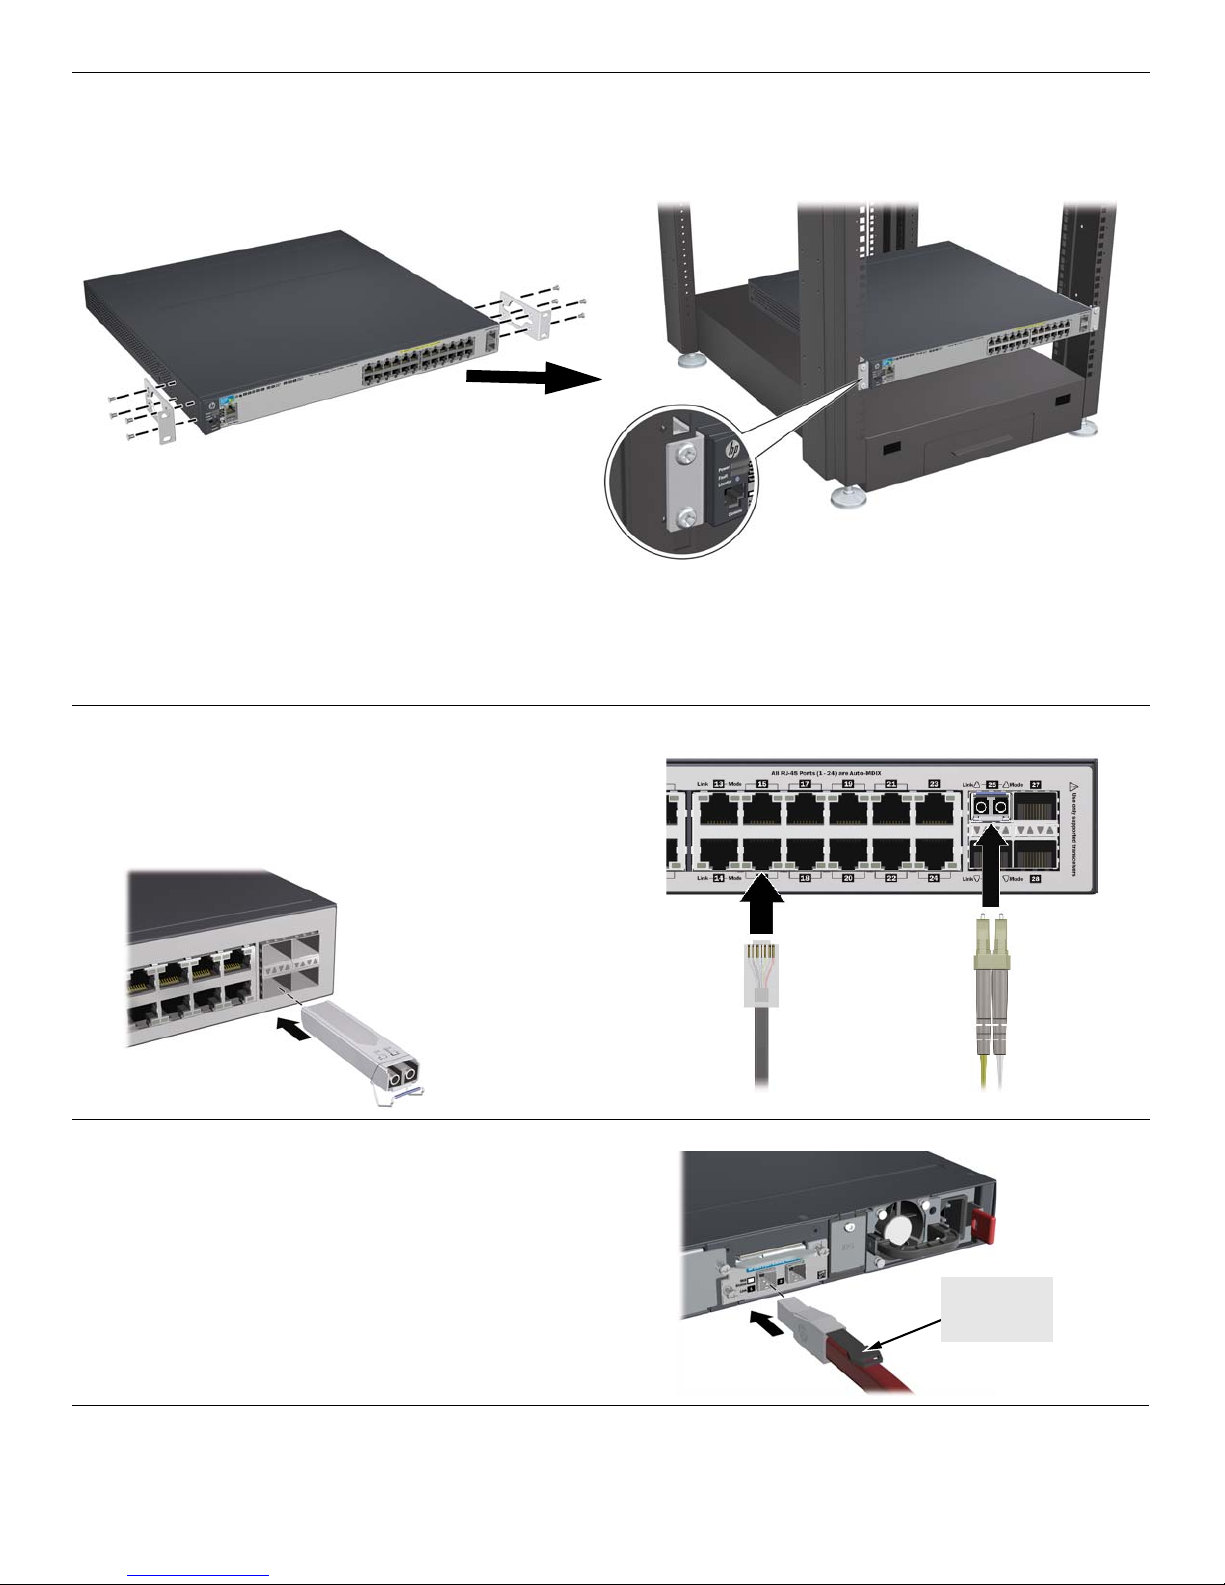
5. Install the Switch Hardware. Unplug the AC power from the switch before installing the switch hardware.
Make sure that
the pull tab is on
the top
■ Rack Mounting: Use a #1 Phillips (cross-head) screwdriver to attach the accessory kit brackets to the switch using
the eight 8-mm M4 screws. Then use the four number 12-24 screws to secure the brackets to the rack.
Note: A rail kit is available for mounting the switch in 4-post racks. For more information, see the Installation and
Getting Started Guide for your switch.
■ Table or Desktop Mounting: Attach the four self-adhesive pads (included in the accessory kit) to the bottom
corners of the switch.
6. Connect Network Cables.
Note: For transceiver connections, install and use only HP
SFP transceivers supported by the switch.
See “SFP Installation Notes” on page 3.
7. Connect stacking cables. If you are stacking multiple HP 2920
switches together, then connect them into a supported stacking
topology using HP 2920 Stacking Modules and stacking cables. For
more information on supported stacking topologies, see the
Installation and Getting Started Guide for your switch.
Caution: Make sure to connect the stacking cable with the
pull tab on the top. Insert the cable until it clicks into place.
To disconnect the cable, pull on the pull tab.
8. Power On the Switch. As shown in step 3.
2
 Loading...